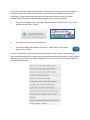
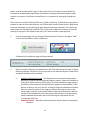
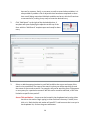
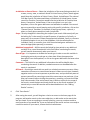
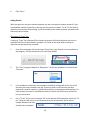
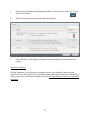
1
ResearchTies: Where to Begin
ResearchTies is an online log that simplifies the recording, analysis, and preservation of
genealogical and historical research. The program uses lists of variables in dropdown menus to
eliminate duplicate data entry and to effectively search for and find entries and documents.
Since the log is personalized by each user, most of the lists are empty in a new account until the
data entry process begins. The best way to get started is to add some data to the lists before
beginning to record goals, searches, and results.
Create a Free Trial Account
In the upper right corner of the http://ResearchTies.com website,
click on “Free Trial.” You will be asked to provide your name, an
email address, and a password. After agreeing to the Terms and
Conditions, click on “Sign up.”
A screen will be presented to name your first log. This name will be at the top of all reports with
the words “Research Log” after it. So, a log named “Smith Family” will have a report heading of
“Smith Family Research Log.”
It is recommended that one log be
created for your entire ancestry. The
main reason logs have been divided
in the past was to be able to find
specific log entries. With
ResearchTies, a search engine will
locate the data in seconds, so there
is no need to divide your log. After
naming the log, click on “Save
Research Log.”
Next, you will see a menu asking which log you would like to open. Whenever you sign in to the
account in the future, this is the first screen that will be presented. To begin, click on “Open” to
open the log. Notice that you can also edit the name of the log from this screen, and it is
possible to delete the entire log in
one click, if desired. It’s important to
understand that this really will
delete the entire log, along with all
data entry, documents, etc. Only use
this link when you truly want to
delete the log!
1
Step 1: Add individuals
The names and basic identifying information for ancestors and extended family can be added
two ways: by hand or with a Gedcom import (.ged file created by your genealogical database
program). It is best to add only the people and families you are actively researching. The menu
options will be most efficient if users don’t include thousands of people from their genealogical
database (Legacy, RootsMagic, Reunion, PAF, etc.) who may never be the subject of active
research. ResearchTies is a companion to your genealogical database and does not replace the
software you are currently using to record relationships and birth, marriage, and death
information. ResearchTies is a program to record research and documentation that has led to
your decisions about relationships and identity. To import a Gedcom, skip to B on page 3.
A.
Hand data entry - ResearchTies has been designed for efficient data entry, so adding
individuals by hand is relatively quick.
1.
From the home page, click on the large “Add Information” button or the “Lists”
icon in the blue toolbar. Select “Individuals.”
2.
Record the names, dates, gender, and ID numbers.
Names – Use full legal names as recorded in your genealogical data program.
The given name field is for one or more personal names, and the
surname field is for the family name.
Dates – Record full dates when known. Partial dates and Abt can be used as
needed, and the date fields can also be left blank.
Gender – Indicate whether the individual is a male or female.
ID numbers – Record the personal ID number (RIN) and parents’ marriage ID
number (MRIN) from your genealogical data program. For the
FamilySearch ID, record the Family Tree ID from FamilySearch.org
(optional). The marriage ID numbers are used by the program’s search
engine to retrieve data by family, so it is important to associate each
individual with their parents’ MRIN.
3.
Click “Add Individual.”
4.
To continue adding more individuals, click on the “+Add” button in
the upper right corner of the list.
2
B.
Gedcom import – When getting started, you may want to import your data from a
genealogical database. As mentioned above, import those who are actively being
researched. It is best to bring in about 1000 or fewer individuals. If you plan to import a
Gedcom file and do additional hand data entry, import the Gedcom first and then add
more names as needed. This will help to prevent duplicate entries. More names can be
imported later, as needed, but importing the same person in multiple Gedcom files will
create duplicates in the list.
1.
Create a Gedcom from your genealogical data management program and save it
where you can locate it in your computer directory. If you are unsure how to do
this, locate the instructions in your user manual or contact the company’s
product support.
2.
On the ResearchTies home page, click on
“Import GEDCOM.”
3.
Click on “Choose File” to open the computer
directory and locate the Gedcom file you
created.
4.
Select the desired Gedcom.
5.
Click “Upload My File.” The program will then proceed to import the individuals,
families, and surnames from the Gedcom file into the appropriate lists in
ResearchTies. The time it takes to complete the process will be determined by
the size of the file. When it is finished, the program will indicate the number of
entries created.
Note: If you have any difficulties with the importing process, please contact
[email protected]. There are a few programs that create non-standard
Gedcom files, and support will be able to assist. You will need to attach a copy of the
Gedcom to the email.
Additional individuals can be added to the list at any time. As your research expands or
as new relatives are identified, add them to the list by hand or in groups with Gedcom
files—just be careful not to add the same person more than once.
6.
Currently, the Gedcom file does not import the parents’ marriage ID (MRIN), so
you will need to add those numbers through the edit process. You can add the
FamilySearch ID at the same time, if desired.
7.
Click on the “Lists” icon in the blue toolbar.
Select “Individuals.”
3
8.
To the right of each person in the list is a link to
edit the record. Click on “Edit,” and any field can
be edited or new data can be added. Enter the
additional ID information and click “Save.”
Step 2: Add families
Since genealogists conduct full-family research, logs need to record data that is researched and
found by family. In ResearchTies, each family is identified by the marriage ID of the parents.
Families can be added by hand or through a Gedcom import. If you imported a Gedcom in Step
1, you can now skip to Step 3.
A.
Hand data entry – For those who used the hand entry method in Step 1, you will need to
connect the individuals to their spouses.
1.
From the home page, click on the large “Add Information” button or the “Lists”
icon in the blue toolbar. Select “Families.”
2.
Select the husband and wife, and then add the marriage information in the “Add
a Family” template.
NOTE: Beginning with this template, you will notice
that there are green add circles in some of the data
fields. First, the circle tells the user that this field is one where data needs to be
selected from a dropdown menu. It will not be typed by hand. Second, if the
person you need to select from the list is not in the dropdown, click on the green
add circle to add the needed person.
Husband – With the cursor in the “Husband” field, the dropdown list will open. If
the desired name is not visible, begin typing a few letters of his name.
Adding more letters will continue to narrow the names in the dropdown.
As soon as you see the desired selection, click on the name. HINT: It is
also possible to type the personal ID number or the FamilySearch ID
number to locate the correct person. If the husband has not yet been
added to the database, click on the green add circle and enter his
information as described in Step 1.
4
Wife – After selecting the husband, tab or click on the wife field. Select her name
from the dropdown. If the desired name is not visible, begin typing a few
letters of her name. If she is not yet in the database, click on the green
add circle and add her. For any field where a person needs to be selected,
it is possible to search by personal ID number (RIN) or FamilySearch ID
number.
Marriage Date – Record the marriage date for the couple. If the date is
unknown, it can be estimated or the field can be left blank.
Place of Marriage – This field will not have any data when data entry first
begins, so the dropdown box will not open. Click on the green add circle
and add the place where this marriage occurred. Be sure to include all
relevant jurisdictions. If the town is known, for example, record the town,
county, state, country (or whatever jurisdictions are appropriate for the
country where the marriage occurred). If only the county is known,
record the county, state, country. See Step 4 for more information about
adding places.
Marriage ID – Record the marriage ID (MRIN) from your genealogical data
management program. All genealogy programs have these ID numbers,
but they may not be visible. It is usually possible to set the program to
show the numbers. Go to your user manual or contact your program
support for help in locating these numbers. The MRIN is important to
recording and reporting data in ResearchTies by family.
B.
3.
Click “Save Family” and the program will go to the “Families” list.
4.
To continue adding more families, click on the “+Add” button in the
upper right corner of the list.
Gedcom import – If a Gedcom file was imported in Step 1, the families were added in
the same process.
Step 3: Add surnames
If a Gedcom file was imported in Step 1, the surnames from the import will already be in the
surname list, but alternate spellings will need to be entered by hand. For hand data entry or to
add spelling variations or additional surnames, go to the home page, click on the large “Add
Information” button or the “Lists” icon in the blue toolbar. Select “Surnames.”
5
1.
Record each surname being researched. This list of surnames will be available to select
in the program’s dropdown boxes.
Alternate Spellings – Add as many alternate spellings of a surname as desired. Click on
“Add Spelling” to open a new field for each one. Many search engines use
Soundex coding or other methods to bring results for names that are somewhat
similar, but the “Alternate spelling” function in ResearchTies allows the user to
tell the search engine which surname spellings should be returned when a
search is conducted for the main spelling.
2.
After the main surname and all alternate spellings have been entered, click “Add
Surname.”
3.
To continue adding more surnames, click on the “+Add” button in the upper
right corner of the list.
4.
If a Gedcom import was done in Step 1, alternate spellings can be added through the
edit process.
5.
Click on the “Lists” icon in the blue toolbar. Select
“Surnames.”
6.
To the right of each name in the list is a link to edit the
record. Click on “Edit.” Enter the alternate spellings and
click “Save Surname.”
Step 4: Add places
Add the places where your family lived and the jurisdictions where research is being conducted.
Each record keeping authority has jurisdiction over a specific area. (For example, a county clerk
has jurisdiction over his county, and a town clerk has jurisdiction over his town.) Record all
jurisdictional levels for each entry, but also create entries for all levels. Research will include
records from all jurisdictional levels, and users will need to indicate the jurisdiction that created
the record being searched, whether national, state, county, town, etc.
For example: If an event occurred in Anna, Illinois, the user would want to record all
jurisdictional levels for that town. The entry should be Anna, Union, Illinois, United States. If the
county marriage records were searched to document this marriage, the jurisdiction of the
record would be Union County, Illinois, United States. If a state marriage index was searched,
6
the jurisdiction of that index would be Illinois, United States. The user will be selecting places
for events as well as jurisdictions of records, so entries need to be added to the place list
accordingly. To get started, add a few entries for the places where many of your family
members lived. More places can be added throughout the process of research.
1.
From the home page, click on the large “Add Information” button or the “Lists” icon in
the blue toolbar. Select “Places.”
2.
Enter a place name, then click “Add Place.”
3.
To continue adding more places, click on the “+Add” button in the upper
right corner of the list.
Over time, the place list will contain entries for countries, states, counties, towns, and any
other jurisdiction applicable to areas of your research around the world. Notice in the list below
that the county for Afton, Wyoming, changed from Uinta to Lincoln, so entries are needed for
both historical situations.
7
Note: Places can be recorded from smallest to largest jurisdiction or largest to smallest,
whatever the user’s preference (i.e. Afton, Lincoln, Wyoming, United States or United States,
Wyoming, Lincoln, Afton). The only recommendation is that the data entry format be
consistent.
Step 5: Add repositories
Where do you typically conduct research? Adding your frequently used repositories now will
simplify data entry of your research later. Genealogists conduct research in a wide variety of
records that are found in many different locations. Not every record we work with is housed in
a library. For example, research could be conducted in archives, county courthouses, internet
websites, an aunt’s personal photo and record collection, cemeteries, and many others. These
are all repositories for records.
1.
From the home page, click on the large “Add Information” button or the “Lists” icon in
the blue toolbar. Select “Repositories.”
2.
Record the applicable data.
Facility – Enter the name of the library, archive, website, etc. A repository, as defined in
ResearchTies, is any entity of any kind that houses records.
Address – Record the physical address of the facility. This field is formatted as open text
to allow for any address format and any number of lines needed for addresses
around the world.
Phone Number – If desired, record the phone number of the repository.
Contact Person – In this field, record the name of any librarian or person at the facility
who has been contacted or who might be helpful for future questions.
Email – This field can be used to record the general email for the repository or a specific
email for the contact person named above.
URL – If the repository has a website, copy and paste the URL into this field. The URL can
be for the repository in general, or it can be a link directly to the online catalog
for quick access in the future.
Comments – Record the hours, parking information, whether a reading card is required,
or anything else that will be helpful when using the repository.
3.
Click “Save Repository.”
8
4.
To continue adding more repositories, click on the “+Add” button in the
upper right corner of the list.
NOTE: Notice that the list of repositories is now a list of bookmarks to the catalogs and library
sites you use most frequently. It is also a record of detailed information that will be extremely
helpful for onsite visits. Take the time to add the data into ResearchTies once, and it will forever
be available for future use—for daily use in the log, as well as future traveling purposes.
Step 6: Add sources
Add the sources that you use most frequently—those that you return to over and over. For
example, how many of your relatives have been or need to be located in the 1900 U.S. Census?
1.
From the home page, click on the large “Add Information” button or the “Lists” icon in
the blue toolbar. Select “Sources.”
2.
Record the applicable data.
Repository – Select from the dropdown list the repository where the source is located. If
it is not visible, type a few letters until the correct selection appears in the list. If
the appropriate entry is not yet in the list, click on the green add button and add
the repository as described in Step 5.
Record Type – Select the record type that best describes the source. If the desired entry
is not visible, type a few letters until the correct selection appears in the list. If
the appropriate entry is not yet in the list, click on the green add button and add
the desired record type.
Author’s Surname or Corporation – The author and title information for each source are
used in dropdown boxes, so they need to be recorded in fields separate from the
remainder of the citation. This field should contain the surname of the main
author or creator of the record. If the author is a corporation or government
entity, record it in the surname field.
Author’s Given Name – Record the main author’s given name here, or leave it blank for
a corporate author. If there are multiple authors, add them after the given name
of the main author, as you would like to see them displayed in a bibliographic
citation.
Title – Record the title of the record exactly as it is found in the repository’s catalog. For
an online catalog, copy/paste works very well, and this makes it clear exactly
9
which record you are referencing. If the title alone is not a sufficient description,
you can enter additional information in square brackets. For example, if a catalog
gives the Church of Scotland as the author and Parish Registers, 1619-1854 as
the title, you would want to indicate that this entry is specifically for the parish
of Kilsyth. Sample title: Parish Registers, 1619-1854 [Kilsyth, Stirling, Scotland]
Call Number – If the source is a book or has a shelf number, record that information in
this field.
Film Number – For a source that has been microfilmed and is contained entirely on one
film, record the film number in this field. This will eliminate the need to
repetitively enter the number for multiple results found in the same source.
However, if the source is a collection of films, the specific film number for each
result will be entered when recording the results. For a multiple-film source,
leave this field blank.
URL – For an online source, copy/paste the URL into this field.
Additional Citation Details – All citation information beyond the author and title for a
source is recorded in this text field. Use the correct citation format generally
accepted for the country and/or repository. If the citation has already been
entered into your genealogical data management program, consider a
copy/paste for efficiency, but don’t duplicate the author and title.
Comment – Include any additional information or comments about the source that
might be helpful.
3.
Click on “Add Source.”
4.
To continue adding more sources, click on the “+Add” button in the upper
right corner of the list.
With some basic data entered into the program, it is time to begin recording research.
Adding Objectives
Have you ever wondered why some genealogists are more effective than others? One reason
may be that these researchers are focused on a specific objective and apply known
methodologies to their work. Setting goals in genealogical research is referred to as defining an
objective. What specific piece of information are you looking for? Which relationship are you
trying to prove?
The first step in any research project is to set a goal. Large, overarching goals are good for longterm direction, but very specific objectives are best for directing day-to-day and month-tomonth work sessions. ResearchTies encourages users to record objectives, and then displays
the current objective at the top of the working template. Remembering the objective helps
researchers to stay on track and reduce time spent wandering. Experience teaches us that
10
certain records provide specific types of data, which then can be used to locate additional
information. Wandering through shelves and websites hoping to find something that might
mention an ancestor is inefficient and ineffective. It is important to have goals to guide our
work.
The three main activities in ResearchTies are: 1) Add an objective, 2) Add searches you plan to
conduct in order to reach that objective, and 3) Record the results of each search. When these
steps are completed, the process begins again. Based on what was learned in the results that
were found, was the objective reached? If not, you’ll want to add more searches to continue
working on the goal. If the objective was met, you’ll want to define a new objective.
1.
From the home page, click on the large “Add Information” button or the green “Add”
circle in the blue toolbar. Select “Objectives.”
A ribbon with five objective types will be presented.
2.
Select the type of objective you would like to add. Each radio button will open a slightly
different template. Feel free to click on each one to see what the objective statement is
and which variables will be recorded.
a.
Conduct a Preliminary Survey - This objective is to learn what has been done
previously by others, before beginning original research. Select the individual or
family who will be the focus of this survey. As mentioned above, begin typing a
few letters of the name until the desired entry appears in the dropdown. If the
person or family is not yet in the list, clicking on the green add button will allow
data entry from this point in the program, without the need to return to the
home page or the lists. If you need to add a family and the husband or wife are
not yet in the Individual list, click on the green add button(s) on that template,
add the husband and/or wife, then finish entering the information for the
marriage and click save.
Additional Details – Record any information that will be helpful in meeting the
objective.
11
Complete – When an objective has been met, check this box. Doing this allows
you to later search for objectives according to whether or not they have
been completed.
b.
Search a Record Group – Choose this option when your goal is to search a record
group for a person, family, or surname in a particular jurisdiction. For example,
choose this objective type if you want to search the census records for a family
in the U.S., the probate records for an individual in a county, or the parish
registers for a surname in a parish of England.
Record Type – A number of record types have already been loaded to the
program. This is not intended to be a complete list, but it will give you an
idea of what this field is used for. Click on the record type for your
objective. If the desired record type is not yet in the list, click on the
green add circle and add it.
Place – This field is to record the jurisdiction of the record type being searched.
Was this record kept on a town, county, state, or national level? Which
town, county, etc? See more information about places in Step 4.
c.
Identify a Person – Use this objective type if your goal is to search for someone
in a particular relationship. For example, use this type if you want to identify
someone’s spouse or parents, or a couple’s children.
Relationship – Again, a few entries for relationships have been loaded for this
dropbox. Click on the relationship for this objective, or click on the green
add circle to add the desired entry.
d.
Find Event Information – Researchers frequently search for events in an
ancestor’s life. Use this objective when searching for military service, migration,
and more.
Event – A few entries are already added to the dropdown to give you an idea of
some of the ways this field and objective can be used. Feel free to add
any event that you would like to research for your family. As always,
select the appropriate item in the list or click on the green add button to
add a new entry.
e.
3.
Other – When all else fails, use the “Other” template to write a custom
objective. Selecting a place and person, family, or surname will provide a way for
the search engine to find these entries.
Select the appropriate data in whichever fields are available for the selected objective
type, then click “Add Objective.” The new objective will be added to your list of goals in
the program.
12
4.
After saving the objective, you will be given a choice to return to the home page of the
program, add another objective, or add a search to the objective that was just saved. If
you are working on goal-setting, you may continue to add as many objectives as you
would like. If you are focused on one goal and are now ready to record the searches you
want to conduct in order to reach your objective, choose the third radio button.
5.
Click “Save.”
Adding Searches
After writing an objective, users need to plan the searches that will be conducted to reach the
desired goal. Which sources typically contain the information you want to find? Which
repositories house records for the specific time and place of your research? If you are just
beginning to do genealogical research, there are books, conference classes, and many
resources to help teach you about sources. There are also record suggestions on FamilySearch
Family Tree and Ancestry “shaky leaves” that may be helpful. You may also consider software
similar to GenSmartsTM. When you have decided what your searches will be, enter them into
ResearchTies.
1.
Locate the objective you want to work on. If you have just saved the objective in the
preceding step, select “Add a search to this objective” and click “Save.” (Skip to 3 on the
next page.) If you are coming back later, use the Find/Select function to locate the
objective.
a.
From the home page, click on the large “Search Your Logs” button or the Search
icon on the blue toolbar.
b.
The “Find” setting will default to “Objectives,” which is the correct selection for
this operation.
c.
If no variables are selected in this template, the default settings will return a list
of all objectives you have written and recorded in the log. When starting a new
account, the list will be short and there will be little need to narrow the
list. Click “Search” to see the list.
d.
As the list of objectives becomes longer, you’ll learn the value of using the search
engine to locate your objectives. Notice that you can request a list of goals you
13
have set for a person, family, or surname, as well as several other variables. It is
also possible to produce a list of objectives that have been completed or those
that are still being researched. Multiple variables can be set, which will continue
to narrow the list, making it very easy to locate the desired entry.
2.
Click “Add Search” to the right of the desired objective. A
template will open displaying the objective at the top of the
form with the “Add Search” template open and ready for data
entry.
3.
Select or add the appropriate data in each field to define the source and scope of the
search to be conducted. The scope of the search is what you will be searching for and
the extent of the record to search. For example, will you be searching for a single person
or every entry for a particular surname? Will the entire record be searched, or will it be
limited to a specific time period?
Source Title and Author – A source can be located in the dropdown box by using either
the title or the author. Begin typing in either field until the entry is visible, then
click on it. Both the title and author will autofill. To add a source that is not yet in
the dropdown list, click on the green add button.
14
Jurisdiction or General Source – Select the jurisdiction of the record being searched. Is it
a town, county, state, or national record? A Union County, Illinois, death register
would have the jurisdiction of Union County, Illinois, United States. The national
Civil War Pension File Index would have a jurisdiction of United States. A town
record for Cheshire, Connecticut would have the jurisdiction of Cheshire, New
Haven, Connecticut, United States. If the correct place is not yet in the
dropdown, click on the green add button and add what is needed. If the record
was not created by a record-keeping entity with specific jurisdiction, click on the
“General Source” checkbox. For example, a family group sheet, a journal, a
photo, or family letters would not have a jurisdiction.
Scope – Be very thoughtful in describing the scope of your search. Who exactly will you
be looking for? Is the search for a specific person, all members of a family, or
every entry for a surname? Select the appropriate individual, family, or surname.
If the desired option is not yet in the dropdown, click the radio button for
individual, family, or surname, then click the associated green add button to
enter the appropriate person(s) or surname.
Additional scope details – Will the search be limited by time period or any additional
variable? If so, record those details in this field. When conducting the search,
you will need to know exactly what your intent is.
Record Type – It is important to include the record type in order to use this variable in
locating log entries by record type at a later date. Select the appropriate
description from the dropdown, or click on the green add button and enter what
is needed.
Comments – This field is for any additional information that will be helpful when
conducting the search. In addition, needed comments can be added after the
search is completed.
Nil Search – Searching a record with no result is a relatively common occurrence. Many
researchers choose not to record them because it takes so much time. However,
negative results can be as important as positive ones, and you definitely want to
prevent yourself from returning to search the same source over and over. If you
plan your research before visiting the repository, recording a nil search will take
only a few seconds. If the entire search was nil with no results for the scope of
the search, record the date and check the Nil box on the Search template. (A
second way to record Nil searches will be described below in the “Adding
Results” section.)
4.
Click “Save Search.”
5.
After saving the search, you will be given a choice to return to the home page of the
program, add another search to the same objective, or add results to the search that
was just saved. If you are working on research planning, you may continue to add as
many searches as you would like. If you are focused on one search and are now ready to
record the results of your search, choose the third radio button.
15
6.
Click “Save.”
Adding Results
With your goals set and your searches planned, you are now ready to conduct research. If you
have added a number of searches to the log, you may want to create a “To do” list for the first
repository where you will be working. If you are already at the results template, proceed to the
data entry section below.
Generating a “To do” List
Creating a “To do” list in ResearchTies involves the process of locating Searches that are not
marked Nil and do not have Results recorded. It is similar to the steps taken to locate an
objective that was previously recorded.
1.
From the home page, click on the large “Search Your Logs” button or from anywhere in
the program, click on the Search icon on the blue toolbar.
2.
The “Find” setting will default to “Objectives,” so click the dropdown arrow and select
“Searches.”
3.
If no variables are selected in this template, the default settings will return a list of all
Searches you have recorded in the log. If you only want to see Searches you have
planned at a specific repository, select that repository in the appropriate dropdown. For
each variable you select in the different fields, the search will continue to narrow the
hits you will receive.
4.
For a “To do” list, be sure to uncheck “All” at the bottom of the template, and check “To
do.” Doing this will return a list of Searches that you have planned, and it will not
include Searches that have
already been completed.
16
5.
After you have selected the appropriate variables (or left the search open to all “To do”
items), click “Search.”
6.
The hits returned will look something like the following:
7.
Click “Add Result” to the right of the Search you are working on, then data enter the
results.
Data Entry of Results
Clicking “Add Result” will bring you to a template similar to the following. Notice that the
objective is still at the top of the form, the Search being conducted is shown next, and the third
section of the form is the results template. Be sure to record a Result for each person located in
the search.
17
1.
Select, add, or type the appropriate data in each field of the template.
Result date – Record the date of the Search. Past dates can be entered when recording
previous research, but it is best to record your work as it is done. Using the tab
key will auto-record “today’s date” without the need to type it. Otherwise, type
the desired date or select it with the calendar tool.
Person found – Select from this dropdown the person who was found in the Search.
Type a few letters to narrow the list, and click on the entry when it is shown. If
the person is not yet in the list, click on the green add circle and add the person.
Name in record – Type the spelling of the person’s name exactly as it was found in the
record. It is important to track the various spellings, names, and nicknames used
by each person.
Citation detail – The bibliographic information for the source being searched was
already added to the source list in Step 6. This citation detail field is to record the
additional details needed beyond the bibliography to create a footnote. The
researcher needs to know exactly where the information was found for the
specific person being recorded. For a book, this would be a page number. For a
census, it’s necessary to record the town, county, state, ED, page, sheet, etc. The
source being searched will determine the amount and type of detail to record.
Film number – When using a source that continues for multiple microfilms, record the
film number that applies to this specific person. As mentioned in Step 6, if it is a
single microfilm source, record the film number in the Source List to avoid
needing to add the film number to every Result separately.
Document number – This field may be used for paper filing numbers, or you may record
the folders and file name for an electronic file on your computer hard drive.
18
Nil – When a search for a specific person is Nil, use the Results template to record the
person and check the box that the search was Nil for that person. This is best
used when there are mixed results in the search. Remember, when the entire
scope of the search was Nil, record the date and check the box on the Search
template. However, if you find a few members of a family but not everyone you
had hoped to find, record those who were located and then make an entry for
those persons you had also hoped to find but did not. This will help you analyze
not only what you have found, but also what you have not found.
Comments – Record any comments or information about the results of the search.
Add Link – Click on the “Add Link” words when you would like to record the URL for an
online result. Two fields will open. The “description” field is the place to record
what you want to name the result. These are the words that will show as a
hyperlink in your reports, rather than a long URL of jibberish. Copy and paste the
URL from the address bar of your browser into the “Link” field. When using this
function, it is important to realize that URLs will change over time, and
subscription databases may not allow the link created in one account to be used
if your subscription ever changes. URLs to subscription databases also do not
allow others to view the documents if they don’t have a subscription. Consider
the “Add Link” function to be temporary. More than one link may be recorded.
To add more, click on the “Add Link” words to open more fields.
Add File – We highly recommend that users download a copy of an online result or save
it as a screenshot to your hard drive. Any digital file may then be loaded as the
Result of a Search (.jpg, .pdf, .png, .docx, .xlsx, etc). These files may be images,
photos, translations, transcriptions, research analysis and conclusions, and more.
Click on “Add file,” then record a name for the file in the “description” field. Click
on “Choose file,” then select the file from the directory of your hard drive.
Multiple files can be added to each Result, if desired, and they may be added in
combination with links. When the Result is saved, a copy of the file is placed on
the ResearchTies server. The hyperlink is linked to the file on the server, so if you
ever rename or move the files on your hard drive, the link will not break. This is
also beneficial for preservation of your files. If your hard drive ever crashes, all of
your documents will still be preserved on the ResearchTies servers.
Add Result – If more than one person was found during the Search, click on “Add
Result” to continue adding more Results, as needed.
“Ditto down” arrow – Notice that several fields on this form have “ditto down” arrows.
Clicking the arrow will copy the information recorded in
the same field of the preceding entry. If more than one
Result is recorded for a Search, clicking the “ditto down” arrows eliminates the
need to retype data that is the same for all members of the family.
2.
After recording the details of each Result found in the Search, click “Save Results.”
19
3.
Recording the Results of research is the final step of the process.
Clicking “Save Results” will save your work, but you will remain on
this form until you select the next task. Notice the functions on the
right side of the template. In the top section of the form, you can
click on “Edit” to edit the objective. In the middle bar, you can add
more Searches to the same objective, or delete or edit the current
Search. In the third section, you can add an additional Result, delete
a Result, or save all Results that have been recorded.
4.
From anyplace in the program, the toolbar at the top of the screen
allows you to return home, add information, search your log, manage
your lists, or create a report.
You are now ready to continue logging your research. Be sure to record your objectives, plan
searches, and record the results of your efforts. With quality data entry and a powerful, multivariable search engine, you will be able to answer all of your questions about past research,
produce “to do” lists for planned research, find and view documents instantly, and open
multiple documents for immediate comparison and analysis of the data. Keeping a detailed and
accurate log of your research will improve your research quality and efficiency, allowing more
of your time to be used for research.
Sign up to receive the ResearchTies monthly newsletter (http://researchties.com) and watch for
new information to be posted on the blog and in the Learning Center. Also, feel free to ask
questions and send feedback by using the contact form or feedback buttons on the website.
We wish you the best as you pursue your research and learn more about your family.
20