Download LRF-3000S User Manual
Transcript
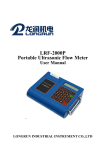
Ultrasonic Flowmeter Instruction Manual
Model: LRF-3000S
Revision: 3.0.0
Date: August. 2014
Update
Revision
Record
Date
LRF-3000S Ultrasonic transit-time flowmeter
Notice:
This instruction manual is appropriate for LRF-3000S series ultrasonic flowmeter.
This ultrasonic flowmeter adopts ARM.FPGA chip and low-voltage wide-pulse sending technology.
This instruction manual contains important information. Please read carefully before the operation of the
flowmeter,avoiding damaging flowmeter and improper use.
This instruction manual will introduce how to use the flowmeter step-by-step, including product
component, installation, wiring, quick setup etc. to make it easier to operate.
Understanding more about the menu settings can fulfill your higher requirements with the flowmeters’
powerful function option and output function.
Warning
May cause injury.
Attention
May damage the flow meter.
Some of the instructions may be different to the flowmeters you purchased, depending on configuration
requirements,otherwise,there is no indication about the product design and upgrade requirement in the
instructions, please refer to the version number, as well as the appendix.
Version:3.0.
Page 1 of 52
LRF-3000S Ultrasonic transit-time flowmeter
Product Components
Inspection should be made before installing the Flowmeter. Check to see if the spare parts are in
accordance with the packing list. Make sure that there is no damage to the enclosure due to a loose screw
or loose wire, or other damage that may have occurred during transportation. Any questions, please
contact your representative as soon as possible.
Version:3.0.
Page 2 of 52
LRF-3000S Ultrasonic transit-time flowmeter
Content
1. TRANSMITTER INSTALLATION AND CONNECTION ................... 5
1.1
INSPECTION
PRIOR TO TRANSMITTER INSTALLATION............................................................................................ 5
1.2
WIRE CONNECTING .......................................................................................................................................... 6
1.2.1
Power supply option............................................................................................................................ 6
1.2.2
Transmitter wiring................................................................................................................................ 6
1.2.3.
Lengthened Cable Method.................................................................................................................. 6
1.3.
POWERING
ON ................................................................................................................................................. 8
1.4.
KEYPAD FUNCTIONS ......................................................................................................................................... 8
1.5.
KEYPAD
1.6.
FLOWMETER WINDOW DESCRIPTIONS ............................................................................................................. 10
OPERATION .......................................................................................................................................... 8
2. PIPE PARAMETER ENTRY SHORTCUTS........................................ 11
2.1.
DUAL
FUNCTION KEYS MENU DESCRIPTION ....................................................................................................... 11
2.2
EXAMPLES......................................................................................................................................................12
3. MEASUREMENT SITE SELECTION ................................................... 14
4. TRANSDUCER INSTALLATION ......................................................... 15
4.1.
INSTALLING
THE TRANSDUCERS ....................................................................................................................... 15
4.1.1.
Transducer Spacing........................................................................................................................... 15
4.1.2.
Transducer Mounting Methods......................................................................................................... 15
4.1.3.
V Method............................................................................................................................................ 15
4.1.4.
Z Method............................................................................................................................................ 16
4.1.5.
N Method (not commonly used)...................................................................................................... 16
4.2.
TRANSDUCER MOUNTING INSPECTION ............................................................................................................. 16
4.2.1.
Signal Strength.................................................................................................................................. 16
4.2.2.
Signal Quality (Q value).................................................................................................................... 17
4.2.3.
Total Time and Delta Time............................................................................................................... 17
4.2.4.
Transit Time Ratio..............................................................................................................................17
4.2.5
Warnings.............................................................................................................................................17
5. OPERATING INSTRUCTIONS........................................................... 19
5.1
SYSTEM NORMAL IDENTIFICATION ................................................................................................................... 19
5.2
ZERO SET CALIBRATION ................................................................................................................................. 19
5.3
SCALE FACTOR............................................................................................................................................... 19
5.4
SYSTEM LOCK ................................................................................................................................................ 19
5.5
FREQUENCY OUTPUT...................................................................................................................................... 20
5.6
4~20MA ANALOG OUTPUT CALIBRATION (OPTIONAL )...................................................................................... 20
5.7
RECOVER
Version:3.0.
THE
FACTORY DEFAULT .................................................................................................................... 20
Page 3 of 52
LRF-3000S Ultrasonic transit-time flowmeter
5.8
4~20MA ANALOG OUTPUT CALIBRATION ....................................................................................................... 21
5.9
ESN............................................................................................................................................................. 21
6. WINDOWS DISPLAY EXPLANATIONS........................................... 22
6.1.
WINDOWS DISPLAY CODES............................................................................................................................ 22
6.2
DISPLAY EXPLANATION................................................................................................................................... 23
7. ERROR DIAGNOSES............................................................................ 35
7.1.
TABLE1. ERROR
CODES AND SOLUTIONS .......................................................................................................... 35
7.2.
FREQUENTLY ASKED QUESTIONS
AND
ANSWERS.............................................................................................. 36
8. PRODUCT OVERVIEW......................................................................... 37
8.1.
INTRODUCTION .............................................................................................................................................. 37
8.2.
FEATURES
8.3.
SPECIFICATIONS .............................................................................................................................................38
OF
LRF-3000S..............................................................................................................................37
9. APPENDIX1-SERIAL INTERFACE NETWORK USE AND
COMMUNICATIONS PROTOCOL ........................................................... 39
9.1
OVERVIEW..................................................................................................................................................... 39
9.2
DIRECT
9.3
COMMUNICATION
CONNECTION VIA
RS-485 TO THE
HOST DEVICE.................................................................................. 39
PROTOCOL AND THE USE ...................................................................................................... 39
9.3.1
FUJI Protocol...................................................................................................................................... 40
9.3.2
MODBUS Communication Protocol................................................................................................... 42
10. APPENDIX2-W210 INSERTION TRANSDUCER ........................ 45
10.1
OVERVIEW................................................................................................................................................... 45
10.2. MEASUREMENT POINT SELECTION ................................................................................................................... 45
10.3. DETERMINING TRANSDUCER SPACING & TRANSDUCER INSTALLATION .................................................................45
10.4. TRANSDUCER MOUNTING METHODS................................................................................................................ 47
10.4.1
Z Mounting Method........................................................................................................................... 47
10.4.2
Pipe Parameter Entry Shortcuts....................................................................................................... 47
11. APPENDIX3-RTD MODULE AND PT1000 WIRING (MODULE
OPTIONAL) .................................................................................................. 49
11.1
RTD ENERGY METER FUNCTION..................................................................................................................... 49
11.2
WIRING(PT1000)......................................................................................................................................... 49
11.3
ENERGY MEASUREMENT METHODS .................................................................................................................. 49
11.4
TEMPERATURE CALIBRATION METHODS............................................................................................................ 50
11.5
INSTALLATION
OF
RTD MODULE .....................................................................................................................51
Update Information:
____________________________________________________________________________________
Version:3.0.
Page 4 of 52
LRF-3000S Ultrasonic transit-time flowmeter
1. Transmitter Installation and Connection
1.1 Inspection prior to Transmitter Installation
You will find a “Position Drawing” in the packing.
Please use it as a template in the place that you are
going to install the Flowmeter. Then drill 4 installing
holes at the screws position shown on the drawing
with the 5.0mm drill.
135 mm
5.32lnch
86 mm
3.39lnch
Position drawing
1. Place this template on the wall and drill 4
holes of 5mm diameter & 40mm deep.
2. Insert a plastic bushing into each of the 4
holes.
3. Screw 4 pcs PA 4 × 30mm self tapping
screws through the transmitter enclosure
base and attach it to the wall.
4. Tighten the screws to secure to the
enclosure on the wall.
Take out the enclosed screws and plastic bushings.
Insert the plastic bushings into the installing holes.
Put the flowmeter to the position and screw it in.
Attention
When installing please ensure the front cover is secure and will not fall open.
Version:3.0.
Page 5 of 52
LRF-3000S Ultrasonic transit-time flowmeter
1.2 Wire Connecting
1.2.1
Power supply option
Customers should pay special attention to specify the desired power supply when wiring.
Factory standard power supply is 10~36VDC/1A max.
To ensure the transmitter can work normally, please pay attention to the followings when wiring:
Ensure that power connections are made in accordance with the specifications shown on the transmitter.
1.2.2
Transmitter Wiring
Once the electronics enclosure has been installed, the Flowmeter wiring can be connected.
Open the case, you will find the transmitter interfaces labels from left to right as follows:
Power supply, Relay output, OCT Output, Upstream transducer, Downstream transducer, 4-20mA, RS485
interface.
Refer to the below diagram for specific connection:
DC+ DC - GE
DC 10 -36VDC
RL1 RL2 OCT+ OCT- E
RELAY
OCT OUT
UP+
UP - E DN+
TRANSDUCER
DN -
I+
I4-20mA
Tx
Rx GND
RS-232/485
Black
Up-Stream
Red Bushing
Down -Stream
Red
10-36VDC
Upstream Transducer
Pipe Straps
Shield
Blue Bushing
Downstream Transducer
Flow
Being tested pipe
1.2.3.
Lengthened Cable Method
Standard cable length of sensor is 9 meters; it can be lengthened to be 300 meters according to the
actual need for fluid measurement.
Version:3.0.1
Page 6 of 52
LRF-3000S Ultrasonic transit-time flowmeter
1.2.3.1
Sketch of lengthened Cable
Shield
Red
Black
Up-Stream
Shield
Red
Black
Up-Stream
Lengthen Cable
To Transmitter
To Transducer
Lengthen Cable
Down-Stream
Shield
Red
Black
1.2.3.2
Down-Stream
Shield
Red
Black
Junction Box Requirements
The flowmeter use sealed waterproof junction box, installing 6×2 press-connections, the recommended
minimum specifications of the junction box is 115×90×55mm.
1.2.3.3
Cable Specifications
Name: Shielded Twisted Pair
Administer Standard: JB8734.5-1998
Diameter: Φ5 mm
Twist Line Space: 50 mm
Multi Core Line: 0.4 mm2/radix
Wire Guage: AWG 20#
Core Line Color: Red and Black
Shield Floor: 128 Intwine
Warning
Wire with power off. The flow meter must be reliable grounding before installation.
Version:3.0.1
Page 7 of 52
LRF-3000S Ultrasonic transit-time flowmeter
1.3. Powering on
As soon as the Flowmeter is switched on, the self-diagnosis program will start to run. If any error is
detected, an error code will display on the screen (Refer - Error Diagnoses). After that self-diagnosis, the
system will run automatically according to the last input parameters.
If the installation is accomplished when system is switched on, gain adjustment can be monitored in
Window M01. After S1, S2, S3, S4 are displayed on the upper left corner of the screen, the system will
activate the normal measurement condition automatically. It is indicated by code “*R” on the upper left
corner of the screen.
If it is the first use or install on a new site, the customer need to input the new installation site parameters.
The system will default to the last window settings and automatically display them at next power on.
1.4. Keypad Functions
This keypad is dual function keypad:
1.When separately pressed,is shortcut function,referring to “2.Quickly set menu instructions”;
2.Press Menu and Number key,is Menu key,referring to“6.Menu
Window Description”
Example1: To enter a pipe outside diameter of 219.234, the
procedure is as follows:
1 1 keys to enter Window M11 (the numerical value
Press
displayed currently is a previous value). Now press Enter key. The
symbol “>” and the flashing cursor are displayed at the left end of
the second line on the Screen. Then input the parameters; or do
2 3 4 Enter .
not press the Enter key, directly enter 2 1 9
Follow these guidelines when using the Flowmeter keypad (Refer to Keypad Figure):
Menu
0
<
~
9
And
●
To input numbers.
Backspace or delete characters to the left.
^
^
And
Return to the last menu or to open the next menu. Acts as “+” and “-” functions when
entering numbers.
Menu
Select a menu. Press this key first, input two menu numbers and then enter the selected menu. For
1
example, to input a pipe outside diameter, press Menu 1
keys, where “11” is the window ID to
display the parameter for pipe outside diameter.
1.5. Keypad Operation
The flow meter adopts the window software design to consolidate or subdivide all of the parameters
entered, the instrument setup and measurement result displays into more than 100 independent
windows. The operator can input parameters, modify settings or display measurement results by
“visiting” a specific window. These windows are arranged by 2-digit serial numbers (including “+” sign)
from 00~99, then to +0, +1, etc. Each window serial number, or so-called window ID code, has a defined
meaning. For example, Window M11 indicates the parameter input for pipe outside diameter, while
Window M25 indicates the mounting spacing between the transducers, etc. (Refer – Windows Display
Explanations).
The keypad shortcut to visit a specific window is to press the Menu key at any time, then input the 2-digit
window ID code. For example, to input or check the pipe outside diameter, just press the Menu 1 1
keys for window ID code 11.
Version:3.0.1
^
^
^
Another method to visit a particular window is to press
example, if the current window ID code is M02, press
and
keys to scroll the screen. For
key to enter Window M01, press the ^
Page 8 of 52
LRF-3000S Ultrasonic transit-time flowmeter
^
^
button again to enter Window M00; then, press the
key to back Window M01, and press the
key again to enter Window M02.
Windows are separated into three types: (1) Data Type, such as M11, M12; (2) Option Type, such as M14;
(3) Pure Display Type, such as M01, M00.
You can check the corresponding parameters by visiting the Data Type Windows. If you want to modify
the parameters, input the digits and press Enter or press Enter first, input the digits then press Enter again
to confirm.
Example1: To enter a pipe outside diameter of
219.234, the procedure is as follows:
Press Menu 1 1 keys to enter Window M11 (the
numerical value displayed currently is a previous
value). Now press Enter key. The symbol “>” and
the flashing cursor are displayed at the left end of
the second line on the Screen. Then input the
parameters; or do not press the Enter key, directly
2
4
5
Enter
3
enter 2 1 9
.
Pi p e Ou t e r Di a me t e r
>_
●
You can check the selected option by visiting
Option Type Windows. If you want to modify it, you
must press Enter first, the symbol “>” and the
flashing cursor are displayed at the left of the
Screen. Operator can use the ^
and
to
scroll the screen and get the required value then
press Enter to confirm; or enter the corresponding
value option directly and press Enter to confirm.
Pi p e Ma t e r i a l
[ 14
>1. St a i n le s s St e e l
^
For example, if the pipe material is “Stainless
4
Steel”, Press Menu 1
to enter Window M14,
Enter
press
to modify the options. Select the “1.
Stainless Steel” option by pressing ^ and
,
then press Enter to confirm the selection; It is
possible to press 1 key to change the selection
and wait until “1.Stainless Steel” is displayed on
the second line of the screen, then press Enter to
confirm.
^
Attention
Generally, press Enter key first if operator wants to enter “modify” status. If the “modify” is
still not possible even after pressing the Enter key, it means that system is locked by a
password. To “Unlock” it, select “Unlock” in Window M47 and enter the original password.
Version:3.0.1
Page 9 of 52
LRF-3000S Ultrasonic transit-time flowmeter
1.6. Flowmeter Window Descriptions
These windows are assigned as follows:
01~08
Flow Totalizer Display: to display flow rate, positive total, negative total, net total, velocity, date
& time, present operation and flow results today, etc.
10~29
Initial Parameter Setup: to enter pipe outside diameter, pipe wall thickness, fluid type,
transducer type, transducer mounting method and spacing, etc.
30~38
Flow Units Options: to select the flow unit such as cubic meter, liter or other units, can turn
totalizers on/off and reset totalizers, etc.
40~49
Setup options: Scaling factor, system lock (Window M47), etc.
55~89
Input and output setup: date and time, ESN, communication baud rate setting, etc.
90~98
Diagnoses: Signal strength and signal quality (Window M90), TOM/TOS*100 (Window M91),
flow sound velocity (Window M92), total time and delta time (Window M93), Reynolds number
and factor (Window M94), etc.
+0~+5 Appendix: power on/off time, total working hours, on/off times and a single-accuracy function
calculator.
Attention
The other windows are for hardware adjustment which reserved by the manufacturer.
Version:3.0.1
Page 10 of 52
LRF-3000S Ultrasonic transit-time flowmeter
2. Pipe Parameter Entry Shortcuts
2.1. Dual function keys menu description
Press
key
Display Net Flow Today /Flow Max /Flow Min/The
Average/Current Rate in turn.
Press
key
Display Day Flow Totalizer/Monthly Totalizer
Flow/Yearly Totalizer Flow / in turn
Press
key
Display Totalizer Start and Stop in turn.
Press
co o l
cap .
key
Display instantaneous cool capacity and cool
capacity totalizer
Press
h eat
cap .
key
Display instantaneous heat capacity and heat
capacity totalizer.
temp
Press
key
Display the Temp in, out and Delt temp
Press
key
Display Flow Rate and Velocity
Press
so u n d
vel.
key
Display Flow Sound Velocity.
Version:3.0.1
F lo w Ma x .
3 6 0 .0 0 0 0 m3 / h
Da y T o t a li z e r
7 0 0 .10 0 0
ON
EF R
ENT
60 s ec
10 .12 3
0 .0 0 0 0
0 X1
m3
m3
GJ / h * R
GJ
EF R 0 .0 0 0 0
GJ / h * R
EPT
0 X1
GJ
St r e n g t h + Qu a li t y [ 9 0
UP:0 0 .0 DN:0 0 .0 Q= 0 0
F lo w 0 .112 9 m3 / h * R
Ve l
1.0 4 15 m/ s
F lu i d So u n d Ve lo c i t y
0 .0 0 0 0 m/ s
Page 11 of 52
LRF-3000S Ultrasonic transit-time flowmeter
signal
Press
key
St r e n g t h + Qu a li t y [ 9 0
UP:0 0 .0 DN:0 0 .0 Q= 0 0
Display Date & Time and Flow Rate.
Press
key
Press Ent to start Manual Totalizer, then press Ent
to end Manual Totalizer, press Ent to input
Standard Totalizer to get the final K factor.
Complete the calibration with pressing Ent to
store.
Press
key
Input Code 1234 to complete Reset Zero.
Press
key
Display System Error Codes.
Ma n u a l Ca li b r a t e
Pr e s s En t Wh e n Re a d y
Se t Z e r o
Ple a s e En t e r PW
* R- - - - - - - - Sy s t e m No r ma l
2.2 Examples
For example, measuring the diameter of 200mm and pipe wall thickness of 6mm, measuring medium is
water, Pipe Material is carbon steel, No Liner, can be operated as follows:
Step1. Pipe outside diameter:
1
Press Menu 1
keys to enter Window
M11, and enter the pipe outside diameter,
and then press the Enter key to confirm.
Pi p e Ou t e r Di a me t e r
2 0 0 mm
Step2. Pipe wall thickness
Press the Menu 1 2 key to enter Window
M12, and enter the pipe wall thickness, and
press the Enter key to confirm.
Pi p e Wa ll T h i c k n e s s
6 mm
Step3. Pipe Material
Press the Menu 1 4 keys to enter Window
M14, press the Enter key, press the ^ or
key to select Pipe Material, and press
Enter
the
key to confirm.
^
Version:3.0.1
Pi p e Ma t e r i a l
0 . Ca r b o n St e e l
[ 14
Page 12 of 52
LRF-3000S Ultrasonic transit-time flowmeter
Step4. Transducer type
( The transmitter is available for various
transducer types.)
Press the Menu 2 3 key to enter Window
M23,press the Enter key,move the ^ or
key to select transducer type,and press
Enter
the
key to confirm.
Tr a n s d u c e r Ty p e [ 2 3
0 . St a n d a r d
^
Step5. Transducer mounting methods
Press the Menu 2 4 key to enter Window
M24, press the Enter key, press the ^ or
key to select transducer-mounting
method, and press the Enter key to confirm.
T r a n s d u c e r Mo u n t i n g
0.
V
^
Step6. Adjust Transducer spacing
Press the Menu 2 5 key to enter Window
M25, accurately install the transducer
according to the displayed transducer
mounting spacing and the selected
mounting method (Refer to Installing the
Transducers in this chapter).
T r a n s d u c e r Sp a c i n g
15 9 .8 6 mm
Step7. Display measurement result
1
Press the Menu 0
keys to enter
Window M01 to display measurement result.
(Base on the actual measurement)\
Version:3.0.1
F lo w 0 .112 9 m3 / h
Ve l
1.0 4 15 m/ s
*R
Page 13 of 52
LRF-3000S Ultrasonic transit-time flowmeter
3. Measurement Site Selection
When selecting a measurement site, it is important to select an area where the fluid flow profile is fully
developed to guarantee a highly accurate measurement. Use the following guidelines to select a proper
installation site:
Choose a section of pipe that is always full of liquid, such as a vertical pipe with flow in the upward
direction or a full horizontal pipe.
Ensure enough straight pipe length at least equal to the figure shown below for the upstream and
downstream transducers installation.
Name
Straight length of upstream
piping
Straight length of
downstream piping
L ≥5D
bend
10D min
L ≥10D
90o
10D min
Detector
L ≥10D
L ≥50D
Tee
0.5D min
10D min
L≥5D
L ≥30D
D
Diffuser
5D min
L≥10D
L ≥5D
Reduce
L≥10D
L≥30D
Valve
Flow controlled upstream
Flow controlled downstream
Check valve
Pump
Stop valve
L≥50D
P
Ensure that the pipe surface temperature at the measuring point is within the transducer temperature
limits.
Consider the inside condition of the pipe carefully. If possible, select a section of pipe where the inside is
free of excessive corrosion or scaling.
Version:3.0.1
Page 14 of 52
LRF-3000S Ultrasonic transit-time flowmeter
4. Transducer Installation
4.1. Installing the transducers
Before installing the transducers, clean the pipe surface where the transducers are to be mounted.
Remove any rust, scale or loose paint and make a smooth surface. Choose a section of sound conducting
pipe for installing the transducers. Apply a wide band of sonic coupling compound down the center of the
face of each transducer as well as on the pipe surface, ensure there are no air bubbles between the
transducers and the pipe wall, and then attach the transducers to the pipe with the straps provided and
tighten them securely.
Note:
The two transducers should be mounted at the pipe’s centerline on horizontal pipes.
Make sure that the transducer mounting direction is parallel with the flow.
During the installation, there should be no air bubbles or particles between the transducer and the pipe
wall. On horizontal pipes, the transducers should be mounted in the 3 o’clock and 9 o’clock positions of
the pipe section in order to avoid any air bubbles inside the top portion of the pipe. (Refer to Transducer
Mounting). If the transducers cannot be mounted horizontally symmetrically due to limitation of the local
installation conditions, it may be necessary to mount the transducers at a location where there is a
guaranteed full pipe condition (the pipe is always full of liquid).
4.1.1.
Transducer Spacing
After entering the required parameters, the spacing between the ENDS of the two transducers is
considered as the standard transducer spacing (Refer to Top View on transducer mounting methods).
Check the data displayed in Window M25 and space the transducers accordingly.
4.1.2.
Transducer Mounting Methods
Three transducer mounting methods are available. They are respectively: V method, Z method and N
method. The V method is primarily used on small diameter pipes (DN100~300mm, 4〞~12〞). The Z
method is used in applications where the V method cannot work due to poor signal or no signal detected.
In addition, the Z method generally works better on larger diameter pipes (over DN300mm, 12〞) or cast
iron pipes.
The N method is an uncommonly used method. It is used on smaller diameter pipes (below DN50mm, 2
〞).
4.1.3.
V Method
The V method is considered as the standard method. It usually gives a more accurate reading and is used
on pipe diameters ranging from 25mm to 400mm (1"~16〞) approximately. Also, it is convenient to use,
but still requires proper installation of the transducers, contact on the pipe at the pipe’s centerline and
equal spacing on either side of the centerline.
Side View
Upstream Transducer
Section
Top View
Transducer
Flow
Flow
Downstream Transducer Pipe Strap
Version:3.0.1
Transducer Space
Page 15 of 52
LRF-3000S Ultrasonic transit-time flowmeter
4.1.4.
Z Method
The signal transmitted in a Z method installation has less attenuation than a signal transmitted with the V
method
when the pipes are too large, there are some suspended solid in the fluid, or the scaling and liner are too
thick . This is because the Z method utilizes a directly transmitted (rather than reflected) signal which
transverses the liquid only once.
The Z method is able to measure on pipe diameters ranging from 100mm to 800mm (4 〞 ~32 〞 )
approximately. Therefore, we recommend the Z method for pipe diameters over 300mm (12〞).
Side View
Upstream Transducer
Section
Top View
Transducer
Flow
Flow
Transducer Spacing
Downstream Transducer Pipe Strap
4.1.5.
N Method (not commonly used)
With the N method, the sound waves traverse the fluid three times and bounce twice off the pipe walls. It
is suitable for small pipe diameter measurement.
The measurement accuracy can be improved by extending the transit distance with the N method
(uncommonly used).
Side View
Upstream Transducer
Section
Top View
Transducer
Flow
Flow
Downstream Transducer Pipe Strap
Transducer Spacing
4.2. Transducer Mounting Inspection
Check to see if the transducer is installed properly and if there is an accurate and strong enough
ultrasonic signal to ensure proper operation and high reliability of the transducer. It can be confirmed by
checking the detected signal strength, total transit time, delta time as well as transit time ratio.
The “mounting” condition directly influences the flow value accuracy and system long-time running
reliability. In most instances, only apply a wide band of sonic coupling compound lengthwise on the face
of the transducer and stick it to the outside pipe wall to get good measurement results. However, the
following inspections still need to be carried out in order to ensure the high reliability of the measurement
and long-term operation of the instrument.
4.2.1.
Signal Strength
Signal strength (displayed in Window M90) indicates a detected strength of the signal both from
Version:3.0.1
Page 16 of 52
LRF-3000S Ultrasonic transit-time flowmeter
upstream and downstream directions. The relevant signal strength is indicated by numbers from
00.0~99.9. 00.0 represents no signal detected while 99.9 represents maximum signal strength.
Normally, the stronger the signal strength detected, the longer the operation of the instrument reliably, as
well as the more stable the measurement value obtained.
Adjust the transducer to the best position and check to ensure that enough sonic coupling compound is
applied adequately during installation in order to obtain the maximum signal strength.
System normally requires signal strength over 60.0, which is detected from both upstream and
downstream directions. If the signal strength detected is too low, the transducer installation position and
the transducer mounting spacing should be re-adjusted and the pipe should be re-inspected. If necessary,
change the mounting method to be Z method.
4.2.2.
Signal Quality (Q value)
Q value is short for Signal Quality (displayed in Window M90). It indicates the level of the signal detected.
Q value is indicated by numbers from 00~99. 00 represents the minimum signal detected while 99
represent the maximum.
Normally, the transducer position should be adjusted repeatedly and coupling compound application
should be checked frequently until the signal quality detected is as strong as possible.
4.2.3.
Total Time and Delta Time
“Total Time and Delta Time”, which displays in Window M93, indicates the condition of the installation.
The measurement calculations in the Flowmeter are based upon these two parameters. Therefore, when
“Delta Time” fluctuates widely, the flow and velocities fluctuate accordingly, this means that the signal
quality detected is too poor. It may be the resulted of poor pipe-installation conditions, inadequate
transducer installation or incorrect parameter input.
Generally, “Delta Time” fluctuation should be less than ±20%. Only when the pipe diameter is too small
or velocity is too low can the fluctuation be wider.
4.2.4.
Transit Time Ratio
Transit Time Ratio indicates if the transducer mounting spacing is accurate. The normal transit time ratio
should be 100+/-3 if the installation is proper. Check it in Window M91.
Attention
If the transit time ratio is over 100±3, it is necessary to check:
(1) If the parameters (pipe outside diameter, wall thickness, pipe material, liner, etc.)
have been entered correctly,
(2) If the transducer mounting spacing is accordance with the display in Window M25,
(3) If the transducer is mounted at the pipe’s centerline on the same diameter,
(4) If the scale is too thick or the pipe mounting is distorted in shape, etc.
4.2.5Warnings
(1)
Pipe parameters entered must be accurate; otherwise the Flowmeter will not work properly.
(2)
During the installation, apply enough coupling compounds in order to stick the transducers
onto the pipe wall. While checking the signal strength and Q value, move the transducers
slowly around the mounting site until the strongest signal and maximum Q value can be
Version:3.0.1
Page 17 of 52
LRF-3000S Ultrasonic transit-time flowmeter
obtained. Make sure that the larger the pipe diameter, the more the transducers should be
moved.
(3)
Check to be sure the mounting spacing is accordance with the display in Window M25 and the
transducer is mounted at the pipe’s centerline on the same diameter.
(4)
Pay special attention to those pipes that formed by steel rolls (pipe with seams), since such
pipe is always irregular. If the signal strength is always displayed as 0.00, that means there is
no signal detected. Thus, it is necessary to check that the parameters (including all the pipe
parameters) have been entered accurately. Check to be sure the transducer mounting method
has been selected properly, the pipe is not worn-out, and the liner is not too thick. Make sure
there is indeed fluid in the pipe or the transducer is not too close to a valve or elbow, and
there are not too many air bubbles in the fluid, etc. With the exception of these reasons, if
there is still no signal detected, the measurement site has to be changed.
(5)
Make sure that the Flowmeter is able to run properly with high reliability. The stronger the
signal strength displayed, the higher the Q value reached. The longer the Flowmeter runs
accurately, the higher the reliability of the flow rates displayed. If there is interference from
ambient electromagnetic waves or the signal detected is too poor, the flow value displayed is
not reliable; consequently, the capability for reliable operation is reduced.
(6)
After the installation is complete, power on the instrument and check the result accordingly.
Version:3.0.1
Page 18 of 52
LRF-3000S Ultrasonic transit-time flowmeter
5. Operating Instructions
5.1 System Normal Identification
Press the Menu 0 8 keys. If the letter “*R” displays on the screen, it indicates system normal.
If the letter “G” is displayed, it indicates that system is adjusting the signal gain prior to the measurement.
Also, it means system normal. Only when the adjustment takes too long without stopping, can system be
identified as abnormal.
Letter “I” indicates no signal is being detected. Check the transducer wiring connections are correct, the
transducers are installed firmly, etc.
5.2 Zero Set Calibration
Once zero flow occurs, a zero point may indicate on each measuring instrument, but the displayed
measuring value is not equal to “0”, this value indicates “Zero”. To any measuring instrument, the smaller
the “Zero” is, the better the quality is. Conversely, if the Zero is too big, that indicates the quality of the
instrument is poor.
If the zero set point is not at true zero flow, a measurement difference may occur. The smaller the
physical measurement capacity is, the larger the measurement difference from the zero point will exist.
Only when zero point reduced to a definite degree, as compared with the physical measurement capacity,
can the measuring difference from zero point be ignored.
For an ultrasonic Flowmeter, the measurement difference from zero point cannot be ignored at low flow.
It is necessary to perform a static zero set calibration to improve low flow measurement accuracy.
Press Window M42 to set the Zero, press Enter first, and then wait the readings displayed at the lower
right corner reducing to be “0”. If this is carried out with flow, the flow will be displayed as “0”, M43 can
help to restore settings.
5.3 Scale Factor
Scale factor refers to the ratio between “actual value” and “reading value”. For example, when the
measurand is 2.00, and it is indicated as 1.98 on the instrument, the scale factor reading is 2/1.98. This
means that the best scale factor constant is 1.
However, it is difficult to keep the scale factor as “1” on the instrument especially in batch productions.
The difference is called “consistency”.
During operation, there still exists possible difference in pipe parameters, etc. The “scale factor” may be
necessary when used on different pipes. Thus, scale factor calibration is specially designed for calibrating
the differences that result from application on different pipes. The scale factor entered must be one that
results from actual calibration. The scale factor can be input in Window M45.
5.4 System Lock
System lock is readable but not modifiable to prevent operation error due to unauthorized tampering by
unauthorized personnel.
7
Press the Menu 4
keys, if displays “Unlock” on the screen, then press the
numerically long password, and then press the Enter key to confirm.
Enter
key, enter 6
Unlock it by using the selected password only. Press Menu 4 7 , if displays “lock” on the screen press
the Enter key and enter the correct password, then press Enter to confirm.
Keep the password in mind or recorded in a safe place, otherwise the instrument cannot be used.
Version:3.0.1
Page 19 of 52
LRF-3000S Ultrasonic transit-time flowmeter
5.5 Frequency Output
The Flowmeter is provided with a frequency output transmitter function. The high or low frequency
output displayed indicates the high or low flow rate reading. The user can reset the frequency output as
well as flow rate per his requirements.
For example: if a pipe flow range is 0~3000m3/h, the relative frequency output required is 0~5000Hz,
and the configuration is as follows:
In Window M68 (low limit frequency output flow value), input 0;
In Window M69 (high limit frequency output flow value), input 3000;
Typical OCT Output wiring diagram as below:
RL1
RL2
OCT+ OCT-
RELAY
E
UP+
UPTRANS
OCT OUT
COM
Vcc
5~10K 1/4w
Sig
OCT Output Wiring Diagram
5.6 4~20mA Analog Output Verification (Optional)
Processing a current loop output exceeding an accuracy of 0.1%, the flowmeter is programmable and
configurable with multiple output modes such as flow rate or fluid velocity. Select in Window M55. For
details, please refer to “Windows Display Explanations”.
In Window M56, enter a 4mA flow rate or fluid velocity value. Enter the 20mA flow rate or fluid velocity
value in Window M57. For example, if the flow range in a specific pipe is 0~1000m3/h, enter 0 in Window
M56 and 1000 in Window M57.
Calibrating and testing the current loop is performed in Window M58. Complete the steps as follows:
^
8
Enter
Press Menu 5
, move ^ or
to display “0mA”, “4mA”, “8mA”, “12mA”,“16mA”, “20mA”
readings, connect an ammeter to test the current loop output and calculate the difference. Calibrate it if
the difference is within tolerance. If the difference is without tolerance, refer to the “Analog Output
Calibration” to calibrate the current loop.
Check the present current loop output in Window M59 as it changes along with change in flow.
5.7 Recover the Factory Default
Version:3.0.1
Enter
keys to Window m37, press
^
or
^
Press Menu 3 7
factory default.
key to choose“Reset”keys to recover the
Page 20 of 52
LRF-3000S Ultrasonic transit-time flowmeter
5.8 4~20mA Analog Output Calibration
Note
Each flowmeter has been calibrated strictly before leaving factory. It is unnecessary to
carry through this step except when the current value (detected while calibrating the
current loop) displayed in Window M58 is not identical with the actual output current
value.
The hardware detect window must be activated prior to calibration the Analog Output. The procedure is
as follows:
^
0
Enter
Press Menu
enter password “115800”, then press Enter to activate the detect menu. With no
effect to next power on, this window will close automatically as soon as the power is turned off.
^
Press
to calibrate the current loop 4mA output. Use an ammeter to measure the current loop output
current. At the same time, press ^ or
to adjust the displayed numbers. Watch the ammeter until it
reads 4.00. Stop at this point, the 4mA has been calibrated.
^
Then, press Enter to calibrate the current loop 20mA output. The method is the same as 4mA calibration.
The results are automatically saved in EEPROM and won’t lose when power off.
5.9 ESN
We provide the Flowmeter with a unique electronic serial number to identify each Flowmeter for the
convenience of the manufacturer and customers. The ESN is able to be viewed in Window M61.
Attention
Other Operation refers to “7.2 Windows Display Explanations”.
Version:3.0.1
Page 21 of 52
LRF-3000S Ultrasonic transit-time flowmeter
6. Windows Display Explanations
6.1. Windows Display Codes
Flow Totalizer Display
33
Totalizer Multiplier
68
Low FO Flow Rate
00
Flow Rate/Net total
35
POS Totalizer
69
High FO Flow Rate
01
Flow Rate/Velocity
36
NEG Totalizer
70
LCD Backlit Option
02
Flow Rate/POS Totalizer
37
Totalizer Reset
72
Working Timer
03
Flow Rate/NEG Totalizer
38
Manual Totalizer
77
Beeper Setup
04
Date Time/Flow Rate
Setup Options
82
Date Totalizer
08
System Error Codes
40
Damping
83
Automatic Correction
09
Net Flow Today
41
Low Flow Cutoff Value
Diagnoses
Initial Parameter setup
42
Set Static Zero
11
Pipe Outer Diameter
43
Reset Zero
12
Pipe Wall Thickness
44
Manual Zero Point
14
Pipe Material
45
Scale Factor
23
Transducer Type
46
24
Transducer Mounting Method
Network
address code
25
Transducer Spacing
26
Parameters Setups
27
Cross-sectional Area
28
Holding with Poor Sig
29
Empty Pipe Setup
Flow Units Options
30
Metric system Units
31
Flow Rate Units
32
Totalizer Units
47
identifying
90
Signal
Quality
91
TOM/TOS*100
92
Fluid Sound Velocity
93
Total Time and Delta
94
Reynolds
Factor
97
Transducer Spacing
correction selection
System Lock
Input and output setup
55
CL Mode Select
56
CL 4mA Output Value
57
CL 20mA Output Value
58
Strength
Number
and
and
Appendix
+0
Last Power Off Time and
Flow Rate
CL Check
+1
Total Working Hours
59
CL Current Output
+2
Last Power Off Time
60
Date and Time
+3
Last Flow Rate
61
ESN
+4
Total Power Off Times
62
Serial Port Parameter
-0
Hardware Adjusting Entry
NOTE:The other menu features are retained by manufacturers and the windows in gray background are
optional functions.
Version:3.0.1
Page 22 of 52
LRF-3000S Ultrasonic transit-time flowmeter
6.2 Display Explanation
Menu
0
1
Display Flow Rate and Velocity.
Menu
0
2
Flow Rate /POS Totalizer
F lo w 0 .112 9 m3 / h
Ve l
1.0 4 15 m/ s
*R
F lo w
POS
*R
0 .112 9 m3 / h
0 x 1m3
Display Flow Rate and POS Totalizer.
Select the POS Totalizer units in Window M31.
If the POS Totalizer has been turned off, the POS
Totalizer value displayed is the total prior to its turn off.
Menu
0
4
Date Time/Flow Rate
The time setting method can be found in Window
M60.
Menu
0
8
System Error Codes
Display the Working Condition and the System
Error Codes. More than one error code can occur
at the same time.
The explanations of error codes and detailed
resolution methods can be found in “Error
Diagnoses”.
Menu
0
Display Net Flow Today.
1
1
Ne t F lo w T o d a y
0 .4 5 8 7 4 8
M0 9
m3
1
Pipe Outer Diameter
Enter the pipe outside diameter or enter the pipe
circumference in Window M10. The pipe outside
diameter must range from 10mm to 6000mm.
Note: Enter either pipe outside diameter or pipe
circumference.
Menu
*R - - -- - -- - -- - -- Sy s t e m No r ma l
9
Net Flow Today
Menu
0 3 - 0 4 - 0 3 15 :4 9 :4 0 * R
F lo w
0 .1116 m3 / h
Pi p e Ou t e r Di a me t e r
5 0 mm
2
Enter the pipe wall thickness
Pi p e Wa ll T h i c k n e s s
4 mm
Version:3.0.1
Page 23 of 52
LRF-3000S Ultrasonic transit-time flowmeter
Menu
1
4
Pipe Material
Enter pipe material. The following options are
available (by ^ 、
buttons or numerical
keys):
^
0.
Carbon Steel
1.
Stainless Steel
2.
PVC
Menu
2
0. Standard(clamp-on type transducer )
1. Ty-45B ( W210
transducer )
2
[ 14
3
Transducer Type
Menu
Pi p e Ma t e r i a l
0 . Ca r b o n St e e l
inserted
Tr a n s d u c e r Ty p e [ 2 3
0 . St a n d a r d
type
4
Transducer Mounting
Four mounting methods are available:
0. V
T r a n s d u c e r Mo u n t i n g
0.
V
1. Z
2. N (for small pipe)
Menu
2
5
Transducer Spacing
The operator must mount the transducer
according to the transducer spacing displayed (be
sure that the transducer spacing must be
measured precisely during installation). The
system will display the data automatically after
the pipe parameter had been entered.
Menu
2
T r a n s d u c e r Sp a c i n g
14 8 .6 6 mm
6
Initial Parameter Setups and Save
Load and save the parameters. 18 different sets of
setup conditions/groups are available to load and
save by three methods
0. Entry to Save
automatically and display the
mounting spacing in Window M25.
transducer
Pa r a me t e r
Se t u p s
En t r y t o SAVE
1. Entry to Load
2. To Browse
Select “Entry to Save”, press Enter . An ID code and
the original parameters are displayed in the
window. Press UP or DOWN ARROW to move the
ID code, then press the Enter key again to save
the current parameter in the current ID room.
When selecting “Entry to Load”, press ENT, and
the system will read and calculate the parameters
Version:3.0.1
Page 24 of 52
LRF-3000S Ultrasonic transit-time flowmeter
Menu
2
7
Cross-sectional Area
Menu
2
“NO”,instead.
8
Holding with Poor Sig
Select “Yes” to hold last good flow signal displayed
if the Flowmeter experiences a poor signal
condition. This function will allow to calculate flow
totalizer data without interruption. Select
Menu
2
3
3
Emp t y Pi p e Se t u p [ 2 9
0
0
Measurement Units Options
Select the measurement unit as follows:
0. Metric
1. English
Menu
Ho ld i n g wi t h Po o r Si g
NO
9
Empty Pipe Setup
This parameter is used to overcome the possible
problems that usually show up when the pipe
being measured is empty. Since signals can be
transmitted through the pipe wall, the flow meter
may still read a flow while measuring an empty
pipe. To prevent this condition from happening,
you can specify a value. When the signal quality
falls below this value, the measurement stops
automatically. If the flow meter is already able to
stop measuring when the pipe is empty, a value in
the range of 30 to 40 should also be entered in
this window to ensure no measurement when the
pipe is empty.
Menu
Cr o s s - s e c t i o n a l Ar e a
3 14 15 .9 mm2
Me a s u r e me n t Un i t s I n
0 .Me t r i c
1
Flow Rate Units Options
The following flow rate units are available:
2. m3
Cubic Meters
3. 1
Liters
4. gal
USA Gallons
5. ig
Imperial Gallons
6. mg
Million Gallons
7. cf
Cubic Feet
8. bal
USA Barrels
9. ib
Imperial Barrels
10. ob
Oil Barrels
The following time units are available:
/Day
/Hour
/Min
/Sec
F lo w Ra t e Un i t s
m3 / h
[31
Factory default is Cubic Meters/hour
Version:3.0.1
Page 25 of 52
LRF-3000S Ultrasonic transit-time flowmeter
Menu
3
2
Totalizer Units Options
Select totalizer units. The available unit options
are as same as those found in Window M31. The
user can
Menu
3
3
3
T o t a li z e r
Mu lt i p li e r
0 . x 0 .0 0 1( 1E- 3 )
“YES”.
5
ON/OFF POS Totalizer
On/off POS Totalizer. “NO” indicates the
Flowmeter starts to totalize the value. When it is
turned off, the positive totalizer displays in
Window M02 will not change. Factory default is
Menu
T o t a li z e r
Un i t s [ 3 2
Cu b i c Me t e r ( m3 )
Factory default factor is x1
3
Totalizer Multiplier Options
The totalizer multiplier acts as the function to
increase the totalizer indicating range. Meanwhile,
the totalizer multiplier can be applied to the
positive totalizer, negative totalizer and net
totalizer. The following options are available:
0. x 0.001 (1E-3)
1. x 0.01
2. x 0.1
3. x 1
4. x 10
5. x 100
6. x 1000
7. x 10000(1E+4)
Menu
select units as their requirement. Factory default
is Cubic Meters.
POS
T o t a li z e r
YES
[35
7
Totalizer Reset
Totalizer reset; all parameters are reset. Press
Enter
; press ^ or
arrow to select “YES” or
“NO”. After “YES” is selected, the following options
are available:
None:No reset;
All:Reset all totalizers;
NET Totalizer Reset;
POS Totalizer Reset;
NEG Totalizer Reset;
Reset:back to the factory default
^
If the user wants to delete all the already set
parameters and set back to the factory default,
select reset in this window and then the flow
meter will reset to be the factory default
automatically.
Version:3.0.1
T o t a li z e r Re s e t ? [ 3 7
Se le c t i o n
Page 26 of 52
LRF-3000S Ultrasonic transit-time flowmeter
Attention
This operation will delete the entire user’s data and reset as the factory default. Please
consider carefully before taking this operation.
Menu
3
8
Manual Totalizer
The manual totalizer is a separate totalizer. Press
Enter
to start, and press Enter to stop it. It is used
for flow measurement and calculation.
Menu
4
Ma n u a l T o t a li z e r
[38
Pr e s s ENT Wh e n Re a d y
0
Damping Factor
Da mp i n g
The damping factor ranges from 0~999 seconds.
[40
10 s e c
0 indicates no damping; 999 indicates the
maximum damping.
The damping function will stabilize the flow display.
Its principle is the same as that in a single-section RC
filter. The damping factor value corresponds to the circuit
time constant. Usually a damping factor of 3 to 10 is
recommended in applications.
Menu
4
1
Low Flow Cut off Value
L o w F lo w Cu t o f f Va l.
0 .0 1 m/ s
Low Flow Cut off is used to make the system
display as “0” value at lower and smaller flows to
avoid any invalid totalizing. For example, if the
cutoff value is set as 0.03, system will take all the
measured flow values below ±0.03 as “0”.
Usually 0.03 is recommended in most
applications.
Menu
4
2
Set Static State Zero
When fluid is in the static state, the displayed
value is called “Zero Point”. When “Zero Point ’ is
not at zero in the Flowmeter, the difference is
going to be added into the actual flow values and
measurement.
Differences will occur in the Flowmeter.
Setting zero must be carried out after the
transducers are installed and the flow inside the
pipe is in the absolute static state. Thus, the “Zero
Point” resulting from different pipe mounting
locations and parameters can be eliminated.
Se t Z e r o
[42
Pr e s s ENT t o g o
Press Enter , wait for the processing instructions at
the right corner bottom to reach 0.
Performing Set zero with existing flow may cause
the flow to be displayed as“0”. If so, it can be
recovered via Window M43.
Version:3.0.1
Page 27 of 52
LRF-3000S Ultrasonic transit-time flowmeter
Menu
4
3
Reset Zero
Select “YES”; reset “Zero Point” which was set by
the
user.
Menu
4
Re s e t
Ze r o
NO
[43
4
Manual Zero Point
This method is not commonly used. It is only
suitable for experienced operators to set zero
under conditions when it is not preferable to use
other methods. Enter the value manually to add to
the measured value to obtain the actual value. For
example:
Ma n u a l Z e r o Po i n t [ 4 4
0 m3 / h
Actual measured value=250 m3/H
Actual measured value=10 m3/H
Flowmeter Display=240 m3/H
Normally, set the value as “0”.
Menu
4
5
Scale Factor
The scale factor named as instrument k coefficient
is used to modify the measurement results. The
user can enter a numerical value according to the
actual calibration results.
Menu
4
4
[45
1
6
Network IDN
Input system identifying code, these numbers
can be selected from 1~247 except that 13 (0
DH ENTER), 10 (0AH Newline), 42 (2AH﹡) an
d 38 (26H&) are reserved.
System IDN is used to identify the flowmeter
to a network.
Menu
Sc a le F a c t o r
Ne t wo r k
I DN
[46
88
7
System Lock
Lock the instrument, Once the system is locke
d, any modification to the system is prohibited,
but the parameter is readable. “Unlock” usin
g your designated password. The password is
composed of 6 numbers.
Version:3.0.1
Sy s t e m L o c k
[47
* * * * Un lo c k e d * * * *
Page 28 of 52
LRF-3000S Ultrasonic transit-time flowmeter
Menu
5
5
CL Mo d e
0. 4 -
Current Loop Mode Select
Se le c t [ 5 5
2 0 mA
0.
1.
4-20mA
0-20mA
set up the 4-20mA output to. be flow rate mode
set up output range to be 0-20mA mode
2.
3.
4-20mA vs.Vel.
4-20mA vs.Energy
set up the 4-20mA output to. be velocity mode
set up current loop output 4-20mAcorresponding energy
Other different current output characteristics are displayed in below figures. The user can select one of
them according to his actual requirements.
4-20mA mode output
Fluid velocity / 4-20mA mode output
Output current
Output current
24mA
24mA
20mA
20mA
4mA
4mA
Flow
F4mA
Flow
F20mA
Flow
Fluid velocity
F4mA
Fluid
Velocity
F20mA
Fluid
Velocity
In two graphs shown above, flow F4mA indicates the value that the user entered in Window M57; and flow
F20mA indicates the value that the user entered in Window M58. In the 4-20mA modes, F4mAand F20mA can
be selected as a positive or negative flow value as long as the two values are not the same.
Menu
5
6
CL 4mA Output Value
CL 4 mA Ou t p u t Va lu e
0 m3 / h
Set the CL output value according to the flow value
at 4mA. The flow unit’s options are the same as those
in Window m31. Once “4-20mA vs.Vel.” is selected
in Window M56, the unit should be set as m/s.
Menu
5
7
20mA Output Value
Set the CL output value according to the flow
value at 20mA. the flow unit is the same as that
found in Window m31. Once “4-20mA vs.Vel.” is
selected in Window M57, the unit should be set as
m/s.
Menu
5
CL 2 0 mA Ou t p u t Va lu e
14 4 0 0 m3 / h
8
CL Check Verification
Check if the current loop has been calibrated
before leaving the factory. Press Enter to start,
press ^ or
to display 0mA, 4mA, 8mA,
12mA, 16mA, 20mA, and at the same time, check
with an ammeter to measure the current loop
output current and calculate the differences to see
if it is under the permitted tolerance. If not, refer
to the “Analog Output Calibration” to calibrate.
^
Version:3.0.1
CL Ch e c k u p
[58
Pr e s s ENT Wh e n Re a d y
Page 29 of 52
LRF-3000S Ultrasonic transit-time flowmeter
Menu
5
9
CL Current Output
Display CL current output. The display of
10.0000mA indicates that CL current output value
is 10.0000mA.
If the difference between displaying value and CL
output value is too large, the current loop then
needs to be re-calibrated accordingly.
Menu
6
0
Date and Time Settings
CL Cu r r e n t Ou t p u t [ 5 9
15 .6 6 1 mA
YY- MM- DD
03- 04- 04
HH:MM:SS
10 :0 5 :0 4
Date and time modifications are made in this window.
The format for setting time setting is 24 hours. Press
Enter
, wait until “>” appears, the modification can be made.
Menu
6
1
ESN
Display electronic serial number (ESN) of the
instrument. This ESN is the only one assigned to
each Flowmeter ready to leave the factory. The
factory uses it for files setup and the user uses it
for management.
Menu
6
2
Serial Port Settings
This window is used for serial port setting. Serial
port is used to communicate with other
instruments. The serial port parameters setting of
the instrument that applies the serial port
connection must be consistence. The first selected
data indicates baud rate, 9600, 19200, 38400,
56000, 57600, 115200 are available.
The second option indicates parity bit, None (No
verification).
Data length fixed to 8;
Stop bit length for a fixed length.
The factory default serial port parameter is “9600,
None”.
Menu
6
Ult r a s o n i c F lo wme t e r
S/ N= 0 5 0 7 118 8
RS- 2 3 2 Se t u p
[62
9600,
No n e
8
Low FO Flow Rate
Set up low FO flow rate, i.e. the corresponding
flow value when output signal frequency is at the
lowest FO frequency. For example, when the low
FO frequency is 0 Hz, low FO flow rate is 100m3/h
then when the frequency output is 0 Hz, the low
flow at this moment measured by the Flowmeter
is 100m3/h.
Version:3.0.1
L o w F O F lo w Ra t e [ 6 8
0 m3 / h
Page 30 of 52
LRF-3000S Ultrasonic transit-time flowmeter
Menu
6
9
High FO Flow Rate
Enter the high FO flow rate, i.e. the corresponding
flow value when frequency output signal is at
highest FO frequency. For example, when the low
FO frequency is 5000Hz, low FO flow rate is
1000m3/h,then when the frequency output is
5000Hz, the low flow at this moment measured by
the Flowmeter is 1000m3/h.
Menu
7
Hi g h F O F lo w Ra t e [ 6 9
2 6 5 5 0 m3 / h
0
LCD Back lit Option
Select LCD back lit controls.
0. Always OFF
1. Always ON
2. Lighting For nn sec
L CD Ba c k li t Op t i o n
1.
Alwa y s ON
Keep the backlight off can save about 30mA
power.
Menu
7
2
Working Timer
Display the totalized working hours of the
Flowmeter since last reset. It is displayed by
HH:MM:SS. If it is necessary to reset it,
press Enter , and select “YES”.
Menu
7
0.
ON
1.
OFF Beeper OFF
8
[72
7
Beeper Setup
Set up the beeper on-off state.
Menu
Wo r k i n g T i me r
0 0 0 0 0 0 11:16 :3 8
BEEPER Se t u p
0.
ON
Beeper ON
[77
2
Date Totalizer
In this window, it is possible to review the
historical flow data totalizer for any day of the last
64 days, any month of the last 64 months and any
year of the last 5 years.
^
Press Enter , use the ^
or
to review
totalizer in days, months and years. “0” for day,
“1” for month, “2” for year.
Da t e T o t a li z e r
0.
Da y
[82
0 0 0 3 - 0 4 - 0 5 G- H- I
- 0 m3
^
Use the ^ or
to review the totalizer in some
day, some month, some year.
For example, to display the flow total for July
18,2000, the display “-----------” at the upper right
Version:3.0.1
Page 31 of 52
LRF-3000S Ultrasonic transit-time flowmeter
corner of the screen indicates that it was working
properly the whole day. On the contrary, if “G” is
displayed, it indicates that the instrument gain
was adjusted at least once. Probably it was offline
once on that day. If “H” is displayed, it indicates
that poor signal was detected at least once. Also,
it indicates that the operation was interrupted or
problems occurred in the installation.
For more information please refer to “Error Code
and Resolutions”
Menu
8
3
Automatic Flow Correction
With the function of automatic flow correction, the
flow lost in an offline session can be estimated
and automatically adjusted. The estimate is based
on the average value, which is obtained from flow
rate before going offline and flow measured after
going online the next time, multiplied times the
time period that the meter was offline. Select
“ON” to use this function and “OFF” to cancel this
function.
Menu
9
00 03- 04- 05 - - - - - >4 3 5 6 .7 8 m3
Au t o ma t i c Co r r e c t i o n
YES
0
Signal Strength and Signal Quality
Display the measured signal strength and signal
quality Q value upstream and downstream.
St r e n g t h + Qu a li t y [ 9 0
UP:0 0 .0 DN:0 0 .0 Q= 0 0
Signal strength is indicated from 00.0~99.9. A
reading of 00.0 indicates no signal detected, while
99.9 indicates maximum signal strength. Normally
the signal strength should be ≥60.0. Signal quality
Q is indicated by 00~99.Therefore, 00 indicates
the poorest signal while 99 indicates the best
signal. Normally, signal quality Q value should be
better than 50.
During the installation, pay attention to the signal
strength and signal quality, the higher, the better.
The strong signal strength and high quality value
can ensure the long-term stability and the high
accuracy of the measurement results.
Menu
9
1
TOM/TOS*100
Display the ratio between the actual measured
transmit time and the calculated transmit time
according to customer’s requirement. Normally
the ratio should be 100±3%. If the difference is
too large, the user should check whether the
parameters are entered correctly, especially the
sound velocity of the fluid and the installation of
the transducers. This data is of no use before the
system is ready.
Version:3.0.1
T OM/ T OS* 10 0
[91
0 .0 0 0 0 %
Page 32 of 52
LRF-3000S Ultrasonic transit-time flowmeter
Menu
9
2
F lu i d So u n d Ve lo c i t y
14 4 3 .4
m/ s
Fluid Sound Velocity
Display the measured fluid sound velocity.
Menu
9
3
Total Time and Delta Time
Display the measured ultrasonic average time
(unit: nS) and delta time of the upstream and
downstream (unit: nS) time. The velocity
calculation in the Flowmeter is based on the two
readings. The delta time is the best indication that
the instrument is running steadily. Normally the
fluctuation in the ratio of the delta time should be
lower than 20%. If it is not, it is necessary to
check if the transducers are installed properly or if
the parameters have been entered correctly.
Menu
9
4
Reynolds Number and Factor
Display the Reynolds number that is calculated by
the Flowmeter and the factor that is set currently
by the Flowmeter. Normally this scaling factor is
the average of the line and surface velocity factor
inside the pipe.
Menu
9
T o t l T i me , De lt a T i me
8 .9 14 9 u S, - 17 1.0 9 n S
Re y n o ld s Nu mb e r [ 9 4
0 .0 0 0 0
1.0 0 0 0
7
Installation spacing correction selection
selection includes the followings:
0.OFF
correction
Turn
off
Installation
spacing
1.ON
correction
Turn
on
Installation
spacing
Menu
^
Sp a c i n g Co r r e c t i o n
0 .OF F
0
Power ON/OFF Time
To view the power on/off time and flow rate for
the last 64 update times to obtain the offline time
period and the corresponding flow rate.
ON/ OF F T i me
[ +0
Pr e s s ENT Wh e n Re a d y
Enter the window, press Enter and ^ to display
the last update before the last 64 times of on/off
time and flow rate values. “ON” on right hand
indicates that time power is on; “00” on the upper
left corner indicates “00-07-18 12:40:12” the date
time; flow rate is displayed in the lower right
corner.
0 0 - 0 7 18
12 :4 0 :12
* ON 12 3 .6 5 m3 / h
Version:3.0.1
Page 33 of 52
LRF-3000S Ultrasonic transit-time flowmeter
Menu
^
1
Total Working Hours
With this function, it is possible to view the total
working hours since the Flowmeter left the factory.
The figure on the right indicates that the total
working hours since the Flowmeter left the factory
is 1107 hours 1 minute 41 seconds.
Menu
^
2
Display the last power off time.
Menu
^
^
L a s t F lo w Ra t e
10 0 .4 3
m3 / h
[ +3
ON/ OF F T i me s
[ +4
40
4
Total ON/OFF Times
Display total on/off times since the Flowmeter left
the factory.
^
Menu
L a s t Po we r Of f T i me
03- 04- 04
11:3 3 :0 2
3
Displays the last flow rate.
Menu
T o t a l Wo r k Ho u r s [ + 1
0 0 0 0 110 7 :0 1:4 1
0
Analog Output Verification
Please refer to the 5.8 “4~20mA Analog Output
Verification”
Version:3.0.1
Ha r d wa r e Ad j u s t i n g
En t r y
Page 34 of 52
LRF-3000S Ultrasonic transit-time flowmeter
7. Error Diagnoses
The ultrasonic Flowmeter has advanced self-diagnostics functions and displays any errors in the upper
right corner of the LCD via definite codes in a date/time order. Hardware error diagnostics are usually
performed upon each power on. Some errors can be detected during normal operation. Undetectable
errors caused by incorrect settings and unsuitable measurement conditions can be displayed accordingly.
This function helps to detect the errors and determine causes quickly; thus, problems can be solved in a
timely manner according to the solutions listed in the following tables.
Table 1 applies when errors caused by incorrect settings and signals are detected and are announced by
error codes displayed in Window M08.
7.1. Table1. Error codes and solutions
M08 Display
Co d e
*R
System Normal
Cause
* System normal
* Signal not detected.
*I
*G
Adjusting Gain
(Display in Windows M01)
Version:3.0.1
* Attach transducer to the pipe
and tighten it securely. Apply a
plenty of coupling compound
on transducer and pipe wall.
Spacing is not
correct between the
transducers or not * Remove any rust, scale, or
loose paint from the pipe
enough
coupling
surface. Clean it with a file.
compound applied to
face of transducers.
*Check the initial parameter
settings.
* Transducers installed
*
Signal Not Detected
Solution
improperly
* Remove the scale or change the
* Scale is too thick.
scaled pipe section. Normally, it is
possible
to
change
a
measurement
location.
The
instrument may run properly at a
new site with less scale.
* New pipe liner.
* Wait until liners solidified and
saturated.
The machine is adjusting
for gain,preparing for
normal calibration.
Page 35 of 52
LRF-3000S Ultrasonic transit-time flowmeter
7.2. Frequently Asked Questions and Answers
Question: New pipe, high quality material, and all installation requirements met: why still no signal
detected?
Answer: Check pipe parameter settings, installation method and wiring connections. Confirm if the
coupling compound is applied adequately, the pipe is full of liquid, transducer spacing agrees
with the screen readings and the transducers are installed in the right direction.
Question: Old pipe with heavy scale inside, no signal or poor signal detected: how can it be resolved?
Answer: Check if the pipe is full of fluid.
Try the Z method for transducer installation (If the pipe is too close to a wall, or it is necessary to install
the transducers on a vertical or inclined pipe with flow upwards instead of on a horizontal pipe).
Carefully select a good pipe section and fully clean it, apply a wide band of coupling compound on each
transducer face (bottom) and install the transducer properly.
Slowly and slightly move each transducer with respect to each other around the installation point until the
maximum signal is detected. Be careful that the new installation location is free of scale inside the pipe
and that the pipe is concentric (not distorted) so that the sound waves do not bounce outside of the
proposed area.
For pipe with thick scale inside or outside, try to clean the scale off, if it is accessible from the inside.
(Note: Sometimes this method might not work and sound wave transmission is not possible because of
the a layer of scale between the transducers and pipe inside wall).
Question: Why is the flow rate still displayed as zero while there is fluid obviously inside the pipe and a
symbol of “R” displayed on the screen?
Answer: Check to see if “Set Zero” was carried out with fluid flowing inside the pipe(Refer to Window
M42). If it is confirmed, recover the factory default in Window M43.
Version:3.0.1
Page 36 of 52
LRF-3000S Ultrasonic transit-time flowmeter
8. Product Overview
8.1. Introduction
The ultrasonic flowmeter is a state-of-the-art universal transit-time Flowmeter designed using FPGA chip
and low voltage broadband pulse transmission.,available for measuring water.
8.2. Features of LRF-3000S
Comparing With other traditional flowmeter or ultrasonic flowmeter,it has distinctive features such as high
precision, high reliability, high capability and low cost, the Flowmeter features other advantages:
1.
SLSI technology designed. Less hardware components, low voltage broadband pulse transmission,
low consumption power, high reliability, anti-jamming and outstanding applicability.
2.
User-friendly menu designed. Parameters of pipe range, pipe material, pipe wall thickness, output
signals, etc can be conveniently entered via the windows. British and Metric measurement units are
available.
3.
Daily, monthly and yearly totalized flow: Totalized flow for the last 64 days and months as well as
for the last 5 years are may be viewed. Power on/off function: allows the viewing of time and flow rate as
power is switched on and off 64 times. Also, the Flowmeter has manual or automatic amendment during
offline sessions.
4.
Parallel operation of positive, negative and net flow totalizes with scale factor (span) and 7 digit
display, while the output of totalize pulse and frequency output are transmitted via open collector.
Version:3.0.1
Page 37 of 52
LRF-3000S Ultrasonic transit-time flowmeter
8.3. Specifications
Performance specifications
Flow range
0.01~5.0 m/s(0.03~16 ft/s)
Accuracy
±1.0%
Pipe size
Clamp-on: 25mm~1200mm(1〞~48〞)
Fluid
Water
Pipe material
Carbon steel, stainless steel, PVC
Function specifications
OCT Pulse output: 0-5000Hz
Outputs
Analog output : 4~20mA, max load 750Ω
Communication interface
RS485
MODBUS
Power supply
10~36VDC/1A
Keypad
16 (4×4) key with tactile action
Display
20×2 lattice alphanumeric, back lit LCD
Temperature
Transmitter: –10℃~50℃
Transducer: 0℃~80℃
Humidity
Up to 99% RH, non-condensing
Physical specifications
Transmitter
PC/ABS,IP65
Transducer
Encapsulated design, IP68
transducer cable
Standard cable length: 30ft (9m)
Weight
Transmitter: approximately 0.7kg
Transducer: approximately 0.4kg
Version:3.0.1
Page 38 of 52
LRF-3000S Ultrasonic transit-time flowmeter
9. Appendix1-Serial Interface Network
Use and Communications Protocol
9.1 Overview
The transmitter has perfect communication protocol. It can also be connected to a RS-485.
Two basic schemes can be chosen for networking, i.e. the analog current output method only using the
flowmeter or the RS485 communication method via serial port directly using the flowmeter. The former is
suitable to replace dated instruments in old monitoring networks. The later is used in new monitoring
network systems. It has advantages such as low hardware investment and reliable system operation.
When the serial port communication method is directly used to implement a monitoring network system,
the address identification code (in window M46) of the flowmeter is used as network address code.
Expanded command set with [W] is used as communication protocol. Thus analog current loop and OCT
output of flowmeter can be used to control the opening of a control valve. The relay output can be used
to power-on/off other equipment. The analog input of the system can be used to input signals such as
pressure and temperature. The system provides an RTU function for flow measurement.
RS-485(0~1000m) can be directly used for data transmission link for a short distance.
The command answer mode is used in data transmission, i.e. the host device issues commands and the
flowmeter answers correspondingly.
9.2 Direct connection via RS-485 to the host device
TX to 2
RX to 3
GND to 5
PC
DC+ DC - GE
DC 10 ~ 36V
RL1 RL2 OCT+ OCTRELAY
E
UP+ UP-
E
DN+ DN-
TRANSDUCER
OCT OUT
5
I+
I-
4 - 20mA
TX
RX GND
RS232(RS485)
3 2
IOIOI
Drawing of Upper Computer RS-485 network data acquisition system
Notices:
When the flowmeter is in flowmeter network ,the following network IDN:13(0DH ENTER),10(0AH
NEWLINE),42(2AH*) and 38(26H&).The Network IDN is set in M46.
9.3 Communication protocol and the use
The communication protocol format used by the ultrasonic flowmeter is an expanded set of the Fuji FLV
series flowmeter protocol. The host device requests the flowmeter to answer by sending a “command”.
The baud rate of asynchronous communication (Primary station; computer system; ultrasonic flowmeter)
is generally 9600BPS. A single byte data format (10 bits): one start bit, one stop bit and 8 data bits. Check
Version:3.0.1
Page 39 of 52
LRF-3000S Ultrasonic transit-time flowmeter
bit: NONE.
9.3.1FUJI Protocol
The communication protocol format used by the ultrasonic flowmeter is an expanded set of the Fuji FLV
series flowmeter protocol. The host device requests the flowmeter to answer by sending a “command”.
The baud rate of asynchronous communication (Primary station: computer system; Secondary station:
ultrasonic flowmeter) is generally 9600BPS. A single byte data format (10 bits): one start bit, one stop bit
and 8 data bits. Check bit:NONE.
A data character string is used to express basic commands and a carriage return (ENTER) is used to
express the end of a command. The characteristic is that the string of data is flexible. Frequently used
commands are as follows:
Command
Description
Data format
DQD(cr)(lf)注 0
Return daily instantaneous flow
±d.ddddddE±dd(cr) *1
DQH(cr)(lf)
Return hourly instantaneous flow
±d.ddddddE±dd(cr)
DQM(cr) (lf)
Return instantaneous flow per minute ±d.ddddddE±dd(cr)
DQS(cr) (lf)
Return
second
DV(cr) (lf)
Return instantaneous velocity
±d.ddddddE±dd(cr)
DI+(cr) (lf)
Return positive accumulative flow
±dddddddE±d(cr) *2
DI-(cr) (lf)
Return negative accumulative flow
±dddddddE±d(cr)
DIN(cr) (lf)
Return net accumulative flow
±dddddddE±d(cr)
DID(cr) (lf)
Return
identification
code
instrument (address code)
DL(cr) (lf)
Return signal intensity
UP:dd.d,DN:dd.d,Q=dd(cr)
DC(cr) (lf)
Return current error code
*3
DT(cr) (lf)
Current date and time
yy-mm-dd,hh:mm:ss(cr)
LCD(cr) (lf)
Return currently displayed content on
LCD display
ESN(cr) (lf)
Return electronic serial number
W
Networking command
numeric string address
P
Prefix of return command with check
&
Function sign of command ”add”
Version:3.0.1
instantaneous
flow
prefix
per
of
±d.ddddddE±dd(cr)
ddddd(cr)5 bits in length
ddddddd(cr)(lf) *4
of
*5
Page 40 of 52
LRF-3000S Ultrasonic transit-time flowmeter
Communications commands
Note:
1.
(cr)expresses carriage return. Its ASCII value is 0DH. (lf) expresses line feed. Its ASCII value is
0AH.
2.
“d” expresses 0-9 number. 0 value is expressed as +0.000000E+00.
“d” expresses 0-9 numbers. There is no decimal point in integral part before “E”.
3.
The status of the machine is expressed by 1-6 letters. See the error code section for the
meaning of the characters. For example, “R” and “IH”.
4.
Eight “dddddddd” expresses the electronic serial number of the machine. “t” expresses the type
of machine.
5.
If there are multiple flowmeters in a data network then the basic commands cannot be used
alone. The prefix W must be added. Otherwise, multiple flowmeters will answer simultaneously,
which will cause chaos in the system.
Function prefix and function sign
Prefix P
The character P can be added before every basic command. It means that the transferred data has
CRC verification. The method of counting the verified sum is achieved by binary system addition.
For example: Command DI+(CR) (the relative binary system data is 44H, 49H, 2BH, 0DH)
transferred data is +1234567E+0m3. (CR) (the relative binary system data is 2BH, 31H, 32H, 33H,
34H, 35H, 36H, 37H, 45H, 2BH, 30H, 6DH, 33H, 20H, 0DH, 0AH). And command PDI+ (CR)
transferred data is +1234567E+0m3! F7 (CR), “!” means the character before it is the sum
character, and the verified sum of the two bytes after it is (2BH+31H+32H+33H+34H+35H+
36H+37H+45H+2BH+30H+6DH+33H+20H =(2)F7H)
Note: there can be no data before “!”, and also may be a blank character.
Prefix W
Usage of prefix W: W+ numeric string address code +basic command. Value range of the numeric
string is 0~65535, except 13 (0DH carriage return), 10 (0AH line feed), 42 (2AH *) and 38 (26H &).
If the instantaneous velocity of No. 12345 flowmeter is to be accessed, the command
W12345DV(CR) can be issued. Corresponding binary code is 57H, 31H, 32H, 33H, 34H, 35H, 44H,
56H and 0DH
Function sign &
Function sign & can add up to 5 basic commands (Prefix P is allowed) together to form a
compound command sent to the flowmeter together. The flowmeter will answer simultaneously.
For example, if No. 4321 flowmeter is requested to simultaneously return: 1] instantaneous flow, 2]
instantaneous flow velocity, 3] positive total flow, 4] energy total, 5] AI1 analogous input current
value, the following command is issued:
W04321PDQD&PDV&PDI+&PDI-&PDIN(CR)
Simultaneously returned data are likely as follows:
+0.000000E+00m3/d! AC(CR)
+0.000000E+00m/s! 88(CR)
+1234567E+0m3! F7(CR)
+0.000000E+0m3! DA(CR)
+0.000000E+0 m3! DA(CR)
Version:3.0.1
Page 41 of 52
LRF-3000S Ultrasonic transit-time flowmeter
9.3.2MODBUS Communication Protocol
This MODBUS Protocol uses RTU transmission mode. The Verification Code uses CRC-16-IBM (polynomial
is X16+X15+X2+1, shield character is 0xA001) which is gained by the cyclic redundancy algorithm method.
MODBUS RTU mode uses hexadecimals to transmit data.
This MODBUS-I Protocol uses RTU transmission mode. The Verification Code uses CRC-16-IBM
(polynomial is X16+X15+X2+1, shield character is 0xA001) which is gained by the cyclic redundancy
algorithm method.
MODBUS-I RTU mode uses hexadecimals to transmit data.
9.3.2.1.
MODBUS Protocol Function Code and Format
The flow meter protocol supports the following two-function codes of the MODBUS:
Function Code
Performance data
0x03
0x06
9.3.2.2.
Read register
Write single register
MODBUS Protocol function code 0x03 usage
The host sends out the read register information frame format:
Slave Address
Operation
First Address Register
Function Code
1 byte
1 byte
2 bytes
0x01~0xF7
0x03
0x0000~0xFFFF
Register Number
Verify Code
2 bytes
2 bytes
0x0000~0x7D
CRC(Verify)
The slave returns the data frame format:
Slave Address
1 byte
0x01~0xF7
Read Operation
Function Code
1 byte
0x03
Number of Data
Bytes
1 byte
2xN*
Data Bytes
Verify Code
N*x2 byte
N*x2
2 bytes
CRC(Verify)
N*=data register number
The range of flow meter addresses 1 to 247 (Hexadecimal: 0x01~0xF7 ), and can be checked in the
Menu 46. For example, decimal number “11” displayed on Menu 46 means the address of the flow meter
in the MODBUS protocol is 0x0B.
The CRC Verify Code adopts CRC-16-IBM (polynomial is X16+X15+X2+1, shield character is 0xA001) which
is gained by the cyclic redundancy algorithm method. Low byte of the verify code is at the beginning
while the high byte is at the end.
For example, to read the address 1 (0x01) in the RTU mode, if the instantaneous flow rate uses hour as a
unit(m3/h), namely reads 40005 and 40006 registers data, the read command is as follows:
0x01
Flowmeter Address
0x03
Function Code
0x00 0x04
Register Address
0x00 0x02
Register Number
0x85 0xCA
CRC Verify Code
Flowmeter returned data is (assuming the current flow=1.234567m3/h)
0x01
0x32
Flowmeter Address
0x03
Function Code
0x04
Data Bytes
0x06 0x51 0x3F 0x9E
Data(1.2345678)
0x3B
CRCVerify Code
The four bytes 3F 9E 06 51 is in the IEEE754 format single precision floating point form of 1.2345678.
Pay attention to the data storage order of the above example. Using C language to explain the data,
pointers can be used directly to input the required data in the corresponding variable address, the low
byte will be put at the beginning, such as the above example 1.2345678 m/s, 3F 9E 06 51 data stored in
order as 51 06 9E 3F.
Version:3.0.1
Page 42 of 52
LRF-3000S Ultrasonic transit-time flowmeter
9.3.2.3.
Error Check
The flowmeter only returns one error code 0x02 which means data first address in error.
For example, to read address 1 (0x01) of the flowmeter 40002 register data in the RTU mode, the
flowmeter considers it to be invalid data, and sends the following command:
0x01
Flowmeter Address
0x03
Function Code
0x00 0x01
Register Address
0x00 0x01
Register Number
0xD5 0xCA
CRC Verify Code
Flowmeter returned error code:
0x01
Flowmeter Address
9.3.2.4.
0x83
Error Code
0x02
Error Extended Code
0xC0 0xF1
CRC Verify Code
MODBUS Register Address List
The flowmeter MODBUS Register has a read register and a write single register.
Read Register Address List (use 0x03 performance code to read)
PDU
Address
Register
$0000
$0001
$0002
$0003
$0004
$0005
$0006
$0007
$0008
$0009
40001
40002
40003
40004
40005
40006
40007
40008
40009
40010
$000A
40011
$000B
$000C
$000D
$000E
40012
40013
40014
40015
$000F
40016
$0010
$0016
$0017
$0018
$0019
$001A
40017
40023
40024
40025
40026
40027
$001B
40028
$001C
40029
$001D
$001E
40030
40031
Flow/s - low word
Flow/s - high word
Flow/m - low word
Flow/m- high word
Flow/h - low word
Flow/h - high word
Velocity – low word
Velocity – high word
Positive total – low word
Positive total – high word
Positive total – exponent
Negative total—low word
Negative total—high word
Negative total—exponent
Net total—low word
Net total-high word
Net total—exponent
Up signal int – low word
Up signal int – high word
Down signal int – low word
Down signal int – high word
Quality
4~20mA Analog output-low
word
4~20mA Analog output-high
word
Error code – char 1,2
Error code – char 3,4
$001F
40032
Error code – char 5,6
$003B
40060
$003C
40061
$003D
40062
$003E
40063
$003F
40064
Velocity unit – char 1,2
Velocity unit – char 3,4
Flow unit – char 1,2
Flow unit – char 3,4
Total unit – char 1,2
Version:3.0.1
Read
Write
Type
32 bits real
2
32 bits real
2
32 bits real
2
32 bits real
2
32 bits uint.
2
16 bits int.
1
32 bits int.
2
16 bits int.
32 bits int.
1
2
16 bits int.
32 bits real
1
2
32 bits real
2
16 bits int.
1
32 bits real
2
No. registers*
0~99.9
0~99.9
0~99
Unit: mA
String
3
Refer to “Error
Analysis” for
detailed codes
meanings.
String
2
Currently support
m/s only
String
2
String
1
Page 43 of 52
LRF-3000S Ultrasonic transit-time flowmeter
Notes:
1.
2.
3.
The following flow rate units are available:
0. “m3”
-Cubic Meter
5. “cf”
-Cubic Feet
1. “l”
-Liters
6. “ba”
-US Barrels
2. “ga”
-Gallons
7. “ib”
-Imperial Barrels
3. “ig”
-Imperial Gallons
8. “ob”
-Oil Barrels
4. “mg”
-Million Gallons
When the flowmeter address or communication baud rate change, the meter will work under the
new address or communication baud rate after the communication baud rate responded with
returned primary address and communication baud rate.
16 bits int-short integer, 32 bits int-long integer, 32 bits real-floating point number, String
-alphabetic string.
Version:3.0.1
Page 44 of 52
LRF-3000S Ultrasonic transit-time flowmeter
10. Appendix2-W210 Insertion
Transducer
10.1.
Overview
W210 type insertion transducers can be installed into metal pipelines via an isolation ball valve
(installation into pipelines of plastic or other materials may require an optional mounting seat). The
maximum pipe diameter in which insertion transducers can be installed is DN2000. Fluid temperature
range: +10℃~+80oC .Sensor cable length (9m standard) normally can be extended to as long as 100m.
Figure 1 shows a diagram of the W210 Insertion Transducer. The insertion transducer is attached to its
mounting base (which is welded to the pipe section at the measurement point) via a ball valve. When the
transducer is removed, pipe fluids can be contained by shutting off the ball valve. Therefore, installation
and extraction of the transducer can be performed without relieving pipeline pressure. An O-ring seal and
joint nut guarantee user safety while installing or operating the transducer.
1
2
3
4
5
6
Construction Drawing of W210 Transducer
1. Cable
4. Ball value
2. Connector
5. Mounting base
3. Locknut
6. Sensor
10.2.
Measurement Point Selection
To guarantee highly accurate measurement results, it is necessary to select an appropriate measurement
point before installing the transducer. For examples of measuring point selection, see the related section
in the manual.
10.3.
Determining Transducer Spacing & Transducer Installation
The mounting space of insertion transducer is the center-to-center hole distance between the two
transducers (please refer to Menu 25). After enter the right parameter, please check the mounting space
in Menu 25. (unit: mm)
Mounting method:
1.Drilling at the measuring point, the diameter of the drilling hole is 24mm. Before drilling, please make
the hole center of transducer mounting base aim at the drilling hole center, and then weld it on the pipe
vertically. ( When the flowmeter need to be hot-tapped into the pipe under pressure without flow
Version:3.0.1
Page 45 of 52
LRF-3000S Ultrasonic transit-time flowmeter
interruption,please refer to the Sitelab’ operation construction of DDK electric Hot-tapping or
corresponding equipment.)
2.Close the ball valve and screw it tightly on the mounting base.
3.Twist off the locknut and loose the lock ring, pull the transducer into the joint nut, and then screw up
the joint nut on the ball valve.
4.Open the ball valve and insert the transducer, measure the dimension from the outer surface of the
pipe to the front end surface of handspike position to meet the following formula:
H=175-d
In this formula:
H is Mounting height (mm)
175 is Transducer length (mm)
d is Pipe wall thickness(mm)
5.Attach the lock ring to the joint nut by fitting its pinhole in the locating pin, then tighten the screw
slightly and turn the orientation handle until it points at the middle position between the two transducers
and its axes matches the axes of the pipeline. Finally, tighten the locking screw and screw the locating
sleeve onto the joint nut.
6.Connect the transducer cables to the corresponding upstream/downstream (upstream=red,
downstream=blue) terminal ends.
7.Please refer to the following installation diagram:
Version:3.0.1
Page 46 of 52
LRF-3000S Ultrasonic transit-time flowmeter
Important
For horizontal pipelines, transducers must be fixed on the sides of the pipe (i.e. at the 3
and 9 o’clock position of the pipe) to prevent signal attenuation caused by sediment on
the bottom of the pipe or air bubbles and air pockets in the top of the pipe.
10.4 Transducer Mounting Methods
W210 insertion transducer mounting method: Z method through M24, it should be installed according to
the specific application condition.
10.4.1
Z Mounting Method
Z method is the most commonly used mounting method for insertion-type ultrasonic flowmeters, suitable
for pipe diameters ranging from 50mm to 2000mm. Due to strong signal strength and high measurement
accuracy, the Z method is preferable for pipe sections severely rusted or with too much scale formation
on the inside wall. When installing the transducer using the Z method, be sure that the two transducers
and the pipeline center axis are in the same plane, but never in the 6 or 12 o’clock positions. see below:
Profile Chart
Top View
Section
Top
Drill hole spacing
T+34mm
10.4.2
Reference point
At 3 o’clock
Reference point
At 9 o’clock
Flow
Bottom
Pipe Parameter Entry Shortcuts
For example, measuring the diameter of DN200, pipe outside diameter is 219mm, pipe wall thickness is
6mm, pipe inner diameter is 207mm, measuring medium is water, and material is carbon steel, no liner,
can be operated as follows:
Step1. Pipe outside diameter:
1 1 keys to enter the window
Press
M11 and enter the pipe outside diameter,
and then press the Enter key to confirm.
Menu
Pi p e Ou t e r Di a me t e r
2 0 7 mm
(For insertion transducer, M11 menu need to
be entered the pipe inner diameter)
Step2. Pipe wall thickness
1 2
Press the
key to enter the
window M12, and enter the pipe wall
thickness, and press the Enter
key to
confirm.
(The Wall Thickness needs to be 0.001mm
for use with insertion sensors.)
Menu
Version:3.0.1
Pi p e Wa ll T h i c k n e s s
0 .0 0 0 1 mm
Page 47 of 52
LRF-3000S Ultrasonic transit-time flowmeter
Step3. Pipe Material
1 4
Press the
keys to enter the
window M14, press the Enter key, press
the ∧ or ∨ key to select Pipe Material,
and press the Enter key to confirm.
Menu
Pi p e Ma t e r i a l
0 . Ca r b o n St e e l
[ 14
Step4. Transducers type
2 3
Press the
keys to enter the
window M23, press the ∧ or ∨ key to
select transducer type, and press the Enter
key to confirm.
1. Plug-in Type B45
(
W
type
insertion transducer).
Menu
Step5. Transducer mounting methods
2 4
Press the
keys to enter the
window M24, press the Enter key, press the
∧
∨
or
key
to
select
transducer-mounting method, and press
the Enter key to confirm.
Choose according to the pipes on site.
Tr a n s d u c e r Ty p e [ 2 3
1.Plu g - i n T y p e B4 5
Menu
T r a n s d u c e r Mo u n t i n g
1.
Z
Step6. Adjust Transducer spacing
2 5
Press the
keys to enter the
window M25, accurately install the
transducer according to the displayed
transducer mounting spacing and the
selected mounting method (Refer to
Installing the Transducers in this chapter).
T r a n s d u c e r Sp a c i n g
14 6 .8 8 7
mm
Step7. Display measurement result
F lo w 0 .112 9 m3 / h
Ve l
1.0 4 15 m/ s
Menu
Press the
M01.
Menu
0
1
keys to enter the window
*R
About other setup,please refer to the related
information in the manual.
Version:3.0.1
Page 48 of 52
LRF-3000S Ultrasonic transit-time flowmeter
11.
Appendix3-RTD Module and PT1000
Wiring (Module optional)
11.1 RTD Energy Meter Function
This function is applied to the following meter and measurement temperature range:
LRF-3000S Hot(Cold) Energy Meter:0~100 ℃,equipped with PT1000 temperature sensor.
The RTD Module’s main function is to input the temperature values for the energy measurement. The
LRF-3000S can automatically calculate the caloric content of water at different temperatures and deriving
an instantaneous energy value and totalized energy value.
11.2 Wiring(PT1000)
Three-wire connections methods is used for the RTD module and PT1000 temperature
sensors,connections methods is as follows.(Note: A1, A2, B1, B2 are the same color, C1 and C2 are the
same color).
The two PT1000 temperature sensors are installed on the inlet and return pipes and they will input
temperature signals to the LRF-3000S transmitter.
11.3 Energy Measurement Methods
Energy Measurement Methods:
Formula 2: Q= m (h1-h2)
Q—Energy Value
m—quality of the medium( density× transit time water volume)
h1—enthalpy value of the inlet water
h2—enthalpy value of the return water
The temperature and pressure at the inlet and return water points can be measured by temperature
sensors and a transmitter, and pressure sensors and a transmitter. Then the enthalpy value at the inlet
and return water points can be calculated through the enthalpy values table. The flow of the medium can
Version:3.0.1
Page 49 of 52
LRF-3000S Ultrasonic transit-time flowmeter
be measured via the ultrasonic flow sensors and LRF-3000S transmitter, and the caloric value can be
derived according to the above formulas and the caloric calibration index.
11.4 Temperature Calibration Methods
There are two methods to calibrate the RTD module (customers can choose the proper one to calibrate
according to the actual situation).
Method One: Resistance box calibration method
Note: The purpose is to calibrate the internal circuit of RTD module
Tools needed: one DC resistance box, 3 wires (each wire less than 40mm long), and an instrument
screwdriver.
1.
Connect RTD module A1 to one end of the DC resistance box, and B1 to the other end of the DC
resistance box, and then connect A2 to one end of the DC resistance box, and B2 to the other end of the
DC resistance box.
2.
Power the transmitter on and then enter menu M07.
3.
Set the resistance value of the DC resistance box to be 1385.06Ω.
4.
Set resistance value of the DC resistance box to be 1000Ω.
5.
Clockwise or counterclockwise adjust the 4mA potentiometer on the left of A1 and the 4mA
potentiometer on the right of A2, and make sure the display of inlet water temperature and return water
temperature is 0.00±0.1.
6.
Enter
1
Press Menu
keys,input code “115800”,then press Enter key to stretch.Only in the
current powering -on period, automatically shut down when the power is cut off.
7.
Press Enter key to enter and then select “Adjust 0”to return water temperature adjustment,press
^
to adjust temperature for 0.00,Press Enter key to enter and then select “Adjust 0”to inlet water
temperature adjustment,press ^
to adjust temperature for 0.00,Press Enter key to Complete
calibration.
^
^
^
Set the resistance value of the DC Resistance box to be 168.46Ω
^
8.
9.
Enter
1
Enter the menu M07,After waiting for two temperature stability press Menu
keys to
^
enter and select “Adjust 100”to return water temperature adjustment,press
to adjust
temperature for 100.Press Enter key to enter inlet water temperature 100°C adjustment, press ^
to adjust temperature for 100,press Enter key to Complete calibration.
10.
Power on for many times,0°C:inlet and return water temperature is 0.00±0.05,Temperature
difference is 0.00±0.05. 100°C:inlet and return water temperature is 100±0.05,Temperature difference
is 0.00±0.05.
^
^
Method Two: Liquid standard temperature calibration method
Note: It is used to calibrate the internal circuit of RTD module and the PT100 temperature
sensors together
1.
2.
3.
Directly put the sensor end of a PT1000 temperature sensor into a mixture of ice and water (the
temperature is 0◦C), and the other end connects with the RTD module (adjust the electric potentiometer
to 4mA accordingly to ensure the display of M63 is 4.00).
Power on the SL1188 transmitter,then enter the menu M07.
Adjust the 4mA potentiometer on the left of A1 and the 4mA potentiometer on the right of A2,
and make sure the display of inlet water temperature and return water temperature is 0.00±0.05.
Version:3.0.1
Page 50 of 52
LRF-3000S Ultrasonic transit-time flowmeter
^
4.
Enter
1
Press Menu
keys,input code “115800”,then press Enter key to stretch.Only in the
current powering -on period, automatically shut down when the power is cut off.
5.
Enter
1
Enter the menu M07,After waiting for two temperature stability press Menu
keys to
^
enter and select “Adjust 100”to return water temperature adjustment,press
to adjust
temperature for 100.Press Enter key to enter inlet water temperature 100°C adjustment, press ^
to adjust temperature for 100,press Enter key to Complete calibration.
6.
Power on for many times,0°C:inlet and return water temperature is 0.00±0.05,Temperature
difference is 0.00±0.05. 100°C:inlet and return water temperature is 100±0.05,Temperature difference
is 0.00±0.05.
7.
After the ice water mixture temperature sensors back to room temperature, put them into a
constant temperature oil/water bath (the temperature is 100°C.)
^
^
^
11.5 Installation of RTD Module
Before installation of the RTD module (as shown in the figure below ):
After installation (as shown in the figure below ).
Version:3.0.1
Page 51 of 52
LRF-3000S Ultrasonic transit-time flowmeter
LONGRUN INDUSTRIAL INSTUMENT CO.,LTD
24 hours service: +86-186-5435-6933
Tel: +86-543-3611555
Fax: +86-543-3615999
E-mail: [email protected]
skype: Longruncn
Website: www.ultrasonicscn.com
Add: No.584,Huanghe Er Lu,Binzhou,Shandong province,China
P.C: 256600
Version:3.0.1
Page 52 of 52


