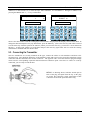
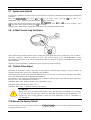
1
Sierra Instruction Manual
Innova-Sonic® Model 210 Portable
Innova-Sonic™ Model 210 Portable
Instruction Manual
Version IM-210, Rev. G, July 2008
Sierra Instruments USA, Main Headquarters
5 Harris Court, Building L
Monterey, CA 93940
Ph: 800-866-0200 (US Only); +831-373-0200 Fax: +1-831-373-4402
www.sierrainstruments.com
Sierra Europe, European Headquarters
Bijlmansweid 2
1934RE Egmond aan den Hoef
Phone: +31 72 5071 400; Fax: +31 72 5071 401
www.sierrainstruments.nl
Sierra Asia, Asia-Pacific Headquarters
Rm. 618, Tomson Centre, Bldg A, 188 Zhang Yang Road
Pu Dong New District, Shanghai, P.R. China
Phone: + 8621 5879 8521 Fax: +8621 5879 8586
http://www.sierra-asia.com
IM-210 Rev. G
Page 1 of 85
Sierra Instruction Manual
Innova-Sonic® Model 210 Portable
Important Customer Notice
Thank you for choosing the Innova-Sonic® Model 210 Transit-Time Ultrasonic Flow Meter. Before installing and operating the
flowmeter, please read this manual carefully and follow its instructions. This manual contains important information about your
meter.
ü Sierra has verified the conformity between the contents in this manual and the hardware and software described.
However, errors may still exist. We regularly review the materials covered in this manual and correct errors with
revisions. Any suggestions for improvement will be appreciated.
ü Go to www.sierrainstruments.com/products/downloads.html for a most current electronic version of this manual.
ü We reserve the right to change the content of this manual without prior notification.
ü If you have any questions or problems regarding this manual, please contact Sierra’s Customer Service
Department:
Toll Free: 800-866-0200 Phone: +831-373-0200 Fax: 831-373-4402
Email: [email protected]
WARNINGS IN THIS MANUAL
Caution and warning statements are used throughout this book to draw your attention to important information.
WARNING
“Warning” statement appears with information that is important to protect people and
equipment from damage. Pay very close attention to all warnings that apply to your application.
Failure to comply with these instructions may damage the meter.
ATTENTION
Failure to comply with these instructions may result in faulty operation.
NOTE
“Note” indicates that ignoring the relevant requirements or precautions may result in flowmeter
damage or malfunction.
IM-210 Rev. G
Page 2 of 85
Sierra Instruction Manual
Innova-Sonic® Model 210 Portable
© COPYRIGHT SIERRA INSTRUMENTS 2008
No part of this publication may be copied or distributed, transmitted, transcribed, stored in a retrieval system, or
translated into any human or computer language, in any form or by any means, electronic, mechanical, manual, or
otherwise, or disclosed to third parties without the express written permission of Sierra Instruments. The
information contained in this manual is subject to change without notice.
TRADEMARKS
Innova-Sonic® is a registered trademark of Sierra Instruments, Inc. Other product and company names listed in
this manual are trademarks or trade names of their respective manufacturers.
IM-210 Rev. G
Page 3 of 85
Sierra Instruction Manual
Innova-Sonic® Model 210 Portable
Product Components
An inspection should be made of the desired area before installing the flowmeter. Check to see if the spare parts
are present in accordance with the packing list. Make sure that there is no shipping damage. If you have any
questions, please contact your representative as soon as possible.
Pipe Strap
Screw Driver
Transmitter
Transducer
Accessory
Document
Toolbox
Cable
PDA
4-20mA
Signal Cable
Tape
Battery
IM-210 Rev. G
Coupling
compound
Software
1.
2.
3.
4.
Instruction Manual
Packing List
Certified 3-Point Factory Calibration
Position drawing
5.
Application Worksheet
Satchel
Charge
Page 4 of 85
Sierra Instruction Manual
Innova-Sonic® Model 210 Portable
Content
1. Transmitter Installation and Connection ....................................................8
1.1.
Inspection Prior to Transmitter Installation ..........................................................................................8
1.2.
Power Supply Connections..................................................................................................................8
1.2.1.
Direct Mount Method......................................................................................................................8
1.2.2.
Connecting The Wiring ..................................................................................................................8
1.3.
Powering on ........................................................................................................................................9
1.4.
Keypad Functions................................................................................................................................9
1.5.
Keypad Operation................................................................................................................................9
1.6.
Flowmeter Menu Descriptions............................................................................................................10
2. Pipe Parameter Entry Shortcuts .............................................................. 11
3. Measurement Site Selection ....................................................................13
4. Transducer Installation............................................................................14
4.1.
Installing the Transducers..................................................................................................................14
4.1.1.
Transducer Spacing.....................................................................................................................14
4.1.2.
Transducer Mounting Methods.....................................................................................................14
4.1.3.
V Method .....................................................................................................................................14
4.1.4.
Z Method......................................................................................................................................15
4.1.5.
N Method (not commonly used) ...................................................................................................15
4.1.6.
W Method (very rarely used) ........................................................................................................15
4.2.
Transducer Mounting Inspection.............................................................................................15
4.2.1.
Signal Strength............................................................................................................................16
4.2.2.
Signal Quality (Q value) ...............................................................................................................16
4.2.3.
Total Time and Delta Time............................................................................................................16
4.2.4.
Transit Time Ratio........................................................................................................................16
Warnings ...................................................................................................................................................17
5. Operating Instructions ............................................................................18
5.1.
Establishing Bluetooth communications............................................................................................18
5.1.1.
IF COMMUNICATIONS FAIL..........................................................................................................18
5.1.2.
Alternative Method for Application Programming.........................................................................19
5.2.
Entering Data In The PDA Menu .........................................................................................................20
5.3.
Connecting the Transmitter................................................................................................................21
5.4.
System Normal Identification.............................................................................................................24
5.5.
Zero Set Calibration...........................................................................................................................24
5.6.
Scale Factor.......................................................................................................................................24
5.7.
System Lock (Unlock)........................................................................................................................25
IM-210 Rev. G
Page 5 of 85
Sierra Instruction Manual
Innova-Sonic® Model 210 Portable
5.8.
4~20mA Current Loop Verification .....................................................................................................25
5.9.
Totalizer Pulse Output........................................................................................................................25
5.10.
Recover the Factory Default...............................................................................................................25
5.11.
Analog Output Calibration .................................................................................................................26
5.12.
210 PORTABLE Software Usage.........................................................................................................26
5.12.1.
Data Acquisition and Analysis ...........................................................................................................26
5.12.1.1. PDA Data Acquisition and Analysis Program................................................................................26
5.12.1.2. Main Interface ..............................................................................................................................27
5.12.1.3. Data Acquisition ..........................................................................................................................27
5.12.1.4. Data Analysis and Graph..............................................................................................................28
5.12.1.5. Data Acquisition Control For The Internal SD Card.......................................................................29
5.12.1.6. Data Reading For The SD Card.....................................................................................................30
5.12.2.
UFM Data Analysis and Printing Program...........................................................................................31
5.12.2.1. Data Browsing and Printing .........................................................................................................31
5.12.2.2. Graph Display and Printing..........................................................................................................32
5.12.2.3. Data Analysis and Printing...........................................................................................................33
5.12.2.4. Configuration Information Display ...............................................................................................34
5.12.2.5. Menu Functions...........................................................................................................................35
5.13.
Analog Voltage Output.......................................................................................................................35
5.14.
Date and Time Settings......................................................................................................................35
5.15.
Check Flow of Every Day/Month/Year.................................................................................................36
5.16.
Automatic Flow Correction ................................................................................................................36
5.17.
Working Timer ...................................................................................................................................36
5.18.
Manual Totalizer.................................................................................................................................36
5.19.
Analog Output Calibration .................................................................................................................36
5.20.
ESN ...................................................................................................................................................36
6. Windows Display Explanations................................................................37
6.1.
Windows Display Codes ....................................................................................................................37
6.2.
Display Explanation...........................................................................................................................38
7. Error Diagnoses......................................................................................52
7.1.
Table 1. Self-diagnoses and Error Solutions (upon power on) ............................................................52
7.2.
Table 2. Error Codes and Solutions (during operation).......................................................................53
7.3.
Frequently Asked Questions and Answers.........................................................................................54
8. Product Overview ...................................................................................55
8.1.
Introduction.......................................................................................................................................55
8.2.
Features of 210..................................................................................................................................55
8.3.
Theory of Operation...........................................................................................................................55
IM-210 Rev. G
Page 6 of 85
Sierra Instruction Manual
Innova-Sonic® Model 210 Portable
8.4.
Applications ......................................................................................................................................56
8.5.
Specifications....................................................................................................................................56
9. Appendix1 - Flow Application Data ..........................................................57
9.1.
Sound Velocity and Viscosity for Fluids Commonly Used ..................................................................57
9.2.
Sound Velocity for Various Materials Commonly Used.......................................................................57
9.3.
Sound Velocity In Water (1 atm) At Different Temperatures.................................................................58
9.4.
Sound Velocity and Viscosity of Common Liquid...............................................................................59
9.5.
Sound Velocity of Common Materials.................................................................................................59
9.6.
Sound Velocity In Water (1 atm) At Different Temperatures.................................................................60
9.7.
Common Pipe Dimensions (English)..................................................................................................61
9.8.
Common Pipe Dimensions (DIN)........................................................................................................67
9.9.
Cement Lined Pipes Liner Thicknesses .............................................................................................70
9.10.
Cast Iron Pipe Data............................................................................................................................70
9.11.
Ductile Iron Pipe Data ........................................................................................................................71
9.12.
Sound Speeds In Various Fluids ........................................................................................................72
9.13.
Sound Speed in Various Pipe Materials..............................................................................................81
10. Appendix ................................................................................................82
10.1.
Install 210 Software on PDA...............................................................................................................82
10.2.
UFM Data Installation.........................................................................................................................84
10.2.1. Hardware requirements................................................................................................................84
10.2.2. OS Requirements.........................................................................................................................84
10.2.3. Installing Method .........................................................................................................................84
Update Information:
__________________________________________________________________________________________
__________________________________________________________________________________________
__________________________________________________________________________________________
__________________________________________________________________________________________
IM-210 Rev. G
Page 7 of 85
Sierra Instruction Manual
Innova-Sonic® Model 210 Portable
1. Transmitter Installation and Connection
1.1. Inspection Prior to Transmitter Installation
Check the packing list and contents to ensure that all necessary and ordered parts are on hand. Should any parts be
missing or damaged, please contact Sierra Instruments as soon as possible.
1.2. Power Supply Connections
1.2.1. Direct Mount Method
The 210 is powered by 11.1V batteries. Batteries can be recharged and a standby power supply can be connected
through the battery recharge port on the panel.
WARNING
Use only the supplied charger to charge the batteries.
Make sure the electronics, the spare battery and PDA are fully charged before using.
1.2.2. Connecting The Wiring
Open the hinged front cover of the electronics. Shown from left to right on the panel of the PORTABLE are the
battery recharge port (charge the transmitter or connect to the standby power supply), power switch, power light
(red), run indicator (green), upstream transducer connector, downstream transducer connector, output
connector(4~20mA output and Relay output).
Power
Charge
Run
On/Off
Transducer
Upstream
UPSTREAM
IM-210 Rev. G
DOWNSTREAM
Red
Bushing
4-20mA
Downstream
(Relay)
Blue
Bushing
Page 8 of 85
Sierra Instruction Manual
Innova-Sonic® Model 210 Portable
WARNING
When the battery power is less than 15% (use time is less than 40 seconds), the power
indicator light will change to orange.
1.3. Powering on
As soon as the Flowmeter is switched on, the self-diagnosis program will start to run. If any error is detected, an
error code will displayed on the screen (see Error Diagnostics on page 58). After that, the system will run
automatically using the programmed parameters.
Normal operation is indicated by code “*R” on the upper left corner of the screen.
1.4. Keypad Functions
Follow these guidelines when using the Flowmeter keypad (Refer to Keypad Figure):
0
~ 9 and
Input numbers.
Backspace or delete characters to the left.
/+
and / - Return to the last menu or open the next menu. Acts as “+”
and “-” functions when entering numbers.
Select a menu. Press this key first, input a two-digit menu number
and the selected menu data will be displayed. For example, to input a pipe
1 1 , where “11” is the window ID to
outside diameter, press
display the pipe outside diameter.
Flow
, Velo , +Total , -Total , Sig , Aout , Error and
are shortcut keys
(explained later).
Flow
7
8
9
MENU
Sig
Velo
4
5
6
/+
Aout
+Total
1
2
3
/-
Error
-Total
0
.
Menu
ENT
Comm
Menu
Comm
1.5. Keypad Operation
The instrument setup and measurement displays are subdivided into more than 100 independent menus. The
operator can input parameters, modify settings or display measurement results by “visiting” a specific menu.
These menus are arranged by 2-digit serial numbers from 00~99, then using +0, +1, etc. Each menu ID code has a
defined meaning. For example, menu 11 is the pipe outside diameter, while menu 25 is the mounting spacing
between the transducers. Each menu is discussed later in this manual.
key, then input the 2-digit menu ID code and that menu will be displayed.
To visit a specific menu, press the
Another method to visit a particular menu is to press the / + / - keys to scroll through the menus. For example,
if the current menu ID code is 03, press / + key to enter menu 02, press the / + button again to enter menu 01;
then press the / - key to go back to menu 02, then press the / - key again to enter menu 03.
Menu
Example 1: To enter a pipe outer diameter of 219.234,
the procedure is as follows:
1 1 keys to enter menu 11 (the
Press
numerical value displayed currently is the previous
pipe outer diameter). Now press ENT key. The
symbol “>” and a flashing cursor are displayed at the
left end of the second line on the screen. The new
value can now be entered.
Menu
2
1
9
IM-210 Rev. G
2
3
4
Pipe Outer Diameter
>_
ENT
Page 9 of 85
Sierra Instruction Manual
Example 2: If the pipe material is “Stainless Steel”,
1 4 to enter Menu 14, then press ENT
press
to modify the options. Then, select “1. Stainless Steel”
from the drop-down menu (you may cycle through the
choices by pressing the / + and / - keys) and then
press ENT to confirm the selection. It is also possible
to press the 1 key to change the selection and wait
until “1. Stainless Steel” is displayed on the second
line of the screen. Then press the ENT key to confirm.
Menu
Innova-Sonic® Model 210 Portable
Pipe Material
[14
>1. Stainless Steel
Pipe Materia
>5. PVC
[14
ATTENTION
The ENT key is used to enter or modify data. If you cannot do so after pressing the ENT key, it
means that someone has enabled password protection. To “unlock” it, select “unlock” in menu 47
and enter the password (this password has to be set by the user).
1.6. Flowmeter Menu Descriptions
Menus are assigned as follows:
00~09
Display menus: Used to display flow rate, positive total, negative total, net total, velocity, date
& time etc.
10~29
Setup menus: Used to enter pipe outer diameter, pipe wall thickness, fluid type, transducer
type, transducer mounting and spacing etc.
30~38
Flow units selection and totalizer operating menus: Used to select units of measurement. Other menus
set/reset the various totalizer modes.
40~49
System menus: Flow correction operating menus and system lock menus etc.
55~83
Input and output setup menus: current loop mode select, 4mA or 0mA output value, etc.
90~94
Diagnostics: signal strength quality (menu 90), TOM/TOS*100 (menu 91), sound velocity
(menu 92), total time and delta time of the measured signal (menu 93), Reynolds number and K
factor (menu 94).
+0~+9
Appendix: Power on/off time, total working hours, on/off times etc.
-0~-9
4~20mA correction menus.
ATTENTION
“missing” menus are for hardware adjustment (set by the manufacturer).
IM-210 Rev. G
Page 10 of 85
Sierra Instruction Manual
Innova-Sonic® Model 210 Portable
2. Pipe Parameter Entry Shortcuts
Example: Lets say we have a DN200 (8”) pipe, measuring water, Material is carbon steel with no liner.
parameters should be entered as follows:
Step 1. Pipe outside diameter
1 1 keys to enter menu 11,
Press
enter the pipe outside diameter 200, then press
the ENT key.
Menu
Step 2. Pipe wall thickness
1 2 key to enter menu 12,
Press the
enter the pipe wall thickness (wall thickness
for various pipe schedules can be found in the
appendix), then press the ENT key.
Menu
These
Pipe Outer Diameter
200 mm
Pipe Wall Thickness
6 mm
Step 3. Pipe material
1 4 key to enter menu 14,
Press the
ENT
press the
key, use the / + or / - key
to select the pipe material from the drop-down
menu, then press the ENT key.
Pipe Material
0. Carbon Steel
Step 4. Liner material parameters
(including thickness and sound velocity, if
needed)
1 6 key to enter menu 16,
Press the
ENT
key, use the / + or / - key
press the
to select liner material from the drop-down
menu, then press the ENT key.
Liner Material [16
0. None, No Liner
Step 5. Fluid type
2 0 key to enter menu 20,
Press the
press the ENT key, use the / + or / - key
to select fluid type from the drop-down menu,
then press the ENT key.
Fluid
0.
Step 6. Transducer type
(The transmitter is available for various
transducer types)
2 3 key to enter menu 23,
Press the
ENT
press the
key, use the / + or / - key
to select transducer type from the drop-down
menu, then press the ENT key.
Transducer Type [23
0. Standard
Menu
[14
Menu
Menu
Type
Water
[20
Menu
ATTENTION
Unless otherwise directed, you will use 0. standard here. High T sensors are being developed
and eventually may be selected here. (along with other specialty sensors)
IM-210 Rev. G
Page 11 of 85
Sierra Instruction Manual
Innova-Sonic® Model 210 Portable
Step 7. Transducer mounting methods
2 4 key to enter menu 24,
Press the
ENT
press the
key, use the / + or / - key
to select transducer-mounting from the
drop-down menu, then press the ENT key.
Transducer Mounting
0.
V
Step 8. Adjust Transducer spacing
2 5 key to enter menu 25,
Press the
accurately install the transducer according to
the displayed transducer mounting spacing and
the selected mounting method (Refer to
Installing the Transducers in this chapter).
Transducer Spacing
159.86 mm
Menu
Menu
IM-210 Rev. G
Page 12 of 85
Sierra Instruction Manual
Innova-Sonic® Model 210 Portable
3. Measurement Site Selection
When selecting a measurement site, it is important to select an area where the fluid flow profile is fully developed
to guarantee a highly accurate measurement. Use the following guidelines to select a proper installation site:
Choose a section of pipe that is always full of liquid, such as a vertical pipe with flow in the upward direction or a
full horizontal pipe.
PUMP
CHECK VALVE
GOOD
5D
10D
MAY BE
(If Pipe Full)
Storage Tank
NEVER
GOOD
10D
5D
The site should have a straight pipe run length equal to at least 10 pipe diameters upstream and 5 pipe diameters
downstream from any throttling valves or other flow disturbance producing elements, such as pipe reducers,
elbows, tees, etc.
Ensure that the pipe surface temperature at the measuring point is within the transducer temperature limits.
Consider the inside condition of the pipe carefully. If possible, select a section of pipe where the inside is free of
excessive corrosion or scaling.
Examples of acceptable measurement sites are illustrated on the figure below.
10D
10D
NEVER
5D
GOOD
5D
10D
5D
GOOD
5D
NEVER
10D
5D
1
GOOD
0D
GOOD
IM-210 Rev. G
Page 13 of 85
Sierra Instruction Manual
Innova-Sonic® Model 210 Portable
4. Transducer Installation
4.1. Installing the Transducers
Before installing the transducers, clean the pipe surface where the transducers are to be mounted. Remove any rust,
scale or loose paint and make a smooth surface. Apply a wide band of sonic coupling compound down the center
of the face of each transducer as well as on the pipe surface, and then attach the transducers to the pipe with the
straps provided and tighten them securely.
Note:
The two transducers should be mounted at the pipe’s centerline on horizontal pipes.
Make sure that the transducer mounting direction is parallel with the flow.
During the installation, there should be no air bubbles or particles between the transducer and the pipe wall. On
horizontal pipes, the transducers should be mounted in the 3 o’clock and 9 o’clock positions of the pipe section in
order to avoid any air bubbles inside the top portion of the pipe. (Refer to Transducer Mounting). If the
transducers cannot be mounted horizontally symmetrically due to limitation of the local installation conditions, it
may be necessary to mount the transducers at a location where there is a guaranteed full pipe condition (the pipe is
always full of liquid).
4.1.1. Transducer Spacing
After entering the required parameters, the spacing between the ENDS of the two transducers is considered as the
standard transducer spacing (Refer to Top View on transducer mounting methods). Check the data displayed in
Window M25 and space the transducers accordingly.
4.1.2. Transducer Mounting Methods
Four transducer mounting methods are available. They are respectively: V method, Z method, N method and W
method. The V method is primarily used on small diameter pipes (DN100~400mm, 4”~16”). The Z method is
used in applications where the V method cannot work due to poor signal or no signal detected. In addition, the Z
method generally works better on larger diameter pipes (over DN300mm, 12”) or cast iron pipes.
The N method is an uncommonly used method as well as is the W method. They are used on smaller diameter
pipes (below DN50mm, 2”).
4.1.3. V Method
The V method is considered as the standard method. It usually gives a more accurate reading and is used on pipe
diameters ranging from 25mm to 400mm (1~16”) approximately. Also, it is convenient to use, but still requires
proper installation of the transducer, contact on the pipe at the pipe’s centerline and equal spacing on either side of
the centerline.
Side View
Upstream Transducer
Section
Top View
Transducer
Flow
F lo w
Downstream Transducer
IM-210 Rev. G
Pipe Strap
Transducer Space
Page 14 of 85
Sierra Instruction Manual
Innova-Sonic® Model 210 Portable
4.1.4. Z Method
The signal transmitted in a Z method installation has less attenuation than a signal transmitted with the V method.
This is because the Z method utilizes a directly transmitted (rather than reflected) signal which transverses the
liquid only once.
The Z method is able to measure on pipe diameters ranging from 100mm to 3000mm (4”~120”) approximately.
Therefore, we recommend the Z method for pipe diameters over 300mm (12”).
Side View
Upstream Transducer
Section
Top View
Transducer
Flow
Flo w
Downstream Transducer
Transducer Spacing
Pipe Strap
4.1.5. N Method (not commonly used)
With the N method, the sound waves traverse the fluid twice and bounce three times off the pipe walls. It is
suitable for small pipe diameter measurement.
The measurement accuracy can be improved by extending the transit distance with the N method (uncommonly
used).
Side View
Upstream Transducer
Section
Top View
Transducer
Flow
Flo w
Downstream Transducer
Transducer Spacing
Pipe Strap
4.1.6. W Method (very rarely used)
As with the N method, the measurement accuracy can also be improved by extending the transit distance with the
W method. The sound wave traverses the fluid four times and bounces four times off the pipe walls. It is suitable
for very small pipe (diameters less than 50mm, 2”).
Side View
Upstream Transducer
Section
Top View
Transducer
Flow
F lo w
Downstream Transducer
Pipe Strap
Transducer Spacing
4.2. Transducer Mounting Inspection
Check to see if the transducer is installed properly and if there is an accurate and strong enough ultrasonic signal
to ensure proper operation and high reliability of the transducer. It can be confirmed by checking the detected
signal strength, total transit time, delta time as well as transit time ratio. These checks are explained below.
The “mounting” condition directly influences the flow value accuracy and system reliability. In most instances,
apply a wide bead of sonic coupling compound lengthwise on the face of the transducer and stick it to the outside
IM-210 Rev. G
Page 15 of 85
Sierra Instruction Manual
Innova-Sonic® Model 210 Portable
pipe wall to get good measurement results. However, the following inspections still need to be carried out in order
to ensure a high reliability of the measurement and long-term operation of the instrument.
4.2.1. Signal Strength
Signal strength (displayed in menu 90) indicates a detected strength of the signal both from upstream and
downstream directions. The relevant signal strength is indicated by numbers from 00.0~99.9. 00.0 represents no
signal detected while 99.9 represent maximum signal strength.
Normally, the stronger the signal strength detected, the better the measurement.
Adjust the transducer spacing to the best position and check to ensure that enough sonic coupling compound is
applied during installation in order to obtain the maximum signal strength. This is essentially fine tuning the
calculated spacing shown in menu 25 (transducer spacing). It may be slightly different.
System normal opperation requires signal strength over 60.0, which is detected from both upstream and
downstream directions. If the signal strength detected is too low, the transducer installation position and the
transducer mounting spacing should be re-adjusted and the pipe should be re-inspected. If necessary, change the
mounting to the Z method (Z has the highest signal strength).
4.2.2. Signal Quality (Q value)
Q value is short for Signal Quality (displayed in menu 90). It indicates the level of the signal detected. Q value is
indicated by numbers from 00~99. 00 represents the minimum signal detected while 99 represent the maximum.
The transducer position may be adjusted and enough coupling used to get the signal quality detected as strong as
possible.
4.2.3. Total Time and Delta Time
“Total Time and Delta Time” are displayed in menu 93. The measurement calculations in the flowmeter are based
upon these two parameters. Therefore, when “Delta Time” fluctuates widely, the flow and velocities fluctuate
accordingly. This means that the signal quality detected is too poor. It may be the resulted of poor pipe-installation
conditions, inadequate transducer installation or incorrect parameter input.
Generally, “Delta Time” fluctuation should be less than±20%. Only when the pipe diameter is too small or
velocity is too low can the fluctuation be wider.
4.2.4. Transit Time Ratio
Transit Time Ratio indicates if the transducer mounting spacing is accurate. The normal transit time ratio should
be 100±3 if the installation is proper. Check it menu 91.
ATTENTION
If the transit time ratio is over 100±3, it is necessary to check:
IM-210 Rev. G
(1)
If the parameters (pipe outside diameter, wall thickness, pipe material, liner, etc.) have
been entered correctly,
(2)
If the transducer mounting spacing is accordance with the display in menu 25,
(3)
If the transducer is mounted at the pipe’s centerline on the same diameter,
(4)
If the scale is too thick or the pipe mounting is distorted in shape, etc.
Page 16 of 85
Sierra Instruction Manual
Innova-Sonic® Model 210 Portable
Warnings
Pipe parameters entered must be accurate; otherwise the flowmeter will not work properly.
(1)
During the installation, apply enough coupling compound to stick the transducer onto the pipe wall.
While checking the signal strength and Q value, move the transducer slowly around the mounting site
until the strongest signal and maximum Q value are obtained. The larger the pipe diameter, the more
the transducer may have to be moved.
(2)
Check to be sure the mounting spacing is as calculated in menu 25 and the transducer is mounted at
the pipe’s centerline on the same diameter. Note that you can adjust the spacing slightly as described
above to fine tune the device.
(3)
Pay special attention to those pipes that formed by steel rolls (pipe with seams), since such pipe is
always irregular. If the signal strength is always displayed as 0.00, that means there is no signal
detected. Thus, it is necessary to check that the parameters (including all the pipe parameters) have
been entered accurately. Check to be sure the transducer mounting method has been selected properly,
the pipe is not worn-out, and the liner is not too thick. Make sure there is there is indeed fluid in the
pipe or the transducer is not very close to a valve or elbow, and there are not too many air bubbles in
the fluid, etc. Once you have ruled out all these reasons, if there is still no signal detected, the
measurement site has to be changed.
IM-210 Rev. G
Page 17 of 85
Sierra Instruction Manual
Innova-Sonic® Model 210 Portable
5. Operating Instructions
5.1. Establishing Bluetooth communications
Once the unit is fully charged, you are now ready to commence the configuration setup for your specific
application. In order to accomplish this, you must first establish Bluetooth Communications between the PDA and
the Electronics unit.
Turn the Electronics unit on. Observe the RED LED Power light illuminate. This must be in sequence, the
Electronics MUST be turned on FIRST, then the PDA. Failure to do so in this sequence will result in a lack of
Blue Tooth Communications.
Turn on the PDA. Observe the PDA Boot up Sequence. The unit will then automatically launch the Sierra 210
application and search for Bluetooth devices. It will show a list of compatible Bluetooth devices (typically cell
phones and laptops) within range. Select the FLOWXXX device if there are multiple devices listed. It will then
establish communications and you should observe the Green/Amber Run light on the Electronics flashing while
communicating.
1 bluetooth device(s) found
FLOWXXXX
Connect Cancel
Search
5.1.1. IF COMMUNICATIONS FAIL
First, ENSURE the Electronics unit is turned on and the RED power LED is Illuminated.
In the event that a Data Window appears asking for a Password, enter the password of 1234. This will
unlock the unit and allow communications to proceed.
Should the PDA not discover the Electronics unit, you will see the following screens. Simply follow the steps
below and you will be guided to re-establishing communications.
NOTE
The range of the Bluetooth Communications is a function of the level of battery life in
both devices. Initially, with a fully charged PDA and Electronics, the Bluetooth with
have a functioning range of approximately 30 feet. As the charge depletes, the range may
also decrease.
On the PDA, you will see “Serial Number Error” Select OK.
PDA will search again for Bluetooth Devices.
IM-210 Rev. G
Page 18 of 85
Sierra Instruction Manual
Innova-Sonic® Model 210 Portable
Communication Setup
Failure!
Flow
7
8
9
Velo
4
5
6
/+
Aout
+Total
1
2
3
/-
Error
-Total
0
.
ENT
Comm
MENU
Sig
If none are found, you will see “Application Error”. Application Functions will be invalid due to wrong
connection or wrong serial number. Select OK.
OK
SL1188P
!
Flow
7
Velo
Application functions will be
invalid except [Comm] due to
wrong connection or wrong
serial number!
MENU
8
9
4
5
6
/+
Aout
+Total
1
2
3
/-
Error
-Total
0
.
ENT
Comm
Flow
7
8
9
MENU
Sig
Velo
4
5
6
/+
Aout
+Total
1
2
3
/-
Error
-Total
0
.
ENT
Comm
Sig
This will take you to the main PDA Desktop screen.
5.1.2. Alternative Method for Application Programming
On the ID Area – Window Frame if you tap once in the Blue Window frame, two selectable tabs appear.
Utility and Options. Under the Utility Tab, you will see the choices for the following;
Data Acquisition\Table & Graph\Configuration\Display\Output.
IM-210 Rev. G
Page 19 of 85
Sierra Instruction Manual
Innova-Sonic® Model 210 Portable
Ultrasonic Flowmeter
S/N=11801186
7
Flow
8
9
Sig
MENU
Data Acquisition
Ctrl+A
Table
Velo & Graph
4
UFM Data
5
Ctrl+T
6
Ctrl+U
/+
Aout
2
Ctrl+R
3
/-
Error
Read File
+Total
1
Ctrl+C
Configuration
-Total
Display
0
.
Ctrl+D ENT Comm
Ctrl+O
Help
Output
Utility
Selecting the Configuration Option will bring up a 1 page synopsis of the currently entered data.
You may change the data here, rather than entering each separate menu section. Simply tap a data
section and it will either activate a cursor in that label or display a selection box with choices to
enter.
IMPORTANT! ONCE YOU ENTER THIS DATA, YOU MUST SELECT THE SEND
BUTTON, OR THE PDA WILL NOT UPLOAD IT TO THE ELECTRONICS. Once complete, you
will still need to enter MENU 25 to read the transducer spacing prior to mounting them on the pipe.
Configuration
• Measurement Units
1.English
• Pipe Outer Diameter
6.61417
in
• Pipe Wall Thickness
0.236221
in
• Pipe Material
0.Carbon Steel
• Liner Material
0.Noen,Liner
• Fluid Type
0.Water
• Transducer Mount
Load
Save
0.V
Send Other
OK
Selecting the OPTIONS Tab will provide you with the Instrument Serial Number and Software Version Data.
The other options under the Utility Tab will be discussed in detail later in this manual.
Innova-Sonic Portable 210
Awarded Serial Number:
11703213
Copyright(C)2005-2008,All
right reserved by Sierra
Instruments,Inc.,
Version: 1.0
OK
5.2. Entering Data In The PDA Menu
In order to input the required data, you must navigate to that data window. Page 37 has all the data windows
IM-210 Rev. G
Page 20 of 85
Sierra Instruction Manual
Innova-Sonic® Model 210 Portable
outlined in a chart format. So, to enter the Pipe Outer Diameter, we need Menu 11. Navigate to Menu 11 by
pressing the MENU and “1”, “1” keys on the PDA.
Pipe Outer Diameter
>
Pipe
in
Outer Diameter
6.61417 in
M11
Flow
7
8
9
Velo
4
5
6
+Total
1
2
3
-Total
0
.
Sig
Flow
7
8
9
/+
Aout
Velo
4
5
6
/+
Aout
/-
Error
+Total
1
2
3
/-
Error
ENT
Comm
-Total
0
.
ENT
Comm
MENU
MENU
Sig
Observe the data window with the existing Pipe Outer Diameter Displayed in the Display section on the PDA. To
change this data and input the new pipe dimensions, press the ENT Key. {This is the enter key and will be referred
to as the Enter key from this point in the manual.} When you select the enter key, you will see a cursor that looks
like this >. At this point, simply type in the data and press the enter key again. This will over write the existing
information in the PDA and save the new data.
5.3. Connecting the Transmitter
Once the transducers are securely mounted on the pipe, connect the cables to each transducer and then to the
electronics box. Care should be taken here as the transducer cable ends are keyed to fit into the transducers wiring
connection and then fastened with a circular connector. The opposite end is a circular connector plug that simply
inserts into the corresponding Upstream and Downstream connection point. Once these 2 cables are securely
connected, you are ready to read the flow.
MATING: As drawing shows, hold the smooth part in
back of the plug and push when the key of the plug
are in line. The connector is fully seated when a click
is heard or felt from the quick disconnect ring.
IM-210 Rev. G
Page 21 of 85
Sierra Instruction Manual
Innova-Sonic® Model 210 Portable
UNMATING: As drawing shows, hold the coupling nut
and pull to unmate.
The upstream transducer cable has red terminal ends and downstream transducer cable has blue terminal ends.
When installing transducers to relatively small pipes {sizes under 8” in most applications}, the transducer spacing
displayed in MENU25 may be less than 7.5” (190mm), then we can install the transducers in single slide ruler
rack. The installation method is unscrewing a transducer off the rack at first,
then install the two transducers to one rack face-to-face.
IM-210 Rev. G
Page 22 of 85
Sierra Instruction Manual
Innova-Sonic® Model 210 Portable
The flow meter will now work as usual. Exercise caution during this procedure as the transducers are spring
loaded in the racks.
When finished installing both transducers in a single rack, they should appear as shown in the photo below. The
oval transducer crystals should be facing each other. They are designed to send signals back and forth to one
another, and if they are installed backwards, they will not function.
Each transducer has a flow direction arrow or an Upstream / Downstream Identification. Additionally, each
rack has the flow direction arrow depicted on it. Ensure the arrows point in the correct direction to ensure
proper operation.
IM-210 Rev. G
Page 23 of 85
Sierra Instruction Manual
Innova-Sonic® Model 210 Portable
NOTE
The 2 transducers must be fixed at the front position (i.e. 3 or 9 o’clock position of the
pipe) to prevent signal loss which can be caused by sediment along the bottom of the pipe
or air bubbles and air pockets along the upper part in the pipe.
Once the cables are connected, simply select MENU 00 and you will display the flow rate. You can then use the
shortcut keys for additional flow information as desired.
5.4. System Normal Identification
0 8 keys. If the letter “*R” displays on the screen, it indicates system normal.
Press the
If the letter “E” is displayed, it indicates that the current loop output is over ranged by 120%. This refers to the
settings in menu 57. Enter a larger value in menu 57, and the letter “E” will disappear. It can be ignored if no
current loop output is used.
If the letter “Q” is displayed, it indicates that the frequency output is over ranged by 120%, and this refers to the
settings in menu 69. Increase the input value in menu 69, and the letter “Q” will disappear. It can be ignored if no
frequency output is used.
If the letter “H” is displayed, it indicates that the ultrasonic signal detected is poor. For more information, please
refer to “Error Diagnoses”.
If the letter “G” is displayed, it indicates that system is adjusting the signal gain prior to the measurement. Also, it
means system normal. Only when the adjustment takes too long without stopping, can system be identified as
abnormal.
Letter “I” indicates no signal is being detected. Check the transducer wiring connections are correct, the
transducers are installed firmly, etc.
Letter “J” indicates a hardware defect exists. Normally, such defect is temporary; it could be eliminated by system
reboot (power off and restart).
For further information, please refer to “Error Diagnoses”.
Menu
5.5. Zero Set Calibration
Once zero flow occurs, a zero point may indicate on each measuring instrument, i.e. as the measurement value
reaches zero flow, it is indicated as zero. It is necessary to establish the true zero flow condition and program that
set point into the instrument.
If the zero set point is not at true zero flow, an offset will occur. For an ultrasonic Flowmeter, the measurement
difference from zero point cannot be ignored at low flow. It is necessary to perform a zero set calibration to
improve low flow measurement accuracy.
5.6. Scale Factor
Scale factor refers to the ratio between “actual value” and “reading value”. For example, when the measurement is
2.00, and it is indicated as 1.98 on the instrument, the scale factor reading is 2/1.98. This means that the best scale
factor constant is 1.
However, it is difficult to keep the scale factor as “1” on the instrument especially in batch control operations. The
difference is called “consistency”. High quality products always require high consistency.
The scale factor default is “1” for each instrument prior to shipment from the factory. The reason is that the scale
factors in the Flowmeter are only limited by two parameters, i.e. the crystal oscillation frequency and the
transducer. It has no relation to any circuit parameters.
During operation, there still exists possible difference in pipe parameters, etc. The “scale factor” may be necessary
when used on different pipes. Thus, scale factor calibration is specially designed for calibrating the differences
that result from application on different pipes. The scale factor entered must be one that results from actual
calibration.
IM-210 Rev. G
Page 24 of 85
Sierra Instruction Manual
Innova-Sonic® Model 210 Portable
5.7. System Lock (Unlock)
System lock is readable but uninterested to prevent operation error due to unauthorized tampering by unauthorized
personnel.
4 7 ENT keys, move / + or / - key to select “Lock”, press the ENT key, enter a 1~4
Press the
numerically long password, and then press the ENT key to confirm.
4 7 ENT , move / + or / - to select “Unlock”, press
Unlock using the selected password only. Press
ENT
ENT
, enter the correct password, then press
to confirm.
Keep the password in mind or recorded in a safe place or the instrument cannot be used.
Menu
Menu
5.8. 4~20mA Current Loop Verification
4-20mA+
Red
4-20mABlack
4-20mA +
4-20mA -
1
3
2
4
6
5
7
The 4~20mA current output connects to the 7-pin din jack on the panel. The color of cable core is red(4-20mA+)
and black (4-20mA-). With an accuracy of 0.1%, The current output of the 210 PORTABLE is fully
programmable and can be set to various output modes such as 4~20mA or 0~20mA. Use Window M55 to select
the output mode.
The max load of 4-20mA DC is 750Ω. Exercise care on polarity when connecting.
5.9. Totalizer Pulse Output
Each time the Flowmeter reaches a unit flow, it may generate a Totalizer pulse output to a remote counter. To
configure the unit flow, please refer to Windows M32 and M33.
The Totalizer pulse output can be transmitted through OCT or a relay. So, it is necessary to configure OCT and the
relay accordingly.(Please refer to Window M78 and M79).
For example, if it is necessary to transmit the positive Totalizer pulse through a relay, and each pulse represents a
flow of 0.1m3, ; the configuration is as follows:
In Window M33, select Totalizer the flow unit “Cubic Meters (m3)”;
In Window M34, select the scale factor “x0.1”;
In Window M79, select “9. Positive Totalizer pulse output”;
ATTENTION
Make sure to select a suitable Totalizer pulse, since the output may be extended if it is too large.
If it is too small, the relay may activate too frequently and shorten its life. Furthermore, if it
operates too fast, it may generate a pulse loss error. Therefore, a rate of 1~60/minute is
recommended.
5.10. Recover the Factory Default
If it is necessary to recover the factory default, press
are displayed on the screen.
IM-210 Rev. G
Menu
3
7
keys after the above-mentioned characters
Page 25 of 85
Sierra Instruction Manual
Innova-Sonic® Model 210 Portable
Generally, it is unnecessary to activate this function except during the initial installation.
5.11. Analog Output Calibration
ATTENTION
Each Flowmeter has been calibrated before leaving factory. It is unnecessary to carry through
this step except when the current value (detected while calibrating the current loop) displayed in
Window M58 is not identical with the actual output current value.
The hardware detect window must be activated prior to calibration. The procedure is as follows:
/0 ENT enter password “4213068”, then press ENT to activate the detect menu. With no effect to
Press
next power on, this window will close automatically as soon as the power is turned off.
/1 ENT to calibrate the current loop 4mA output. Use an ammeter to measure the current loop
Press
output current. At the same time, move / + or / - to adjust the displayed numbers. Watch the ammeter until it
reads 4.00. Stop at this point, the 4mA has been calibrated.
Then, press ENT to calibrate the current loop 20mA output. The method is as same as in 4mA calibration.
The result is saved in EEPROM. Switch off the power supply has not lost.
Menu
Menu
5.12. 210 PORTABLE Software Usage
The 210 PORTABLE software contains two parts: 210.prc that runs on the PDA and UFM Data processing
program working under Microsoft Windows operating system.
Under normal conditions, to complete all measurement tasks and data acquisition, data browsing and setup guide
operations, only the PDA software 210.prc is needed. If you need further data processing, copy the data from PDA
to your PC and carry out statistical analysis, graphic display, printing and other operations on the data using UFM
Data (UFM Data will be provided and will need to be installed in your PC).
210.prc exploits the powerful computing capabilities of the PDA, offering the following functions in addition to
normal measurement:
Data Acquisition: Collects data from the Flowmeter and stores it in the memory of the PDA. The collected data
can be browsed in a table or graph on the PDA and simple analysis can be conducted.
Setup Guide: Allows the meter to be configured in steps with a setup wizard. Users can save the settings in a file,
which can be recalled directly later on to simplify the setup process. The setup guide greatly simplifies the
operation of the meter, allowing personnel who are unfamiliar with the Flowmeter to configure its settings easily.
Full Screen Display: The program has the ability to display MENU00~04 and shortcut keys Flow, Velo, +Total,
-Total in full screen view. Operators can check the data easily.
5.12.1. Data Acquisition and Analysis
5.12.1.1. PDA Data Acquisition and Analysis Program
This program stores the collected data into the PDA’s Flash memory in the form of files.
For 210 Portable kits equipped with the PDA, the data is stored on the SD card. The Data Files may be accessed
by starting the “Card Reader” program while attached to your PC. This will allow you to transfer the data files
to your PC for use with the UFM Data program.
The data files are stored in the following directory. Press the “file” icon in the PDA window and go to the
following directory: PDA\start\explorer\memorizer. You can see four directories: 210, Display, Output, and Setup.
The “210” directory is used for storing the collected Flowmeter data, “Output” for storing output setup files of the
Flowmeter, “Display” for storing the display setup files of the Flowmeter and “Setup” for storing setup and
configuration files of the Flowmeter.
During data acquisition, 1800 data points can be collected each hour (i.e. each data point requires 2 seconds). Data
amount for each hour is 144K. Assuming the data storage of the PDA is 128M, each extension card is able to store
IM-210 Rev. G
Page 26 of 85
Sierra Instruction Manual
Innova-Sonic® Model 210 Portable
over 900 hours of data or 160000 data points. If needed, users can choose extension cards with more storage.
5.12.1.2. Main Interface
The main menu is divided into two items: Utility and Options. Submenus under Utility are further classified into
two modules: Data Acquisition, Table & Graph, UFM Data (internal SD card data acquisition) and Read file (read
the data in the SD card) are menus used to perform data acquisition and display data table and graph, while
Configuration, Display and Output are menus used for Flowmeter setup. Options menu is used to display software
copyright and version information.
Ultrasonic Flowmeter
S/N=11801186
Flow
7
8
9
MENU
Sig
Data Acquisition
Ctrl+A
Table
Velo & Graph
4
UFM Data
5
Ctrl+T
6
Ctrl+U
/+
Aout
Read File
+Total
2
Ctrl+R
3
/-
Error
1
Configuration
-Total
Display
0
Ctrl+C
.
Output
Utility
Ctrl+D ENT Comm
Ctrl+O
Help
5.12.1.3. Data Acquisition
To collect data, click “Data Acquisition” menu to enter Data Acquisition mode. After inputting the File Name and
Time of Acquisition, operators can click the “start” button to enter data acquisition mode. The Data that can be
collected include: date & time, flow rate, flow velocity, net total flow, positive Total flow, negative total flow,
Electronic Serial Number, pipe inner diameter, pipe outer diameter, pipe material, liner material and fluid type.
Collected data will be stored under the “210” directory of the PDA extension card. Acquisition of each data point
requires 2 seconds.
During data acquisition, graphs and data values of the flow rate and flow velocity are displayed on the screen in
real time, each of them distinguished by different colors. If a curve exceeds the display range of the coordinate, it
will be readjusted to be within the optimal display area. If necessary, you can also adjust it manually using a
multiplier.
Data Acquisition
lFile Name
2s
lInterval Time
Time of Acquisition 120
Min
1E+0
1E+0
Flow Rate
Velocity
40
20
0
Start
OK
File Name: Give a name for the collected data. Input the name above the line manually, otherwise the name will
be generated automatically.
Time of Acquisition: A period of time in which the data is collected. Input the time manually in minutes. The
IM-210 Rev. G
Page 27 of 85
Sierra Instruction Manual
Innova-Sonic® Model 210 Portable
default time is 120 min.
Start Button: Click to start acquisition. During acquisition, this button becomes a “stop” button. If clicked, “stop”
can stop the acquisition.
Done Button : Click to exit this page.
Coordinate: Curves that display Flow Rate and Flow Velocity during data acquisition.
Red Box: Displays the value of the Flow Rate.
Blue Box: Displays the value of the Flow Velocity.
5.12.1.4. Data Analysis and Graph
Select “Table & Graph” from the “Utility” menu to enter the data analysis mode. This page is presented as a table
where the date & time, flow rate, flow velocity, net Totalizer, positive total flow, negative total flow of the
collected data are shown in the form of a data table. To view the data more easily, you can adjust the display time
interval by pressing different Time buttons. Press Left/Right/Up/Down arrow buttons to turn page.
Data Table
05200939.dat
Flow
Velo
YY:MM:DD HH:MM:SS
Flow(m3/h)
Qmax
6.8292
9.9250
08–05–13, 15 : 17 : 15
+3.591161E+01
Qmin
1.1987
1.7421
08–05–13, 15 : 17 : 16
+3.633543E+01
Qavg
3.8466
5.5904
08–05–13, 15 : 17 : 18
+3.656122E+01
Dev
0.8199
1.1915
UPmax
3410.5788
1.3768
DNmax
10134.9431
4.0914
2s
Graph
OK
Load
10s
Analyze
30s
Graph
60s
OK
There are 4 buttons below the main page: “Load”, “Analyze”, “Graph” and “Done”. These buttons are used for
loading data file, data analysis, graph display and exiting respectively.
“Load” page: Press “Load” button to enter the Load page. After clicking a file and pressing the “OK” button, the
contents of the selected file are displayed in a table. You can delete data files from this page by selecting a file and
pressing the “Delete” button.
Load
05200939.dat
07180926.dat
Dct200808051106.dat
Dct200808051108.dat
OK
Delete
Cancel
“Analyze” page : Click “Analyze” button to enter Data Analyze page. This table shows the analysis results of the
flow rate and flow velocity in the “Data Table”.
IM-210 Rev. G
Page 28 of 85
Sierra Instruction Manual
Innova-Sonic® Model 210 Portable
05200939.dat
Flow
Velo
Qmax
6.8292
9.9250
Qmin
1.1987
1.7421
Qavg
3.8466
5.5904
Dev
0.8199
1.1915
UPmax
3410.5788
1.3768
DNmax
10134.9431
4.0914
Graph
OK
Qmax: Maximum values of flow rate and flow velocity;
Qmin: Minimum values of flow rate and flow velocity;
Qavg: Average values of flow rate and flow velocity;
Dev: Deviation of flow rate and flow velocity;
UPmax: Maximum upwards variable rate of flow rate and flow velocity;
DPmax: Maximum downwards variable rate of flow rate and flow velocity;
“Graph” Page: Click “Graph” button to enter Data Curve Graph page.
Data Curve Graph page displays curves of flow rate, flow velocity, net Totalizer for the current file. Different
curves are shown in different colors, which are indicated by the boxes with filled-in colors. Below the boxes are
curve names that the boxes indicate. You can adjust the display area of a curve by using a multiplier. The time
below the coordinate shows the time range of the curve currently displayed on the screen. You can browse through
the page using Left/Right arrow button, or move data points using Left/Right triangle button.
When clicking a point within the graph display area, a cursor intersecting with the curve appears. At the same time,
the value of the curve at the intersection point is displayed.
05200939.dat
1E-0
1E+0
1E+0
Flow Rate
Velocity
Net
80
60
40
20
0
0
20
40
60
80
100
09:51:59
120
09:54:18
5.12.1.5. Data Acquisition Control For The Internal SD Card
Click “UFM Data” menu to enter the data acquisition control page for the internal SD card. Input the file name
after the “File name”. Select the interval time among the options after “Interval time”. Input the time of
acquisition (Unit: min) after “Time of Acquistion”. Then click “Start” button to enter the data collecting status.
The content of the data logging contains: Date and Time, Flow rate, Flow velocity, Net Totalizer, Pos Totalizer,
Neg Totalizer, ESN, Pipe Inner Diameter, Pipe Outer Diameter, Pipe material, Liner material and Fluid Type.
IM-210 Rev. G
Page 29 of 85
Sierra Instruction Manual
Innova-Sonic® Model 210 Portable
When data logging the display will show the actual flow rate and flow velocity value.
UFM Data
(.txt)
lFile Name
lInterval Time
10s
lTime of Acquisition
120
Start
Min
OK
“File name”: the file name for the acquisiotion data, input the name on the line. If user dose not input a name, the
system will create an “xxxxxxxx” format file name automatically. “x” indicates numbers. The 1-4 digit indicate
the current month and date, and the last four digit indicate the current time. Such as “10260955” indicates the
current time is Oct. 26th 9:55am. The file will be saved as *.TXT format.
“Interval time”: the interval time for the data acquisition. There are “2S, 10S, 30S, 60S” 4 options to select.
“Time of Acquisition”: the time of acquisition for the data.. Input by the users. Unit: min. Factory default is “120
min”.
“Start”: click “Start” to start the data acquisition. During the data acquisition this button will change to “Stop”
button automatically. Click “Stop” to stop the data acquisition.
“Done”: click “Done” to quit the page.
NOTE
The SD card can only support 256 files. If the file is over 256, the system will cover the
oldest file automatically.
5.12.1.6. Data Reading For The SD Card
Click “Read File” menu to enter the data reading page for the SD card. This page is the data reading page for the
internal SD card.
Read File
01142331
01150820
05200939
Delete All
List file ok!
List
IM-210 Rev. G
Read
Delete
OK
Page 30 of 85
Sierra Instruction Manual
Innova-Sonic® Model 210 Portable
“List”: read the files content in the SD card.
“Read”: read the selected file to PDA, and convert the file to *.dat format.
“Delete”: delete the selected file.
“Done”: click to quit the page.
“Delete all”: select this option, click “delete” will delete all the files in the SD card.
5.12.2. UFM Data Analysis and Printing Program
NOTE
Skip this section if you will not use a PC to process the collected data.
Running under the Windows operating system (Windows98 or above) at a PC terminal, the UFM Data data
analysis and printing program is used to process the ultrasonic Flowmeter data collected by the PDA. The purpose
of this program is to supplement the data processing function of the PDA. This program allows users to display
graphs, print or save the files in Excel format, or browse and analyze the collected data in a table, enabling users
to manage the Flowmeter data more conveniently.
Flowmeter data are stored under the 210 directory of the PDA. You can set the PDA to “Driver Mode” and
connect it with your PC.
NOTE
For information about how to connect the PDA with your PC, see Tungsten
PDA_handbook_CS.pdf in the PDA CD-ROM.
The main window of this program is divided up into 4 pages: Data page, Graph page, Analyze page,
Configuration page.
5.12.2.1. Data Browsing and Printing
After the program starts, the data browsing page will be displayed. This page allows you to browse and print the
loaded data in a table, or adjust the display time of the data.
IM-210 Rev. G
Page 31 of 85
Sierra Instruction Manual
Innova-Sonic® Model 210 Portable
“Open” button: Press this button to read in the Flowmeter data files under “210” directory. Theses files are data
collected by the PDA.
“Graph” button: Press this button to jump to the “Graph” page, where data are displayed in graphs.
“Print…” button: Press this button to print the table. Basic printing settings can be set in the Print dialog box.
“Time Unit” button: These buttons are used to adjust the display time. Available time units include 2 sec, 10 sec,
30 sec, and 60 sec. The default unit is 2 sec. When a time unit other than 2 sec is selected, the data in the table will
be displayed and printed according to the selected time interval.
Below the data table, the “File” text box shows the File Path, “Rec” shows the number of the data and “Time”
shows the time range for data acquisition.
The contents of the data table are: date & time, flow rate, flow velocity, net total flow, positive total flow and
negative total flow.
5.12.2.2. Graph Display and Printing
Click “Graph” button in the data table to enter the Graph display page. This page allows you to display and print
loaded data by graphs intuitively. Users can adjust the color of the curve or change display unit as required.
IM-210 Rev. G
Page 32 of 85
Sierra Instruction Manual
Innova-Sonic® Model 210 Portable
This page is divided up into 2 parts: the graph display area with black background is the main page and the left is
the graph display setup area.
“Curve” check box: Placing a check mark to the left of the graph name displays the corresponding graph in the
graph area. Clicking the color box to the right of the graph name changes the color of the graph. You can change
the text color of the coordinate by clicking the color box to the right of “Text Color”, or change the coordinate
grid color by clicking “Grid Color” color box.
“Coordinate” check box: Select to display the graph at different magnifications. Magnification can be changed in
the range of 10-4~108 (default is 100). Once it is changed, the curve displayed on the vertical ordinate will be
changed accordingly. “Time”: Used to change range of the time scale. 1mul stands for 50 sec per scale, 2mul for
25 sec, 5mul for 10 sec and 10mul for 5sec. Once it is changed, the curve displayed on the horizontal ordinate will
be changed accordingly.
“Reset” button: Press to restore the colors of the curves into defaults.
“Print” button: Press to print the graph.
At the bottom of the page, the “File” text box shows the File Path; “Rec” shows the number of the data and
“Time” shows the time range for the data acquisition.
5.12.2.3. Data Analysis and Printing
The data analysis page is used to perform statistical analysis on collected Flowmeter data. Its contents include:
Qmax: Maximum values of flow rate and flow velocity;
Qmin: Minimum values of flow rate and flow velocity;
Qavg: Average values of flow rate and flow velocity;
Dev: Deviation of flow rate and flow velocity;
UPmax: Maximum upwards variable rate of flow rate and flow velocity;
DPmax: Maximum downwards variable rate of flow rate and flow velocity;
IM-210 Rev. G
Page 33 of 85
Sierra Instruction Manual
Innova-Sonic® Model 210 Portable
5.12.2.4. Configuration Information Display
This page displays the configuration information of the Flowmeter. This page cannot be printed.
Flowmeter Serial Number: Displays Flowmeter serial number;
Fluid Type: Displays fluid type being measured;
Pipe Outer Diameter: Displays pipe outer diameter;
IM-210 Rev. G
Page 34 of 85
Sierra Instruction Manual
Innova-Sonic® Model 210 Portable
Pipe Inner Diameter: Displays pipe inner diameter;
Pipe Material: Displays pipe material;
Liner Material: Displays liner material.
5.12.2.5. Menu Functions
There are three menus in the Menu bar of the program: “File”, “Edit” and “Help” the File submenu has the
following functions:
“Open”: Opens the data files stored under the “210” directory;
“Save As”: Saves reports as text files (.txt) and Excel files (.xls);
“Print”: Prints data tables or graphs;
“Page Setup”: Sets the paper settings for printing, such as Paper Size, Paper Direction, etc.
“Print Preview”: Previews the printing contents.
the “Edit” submenu has the following functions:
“Copy”: Copies the selected region.
“Find”: Searches the data in the report.
the “Help” submenu has the following functions:
“Help”: Operating instructions for this software.
“About”: Software copyright, version information, and so on.
5.13. Analog Voltage Output
Connect a 250Ω resistance to the current loop in parallel to transform 4~20mA into 1~5V voltage output.
5.14. Date and Time Settings
Generally, it is unnecessary to modify date time as the system is provided with a highly reliable perpetual calendar
6 0 buttons to enter the window, then press ENT to see ‘>’ displayed on the
chip. If necessary, key in the
bottom left line of the screen. It indicates that the screen is ready for the modification. Press
to skip the
numbers that do not need to be changed, and then press ENT again to confirm the modification.
Menu
IM-210 Rev. G
Page 35 of 85
Sierra Instruction Manual
Innova-Sonic® Model 210 Portable
5.15. Check Flow of Every Day/Month/Year
Window M82 allows you to read flow data history and the operating state of the instrument in the past 64 days.
8 2 key and select sub item No.0 “Day”. Then, the character is displayed as shown in right. The
Press
“00” – “63” in the upper left corner stands for serial number, the “00-07-21” in the middle for date and the
“--------” in the upper right corner for operating state. Only “--------” being displayed on the status bar indicates
the instrument was working properly at that working day. If there are other characters displayed, see the error code
instruction for reference. The data 3412.53 in the bottom shows the net total flow of that working day.
Menu
To read the total flow of a month, press
To read the total flow of a year, press
Menu
Menu
8
8
key and select sub item No.1 “Month”.
2
2
key and select sub item No.2 “Year”.
5.16. Automatic Flow Correction
In Window M83, select “Yes”, the lost flow during an offline session will be automatically recovered into the flow
Totalizer as soon as the next power on. Select “No” to neglect this function.
5.17. Working Timer
Window M72 displays the total running hours since last reset.
Press
ENT
, select “Yes” to reset the working timer.
5.18. Manual Totalizer
Press
Menu
3
8
ENT
to start the Totalizer. Press
ENT
key to stop it.
5.19. Analog Output Calibration
Each Flowmeter has been calibrated strictly before leaving factory. It is unnecessary to carry through this step
except when the current value (detected while calibrating the current loop) displayed in Window M58 is not
identical with the actual output current value.
The hardware detect window must be activated prior to calibration. The procedure is as follows:
/0 ENT enter password “4213068”, then press ENT to activate the detect menu. With no effect to
Press
next power on, this window will close automatically as soon as the power is turned off.
Menu
Press / - ENT to calibrate the current loop 4mA output. Use an ammeter to measure the current loop output
current. At the same time, move / + or / - to adjust the displayed numbers. Watch the ammeter until it reads
4.00. Stop at this point, the 4mA has been calibrated.
Then, press
ENT
to calibrate the current loop 20mA output. The method is as same as in 4mA calibration.
The results is saved in EEPROM. Switch off the power supply has not lost.
5.20. ESN
We provide the Flowmeter with a unique electronic serial number to identify each Flowmeter for the convenience
of the manufacturer and customers. The ESN, instrument types and versions are able to view in Window M61.
ATTENTION
Other Operating Refer to “Windows Display Explanations”.
IM-210 Rev. G
Page 36 of 85
Sierra Instruction Manual
Innova-Sonic® Model 210 Portable
6. Windows Display Explanations
6.1. Windows Display Codes
Flow Totalizer Display
00
Flow Rate/Net Totalizer
01
Flow Rate/Velocity
02
Flow Rate/POS Totalizer
03
Flow Rate/NEG Totalizer
04
Date Time/Flow Rate
08
System Error Codes
09
Net Flow Today
Initial Parameter setup
10
Pipe Outer Perimeter
Pipe Outer Diameter
11
12
Pipe Wall Thickness
13
Pipe Inner Diameter
14
Pipe Material
15
Pipe Sound Velocity
16
Liner Material
17
Liner Sound Velocity
18
Liner Thickness
20
Fluid Type
21
Fluid Sound Velocity
22
Fluid Viscosity
23
Transducer Type
24
Transducer Mounting
25
Transducer Spacing
26
Parameter Setups
27
Cross-sectional Area
28
Holding with Poor Sig
Empty Pipe Setup
29
Flow Units Options
30
Measurement Units
31
Flow Rate Units
32
Totalizer Units
33
Totalizer Multiplier
34
Net Totalizer
35
POS Totalizer
36
NEG Totalizer
37
Totalizer Reset
38
Manual Totalizer
Setup Options
40
Damping
41
Low Flow Cutoff Value
42
Set Zero
43
Reset Zero
44
Manual Zero Point
45
Scale Factor
47
System Lock
Input and output setup
55
CL Mode Select
56
CL 4mA Output Value
57
CL 20mA Output Value
58
CL Check
59
CL Current Output
60
Date and Time
61
ESN
72
Working Timer
82
Date Totalizer
83
Automatic Correction
Diagnoses
90
Signal Strength and Quality
91
TOM/TOS*100
92
Fluid Sound Velocity
93
Total Time and Delta
94
Reynolds Number and Factor
Appendix
+0
Power ON/OFF time
+1
Total Working Hours
+2
Last Power Off Time
+3
Last Flow Rate
+4
ON/OFF Times
+5
Calculator
Shortcut Keys
Flow Flow Rate
Velo Flow Velocity
+Total Positive Total
-Total Negative Total
Sig
signal Strength and Quality
Aout Analog Output
Error Error Code
Comm Communication Information Between PDA
NOTE:The menu features from other manufacturers to retain.
IM-210 Rev. G
Page 37 of 85
Sierra Instruction Manual
Innova-Sonic® Model 210 Portable
6.2. Display Explanation
While reading this section, please compare it with the instrument in order to improve your understanding.
Menu
0
0
Flow Rate/Net Totalizer
Display flow rate and net Totalizer.
If the net Totalizer has been turned off (refer to M34),
the net Totalizer value displayed is the total prior to its
turn off.
Menu
0
1
Flow Rate/Velocity
Display flow rate and velocity.
Menu
0
2
Flow Rate/Positive Totalizer
Display flow rate and positive Totalizer.
Select the positive Totalizer units in Window M31.
If the positive Totalizer has been turned off, the
positive Totalizer value displayed is the total prior to
its turn off.
Menu
0
3
Flow Rate/Negative Totalizer
Display flow rate and negative Totalizer.
Select the negative Totalizer value in Window M31.
If the negative Totalizer has been turned off (refer to
M36), the value displayed is the total prior to turn off.
Menu
0
4
Date Time/Flow Rate
Display the current date time and flow rate.
The time setting method is found in Window M60.
Menu
0
8
System Error Codes
Display the working condition and the system error
codes. More than one error code can occur at the same
time.
The explanations of error codes and detailed
resolution methods can be found in “Error
Diagnoses”.
Menu
0
9
Net Flow Today
Display net total flow today.
IM-210 Rev. G
Flow 0.1154m3/h *R
NET
0x1m3
Flow 0.1129m3/h *R
Vel 1.0415m/s
Flow 0.1129m3/h *R
POS
0x1m3
Flow 0.1120m3/h *R
NEG
0x1m3
03-04-03 15:49:40 *R
Flow 0.1116 m3/h
*R -----------System Normal
Daily Total Flow [09
0.458748 m3
Page 38 of 85
Sierra Instruction Manual
Menu
1
Innova-Sonic® Model 210 Portable
0
Pipe Outer Perimeter
Enter the pipe outer perimeter. If the diameter of the
know, enter it in window M11.
Menu
1
1
Pipe Outside Diameter
Enter the pipe outside diameter, The pipe outside
diameter must range from 10mm to 6000mm.
Menu
1
2
Pipe Wall Thickness
Enter the pipe wall thickness. If the pipe inside
diameter is already known, skip this window and enter
it in Window M13.
Menu
1
3
Pipe Inner Diameter
Enter the pipe inside diameter. If the pipe outside
diameter and pipe wall thickness has been entered,
press / - to skip this window.
Note: Enter either pipe wall thickness or pipe inside
diameter.
Menu
1
4
Pipe Material
Enter pipe material. The following options are
available (by / + 、 / - buttons or numerical keys):
0. Carbon Steel
1. Stainless Steel
2. Cast Iron
3. Ductile Iron
4. Copper
5. PVC
6. Aluminum
7. Asbestos
8. Fiber Glass-Epoxy
9. Other
Pipe Outer Perimeter
157 mm
Pipe Outer Diameter
200 mm
Pipe Wall Thickness
1 mm
Pipe Inner Diameter
52 mm
Pipe Material [14
0. Carbon Steel
Refer to item 9 “Other”; it is possible to enter other
materials, which are not included in previous eight
items. Once item 9 is selected, the relevant pipe sound
velocity must be entered in Window M15.
Menu
1
5
Pipe Sound Velocity
Enter pipe sound velocity. This function is only used
when item 9 “Other” is selected in Window M14. At
the same time, this window cannot be visited. System
will calculate automatically according to the existing
parameters.
IM-210 Rev. G
Pipe Sound Velocity
2800 m/s
Page 39 of 85
Sierra Instruction Manual
Menu
1
Innova-Sonic® Model 210 Portable
6
Select the Liner Material
The following options are available:
0. None ,No Liner
1. Tar Epoxy
2. Rubber
3. Mortar
4. Polypropylene
5. Polystryol
6. Polystyrene
7. Polyester
8. Polyethylene
9. Ebonite
10. Teflon
11. Other
Liner Material [16
0. None, No Liner
Item 11 “Other” is available to enter other materials
that are not included in previous ten items. Once the
“Other” is selected, the relevant liner sound velocity
must be entered in Window M17.
Menu
1
7
Liner Sound Velocity
Enter liner sound velocity. It only can be visited when
item “ Other” in Window M16 is selected.
Menu
1
8
Liner Thickness
Enter liner thickness. It only can be visited when a
definite liner is selected in Window M16.
Menu
2
0
Select Fluid Type
The following options are available:
0. Water
1. Sea Water
2. Kerosene
3. Gasoline
4. Fuel Oil
5. Crude Oil
6. Propane (-45℃)
7. Butane (0℃)
8. Other
9. Diesel Oil
10. Castor Oil
11. Peanut Oil
12. Gasoline #90
13. Gasoline #93
14. Alcohol
15. Water (125℃)
Liner Sound Velocity
2270 m/s
Liner Thickness [18
10 mm
Fluid Type [20
0. Water
“Other” refers to any fluid. The relevant sound
velocity must be entered in Window M21.
Menu
2
1
Fluid Sound Velocity
Enter the fluid sound velocity. It only can be used
when item “Other” is selected in Window M20, i.e. it
is unnecessary to enter all the fluids listed in Window
M20.
IM-210 Rev. G
Fluid Sound Velocity
1482.3 m/s
Page 40 of 85
Sierra Instruction Manual
Menu
2
2
Fluid Viscosity
Enter fluid’s kinematics viscosity. It only can be used
when item “Other” is selected in Window M20, i.e. it
is unnecessary to enter all the fluids that listed in
Window M20.
Menu
2
3
Select transducer type
Please select “0.Standard”.
Menu
2
4
Transducer Mounting
Four mounting methods are available:
V( sound wave bounces 2 times)
Z(sound wave bounces once. The most commonly use
method)
N (small pipe, sound wave bounces 3 times.)
W (small pipe, sound wave bounces 4times.)
Menu
2
5
Transducer Spacing (this value is Calculated by the
Flowmeter)
The operator must mount the transducer according to
the transducer spacing displayed (be sure that the
transducer spacing must be measured precisely during
installation). The system will display the data
automatically after the pipe parameter had been
entered.
Menu
2
6
Initial Parameter Setups and Save
Load and save the parameters. 18 different sets of
setup conditions/groups are available to load and save
by three methods (i.e.-you can load and save 18
different applications):
0. Entry to Save
1. Entry to Load
2. To Browse
Select “Entry to Save”, press ENT . An ID code and the
original parameters are displayed in the window. Press
UP or DOWN ARROW to move the ID code, then
press the ENT key again to save the current parameter
in the current ID room.
When selecting “Entry to Load”, press ENT, and the
system will read and calculate the parameters
automatically and display the transducer mounting
spacing in Window M25.
IM-210 Rev. G
Innova-Sonic® Model 210 Portable
Fluid Viscosity [22
1.0038 cST
Transducer Type [23
0. Standard
Transducer Mounting
0. V
Transducer Spacing
62.7327 mm
Parameters Setups
Entry to SAVE
Page 41 of 85
Sierra Instruction Manual
Menu
2
7
Cross-Sectional Area
Display the cross-sectional area inside the pipe.
Menu
2
8
Holding With Poor Sig
Select “Yes” to hold last good flow signal displayed if
the Flowmeter experiences a poor signal condition.
This function will allow continued data calculation
without interruption.
Menu
2
9
Empty Pipe Setup
This value may be used to solve the problem of air
traffic control. In the empty pipe, it may be because
the flow meter signal transmission through the wall
and show the "normal work", in order to avoid such a
situation arise, set this value to Flowmeter in the small
signal of this is not a numerical measure.
Menu
3
0
Measurement Units
Select the measurement unit as follows:
0. Metric
1. English
Factory default is metric.
Menu
3
1
Flow Rate Units Options
The following flow rate units are available:
0. Cubic Meters
(m3)
1. Liters
(1)
2. USA Gallons (GAL)
3. Imperial Gallons (Imp gal)
4. Million Gallons (mg)
5. Cubic Feet
(cf)
6. USA Barrels
(US bbl)
7. Imperial Barrels (Imp bbl)
8. Oil Barrels
(Oil bbl)
The following time units are available:
/Day
/Hour
/Min
/Sec
Innova-Sonic® Model 210 Portable
Cross-sectional Area
31415.9 mm2
Holding with PoorSig
NO
Empty Pipe Setup [29
0
Measurement Units In
0. Metric
Flow Rate Units [31
m3/h
Factory default is Cubic Meters/hour.
Menu
3
2
Totalizer Units Options
Select Totalizer units. The available unit options are as
same as those found in Window M31. The user can
select units as their required. Factory default is Cubic
Meters.
IM-210 Rev. G
Totalizer Units [32
Cubic Meter (m3)
Page 42 of 85
Sierra Instruction Manual
Menu
3
3
Totalizer Multiplier Options
The Totalizer multiplier acts as the function to
increase the Totalizer indicating range. Meanwhile,
the Totalizer multiplier can be applied to the positive
Totalizer, negative Totalizer and net Totalizer at the
same time. The following options are available:
0. X0.001(1E-3)
1. X0.01
2. X0.1
3. X1
4. X10
5. X100
6. X1000
7. X10000(1E+4)
Factory default factor is x1
Menu
3
4
ON/OFF Net Totalizer
On/off net Totalizer. “ON” indicates the Totalizer is
turned on, while “OFF” indicates it is turned off.
When it is turned off, the net Totalizer displays in
Window M00 will not change. Factory default is
“ON”.
Menu
3
5
ON/OFF POS Totalizer
On/off positive Totalizer. “ON” indicates the
Flowmeter starts to totalize the value. When it is
turned off, the positive Totalizer displays in Window
M02. Factory default is “ON”.
Menu
3
6
ON/OFF NEG Totalizer
ON/OFF negative Totalizer. “ON” indicates the
Totalizer is turned on. When it is turned off, the
negative Totalizer displays in Window M03.
Factory default is “ON”.
Menu
3
7
Totalizer Reset
Totalizer reset; all parameters are reset. Press ENT ;
move / + or / - arrow to select “YES” or “NO”.
After “YES” is selected, the following options are
available:
Innova-Sonic® Model 210 Portable
Totalizer Multiplier
0.
x0.001(1E-3)
Net Totalizer
[34
ON
POS Totalizer [35
ON
NEG Totalizer [36
ON
Totalizer Reset? [37
Selection
None, All, NET, POS, NEG
If it is necessary to recover the factory default,
keys after the above-mentioned
press
characters are displayed on the screen.
Generally, it is unnecessary to activate this function
IM-210 Rev. G
Page 43 of 85
Sierra Instruction Manual
Innova-Sonic® Model 210 Portable
except during the initial installation.
Menu
3
8
Manual Totalizer
The manual Totalizer is a separate Totalizer. Press
ENT
to start, and press ENT to stop it. It is used for
flow measurement and calculation.
Menu
4
0
Damping
Manual Totalizer [38
Press ENT When Ready
Damping
[40
10 sec
The damping function will stabilize the flow display.
Essentially, it is a part of the signal filter. Enter a
coefficient. Increasing the coefficient increases the
stability. However, the measurement displayed may be
slightly delayed due to over damping. Logging too
long may result in no response to real-time fluctuation,
especially when flow rate fluctuates wildly. Therefore,
damping should be kept at a minimum and increased
just enough to reduce the fluctuation to an acceptable
degree by 3 to 10 seconds.
The damping factor ranges from 0~999 seconds.0
indicates no damping; 999 indicate the maximum
damping.Usually a damping factor of 3 to 10 is
recommend in applications.
Menu
4
1
Low Flow Cutoff Value
If the flow rate falls below the low flow cutoff value,
the flow indication is driven to zero. This function can
prevent the Flowmeter from reading flow after a pump
as shut down but there is still liquid movement in the
pipe, which will result in totalization error.
Generally, 0.03m/s is recommended to enter as the
low flow cutoff point. The low flow cutoff value has
no relation to the measurement results once the
velocity increases over the low flow cutoff value
Menu
4
2
Set Zero
When fluid is in the static state, the displayed value is
called “Zero Point”. When “Zero Point’ is not at zero
in the Flowmeter, the difference is going to be added
into the actual flow values and measurement
differences will occur in the Flowmeter.
Set zero must be carried out after the transducers are
installed and the flow inside the pipe is in the absolute
static state (no liquid movement in the pipe). Thus, the
“Zero Point” resulting from different pipe mounting
location and parameters can be eliminated. The
measuring accuracy at low flow is enhanced by doing
this and flow offset is eliminated.
Press ENT , wait for the processing instructions at the
IM-210 Rev. G
Low Flow Cutoff Val.
0.01 m/s
Set Zero
[42
Press ENT to go
Page 44 of 85
Sierra Instruction Manual
Innova-Sonic® Model 210 Portable
bottom right corner to reach 0.
Performing Set zero with existing flow may cause the
flow to be displayed as “0”. If so, it can be recovered
via Window M43.
Menu
4
3
Reset Zero
Select “YES”; reset “Zero Point” which was set by the
user.
Menu
4
4
Manual Zero Point
This method is not commonly used. It is only suitable
for experienced operators to set zero under conditions
when it is not preferable to use other methods. Enter
the value manually to add to the measured value to
obtain the actual value. For example:
Actual measured value
=250 m3/H
Value Deviation
Flowmeter Display
Reset Zero
[43
NO
Manual Zero Point [44
0 m3/h
=-10 m3/H
=240 m3/H
Normally, set the value as “0”.
Menu
4
5
Scale Factor
The scale factor is used to modify the measurement
results. The user can enter a numerical value other
than “1” according to calibration results.
Menu
4
7
System Lock
Lock the instrument.
Once the system is locked, any modification to the
system is prohibited, but the parameter is readable.
“Unlock” using your designated password. The
password is composed of 1 to 4 numbers.
Menu
5
5
Current Loop Mode Select
Scale Factor [45
1
System Lock [47
**** Unlocked ****
CL Mode Select [55
0.
4 - 20 mA
Select the current loop mode. The following options are available:
0.
4-20mA Output Mode
set up the output range from 4-20mA
1.
0-20mA Output Mode
set up the output range from 0-20mA
2.
RS232 controls 0-20mA
set up to control by Serial Port
3.
Turn off the current loop
turn off the current loop to save battery life(Factory default value)
4.
20-4-20mA Mode
set up the output range from 20-4-20mA
5.
0-4-20mA Mode
set up the output range from 0-4-20mA
6.
20-0-20mA Mode
set up the output range from 20-0-20mA
IM-210 Rev. G
Page 45 of 85
Sierra Instruction Manual
Innova-Sonic® Model 210 Portable
7.
4-20mA Corresponding Velocity
set up the CL output range from 4-20mA
8.
4-20mA Corresponding Heat Flow
set up the CL output range from 4-20mA
20-4-20mA mode output
20-0-20mA mode output
Output current
0-20mA mode output
Output current
Output current
24mA
24mA
24mA
20mA
Flow
-F20mA
Flow
-4mA
Flow
F4mA
Flow
F20mA
Flow
Flow
Flow
-F20mA
Flow
4-20mA mode output
-4mA
Flow
F4mA
Flow
F20mA
Flow
0-4-20mA mode output
Output current
F0mA
Flow
Fluid velocity / 4-20mA mode output
Output current
Output current
24mA
24mA
24mA
20mA
20mA
20mA
4mA
4mA
Flow
F4mA
Flow
F20mA
Flow
F20mA
Flow
4mA
Flow
F0mA
Flow
F20mA
Flow
Fluid velocity
F4mA
Fluid
Velocity
F20mA
Fluid
Velocity
The Serial Port controls the output according to the command and parameter entered in the RS232 to output a
definite current value through the current loop. The command formats are narrated in the command explanations
to Serial Port controls. For example, if it is necessary to output a 6mA current through the current loop, it can be
realized by setting Window M56 to the mode “0-20mA Via RS232” and giving a command as “AO6 (CR)”. This
function is able to make the Flowmeter operate a control valve conveniently.
Other different current output characteristics are displayed in above figures. The user can select one of them
according to his actual requirements.
0. 4-20mA
1. 0 - 20 mA
2. 0 - 20 mA Via RS232
3. 4 - 20 mA VS. Fluid
4. 20-4-20 mA
5. 0-4-20 mA
6. 20-0-20 mA
7. 4-20mA vs. Vel
8. 4-20mA vs. Energy
In six graphs shown above, flow F0mA or F4mA indicates the value that user entered in Window M57; and flow
F20mA indicates the value that customer entered in Window M58. In the 4-20mA and 0-20mA modes, F0mA(or
F4mA)and F20mA can be selected as a positive or negative flow value as long as the two values are not the same. As
for modes 20-4-20mA and 20-0-20mA, the Flowmeter ignores the positive and negative value of the actual flow;
therefore, both F0mA(or F4mA)and F20mA must be selected as positive flow values.
In mode 0-4-20mA, F0mA must be select as a negative value and F20mA as a positive value. Furthermore, in mode
4-20mA, the output current is indicated as velocity.
Menu
5
6
CL 4mA or 0mA Output Value
Set the CL output value according to the flow value at
4mA or 0MA.(4mA or 0mA are determined by the
settings in Window M56). The flow unit’s options are
as same as those in Window M31. Once “velocity
4-20mA”is selected in Window M56, the unit should
IM-210 Rev. G
CL 4 mA Output Value
0 m3/h
Page 46 of 85
Sierra Instruction Manual
Innova-Sonic® Model 210 Portable
be set as m/s.
Menu
5
7
20mA Output Value
Set the CL output value according to the flow value at
20mA. The flow unit is the as same as that found in
Window M31.
Menu
5
8
CL Check Verification
Check if the current loop has been calibrated before
/+
leaving the factory. Press ENT move
or / separately to display 0mA, 4mA till 24mA, and at the
same time, check with an ammeter to verify that CL
output terminals M31 and 32 agree with the displayed
values. It is necessary to re-calibrate the CL if over the
permitted tolerance. For more information, refer to
“Analog Outputs Calibration”.
Menu
5
9
CL Current Output
Display CL current output. The display of 10.0000mA
indicates that CL current output value is 10.0000mA.
If the difference between displaying value and CL
output value is too large, the current loop then needs
to be re-calibrated accordingly.
Menu
6
0
Date and Time Settings
Generally, it is unnecessary to modify date time as the
system is provided with a highly reliable perpetual
calendar chip.
The format for setting time setting is 24 hours. Press
ENT
, wait until “>” appears, the modification can be
made.
Menu
6
1
ESN
Display electronic serial number (ESN) of the
instrument. This ESN is the only one assigned to each
Flowmeter ready to leave the factory. The factory uses
it for files setup and for management by the user.
Menu
7
2
Working Timer
Display the totalized working hours of the Flowmeter
since last reset. It is displayed by HH:MM:SS. If it is
necessary to reset it, press ENT , and select “YES”.
IM-210 Rev. G
CL 20mA Output Value
14400 m3/h
CL Checkup [58
Press ENT WhenReady
CL Current Output [59
15.661 mA
YY-MM-DD HH:MM:SS
03-04-04 10:05:04
Ultrasonic Flowmeter
S/N=05071188
Working Timer [72
00000011:16:38
Page 47 of 85
Sierra Instruction Manual
Menu
8
2
Date Totalizer
The following options are available:
0. Day
1. Month
2. Year
In this window, it is possible to review the historical
flow data Totalizer for any day for the last 64 days,
any month for last 64 months and any year for last 5
years.
Press ENT , use the / + or / - to review Totalizer
in days, months and years. Left upper corner: “00-63”
indicates the serial numbers;
In the middle: “03-04-05” indicates the date; Upper
right corner: “G-H-I” indicates the working condition.
If there is only “--------” displayed, it indicates the
system was normal during that time period. If other
characters displayed, please refer to the “Error Code
and 5 Resolutions”.
For example, to display the flow total for July 18,
2000, the display “-----------” at the upper right corner
of the screen indicates that it was working properly the
whole day. On the contrary, if “G” is displayed, it
indicates that the instrument gain was adjusted at least
once. Probably it was offline once on that day. If “H”
is displayed, it indicates that poor signal was detected
at least once. Also, it indicates that the operation was
interrupted or problems occurred in the installation.
Menu
8
3
Automatic Flow Correction
With the function of automatic flow correction, the
flow lost in an offline session can be estimated and
automatically adjusted. The estimate is based on the
average value, which is obtained from flow rate before
going offline and flow measured after going online the
next time, multiplied times the time period that the
meter was offline. Select “NO” to cancel this function.
Menu
9
0
Signal Strength and Signal Quality
Display the measured signal strength and signal
quality Q value upstream and downstream.
Signal strength is indicated from 00.0 ~ 99.9. A
reading of 00.0 indicates no signal detected, while
99.9 indicates maximum signal strength. Normally the
signal strength should be ≥60.0. Signal quality Q is
indicated by 00 ~ 99. Therefore, 00 indicates the
poorest signal while 99 indicates the best signal.
Normally, signal quality Q value should be better than
50.
IM-210 Rev. G
Innova-Sonic® Model 210 Portable
Date Totalizer [82
0. Day
00 03-04-05 G-H-I
-0 m3
00 00-07-18 ----> 4356.78 m3
Automatic Correction
YES
Strength+Quality [90
UP:00.0 DN:00.0 Q=00
Page 48 of 85
Sierra Instruction Manual
Menu
9
1
TOM/TOS*100
Display the ratio between the actual measured
transmit time and the calculated transmit time
according to customer’s requirement. Normally the
ratio should be 100±3%. If the difference is too large,
the user should check that the parameters are entered
correctly, especially the sound velocity of the fluid
and the installation of the transducers. This data is of
no use before the system is ready.
Menu
9
2
Fluid Sound Velocity
Display the measured fluid sound velocity. Normally
this value should be approximately equal to the
entered value in Window M21. If the difference is too
large, it probably results from an incorrect value
entered in Window M21 or improper installation of
the transducers.
Menu
9
3
Total Time and Delta Time
Display the measured ultrasonic average time (unit:
nS) and delta time of the upstream and downstream
(unit: nS) time. The velocity calculation in the
Flowmeter is based on the two readings. The delta
time is the best indication that the instrument is
running steadily. Normally the fluctuation in the ratio
of the delta time should be lower than 20%. If it is not,
it is necessary to check if the transducers are installed
properly or if the parameters have been entered
correctly.
Menu
9
4
Reynolds Number and Factor
Display the Reynolds number that is calculated by the
Flowmeter and the factor that is set currently by the
Flowmeter. Normally this scaling factor is the average
of the line and surface velocity factor inside the pipe.
Menu
/+
0
Power ON/OFF Time
To view the power on/off time and flow rate for the
last 64 update times to obtain the offline time period
and the corresponding flow rate. Enter the window,
press ENT to display the last update before the last 64
times of on/off time and flow rate values. “ON” on
right hand indicates that time power is on; “00” on the
upper left corner indicates “00-07-18 12:40:12” the
date time; flow rate is displayed in the lower right
corner.
IM-210 Rev. G
Innova-Sonic® Model 210 Portable
TOM/TOS*100 [91
0.0000%
Fluid Sound Velocity
1443.4 m/s
Totl Time, Delta Time
8.9149uS, -171.09nS
Reynolds Number [94
0.0000 1.0000
ON/OFF Time [+0
Press ENT When Ready
00 00-07-18 12:40:12
*ON 123.65 m3/h
Page 49 of 85
Sierra Instruction Manual
Menu
/+
1
Total Working Hours
With this function, it is possible to view the total
working hours since the Flowmeter left the factory.
The figure on the right indicates that the total working
hours since the Flowmeter left the factory is 1107
hours 1 minute 41 seconds.
Menu
/+
2
Last Power Off Time
Display the last power off time.
Menu
/+
3
Last Flow Rate
Display the last flow rate.
Menu
/+
4
Total ON/OFF Times
Display total on/off times since the Flowmeter left the
factory.
Menu
/+
5
Calculator
This window works as a calculator with an internal
calculation function. To use the calculator, enter the
first parameter X, select a calculating operator; if there
is a second parameter, enter it as parameter Y, then
combine the calculation results into parameter X. For
example:
To calculate 1+2, then it is necessary to press
/+
5 1 ENT , use / + or / - to select “+”,
ENT
2 ENT to confirm. This calculator is also
press
provided with a register function. To select it, use the
Sam as same as used with calculators.
Note: Using the calculator while the system is running
will not influence the measurement.
Innova-Sonic® Model 210 Portable
Total Work Hours [+1
00001107:01:41
Last Power Off Time
03-04-04 11:33:02
Last Flow Rate [+3
100.43 m3/h
ON/OFF Times [+4
40
Calculator : Input X=
0
Menu
Flow
Shortcut Key for Flow rate
Displays flow rate, which equals to the contents of
Flow when issuing command M00.
Velo
Shortcut Key for Flow Velocity
Displays flow velocity, which equals to the contents of
Vel after issuing command M01.
Flowrate
:
0.0000m3/h
Flow Velocity:
0.0000m3/s
+Total
Shortcut Key for POS Total Flow
IM-210 Rev. G
Page 50 of 85
Sierra Instruction Manual
Displays positive total flow, which equals to the
contents of POS after issuing command M02.
-Total
Shortcut Key for NEG Total Flow
Display negative total flow, which equals to the
contents of NEG after issuing command M03.
Sig
Shortcut Key for Signal Strength and Quality
Displays signal strength and quality, which equals to
the contents displayed in the window after issuing
command M90.
Aout
Shortcut Key for Analog Output
Displays analog output( 4~20mA)information.
Error
Shortcut Key for Error Code
Display error codes during an operation. See chapter 5
for error code contents.
Comm
Shortcut Key for Communication Setup
Display the communication condition between the
PDA and the Flowmeter. This window Display “OK”
if the connection has been made correctly. If not, it
displays “Failure”, and you should check the
Bluetooth Communications. Under normal conditions,
you should not conduct detection repeatedly using this
button, otherwise you may cause the PDA to
shutdown.
IM-210 Rev. F
Innova-Sonic® Model 210 Portable
POS Total Flow:
+0005209E+0m3
NGE Total Flow:
-0000024E+0m3
SigStrength&Quality
:
UP:40.1,DN:00.0,Q=00
Analog Output(%):
+2.000000E+01
Error Code:
1
Communication Setup:
ok!
Page 51 of 85
Sierra Instruction Manual
Innova-Sonic® Model 210 Portable
7. Error Diagnoses
The ultrasonic Flowmeter has advanced self-diagnostics functions and displays any errors in the upper right corner
of the LCD via definite codes in a date/time order. Hardware error diagnostics are usually performed upon each
power on. Some errors can be detected during normal operation. Undetectable errors caused by incorrect settings
and unsuitable measurement conditions can be displayed accordingly. This function helps to detect the errors and
determine causes quickly; thus, problems can be solved in a timely manner according to the solutions listed in the
following tables.
Errors displayed in the Flowmeter are divided into two categories:
Table 1 is for errors displayed during self-diagnostics upon power on. “*F” may be displayed on the upper left
corner of the screen after entering the measuring mode. When this occurs, it is necessary to power on for
self-diagnostics once again to detect and solve possible errors using the table below. If a problem still exists, please
contact the factory or the factory’s local representative for assistance.
Table 2 applies when errors caused by incorrect settings and signals are detected and are announced by error codes
displayed in Window M08.
7.1. Table 1. Self-diagnoses and Error Solutions (upon power on)
LCD Display
Cause
Solution
Rom Parity Error
System ROM illegal or error
Contact the factory
Stored Data Error
System stored data block error
Power on again or contact the factory
SCPU Fatal Error
SCPU circuit fatal error
Power on again or contact the factory
Timer Slow Error
Timer Fast Error
System clock error
Contact the factory
CPU or IRQ Error
CPU or IRQ problem
Power on again
System RAM Error
System RAM questionable
Power on again or contact the factory
Time or Bat Error
System date time chip error
Power on again or contact the factory
No Display, Erratic or Abnormal
Operation
Bad wiring connection
Check wiring connections
Stroke Key - No Response
Keypad locked or bad plug
connection
Enter the unlock password if the keypad is
locked
IM-210 Rev. G
Page 52 of 85
Sierra Instruction Manual
Innova-Sonic® Model 210 Portable
7.2. Table 2. Error Codes and Solutions (during operation)
M08 Display
Code
Cause
Solution
*R
System Normal
System normal
No errors
*J
SCPU Fatal Error
Hardware defect
Contact the factory
*I
Signal Not Detected
Signal not detected.
Attach transducer to the pipe and tighten it
securely. Apply a plenty of coupling
compound on transducer and pipe wall.
Spacing is not correct between the
transducers or not enough coupling
compound applied to face of
transducers.
Remove any rust, scale, or loose paint from
the pipe surface. Clean it with a file.
Transducers installed improperly.
Check the initial parameter settings.
Scale is too thick.
Remove the scale or change the scaled pipe
section. Normally, it is possible to change a
measurement location. The instrument may
run properly at a new site with less scale.
New pipe liner.
Wait until liners solidified and saturated.
Solution refers to above-mentioned solutions.
*H
Low Signal Strength
Low signal strength.
Cause refers to above-mentioned
reasons.
*H
Poor Signal Quality
Poor signal quality
Solution refers to above-mentioned solutions.
All reasons are included in the
above-mentioned causes.
*E
4-20mA current loop over 120%.
Current Loop over 20mA
(No influence normally. Ignore it if no Improper settings to current loop
current output is being used.)
output.
*Q
Frequency output over 120%.
Frequency output over set value
Check settings(refer to Window M66M69)and
confirm if the actual flow is too
No influence normally. Ignore it if no Improper settings to frequency output
high.
frequency output is being used.
or actual flow are too high.
*F
Refer to Table 1.
Error in self-diagnoses during power Power on again; resolve it by the method
on.
listed in Table 1. If it is still a problem,
contact the factory.
Permanent hardware error.
*G
Adjusting Gain>S1
Adjusting Gain>S2
Adjusting Gain>S3
Adjusting Gain>S4
(Display in Windows
M00,M01,M02,M03)
Adjusting gain for normal
measurement.
Stop in S1 or S2 and only switch
between S1 and S2 indicates a poor
waveform or low signal strength. All
reasons
may be
included
in
above-mentioned items.
*K
Pipe Empty. Set in Window M29
No fluid in pipe or settings incorrect.
IM-210 Rev. G
Check settings(refer to Window M56)and
confirm if actual flow is too high.
Contact the factory.
Once fluid is detected in the pipe, set 0 in
Window M29.
Page 53 of 85
Sierra Instruction Manual
Innova-Sonic® Model 210 Portable
7.3. Frequently Asked Questions and Answers
Question: New pipe, high quality material, and all installation requirements met: why still no signal detected?
Answer: Check pipe parameter settings, installation method and wiring connections. Confirm if the coupling
compound is applied adequately, the pipe is full of liquid, transducer spacing agrees with the screen
readings and the transducers are installed in the right direction.
Question: Old pipe with heavy scale inside, no signal or poor signal detected: how can it be resolved?
Answer: Check if the pipe is full of fluid. Try the Z method for transducer installation (If the pipe is too close to
a wall, or it is necessary to install the transducers on a vertical or inclined pipe with flow upwards
instead of on a horizontal pipe).
Carefully select a good pipe section and fully clean it, apply a wide band of coupling compound on
each transducer face (bottom) and install the transducer properly.
Slowly and slightly move each transducer with respect to each other around the installation point until
the maximum signal is detected. Be careful that the new installation location is free of scale inside the
pipe and that the pipe is concentric (not distorted) so that the sound waves do not bounce outside of the
proposed area.
For pipe with thick scale inside or outside, try to clean the scale off, if it is accessible from the inside.
(Note: Sometimes this method might not work and sound wave transmission is not possible because of
the a layer of scale between the transducers and pipe inside wall).
Question: Why is there no CL (current loop) output?
Answer: Check if the desired current output mode is set in Window M55. See if the CL is powered off by “ CL
Off” settings.
Open the electronics enclosure to inspect the hardware circuit. Check to see if the short-circuit terminal
near terminal 3 is in place, i.e. Direct Output Mode(set CL output as Transmitter Mode with external
power supply).
Question: Why is the CL output abnormal?
Answer: Check to see if the desired current output mode is set in Window M55.
Check to see if the maximum and minimum current values are set properly in Windows M56 and M57.
Re-calibrate CL and verify it in Window M49.
Question: Why is the flow rate still displayed as zero while there is fluid obviously inside the pipe and a symbol
of “R” displayed on the screen?
Answer: Check to see if “Set Zero” was carried out with fluid flowing inside the pipe(Refer to Window M42). If
it is confirmed, recover the factory default in Window M43.
Question: With a poor measurement site environment in the plant and the voltage and power supplies fluctuating
widely, is the instrument really able to keep running 24 hours a day repeatedly without stopping and
last for several years under such conditions?
Answer: Flowmeter is designed to work with high reliability under such conditions. It is provided with an
intelligent signal conditioning circuit and internal correction circuitry. It will work under strong
interference conditions and is able to adjust itself with strong or weak sound waves. It will work in a
wide band of voltage: 90-245VAC or 10V~36VDC voltage.
IM-210 Rev. G
Page 54 of 85
Sierra Instruction Manual
Innova-Sonic® Model 210 Portable
8. Product Overview
8.1. Introduction
The 210 PORTABLE Ultrasonic Liquid Flow Meter consists of a flow sensor (two ultrasonic transducers), a flow
transmitter and a Personal Digital Assistant (PDA).
The Model 210 PORTABLE Ultrasonic Flowmeter is a state-of-the-art universal transit-time Flowmeter designed
using SLSI technology and low-voltage broadband pulse transmission. While principally designed for clean liquid
applications, the instrument is tolerant of liquids with the small amounts of air bubbles or suspended solids found
in most industrial environments.
8.2. Features of 210
Easy data acquisition and processing. By using the PDA data acquisition and processing program of the 210
PORTABLE, you can perform data acquisition and processing conveniently. Using the PDA, you can also perform
such operations as browsing the collected data, making statistical analysis, displaying graphs, etc. The PC
applications of the 210 PORTABLE make it even easier to implement the above operations or print data tables.
With distinctive features such as high precision, high reliability, high capability and low cost, the Flowmeter
features other advantages:
Low consumption power, high reliability, anti-jamming and outstanding applicability.
Clear, user-friendly menu selections make Flowmeter simple and convenient to use.
U.S., British and Metric measurement units are available. Meanwhile, almost all-universal measurement units
worldwide may be selected to meet customer’s requirements.
Daily, monthly and yearly totalized flow: Totalized flow for the last 64 days and months as well as for the last 5
years are may be viewed.
You can be convenient to use the high capacity memerized SD card for long time data logging on the scene.
Clear, user-friendly operating interface. The fully-windowed software supplied with this instrument allows users
to set parameters or types easily, including British or Metric measurement units, pipe size, pipe material, wall
thickness, fluid type, output signal, etc. The setup guide of the PDA makes it more convenient for users to
configure the setup parameters, display settings and output settings. Instead of memorizing a large number of
commands, you can complete these configurations simply by following the instructions on the screen. Different
settings can be saved as different files that can be recalled easily.
Power on/off function: allows the viewing of time and flow rate as power is switched on and off 64 times. Also,
the Flowmeter has manual or automatic amendment during offline sessions.
Self-contained signal output, including relay, open collector, frequency and 4~20mA current loop analog outputs,
etc.
Parallel operation of positive, negative and net flow totalizes with scale factor (span) and 7 digit display, while the
output of totalize pulse and frequency output are transmitted via relay and open collector.
8.3. Theory of Operation
When the ultrasonic signal is transmitted through the flowing liquid, there will be a difference between the
upstream and downstream transit time (travel time or time of flight), which is proportional to flow velocity,
according to the formula below.
V =
MD
∆T
×
sin 2θ Tup • Tdown
Remarks:
V
Medium Velocity
M
Ultrasonic frequency of reflection
IM-210 Rev. G
Page 55 of 85
Sierra Instruction Manual
Innova-Sonic® Model 210 Portable
D
θ
Pipe Diameter
The angle between the ultrasonic signal and
the flow
Tup
Transit time in the forward direction
Tdown Transit time in the reverse direction
ΔT=Tup–Tdown
Downstream Transducer
Tdown
Flow
Tup
D
Upstream Transducer
8.4. Applications
• Water, sewage (with low particle content) and seawater
• Water supply and drainage water
• Power plants (nuclear power plant, thermal and hydropower plants), heat energy, boiler feed water and
energy management system
• Metallurgy and mining applications (cooling water and acid recovery, for example)
• Petroleum and chemicals
• Food, beverage and pharmaceutical
• Marine operation and maintenance
• Energy economy supervision and water conservation management
• Pulp and paper
• Pipeline leak detection
• Regular inspection, tracking and collection
• Energy measuring and balance
• Network monitoring systems and energy/flow computer management
8.5. Specifications
Performance
Flow range
Accuracy
Repeatability
Pipe size
Functional
Outputs
Power supply
Display and Operation
Storage
Temperature
Humidity
Physical
Transmitter
Transducer
Weight
IM-210 Rev. G
0~±40ft/s (0~±12m/s)
±1% of measured value
0.3%
Clamp-on: 1″~200″(25~5000mm)
Analog output: 0/4~20mADC (standard)
12VDC Battery Power (continuous operation of main battery 8 hours + spare
battery for 24 hours)
PDA
PDA with 1GB memory card, 1GB card within the meter
Transmitter: -40℉~140℉ ( -40℃~60℃)
Measuring medium: -40℉~176℉ (-40℃~80℃)
0~99%RH, non-condensing
Aluminum case
Encapsulated design
Standard cable length: 15ft.(5m)
Transmitter +Transducer: approximately 6lbs (2.8kg)
Page 56 of 85
Sierra Instruction Manual
Innova-Sonic® Model 210 Portable
9. Appendix1 - Flow Application Data
9.1. Sound Velocity and Viscosity for Fluids Commonly Used
Fluid
water 20℃
water 50℃
water 75℃
water100℃
water125℃
water150℃
water175℃
water200℃
water225℃
water250℃
Acetone
Carbine
Ethanol
Sound
Velocity (m/s)
1482
1543
1554
1543
1511
1466
1401
1333
1249
1156
1190
1121
1168
Viscosity
1.0
0.55
0.39
0.29
0.25
0.21
0.18
0.15
0.14
0.12
Alcohol
Glycol
Glycerin
Gasoline
Benzene
Toluene
Kerosene
Petroleum
Retinal
Aviation
kerosene
Peanut oil
Castor oil
1440
1620
1923
1250
1330
1170
1420
1290
1280
1.5
1180
0.80
0.69
2.3
1298
1472
1502
9.2. Sound Velocity for Various Materials Commonly Used
Pipe Material
Steel
ABS
Aluminum
Brass
Cast iron
Bronze
Fiber glass-epoxy
Glass
Polyethylene
PVC
IM-210 Rev. G
Sound Velocity (m/s)
3206
2286
3048
2270
2460
2270
3430
3276
1950
2540
Titanium
Cement
Bitumen
Porcelain enamel
Glass
Plastic
Polyethylene
PTFE
Rubber
3150
4190
2540
2540
5970
2280
1600
1450
1600
Page 57 of 85
Sierra Instruction Manual
Innova-Sonic® Model 210 Portable
9.3. Sound Velocity In Water (1 atm) At Different Temperatures
t(℃)
0
1
2
3
4
5
6
7
8
9
10
11
12
13
14
15
16
17
18
19
20
21
22
23
24
25
26
27
28
29
30
31
32
33
IM-210 Rev. G
v(m/s)
1402.3
1407.3
1412.2
1416.9
1421.6
1426.1
1430.5
1434.8
1439.1
1443.2
1447.2
1451.1
1454.9
1458.7
1462.3
1465.8
1469.3
1472.7
1476.0
1479.1
1482.3
1485.3
1488.2
1491.1
1493.9
1496.6
1499.2
1501.8
1504.3
1506.7
1509.0
1511.3
1513.5
1515.7
34
35
36
37
38
39
40
41
42
43
44
45
46
47
48
49
50
51
52
53
54
55
56
57
58
59
60
61
62
63
64
65
66
67
68
1517.7
1519.7
1521.7
1523.5
1525.3
1527.1
1528.8
1530.4
1532.0
1533.5
1534.9
1536.3
1537.7
1538.9
1540.2
1541.3
1542.5
1543.5
1544.6
1545.5
1546.4
1547.3
1548.1
1548.9
1549.6
1550.3
1550.9
1551.5
1552.0
1552.5
1553.0
1553.4
1553.7
1554.0
1554.3
69
70
71
72
73
74
75
76
77
78
79
80
81
82
83
84
85
86
87
88
89
90
91
92
93
94
95
96
97
98
99
1554.5
1554.7
1554.9
1555.0
1555.0
1555.1
1555.1
1555.0
1554.9
1554.8
1554.6
1554.4
1554.2
1553.9
1553.6
1553.2
1552.8
1552.4
1552.0
1551.5
1551.0
1550.4
1549.8
1549.2
1548.5
1547.5
1547.1
1546.3
1545.6
1544.7
1543.9
Page 58 of 85
Sierra Instruction Manual
Innova-Sonic® Model 210 Portable
9.4. Sound Velocity and Viscosity of Common Liquid
Liquid
Velocity of
Sound(m/s)
Viscosity
(mm2/s)
Glycerin
1923
1180
Gas
1250
0.80
Water 20℃
1482
1.0
66#Gas
1171
Water 50℃
1543
0.55
80#Gas
1139
Water 75℃
1554
0.39
0#Gas
1385
Water 100℃
1543
0.29
Benzene
1330
Water 125℃
1511
0.25
Methylbenzene
1340
Water 150℃
1466
0.21
1401
0.18
Water 200℃
1333
0.15
Water 225℃
1249
0.14
Toluene
Tetra
chloromethane
Kerosene
1170
Water 175℃
1420
Water 250℃
1156
0.12
Petroleum
1290
Acetone
1190
Pine oil
1280
Carbonyl
1121
Chloroethylene
1050
Ethanol
1168
1298
Alcohol
1440
Ketone
1310
Dagang jet fuel
Daqing 0#jet
fuel
Arachis oil
Acetaldehyde
1180
Castor oil
1502
Glycol
1620
1.5
0.69
938
2.3
0.82
1290
1472
9.5. Sound Velocity of Common Materials
Pipe Material
Steel
ABS
Aluminum
Brass
Cast iron
Bronze
Fiber glass-epoxy
lass
Polyethylene
PVC
IM-210 Rev. G
Sound Velocity (m/s)
3206
2286
3048
2270
2460
2270
3430
3276
1950
2540
Titanium
Cement
Bitumen
Porcelain enamel
Glass
Plastic
Polyethylene
PTFE
Rubber
3150
4190
2540
2540
5970
2280
1600
1450
1600
Page 59 of 85
Sierra Instruction Manual
Innova-Sonic® Model 210 Portable
9.6. Sound Velocity In Water (1 atm) At Different Temperatures
Temperature
℃
℉
61
141.8
62
143.6
63
145.4
64
147.2
65
149.0
66
150.8
67
152.6
68
154.4
69
156.2
70
158.0
71
159.8
72
161.6
73
163.4
74
165.2
75
167.0
76
168.8
77
170.6
78
172.4
79
174.2
80
176.0
81
177.8
82
179.6
83
181.4
84
183.2
85
185.0
86
186.8
87
188.6
88
190.4
89
192.2
90
194.0
91
195.8
92
197.6
93
199.4
94
201.2
IM-210 Rev. G
Sound Speed in Water
m/s
Ft/s
1,551
5,089
1,552
5,092
1,552
5,092
1,553
5,095
1,553
5,095
1,553
5,095
1,554
5,099
1,554
5,099
1,554
5,099
1,554
5,099
1,554
5,099
1,555
5,102
1,555
5,102
1,555
5,102
1,555
5,102
1,555
5,102
1,554
5,099
1,554
5,099
1,554
5,099
1,554
5,099
1,554
5,099
1,553
5,095
1,553
5,095
1,553
5,095
1,552
5,092
1,552
5,092
1,552
5,092
1,551
5,089
1,551
5,089
1,550
5,086
1,549
5,082
1,549
5,082
1,548
5,079
1,547
5,076
Temperature
95
203.0
96
204.8
97
206.6
98
208.4
99
210.2
100
212.0
104
220.0
110
230.0
116
240.0
121
250.0
127
260.0
132
270.0
138
280.0
143
290.0
149
300.0
154
310.0
160
320.0
166
330.0
171
340.0
177
350.0
182
360.0
188
370.0
193
380.0
199
390.0
204
400.0
210
410.0
216
420.0
221
430.0
227
440.0
232
450.0
238
460.0
243
470.0
249
480.0
254
490.0
260
500.0
Sound Speed in Water
1,547
5,076
1,546
5,072
1,545
5,069
1,544
5,066
1,543
5,063
1,543
5,063
1,538
5,046
1,532
5,026
1,524
5,000
1,526
5,007
1,507
4,944
1,497
4,912
1,487
4,879
1,476
4,843
1,465
4,807
1,453
4,767
1,440
4,725
1,426
4,679
1,412
4,633
1,398
4,587
1,383
4,538
1,368
4,488
1,353
4,439
1,337
4,387
1,320
4,331
1,302
4,272
1,283
4,210
1,264
4,147
1,244
4,082
1,220
4,003
1,200
3,937
1,180
3,872
1,160
3,806
1,140
3,740
1,110
3,642
Page 60 of 85
Sierra Instruction Manual
Innova-Sonic® Model 210 Portable
9.7. Common Pipe Dimensions (English)
OD
INCH
WALL
ID
1/8"
0.405"
10
10S
0.049"
0.307"
1/8"
0.405"
STD
40
40S
0.068"
0.269"
1/8"
0.405"
XS
80
80S
0.095"
0.215"
1/4"
0.540"
10
10S
0.065"
0.410"
1/4"
0.540"
STD
40
40S
0.088"
0.364"
1/4"
0.540"
XS
80
80S
0.119"
0.302"
3/8"
0.675"
10
10S
0.065"
0.545"
3/8"
0.675"
STD
40
40S
0.091"
0.493"
3/8"
0.675"
XS
80
80S
0.126"
0.423"
1/2"
0.840"
5
5S
0.065"
0.710"
1/2"
0.840"
10
10S
0.083"
0.674"
1/2"
0.840"
STD
40
40S
0.109"
0.622"
1/2"
0.840"
XS
80
80S
0.147"
0.546"
1/2"
0.840"
160
0.188"
0.464"
1/2"
0.840"
XX
0.294"
0.252"
3/4"
1.050"
5
5S
0.065"
0.920"
3/4"
1.050"
10
10S
0.083"
0.884"
3/4"
1.050"
STD
40
40S
0.113"
0.824"
3/4"
1.050"
XS
80
80S
0.154"
0.742"
3/4"
1.050"
160
0.219"
0.612"
3/4"
1.050"
XX
0.308"
0.434"
1"
1.315"
5
5S
0.065"
1.185"
1"
1.315"
10
10S
0.109"
1.097"
1"
1.315"
STD
40
40S
0.133"
1.049"
1"
1.315"
XS
80
80S
0.179"
0.957"
1"
1.315"
160
0.250"
0.815"
1"
1.315"
XX
0.358"
0.599"
11/4"
1.660"
5
5S
0.065"
1.530"
11/4"
1.660"
10
10S
0.109"
1.442"
11/4"
1.660"
STD
40
40S
0.140"
1.380"
11/4"
1.660"
XS
80
80S
0.191"
1.278"
11/4"
1.660"
160
0.250"
1.160"
11/4"
1.660"
XX
0.382"
0.896"
11/2"
1.900"
5
5S
0.065"
1.770"
11/2"
1.900"
10
10S
0.109"
1.682"
11/2"
1.900"
STD
40
40S
0.145"
1.610"
11/2"
1.900"
XS
80
80S
0.200"
1.500"
IM-210 Rev. G
SCHEDULE
Page 61 of 85
Sierra Instruction Manual
Innova-Sonic® Model 210 Portable
11/2"
1.900"
160
0.281"
1.388"
11/2"
1.900"
XX
0.400"
1.100"
2"
2.375"
5
5S
0.065"
2.245"
2"
2.375"
10
10S
0.109"
2.157"
2"
2.375"
STD
40
40S
0.154"
2.067"
2"
2.375"
XS
80
80S
0.218"
1.939"
2"
2.375"
160
0.344"
1.687"
2"
2.375"
XX
0.436"
1.503"
21/2"
2.875"
5
5S
0.083"
2.709"
21/2"
2.875"
10
10S
0.120"
2.635"
21/2"
2.875"
STD
40
40S
0.203"
2.469"
21/2"
2.875"
XS
80
80S
0.276"
2.323"
21/2"
2.875"
160
0.375"
2.125"
21/2"
2.875"
XX
0.552"
1.771"
3"
3.500"
5
5S
0.083"
3.334"
3"
3.500"
10
10S
0.120"
3.260"
3"
3.500"
STD
40
40S
0.216"
3.068"
3"
3.500"
XS
80
80S
0.300"
2.900"
3"
3.500"
160
0.438"
2.624"
3"
3.500"
XX
0.600"
2.300"
31/2"
4.000"
5
5S
0.083"
3.834"
31/2"
4.000"
10
10S
0.120"
3.760"
31/2"
4.000"
STD
40
40S
0.226"
3.548"
31/2"
4.000"
XS
80
80S
0.318"
3.364"
31/2"
4.000"
XX
0.636"
2.728"
4"
4.500"
5
5S
0.083"
4.334"
4"
4.500"
10
10S
0.120"
4.260"
4"
4.500"
0.156"
4.188"
4"
4.500"
0.188"
4.124"
4"
4.500"
STD
40
40S
0.237"
4.026"
4"
4.500"
XS
80
80S
0.337"
3.826"
4"
4.500"
120
0.438"
3.624"
4"
4.500"
160
0.531"
3.438"
4"
4.500"
XX
0.674"
3.152"
41/2"
5.000"
STD
40
40S
0.247"
4.506"
41/2"
5.000"
XS
80
80S
0.355"
4.290"
41/2"
5.000"
XX
0.710"
3.580"
5"
5.563"
5
5S
0.109"
5.345"
5"
5.563"
10
10S
0.134"
5.295"
5"
5.563"
STD
40S
0.258"
5.047"
IM-210 Rev. G
40
Page 62 of 85
Sierra Instruction Manual
Innova-Sonic® Model 210 Portable
5"
5.563"
XS
5"
5.563"
5"
0.375"
4.813"
120
0.500"
4.563"
5.563"
160
0.625"
4.313"
5"
5.563"
XX
0.750"
4.063"
6"
6.625"
5
5S
0.109"
6.407"
6"
6.625"
10
10S
0.134"
6.357"
6"
6.625"
0.188"
6.249"
6"
6.625"
STD
40
40S
0.280"
6.065"
6"
6.625"
XS
80
80S
0.432"
5.761"
6"
6.625"
120
0.562"
5.501"
6"
6.625"
160
0.719"
5.187"
6"
6.625"
XX
0.864"
4.897"
7"
7.625"
STD
40
40S
0.301"
7.023"
7"
7.625"
XS
80
80S
0.500"
6.625"
7"
7.625"
XX
0.875"
5.875"
8"
8.625"
5S
0.109"
8.407"
8"
8.625"
10
10S
0.148"
8.329"
8"
8.625"
20
0.250"
8.125"
8"
8.625"
30
0.277"
8.071"
8"
8.625"
STD
0.322"
7.981"
8"
8.625"
60
0.406"
7.813"
8"
8.625"
XS
0.500"
7.625"
8"
8.625"
100
0.594"
7.437"
8"
8.625"
120
0.719"
7.187"
8"
8.625"
140
0.812"
7.001"
8"
8.625"
XX
0.875"
6.875"
8"
8.625"
160
0.906"
6.813"
9"
9.625"
STD
40
40S
0.342"
8.941"
9"
9.625"
XS
80
80S
0.500"
8.625"
9"
9.625"
XX
0.875"
7.875"
10"
10.750"
5S
0.134"
10.482"
10"
10.750"
10S
0.165"
10.420"
10"
10.750"
0.188"
10.374"
10"
10.750"
20
0.250"
10.250"
10"
10.750"
30
0.307"
10.136"
10"
10.750"
STD
40
40S
0.365"
10.020"
10"
10.750"
XS
60
80S
0.500"
9.750"
10"
10.750"
80
0.594"
9.562"
10"
10.750"
100
0.719"
9.312"
10"
10.750"
120
0.844"
9.062"
IM-210 Rev. G
80
40
80
80S
40S
80S
Page 63 of 85
Sierra Instruction Manual
Innova-Sonic® Model 210 Portable
10"
10.750"
140
1.000"
8.750"
10"
10.750"
160
1.125"
8.500"
11"
11.750"
STD
40
40S
0.375"
11.000"
11"
11.750"
XS
80
80S
0.500"
10.750"
11"
11.750"
XX
0.875"
10.000"
12"
12.750"
5S
0.156"
12.438"
12"
12.750"
10S
0.180"
12.390"
12"
12.750"
20
0.250"
12.250"
12"
12.750"
30
0.330"
12.090"
12"
12.750"
STD
0.375"
12.000"
12"
12.750"
40
0.406"
11.938"
12"
12.750"
XS
0.500"
11.750"
12"
12.750"
60
0.562"
11.626"
12"
12.750"
80
0.688"
11.374"
12"
12.750"
100
0.844"
11.062"
12"
12.750"
120
1.000"
10.750"
12"
12.750"
140
1.125"
10.500"
12"
12.750"
160
1.312"
10.126"
14"
14.000"
0.188"
13.624"
14"
14.000"
10
0.250"
13.500"
14"
14.000"
20
0.312"
13.376"
14"
14.000"
STD
0.375"
13.250"
14"
14.000"
40
0.438"
13.124"
14"
14.000"
XS
0.500"
13.000"
14"
14.000"
60
0.594"
12.812"
14"
14.000"
80
0.750"
12.500"
14"
14.000"
100
0.938"
12.124"
14"
14.000"
120
1.094"
11.812"
14"
14.000"
140
1.250"
11.500"
14"
14.000"
160
1.406"
11.188"
16"
16.000"
0.188"
15.624"
16"
16.000"
10
0.250"
15.500"
16"
16.000"
20
0.312"
15.376"
16"
16.000"
STD
30
40S
0.375"
15.250"
16"
16.000"
XS
40
80S
0.500"
15.000"
16"
16.000"
60
0.656"
14.688"
16"
16.000"
80
0.844"
14.312"
16"
16.000"
100
1.031"
13.938"
16"
16.000"
120
1.219"
13.562"
16"
16.000"
140
1.438"
13.124"
IM-210 Rev. G
40S
80S
10S
30
40S
80S
10S
Page 64 of 85
Sierra Instruction Manual
16"
16.000"
18"
18.000"
18"
18.000"
18"
Innova-Sonic® Model 210 Portable
160
1.594"
12.812"
0.188"
17.624"
10
0.250"
17.500"
18.000"
20
0.312"
17.376"
18"
18.000"
STD
0.375"
17.250"
18"
18.000"
30
0.438"
17.124"
18"
18.000"
XS
0.500"
17.000"
18"
18.000"
40
0.562"
16.876"
18"
18.000"
60
0.750"
16.500"
18"
18.000"
80
0.938"
16.124"
18"
18.000"
100
1.156"
15.688"
18"
18.000"
120
1.375"
15.250"
18"
18.000"
140
1.562"
14.876"
18"
18.000"
160
1.781"
14.438"
20"
20.000"
0.218"
19.564"
20"
20.000"
10
0.250"
19.500"
20"
20.000"
STD
20
40S
0.375"
19.250"
20"
20.000"
XS
30
80S
0.500"
19.000"
20"
20.000"
40
0.594"
18.812"
20"
20.000"
60
0.812"
18.376"
20"
20.000"
80
1.031"
17.938"
20"
20.000"
100
1.281"
17.438"
20"
20.000"
120
1.500"
17.000"
20"
20.000"
140
1.750"
16.500"
20"
20.000"
160
1.969"
16.062"
22"
22.000"
22"
22.000"
22"
10S
40S
80S
10S
10
10S
0.250"
21.500"
STD
20
40S
0.375"
21.250"
22.000"
XS
30
80S
0.500"
21.000"
22"
22.000"
60
0.875"
20.250"
22"
22.000"
80
1.125"
19.750"
22"
22.000"
100
1.375"
19.250"
22"
22.000"
120
1.625"
18.750"
22"
22.000"
140
1.875"
18.250"
22"
22.000"
160
2.125"
17.750"
24"
24.000"
24"
24.000"
STD
24"
24.000"
XS
24"
24.000"
24"
24"
IM-210 Rev. G
10
10S
0.250"
23.500"
20
40S
0.375"
23.250"
80S
0.500"
23.000"
30
0.562"
22.876"
24.000"
40
0.688"
22.624"
24.000"
60
0.969"
22.062"
Page 65 of 85
Sierra Instruction Manual
Innova-Sonic® Model 210 Portable
24"
24.000"
80
1.219"
21.562"
24"
24.000"
100
1.531"
20.938"
24"
24.000"
120
1.812"
20.376"
24"
24.000"
140
2.062"
19.876"
24"
24.000"
160
2.344"
19.312"
26"
26.000"
0.312"
25.376"
26"
26.000"
STD
40S
0.375"
25.250"
26"
26.000"
XS
80S
0.500"
25.000"
28"
28.000"
0.312"
27.376"
28"
28.000"
40S
0.375"
27.250"
28"
28.000"
20
80S
0.500"
27.000"
28"
28.000"
30
0.625"
26.750"
30"
30.000"
10
0.312"
29.376"
30"
30.000"
STD
40S
0.375"
29.250"
30"
30.000"
XS
80S
0.500"
29.000"
30"
30.000"
30
0.625"
28.750"
32"
32.000"
10
0.312"
31.376"
32"
32.000"
0.375"
31.250"
32"
32.000"
20
0.500"
31.000"
32"
32.000"
30
0.625"
30.750"
32"
32.000"
40
0.688"
30.264"
34"
34.000"
10
0.312"
33.376"
34"
34.000"
0.375"
33.250"
34"
34.000"
20
0.500"
33.000"
34"
34.000"
30
0.625"
32.750"
34"
34.000"
40
0.688"
32.624"
36"
36.000"
10
0.312"
35.376"
36"
36.000"
STD
40S
0.375"
35.250"
36"
36.000"
XS
80S
0.500"
35.000"
42"
42.000"
STD
40S
0.375"
41.250"
42"
42.000"
XS
80S
0.500"
41.000"
42"
42.000"
0.750"
40.500"
48"
48.000"
STD
40S
0.375"
47.250"
48"
48.000"
XS
80S
0.500"
47.000"
IM-210 Rev. G
10
10
STD
20
STD
STD
40
Page 66 of 85
Sierra Instruction Manual
Innova-Sonic® Model 210 Portable
9.8. Common Pipe Dimensions (DIN)
Identification
N.B(inches)
N.B(mm)
O.D(mm)
WALL(mm)
1
1
1
1
1¼
1¼
1¼
1¼
1½
1½
1½
1½
2
2
2
2
2½
2½
2½
2½
3
3
3
3
3½
3½
4
4
4
4
4
5
5
5
5
5
6
6
6
6
6
8
8
8
8
8
8
8
8
8
25
25
25
25
32
32
32
32
40
40
40
40
50
50
50
50
65
65
65
65
80
80
80
80
90
90
100
100
100
100
100
125
125
125
125
125
150
150
150
150
150
200
200
200
200
200
200
200
200
200
33.4
33.4
33.4
33.4
42.2
42.2
42.2
42.2
48.3
48.3
48.3
48.3
60.3
60.3
60.3
60.3
73.0
73.0
73.0
73.0
88.9
88.9
88.9
88.9
101.6
101.6
114.3
114.3
114.3
114.3
114.3
141.3
141.3
141.3
141.3
141.3
168.3
168.3
168.3
168.3
168.3
219.1
219.1
219.1
219.1
219.1
219.1
219.1
219.1
219.1
3.4
4.5
6.4
9.1
3.6
4.9
6.4
9.7
3.7
5.1
7.1
10.2
3.9
5.5
8.7
11.1
5.2
7.0
9.5
14.0
5.5
7.6
11.1
15.2
5.7
8.1
6.0
8.6
11.1
13.5
17.1
6.6
9.5
12.7
15.9
19.0
7.1
11.0
14.3
18.3
21.9
6.4
7.0
8.2
10.3
12.7
15.1
18.3
20.6
22.2
IM-210 Rev. G
STD,XS,XXS
STD
XS
XXS
STD
XS
XXS
STD
XS
XXS
STD
XS
XXS
STD
XS
XXS
STD
XS
XXS
STD
XS
STD
XS
XXS
STD
XS
XXS
STD
XS
Schedule
Number
40
80
160
40
80
160
40
80
160
40
80
160
40
80
160
40
80
160
40
80
40
80
120
160
40
80
120
160
40
80
120
160
XXS
STD
XS
20
30
40
60
80
100
120
140
XXS
Page 67 of 85
Sierra Instruction Manual
8
10
10
10
10
10
10
10
10
10
12
12
12
12
12
12
12
12
12
12
12
14
14
14
14
14
14
14
14
14
14
14
16
16
16
16
16
16
16
16
16
16
18
18
18
18
18
18
18
18
18
18
18
18
20
IM-210 Rev. G
200
250
250
250
250
250
250
250
250
250
300
300
300
300
300
300
300
300
300
300
300
350
350
350
350
350
350
350
350
350
350
350
400
400
400
400
400
400
400
400
400
400
450
450
450
450
450
450
450
450
450
450
450
450
500
Innova-Sonic® Model 210 Portable
219.1
273.0
273.0
273.0
273.0
273.0
273.0
273.0
273.0
273.0
323.9
323.9
323.9
323.9
323.9
323.9
323.9
323.9
323.9
323.9
323.9
355.6
355.6
355.6
355.6
355.6
355.6
355.6
355.6
355.6
355.6
355.6
406.4
406.4
406.4
406.4
406.4
406.4
406.4
406.4
406.4
406.4
457.0
457.0
457.0
457.0
457.0
457.0
457.0
457.0
457.0
457.0
457.0
457.0
508.0
2300
6.4
7.8
9.3
12.7
15.1
18.3
21.4
25.4
28.6
6.4
8.4
9.5
10.3
12.7
14.3
17.5
21.4
25.4
28.6
33.3
6.4
7.9
9.5
11.1
12.7
15.1
19.0
23.8
27.8
31.8
35.7
6.4
7.9
9.5
12.7
16.7
21.4
26.2
31.0
36.5
40.5
6.4
7.9
9.5
11.1
12.7
14.3
19.0
23.8
29.4
34.9
39.7
45.2
6.4
STD
XS
XXS
STD
XS
XXS
STD
160
20
30
40
60
80
100
120
140
160
20
30
40
60
80
100
120
140
160
10
20
30
40
XS
STD
XS
60
80
100
120
140
160
10
20
30
40
60
80
100
120
140
160
10
20
STD
30
XS
40
60
80
100
120
140
160
10
Page 68 of 85
Sierra Instruction Manual
20
20
20
20
20
20
20
20
20
22
22
22
22
22
22
22
22
22
24
24
24
24
24
24
24
24
24
24
24
26
26
26
28
28
28
28
30
30
30
30
32
32
32
32
32
34
34
34
34
34
36
36
36
36
36
IM-210 Rev. G
500
500
500
500
500
500
500
500
500
550
550
550
550
550
550
550
550
550
600
600
600
600
600
600
600
600
600
600
600
650
650
650
700
700
700
700
750
750
750
750
800
800
800
800
800
850
850
850
850
850
900
900
900
900
900
Innova-Sonic® Model 210 Portable
508.0
508.0
508.0
508.0
508.0
508.0
508.0
508.0
508.0
559.0
559.0
559.0
559.0
559.0
559.0
559.0
559.0
559.0
610.0
610.0
610.0
610.0
610.0
610.0
610.0
610.0
610.0
610.0
610.0
660.0
660.0
660.0
711.0
711.0
711.0
711.0
762.0
762.0
762.0
762.0
813.0
813.0
813.0
813.0
813.0
864.0
864.0
864.0
864.0
864.0
914.0
914.0
914.0
914.0
914.0
9.5
12.7
15.1
20.6
26.2
32.5
38.1
44.4
50.0
6.4
9.5
12.7
22.2
28.6
34.9
41.3
47.6
54.0
6.4
9.5
12.7
14.3
17.5
24.6
31.0
38.9
46.0
52.4
59.5
7.9
9.5
12.7
7.9
9.5
12.7
15.9
7.9
9.5
12.7
15.9
7.9
9.5
12.7
15.9
17.5
7.9
9.5
12.7
15.9
17.5
7.9
9.5
12.7
15.9
19.0
STD
XS
STD
XS
STD
XS
20
30
40
60
80
100
120
140
160
10
20
30
60
80
100
120
140
160
10
20
30
40
60
80
100
120
140
160
10
STD
XS
STD
XS
STD
XS
STD
XS
STD
XS
20
10
20
30
10
20
30
10
20
30
40
10
20
30
40
10
STD
XS
20
30
40
Page 69 of 85
Sierra Instruction Manual
Innova-Sonic® Model 210 Portable
9.9. Cement Lined Pipes Liner Thicknesses
Size(in)
Nominal
Pipe
Length(ft)
4
6
8
10
12
14
16
18
20
24
30
36
42
48
54
60
64
20
20
20
20
20
20
20
20
20
20
20
20
20
20
20
20
20
Standard Thickness
Minimum
Weight
Weight
Thickness(in)
Per
Per
Foot(lb)
Length(lb)
1/16
0.87
17
1/16
1.3
26
1/16
1.74
35
1/16
2.15
43
1/16
2.57
51
3/32
4.49
90
3/32
5.13
103
3/32
5.76
115
3/32
6.4
128
3/32
7.68
154
1/8
12.76
255
1/8
15.31
306
1/8
17.82
356
1/8
20.35
407
1/8
22.89
458
1/8
24.71
494
1/8
26.35
527
Double Thickness
Minimum
Weight
Weight
Thickness(in)
Per
Per
Foot(lb)
Length(lb)
1/8
1.71
34
1/8
2.57
51
1/8
3.45
69
1/8
4.28
86
1/8
5.12
102
3/16
8.93
179
3/16
10.19
204
3/16
11.47
229
3/16
12.73
255
3/16
15.31
306
1/4
25.42
508
1/4
30.51
610
1/4
35.53
711
1/4
40.6
812
1/4
45.68
914
1/4
49.32
986
1/4
52.61
1052
9.10. Cast Iron Pipe Data
Nominal
Pipe Size
(in.)
3
4
6
8
10
12
14
16
18
20
24
30
32
42
48
54
60
72
84
IM-210 Rev. G
Class A
Outside
Wall
Diameter
Thickness
(in.)
(in.)
3.80
0.39
4.80
0.42
6.90
0.44
9.05
0.46
11.10
0.50
13.20
0.54
15.30
0.57
7.40
0.60
19.50
0.64
21.60
0.67
25.80
0.76
31.74
0.88
37.96
0.99
44.20
1.10
50.50
1.26
56.66
1.35
62.80
1.39
75.34
1.62
87.54
1.72
Class B
Outside
Wall
Diameter Thickness
(in.)
(in.)
3.96
0.42
5.00
0.45
7.10
0.48
9.05
0.51
11.10
0.57
13.20
0.62
15.30
0.66
17.40
0.70
19.50
0.75
21.60
0.80
25.80
0.89
32.00
1.03
38.30
1.15
44.50
1.28
50.80
1.42
57.10
1.55
63.40
1.67
76.00
1.95
88.54
2.22
Class C
Outside
Wall
Diameter Thickness
(in.)
(in.)
3.96
0.45
5.00
0.40
7.10
0.51
9.30
0.56
11.40
0.62
13.50
0.68
15.65
0.74
17.80
0.80
19.92
0.87
22.06
0.92
26.32
1.05
32.40
1.20
38.70
1.36
45.10
1.54
51.40
1.71
57.80
1.90
64.20
2.00
76.88
2.39
Class D
Outside
Wall
Diameter Thickness
(in.)
(in.)
3.96
0.48
5.00
0.52
7.10
0.55
9.30
0.60
11.40
0.68
13.50
0.75
15.65
0.82
17.80
0.89
19.92
0.96
22.06
1.03
23.32
1.16
32.74
1.37
39.16
1.58
45.58
1.78
51.98
1.99
58.40
2.23
64.82
2.38
Page 70 of 85
Sierra Instruction Manual
Nominal
Pipe Size
(in.)
3
4
6
8
10
12
14
16
18
20
24
30
32
42
48
54
60
72
84
Innova-Sonic® Model 210 Portable
Class E
Outside
Wall
Diameter
Thickness
(in.)
(in.)
3.80
0.39
4.80
0.42
7.22
0.58
9.42
0.66
11.60
0.74
13.78
0.82
15.98
0.90
18.16
0.90
20.34
1.07
22.54
1.15
26.90
1.31
33.10
1.55
39.60
1.80
Class F
Outside
Wall
Diameter Thickness
(in.)
(in.)
3.96
0.42
5.00
0.45
7.22
0.61
9.42
0.66
11.60
0.80
13.78
0.89
15.98
0.99
18.16
1.08
20.34
1.17
22.54
1.27
26.90
1.45
33.46
1.73
40.04
2.02
Class G
Outside
Wall
Diameter Thickness
(in.)
(in.)
3.96
0.45
5.00
0.40
7.38
0.65
9.60
0.75
11.84
0.86
14.08
0.97
16.32
1.07
18.54
1.18
20.78
1.28
23.02
1.39
27.76
1.75
Class H
Outside
Wall
Diameter Thickness
(in.)
(in.)
3.96
0.48
5.00
0.52
7.38
0.69
9.60
0.80
11.84
0.92
14.08
1.04
16.32
1.16
18.54
1.27
20.78
1.39
23.02
1.51
27.76
1.88
9.11. Ductile Iron Pipe Data
Nominal
Pipe Size
(in.)
Outside
Diameter
(in.)
3
4
6
8
10
12
14
16
18
20
24
30
32
42
48
54
3.96
4.80
6.90
9.05
11.10
13.20
15.30
17.40
19.50
21.60
25.80
32.00
38.30
44.50
50.80
57.10
IM-210 Rev. G
Pipe Wall Thickness(in.)
Class50
Class51
Class52
Class53
Class54
Class55
Class56
0.25
0.27
0.29
0.31
0.33
0.34
0.35
0.36
0.38
0.25
0.26
0.28
0.30
0.32
0.34
0.36
0.37
0.38
0.39
0.41
0.28
0.29
0.31
0.33
0.35
0.37
0.39
0.40
0.41
0.42
0.44
0.31
0.32
0.34
0.36
0.38
0.40
0.42
0.43
0.44
0.45
0.47
0.51
0.58
0.65
0.72
0.81
0.43
0.35
0.37
0.39
0.44
0.43
0.45
0.46
0.47
0.48
0.50
0.55
0.63
0.71
0.79
0.89
0.37
0.38
0.40
0.42
0.47
0.46
0.48
0.49
0.50
0.51
0.53
0.59
0.68
0.77
0.86
0.97
0.40
0.41
0.43
0.45
0.49
0.51
0.52
0.53
0.54
0.56
0.63
0.73
0.83
0.93
1.05
Page 71 of 85
Sierra Instruction Manual
Innova-Sonic® Model 210 Portable
9.12. Sound Speeds In Various Fluids
All data given at 25℃(77℉)unless otherwise noted
Substance
Chemical
Formula
Acetic anhydride(22)
(CH3CO)2O
Acetic acid, anhydride(22)
(CH3CO)2O
Acetic acid, nitrile
Acetic acid, ethyl ester(33)
Acetic acid, methyl ester
Acetone
Acetonitrile
Acetonylacetone
Acetylen dichloride
Acetylene tetrabromide(47)
Acetylene tetrachlonde(47)
C2H3N
C4H8O2
C3H6O2
C3H6O
C2H3N
C6H10O2
C2H2Cl2
C2H2Br4
C2H2Cl4
Alcohol
Alkazene-13
Alkazene-25
2-Amino-ethanol
2-Aminotolidine(46)
C2H6O
C15H24
C10H12Cl2
C2H7NO
C7H9N
4-Aminotolidine(46)
C7H9N
Ammonia(35)
NH3
Amorphous Polyolefin
Specific
Gravity
1.082
(20℃)
1.082
(20℃)
0.783
0.901
0.934
0.791
0.783
0.729
1.26
2.966
1.595
0.789
0.86
1.20
1.018
0.999
(20℃)
0.966
(45℃)
0.771
0.98
t-Amyl alcohol
Aminobenzene(41)
Aniline(41)
Argon(45)
C5H12O
C6H5NO2
C6H5NO2
Ar
Azine
C6H5N
0.81
1.022
1.022
1.400
(-188℃)
0.982
Benzene(29,40,41)
Benzol(29,40,41)
Bromine(21)
Bromo-benzene(46)
C6H6
C6H6
Br2
C6H5Br
0.879
0.879
2.928
1.522
1-Bromo-butane(46)
C4H9Br
Bromo-ethane(46)
C2H5Br
Bromoform(46,47)
CHBr3
n-Butane(2)
C4H10
1.276
(20℃)
1.460
(20℃)
2.89
(20℃)
0.601
(0℃)
IM-210 Rev. G
Sound speed
△V/℃
Kinematic
Viscosity×10-6
m/s
1180
ft/s
38714
m/s/℃
2.5
㎡/s
0.769
ft2/s
8274
1180
38714
2.5
0.769
8274
1290
1085
1211
1174
1290
1399
1015
1027
1147
42323
35597
39731
38517
42323
45899
33301
33694
37631
4.1
4.4
0.441
0.467
0.407
0.399
0.441
4745
5025
4379
4293
4745
0.400
4.304
1207
1317
1307
1724
1618
3960
43209
42881
56562
53084
4.0
3.9
3.4
3.4
1.156
(15℃)
1.396
12438
(59℉)
1502
1480
48556
1729
(-33℃)
962.6
(190℃)
1204
1639
1639
853
(-188℃)
1415
56726
(-27℉)
31582
(374℉)
39501
53773
53773
27986
(-306℉)
46424
6.68
4.394
(20℃)
1.863
(50℃)
0.292
(-33℃)
26600
47297
(68℉)
20045
(122℉)
3141
(-27℉)
286000
4.0
4.0
4.374
3.63
3.63
47064
39058
39058
4.1
1306
1306
889
1170
(20℃)
1019
(20℃)
900
(20℃)
918
42848
42848
29167
38386
(68℉)
33432
(68℉)
29528
(68℉)
30118
4.65
4.65
3.0
0.992
(20℃)
0.711
0.711
0.323
0.693
10.673
(68℉)
7.65
7.65
3.475
7.456
0.49
(15℃)
0.275
5.272
(59℉)
2.959
0.654
7.037
1085
(-5℃)
35597
(23℉)
5.8
4.5
4.1
3.6
3.8
3.1
Page 72 of 85
Sierra Instruction Manual
Innova-Sonic® Model 210 Portable
2-Butanol
Sec-Butylalochol
C4H10O
C4H10O
0.81
0.81
1240
1240
40682
40682
n-Butyl bromide(46)
C4H9Br
n-Butyl chloride(22,46)
C4H9Cl
1.276
(20℃)
0.887
1019
(20℃)
1140
33432
(68℉)
37402
tert Butyl chloride
Butyl oleate
2,3Butylene glycol
Cadmium(7)
C4H9Cl
C22H42O2
C4H10O2
Cd
0.84
Carbinol(40,41)
CH4O
32283
46063
48688
73415
(752℉)
35302
Carbitol
Carbon diaxide(26)
C6H14O3
CO2
Carbon disulphide
CS2
1458
839
(-37℃)
1149
47835
27526
(-35℉)
37697
Carbon tetrachloride
(33, 35, 47)
Carbon tetrachloride(14)
(Freon 14)
Cetane(23)
CCl4
926
3038.1
Chloro-benezene
1-Chloro-butane(22, 26)
C6H5Cl
C4H9Cl
0.791
(20℃)
0.988
1.101
(-37℃)
1.261
(22℃)
1.595
(20℃)
1.75
(-150℃)
0.773
(20℃)
1.106
0.887
984
1404
1484
22377
(400℃)
1076
Chloro-diFluoromethane(3)
(Freon 22)
Chloroform(47)
1-Chloro-propane(47)
Chlorotrifluorornrthane(5)
CHClF2
Cinnamaldehyde
Cinnamic aldehyde
Colamine
o-Cresol(46)
C9H8O
C9H8O
C2H7NO
C7H8O
m-Cresol(46)
C7H8O
Cyanomthane
Cyclohexane(15)
C2H3N
C6H12
Cyclohexanol
C6H12O
1.112
1.112
1.018
1.047
(20℃)
1.034
(20℃)
0.783
0.779
(20℃)
0.962
Cyclohexanone
Decane(45)
C6H10O
C10H22
1-Decene(27)
n-Decylene(27)
Diacetyl
C10H20
C10H20
C4H6O2
IM-210 Rev. G
CF4
C16H34
CHCl3
C3H7Cl
CClF3
1.109
3.3
3.3
3.239
3.239
34.851
34.851
4.57
0.49
(15℃)
0.529
0.646
5.272
(59℉)
5.692
(59℉)
6.95
1.355cp
(440℃)
0.695
14.579
(824℉)
7.478
7.71
0.137
(-37℃)
0.278
1.474
(-35℉)
2.991
2.48
0.607
6.531
4.32
46.483
0.722
0.529
(15℃)
7.768
5.692
(59℉)
0.55
0.378
5.918
4.067
4.29
(40℃)
5.979
(40℃)
0.441
1.31
(17℃)
0.071
(17℃)
46.16
(104℉)
64.334
(104℉)
4.745
14.095
(63℉)
0.764
(63℉)
1.26
(20℃)
13.55
(68℉)
4.2
3.0
1.51
2.92
875.2
2871.5
6.61
(-150℃) (-238℉)
1338
4389.8
3.71
1273
1140
4176.5
3740.2
3.6
4.57
893.9
(-50℃)
979
1058
724
(-82℃)
1554
1554
1724
1541
(20℃)
1500
(20℃)
1290
1248
2932.7
(-58℉)
3211.9
3471.1
2375.3
(-116℉)
5098.4
5098.4
5656.2
5055.8
(68℉)
4921.3
(68℉)
4232.3
4094.5
4.79
1454
4770.3
3.6
0.948
0.730
1423
1252
4668.6
4107.6
4.0
0.746
0.746
0.99
1235
1235
1236
4058.1
4058.1
4055.1
4.0
4.0
4.6
1.491
(-69℃)
1.489
0.892
3.4
5.26
3.2
3.2
3.4
4.1
5.41
Page 73 of 85
Sierra Instruction Manual
Innova-Sonic® Model 210 Portable
Diamylamine
1,2 Dibromo-ethane(47)
C10H23N
C2H4Br2
2.18
1256
995
4120.7
3264.4
Trans-1,2-Dibromoethene
(47)
Dibutyl phthalate
Dichloro-t-butyl alcohol
2,3Dichlorodioxane
Dichlorodifluoromethane
(3)(Freon 12)
1,2 Dichloro ethane(47)
Cis1,2-Dichloro ethane
(3,47)
trans1,2-Dichloro-ethene
(3,47)
Dichloro-fluoromethane
(3)(Freon 21)
1-2-Dichlorohenxafluoro
-Cyclobutane(47)
1-3-Dichoro-isobutane
Dichloro methane(3)
1,1-Dichloro-1,2.2.2
Tetra fluoroethane
Diethyl ether
Diethylene glycol
Diethylene glycol
Monoethyl ether
Diethylenimide oxide
1,2-bis(DiFluoramino)
Butane(43)
1,2-bis(DiFluoramino)
2-methylpropane(43)
1,2-bis(DiFluoramino)
propane(43)
2,2-bis(DiFluoramino
Propane(43)
2,2-Dihydroxydiethylether
Dihydroxyethane
1,3-Dimethyl-benzene(46)
C2H2Br2
2.231
935
3067.6
1408
1304
11391
774.1
4619.4
4278.2
4563.6
2539.7
1193
10611
3914
3481
1,2-Dimethyl-benzene
C8H10
C8H22O4
C4H8Cl2O
C2H6Cl2O2
CCl2F2
IM-210 Rev. G
0.79
(20℃)
8.5
(68℉)
0.61
6.563
0.31
3.335
0.311
3.346
4.1
0.749
(15℃)
0.903
(20℃)
0.662
8.059
(59℉)
9.716
(68℉)
7.123
4.5
0.399
4.293
3.85
2.1
1.8
19.368
0.441
0.769
4.745
8.274
3.8
3.7
4.24
C2H4Cl2
C2H2Cl2
1.516
(40℃)
1.253
1.284
C2H2Cl2
1.257
1010
3313.6
CHCl2F
1.426
(0℃)
1.654
891
(0℃)
669
2923.2
(32℉)
2194.9
3.97
4002.6
3510.5
2182.7
(14℉)
3231.6
5203.4
4783.5
3.4
3.94
3.73
3.8
C4Cl2F6
C4H8Cl2
1.14
CH2Cl2
1.327
CClF2-CClF2 1.455
C4H10O
C4H10O3
C6H14O3
0.713
1.116
0.988
1220
1070
665.3
(-10℃)
985
1586
1458
C4H9NO
C4H8(NF2)2
1.00
1.216
1442
1000
4731
3280.8
C4H9(NF2)2
1.213
900
2952.8
C3H6(NF2)2
1.265
960
3149.6
C3H6(NF2)2
1.254
890
2920
C4H10O3
C2H6O2
C8H10
1.116
1.113
0.868
(15℃)
0.897
(20℃)
1586
1658
1343
(20℃)
1331.5
5203.4
5439.6
4406.2
(68℉)
4368.4
1334
(20℃)
1079
4376.6
(68℉)
3540
1174
1063
1463
980
1376
1279
1658
1290
1180
3851.7
3487.5
1799.9
3215.2
4514.4
4196.2
5439.6
4232.2
3871.4
1,4-Dimethyl-benzene(46) C8H10
2,2-Dimethyl-butance
(29,33)
Dimethyl ketone
Dimethyl ptntane(47)
Dimethyl phthalate
Diiodo-methane
Dioxane
Dodecane(23)
1,2-Ethanediol
Ethanenitrile
Ethanoic anhydride(22)
3.9
C6H14
C3H6O
C7H16
C8H10O4
CH2I2
C4H8O2
C12H26
C2H6O2
C2H3N
(CH3CO)2O
0.649
(20℃)
0.791
0.674
1.2
3.235
1.033
0.749
1.113
0.783
1.082
4.87
2.4
2.4
2.1
Page 74 of 85
Sierra Instruction Manual
Innova-Sonic® Model 210 Portable
Ethanol
Ethanol amide
Ethoxyethane
Ethyl acetate(33)
Ethyl alcohol
Ethyl benzene(46)
C2H6O
C2H7NO
C4H10O
C4H8O2
C2H6O
C8H10
Ethyl bromide(46)
C2H5Br
Ethyliodide(46)
C2H5I
Ether
Ethyl ether
Ethelene bromide(47)
Ethylene chloride(47)
Ethylene glycol
C4H10O
C4H10O
C2H4Br2
C2H4Cl2
C2H6O2
d-fenochone
d-2-Fenechanone
Fluorine
C10H16O
C10H16O
F
Fluoro-benzene(46)
C6H5F
Formaldehyde
Methyl ester
Formamide
C2H4O2
Formic acid,amide
CH3NO
Freon R12
Furfural
Furfuryl alcohol
Fural
2-Furaldehyde
2-Furancarboxaldehyde
2-Furyl-Methanol
Gallium
C5H4O2
C5H4O2
C5H4O2
C5H4O2
C5H4O2
C5H6O2
Ga
1.157
1.135
1.157
1.157
1.157
1.135
6.095
Glycerin
Glycerin
Glycerol
C3H8O3
C3H8O3
C2H6O2
1.26
1.26
1.113
CH3NO
0.789
1.018
0.713
0.901
0.789
0.867
(20℃)
1.461
(20℃)
1.950
(20℃)
0.713
0.713
2.18
1.253
1.113
1207
1724
985
1085
1207
1338
(20℃)
900
(20℃)
875
(20℃)
985
985
995
1193
1658
3960
5656.2
3231.6
3559.7
3960
4389.8
(68℉)
2952.8
(68℉)
2874
(68℉)
3231.6
3231.6
3264.4
3914
5439.6
0.947
0.947
0.545
(-143℃)
1.024
(20℃)
0.974
1320
1320
403
(-143℃)
1189
4330.7
4330.7
1322.2
11.31
(-225℉)
3900.9
1127
3697.5
4.02
1.134
(20℃)
1.134
(20℃)
1622
5321.5
2.2
1622
5321.5
774.2
1444
1450
1444
1444
1444
1450
2870
(30℃)
1940
1940
1658
2540
4737.5
4757.2
4737.5
4737.5
4737.5
4757.2
9416
(86℉)
6246.7
6246.7
5439.6
1578
5177
50% Glycol/50%
Helium(45)
He4
Heptane(22,23)
C7H16
n-Heptane(29,33)
C7H16
HexachloroCyclopentandiene(47)
Hexadecane(23)
C5Cl6
IM-210 Rev. G
C16H34
4.0
3.4
4.87
4.4
4.0
1.39
14.956
0.311
0.489
1.396
0.797
(17℃)
0.275
(20℃)
0.29
3.346
5.236
15.020
8.575
(63℉)
2.929
(68℉)
3.12
4.87
4.87
0.311
0.311
0.79
0.61
17.208
(20℃)
0.22
0.22
3.346
3.346
8.5
6.563
185.158
(68℉)
2.367
2.367
0.584
(20℃)
6.238
(68℉)
2.91
31.311
2.91
31.311
757.1
757.1
8081.836
8081.836
0.025
0.269
0.598
(20℃)
6.434
(68℉)
4.32
(20℃)
46.483
(68℉)
2.1
3.7
3.4
3.7
3.7
3.7
3.4
2.2
2.2
2.1
0.125
(-269℃)
0.384
(20℃)
0.684
(20℃)
1.7180
183
600.4
(-269℃) (-452℉)
1131
3710.6
4.25
0.773
(20℃)
1180
3871.3
1150
3773
1338
4389.8
4.0
3.71
Page 75 of 85
Sierra Instruction Manual
Innova-Sonic® Model 210 Portable
Hexalin
C6H12O
0.962
1454
4770.3
3.6
Hexane(16,22,23)
n-Hexane(29,33)
2,5-Hexanedione
n-Hexanol
Hexahydrobenzene(15)
C6H14
C6H14
C6H10O2
C6H14O
C6H12
0.659
0.649
0.729
0.819
0.779
1112
1079
1399
1300
1248
3648.3
3540
4589.9
4265.1
4094.5
2.71
4.53
3.6
3.8
5.41
Hexahydrophenol
Hexamethylene(15)
C6H12O
C6H12
0.962
0.779
1454
1248
4770.3
4094.5
3.6
5.41
Hydrogen(45)
H2
2-Hydroxy-toluene(46)
C7H8O
3-Hydroxy-toluene(46)
C7H8O
0.071
(-256℃)
1.047
(20℃)
1.034
1187
(-256℃)
1541
(20℃)
1500
Lodo-benzene(46)
C6H5l
1.823
1114
Lodo-ethane(46)
C2H5l
876
lodo-methane
CH3l
1.950
(20℃)
2.28
(20℃)
978
3894.4
(429℉)
5.55.8
(68℉)
4921.3
(68℉)
3654.9
(68℉)
2874
(68℉)
3208.7
Lsobutyl acetate(22)
C6H12O
Isobutanol
C4H10O
0.81
(20℃)
1180
(27℃)
1212
3871.4
(81℉)
3976.4
Iso-Butane
Isopentane(36)
C5H12
1219.8
980
4002
3215.2
Isopropanol(46)
C3H8O
Isopropyl alcohol(46)
C3H8O
Kerosene
Ketohexamethylene
Lithium fluoride(42)
C6H10O
LiF
0.62
(20℃)
0.785
(20℃)
0.785
(20℃)
0.81
0.948
Mercury(45)
Hg
13.594
Mesityloxide
C6H16O
0.85
1170
(20℃)
1170
(20℃)
1324
1423
2485
(900℃)
1449
(24℃)
1310
3838.6
(68℉)
3838.6
(68℉)
4343.8
3.6
4668.6
4.0
8152.9
1.29
(1652℉)
4753.9
(75℉)
4297.9
Methane(25,28,38,39)
CH4
Methanol(40,41)
CH4O
405
(-89℃)
1076
1328.7
(-128℉)
3530.2
Methyl acetate
0-Methylaniline(46)
C3H6O2
C7H9N
1211
1618
3973.1
5308.4
4-Methylaniline(46)
C7H9N
1480
4855.6
Methyl alcohol(40,44)
CH4O
1076
Methyl benzene(16,52)
C7H8
0.162
(-89℃)
0.791
(20℃)
0.934
0.999
(20℃)
0.966
(45℃)
0.791
(20℃)
0.867
2-Methyl-butane(36)
C5H12
0.62
1328
(20℃)
980
IM-210 Rev. G
70.69
(17℃)
0.446
760.882
(68℉)
4.798
1.31
(17℃)
14.095
(63℉)
1.31
(17℃)
0.003
(-256℃)
4.29
(40℃)
5.979
(40℃)
0.954
14.095
(63℉)
0.032
(-429℉)
46.16
(104℉)
64.334
(104℉)
0.29
3.12
0.211
2.27
0.34
3.658
2.718
29.245
2.718
29.245
0.114
1.226
2.92
0.695
7.478
3530.2
2.92
0.407
4.394
(20℃)
1863
(50℃)
0.695
4.379
47.297
(68℉)
20.095
(122℉)
7.478
4357
(68℉)
3215.2
4.27
0.644
7.144
0.34
3.658
4.85
4.8
17.5
Page 76 of 85
Sierra Instruction Manual
Innova-Sonic® Model 210 Portable
Methyl carbinol
Methyl-chloroform(47)
C2H6O
C2H3Cl3
Methyl-cyanide
3-Methyl cyclohexanol
Methylene chloride(3)
Methylene iodide
Methyl formate(22)
C2H3N
C7H14O
CH2Cl2
CH2I2
C2H4O2
Methyl iodide
CH3I
a- Methyl naphthalene
2- Methylphenol(46)
C11H10
C7H8O
3- Methylphenol(46)
C7H8O
Milk, homogenized
Morpholine
Naphtha
Natural Gas(37)
C4H9NO
Neon(45)
Ne
Nitrobenzene(46)
C6H5NO2
Nitrogen(45)
N2
Nitromethane(43)
Nonane(23)
CH3NO2
C9H2O
1-Nonene(27)
C9H18
Octane(23)
n-Octane(29)
C8H18
C8H18
1-Octane(27)
C8H16
Oil of Camphor Sassafrassy
Oil, Car(SAE 20a.30)
Oil, Castor
C11H10O10
Oil, Diesel
Oil, Fuel AA gravity
Oil (Lubricating X2000)
Oil (Olive)
Oil (Peanut)
Oil (Sperm)
Oil, 6
2,2-Oxydiethanol
Oxygen(45)
C4H10O3
O2
Pentachloro-ethane(47)
Pentalin(47)
Pentane(36)
C2HCl5
C2HCl5
C5H12
IM-210 Rev. G
(20℃)
0.789
1.33
0.783
0.92
1.327
3.235
0.974
(20℃)
2.28
(20℃)
1.090
1.047
(20℃)
1.034
(20℃)
1.00
0.76
0.316
(-103℃)
1.207
(-246℃)
1.204
(20℃)
0.808
(-199℃)
1.135
0.718
(20℃)
0.736
(20℃)
0.703
0.704
(20℃)
0.723
(20℃)
1.74
0.969
0.80
0.99
0.912
0.936
0.88
1.116
1.155
(-186℃)
1.687
1.687
0.626
1207
985
3960
3231.6
4.0
1290
1400
1070
980
1127
4232.3
4593.2
3510.5
3215.2
3697.5
978
3208.7
1510
1541
(20℃)
1500
(20℃)
1548
1442
1225
753
(-103℃)
595
(-246℃)
1415
(20℃)
962
(-199℃)
1300
1207
4954.1
5055.8
(68℉)
4921.3
(68℉)
5080
4731
4019
2470.5
(-153℉)
1952.1
(-411℉)
4642.4
(68℉)
3156.2
(-328℉)
4265.1
3960
3.7
1207
3960
4.0
1172
1212.5
3845.1
3978
4.14
3.50
1175.5
3856.6
4.10
1390
870
1477
1250
1485
1530
1431
1458
1440
1509
(22℃)
1586
952
(-186℃)
1082
1082
1020
4560.4
2854.3
4845.8
4101
4872
5019.9
4694.9
4783.5
4724.4
4951
(72℉)
5203.4
3123.4
(-303℉)
3549.9
3549.9
3346.5
3.8
3.94
1.396
0.902
(20℃)
0.441
9.705
(68℉)
4.745
0.31
3.335
0.211
2.27
4.29
(40℃)
5.979
(40℃)
46.16
(104℉)
64.334
(104℉)
1.514
16.29
0.217
(-199℃)
0.549
0.99
(20℃)
2.334
(-326℉)
5.907
10.652
(68℉)
0.73
0.737
7.857
0.930
190
0.670
2045.093
7.209
100
1076.365
0.173
1.861
0.363
3.905
4.02
3.8
4.0
4.04
3.6
3.7
2.75
2.4
Page 77 of 85
Sierra Instruction Manual
Innova-Sonic® Model 210 Portable
n-Pentane(47)
Perchlorocyclopentadiene
(47)
Perchloro-ethylene(47)
Perfluoro-1-Hepten(47)
Perfluoro-n-Hexane(47)
Phene(29,40,41)
b-Phenyl acrolein
Phenylamine(41)
Phenyl bromide(46)
C5H12
C5Cl6
(20℃)
0.557
1.718
C2Cl4
C7F14
C6F14
C6H6
C9H8O
C6H5NO2
C6H5Br
1.632
1.67
1.672
0.879
1.112
1.022
1.522
Phenyl chloride
Phenyl iodide(46)
C6H5Cl
C6H5I
1.106
1.823
Phenyl methane(16,52)
C7H8
3-Phenyl propenal
C9H8O
Phthalardione
C8H4O3
Phthalic acid, anhyaride
C3H4O3
Pthalic anhyaride
C8H4O3
Pimelic ketone
C6H10O
Plexiglas, Lucite, Acrylic
Polyterpene Resin
1006
1150
3300.5
3773
0.867
(20℃)
1036
583
508
1306
1554
1639
1170
(20℃)
1273
1114
(20℃)
1328
(20℃)
3399
1912.7
1666.7
4284.8
5098.4
5377.3
3838.6
(68℉)
4176.5
3654.9
(68℉)
4357
(68℉)
1.112
1554
5098.4
1125
(152℃)
1125\
(152℃)
1125
(152℃)
1423
2651
1099.8
(190℃)
1169
(900℃)
1792
(900℃)
985
(900℃)
1740.1
(352℃)
1003
(-45℃)
1904
1222
(20℃)
1170
(20℃)
1174
963
(-13℃)
1280
(2℃)
1222
(20℃)
1058
3691
(306℉)
3691
(306℉)
3691
(306℉)
4668.6
8698
3608.4
(374℉)
3835.3
(1652℉)
5879.3
(1652℉)
3231.6
(1652℉)
5709
(666℉)
3290.6
(-49℉)
6246.7
4009.2
(68℉)
3838.6
(68℉)
3851.7
3159.4
(9℉)
4199
(36℉)
4009.2
(68℉)
3471.1
0.948
0.77
Potassium bromide(42)
KBr
Potassium fluoride(42)
KF
Potassium lodide(42)
KI
Potassium nitrate(48)
KNO3
Propane(2, 13)
(-45℃~130℃)
1,2,3-Propanetriol
1-Propanol(46)
C3H8
2-Propanol(46)
C3H8O
1-Propanone
Propene(17, 18, 35)
C3H60
C3H6
n-Propyl ocetate(22)
C5H10O2
n-Propyl-alcohol
C3H8O
0.78(20℃)
Propylchloride(47)
C3H7Cl
0.892
IM-210 Rev. G
C3H8O3
C3H8O
1.859
(352℃)
0.585
(-45℃)
1.26
0.78
(20℃)
0.785
(20℃)
0.791
0.563
(-13℃)
0.41
4.413
4.65
3.2
4.0
0.711
7.65
3.63
0.693
39.058
7.456
3.6
0.722
0.954
(15℃)
0.644
7.768
10.265
(59℉)
6.929
39,000
419.500
715cp
(900℃)
7.693
(1652℉)
1.19
(327℃)
12.804
(621℉)
4.27
3.2
4.0
0.71
1.03
0.64
1.1
5.7
2.2
4.5
6.32
000757
2.718
29.245
0.399
4.293
2.549
27.427
0.378
4.067
4.63
Page 78 of 85
Sierra Instruction Manual
Innova-Sonic® Model 210 Portable
Propylene(17,18,35)
C3H6
C6H5N
0.563
(-13℃)
0.982
963
(-13℃)
1415
3159.4
(9℉)
4642.4
Pyridine
Refrigerant 11(3,4)
CCl3F
1.49
Refrigerant 12(3)
CCl2F2
Refrigerant 14(14)
CF4
Refrigerant 21(3)
CHCl2F
Refrigerant 22(3)
CHClF2
Refrigerant 113(3)
Refrigerant 115(3)
CCl2F
-CClF2
CClF2
-CClF2
C2ClF5
1.516
(-40℃)
1.75
(-150℃)
1.426
(0℃)
1.491
(-69℃)
1.563
Refrigerant C318(3)
C4F8
Selenium(8)
Se
Silicone(30 cp)
Sodium fluoride(42)
NaF
Sodium nitrate(48)
NaNO3
Sodium nitrite(48)
NaNO2
Solvesso #3
Spirit of wine
Sulfur(7, 8, 10)
C2H6O
S
Sulfuric Acid(1)
Tellurium(7)
H2SO4
Te
1.841
1,1,2,2-Tetrabromo
-ethane(47)
1,1,2,2-Tetrabromo
-ethane(67)
Tetrabromoethane(46)
C2H2Br4
2.966
828.3
(0℃)
774.1
(-40℃)
875.24
(-150℃)
891
(0℃)
893.9
(50℃)
783.7
(0℃)
665.3
(-10℃)
656.4
(-50℃)
574
(-10℃)
1072
(250℃)
990
2082
(1000℃)
1763.3
(336℃)
1876.8
(292℃)
1370
1207
1177
(250℃)
1257.6
991
(450℃)
1027
2717.5
(32℉)
2539.7
(-40℉)
2871.5
(-238℉)
2923.2
(32℉)
2932.7
(122℉)
2571.2
(32℉)
2182.7
(14℉)
2153.5
(-58℉)
1883.2
(14℉)
3517.1
(482℉)
3248
6830.7
(1832℉)
5785.1
(637℉)
6157.5
(558℉)
4494.8
3960
3861.5
(482℉)
4126
3251.3
(842℉)
3369.4
C2H2Cl4
1.595
1147
3763.1
C2H2Cl4
Tetrabromo-ethene(47)
Tetrabromo-Methane
(33, 47)
Tetradecane(46)
C2Cl4
CCl4
1170
(20℃)
1036
926
3838.6
(68℉)
3399
3038.1
Tetraethylene glycol
Tetrafluoro-methane(14)
(Freon 14)
Tetrahydro-1,
4-isoxazine
Toluene(16, 52)
C8H18O5
CF4
1.553
(20℃)
1.632
1.595
(20℃)
0.763
(20℃)
1.123
1.75
(-150℃)
1.000
1331
(20℃)
1586
875.24
(-150℃)
1442
0.867
(20℃)
1328
(20℃)
Refrigerant 114(3)
IM-210 Rev. G
C14H3O
C4H9NO
C7H8
1.455
1.62
(-20℃)
0.993
0.877
1.884
(336℃)
1.805
(292℃)
0.877
0.789
6.32
4.1
0.992
(20℃)
10.673
(68℉)
30
322.8
1.37
(336℃)
14.74
(637℉)
1.396
15.02
11.16
120.081
1.156
(15℃)
1.19
12.438
(59℉)
12.804
0.607
6.531
4366.8
(68℉)
5203.4
3.0
2871.5
6.61
(-238℉)
4731
3.8
2.86
(20℃)
30.773
(68℉)
4357
(68℉)
0.644
6.929
3.56
4.24
6.61
3.97
4.79
3.44
3.73
4.42
3.88
0.38
1.32
0.74
3.7
4.0
-1.13
1.43
0.73
4.27
Page 79 of 85
Sierra Instruction Manual
Innova-Sonic® Model 210 Portable
o-Toluidine(46)
C7H9N
C2H3Cl3
0.999
(20℃)
0.966
(45℃)
0.866
2.89
(20℃)
1.33
p-Toluidine(46)
C7H9N
Toluol
Tribromo-methane
(46, 47)
1,1,1-Trichloro-ethane
(47)
Trichloro-ethane(47)
Trichloro-fluoromethane
(3)(Freon 11)
Trichloro-methane(47)
1,1,2-Trichloro1,2,2-Trifluoro-Etham
Triethyl-amine(33)
Triethylene glycol
1,1,1-Trifluoro-2-Chloro
-2-Bromo-Ethane
1,2,2-Trifluorotrichloro-ethane(Freon 1.13)
d-1,3,3
-Trimethylnorrcamphor
Trinitrotoluene(43)
C7H8
CHBr3
C2HCl3
CCl3F
1464
1.49
CHCl3
CCl2F
-CClF2
C6H15N
C6H14O4
C2HClBrF3
1.489
1.563
CCl2F
-CClF2
C10H16O
1.563
0.947
C7H5(NO2)3
1.64
Turpentine
Unisis 800
Water, distilled(49, 50)
Water, heavy
Water, sea
Wood Alcohol(40, 41)
H2 O
D2 O
Xenon(45)
Xe
m-Xylene(46)
C8H10
o-Xylene(29, 46)
C8H10
p-Xylene(46)
C8H10
Xylene hexafluoride
C8H10
Zinc(7)
Zn
IM-210 Rev. G
CH4O
0.726
1.123
1.869
0.88
0.87
0.996
1.025
0.791
(20℃)
0.868
(15℃)
0.897
(20℃)
1.37
1618
5308.4
4.394
(20℃)
1.863
(50℃)
0.58
0.654
47.279
(68℉)
20.053
(122℉)
6.24
7.037
1480
4855.6
1308
918
4291.3
3011.8
985
3231.6
0.902
(20℃)
9.705
(68℉)
1028
828.3
(0℃)
979
783.7
(0℃)
1123
1608
693
3372.7
2717.5
(32℉)
3211.9
2571.2
(32℉)
3684.4
5275.6
2273.6
0.55
5.918
783.7
(0℃)
1320
2571.2
(32℉)
4330.7
0.22
2.37
1610
(81℃)
1255
1346
1498
1400
1531
1076
5282.2
(178℉)
4117.5
4416
4914.7
4593
5023
3530.2
1.4
15.064
2.4
1.00
10.76
2.4
2.92
1.00
0.695
10.76
7.478
630
(-109℃)
1343
(20℃)
1331.5
2067
(-164℉)
4406.2
(68℉)
4368.4
4.1
0.749
(15℃)
0.903
(20℃)
0.662
8.059
(59℉)
9.716
(68℉)
7.123
1334
(20℃)
879
4376.6
(68℉)
2883.9
0.613
6.595
3298
(450℃)
10820.2
(842℉)
4.2
3.56
3.4
4.47
3.8
3.44
Page 80 of 85
Sierra Instruction Manual
Innova-Sonic® Model 210 Portable
9.13. Sound Speed in Various Pipe Materials
Material
Steel, 1% Carbon, Hardened
Carbon Steel
Mild Steel
Steel, 1% Carbon
302 Stainless Steel
303 Stainless Steel
304 Stainless Steel
304L Stainless Steel
316 Stainless Steel
347 Stainless Steel
Aluminum
Aluminum(rolled)
Copper
Copper (annealed)
Copper (rolled)
CuNi (70%Cu 30%Ni)
CuNi (90%Cu 10%Ni)
Brass (Naval)
Gold (hand-drawn)
Inconel
Iron (electrolytic)
Iron (Armco)
Ductile Iron
Cast Iron
Monel
Nickel
Tin, rolled
Titanium
Tungsten, annealed
Tungsten, drawn
Tungsten, carbide
Zinx, rolled
Glass, Pyrex
Glass, heavy silicate flint
Glass, light borate crown
Nylon
Nylon, 6-6
Polyethylene(HD)
Polyethylene(LD)
PVC, CPVC
Acrylic
Asbestos Cement
Tar Epoxy
Mortar
Rubber
Sound Speed*
Shear Wave(25℃)
m/s
ft/s
3150
10335
3230
10598
3235
10614
3220
10565
3120
10236
3120
10236
3141
10306
3070
10073
3272
10735
3095
10512
3100
10171
3040
9974
2260
7415
2325
7628
2270
7448
2540
8334
2060
6759
2120
6923
1200
3937
3020
9909
3240
10630
3240
10630
3000
9843
2500
8203
2720
8924
2960
9712
1670
5479
3125
10253
2890
9482
2640
8661
3980
13058
2440
8005
3280
10761
2380
7808
2840
9318
1150
3772
1070
3510
540
1060
1430
1772
3477
4690
Sound Speed*
Long Wave(25℃)
Mm/us
In./us
5.88
0.2315
5.89
0.2319
5.89
0.2319
5.690
5.640
5.920
5.790
5.720
5.720
6.32
0.224
0.222
0.233
0.228
0.225
0.225
0.2488
4.66
0.1835
5.03
4.01
4.43
3.24
5.82
5.90
5.90
0.1980
0.1579
0.1744
0.1276
0.2291
0.2323
0.2323
4.55
5.35
5.63
3.32
6.10
5.18
0.1791
0.2106
0.2217
0.1307
0.2402
0.2039
4.17
5.61
0.1642
0.2209
5.26
2.40
0.2071
0.0945
2.31
1.94
2.40
2.73
2.20
2.00
2.50
1.90
0.0909
0.0764
0.0945
0.1075
0.0866
0.0787
0.0984
0.0748
Refer to the sound velocity of other fluids and materials, please contact the factory.
IM-210 Rev. G
Page 81 of 85
Sierra Instruction Manual
Innova-Sonic® Model 210 Portable
10. Appendix
10.1. Install 210 Software on PDA
Note: Read this section before reinstalling the PDA program.
To install communication software (take Palm DeskTop V4.1 as an example) using the HotSync Manager of the
PDA , follow the following steps:
1. Install Palm Desktop to your computer. For details, see the PDA user’s manual.
2. Connect the PDA to your computer with USB cable (or serial port cable) according to the HotSync manager
on the Windows system disk.
Choose Sync Connection Mode of the PDA and Desktop Computer
3.
Run Palm Desktop, and select [View] -> [Quick Install] on the menu or click “Install” icon.
Run sync software
4.
Select the corresponding user on the pop-up window and click [Add] button to install communication
software application INNOVA SONIC PORTABLE.prc and serial number file Dslp.pdb.
IM-210 Rev. G
Page 82 of 85
Sierra Instruction Manual
Innova-Sonic® Model 210 Portable
Select a User Name and Sync File 210.prc and Dctp.pdb
5.
Click the HotSync icon of the PDA or press the HotSync key on the sync jack and install the application
according to the clue.
Press sync button to synchronize
6.
For application icons displayed on the PDA after installation.
IM-210 Rev. G
Page 83 of 85
Sierra Instruction Manual
Innova-Sonic® Model 210 Portable
The Application Icons Displayed on the PDA After Installation
When not using the PDA for a extended period of time, or there is not enough battery charge, please recharge it in
time.
10.2. UFM Data Installation
10.2.1. Hardware requirements
CPU: PII266 or faster,Memory: 64M or more,Display resolution: 1024*768 or higher.
10.2.2. OS Requirements
Windows 98SE 4.10.2222A or later, IE4.01 or later.
10.2.3. Installing Method
Step 1: Open Setup file in the UFM Data directory to enter installation page. Click “Next” to proceed.
Step 2: Select an installation directory. Click “Next” to accept the default directory. If you want to change the
installation directory, click “Browse” to select a directly and click “next” to continue to the next step.
IM-210 Rev. G
Page 84 of 85
Sierra Instruction Manual
Innova-Sonic® Model 210 Portable
Step 3: Select a program folder, then click “Next” to enter next step.
Step 4: Click “Finish” to finish installation.
IM-210 Rev. G
Page 85 of 85