1
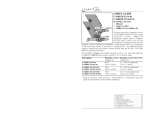
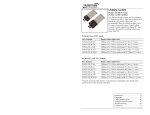
Ethernet™ 10Mbps/100Mbps
PCI Network Interface Cards
EFA0201, EFA0202, EFA0203
USER’S GUIDE
Installation Notes.......................................................................2
EFA020x PCI Cards ....................................................................3
Microsoft Windows 95 - New Installation ................................4
Microsoft Windows 98 - New Installation ................................5
Microsoft Windows NT 4.0 - New Installation..........................6
Novell Netware 4.X - New Installation .....................................7
Microsoft Windows 95 - Software Upgrade .............................8
Microsoft Windows 98 - Software Upgrade .............................8
Microsoft Windows NT 4.0 - Software Upgrade ......................9
Novell Netware 4.X - Software Upgrade/Adding Network Card to
Existing system. ..............................................................10
Microsoft Windows NT 4.0 - Permanet Server .........................11
Compliance Information ..........................................................12
INSTALLATION NOTES
Adapter Hardware Installation
Follow Instructions outlined in the indicated personal computer user’s guide for installing PCI Bus add-in cards
into a PCI slot that supports bus mastering.
CAUTION: Heed the warnings in the PC User's Manual in regard to proper protection against static discharge.
Always hold the adapter by the metal bracket. Always be properly grounded when handling an adapter. Since
LANart adapters are designed with CMOS ICs and are particularly sensitive to static discharge, failure to observe
this caution could result in damage to the adapter and subsequent failure.
Once the adapter is installed in the PC, power the PC.
Adapter Software Installation
LANart EFA020x series PCI Fiber-Optic Adapters are shipped with three (3) driver disks, which contain software
drivers for various network operating systems, diagnostic utilities, and electronic format documentation.
Follow the directions in this user’s guide (also provided on Disk 3) to install the indicated software driver.
Technical Support
EFA020x PCI CARDS
LANart EFA020x series PCI Fiber-Optic Adapters, EFA0201. EFA0202, and EFA0203, are 32-bit bus-mastering PCI
cards that support both half-duplex and full-duplex operation.
LANart EFA020x adapters comply with PCI Specifications, revision 2.1, and with both IEEE 802.3 10BASE-FL and
802.3u 100BASE-FX standards
EFA0201
Provides one (1) connection to 10BASE-FL fiber cable.
EFA0202
Provides one (1) connection to 100BASE-FX fiber
cable.
EFA0203
Provides one (1) connection to 10BASE-FL fiber cable
AND one (1) connection to 100BASE-FX fiber cable.
NOTE: Only one EFA0203 connection, 100BASE-FX
OR 10BASE-FL, is operational at any one time. Moving
cable between the 10BASE-FL connection and the
100BASE-FX connection selects a change in speed. If
cable is inatalled at BOTH connections on the
EFA0203, then, as long as the Fast Ethernet link is
available, the LANart NIC operates at 100Mbps and
the 10BASE-FL link is inactive. Should the 100Mbps
network become unavailable - due to a fault at any
point on the network - the LANart NIC seamlessly
switches activity to the 10BASE-FL port and continuously monitors the 100BASE-FX network for a restored
link. When the Fast Ethernet link is restored, the
LANart NIC seamlessly switches activity back to the
100BASE-FX port.
LED INDICATORS
The two LEDs closest to each connector shows link status and activity for that port. Collision, full-duplex, and
10Mbps/100Mbps selection LEDs apply to the active network port.
LNK
(L(i)nk integrity) Steady green LED indicates link is able to pass data.
Dark LED indicates link is unavailable. To correct, verify that the RX port is cabled to
the TX port at the far end of the cable, and vice versa. Also verify that the equipment is
functioning at the far end and that the cabling does not exceed IEEE 802.3(u) recommended lengths.
ACT
(Act(ivity)) Flashing yellow LED indicates link is passing traffic
Dark LED indicates link is idle. NOTE: If link is unavailable, indicator is dark.
FD
(F(ull) D(uplex)) Steady green LED indicates full duplex mode.
Dark LED indicates half duplex mode.
COL
(COL(lisiion)) Flashing yellow LED indicates network activity.
100
(Port selectiion) Steady green LED indicates that EFA0203 100BASE-FX port has been
(automatically) selected as the active link.
Dark LED indicates that EFA0203 10BASE-FL port has been (automatically) selected as
the active link.
MICROSOFT WINDOWS 95 - NEW INSTALLATION
1.
Copy the appropriate device install script
For NDIS3 MAC driver type
copy
A:\Win95\Nids3\Mac\Netamd.inf
C:\Windows\Inf
For NDIS4 MINIPORT driver type
copy
A:\Win95\Nids4\Mini\Netamd.inf
C:\Windows\Inf
2.
Shutdown Windows 95 and power-off the machine.
3.
Install the LANart EFA020X Adapter card in accordance with your personal computer user's manual. Again, follow all handling procedures to avoid electro-static discharges.
4.
Turn the computer on to start Windows 95
5.
If your computer is Plug and Play compatible, Windows 95 will recognize that new hardware has
been installed, and will attempt to configure itself. Follow the steps below. Other wise, Skip to
step 12
6.
Insert the LANart Driver Disk 1 into the floppy disk drive. When prompted for the LANart Win 95
Disk
7.
Type the following path
For NDIS3 MAC driver type A:\Win95\Nids3\Mac
For NDIS4 MINIPORT driver type A:\Win95\Nids4\Mini
9.
When prompted insert the Windows 95 CD-ROM
10.
Click "Yes"
11.
Remove the LANart driver disk, and power up the computer, and start Windows 95. When system
comes up go to step 19
12.
If your computer is not Plug and Play compatible, open the control panel by clicking "Start," then
"Settings," then "Control Panel."
13.
Open the Network control panel by double clicking the "Network" icon.
14.
Click "Add" inside the Network control panel, then select "Adapter", and click "Add" inside the
Select Network Component Type window. Select "Have Disk."
15
For the NDIS3 MAC driver, type at the prompt:
"A:\Win95\Ndis3\Mac"
and click "OK."
For the NDIS4 MINIPORT driver, type at the prompt:
"A:\Win95\Ndis4\Mini"
and click "OK."
16.
Select "OK" to exit the Network control panel.
17.
You will be prompted to insert your original Windows 95 CD. Insert the CD, and click "OK" to
begin copying files.
18.
Restart the computer to and follow steps below.
19.
When the system comes up open the control panel by clicking "Start," then "Settings," then
"Control Panel."
20.
Double Click "system"
21.
Click "Device Manager"
22.
Double Click "Network Adapter"
23.
Highlight "LANart …." And , Click on "Properties"
24.
Click on Advance
25.
Chose the properties as required by Network Administrator
26.
Restart the computer. Your LANart adapter is now configured. To access your network, protocols
will need to be configured. Please see your network administrator for details.
MICROSOFT WINDOWS 98 - NEW INSTALLATION
1.
Copy the appropriate device install script
For NDIS3 MAC driver type
copy
A:\Win98\Nids3\Mac\Netamd.inf
C:\Windows\Inf
For NDIS4 MINIPORT driver type
copy
A:\Win98\Nids4\Mini\Netamd.inf
C:\Windows\Inf
2.
Shutdown Windows 98 and power-off the machine.
3.
Install the LANart EFA020X Adapter card in accordance with your personal computer user's manual. Again, follow all handling procedures to avoid electro-static discharges.
4.
Turn the computer on to start Windows 98
5.
If your computer is Plug and Play compatible, Windows 98 will recognize that new hardware has
been installed, and will attempt to configure itself. Follow the steps below. Other wise, Skip to
step 12
6.
Insert the LANart Driver Disk 1 into the floppy disk drive. When prompted for the LANart Win 98
Disk
7.
Type the following path
8.
For NDIS3 MAC driver type A:\Win98\Nids3\Mac
For NDIS4 MINIPORT driver type A:\Win98\Nids4\Mini
9.
When prompted insert the Windows 98 CD-ROM
10.
Click "Yes"
11.
Remove the LANart driver disk, and power up the computer, and start Windows 98. When system
comes up go to step 19
12.
If your computer is not Plug and Play compatible, open the control panel by clicking "Start," then
"Settings," then "Control Panel."
13.
Open the Network control panel by double clicking the "Network" icon.
14.
Click "Add" inside the Network control panel, then select "Adapter", and click "Add" inside the
Select Network Component Type window. Select "Have Disk."
15.
For the NDIS3 MAC driver, type at the prompt:
"A:\Win95\Ndis3\Mac" and click "OK."
For the NDIS4 MINIPORT driver, type at the prompt:
"A:\Win95\Ndis4\Mini" and click "OK."
16.
Select "OK" to exit the Network control panel.
17.
You will be prompted to insert your original Windows 95 CD. Insert the CD, and click "OK" to
begin copying files.
18.
Restart the computer to and follow steps below.
19.
When the system comes up open the control panel by clicking "Start," then "Settings," then
"Control Panel."
20.
Double Click "system"
21.
Click "Device Manager"
22.
Double Click "Network Adapter"
23.
Highlight "LANart …." And , Click on "Properties"
24.
Click on Advance
25.
Chose the properties as required by the Network Administrator
26.
Restart the computer. Your LANart adapter is now configured. To access your network, protocols
may need to be configured. Please see your network administrator for details.
3.5. MICROSOFT WINDOWS NT 4.0 - NEW INSTALLATION
1.
Install the LANart EFA020X Adapter card in accordance with your personal computer user's manual. Again, follow all handling procedures to avoid electro-static discharges.
2.
Start Windows NT, and open the control panel by clicking "Start," then "Settings," then "Control
Panel."
3.
Double Click on "Network."
4.
Click on the Adapters tab.
5.
Click "Add" inside the Network control panel, then select "Adapter."
6.
Select "Have Disk."
7.
Insert the LANart Driver Disk 2 into the floppy drive
8.
For the NDIS3 MAC driver, type at the prompt:
"A:\Winnt\Ndis3\Mac" and click "OK."
For the NDIS4 MINIPORT driver, type at the prompt:
"A:\Winnt\Ndis3\Mini" and click "OK."
9.
Choose the appropriate LANart EFA020X Adapter and Click on "OK"
10.
Click on "Properties" - Choose the appropriate properties as required by the Network Administrator
for the driver to work properly.
Click "Close" - Protocols may be needed to be configured. Please see your Network
Administrator for details
11.
Select "OK" to exit the Network control panel, and Select "OK" when prompted to restart your
machine. Remove the LANart Driver Disk.
12.
If this is your first adapter installation, you will be prompted to insert your original Windows NT
CD. Insert the CD, and click "OK" to begin copying files.
13.
Restart the computer. Your LANart adapter is now configured. To access your network, protocols
may need to be configured. Please see your network administrator for details.
NOVELL NETWARE 4.X - NEW INSTALLATION
1.
Power off the machine.
2.
Install the LANart EFA020X Adapter card in accordance with your personal computer user's manual. Again, follow all handling procedures to avoid electro-static discharges.
3.
Install the server software
4.
When the NIC selection menu appears, place the appropriate diskette (Disk 3)into the floppy drive
5.
Press Insert (Ins)
6.
Press [F3] to change the path.
7.
At the A: prompt, type
\Novell\Nwsrvr41
MICROSOFT WINDOWS 95 - SOFTWARE UPGRADE
1.
Power up the computer, and start Windows 95.
2.
The following instruction is to update the driver for LANart network card.
3.
Update the driver for LANart EFA020X - open the control panel by clicking "Start," then "Settings,"
then "Control Panel."
4.
Double Click "system"
5.
Click "Device Manager"
6.
Double Click "Network Adapter"
7.
Highlight "LANart…." And , Click on "Properties"
8.
Click on "Driver" and Click on "Update Driver"
9.
Click on "Next" and choose - "No, Select Driver from List."
10.
Click "Next" and Highlight LANart EFA020X Adapter
11.
Click "Have Disk"
12.
For the NDIS3 MAC driver, type at the prompt:
"A:\Win95\Ndis3\Mac" and click "OK."
For the NDIS4 MINIPORT driver, type at the prompt:
"A:\Win95\Ndis4\Mini" and click "OK."
13.
Click "OK"
14.
Click "Next" and Click "Finish"
15.
Click "Yes" to restart the computer. And, when the system comes up open the control panel by
clicking "Start," then "Settings," then "Control Panel."
16.
Double Click "system"
17.
Click "Device Manager"
18.
Double Click "Network Adapter"
19.
Highlight "LANart …." And , Click on "Properties"
20.
Click on Advance
21.
Chose the properties as required by the Network Administrator
22.
Restart the computer. Your LANart adapter is now configured. To access your network, protocols
will need to be configured. Please see your network administrator for details.
MICROSOFT WINDOWS 98 - SOFTWARE UPGRADE
1.
Power up the computer, and start Windows 98.
2.
The following instruction is to update the driver for LANart network card.
3.
Update the driver for LANart EFA020X - open the control panel by clicking "Start," then "Settings,"
then "Control Panel."
4.
Double Click "system"
5.
Click "Device Manager"
6.
Double Click "Network Adapter"
7.
Highlight "LANart…." And , Click on "Properties"
8.
Click on "Driver" and Click on "Update Driver"
9.
Click on "Next" and choose - "No, Select Driver from List."
10.
Click "Next" and Highlight LANart EFA020X Adapter
11.
Click "Have Disk"
12.
For the NDIS3 MAC driver, type at the prompt:
"A:\Win98\Ndis3\Mac" and click "OK."
For the NDIS4 MINIPORT driver, type at the prompt:
"A:\Win98\Ndis4\Mini" and click "OK."
13.
Click "OK"
14.
Click "Next" and Click "Finish"
15.
Click "Yes" to restart the computer. And, when the system comes up open the control panel by
clicking "Start," then "Settings," then "Control Panel."
16.
Double Click "system"
17.
Click "Device Manager"
18.
Double Click "Network Adapter"
19.
Highlight "LANart …." And , Click on "Properties"
20.
Click on Advance
21.
Chose the properties as required by the Network Administrator
22.
Restart the computer. Your LANart adapter is now configured. To access your network, protocols
will need to be configured. Please see your network administrator for details.
MICROSOFT WINDOWS NT 4.0 - SOFTWARE UPGRADE
1.
Start Windows NT, and open the control panel by clicking "Start," then "Settings,"
then "Control Panel."
2.
Double Click on "Network."
3.
Click on the Adapters tab.
4.
Highlight the existing LANart adapter, and click "Remove." Close the control panel to effect the
change.
5.
Re-open the Network control panel, and click "Add," then select "Adapters."
6.
Select "Have Disk."
7.
Insert the LANart Driver Disk 2 into the floppy drive
8.
For the NDIS3 MAC driver, type at the prompt:
"A:\Winnt\Ndis3\Mac" and click "OK."
For the NDIS4 MINIPORT driver, type at the prompt:
"A:\Winnt\Ndis3\Mini" and click "OK."
9.
Choose the appropriate LANart EFA020X Adapter and Click on "OK"
10.
Click on "Properties" - Choose the appropriate properties as required by Network Administrator
for the driver to work properly.
11.
Select "OK" to exit the Network control panel, and Select "OK" when prompted to restart your
machine. Remove the LANart Driver Disk.
12.
If this is your first adapter installation, you will be prompted to insert your original Windows NT
CD. Insert the CD, and click "OK" to begin copying files.
Click "Close"
13.
Protocols may be needed to be configured. Please see your Network Administrator for details.
14.
Restart the computer to begin using your LANart adapter.
NOVELL NETWARE 4.X - SOFTWARE UPGRADE/ADDING NETWORK
CARD TO EXISTING SYSTEM.
1.
Shutdown Netware Server and power-off the machine.
2.
Install the LANart EFA020X Adapter card in accordance with your personal computer user's manual. Again, follow all handling procedures to avoid electro-static discharges.
3.
On the server’s prompt type: LOAD INSTALL
4.
Choose - "Driver Option"
5.
Select - Configure Network driver"
6.
Select "Load a Driver"
7.
Press Insert (Ins)
8.
Press <F3>
9.
Insert LANart Disk 3 in the floppy drive
10.
Type at the A prompt - \Novell\nwsrvr41
11.
Choose the appropriate LANart EFA020X driver and proceed to configure the adapter
12.
Save and Load the driver
13.
See your Network Administrator for the proper network numbers and continue with the installation.
MICROSOFT WINDOWS NT 4.0 - PERMANET SERVER
The PermaNet Server feature allows users to configure a pair of LANart PCI device based NIC as primary and
secondary, and provides the ability to automatically fail-over from primary adapter to the secondary adapter
should the link status of the primary go down
1.
Shutdown Windows NT and power-off the machine.
2.
Install the 2 identical LANart EFA020X Adapter card in accordance with your personal computer
user's manual. Again, follow all handling procedures to avoid electro-static discharges.
3.
Start Windows NT, and open the control panel by clicking "Start," then "Settings," then "Control
Panel."
4.
Double click on "Network."
5.
Click on the Adapters tab.
6.
Click "Add" inside the Network control panel, then select "Adapter", and click "Add" inside the
Select Network Component Type window. Select "Have Disk."
7.
Insert the LANart Driver Disk 2 into the floppy drive
8.
For the Permanet Server driver, type at the prompt:
"A:\Winnt\permanet" and click "OK."
9.
Select "OK."
10.
Click on "Properties." For each of the network cards and select properties as required by the
Network Administrator
Click on "Grouping."
Select the appropriate adapter as Primary or Secondary.
Click "OK"
Do same for the next adapter.
Click "Close"
11.
Select "OK" to exit the Network control panel, and Select "OK" when prompted to restart your
machine. Remove the LANart Driver Disk.
12.
If this is your first adapter installation, you will be prompted to insert your original Windows NT
CD. Insert the CD, and click "OK" to begin copying files.
13.
Restart the computer. Your LANart adapter is now configured. To access your network, protocols
may need to be configured. Please see your network administrator for details.
DECLARATION OF CONFORMITY
Name of Mfg:
LANart Corporation
6475 City West Parkway, Minneapolis MN 55344 USA
Model:
EFA020x Series PCI Cards
Part Number:
EFA0201, EFA0202, EFA0203
Regulation:
EMC Directive 89/336/EEC
Purpose: To declare that the EFA0201, EFA0202 and EFA0203 to which this
declaration refers is in conformity with the following standards.
EMC-CISPR 22: 1985 Class A; EN 55022: 1988 Class A; EN 50082-1:1992;
EN 60950 A4:1997; IEC 801.2, IEC 801.3, and IEC 801.4; IEC 950
I, the undersigned, hereby declare that the equipment specified above conforms to the
above Directive(s) and Standard(s).
_August 3, 1999_____
Stephen Anderson, Vice-President of Engineering
Date
COMPLIANCE INFORMATION
UL Listed
C-UL Listed (Canada)
CISPR/EN55022 Class A
FCC Regulations
This equipment has been tested and found to comply with the limits for a class A digital device, pursuant to part 15 of the FCC
rules. These limits are designed to provide reasonable protection against harmful interference when the equipment is operated
in a commercial environment. This equipment generates, uses, and can radiate radio frequency energy and, if not installed and
used in accordance with the instruction manual, may cause harmful interference to radio communications. Operation of this
equipment in a residential area is likely to cause harmful interference, in which case the user will be required to correct the
interference at the user’s own expense.
Canadian Regulations
This digital apparatus does not exceed the Class A limits for radio noise for digital apparatus set out on the radio interference regulations of the Canadian Department of Communications.
Le présent appareil numérique n'émet pas de bruits radioélectriques dépassant les limites applicables aux appareils numériques de
la class A prescrites dans le Règlement sur le brouillage radioélectrique édicté par le ministère des Communications du Canada.
European Regulations
Warning
This is a Class A product. In a domestic environment this product may cause radio interference in which case the user may be
required to take adequate measures.
Achtung !
Dieses ist ein Gerät der Funkstörgrenzwertklasse A. In Wohnbereichen können bei Betrieb dieses Gerätes Rundfunkstörungen
auftreten, in weichen Fällen der Benutzer für entsprechende Gegenmaßnahmen werantwortlich ist.
Attention !
Ceci est un produit de Classe A. Dans un environment domestique, ce produit risque de créer des interférences radioélectriques,
il appartiendra alors à l’utilsateur de prende les measures spécifiques appropriées
VCCI Class 1 Compliance
This equipment is in the 1st Class category (information equipment to be used in commercial and/or industrial areas) and conforms to the standards set by the Voluntary Control Council For Interference by Data Processing Equipment and Electronic Office
Machines aimed at preventing radio interference in commercial and/or industrial areas. When used in a residential area or in an
adjacent area thereto, interference may be caused to radio and TV receivers, etc. Read the instructions for correct handling.
Trademark Notice
All registered trademarks and trademarks are the property of their respective owners.
Copyright Restrictions
© 1999 TRANSITION Networks.
All rights reserved. No part of this work may be reproduced or used in any form or by any means – graphic, electronic, or
mechanical – without written permission from TRANSITION Networks.
Printed in the U.S.A.
33123.A