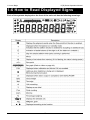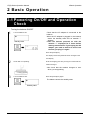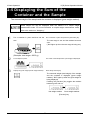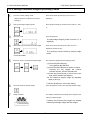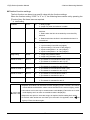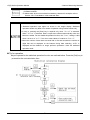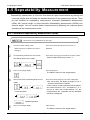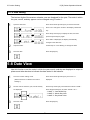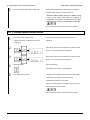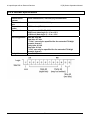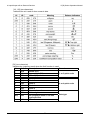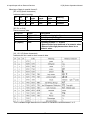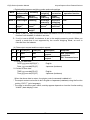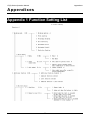
1
380002M 21 Semi-micro and Analytical Balance LF Series Operation Manual ● To ensure safe and proper use of the balance, please read this manual carefully. ● After reading this manual, store it in a safe place near the balance, so you can review it as needed. SHINKO DENSHI CO., LTD Preface Thank you very much for choosing the LF series balance. This balance has an automatic calibration (span adjustment) function, which can be easily used at any time at the press of a button. The balance also has a function that alerts the user of when it is time to calibrate the balance depending on the surrounding environment. This enables you to calibrate the balance at the right time depending on your usage. In addition, the balance comes standard with ISO/GLP/GMP compliant output functions, a calendar and clock function, and various application measurement functions, such as the counting mode, percentage weighing mode and addition mode. The balance is easy to use, with a windshield that can be opened from the opposite side (the right door with the left knob and vice versa) and a weighing chamber that can be easily removed along with the windshield doors and the bottom plate for easy cleaning. -i- Instructions ● This manual is copyrighted by SHINKO DENSHI CO., LTD. and may not be reproduced in part or in whole without permission. ● Please understand that part of this manual may not agree with the product due to modifications or other such changes to it. ● Descriptions in this manual are subject to change without notice. ● This manual is created with all possible care. However, in the unlikely event of an incorrect description or any other errors, please tell us. ● If any pages are bound in incorrect order or are missing, we will replace the manual. Please contact the retailer from whom the balance was purchased. ● Trouble with the equipment and the system’s main unit will be serviced in accordance with their maintenance contracts. However, please be aware that we will not be held responsible for any indirectly related trouble that may occur such as operations being stopped due to the trouble of the main unit. ● is the registered trademark of SHINKO DENSHI CO., LTD. The company names and product names described in this manual are either their trademarks or registered trademarks. - ii - Important Notice • You must be aware that the balance can potentially be dangerous. Be sure to follow this manual when you install and operate the balance, and perform maintenance and inspection. • SHINKO DENSHI CO., LTD. takes no responsibility for any injury or damage caused because you did not follow this manual or the balance was incorrectly used or modified without permission. In today’s industrial equipment industry, potential risks are increasing due to new materials, process methods, and faster machines. It is impossible to predict all situations that pose such threats. In addition, there are too many “do’s” and “do not’s,” to be able to cover them all in this manual. If the operation manual does not explicitly say that something is OK to do, please interpret it as a “do not.” When installing or operating the balance, or performing maintenance or inspections on it, give due consideration to safety measures in addition to the instructions written in this manual and those written on the balance’s main unit. This manual is copyrighted by SHINKO DENSHI CO., LTD. All rights reserved. Do not reproduce or disclose drawings and technical documents without prior written consent from SHINKO DENSHI CO., LTD. If you have any questions about this manual or you need more detailed information, please have the model name (type) and the manufacture number ready and contact the retailer from whom the balance was purchased. - iii - How to Use This Manual Symbols in this manual Understand the meanings of the following symbols to follow the instructions in this manual: Symbol Meaning This symbol indicates a dangerous situation that may cause death or serious injury if not avoided. This symbol indicates a situation that may cause damage to the system or equipment, or data corruption, deletion, or overwriting if not avoided. This symbol is used for information to which particular attention is required, or to highlight information. This symbol is used for information such as operational tips. This symbol indicates a prohibited action that must not be done. This symbol indicates a mandatory action that must be executed without fail. - iv - How to Read This Manual This manual comprises the following chapters: Chapter 1 How to Begin Chapter 2 Basic Operation Chapter 3 Various Measuring Methods Chapter 4 Adjusting the Balance Chapter 5 Setting the Functions Chapter 6 Input/Output to/from External Devices Chapter 7 Troubleshooting Appendixes This chapter gives introductory information such as how to assemble and install the balance, and how to turn the power on and off. Be sure to read this chapter the first time you use the balance. This chapter gives basic instructions on how to weigh objects. The procedures for setting the functions used to set various functions are also described. This chapter describes how to use various measuring methods of the balance, such as counting and percentage weighing. The balance needs to be adjusted depending on where and when it is used. This chapter describes how to calibrate and test the balance. This chapter describes how to set the functions of the balance, such as setting units and readability. This chapter describes printing to printers and how to input and output to and from RS-232C devices in detail. This chapter describes how to troubleshoot problems occurring with the balance, including actions required for errors, and remedies to problems. The appendixes contain required data including the specifications of the balance. Notational Conventions In this manual, the following notation is used. The balance Refers to an LF series product. [On/Off] key The names of the operation keys provided on the front of the main unit are enclosed in brackets [ ]. “Func” Messages shown on the display are enclosed in quotation marks “ ”. Press the key. Refers to pressing a key once. Press and hold the key. Refers to pressing and holding down the operation key until the desired display is obtained. -v- Contents Preface ....................................................................................................................................... i Important Notice.........................................................................................................................iii How to Use This Manual ............................................................................................................iv Contents .......................................................................................................................... vi 1 How to Begin .................................................................................................................1 1-1 Wa r n i n g s r e g a r d i n g U s e .............................................................................................. 1 1-2 For More Precise Measurements......................................................................................... 4 1-2-1 Precautions on the Measuring Room ........................................................................... 4 1-2-2 Precautions on the Samples......................................................................................... 5 1-3 Checking Supplied Items ..................................................................................................... 6 1-4 Names and Functions of Component Parts ......................................................................... 7 1-5 Functions of Operation Keys .............................................................................................. 8 1-5-1 Operation keys ............................................................................................................. 8 1-5-2 Operation key explanations .......................................................................................... 8 1-6 How to Read Displayed Signs ........................................................................................... 10 1-7 Assembling and Installing the Balance............................................................................... 12 1-8 Operating the Windshield Doors ........................................................................................ 13 1-8-1 Opening and closing the windshield doors ................................................................. 13 2 Basic Operation ...........................................................................................................15 2-1 P o we r i n g O n / O ff a n d O p e r a t i o n C h e c k .............................................................. 15 2-2 Zero-point Adjustment........................................................................................................ 17 2-3 Weighing a Sample in a Container (Tare) ......................................................................... 18 2-4 Weighing an Added Sample............................................................................................... 19 2-5 Displaying the Sum of the Container and the Sample ...................................................... 20 2-6 Basics of Function Settings................................................................................................ 21 2-7 Underfloor Measurement ................................................................................................... 22 3 Various Measuring Methods ........................................................................................23 3-1 Simple Weight Measurement ............................................................................................. 23 3-2 Counting the Number of Parts ........................................................................................... 24 3-2-1 Displaying the average sample weight ....................................................................... 25 3-3 Measuring Percentage....................................................................................................... 27 3-3-1 Setting a reference weight by weighing an actual sample .......................................... 27 3-3-2 Setting a reference weight by entering a value........................................................... 28 - vi - 3-4 Obtaining Weight Multiplied by a Coefficient...................................................................... 30 3-5 Measuring Specific Gravity ................................................................................................ 32 3-5-1 Specific gravity measurement procedure.................................................................... 32 3-5-2 Preparing measurement tools..................................................................................... 32 3-5-3 Measurement ............................................................................................................. 33 3-5-4 When using a liquid other than water ......................................................................... 35 3-5-5 Printing the specific gravity data ................................................................................. 36 3-6 Adding Multiple Measurements .......................................................................................... 37 3-6-1 Addition function settings............................................................................................ 37 3-6-2 Weighing with the addition function ............................................................................ 38 3-7 Judging between Too Heavy and Too Light (Limit Function) .............................................. 40 3-7-1 Limit function settings ................................................................................................. 44 3-7-2 Judgment using definite values .................................................................................. 45 3-7-3 Judgment using deviation values ............................................................................... 47 3-8 Statistical Operation Function ............................................................................................ 49 3-8-1 Calculation items ........................................................................................................ 49 3-8-2 Operation method....................................................................................................... 50 3-8-3 Output of statistical operation results.......................................................................... 52 3-8-4 Cancellation of last collected data .............................................................................. 53 3-8-5 Clearing statistical operation results ........................................................................... 54 4 Adjusting the Balance ..................................................................................................55 4-1 Adjusting (Calibrating) the Balance.................................................................................... 55 4-1-1 Span adjustment with internal weight ......................................................................... 55 4-1-2 Span test with internal weight ..................................................................................... 56 4-1-3 Span adjustment with external weight ........................................................................ 57 4-1-4 Span test with external weight .................................................................................... 58 4-2 Calibrating the Internal Weight........................................................................................... 59 4-3 Entering the Instrumental Error of a Weight for Use .......................................................... 62 4-4 Se-CAL (full automatic calibration function) ....................................................................... 63 4-5 Repeatability Measurement ............................................................................................... 64 4-5-1 Automatic Repeatability Measurement (ARM) ............................................................ 64 4-5-2 Semi-Automatic Repeatability Measurement (SARM) ................................................ 65 4-6 Easy RES Function (single-touch response time change) ................................................. 67 5 Setting the Functions...................................................................................................69 - vii - 5-1 Select and Switch of Weighing Units ................................................................................. 69 5-2 Readability Setting............................................................................................................. 70 5-3 Automatic Switching of Scale Intervals .............................................................................. 71 5-4 Turning ON/OFF the Automatic Switching of Scale Intervals with a Single Touch ............. 72 5-5 Saving the Container (Tare) Weight ................................................................................... 73 5-6 Power Setting .................................................................................................................... 74 5-6-1 Automatic backlight-off function .................................................................................. 74 5-7 Date and Time Setting ....................................................................................................... 75 5-7-1 Time setting ................................................................................................................ 75 5-7-2 Date setting ................................................................................................................ 76 5-8 Date View .......................................................................................................................... 76 5-9 Time Output ....................................................................................................................... 77 5-10 Interval Output Function................................................................................................... 78 5-11 ID No. Setting................................................................................................................... 80 5-12 Improving the Stability of the Balance .............................................................................. 81 5-13 α-Check(self-diagnosis function) ..................................................................................... 83 5-13-1 Display test............................................................................................................... 83 5-13-2 Key test .................................................................................................................... 84 5-13-3 Motor test ................................................................................................................. 85 5-13-4 Span adjustment history ........................................................................................... 86 5-13-5 Automatic Repeatability Measurement (ARM) .......................................................... 87 5-13-6 Semi-Automatic Repeatability Measurement (SARM) .............................................. 88 6 Input/Output to/from External Devices ........................................................................89 6-1 Output to Printers............................................................................................................... 89 6-1-1 Connecting a printer ................................................................................................... 89 6-1-2 Printing span adjustment and span test results .......................................................... 89 6-1-3 Printing measurement results ..................................................................................... 90 6-2 Connection of interface and the external equipment.......................................................... 91 6-2-1 Connector pin numbers and functions of the D-SUB9P.............................................. 91 6-2-2 Examples of connection with a PC ............................................................................. 92 6-2-3 Connecting a type-B USB connector to a PC ............................................................. 93 6-2-4 Interface specifications ............................................................................................... 94 6-3 Communication Data and Commands ............................................................................... 95 6-4 Output Data ....................................................................................................................... 95 - viii - 6-4-1 Data format................................................................................................................. 96 6-4-2 Meanings of data ........................................................................................................ 97 6-4-3 Communication format examples ............................................................................. 100 6-4-4 Special formats ......................................................................................................... 100 6-5 Input Commands ............................................................................................................. 104 6-5-1 Procedure for transmission....................................................................................... 104 6-5-2 Input command examples ........................................................................................ 104 6-5-3 Command format...................................................................................................... 105 6-5-4 Format of each command......................................................................................... 105 6-6 Response..........................................................................................................................110 7 Troubleshooting ......................................................................................................... 111 7-1 Error Messages ................................................................................................................111 7-2 Troubleshooting ................................................................................................................114 7-3 Initializing ..........................................................................................................................117 7-4 Maintenance .....................................................................................................................118 7-4-1 For heavy dirt ............................................................................................................118 7-4-2 How to clean the balance ..........................................................................................119 Appendixes ...................................................................................................................121 Appendix 1 Function Setting List............................................................................................ 121 Appendix 2 Measurement Mode List...................................................................................... 130 Appendix 3 ISO/GLP/GMP Compliant Printing ...................................................................... 131 Appendix 4 Specifications ...................................................................................................... 136 Appendix 4-1 Basic Specifications ..................................................................................... 136 Appendix 4-2 Functional Specifications ............................................................................. 137 Appendix 4-3 Weighing Capacity and Readability by Unit ................................................. 138 Appendix 4-4 Unit Conversion Table.................................................................................. 139 Appendix 4-5 Outline Drawings ......................................................................................... 140 Index of Terms ..............................................................................................................141 - ix - (Memo) -x- LF Series Operation Manual 1 How to Begin 1 How to Begin 1-1 Warnings regarding Use Do not disassemble or modify the balance. Doing so could result in injury, electric shock, fire and other accidents or failures. For inspection and adjustment, contact the retailer from whom the balance was purchased. Do not move the balance with a sample placed on the weighing pan. The sample could fall from the weighing pan and break or injure someone. Do not plug the AC adapter cord or the communication cable into the balance when the connector or jack is wet. Doing so could result in electric shock, short circuit or failure. Do not touch the AC adapter with wet hands. Doing so could result in electric shock, causing disability or death. Do not route the AC cord across passages. The cord could be tripped on by a passerby and the balance could fall down and break or injure someone. Do not use the balance on an unstable platform or in a place subject to vibration. A sample could fall from the weighing pan and break or injure someone. In addition, the balance could fail to accurately weigh samples. Only use the AC adapter specifically designed for the balance. Using any AC adapter other than the specified adapter could cause overheating, fire or failure. Only use the specified power supply. Using any power supply other than that specified could cause overheating, fire or failure. -1- 1 How to Begin LF(R) Series Operation Manual Do not apply excessive force to or impact the balance. Doing so could damage or result in failure of the balance. Carefully place samples on the balance. Do not allow the balance to remain in an overloaded state (o-Err indication). Doing so could damage or result in failure of the balance. Remove the sample immediately. Do not use volatile solvents. The main unit could deform. Wipe the main unit using dry cloth or a cloth moistened with a small amount of neutral detergent. Do not install the balance in a place where it is directly exposed to airflow from air-conditioning or heating equipment. Due to changes in the ambient temperature, the balance could fail to accurately weigh samples. Do not install the balance in a place exposed to direct sunlight. The internal temperature of the balance could rise and the balance could fail to accurately weigh samples. Do not install the balance where the floor is soft. When a sample is placed on the balance, the balance could slant and fail to accurately weigh samples. Do not install the balance in a place where the ambient temperature or humidity change significantly. The balance could fail to accurately weigh samples. Use the balance at an ambient temperature of 10 to 30°C and a relative humidity of 80% or lower. Do not install the balance on an unstable platform or in a place subject to vibration. The balance could fail to accurately weigh samples. In addition, a sample could fall off the weighing pan and injure someone. Do not install the balance on an inclined surface. The balance could fail to accurately weigh samples due to errors caused by the inclination. Install the balance on a level surface. -2- LF Series Operation Manual 1 How to Begin After turning the balance on, leave it unused for more than 5 hours to acclimate it to the surrounding environment. Failure to do so could result in measurement errors. To ensure accurate measurements, be sure to acclimate the balance to the environment with the power on. Adjust (calibrate) the balance when it is installed or relocated. Failure to do so could result in measurement errors. To ensure accurate measurements, be sure to adjust (calibrate) the balance. Unplug the AC adapter from the receptacle when the balance is not going to be used for a long period of time. Unplug the balance from the receptacle to save energy and prevent degradation. -3- 1 How to Begin LF(R) Series Operation Manual 1-2 For More Precise Measurements To be able to conduct more precise measurements, it is necessary to minimize the factors that contribute to measurement errors. There are a great variety of such error-inducting factors, which can be linked to machine error and performance of the balance itself, as well as the properties and condition of samples being measured, and the measuring environment (e.g., vibration, temperature/humidity). These factors can readily affect the results of measurement on a balance that has high resolution readability. This material includes some precautionary notes that the user should bear in mind to eliminate error factors and ensure accurate measurement results. 1-2-1 Precautions on the Measuring Room Temperature / Humidity Vibration / Shaking Drafts Gravity Electromagnetic Waves • Try to maintain constant room temperature as much as possible to prevent dew condensation and unstable indications due to fluctuations in temperature. • Low relative humidity tends to induce static electricity, causing measurement error. (Relative humidity of about 60% is considered ideal.) • The measuring room should preferably be located on the ground floor or in the basement. Higher floors are more susceptible to heavy vibration and shaking, which make such locations less suitable for measurement. A room facing a railway or road with heavy traffic should also be avoided as much as practicable. • Avoid choosing a location subject to a direct draft of airflow from an air-conditioning unit or exposed to direct sunlight, which may cause unstable reading due to abrupt fluctuations in temperature. • Also avoid a room subject to a heavy flow of people, since fluctuations in drafts and temperature are likely to occur in such a location. • The gravity acting on a sample varies depending on the latitude or height of the location where measurement is being conducted. For this reason, the same sample may show different weight indications from one place to another. Therefore, make it a rule to calibrate the balance every time it is relocated. • When the balance is located near an object that generates intense electromagnetic waves, it may be hindered from showing accurate weight due to the effects of such waves. Therefore, avoid placing the balance in such a location. -4- LF Series Operation Manual 1 How to Begin 1-2-2 Precautions on the Samples Static Electricity Magnetism Absorption / Evaporation of • Generally speaking, objects made of synthetic resin and glass have high electric insulating properties and, therefore, are apt to be electrically charged. Measuring a charged sample as is may cause unstable indications, with resultant poor reproducibility of the results. With this in mind, be sure to discharge charged samples before measurement. • A sample affected by magnetism indicates different weight values depending on where it is located on the measuring pan, along with resultant poor reproducibility of the results. When a magnetized sample must be measured, first demagnetize it or place an appropriate pedestal on the measuring pan to adequately separate the mechanism part of the balance from the magnetized sample for avoiding the effects of magnetism. • Measuring a sample with moisture absorbed or evaporated (volatized) continuously increases or decreases the values indicated. In such case, measure the sample in a container with a small opening and sealed airtight with a cap. Moisture Sample Temperature • A difference in temperature between a sample and the interior of a windshield may cause convection to occur inside the windshield, resulting in erroneous measurement. Therefore, measure a very hot or cold sample only after allowing time for its temperature to acclimatize to room temperature. Moreover, to prevent convection inside the windshield, allow time for the interior of the windshield to acclimatize to room temperature. • The body heat of a person conducting measurement can also affect measurement results. Avoid holding the sample with bare hands, and use long tweezers or a similar tool instead. Also refrain from putting your hands inside the windshield while measurement is in progress. -5- 1 How to Begin LF(R) Series Operation Manual 1-3 Checking Supplied Items The following items are in the box. In the unlikely event of problems such as missing or broken items, please contact the retailer from whom the balance was purchased. -6- LF Series Operation Manual 1 How to Begin 1-4 Names and Functions of Component Parts Names of Component parts 1 Level 7 Adjuster 2 LCD 8 Measurement pan 3 Panel section 9 Windshield ring 4 Door storage cover 10 D-SUB9P RS232C output connector 5 Windshield 11 AC adapter jack 6 Knob 12 USBoutput connector -7- 1 How to Begin LF(R) Series Operation Manual 1-5 Functions of Operation Keys The operation keys are located on the front of the main unit. Use these keys to operate and set the balance. 1-5-1 Operation keys 1-5-2 Operation key explanations Operation key [On/Off] key [Print] key [Set] key [Cal] key [Function] key [Zero/Tare] key Function Used to power on/off the balance. Used to start printing. Used to interrupt settings and inputs. [Press] to turn ON/OFF the automatic switch between two scale intervals. [Press] to save settings. [Press and hold] to start making settings. [Press] to call span adjustment and span test. [Press and hold] to start an automatic repeatability measurement. [Press] to switch measurement modes. [Press] to make settings by entering values. [Press] to select items for function settings. [Press and hold] to call functions. [Press] to set the zero point or change the readout to zero using the tare. [Press] to set a value by entering the value. [Press] to select functions. -8- LF Series Operation Manual 1 How to Begin How to press keys The functions of some operation keys depend on how they are pressed. For example, the [Set] key saves a setting when it is pressed quickly. (This is the normal way of pressing keys.) The [Set] key starts making a setting when it is pressed and held. Pressing and holding a key is to hold the key down and then release it once the desired display has been obtained. -9- 1 How to Begin LF(R) Series Operation Manual 1-6 How to Read Displayed Signs Each of the symbols displayed on the front of the main unit has the following meanings: - 10 - LF Series Operation Manual 1 How to Begin 7-segment character display Numeric characters Alphabet Some characters look the same, for example, “5” and “S,” and “H,” “K,” and “X.” - 11 - 1 How to Begin LF(R) Series Operation Manual 1-7 Assembling and Installing the Balance (1) Attach the windshield ring, the pan base, and the weighing pan, in this order, to the main unit. Check that these parts are free from dust and other foreign matter before attaching them. (2) Install the balance horizontally. Rotate the adjuster so that the level bubble is positioned in the center of the red circle. (3) Connect the supplied AC adapter to the balance and plug it into the receptacle (100 VAC). - 12 - LF Series Operation Manual 1 How to Begin 1-8 Operating the Windshield Doors The left and right windshield doors can be opened and closed by using the upper and lower knobs on both sides of the windshield. Two knobs are used on either side; one is secured on the door (upper knob), and the other can be slid up and down (lower knob). Each windshield door can be locked (LOCK) and unlocked (RELEASE) by moving the lower knob up or down to lock or unlock, allowing for windshield operation that suits the conditions, such as whether the user is left- or right-handed and the way a sample is placed on the weighing pan. 1-8-1 Opening and closing the windshield doors Opening and closing the right and left windshield doors at the same time The right and left windshield doors can be opened and closed at the same time by operating knob on either side. Knob status - 13 - 1 How to Begin LF(R) Series Operation Manual Opening and closing the right windshield door The right windshield door can be opened and closed by operating the left lower knob. Knob status Opening and closing the left windshield door The left windshield door can be opened and closed by operating the right lower knob. Knob status * To open and close the left and right windshield doors individually, push the left and right lower knobs down to unlock. Use the upper knobs to open and close the doors. - 14 - LF(R) Series Operation Manual 2 Basic Operation 2 Basic Operation 2-1 Powering On/Off and Operation Check Turning the balance ON/OFF 1 Check that the AC adapter is connected to the balance. When the AC adapter is plugged in, the balance enters the standby state and an asterisk “*” appears. Leave the balance powered on with the asterisk “*” displayed for 5 hours before starting measurement. If you unplug the AC adapter, you need to wait for 5 hours from the time you plug it in again. Turn the balance ON. Standby state Press the [On/Off] key. The display shows all symbols and then changes to the zero display. 2 Check that it is operating. Push the weighing pan with your finger to check that the readout changes. Also check that the readout changes to zero when you stop pushing. 3 Turn the balance OFF. Press the [On/Off] key again. The balance enters the standby state. Standby state - 15 - 2 Basic Operation LF(R) Series Operation Manual When the balance is turned ON, it is in the same measurement mode as when it was turned OFF. For example, if the balance was turned OFF in counting mode, when it is turned ON it is still in counting mode. When the balance is stabilized, the display shows a circle “ .” When the balance is unstable, the circle “ ” disappears. The balance may be affected by wind or vibration. The bar graph also appears on the display. It shows the current weight level compared to the weighing capacity. As the weight approaches the weighing capacity of the balance the bar graph moves toward the right end. - 16 - LF(R) Series Operation Manual 2 Basic Operation 2-2 Zero-point Adjustment Zeroing a deviated readout is called “zero-point adjustment.” 1 Examine the surface of the weighing section. Check that nothing is on the weighing section. 2 Execute zero-point adjustment. Press the [Zero/Tare] key. The readout becomes zero and the “ appears. ” mark Zero-point adjustment may not be possible if an object is on the weighing section. In such cases, refer to Section 2-3 “Weighing a Sample in a Container (Tare)” and perform “tare range setting.” Whether the balance waits until it is stabilized for zero-point adjustment can be set using the function item “wait for the balance to stabilize.” When “Operate after waiting for the balance to stabilize” is set, the “ while waiting for the balance to stabilize. While the “ that the balance is not subjected to wind or vibration. - 17 - ” indicator blinks ” indicator is blinking, make sure 2 Basic Operation LF(R) Series Operation Manual 2-3 Weighing a Sample in a Container (Tare) When weighing a sample in a container (tare), only the sample is weighed by subtracting the mass of the container. This is called “tare.” 1 Place the container on the weighing pan. The mass of the container is displayed. 2 Set the tare. Press the [Zero/Tare] key. The readout becomes zero and “→0←” and “Net” are displayed (tare range setting). If “Net” does not appear when the [Zero/Tare] key is pressed, the balance is executing zero-point adjustment, not tare range setting. 3 Place a sample in the container. Only the mass of the sample is displayed. When setting the tare range, the weighable range is reduced by the mass of the tare (set tare). Weighable range = original weighing capacity − set tare - 18 - LF(R) Series Operation Manual 2 Basic Operation 2-4 Weighing an Added Sample Place an additional sample on the balance. Only the addition is measured. 1 Put a sample in place. The mass of the sample is displayed. 2 Set the tare. Press the [Zero/Tare] key. 3 Place the next sample on the balance. The readout becomes zero (tare range set). Only the mass of the added sample is displayed. - 19 - 2 Basic Operation LF(R) Series Operation Manual 2-5 Displaying the Sum of the Container and the Sample The summed weight of the sample and the container is displayed (gross weight readout). Gross weight can only be displayed when the balance is in simple weight measurement mode. For more information on simple weight measurement mode, refer to the section on “Weighing.” 1 Put a container in place and then set the Put a container in place and press the [Zero/Tare] key. The tare range is set and the readout becomes zero. (“Net” lights up when the tare range is being set.) tare. (Example: tare range = 300.0 g) 2 Put a sample in place. The mass of the sample alone (net weight) is displayed. 3 Display the gross weight (Gross weight readout). Press the [Function] key. The summed weight (total weight) of the sample and the container is displayed (gross weight readout). “B/G” lights up when the gross weight is being displayed. Pressing the [Function] key toggles the readout between gross and net. Net weight readout Gross weight readout [Function] key - 20 - LF(R) Series Operation Manual 2 Basic Operation 2-6 Basics of Function Settings Use the Function key to change the balance’s settings. This section describes the basic operations for setting functions. 1 Go to the function setting mode. Press and hold the [Function] key. After “Func” is displayed, release the key. The first function item is then displayed. Release the key when the display changes. If you continuously hold the [Function] key, the function setting mode will change to another mode. If this happens, press the [Print] key to cancel the setting and do this step over again. 2 Select an item to set. 3 Select a setting. Press the [Function] key to select the item to be set. Example: Press the [Function] key once and select “2.SEL” (additional functions). The first setting “2.SEL 0” is displayed. Press the [Zero/Tare] key to select the setting. The next setting is displayed every time the [Zero/Tare] key is pressed. The first setting is displayed again if the [Zero/Tare] key is pressed when the last setting is displayed. Example: Press the [Zero/Tare] key twice to select “2.SEL 2.” 4 Save the setting. Press the [Set] key to finish making settings. The balance returns to the weight display. To cancel making settings, press the [Print] key. Refer to Appendix 1 “Function Setting List” for available function items and settings. To return the function settings to their default values, refer to Section 7-3 “Initializing.” When you are in the middle of making a function setting, you can press the [Print] key to cancel the setting and return to measurement mode. - 21 - 2 Basic Operation LF(R) Series Operation Manual 2-7 Underfloor Measurement This balance has a hook for underfloor measurement. You can weigh samples by hanging a bottom pan or the like from the hook. Use underfloor measurement for weighing samples of ferromagnetic substances, samples having strong static electricity and other samples that cannot be accurately weighed on the weighing pan. 1 Unplug the AC adapter from the receptacle. Fully open all doors and remove the weighing pan, the pan base, the windshield ring, and the bottom plate. Remove the bottom plate by holding both sides and lifting it up. 2 3 4 5 Slowly turn the balance and lay it on its back. Loosen the hook cover screw, and rotate the hook cover around the screw by 90 degrees to the right. Retighten the screw. Put the bottom plate, the windshield ring, the pan base and the weighing pan back in place. Close all the windshield doors. Parts such as a bottom pan are included in the tare range, so the balance cannot measure to its full weighing capacity. Keep the hook cover closed to prevent dust from entering the balance, unless it is used for underfloor measurement. When opening and closing the windshield doors with a bottom pan or the like hanging from the balance, loosen the knobs and use the upper knobs to open and close the doors. - 22 - LF(R) Series Operation Manual 3 Various Measuring Methods 3 Various Measuring Methods 3-1 Simple Weight Measurement By default, the balance is set to simple weight measurement mode. To return to simple weight measurement mode from other weighing modes, perform following operations. 1 Go to function setting mode. (Refer to Section 2-6 “Basics of Function Settings.”) 2 3 Select simple weight measurement mode. Press and hold the [Function] key until “Func” is displayed. “1. SEt” is displayed. Press the [Zero/Tare] key several times to select “1.SEt 1.” Press the [Set] key. The setting is saved and the display returns to showing the sample’s weight. - 23 - 3 Various Measuring Methods LF(R) Series Operation Manual 3-2 Counting the Number of Parts The balance saves the weight of a sample (unit weight) using the automatic memory update method (simplified SCS method) to count the number of samples. First, put a set number of samples in place. Next, put up to three times the set number of additional samples in place. The balance will automatically update the average sample weight. Repeating this step allows accurate counting. 1 Go to the function setting mode. (Refer to Section 2-6 “Basics of Function Press and hold the [Function] key until “Func” is displayed. Settings.”) 2 Select counting mode. Press the [Zero/Tare] key several times to select “1. SEt 2.” 3 Save the mode. 4 Start sampling. Press the [Set] key. The balance is set to counting mode and “Pcs” is displayed. Press and hold the [Function] key until “U. SEt” is displayed. The display reads “on 10 Pcs” which indicates that ten samples will be used. <Press and hold> Pressing the [Print] key during sampling cancels the sampling. 5 Select the number of samples. A sample count can be chosen by repeatedly pressing the [Zero/Tare] key which cycles through the sample counts: 5, 10, 30, and 100. If the samples vary considerably in size or are light in weight, set a greater number of samples. - 24 - LF(R) Series Operation Manual 6 Weigh the samples. 3 Various Measuring Methods Place the set number of samples on the weighing pan and then press the [Function] key. The displayed sample quantity (Example: “on 10 Pcs”) blinks. 7 Add more samples. Add more samples. The number of additional samples can be up to three times the set number of samples. For example, if “10 Pcs” is set, add 30 or less samples. A beep notifies you that added samples have been measured. Repeating this sample addition step improves the counting accuracy. 8 Finish sampling. 9 Put samples in place to count them. Press the [Function] key. The average sample weight is saved and the balance returns to displaying the number of samples. Pressing the [Function] key toggles the display between the number of samples, the average sample weight, and the total weight. 3-2-1 Displaying the average sample weight Pressing the [Function] key toggles the display between the number of samples, the average sample weight, and the total weight. - 25 - 3 Various Measuring Methods LF(R) Series Operation Manual If “Sub” is displayed, it indicates that you added more than three times as many samples as the set number. Decrease the number of additional samples. Starting from a small number of samples, gradually increase the number of samples to increase counting accuracy. If “Add” is displayed, it indicates that the number of added samples is too small. Increase the number of additional samples. Sampling is possible even when “Sub” or “Add” is displayed. However, counting accuracy will be low. If [L-Err] is displayed, it indicates that the average sample weight is smaller than the weighable unit weight. - 26 - LF(R) Series Operation Manual 3 Various Measuring Methods 3-3 Measuring Percentage The weight of a sample is shown as a percentage of the reference sample weight. A reference sample weight can be set by weighing an actual sample (setting a reference weight by weighing an actual sample) or entering a value (setting a reference weight by entering a value). 3-3-1 Setting a reference weight by weighing an actual sample 1 Go to the function setting mode. (Refer to Section 2-6 “Basics of Function Press and hold the [Function] key until “Func” is displayed. Settings.”) 2 Select percentage weighing mode. Press the [Zero/Tare] key several times to select “1. SEt 3.” 3 Save the mode. 4 Start measuring the reference sample weight. The percentage weighing mode is set and “%” is displayed. Press and hold the [Function] key. After “P. SEt” is displayed, release the key. <Press and hold> 5 Press the [Set] key. Save the reference sample weight. The previously saved reference sample weight blinks. Put the reference sample on the balance and then press the [Function] key. The reference weight is saved. 6 Weigh a sample. The display indicates the percentage of the sample to the reference sample weight. Pressing the [Function] key toggles the display between percentage weight and total weight. - 27 - 3 Various Measuring Methods LF(R) Series Operation Manual 3-3-2 Setting a reference weight by entering a value 1 Go to the function setting mode. (Refer to Section 2-6 “Basics of Function Press and hold the [Function] key until “Func” is displayed. Settings.”) 2 Select percentage weighing mode. 3 Save the mode. 4 Start measuring the reference sample weight. Press the [Zero/Tare] key several times to select “1. SEt 3.” Press the [Set] key. The percentage weighing mode is set and “%” is displayed. Press and hold the [Function] key. After “P. Set” is displayed, release the key. <Press and hold> The previously saved reference sample weight blinks. 5 Enter the value of a reference sample weight. 6 Save the reference sample weight. Press the [Set] key to save the reference sample weight. 7 Weigh a sample. The display indicates the percentage of the sample to the Set a reference weight with the following steps: (1) Press the [Zero/Tare] key. The rightmost digit will blink. (2) Press the [Zero/Tare] key to select a number. Pressing the key toggles the number between 0 and 9, and the decimal point. (3) Press the [Function] key to move to the next digit, which will then start blinking. Set the reference sample weight by repeating steps (2) and (3). Press the [Print] key to cancel the setting. reference sample weight. Pressing the [Function] key toggles the display between percentage weight and total weight. - 28 - LF(R) Series Operation Manual 3 Various Measuring Methods The readability is automatically set based on the saved reference weight. Readability Range of Reference Weight 1% Lower weight limit ≤ Reference weight < Lower weight limit × 10 Lower weight limit × 10 ≤ Reference weight < Lower weight limit × 100 0.1% 0.01% Lower weight limit × 100 ≤ Reference weight The “L-Err” display indicates that the reference weight is below the lower weight limit, which means that weighing is impossible. For more information on the weight limit in percentage weighing, refer to Appendix 4-2 “Functional Specifications.” - 29 - 3 Various Measuring Methods LF(R) Series Operation Manual 3-4 Obtaining Weight Multiplied by a Coefficient Measured weight is multiplied by a set coefficient, and the result be displayed. For example, if “2.35” is set for the coefficient, and the weight of the sample is “2000 g,” the given readout is “4700.” (Example) Sample (2000 g) × Coefficient (2.35) → Readout (4700) 1 Go to the function setting mode. (Refer to Section 2-6 “Basics of Function Press and hold the [Function] key until “Func” is displayed. Settings.”) 2 Select unit conversion mode. Press the [Zero/Tare] key several times to select “1. SEt 4.” 3 Save the mode. 4 Go to the coefficient setting mode. Press the [Set] key. The unit conversion mode is set and “#” is displayed. Press and hold the [Function] key until “C. SEt” is displayed. The previously saved coefficient is displayed. <Press and hold> 5 Enter a coefficient. Set a coefficient with the following steps: (1) Press the [Zero/Tare] key. The rightmost digit will blink. (2) Select a number by pressing the [Zero/Tare] key. Pressing the key toggles the number between 0 and 9, and the decimal point. (3) Press the [Function] key to move to the next digit, which will then start blinking. Set the coefficient by repeating steps (2) and (3). Press the [Print] key to cancel setting the coefficient. - 30 - LF(R) Series Operation Manual 3 Various Measuring Methods 6 Save the coefficient. Press the [Set] key. 7 Weigh a sample. The weight of the sample is multiplied by the coefficient, and the result is displayed. The increment of the readability is automatically set to 1, 2, or 5 depending on the entered coefficient. - 31 - 3 Various Measuring Methods LF(R) Series Operation Manual 3-5 Measuring Specific Gravity Use either underfloor measurement or the optional specific gravity measurement kit to measure specific gravity. When using underfloor measurement, you need a cage or net in which to place a sample, string, a container, and other tools depending on the sample you are going to measure. * Function 1 is “1 SEt. 5” (Solid gravimeter). Set “11. MEd.” to “0: water” or “1: Not water” depending on the medium you will use. 3-5-1 Specific gravity measurement procedure Measure the specific gravity according to the following procedures: (1) Prepare measurement tools (2) Set the water temperature or the specific gravity of the liquid (3) Weigh the sample in air (4) Correct the error of the basket (5) Weigh the sample in water (6) The specific gravity value is displayed 3-5-2 Preparing measurement tools Prepare the following tools and a sample. (Tools must be procured by users.) The balance may fail to accurately weigh small samples. Use as large a sample as possible. To accurately measure the specific gravity, set the water temperature. Measure the water temperature inside the container in advance. - 32 - LF(R) Series Operation Manual 3 Various Measuring Methods 3-5-3 Measurement 1 Go to the function setting mode. (Refer to Section 2-6 “Basics of Function Press and hold the [Function] key until “Func” is displayed. Settings.”) 2 Select gravimeter mode. 3 Save the mode. 4 Go to the water temperature setting mode. Press the [Zero/Tare] key several times to select “1.SEt 5.” Press the [Set] key. The gravimeter mode is set and “d” is displayed. Press and hold the [Zero/Tare] key. (When using any liquid other than water, refer to the section on “When using a liquid other than water.”) <Press and hold> 5 Set the temperature of water in the container. Set the water temperature with the following steps: Start the water temperature setting with the highest-order digit and then sequentially set lower-order digits. (1) Press the [Zero/Tare] key. The rightmost digit will blink. (2) Select a number by pressing the [Zero/Tare] key. Pressing the key toggles the number between 0 and 9, and the decimal point. (3) Press the [Function] key to move to the next digit, which will then start blinking. Set the water temperature by repeating steps (2) and (3). When using a liquid other than water, refer to page 35 and set the medium. When using a liquid other than water, set the density. The set values remain saved even after the balance is turned off. The water temperature can be set to between 0 and 99.9°C. Press the [Print] key to cancel the setting. - 33 - 3 Various Measuring Methods LF(R) Series Operation Manual 6 Save the water temperature. Press the [Set] key. 7 Hang the cage only and set the weight readout to Hang only the cage from the underfloor weighing hook. zero. Press the [Zero/Tare] key. The readout changes to zero. 8 Weigh a sample. Place a sample in the cage. When the weight readout is stabilized, press the [Set] key. This saves the weight of the sample in the air. Once the weight is saved, “ ” is shown in the lower left corner of the display. You can also weigh the sample on the weighing pan. 9 Set the liquid container in place. Place the container with water under the balance, and put only the cage into the water. (Do not put the sample in the cage.) Press the [Zero/Tare] key to change the readout to zero. This eliminates the discrepancy caused by the cage. - 34 - LF(R) Series Operation Manual 10 3 Various Measuring Methods Place the sample in the cage. Place the sample in the cage and immerse the sample fully in the water. When the weight readout is stabilized, press the [Set] key. The measured specific gravity value is displayed. Keep the cage away from the liquid container. Pressing the [Function] key toggles the display between the specific gravity and the volume. Press the [Set] key to return to the weight display. 3-5-4 When using a liquid other than water 1 Go to the function setting mode. Press and hold the [Function] key until “Func” is (Refer to Section 2-6 “Basics of Function displayed. Settings.”) 2 Select gravimeter mode. 3 Go to the medium selection mode. 4 Select the “Not water” setting. Press the [Zero/Tare] key several times to select “1.SEt 5.” Press the [Function] key. “11.MEd.” is displayed. Press the [Zero/Tare] key to select “1” (Not water), and press the [Set] key. Now the balance can measure the specific gravity using any liquid other than water. Measure the specific gravity with the steps described in “Measurement” (page エラー! ブッ クマークが定義されていません。). In step 5, set the density of the liquid you are using, instead of the water temperature. The liquid density can be set to between 0.0001 and 9.999 g/cm3. - 35 - 3 Various Measuring Methods LF(R) Series Operation Manual 3-5-5 Printing the specific gravity data To output the measured specific gravity data to a printer, perform the following operations depending on settings. Before measurement Press the [Print] key to print data (whether the balance is stable or unstable), regardless of the “71. o.c.” (output control) function setting. When specific gravity is displayed You can change the output details and method by changing the “12. d.o.d.” (output data selection) and “13. A.o.” (automatic output) function settings. Print format When the “12. d.o.d.” (output data selection) function setting is set to “1” (specific gravity, weight, actual water temperature or medium density), all data are output. (See the figures below.) When the “12. d.o.d.” (output data selection) function setting is set to “0” (only specific gravity), only the first and second lines in the figures below are printed. When statistical operation is conducted with a printer, a serial number is added before the numerical value of the second line in the figures below. Set the language used for printing with the “G3.P.F.” (print characters) function setting. (Set 1 for English or 2 for Japanese.) Examples of printed specific gravity data - 36 - LF(R) Series Operation Manual 3 Various Measuring Methods 3-6 Adding Multiple Measurements Multiple samples are weighed consecutively and the sum is displayed. You can choose to replace samples (cumulate function) for each addition or leave the previous samples on the scale as you add more (net addition function). The addition function can be used in simple weight measurement mode, the counting mode, the percentage weighing mode and the unit conversion mode. 3-6-1 Addition function settings 1 Go to the function setting mode. (Refer to Section 2-6 “Basics of Function Press and hold the [Function] key until “Func” is displayed. Settings.”) 2 Select the addition function. Press the [Function] key several times to select “2. SEL.” Press the [Zero/Tare] key to select “2. SEL 1.” When using both the cumulate and limit functions together, select “2. SEL 3.” For more information on the limit function, refer to Section 3-7 “Judging between Too Heavy and Too Light (Limit Function).” 3 Select cumulate or net addition. Press the [Function] key. After “2C.Add.” is displayed, press the [Zero/Tare] key to set the value. 1: Cumulate function 2: Net addition function Details of “2C.Ad.” [1: Cumulate function] Continue measurements by replacing samples after each addition. [2: Net addition function] Continue measurements by adding samples without replacing them after each addition. The balance automatically sets the tare range after each addition. 4 Finish making settings. Press the [Set] key. The addition function is set. - 37 - 3 Various Measuring Methods LF(R) Series Operation Manual 3-6-2 Weighing with the addition function 1 Put the first sample in place. After an asterisk “*” is displayed, press the [Set] key. The measured value is saved and a sigma “∑” sign is displayed for several seconds. (The tare range is set automatically when net addition is selected.) 2 Cumulate Put another sample in place. Unload the previous sample, check that the display indicates “0,” and place the next sample. After an asterisk “*” is displayed, press the [Set] key. The sigma “∑” sign and the cumulative weight are displayed for several seconds. Repeat this operation to add measurements. After adding a measurement, press the [Zero/Tare] key to set the tare range. By doing so, you can add another sample without removing the previous sample to add the next measurement. Net addition Place an additional sample. Add another sample. (The tare range is set automatically.) After an asterisk “*” is displayed, press the [Set] key. The sigma “∑” sign and the cumulative weight are displayed for several seconds. Then the balance returns to the weight display and the tare range is set automatically. Repeat this operation to add measurements. 3 Display the cumulative weight. <Press twice> Press the [Function] key twice. The “∑” sign and the cumulative weight are displayed. - 38 - LF(R) Series Operation Manual 3 Various Measuring Methods To clear the cumulative weight Cumulate: Press the [Zero/Tare] key when the cumulative weight is displayed. Net addition: Press the [Zero/Tare] key. (The cumulative weight is cleared whether the cumulative weight is displayed or not.) After clearing the cumulative weight, press the [Function] key to return to the measurement mode. You can repeat the addition operation from step 1. If “t-Err” is displayed it indicates (1) you have attempted to add a measurement when a negative weight is displayed or (2) you have attempted to add measurements without replacing samples or setting the display to zero when the cumulate function is selected. You cannot add measurements in either case. The function setting “L. tA.” can be used to turn ON/OFF the function to wait for stabilization after making additions. (Refer to Appendix 1 “Function Setting List.”) - 39 - 3 Various Measuring Methods LF(R) Series Operation Manual 3-7 Judging between Too Heavy and Too Light (Limit Function) You can set several limit values to be used to judge whether measurements are within the specified limits. The limit function can be used in simple weight measurement mode, counting mode, percentage weighing mode and unit conversion mode. Judgment method According to the lower and upper limits you set, a measurement is judged to be too light (lower than the lower limit), within the appropriate range, or too heavy (higher than the upper limit), and the judgment result is displayed using the “ ” symbol. Judgment 1-point setting (lower 2-point setting (upper & result limit) lower limits) Not displayed Upper limit < Weight Above the upper limit Appropriate Lower limit ≤ Weight Below the Weight < lower limit Lower limit For a 3- or 4-point setting, “ judgment result. Lower limit ≤ Weight ≤ Upper limit Weight < Lower limit ” appears on the display in 4 or 5 steps according to the Judgment result 3-point/4-point setting Rank 5 Point 4 ≤ Weight (4-point setting) Rank 4 Point 3 ≤ Weight < Point 4 Rank 3 Point 2 ≤ Weight < Point 3 Rank 2 Point 1 ≤ Weight < Point 2 Rank 1 Weight < Point 1 - 40 - LF(R) Series Operation Manual 3 Various Measuring Methods Depending on the number of judgment points, the “<” mark shown in the range indicated by “ ” appears at all times. In 1-point setting, only the lower limit is set and is used for judging whether samples are “OK (appropriate range)” or “LO (too light).” - 41 - 3 Various Measuring Methods LF(R) Series Operation Manual The judgment result can also be shown on a graph. Set the function “2A.LG.” to “2” (2-point bar graph). (Refer to Appendix 1 “Function Setting List.”) The bar graph display is available only with the 2-point setting. Judgment criteria and limit value setting One of the following criteria is used for judgment. Judgment using definite values: Upper-limit, lower-limit and other limit values by which to judge are specified. Judgment using deviation values: A reference weight and the range between its upper and lower limits are used to make judgment. The following two methods are available to enter limit values. Setting a weight by weighing an actual sample: Weigh an actual sample on the balance and save the weight. Setting a weight by entering a value: Enter a value using the keys. - 42 - LF(R) Series Operation Manual 3 Various Measuring Methods Detailed function settings The limit function can be set to a specific value with the function settings. When the function setting “2.SEL” is “2” or “3,” the following items can be set by pressing the [Function] key. Set these items as required. ☆ Initial setting Condition 21.Co. ☆ 1: Always judge. 2: Judge only when the balance is stable. Range to cover 0: Detect when the limit is exceeded by more than five 22.Li divisions. 1: Detect when the limit is exceeded by more than fifty divisions ☆ 2: Detect both when the limit is exceeded and when it is not reached. Point scale 23.Pi 0: 1-point scale (OK and LO are judged.) 1: 1-point scale (HI and OK are judged.) ☆ 2: 2-point scale (HI, OK, and LO are judged.) 3: 3-point scale (Ranks 1 to 4 are judged.) 4: 4-point scale (Ranks 1 to 5 are judged.) Judge using 24.tYP. ☆ 1: Judge using definite values 2: Judge using deviation values Buzzer for rank 1 25.bu.1 ☆ 0: The buzzer is not sounded for rank 1 (LO). 1: The buzzer is sounded for rank 1 (LO). Buzzer for rank 2 26.bu.2 ☆ 0: The buzzer is not sounded for rank 2 (OK). 1: The buzzer is sounded for rank 2 (OK). Buzzer for rank 3 27.bu.3 ☆ 0: The buzzer is not sounded for rank 3 (HI). 1: The buzzer is sounded for rank 3 (HI). Buzzer for rank 4 28.bu.4 ☆ Buzzer for rank 5 29.bu.5 ☆ 0: The buzzer is not sounded for rank 4. 1: The buzzer is sounded for rank 4. 0: The buzzer is not sounded for rank 5. 1: The buzzer is sounded for rank 5. Separate limit values can be saved for each weighing mode. However, limit values of both definite and deviation values cannot be saved in the same weighing mode. Limit values can be set only in measurement mode display (Cannot be set in other mode displays such as when a cumulative value is displayed). Adjust the zero-point or set a tare range, as required, before setting limit values. If the limit value entries are not lined up in the order of magnitude, three “ light up. Enter the values again. - 43 - ” will 3 Various Measuring Methods LF(R) Series Operation Manual 3-7-1 Limit function settings First set the limit function and then set limit values. 1 Go to the function setting mode. (Refer to Section 2-6 “Basics of Function Press and hold the [Function] key until “Func” is displayed. Settings.”) 2 Select the limit function. Press the [Function] key several times to select “2.SEL.” Press the [Zero/Tare] key to select “2.SEL 2.” When using both the cumulate and limit functions together, select “2.SEt. 3.” 3 Set the judgment condition. Press the [Function] key several times to select “21.Co.” Press the [Zero/Tare] key to select a judgment condition. 1: Always judge (even when the balance is unstable) 2: Judge only when the balance is stable. 4 Set the range to cover. Press the [Function] key several times to select “22.Li.” Press the [Zero/Tare] key to select the range to cover. 0: Detect when the limit is exceeded by more than five divisions. 1: Detect when the limit is exceeded by more than fifty divisions 2: Detect both when the limit is exceeded and when it is not reached. 5 Set the point scale. Press the [Function] key several times to select “23.Pi.” Press the [Zero/Tare] key to select a point scale. 0: 1-point scale (OK and LO are judged.) 1: 1-point scale (HI and OK are judged.) 2: 2-point scale (HI, OK, and LO are judged.) 3: 3-point scale (Ranks 1 to 4 are judged.) 4: 4-point scale (Ranks 1 to 5 are judged.) 6 Set the judgment method. Press the [Function] key several times to select “24.tYP.” Press the [Zero/Tare] key to select a judgment method. 1: Judge using definite values 2: Judge using deviation values - 44 - LF(R) Series Operation Manual 7 3 Various Measuring Methods Save the settings. Press the [Set] key. Next, set values for judgment (limit values) and take measurements. 3-7-2 Judgment using definite values Use the function setting “24.tYP. 1” to judge samples using definite values. Judgment using definite values by setting actual sample weights Weigh a sample and set the upper-limit and lower-limit. Check that the limit function for judgment using definite values is selected. (Refer to the previous section “Limit function settings.”) 1 Set to actual sample weight setting mode. Press and hold the [Set] key until “L.SEt” is displayed. <Press and hold> 2 Weigh the sample serving as the lower limit. Put the sample serving as the lower-limit in place and press the [Function] key. For 1-point setting, this operation completes the setting save process. Proceed to step 4. For 2-point setting, “H.SEt” is displayed. 3 Weigh the sample serving as the upper limit. Place the sample serving as the upper limit on the weighing pan and press the [Function] key. The values for judgment are saved and the balance returns to the weight display. 4 Weigh a sample. Place the sample to be judged on the weighing pan. The OK/LO/HI result judged according to the upper-limit and lower-limit is indicated by “ ”. - 45 - 3 Various Measuring Methods LF(R) Series Operation Manual Judgment using definite values by entering values Set the upper limit and the lower limit by using the keys. Check that the limit function for judgment using definite values is selected. (Refer to the previous section “Limit function settings.”) 1 Set to actual sample weight setting mode. Press and hold the [Set] key until “L.SEt” is displayed. <Press and hold> 2 Enter the lower-limit value. Enter the lower-limit value with the following steps: (1) Press the [Zero/Tare] key. The rightmost digit will blink. (2) Select a number by pressing the [Zero/Tare] key. Pressing the key toggles the number between 0 and 9, and the decimal point. (3) Press the [Function] key to move to the next digit, which will then start blinking. (4) Press the [Set] key to save the number. For 1-point setting, this operation completes the setting save process. Proceed to step 4. For 2-point setting, “H.SEt” is displayed. 3 Enter the upper-limit value. Enter the upper-limit value by doing the same operation as in step 2. The values for judgment are saved and the balance returns to the weight display. 4 Weigh a sample. Place the sample to be judged on the weighing pan. The OK/LO/HI result judged according to the upper-limit and lower-limit is indicated by “ - 46 - ”. LF(R) Series Operation Manual 3 Various Measuring Methods 3-7-3 Judgment using deviation values Use the function setting “24.tYP.2” to judge samples using deviation values. Judgment using deviation values by setting actual sample weights Weigh a sample and set the reference weight, the upper-limit, and the lower-limit. Check that the limit function for judgment using deviation values is selected. (Refer to the previous section “Limit function settings.”) 1 Go to the actual sample weight setting mode. Press and hold the [Set] key until “r.SEt” is displayed. <Press and hold> 2 Weigh the sample serving as the reference Put the sample serving as the reference weight in place weight. and then press the [Function] key. 3 Weigh the sample serving as the lower limit. Place the sample serving as the lower-limit in place and press the [Function] key. For 1-point setting, this operation completes the setting save process. Proceed to step 5. For 2-point setting, “H.SEt” is displayed. 4 Weigh the sample serving as the upper limit. Place the sample serving as the upper limit on the weighing pan and press the [Function] key. The values for judgment are saved and the balance returns to the weight display. 5 Weigh a sample. Place the sample to be judged on the weighing pan. The OK/LO/HI result judged according to the upper-limit and lower-limit is indicated by “ ”. - 47 - 3 Various Measuring Methods LF(R) Series Operation Manual Judgment using deviation values by entering values Set the reference weight, the upper limit, and the lower limit by using the keys. Check that the limit function for judgment using deviation values is selected. (Refer to Section 3.7.1, “Limit function settings.”) For judgment using deviation values by entering values, enter the difference between the upper limit and the lower limit with respect to the reference weight. To perform a judgment with an upper-limit weight of 200 g and a lower-limit weight of 100 g, set the reference weight to 150 g, the upper limit value to 50 g and the lower-limit value to -50 g. 1 Go to the value entry mode. Press and hold the [Set] key until “r.SEt” is displayed. <Press and hold> 2 Enter the reference weight. Enter the reference weight with the following steps: (1) Press the [Zero/Tare] key. The rightmost digit will blink. (2) Select a number by pressing the [Zero/Tare] key. Pressing the key toggles the number between 0 and 9, and the decimal point. (3) Press the [Function] key to move to the next digit, which will then start blinking. (4) Press the [Set] key to save the number. 3 Enter the lower-limit value. Enter the lower-limit value by doing the same operation as in step 2. For 1-point setting, this operation completes the setting save process. Proceed to step 5. For 2-point setting, “H.SEt” is displayed. 4 Enter the upper-limit value. Enter the upper-limit value by doing the same operation as in step 2. The values for judgment are saved and the balance returns to the weight display. 5 Weigh a sample. Place the sample to be judged on the weighing pan. The OK/LO/HI result judged according to the upper-limit and lower-limit is indicated by “ ”. - 48 - LF(R) Series Operation Manual 3 Various Measuring Methods 3-8 Statistical Operation Function The statistical operation function collects weight data and displays maximum, average, and other statistical values. 3-8-1 Calculation items Calculation item Display example Maximum value Minimum value Average value Standard deviation Width (Maximum – Minimum) Coefficient of variation Number of data items Sum total - 49 - 3 Various Measuring Methods LF(R) Series Operation Manual 3-8-2 Operation method 1 Go to the function setting mode. Press and hold the [Function] key until “Func” is (Refer to Section 2-6 “Basics of Function displayed. Settings.”) 2 Set the weighing mode to the statistical operation 3 Save the statistical operation mode. 4 Collect data. 5 Collect more data. mode. Press the [Function] key several times to select “1.SEt.” Press the [Zero/Tare] key to select “7.” Press the [Set] key. The statistical operation mode is set and “st” is displayed. Put a sample in place and press the [Print] key. Data is collected and then output. Unload the previous sample, check that the display indicates “0,” and place the next sample. Collect data in the same way as in step 4. Repeat placing a sample, collecting data, and removing the sample until the required number of data items are collected. 6 Display the statistical operation result. 7 Switch to another calculation item. Press the [Function] key. The display changes to the statistical operation display. Press the [Set] key when the statistical operation display is active. Pressing the [Set] key toggles the calculation item cyclically in the order shown in the table in Section 3-8-1 “Calculation items.” 8 Return to the weight display. Press the [Function] key when the statistical operation display is active. The balance returns to the weight display. - 50 - LF(R) Series Operation Manual 3 Various Measuring Methods Zero-point setting and tare range setting are important for accurate calculation of statistical values. To delete data, when incorrect data is mistakenly collected for example, refer to Section 3-8-4 “Cancellation of last collected data.” Zero or minus data cannot be collected and “9-Err” will be displayed. Statistical operation uses digits not shown in the weight display. Statistical operation results may differ from results of operation using readout values only. In step 4, pressing the [Print] key is required only when “71.o.c.7” is selected. When “71.o.c.4” is selected, data is output and collected automatically when the balance is stable. For the statistical operation function, the “71.o.c.” setting is valid when it is set to “4” or “7.” If it is set to other values, it is taken as “71.o.c.7.” When the number of data items exceeds 999 or the total exceeds the number of digits that can be displayed on the balance during data collecting, “9-Err” is displayed and the balance no longer performs operations. Clear the statistical operation result. Tip for operation Keys to operate for the statistical operation function are outlined below. Press the [Set] key to proceed to the next calculation item. - 51 - 3 Various Measuring Methods LF(R) Series Operation Manual 3-8-3 Output of statistical operation results Statistical operation results are collectively output to devices. 1 Set to the statistical operation display. Press the [Function] key when the balance is displaying the weight. Do this before collecting the next data item. 2 Output the statistical operation results. Press the [Print] key. At this time, it does not matter which calculation item is selected. The statistical operation results are output. Indication of operation result <RESULT> DATE: TIME: N SUM MAX MIN R AVE SD CV Other indications CANCEL ALLCLR Description Title Date when the operation result is output Time when the operation result is output Number of data items Sum total Maximum value Minimum value Width (Maximum – Minimum) Average value Standard deviation Coefficient of variation Description Cancel last collected data Clear all statistical operation results How the year, month, and date are displayed depends on the “H.dAtE” setting. Whether the date and time is displayed in English or Japanese depends on the “G3.P.F.” setting. - 52 - LF(R) Series Operation Manual 3 Various Measuring Methods 3-8-4 Cancellation of last collected data You can only cancel the data collected last. 1 Set to the statistical operation display. Press the [Function] key when the balance is displaying the weight. Do this before collecting the next data item. 2 Set the calculation item to “Number of data items.” Press the [Set] key several times until the calculation item is set to “Number of data items.” When the calculation item is “Number of data items,” three “(Insert the image of the black triangle on the left-hand side)” symbols light up. 3 Cancel the last collected data. Press the [Zero/Tare] key. The last collected “CANCEL” is output. data is cancelled and You cannot cancel the second to last data. If you press the [Zero/Tare] key after cancelling data once, “8-Err” is displayed. - 53 - 3 Various Measuring Methods LF(R) Series Operation Manual 3-8-5 Clearing statistical operation results You can clear all collected data. Note that this operation deletes ALL data. Print statistical operation results as needed before clearing data. 1 Set to the statistical operation display. 2 Set the calculation item to “Sum total.” Press the [Function] key when the balance is displaying the weight. Press the [Set] key several times until the calculation item is set to “Sum total.” When the calculation item is “Number of data items,” the “Σ” sign lights up. 3 Clear statistical operation results. Press the [Zero/Tare] key. The statistical operation results are cleared and “ALLCLR” is output. When the “1.SEt.” setting is changed from “7” to another value or when the balance is turned off, statistical operation results are cleared too. - 54 - LF(R) Series Operation Manual 4 Adjusting the Scale 4 Adjusting the Balance 4-1 Adjusting (Calibrating) the Balance Calibrating a balance is also called span adjustment. Be sure to perform span adjustment to ensure highly accurate measurements. Electronic balances are influenced by the acceleration of gravity. For this reason, you should adjust (calibrate) your balance every time you relocate it. You should also adjust (calibrate) it after a long period of use or if it does not indicate correct values. To perform span adjustment (calibration), wait more than 5 hours after connecting the AC adapter. Use a weight for adjustment (calibration) that weighs 50% or more of the weighing capacity. To calibrate the balance more accurately, use a weight that is equivalent to the weighing capacity. For calibration of the internal weight, use a weight that has a mass equivalent to the weighing capacity. 4-1-1 Span adjustment with internal weight This function is only available for the LFR type. 1 Go to the function setting mode. (Refer to Section 2-6 “Basics of Function Press and hold the [Function] key until “Func” is displayed. Settings.”) 2 Select span adjustment with internal weight. Press the [Function] key several times to select “8.CA.” Press the [Zero/Tare] key to select “8.CA. 1.” Press the [Set] key to return to the weight display. 3 Start span adjustment. Press the [Cal] key. “Aut. CAL” is displayed. - 55 - 4 Adjusting the Scale 4 LF(R) Series Operation Manual Start automatic span adjustment using the internal When “PuSH C” is displayed, press the [Cal] key. The internal weight is activated and starts the span adjustment automatically. The balance display changes to “Aut. CAL,” “CH. 0,” “CH. F.S.,” “buSY,” and then “End.” When the span adjustment is completed, the balance returns to the weight display. weight. 4-1-2 Span test with internal weight This function is only available for the LFR type. 1 Go to the function setting mode. (Refer to Section 2-6 “Basics of Function Press and hold the [Function] key until “Func” is displayed. Settings.”) 2 Select span test with internal weight. Press the [Function] key several times to select “8.CA.” Press the [Zero/Tare] key to select “8.CA. 2.” Press the [Set] key to return to the weight display. 3 Start the span test. Press the [Cal] key. “t.Int” is displayed. When “PuSH C” is displayed, press the [Cal] key. The internal weight is activated and starts the span test automatically. The balance display changes from “t.Int” to “t. 0,” “t. F.S.,” “dIFF.,” and then “error display.” - 56 - LF(R) Series Operation Manual 4 4 Adjusting the Scale Return to the weight display. Press the [Set] key. The balance returns to the weight display. 4-1-3 Span adjustment with external weight 1 Go to the function setting mode. Press and hold the [Function] key until “Func” is (Refer to Section 2-6 “Basics of Function displayed. Settings.”) 2 Select the span adjustment with external weight. Press the [Function] key several times to select “8.CA.” Press the [Zero/Tare] key to select “8.CA. 3.” Press the [Set] key to return to the weight display. 3 Start span adjustment with external weight. Press the [Cal] key. “CAL EHt” is displayed. When “PuSH C” is displayed, press the [Cal] key. The display changes from “CAL EHt” to “on 0” and then zero-point adjustment starts. (If an instrumental error of weight is used, the entered instrumental error of weight is displayed for about two seconds.) 4 Place a weight on the weighing pan. When zero-point adjustment is completed and “on F.S.” is displayed, place a weight on the weighing pan. Adjustment will start. The display changes to “buSY” and then “End.” When the span adjustment is completed, the balance returns to measurement mode. - 57 - 4 Adjusting the Scale LF(R) Series Operation Manual 4-1-4 Span test with external weight 1 Go to the function setting mode. (Refer to Section 2-6 “Basics of Function Press and hold the [Function] key until “Func” is displayed. Settings.”) 2 Go to the span test mode. Press the [Function] key several times to select “8.CA.” Press the [Zero/Tare] key to select “8.CA. 4.” Press the [Set] key to return to the weight display. 3 Start the span test with external weight. Press the [Cal] key. “t. EHt” is displayed. When “PuSH C” is displayed, press the [Cal] key. The display changes to “t. EHt” then “on 0” and then zero-point adjustment starts. (If an instrumental error of weight is adopted, the entered instrumental error of weight is displayed for about two seconds.) 4 Place a weight on the weighing pan. When zero-point adjustment is completed and “on F.S.” is displayed, place a weight on the weighing pan. Adjustment will start. The display changes to “dIFF.” and then “error display.” 5 Return to the weight display. Press the [Set] key. The balance returns to the weight display. - 58 - LF(R) Series Operation Manual 4 Adjusting the Scale 4-2 Calibrating the Internal Weight Use this function to calibrate the internal weight with a weight. You should calibrate the internal weight after the balance has been subjected to a strong impact, for example. This function is only available for the LFR type. 1 Go to Function 2 setting mode. [Function] key. After “Func2” is displayed, release the + 2 While pressing the [Zero/Tare] key, press and hold the Select calibration of internal weight. keys. Press the [Function] key several times to select “3.r.CA.” Press the [Zero/Tare] key to select “1.” Press the [Function] key. The display changes to “rEF. CAL.” 3 Start the calibration of the internal weight. While pressing the [Zero/Tare] key, press the [Function] key, and release the keys simultaneously. + 4 Start the zero-point adjustment. 5 Place a weight on the weighing pan. “on 0” blinks on the display and zero-point adjustment is started. When zero-point adjustment is completed and “on F.S.” is displayed, place a weight on the weighing pan. When “on F.S.” starts blinking on the display, span adjustment has started. - 59 - 4 Adjusting the Scale 6 LF(R) Series Operation Manual Unload the weight from the weighing pan. When span adjustment is completed and “on 0” is displayed, unload the weight from the weighing pan. After the weight is unloaded, the balance automatically starts calibration of the internal weight. The display changes to “CH. 0,” “CH. F.S.” and then “End.” 7 Finish the calibration of the internal weight. When “4.M.E.H.*” is displayed, press the [Function] key to return to measurement mode. * For details on “4.M.E.H.*,” refer to Section 4-3 “Entering the instrumental error of a weight for use.”) 1. When the [Print] key is pressed during span adjustment or span test, “StOP” is displayed. Then the span adjustment or span test is discontinued and the balance returns to the weight display. 2. For span adjustment or a span test with external weight, use a weight that weighs 50% or more of the weighing capacity. To calibrate the balance more accurately, use a weight that is equivalent to the weighing capacity. - 60 - LF(R) Series Operation Manual 3. 4 Adjusting the Scale If there are any problems with results of span adjustment or span tests, the following messages are displayed: (1) “1-Err”: This means that you have used a reference weight that weighs less than 50% of the weighing capacity during span adjustment with an external weight. (2) “2-Err”: This means that an error of over 1.0% was detected, or the balance has malfunctioned during span adjustment with an external weight. (3) “3-Err”: This means that you have adjusted the balance with a sample placed on the weighing pan during adjustment with the internal weight. (4) “4-Err”: This means that an error of over 1.0% was detected, or the balance has malfunctioned during adjustment using the internal weight. (5) “A-Err”: This means that the internal drive has malfunctioned during adjustment using the internal weight. (When an error message is displayed, press any key to return to the measurement mode.) * When any of these messages is displayed, calibration is not performed. Check the weight and do this procedure over again. 4. If GLP compliant output is set to ON, the output is performed at the end of span adjustment/test. At this time, the display continues to show “output” for span adjustment or an error for span test. The balance may seem to have frozen during output, but this is normal. Wait until output is completed. (Refer to Section 6-1 “Output to Printers.”) - 61 - 4 Adjusting the Scale LF(R) Series Operation Manual 4-3 Entering the Instrumental Error of a Weight for Use To adjust (calibrate) the balance more accurately, enter the instrumental error of an external weight to be used for span adjustment or span tests. (Enter the instrumental error in mg.) 1 Go to Function 2 setting mode. [Function] key. After “Func2” is displayed, release the keys. + 2 While pressing the [Zero/Tare] key, press and hold the Select display of instrumental error. Press the [Function] key several times to select “2.o.M.P.” Press the [Zero/Tare] key to select “1.” 3 Start entering the instrumental error. 4 Enter a value. 5 Move to the other digits to enter Press the [Function] key to move the cursor to the left and numbers. the digit in the cursor position will then start blinking. Press the [Zero/Tare] key. The leftmost digit will blink. Press the [Zero/Tare] key to change the value in the blinking digit. If the cursor is at the leftmost digit, it moves to the negative sign setting “M” and then returns to the rightmost digit. Press the [Print] key to return to the state in step 2. 6 Save the instrumental error. Press the [Set] key. The display changes to “3.r.CA.” Press the [Set] key again to return to the measurement mode. To use the entered instrumental error To use the entered instrumental error, set Function 2 to “4.M.E.H. 1.” - 62 - LF(R) Series Operation Manual 4 Adjusting the Scale 4-4 Se-CAL (full automatic calibration function) Se-CAL function is composed of two functions. One is Advice CAL, which advises the user to perform calibration by showing blinking “CAL” in the display. “CAL” start blinking when a certain amount of time elapses since the previous calibration or when the temperature changes. Another is full automatic calibration function, which automatically perform calibration after 10 minutes have passed since “CAL” start blinking. The full automatic calibration function is only available for the LFR type. 1 Go to the function setting mode. Press and hold the [Function] key until “Func” is (Refer to Section 2-6 “Basics of Function displayed. Settings.”) 2 Select full automatic calibration. Press the [Function] key several times to select “E.Ad.C.” Press the [Zero/Tare] key to select “1” or “2.” “E.Ad.C.0”: Both functions are inactive. “E.Ad.C.1”: Advice CAL function is active. “E.Ad.C.2”: Full automatic calibration function is active. or 3 Return to the weight display. Press the [Set] key. The balance returns to the weight display. The full automatic calibration function is performed only when “8.CA.1” (span adjustment with internal weight) is selected. - 63 - 4 Adjusting the Scale LF(R) Series Operation Manual 4-5 Repeatability Measurement Repeatability measurement is a function that takes ten span measurements by placing and removing weights and calculates the standard deviation of the measurement results. There are two methods for repeatability measurement: Automatic Repeatability Measurement (ARM) with internal weight or Semi-Automatic Repeatability Measurement (SARM) with external weight. You can conduct stable measurements by adjusting the response speed according to the measurement results. 4-5-1 Automatic Repeatability Measurement (ARM) This function is only available for the LFR type. 1 Go to the function setting mode. (Refer to Section 2-6 “Basics of Function Press and hold the [Function] key until “Func” is displayed. Settings.”) 2 Set repeatability measurement to Automatic 3 Return to the weight display. 4 Start the Automatic Repeatability Measurement Repeatability Measurement (ARM). Press the [Function] key several times to select “F.ArM.” Press the [Zero/Tare] key to select “1.” Press the [Set] key. The balance returns to the weight display. (ARM). <Press and hold> Press and hold the [Cal] key until “ArM” is displayed. After a short time, the display changes to “Cnt.1” and the measurement is started. As the number of span measurements increases, the number shown in “Cnt.*” increases to 1, 2, 3, and so on. When the number reaches “10,” the measurements are completed and the standard deviation is displayed. ... Standard deviation 5 Return to the weight display. Press any key. The balance returns to the weight display. - 64 - LF(R) Series Operation Manual 4 Adjusting the Scale To discontinue the measurement, press the [Print] key. 4-5-2 Semi-Automatic Repeatability Measurement (SARM) 1 Go to the function setting mode. Press and hold the [Function] key until “Func” is (Refer to Section 2-6 “Basics of Function displayed. Settings.”) 2 3 4 Set repeatability measurement to Semi-Automatic Repeatability Measurement (SARM). Return to the weight display. Press the [Function] key several times to select “F.ArM.” Press the [Zero/Tare] key to select “2.” Press the [Set] key. The balance returns to the weight display. Start the Semi-Automatic Repeatability Measurement (SARM). Press and hold the [Cal] key until “SArM” is displayed. After a short time, the display changes to “Cnt.1” and the measurement is started. <Press and hold> 5 Measure the zero point. 6 Place a weight on the weighing pan. The display changes to “on 0” and the zero-point measurement is started. When the zero-point measurement is completed and “on F.S.” is displayed, place a weight on the weighing pan. The span measurement is started. - 65 - 4 Adjusting the Scale 7 LF(R) Series Operation Manual Repeat steps 5 and 6. “Cnt.*” is displayed. As steps 5 and 6 are repeated, the Display the standard deviation. number shown in “Cnt.*” increases to 1, 2, 3, and so on. When the number reaches “10,” the measurements are ... completed and the standard deviation is displayed. Standard deviation 8 Return to the weight display. Press any key. The balance returns to the weight display. To discontinue the measurement, press the [Print] key. The standard deviation displayed after the Automatic Repeatability Measurement (ARM) is the result of measurement using the internal weight equivalent to the weighing capacity. To obtain a result of measurements in a state similar to how you use the balance, use an appropriate weight and conduct the Semi-Automatic Repeatability Measurement (SARM). - 66 - LF(R) Series Operation Manual 4 Adjusting the Scale 4-6 Easy RES Function (single-touch response time change) Easy RES function enables the user to change the response speed very easily. You can change response speed just by pressing [Set] key. By changing the response speed according to the degree of vibration in the place where the balance is installed, you can reduce the display fluctuation and the time spent waiting for the display to stabilize. 1 Go to the function setting mode. Press and hold the [Function] key until “Func” is (Refer to Section 2-6 “Basics of Function displayed. Settings.”) 2 Set the single-touch response speed. Press the [Function] key several times to select “d.o.t.c.” Press the [Zero/Tare] key to select “1.” 3 Save the setting. Press the [Set] key. The balance returns to the weight display. When the [Set] key is pressed once, the current setting is displayed. Each time the [Set] key is pressed, the response speed changes in three steps: “NORMAL,” “SLOW,” and “FAST” in this order. After the setting is completed, the balance returns to measurement mode automatically. This function is related to Function 1 “5A.rE.” and “5C.Fr.” settings. [Set] key Meaning Description Related Function 1 setting “5A.rE.” “5C.Fr.” 0 1 2 2 4 4 Fast response FAST Easily affected by vibration NORMAL Halfway between FAST and SLOW Slow response SLOW Hardly affected by vibration - 67 - 4 Adjusting the Scale LF(R) Series Operation Manual Setting “5A.rE.” to “1” results in the fastest response, which is suitable for use in a place hardly affected by vibration. Setting “5A.rE.” to a larger number up to “7” results in lower response, which is suitable for use in a place significantly affected by vibration. Setting “5C.Fr.” to “0” results in the fastest response, which is suitable for use in a place hardly affected by vibration. Setting “5C.Fr.” to a larger number up to “4” results in lower response, which is suitable for use in a place significantly affected by vibration. This function is not available when the addition function or the gravimeter mode is used. - 68 - LF(R) Series Operation Manual 5 Function Setting 5 Setting the Functions 5-1 Select and Switch of Weighing Units You can set two units (unit A and unit b) and switch between the units. Unit b can only be used in simple weight measurement mode. Unit A can be used in all measurement modes. 1 Go to the function setting mode. (Refer to Section 2-6 “Basics of Function Press and hold the [Function] key until “Func” is displayed. Settings.”) 2 Set unit A. Press the [Function] key several times to select “b1.u.A.” Press the [Zero/Tare] key to select a unit from the following numbers: 1:mg/2:g/4:ct (carat)/d:mom (momme) When only setting unit A, press the [Set] key in this step to save the setting. 3 Set unit b. Press the [Function] key several times to select “b3.ub” Press the [Zero/Tare] key to select a unit from the following numbers: 0: Unit b is not used/1:mg/2:g/4:ct (carat)/d:mom (momme) Unit b can only be used in simple weight measurement mode. 4 Save the setting. 5 Switch between unit A and unit b. Press the [Set] key. The balance returns to the weight display. Press the [Function] key during measurement. This switches between unit A*, unit A (gross), and unit b*. (* “Net” lights up during tare range setting.) - 69 - 5 Function Setting LF(R) Series Operation Manual 5-2 Readability Setting Use this function to set the readability. The larger the readability becomes, the less the balance is affected by external influences. In addition, it takes less time for the balance reading to stabilize. Each unit has a different readability. The readability setting is available for the single-range type only. 1 Go to the function setting mode. Press and hold the [Function] key until “Func” is (Refer to Section 2-6 “Basics of Function displayed. Settings.”) 2 Select the readability. Press the [Function] key several times to select “b2.d.A.” Press the [Zero/Tare] key to select from 1 through 5. 3 Save the setting. Press the [Set] key. The balance returns to the weight display. To set the readability of unit b, select “b4.d.b” in step 2. You can also set the same unit for unit A and unit b, and set different minimum indications, so that unit A and unit b can be used to switch the readability. List of readability settings Set value Unit LF-135R LF(R)-124 / -224 mg g ct mom mg g ct mom 1 0.1 0.0001 0.001 0.0001 0.01 0.00001 0.0001 0.00001 2 0.2 0.0002 0.002 0.0002 0.2 0.00002 0.0002 0.00002 3 0.5 0.0005 0.005 0.0005 0.05 0.00005 0.0005 0.00005 4 1 0.001 0.01 0.001 0.1 0.0001 0.001 0.0001 5 2 0.002 0.02 0.002 0.2 0.0002 0.002 0.0002 - 70 - LF(R) Series Operation Manual 5 Function Setting 5-3 Automatic Switching of Scale Intervals With this function, the readability of the balance automatically switches between 0.00001 g for gross readout equal to or less than 92.00000 g and 0.0001 g for gross readout over 92.00000 g. Automatic switching between two scale intervals is only available for the LF225DR. You can use it when the balance is displaying the weight. 1 Go to the function setting mode. Press and hold the [Function] key until “Func” is (Refer to Section 2-6 “Basics of Function displayed. Settings.”) 2 Set automatic switching of scale intervals to ON. 3 Return to the weight display. Press the [Function] key several times to select “C.d.r.” Press the [Zero/Tare] key to select “1.” Press the [Set] key. The balance returns to the weight display. When any unit other than “g” is selected, the two scale intervals are switched at a weight equivalent to 92.00000 g. - 71 - 5 Function Setting LF(R) Series Operation Manual 5-4 Turning ON/OFF the Automatic Switching of Scale Intervals with a Single Touch This function allows you to turn on or off the automatic switch between two scale intervals just by pressing the [Set] key. Automatic switching between two scale intervals is only available for the LF225DR. You cannot use it when using the addition function, the gravimeter mode or the statistical operation function. You can use it when the balance is displaying the weight. 1 Go to the function setting mode. Press and hold the [Function] key until “Func” is (Refer to Section 2-6 “Basics of Function displayed. Settings.”) 2 3 Set the function that turns on or off the automatic Press the [Function] key several times to select “d.o.t.c.” switching of scale intervals. Press the [Zero/Tare] key to select “2.” Save the setting. Press the [Set] key. The balance returns to the weight display. This function is related to Function 1 “C.d.r.” setting, which will be changed according to this setting. - 72 - LF(R) Series Operation Manual 5 Function Setting 5-5 Saving the Container (Tare) Weight Use this function to set a tare range when the balance is turned on using the latest saved tare weight. Use this function when you turn the balance on or off with a sample and tare on the pan. Leaving the balance with a substance and tare on it for a long period of time may result in a larger error in weighing. You should set the tare range regularly. 1 Go to the function setting mode. (Refer to Section 2-6 “Basics of Function Press and hold the [Function] key until “Func” is displayed. Settings.”) 2 Set the tare memory. Press the [Function] key several times to select “n.tArE.” Press the [Zero/Tare] key to select “1.” 3 Save the setting. 4 Save the tare weight. Press the [Set] key. The balance returns to the weight display. Place the container (tare) the weight of which you want to save and then measure the tare. The saved tare weight is updated every time a tare range is set. - 73 - 5 Function Setting LF(R) Series Operation Manual 5-6 Power Setting 5-6-1 Automatic backlight-off function This function automatically turns off the backlight if the balance is left untouched in measurement mode for about 3 minutes. 1 Go to the function setting mode. (Refer to Section 2-6 “Basics of Function Press and hold the [Function] key until “Func” is displayed. Settings.”) 2 Set the automatic backlight-off function. Press the [Function] key several times to select “A.A.b.” Press the [Zero/Tare] key to select “1.” 3 Save the setting. Press the [Set] key. The balance returns to the weight display. The automatic backlight-off function does not work under the following conditions: Function settings are displayed. An object is placed on the weighing pan and the display is not stable. Placing an object on the weighing pan or pressing a key turns the backlight on again. - 74 - LF(R) Series Operation Manual 5 Function Setting 5-7 Date and Time Setting 5-7-1 Time setting Use this function to set the time of the 24 hour clock (hours:minutes:seconds). 1 Open the time view. Press and hold the [Function] key for several seconds. After “Func” changes to “d-SEt” in the display, release the key. Press the [Function] key once. After “tImE” is displayed, the time is displayed. 2 Adjust the time. Press the [Set] key. The value in the location of the cursor can be changed. Change the value in the location of the cursor using the [Zero/Tare] key. Press the [Function] key to move the cursor to the right. If the cursor is at the rightmost digit, it returns to the leftmost digit. Pressing the [Print] key while making the setting returns to the time that was set before you started making changes. 3 Save the time. Press the [Set] key. The display changes to the date view. If the date does not need to be changed, leave the setting screen using the [Function] key. - 75 - 5 Function Setting LF(R) Series Operation Manual 5-7-2 Date setting The last two digits of the western calendar year are displayed for the year. The order in which the year, month, and day appear can be changed using Function 1. 1 Open the date view. Press and hold the [Function] key for several seconds. After “Func” changes to “d-SEt” in the display, release the key. Press the [Function] key to display the time, and then press the [Function] key again. After “dAtE” is displayed, the display automatically changes to the date view. 2 Adjust the date. Follow step 2 in “Time Setting” to change the date. 3 Save the date. Press the [Set] key. 5-8 Date View Use this function to set the order in which the year, month, and day are displayed or output to printers and other devices to indicate the date stored in the balance. 1 Go to the function setting mode. (Refer to Section 2-6 “Basics of Function Press and hold the [Function] key until “Func” is displayed. Settings.”) 2 Set the order in which the year, month and day Press the [Function] key several times to select “H.dAtE.” are displayed. Press the [Zero/Tare] key to select “H.dAtE 1 to 3.” “H.dAtE 1”: Year-Month-Day “H.dAtE 2”: Month-Day-Year “H.dAtE 3”: Day-Month-Year 3 Save the order. Press the [Set] key. - 76 - LF(R) Series Operation Manual 5 Function Setting 5-9 Time Output Use this function to output the current time along with measurement data. Set the time before using this function. 1 Go to the function setting mode. (Refer to Section 2-6 “Basics of Function Press and hold the [Function] key until “Func” is displayed. Settings.”) 2 Set the time output function. Press the [Function] key several times to select “J.t.o.” Press the [Zero/Tare] key to select “J.t.o. 1.” 3 Save the setting of time output function. Press the [Set] key. - 77 - 5 Function Setting LF(R) Series Operation Manual 5-10 Interval Output Function Use this function to output data at specified intervals. Set the interval time in “hour:minute:second” form. You can output time with measurement data. To output time, refer to Section 5.9 “Time Output.” 1 Go to the function setting mode. Press and hold the [Function] key until “Func” is (Refer to Section 2-6 “Basics of Function displayed. Settings.”) 2 Set the output control to “Output once after a set Press the [Function] key several times to select “71.o.c.” Press the [Zero/Tare] key to select “A” or “b” and then press the [Set] key. 71.o.c.A = Output once after a set interval elapses 71.o.c.b = Output once in a stable state after a set interval elapses interval elapses” or “Output once in a stable state after a set interval elapses.” or 3 Bring up the interval function. Press and hold the [Set] key until “Int.VAL” is displayed. The interval time is displayed and the cursor is located at the leftmost digit. <Press and hold> 4 Set the interval time. Change the value at the location of the cursor using the [Zero/Tare] key. Press the [Function] key to move the cursor to the right. If the cursor is at the rightmost digit, it returns to the leftmost digit. Pressing the [Print] key while making the setting returns to the weight display without saving the setting. 5 Save the setting and return to the weight display. Press the [Set] key. The balance returns to the weight display. - 78 - LF(R) Series Operation Manual 6 Start interval output. 7 End interval output. 5 Function Setting Press the [Print] key. After “StArt” is displayed, interval output starts. Press the [Print] key. After “End.” is displayed, the balance returns to the weight display. Output stops in the function setting mode. When “6-Err” is displayed, it indicates that the interval time is set to zero. Set the interval time again (Press any key to delete the error display.) - 79 - 5 Function Setting LF(R) Series Operation Manual 5-11 ID No. Setting Results of successfully completed span adjustments and span tests can be printed by ISO/GLP/GMP compliant devices. Set the ID number printed with the results. In situations such as when the same model is used, you can assign numbers that allow you to easily manage them. You can use up to six digits in an ID number. The characters that you can use are as follows: Spaces, 0 to 9, A to F, − (minus) 1 Go to Function 2 setting mode. Press the [Function] key while pressing the [Zero/Tare] key. Release the keys when “Func2” is displayed. Function 2 setting mode is set and “1. Id 0” is displayed. + 2 Set the ID number. Press the [Zero/Tare] key to select “1.” 3 Go to the ID number setting mode. Press the [Function] key. 4 Enter the ID number. Enter the ID number with the following steps: (1)Press the [Zero/Tare] key. The leftmost digit will blink. (2)Press the [Zero/Tare] key to select a character. (When ID number is being displayed or Pressing the key toggles between a space, 0 to 9, A to F, set, “ ” and “▲” appear in the upper left of and – (minus). the display.) (3)Pressing the [Function] key causes the next digit to blink. Set the ID number by repeating steps (2) and (3). 5 Save the ID number. Press the [Set] key. The display changes to “2.o.M.P.0.” Press the [Set] key again to return to the weight display. - 80 - LF(R) Series Operation Manual 5 Function Setting 5-12 Improving the Stability of the Balance When the balance is stable, “ ” (stability indicator) appears in the upper left of the display. When displayed values flicker or the stability indicator blinks, this indicates that the balance is being affected by wind or vibration. In these situations, a setting change can improve stability. The greater the values set in the “4A.S.h (stability judgment width,” “4b.S.C. (number of stability judgments),” “5A.rE. (response speed),” “5C.Fr. (signal processing),” and “b2.d.A/b4.d.b (minimum readability setting)” function settings, the better the stability will be. Relationship between each function setting and the effect of wind/vibration Effect of wind/vibration Small | | | | | | Big 4A.S.h (stability judgment width) 4b.S.C. (number of stability judgments) 5A.rE. (response speed) 5C.F.r. (signal processing) 1 1 0 1 2 2 1 2 3 3 2 3 4 4 3 4 5 5 4 6 6 5 7 6 8 7 Method 1) Decrease the weight change speed to reduce the effects of wind and vibration. First, incrementally set “5A.rE. (response speed)” to larger values up to 4. If this does not improve the stability of the balance, incrementally set “5C.Fr. (signal processing)” to larger values. - 81 - 5 Function Setting LF(R) Series Operation Manual Method 2) Change the stability indicator lighting criteria to prevent the stability indicator from blinking. This method does not affect the flickering of displayed values, but affects when the stability indicator lights up. Setting larger values reduces blinking and causes the stability indicator to light up faster. Set larger values for “4A.S.h (stability judgment width)” and “4b.S.C. (number of stability judgments)” in this order. Setting smaller values reduces blinking and causes the stability indicator to take longer to light up. Set smaller values at “4b.S.C. (number of stability judgments)” and “4A.S.h (stability judgment width)” in this order. Method 3) Set the minimum readability to a larger value to improve both flicker of displayed values and blinking of the stability indicator. (This method cannot be used for the LF225DR.) Set a larger value for “b2.d.A/b4.d.b (minimum readability setting).” 1 Go to the function setting mode. (Refer to Section 2-6 “Basics of Function Press and hold the [Function] key until “Func” is displayed. Settings.”) 2 Set each function. Press the [Function] key several times to select the function to set. (See the above table). 4A.S.h.= Stability judgment width 4b.S.C.= Number of stability judgments 5A.rE.= Response speed 5C.Fr. = Signal processing b2.d.A= Readability setting (A) b4.d.b= Readability setting (B) 3 Select a setting. 4 Save the setting. Press the [Zero/Tare] key to select a set value for each function (see the above table). Press the [Set] key. The balance returns to the weight display. - 82 - LF(R) Series Operation Manual 5 Function Setting 5-13 α-Check(self-diagnosis function) α-check function gives the users menu of self-diagnosis of the balance. It is composed of five test items, display test, key test, motor test, check of calibration history, and repeatability test. 5-13-1 Display test Use the display test to check whether all display segments are working properly. 1 Go to the function 2 setting mode. While pressing the [Zero/Tare] key, press the [Function] key. After “Func2” is displayed, release the keys. + 2 Select α-check function. Press the [Function] key several times to select “5.S.dn.” Press the [Zero/Tare] key to select “1,” and then press the [Function] key. “51.d.t.” is displayed. 3 Start the test. Select “51.d.t.” Press the [Zero/Tare] key to select “1” and then press the [Function] key. “dSP.tESt.” is displayed. 4 Check the display. 5 Print the test result. 6 End the test. Press the [Function] key several times. Pressing the [Function] key toggles the display between “dSP.tESt.,” all ON and all OFF. Press and hold the [Print] key. The test result is output. Press the [Set] key to end the test. Press the [Set] key again to return to the weight display. The test result can only be output after all ON and all OFF are checked. - 83 - 5 Function Setting LF(R) Series Operation Manual 5-13-2 Key test Use the key test to check whether the keys are working properly. 1 Go to the function 2 setting mode. While pressing the [Zero/Tare] key, press the [Function] key. After “Func2” is displayed, release the keys. + 2 Select α-check function. Press the [Function] key several times to select “5.S.dn.” Press the [Zero/Tare] key to select “1,” and then press the [Function] key. “51.d.t.” is displayed. 3 Start the test. Press the [Function] key several times to select “52.K.t.” Press the [Zero/Tare] key to select “1” and then press the [Function] key. “KEy.tESt.” is displayed. 4 Check the keys. 5 Print the test result. Press and hold the [Print] key. 6 End the test. Press the [Set] key twice to end the test. Press the [Set] Press the keys several times. Pressing each key should bring up the following display: [Zero/Tare] key (left) “tArE1” [Zero/Tare] key (right) “tArE2” [Function] key “Function” [Set] key “Set” [Cal] key “CAL” [Print] key “Print” The test result is output. key again to return to the weight display. The test result can only be output after all the keys are checked. - 84 - LF(R) Series Operation Manual 5 Function Setting 5-13-3 Motor test Use the motor test to check whether the internal weight is working properly. This function is only available for the LFR type. 1 Go to the function 2 setting mode. While pressing the [Zero/Tare] key, press the [Function] key. After “Func2” is displayed, release the keys. + 2 Select α-check function. Press the [Function] key several times to select “5.S.dn.” Press the [Zero/Tare] key to select “1,” and then press the [Function] key. “51.d.t.” is displayed. 3 Start the test. Press the [Function] key several times to select “53.M.t.” Press the [Zero/Tare] key to select “1” and then press the [Function] key. “Mot.tESt.” is displayed. 4 Activate the internal weight. 5 Print the test result. Press and hold the [Print] key. 6 End the test. Press the [Set] key to end the test. Press the [Set] key Press the [Function] key. The internal weight is activated. The test result is output. again to return to the weight display. The test result can only be output after the internal weight is activated. - 85 - 5 Function Setting LF(R) Series Operation Manual 5-13-4 Span adjustment history Use this function to display and print the history of span adjustments. The balance saves the history data of the last ten span adjustments with the history numbers “HIS.1” (newest) to “HIS.10” (oldest). This function does not work when no history data is saved. History data cannot be deleted once it is saved. 1 Go to the function 2 setting mode. While pressing the [Zero/Tare] key, press the [Function] key. After “Func2” is displayed, release the keys. + 2 Select α-check function. Press the [Function] key several times to select “5.S.dn.” Press the [Zero/Tare] key to select “1” and then press the [Function] key. “51.d.t.” is displayed. 3 Start the test. Press the [Function] key several times to select “54.Sc.t.” Press the [Zero/Tare] key to select “1” and then press the [Function] key. “CAL.HiSt.” is displayed. 4 Display details of history data. When the history number is displayed, press the [Zero/Tare] key several times. Pressing the [Zero/Tare] key cyclically shows “history number,” “type of adjustment,” “date,” “time,” “temperature” and “error display.” 5 6 7 8 Display the next history data. Press the [Function] key. The next history data is displayed. Repeat steps 4 and 5. Repeat steps 4 and 5 to view the history. Print the test result. Press and hold the [Print] key. End the test. Press the [Set] key to end the test. Press the [Set] key The test result is output. again to return to the weight display. - 86 - LF(R) Series Operation Manual 5 Function Setting 5-13-5 Automatic Repeatability Measurement (ARM) You can conduct an Automatic Repeatability Measurement (ARM) (Section 4-5-1) by using α-check function. This function is only available for the LFR type. 1 Go to the function 2 setting mode. While pressing the [Zero/Tare] key, press the [Function] key. After “Func2” is displayed, release the keys. + 2 Select α-check function. Press the [Function] key several times to select “5.S.dn.” Press the [Zero/Tare] key to select “1” and then press the [Function] key. “51.d.t.” is displayed. 3 Start the Automatic Repeatability Measurement Press the [Function] key several times to select “55.ArM.” (ARM). Press the [Zero/Tare] key to select “1” and then press the [Function] key. “ArM” is displayed and the Automatic Repeatability Measurement (ARM) is started. For details on how to use the Automatic Repeatability Measurement (ARM), refer to Section 4-5-1 “Automatic Repeatability Measurement (ARM).” - 87 - 5 Function Setting LF(R) Series Operation Manual 5-13-6 Semi-Automatic Repeatability Measurement (SARM) You can conduct an Automatic Repeatability Measurement (ARM) (Section 4-5-2) by using α-check function. 1 Go to the function 2 setting mode. While pressing the [Zero/Tare] key, press the [Function] key. After “Func2” is displayed, release the keys. + 2 Select α-check function. Press the [Function] key several times to select “5.S.dn.” Press the [Zero/Tare] key to select “1” and then press the [Function] key. “51.d.t.” is displayed. 3 Start the Semi-Automatic Repeatability Press the [Function] key several times to select Measurement (SARM). “56.SArM.” Press the [Zero/Tare] key to select “1” and then press the [Function] key. “SArM” is displayed and the Semi-Automatic Repeatability Measurement (SARM) is started. For details on how to use the Semi-Automatic Repeatability Measurement (SARM), refer to Section 4-5-2 “Semi-Automatic Repeatability Measurement (SARM).” - 88 - LF(R) Series Operation Manual 6 Input/Output to/from External Devices 6 Input/Output to/from External Devices 6-1 Output to Printers By connecting a printer to the balance, span adjustment results, span test results, and measurement results can be printed in an ISO/GLP/GMP compliant format. 6-1-1 Connecting a printer Connect the RS-232C connector of the balance to a printer using the D-SUB9P cable. You can connect the balance to SHINKO DENSHI CSP-160 II printer or standard printer from printer manufacturers. The following setting is required for the printer. Set it by referring to the operation manual of the printer. Set the printing function (printing control) to “balance control.” Match the baud rate and other communication settings to the settings of the balance. Set the date and time of the printer before printing. 6-1-2 Printing span adjustment and span test results 1 Go to the function setting mode. (Refer to Section 2-6 “Basics of Function Press and hold the [Function] key until “Func” is displayed. Settings.”) 2 Press the [Function] key several times to select “G.GLP.” Select “1” by pressing the [Zero/Tare] key. 3 4 Press the [Function] key several times to select “G1.out.” Select “1” by pressing the [Zero/Tare] key. Save the setting. Press the [Set] key. The balance returns to the weight display. - 89 - 6 Input/Output to/from External Devices 5 LF(R) Series Operation Manual Perform the span adjustment or span test. After the span adjustment or span test is successfully completed, the printer executes the print job. While the data is being printed, the balance may seem to be frozen, but wait until printing is completed. No printing is executed if the span adjustment or test is not successfully completed. Do not press any keys on the printer during printing. 6-1-3 Printing measurement results 1 Go to the function setting mode. (Refer to Section 2-6 “Basics of Function Press and hold the [Function] key until “Func” is displayed. Settings.”) 2 Press the [Function] key several times to select “G.GLP.” Select “1” by pressing the [Zero/Tare] key. 3 Press the [Function] key several times to select “G2.od.” Select “1” by pressing the [Zero/Tare] key. 4 Save the setting. Press the [Set] key. The balance returns to the weight display. 5 Print measurement results. Pressing and holding the [Print] key prints the header. Pressing the [Print] key at any time during measurements prints the result data. After the measurement is completed, press and hold the [Print] key to print the footer. Do not press any keys on the printer during printing. - 90 - LF(R) Series Operation Manual 6 Input/Output to/from External Devices 6-2 Connection of interface and the external equipment The balance communicates with external devices such as a PC via the RS-232C interface. The RS-232C interfaces equipped on the balance are a type-B USB and a D-SUB9P. Connection with external devices is established with the following specifications: Disconnect the AC adapter of the balance before connecting external devices. 6-2-1 Connector pin numbers and functions of the D-SUB9P The D-SUB9P connector equipped on the balance has the following pin alignment: Pin number Signal name Input/Output Function & Remarks 1 – – – 2 RXD Input Receiving data 3 TXD Output Transmitting data 4 DTR Output HIGH (When the balance is powered ON) 5 GND – Signal ground 6 – – – 7 – – – 8 – – – 9 EXT.TARE Input External tare range setting - 91 - 6 Input/Output to/from External Devices LF(R) Series Operation Manual You can set a tare range or adjust the zero-point from an external device by connecting a contact or a transistor switch between the pin for externally setting a tare range (Pin 9) and the signal ground pin (Pin 5). When doing so, allow at least 400 ms for connection (ON) time (Maximum voltage when the balance is turned OFF: 15 V, sink current when it is turned ON: 20 mA). 6-2-2 Examples of connection with a PC Use the following examples as a guide to connect the balance to external devices using a cable. Examples of connection with a PC/AT compatible machine - 92 - LF(R) Series Operation Manual 6 Input/Output to/from External Devices 6-2-3 Connecting a type-B USB connector to a PC 1 Download the driver suitable for the OS installed on your PC from the following 2 3 Connect the AC adapter to the balance and turn the balance on. 4 After the driver is properly installed, check the port to which the balance is 5 Set the application connection port to be used, and check that communication has URL:http://www.ftdichip.com/ Connect the balance to the PC using a USB cable. At this time, the USB adapter is detected as a new device. Install the driver. connected by using Device Manager, for example. been established. If communication is not established properly, check the communication settings of both the balance and the application, and check whether communication has been established. When the balance is connected to a PC via USB, the USB operates as a Virtual COM port inside the PC. Be sure to check which COM port the USB is connected to. - 93 - 6 Input/Output to/from External Devices LF(R) Series Operation Manual 6-2-4 Interface specifications Transmission system Transmission rate Transmission codes Signal level Bit configuration Parity bit Serial transmission, Start-stop synchronization 1200/2400/4800/9600/19200 bps ASCII codes (8/7 bits) Compliant with EIA RS-232C HIGH level (data logic 0): +5 to +15 V LOW level (data logic 1): −5 to −15 V Start bit: One bit Data bits: 8/7 bits (“7 bits” can only be specified for the extended 7/8-digit numeric format.) Parity bits: 0/1 bit Stop bits: 2/1 bit (“1 bit” can only be specified for the extended 7/8-digit numeric format.) None/Odd/Even - 94 - LF(R) Series Operation Manual 6 Input/Output to/from External Devices 6-3 Communication Data and Commands The RS-232C interface exchanges data with external devices as follows: 6-4 Output Data The five formats “6-digit numeric,” “7-digit numeric,” “extended 7-digit numeric,” “special format 1” and “special format 2” are available. Select a format by performing the following steps: 1 Go to the function setting mode. (Refer to Section 2-6 “Basics of Function Press and hold the [Function] key until “Func” is displayed. Settings.”) 2 Press the [Function] key several times to select “7.1.F.” Press the [Zero/Tare] key to select a format. 2 = 7-digit numeric format 3 = Extended 7-digit numeric format 41= Special format 1 42= Special format 2 5 = 8-digit numeric format 6 = Extended 8-digit numeric format 3 Save the setting. Press the [Set] key. The balance returns to the weight display. - 95 - 6 Input/Output to/from External Devices LF(R) Series Operation Manual 6-4-1 Data format 7-digit numeric format Consists of 15 characters including terminators (CR=0DH/LF=0AH), to which a parity bit can be added. 1 P1 2 D1 3 D2 4 D3 5 D4 6 D5 7 D6 8 D7 9 D8 10 U1 11 U2 12 S1 13 S2 14 CR 15 LF Extended 7-digit numeric format This is an extended version of the 7-digit numeric format and is different from the 7-digit numeric format in that: the data length can be set to seven bits, and the stop bit length can be one bit. If you select Japanese (katakana) as the print language, the data length is automatically set to eight bits. 8-digit numeric format Consists of 16characters including terminators (CR=0DH/LF=0AH), to which a parity bit can be added. 1 2 3 4 5 6 7 8 9 10 11 12 13 14 15 16 P1 D1 D2 D3 D4 D5 D6 D7 D8 D9 U1 U2 S1 S2 CR LF Extended 8-digit numeric format This is an extended version of the 8-digit numeric format and is different from the8-digit numeric format in that: the data length can be set to seven bits, and the stop bit length can be one bit. If you select Japanese (katakana) as the print language, the data length is automatically set to eight bits. - 96 - LF(R) Series Operation Manual 6 Input/Output to/from External Devices 6-4-2 Meanings of data [P1] (one character) Indicates the polarity of data. P1 Code Description + 2BH Zero or positive data − 2DH Negative data [D1 to D7 (or D8)] (seven or eight characters) Stores numeric data. D1 to D7 (D8) Code Description 0 to 9 30H to 39H 0 to 9 (numeric) 2EH • Decimal point (floating) • Omitted when numeric data does not contain decimal places. In this case, a space is output after the least significant digit. SP (Space) 20H • A space at the front of a numeric value • When numeric data does not contain decimal places, a space rather than a decimal point is output after the least significant digit. * By default, 0 (30H) is used to begin numeric values that do not begin with data. Using the function setting, such values can begin with spaces (20H). When expression units are changed or switched to display counting, percentage weighing, or unit conversion, the decimal place is changed (“ Communication format examples”). - 97 - 6 Input/Output to/from External Devices LF(R) Series Operation Manual [U1, U2] (two characters) Indicates the unit used to show numeric data. [S1] (one character) Indicates the judgment result when the limit function is used. S1 Code Description Remarks L 4CH Below (LO) 1- or 2-point scale G 47H Appropriate (OK) H 48H Above (HI) 1 31H Rank 1 2 32H Rank 2 3- or 4-point scale 3 33H Rank 3 4 5 T U (SP) 34H 35H 54H 55H 20H d 64H Rank 4 Rank 5 Cumulative value Unit weight No judgment result or no data type specified Gross - 98 - Data type LF(R) Series Operation Manual [S2] (one character) Indicates the status. S2 Code S 53H U 55H E 45H (SP) 20H 6 Input/Output to/from External Devices Description Data stable *1 Data unstable *1 Data error *2 (Indicates that data other than S2 is invalid.) No status specified *1: This value is independent of data if the data is independent of whether the weighing condition is stable or not, such as cumulative values and unit weights. *2: When “o-Err” or “u-Err” is displayed Output data other than measurement data When the following data is output, the printer control command is added before and after the output data. (1) Interval output The header and footer are output at the start and end of interval output. Header 15 “-” characters and the terminators (CR=0DH, LF=0AH) are output. 1 2 3 4 5 6 7 8 9 10 11 12 13 - 14 - 15 - Footer Two line feeds are output. (2) Time output When the time output function is set, the time is output in the line before the output data. 1 2 3 4 5 6 7 8 9 10 h h : m m : s s CR LF * hh: hours (00 to 23), mm: minutes (00 to 59), ss: seconds (00 to 59) - 99 - 6 Input/Output to/from External Devices LF(R) Series Operation Manual 6-4-3 Communication format examples 7-digit numeric format 3000.1 g/No data type specified/Data stable 1 2 3 4 5 6 7 8 9 + 0 0 3 0 0 0 . 1 +10.05 mom/Gross/Data unstable 1 2 3 4 5 6 0 0 0 1 0 7 . 250 pcs./Cumulative value/Data stable 1 2 3 4 5 6 7 + 0 0 0 0 2 5 8 0 9 5 8 0 9 (SP) 10 (SP) 11 G 12 (SP) 13 S 14 CR 15 LF 10 M 11 O 12 d 13 U 14 CR 15 LF 11 C 12 T 13 S 14 CR 15 LF 10 P 6-4-4 Special formats Data formats Special format 1 Consists of 16 characters including terminators (CR=0DH/LF=0AH). 1 2 3 4 5 6 7 8 9 10 11 12 13 P1 SP D1 D2 D3 D4 D5 D6 D7 D8 SP U1 U2 14 U3 15 CR 16 LF Special format 2 Consists of 18 to 20 characters including terminators (CR=0DH/LF=0AH). 1 S1 2 S2 3 S3 4 SP 5 D1 6 D2 7 D3 8 D4 9 D5 10 D6 11 D7 12 D8 13 D9 14 D10 15 SP 16 U1 17 U2 18 U3 19 CR 20 LF Meanings of special format 1 data [P1] (one character) Indicates the polarity of data. P1 Code Description + 2BH Zero or positive data − 2DH Negative data [SP, D1 to D8] Stores numeric data. D1 to D8 Code 0 to 9 30H to 39H 2EH SP (Space) 20H Description 0 to 9 (numeric) right-aligned Decimal point (floating) Spaces at the front and back of a numeric value Spaces in the digit places where there is no numeric value - 100 - LF(R) Series Operation Manual 6 Input/Output to/from External Devices [U1, U2, U3] (three characters) Indicates the unit used to show numeric data. For output when the balance is unstable, the unit (three characters) becomes a space (20H). Communication format examples for special format 1 123.4567 g/No data type specified/Data stable 1 2 3 4 5 6 7 8 9 10 + SP 1 2 3 . 4 5 6 7 1 SP Scale overload “o-Err” 2 3 4 5 SP SP SP SP 6 SP 7 H 8 SP 9 SP 10 SP 11 SP 12 g 13 SP 14 SP 15 CR 16 LF 11 SP 12 SP 13 SP 14 SP 15 CR 16 LF In the case of scale underload “u-Err,” “L” is output as the seventh character. - 101 - 6 Input/Output to/from External Devices Meanings of data in special format 2 [S1 to S3] (three characters) Indicates stable/unstable. S1 S1 S2 S3 code S (SP) S 53H S (SP) D 53H [SP, D1 to D10] Stores numeric data. D1 to D10 Code 0 to 9 30H to 39H 2EH − 2DH SP (Space) 20H LF(R) Series Operation Manual S2 code 20H 20H S3 code 53H 44H Meaning Stable Unstable Description 0 to 9 (numeric) right-aligned Decimal point (floating) Polarity negative “−” Polarity positive “+” or zero Spaces at the front and back of a numeric value Spaces in the digit places where there is no numeric value [U1, U2, U3] (three characters) Indicates the unit used to show numeric data. This is variable-length data and the number of characters varies between 1 to 3. - 102 - LF(R) Series Operation Manual 6 Input/Output to/from External Devices Communication format examples for special format 2 123.4567 g/No data type specified/Data stable 1 2 3 4 5 6 7 8 9 10 11 12 S SP S SP SP SP 1 2 3 . 4 5 13 6 14 7 15 SP 16 g Scale overload “o-Err” 1 2 3 4 5 S SP + CR LF In the case of scale underload “u-Err,” “-” is output as the third character. - 103 - 17 CR 18 LF 6 Input/Output to/from External Devices LF(R) Series Operation Manual 6-5 Input Commands Use these commands to control the balance from an external device. (1) Tare range setting command, (2) Output control setting command, (3) Measurement mode setting command, (4) Date output request and time output request command, (5) Interval time setting command, (6) Span adjustment and span test command, and (7) Limit value setting command 6-5-1 Procedure for transmission (1) An input command is sent from an external device to the balance. The full-duplex transmission system allows you to send input commands at any time regardless of the data transmit timing of the balance. (2) Upon successful completion of an input command, the balance will send either a normal completion response or the result data requested by the command to the external device. If the operation has not resulted in successful completion, or if the command is invalid (an error), the balance will transmit an error response. When the balance is in normal display mode, it usually sends a response to a command within one second of receiving the command. For the tare range, span adjustment or span test commands, a response is sent after the commands are completely processed. If the balance receives a tare range setting command when the function setting for tare range (function setting H.tr) is set to “wait for the balance to stabilize for zero-point adjustment (waiting for the balance to stabilize),” or if the balance receives an input command that takes a long time, the balance sends a response after the command is completely processed. If the balance receives a command when you are setting a function, when the balance is under span adjustment, or the balance is busy for other reasons, the command is executed after the current operation has been completed. After you have sent an input command, do not send another command to the balance until the external device receives a response from the balance. 6-5-2 Input command examples Sent command T(SP)(CR)(LF) O1 (CR)(LF) O8 (CR)(LF) Description Set the tare range (adjust the zero point). Set to continuous output. Output data (once immediately). - 104 - LF(R) Series Operation Manual 6 Input/Output to/from External Devices 6-5-3 Command format An input command consists of 4 characters including terminators (CR/LF). C1 C2 CR LF 6-5-4 Format of each command Pay attention to the difference between O (the letter “o”) and 0 (zero). (1) Tare range setting (zero-point adjustment) command C1 C2 Code (C1) Code (C2) Description Value T (SP) 54H 20H Tare range setting Zero-point adjustment None Acknowledgment A00:Successful completion E01:Command error E04:The tare range cannot be set (zero point cannot be adjusted) (range violation, weight error, etc.). (2) Output control setting command C1 O C2 0 Code (C1) 4FH Code (C2) 30H O 1 4FH 31H O 2 4FH 32H O 3 4FH 33H O 4 4FH 34H Description Stop output. Output continuously at all times. Output continuously if stable (Stop output if unstable). Output once when the [Print] key is pressed (whether the balance is stable or unstable). Output once when the balance is stable. Output when a sample is removed, causing the display to go below zero, and then another sample is placed, stabilizing the balance. - 105 - Response A00:Successful completion E01:Command error 6 Input/Output to/from External Devices C1 C2 Code (C1) Code (C2) O 5 4FH 35H O 6 4FH 36H O 7 4FH 37H O 8 4FH 38H O 9 4FH 39H O A 4FH 41H O B 4FH 42H LF(R) Series Operation Manual Description Output once when the balance is stable. Stop output when unstable. Output once when the balance has restabilized (the output includes zero) even if it is not reloaded. Output once when the balance is stable. Output continuously when unstable. Output is stopped after a single output when the balance is stable even if it is not reloaded. Output once when the [Print] key is pressed if the balance is stable. Output once immediately. Output once after stabilizing. Interval function (Output once each time the output time has elapsed) Interval function (Output once during stabilization, each time the output time has elapsed) Response A00:Successful completion E01:Command error Commands O0 to O7 have the same functions as the output control set by the function setting. Commands O8 and O9 are used to request data from the balance. Once the O0 to O7 commands are executed, that state is maintained. However, the status is reset to the function setting when the balance is turned on again. When the OA or OB command is input, the interval function starts, and when input again, the interval function ends. After the O8 or O9 command is executed, it returns to “O0.” C1 M M M M (3) Measurement mode setting command C2 Code (C1) Code (C2) Description 1 4DH 31H Set to Mode 1 2 4DH 32H Set to Mode 2 3 4DH 33H Set to Mode 3 4 4DH 34H Set to Mode 4 Response A00: Successful completion E01: Command error E02: Error * The measurement mode activated by mode settings 1 to 4 depends on the weighing mode currently in use. - 106 - LF(R) Series Operation Manual 6 Input/Output to/from External Devices Relationships between weighing modes and mode settings Percentage Unit Simple weight Counting Mode weighing conversion measurement Mode 1 Weight Weight Weight Weight measuring measuring measuring measuring Mode 2 Gross weight Counting Percentage Coefficient measuring multiplying Mode 3 Cumulative Cumulative Cumulative Cumulative count*1 percent*1 coefficient*1 weight*1 Error Mode 4 Display in unit Average unit Error weight b*2 Gravimeter/Statistical operation function Error Error Error Error *1: Mode 3 (M3) can only be specified when the addition function is used. If the addition function is not enabled, it results in an error. *2: If unit b is set to NONE, the balance is set to the weight measuring mode. When you specify a mode that is not supported by the current Weighing Mode, an error is returned from the balance. (4) Date output request and time output request C1 C2 Code (C1) Code (C2) Description Date output D D 44H 44H request Time output D T 44H 54H request 1: Content of date data DATE:yyyy.mm.dd(CR)(LF) Date: yyyy.mm.dd(CR)(LF) 2: Content of time data TIME:yyyy.mm.dd(CR)(LF) Time:yyyy.mm.dd(CR)(LF) Response A00: Successful completion E01: Command error English Japanese (katakana) English Japanese (katakana) When the above data is output, the printer control command is added to it. * The output content can be set to be in English or Japanese (katakana) using the function setting “G3.P.F.” (print language). * The order in which the year, month, and day appear depends on how the function setting “H.dAtE” (date display) is set. - 107 - 6 Input/Output to/from External Devices LF(R) Series Operation Manual (5) Interval (output) time setting command C2 Code (C1) Code (C2) Description C1 I A 49H 41H Interval time setting Value Response Interval time A00: Successful completion E01: Command error E02: Interval time setting error * Delimit the command, hour, minute and second with commas “,” (2CH), for example, “IA,hh,mm,ss.” (6) Span adjustment and span test command C1 C2 Code (C1) Code (C2) Description C 0 43H 30H Disables command inputs.*1 C 1 43H 31H Span adjustment with internal weight C 2 43H 32H Span test with internal weight C 3 43H 33H Span adjustment with external weight C 4 43H 34H Span test with external weight Response A00: Successful completion E01: Command error E02: Operation is disabled. E03: Cancelled by operation E04: Abnormal completion *1: Span adjustment and test commands will also be disabled. * This command takes time because the balance sends back a response after the current operation is completed. * If the function setting “8.CA.” is set to “[Cal] key disabled” (0), the span adjustment command does not work. - 108 - LF(R) Series Operation Manual 6 Input/Output to/from External Devices C1 (7) Limit value setting command C2 Code (C1) Code (C2) L A 4CH 41H First set point/ Lower limit L B 4CH 42H Second set point/ Upper limit Description L C 4CH 43H Reference L D 4CH 44H Third set point L E 4CH 45H Fourth set point Value Response Limit value A00: Successful completion E01: Command error E02: Value setting error * Delimit the command and the limit value with a comma “,” (2CH), for example, “LA,nnn.” * Enter a value with no unit. * When the balance is in simple weight measurement mode, the entered value is recognized in the unit registered as Unit A. For example, if the command “LA,20.00” is sent, the balance takes it as 20.00 g if Unit A is set to grams or 20.00 ct if Unit A is set to carats. * When the balance is in counting, percentage weighing or unit conversion mode, the unit of limit values is PCS, % or # respectively. - 109 - 6 Input/Output to/from External Devices LF(R) Series Operation Manual 6-6 Response Upon receiving an input command, the balance sends out a response. You can select the response format of either the [“A00”/“Exx”] format or the [ACK/NAK] format. The [“A00”/“Exx”] format responses are described in the explanation of “input commands” in the previous section. [“A00”/“Exx”] format] Consists of five characters including terminators. For more information on A1 to A3, see the “Response” fields in the previous section. A1 A2 A3 CR LF [ACK/NAK] format Consists of one character without a terminator. “Successful completion” (ACK) or “Abnormal completion” (NAK) is returned. Response Code Meaning ACK 06H Successful completion NAK 15H • Command error (when an erroneous command is received) • Numeric format error • Processing interrupted • Processing terminated abnormally • Other errors To switch between the [“A00”/“Exx”] format and [ACK/NAK] format, use the “67.rS” function setting. 1: [“A00”/“Exx”] format 2: [ACK/NAK] format - 110 - LF(R) Series Operation Manual 7 Troubleshooting 7 Troubleshooting 7-1 Error Messages Message o-Err Cause The weight of the sample is more than the weighing capacity. The number of digits in the addition result or calculation result went beyond the largest number that can be displayed. u-Err The negative load exceeded the lower limit. - 111 - Remedy • Unload the sample and weigh it in parts. • Replace the tare with a lighter one. • If the error message does not disappear even when nothing is placed on the weighing pan, mechanical parts may have failed. Please contact the retailer from whom the balance was purchased. • First, clear the addition result. Then execute the addition again. • The coefficient used for unit conversion is too small. Set a larger coefficient. • The weighing pan or the pan base may not be set properly. Check whether they are in contact with an object or if there is some other problem with them. • If the error message does not disappear even if the weighing pan and pan base are properly set, mechanical parts may have failed. Please contact the retailer from whom the balance was purchased. 7 Troubleshooting Message 1-Err 2-Err LF(R) Series Operation Manual Cause The reference weight used during span adjustment or span test with an external weight is far less than 50% of the weighing capacity. An error over 1.0% was detected in span adjustment or span test with an external weight, or the balance failed. b-Err The balance is influenced by static electricity or noise. d-Err The balance is influenced by static electricity or noise. L-Err The weight of a sample is too light to take samples for counting, or for reference weight saving during percentage weighing. t-Err • While using the addition operation, two additional samples were placed on the balance at once. • The addition operation was performed when zero or a negative value is displayed. - 112 - Remedy Use a weight that is as close to the weighing capacity as possible. Check that the correct weight was put in place and that no objects other than the weight are on the pan. Then, execute span adjustment or span test again. • Unplug the AC adapter from the receptacle and then turn the power on again. • If this error occurs again, electric components may have failed. Please contact the retailer from whom the balance was purchased. • Unplug the AC adapter from the receptacle and then turn the power on again. • If this error occurs again, electric components may have failed. Please contact the retailer from whom the balance was purchased. Use a heavier sample by referring to the Specifications to check the minimum unit weight and the percentage weighing weight limit. • After returning the display to “0” (by removing the previous sample), place the next sample on the balance to continue the addition operation. • Addition operations are impossible when 0 or a negative value is displayed. Place a sample on the balance to continue the addition operation. LF(R) Series Operation Manual 7 Troubleshooting Message E1-Err Cause No input is being sent from the weight sensor. E2-Err Initialization cannot be completed because the balance is unstable. - 113 - Remedy • Unplug the AC adapter from the receptacle and then turn the power on again. • If this error occurs again, the sensor may be malfunctioning. Please contact the retailer from whom the balance was purchased. The balance may be affected by an external influence such as wind and vibration. Relocate the balance by referring to instructions about the place of installation described in Section 1-1 “Warnings regarding Use.” 7 Troubleshooting LF(R) Series Operation Manual 7-2 Troubleshooting Problem Nothing is displayed even when the balance is powered on. Cause The AC adapter is not connected. Remedy • Check that the AC adapter is connected. • If nothing is displayed even if the AC adapter plug is properly connected, the electric components of the balance or the AC adapter may have failed. Replace the AC adapter to test whether the adapter was the problem if you have an AC adapter of the same model that you know operates properly. • Please contact the retailer from whom the balance was purchased. The display flickers. The balance may be affected by an external influence such as wind and vibration. Increase the setting values of relevant functions by referring to Section 5-11 “Improving the Stability of the Balance.” The displayed weight is incorrect. This error is caused by the balance not being used for a long period of time or being relocated. Perform span adjustment. The adjusters are not resting flat on the surface and the balance is not horizontal. The tare range is set or is not set. Make sure that the balance is horizontal. - 114 - Unload the sample from the weighing pan and then zero the readout by pressing the [Zero/Tare] key to continue measurement. LF(R) Series Operation Manual Problem The weight indication contains an error even after it is calibrated. 7 Troubleshooting Cause The balance may have been affected by an external influence such as wind and vibration during calibration. Remedy The balance may be affected by an external influence such as wind and vibration. Take remedial actions or relocate the balance by referring to instructions about the place of installation described in Section 1-1 “Warnings regarding Use.” Then calibrate it again. The weight used for calibration is slightly different in mass from the weight used for checking. Use the same weight during calibration and checking. The M continuously flashes. (When the [Zero/Tare] key is pressed when taking samples in counting mode, etc.) The balance may be affected by an external influence such as wind and vibration. The balance may be affected by an external influence such as wind and vibration. Take remedial actions or relocate the balance by referring to instructions about the place of installation described in Section 1-1 “Warnings regarding Use.” Unable to output anything The output function settings may not have been set as you intended. Match the balance’s communication conditions with the external device by - 115 - 7 Troubleshooting Problem LF(R) Series Operation Manual Cause Communication conditions do not match those of the external device. Remedy referring to their operation manuals. Check output by: Initialize the function settings by referring to Section 7-3 “Initializing” or Function Setting List. Then, set communication conditions 1,200 bps, 8-bit data, 2-bit stop bit, and no parity by referring to the operation manual of the external device. With these settings, after the [Print] key is pressed and once the balance has stabilized, output is done once. Check the output by pressing the [Print] key. Wrong cable connection To connect the balance to a common PC, a crossover cable is required (Refer to Section 6-2 “Connecting to External Devices via the RS-232C Interface”). Obtain one yourself or contact the retailer from whom the balance was purchased. The cable is disconnected or not properly connected. To reset the balance to the initial settings at the time of purchase. Make sure that the cable is connected properly. The balance can be re-initialized (Section 7-3 “Initializing”). - 116 - LF(R) Series Operation Manual 7 Troubleshooting 7-3 Initializing The settings of the balance can be initialized by following these steps: 1 Go to the function 2 setting mode. While pressing the [Zero/Tare] key, press and hold the [Function] key. After “Func2” is displayed, release the keys. + The function 2 setting mode is set, displaying “1. ID 0.” 2 Set the function initialization. Press the [Function] key to select “2. in i.” Press the [Zero/Tare] key to select “1.” 3 Save the setting. Press the [Set] key. The balance returns to the weight display. All function settings are initialized, discarding all data including ID numbers, limit values, as well as all counting, percentage weighing, unit conversion, and gravimeter data. Restoring the information once it has been initialized is impossible. Before initializing the balance, record necessary function settings by writing them down. - 117 - 7 Troubleshooting LF(R) Series Operation Manual 7-4 Maintenance When performing maintenance on the balance, be careful of the following: 7-4-1 For heavy dirt It is easy to remove the right and left doors of the windshield, and the weighing pan, the pan base, the windshield ring and the bottom plate in the weighing chamber, so that you can clean the balance. Unplug the AC adapter before cleaning the balance. Be sure to unplug the AC adapter before cleaning the balance. Removing the windshield doors (1) Push down the lower knob of the doors you want to remove until they are free. (2) Remove the door storage cover by pushing the upper part of the claw down and tilting the cover toward you. (3) Remove the doors by pushing them backward. (4) Attach the doors in the reverse order of removal. When attaching the doors, bring the two doors together with the door having the knob facing the inside. The four doors have different shapes. To attach them properly, you should only remove the doors on one side at a time. When attaching the doors, pay close attention to their directions. - 118 - LF(R) Series Operation Manual 7 Troubleshooting Removing the weighing pan, the pan base, the windshield ring and the bottom plate in the weighing chamber Lift the windshield ring. At the same time, you can remove the pan base and the weighing pan. To remove the bottom plate, hold both sides of the bottom plate with both hands and pull it up. Attach the bottom plate, the windshield ring, the pan base, and the weighing pan in this order. 7-4-2 How to clean the balance To clean the main unit, wipe it down with a wet soft cloth that has been thoroughly wrung out. Do not use any strong solvents or abrasive cleansers. Take care not to allow liquid or dirt to enter the main unit (mechanical parts). - 119 - 7 Troubleshooting LF(R) Series Operation Manual (Memo) - 120 - LF(R) Series Operation Manual Appendixes Appendixes Appendix 1 Function Setting List - 121 - Appendixes LF(R) Series Operation Manual - 122 - LF(R) Series Operation Manual Appendixes - 123 - Appendixes LF(R) Series Operation Manual - 124 - LF(R) Series Operation Manual Appendixes - 125 - Appendixes LF(R) Series Operation Manual - 126 - LF(R) Series Operation Manual Appendixes - 127 - Appendixes LF(R) Series Operation Manual - 128 - LF(R) Series Operation Manual Appendixes - 129 - Appendixes LF(R) Series Operation Manual Appendix 2 Measurement Mode List In each weighing mode, pressing the [Function] key switches the function displayed. Displayable functions differ between modes. The additional functions usable concurrently with each function also differ. Weighing mode Simple weight measurement Displayed functions switched with each press of the [Function] key Additional function usable Remarks in each function Switching Displayed order function Unit used Addition Limit 1 Weight measuring Unit A Available Available 2 Gross weight Unit A N/A N/A 3 Weight measuring Unit b N/A N/A Displayed only when unit b is selected 4 Cumulative weight Unit A Cumulative value N/A Displayed only when the addition function is selected 1 Counting Pcs Available Available 2 Cumulative count Pcs Σ Cumulative value N/A 3 Average unit weight Unit A Pcs N/A N/A 4 Weight measuring Unit A N/A N/A 1 Percentage measuring % Available Available 2 Cumulative percent % Cumulative value N/A 3 Weight measuring Unit A N/A N/A 1 Coefficient multiplying # Available Available 2 Cumulative coefficient # Cumulative value N/A 3 Weight measuring Unit A N/A N/A 1 Measurement of specific gravity g N/A N/A Displayed sign B/G Σ Counting Percentage weighing Unit conversion Gravimeter Σ Σ Displayed only when the addition function is selected Displayed only when the addition function is selected Displayed only when the addition function is selected Unit for weight fixed to g * For more information on unit A and unit b, refer to Section 5-1 “Select and Switch of Weighing Units.” - 130 - LF(R) Series Operation Manual Appendixes Appendix 3 ISO/GLP/GMP Compliant Printing When span adjustment, span test or α-check is successfully completed, the balance outputs the following: The “ERR” and the instrumental error line is output when the instrumental error has been entered. Span adjustment with internal weight Span adjustment with external weight - 131 - Appendixes LF(R) Series Operation Manual Span test with internal weight Span test with external weight - 132 - LF(R) Series Operation Manual Appendixes Calibration of internal weight Measurement data: Header Measurement data: Footer - 133 - Appendixes LF(R) Series Operation Manual α-check: Display test α-check: Key test - 134 - LF(R) Series Operation Manual Appendixes α-check: Motor test Span adjustment history - 135 - Appendixes LF(R) Series Operation Manual Appendix 4 Specifications Appendix 4-1 Basic Specifications Gram (g) Model Max (g) d (g) Parts counting Percentage Minimum unit Weight limit (g) weight (g) LF124(R) 120 0.0001 0.0001 0.01 LF224(R) 220 0.0001 0.0001 0.01 LF225DR 92 / 220 0.00001 / 0.0001 0.00001 0.001 LF135R 135 0.00001 0.00001 0.001 Pan size φ80 - 136 - LF(R) Series Operation Manual Appendixes Appendix 4-2 Functional Specifications Weighing system Weighing mode Function Display Tare range setting Zero tracking Display when overloaded Output Span adjustment Power External dimensions (WDH) Mass of the main unit Operating temperature/humidity Options Electromagnetic balance Simple weight measurement, Counting, Percentage weighing, Unit conversion and Gravimeter (only measures specific gravity of a solid) Automatic switch between two scale intervals (for LF225DR only), cumulate, net addition, limit function (5-level judgment based on upper- and lower-limit settings, judging by definite/deviation values), unit change, ISO/GLP/GMP, tare value save, calendar, clock, readability change, Se-CAL (Advice CAL and full automatic calibration), unit weight readout, gross weight readout, backlight duty selection, automatic backlight-off, Easy RES (single-touch response time change) and α-check (self-diagnosis function) LCD (with backlight) Maximum 8-digit 7-segment display, segment height up to 16.5 mm, 40-step bar graph display, and display of messages and symbols Single-touch tare range setting with an actual sample weight using the [Zero/Tare] key (Whether to wait for the balance to stabilize or not can be selected) Zero tracking can be disabled with a setting. “o-Err” is displayed when the weighing capacity is exceeded by +9e (0.009 g). RS-232C compliant output is equipped as standard. SHINKO DENSHI standard format Type-B USB, D-SUB9P male (RS-232C output, external tare range setting port, bidirectional) Supported printer: CSP-160 II (SHINKO DENSHI) Functions selectable via settings Automatic span adjustment with internal weight (for LFR type only) Span adjustment with external weight (Use a weight that weighs 10% or more of the weighing capacity.) Entry of instrumental error of a weight to be used * Span adjustment is available in grams only. AC 100 to 240 V , DC 5.5V~6V 210×320×335 mm (including the windshield) Approx. 5.5 kg Temperature: +10 to +30°C, Humidity: 80%rh or less (no condensation) Specific gravity measurement kit - 137 - Appendixes LF(R) Series Operation Manual Appendix 4-3 Weighing Capacity and Readability by Unit Model Unit mg gram (g) carat (ct) ounce (oz) pound (lb) troy ounce (ozt) penny weight (dwt) grain (GN) tael (tl) (Hong Kong) tael (tl) (Singapore,Malaysia) tael (tl) (Taiwan) momme (mom) tola (to) LF124(R) LF224(R) LF225DR LF135R 120000 220000 92000 220000 130000 0.1 0.1 0.01 0.1 0.01 120 220 92 220 130 0.0001 0.0001 0.00001 0.0001 0.00001 600 1100 460 1100 650 0.0005 0.001 0.0001 0.001 0.0001 4.2 7.7 3.2 7.7 4.5 0.000005 0.000005 0.000001 0.000005 0.000001 0.26 0.48 0.2 0.48 0.28 0.000001 0.000001 0.000001 0.000001 0.0000001 3.8 7 2.9 7 4.1 0.000005 0.000005 0.000001 0.000005 0.000001 77 140 59 140 83 0.0001 0.0001 0.00001 0.0001 0.00001 1800 3300 1400 3300 2000 0.002 0.002 0.001 0.002 0.001 3.2 5.8 2.4 5.8 3.4 0.000005 0.000005 0.000001 0.000005 0.000001 3.1 5.8 2.4 5.8 3.4 0.000005 0.000005 0.000001 0.000005 0.000001 3.2 5.8 2.4 5.8 3.4 0.000005 0.000005 0.000001 0.000005 0.000001 32 58 24 58 34 0.00005 0.00005 0.00001 0.00005 0.00001 10 18 7.8 18 11 0.00001 0.00001 0.00001 0.00001 0.000001 - 138 - LF(R) Series Operation Manual Appendixes Appendix 4-4 Unit Conversion Table - 139 - Appendixes LF(R) Series Operation Manual Appendix 4-5 Outline Drawings - 140 - LF(R) Series Operation Manual Index for Terms Index of Terms [A] α-check (self-diagnosis function)........... 83 Addition function.............................. 37, 68 Advice CAL ........................................... 63 Automatic backlight-off .......................... 74 Automatic repeatability measurement ............................ 64, 87, 88 Automatic switch between two scale intervals ....................................... 71, 72 Average sample weight ......................... 24 [B] Interface................................................ 94 Interval output function.......................... 78 ISO/GLP/GMP compliant form .............. 89 [J] Judgment using definite values............. 45 Judgment using deviation values.......... 47 [K] Key test................................................. 84 [L] Limit function......................................... 40 Limit value............................................. 42 Liquid density........................................ 35 Lower weight limit ................................. 29 [M] Bar graph ........................................ 16, 42 [C] Calibration ............................................. 55 Calibration of internal weight ................. 59 Carat ..................................................... 69 Command............................................ 104 Counting.................................... 24, 37, 40 Cumulate............................................... 37 [D] Motor test.............................................. 85 [N] Net ........................................................ 20 Net addition........................................... 37 [O] Definite value ........................................ 42 Deviation value................................ 42, 47 Display test............................................ 83 D-SUB9P cable ..................................... 89 [E] Operation key ......................................... 8 [P] Percentage weighing ................ 27, 37, 40 Press and hold........................................ 9 Printer ................................................... 89 [R] Easy RES (single-touch response time change).............................................. 67 [F] Readability ............................................ 70 Reference weight .................................. 29 Repeatability measurement .................. 64 Response.............................................110 RS-232C ......................................... 89, 91 [S] Full automatic calibration....................... 63 Function setting..................................... 21 [G] Gravimeter ...................................... 32, 68 Gross..................................................... 20 [H] Sample.................................................. 24 Se-CAL ................................................. 63 Semi-Automatic Repeatability Measurement ........................ 64, 65, 88 Span adjustment ............55, 57, 62, 80, 89 Span test........................56, 58, 62, 80, 89 History ................................................... 86 [I] ID number ............................................. 80 Initialize ............................................... 117 Instrumental error .................................. 62 - 141 - Index for Terms LF(R) Series Operation Manual Unit ....................................................... 69 Unit conversion ......................... 30, 37, 40 USB ...................................................... 93 [W] Stability.................................................. 81 Statistical operation function.................. 49 [T] Tare range setting ........................... 18, 73 Terminator ........................................... 105 Turning ON/OFF the automatic switch between two scale intervals............... 72 [U] Weighing capacity................................. 18 Weight................................................... 55 Windshield door .................................... 13 [Z] Zero-point adjustment ........................... 17 Underfloor measurement....................... 22 - 142 - LF(R) Series Operation Manual Index for Terms (Memo) き - 143 -