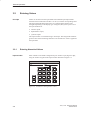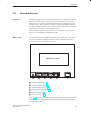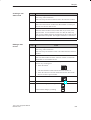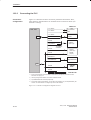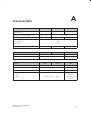
1
Preface, Contents 1 Part I Introduction 2 SIMATIC HMI 3 TP27, TP37 Touch Panels Part II Functions of the Touch Panels 11 12 Equipment Manual Part III Installation and Commissioning 13 14 Part IV Device Description and Maintenance 18 A Part V Appendices E Glossary, Index 6AV3991–1AJ02–0AB0 Release 01/00 Safety Guidelines ! ! This manual contains notices which you should observe to ensure your own personal safety, as well as to protect the product and connected equipment. These notices are highlighted in the manual by a warning triangle and are marked as follows according to the level of danger: Warning indicates that death, severe personal injury or substantial property damage can result if proper precautions are not taken. Caution indicates that minor personal injury or property damage can result if proper precautions are not taken. Note draws your attention to particularly important information on the product, handling the product, or to a particular part of the documentation. Qualified Personnel Equipment may be commissioned and operated only by qualified personnel. Qualified personnel within the meaning of the safety notices in this manual are persons who are authorized to commission, ground and identify equipment, systems and circuits in accordance with safety engineering standards. Correct Usage Note the following: ! Warning The equipment may be used only for the applications stipulated in the catalog and in the technical description and only in conjunction with other equipment and components recommended or approved by Siemens. Startup must not take place until it is established that the machine, which is to accommodate this component, is in conformity with the guideline 89/392/EEC. Faultless and safe operation of the product presupposes proper transportation, proper storage, erection and installation as well as careful operation and maintenance. Approvals The approvals that apply to the device are detailed in the Chapter Technical Data. Trademarks SIMATICR, SIMATIC HMIR, SIMATIC Multi PanelR, SIMATIC Multifunctional PanelR, ProTool/LiteR, ProToolR, ProTool/ProR and MP270R are registered trademarks of Siemens AG. Some of the other designations used in these documents are also registered trademarks; the owner’s rights may be violated if they are used be third parties for their own purposes. Impressum Editor and Publisher: A&D PT1 Copyright E Siemens AG 1999 All rights reserved Disclaimer of Liability The reproduction, transmission or use of this document or its contents is not permitted without express written authority. Offenders will be liable for damages. All rights, including rights created by patent grant or registration of a utility model or design, are reserved. We have checked the contents of this manual for agreement with the hardware and software described. Since deviations cannot be precluded entirely, we cannot guarantee full agreement. However, the data in this manual are reviewed regularly and any necessary corrections included in subsequent editions. Suggestions for improvement are welcomed. Siemens AG, Automation & Drives SIMATIC Human Machine Interface Postfach 4848, D-90327 Nuernberg Siemens Aktiengesellschaft Technical data subject to change. E Siemens AG 1999 Order No. 6AV3991–1AJ02–0AB0 Preface Purpose This equipment manual provides operation, installation, configuration and system service personnel with information concerning functionality, operation and technical design of the Touch Panels TP27 and TP37. Organization of the manual The equipment manual Touch Panel TP27, TP37 is organized into five parts: Part Chapters I 1-2 Overview of the Touch Panel and range of functions in tabular form. II 3 - 11 Step-by-step instructions on how to operate the Touch Panel using the standard screens. III 12 - 13 – Mechanical and electrical installation, – Commissioning – Touch Panel operating modes. IV 14 - 18 Detailed information on the Touch Panel and maintenance. V Conventions Contents Appendix – – – – – – Technical data, Interface assignments, System messages, SIMATIC HMI documentation, ESD guidelines, Glossary of technical terms. The following conventions are used throughout this manual: Motor off Text in the Touch Panel display is presented in this typewriter font. Variable Symbolic names representing variable values on the screen are presented in this italic typewriter font Screens Functions selected by the user are presented in this standard italic font. ESC The labels of buttons are presented in a different typeface. TP27, TP37 Equipment Manual Release 01/00 i Preface History The various releases of the equipment manual correspond to the following firmware and ProTool versions: Release ii Remarks ProTool version 04/97 First release of the TP37 equipment manual V 3.0 and later 10/97 Inclusion of TP27, inclusion of touch screen functionality V 4.0 and later V 4.0 and later 09/98 Inclusion of the TP27–10; new standard screen for printing messages V 5.0 01/99 Inclusion of standard screens for Status/Force and Clean Screen V 5.1 01/00 Inclusion of the JEIDA/PCMCIA card for the TP27–6. V 5.2 TP27, TP37 Equipment Manual Release 01/00 Preface Other support In the case of technical queries, please contact your local Siemens in the subsidiaries and branches responsible for your area. SIMATIC Customer Support Hotline Available worldwide, at all times: Nuernberg Johnson City Singapur Simatic Basic Hotline Nuernberg Johnson City SIMATIC BASIC Hotline SIMATIC BASIC Hotline Singapur SIMATIC BASIC Hotline Local time: Mon - Fri 8:00 to 18:00 Local time: Mon - Fri 8:00 to 17:00 Local time: Mon - Fri 8:00 to 17:30 Telephone: +49 (911) 895-7000 Telephone: +1 423 461-2522 Telephone: +65 740-7000 Fax: +49 (911) 895-7002 Fax: +1 423 461-2231 Fax: +65 740-7001 E-Mail: simatic.support@ nbgm.siemens.de E-Mail: simatic.hotline@ sea.siemens.com E-Mail: simatic@ singnet.com.sg SIMATIC Premium Hotline (charged, only with SIMATIC Card) Time: Mon - Fri 0:00 to 24:00 Telephone: +49 (911) 895-7777 Fax: +49 (911) 895-7001 TP27, TP37 Equipment Manual Release 01/00 iii Preface SIMATIC Customer Online Services SIMATIC Customer Support offers comprehensive additional information concerning SIMATIC products through its Online services as follows: S Up–to–date general information is provided – in Internet under http://www.ad.siemens.de/simatic – via Fax-Polling under 08765-93 02 77 95 00 S Up–to–date product information and downloads for practical use can be found: – in Internet unter http://www.ad.siemens.de/support/ html–00/ – via the Bulletin Board System (BBS) in Nürnberg (SIMATIC Customer Support Mailbox) under +49 (911) 895–7100 In order to contact the mailbox, please use a modem with up to 28.8 kBaud (V.34) capacity. Set the parameters as follows: 8, N, 1, ANSI, or dial for connection via ISDN (x.75, 64 kBit). Abbreviations The abbreviations used in this equipment manual have the following meaning: AM ANSI AS511 ASCII CPI CPU DIL DP DRAM DKM EM ESD LCD LED MPI PC PLC PU PPI SRAM STN TFT TP TTL iv Alarm Message American National Standards Institute Protocol of the PU interface to SIMATIC S5 American Standard Code for Information Interchange Control Panel Interface Central Processing Unit Dual-In-Line (package) Decentral Periphery Dynamic Random Access Memory Direct Key Module Event message Electrostatic Sensitive Device Liquid Crystal Display Light–Emitting Diode Multipoint Interface (SIMATIC S7) Personal Computer Programmable Logic Controller Programming Unit Point to Point Interface (SIMATIC S7) Static Random Access Memory Super Twisted Nematic Thin Film Transistor Touch Panel Transistor-Transistor Logic TP27, TP37 Equipment Manual Release 01/00 Contents Part I INTRODUCTION 1 2 Product Description . . . . . . . . . . . . . . . . . . . . . . . . . . . . . . . . . . . . . . . . . . . . . . . . . . . . 1-1 1.1 Visualizing and Controlling Processes . . . . . . . . . . . . . . . . . . . . . . . . . . . . . . 1-3 1.2 The Touch Panels at a Glance . . . . . . . . . . . . . . . . . . . . . . . . . . . . . . . . . . . . 1-5 Functionality . . . . . . . . . . . . . . . . . . . . . . . . . . . . . . . . . . . . . . . . . . . . . . . . . . . . . . . . . . . 2-1 Part II FUNCTIONS OF THE TOUCH PANELS 3 4 5 6 General Operation . . . . . . . . . . . . . . . . . . . . . . . . . . . . . . . . . . . . . . . . . . . . . . . . . . . . . . 3-1 3.1 Operating Touch Elements . . . . . . . . . . . . . . . . . . . . . . . . . . . . . . . . . . . . . . . . 3-4 3.2 3.2.1 3.2.2 3.2.3 Entering Values . . . . . . . . . . . . . . . . . . . . . . . . . . . . . . . . . . . . . . . . . . . . . . . . . Entering Numerical Values . . . . . . . . . . . . . . . . . . . . . . . . . . . . . . . . . . . . . . . . Entering Alphanumeric Values . . . . . . . . . . . . . . . . . . . . . . . . . . . . . . . . . . . . Entering Symbolic Values . . . . . . . . . . . . . . . . . . . . . . . . . . . . . . . . . . . . . . . . 3-6 3-6 3-8 3-10 3.3 Help Text . . . . . . . . . . . . . . . . . . . . . . . . . . . . . . . . . . . . . . . . . . . . . . . . . . . . . . . 3-11 Screens . . . . . . . . . . . . . . . . . . . . . . . . . . . . . . . . . . . . . . . . . . . . . . . . . . . . . . . . . . . . . . . . 4-1 4.1 Screen Elements . . . . . . . . . . . . . . . . . . . . . . . . . . . . . . . . . . . . . . . . . . . . . . . . 4-1 4.2 Standard Screens . . . . . . . . . . . . . . . . . . . . . . . . . . . . . . . . . . . . . . . . . . . . . . . 4-3 Password Protection . . . . . . . . . . . . . . . . . . . . . . . . . . . . . . . . . . . . . . . . . . . . . . . . . . . 5-1 5.1 Password Level and Access Permissions . . . . . . . . . . . . . . . . . . . . . . . . . . . 5-1 5.2 Login/Logout on the Touch Panel . . . . . . . . . . . . . . . . . . . . . . . . . . . . . . . . . . 5-3 5.3 Password Management . . . . . . . . . . . . . . . . . . . . . . . . . . . . . . . . . . . . . . . . . . 5-5 Messages . . . . . . . . . . . . . . . . . . . . . . . . . . . . . . . . . . . . . . . . . . . . . . . . . . . . . . . . . . . . . . 6-1 6.1 6.1.1 6.1.2 6.1.3 Types of Message . . . . . . . . . . . . . . . . . . . . . . . . . . . . . . . . . . . . . . . . . . . . . . . Event Messages and Alarm Messages . . . . . . . . . . . . . . . . . . . . . . . . . . . . . Alarm Messages . . . . . . . . . . . . . . . . . . . . . . . . . . . . . . . . . . . . . . . . . . . . . . . . System Messages . . . . . . . . . . . . . . . . . . . . . . . . . . . . . . . . . . . . . . . . . . . . . . . 6-2 6-2 6-6 6-8 6.2 6.2.1 6.2.2 Displaying Messages . . . . . . . . . . . . . . . . . . . . . . . . . . . . . . . . . . . . . . . . . . . . Opening a Message Page . . . . . . . . . . . . . . . . . . . . . . . . . . . . . . . . . . . . . . . . Opening a Message Buffer . . . . . . . . . . . . . . . . . . . . . . . . . . . . . . . . . . . . . . . 6-9 6-11 6-13 6.3 Deleting Messages . . . . . . . . . . . . . . . . . . . . . . . . . . . . . . . . . . . . . . . . . . . . . . 6-14 TP27, TP37 Equipment Manual Release 01/00 i Contents 6.4 Printing Messages . . . . . . . . . . . . . . . . . . . . . . . . . . . . . . . . . . . . . . . . . . . . . . . 6-16 6.5 6.5.1 6.5.2 6.5.3 6.5.4 6.5.5 6.5.6 ALARM_S Messages . . . . . . . . . . . . . . . . . . . . . . . . . . . . . . . . . . . . . . . . . . . . Communication Sequence . . . . . . . . . . . . . . . . . . . . . . . . . . . . . . . . . . . . . . . . Message Acknowledgement . . . . . . . . . . . . . . . . . . . . . . . . . . . . . . . . . . . . . . Printing Messages . . . . . . . . . . . . . . . . . . . . . . . . . . . . . . . . . . . . . . . . . . . . . . . Message Overload . . . . . . . . . . . . . . . . . . . . . . . . . . . . . . . . . . . . . . . . . . . . . . Updating . . . . . . . . . . . . . . . . . . . . . . . . . . . . . . . . . . . . . . . . . . . . . . . . . . . . . . . Buffer Overflow . . . . . . . . . . . . . . . . . . . . . . . . . . . . . . . . . . . . . . . . . . . . . . . . . 6-18 6-19 6-20 6-20 6-21 6-22 6-23 6.6 6.6.1 6.6.2 6.6.3 Standard Screens for Messages . . . . . . . . . . . . . . . . . . . . . . . . . . . . . . . . . . . “Edit Message” Standard Screen . . . . . . . . . . . . . . . . . . . . . . . . . . . . . . . . . . “Output Messages” Standard Screen . . . . . . . . . . . . . . . . . . . . . . . . . . . . . . . “System Settings” Standard Screen . . . . . . . . . . . . . . . . . . . . . . . . . . . . . . . . 6-24 6-24 6-26 6-28 7 Printing . . . . . . . . . . . . . . . . . . . . . . . . . . . . . . . . . . . . . . . . . . . . . . . . . . . . . . . . . . . . . . . . 7-1 8 Recipes . . . . . . . . . . . . . . . . . . . . . . . . . . . . . . . . . . . . . . . . . . . . . . . . . . . . . . . . . . . . . . . . 8-1 9 10 11 8.1 8.1.1 8.1.2 Standard Screens for Recipes . . . . . . . . . . . . . . . . . . . . . . . . . . . . . . . . . . . . Creating, Editing and Saving Data Records . . . . . . . . . . . . . . . . . . . . . . . . . Transferring Data Records . . . . . . . . . . . . . . . . . . . . . . . . . . . . . . . . . . . . . . . . 8-3 8-8 8-13 8.2 Record Sets . . . . . . . . . . . . . . . . . . . . . . . . . . . . . . . . . . . . . . . . . . . . . . . . . . . . 8-15 Storing and Loading Data . . . . . . . . . . . . . . . . . . . . . . . . . . . . . . . . . . . . . . . . . . . . . . . 9-1 9.1 Data Types, Data Media and Storage Principle . . . . . . . . . . . . . . . . . . . . . . 9-1 9.2 Delete Storage Medium . . . . . . . . . . . . . . . . . . . . . . . . . . . . . . . . . . . . . . . . . . 9-3 9.3 Backup/Restore . . . . . . . . . . . . . . . . . . . . . . . . . . . . . . . . . . . . . . . . . . . . . . . . . 9-5 Status/Force Variable Using the TP . . . . . . . . . . . . . . . . . . . . . . . . . . . . . . . . . . . . . . 10-1 10.1 Status Variable . . . . . . . . . . . . . . . . . . . . . . . . . . . . . . . . . . . . . . . . . . . . . . . . . . 10-2 10.2 Force Variable . . . . . . . . . . . . . . . . . . . . . . . . . . . . . . . . . . . . . . . . . . . . . . . . . . 10-5 System Settings . . . . . . . . . . . . . . . . . . . . . . . . . . . . . . . . . . . . . . . . . . . . . . . . . . . . . . . . 11-1 11.1 Setting an Operating Mode . . . . . . . . . . . . . . . . . . . . . . . . . . . . . . . . . . . . . . . 11-4 11.2 Blanking the Screen . . . . . . . . . . . . . . . . . . . . . . . . . . . . . . . . . . . . . . . . . . . . . 11-5 11.3 Deactivate Touch Screen . . . . . . . . . . . . . . . . . . . . . . . . . . . . . . . . . . . . . . . . . 11-6 11.4 Calibrating the Touch Screen (TP37 and TP27-10 only) . . . . . . . . . . . . . . . 11-7 11.5 Other Settings . . . . . . . . . . . . . . . . . . . . . . . . . . . . . . . . . . . . . . . . . . . . . . . . . . 11-8 Part III INSTALLATION AND COMMISSIONING 12 ii Installation . . . . . . . . . . . . . . . . . . . . . . . . . . . . . . . . . . . . . . . . . . . . . . . . . . . . . . . . . . . . . 12-1 12.1 Mechanical Installation . . . . . . . . . . . . . . . . . . . . . . . . . . . . . . . . . . . . . . . . . . . 12-2 12.2 12.2.1 12.2.2 12.2.3 12.2.4 Electrical Installation . . . . . . . . . . . . . . . . . . . . . . . . . . . . . . . . . . . . . . . . . . . . . 12-6 Power Supply and Relay Contacts . . . . . . . . . . . . . . . . . . . . . . . . . . . . . . . . . 12-7 Connecting the Configuration Computer . . . . . . . . . . . . . . . . . . . . . . . . . . . . 12-8 Connecting the PLC . . . . . . . . . . . . . . . . . . . . . . . . . . . . . . . . . . . . . . . . . . . . . 12-10 Connecting a Printer . . . . . . . . . . . . . . . . . . . . . . . . . . . . . . . . . . . . . . . . . . . . . 12-12 TP27, TP37 Equipment Manual Release 01/00 Contents 13 Commissioning . . . . . . . . . . . . . . . . . . . . . . . . . . . . . . . . . . . . . . . . . . . . . . . . . . . . . . . . 13-1 13.1 Initial Startup . . . . . . . . . . . . . . . . . . . . . . . . . . . . . . . . . . . . . . . . . . . . . . . . . . . 13-3 13.2 Recommissioning . . . . . . . . . . . . . . . . . . . . . . . . . . . . . . . . . . . . . . . . . . . . . . . 13-4 13.3 Startup Behavior . . . . . . . . . . . . . . . . . . . . . . . . . . . . . . . . . . . . . . . . . . . . . . . . 13-8 13.4 Testing a Configuration in OFFLINE Mode . . . . . . . . . . . . . . . . . . . . . . . . . . 13-9 13.5 Testing the Configuration in Conjunction with the PLC . . . . . . . . . . . . . . . . 13-10 Part IV DEVICE DESCRIPTION AND MAINTENANCE 14 15 16 17 18 Unit Description TP27-6 . . . . . . . . . . . . . . . . . . . . . . . . . . . . . . . . . . . . . . . . . . . . . . . . . 14-1 14.1 Dimensions . . . . . . . . . . . . . . . . . . . . . . . . . . . . . . . . . . . . . . . . . . . . . . . . . . . . . 14-1 14.2 Operating elements . . . . . . . . . . . . . . . . . . . . . . . . . . . . . . . . . . . . . . . . . . . . . . 14-2 14.3 Connection elements . . . . . . . . . . . . . . . . . . . . . . . . . . . . . . . . . . . . . . . . . . . . 14-2 14.4 Communication options . . . . . . . . . . . . . . . . . . . . . . . . . . . . . . . . . . . . . . . . . . 14-3 Unit Description TP27-10 . . . . . . . . . . . . . . . . . . . . . . . . . . . . . . . . . . . . . . . . . . . . . . . . 15-1 15.1 Dimensions . . . . . . . . . . . . . . . . . . . . . . . . . . . . . . . . . . . . . . . . . . . . . . . . . . . . . 15-2 15.2 Operating elements . . . . . . . . . . . . . . . . . . . . . . . . . . . . . . . . . . . . . . . . . . . . . . 15-3 15.3 Connection Elements . . . . . . . . . . . . . . . . . . . . . . . . . . . . . . . . . . . . . . . . . . . . 15-3 15.4 Communication options . . . . . . . . . . . . . . . . . . . . . . . . . . . . . . . . . . . . . . . . . . 15-4 Unit Description TP37 . . . . . . . . . . . . . . . . . . . . . . . . . . . . . . . . . . . . . . . . . . . . . . . . . . . 16-1 16.1 Dimensions . . . . . . . . . . . . . . . . . . . . . . . . . . . . . . . . . . . . . . . . . . . . . . . . . . . . . 16-2 16.2 Operating and Display Elements . . . . . . . . . . . . . . . . . . . . . . . . . . . . . . . . . . 16-3 16.3 Connection Elements . . . . . . . . . . . . . . . . . . . . . . . . . . . . . . . . . . . . . . . . . . . . 16-5 16.4 Communication options . . . . . . . . . . . . . . . . . . . . . . . . . . . . . . . . . . . . . . . . . . 16-6 Options . . . . . . . . . . . . . . . . . . . . . . . . . . . . . . . . . . . . . . . . . . . . . . . . . . . . . . . . . . . . . . . . 17-1 17.1 17.1.1 17.1.2 Direct Key Module . . . . . . . . . . . . . . . . . . . . . . . . . . . . . . . . . . . . . . . . . . . . . . . Installing the Direct Key Module . . . . . . . . . . . . . . . . . . . . . . . . . . . . . . . . . . . Connectors and Adjusters . . . . . . . . . . . . . . . . . . . . . . . . . . . . . . . . . . . . . . . . 17-1 17-2 17-4 17.2 17.2.1 17.2.2 Control Panel Interface . . . . . . . . . . . . . . . . . . . . . . . . . . . . . . . . . . . . . . . . . . . Installing the Control Panel Interface . . . . . . . . . . . . . . . . . . . . . . . . . . . . . . . Connectors . . . . . . . . . . . . . . . . . . . . . . . . . . . . . . . . . . . . . . . . . . . . . . . . . . . . . 17-6 17-7 17-9 Maintenance/Upkeep . . . . . . . . . . . . . . . . . . . . . . . . . . . . . . . . . . . . . . . . . . . . . . . . . . . . 18-1 18.1 Cleaning the Screen . . . . . . . . . . . . . . . . . . . . . . . . . . . . . . . . . . . . . . . . . . . . . 18-1 18.2 Replacing the Backup Battery . . . . . . . . . . . . . . . . . . . . . . . . . . . . . . . . . . . . . 18-2 18.3 Replacing the Back–Lighting (TP37 only) . . . . . . . . . . . . . . . . . . . . . . . . . . . 18-4 TP27, TP37 Equipment Manual Release 01/00 iii Contents Part V APPENDICES A Technical Data . . . . . . . . . . . . . . . . . . . . . . . . . . . . . . . . . . . . . . . . . . . . . . . . . . . . . . . . . A-1 A.1 Direct Key Module and Control Panel Interface . . . . . . . . . . . . . . . . . . . . . . A-5 A.2 Chemical Resistance of the Touch Panel . . . . . . . . . . . . . . . . . . . . . . . . . . . A-8 B Interface Assignments . . . . . . . . . . . . . . . . . . . . . . . . . . . . . . . . . . . . . . . . . . . . . . . . . . B-1 C System Messages . . . . . . . . . . . . . . . . . . . . . . . . . . . . . . . . . . . . . . . . . . . . . . . . . . . . . . C-1 D SIMATIC HMI Documentation . . . . . . . . . . . . . . . . . . . . . . . . . . . . . . . . . . . . . . . . . . . . D-1 E ESD Guidelines . . . . . . . . . . . . . . . . . . . . . . . . . . . . . . . . . . . . . . . . . . . . . . . . . . . . . . . . E-1 Glossary . . . . . . . . . . . . . . . . . . . . . . . . . . . . . . . . . . . . . . . . . . . . . . . . . . . . . . . . . . . Glossary-1 Index . . . . . . . . . . . . . . . . . . . . . . . . . . . . . . . . . . . . . . . . . . . . . . . . . . . . . . . . . . . . . . . . . Index-1 iv TP27, TP37 Equipment Manual Release 01/00 INTRODUCTION 1 Product Description 2 Functionality Part I -2 TP27, TP37 Equipment Manual Release 01/00 Product Description Use of TP27 and TP37 1 By implementing the Touch Panels TP27 and TP37 operating statuses, current process values and faults in respect of a connected PLC can be graphically represented and the monitoring machine or system easily operated. This is made possible by using the Touch Panels which have of a number of standard functions for this purpose. The method of display and operation of the Touch Panel can be customized using the ProTool configuration software to achieve optimum results in respect of process requirements. The Touch Panel can be used to S control and monitor the process by means of the menu system. In this way, setpoints can be entered in the form of values or by touching configured buttons, for example, or control positioning elements; S display processes, machines and systems on full–graphic and semi–graphic screens; S visualize event messages and alarm messages, in addition to process variables such as an output field, bar graph, trends or status display; S intervene directly in the operation by means of the touch–sensitive screen. Touch screen The Touch Panels TP27 and TP37 have standard keyboards. The device is operated intuitively by touching configured buttons and input fields on the touch–sensitive screen, referred to in this manual as the “touch screen”. Device variants The TP27 can be supplied in a range of variations. One variant is equipped with a 6 inch display, available as monochrome and color versions. This variant is subsequently referred to as TP27-6. The second variant is the TP27, equipped with a 10 inch, color display. This variant is subsequently referred to as TP27-10. The TP37 is equipped with a 10 inch, color display. Installation possibilities The Touch Panels TP27 and TP37 are installation units for use directly at the machine location. The degree of protection is high (front panel IP65), so the devices are suitable for use in hostile industrial environments. TP27, TP37 Equipment Manual Release 01/00 1-1 Product Description Set up data areas Before commissioning, the Touch Panel must be prepared for the task of visualizing data from the PLC. This means that data areas must be created in the PLC memory in your configuration which are then used by the Touch Panel to communicate with the PLC. Configuration using ProTool Graphics and texts to be displayed on the Touch Panel, together with the properties and functionalities of the touch–sensitive operating elements, must be created beforehand by means of a configuration computer (PC or PG) using the configuration software ProTool. Before downloading the configuration data to the Touch Panel, connect the configuration computer to the Touch Panel. Once the configuration has been successfully downloaded, connect the Touch Panel to the PLC. The Touch Panel now communicates with the PLC and reacts to program execution on the PLC in accordance with the configured default values. Figure 1-1 outlines the configuration and process control phase. Configuration phase PC or PU Create configuration data Save configuration data Download configuration data Touch Panel Connected to PLC Process control phase Figure 1-1 Further information PLC Configuration and process control phase Information regarding configuration of the Touch Panel is provided in the User’s Guide ProTool – Configuring Graphics Displays. The Communication User’s Guide provides information on connecting the Touch Panel to the PLC. 1-2 TP27, TP37 Equipment Manual Release 01/00 Product Description 1.1 Visualizing and Controlling Processes Display and operating functions The basic function of the Touch Panels TP27 and TP37 is the visualization of process statuses and the operation of processes. The following display and operating functions can be configured: S screens S input/output of process values S bar graphs and trends S text or graphic lists S messages S printout S text S help text S recipes S multiple languages S password protection S touch–sensitive operating elements. Screens Logically related process data from the PLC can be compiled, displayed on a screen and individual parts of it modified. Screens may contain buttons, graphics, text and values. The Touch Panels can display machines and systems as full–graphics screens. This makes it easier for the operator to find his way around. Input/Output Numeric, alphanumeric and symbolic values can be entered via touch–sensitive input fields on the Touch Panel which are then transferred to the PLC. Current values of the PLC are displayed in output fields. Bar graphs and trend curves Current process values can be output as numeric values, symbolic text, symbolic graphs or in the form of bar graphs and trend curves. S Bar graphs represent a value as a rectangular area. Bar graphs can be used to display fill levels or quantities, for example. S Trends display a value continuously. This display mode is useful when displaying values that vary with time, variations in temperature or pressure, for example. Symbol lists Various graphic elements (bitmaps) or texts can be called into the display depending on the process status. In this way, for example, the current setting of a valve can be visualized on the Touch Panel by means of symbolic graphics or text can be modified according to the situation. TP27, TP37 Equipment Manual Release 01/00 1-3 Product Description Messages Messages appear on the Touch Panel in plain text. The message text may also contain current process values. Incoming messages are stored in a message buffer together with their date and time. S Event messages provide information and operating notes on current processes or machine states, for example Motor running at 3000 revs. S Alarm messages provide information on critical machine states, for example Motor speed too high. Alarm messages must be acknowledged on account of their urgency. Messages are classified as event messages or alarm messages during configuration. Recording All message events can be additionally recorded by being printed out in online mode on a connected printer. Messages which have accumulated in the event and alarm buffers can also be printed out. Texts Texts identify individual parts of the screen in order to be able to assign the fields displayed to the process. Help texts Help texts represent additional information and notes for the operator, which can be configured, in respect of the screens, input fields and messages. The help text relating to an alarm message, for example, may display information on the cause of a malfunction and how to clear it. Recipe Complete machine data records can be stored as recipes in a Touch Panel. A recipe defines the data structure in a configuration. Data is assigned to the configured structure on the Touch Panel. The purpose of recipes is to transfer several items of data collectively to the PLC. In this respect, it is immaterial whether actual recipes, specifications of quantities, distances to be traversed or temperature variations are involved. Multiple languages Message texts, texts in screens, help texts, system messages and button labels may be stored in three languages simultaneously in the Touch Panel and selected online. Password protection The password protection feature prevents unauthorized operations of the Touch Panel. Different passwords can be assigned to different users or user groups, thus authorizing or prohibiting access to specific control functions by assigning different password levels. Operating elements Direct intervention in the process operation is possible by using the touch–sensitive buttons and input fields on the Touch Panel screen. The structure of the Touch Panel user interface can be configured to suit individual needs. Simply adjust the number, characteristics, positions and functionality of the operating elements for the specific application. 1-4 TP27, TP37 Equipment Manual Release 01/00 Product Description 1.2 The Touch Panels at a Glance SIMATIC TP27 Hardware Models Display SIMATIC TP37 TP27-6 Monochrome TP27-6 Color TP37 Color Monochrome display 4 – Color display – 4 STN1)-LCD Type Size Touch screen Resolution (pixels) Colors LEDs for TFT2)-LCD 5.7” 10.3” Matrix 20 x 15 Analog, resistive 320 x 240 640 x 480 8 Grey shades 8 4 Back–lighting Indicators TP27-10 Color – TP on Temperature limit value reached Write/read access to memory card Interfaces Serial interface to connection From PLC, PC/PU, printer 2 x RS232/TTY 2 x RS232/TTY (active/passive) (active/passive) 1 x RS422/RS485 1 x RS422/RS485 1 x TTY (passive) / RS422/RS485 Parallel interface for connecting a printer – 1 x TTL (Centronics) 1) passive drive 2) active drive TP27, TP37 Equipment Manual Release 01/00 1-5 Product Description Hardware Processor Memory TP27-6 Monochrome TP27-10 Color TP37 Color Type 80486 Pentium Clock 33 MHz 100 MHz Flash EPROM for firmware and user data 1 MB Main memory (DRAM) Special features TP27-6 Color 2 MB 2 MB 4 MB 4 Hardware clock (battery–backed) Relay output for temperature monitoring 4 – 4 Module slot for PCMCIA/Jeida cards Hardware 8 MB Slot B (Slot A not used) TP27M-6 TP27C-6 TP27-10 TP37 direct key module Digital outputs, drive via configurable ports 8 16 Control Panel Interface1) Digital inputs/outputs 16 16/32 1) usable only in conjunction with SIMATIC S7 and Profibus-DP Further information 1-6 Detailed information regarding the technical data of the Touch Panels TP27 and TP37 is provided in the Appendix A of this manual. TP27, TP37 Equipment Manual Release 01/00 2 Functionality The table below summarizes the functions of the Touch Panels TP27 and TP37. The values quoted are the maximum values which can be managed by the Touch Panels. The values are limited by the size of the user memory. Functions Event messages TP27-6 TP27-10 Number 2000 Display On message line/message window View all waiting messages Length message text per line Lines per message on message page 35 characters 70 characters 2 1 Process values in message text Alarm messages TP37 8 Number 2000 Display In message window Display type First value/last value, selectable View all waiting messages Length message text per line Lines per message On message page 35 characters 70 characters 2 1 Process values in message text 8 Acknowledge individual alarm messages 4 Acknowledge several alarm messages simultaneously Message logging Output to printer Message buffer Capacity 16 acknowledgment groups 4 512 message events View buffered event/alarm messages 4 Delete 4 Buffer overflow warning 4 Automatic printout on buffer overflow 4 Message events queued simultaneously (max.) S Event messages S Alarm messages TP27, TP37 Equipment Manual Release 01/00 500 250 2-1 Functionality Functions Message acquisition Time of occurrence Message events Screens TP27-6 TP27-10 Date and time Arrive, depart, acknowledge View 4 Printout 4 Static screen elements TP37 Pixel graphics Text Character graphics Input/Output elements Input fields Output fields Combined input/output fields Symbolic input fields Symbolic output fields Bar graphs Trends Buttons light indicators Operator prompting Buttons (dynamically modifiable) light indicators Symbolic input Symbolic output Limit value monitoring Text attributes Fixed window 4 Inputs/outputs 4 Bar graphs and trends 4 Display Printer (messages) Help text Print functions Password protection Lines/characters Bold, underscore 7/35 For messages 4 For input fields 4 For screens 4 Hardcopy of display contents (screen dump) S character mode (ASCII) S graphics mode 4 4 Direct message logging 4 Screen printout in character mode (ASCII) 4 Graphics printout in graphics mode 4 Number of passwords 50 Password levels 2-2 Flashing, inverse, underscore 10 (0...9) TP27, TP37 Equipment Manual Release 01/00 Functionality Functions Recipes TP27-6 TP27-10 Number 255 Data records per recipe 500 Entries per data record TP37 500 3000 (SIMATIC S7) Save (create) data records PLCTP ! Data medium Load data records Data medium ! TP/PLC Delete data records On data medium Modify (edit) data records On data medium PLC ! TP Transfer current values TP ! PLC Data Medium ! TP Transfer data records TP ! Data Medium 4 Record sets 4 Backup Backup/restore for memory card Online language change Number of languages 3 Loadable character sets per language 3 Language–independent character set (incl. character–graphic characters) 1 – Character size in pixels Display 4 Blank screen Contrast 4 – Audio volume adjustable 4 4 1) Calibration 1) 8 x 8 to 64 x 64 not necessary 4 Can only be switched on/off TP27, TP37 Equipment Manual Release 01/00 2-3 Functionality Functions Communication TP27-6 TP27-10 TP37 SIMATIC S5 – AS511 – FAP – PROFIBUS-DP 4 4 4 SIMATIC S7/M7 – PPI – MPI – PROFIBUS-DP 4 4 4 SIMATIC 500/505 – NITP 4 NATIVE driver – – – – – 2-4 AEG/Modicon (Modbus) Allen Bradley (DF1)O Mitsubishi (FX) Omron Telemecanique (Adjust, Uni-Telway) 4 4 4 4 4 TP27, TP37 Equipment Manual Release 01/00 FUNCTIONS OF THE TOUCH PANELS 3 General Operation 4 Screens 5 Password Protection 6 Messages 7 Printing 8 Recipes 9 Storing and Loading Data 10 Status/Force Tag Using the TP 11 System Settings Part II 2-2 TP27, TP37 Equipment Manual Release 01/00 3 General Operation Operating concept Using the Touch Panel screen, it is possible to observe the operating status of the machine or system being monitored and, at the same time, to intervene directly in the process running simply by touching the buttons and input fields displayed. Operation of the Touch Panels TP27 and TP37 is intuitive to a large extent, because S operating elements can be positioned where they belong, from a functional point of view, S labeling of visible buttons is dynamic; in other words, labeling can be changed online, according to the language required, or language–independent bitmaps can be assigned to the buttons, for example, S any sections of the system or process screen are rendered operable by superimposing invisible buttons S virtual keys for cursor functions and value input only appear when they can actually be used: In input windows. Screen partitioning A screen occupies the entire display. An example of screen partitioning on the TP37 display containing several open windows is illustrated in figure 3-1. The TP27-6 has a smaller display, so that the operating elements are cascaded (overlap). System messages Global button Fixed window Message indicators Event and alarm messages Main area Numeric input window Light indicators Figure 3-1 TP27, TP37 Equipment Manual Release 01/00 Local button Help window Screen partitioning on the TP37 (example) 3-1 General Operation Fixed window The fixed window can be used to display important process magnitudes or date and time, since the contents are not affected by the screen currently open. Main area The main area comprises the entire display. It is superimposed by all other areas (fixed window, message window etc.). The main area contains the current contents of the screen that is currently open. Buttons The functions configured for the buttons have a local significance in the main area. Buttons of local significance initiate different actions from screen to screen on the Touch Panel or on the PLC, such as enabling and disabling Select Screen, Language Switch or message logging. If buttons are positioned in the fixed window, their functions are available globally. This means, for example, that the current screen can be printed (Print Screen) or the system returned to the main screen from any operating situation. Buttons may have text or graphic labels. Examples: Help Light indicators Light indicators are configurable, non–operable display elements. A light indicator signals the status of a defined bit by assigning dynamic attributes, for example a change of color or flashing text. No function is assigned to a light indicator. Light indicators have thin borders to distinguish them from user–operable buttons. Temperature Light indicators can be positioned locally in the main area or globally in the fixed window. 3-2 TP27, TP37 Equipment Manual Release 01/00 General Operation Window positions Input window: Regardless of the absolute position of the selected field, the input window always appears at the bottom right of the screen. After clicking on the top edge of the window, it skips to the opposite edge of the screen (only with TP37 and TP27-10) Message window: The system message window appears in the upper part of the screen. The position of the event message window can be configured. Help window: The window for displaying configured Help texts is appears at the bottom left. Open windows Several windows can be opened simultaneously on the Touch Panel, e.g. an input window in the main area, an event message window, an alarm window and a help window (figure 3-1). As soon as one of these windows is opened, the input elements in the main area and fixed window can no longer be accessed. All visible elements in the input and message windows remain accessible. Message indicator The message indicator indicates that alarm messages have been received. Not flashing: Alarm messages have been received which have been acknowledged. Flashing: Alarm messages have been received which have not been acknowledged. TP27, TP37 Equipment Manual Release 01/00 3-3 General Operation 3.1 Operating Touch Elements Definition Touch elements are contact–sensitive operating elements on the screen of the Touch Panel, such as buttons, input fields, message windows and help windows. Their operation is basically no different from pressing conventional keys. Touch elements are operated by lightly touching them with your finger or a pointer. Note S Never use pointed or sharp instruments to operate the Touch Panel to prevent damage to the plastic surface of the touch screen. S Touch only one point of the Touch Panel screen at a time. Do not touch several touch elements simultaneously. If you do, an unintended action may be initiated. Triggering functions A function assigned to a button is normally triggered when the button is touched. With some functions, it is possible to define the configuration so that the function is not triggered until the button is released or its outlines remain while being touched, e.g. the “Set Bit” function or the keypad in the input window for numerical values. If the button has a repeater, keep touching the button as long as the function in question is to be to repeated. Not more than one touch element is activated per touch. Where an operating function has still not been completed, e.g. entering a value, any successive attempt to trigger a similar function is refused and a system message to this effect issued. Similar functions in this respect are Enter Setpoint and Edit Data Record, for example. Operation acknowledgement When the Touch Panel detects contact on a valid touch element, it responds with a visual or acoustic acknowledgement. An acknowledgment is independent of communication with the PLC. It is not an indication of the required action actually having been executed. Acoustic acknowledgment An acoustic signal is issued as long as the touch element is touched. The signal tone can be enabled and disabled by means of the System Settings standard screen (TP37) and the volume adjusted (TP27), see chapter 11. 3-4 TP27, TP37 Equipment Manual Release 01/00 General Operation Visual acknowledgement The type of visual operation acknowledgement is dependent on the operating element touched. S Visible buttons The border color of the button touched changes: Start Untouched Start Touched S Input fields The foreground and background colors of a touched input field are interchanged. The change of color remains in effect until input is terminated or canceled. 2500 Untouched 2500 Touched S Message windows and invisible buttons A pointing hand, similar to that illustrated here, appears to the top left of the operating element touched: If the element touched is at the top border of the screen, the pointing hand appears to the right and beneath the element in question. TP27, TP37 Equipment Manual Release 01/00 3-5 General Operation 3.2 Entering Values Principle Values can be entered in the input fields and combined input/output fields which are then transferred to the PLC. To do so, touch the corresponding field. The foreground and background colors of a selected input field are interchanged. Depending on the display type configured, the system opens one of the input windows for S numeric inputs, S alphanumeric inputs, S symbolic inputs. The input window is closed following a valid input. The foreground and background colors of the field being edited are reset and the new value is applied to the input field. 3.2.1 Entering Numerical Values Input window Enter numbers in the fields configured for pure numeric input, digit for digit, using the numeric keypad of the input window illustrated in figure 3-2. 0 MIN: 999999 MAX: 2500 7 9 BS 4 D 5 E 6 F CLR HEX 1 A 2 B 3 C ESC HELP . Figure 3-2 3-6 8 0 +/– Window for entering numeric values TP27, TP37 Equipment Manual Release 01/00 General Operation Meanings of buttons Button 0 1 A Function Enter digits Enter digits 0 to 9. Enter hexadecimal numbers Enter the hexadecimal numbers A to F (after pressing HEX). Change sign Change sign from + to – and back. Enter decimal point Enter decimal point or comma. Hexadecimal mode Change numbers 1 to 6 to characters A to F. HELP Display help text (Help) Call Help text for the current input field. The button is not displayed unless the corresponding Help text is configured. BS Delete character (Backspace) Delete character shown in reverse video in the input line. CLR Delete input line (Clear) Delete all characters in the line, i.e. clear the input line. Cancel (Escape) Discard input and close window. ESC Enter Confirm input and close window. ... 9 ... 6 +/– . F HEX Entering a value Purpose Entries in numeric input fields begin aligned to the right. Entered digits are moved to the left (pocket calculator format). The current input position is displayed in reversed background/foreground colors. Invalid characters, e.g. numbers greater than 1 in binary format, are rejected with an error message. If the entry is too long, the last character entered is overwritten. If limit valuers have been configured for the specifications to be entered, they appear at the top edge of the input window. MIN indicates the lower limit value and MAX the upper. Hexadecimal mode In order to enter the hexadecimal digits A to F, press the button HEX. An “h” appears at the current input position. Press one of the buttons 1 to 6. The Touch Panel reverts to decimal mode after each character. TP27, TP37 Equipment Manual Release 01/00 3-7 General Operation Help text After pressing the HELP button, the help text configured for the relevant input field appears. See figure 3-5 on page 3-11 for an example. Terminate input Confirm the value entered by pressing the ENTER button, press ESC to cancel the input process. The window is closed in both cases. 3.2.2 Entering Alphanumeric Values Input window Enter numbers in the fields configured for alphanumeric input, character for character, using the alphanumeric keypad. Figure 3-3 illustrates the language– independent keyboard template for the normal level. The keyboard template for the Shift level of the alphanumeric keyboard varies according to the language. 15.34.19 A B C D E F G H I J K L M N O P Q R S T U V W X Y Z ( ) ’ = : / \ * – + . % & 0 1 2 3 4 5 6 7 8 Help Figure 3-3 Meanings of buttons Entering alphanumeric values at the language–independent normal level ... HELP 3-8 ESC Shift Button A 9 Function Purpose Enter characters Enter the characters using either the normal or Shift level of the keyboard. Display help text Call help text for the current input field. The button is not displayed unless the corresponding help text is configured. 9 TP27, TP37 Equipment Manual Release 01/00 General Operation Button Function Keyboard levels Activate/Deactivate the keyboard Shift level from normal level. Cursor left Cursor moves one character to the left. Cursor right Cursor moves one character to the right. Cancel (Escape) Discard input and close window. Enter Confirm input and close window. Shift ESC Entering a value Purpose Entries in alphanumeric input fields begin aligned to the left. Every time a character is entered, the cursor moves to the right to the next input position. Characters at the input position are overwritten. The current input position is displayed in reversed background/foreground colors. Invalid characters (e.g. values greater than 23 for the hour value in time) are rejected and an error message issued. If the entry is too long, the last character entered is overwritten. If a value already exists in the alphanumeric input field, this appears in inverse colors when the field is activated and deleted on beginning a new entry. In order to edit the old value, one of the cursor keys must be pressed as the first entry. On pressing CURSOR LEFT, the cursor remains on the first character, and on pressing CURSOR RIGHT it skips to the second character. In this case, the value is no longer displayed in inverse colors and can be edited. Help text After pressing the HELP button the help text configured for the relevant input field appears. See figure 3-5 on page 3-11 for an example. Keyboard levels The alphanumeric keyboard has two levels: S Normal level: (see figure 3-3) is the same in all languages. S Shift level: the keyboard template varies from language to language. Use SHIFT to toggle between the two levels. Terminate input Confirm the value entered by pressing the ENTER button, press ESC to cancel the input process. The window is closed in both cases. TP27, TP37 Equipment Manual Release 01/00 3-9 General Operation 3.2.3 Entering Symbolic Values Input window Text is entered and displayed in symbolic input fields instead of a value. Select the text from the configured text list. Figure 3-4 depicts the input window. Selection 1 Selection 2 Selection 3 Selection 4 Selection 5 Selection 6 Selection 7 Selection 8 Selection 9 Figure 3-4 Meanings of buttons HELP ESC Window for entering symbolic values Button Function Purpose Scroll (Cursor) Scroll up and down one line at a time through the text list. Display Help text Call Help text for the current input field. The button is not displayed unless the corresponding Help text is configured. Cancel (Escape) Discard selection and close window. Enter Confirm selection and close window. HELP ESC Select value Scroll through the text list using the cursor buttons or point directly to the entry required. The current selection is displayed in reversed screen colors. The cursor buttons have a repeat function. When pressed, their scroll function is repeated after a short delay and continues until the button is released. Help text After pressing the HELP button the help text configured for the relevant input field appears. See figure 3-5 on page 3-11 for an example. Terminate input Confirm the selection by pressing the ENTER button, press ESC to cancel the input process. The window is closed in either case. 3-10 TP27, TP37 Equipment Manual Release 01/00 General Operation 3.3 Help Text Purpose Help texts are created during configuration using ProTool and provide additional information on the respective subject in the language selected on the Touch Panel. Help texts can be configured for S event and alarm messages S screens S input and combined input/output fields. Help texts can provide information to the user on the permissible range of values for the input field selected, for instance. Help texts referring to an alarm message may, for example, contain supplementary details on possible causes and on rectifying the problem. Calling help texts The configured help text can be called to the screen by accessing the relevant input field and pressing the HELP button. Figure 3-5 depicts an example of the output window. Enter temperature setpoint for Tank_1 (Range 40...80 _C) Figure 3-5 Window with help text (example) Touch the window to close it. TP27, TP37 Equipment Manual Release 01/00 3-11 General Operation 3-12 TP27, TP37 Equipment Manual Release 01/00 4 Screens Process control and monitoring Processes (e.g. a processing machine or mixing station) are displayed on and can be influenced by screens which appear on the Touch Panel. These screens are created during configuration with ProTool for specific applications. Logically related process values are acquired on screens and thus provide an overview of a process or a system. Apart from this graphic mapping of processes, screens provide an opportunity of entering new process values and thus of controlling the process. 4.1 Screen Elements Screen sections Various screen elements are used to display and control screens: S text S graphics S character graphics S input fields for process values S output fields for process values S combined input/output fields S bar graphs S trends S text or graphic lists S buttons, S light indicators. The different screen elements are presented on the basis of the following examples. Example Part of the contents of various tanks are filled and mixed in a mixing unit of a fruit juice mixing system. The liquid levels in the tanks and in the mixer are displayed. The intake valves can be opened and closed by means of operator input on the Touch Panel. The motor for the mixer can be turned on and off in a similar manner. TP27, TP37 Equipment Manual Release 01/00 4-1 Screens Figure 4-1 illustrates how the configured screen may appear on the Touch Panel. Mixing Unit ¬ Tank 1 Tank 2 Tank 3 ¯ ° OPEN OPEN CLOSED Amount in the mixer (l) ® Valve 4 ± 5300 ² 4 4 HELP Motor ON Valve OPEN Valve CLOSED Motor OFF ³ Help Fill tank Selection Main Screen ¬ Text Character graphic ® Numeric output field ¯ Bar graph (tank filling) ° Symbolic input field for opening and closing the valve ± Symbolic graphic indicates the valve status graphically (open/closed) ² Graphic ³ Button Figure 4-1 Selecting a screen Configured screen for a mixing unit (example) Screens can be viewed, processed and printed via the Touch Panel. Before these actions can be performed, however, the screen has to be selected. Select a screen by means of a S Button The screen set in the configuration is opened by touching a button. S Input field Enter the number of the screen to be opened or select the name of the screen from the pick list, if applicable. S PLC job The PLC calls a screen on the Touch Panel, depending on the status of the process or the system. 4-2 TP27, TP37 Equipment Manual Release 01/00 Screens 4.2 Standard Screens Purpose A standard configuration containing standard screens is supplied with the configuration software ProTool for the respective Touch Panel. The functions needed for basic operation of the Touch Panel have been implemented in the standard screens. They include, for example, Call Message Buffer, Edit Passwords and Change Parameters Online. The individual functions are described in this manual on the basis of the standard screens. Process–specific implementation, such as event messages or screens for the process, are not included in the standard screens. Main screen The standard screens are called in via buttons on the main screen. The following screen provides an example of the main screen of theTP37. The main screen of the TP27 contains the same buttons. Main Screen TP37 HELP 1 2 3 4 1 Edit Password (chapter 5) 2 Printer Settings (chapter 7) 3 System Settings (chapter 11) 4 Status/Control Tag (chapter 10) 5 Messages (chapter 6) 6 Help Text (section 3.3) 5 6 Figure 4-2 illustrates the standard screen hierarchy. Detailed information on the functions and operation of standard screens is provided in the corresponding sections of this manual. TP27, TP37 Equipment Manual Release 01/00 4-3 Screens Main Screen Edit Password S S S Login/Logout View Edit Printer Settings S S S General Hardcopy Assign Color Status/Control Tag S S Status Tag Control Tag 1) System Settings S S S S S S S S S S S S Operating Mode Display Message Message Logging Buffer Overflow Warning Date and Time Language Backup/Restore Blank Audio Signal Contrast 3) Calibrate Screen 2) Clean Screen Edit Message S S S S EM Window ON/OFF View Messages Print Messages Delete Buffer Output Messages S S S S S S S Output Medium Message Event Priority Date Text Acknowledgement Group Print Messages with Filter Data Record Processing and Transmission S S S S S S Save Load Delete Edit Select Sort Selective Data Record Transmission S S S S S S PLC ³ TP TP ³ PLC Data Medium³ TP TP ³ Data Medium Select Data Record Sort 1) 1) 1) 1) 2) 3) Figure 4-2 4-4 IIncluded in standard configuration but not linked Not with TP27-6 Not with TP37 Standard screen hierarchy TP27, TP37 Equipment Manual Release 01/00 Screens Calling functions Functions are called in on the Touch Panel by means of configured buttons. To prevent unauthorized access, some functions have to be protected beforehand by means of a password at a specific password level (see chapter 5). Calling Help texts Configured help texts can be called int the standard screens by pressing the button shown here. TP27, TP37 Equipment Manual Release 01/00 HELP 4-5 Screens 4-6 TP27, TP37 Equipment Manual Release 01/00 Password Protection Access protection 5.1 5 Password protection can be configured for buttons and input fields to prevent operation of the Touch Panel by unauthorized personnel. Password Level and Access Permissions Password hierarchy During the configuration phase with ProTool, the configurer assigns the buttons and input fields hierarchically ascending password levels from 0 to 9. When a password is assigned to an individual user or to a whole user group, the permission to execute functions at a specific level is assigned simultaneously. After logging in with a password of a specific password level on the Touch Panel, permission to execute functions is granted at that password level and functions at lower levels. Password level 0 If a function is configured with password level 0, no password need be entered in order to execute this function. The functions assigned at this level, the lowest in the hierarchy, have little or no effect on operation. These functions normally do not have input options; one example is Open Message Pages. To call a password level 0 function, you do not have to enter a password. If you call a function that is assigned to a higher level, the Touch Panel will prompt you to enter a password. Password level 1–8 Levels 1 to 8 should be assigned by the configurer according to the significance of the respective function. The supervisor (superuser) is responsible for assigning a password level to a password as part of his password management duties. Password level 9 Only the superuser has the rights to execute functions assigned password level 9. The superuser has access to all the functions of the Touch Panel. Only the superuser is authorized to perform password management on the Touch Panel. Password management involves assigning and changing passwords. TP27, TP37 Equipment Manual Release 01/00 5-1 Password Superuser password The superuser password is defined during configuration. The default value in the standard configuration is “100”. This setting can be changed using the Touch Panel. Passwords from levels 1 to 8 The passwords from levels 1 to 8 are not assigned during configuration but during operation by using the Touch Panel. Use the standard screen Password Processing to do this (refer to chapter 5.3). Format The password must be a minimum of 1 character and may be a maximum of 8. Alphanumeric characters are permissible. Leading zeroes are not permitted. Standard screen The Password Processing standard screen (figure 5-1) provides the following functions: S Login/logout on the Touch Panel, S Change and delete passwords, S View password list. Password Processing Login: Edit: HELP View password list ESC Calling Help texts Exit from standard screen Figure 5-1 5-2 Standard screen Password Processing TP27, TP37 Equipment Manual Release 01/00 Password 5.2 Login/Logout on the Touch Panel Login Login on the Touch Panel S using the Password Processing standard screen S by calling a function for which the current password level is too low. In this case, the Touch Panel automatically requests a password. Logging in on standard screen Step Action Result 1 Call the standard screen Password Processing. The standard screen is displayed (figure 5-1). 2 Touch the Login input field. The password input window opens (figure 5-2). The possible input positions are marked by hash characters (#). 3 Enter your password by means of the keypad. Input commences flush left. Each character entered is representedby an asterisk (∗). 4 Confirm the entry by pressing The input window is closed. If the password is valid, the corresponding password level is disdis played next to the Login input field. Or cancel the input by pressing ESC ∗∗∗∗∗∗∗∗ A B C D E F G H I J K L M N O P Q R S T U V W X Y Z ( ) ’ = : / \ * – + . % & 0 1 2 3 4 5 6 7 8 Help Figure 5-2 TP27, TP37 Equipment Manual Release 01/00 Shift 9 ESC Window for entering the password (example TP27-6) 5-3 Password Automatic call If a password level higher than the current one is required for a button or an input field, the Touch Panel automatically requests the entry of an appropriate password beforehand. Logout If the Touch Panel screen is not touched within a configured time, the current password level is automatically reset to zero. This means that unauthorized persons cannot gain access while the Touch Panel is unattended. Itb is also possible to log out from the Touch Panel by using the Password Processing standard screen. Carry out the following steps to do this: Logging off on standard screen 5-4 Step Action Result 1 Call the standard screen Password Processing. The standard screen is displayed (figure 5-1). 2 Touch the Login input field. The password input window opens (figure 5-2). 3 Enter an invalid password and confirm by pressing Once it has been applied, the effective current password level is 0. TP27, TP37 Equipment Manual Release 01/00 Password 5.3 Password Management Functions The Password Processing standard screen provides the following functions for password management: S create passwords and assign password levels, S delete passwords, S change passwords and password levels, S view password list. These functions can only be called in password level 9 (exception: view password list). Therefore, log in beforehand by means of the Login input field using the superuser password. Creating a password A maximum of 50 different passwords can be set up on the Touch Panel. Password level 9 (superuser) can be assigned once only. Carry out the following steps to assign a password and password level: Step TP27, TP37 Equipment Manual Release 01/00 Action Result 1 Touch the Edit input field. The password input window opens. 2 Enter a password that has not been previously issued and confirm it by pressing The password is transferred to the Edit field. 3 Touch the input field behind the Edit field. The password level input window opens. 4 Enter a password level between 1 and 8 and confirm by pressing The new password is saved on the Touch Panel and protected even in the event of a power failure. 5-5 Password Deleting a password Changing a password Step Action Result 1 Touch the Edit input field. The password input window opens. 2 Enter the password to be deleted If the password level in the adin the input field Edit and conjacent input field is set to 0, the firm by pressing password has been deleted. 3 Otherwise, touch the input field behind the Edit field. The password level input window opens. 4 Overwrite the password level with 0 and confirm by pressing Once it has been transferred, the password is deleted. It is not possible to change a password on the Touch Panel directly. To change a password, the existing one must be deleted and a new one entered. Exception: The superuser password can be changed by overwriting it directly. Changing password levels 5-6 Step Action Result 1 Touch the Edit input field. The password input window opens. 2 Enter the password to be assigned a new level in the input field Edit and confirm by pressing The password level of the password entered appears in the input field behind the field Edit. 3 Touch the input field behind the Edit field. The password level input window opens. 4 Overwrite the password level with a new value and confirm pressing Once it has been transferred, the new level is assigned to the password. TP27, TP37 Equipment Manual Release 01/00 Password Viewing the password list The password list contains all the passwords set up on the Touch Panel. The only passwords displayed are those with a password level lower or equal to that with which the user logged in on the Touch Panel. The supervisor password is not displayed. Call in the password list by pressing the button Action Step Action Result 1 Touch the button The password list window opens (figure 5-3). 2 Use the arrow keys, if necessary, to scroll through the list The password and password level at the current cursor position are displayed in inverse screen colors. 3 Terminate the action by pressing The password list window is closed. ESC Serial number Password 1 2 3 4 5 6 7 8 9 Figure 5-3 TP27, TP37 Equipment Manual Release 01/00 1049 19FF27 1A740K 22CE51 3D36M1Z7 723 97BC1 A0YC3 MIRROR Password level 3 4 4 1 8 5 4 1 1 ESC Password list 5-7 Password 5-8 TP27, TP37 Equipment Manual Release 01/00 6 Messages Overview Messages on the Touch Panel indicate events and statuses related to control processes. A message consists of static text, at least. It may also contain tags. The following types of message are displayed in plain text on the Touch Panel. S event messages S alarm messages S system messages Once issued, alarm messages and event messages are stored on the Touch Panel in battery–backed message buffers, so they are protected against power failures. Messages in the buffers may be called to the display and logged on the attached printer. The Touch Panel can still be operated when messages are waiting to be displayed. Message states Alarm and event messages may contain the following information: S Arrived: Denotes the occurrence of a message. S Cleared: The reason for the message no longer exists. S Acknowledged (alarm messages only): The message has been noted by the operator or the PLC, acknowledged and confirmed. A message status is accurately timed by the Touch Panel when it is recorded and indicated when a message page or buffer is displayed. TP27, TP37 Equipment Manual Release 01/00 6-1 Messages 6.1 Types of Message Event and alarm messages Event and alarm messages must be configured. Event messages indicate a status in the process, whereas alarm messages indicate faults or errors. Event messages and alarm messages are issued by the PLC. Alarm messages have to be acknowledged on account of their significance. System messages System messages are triggered by the Touch Panel. They do not have to be configured. System messages provide information on operating status of the Touch Panel and on maloperations or malfunctions in communication. 6.1.1 Definition Event Messages and Alarm Messages The configuration defines whether a process status is indicated by an event message or alarm message. Messages referring to regular sequences of events or states should be categorized as event messages; for example 0000031 10:53:27 04.04.97 Mixing operation completed Filing level in mixer: 5000 l 11 Messages relating to disturbances of the process or status should be categorized as alarm messages; for example 0000017 10:59:53 04.04.97 Bottling operation aborted Bottling valve closed AGR 04 3 Alarm messages have to be acknowledged on account of their urgency. By doing so, the operator confirms that he has taken note of the alarm message. Alarm messages can also be acknowledged by the PLC. Operational hints can be configured as event messages or alarm messages, in addition to status messages. If, for example, the machine operator wishes to start the filling operation but has forgotten to open the bottling valve on the mixer, he can be requested to rectify the error by means of an event message; for example 0000037 11:01:02 04.04.97 Open bottling valve 6-2 11 TP27, TP37 Equipment Manual Release 01/00 Messages Presentation Alarm and event messages can be configured so that text components flash in order to distinguish them from other message texts. Messages may contain text and tag fields. Tag fields display current PLC actual values in numeric form. Standby message A sub–category of the event message is the standby message. The standby message is the event message number 0. It is displayed when there are no event messages on the Touch Panel. Display mode A current event or alarm message can be displayed in either a message line or message window. One of the following combinations can be defined in the configuration: S Window/window Event messages and alarm messages are displayed in separate windows. Event message Alarm message The alarm message window is opened automatically when an alarm message arrives. When the alarm message is acknowledged, the alarm message window disappears. The event message window can be opened only by activating a button. S Window/line An event message is displayed in the message line, whereas an alarm message is displayed in the message window. The alarm message window is opened automatically when an alarm message occurs. When an alarm message is acknowledged, the alarm message window disappears if no other alarm messages are waiting. Event message Alarm message S Window/hide An alarm message is displayed in the message window. Event messages are not displayed. Alarm message When the alarm message is acknowledged, the alarm message window is closed. TP27, TP37 Equipment Manual Release 01/00 6-3 Messages Message line When a message line has been configured it is always displayed, regardless of the screen selected. Only the latest message is displayed in the message line. Message window Messages in the configured message window contain additional information on the message, such as message number and date/time the message arrived. The alarm message window has extra buttons. Alarm message window: The alarm message window (figure 6-1) automatically appears whenever an alarm message is issued. Message number Date Number of unacknowledged messages (TP37 only) Time 0000048 11:34:02 27.03.97 2 Boiler 25: Temperature 156 degrees Summon Shift Engineer. Tel.: 9456 ACK HELP ESC Process value Figure 6-1 Alarm message window (example) The buttons in the alarm message window have the following significance: Button ACK Function Acknowledge alarm message When an alarm message is acknowledged, the alarm message window disappears if no other alarm messages are waiting. Display help text Call help text concerning the alarm message, if configured. Cancel Set the alarm message window to the background HELP ESC 6-4 Purpose TP27, TP37 Equipment Manual Release 01/00 Messages Event message window: The event message window must be selected by the operator or the PLC and can also be deselected. If a current event message is not waiting, the standby message is displayed. Activate the event message window by touching the OPEN EVENT MESSAGE WINDOW button on the Edit Message standard screen. The button is inactive if the Line setting has been configured for event messages. Close the event message window by touching it. Message archive Alarm and event messages are written in the Touch Panel message archive when they arrive. The message archive is a message buffer, created by the operatng system, in which all message events are eneterd in chronological order. Message events consist of: S arrival of a message S acknowledgment of an alarm message S clearing of a message. The message archive is a FIFO buffer. When the buffer is full, the oldest messages are deleted. Overflow warning During configuation, it is possible to define a remainder buffer size for the message archive. As soon as this remaining buffer size is reached, the Touch Panel automatically issues an overflow warning (system message). Messages continue to be entered in the message archive even after the remaining buffer size has been reached. Message bit procedure If the conditions for issuing a message have been fulfilled in the process currently running, a value has been reached, a bit is set in the data area by the PLC application program for an event or alarm message. The Touch Panel reads the data area after a configured polling time. In this way, a message is detected as having “arrived”. The bit is reset by the PLC when the condition for issuing the message no longer exists. The message is then regarded as having been “cleared”. TP27, TP37 Equipment Manual Release 01/00 6-5 Messages 6.1.2 Alarm Messages Acknowledging alarm messages Alarm messages have to be acknowledged on account of their urgency. This can be done manually or automatically by the PLC. ACK To acknowledge an alarm message manually, simply touch the ACK button in the alarm message window (figure 6-1 on page 6-4). If the error messages should be acknowledged by the PLC, continue to read the Communication User’s Manual. If several alarm messages are waiting to be displayed, the next alarm message is displayed after one has been acknowledged. Each message must be acknowledge in turn. Acknowledgment groups, group acknowledgement During configuration, several alarm messages can be combined to so called acknowledgment groups. This means that by acknowledging the first alarm message, e.g. the cause of the malfunction, all the remaining alarm messages in the same acknowledgment group are acknowledged simultaneously (consequential malfunctions) without them being issued in succession for acknowledgment on the Touch Panel (group acknowledgment). Up to 16 acknowledgment groups can be configured. If alarm messages are not assigned to an acknowledgment group, only the message currently displayed is acknowledged when more than one are waiting. Message indicator As soon as a alarm message arrives, an alarm message window is opened and the message indicator shown here appears as a button on the screen. The message indicator can assume one of two states: S flashing, as soon as at least one unacknowledged alarm message is waiting. S not flashing, when all waiting alarm messages have been acknowledged, but at least one has not yet been cleared. After touching the message indicator, the alarm message page appears. The message indicator does not disappear until all acknowledged alarm messages have been cleared. This means that a pending alarm message is not forgotten. 6-6 TP27, TP37 Equipment Manual Release 01/00 Messages Setting alarm messages in the background The alarm message window can be set in the background so that if there are numerous alarm messages pending, it is not necessary to acknowledge them all before rectifying what may be a critical system condition at the machine. Set the window in the background by touching the ESC button in the alarm message window (figure 6-1 on page 6-4). The other touch elements on the screen can then be used. ESC The alarm messages set in the background are re–displayed S after touching the message indicator, or S a new alarm message arrives. If the alarm message is in the foreground, the alarm message screen can be opened by touching the message indicator. Each subsequent touch opens the alarm message buffer or alarm message screen alternately. TP27, TP37 Equipment Manual Release 01/00 6-7 Messages 6.1.3 System Messages Definition System messages indicate internal Touch Panel operating statuses. They indicate, for example, maloperations or communication malfunctions. Touch the system message window to close it. Structure A system message consists of a message number and text, e.g.: 222 AM remaining buffer reached Message text may contain internal system tags for defining the cause of the message more precisely. Some system messages expect an acknowledgement or to make a decision. To determine the further course of events, two buttons are displayed in the system message window; for example 559 Delete event buffer? OK Yes / ESC No OK Serious and non–serious system messages ESC System messages are catagorized into serious and non–serious messages. A serious system message relates to an error which can be eliminated only by a cold or warm restart of the Touch Panel. All other errors generate non–serious system messages – for example, a configured limit value is not maintained on entry or the current password level is too low for the operator input required. If a non–serious system message is not hidden automatically after a short period of time, hide it by touching the message window. Display can be terminated automatically after a configurable display time expires. A list of system messages, with explanations, is provided in Appendix C of this manual. 6-8 TP27, TP37 Equipment Manual Release 01/00 Messages 6.2 Displaying Messages Message archive All message events are written in the message archive in chronological order. Message events are the arrival, clearing and acknowledgment of a message. A maximum of 512 message events can be stored in the Touch Panel message archive. Every message event is stored with the following information: S message number S event identifier (A for arrived, D for cleared, K for acknowledged), S S S S time of the event with date and time of day acknowledgment group (alarm messages) message text values of tags at the time of arrival or clearing. If a message contains process values, the values stored in the message archive are those which were available when the message event arrived or has been cleared. The Touch Panel does not record any current process values for the Acknowledged message status. The value is replaced by ### characters. Figure 6-2 shows the structure of the message archive. Message number Message status Time and date (time of arrival) Process value (time of arrival) Acknowledgment group 0000049 A 11:32:00 27.03.97 AGR:01 Boiler pressure too high: 12,7 bar 0000049 AK 11:33:20 27.03.97 AGR:01 Kesseldruck zu hoch: #### bar 0000010 A 11:34:36 27.03.97 AGR:02 Oil supply stopped 0000010 AK 11:35:18 27.03.97 AGR:02 Oil supply stopped Figure 6-2 TP27, TP37 Equipment Manual Release 01/00 Storing message events in the message archive 6-9 Messages Display The message events in the message archive can be filtered according to various criteria and displayed on the Touch Panel (figure 6-3). – All waiting event messages are displayed on the event message page. – All message events for event messages are displayed in the event message buffer. The events related to message events are Arrived and Cleared. – All waiting alarm messages are displayed on the alarm message screen. – All message events for alarm messages are displayed in the alarm message buffer. These message events are Arrived, Cleared and Acknowledged. Event messages Alarm messages Page A Page A EM 16 AM 2 Message archive Buffer A A D Figure 6-3 Priority EM 15 EM 16 EM 15 A A A A K K D D Event message 15 Event message 16 Alarm message 2 Alarm message 3 Alarm message 2 Alarm message 3 Event message 15 Alarm message 3 Buffer A A K K D AM 2 AM 3 AM 2 AM 3 AM 3 Displaying message events on the Touch Panel Within the alarm and event messages, it is possible to configure message priorities according to their importance. S 1 (low) to S 16 (high). If several messages having the same display priority are waiting, they are displayed according to their message priority – the highest first and the lowest last. 6-10 TP27, TP37 Equipment Manual Release 01/00 Messages 6.2.1 Opening a Message Page Purpose An overview of the alarm and message events still pending on the Touch Panel is provided from S the alarm message screen and S the event message page. Open message pages are constantly updated. Alarm message page In order to open an alarm message page, touch S the message indicator or S the OPEN ALARM MESSAGE SCREEN button on the Edit Message standard screen Event message page To open the event message page, touch the OPEN EVENT MESSAGE PAGE button on the Edit Message standard screen Structure The event message screen is sorted chronologicaly. The sorted order of the alarm message screen also depends on the First/Last parameters set on the System Settings standard page. Figure 6-4 depicts an example of an alarm message screen. Displaying first/last message Depending on the setting, either the oldest (first) or latest (last) message is displayed where several messages are pending. This setting can be modified online on the Touch Panel by means of the System Settings standard screen. To do this, touch the MESSAGE DISPLAY field and select either the FIRST or LAST parameter from the selection window. TP27, TP37 Equipment Manual Release 01/00 6-11 Messages Message indicator 0000049 A 11:32:00 27.03.97 AGR:01 Boiler pressure too high: 12.7 bar 0000049 AK 11:33:20 27.03.97 AGR:01 Boiler pressure too high: 10.3 bar 0000010 A 11:34:36 27.03.97 AGR:02 Oil supply stopped 0000010 AK 11:35:18 27.03.97 AGR:02 Oil supply stopped HELP ESC Figure 6-4 Meanings of buttons Alarm message screen (example TP37 ) Button Function Purpose Scroll Scroll backwards/forwards one line at a time. Jump Scroll backwards/forwards one screen at a time (TP37 only). Display Help text Call help text for the marked message, if configured. Toggle Toggle back and forth between alarm message screen and alarm message buffer. Cancel (Escape) Close message page. HELP ESC 6-12 TP27, TP37 Equipment Manual Release 01/00 Messages 6.2.2 Opening a Message Buffer Purpose An overview of the message events which have arrived on the Touch Panel is provided concerning the S alarm message buffer S event message buffer. Open message buffers are constantly updated. Alarm message buffer In order to open the alarm message buffer, touch S the message indicator on the alarm message screen or S the OPEN ALARM MESSAGE BUFFER button on the Edit Message standard screen Event message buffer To open the event message buffer, touch the OPEN EVENT MESSAGE BUFFER button on the Edit Message standard screen Structure The message buffers in the Touch Panel list all the message events which have occurred in chronological order. The basic structure and the significance of the buttons do not differ from those illustrated in the example alarm message screen in figure 6-4. TP27, TP37 Equipment Manual Release 01/00 6-13 Messages 6.3 Deleting Messages Purpose All message events from event and alarm messages are stored automatically in the message archive. The message archive can contain as many as 512 message events. Message events are deleted S automatically in the case of buffer overflow S by means of the Edit Message standard screen. Overflow warning On reaching the configured remaining buffer size, (default setting 10%), an overflow warning is issued by default. Issue of the the warning can be enabled or disabled via the Touch Panel using the System Settings standard screen. To do so, touch the BUFFER OVERFLOW WARNING field and select one of the two parameters, OFF or ON, from the selection window. Deleting on buffer overflow If the message archive is no longer capable of recording more message events, message events are automatically deleted until the capacity configured for the remaining buffer size is reached. Deletion occurs in the following sequence: S The oldest messages which have already been cleared. The message events Arrived and Cleared for an event message which has cleared are deleted. The message events Arrived, Cleared and Acknowledged for an alarm message which has cleared are deleted. S Messages still waiting. If capacity is still not sufficient for new messages, the oldest waiting messages are deleted. This triggers the issue of a system message. Automatic printout In the case of a buffer overflow, a printout of all the alarm and event messages deleted is automatically triggered if S “Printout on overflow” is configured, S message logging is deactivated on the Touch Panel, and S a printer, ready to operate, is connected. 6-14 TP27, TP37 Equipment Manual Release 01/00 Messages Deleting via standard screen The following messages can be deleted from the message archive via standard screen Edit Message: S all (not individual) acknowledged and cleared alarm messages S all (not individual) arrived and cleared event messages. Delete alarm messages by pressing the DELETE ALARM MESSAGE BUFFER button. Delete event messages by pressing the DELETE EVENTS BUFFER button. The message events for messages which have not been cleared remain in the message archive. TP27, TP37 Equipment Manual Release 01/00 6-15 Messages 6.4 Printing Messages How to print Alarm and event messages can be printed out S automatically following buffer overflow (see chapter 6.3), S automatically as direct message logging, S manually (see chapter 6.5.2). Set the printer parameters in the Printer Settings standard screen. The standard screen is described in chapter 7. Note If a flood of more than 20 messages arrive simultaneously causing the buffer to overflow, it is possible that the messages will not be printed. If this happens “****” appears in the printout instead of messages. Direct message logging Alarm and event messages can be printed out directly on arrival and clearing (alarm messages also on acknowledgement) when this has been defined in the message configuration. System messages are not logged. Enabling/Disabling direct message logging Message logging can be enabled/disabled online via the Touch Panel using the System Settings standard screen. To do so, touch the MESSAGE LOGGING field and select either of the parameters OFF or ON from the selection window. The table shows the relationships between the settings on the Touch Panel and the settings configured in ProTool. Setting in ProTool Setting on Touch Panel Message Logging ON Message Logging OFF Messages Messages are logged Messages are not logged Overflow Messages are logged Buffer overflow is printed Off Messages are logged No effect Note If Asian character sets are used for messages, the messages are printed in graphics mode. 6-16 TP27, TP37 Equipment Manual Release 01/00 Messages Manual printout of buffer content The buffer contents can be printed out in the following ways: S The Edit Message standard screen (see chapter 6.6.1) has buttons to print out alarm and event messages. S The Output Messages standard screen (see chapter 6.6.2) has buttons to print out alarm and event messages. In addition, it is possible to enter filter criteria concerning the messages to be printed. TP27, TP37 Equipment Manual Release 01/00 6-17 Messages 6.5 ALARM_S Messages The STEP 7 option packages S7–PDIAG and S7–GRAPH only issue ALARM_S messages. For that reason, the message number procedure ALARM_S must be used for configuring process diagnosis in ProTool as well. ALARM_S messages are not configured in ProTool but in STEP 7. Incorporating ALARM_S Messages When configuring messages in STEP 7 the message text and attributes entered are stored in the database shared with ProTool. During the process of compiling the project, ProTool automatically imports the necessary data and subsequently downloads it to the operating unit. Shared Database Figure 6-5 Configuring and Downloading ALARM_S Messages It is therefore important that the shared database is always up to date during the compilation process and that data synchronization is active. Use of Resources ALARM_S messages are configured in STEP 7. The data is then stored in a shared database, imported during the process of compiling the ProTool project and finally downloaded to the operating unit. That means that ALARM_S messages use up resources on the operating unit. The shorter the messages are, the less storage space they will require. A maximum of 2000 event messages and 2000 alarm messages can be created. It is of no consequence in this regard which message procedure is used. Note In STEP 7 there are restrictions regarding the number and size of tags that can be used within a message. For more precise details, please consult your STEP 7 documentation. 6-18 TP27, TP37 Equipment Manual Release 01/00 Messages 6.5.1 Communication Sequence Logging On For ALARM_S More than one station (e.g. more than one OP, PU, etc.) on a network can log on for ALARM_S messages. Each station that wants to display ALARM_S messages logs on to the CPU for ALARM_S. S7 S7 CPU OP CPU TP PU Figure 6-6 MPI Network When A Message Event Occurs When a message–triggering event occurs, the CPU actively sends telegrams to that effect to all stations that have logged on. The message number identifies the corresponding message text that has previously been downloaded to the operating unit. This means that the CPU does not have to be actively scanned for messages by regular polling as was the case with the message bit procedure. The operating unit, CPU and network are completely relieved of that burden on the system. Time Stamp With the ALARM_S procedure, the time stamp is not issued by the operating unit but by the CPU. The messages are stored in chronological order on the basis of their time stamp in the message buffer on the operating unit – even if they originate from different CPUs. Information Stored The CPU stores not only the time of the message but also the status (arrived, departed, acknowledged) and any process parameters. That information is retained until a message has been completely processed, i.e. until it has arrived, departed and been acknowledged. On the operating unit, the information in the message buffer is kept even longer. TP27, TP37 Equipment Manual Release 01/00 6-19 Messages 6.5.2 Message Acknowledgement ALARM_S Messages Requiring Acknowledgement When a message is acknowledged by a station on the network, the CPU is immediately notified. The CPU then distributes the acknowledgement to all connected stations. It is only to this message that the operating unit responds, i.e. only at this point does it enter the acknowledgement in the message buffer. Note The CPU issues a time stamp for the acknowledgement event but does not store it. It is therefore not possible in the event of a subsequent update to determine whether or when a message has been acknowledged. ALARM_S Messages Not Requiring Acknowledgement 6.5.3 In the case of those ALARM_S messages that although they are configured as alarm messages do not require explicit acknowledgement by the user, the CPU acknowledges the message automatically when it arrives. The acknowledged event is then immediately entered in the message buffer along with the arrived event. Printing Messages You specify which messages are to be printed in the usual way in ProTool by choosing the menu option System → Messages → Settings. Message Logging If you do not specify any device–specific message settings in STEP 7, all message events are automatically logged directly to the connected printer. If you configure device–specific messages, you can specify separately for each message whether it is to be logged or not. If there are several CPUs in a network, this means that messages may not always be received in chronological order by the operating unit. Messages are always printed in the order in which they are sent by the CPUs. This is also the case with every synchronisation. Printing Messages In the Event of a Buffer Overflow 6-20 Printing of the message buffer contents in the event of a buffer overflow is carried out in the same way as with the familiar message bit procedure. All messages are printed before being deleted. TP27, TP37 Equipment Manual Release 01/00 Messages 6.5.4 Message Overload It can happen that a large number of ALARM_S messages are issued within a short space of time. This can result in the build–up of processing backlogs. Communication Overload If the time gap between the first occurrence of a message and a subsequent occurrence is very short, it may be that the first message has not yet even been sent. In that case, the CPU reports the current status, i.e. the most recent occurrence of the message. Every station, i.e. including the operating unit, is informed at the same time, however, that at least one signal change that could not be sent has occurred. The message number appears on the operating unit in inverted type (light letters on dark background) if multiple arrivals and departures of the message have not been able to be recorded. *1234567 A KGQ HH:MM:SS DD.MM.YYYY GRU00 Boiler 13: temperature 190 degrees Inform shift supervisor Tel. 007 Figure 6-7 Multiple Arrivals and Departures Could Not Be Recorded CPU Memory Overload If there are more messages pending than the CPU can process, any new messages are discarded. Only when a message has been fully processed can a new message be processed. The date and time of a message appear on the operating unit in inverted type (light letters on dark background) if it is the last message that could be accepted by the CPU message buffer. *1234567 A KGQ HH:MM:SS DD.MM.YYYYGRU00 Boiler 13: temperature 190 degrees Inform shift supervisor Tel. 007 Figure 6-8 Last Message Accepted by the CPU Operating Unit Overload An operating unit can process a maximum of approx. 200 simultaneously pending messages (total number of event and alarm messages). If the operating unit then receives more messages from the CPUs on the network, they can no longer be displayed. A system message to that effect is then displayed on the operating unit. The maximum number of messages that could theoretically be simultaneously pending on an operating unit is calculated from the sum of the maximum numbers possible on the connected CPUs. TP27, TP37 Equipment Manual Release 01/00 6-21 Messages Example: A CPU 315 can process a maximum of 50 simultaneously pending messages. Accordingly, an operating unit can handle a maximum of four CPU 315s sending ALARM_S messages without overflow problems occurring. 6.5.5 Updating Since the CPU stores the message information when a fault occurs, individual network stations (e.g. an OP) can log on at a later date and obtain an update. However, the CPU only stores information about pending messages. Once all events (arrival, departure, acknowledgement) have occurred, the message is deleted from the CPU. When obtaining an update, therefore, the operating unit processes any missing events automatically if a message is not known to the PLC but the arrival and acknowledgement events are not entered on the operating unit. The events are not entered in the message buffer in that case, however. Events processed in this way are identified on the operating unit by displaying the message status symbols in inverse type thus: *1234567 A KGQ HH:MM:SS DD.MM.YYYYGRU00 Boiler 13: temperature 190 degrees Inform shift supervisor Tel. 007 Figure 6-9 Automatically Processed Events 6-22 TP27, TP37 Equipment Manual Release 01/00 Messages 6.5.6 Buffer Overflow Message Archive All message events for event and alarm messages are automatically stored in a message archive. The message archive can hold up to 512 message events. Overflow Warning When the remaining buffer capacity specified in ProTool (default setting 10%) is reached, an overflow warning is automatically issued. Deleting Message Events In the Event of a Buffer Overflow If the message archive has insufficient space to accept any more message events, message events are automatically deleted until the specified remaining buffer capacity is reached. Deletion is carried out in the following order: 1. The oldest departed messages. For departed event messages, the message events arrival and departure are deleted. For departed alarm messages, the message events arrival, departure and acknowledged are deleted. 2. Pending messages. The oldest pending messages are deleted to make space for the newly received events. Printout If Buffer Overflow Message Logging has been specified and a printer is connected and switched on, all deleted alarm and event messages are printed out in the event of a buffer overflow. TP27, TP37 Equipment Manual Release 01/00 6-23 Messages 6.6 Overview Standard Screens for Messages The two standard standard screens below are significant for messages: S Edit Message S Output messages S System Settings 6.6.1 Purpose “Edit Message” Standard Screen Functions are configured in the Edit Message standard screen which are necessary to view, delete and print messages (figure 6-10). Open the Edit Message standard screen from the main screen by pressing the button Structure Edit Message Help ESC Figure 6-10 Standard screen Edit Message 6-24 TP27, TP37 Equipment Manual Release 01/00 Messages Meanings of buttons Open event message window Open event message page Open event message buffer Delete event message buffer Print event message buffer Open alarm message screen Open alarm message buffer Delete alarm message buffer Print alarm message buffer Call Help text on standard screen Help Exit from standard screen ESC TP27, TP37 Equipment Manual Release 01/00 6-25 Messages 6.6.2 “Output Messages” Standard Screen Condition In order to select and print messages via the Touch Panel according to filter criteria, the Output Messages standard screen must be integrated in the configuration. Purpose The Output Messages standard screen enables the selection and printing of messages according to various, user–defined filter criteria (figure 6-11). Structure Output Messages Output medium: Message event: Priority: Date: Text: Acknowledgment group: ESC Figure 6-11 Standard screen Output Messages 6-26 TP27, TP37 Equipment Manual Release 01/00 Messages Meaning of operating elements Output medium PRINTER The factory setting for output from units TP27 and TP37, is to a printer. Message event ALL All the alarm messages or event message buffer contents are printed out. This includes all message events which have Arrived, Cleared or been Acknowledged. ARRIVED ONLY Only the Arrived message events stored in the buffer are printed. CLEARED ONLY Only the Cleared message events stored in the buffer are printed. ACKNOWLEDGED ONLY Only the Acknowledged message events stored in the buffer are printed. ARRIVED AND CLEARED Only the Arrived and Cleared message events stored in the buffer are printed. ARRIVED AND ACKNOWLEDGED Only the Arrived and Acknowledged message events stored in the buffer are printed. CLEARED AND ACKNOWLEDGED Only the Cleared and Acknowledged message events stored in the buffer are printed. Priority 0 Date Only those message events with the specified date are printed. Text Only those message events are printed which contain the specified character string. Upper/ lower case is not considered. Acknowledgment group 0 TP27, TP37 Equipment Manual Release 01/00 to 16 Only those message events are printed which have at least the specified priority. to 16 Only those message events are printed which belong to the specified acknowledgement group. 6-27 Messages 6.6.3 “System Settings” Standard Screen Purpose Different settings can be defined for messages using the symbolic input fields in the System Settings standard screen. Open the System Settings standard screen from the main screen by pressing the adjacent button Structure TP27 and TP37 have different System Settings standard screens. Figure 6-12 illustrates an example of the System Settings standard screen for the TP27-10. Fields relevant for messages are shown grey. System Settings Operating mode: Display message : Message logging: Buffer overflow warning: Date: Time: ESC Help Figure 6-12 System Settings standard screen for TP27-10 Meaning of operating elements Only the operating elements of interest as regards messages are listed below. See chapter 11 for a description of the other fields and buttons. Message display FIRST The oldest alarm message is displayed first. LAST The most recent alarm message is displayed first. Message logging ON Alarm messages and event messages are printed in addition to being displayed. OFF Alarm messages and event messages are printed only on buffer overflow. 6-28 TP27, TP37 Equipment Manual Release 01/00 Messages Overflow warning ON A system message is issued when the remaining buffer size is reached. OFF No message is issued when the remaining buffer size is reached. Call Help text on standard screen Help Exit from standard screen ESC TP27, TP37 Equipment Manual Release 01/00 6-29 Messages 6-30 TP27, TP37 Equipment Manual Release 01/00 7 Printing Connecting a printer A monochrome printer or color printer can be connected to the Touch Panels. Configuration of the connection is described in section 12.2.4. Descriptions of the interfaces is provided in Appendix B. Print functions The following print functions are provided on the Touch Panel: S Print Messages (see section 6.4). All the message events which occur (Arrived, Departed, Acknowledged) are printed on the printer. Screen prints and screens can be printed during message logging. S Print Buffer The entire event message or alarm message buffer contents are printed on the printer. Filter criteria can be defined for the printout (see Chapter 6.5.2). S Print Screen If you wish to use this function on the Touch Panel, you have to assign the PRINT SCREEN function to a button when configuring. Touching the button prints the displayed screen. Windows currently shown on the screen – for example, the message window – are not printed together with the screen. You can abort the Print Screen function by touching the button again. A system message indicates that the Print Screen function has been aborted. S Print Screen List To use this function on the touch screen, the PRINT SCREEN LIST function must be assigned to a button during configuration. This function can be used to print up to twenty screens in succession at one page per screen. If there are output fields on a screen for process values, the values current at the time of printing are read out from the PLC. ASCII is the default printing mode; in other words, graphic elements such as graphics, trends and bar graphs are not printed. Print Screen is not possible while printing is in progress. If the Graphics mode for screen list printing is configured for individual screens, these screen lists are printed complete with all elements, i.e. including graphics, trends, bar graphics, etc. In order to print all the screens selected using the Print screen list function in Graphics mode, it must be defined in the configuration using the global function Automatic graphics printing. TP27, TP37 Equipment Manual Release 01/00 7-1 Printing Standard screen The settings configured for printer type and printer parameters can be modified online via the symbolic input fields S with the TP27-6 in standard screens Printer Settings General, Print Screen and Assign Color (figure 7-1), S with the TP37 and TP27-10 in standard screen Printer Settings (figure 7-2). Make sure that the parameters on the Touch Panel match those on the printer. Printer Settings General: Printer: Interface: Baud rate: Data bits: Stop bits: Timeout (sec): Parity: Type: Help ESC Assign Color Print Screen OP < – > Printer Printout: Color: Bold: (4) Red: (1) Blue: (5) Magenta: (2) Green: (6) Yellow: (3) Cyan: (–1) White: Density: Needles: OP <–> Printer (0) Black: ( Value –1 = “No color” ) ESC Figure 7-1 7-2 ESC Standard screens for printer settings (example TP27-6) TP27, TP37 Equipment Manual Release 01/00 Printing Printer Settings Print Screen: General: Interface: Baud rate: Data bits: Stop bits: Timeout (sec): Parity: Type: Printer: OP (0) Black: (1) Blue: (2) Green: (3) Cyan: Printout: Color: Bold: Density: Needles: <–> Assign Color Printer <–> OP (4) Red: (5) Magenta: (6) Yellow: (–1) White: Printer ( Value –1 = “No color” ) ESC Figure 7-2 Meaning of operating elements Standard screen Printer Settings (example TP37 and TP27-10) Interface Set printer interface: IF2 LPT Transfer Parameters (serial) (parallel, TP37 only) Standard setting (serial): BAUD RATE: DATA BITS: STOP BITS: PARITY: TIMEOUT (S): 9600 8 1 None 60 Do not change the parameters unless they do not match the transfer parameters of your printer. Printer TP27, TP37 Equipment Manual Release 01/00 Select a printer from the list of configured printerss. 7-3 Printing Print Screen ASCII (default setting): Only ASCII characters are printed in a screen printout (no graphics or character graphics). An ASCII screen print is appreciably quicker than a graphic screen print. A screen which contains text characters belonging to an Asiatic character set is always printed in graphics mode, irrespective of the ASCII default setting. GRAPHIC: All elements on the screen are printed in a screen print, including graphics, trends and bar graphs. Assign Color Disable individual colors (–1) or modify color assignment. Example: You wish to use black (0) as the color instead of blue (1). Switch to the Hardcopy standard screen (TP27-6 only). Switch to the Assign Color standard screen (TP27-6 only). Call Help text HELP Exit from standard screen ESC 7-4 TP27, TP37 Equipment Manual Release 01/00 8 Recipes Purpose Recipes consist of combinations of tags for a specific application. The purpose of recipes is to transfer several items of data collectively to the PLC. This transfer requires synchronization between the touch screen and the PLC. Data records The data structure is defined with the data record in the configuration. Data is assigned to the structure on the Touch Panel. This data structure (recipe) can be used more than once and different data can be assigned to it. We refer to data records to which data has been assigned as “data records”. Data records are stored on the Touch Panel. This saves memory space on the PLC. Example of a recipe The same bottling machine of a fruit juice filling system is to be used to produce orange nectar, an orange drink and orange juice. The mixing ratios are different for each drink, though the ingredients are always the same. The production details are configured in this example as the “Mixture” recipe. Mixing Unit Tank 1 Tank 2 Tank 3 To bottling machine MIXER M PLC – for example, SIMATIC S7 TP27/TP37 SIMATIC Figure 8-1 TP27, TP37 Equipment Manual Release 01/00 Example: Fruit juice system 8-1 Recipes Ingredients of a recipe A recipe consists of a series of recipe entries. Each entry contains no more than one input field (tag). The Mixture recipe might contain the following entries: Name: Orange: l Water: l Sugar: kg Flavor: g Input fields (variables) Data records on the Touch Panel Values are assigned to the input field variables on the Touch Panel and stored. Together, these values form one data record of the recipe. Several data records can be created for one recipe. This enables the fruit juice system, for example, to produce drinks of different kinds. It uses a different data record for each drink: Name: Beverage Nectar Juice Orange: 90 l 70 l 95 l Water: 10 l 30 l 5l Sugar: 1.5 kg 1.5 kg 0.5 kg Flavor: 200 g 400 g 100 g Data record 1 Data record 2 “Mixture” recipe entries Data record 3 All data records are stored in the Touch Panel. Only the currently active data record is stored on the PLC. This saves memory space on the PLC. Identifying recipes 8-2 A recipe is created under a symbolic name in the configuration. The recipe is then selected using this symbolic name on the Touch Panel. TP27, TP37 Equipment Manual Release 01/00 Recipes 8.1 Standard Screens for Recipes Condition In order to create, save and download data records using the Touch Panel, the standard screen Data Record Processing and Transmission must be integrated in the configuration. The Selective Data Record Transmission standard screen need only be integrated in the configuration when current data has to be exchanged between the Touch Panel and PLC. Purpose Data records are created, modified and deleted using the standard screen Data Record Processing and Transmission. It is also possible to use the standard screen to transfer data records from data media (flash or memory card) to the PLC or vice versa. The standard screen Selective Data Record Transmission is only required when data records need to be transferred between specific Touch Panels, data media or PLCs. A detailed description of handling standard screens is provided in Section 8.1.1. Standard screen Edit Data Records Use the standard screen Data Record Processing and Transmission (figure 8-2) to S create and edit data records on the Touch Panel and save these records on a data medium, S transfer the records from data media to the main memory of the Touch Panel and from there to the PLC, TP PLC Data medium Flash/ memory card ÉÉÉ ÉÉÉ ÉÉÉ ÉÉÉ Main memory SRAM S delete data records on the data medium S edit data records on the Touch Panel. The structure of a recipe cannot be modified on the Touch Panel. TP27, TP37 Equipment Manual Release 01/00 8-3 Recipes Data Record Processing and Transmission Recipe: Data record name: Comment: Sort order: Data medium: Format Help Figure 8-2 Meaning of operating elements ESC Input fields and buttons in standard screen Data Record Processing and Transmission (exampleTP37) Copy current values from the PLC to the main memory of the Touch Panel and save them as a data record on the data medium flash or module (memory card). Load selected data records from data medium to the main memory of the Touch Panel and transfer from there to the PLC. Delete selected data record on the data medium. Create and modify selected data record on the data medium. Select data record from recipe data. Call Help text on standard screen. Help Exit from standard screen ESC 8-4 TP27, TP37 Equipment Manual Release 01/00 Recipes Recipe Select a recipe from the list of configured recipes. Data record name Enter the name of the new data record or the data record to be edited. Comment Enter a comment in respect of the data record to be edited. The comment entered is only accepted when the data record is stored on the data medium. It is not accepted if the data record is saved a second time. In this case, the comment must be entered in the Edit window (refer to figure 8-4 on Page 8-10). Sort order Define the sort criteria for the list of data records. Select from the following sort criteria: S S S S S Data medium unsorted, alphabetic, alphabetic reversed, chronological, chronological reversed. Select one of the data media flash or module (memory card) here. Format the data medium using the Format list box. Standard screen Transfer Data Record Current values can be downloaded from the Touch Panel to the PLC and vice versa, without having to store them on a data medium. This makes the startup phase of a process easier, for example. Similarly, transfer between the Touch Panel and data medium is also possible. Using the standard screen Selective Data Record Transmission (figure 8-3) it is possible to S transfer the current values from the PLC to the main memory of the Touch Panel, S transfer the current values from the main memory of the Touch Panel to the PLC, S load data records from data medium into the main memory of the Touch Panel, S transfer data records from the main memory of the Touch Panel to data medium. TP27, TP37 Equipment Manual Release 01/00 8-5 Recipes Selective Data Record Transmission Recipe: Data record name: Comment: Sort order: Data medium: Help Figure 8-3 Meaning of operating elements ESC Input fields and buttons in standard screen Selective Data Record Transmission (example TP37) Transfer current values from the PLC to the main memory of the Touch Panel (update values in the Touch Panel) Transfer the current values from the main memory of the Touch Panel to the PLC. Transfer data record from the data medium to the main memory of the Touch Panel. Transfer data record from the main memory of the Touch Panel to the data medium. Select data record. Call Help text on standard screen. Help Exit from standard screen ESC 8-6 TP27, TP37 Equipment Manual Release 01/00 Recipes Recipe Select a recipe from the list of configured recipes. Data record name Enter the name of the data record you wish to transfer. Comment Enter a comment in respect of the data record to be edited. Sort order Define the sort criteria for the data records to be transferred. Select from the following sort criteria: S S S S S Data medium TP27, TP37 Equipment Manual Release 01/00 unsorted, alphabetic, alphabetic reversed, chronological, chronological reversed. Select one of the data media flash or module (memory card) here. 8-7 Recipes 8.1.1 Creating, Editing and Saving Data Records In this section The data structure is defined with the recipe during configuration. Initially, there are no data records. They are created, edited and stored on data media directly on the Touch Panel using the standard screen Data Record Processing and Transmission. How to operate the standard screen Data Record Processing and Transmission is the subject of this section. Formatting data media Before a data record can be stored, the data medium must be formatted. To do this, use the formatting function in the input field beneath the data medium selection. Note Any data records on the data medium are deleted by the formatting operation. Formatting of a data medium cannot be undone. Step Action 1 Touch the Format field of standard screen Data Record Processing and Transmission. 2 Select the formatting function from the selection window by touching 3 Confirm the prompts in the following two system message windows by touching OK or cancel the action by touching 8-8 ESC TP27, TP37 Equipment Manual Release 01/00 Recipes Creating a new data record Editing a data record Step Action 1 Touch the Recipe field of the standard screen Data Record Processing and Transmission. Select the recipe for the new data record in the selection window. 2 Touch the Data Medium field. Select from the selection window the data medium on which you want to save the new data record. 3 Touch the Data Record Name field. Enter the name of a data record, which does not yet exist, in the input window . To save the data record on a disk, the name may only consist of alpha characters and digits from the normal level of the alphanumeric keyboard. The length is limited to 11 characters. 4 Edit the data record and then download it to the data medium. Step Action 1 Touch the Recipe field in the standard screen Data Record Processing and Transmission. Select the recipe for the data record to be edited from the selection window. 2 Touch the Data Medium field. Select the data medium from the selection window on which the edited data record should be saved . 3 Select the name of the data record which you which to edit. There are two ways of doing this: S Touch the button and select the data record from the selection window or S Touch the Data Record Name field and enter the name of the data record in the input window. 4 Touch the button 5 Edit the data record in the edit window (figure 8-4). 6 Confirm the change by touching or discard the change by touching TP27, TP37 Equipment Manual Release 01/00 ESC 8-9 Recipes Edit window The entries of the selected data record are listed in the Edit window (figure 8-4). Each line contains the configured name on the left and the editable value of the entry on the right. Entries Data record name Recipe name Mixture Orange: Water: Sugar: Flavor: Beverage Values Comment 90.0 10.0 1.5 200.0 EDIT ESC Figure 8-4 Meanings of buttons Edit window for data records Button Function Purpose Scroll (cursor) Scroll up and down one line at a time through the list of entries. Jump Browse forwards and backwards in the entry list screen by screen. Edit Edit selected entry. Cancel (Escape) Discard input and close window. Enter Confirm input and close window. EDIT ESC 8-10 TP27, TP37 Equipment Manual Release 01/00 Recipes Saving data records Current values can be copied from the PLC to the Touch Panel main memory and saved on a data medium. The time at which the data record was saved is also stored. Step Action 1 Touch the Recipe field in standard screen Data Record Processing and Transmission. Select the recipe for the data record to be saved from the selection window. 2 Touch the Data Medium field. Select the data medium on which the data record is to be saved from the selection window . 3 Select the name of the data record to be saved (see Editing a data record, Step 3, Page 8-9). 4 Touch the button If a data record with this name does not exist, it is created. If a data record with this name already exists, the system asked whether the existing data record should be overwritten. 5 Confirm by touching OK or cancel the action by touching 6 Loadig data records ESC Repeat steps 1 to 5 for each data record to be saved on the data medium. Proceed as follows to load data records from data media in the main memory of the Touch Panel and download them to the PLC: TP27, TP37 Equipment Manual Release 01/00 Step Action 1 Touch the Recipe field in standard screen Data Record Processing and Transmission. Select a recipe for the data record to be loaded from the selection window. 2 Select the name of the data record to be loaded (see Editing a data record, Step 3, Page 8-9). 3 Touch the Data Medium field. Select the data medium from which the data record is to be loaded from the selection window . 4 Touch the button 8-11 Recipes Deleting data records The following section describes the sequence for deleting individual data records fro the selected data medium. If all the data records on the data medium are to be deleted, it is more practical to use the Format function (see Page 8-8). If the data record to be deleted from the data medium is active on the PLC, it remains active on the PLC even after it has been deleted. Step Action 1 Touch the Recipe field in standard screen Data Record Processing and Transmission. Select the recipe for the data record to be delete from the selection window. 2 Touch the Data Medium field. Select the data medium containing the data record to be deleted from the selection window . 3 Select the name of the data record to be deleted (see Editing a data record, Step 3, Page 8-9). 4 Touch the button 5 Confirm the prompt which follows by touching or cancel the action by touching 8-12 OK ESC TP27, TP37 Equipment Manual Release 01/00 Recipes 8.1.2 Transferring Data Records In this section The following section describes how to operate the Selective Data Record Transmission standard screen. This standard screen contains special functions configured for transferring data records between the Touch Panel and PLC and between Touch Panels and data medium. As opposed to transfer using standard screen Data Record Processing and Transmission, intermediate steps are provided here for the transfer process. This means that it is possible to load a data record from the PLC in the main memory of the Touch Panel, edit the data record and then transfer the record back to the PLC with modified values. PLC ³ Touch Panel Proceed as follows to update the values in the data record in the Touch Panel main memory with values from the PLC: Step Touch Panel ³ PLC Action 1 Touch the Recipe field in the standard screen Selective Data Record Transmission. Select the recipe for the data record you wish to update from the selection window. 2 Touch the button Proceed as follows to transfer the current values in the main memory of the Touch Panel to the PLC: Step TP27, TP37 Equipment Manual Release 01/00 Action 1 Touch the Recipe field in standard screen Selective Data Record Transmission. Select a recipe for the data record to be transferred from the selection window. 2 Touch the button 8-13 Recipes Data medium ³ Touch Panel Proceed as follows to load a data record from a data medium in the Touch Panel main memory: Step Touch Panel ³ Data Medium Action 1 Touch the Recipe field in standard screen Selective Data Record Transmission. Select a recipe for the data record to be loaded from the selection window. 2 Touch the Data Medium field. Select the data medium from which to load the data record from the selection window . 3 Select the name of the data record to be loaded into the main memory of the Touch Panel (see Editing a data record, Step 3, Page 8-9). 4 Touch the button Proceed as follows to save a data record in the main memory of the Touch Panel on a data medium: Step 8-14 Action 1 Touch the Recipe field in standard screen Selective Data Record Transmission. Select the recipe for the data record to be saved from the selection window. 2 Touch the Data Medium field. Select the data medium on which the data record is to be saved from the selection window. 3 Select the name of the data record to be save (see Editing a data record, Step 3, Page 8-9). 4 Touch the button TP27, TP37 Equipment Manual Release 01/00 Recipes 8.2 Definition Record Sets A record set combines one data record from several different recipes under a common name. In its data records, a record set contains all the values required to set up a machine or system. This means, for example, that the basic settings for machines which operate simultaneously can be loaded to produce different products. Example In order to simplify the general overview, the ORANGE fruit juice system used in this chapter is extended by the production lines GRAPEFRUIT and LEMON. To do this, the recipes GRAPEFRUIT and LEMON are set up. Each of these recipes has a data record called ”Drink”. These three data records form the record set called ”Drink”. The data record ”Drink” for all three recipes can be downloaded simultaneously to the PLC in a single transfer action, thus starting production of the “Drink”. Editing A record set is edited in the Data Record Processing and Transmission standard screen the same as a data record. The editing options are: S Select S Save (Create) S Load S Delete Selecting Select the recipe name RecordSet from the selection window. If ”Record set” has been chosen as the recipe, all the data records of all recipes are displayed following selection of the data record. Record sets (data records which are present in several recipes) are identified by * in front of their name. TP27, TP37 Equipment Manual Release 01/00 8-15 Recipes Save (Create) A Record Set can be created in standard screen Data Record Processing and Transmission in two different ways, i.e. saved on a data medium: 1. Save a data record for each recipe Step Action 1 Select RecordSet as the recipe. 2 Define the data record name and the data medium. 3 Save the record set as with a data record. A data record is created for each recipe. 4 Delete any data records not required. 2. Save a data record individually for selected recipes Step Load Action 1 Select the recipe name, e.g. ORANGE. 2 Define the data record name (e.g. Drink) and data medium. Each data record name must be created with the same name (= Drink). 3 Edit the data record and save it. 4 Repeat steps 1 and 3 for each data record. During the loading procedure all the data records with the selected name located on the data medium are loaded on the Touch Panel and transferred on to the PLC. The sequence of steps corresponds to the procedure described on Page 8-11 under Loading data records. Note S It may take a relatively long time to upload a record set from the data medium to the PLC, depending on the size of the recipes. A record set should, therefore, only contain essential recipes. S During the following downloading procedure, all current values of all recipe tags are transferred, and not just the data records with the same name: – PLC ³ TP – PLC ³ Data medium – TP ³ PLC 8-16 TP27, TP37 Equipment Manual Release 01/00 Recipes Delete S Complete record set: The sequence of steps corresponds to the procedure described on Page 8-12 under Deleting data records. S Partial record set: Delete the data records with the corresponding name individually from the selected data records. The sequence of steps corresponds to the procedure described on Page 8-12 under Deleting data records. Modify Record sets cannot be modified. Only the individual data records in the record set can be modified. The sequence of steps corresponds to the procedure described on page 8-9 under Editing data records. TP27, TP37 Equipment Manual Release 01/00 8-17 Recipes 8-18 TP27, TP37 Equipment Manual Release 01/00 Storing and Loading Data 9 In this chapter This chapter explains S how to transfer data to different data media, S which settings have to be performed, S what must be taken into consideration. Purpose Depending on the type and quantity, data is loaded onto data media to S back up data, S restore data, S load or store recipe data records, S load data from the configuration computer to a different Touch Panel, S download Touch Panel firmware. 9.1 Data Types, Data Media and Storage Principle Data types Data is divided into the following categories: S configuration data S firmware data and S recipe data. Data media Touch Panels are equipped with the data media internal flash and memory card. Internal flash memory The internal flash memory is a standard storage medium in the Touch Panel. The storage capacity is 1 Mbyte in the TP27–6 and 2 Mbytes in the TP27–10 and TP37. All data types can be stored in the flash memory. Memory allocation depends on the size of the configuration, the firmware and the data area configured for data records. TP27, TP37 Equipment Manual Release 01/00 9-1 Storing and Loading Data Memory card The memory card is an external memory medium, comparable to a disk. Compared to the internal flash memory, the memory card features the following advantages: S The memory card is a portable storage medium. This means that, for example, recipe data can be transported from one TP to another. In this way, changes to configurations or firmware updates can be performed on systems on which no configuration computer is immediately available for transferring such data. S Configurations can be loaded directly from the memory card because a Touch Panel detects a card when inserted. In this case, the units access the memory card first and then the internal flash memory. S Its storage capacity of up to 16 MB provides space for large configurations or a large number of recipe data records. ! Storage principle 1) Caution Memory cards containing stored configurations must be used only in Touch Panels of the same type. If not, you might provoke a system crash. Data can only be saved in the following combinations for practical purposes: S firmware, configuration and recipe data records, or S firmware and configuration.1) or S recipe data. This function is not contained on the standard screen and has to be configured. 9-2 TP27, TP37 Equipment Manual Release 01/00 Storing and Loading Data 9.2 Delete Storage Medium Delete flash / memory card It is not normally necesary to delete the memory. Deletion produces a definied initial state on the memory media. Note If a memory card is inserted in the Touch Panel, this function deletes the contents of the memory card. If no memory card is inserted in the Touch Panel, this function deletes the contents of the internal flash. During the deletion process, all data is cleared from the data medium. Procedure for deleting In order that the configuration on the TP is not deleted inadvertently, several separate touches are necessary simultaneously on the screen. Proceed as follows to delete the memory: 1. Touch the top left corner of the screen as the Touch Panel is starting up. The menu illustrated in figure 9-1 appears with the first confirmation request. SIMATIC TP37, V x.xxx Copyright (c) SIEMENS AG 1997 ALL DATA ON FLASH/MODULE WILL BE ERASED ! ARE YOU SURE ? OK SERIAL DOWNLOAD Figure 9-1 CANCEL BOOT CONFIGURATION Settings in the startup phase (example: clear flash memory) 2. Touch the lower left corner area of the screen. When using the TP27–10, it is also necessary to touch the OK button. Touching any other area of the screen subsequently stops the deletion procedure. 3. Confirm the second confirmation request using the OK button. TP27, TP37 Equipment Manual Release 01/00 9-3 Storing and Loading Data Reserved memory area for recipe data A memory area, with the following default settings, is reserved for recipe data in the flash memory and on the memory card: S 64 kB (flash memory) S 128 kB (memory card). If the default values are not sufficient, reset them in ProTool. Remember, however, that less space will be available for the configuration if the reserved area is enlarged. Note Remember that, in addition to the reserved area for recipe data records, 64 kB are required on the internal flash memory and 128 kB on the memory card for management data. 9-4 TP27, TP37 Equipment Manual Release 01/00 Storing and Loading Data 9.3 Backup/Restore Application The memory card offers the possibility of loading data stored in a Touch Panel directly onto a machine or system. This means that a configuration or recipe data records can be updated or modified irrespective of the location at which the system is being used. A separate standard screen is provided for backup/restore with which the functions can be implemented. Standard screen The standard screen Backup/Restore (figure 9-2) is opened from the System Settings standard screen on the Touch Panel by pressing the button Backup/Restore Help Figure 9-2 Meanings of buttons ESC Standard screen Backup/Restore Backup: Firmware + configuration + data records Restore: Firmware + configuration + data records Backup: Data records Restore: Data records TP27, TP37 Equipment Manual Release 01/00 9-5 Storing and Loading Data Call Help text on standard screen Help Exit from standard screen ESC Insert memory card Use Slot B to plug the memory card into the TP37 and TP27–10. Only one slot is available in the TP27–6. The slot is described for TP37 in chapter 16.3, for TP27-10 in chapter 15.3 and for TP27-6 in chapter 14.3. Backup flash ³ module A backup flash ! module process can be carried out in normal operation of the Touch Panel: Step Restore module ³ flash Action 1 Insert the memory card in Slot B of the Touch Panel. 2 Delete the memory card contents before initiating the backup (see chapter 9.2). 3 Start the backup function by touching the corresponding button on the Backup/Restore standard screen. After successful transfer, a message is appears on the Touch Panel. 4 Remove the memory card from the Touch Panel. If a memory card only contains recipe data records, they can be restored to the Touch Panel in normal operating mode: Step Action 1 Insert the memory card in Slot B of the Touch Panel. 2 Start the restore function by touching the corresponding button on the Backup/Restore standard screen. The recipe data records in the internal flash memory are overwritten by the data records read in from the memory card. 3 Remove the memory card from the Touch Panel. Note Recipe data records, stored on the memory card using Backup, must first be transferred to the internal flash using the Touch Panel with the Restore function before they can be edited. Recipe data records, saved directly on the memory card (e.g. using standard screen Data Record Processing and Transmission), cannot be transferred back into the internal flash using Restore. 9-6 TP27, TP37 Equipment Manual Release 01/00 Storing and Loading Data Restore firmware/ configuration Proceed as follows to restore a firmware/configuration backup on the Touch Panel: Step Load configuration in another unit Action 1 Insert the memory card with the firmware/configuration in Slot B of the Touch Panel. 2 Restart the TP37. The Touch Panel starts up wih the firmware/configuration contained on the memory card. 3 Start the restore function by touching the corresponding button on the Backup/Restore standard screen. The memory contents of the internal flash memory are overwritten by the firmware/configuration contained on the memory card. In order to load the configuration on another unit which is not locally available, proceed as follows: Step Action 1 Firstly, download the configuration in the internal flash of the available unit. 2 Then transfer the configuration to the memory card (refer to procedure Backup flash ! module). 3 Following that, load the file in the other unit according to the procedure Restore firmware/configuration. Note It is advised against downloading the configuration directly onto the memory card because the memory location organization differentiates between memory card and (target) flash which may lead to problems. Automatic restore firmware/ configuration If the Backup/Restore function is added to “initialization” entry point in the configuration, the function is called in each time the Touch Panel is started upaufgerufen. The system then asks whether the internal flash memory should be overwritten by the data stored on the memory card. Step TP27, TP37 Equipment Manual Release 01/00 Action 1 Insert the memory card containing the backup into Slot B of the system. 2 Start up the Touch Panel. 3 Confirm that the restore function should be started by answering “OK” at the prompt. 4 Remove the memory card from the TP37. 9-7 Storing and Loading Data 9-8 TP27, TP37 Equipment Manual Release 01/00 Status/Force Variable Using the TP Purpose 10 The Touch Panels provide two functions, namely Status Variable and Force Variable, which enable operand values from the connected PLC to be displayed in a standard screen and modified in a second screen. This means that PLC operands can be edited directly on the TP in online mode without having to connect a programming unit to the PLC to do it. Status Variable Status Variable enables the status of SIMATIC S5/S7 operands to be displayed. Force Variable Force Variable enables SIMATIC S5/S7 operands to be controlled through modifying their values and transferring them back to the PLC. TP27, TP37 Equipment Manual Release 01/00 10-1 Status/Force Variable Using the TP 10.1 Status Variable Standard screen Status Variable The standard screen Status Variable is selected from the main screen using a soft key. Status Variable MPI 12 1 1 1 1 1 1 1 1 1 123 Operand DB, DBB 100 ?????? ?????? ?????? ?????? ?????? ?????? ?????? ?????? ?????? 10 0 0 0 0 0 0 0 0 0 Format Value BIN = 0000000000000000 ????????? 0 ????????? 0 ????????? 0 ????????? 0 ????????? 0 ????????? 0 ????????? 0 ????????? 0 ????????? 0 Status: Running Help ESC Figure 10-1 Status Variable standard screen (example: TP37 with SIMATIC S7) Significance of the operating elements Start/Stop update 123 Help Call in help text concerning on the current screen Exit from current screen ESC 10-2 TP27, TP37 Equipment Manual Release 01/00 Status/Force Variable Using the TP Operands for SIMATIC S5 Figure 10-2 illustrates the structure of a line for the SIMATIC S5 in the form of an example: DB, DW 28 34 KF 20 Operand value Data format Operand address (for data types DB, DW, DB, DD: Number of DW or DD) DB number (applicable only to data types DB, DW, DB and DD) Data type Figure 10-2 Display of PLC operands for the SIMATIC S5 Operands for SIMATIC S7 Figure 10-3 illustrates the structure of a line for the SIMATIC S7 in the form of an example: 001 DB, DBD 12 1438 DEC 1820 Operand value Data format Operand address (for data types DBB, DBW DB, DBD and DB: Number of DB, DD) DB number (applicable only to data types DBB, DBW, DBD and DBX) Data type MPI address PLC address input Figure 10-3 Display of PLC operands for the SIMATIC S7 TP27, TP37 Equipment Manual Release 01/00 10-3 Status/Force Variable Using the TP Control sequence Carry out the following steps to view operand values on the PLC: Step 1 Action Enter operands Once the screen has been selected, status processing is at Status Stop. Proceed as follows: 1. Call in the relevant screen for entering values by clicking on the first line. 2. Enter the data type for the first operands. 3. Enter the operand address for the first operands. 4. Enter the dataformat for the first operands. 5. Exit from the screen for entering values by clicking on button ESC. 6. Repeat the entries for operands 2 to x. Note A system message is issued if input is incorrect (e.g. the data format does not match the type entered). By default, the first entry in the pop-up window is then applied to the field. 2 START updating Press the function key assigned to the icon depicted on the right, and set status processing to Status Running. The TP then displays the values of the operands in the final column of the standard screen. The display is updated cyclically. 3 STOP updating Press the function key again to stop updating and revert status processing to Status Stop. 10-4 123 123 TP27, TP37 Equipment Manual Release 01/00 Status/Force Variable Using the TP 10.2 Force Variable Function In addition to the function provided by Status Variable, operand values can be modified using the Force Variable screen ( = force). Standard screen: Force Variable The Force Variable screen is not integrated in the ProTool standard screens and, therefore, must be assigned to a button in the configuration. Force Variable MPI 12 1 1 1 1 1 1 1 1 1 Operand DB, DBB 100 ?????? ?????? ?????? ?????? ?????? ?????? ?????? ?????? ?????? 123 123 10 0 0 0 0 0 0 0 0 0 Format Value BIN = 0000000000100000 ????????? 0 ????????? 0 ????????? 0 ????????? 0 ????????? 0 ????????? 0 ????????? 0 ????????? 0 ????????? 0 Status: Force Input Help ESC Figure 10-4 Force Variable standard screen (example: TP37 with SIMATIC S7) Significance of the operating elements Start/Stop update 123 123 Help Force input/start Call in help text concerning on the current screen Exit from current screen ESC TP27, TP37 Equipment Manual Release 01/00 10-5 Status/Force Variable Using the TP Control sequence Carry out the following steps to comntrol operand values: Step 1 Action START updating Press the function key assigned to the icon depicted on the right and set status processing to Status Running. 2 Force INPUT Switch status processing to the Force Input state using: 123 123 Status processing is stopped and input is possible. 3 Enter/modify operand value Proceed as follows: 1. Select the line in which values need to be entered, thus calling in the corresponding screen for entering values. 2. Enter the required values. 3. Exit from the screen for entering values by clicking on the ESC button. 4 Force START Press the function key assigned to the icon on the right a second time: 123 S all values of the operands assigned a change mark are transferred to the PLC S the change marks are reset, and S the system reverts automatically to status processing (Status: Status Running). or Cancel input ESC Press the system key shown on the right. Modified values are no longer transferred to the PLC after exiting from the Force Tag standard screen or switching to the Updating in Progress status. 10-6 123 TP27, TP37 Equipment Manual Release 01/00 11 System Settings Standard Screen The standard screen System Settings is used to configure functions which influence general Touch Panel settings. The following settings are possible: S Blank screen S Select language S Initiate backup/restore, S Adjust volume, S Adjust contrast (TP27 only), S Calibtate touch screen (TP37 and TP27-10 only) S Deactivate touch screen (clean screen) S Set TP mode S Set parameters for messages S Set date/time Figures 11-1, 11-2 and 11-3 depict the standard System Settings screen for TP27-6, TP27-10 and TP37. Open the standard screen from the main screen by touching the button shown here. System Settings Operating mode: Display message: Message logging: Buffer overflow warning: Date: Time: Help ESC Figure 11-1 System Settings standard screen for TP27-6 TP27, TP37 Equipment Manual Release 01/00 11-1 System Settings System Settings Operating mode: Display message: Message logging: Buffer overflow warning: Date: Time: ESC Help Figure 11-2 System Settings standard screen for TP27-10 System Settings Operating mode: Display message: Message logging: Buffer overflow warning: Date: Time: Help ESC Figure 11-3 System Settings standard screen for TP37 and TP27-10 Purpose of operating elements Operating mode Set one of the following operating modes for the Touch Panel: Online Offline Transfer (Serial MPI) 11-2 Display message For a description, refer to chapter 6 Message logging For a description, refer to chapter 6 TP27, TP37 Equipment Manual Release 01/00 System Settings Buffer overflow warning For a description, refer to chapter 6 Date and time Set current date and time of day Blank screen USA D E F GBR I Switch language Call Backup/Restore function (for a description, refer to section 9.3) Adjust volume TP27: Adjust contrast TP37 and TP27-10: Calibrate touch screen Deactivate touch screen to clean the screen (time limit) Call Help text on standard screen Help Exit from standard screen ESC TP27, TP37 Equipment Manual Release 01/00 11-3 System Settings 11.1 Setting an Operating Mode Operating modes The following TP operating modes can be adjusted: S Online S Offline S Download – Serial – MPI (S7) Online This is the standard operating mode for unrestricted process operation and process visualization. In Online mode, a logical connection is established between the Touch Panel and PLC or the Touch Panel attempts to establish a connection. Offline In Offline mode, no logical connection is established between theTouch Panel and PLC. The Touch Panel does not attempt to establish a connection. You can use the Touch Panel. Process control and process visualization are not possible. Download In Download mode, data can be downloaded from the configuration computer to the Touch Panel (refer to chapter 13.2). In this mode there is no logical connection between the PLC and the Touch Panel. You cannot operate the Touch Panel in Download mode. Changing the operating mode S In routine operation On the System Settings standard screen, touch the Operating Mode field and select the operating mode required from the selection window. The Touch Panel saves the current operating mode in the non–volatile memory. The next time it powers up, the Touch Panel automatically reactivates the operating mode last set. S During the startup phase of the Touch Panel The procedure for setting the Touch Panel to Download mode during the startup phase is described in section 13.2. 11-4 TP27, TP37 Equipment Manual Release 01/00 System Settings 11.2 Purpose Blanking the Screen The brightness of the LCD back–lighting is reduced during the course of time due to technological reasons. To extend its useful life: S reduce the brightness of the back–lighting on the TP27, S switch off the back–lighting on the TP37. Action S Trigger using the standard screen Touch the button depicted on the right of the System Settings standard screen. This blanks the screen. As soon as you touch any part of the screen of the TP27, the back–lighting returns to full brightness; if you are using TP37 touching the screen switches on the back–lighting. S Automatic triggering If you do not touch the Touch Panel’s screen within a configured period of time, the screen is blanked automatically. As soon as you touch any part of the screen of the TP27, the back–lighting returns to full brightness; if you are using a TP37 touching the screen switches on the back–lighting. The screen of the Touch Panel is only blanked automatically if this function has been configured in ProTool. TP27, TP37 Equipment Manual Release 01/00 11-5 System Settings 11.3 Deactivate Touch Screen Purpose Soiling the touch screen cannot be avoided during normal operation. Therefore, it should be cleaned at regular intervals. In order to prevent functions being activated inadvertently while cleaning the screen, it can be deactivated via the System Settings screen for a limited period of time. Procedure Touch the button depicted on the right in the System Settings screen. The screen is blanked and a bar graph appears. The touch panel is then deactivated for 30 seconds. It can be cleaned without any functions being triggered. The way to clean the touch panel is described in section 18.1. The bar graph on the screen constantly indicates the remaining time until the touch panel is reactivated. The standard screen reappears automatically after 30 seconds. If this function is used in a customized configuration, the time period of deactivation can be changed. 11-6 TP27, TP37 Equipment Manual Release 01/00 System Settings 11.4 Purpose Calibrating the Touch Screen (TP37 and TP27-10 only) Depending on the installation position and viewing angle, it is possible that when operating the TP37 and TP27-10 one or more parallel axes appear, some more some less strongly highlighted. To prevent any operating errors occuring as a result of this, the TP37 and TP27-10 screens can be calibrated using the System Settings standard screen. The Touch Calibration function is protected by a password. Action Step Action 1 On the System Settings standard screen, touch the button 2 Enter the supervisor password in the password window. 3 Three calibration boxes appear one after the other on the screen in the sequence given in the figure below. Follow the prompt and touch the calibration box currently visible. ¶ ® Please touch the box 4 The Touch Panel checks whether two of the positions touched are in line. S When this condition is satisfied, the screen is calibrated and the System Settings standard screen reappears. S If the condition is not satisfied, an error message is issued and the user is prompted to repeat Step 3. With the TP37and TP27-10, calibration is saved even in the event of a power failure. Tip If calibration is not correctly performed, TP37 und TP27-10 may not be operable in the case of extreme adjustments. In this case, restart the TP and repeat the touch calibration. Any extreme calibration error is corrected by default values which are restored on restarting. TP27, TP37 Equipment Manual Release 01/00 11-7 System Settings 11.5 Other Settings Date/Time The current date and time can be set on the Touch Panel in order, for example, to make adjustments for summer and winter time. Any change affects all the fields which display a date and time variable. The display format for date and time is set in the configuration and cannot be changed later on the Touch Panel. Procedure: Touch the Date or Time field in the System Settings standard screen. Enter the current values in the correct format in the edit window. Enter the periods as well. The Touch Panel saves the current date and time in the non–volatile memory. Language The configuration can be loaded onto the Touch Panel in up to three languages. It is possible to switch to any of the languages at any time in Online mode. After switching to another language, all passages of language–dependent text are displayed in the new language. Procedure: Touch the button depicted on the right on the System Settings standard screen. The languages are scrolled, one by one, each time the button is pressed. I USA D E F GBR The Touch Panel saves the current language setting in non–volatile memory. The next time the Touch Panel is switched on all the language–dependent text passages are displayed in the last language you set. Adjusting volume The Touch Panel acknowledges contact with a touch element by issuing an acoustic signal. This signal takes the form of a tone audible while contact is made. The procedure for adjusting the volume of this audible tone online is as follows: S TP27: “high”, “low” or “off”, S TP37: “ON” or “OFF”. Procedure, TP27: The default setting is “high” volume. Each time the button on the right is touched in the System Settings standard screen, the volume is adjusted, cyclically, to the next setting: High –> Off –> Low –> High. 11-8 TP27, TP37 Equipment Manual Release 01/00 System Settings Procedure, TP37: The default setting is signal tone ON. Touch the button shown here in the System Settings standard screen to switch off the signal tone. Toggle between signal tone ON and OFF by repeatedly touching the button. The volume can also be adjusted by means of the potentiometer on the underside of the housing (see section 13.2). Note The signal tone is independent of communication with the PLC. It does not indicate that the required action has actually been executed. Contrast The TP27 has two buttons with which to adjust the contrast of the screen display in Online mode. Increase contrast : Touch the button depicted on the right on the System Settings standard screen. Each time the button is pressed, the contrast is increased by one level. Reduce contrast : Touch the button depicted on the right on the System Settings standard screen. Each time the button is pressed, the contrast is reduced by one level. Apat from using these two buttons, the contrast can also be adjusted via the Boot window (refer to chapter 13.2). TP27, TP37 Equipment Manual Release 01/00 11-9 System Settings 11-10 TP27, TP37 Equipment Manual Release 01/00 INSTALLATION AND COMMISSIONING 12 Installation 13 Commissioning Part III 11-2 TP27, TP37 Equipment Manual Release 01/00 12 Installation Installation location and conditions The Touch Panels TP27 and TP37 are designed for vertical installation in the front panels of switching cabinets. Cut a mounting slot in the front panel in preparation for installation of the Touch Panel. The thickness of the front panel must not exceed 6 mm. No other holes need to be drilled for mounting. Details regarding the mounting depth and mounting slot are provided in chapter 14. Degree of protection The IP65 degree of protection for the front panel can only be ensured when the seal on the front plate of the Touch Panel is fitted correctly. ! Caution S The TP must be brought to room temperature before it is commissioned. If condensation forms, do not switch on the TP until it absolutely dry. S To prevent the Touch Panel from overheating during operation, – the angle of inclination specified in the technical data must not be exceeded, – do not expose the TP to direct sunlight – ensure that the ventilation slits in the housing remain free after installation. S When the cabinet is opened, certain parts of the system that may conduct hazardous voltage are exposed. S The TP was function–tested before shipping. If a fault occurs nevertheless, please enclose a full account of the fault when returning the TP. TP27, TP37 Equipment Manual Release 01/00 12-1 Installation 12.1 Mechanical Installation How to install the TP27-6 Step Action 1 Slide the enclosed seal from the rear over the housing and, working from the front, install the TP27-6 in the mounting cutout prepared. Make sure the TP cannot drop out of the front panel before it has been secured. 2 Place the hooks of the five screw–type clamps enclosed Ê in the coresponding recesses in the housing of the TP27-6. Front panel TP27-6 Ê Ê 3 Use a screwdriver to tighten the TP27-6 from the rear in the front panel Ë. Note: – Make sure the seal is seated correctly against the front panel. – Do not overtighten the screws to avoid damage. Front panel TP27-6 Ë 12-2 TP27, TP37 Equipment Manual Release 01/00 Installation How to install the TP27-10 Step 1 Action Install the TP27-10 from the front in the pre–prepared mounting cutout. Ensure the TP cannot drop out of the front panel before it has been secured. 2 Place the hooks of the screw–type clamps enclosed ¶ in the corresponding recesses in the housing of the TP27-10. Front panel ¶ ¶ ¶ TP27-10 ¶ ¶ ¶ 3 ¶ ¶ Tighten the TP27-10to the front panel Ë, from the rear, using a hexagonal socket–head screw key. Note: – Do not overtighten the screws, maximum: 0,5 Nm. Threaded spindle Hexagon socket– head screw key Screw– type clamps TP27-10 Ë Rear of TP For mounting into a front panel, the TP27-10 must be fixed using screw-type clamps. Too high torques when tightening the threaded spindle may distort the equipment housing and, as a result, cause breaking of the Touch Screen. TP27, TP37 Equipment Manual Release 01/00 12-3 Installation Maximum torque It must be ensured that the threaded spindles of the screw-type clamps are tightened with the recommended torque of 0,5 Nm. Seal After correct fixing of the equipment, the seal remains visible owing to construction reasons. ! Caution Do not try to upset the seal until the TP27-10 and the front panel lie on each other at the same level. Any damages caused by too high torques when tightening the screw-type clamps of the TP27-10 are not covered by the warranty. 12-4 TP27, TP37 Equipment Manual Release 01/00 Installation How to install the TP37 Step 1 Action Working from the front, position the TP37 in the slot cut in the cabinet. Make sure the TP cannot drop out of the front panel before it has been secured. 2 Locate the hooks of the six screw–type clamps enclosed with the TP in the corresponding recesses in the housing of the TP37. One large screw–type clamp Ê is required on the left and another on the right, two small screw–type clamps Ë for the top and two for the bottom. Ê Ë Ë 3 Working from behind, tighten the grub screws ¸ against the front panel, as illustrated. Grub screw ¸ Screw–type clamps Rear of TP Hexagon socket–head screw key Note: S Make sure the seal is seated correctly against the front panel. S Do not overtighten the screws to avoid damage. TP27, TP37 Equipment Manual Release 01/00 12-5 Installation 12.2 Electrical Installation Electrical connections The Touch Panel requires electrical connections S to the power supply, S to the configuration computer (PU or PC), S to the PLC. The electrical connection to the PU or PC is required purely for downloading the firmware and configuration. Following the configuration and test phases, a serial printer can be connected to the Touch Panel instead of the configuration computer. EMC compatible design ! A precondition for error–free operation is an EMC compatible hardware design of the PLC and the use of interference–proof cables. The guidelines on interference–free design of the PLCs apply equally to installation of the Touch Panel. Caution S Only shielded cables are allowed for all signal connections. S Screw or lock all plug connections. S Do not install signal lines in the same cable ducts as power cables. S Siemens AG refuses to accept liability for malfunctions and damage arising from use of self–made cables or cables from other manufacturers. Reverse battery protection The operating units have reverse battery protection. This has no effect if a connection already exists to another unit via RS 232. Therefore, proceed as follows when commissioning the operating unit: 1. Connect the power supply. 2. Switch on the operating unit. If the operating unit does not power up, swap the connections because the poles are reversed. 3. When the operating unit has been powered up, connect the configuration computer or periphery equipment. 12-6 TP27, TP37 Equipment Manual Release 01/00 Installation Configuration options Figure 12-1 illustrates a number of configuration options for Touch Panels, PLCs and periphery equipment. PLC PLC SIMATIC S5 SIMATIC 500/505 PC Other PLCs PROFIBUS-DP SIMATIC 500/505 SIMATIC S7 Other PLCs Configuration computer 1) PC PG 7xx optionally Relay contact for temperature monitoring DIL switches IF1A IF2 IF3 IF1B LPT TP27, TP37 Currently unassigned Power supply with relay contact2) optionally Serial Configuration computer PC PG 7xx Printer E.g. DR215 DR235 Parallel Printer E.g. Epson Stylus Canon BJC Valid for TP27 and TP37 Only valid for TP37 1) with MPI card 2) Relay contacts only for TP27-6 and TP37 Figure 12-1 Configuration options Detailed information on connection options is provided in the sections below. The connection plug pin assignment for the interfaces are provided in Appendix B of this manual. TP27, TP37 Equipment Manual Release 01/00 12-7 Installation 12.2.1 Power Supply and Relay Contacts Power supply The power supply for the Touch Panel is connected at the 4–pin plug connector on the underside of the unit . Use the 4–pin terminal block supplied with the TP for this purpose. The terminal block is designed for cables with a cross–section not larger than 2.5 mm2. Please refer to the technical data in Appendix A of information on the power supply requirements. Relay contacts (TP27-6 and TP37) only When configured accordingly, messages on the Touch Panel can trigger visual and acoustic signals (lights, flashing lights, buzzer, sirens etc.) by tripping an internal relay. The relay contacts are also carried to the 4–pin plug connector. The figure below illustrates assignment of the 4–pin plug connector for the power supply and relay contacts. 1 2 3 4 Relay contacts (NO contacts) Rating 24 V DC; 0.4 A (no inductive load) GND + 24 V DC ! Temperature monitoring ( TP37 only) Caution S With a 24 V supply, make sure that the extra–low voltage is isolated safely. Use only power supply units complying with IEC 364-4-41 or HD 384.04.41 (VDE 0100, Part 410). S The supply voltage must be within the specified voltage range. Voltages outside this range can cause malfunctions. A sensor monitors the temperature on the inside of the TP37. The contacts of the internal relay close if the temperature exceeds the permissible limit value. The relay contacts are carried to a 2–pin plug connector. This connector can be used to drive an external fan, for instance. The figure below illustrates the assignment of the 2–pin plug connector. 1 2 Ground connection 12-8 Relay contacts (NO contacts) Rating 24 V DC; 0.4 A (no inductive load) Connect the ground connection of the unit to the cabinet ground. To do so, use the grounding screwdriver supplied. TP27, TP37 Equipment Manual Release 01/00 Installation 12.2.2 Connecting the Configuration Computer Connection configuration In order to download the configuration, a connection between the configuration computer (PU or PC) and TP must be established. There are two connection options available for this: S the serial connection of a configuration computer to the TP interface IF2 (serial downloading), S the connection of a configuration computer to the TP interface IF1B (MPI downloading). In this case, the configuration computer and TP are connected to the MPI network. A condition for this is that a configuration already exists on the TP. Both connections serve for downloading the firmware and configuration data (chapter 13.2). Standard cables are available for the connections shown (refer to the ST80.1 catalog). PC TP27, TP37 RS232 COM1/2 (9–pin) RS232 COM1/2 (25–pin) TTY passive 1) TTY/RS232 converter IF2 TTY passive RS232 IF1B 1) 1) PG 7xx COM1 (25–pin) COM2 (9–pin) PC or PU with MPI card Do not use the Siemens converter cable for connection by TTY/passive, because the Touch Panel does not supply 5 V. Figure 12-2 Connection configuration diagram for configuration computer TP27, TP37 Equipment Manual Release 01/00 12-9 Installation 12.2.3 Connecting the PLC Connection configuration Figure 12-3 illustrates the basic connection possibilities between the TP27, TP37 and PLC. Standard cables are available for the connections shown (see the ST80.1 catalog). SIMATIC S5 CPU PU interface TTY active TP27, TP37 TTY active IF1A4) SI 2 TTY active CP521 SI RS232 CP523 PU or PC RS232 COM1/2 (9/25–pin) TTY passive 1) TTY/RS232 converter SIMATIC 500/505 RS232 RS232 (9/25–pin) RS422 RS422 (9–pin) RS232/TTY PLCs of other manufacturers RS422/RS485 IF1B4) SIMATIC S7/M72) RS485 RS485 3) PROFIBUS-DP 1) Do not use the Siemens converter cable for connection by TTY/passive, because the Touch Panel does not supply 5 V. 2) Use only the approved cables for connection to SIMATIC S7/M7. 3) Any PROFIBUS-DP bus terminal (except FSK) 4) For operation via the serial interface, connect either IF1A (RS232/TTY) or IF1B (RS422/485), but not both. The IF1B interface is configured by means of DIL switches. Figure 12-3 Connection configuration diagram for PLCs 12-10 TP27, TP37 Equipment Manual Release 01/00 Installation Configure interface IF1B The IF1B interface can be configured by using the DIL switches, located beside the 9–pin Sub-D connector. This interchanges the RS422 receive data and the RTS signal. By default, the RTS signal is not required by the communication peer. The table shows the permissible DIL switch settings. Communication TP RS422/RS485 Switch Setting 1 2 3 4 ON PLC OFF PPI/MPI/PROFIBUS 1 2 3 4 TP ON OFF RTS on pin 4 (default) 1 2 3 4 ON OFF RTS on pin 9 (same as PU) 1 2 3 4 ON PLC OFF No RTS on plug TP PPI/MPI Standard cable TP27, TP37 Equipment Manual Release 01/00 1 PLC 2 3 4 ON OFF 12-11 Installation 12.2.4 Connecting a Printer Connection configuration Figure 12-4 illustrates the connection of a printer to the serial and parallel printer interfaces of the Touch Panel: S Serial connection: IF2 S Parallel connection: LPT (TP37 only) Cables with integral connectors are available for connecting Siemens printers (refer to the ST80.1 catalog). When connecting printers from other manufacturers, use the cables supplied or specially made cables. TP27, TP37 Printer TTY Serial IF2 RS232 ÇÇÇÇÇÇ ÇÇÇÇÇÇ ÇÇÇÇÇÇ ÇÇÇÇÇÇ ÇÇÇÇÇÇ RS232 ÇÇÇ ÇÇ ÇÇ LPT Parallel TTL TP37 Figure 12-4 Connection configuration diagram for printers Note Use only a cable with braided metal shield grounded at each end for connecting the Touch Panel and the printer. Printer settings The printer type and transmission parameters are defined on the Touch Panel via standard screen Printer Settings (refer to chapter 7). Some printers may require defining the ASCII character set used in the configuration on the printer as well. 12-12 TP27, TP37 Equipment Manual Release 01/00 13 Commissioning Flowchart The guide to commissioning, depicted below, describes the individual steps required for commissioning Touch Panels TP27 and TP37. Figure 13-1 illustrates the most important steps for the initial startup, recommissioning and normal operation of the Touch Panels. Initial startup Recommissioning Normal operation Neither a configuration nor firmware is available on the Touch Panel. The Touch Panel already has a configuration but must now use a new configuration or firmware. The Touch Panel is operated with the loaded configuration. Switch on the Touch Panel’s power supply Set the Touch Panel to Download mode in the startup phase (refer to Section 13.2) Download configuration data to the Touch Panel Touch Panel ProTool SIMATIC COM1/2 Start screen Figure 13-1 Commissioning flowchart TP27, TP37 Equipment Manual Release 01/00 13-1 Commissioning Before commissioning ! Before commissioning the Touch Panel please observe the following: Caution S With the SIMATIC S5, compression of the internal program memory on the PLC (PU “Compress” function, integrated FB COMPR) is not allowed when a Touch Panel is connected. Compression modifies the absolute addresses of the blocks in the program memory. As the Touch Panel reads the address list only during startup, it does not detect any address modifications and accesses the wrong memory areas. If compression is inevitable during routine operation, switch off the Touch Panel prior to compression. S In hazardous areas, always de–energize the Touch Panel before unplugging connectors. Note regarding TP start–up Do not touch the screen of the Touch Panel until after the initialization phase when the menu illustrated in figure13-2 or figure 13-3 appears. The signal tone is not active during startup. 13-2 TP27, TP37 Equipment Manual Release 01/00 Commissioning 13.1 Initial Startup Procedure The firmware and configuration must be downloaded to the Touch Panel when it is started up for the first time. All the units in the SIMATIC HMI family are equipped with reverse battery backup. The reverse battery backup is not effective if a connection to the configuration computer already exists to download the generated project. For this reason, the following procedure is absolutely essential for downloading and commissioning the unit: Step Action 1 Switch on the Touch Panel’s power supply. Since a configuration has yet to be loaded at this stage (and no PCMCIA card has been inserted in another unit, refer to chapter 9.3, Load configuration in another unit), the Touch Panel automatically enters Download mode, displaying the message ”READY FOR SERIAL TRANSFER” and waits for data to be downloaded from the PU or PC (see figure 13-3). The Touch Panel cannot be operated in Download mode. 2 Connect the IF2 interface (RS232/TTY) on the Touch Panel to the PU or PC by means of a suitable standard cable. 3 Start the download operation on the PC or PU to the TP27, TP37. The Touch Panel checks the connection to the PC or PU. If the connection is not available, or if it is not functioning correctly, the Touch Panel issues the corresponding error message. If the connection is in order, downloading of the configuration commences. The Touch Panel’s firmware is downloaded automatically. Following successful downloading, the Touch Panel restarts and displays the start screen of the configuration that has just been loaded. Note Please refer to theProTool for information on which settings are required for the downloading operation in User’s Guide ProTool Configuring Graphic Displays. TP27, TP37 Equipment Manual Release 01/00 13-3 Commissioning 13.2 Recommissioning Types of downloading When recommissioning, the configuration/firmware already loaded in the Touch Panel is replaced by another. Downloading can be performed by means of S serial download or S MPI download (for SIMATIC S7). Serial download In the case of a serial downloading operation, the configuration/firmware is transferred from the PC/PG to the Touch Panel via an RS232/TTY connection. Begin by connecting the IF2 interface (RS232/TTY) on the Touch Panel to the PU or PC using a suitable standard cable. There are two ways of setting the Touch Panel to Download mode: S In routine operation The method of changing the operating mode of the Touch Panel online is described in Section 11.1. S In the startup phase of the Touch Panel In the startup phase of the Touch Panel, the menu illustrated in figure 13-2 or figure 13-3, as appropriate, appears briefly in the initialization phase. Touch the SERIAL DOWNLOAD button to set the Touch Panel to Download mode before power up. Providing the download operation to the Touch Panel has not started, you can exit the Download mode by touching the BOOT CONFIGURATION button to continue the boot operation. Following a successful download operation, the Touch Panel powers up with the new configuration and/or firmware and displays the start screen of the configuration that has just been loaded. 13-4 TP27, TP37 Equipment Manual Release 01/00 Commissioning TP27, Boot V x.xxx Copyright (c) SIEMENS AG 1997 READY FOR SERIAL TRANSFER OK SERIAL DOWNLOAD CANCEL BOOT CONFIGURATION CONTRAST Figure 13-2 TP27 in Serial Download Before downloading to a TP27, the display contrast can be adjusted in the Boot window by pressing the CONTRAST – and CONTRAST + fields. SIMATIC TP37, V x.xxx Copyright (c) SIEMENS AG 1997 READY FOR SERIAL TRANSFER OK SERIAL DOWNLOAD CANCEL BOOT CONFIGURATION Figure 13-3 TP37 in Serial Download TP27, TP37 Equipment Manual Release 01/00 13-5 Commissioning MPI download If a configuration is already loaded for the SIMATIC S7 on the Touch Panel, other S7 configurations can be downloaded to the Touch Panel via an MPI connection. Step Action 1 Switch on the Touch Panel’s power supply. 2 Connect the IF1B interface on the Touch Panel to the PC or PU using a standard cable. If the Touch Panel and PC or PU have been incorporated on the MPI bus, the cables need not be switched for the download operation. 3 In the System Settings standard screen, touch the Operating mode field and select MPI Download from the selection window. The Touch Panel restarts, shows the menu illustrated in figure 13-4 and waits for data to be downloaded from the PU or PC. 4 Providing data is not being downloaded to the Touch Panel, it is possible to S exit from the MPI download operation by touching the BOOT CONFIGURATION button and performing the boot operation or S start the serial download operation by touching the SERIAL DOWNLOAD button. 5 Before data is downloaded, touch the MPI baud rate input field, if necessary, and select a baud rate between 9.6 kbaud and 1.5 Mbaud from the selection window. 6 Start the download operation on the PC or PU to the /Touch Panel. The procedure is described in the User’s Guide ProTool – Configuring Graphics Displays. The Touch Panel checks the connection to the PC or PU. If the connection is not available or if it is not functioning correctly, the Touch Panel issues a corresponding error message. If the connection is in order, downloading of the configuration and or firmware commences. Following successful downloading, the Touch Panel restarts and displays the start screen of the configuration that has just been loaded. 13-6 TP27, TP37 Equipment Manual Release 01/00 Commissioning MPI DOWNLOAD MPI Baud Rate: 187.5 kBaud 2 MPI OP Station Address: Tel.: FF Download Address: FF SERIAL DOWNLOAD BOOT CONFIGURATION Figure 13-4 Touch Panel in MPI Download mode Fault diagnosis A fault occurring during commissioning or operation is normally displayed on the Touch Panel by means of a system message. Appendix C of this manual contains a list of some of the most important system messages and explanations on how to eliminate them. Data backup The operating data of the Touch Panel (tag values, message buffer) is stored in a buffered SRAM and retained even in the event of a power failure. Operating data is not lost if the power supply is turned off or fails. TP27, TP37 Equipment Manual Release 01/00 13-7 Commissioning 13.3 Startup Behavior After the power supply has been switched on, the Touch Panel performs a self test. During the test, it checks the operability of the most important TP components and displays the test results. The test results are then deleted. Self test If a configuration is not present on the Touch Panel, it automatically enters Serial Download mode. TP starts up No configuration installed or SERIAL DOWNLOAD button pressed? Yes No Download operation Initialization Establish connection to PLC The Touch Panel then performs various internal initializations. During the startup phase, the Touch Panel attempts to establish a connection to the PLC. If communication is not possible – for example, because the cable to the PLC has not been connected – the Touch Panel displays a system message. Start screen 13-8 Following startup, the Touch Panel displays the configured start screen. TP27, TP37 Equipment Manual Release 01/00 Commissioning 13.4 Testing a Configuration in OFFLINE Mode Purpose In operating mode OFFLINE, individual functions and configurations downloaded from the PC/PG to the Touch Panel can be tested without being influenced by the PLC. PLC tags are not updated in OFFLINE mode. Action End of test Step Action 1 Set the TP27, TP37 to OFFLINE mode using the System Settings standard screen. 2 Check all the configured screens in respect of correct presentation. 3 Check the screen hierarchy. 4 Check the input fields. 5 Test the buttons. If faults occur when executing the individual steps, download the configuration again. TP27, TP37 Equipment Manual Release 01/00 13-9 Commissioning 13.5 Testing the Configuration in Conjunction with the PLC Test with PLC connected If the tests have been successfully performed in Offline mode, test the TP27, TP37 in conjunction with the connected PLC. This checks that the correct data areas have been configured. Step Action 1 Connect the TP27, TP37 to the PLC. A message on the TP27, TP37 indicates that it has been connected successfully. 2 Acknowledge this message. 3 Set the TP27, TP37 to ONLINE mode using the System Settings standard screen. All the items contained in the configuration that are necessary for communication with the PLC can then be tested. Depending on the configuration, these might be: S S S S S 13-10 event and alarm messages buffers for event messages and alarm messages print functions automatic message logging selecting screens etc. TP27, TP37 Equipment Manual Release 01/00 DEVICE DESCRIPTION AND MAINTENANCE 14 Device Description TP27–6 15 Device Description TP27–10 16 Device Description TP37 17 Options 18 Maintenance/Upkeep Part IV 13-2 TP27, TP37 Equipment Manual Release 01/00 14 Unit Description TP27-6 In this chapter This chapter provides information on: S dimensions S operating and display elements S connection elements and S communication options of Touch Panel TP27-6. 14.1 Dimensions Unit dimensions The following figure indicates the dimensions of the TP27-6 with the housing of the direct key module/control panel which is available on option. Front view Side view 212 65 ÇÇ ÇÇ ÇÇ ÇÇ CPI/DKM 156 146 SIMATIC TP27 4 97 Plan view 202 ÇÇÇÇÇ ÇÇÇÇÇ CPI/DKM Mounting cutout ÇÇ ÇÇ = option The TP27-6 requires a mounting cutout (WxH) of 203+1 mm x 147+1 mm. TP27, TP37 Equipment Manual Release 01/00 14-1 Unit Description 14.2 Operating elements Touch screen 14.3 The TP27-6 touch screen is used to operate and monitor processes. Operation is effected by means of contact–sensitive buttons and input fields which are defined in the configuration for a specific application. No additional keyboard is necessary. Connection elements Figure 14-1Arrangement of connections No. Name/Purpose Description Serial interfaces1): Level Usage S IF1A S IF2 S IF1B RS232/TTY (active/passive) PLC RS232/TTY (active/passive) PC, PU, printer RS422/RS485 (floating) PLC 4 DIL switch2) for configuring the IF1B interface. 5 Grounding connection 6 Power supply3) 1 2 3 output3) 7 Relay 8 DKM/CPI interface4) (covered) 9 Battery compartment (covered) PCMCIA Slot – Voltage supply (+ 24 V DC). Relay contact for a buzzer or light, for example. For connecting a direct key module with 16 digital outputs or a control panel interface with max. 32 digital inputs/outputs. – For JEIDA/PCMCIA cards 1) Connection plug pin assignment, see Appendix B. 2) For details of permissible switch settings, see Section 12.2.3 3) For details of pin assignments, see Section 12.2.1 4) For details of DKM connector pin assignments, see Section 17.1.2 ; and details of CPI connector pin assignments, see Section 17.2.2. 14-2 TP27, TP37 Equipment Manual Release 01/00 Unit Description 14.4 Communication options Device SIMATIC S5 Connection Interface – AS511 (TTY) IF1A – FAP (TTY/RS232) IF1A – PROFIBUS-DP IF1B – PPI IF1B – MPI IF1B – PROFIBUS-DP IF1B – RS232 IF1A – RS422/RS485 IF1B – RS232/TTY IF1A – RS422/RS485 IF1B PC/PU – (TTY/RS232) IF2 Printer – TTY/RS232 IF2 SIMATIC S7/M7 SIMATIC 500/505 Other PLCs TP27, TP37 Equipment Manual Release 01/00 14-3 Unit Description 14-4 TP27, TP37 Equipment Manual Release 01/00 Unit Description TP27-10 In this chapter 15 This chapter provides information on: S dimensions S operating and display elements S connection elements and S communication options of Touch Panel TP27-10. TP27, TP37 Equipment Manual Release 01/00 15-1 Unit Description 15.1 Dimensions Unit dimensions The following figure indicates the dimensions of the TP27-10 with the housing of the direct key module/control panel which is available on option. Side view Front view 335 73 ÉÉ ÉÉ ÉÉ ÉÉ 275 247.4 CPI/DKM SIMATIC TP27 5 31 105 Plan view ÉÉÉÉÉÉÉÉ ÉÉÉÉÉÉÉÉ 309.4 CPI/DKM Mounting cutout 15-2 ÉÉ ÉÉ = option The TP27-10 requires a mounting cutout (WxH) of 310+1 mm x 248+1 mm. TP27, TP37 Equipment Manual Release 01/00 Unit Description 15.2 Operating elements Touch Screen 15.3 The TP27-10 touch screen is used to operate and monitor processes. The touch screen is operated by means of touching contact–sensitive buttons and input fields, located on the screen, which are defined in configurations for specific applications. An additional keyboard is not required. Connection Elements 8 7 9 5 6 4 1 2 3 Figure 15-1 Arrangement of connections No. Name/Purpose Serial 4) Usage PLC RS232/TTY (active/passive) PC, PU, printer RS422/RS485 (floating) PLC 4 DIL switch2) For configuring the IF1B interface. 5 Grounding connection 6 supply3) 3 3) Level RS232/TTY (active/passive) 2 2) Description S IF1A S IF2 S IF1B 1 1) interfaces1): Power interface4) (covered) 7 DKM/CPI 8 Battery compartment (covered) 9 PCMCIA Slot A and Slot B – Voltage supply (+ 24 V DC). For connecting a direct key module with 16 digital outputs or a control panel interface with max. 32 digital inputs/outputs. – For JEIDA/PCMCIA cards (can only be used for Slot B). For the connection plug pin assignment, see AppendixB. For details of permissible switch settings, see Section 12.2.3 For details of pin assignments, see Section 12.2.1 For details of DKM connector pin assignments, see Section 17.1.2; and details of CPI connector pin assignments, see Section 17.2.2 TP27, TP37 Equipment Manual Release 01/00 15-3 Unit Description 15.4 Communication options Device SIMATIC S5 Connection Interface – AS511 (TTY) IF1A – FAP (TTY/RS232) IF1A – PROFIBUS-DP IF1B – PPI IF1B – MPI IF1B – PROFIBUS-DP IF1B – RS232 IF1A – RS422/RS485 IF1B – RS232/TTY IF1A – RS422/RS485 IF1B PC/PU – (TTY/RS232) IF2 Printer – TTY/RS232 IF2 SIMATIC S7/M7 SIMATIC 500/505 Other PLCs 15-4 TP27, TP37 Equipment Manual Release 01/00 Unit Description TP37 In this chapter 16 This chapter provides information on: S dimensions S operating and display elements S connection elements and S communication options of Touch Panel TP37. TP27, TP37 Equipment Manual Release 01/00 16-1 Unit Description 16.1 Dimensions Unit dimensions The figure below indicates the dimensions of the TP37 with the housing of the direct key module/control panel which is available on option. Side view Front view 123 335 5 ÇÇ ÇÇ ÇÇ ÇÇ CPI/DKM 275 246 SIMATIC TP37 81 155 Plan view ÇÇÇÇÇÇÇÇ ÇÇÇÇÇÇÇÇ 308 CPI/DKM ÇÇ ÇÇ = option Mounting cutout 16-2 The TP37 requires a mounting cutout (WxH) of 310+1 mm x 248+1 mm. TP27, TP37 Equipment Manual Release 01/00 Unit Description 16.2 Operating and Display Elements Touch screen The TP37 touch screen is used to operate and monitor processes. The touch screen is operated by means of touching contact–sensitive buttons and input fields, located on the screen, which are defined in configurations for specific applications. An additional keyboard is not required. LEDs The LEDs located beneath the display indicate the following operating statuses of the TP37: S TEMP The temperature inside the TP37 has exceeded the permissible limit value; the monitoring relay has tripped (see Section 12.2.1). S DISK Write/read access to memory card. S HD BUSY No function currently assigned. S POWER The TP37 in operation. TP27, TP37 Equipment Manual Release 01/00 16-3 Unit Description Volume control On the underside of the unit, below the power supply/relay connection, is a potentiometer to adjust the volume of acoustic signals. The potentiometer is inside the device and can be adjusted by inserting a screwdriver though the ventilation slits. View from underside Power supply/relay output Potentiometer for volume control ! 16-4 Warning Use an insulated electrician’s screwdriver to adjust the potentiometer. Insert the screwdriver only at the position indicated and use it only to adjust the potentiometer inside the device. TP27, TP37 Equipment Manual Release 01/00 Unit Description 16.3 Connection Elements 13 9 14 15 8 1 2 3 4 5 6 7 11 12 10 Figure 16-1 Arrangement of connections No. Name/Purpose 1 Currently unassigned 3 Currently unassigned 5 DIL switch1) Serial S S S S 2 4 6 7 interfaces2): IF1A IF2 IF1B IF3 Description – – For configuring the IF1B interface. Level Usage RS232/TTY (active/passive) PLC RS232/TTY (active/passive) PC, PU, printer RS422/RS485 (floating) PLC TTY (passive)/RS422/RS485 Not used at present 8 Parallel interface LPT2) For connecting a parallel printer 9 Relay output3) Relay contact for temperature monitoring and driving for example, a light or an external fan. The relay is tripped when the outside temperature reaches 45 °C. 10 10 Grounding connection output3) – 11 Relay 12 Power supply3) Voltage supply (+ 24 V DC). 13 PCMCIA slot A and slot B For JEIDA/PCMCIA cards (only slot B can be used, upper slot in Figure 16-1). 14 DKM/CPI interface4) (covered) For connecting a direct key module with 16 digital outputs or a control panel interface with max. 32 digital inputs/outputs. 15 1) 2) 3) 4) Battery compartment (covered) Relay contact for a horn or light, for example. – For details of permissible switch settings, see Section 12.2.3 For connector plug pin assignment, see Appendix B. For details of pin assignments, see Section 12.2.1 For details of DKM connector pin assignments, see Section ; and details of CPI connector pin assignments, see Sections 17.1.2, 17.2.2 TP27, TP37 Equipment Manual Release 01/00 16-5 Unit Description 16.4 Communication options Device SIMATIC S5 Connection Interface – AS511 (TTY) IF1A – FAP (TTY/RS232) IF1A – PROFIBUS-DP IF1B – PPI IF1B – MPI IF1B – PROFIBUS-DP IF1B – RS232 IF1A – RS422/RS485 IF1B – RS232/TTY IF1A – RS422/RS485 IF1B PC/PU – (TTY/RS232) IF2 Printer – TTY/RS232 IF2 – TTL LPT SIMATIC S7/M7 SIMATIC 500/505 Other PLCs 16-6 TP27, TP37 Equipment Manual Release 01/00 17 Options Overview This chapter contains desriptions of the follwng units which can be optionally connected: S Direct Key Module (DKM) S Control Panel Interface (CPI) 17.1 Direct Key Module A Direct Key Module (DKM) is available as an option for connection to the Touch Panel. The following variants are available: Operator panel Direct key module with 8 outputs 16 outputs TP27 TP37 – – The variants vary according to the units. The DKM for the S TP27-6 consists of a module board (DKM A) and a small housing, S TP27-10 and TP37 consists of two module boards (DKM A + DKM B) and a large housing (see figure 17-4). The housing is secured to the rear of the Touch Panel. It can be retrofitted at any time. Function of the direct key module The Direct Key Module (DKM) must be implemented where fast keyboard operation is required without any communication–related delays. Example: Direct key control for jog operation. Direct keys can be operated via the software using buttons and messages, if configured in ProTool. The direct key module provides eight digital outputs per board. External power supply The digital outputs are galvanically isolated from the Touch Panel by means of optocouplers. Consequently, the boards require a dedicated voltage supply. TP27, TP37 Equipment Manual Release 01/00 17-1 Options 17.1.1 Installing the Direct Key Module A Touch Panel can accommodate either a direct key module or a control panel interface (see section 17.2). The procedure for installing a direct key module is as follows: 1. Place the front panel of the Touch Panel on a workbench. ! Caution S Make sure that the Touch Panel is disconnected from the voltage supply. S Always follow the ESD guidelines in the Appendix when working on open devices. 2. Release the two pop rivets ¶ and then the cover · indicated in figure 17-1, in an example of the TP37, from the rear panel of the Touch Panel. ¶ ¶ · Figure 17-1 Removing the cover (example TP37) 17-2 TP27, TP37 Equipment Manual Release 01/00 Options 3. Connect the plug of the DKM ribbon cable to the Touch Panel pin array so that the colored side of the ribbon cable faces in towards the inside of the unit (illustrated in an example of the TP37 in figure 17-2). Color coding Ribbon cable Pins Figure 17-2 Connecting the direct key module (example: TP37) 4. Secure the direct key module to the Touch Panel using the four screws enclosed (illustrated in an example of the TP37 in figure 17-3). DKM B DKM A Figure 17-3 Securing the direct key module (example: TP37) Removal is carried out in the reverse of the installation procedure. TP27, TP37 Equipment Manual Release 01/00 17-3 Options 17.1.2 Connectors and Adjusters Each DKM board has S a 10–pin array for connecting the outputs and external voltage supply, and S a DIL switch for configuring the outputs so that they can be set by the software. When installed, the pin array and DIL switch are on the rear side of the Touch Panel (illustrated in an example of the TP37 in figure 17-4). DIL switch Pins DKM DKM B B DKMAA DKM Figure 17-4 Location of the connection and adjustment elements (example TP37) 17-4 TP27, TP37 Equipment Manual Release 01/00 Options Pin arrays The pin arrays of the module boards DKM A and DKM B have the following pin assgnment: 1 2 3 4 5 6 7 8 9 10 +24V DC ext. DO 1 DO 3 DO 5 DO 7 GND1 DO 8 DO 6 DO 4 DO 2 +24V DC ext. DO 9 DO 11 DO 13 DO 15 GND1 DO 16 DO 14 DO 12 DO 10 1) DKM A DKM B floating The components to be triggered (e.g. relays, signaling indicators, etc.) are connected by means of the five–pin connectors supplied: S Connect the wires (conductor cross–sections 0.5 ... 2.5 mm2) S Plug the terminal blocks onto the pins of the DKM DIL switch The DIL switches on the direct key modules DKMA and DKMB must be set as follows: DKM A DKM B S1 S2 S3 S4 S1 S2 S3 S4 OFF OFF ON ON S S1 must always be ON; S S2 selects the module board (DKM A = ON, DKM B = OFF); S S3 and S4 must be ON to drive the outputs. TP27, TP37 Equipment Manual Release 01/00 17-5 Options 17.2 Control Panel Interface A Control Panel Interface (CPI) is available as an option for Touch Panels connected to SIMATIC S7 PLCs. The following variants are available: Operator panell Control Panel Interface with 16 inputs/outputs TP27 TP37 16 inputs/outputs 32 inputs/outputs – – – The variants vary according to the units. The DKM for the S TP27-6 consists of a module board (CPI) and a small housing, S TP27-10 and TP37 consist of a module board (CPI) or two module boards (CPI1 + CPI2) and a large housing (see figure 17-8). The housing is secured to the rear of the Touch Panel. It can be retrofitted at any time. Function of the control panel interface The Control Panel Interface must be implemented where fast key operation is required without any communication–related delays (jog operation < 100 ms). It communicates via the PROFIBUS-DP bus and can only be used in conjunction with the SIMATIC S7 PLC. Each module board provides 16 digital inputs/outputs. An external keypad with controls and light indicators can be connected for each module board. The assignment of the digital inputs/outputs to the control and light indicators of the external keypads is configured in the PLC (also refer to the Communication User’s Guide). External power supply 17-6 The Control Panel Interface requires its own power supply. Note, however, that the digital inputs/outputs are not isolated from the Touch Panel. TP27, TP37 Equipment Manual Release 01/00 Options 17.2.1 Installing the Control Panel Interface A Touch Panel can accommodate either a control panel interface or a direct key module (see section 17.1.1). Use the following procedure to install a control panel interface: ! Caution S Make sure that the Touch Panel is disconnected from the voltage supply. S Always follow the ESD guidelines in the Appendix when working on open devices. 1. Place the front panel of the Touch Panel on a workbench. 2. Release the two pop rivets ¶ and then the cover · indicated in figure 17-5 in an example of the TP37, from the rear panel of the Touch Panel. ¶ ¶ · Figure 17-5 Removing the cover (example TP37) TP27, TP37 Equipment Manual Release 01/00 17-7 Options 3. Connect the plug of the CPI ribbon cable to the Touch Panel pin array so that the colored side of the ribbon cable faces in towards the inside of the unit (illustrated in an example of the TP37 in figure 17-6). Color coding Ribbon cable Pins Figure 17-6 Connecting the control panel interface (example: TP37) 4. Secure the control panel interface to the Touch Panel with the four screws enclosed (illustrated in an example of the TP37 in figure 17-7). DKM B DKM A Figure 17-7 Securing the control panel interface (example: TP37) Removal is carried out in the reverse of the installation procedure. 17-8 TP27, TP37 Equipment Manual Release 01/00 Options 17.2.2 Connectors Each of the two module boards has a 36–pin adapter for connecting the inputs/ outputs and the external voltage supply. When the module is installed, the connectors are located on the rear side of the Touch Panel (illustrated in an example of the TP37 in figure 17-8) 0V +24V DO DI Adapter DKM BCPI 1 DKM A CPI 2 Figure 17-8 Location of the conection elements (example TP37) TP27, TP37 Equipment Manual Release 01/00 17-9 Options Connectors The connectors of module boards CPI 1 und CPI 2 have the following pin assignment when installed (see figure 17-8): CPI 1 GND1) DO 16 to DO 1 +24V DC ext. GND1) DI 16 to DI 1 +24V DC ext. GND1) DO 32 to DO 17 +24V DC ext. GND1) DI 32 to DI 17 +24V DC ext. CPI 2 1) not isolated The controls and light indicators to be used are connected by means of the nine–pin connectors supplied. S Connect the wires (conductor cross–sections 0.5 ... 2.5 mm2) S Plug in the terminal blocks on the adapters of the CPI module boards. 17-10 TP27, TP37 Equipment Manual Release 01/00 Maintenance/Upkeep Scope 18 The Touch Panels TP27 and TP37 are designed for low maintenance operation. Maintenance of the TP is limited to S regular cleaning of the screen S changing the backup battery and S replacing the LCD back–lighting (TP37 only). 18.1 Cleaning the Screen Preparation Clean the Touch Panel screen at regular intervals using a damp cloth. Do not clean the TP while it is turned on. Either switch the unit off or deactivate the Touch Screen. The way to deactivate the Touch Screen is described in Section 11.3. This ensures that functions are not triggered by inadvertently coming into contact with the touch screen. Cleaning agents Use only water or a screen cleaning foam to dampen the cloth. Do not spray cleaning agents directly onto the screen, but onto the cloth. Never use aggressive solvents or scouring powder. Protective foil The protective foil for the TP prevents the screen being scratched or soiled. It is available as an option at your local Siemens branch. TP27, TP37 Equipment Manual Release 01/00 18-1 Maintenance/Upkeep 18.2 Replacing the Backup Battery Function The backup battery ensures that, in the event of a power failure S the operating data (trend data, passwords, messages) in the SRAM of the Touch Panel is retained, and S the hardware clock does not stop. Service life Under normal operating conditions, the service life is approximately 4 years. A dead battery is indicated in routine operation by a system message on the Touch Panel. Replace the backup battery as quickly as possible after the message is received. Source of supply The battery can be ordered via the Siemens spare parts service. It is shipped ready for installation with a lead and connector. See our catalog ST80.1 for the order number. Before changing the battery Observe the following before changing the battery: ! Caution S Change the battery with the power supply switched on, in order to prevent loss of data; passwords, for example. S The battery must be changed by a properly qualified person. S Before replacing the battery, note the ESD guidelines in Appendix E of this manual. 18-2 TP27, TP37 Equipment Manual Release 01/00 Maintenance/Upkeep Action Step Action 1 If a direct key module or control panel interface is connected to the TP37, remove it (see section 17.1 or 17.2) in order to gain access to the cover of the battery compartment. Switch off the voltage supply before removing the DKM or CPI. After removing the direct key module or the control panel interface, switch on the voltage supply before removing the battery. General notes ! 2 Remove the grey, plastic cover of the battery compartment at the rear of the Touch Panel. 3 Remove the battery lead connector from the two–pin plug connector on the TP. 4 Remove the dead battery from the holder and insert the new one. The snap–in plastic holder secures the battery in the battery compartment. 5 Insert the battery lead connector back into the plug connector. The connector is coded and thus protected against polarity reversal. 6 Stow the lead in the battery compartment and close the battery compartment. Please observe the followinf safety notes to ensure correct handling and disposal of lithium batteries: Warning S If the lithium battery is not handled properly, there is risk of explosion. S Batteries – – – – – – should never be charged should not be opened should not be short–circuited should be safeguarded against polarity reversal should not be exposed to temperatures in excess of 100 °C should be protected against direct sunlight. S Do not allow condensation to form on batteries. S Should shipping become necessary, ensure compliance with the Dangerous Chemicals Ordinance for the carrier concerned (coding obligation). S Treat used lithium batteries as special waste. Pack them in separate leakproof plastic bags to dispose of them. TP27, TP37 Equipment Manual Release 01/00 18-3 Maintenance/Upkeep 18.3 Replacing the Back–Lighting (TP37 only) Note on TP27 The back–lighting of the TP27 cannot be replaced by the user. Please contact your Siemens representative if the back–lighting is defective. Service life The brightness of the LCD back–lighting decreases during the course of time for technological reasons. The difference in brightness between a new fluorescent tube and an old one is clearly noticeable on the screen. Therefore, replace both tubes simultaneously if one fails. This saves having to open up the TP a second time when the second tube fails. The way to increase the service life of the two fluorescent tubes by blanking the screen is described in Section 11.2. Before replacing ! The unit must be opened up in order to replace the back–lighting. Observe the following notes on safety with reagrd to opening the TP: Warning S Repairs to the TP must be performed by suitably qualified, authorized technical personnel. S The user may be exposed to exteme risk as a result of unauthorized opening of the TP and inexpert repairs. S The display back–lighting operates at voltages > 1000 V. Ensure that the TP37 is disconnected from the power supply before the TP is opened. S Crystal liquid may leak from a damaged display. Do not allow liquid to come incontact with the skin; do not inhale vapors. If crystal liquid does come into contact with the skin, wash the affected area skin immediately with alcohol. Consult a doctor without delay. S Before working on a open unit, observe the ESD guidelines in the Appendix E of this manual. 18-4 TP27, TP37 Equipment Manual Release 01/00 Maintenance/Upkeep Procedure Step Action 1 Slacken the two knurled screws ¶ at the rear of the TP and loosen the two screws at the top and underside. ¶ ¶ 2 Carefully tilt the hinged rear panel backwards until the plug connections for the ribbon cable and 8–pin socket housing can be removed. Then tilt the rear panel backwards as far as the stop. 3 Undo two screws per fluorescent tube ® (figure 18-1) and remove the covers ¯. 4 Remove the two connectors °. 5 Replace the fluorescent tubes. 6 Reassemble in the reverse sequence of the disassembly procedure. ® ° ® ® ® ° ¯ ¯ Figure 18-1 Replacing the back–lighting TP27, TP37 Equipment Manual Release 01/00 18-5 Maintenance/Upkeep 18-6 TP27, TP37 Equipment Manual Release 01/00 APPENDICES A Technical Data B Interface Assignments C System Messages D SIMATIC HMI Documentation E ESD Guidelines Part V R-2 TP27, TP37 Equipment Manual Release 01/00 A Technical Data Housing TP27-6 TP27-10 TP37 External dimensions W x H x T (mm) without option 212 x 156 x 69 335 x 275 x 78 335 x 275 x 128 Mounting cutout W x H (mm) 203+1 x 147+1 Mounting depth (mm) without option 310+1 x 248+1 65 73 123 Degree of protection S Front panel S Rear panel Weight approx. (kg) without option Processor IP65 IP20 1.5 5 7 TP27-6 TP27-10 TP37 Type Clock frequency (MHz) Memory 80486 Pentium 33 100 TP27-6 TP27-10 TP37 Flash (MB) 1 2 DRAM (MB) 2 8 128 128 SRAM, battery–backed (KB) Memory card S Slot A S Slot B – Not used For memory card !1 MB For memory card !1 MB TP27, TP37 Equipment Manual Release 01/00 A-1 Technical Data Display TP27-6 Type TP27-10 TP37 STN LCD TFT LCD Resolution (horizontal x vertical) 320 x 240 Active screen area (mm x mm) 106 x 79 215 x 165 211 x 158 1 CCFL tube 2 CCFL tubes 2 CCFL tubes Back–lighting Service 1) life1) 640 x 480 approx. (h) with – Monochrome display 50,000 – – – color display 50,000 50,000 25,000 The back–lighting tube for the display is a wear part and is therefore not covered by the warranty. TP37: In unfavorable operating conditions we recommend replacing the tube after the period has elapsed. The tube is available as a spare part. Power supply TP27-6 TP27-10 Rated voltage (VDC) +24 Permissible range (VDC) +18 to +30 Maximum permissible transients 35 V (500 msec) Time between two transients 50 sec minimum Typical power consumption at 24 V Approx. 0.4 A Switch–on current I2t Approx. 0.7 A 0.45 A2s Fuse, internal Backup battery Approx. 1.3 A 0.55 A2s Electronic fuse TP27-6 Type TP27-10 TP37 lithium battery Voltage/capacity 2 3.6 V/approx. 1.5 Ah Service life 2) TP37 > 4 years Technical details subject to change without notice. Relay contact with current supply (message relay) Switching power TP27-6 24 V DC, 0.4 A TP27-10 – 24 V DC, 0.4 A (no inductive load) Relay contact for temperature monitoring Switching power TP37 (no inductive load) TP27-6 TP27-10 TP37 – – 24 V DC, 0.4 A (No inductive load) A-2 TP27, TP37 Equipment Manual Release 01/00 Technical Data Ambient conditions TP27-6 Location TP27-10 TP37 vertical S Maximum permissible angle of inclina- "35° tion Ambient temperature S Operation in vertical position 0 ... 50° C S Operation at 35° angle of inclination 0 ... 35° C 4 to 45° C –20 to 60° C –20 to 60° C S from the perpendicular Shipping, storage 5 to 45° C 4 to 45° C Relative humidity S Operation S Shipping, storage v 95%, no condensation v 95% Shock loading S Operation S Shipping, storage 15 g/11 msec 25 g/6 msec Vibration S Operation S Shipping, storage 0.075 mm 0.075 mm (10 Hz to 58 Hz) 1g (58 Hz to 500 Hz) 3.5 mm (5 Hz to 10 Hz) 1g (10 Hz to 500 Hz) (10 Hz to 58 Hz) 1g (58 Hz to 500 Hz) 3.5 mm (5 Hz to 8.5 Hz) 1g (8.5 Hz to 500 Hz) Barometric pressure S Operation S Shipping, storage TP27, TP37 Equipment Manual Release 01/00 706 to1030 hPa 581 to 1030 hPa A-3 Technical Data Compliance of the named products with the regulations of Directive 89/336 EEC is verified by conformance with the following standards: Noise immunity EN 50082-1 TP27-6 TP27-10 TP37 Static discharge (contact discharge) EN 61000-4-2 Class 3 RF irradiation EN 61000-4-3 Class 3 Pulse modulation ENV 50204 (900 MHz RF conduction 5 MHz) ENV 50141 Class 3 Burst interference ENV 61000-4-4 Class 3 Radio interference TP27-6 TP27-10 RFI suppression TP37 EN 55022 Class A Certifications TP27-6 UL certification TP27-10 TP37 UL Recognition Mark Underwriters Laboratories (UL) in compliance with Standard UL 508, File E 120869 CSA certification CSA Certification Mark Canadian Standard Association (CSA) in compliance with Standard C 22.2 No. 142, File LR 89077-19 FM certification FM Certification Complying with Factory Mutual Approval Standard Class Number 3611 Hazardous (classified) Locations Class I, Division 2, Group A, B, C, D Warning ! Personal injury and material damage may occur. Personal injury and material damage may occur in hazardous areas if plug connections are disconnected during the routine operation of a TP. In hazardous areas, always de-energize the TP before unplugging connectors. Warning ! A-4 WARNING – DO NOT DISCONNECT WHILE CIRCUIT IS LIVE UNLESS LOCATION IS KNOWN TO BE NONHAZARDOUS. TP27, TP37 Equipment Manual Release 01/00 Technical Data A.1 Direct Key Module and Control Panel Interface Direct key module (DKM) Voltage supply for outputs, load voltage supply and internal logic circuitry Voltage supply S rated value S permissible range S value at t < 0.5 sec Power consumption of logic circuitry Short-circuit protection upon polarity reversal of load voltage + 24 V DC +18.0 to +30.0 V 35 V 50 mA 4 Outputs3) No. of outputs 8 per module Output voltage S with signal “0” S with signal “1” Max. 2 V (idling) Min. (voltage supply –3 V) Output current S with signal “0” S with signal “1” Max. 1 mA Max. 300 mA per output Switch rate at S resistive load S inductive load S lamp load Short-circuit current Max. 100 Hz Max. 0.5 Hz Max. 8 Hz Max. 500 mA per output Note: With inductive loads, an external free-wheeling diode must be used directly on the load. 3) Outputs are isolated by means of optocouplers. TP27, TP37 Equipment Manual Release 01/00 A-5 Technical Data Control Panel Interface Voltage supply for outputs, load voltage supply and internal logic circuitry Voltage supply S rated value S permissible range S value at t < 0.5 sec Power consumption of logic circuitry Short-circuit protection upon polarity reversal of load voltage Connection of OP37 24 V DC +18.0 to +30.0 V 35 V 40 mA 4 Lamps (inductive load not permitted) Outputs No. of outputs S S S S S in groups of 16 4 output DO1 to DO4 Group 1 output DO5 to DO8 Group 2 output DO9 to DO12 Group 3 output DO13 to DO16 Group 4 Optical isolation – Output voltage S with signal “0” S with signal “1” Max. 2 V (idling) Min. (voltage supply –3 V) Output current S with signal “0” S with signal “1” Max. 1 mA Max. 500 mA per group 1 output of 200 mA, the remainder 100 mA Switch rate at S resistive load S lamp load Max. 100 Hz Max. 8 Hz Load current per group S aggregate current S on short-circuit Cable length 500 mA Complete group deenergized Max. 1 m Voltage supply for inputs Voltage supply S rated value S permissible range S value at t < 0.5 sec Connection of A-6 + 24 V DC +18.0 to +30.0 V 35 V Pushbuttons, switches (inductive load not permitted) TP27, TP37 Equipment Manual Release 01/00 Technical Data Control Panel Interface Inputs No. of inputs 16 Optical isolation from internal logic circuitry – Input voltage S rated value S with signal “0” S with signal “1” Input current with signal “1” 24 V DC 0 to 5 V 15 to 30 V Typically 5 mA at 24 V Input delay 0.3 msec Connection of mechanical switches Possible Bounce time Cable length of sensors, unshielded TP27, TP37 Equipment Manual Release 01/00 v 10 msec 1m A-7 Technical Data A.2 Chemical Resistance of the Touch Panel Chemical resistance of TP27-6 The surface of the TP27-6 complies to DIN 42 115 Teil 2 and shows no visible signs of change when exposed to the chemicals listed in Table A-1 for a period of over 24 hours. Table A-1 Resistof the surface of the TP27 6” Ethanol Acetaldehyd Fluorocarbons Cyclohexanol Aliphatics Perchlorethylene Glycol Benzine 1.1.1 Trichlorethylene Isopropanol Toluol Trichlorethylene Glycerin Xylene Ethylacetate Methanol Benzole Diethylether Acetone Formic acid Methyl ethyl Ketone Dioxan Dimethylformamide Hydrochloric acid < 10% Benzyl alcohol Nitric acid < 50% Chlomatron ethanoic acis < 95% Hydrogen peroxide< 25% Phosphoric acid < 30% Potash soap < 10% < 20% Cleaning solution (Tenside) Softener Ammoniac < 2% drilling emulsion Sodium hydroxide < 2% Diesel oil Alcali carbonate Varnish Bichromate Paraffin oil Potassium ferricyanide Ricinusöl Silicon oil Terpentin oil substitute ! Caution S The surface of the TP27-6 is not resistant to the following chemicals: Concentrated mineral acids Methylene chloride Concentrated alcaline solutions High pressure steam exceeding 100_C A-8 TP27, TP37 Equipment Manual Release 01/00 Technical Data Chemical Resistance of the TP37 and TP27-10 The surfaces of the TP37 and TP27-10 complies to DIN 42 115 Teil 2 and shows no visible signs of change when exposed to the chemicals listed in Table A-2 for a period exceeding 24 hours. Table A-2 Resistance of the surfaces of the TP37 and TP27-10 Acetone Hexane Toluol Butyl cellosolve Isopropyl alcohol Xylene Cyclohexanol Methyl ethyl ketone NaOH Ethyl acetate Methylene chloride < 40% Mineral spirits Terpentine Vinegar Glass cleaner on ammoniac basis Household cleaners TP27, TP37 Equipment Manual Release 01/00 A-9 Technical Data A-10 TP27, TP37 Equipment Manual Release 01/00 B Interface Assignments IF1A and IF2 8 15 Pin assignment of the 15–pin Sub-D socket: 1 Pin General 1 Housing RS232 2 9 RxD– 3 RxD 4 TxD 5 CTS 6 TxD+ 7 TxD– 8 Housing 9 RxD+ 10 RTS +20 mA1) 11 12 GND +20 mA1) 13 1) TP27, TP37 Equipment Manual Release 01/00 TTY 14 +5 V 15 GND Not IF2 B-1 Interface Assignments IF1B Pin assignment of the 9–pin Sub-D socket (Configuration via DIL switch, see Chapter 12.2.3): 5 1 Pin General PROFIBUS-DP MPI RS422 RS485 Data B TxD (B) Data B 1 9 6 2 3 4 RxD (B) 5 GND (floating ) 6 +5 V (floating ) 7 8 Housing Data A 9 IF3 (TP37 only) 8 15 TxD (A) Data A RxD (A) Pin assignment of the 15–pin Sub–D socket: 1 9 Pin General 1 Housing 2 TTY RS42 RxD– 3 RxD (B) 4 TxD (B) 5 RxD (A) 6 TxD+ 7 TxD– 8 RS485 Data B Housing 9 RxD+ 10 TxD (A) 11 +24 V 12 GND (5 V) Data A 13 B-2 14 +5 V 15 GND (24 V) TP27, TP37 Equipment Manual Release 01/00 Interface Assignments LPT (TP37 only) 13 25 Pin assignment of the 25–pin Sub–D socket: 1 14 Pin 1 – Strobe 2 + Data Bit 0 3 + Data Bit 1 4 + Data Bit 2 5 + Data Bit 3 6 + Data Bit 4 7 + Data Bit 5 8 + Data Bit 6 9 + Data Bit 7 10 – Acknowledge 11 + Busy 12 + Paper End 13 + Select 14 – Auto Feed 15 – Error 16 – Init Printer 17 – Select Input 18...25 TP27, TP37 Equipment Manual Release 01/00 TTL (Centronics) Ground B-3 Interface Assignments B-4 TP27, TP37 Equipment Manual Release 01/00 System Messages Message number C OP system messages can be subdivided into various categories. The information as to which category a system message belongs to is contained in the message number as indicated below. Message number VVV Message text 0 1 2 3 4 5 6 7 Driver error Startup message Warning Information message Operator error Other message Configuration error Internal error The message category enables you to identify the general area in which the cause of the fault is to be found. Below you will find a selection of system messages listed together with details of under what circumstances they occur and, where applicable, how the cause of the fault can be eliminated. Self-explanatory system messages are not included. Note System messages are displayed in the language selected in the configuration. If the OP does not have access to any configuration data, the messages are displayed in English. TP27, TP37 Equipment Manual Release 01/00 C-1 System Messages Message Cause Remedy Please wait Mode change in progress or recipe function started. Ready for transfer Waiting for data from PU/PC Data transfer Data transfer between PU/PC and OP in progress Firmware not compatible The firmware can not be used for the current configuration EPROM memory failure Memory module defective or internal hardware fault Send unit for repair quoting details of error message g Memory module defective or transmission error Retransfer configuration or send OP for repair RAM memory failure Flash memory failure C-2 TP27, TP37 Equipment Manual Release 01/00 System Messages Message Cause Remedy: 026...029 Storage medium not ready, contains errors or status unde- Reset hardware, remove then refit Flash finable. memory module or carry out hardware test. 030 Storage medium not intialized. Switch to download mode. 032 Error accessing module, Flash may not be supported or initialized by incorrect OP. Check whether module is properly inserted and compatible. If restoring: repeat backup with correct OP. 033 Internal Flash memory initialized; configuration data deleted, some recipe data preserved. Retransfer configuration. 034 Inserted module initialized, all stored data deleted. Retransfer configuration. 035 Size of selected recipe memory has been reduced. The reduced-size recipe memory can not be used and all data records must be deleted. The recipe memory is only initialized when requested. 040 Driver error If FAP is set, the character delay time setting may be too short. Check physical connection with PLC. Modify character delay time. 041 Fault in connection with PLC. Possible causes: – Fault on the transmission link, e.g. connecting cable defective – Incorrect interface parameters set on OP or on communication peer. 043 Data transfer error. A variable indicating the cause of the fault is transferred with this message. Variable: 0 Timeout error 1 Framing error (receiving) 2 Overrun error 3 Parity error 4 No connection established 5 Checksum error (receiving) 6 Unexpected characters received 7...11 Internal error 12 Receive data block too large 13 Memory area not available on PLC 044 Repeat the data transfer. Before doing so, check the physical connection/configured interface parameters if necessary. Fault in connection with PLC. Possible causes: – Fault on the transmission link, e.g. connecting cable defective – Incorrect interface parameters set on OP or on communication peer. 114 PLC has been restarted. 115 Establishment of logical link with PLC in progress. 117 Connection with PLC is OK again following a fault. 119 Automatic restart. 136 PLC not responding. Check program sequence on PLC. Check physical connection. 138 Data block not available on PLC Set up relevant memory area. TP27, TP37 Equipment Manual Release 01/00 C-3 System Messages Message Cause Remedy: 200 Battery power no longer sufficient for internal data buffer Replace battery. on OP. Note: Battery on memory is discharged, data may no longer be Replace the battery while the unit is readable. switched on in order to prevent loss of data. 210 Internal error Press restart button. OP co-ordination area not receivable during startup. 212 Internal error Restart OP. Bit for changing operating mode has been inverted erroneously. 213 Offline mode not possible at present. Try change of operating mode again later. 214 The job number sent by the PLC or configured in a function field is too large. Check PLC program and configured screen. 217, 218 Overlapping specified/actual values. Check configuration of actual/specified values in the process link. 230 The minimum value is greater than the maximum value for variable limits. Correct the limit settings. 231 The minimum value is equal to the maximum value for variable scales. Correct the scale on the OP. 250 You can not switch to the desired operating mode. Check parameters of PLC job. 251 Error transferring data record to PLC. Check recipe configuration. 252 Function can not be executed as a function of the same group has not yet been completed (e.g.: setpoint entry is active, password list can not be opened). Wait until preceding function has been completed (or terminate function) and then invoke desired function again. 253 Access to data medium is not possible. 1. Floppy drive not present, 2. Floppy is read only, 3. Disk is not formatted. 254 The disk must be formatted before a data record can be saved for the first time. First format the disk. 255 Not enough space on disk for this data record. Delete data records that are no longer required. 256 Not enough system memory available to execute the desired function. Try activating function again. Check configuration. 1. Move function to a different screen 2. Simplify screen structure 3. Do not use trends on screen in conjunction with this function 257 Data record has been stored with a different version stamp than defined in the current configuration. If the data records are to continue to be used, the old version number must be entered in the recipe configuration. Caution: The structure of the recipe determines the assignment of data to a data record. 258 C-4 A parameter record has been selected as a recipe. Parameter records can not be edited directly. Only individual data records of a parameter record can be edited. TP27, TP37 Equipment Manual Release 01/00 System Messages Message Cause Remedy: 259 Transfer of a data record to the PLC is taking too long. Check PLC program. In the case of large data records no modifications are necessary as the function is being processed correctly. Example: PLC is not acknowledging data record or very large data records are being transferred. 260 Operating mode of PLC does not match the configuration. Change operating mode of PLC. 261 The data in this data record is no longer consistent and it can therefore no longer be used. Edit data record and check that all entries are correct. 262 Password or query window already in use by another function. Complete first function then execute desired function again. 263 Specified remaining buffer space for messages has been reached! Configure smaller remaining buffer, delete event/alarm message buffers. 264 Message buffer overflow. The overflow messages are printed out if so specified in the configuration. 265 The number of passwords issued has already reached 50. You can not enter any more passwords. If you wish to issue additional passwords, you must first delete some of the existing ones. 266 The field configured in the PLC job does not exist. Change the parameters of the PLC job and retransfer the configuration. 303 Fault in connection with PLC. Check PLC status. S5: this error may occur when transferring large data records. In such cases the watchdog is activated. S5: set value in data word 98 to at least 2000. 305 Data block number missing. Set up data block or change configuration. 306 Incorrect CPU specified under ”PLC –> Parameters”. Change configuration and retransfer. 307 ... 311 Variable not present on PLC Check configuration of process link. 316 Active password level insufficient for menu item Enter password with higher password level. 339 Startup completed. Communication with PLC has been resumed. 340 Status processing in progress on PU/PC. The OP can not be used while this is going on. 341 Internal error With non-Siemens connections: data block error 342 Network node has illegal address. 343 You are attempting to edit a variable of a type that can not be edited in a recipe: currently applies to ARRAY variables only. 350 PLC is performing initialization. You can not enter any setpoints during initialization. Scrolling of screens is possible. 351 PLC has completed initialization. You can resume entering setpoints once this message has appeared. TP27, TP37 Equipment Manual Release 01/00 Max. addresses: S7-MPI: 32 PROFIBUS-DP: 128 This operating mode may be set by the PLC programmer. C-5 System Messages Message Cause Remedy: 352 You are attempting to select a screen that does not exist or has been disabled by the function Hide. 353 The minimum value is greater than the maximum value for variable scales. 354 You are attempting to enter a value in an input field when Log on with a higher password level. the current password level is insufficient for input. 355 Entry of this variable has not been configured for the current PLC mode. 356 A print function has been initiated on the OP. When atSwitch the printer online. tempting to print it has been ascertained that the printer is Check the connection between the OP and offline. the printer. Minimum and maximum values are being confused by OP. To prevent this, enter correct minimum and maximum values. Has the printer been connected to the correct interface? 357 You are attempting to enter a setpoint that contains an illegal character. Enter the value correctly. 358 The OP is currently executing a function which does not permit use of the OP while it is in progress. Wait until the function has been completed. 365 Incorrect index. A multiplex index is outside the defined range. 370 Hard copy print-out has been cancelled manually. 371 Print function disabled at present. 372 The function started has been cancelled. 383 For information: transfer of data records completed. 384 Data record required is not on data medium. Check the data record selection parameters (recipe, data record name, data medium) or use the Select function to select the data record. 385 Information message: transfer of data records from OP to data medium or vice versa has been initiated. 386 Information message: transfer of data records from OP to PLC or vice versa has been initiated. One possible reason is that operation is no longer possible: The PLC has not reset the corresponding control and acknowledgment bit, which deactivates the recipe mailbox lock, in the interface area. 387 Data record not found. 388 Activating selected function. 389 De-activating selected function. 391 No Help text configured. C-6 This message may appear in the case of recipe functions, for example. There is no data record relating to the selected recipe on the data medium. Check configuration. TP27, TP37 Equipment Manual Release 01/00 System Messages Message Cause Remedy: 442 Data block error x DB no. y Correct the block length/block number as This message indicates a data block error. The variables x necessary or send the correct data block. and y identify the cause of the fault (x)) and the number of the receive block concerned (y)). Variable x: 0 incorrect block length entered in receive block No. y. 1 incorrect block number entered in receive block No. y. 450 When entering a value, you have attempted to press a key that is not compatible with the defined input field. 451 You have entered a setpoint that is below the configured lower limit. Enter a value that is greater than or equal to the limit. 452 You have entered a setpoint that is above the configured upper limit. Enter a value that is less than or equal to the limit. 453 Time not entered correctly. Enter time correctly 454 Interface parameters incorrectly set, e.g. when specifying parameters for printer interface Enter valid value for interface parameters. The following values are valid: – Baud rate: 300, 600, 1200, 2400, 4800, 9600, 19200 – Data bits: 5,6,7,8 – Stop bits: 1,2 – Timeout: 1...600 455 You have set graphics printing on the OP but the corresponding ESC sequence has not been configured. Select a different printer or check printer configuration in ProTool. 456 You have entered an incorrect value, e.g. a variable with a user function that blocks certain input values. Enter permissible value. 458 You have entered a value that is too great or too small for the variable type concerned, e.g. a value greater than 32767 for a variable of the type Integer. Enter a value that is within the permissible range. 459 You are attempting to enter an illegal character (e.g. letter Enter permissible value. in a numerical value) The input is rejected and the existing entry retained. 500...503 Scheduler, counter, date or time data can not be sent. This error can occur if the PLC is tempop rarily il overloaded l d d or if the h ffunction i bl block k iis not invoked for more than 1.5 s. 504 Free ASCII Protocol: operator input value could not be sent. 505 The data record can not be sent as the recipe disable bit on the PLC is set or because transfer of a recipe is still in progress. Try sending again later when the PLC has released the recipe mailbox. 506 Overload: too many message blocks with the same block number in transit. This error occurs if the PLC sends too many jobs using ’collect message area’ within a certain period of time. 507 Transfer of the data record was not acknowledged by the PLC within a certain period. Checking of data records by the user at the PLC end must be carried out more quickly (< 10 s). 509 Firmware version is different from standard FB version. Please contact the SIMATIC Hotline. TP27, TP37 Equipment Manual Release 01/00 C-7 System Messages Message Cause Remedy: 510 Data record not present. A process link with a non-existent data block has been configured in a recipe or the recipe data contains errors. 512 Configured data block length is too short. Change configuration and retransfer. The variable transferred with the message identifies the number of the data block. 541 ... 550 Specified variable not available on PLC Change configuration and retransfer. 551 An MPI/PPI connection to the PLC cannot be established using the specified station address. Check MPI station addresses and wiring. 552 Query: safety check as to whether the selected data record is to be deleted. The data record is only deleted if 0 is entered. If not the function is cancelled. This query is also used when backing up or restoring configurations. In that case, it relates to deletion of all data records in the system memory. 553 Information message: selected data record has been deleted. 554 Query: 1st safety check as to whether the data medium for storing data records is to be formatted. Any data records already on the disk will be deleted when the function is executed! The function is only executed if 0 is entered. 555 Query: 2nd safety check as to whether the data medium for storing data records is to be formatted. Any data records already on the disk will be deleted when the function is executed! The function is only executed if 0 is entered. 556 Information message: disk has been formatted. 557 Query: if 0 is entered the data record will be adopted with the new values. If anything else is entered, you may continue editing. 558 Query: if 0 is entered the edited data record is rejected. The data remains as it was before editing. If anything else is entered, you may continue editing. 559 Query as to whether the event message buffer should be cleared. 560 Query as to whether the alarm message buffer should be cleared. 561 A global data record (rel. 3.0 or higher) is being edited and does not have all the entries defined in the current recipe. 562 Information as to which mode was set using the function ”First/Last Message”. 563 Information as to which mode was set using the function ”First/Last Message”. 564 Query: if 0 is entered the data record is created. If anything else is entered, the function is cancelled. C-8 The data record can only be saved if the marked entries are edited. If no entries are marked, only the version number has changed. TP27, TP37 Equipment Manual Release 01/00 System Messages Message Cause Remedy: 565 On transferring a global data record, it is established that not all entries are present. You have the following options: Only returned in the case of data records that are transferable from one recipe to another. rel. 3.0 or higher, plastic functions.) 1: read the missing entries from the PLC 2: edit the missing entries 3: cancel the Download operation. 566 Data record contains array that does not fit the current recipe structure. The following question appears: Save yes/no ? If you elect to save, the array data is set to 0. 567, 568 If the message buffer has to be cleared, pending event/ alarm messages also have to be deleted in order to make space for new message events. Check configuration. Too many messages are pending. 569 Fault on CPI module. – CPI no.: defective CPI module – Error: 1 = Voltage too low 2 = Current too high 3 = Temperature too high 4 = Module not present (failed during operation) 571 S7 system diagnosis/ALARM_S returns error if OP logs on/off. CPU operating system out of date. 572 Query: data record already exists on data medium. If 0 is entered the data record will be overwritten with the new values. 604 Message does not exist. Configure message. 605 Process link is only configured symbolically. Change g configuration g and retransfer. 606 Too many message variables configured. 607 Data type configured does not exist. 613 Data block not available or too short. Create data block of required length on the PLC. 622 Configured recipe does not fit in recipe mailbox on PLC (> 512 data words). Reduce configured size of recipe and retransfer configuration. 623 Internal error If the fault is not corrected by performing a restart, please contact the SIMATIC Hotline. Screen object for “Send Recipe“ is not a recipe type (fixed by COM TEXT). 624 No recipe entries found. Set up area pointers and retransfer configuration. 625 Recipe number does not exist. Reconfigure g recipe. p 626 No setpoints have been configured. 627 Internal error Correct the block number. Configured keyboard block number too high. 628 Recipe does not fit in mailboxes. TP27, TP37 Equipment Manual Release 01/00 Increase configured size of recipe mailbox or succeeding recipe mailbox. C-9 System Messages Message Cause Remedy: 636 Event message is not configured Configure event message (–> message number) fully. 640 Alarm message is not configured Configure alarm message (–> message number). 645 Internal error Press key to restart. PLC co-ordination area not receivable during startup. If the fault is not corrected by performing a restart, please contact the SIMATIC Hotline. Internal error If the fault is not corrected by performing a restart, please contact the SIMATIC Hotline. 649 Driver number configured can not be interpreted. 650 Missing area pointer. Configure an area pointer. 653 The configured user version number does not match the version number stored on the PLC. Change configuration and retransfer. 655 PLC acknowledgement area does not physically follow on from the alarm messages area (–> no startup). 657 Configured PLC protocol is not possible. Use current firmware version or configure different protocol. 667 Configuration error: x = 1..8: Change the configuration of the process link and retransfer. x = 9..13:Change configuration of area pointer and retransfer x = 14: Restrict configuration and retransfer. Variable x: 1 Data type is not DB 2 DB number is greater than 15 3 DB length is greater than 1024 4 DW is in data block header 5 Actual value not in send block 6 Setpoint not in receive block 7 Setpoint/actual value not in receive block 8 Initial value not in send block 9 Data type is not DB 10 DB number is greater than 15 11 DB length is greater than 1024 12 DW is in data block header 13 Area is in wrong DB 14 Sum of data blocks too great 668 Incorrect configuration. Change configuration and retransfer. Meaning of variables: 1: Incompatible PLC types configured 2: No PLC configured 3: Incorrect baud rate configured 669 Too many actual values (> 512) have been configured for cyclic reading in a screen/variable. 670 Too many variables requested simultaneously. Lengthen standard clock pulse or configure fewer variables on screen. 671 Configuration of message variables incompatible. Differences between configuration and PLC. 672 Message not configured. Check S7 programs, check message g server configuration, g , modify configuration and download again. 680 Selection of a recipe not defined in the project. Select a valid recipe. C-10 TP27, TP37 Equipment Manual Release 01/00 System Messages Message Cause Remedy: 681 Overload caused by too many variables (setpoints/actual values). Check the interface parameters. Fault in connection between the OP and PLC. 682 Incorrect interface parameters configured. Configure fewer process links for the screen displayed. 683 Configuration error: upper limit = lower limit Correct the limits and retransfer configuration. 684 Non-existent trend switch buffer requested. Check PLC program/OP configuration. Only use trend request area 2 for trends with switch buffer. 701 Internal error Incorrect assignment of “head –> res“ when receiving variable. 702 Job can not be executed. Change interface or configure area pointer. 703 Flash memory full. Restrict the configuration. 704 Incorrect CPU specified under ”PLC –> Parameters”. Change configuration and retransfer. 706 Recipe request will not be processed as another request is already active. 722 Internal error Incorrect mailbox type received (OP15 –> OP5) 723 Internal error Change area pointer list. OP5: more than 500 messages are specified in the area pointer lists. 724 Internal error Mailbox type not implemented. 771 Internal error Error during communication (→ messages). 779 Internal error Reset and repeat MPI download. Internal error during MPI download; possibly due to buffer problems. 780 Internal error Undefined error from communication with PLC. 781 An ”Online Setter” function has been incorrectly defined in ProTool. TP27, TP37 Equipment Manual Release 01/00 C-11 System Messages Procedure for ”internal errors” In the case of all system messages that relate to ”internal errors”, please follow the procedure outlined below. a) Switch off the OP, set the PLC to STOP mode and then restart both units. b) During startup, set the OP to download mode, downlaod the configuration again and then restart the OP and PLC again. c) If the fault recurs, please contact your nearest Siemens representative. When doing so, please quote the number of the error that has occurred and any variables referred to in the message. C-12 TP27, TP37 Equipment Manual Release 01/00 SIMATIC HMI Documentation D Target groups This manual is part of the SIMATIC HMI documentation. The documentation is aimed at the following target groups: S Newcomers S Users S Configurers S Programmers S Commissioning engineers How the documentation is organized The SIMATIC HMI documentation consists of the following components: S User’s Guides / User’s Manuals for: – Configuration software – Runtime software – Communication between PLCs and operating units S Equipment Manuals for the following operating units: – MP (Multi Panel) – OP (Operator Panel) – TP (Touch Panel) – TD (Text Display) – PP (Push Button Panel) S Online Help on the configuration software S Start–up Guides S First Steps Overview of complete documentation The following table provides an overview of the SIMATIC HMI documentation and shows you when you require the different documents. TP27, TP37 Equipment Manual Release 01/00 D-1 SIMATIC HMI Documentation Documentation Target Group Content First Steps with ProTool Newcomers This documentation guides you step by step through the configuration of Product Brief S a screen with various objects S changing from one screen to another S a message. This documentation is available for: S OP3, OP5, OP7, OP15, OP17 S OP25, OP27, OP35, OP37, TP27, TP37 S Windows-based systems ProTool Configuring Windows-based Systems Configurers Provides information on working with the ProTool/Pro configuration software. It contains S information on installation S basic principles of configuration S a detailed description of configurable objects and func- User’s Guide tions. This documentation is valid for Windows-based systems. ProTool Configuring Graphics Displays Configurers Provides information on working with the ProTool configuration software. It contains S information on installation S basic principles of configuration S a detailed description of configurable objects and func- User’s Guide tions. This documentation is valid for graphic display operating units. ProTool Configuring Text-based Displays Configurers Provides information on working with the ProTool/Lite configuration software. It contains S information on installation S basic principles of configuration S a detailed description of configurable objects and func- User’s Guide tions. This documentation is valid for text-based display operating units. ProTool Configurers Online Help ProTool/Pro Runtime User’s Guide Provides information on the configuration computer while working with ProTool. Online Help contains S S S S Commissioning engineers, Users context-sensitive help detailed instructions and examples detailed information all the information from the user guide. Provides information on working with ProTool/Pro Runtime software. It contains S installation of the ProTool/Pro Runtime visualization software S commissioning and running the software on Windows-based systems. Copy Protection Start–up Guide D-2 Commissioning engineers, Users The ProTool/Pro Runtime visualization software is a copyright product. This manual contains information on the installation, repair and uninstallation of authorizations. TP27, TP37 Equipment Manual Release 01/00 SIMATIC HMI Documentation Documentation Target Group Content Application Example Newcomers ProTool is supplied with example configurations and the corresponding PLC programs. This documentation describes how you Start–up Guide S load the examplesonto the operating unit and PLC S run the examples and S upgrade the connection to the PLC to suit your own specific application. MP270 Equipment Manual Commissioning engineers, Users Describes the hardware and the general operation of Multi Panel MP270. It contains S S S S installation and commissioning instructions a description of the equipment operating instructions instructions for connecting the PLC, printer and programming computer, S maintenance instructions. OP37/Pro Equipment Manual Commissioning engineers, Users Describes the hardware, installation and inclusion of upgrades and options for the OP37/Pro. TP27, TP37 Equipment Manual Commissioning engineers, Users Describes the hardware and general operation. It contains OP27, OP37 Equipment Manual OP25, OP35, OP45 Equipment Manual OP7, OP17 Equipment Manual OP5, OP15 Equipment Manual installation and commissioning instructions operating unit description connecting the PLC, printer and programming computer operating modes operation description of the standard screens supplied with the operating unit and how to use them S fitting options S maintenance and fitting of spare parts. TD17 Equipment Manual OP3 S S S S S S Commissioning engineers, Users, Programmers Describes the hardware of the OP3, its general operation and the connection to the SIMATIC S7. Equipment Manual Commissioning engineers, Users Describes the hardware, installation and commissioning of push-button panels PP7 and PP17. Communication Programmers Provides information on connecting text-based and graphics displays to the following PLCs: Equipment Manual PP7, PP17 User’s Manual S S S S SIMATIC S5 SIMATIC S7 SIMATIC 500/505 drivers for other PLCs This documentation describes the S configuration and parameters required for connecting the devices to the PLC and the network S user data areas used for exchanging data between operationg unit and PLC. TP27, TP37 Equipment Manual Release 01/00 D-3 SIMATIC HMI Documentation Documentation Target Group Content Communication for Windows-based Systems Programmers Provides information on connecting Windows-based systems to the following PLCs: S S S S User’s Manual SIMATIC S5 SIMATIC S7 SIMATIC 505 Allen Bradley PLC 5/SLC 500 This documentation describes the S configuration and parameters required for connecting devices to the PLC and the network S user data areas used for exchanging data between operating unit and PLC. Other PLCs Programmers Online Help Provides information on connecting devices to PLCs, such as: S S S S S S Mitsubishi Allen Bradley Telemecanique Modicon Omron SIMATIC WinLC When the drives are installed, the relevant Online Help is installed at the same time. ProAgent for OP User’s Manual Configurers Provides the following information about the ProAgent optional package (process diagnosis) for OPs S configuring system-specific process diagnosis S detecting, locating the cause of and eliminating process errors, S customizing standard diagnostic screens supplied with the software. D-4 TP27, TP37 Equipment Manual Release 01/00 ESD Guidelines What does ESD mean? E Virtually all present-day modules incorporate highly integrated MOS devices or components. For technological reasons, these electronic components are very sensitive to overvoltages and consequently therefore to electrostatic discharge: These devices are referred to in German as Elektrostatisch Gefährdeten Bauelemente/ Baugruppen: ”EGB” The more frequent international name is: ”ESD” (Electrostatic Sensitive Device) The following symbol on plates on cabinets, mounting racks or packages draws attention to the use of electrostatic sensitive devices and thus to the contact sensitivity of the assemblies concerned: ESDs may be destroyed by voltages and energies well below the perception threshold of persons. Voltages of this kind occur as soon as a device or an assembly is touched by a person who is not electrostatically discharged . Devices exposed to such overvoltages cannot immediately be detected as defective in the majority of cases since faulty behavior may occur only after a long period of operation. Precautions against electrostatic discharge Most plastics are capable of carrying high charges and it is therefore imperative that they be kept away from sensitive components. When handling electrostatic sensitive devices, make sure that persons, workplaces and packages are properly grounded. TP27, TP37 Equipment Manual Release 01/00 E-1 ESD Guidelines Handling ESD assemblies A general rule is that assemblies should be touched only when this cannot be avoided owing to the work that has to performed on them. Under no circumstances should you handle printed-circuit boards by touching device pins or circuitry. You should touch devices only if S you are grounded by permanently wearing an ESD wrist strap or S you are wearing ESD shoes or ESD shoe-grounding protection straps in conjunction with an ESD floor. Before you touch an electronic assembly, your body must be discharged. The simplest way of doing this is to touch a conductive, grounded object immediately beforehand – for example, bare metal parts of a cabinet, water pipe etc. Assemblies should not be brought into contact with charge-susceptible and highly insulating materials such as plastic films, insulating table tops and items of clothing etc. containing synthetic fibers. Assemblies should be deposited only on conductive surfaces (tables with an ESD coating, conductive ESD cellular material, ESD bags, ESD shipping containers). Do not place assemblies near visual display units, monitors or television sets (minimum distance to screen > 10 cm). Measuring and modifying ESD assemblies Perform measurements on ESD assemblies only when S the measuring instrument is grounded – for example, by means of a protective conductor – or S the measuring head has been briefly discharged before measurements are made with a potential-free measuring instrument – for example, by touching a bare metal control cabinet. When soldering, use only grounded soldering irons. Shipping ESD assemblies Always store and ship assemblies and devices in conductive packing – for example, metallized plastic boxes and tin cans. If packing is not conductive, assemblies must be conductively wrapped before they are packed. You can use, for example, conductive foam rubber, ESD bags, domestic aluminum foil or paper (never use plastic bags or foils). With assemblies containing fitted batteries, make sure that the conductive packing does not come into contact with or short-circuit battery connectors. If necessary, cover the connectors beforehand with insulating tape or insulating material. E-2 TP27, TP37 Equipment Manual Release 01/00 Glossary A Alarm message Calls attention to high-priority operating states and has therefore to be acknowledged. Alarm time Time between the arrival and departure of an alarm message. Area pointer Required for data exchange between the TP and the PLC. It contains information concerning the length and size of data areas on the PLC. Arrival of a message The point in time at which a message is issued by the PLC or TP. Automation systems PLCs of the SIMATIC S7 series – for example, SIMATIC S7-200/300/400) B Blanking Automatic turn-off of display back lighting. Boot A load operation which transfers the operating system to working memory on the TP. Button Touch-sensitive area on the screen of a Touch Panel with configured functionality. Buttons replace, among other things, system keys and function keys on the TP37. TP27, TP37 Equipment Manual Release 01/00 Glossary-1 Glossary C Configuration Definition of system-specific basic settings, messages and screens using the ProTool configuration software. Control Panel Interface Option for Touch Panel with 16 (TP27–6) or 32 TP27–10/TP37) digital input/ outputs for fast key input without any communication–based delay. Can be used with SIMATIC S/ and PROFIBUS–DP. D Departure of a message The point in time at which a message is withdrawn by the PLC. Display function Function causing the contents of the display to be modified – for example, Display Message Level, Display Alarm Buffer And Display Process Screen. Download mode Operating mode of the TP during which data are downloaded from the PU or PC to the TP. Duration of display The time between the arrival and departure of a message. E Event message Draws attention to specific operating states on machines or systems connected to the PLC. F Field Reserved area in configured and non-configurable text for the output and/or input of values. Flash memory Programmable memory which can quickly be deleted and then re-written. H Help text Glossary-2 Additional, configurable information for messages, screens, screen entries and list boxes. TP27, TP37 Equipment Manual Release 01/00 Glossary L Loop-through mode Operating mode of the TP. It covers normal operation and also handles communication between a PU or PC and the PLC via the TD. This operating mode is only possible when connection to the PLC is made via the AS511 protocol. M Message log Printout of alarm messages and event messages simultaneously with their output to the display. N Normal mode Operating mode of the TP during which messages can be displayed and screens can be controlled by the operator. O Output field Field for displaying a setpoint. P Password, Password level To control a protected function, a password of a specific password level has to be entered. The password level determines the privileges of the operator. The requisite password level can be configured, 0 being the lowest level and 9 the highest. PLC Generic term for devices and systems with which the TP communicates – for example, SIMATIC S5/S7 or PCs). PLC job Function triggered by the PLC. Printout Output of the contents of the display to an attached printer. Process screen Representation of process values and process sequences in the form of screens, which may contain graphics, pieces of text and values. TP27, TP37 Equipment Manual Release 01/00 Glossary-3 Glossary S Screen Form of displaying logically associated process data which may be shown collectively on the TP and modified individually. Selection field Field for the value setting of a parameter (one value can be selected as the default value). Startup test Checks the state of the CPU and memories every time the power supply voltage is turned on. System message Calls attention to internal states on the TP and on the PLC. T Touch Panel Glossary-4 An Operator Panel without a keyboard. A Touch Panel is operated by means of its touch-sensitive screen. TP27, TP37 Equipment Manual Release 01/00 Index A Access permissions, 5-1 Access protection, 5-1 Acknowledge, alarm message, 6-2, 6-4, 6-6 Acknowledged, message, 6-1, 6-9 Acknowledgement, on contact, 3-4 Acknowledgment group, 6-6, 6-9 alarm message, 2-1 set, 6-27 Acoustic acknowledgment, 3-4 Acoustic signal, 11-8 Additional information, 1-4 Alarm message, 1-4, 2-1, 6-2, 6-6 acknowledging, 6-4, 6-6 displaying help text, 6-4 send to background, 6-4 Alarm message buffer deleting, 6-25 opening, 6-7, 6-13, 6-25 print, 6-25 Alarm message page, opening, 6-11 Alarm message screen, opening, 6-7, 6-25 Alarm message window, 6-4 ALARM_S Messages, 6-18 buffer overflow, 6-23 deleting messages, 6-23 message archive, 6-23 overflow warning, 6-23 printout, 6-23 communication sequence, 6-19 Anmelden, 6-19 information stored, 6-19 time stamp, 6-19 when a message event occurs, 6-19 incorporate, 6-18 message acknowledgement, 6-20 message logging, 6-20 message overload, 6-21 overload communication, 6-21 CPU memory, 6-21 operating unit, 6-21 printing messages, 6-20 TP27, TP37 Equipment Manual Release 01/00 Printing messages in the event of a buffer overflow, 6-20 updating, 6-22 use of resources, 6-18 Alphanumeric keyboard, 3-8 cancel entry, 3-9 confirm entry, 3-9 cursor left, 3-9 cursor right, 3-9 display help text, 3-8 entering values, 3-8 keyboard levels, 3-9 Alphanumeric keypad, entering characters, 3-8 Ambient conditions, A-3 Angle of inclination, 12-1, A-3 Applications, 1-1 Appropriate installation, 12-1 Arrived, message, 6-1, 6-9 AS511, connection, 14-3, 15-4, 16-6 ASCII character set, 12-12 print screen, 7-4 Assembly, 12-2, 12-3 Assign, printer colors, 7-4 Assignment, interfaces, B-1 Authorization, 5-1 B Back–lighting, 11-5, A-2 replacing, 18-4, 18-5 Background color button, 3-5 input field, 3-6 Backspace, 3-7 Backup, 2-3 flash module, 9-6 Backup battery, A-2 changing, 18-2 Backup/Restore, standard screen, 9-5 Bar graph, 1-3 Barometric pressure, A-3 Basic functions, 1-3 Index-1 Index Battery compartment, 18-3 Baud rate, printer, 7-3 Blanking, screen, 11-5 Boot operation, 13-6 Bordercolor, button, 3-5 Bottling machine, example, 8-1 Brightness, back–lighting, 18-4 Buffer overflow, ALARM_S Messages, 6-23 Burst interference, A-4 Button, 3-1, 3-2, 4-2 C Calibrating, touch screen, 11-7 Calibration error, 11-7 Calibration window, 11-7 Call, function, 4-5 Calling, help text, 3-11, 4-5 Cancel, input, 3-8, 3-9 Capacity backup battery, A-2 message buffer, 2-1 Category messages, 6-2 system message, C-1 Cause of malfunction, acknowledging, 6-6 Causes, system message, C-2 Centronics interface, B-3 Certifications, A-4 Change backup battery, 18-2 language, 11-8 operating mode, 11-4 password, 5-6 password level, 5-6 Character, delete, 3-7 Character alignment, 3-7 Character sets, 2-3 number, 2-3 Character size, character set, 2-3 Chassis ground, 12-8, 15-3 Chemical resistance, A-5, A-8 Clean, screen, 11-6, 18-1 Cleaning agents, 18-1 Clear, 3-7 Cleared, message, 6-1, 6-9 Clock frequency, A-1 Close, event message window, 6-5 Closing, help window, 3-11 Color button, 3-5 input field, 3-6 Index-2 Color assignment, printer, 7-4 Combination Message window/Message line, 6-3 variables, 8-1 Commissioning, 13-1 Communication, 1-2, 2-4 Communication options, 16-6 TP27–10, 15-4 TP27–6, 14-3 Communication sequence, ALARM_S Messages, 6-19 Compress, internal program memory, 13-2 Concept, operating, 3-1 Condensation, 12-1 Conduction, RF, A-4 Configuration, 1-2 downloading, 13-3 testing, 13-9, 13-10 Configuration computer, 1-2 connecting, 12-9 Configuration data, download, 1-2 Configuration options, 12-7 Configuration software, 1-1 Configuration using ProTool, 1-2 Configuring, IF1B interface, 12-11 Connecting light, siren etc., 12-8 PU or PC, 12-9 Connection battery, 14-2, 15-3, 16-5, 18-2 configuration computer, 12-9 electrical, 12-6 ground, 12-8 options, 12-10 PLC, 12-10 power supply, 12-8 printer, 12-12, 14-3, 15-4, 16-6 Connection configuration, printer, 12-12 Connection configuration diagram configuration computer, 12-9 PLC, 12-10 printer, 12-12 Connection elements TP27–10, 15-3 TP27–6, 14-2 TP37, 16-5 Consequential malfunction, acknowledging, 6-6 Contact discharge, A-4 Control panel interface, 1-6, 17-6 connector pin assignemnt, 17-10 connectors and adjusters, 17-9 installing, 17-7 TP27, TP37 Equipment Manual Release 01/00 Index Correct, parallax, 11-7 Create data record, 8-9 password, 5-5 record set, 8-16 CSA certification, A-4 Cursor, 3-10 move left, 3-9 move right, 3-9 D Data loading, 9-1 storing, 9-1 technical, A-1 Data areas, set up, 1-2 Data bits, printer, 7-3 Data medium, 9-1 format, 8-8 Data record creating, 8-9 deleting, 8-12 download, 8-11 editing, 8-9 load, 8-11, 8-14 save, 8-11, 8-14 update, 8-13 Data Record Processing and Transmission, standard screen, 8-6 Data records, 8-1 Data structure, 1-4, 8-1 Data types, 9-1 Date message, 6-4 set, 6-27 Date/time, setting, 11-8 Deactivate, touch screen, 11-6 Decimal format, 3-7 Decimal point, entering, 3-7 Degree of protection, 12-1, A-1 Delete alarm message buffer, 6-25 character, numeric keypad, 3-7 data medium, 9-3 data record, 8-12 event message buffer, 6-25 input line, numeric keypad, 3-7 messages, 6-14, 6-15 password, 5-6 record set, 8-17 Deleting messages, buffer overflow, 6-14 TP27, TP37 Equipment Manual Release 01/00 Departed, message, 6-1, 6-9 Description, TP, 14-1, 15-1, 16-1 Design, interference–free, 12-6 Device variants, 1-1 Digital outputs, 17-1, 17-6 DIL switch direct key module, 17-5 IF1B interface, 12-11, 14-2, 15-3, 16-5 Dimensions, A-1 TP27–10, 15-2 TP27–6, 14-1 TP37, 16-2 Direct key module, 1-6, 17-1 connectors and adjusters, 17-4 installing, 17-2 pin array pin assignment, 17-5 Direct message logging, 6-16 Disable message logging, 6-16, 6-28 overflow warning, 6-29 Discharge, static, A-4 Display, 1-5, 2-3, A-2 alarm messages, 2-1 backlit, 1-5 colors, 1-5 event messages, 2-1 fill level, 1-3 first message, 6-11 graphic elements, 1-3 last message, 6-11 messages, 6-9 pressure variation, 1-3 quantities, 1-3 resolution, 1-5 size, 1-5 temperature variation, 1-3 touchscreen, 1-5 type, 1-5 Display elements, TP37, 16-3 Display functions, 1-3 Display mode, messages, 6-3 Display type, alarm messages, 2-1 Disposal, lithium battery, 18-3 Documentation, D-1 Download configuration data, 1-2, 13-3 data record, 8-11 firmware, 13-3 serial, 13-4 Download mode, 11-4, 13-3 Download Selective Data Record, standard screen, 8-4 Index-3 Index DRAM, A-1 E Edit data record, 8-9 password, 5-6 record set, 8-15 Edit Message, standard scren, 6-15 Edit Password, standard screen, 5-2 Edit window, data records, 8-10 Electrical connections, 12-6 Electrical installation, 12-6 EMC–compatible installation, 12-6 Enable message logging, 6-16, 6-28 overflow warning, 6-29 Enlarge, memory area, 9-4 ENTER, 3-7, 3-9 Enter alphanumeric values, 3-8 password, 5-3 value, 3-6 Entry cancel, 3-9 confirm, 3-9 Error handling, C-12 Errors, internal, C-12 ESC, 3-7, 3-9 ESD Guidelines, E-1 Event message, 1-4, 2-1, 6-2 inhibiting, 6-3 Event message buffer deleting, 6-25 opening, 6-13, 6-25 print, 6-25 Event message page, opening, 6-11, 6-25 Event message window, 6-5 opening, 6-5, 6-25 External dimensions, A-1 External power supply, 17-1, 17-6 Fixation TP27–10, 12-3 TP27–6, 12-2 Fixed window, 3-1, 3-2 Flash, 1-6, 9-1 delete, 9-3 Flash memory, A-1 Fluorescent tube, 18-4 FM certification, A-4 Force Variable, 10-1 control sequence, 10-6 standard screen, 10-2, 10-5 Forced printout, automatic, buffer overflow, 6-14 Foreground color button, 3-5 input field, 3-6 Format data medium, 8-8 password, 5-2 Front view TP27–10, 15-2 TP27–6, 14-1 TP37, 16-2 Function call, 4-5 password management, 5-5 trigger, 3-4 Functionality, 2-1 Fuse, A-2 G General operation, 3-1 Generate, data record, 8-9 Global button, 3-2 Graphic, print screen, 7-4 Graphic elements, display, 1-3 Grounding connection, 14-2, 16-5 Grounding screwdriver, 12-8 Group acknowledgement, 6-6 F H Fan, 12-8 FAP connection, 14-3, 15-4, 16-6 Fill level, display, 1-3 Firmware, 12-6 downloading, 13-3 First message, display, 6-11 Fitting, TP37, 12-5 Hand symbol, 3-5 Hardware clock, 18-2 HELP, 3-7, 3-8, 3-11, 6-4 Help text, 1-4, 2-2, 3-8, 3-9, 3-11 calling, 4-5 display , 3-8 displaying, 3-7, 6-4 Index-4 TP27, TP37 Equipment Manual Release 01/00 Index Help window, 3-1, 3-3 closing, 3-11 HEX, 3-7 Hexadecimal mode, 3-7 Hide event messages, 6-3 system message, 6-8 Hierarchy passwords, 5-1 standard screens, 4-4 Hints on operation, messages, 6-2 Housing, A-1 Humidity, A-3 I Identify, recipe, 8-2 IF1A interface, 14-2, 15-3, 16-5 assignment, B-1 IF1B interface, 14-2, 15-3, 16-5 assignment, B-2 IF2 interface, 14-2, 15-3, 16-5 assignment, B-1 IF3 interface, 16-5 assignment, B-2 Incorporating, ALARM_S Messages, 6-18 Indicator, alarm messages, 6-6, 6-7 Indicators, 1-5 Information text, 3-11 Ingredients, recipe, 8-2 Inhibit, event message, 6-3 Initial startup, 13-1, 13-3 Initialize, TP, 13-8 Input cancel, 3-7, 6-4 confirm, 3-7 numerical value, 3-6 symbolic value, 3-10 Input field, 1-3, 3-6, 4-2 Input line, delete, 3-7 Input window, 3-1, 3-3 numeric input, 3-6, 3-8 symbolic input, 3-10 Insert, memory card, 9-6 Installation, 12-1 electrical, 12-6 mechanical, 12-2 TP27–10, 12-3 TP27–6, 12-2 TP37, 12-5 Installation conditions, 12-1 TP27, TP37 Equipment Manual Release 01/00 Installation position, 12-1 Installation possibilities, 1-1 Interface, 1-5 control panel interface, 14-2, 15-3, 16-5 direct key module, 14-2, 15-3, 16-5 IF1A, 14-3, 15-4, 16-6, B-1 IF1B, 12-11, 14-3, 15-4, 16-6, B-2 IF2, 14-3, 15-4, 16-6, B-1 IF3, B-2 LPT, 16-6, B-3 MPI, 14-3, 15-4, 16-6 parallel, 16-5 PPI, 14-3, 15-4, 16-6 serial, 14-2, 15-3, 16-5 Interface assignment, B-1 Interference–free design, 12-6 Internal errors, C-12 Internal operating state, 6-8 Irradiation, RF, A-4 Issue, password, 5-5 J Job, from PLC, 4-2 K Keyboard, 1-1 switchover, 3-9 Keypad, 3-6 Keys, virtual, 3-1 L Labeling, buttons, 3-2 Language, 1-4 changing, 2-3, 11-8 number, 2-3 Last message, display, 6-11 LCD back–lighting, 11-5, 18-4 LED, 1-5, 16-3, 16-4 Length alarm messages, message text, 2-1 event messages, message text, 2-1 Light indicators, 3-2 Lighting, screen, 11-5 Limit value monitoring, 2-2 Line, messages, 6-3 Index-5 Index Lines per message alarm messages, message text, 2-1 event messages, message text, 2-1 List passwords, 5-7 printers, 7-3 system messages, C-1 Literature, D-1 Lithium battery, 18-3 Load data, 9-1 data record, 8-11, 8-14 record set, 8-16 Local button, 3-2 Location, A-3 Logging, messages, 6-16 Logging out, from TP, 5-4 Logical connection, TP – PLC, 11-4 Login, 5-3 Logout, 5-4 Loudspeaker, 11-8 LPT, parallel interface, 16-5 LPT interface, assignment, B-3 M Main area, 3-1, 3-2 Main memory, 1-6 Main screen, 4-3 Maintenance, 18-1 Management, passwords, 5-5 Mechanical installation, 12-2 Memory, 1-6, A-1 Memory area, reserved , 9-4 Memory card, 9-2, A-1 delete, 9-3 inserting, 9-6 Message, 1-4, 6-1 delete, 6-14, 6-15 display, 6-3, 6-9 printing, 6-16 type, 6-2 Message acknowledgement, ALARM_S Messages, 6-20 Message acquisition, 2-2 Message archive, 6-9 Index-6 Message bit procedure, 6-5 Message buffer, 1-4, 2-1, 6-5, 6-13 opening, 6-13 Message display, setting, 6-28 Message event, 2-2, 6-5 acknowledgment of alarm message, 6-5 arrival of message, 6-5 clearing of a message, 6-5 number, 2-1 printing, 1-4 set, 6-27 Message indicator, 3-3, 6-6, 6-7 Message line, 2-1, 6-3, 6-4 Message logging, 2-1, 6-16 enabling and disabling, 6-28 Message number, 6-4, 6-9, C-1 Message overload, ALARM_S Messages, 6-21 Message page, 2-1, 6-11 opening, 6-11 Message relay, A-2 Message states, 6-1 Message window, 3-3, 6-3, 6-4 Mixing unit, example, 4-1, 4-2 Message text, 6-9 Models, 1-5 Modify memory addresses, 13-2 record set, 8-17 Monitor, temperature, 12-8 Mounting cutout, A-1 TP27–10, 15-2 TP27–6, 14-1 TP37, 16-2 Mounting depth, A-1 Mounting location, 12-1 MPI, connection, 14-3, 15-4, 16-6 MPI download, 13-6, 13-7 Multiple languages, 1-4 N NATIVE driverr, 2-4 Noise immunity, A-4 Non–Siemens PLC, connection, 14-3, 15-4, 16-6 Normal operation, 13-1 TP27, TP37 Equipment Manual Release 01/00 Index Number alarm messages, 2-1 character sets, 2-3 characters alarm message, 2-1 event message, 2-1 data records per recipe, 2-3 entries per data record, 2-3 event messages, 2-1 languages, 2-3 message, 6-4, 6-9 password levels, 2-2 passwords, 2-2 recipes, 2-3 Numeric keypad canceling input, 3-7 changing sign, 3-7 changing to hexadecimal mode, 3-7 confirming input, 3-7 deleting characters, 3-7 deleting input line, 3-7 displaying help text, 3-7 entering decimal point, 3-7 entering digits, 3-7 entering hex numbers, 3-7 Numerical value entry, 3-6 O Offline mode, 11-4 Online mode, 11-4 Open alarm message buffer, 6-7, 6-25 alarm message screen, 6-7, 6-25 event message buffer, 6-25 event message page, 6-25 event message window, 6-5, 6-25 help window, 3-11 message buffer, 6-13 message page, 6-11 Operate process, 1-3 touch element, 3-4 Operating, touch panel, 1-1 Operating concept, 3-1 Operating elements, 1-4 TP27–10, 15-3 TP27–6, 14-2 TP37, 16-3 Operating functions, 1-3 Operating mode, setting, 11-4 Operating state, internal, 6-8 TP27, TP37 Equipment Manual Release 01/00 Operating status, TP, 16-3 Operating temperature, A-3 Operation, general, 3-1 Operation acknowledgement, 3-4 Operator permission, 5-1 Operator process control, 1-4 Operator prompting, 2-2 Options, 17-1 Other PLCs, connection, 14-3, 15-4, 16-6 Output field, 1-3 Output medium, set, 6-27 Overflow warning, 6-5 enabling and disabling, 6-29 switch on/off, 6-14 Overview, 1-5 Overwrite, password, 5-6 P Parallax, correcting, 11-7 Parallel interface, LPT, 16-5 Parallel printer connection, 12-12 Parameter, printer, 7-3 Parity, printer, 7-3 Partitioning, screen, 3-1 Password changing, 5-6 creating, 5-5 deleting, 5-6 enter, 5-3 format, 5-2 number, 2-2 supervisor, 5-2 Password hierarchy, 5-1 Password level, 5-1 changing, 5-6 number, 2-2 Password list, view, 5-7 Password management, 5-5 Password protection, 1-4, 2-2, 5-1 PC, connecting, 12-9 PC/PU, connecting, 14-3, 15-4, 16-6 PCMCIA, 14-2, 15-3, 16-5 Permission, password protection, 5-1 Plan view TP27–10, 15-2 TP27–6, 14-1 TP37, 16-2 PLC, connecting, 12-10 PLC job, 4-2 Pocket calculator format, 3-7 Position, window, 3-3 Index-7 Index Power consumption, A-2 Power supply, 14-2, 15-3, 16-5, A-2 connecting, 12-8 Power supply unit, 12-8 PPI, connection, 14-3, 15-4, 16-6 Presentation, message, 6-3 Pressure variation, display, 1-3 Principle data storage, 9-2 enter value, 3-6 Print alarm message buffer, 6-25 buffer, 7-1 event message buffer, 6-25 messages, 6-14, 6-16, 7-1 screen list, 7-1 Print functions, 2-2, 7-1 Print screen, parameters, 7-4 Printer, 7-3 connecting, 12-12, 14-3, 15-4, 16-6 Printer interface, set, 7-3 Printer Settings, standard screen, 7-2 Printing messages, ALARM_S Messages, 6-20 Priority, 6-10 set, 6-27 Process control, 1-1, 4-1 monitoring, 1-1, 4-1 operating, 1-3 visualize, 1-3 Process control phase, 1-2 Process disturbance, reporting, 6-2 Process state, reporting, 6-2 Process values alarm messages, 2-1 event messages, 2-1 messages, 6-4 Process variable, visualizing, 1-1 Processor, 1-6 Processor type, A-1 Product description, 1-1 PROFIBUS–DP, 14-3, 15-4, 16-6 Protective foil, 18-1 ProTool, 1-1 PU, connecting, 12-9 Pulse modulation, A-4 Q Quantities, display, 1-3 Index-8 R Radio interference, A-4 Rated voltage, A-2 Recipe, 1-4, 2-3, 8-1 identifying, 8-2 Recommissioning, 13-1, 13-4 Record sets, 8-15 Recording, 1-4 Relative humidity, A-3 Relay contact, 12-8, A-2 message relay, A-2 with current supply, A-2 Relay output, 14-2, 16-5 for temperature monitoring, 16-5 Release, button, 3-4 Remaining buffer size, 6-5, 6-14 Remedies, system message, C-2 Replace, back–lighting, 18-4, 18-5 Report, process state, 6-2 Reserved memory area, 9-4 Resistance, chemical influences, A-5, A-8 Resolution, screen, A-2 Restore configuration, another unit, 9-7 firmware/configuration, 9-7 module – flash, 9-6 RF conduction, A-4 RF irradiation, A-4 RFI suppression, A-4 RS232, connection, 14-3, 15-4, 16-6 RS422, connection, 14-3, 15-4, 16-6 RS485, connection, 14-3, 15-4, 16-6 RTS signal, 12-11 S Save data record, 8-11, 8-14 record set, 8-16 Screen blanking, 11-5 cleaning, 18-1 select, 4-2 Screen elements, 4-1 Screen list, print, 7-1 Screen partitioning, 3-1 Screen saver, 11-5 Screen sections, 4-1 Screens, 1-3, 2-2, 4-1 TP27, TP37 Equipment Manual Release 01/00 Index Screw–type clamp, 12-2, 12-3, 12-5 Scroll, alarm message screen, 6-12 Scrolling, 3-10 Sections of a screen, 4-1 Securing, TP, 12-5 Select printer, 7-3 record set, 8-15 screen, 4-2 value, 3-10 Self test, 13-8 Serial download, 13-4 Serial interfaces, 14-2, 15-3, 16-5 Serial printer connection, 12-12 Serious system message, 6-8 Service life back–lighting, 18-4 backup battery, 18-2 Set acknowledgment group, 6-27 date, 6-27 date/time, 11-8 language, 11-8 message display, 6-28 message event, 6-27 operating mode, 11-4 output medium, 6-27 printer colors, 7-4 printer interface, 7-3 priority, 6-27 text, 6-27 Set up, data areas, 1-2 Settings ASCII character set, 12-12 printer, 7-2, 12-12 startup phase, 9-3 system, 6-28 Shift, 3-9 Shipping conditions, A-3 Shock loading, A-3 Side view TP27–10, 15-2 TP27–6, 14-1 TP37, 16-2 Sign, changing, 3-7 Signal tone, 3-4, 13-2 adjusting volume, 11-8 Significance, messages, 6-10 SIMATIC 500/505, 2-4 connection, 14-3, 15-4, 16-6 SIMATIC HMI documentation, D-1 SIMATIC M7, connection, 14-3, 15-4, 16-6 TP27, TP37 Equipment Manual Release 01/00 SIMATIC S5, connection, 14-3, 15-4, 16-6 SIMATIC S7, connection, 14-3, 15-4, 16-6 Sort order, messages, 6-11 Source of supply, backup battery, 18-2 Spare parts service, 18-2 SRAM, A-1 SS number, printer, 7-3 Standard configuration, 4-3 Standard screen Backup/Restore, 9-5 Data Record Processing and Transmission, 8-4, 8-6 Edit Message, 6-15, 6-24 Edit Password, 5-2 Force Variable, 10-5 Output Messages, 6-26 Printer Settings, 7-2 Status Variable, 10-2 System Settings, 6-11, 6-28, 11-2 Standard screens, 4-3 Standby message, 6-3 Startup behavior, 13-8 Startup phase, 9-3 Static discharge, A-4 Status, message, 6-1 Status disturbance, reporting, 6-2 Status Variable, 10-1, 10-2 control sequence, 10-4 Stop bits, printer, 7-3 Storage, A-3 Storage medium, 9-1 Store data, 9-1 data record, 8-11 Structure alarm message, 6-4 alarm message screen, 6-12 message buffer, 6-13 message page, 6-11 standard screen Backup/Restore, 9-5 Data Record Processing and Transmission, 8-4, 8-6 Edit Message, 6-24, 6-26 Printer Settings, 7-2 System Settings, 6-28, 11-2 system message, 6-8 user interface, 1-4 Structure of the documentation, D-1 Sub–D socket, B-1, B-2 Summer and winter time, 11-8 Sunlight, 12-1 Index-9 Index Superuser, 5-1 Supervisor, 5-1 password change, 5-6 Switch, IF1B interface, 12-11 Switch off, acoustic signal, 11-8 Switch on, acoustic signal, 11-9 Switching power, relay contacts, A-2 Switchover, keyboard , 3-9 Symbol hand, 3-5 message indicator, 6-6 Symbol lists, 1-3 Symbolic name, recipe, 8-2 Symbolic value entry, 3-10 System message, 6-8 System message window, 6-8 System messages, list of, C-1 System Settings, standard screen, 6-11, 6-28, 11-2 T Target groups, D-1 Technical data TP27, A-1 TP37, A-1 Temperature limit value, 1-5 Temperature monitoring, 12-8 relay output, 16-5 Temperature variation, display, 1-3 Terminal block, 12-8 Test, configuration, 13-9, 13-10 Text, set, 6-27 Text attributes, 2-2 Text list, 3-10 Texts, 1-4 Time message, 6-4 message event, 6-9 Time/date, setting, 11-8 Timeout, printer, 7-3 Touch, button, 3-4 Touch element definition, 3-4 operating, 3-4 Touch panel, operating, 1-1 Touch screen, 1-1, 14-2, 15-3, 16-3 calibrating, 11-7 deactivate, 11-6 Touch–sensitive button, 1-4 TP start–up, 13-2 Index-10 TP27–10, installation, 12-3 TP27–6, installation, 12-2 TP37, installing, 12-5 Transfer, data record, 8-13 Transfer parameters, printer, 7-3 Transients, A-2 Trends, 1-3 Trigger, function, 3-4 TTL connection, 16-6 TTY connection, 14-3, 15-4, 16-6 Type, printer, 7-3 Types of downloading, 13-4 Types of message, 6-2 U UL certification, A-4 Unit description, 14-1, 15-1, 16-1 Unit dimensions TP27–10, 15-2 TP27–6, 14-1 TP37, 16-2 Update, data record, 8-13 Updating, ALARM_S Messages, 6-22 Upkeep, 18-1 Use, 1-1 Use of resources, ALARM_S Messages, 6-18 User group, 5-1 User interface, structure, 1-4 V Value entering, 3-6 select, 3-10 Ventilation slits, 12-1 Vibration, A-3 View, password list, 5-7 Virtual keys, 3-1 Visual acknowledgement, 3-4, 3-5 Visualize process, 1-3 process variables, 1-1 Voltage, backup battery, A-2 W Weight, A-1 Window, messages, 6-3 Window positions, 3-3 TP27, TP37 Equipment Manual Release 01/00