1
Installation Manual
IM-DOC-022
Using DiskOnChip® with VxWorks
Written by: Esther Spanjer
SEP-2000
91-SR-005-38-7L REV. 1.3
Using DiskOnChip with VxWorks
Limited Warranty
(a) M-Systems warrants that the Licensed Software — prior to modification and adaptation by
Licensee — will conform to the documentation provided by M-Systems. M-Systems does not
warrant that the Licensed Software will meet the needs of the Licensee or of any particular customer
of Licensee, nor does it make any representations whatsoever about Licensed Software that has been
modified or adapted by Licensee.
(b) Subsection (a) above sets forth Licensee’s sole and exclusive remedies with regard to the
Licensed Software.
M-SYSTEMS MAKES NO OTHER WARRANTIES, EXPRESS OR IMPLIED, WITH RESPECT
TO THE LICENSED SOFTWARE, INCLUDING BUT NOT LIMITED TO ANY WARRANTY OF
MERCHANTABILITY OR FITNESS FOR A PARTICULAR PURPOSE. THERE ARE NO
OTHER WARRANTIES WITH RESPECT TO THE LICENSED SOFTWARE ARISING FROM
ANY COURSE OF DEALING, USAGE, TRADE OR OTHERWISE.
IN NO EVENT SHALL M-SYSTEMS BE LIABLE TO LICENSEE FOR LOST PROFITS OR
OTHER INDIRECT, SPECIAL OR CONSEQUENTIAL DAMAGES, WHETHER UNDER THIS
AGREEMENT, IN TORT OR OTHERWISE.
(c) Licensee shall not make any promise, representation, warranty or guaranty on behalf of MSystems with respect to the Licensed Software except as expressly set forth herein.
Note: The Licensed Software is not warranted to operate without failure. Accordingly, in any use of
the Licensed Software in life support systems or other applications where failure could cause injury
or loss of life, the Licensed Software should only be incorporated in systems designed with
appropriate and sufficient redundancy or back-up features.
91-SR-005-38-7L Rev. 1.3
2
Using DiskOnChip with VxWorks
Contents
1
Introduction ..............................................................................................................................5
2
Hardware Requirements for the DiskOnChip.........................................................................6
3
Installing the TrueFFS Driver into VxWorks...........................................................................7
3.1 Preparing VxWorks.............................................................................................................7
3.2 Contents of TrueFFS Driver Package .................................................................................7
3.3 Customizing the TrueFFS Driver.........................................................................................8
3.4 Creating a ‘device’ for the DiskOnChip .............................................................................10
3.5 Configuring ‘dosFs’ File System........................................................................................11
4
Booting VxWorks from the DiskOnChip (on an x86 Platform)............................................12
4.1 Boot Options .....................................................................................................................12
4.2 Requirements for Installation of the DiskOnChip into VxWorks.........................................13
4.3 Preparing the DiskOnChip to boot VxWorks .....................................................................13
5
TrueFFS Driver Run-time Configuration Options ................................................................14
5.1 Introduction .......................................................................................................................14
5.2 8-Bit/32-Bit Access to the DiskOnChip..............................................................................14
5.3 Configuring RAM Usage ...................................................................................................15
5.4 Built-in Diagnostics ...........................................................................................................15
5.5 Yielding the CPU During Long Flash Operation ................................................................15
6
Formatting the DiskOnChip Under VxWorks .......................................................................16
7
Data Integrity on the DiskOnChip .........................................................................................17
8
Garbage Collection ................................................................................................................17
9
IOCTL calls to the TrueFFS driver........................................................................................19
9.1 Introduction .......................................................................................................................19
9.2 FL_IOCTL_GET_INFO .....................................................................................................20
9.3 FL_IOCTL_DEFRAGMENT ..............................................................................................21
9.4 FL_IOCTL_WRITE_PROTECT ..........................................................................................22
9.5 FL_IOCTL_BDK_OPERATION ..........................................................................................24
9.6 FL_IOCTL_READ_SECTORS and FL_IOCTL_WRITE_SECTORS
91-SR-005-38-7L Rev. 1.3
3
Using DiskOnChip with VxWorks
10 Known Problem......................................................................................................................29
Appendix I:
Two Step Stand Alone Boot .................................................................................29
Additional Information and Tools.................................................................................................41
How to Contact Us ........................................................................................................................42
91-SR-005-38-7L Rev. 1.3
4
Using DiskOnChip with VxWorks
1
Introduction
M-Systems’ DiskOnChip is a family of high performance flash disk. DiskOnChip provides a flash
disk in several standard form factors:
•
DiskOnChip 2000 – Standard 32-pin DIP package, single chip flash disk.
•
DiskOnChip Millennium – Standard 32-pin DIP package or standard TSOP-II 32-pin package
single die flash disk.
•
DiskOnChip DIMM2000 – Standard 144-pin Small Outline DIMM (Dual In-line Memory
Module) flash disk.
When used under VxWorks, the DiskOnChip is managed by TrueFFS (True Flash File System), a
technology based device driver, attached to VxWorks’ dosFS file system. Most of VxWorks’ disk
oriented calls (including all ANSI C file I/O facilities) work correctly with the DiskOnChip.
This installation manual is intended for system integrators designing with the DiskOnChip 2000,
DiskOnChip Millennium or DiskOnChip DIMM2000 and describes how the DiskOnChip can be
installed as an additional disk or as a boot device under VxWorks. In this manual, all of the devices
described above will be referred to as DiskOnChip.
A single TrueFFS driver is capable of supporting up to 4 DiskOnChip devices, possibly of different
types and capacities, in parallel. The driver is fully re-entrant and takes care of all issues related to a
multitasking environment, thus freeing an application from this task.
It is assumed that the reader is familiar with the Operating System in use.
The hardware requirements of the DiskOnChip will be briefly discussed. The main part of this
installation manual is related to software installation. This will include basic driver installation and
boot issues.
91-SR-005-38-7L Rev. 1.3
5
Using DiskOnChip with VxWorks
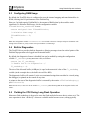
2
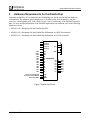
Hardware Requirements for the DiskOnChip
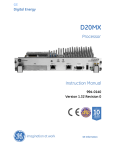
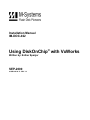
Originally designed for PC environments, the DiskOnChip can also be used in different hardware
environments. The minimum requirements are a 12-bit address bus, an 8-bit data bus, and three
active low control signals (#CE, #OE, #WR). Figure 1 below is a drawing of the DiskOnChip and its
pins. For more detailed information of the DiskOnChip hardware environment, refer to the following
Application Notes:
•
AP-DOC-010 “Designing with the DiskOnChip DIP”
•
AP-DOC-030 “Designing with the DiskOnChip Millennium in a RISC Environment”
•
AP-DOC-031 “Designing with the DiskOnChip Millennium in a PC Environment”
1
2
3
29
28
SA12
SA11
SA10
SA9
SA8
SA7
SA6
SA5
SA4
SA3
SA2
SA1
SA0
Active Low Chip Enable
Active Low Output Enable
Active Low Write
4
25
23
26
27
5
6
7
8
9
10
11
12
NC
NC (A16)
NC (A15)
NC (A14)
NC (A13)
5V
30
VCC 32
GND
A12
A11
A10
A9
A8
DiskOnChip
A7
D0
A6
D1
A5
D2
A4
D3
A3
D4
A2
D5
A1
D6
A0
D7
0.1
16
13
14
15
17
18
19
20
21
SD0
SD1
SD2
SD3
SD4
SD5
SD6
SD7
22
CE#
24
OE#
31
WR#
Figure 1 DiskOnChip Pin-out
91-SR-005-38-7L Rev. 1.3
6
Using DiskOnChip with VxWorks
3
Installing the TrueFFS Driver into VxWorks
3.1
Preparing VxWorks
Verify that the BSP library (Tornado/target/lib<CPU>gnuvx.a) or the BSP object directory
(Tornado/target/obj<CPU>gnuvx) contain the following object modules and if so, delete them:
tffsDrv.o
nftllite.o
tffsLib.o
flflash.o
dosformt.o
nfdc2148.o
fatlite.o
reedsol.o
fltl.o
flsocket.o
flbase.o
Example:
To check the contents of the 'pc486' BSP library (libI80486gnuvx.a), use the following
command:
ar386 -tv libI80486gnuvx.a
Example:
To delete the module fltl.o from the BSP library libI80486gnuvx.a, use the following
command:
ar386 -dv libI80486gnuvx.a fltl.o
Ensure that the BSP configuration .H file (Tornado/target/config/pc486/config.h in case of pc486
BSP) excludes the following VxWorks components:
#undef INCLUDE_TFFS
#undef INCLUDE_PCMCIA
3.2
/* include TrueFFS driver for Flash */
/* include PCMCIA driver */
Contents of TrueFFS Driver Package
The distribution of the TrueFFS driver for VxWorks on x86 compatible platforms consists of the
following files:
MSYSVXW.o
x86 binary of the TrueFFS driver for VxWorks
fldrvvxw.h
TrueFFS driver's "include" file
flioctl.h
Extended functionality "include" file
Readme
Readme file
91-SR-005-38-7L Rev. 1.3
7
Using DiskOnChip with VxWorks
MSYSVXW.o
The object module MSYSVXW.o contains the x86 binaries of the TrueFFS driver for VxWorks. This
object module should be added to the application's linking process, either statically or dynamically.
One possible way to accomplish this is to copy the file MSYSVXW.o to the directory
Tornado/target/lib and then add it to the existing VxWorks/I80486 object library as follows:
ar386 -cru libI80486gnuvx.a MSYSVXW.o
fldrvvxw.h
Include file for the TrueFFS driver that must be #included by the application in order to access the
driver’s API. Furthermore, make sure it is on the compiler’s INCLUDE path.
flioctl.h
Extended functionality "include" file. This file must be #included by the application in order to be
able to access the Extended functionality API.
3.3
Customizing the TrueFFS Driver
3.3.1 Setting the Address Range
The initialization routine of the TrueFFS driver scans the host address space for the DiskOnChip(s).
By default, the driver will look for a single DiskOnChip in the address range 0xc8000..0xe0000.
In most x86 architecture scanning, the default address range will be sufficient, but in certain cases,
there might be a need to change it. Changing the area to be scanned can be accomplished by calling
the routine tffsSetup().
Note: The routine tffsSetup() must be called only once, before the call to the initialization routine tffsDrv().
Normally, this is done from usrRoot.
The routine tffsSetup()can be found in the header file fldrvvxw.h and has the following
declaration:
extern void tffsSetup (int diskonchips, long *addressRange);
where diskonchips is the number of DiskOnChip devices installed in the system and
addressRange is an array of address pairs that restricts the area of scanning.
Example 1:
For instance, if the platform allows an installation of up to three DiskOnChips, and the regions to
search for the DiskOnChips are as follows:
[0xc8000 .. 0xd0000]
1st DiskOnChip
[0xd0000 .. 0xd2000]
2nd DiskOnChip
91-SR-005-38-7L Rev. 1.3
8
Using DiskOnChip with VxWorks
[0xd2000 .. 0xd4000]
3rd DiskOnChip
Then the following code fragment should be included in the application:
#include "fldrvvxw.h"
/* address ranges to search for the DiskOnChip */
long tffsAddresses[] = {0xc8000, 0xd0000, /* 1st DiskOnChip */
0xd0000, 0xd2000,
/* 2nd DiskOnChip */
0xd2000, 0xd4000}; /* 3rd DiskOnChip */
/* Configure the driver to detect up to three DiskOnChips */
tffsSetup(3, tffsAddresses);
In some cases, when the DiskOnChip is located at a known address, it is required to prevent the
TrueFFS driver from performing its scanning routine. In such cases both the upper and lower
boundary of the search range can be set to the exact DiskOnChip address.
Example 2:
If the DiskOnChip is always installed at address 0xd0000, then the application can instruct the
TrueFFS driver to look for the DiskOnChip at that particular address by executing the following code
fragments:
#include "fldrvvxw.h"
/* single address to look for a DiskOnChip */
long tffsAddresses[ ] = { 0xd0000, 0xd0000 };
/* configure the driver to detect a single DiskOnChip */
tffsSetup(1, tffsAddresses);
91-SR-005-38-7L Rev. 1.3
9
Using DiskOnChip with VxWorks
3.3.2 Configuring the TrueFFS Driver
The TrueFFS driver provides configuration options that are described in detail in Section 4 . Most
applications can use the default settings for these options.
If it is required to change some of the driver's configuration options, you should do so at this stage.
Example:
To enable the TrueFFS driver's built-in diagnostics (refer to Section 5.4), include the following code
fragment:
#include "fldrvvxw.h"
/* enable built-in diagnostics and allocate 4KB for logging diagnostics messages */
fl_useDebug = 4;
Note: All the driver's configuration options must be set to the desired values before calling the initialization routine
tffsDrv(). Once the routine tffsDrv()has been called, the configuration options must NOT be changed.
3.4
Creating a ‘device’ for the DiskOnChip
Before a ‘device’ for each physical DiskOnChip installed in the system can be created, the TrueFFS
driver must be initialized. This is done through a call to the routine tffsDrv().
Note: The routine tffsDrv() should be called only once, after the call to routine tffsSetup(). Normally, this is
done from usrRoot.
The next step is to create a ‘device’ for each DiskOnChip, which is done by calling the routine
tffsDevCreate(). The routine tffsDevCreate()can be found in the header file
fldrvvxw.h and has the following declaration:
extern BLK_DEV* tffsDevCreate (int tffsDriveNo,
int removableMediaFlag);
where tffsDriveNo is the DiskOnChip sequential number (zero-based). The argument
removableMediaFlag must always be zero.
The routine tffsDevCreate() routine returns a pointer of type (BLK_DEV *), which must be
saved by the application for later use.
Example 1:
If there is only one DiskOnChip in the system, the application should include the following code
fragment:
#include "fldrvvxw.h"
BLK_DEV
*tffs_blk_dev = tffsDevCreate (0, 0);
In a system containing three DiskOnChips, the code fragment is as follows:
91-SR-005-38-7L Rev. 1.3
10
Using DiskOnChip with VxWorks
#include "fldrvvxw.h"
BLK_DEV
*tffs_blk_dev[3] = { NULL, NULL, NULL };
tffs_blk_dev[0]=tffsDevCreate (0, 0); /*1st DiskOnChip*/
tffs_blk_dev[1]=tffsDevCreate (1, 0); /*2nd DiskOnChip*/
tffs_blk_dev[2]=tffsDevCreate (2, 0); /*3rd DiskOnChip*/
Once the 'devices' have been created for every DiskOnChip, they must be given names and associated
with the file system (dosFs). This is accomplished by calling the routine dosFsDevInit() (refer
to the VxWorks Reference Manual). The parameter that is passed to this routine is a pointer of type
(BLK_DEV *) that has been returned by the preceding call to tffsDevCreate().
The routine dosfsDevInit() returns a pointer of type (DOS_VOL_DESC *) which must be
saved by the application for later use.
Example 2:
If there is only one DiskOnChip in the system, the following code section names it /tffs0 and
associates it with the dosFs file system:
#include "fldrvvxw.h"
DOS_VOL_DESC *tffs_dosFs_vol =
dosFsDevInit ("/tffs0:", tffs_blk_dev, NULL);
In a system containing three DiskOnChips, the code fragment is as follows:
#include "fldrvvxw.h"
DOS_VOL_DESC *tffs_dosFs_vol[3] = { NULL, NULL, NULL };
tffs_dosFs_vol[0] = dosFsDevInit("/tffs0:",tffs_blk_dev[0], NULL);
tffs_dosFs_vol[1] = dosFsDevInit("/tffs1:",tffs_blk_dev[1], NULL);
tffs_dosFs_vol[2] = dosFsDevInit("/tffs2:",tffs_blk_dev[2], NULL);
3.5
Configuring ‘dosFs’ File System
M-Systems guarantees that the low-level format of the DiskOnChip never becomes corrupted by
unexpected power shutdowns. Unfortunately, the default configuration of VxWorks’ dosFs file
system is aimed at providing high I/O performance by caching user data in RAM rather than
immediately writing it onto the disk.
If unexpected power shutdowns are likely, this data will be lost. To minimize the risk, it is possible to
eliminate data caching by dosFS. This can be achieved by calling the routine
dosFsVolOptionsSet() (refer to the VxWorks Reference manual), as follows:
#include "fldrvvxw.h"
91-SR-005-38-7L Rev. 1.3
11
Using DiskOnChip with VxWorks
dosFsVolOptionsSet(tffs_dosFs_vol,
tffs_dosFs_vol->dosvd_options | DOS_OPT_CHANGENOWARN);
where tffs_dosFs_vol is a pointer returned by the routine dosFsDevInit().
(Refer to Section 3.4).
More detailed information on unexpected power shutdowns can be found in Chapter 7.
Note: Disabling the file system cache reduces the I/O performance of the DiskOnChip.
4
Booting VxWorks from the DiskOnChip (on an x86 Platform)
4.1
Boot Options
There are three basic VxWorks boot options supported by the TrueFFS driver:
•
Network boot
•
One-step standalone boot
•
Two-step standalone boot
Network boot
The bootfile BOOTROM.SYS that is located on the DiskOnChip acts as a secondary program loader
and uses the network connection to download the VxWorks application from the remote host. This
scenario is usually used during application development/debugging stage.
One-step standalone boot
The bootfile BOOTROM.SYS includes the application itself. This scenario is used for relatively small
applications that fit entirely into the first 640KB of RAM.
Two-step standalone boot
The bootfile BOOTROM.SYS acts as a secondary program loader and loads the application from the
DiskOnChip. This scenario is used with large VxWorks applications where a one-step boot cannot be
used because of the application's size.
The DiskOnChip supports both the network boot and the one-step boot and there is no need to make
any changes to the VxWorks boot code.
The two-step boot requires some minimal changes to the following VxWorks files:
•
BSP configuration .H file (i.e. Tornado/target/config/pc486/config.h in case of
pc486 BSP)
•
Tornado/target/config/all/bootConfig.c
•
Tornado/target/config/all/usrConfig.c
91-SR-005-38-7L Rev. 1.3
12
Using DiskOnChip with VxWorks
The procedures outlined in Sections 4.2–4.3 are common to all three-boot scenarios. When using the
two-step boot, follow the extra procedures outlined in Appendix 1.
Note: The procedures described in Sections 4.2–4.3 are typically done only once, on the very first DiskOnChip you use.
Once you have successfully gone through one of these procedures, it is possible to copy the binary image of the
DiskOnChip to other DiskOnChips (i.e. cloning the first DiskOnChip)1.
4.2
Requirements for Installation of the DiskOnChip into VxWorks
In order to prepare the DiskOnChip to boot VxWorks, the following software tools are required:
•
DiskOnChip DOS utilities diskette. The utilities can also be found on M-Systems’ website:
www.m-sys.com.
•
DiskOnChip firmware file DOC121.EXB file (where '121' is the firmware version. Any firmware
version higher than '121' will do). This file can be found on the DOS utilities diskette or can be
downloaded from the M-Systems website.
•
Standard VxWorks VXSYS utility.
•
VxWorks bootfile BOOTROM.SYS.
•
DOS-bootable floppy.
4.3
Preparing the DiskOnChip to boot VxWorks
If you wish to boot VxWorks from the DiskOnChip either using the network boot, the one-step
standalone or two-step standalone boot option, follow the steps as described below.
1. Boot DOS on the target board from a DOS diskette.
2. Reformat the DiskOnChip by running the DOS utility DFORMAT.EXE as shown below:
DFORMAT /WIN={address} /S={firmware} /FIRST /Y
3. where {address} is the base address of the DiskOnChip (i.e. D000, D400 and so on), and
{firmware} is the DiskOnChip firmware file (DOC110.EXB, DOC121.EXB, and so on).
4. Reboot the target system from the DOS diskette and check that the driver letter C: was assigned
to the DiskOnChip:
dir C:
5. At the DOS prompt, run WindRiver's VXSYS utility to write the VxWorks bootstrap code onto
the DiskOnChip:
VXSYS C:
1
Another solution to copy the binary image of the DiskOnChip to various target DiskOnChip is through the usage of the
GANG programmer. For further details refer to “DiskOnChip GANG programmer User Manual” or contact M-Systems.
91-SR-005-38-7L Rev. 1.3
13
Using DiskOnChip with VxWorks
6. Copy the file BOOTROM.SYS to the root directory of the DiskOnChip.
At this point, the DiskOnChip is ready to boot VxWorks. If you wish to follow the two-step
standalone boot scenario, refer to Appendix A.
5
TrueFFS Driver Run-time Configuration Options
5.1
Introduction
The TrueFFS driver provides a number of run-time configuration options. The default settings of
these options are adequate for most applications. However, in some situations it may be required to
change these settings. All the driver’s configuration options are described in detail in Sections 5.2 to
5.5.
Note: All the configuration variables must be set to the desired values before the initialization routine tffsDrv() is
called. The value of the configuration variables must NOT be changed after the call to tffsDrv().
5.2
8-Bit/32-Bit Access to the DiskOnChip
By default, the TrueFFS driver accesses the DiskOnChip in 32-bit mode. Most platforms are capable
of breaking down a single 32-bit cycle into correct sequences of 8-bit access cycles to the
DiskOnChip. However, there are some platforms that don’t support this mode and accessing the
DiskOnChip in 8-bit mode is required.
To configure the TrueFFS driver to access the DiskOnChip in 8-bit mode, set the configuration
variable flUse8bit to '1' in your application:
extern unsigned char flUse8bit;
/* Access the DiskOnChip in 8-bit mode */
flUse8bit = 1;
Note: The DiskOnChip I/O performance decreases by 10-20% (depending on the platform) when the TrueFFS driver is
configured to run in 8-bit mode.
91-SR-005-38-7L Rev. 1.3
14
Using DiskOnChip with VxWorks
5.3
Configuring RAM Usage
By default, the TrueFFS driver is configured to store the internal mapping and translation tables in
RAM, allowing fast I/O performance to the DiskOnChip.
However, for high capacity DiskOnChip’s, the amount of RAM taken by these tables can be
significant. To minimize RAM usage, set the configuration variable
flUseNFTLCache_useSCache to zero:
extern unsigned char flUseNFTLCache;
/* Minimize RAM usage */
flUseNFTLCache = 0;
0;
Note: The configuration variable flUseNFTLCache is not related to the issue of unexpected power shutdowns. The
settings of this variable is purely a matter of I/O performance vs. RAM usage.
5.4
Built-in Diagnostics
The TrueFFS driver provides built-in diagnostics, allowing messages issued at critical points of the
DiskOnChip operation to be logged into an internal buffer.
By default, the diagnostics feature is disabled, but can be enabled by setting the configuration
variable fl_useDebug to any non-zero value, as follows:
extern int fl_useDebug;
/* Enable built-in diagnostics */
fl_useDebug = 4;
The size of the allocated buffer (in KBytes) is equal to the numerical value of the fl_useDebug
variable (in the example above, the buffer size will be 4KB).
The diagnostics buffer will contain C-style zero-terminated strings that can either be viewed (using
the debugger) or printed on the console at any time.
A pointer to the start of the diagnostics buffer is returned by the routine tffsViewDebugLog()
(see fldrvvxw.h).
Note: In most cases, a value of 2 for the variable fl_useDebug (thus allocating 2KB for the diagnostic buffer) will
suffice.
5.5
Yielding the CPU During Long Flash Operation
Inherent to flash technology is the need to erase the flash media before new data is written to it. The
erase operation is done “on-the-fly” whenever available media becomes scarce, taking typically
91-SR-005-38-7L Rev. 1.3
15
Using DiskOnChip with VxWorks
around 4 milliseconds to complete. During an erase operation, by default the TrueFFS driver polls the
DiskOnChip, waiting for the erase operation to complete.
Alternatively, the TrueFFS driver can suspend itself during the erase operation, allowing other tasks
to use the CPU’s resources. To instruct the TrueFFS driver to always release the CPU right after
starting the erase operation, set the configuration variable flDelay to non-zero value:
extern unsigned char flDelay;
flDelay = (unsigned char) 1;
Note: Suspending the TrueFFS driver for a certain amount of clock ticks can affect the write performance of the
DiskOnChip. This may occur when the TrueFFS driver is not given the CPU right after the specified number of clock
ticks, but rather be put at the end of the queue of tasks that are waiting for the CPU resource, the write performance is
reduced.
Furthermore, the duration of a clock tick in VxWorks (usually 10 msec, or 2.5 times longer than the
erase operation) provides poor granularity for suspending the TrueFFS driver.
6
Formatting the DiskOnChip Under VxWorks
It is possible to format the DiskOnChip under VxWorks, instead of using the standard DiskOnChip
DOS utilities DFORMAT.EXE.
In order to format the DiskOnChip under VxWorks the routine tffsDevFormat() is called. The
routine tffsDevFormat()can be found in the header file fldrvvxw.h and has the following
declaration:
extern STATUS tffsDevFormat (int tffsDriveNo, int arg);
where tffsDriveNo is the DiskOnChip sequential number (zero-based) and arg is a pointer (type
casted to int) to the struct tffsDevFormatParams, containing the parameters of the format
call.
Note: A brief description of the fields in the struct
file fldrvvxw.h.
tffsDevFormatParams can be found in the header
In most cases, the struct tffsDevFormatParams can be initialized using the #define
TFFS_STD_FORMAT_PARAMS(see fldrvvxw.h) as shown below:
struct tffsDevFormatParams format_params = TFFS_STD_FORMAT_PARAMS;
Example:
If there are three DiskOnChips present in the system, the application can format each DiskOnChip
separately. The following code sample formats the first and third DiskOnChip available in the
system:
#include "fldrvvxw.h"
/* use standard format parameters */
91-SR-005-38-7L Rev. 1.3
16
Using DiskOnChip with VxWorks
struct tffsDevFormatParams format_params = TFFS_STD_FORMAT_PARAMS;
/* format the first DiskOnChip */
tffsDevFormat(0, (int) (&format_params));
/* skip the second DiskOnChip */
/* tffsDevFormat(1, (int) (&format_params)); */
/* format the third DiskOnChip */
tffsDevFormat(2, (int) (&format_params));
7
Data Integrity on the DiskOnChip
The data structures on the DiskOnChip can be divided into low-level data structures and file system
data structures. The low-level data structures are M-Systems’ proprietary flash-specific data
structures that are maintained by the TrueFFS driver. The file system data structures are maintained
by VxWorks' dosFs filesystem and basically consist of the FAT, root directory, and so on.
The flash management algorithms that are used inside the TrueFFS driver have been carefully
designed to keep the low-level format consistent at any given moment of time and guarantee the
integrity of the low-level data structures, even after a power failure or an unexpected system
shutdown.
Data integrity on the file system level is the responsibility of the OS and not the TrueFFS driver. By
default, VxWorks’ dosFs file system does not immediately write data onto the storage device (i.e.
DiskOnChip), but instead caches data in RAM. While this increases the I/O performance of the
system, it also becomes more vulnerable to corruption in cases of power failure or unexpected system
shutdown.
It is possible to prevent dosFs from caching the data in RAM by using the option
DOS_OPT_CHANGENOWARN (refer to Section 3.5).
Unfortunately, the risk of data corruption at file system level due to power failures or an unexpected
system shutdown cannot be reduced to zero. Repair of corrupted data structures on file system level,
such as broken FAT chains or corrupted directory entries, can be done by tools similar to CHKDSK in
DOS. Please contact WindRiver Systems regarding the availability of similar tools for VxWorks.
8
Garbage Collection
Inherent to flash technology is the need to erase flash media before new data is written to it. The
process of erasing previously used blocks of flash is known as "garbage collection".
The TrueFFS driver automatically performs a “garbage collection” whenever there is not enough free
space on the media available to complete the write operation. This implies that at random times the
write operation is delayed due to “garbage collection” that needs to be performed. The result is that
the time it takes to write a certain amount of data varies.
91-SR-005-38-7L Rev. 1.3
17
Using DiskOnChip with VxWorks
For most applications it is of minor concern that the length of a write operation varies. However,
there are certain applications that have special requirements regarding the write operation’s timing. In
these cases, it is possible to provide a separate “garbage collection” task that runs at a relatively low
priority, when the system is idle.
The sole purpose of this task is to perform a "garbage collection" on the DiskOnChip and guarantee
that there will be enough "free" media available for the next write operation.
The routine tffsRecycle() that provides the "garbage collection" task can be found in the header
file fldrvvxw.h and has the following declaration:
extern STATUS tffsRecycle (int volNo, int mode);
where volNo is the DiskOnChip sequential number (zero-based) and 'mode' is the mode of recycling
(0 for single, quick “garbage collection" action and 1 for long, full "recycling" of all "dirty" flash
memory regions)..
Note: The second parameter of the routine tfssRecycle has been changed from the "number of flash KBytes to
recycle" to the "mode of recycling" (0 or 1) from version 4.2.
Example:
If there is only one DiskOnChip in the system, then the "garbage collection" task can be
implemented:
#include "fldrvvxw.h"
void garbageCollectionTask(void)
{
while (1) {
/* quick "recycle" action on the first DiskOnChip */
if (tffsRecycle(0, 0) != OK)
break;
/* sleep for a while (5 ticks) */
taskDelay(5);
}
}
The priority of the "garbage collection" task should be slightly lower than the priorities of all the
tasks that write/read data to/from the DiskOnChip. At the same time, it shouldn’t be too low as it
could effectively block the access to the DiskOnChip for a long time if it is pre-empted by other tasks
while running.
Note: The "garbage collection" task should be started after the application has called all the routines mentioned in
Section 3.
91-SR-005-38-7L Rev. 1.3
18
Using DiskOnChip with VxWorks
Note: The TrueFFS driver performs all the necessary synchronization between multiple tasks that access the DiskOnChip
concurrently. This means that there is no need for the application to synchronize the "garbage collection" task with all the
other tasks that access the DiskOnChip.
9
IOCTL calls to the TrueFFS driver
9.1
Introduction
Version 4.1 of the TrueFFS driver for VxWorks allows the user to implement the following new
features of the DiskOnChip software:
•
Obtain information on DiskOnChip
•
Software write protection
•
Run "garbage collection" in the background
•
Access the Binary Partition2, allowing the user to boot VxWorks on BIOS-less systems
•
Bypass the file system and access the DiskOnChip at virtual sector level
These new features are accessible through standard VxWorks IOCTL calls to the TrueFFS driver3
(provided by the API given in the file flioctl.h). The following IOCTL calls are supported:
IOCTL call
FL_IOCTL_GET_INFO
Usage
FL_IOCTL_DEFRAGMENT
Background “garbage collection”
FL_IOCTL_WRITE_PROTECT
Software write protection of the DiskOnChip
FL_IOCTL_BDK_OPERATION
Accessing Binary Partition of DiskOnChip
Obtain information on DiskOnChip
Read virtual sectors from DiskOnChip
FL_IOCTL_READ_SECTORS
Write virtual sectors to DiskOnChip
FL_IOCTL_WRITE_SECTORS
Note: All the data structures in the file flioctl.h are assumed to be packed, i.e. all the members of these data
structures are NOT aligned in any way. For instance, the function sizeof(flDiskInfoOutput) should return 55.
Sections 9.2 to 9.6 provide sample codes on how an application can issue IOCTL calls to the
TrueFFS driver.
2
3
For more information on accessing the Binary Partition on the DiskOnChip, refer to Application Note AP-DOC-020 “Boot Developers Kit”.
For more information on IOCTL calls, refer to Application Note AP-DOC-046 “Extended functions of TrueFFS driver for DiskOnChip”.
91-SR-005-38-7L Rev. 1.3
19
Using DiskOnChip with VxWorks
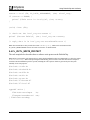
9.2
FL_IOCTL_GET_INFO
The following code sample shows how to obtain general information on the DiskOnChip's flash
array:
#include <ioLib.h>
#include <dosFsLib.h>
#include <stdlib.h>
#include <stdio.h>
#include <errno.h>
#include "fldrvvxw.h"
#include "flioctl.h"
flDiskInfoOutput
out;
int
fd;
int
status;
/* open the DiskOnChip raw device (assuming it is "/dev/tffs0") */
fd = open ("/dev/tffs0", O_RDWR, 0);
if (fd == ERROR) {
printf ("0x%x error in open()\n", (int) errno);
return;
}
/* issue IOCTL call to the driver */
status = ioctl (fd, FL_IOCTL_GET_INFO, (int) &out);
if (status == ERROR) {
printf ("0x%x error in ioctl()\n", (int) errno);
}
(void) close (fd);
/* check out the out.status */
printf ("status 0x%x\n", (int) out.status);
/* reply data is in out.info */
91-SR-005-38-7L Rev. 1.3
20
Using DiskOnChip with VxWorks
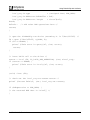
9.3
FL_IOCTL_DEFRAGMENT
The following code sample describes how to perform a short cycle of the "garbage collection"
process on the DiskOnChip:
#include <ioLib.h>
#include <dosFsLib.h>
#include <stdlib.h>
#include <stdio.h>
#include <errno.h>
#include "fldrvvxw.h"
#include "flioctl.h"
typedef union {
flDefragInput
in;
flDefragOutput
out;
} flDefragReq;
flDefragReq
ioctl_req;
int
fd;
int
status;
/* request minimal garbage collection */
ioctl_req.in.requiredNoOfSectors = (long) -1;
/* open the DiskOnChip raw device (assuming it is "/dev/tffs0") */
fd = open ("/dev/tffs0", O_RDWR, 0);
if (fd == ERROR) {
printf ("0x%x error in open()\n", (int) errno);
return;
}
/* issue IOCTL call to the driver */
91-SR-005-38-7L Rev. 1.3
21
Using DiskOnChip with VxWorks
status = ioctl (fd, FL_IOCTL_DEFRAGMENT, (int) &ioctl_req);
if (status == ERROR) {
printf ("0x%x error in ioctl()\n", (int) errno);
}
(void) close (fd);
/* check out the ioctl_req.out.status */
printf ("status 0x%x\n", (int) ioctl_req.out.status);
/* reply data is in ioctl_req.out.actualNoOfSectors */
Note: The TrueFFS driver also provides the routine tffsRecycle(), which can be used instead of the
FL_IOCTL_DEFRAGMENT IOCTL call. Refer to Section 8 for further details.
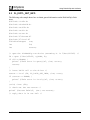
9.4 FL_IOCTL_WRITE_PROTECT
The code sample below describes how to software write protect on the DiskOnChip.
Note: Before executing the code fragment below, ensure that the DiskOnChip has been unmounted by a call to the routine
dosFsVolUnmount(). When write-protecting the DiskOnChip, please be aware of the fact that ALL the attempts to
write data onto the DiskOnChip will be rejected, including the write requests which are generated by the filesystem
internally for it's own purposes.
#include <ioLib.h>
#include <dosFsLib.h>
#include <stdlib.h>
#include <stdio.h>
#include <errno.h>
#include "fldrvvxw.h"
#include "flioctl.h"
typedef union {
flWriteProtectInput
in;
flOutputStatusRecord
out;
} flWriteProtectReq;
91-SR-005-38-7L Rev. 1.3
22
Using DiskOnChip with VxWorks
flWriteProtectReq
ioctl_req;
int
fd;
int
status;
/* specify type of operation */
ioctl_req.in.type = (unsigned char) FL_UNPROTECT;
/* replace the password below with your own */
ioctl_req.in.password[0] = 0x11223344;
ioctl_req.in.password[1] = 0x55667788;
/* open the DiskOnChip raw device (assuming it is "/dev/tffs0") */
fd = open ("/dev/tffs0", O_RDWR, 0);
if (fd == ERROR) {
printf ("0x%x error in open()\n", (int) errno);
return;
}
/* issue IOCTL call to the driver */
status = ioctl (fd, FL_IOCTL_WRITE_PROTECT, (int) &ioctl_req);
if (status == ERROR) {
printf ("0x%x error in ioctl()\n", (int) errno);
}
(void) close (fd);
/* check out the ioctl_req.out.status */
printf ("status 0x%x\n", (int) ioctl_req.out.status);
91-SR-005-38-7L Rev. 1.3
23
Using DiskOnChip with VxWorks
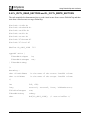
9.5 FL_IOCTL_BDK_OPERATION
The code sample below shows how to access the Binary (BDK) Partition on the DiskOnChip.
Note: For further details on the Binary Partition of the DiskOnChip and its usage, refer to Application Note AP-DOC-020
“Boot Developers Kit”.
#include <ioLib.h>
#include <dosFsLib.h>
#include <stdlib.h>
#include <stdio.h>
#include <errno.h>
#include "fldrvvxw.h"
#include "flioctl.h"
typedef union {
flBDKOperationInput
in;
flOutputStatusRecord
out;
} flBDKOperationReq;
flBDKOperationReq
ioctl_req;
int
fd;
int
status;
unsigned char
buf[512];
/* buffer to read BDK data to/write from */
switch (bdkOperation) {
case BDK_WRITE:
ioctl_req.in.type
= (unsigned char) BDK_WRITE;
ioctl_req.in.bdkStruct.bdkBuffer = buf;
ioctl_req.in.bdkStruct.length
= sizeof(buf);
/* place your BDK data to buf[] */
break;
case BDK_READ:
91-SR-005-38-7L Rev. 1.3
24
Using DiskOnChip with VxWorks
ioctl_req.in.type
= (unsigned char) BDK_READ;
ioctl_req.in.bdkStruct.bdkBuffer = buf;
ioctl_req.in.bdkStruct.length
= sizeof(buf);
break;
default:
/* add other BDK operations here */
return;
}
/* open the DiskOnChip raw device (assuming it is "/dev/tffs0") */
fd = open ("/dev/tffs0", O_RDWR, 0);
if (fd == ERROR) {
printf ("0x%x error in open()\n", (int) errno);
return;
}
/* issue IOCTL call to the driver */
status = ioctl (fd, FL_IOCTL_BDK_OPERATION, (int) &ioctl_req);
if (status == ERROR) {
printf ("0x%x error in ioctl()\n", (int) errno);
}
(void) close (fd);
/* check out the ioctl_req.out.status.status */
printf ("status 0x%x\n", (int) ioctl_req.out.status);
if (bdkOperation == BDK_READ) {
/* the returned BDK data is in buf[] */
}
91-SR-005-38-7L Rev. 1.3
25
Using DiskOnChip with VxWorks
9.6 FL_IOCTL_READ_SECTORS and FL_IOCTL_WRITE_SECTORS
The code sample below demonstrates how to read virtual sectors from a source DiskOnChip and then
write these virtual sectors to a target DisknChip.
#include <ioLib.h>
#include <dosFsLib.h>
#include <stdlib.h>
#include <stdio.h>
#include <errno.h>
#include "fldrvvxw.h"
#include "flioctl.h"
#define FL_SECT_SIZE
512
typedef union {
flReadWriteInput
in;
flReadWriteOutput
out;
} flReadWriteReq;
/*
Assuming :
char *fromVolName
is the name of the source TrueFFS volume
char *toVolName
is the name of the target TrueFFS volume
*/
int
fd1, fd2;
long
sectors1, sectors2, iSect, hiddenSectors;
flDiskInfoOutput
out;
flReadWriteReq
rwReq;
char
buf[FL_SECT_SIZE];
91-SR-005-38-7L Rev. 1.3
/* sector buffer */
26
Using DiskOnChip with VxWorks
/* get the number of sectors on the source and target TrueFFS
volumes. Abort is target is smaller then the source
*/
fd1 = open (fromVolName, O_RDONLY, 0);
if (fd1 == ERROR)
return;
/* error */
if (ioctl (fd1, FL_IOCTL_GET_INFO, (int) &out) == ERROR)
return;
/* error */
sectors1
= (long) out.info.logicalSectors;
hiddenSectors = (long) out.info.sectors;
fd2 = open (toVolName, O_RDWR, 0);
if (fd2 == ERROR)
return;
/* error */
if (ioctl (fd2, FL_IOCTL_GET_INFO, (int) &out) == ERROR)
return;
/* error */
sectors2 = (long) out.info.logicalSectors;
if (sectors1 > sectors2)
return;
/* error */
/* Copy source TrueFFs volume to the target. Sector ## are zerobased. */
for (iSect = 0; iSect < sectors1; iSect++) {
/* read the sector from the source volume */
rwReq.in.firstSector
= iSect - hiddenSectors;
rwReq.in.numberOfSectors = (long) 1;
rwReq.in.buf
= buf;
if (ioctl (fd1, FL_IOCTL_READ_SECTORS, (int) &rwReq) == ERROR)
return;
/* error */
if((rwReq.out.numberOfSectors != 1)||(rwReq.out.status!= flOK))
return;
/* error */
/* write the sector to the target volume */
91-SR-005-38-7L Rev. 1.3
27
Using DiskOnChip with VxWorks
rwReq.in.firstSector
= iSect - hiddenSectors;
rwReq.in.numberOfSectors = (long) 1;
rwReq.in.buf
= buf;
if (ioctl (fd2, FL_IOCTL_WRITE_SECTORS, (int) &rwReq) == ERROR)
return;
/* error */
if((rwReq.out.numberOfSectors != 1)||(rwReq.out.status!=flOK))
return;
/* error */
}
(void) close (fd1);
(void) close (fd2);
Note: The IOCTL calls FL_IOCTL_READ_SECTORS and FL_IOCTL_WRITE_SECTORS use an atypical sector
numbering scheme. They assume that the sector numbers are zero-based, and map sector #0 to the starting sector of the
FAT partition (i.e VxWorks bootsector). To access the sectors located before the starting sector of the FAT partition (for
instance, the Master Boot Record), the application needs to specify negative sector numbers. The code fragment above
illustrates how to read the Master Boot Record. It sets the parameter rwReq.in.firstSector to the '0 hiddenSectors' (i.e. negative) value.
91-SR-005-38-7L Rev. 1.3
28
Using DiskOnChip with VxWorks
10
Known Problem
Version 4.1 and up of the TrueFFS driver for VxWorks contains the following known problem:
• The VxWorks' routine dosFsMkfs() is incompatible with the original MS-DOS FAT volume
formats. Use the tffsDevFormat() routine instead (refer to Section 5 “TrueFFS Driver Runtime Configuration Options”) for creating dosFs file system structures on the DiskOnChip. Refer
to Appendix I: Two Step Stand Alone Boot
91-SR-005-38-7L Rev. 1.3
29
Using DiskOnChip with VxWorks
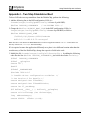
Appendix I - Two Step Standalone Boot
To boot VxWorks two-step standalone from the DiskOnChip, perform the following:
1. Add the following line to the BSP configuration .H file (i.e.
Tornado/target/config/pc486/config.h in case of pc486 BSP):
#define INCLUDE_DISKONCHIP
/* M-SYSTEMS TFFS */
2. Change the #define DEFAULT_BOOT_LINE in the BSP configuration .H file (i.e.
Target/target/config/pc486/config.h in case of pc486 BSP) as follows:
#define DEFAULT_BOOT_LINE
\"tffs=0,0(0,0)host:/tffs0/vxWorks
h=90.0.0.3 e=90.0.0.50 u=target"
Note: The above code instructs the BOOTROM.SYS to look for an application named vxWorks located in the root
directory of the device /tffs0 (i.e. first DiskOnChip).
If it is required to name the application differently or to place it in a different location other than the
root directory of the first DiskOnChip, change the respective fields in the code.
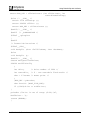
3. Modify the file Tornado/target/config/all/bootConfig.c by adding the following
code after the line #define INCLUDE_DISKONCHIP, just before the routine usrInit():
#ifdef
INCLUDE_DISKONCHIP
#ifdef __cplusplus
extern "C" {
#endif
#ifndef _ASMLANGUAGE
#include "blkIo.h"
/* TrueFFS driver configuration variables. */
/* See Section 4 for details */
extern unsigned char flUse8bit;
extern unsigned char flUseNFTLCache;
extern int fl_useDebug;
#if defined(__STDC__) || defined(__cplusplus)
extern void tffsSetup (int diskonchips,
long
addressRange);
extern STATUS
91-SR-005-38-7L Rev. 1.3
tffsDrv (void);
30
Using DiskOnChip with VxWorks
extern BLK_DEV * tffsDevCreate (int tffsDriveNo, int
removableMediaFlag);
#else /* __STDC__ */
extern void tffsSetup ();
extern STATUS tffsDrv ();
extern BLK_DEV * tffsDevCreate ();
#endif /* __STDC__ */
#endif
/* _ASMLANGUAGE */
#ifdef __cplusplus
}
#endif
/* forward declarations */
#ifdef __STDC__
void devSplit (char *fullFileName, char *devName);
#else
void devSplit ();
#endif /* __STDC__ */
extern unsigned noOfDrives;
STATUS usrTffsConfig
(
int drive,
/* drive number of TFFS */
int removable,
/* 0 – non removable flash media */
char * filename /* mount point */
)
{BLK_DEV * pBootDev;
char bootDir [BOOT_FILE_LEN];
if ((UINT)drive >= noOfDrives)
{
printErr ("Drive is out of range (0-%d).\n",
NoOfDrives - 1);
return (ERROR);
}
91-SR-005-38-7L Rev. 1.3
31
Using DiskOnChip with VxWorks
/* Create a block device spanning the entire disk */
/* (non-destructive) */
if ((pBootDev = tffsDevCreate (drive, 0)) == NULL)
{
printErr ("tffsDevCreate failed.\n");
return (ERROR);
}
/* Split off boot device from boot file */
devSplit (fileName, bootDir);
/* Initialize the boot block device as a dosFs */
/* device named <bootDir> */
if (dosFsDevInit (bootDir, pBootDev, NULL) == NULL)
{
printErr ("dosFsDevInit failed.\n");
return (ERROR);
}
return (OK);
}
LOCAL STATUS tffsLoad
(
int drive,
/* TFFS drive number (0 - (noOfDrives-1)) */
int removable,
/* 0 – non removable flash media */
char * fileName, /* file name to download */
FUNCPTR * pEntry
)
{
int fd;
/*
* Call tffsSetup() as appropriate for your application.
* If you want to change the settings of the driver's
* configuration variables flUse8bit,
91-SR-005-38-7L Rev. 1.3
32
Using DiskOnChip with VxWorks
flUseNFTLCache and fl_useDebug, do it here.
*/
if (tffsDrv () != OK)
{
printErr ("Could not initialize.\n");
return (ERROR);
}
printf ("Attaching to TFFS... ");
dosFsInit (NUM_DOSFS_FILES); /* initialize DOS-FS */
if (usrTffsConfig (drive, 0, fileName) == ERROR)
{
printErr ("usrTffsConfig failed.\n");
return (ERROR);
}
printErr ("done.\n");
/* load the boot file */
printErr ("Loading %s...", fileName);
if ((fd = open (fileName, O_RDONLY, 0)) == ERROR)
{
printErr ("\nCannot open \"%s\".\n", fileName);
return (ERROR);
}
if (bootLoadModule (fd, pEntry) != OK)
goto tffsLoadErr;
close (fd);
return (OK);
tffsLoadErr:
printErr ("\nError loading file: status = 0x%x.\n",
errnoGet ())
close (fd);
return (ERROR);
91-SR-005-38-7L Rev. 1.3
33
Using DiskOnChip with VxWorks
}
#endif /* INCLUDE_DISKONCHIP */
4. Modify the file Tornado/target/config/all/bootConfig.c by adding the following
code after the line #define INCLUDE_DISKONCHIPTFFS to the helpMsg[] in the routine
bootHelp():
#ifdef INCLUDE_FD
/fd0/vxWorks","",
#endif /* INCLUDE_FD */
#ifdef INCLUDE_IDE
/ide0/vxWorks","",
*/
#ifdef INCLUDE_ATA
"boot device: ata=ctrl,drive file name: /ata0/vxWorks","",
#endif /* INCLUDE_ATA */
#ifdef INCLUDE_PCMCIA
"boot device: pcmcia=sock file name: /pcmcia0/vxWorks","",
#endif /* INCLUDE_PCMCIA */
#ifdef INCLUDE_DISKONCHIP
"boot device: tffs=drive,removable file name:
/tffs0/vxWorks","",
#endif /* INCLUDE_DISKONCHIP */
"Boot flags:", "",
5. Modify the file Tornado/target/config/all/bootConfig.c by adding the following
code after the line #define INCLUDE_DISKONCHIP to the routine bootHelp():
INCLUDE_FD
printf (" fd");
#endif
/* INCLUDE_FD */
#ifdef
INCLUDE_IDE
printf (" ide");
#endif
/* INCLUDE_IDE */
#ifdef
INCLUDE_ATA
91-SR-005-38-7L Rev. 1.3
34
Using DiskOnChip with VxWorks
printf (" ata");
#endif
/* INCLUDE_ATA */
#ifdef
INCLUDE_DISKONCHIP */
printf (" tffs");
#endif
/* INCLUDE_DISKONCHIPTFFS */
#ifdef
INCLUDE_TFFS
printf (" tffs");
#endif
/* INCLUDE_TFFS */
printf ("\n");
}
6. Modify the file Tornado/target/config/all/bootConfig.c by adding the following
code after the line #define INCLUDE_DISKONCHIP to the routine bootLoad():
#ifdef
INCLUDE_FD
0)
{
int type = 0;
int drive = 0;
2)
return (ERROR);
else
&type);
OK)
{
0x%x.\n",
errno);
return (ERROR);
}
return (OK);
}
#endif
/* INCLUDE_FD */
#ifdef INCLUDE_IDE
0)
{
91-SR-005-38-7L Rev. 1.3
35
Using DiskOnChip with VxWorks
int type = 0;
int drive = 0;
3)
return (ERROR);
else
&type);
OK)
{
errno);
return (ERROR);
}
return (OK);
}
#endif /* INCLUDE_IDE */
#ifdef INCLUDE_ATA
if (strncmp (params.bootDev, "ata", 3) == 0)
{
int ctrl
= 0;
int drive = 0;
if (strlen (params.bootDev) == 3)
return (ERROR);
else
sscanf (params.bootDev, "%*3s%*c%d%*c%d", &ctrl, &drive);
if (ataLoad (ctrl, drive, params.bootFile, pEntry) != OK)
{
printErr ("\nError loading file: errno = 0x%x.\n",
errno);
return (ERROR);
}
return (OK);
}
#endif /* INCLUDE_ATA */
#ifdef INCLUDE_PCMCIA
pcmciaInit ();
/* init PCMCIA Lib */
if (strncmp (params.bootDev, "pcmcia", 6) == 0)
91-SR-005-38-7L Rev. 1.3
36
Using DiskOnChip with VxWorks
{
int sock = NONE;
if (strlen (params.bootDev) == 6)
return (ERROR);
else
sscanf (params.bootDev, "%*6s%*c%d", &sock);
if (pcmciaLoad (sock, params.bootFile, pEntry) == OK)
return (OK);
/* fall through if the PC card is not a block device
* let's try to boot it from an ethernet device.
*/
}
#endif /* INCLUDE_PCMCIA */
#ifdef INCLUDE_DISKONCHIP
if (strncmp (params.bootDev, "tffs", 4) == 0)
{
int drive = 0;
int removable = 0;
(strlen (params.bootDev) == 4)
return (ERROR);
else
sscanf (params.bootDev, "%*4s%*c%d%*c%d",
&drive, &removable);
if (tffsLoad (drive, 0, params.bootFile, pEntry) != OK)
{
printErr ("\nError loading file: errno = 0x%x.\n",
errno);
return (ERROR);
}
return (OK);
}
#endif
/* INCLUDE_DISKONCHIP */
7. Modify the file Tornado/target/config/all/bootConfig.c by adding the line
#define INCLUDE_DISKONCHIP as follows:
#if(defined (INCLUDE_SCSI_BOOT) || defined (INCLUDE_FD) || \
defined (INCLUDE_IDE) || defined (INCLUDE_ATA) || \
defined (INCLUDE_DISKONCHIPTFFS) || defined (INCLUDE_TFFS))
#define SPIN_UP_TIMEOUT 45 /* max # of seconds to wait for spinup
*/
91-SR-005-38-7L Rev. 1.3
37
Using DiskOnChip with VxWorks
8. Modify the file Tornado/target/config/all/bootConfig.c by adding
the following code after the line #define INCLUDE_DISKONCHIP, just
before the routine usrRoot():
#ifdef INCLUDE_DISKONCHIP
#ifdef __cplusplus
extern "C" {
#endif
#ifndef _ASMLANGUAGE
/* TrueFFS driver's configuration variables. */
extern unsigned char flUse8bit;
extern unsigned char flUseNFTLCache;
extern int fl_useDebug;
#if defined(__STDC__) || defined(__cplusplus)
extern void tffsSetup (int diskonchips, long *addressRange);
extern STATUS tffsDrv (void);
#else /* __STDC__ */
extern void
extern STATUS
tffsSetup ();
tffsDrv ();
#endif /* __STDC__ */
#endif
/* _ASMLANGUAGE */
#ifdef __cplusplus
}
#endif
#endif /* INCLUDE_DISKONCHIP */
9. Modify the file Tornado/target/config/all/bootConfig.c by adding the following
code after the line #define INCLUDE_DISKONCHIP, just before the routine usrRoot():
*/
#ifdef
INCLUDE_FD
*/
*/
#ifdef
INCLUDE_IDE
91-SR-005-38-7L Rev. 1.3
38
Using DiskOnChip with VxWorks
*/
*/
#ifdef
INCLUDE_ATA
{
IMPORT ATA_RESOURCE ataResources[];
ATA_RESOURCE *pAtaResource;
for (ix = 0; ix < ATA_MAX_CTRLS; ix++)
{
pAtaResource = &ataResources[ix];
if (pAtaResource->ctrlType == IDE_LOCAL)
ataDrv (ix, pAtaResource->drives, pAtaResource->
intVector, pAtaResource->intLevel,
pAtaResource->configType, pAtaResource->semTimeout,
pAtaResource->wdgTimeout);
}
}
#ifdef
INCLUDE_SHOW_ROUTINE
ataShowInit (); /* install ATA/IDE show routine */
#endif /* INCLUDE_SHOW_ROUTINES */
#endif /* INCLUDE_ATA */
#ifdef INCLUDE_LPT
{
IMPORT LPT_RESOURCE lptResources[];
lptDrv (LPT_CHANNELS, &lptResources[0]);
/* init LPT parallel driver */
}
#endif /* INCLUDE_LPT */
#ifdef INCLUDE_PCMCIA
#ifdef INCLUDE_SHOW_ROUTINE
pcmciaShowInit (); /* install PCMCIA show routines */
#endif /* INCLUDE_SHOW_ROUTINES */
pcmciaInit (); /* init PCMCIA Lib */
#endif /* INCLUDE_PCMCIA */
91-SR-005-38-7L Rev. 1.3
39
Using DiskOnChip with VxWorks
#ifdef INCLUDE_DISKONCHIP
/*
* Call tffsSetup() as appropriate for your application.
*/
/*
* If you want to change the settings of the driver's
* configuration variables flU_use8bit,
flUseNFTLCache_useUCache,
and fl_useDebug, do it here.
*/
tffsDrv ();
#endif /* INCLUDE_DISKONCHIPTFFS */
#ifdef INCLUDE_FORMATTED_IO
*/
10. Recompile the BOOTROM.SYS and copy it to the root directory of the first DiskOnChip. Also
copy the VxWorks application itself to the DiskOnChip.
Unless you have a #defined DEFAULT_BOOT_LINE different from the one described in step 2,
the application should be called vxWorks and it should be located in the root directory of the first
DiskOnChip.
91-SR-005-38-7L Rev. 1.3
40
Using DiskOnChip with VxWorks
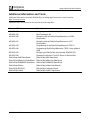
Additional Information and Tools
Additional information about the DiskOnChip, including application notes, can be found at
http://www.m-sys.com.
Additional tools and documents are listed in the following table:
Document/Tool
Description
AP-DOC-010
Designing with the DiskOnChip DIP
AP-DOC-020
Boot Developers Kit
AP-DOC-030
Designing with the DiskOnChip Millennium in a RISC
Environment
AP-DOC-031
Designing with the DiskOnChip Millennium in a PC
Environment
AP-DOC-039
Programming of the DiskOnChip Millennium TSOP-II
AP-DOC-040
Programming DiskOnChip Millennium TSOP, Using a Bed of
Nails
AP-DOC-042
Designing the DiskOnChip with Hyundai ARM720 CPU
AP-DOC-046
Extended Functions of TrueFFS Driver for DiskOnChip
DiskOnChip 2000 Data Sheet
DiskOnChip 2000 Data Sheet
DiskOnChip Millennium Data Sheet
DiskOnChip Millennium Data Sheet
DiskOnChip DIMM2000 Data Sheet
DiskOnChip DIMM2000 Data Sheet
DiskOnChip Utilities
DiskOnChip Utilities User Manual
DiskOnChip DIP EVB
DiskOnChip Evaluation Board
DiskOnChip-GANG
DiskOnChip GANG Programmer
91-SR-005-38-7L Rev. 1.3
41
Using DiskOnChip with VxWorks
How to Contact Us
Internet:
http://www.m-sys.com
E-mail:
[email protected]
USA Office:
M-Systems Inc.
8371 Central Ave, Suite A
Newark CA 94560
Phone: 1-510-494-2090
Fax: 1-510-494-5545
Japan Office:
M-Systems Japan Inc.
Arakyu Bldg., 5F
2-19-2 Nishi-Gotanda Shinagawa-ku
Tokyo 141-0031
Phone: 81-3-5437-5739
Fax: 81-3-5437-5759
Taiwan Office:
Room B, 13th floor, No. 133
Min Sheng East Road
Taipei, Taiwan
R.O.C.
Phone: 886-2-87706226
Fax: 886-2-87706295
U.K. Office:
M-Systems UK Ltd.
PO Box 20
Chalgrove SPDO
OX44 7YP
Phone: 44-1865-891-123
Fax: 44-1865-891-391
Israel Office:
M-Systems Ltd.
Atidim Industrial Park P.O.B. 58036
Tel Aviv 61580
Phone: 972-3-647-7776
Fax: 972-3-647-6668
M-Systems assumes no responsibility for the use of the material described in this document.
Information contained herein supersedes previously published specifications on this device from
M-Systems. M-Systems reserves the right to change this document without notice.
91-SR-005-38-7L Rev. 1.3
42