1
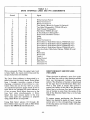
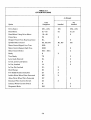
TN84%5
i
48-2E
FLEXISLK 9I8g j%)RIVES
M J' 4
il
[
PRODUCT SPE/IFICATION AND USER'SMANUAL
NOTICE
This document, and th e i n f o r m a t ion contained herein, is copyright b y T a n don Corporation an d
may not be duplicated or r eproduced, in wh ole or i n p a r t , w i t h out t h e p r ior w r i t t e n a pproval of
Tandon Corporation.
This document isintended to provide the user with detailed information adequate for the efficient
installation, operation, and service of the equipment involved.
However, while every efforthas been made to keep the information contained herein current and
accurate as of the date of publication, no guarantee is given or implied as to its accuracy.
TM848-1E, TM848-2E
T HINL I N E ™ FL E X I B L E D ISK DR I V E
48 TRACKS PER INCH
PRODUCT SPECIFICATION AND USER'S MANUAL
lclll d D I 1 CORPORATION
20320 PRAIRIE STREET
CHATSWORTH, CALIFORNIA 91311
o COPYRIGHT 1983 TANDON CORPORATION
CONTENTS
Page
Section
Number
Title
SECTION 1
G E N E R A L D E S C R IPTION
1.5
Introduction
Scope Of The Document . . . . . . . . . . . . . . . . . . . . . . .
Purpose Of The Drive
Major Features
Microprocessor Control
Write Protect .
Daisy Chain Capability
Internal Trim Er ase
Industry Standard Interface Compatibility.
Activity In dicator .
Direct Drive, Brushless D. C. Motor
Compact Size
Diskette Lever Lock Solenoid
Functional Description
Power On Self- Tests
Physical Description
SECTION 2
PRO D U CT SPECIFICATIONS
2.1
2.2
2.3
2.4
Introduction .
Mechanical Specifications .
Electrical and Operational Specifications
Reliability Specifications
Environmental Specifications .
SECTION 3
OPER A T I ON
1.1
1.2
1.3
1.4
3.1
3.2
3.3
3.4
3.5
3.6
Introduction
Unpacking The Drive
Preinstallation Checkout
Mounting The Drive .
Dust Cover .
Cooling .
Interface Connections
Input Control Lines
Output Control Lines . .
Typical Interface Characteristics
D. C. Power .
Drive Address and Option Strapping
Drive Select (DS1 — DS4)
Head Select Options (Sl — S3 and 1B — 4B) .
Stepper Motor Power (PS, PS*, DS, HL) .
Spindle Motor Control Options (Ml , M3, M4, MOL, MOH, MC1 — MC4)
Ready and True Ready (R and TR)
Lever Lock Options (D, DL, LL, NL)
Disk Change (DC) .
Two-Sided Diskette Installed (2S) ,
Write Protect (WP and NP) .
Write Current Switch (XC and IC)
Diagnostic Mode of Operation (DM, DL, Ml , M3, M4) .
Number
1-1
1-1
1-1
1-1
1-1
1-1
1-1
1-2
1-2
1-2
1-2
1-2
1-2
1-2
1-3
1-3
2-1
2-1
2-1
2-1
2-1
3-1
3-1
3-1
3-1
3-2
3-2
3-2
3-2
3-5
3-6
3-6
3-8
3-8
3-8
3-10
3-10
3-13
3-13
3-13
3-13
3-13
3-14
3-14
Section
Number
Page
Number
Title
3-14
3-14
3-14
3-17
Diskettes
Loading The Diskette
Write Protect Yab .
Diskette Handling and Storage
ILLUSTRATIONS
FIGURES
Figure
Number
1-1
2-1
2-2
n
r
4-o
3-1
3-2
3-3
3-4
3-5
3-6
Page
Number
Title
Disk Drive
Disk Drive Outline Drawing
+24 Volt D. C. Current, Configuration 1
+ 24 Volt D. C. Current, Configuration 2
Electrical Interface Characteristics .
Control and Data Timing Requirements
LSI Circuit Board Assembly .
Non-LSI Circuit Board Assembly .
Recording Media
Diskette Care and Handling .
1-4
2-2
2-5
2-5
3-6
3-7
3-11
3-12
3-17
3-18
TABLES
Table
Page
Number
Title
2-1
2-2
2-3
3-1
3-2
3-3
3-4
Electrical and Operational Specifications .
Reliability Specifications .
Environmental Specifications
Drive Interface Lines and Pin Assignments
D . C. Power Connector Pin Assignments . .
Option Patching
Diagnostic Mode Of Operation
Number
11
2-3
2-6
2-6
3-3
3-8
3-9
3-15
SECTION 1
GENERAL DESCRIPTION
i nte l l i g e n t
t er m i n a l con t r o l l e r s , m i c r o computers, word processing systems, datacommunication systems, error logging, program
loading, and point-of-sale terminals.
INTROOU CTION
This document provides required inf ormati on
in order to evaluate or incorporate Tandon's
disk driveinto a system.
T andon
1.3 MA JOR FEATURES
C o rporation's Model N u m b e r s
TM848-1E and TM848-2E, eight-inch flexible
M ICROPRO C E S SOR CON T R O L
drives are full-feature, microprocessorc ontrolled d r i v es. They m a y b e i n s t a l led i n
o ne-half th e s pace normall y r e q u i red fo r a n
eight-inch drive.They are compact data storage devices that use an IBM -formatt ed, industry standard, eight-inch diskette. Both dr i v es
are 48 tracks perinch recording devices.
The TM848-1E and T M 8 48-2E drives feature
an onboard microprocessor. This microprocessor provides six major features:
1. Bu f f ered seek capabilities..
The Model TM848 series ofdrives are capable
of r e a d in g a n d w ri t i n g i n si n g l e -density
format on a diskette, using a proprietary
r ead/writ e h e a d p a t e n t e d b y Tan d o n . I n
addition, both d r i v e s h av e a d o u bl e d ensity
capability w hen M odi f ied Fr equency Modulation (MFM) or other appropriate recording
techniques are used. The encoding and decoding of the data is done by the user's controller.
The Model T M 8 4 8-1E dr iv e u ses one side of
t he d i s k ett e f o r d a t a s t o r a ge . T h e M o d e l
TM848-2E drive doubles data storage capabilities by using both sides of the diskette.
2. I m p r oved h e a d p o s i t i onin g a c c u r a cy
with reduced hysteresis.
3 . W r i t e c u r r en t s w i t c h in g f o r o p t i m a l
data recording quality.
4. T ru e Ready signal.
5. I n t e r nal diagnostics (strappable).
6. Power On Self- Tests.
WRITE PROTECT
1 .1 SCOPE OF THE DOCUM E N T
When a w r i t e p r o t ected di skette i s i n s erted
i nto t h e dr i v e , t h e w r i t e e l e c t r o nic s a r e
disabled.
T his document contains a d escription of t h e
major features, physical and functional specifications, mounting an d p ower r equirements,
the interface, and ty pical t i m i n g ch aracteristics of the TM848-1E and TM848-2E drives.
DAISY CHAIN CAPABILITY
1.2 P U RPOSE OF THE DRIVE
The drive provides the address selection and
gating functions necessary to daisy chain a
maximum o f f o u r u n i t s a t t h e u s er's option.
The last dr ive on th e d aisy chain t e r m i n a t es
the i n t e r f ace. Th e t e r m i n a t i ons ar e a c complished by a resistor array plugged into a DI P
socket.
T he T M 8 4 8 -1E a n d TM 8 4 8 -2 E d r i v e s a r e
rotating d isk m e m ories designed for r a n dom
access data entry, storage, and retrieval
a pplicati ons . T y p i c a l a p p l i c a t i on s i n c l u d e
1-1
INTERNAL TRIM ERASE
n ormal o p eration. E ac h d r i v e c o n sists o f a
direct drive, spindle system, a head positioning
system, and aread/write system.
The drive provides the control signals necessary forproper trim erasure of data.
T he T M 8 4 8-1E i s a s i n g l e-sided d r i ve. T h e
T M848-2E i s a d o u b le-sided dri ve. Th e on l y
difference b e t w een t h e t w o d ri v e s i s t h e
number of heads.The circuit board is identical
for both models.
INDUSTRY STANDARD INTERFACE
CO MPATI B ILITY
When the d i sk ette l ever i s opened, access is
p rovided for t h e i n s ertion of a d i s k e t te. Th e
diskette's j a cket i s a c curately p o si ti oned by
plastic guide r a i ls. It s l ocation i s ensured by
the back stop and diskejector.
T he drive is compatible w it h c ontr ollers th at
use an industry standard interface.
ACTIVITY INDICATOR
C losing t h e di s k e t t e l e v e r ac t i v a t e s t h e
c one/clamp s y s t em , r e s u l t i n g in acc u r a t e
c entering and clamping of th e diskette to th e
d rive hub. The dr iv e hu b i s d r i ve n a t a c o n s tant s p ee d o f 360 RPM by a cry st a l controlled, direct drive, brushless D. C. motor.
The h ea d i s l o a de d i n t o c o n t ac t w i t h t h e
r ecording m e d i u m wh e n e ve r t he di s k e t t e
lever is latched.
An activity indicator, located on the front
p anel, is automatically i l l u m i n a ted when t h e
d rive i s s elected. Thi s f r on t p a ne l L . E .D. i s
also used as an indicator in the diagnostic
mode.
DIRECT DRIVE, BRUSHLESS D. C.
MOTOR
The heads are positioned over the desired
track by means of a stepper motor/band
assembly and i t s a ssociated electronics. This
positioner uses a3.6 degree rotation to cause a
one track linear movement.
The spindle m o t o r i s a cr y s t a l c o n t r o l l ed,
direct drive, brushless D. C. motor for
improved m otor start time, and speed
accuracy.
When a w r i t e - protected di skett e i s i n s e rt ed
into th e d r i ve, th e W r i t e P r o t ect sensor di sables the write electronics ofthe drive, and a
Write Protect status output signal is available
t o th e i n t e r f a ce. W hen p e r f o r m in g a w r i t e
o peration, a 0 . 0 13-inch w i de , n o m i n al , d a t a
t rack i s r e corded. Then, thi s t r ac k i s t u n n e l
erased to 0.012-inch, nominal.
COMPACT SIZE
The reduced size of the drive occupies only
o ne-half t h e m o u n t i n g s p ace r equired fo r a
conventional drive.
DISKETTE LEVER LOCK SOLENOID
Data recovery electronics include a l ow-level
r ead a m p l i f i e r , f i l t e r , d i f f e r e n t i a t or , z e r o
crossover detector, and digi t i z ing ci r cu i ts. No
data-clock separation isprovided.
The diskette lever l ock solenoid is controlled
by the host system.
In addition, the drive is supplied with th e fol lowing sensor systems:
1.4 F U NCTIONAL DESCRIPTION
1 . A T r a c k 0 s e n so r d e t ects w h e n t h e
Head/Carriage Assembly is positioned
over Track 0.
The drives are fully self-contained, and
r equir e n o ope r a t o r i n t e r v e n t io n d u r i n g
2. Th e T M 8 4 8-2E has tw o i n dex sensors,
e ach consisting o f a n i n f r a r e d L . E .D .
1-2
light source and a phototransistor, posit ioned to g en erate a s i g na l w h e n a n
index hole on the diskette isdetected.
T he drive ca n d e t er m in e i f a s i n g l e sided o r dou b l e - s i de d d i s k e t t e i s
installed. This output signal is present
at the interface.
O pening an d c l o s in g t h e d i s k e tt e l e v e r i s
required to repeat a t est t ha t ha s f a i l ed. The
diskette lever must be left open to complete
an error cycle.
1.5 P H YSICAL DESCRIPTION
3 . A W r i t e P r o t ec t s e nsor d i s ables t h e
write electronics when a w r i t e -enable
tab isremoved from the diskette.
A representative drive is shown in Fi gure 1-1.
The drive can be mounted in a vertical or horizontal plane. However, thelogic circuit board
must be on the uppermost side when the drive
is mounted horizontally.
POWER ON SELF- TESTS
The drive conducts apower on self-test as part
o f the normal power on sequence. Two of th e
tests do not require a di skette to be inserted.
These testsare: the head carriage stepping in,
away from, Track 0, and the head carriage
stepping out toward Tr ack 0. Failure of either
of these tests is in dicated on th e f r ont p a n el
L.E.D. by the following flashing sequence:
The spindle isrotated by a direct drive, brushless D. C. motor w it h a n i n t e gral t a chometer.
T he c r y s t a l - con t r o l l e d s e r v o c i r c u i t an d
tachometer control the speed of the spindle.
3 flashes, then 2:
F a ils t o s t ep i n fr o m
Track 0 or Tr a c k 0
sensor is a l w ay s equal
to zero.
O perator access for d i s k e tt e l o a ding i s p r o vided via a horizontalslot located at the front
of the drive.
3 flashes, then 3:
F a i l s t o st e p o ut t o
Track 0 or Tr ac k 0
sensor is a l w ay s equal
to one.
The read/write double-head assembly is positioned by a split band positioner mounted to a
microprocessor-controlled stepper motor. The
r ead/writ e h e ad s a r e g l a s s-bonded, f e r r i t e /
ceramic structures w it h a l i f e e x p ectancy of
15,000 operating hours.
A third t est monitors the index sensors whene ver th e d i s k ett e l e ve r i s c l o sed, and m u s t
have a diskette inserted into the drive.If the
d iskette lever i s closed wi t h out a d i s k ette i n
place, orthe spindle motor fails to operate, an
error message flashes on the front panel
L.E.D. in the following sequence:
3 flashes, then 4:
The c o n t ro l e l e c t r onics o f t h e dri v e ar e
mounted on a printed circuit board located
above the chassis. Power and interface signals
a re r o u t e d t hr o u g h co n n e c t or s p l u g g i n g
directly i nt o th e l ogic circuit board. A second
circuit board, mounted under the drive,operates the brushless D. C. spindle motor.
N o in d e x pu l s e wi t h
lever closed.
1-3
~>GURp y.y
OISK Qp]yp
SECTION 2
PRODUCT SPECIFICATIONS
INTRODUCTION
This section contains the mechanical, electrical, reliabili ty, and environmental specifications for the
TM848-1E and TM848-2E drives.
2.1 M E C HANICAL SPECIFICATIONS
Figure 2-1 contains the physical dimensions of the drive.
2.2 ELECTRICAL AND O P E R ATIONAL SPECIFICATIONS
The electrical and operational specifications are located in Table 2-1.
2.3 R E LIABILITY SPECIFICATIONS
The reliability specifications are located in Table 2-2.
2.4 ENVIRONM E N TAL SPECIFICATIONS
The environmental specifications are located in Table 2-3.
C RV I C I E3 f l
C OR OR A O N ,CH TSWORTII,CAL O • IA 9 1
2-1
1 7 9049-001
REY. A
6-32 THD
THRU 4 PLCS
(2 EACH SIDE)
Go
Q5)
O
0
/ 0.149 DIA TOP X
0.156 DIA BOTTOM
X 0.430 DEEP
4 PLCS
1 2.00
' (304.8 MM)
o
8.00
(203.2 MM)
o
o
o
o)
0
•
Oo
3.50
(88.9 MM)
o
o
p
L~
/
1.20
(30.5 MM)
0.75 ~
'
(19.0 MM)
1.60
(40.6 MM)
8.550
(217.2 MM)
1.650
(41.5 MM)
(25.4 MM)
7. 50
(190.5 MM)
0.52
(13.2 MM)
2.025
(51.4 MM)
2.300
(58.4 MM)
NOTES: 1. DIMENSIONS ARE GIVEN IN INCHES. METRIC EQUIVALENTS ARE IN PARENTHESES.
2. TOLERANCE ON ALL DIMENSIONS ISH-.020 INCH.
3. WEIGHT IS APPROXIMATELY 5.7 POUNDS.
FIGURE 2-1
DISK DRIVE OUTLINE DRAWING
mn
d
n
n
DDRPDR A TIDN, DHATswDR H, DALIPDRNIA 31311
2-2
1 79049-001
REV. A
TABLE 2-1
ELECTRICAL AND OP ER AT IONA L SP ECIF I CAT ION S
Media
203.20 millimeter, 8-inch IBM industry
standard diskette
Media Life (for reference only)
3 x 10 passes per track
Tracks Per Inch
48 TPI, both drives
6
Tracks Per Drive
TM848-1E
77 tracks per drive
TM848-2E
154 tracks per drive, 77 per side
Track Spacing
0.529 millimeter, 20.8 milinches
Inside Track Radius
Both Drives, Side 0
51.50 millimeters, 2.03 inches
TM848-2E, Side 1
49.42 millimeters, 1.95 inches
Outside Track Radius
Both Drives
91.75 millimeters, 3.61 inches
TM848-2E, Side 1
89.64 millimeters, 3.53 inches
Head Life
15,000 media contact hours
Disk Rotational Speed,
microprocessorcontrolled
360 RPM ~ 1.5 percent
Instantaneous Speed Variation (ISVl
1 percent
M otor Start Tim e
150 milliseconds, maximum
Seek Time, Track to Track
3 milliseconds, minimum
Head Settling Time
15 milliseconds
Average Track Access Time
i ncluding head settling tim e
91 milliseconds
Data Transfer Rate
500,000 bits per second
an
d
n
n
DDRPDR A TIDN, DHATswDRTH, DALIFDR • IA 91311
1 79049-001
REV. A
TABLE 2-1 (CONTINUED)
ELECTR ICAL AN D
O P E R A T IO N A L S P E C IFICATIONS
Flux Reversals Per Inch (FRPI),
inside track
Both Drives, Side 0
6,536 FRPI
TM848-2E, Side 1
6,816 FRPI
Unformatted Recording Capacity
TM848-1E
0.8 megabyte per disk
TM848-2E
1.6 megabytes per disk
D. C. Voltage and Current
Requirements
+ 24 volts D. C. Power
+ 24 volts, ~ 10 percent at 700
milliamperes, typical. For surge current
requirements, see Figures 2-2 and 2-3.
+ 5 volts D. C. Power
+5 volts,~ 5 percent at 450
milliamperes, typical
Typical Current Requirements
For +24 volts D. C.
Spindle Motor
170 milliamperes
Stepper Motor
4 00 mi l l i a m p e r e s
Electronics
130 milliamperes
Power Dissipation
20 watts, typical
Shipment
When prepared forshipment by Tandon,
the drive meets the requirements of
NSTA preshipment test procedure
Project 1A.
1 7904 9 - 0 0 1
KRV I d
C ln
OO RPO R A TIO • .OHATSTIIORT
• CALIFORNIA R 3
2-4
REV. A
Configured for stepper motor enabled during motor start, 2.25 amps typical surge.
C
25
U
R
R
1.5
E
1.O
T
0.5
I
N
o
50
p
A
100
150
200
250
TiME IN MiLLISECONDS
S
FIGURE 2-2
+24 VOLT D. C.CURRENT, CONFIGURATION 1
Configured for stepper motor disabled until motor comes up to speed, 1.8 amps typical surge.
STEPPER MOTOR
ENABLED
2.5
C
U
2.0
R
1.5
E
N
10
T
0.5
I
N
50
A
M
p
100
150
200
250
TIME IN MILLISECONDS
S
FIGURE 2-3
+24 VOLT D. C.CURRENT, CONFIGURATION 2
an
d
a
n
cDRPDR ATIDN,c • ATswDRT •,cALIFDR • IA 91311
2-5
1 79049 - 0 0 1
REY. A
TABLE 2-2
RELIABILITY SPECIFICATIONS
Error Rates, maximum, exclusive
of external sources, e.g.:
electronics, defective and
contaminated diskettes
Soft Errors (Recoverable)
O ne in 10 bi t s
Hard Errors (Nonrecoverable)
O ne in 10
Seek Errors
One in 10 seeks
bits
6
Mean Time Between Failures
10,000 power-on hours
Mean Time To Repair
30 minutes
TABLE 2-3
ENVIRONM E N TAL SPECIFICATIONS
Temperature
Operating, media dependent
4.4 C to46 C,4 0 F to 115 F
Nonoperating
— 40 C to 71 C, — 40 F to 160 F
R elative Humidi t y
Operating, noncondensing,
media dependent
20-to-80 percent
Nonoperating, noncondensing
5-to-95 percent
1 7 9049-0 0 1
CR n d E 3
&
CORP O R ATION, CHATSWORTH. CALIFORNIA 91311
2-6
REV. A
SECTION 3
OPERATION
INTRODUCTION
3. Remove the cardboard shipping insert,
and retain for fut ure shipment.
T his section contains i n f o r m a t ion on ho w t o
u npack, check o ut , i n s t a ll , a n d o p er at e t h e
TM848-1E and TM848-2E drives.
4. E n sure that the front panel is secure.
5. En sure that the circuit board is secure.
6 . E n sure t ha t t h e connectors are fi r m l y
seated.
3.1 U N PACKING THE DRIVE
3.3 MOU N TING THE DRIVE
The drives are packaged in protective containers to mi n i m ize the possibility of d amage
during s h i p m ent . T h e f o l l o w in g l i s t i s t h e
r ecommended p r ocedure f o r u n p a c k in g t h e
drive.
T he dr iv e h a s b een d e signed so i t m a y b e
mounted in any plane, i.e.: upright, horizontal,
o r vertical. W hen m o u n ted h o r i zontally, t h e
Logic circuit board side of the chassis must be
the top side.
1 . Pl ace t h e c o n t a i ne r o n a f l a t wo r k
surface.
2. Remove the upper half of the container.
Eight holes areprovided for mounting: two on
each side and four on the bottom of th e housing (see Figure 2-1). The two mount in g h oles
on each side are t a pped for 8-32 screws. The
f our m o u n t in g h o l e s o n t h e b o t t o m r e q u i r e
8-32 thread forming screws. When installed in
e ither pl ane, horizontal or v e r t i c al, only t w o
mounting screws are required to securely hold
the drive in place.
3 . Remove the dr iv e f rom t h e l o wer h a l f
of the container.
4. Check t h e c o n t e nt s o f t h e c o n t a i n er
against the packing slip.
5. Investigate the contents of the container for possible damage.
O ptional s t r aps ar e a v a i l a ble t o p e r mi t t w o
drives to be attached together for installati on
in standard width drive openings.
6 . N o t if y t h e c a r r ier i m m e di ately i f a n y
damage is found.
A ny mount in g scheme in w h i c h t h e d r i v e i s
part of t h e s t r u c t u ra l i n t e g r it y o f t h e e n closure i s n o t pe r m i t t e d , M o u n t i n g s c h e m es
should allow for adjustable brackets orincorporate resilient members to accommodate
tolerances. I n a d d i t i on , i t i s r e c o m m ended
that mount ing schemes include no more than
two mounting surfaces.
3.2 P R EINSTALLATION
CHECKOUT
Before applying power tothe drive, the following inspection should be conducted:
1. Check to ensure that the diskette lever
opens and closes.
T he driv e i s m a n u f a ct ured an d t e s ted w i t h
s ome critical i n t e r na l a l i g n m ents t h a t m u s t
b e maintained. Hence, it is important t hat t h e
mounting h a r dware not i n t r o duce significant
stress on the chassis.
2 . W hen t h e l e ve r i s m o ve d t o a n o p e n
position,the head arm raises.
3-1
DUST COVER
A ll i n t e r f ac e s i g n al s a r e T T L co m p a t i b l e .
Logic true (low) is + 0 . 4 volt m a x i m um . Logic
f alse (high) is + 2.4 volts minim u m .
The design of an enclosure should incorporate
a means to prevent contamination from loose
items, e.g., dust, lint, and paper chad since the
drive does not have a dust cover.
INPUT CONTROL LINES
These input l i nes are indivi dually t e r m i n a t ed
through a 150 ohm r e sistor pack i n st alled i n
t he di p s ocket l o c ated a t i n t e g r a ted c i r c u i t
location RP5 (or RP1 in th e Large Scale Integration version). In a single-drive system, this
r esistor pack s h oul d b e i n s t a l led t o p r o v i d e
the proper t e r m i n a t i ons. In a m u l t i p l e -driv e
system, only the last dr ive on the i n t e r f ace is
to be terminated. All other drives on the interface must have theresistor pack removed.
COOLING
H eat dissipation f r o m a s i n g l e d r i v e i s n o r mally 20 w a t ts, 68 BTU per hour, under high
load conditions. When the drive ismounted so
the components have access to a free flow of
air, normal c o nvection cooling a l l ows operation within the specified temperature range.
T he drive can t e r m i n at e th e f o l l owing i n p u t
lines:
W hen t h e d r i v e i s m o u n t e d i n a co n f i n e d
environment, air flow must be provided to
m aintain s p ecified a i r t e m p e r at u res i n t h e
vicinity of t h e m o t ors, printed circuit hoards,
and diskettes.
1. Di r ection
2. St ep
3. W r i t e Dat a
4. W r i t e Gate
5 . In U s e
6. Side Select (TM848-2E only)
7. W r i t e Current Switch
8. H ead Load
W hen f o r ced ai r i s u s ed , ai r fl o w m u s t b e
directed outward from the drive. Do not
intake ai r t h r o u gh t h e d r i v e nr h e a ds a n d
diskettes.
3.4 INTERFACE CONNECTIONS
M OTOR ON CONTRO L
Interface connections for t h e T M 8 4 8 -1E an d
T M848-2E are made via a user-supplied, fift y pin, flatribbon connector, 3M Scotchflex, Part
Number 3415, or it s equivalent. This connect or m a t e s d i r e c tl y w i t h t he ci r c u i t b o a r d
connector at the rear of the drive.
The Motor On Control lines are used to control
t he spindle m otor. W it h t h e M O L j u m p e r i n
(factory installed), the Motor On Control li n es
are low true. Wit h t h e MO H j u m per i n st all ed
( optional), t h e M o t o r O n C o n t r o l l i n e s a r e
high true (see Table 3-3 located in Section 3.6).
The in t e r f ace description o f t h e c o n nectors,
and the location of each one, is contained in
t his section. I n t e r f ace l i n e s a r e l o c a ted i n
Table 3-1. D. C. power connector pi n a ssignments are located in T a ble 3-2, Section 3.5 of
this manual.
DRIVE SELECT LINES
T he Dr iv e S e lect l i n e s p r o v ide a m e a n s o f
selecting and deselecting a d r i v e . These four
lines, DS1 t h r o ug h D S 4 , a l lo w i n d e pendent
selection of up to four drives attached to the
controller.
T he signal w ir e h a r ness should be of th e fl a t
r ibbon or t w i sted pair t y pe, have a maxi m u m
length of ten feet,and have a 26-to-28 gauge
conductor compatible with th e connector to be
u sed. It i s r e c o mmended t h a t t h e i n t e r f a ce
cable have a characteristic i m pedance of 100
ohms.
When the signal l o gic level is t r u e ( l ow), th e
d rive electronics are activ ated, and th e dr i v e
is conditioned to respond to Step or to Read/
3-2
T ABLE 3 - 1
D RIVE INTERFAC E L INES A N D
Ground
1
7
5
3
Pin
2
4
8
6
9
11
13
15
17
19
21
23
25
27
29
31
33
35
37
39
10
12
14
16
18
20
22
24
26
28
30
32
34
36
38
40
l 1
'+8
43
45
47
49
44
46
48
50
l A
P IN A S S IGN M E N T S
Signal
Write Current Switch
Motor On Control 1
Motor On Control 2
True Ready, (Motor On Control 3, Optional)
Two Sided (Strappable) (TM848-2E only)
Disk Change (Strappable)
Side Select (TM848-2E only)
In Use Indicator (Strappable)
Head Load Line/Motor Control
Index
Ready
Motor On Control 4
Drive Select 1 (Side Select Option, TM848-2E only)
Drive Select 2 (Side Select Option, TM848-2E only)
Drive Select 3 (Side Select Option, TM848-2E only)
Drive Select 4 (Side Select Option, TM848-2E only)
Direction Select (Side Select Option, TM848-2E only)
Step
Write Data
Write Gate
Track v
Write Protect
Read Data
Alternate I/O
Alternate I/O
Write commands. When the signal logic level
is false (high), the input control l i nes and the
output status lines are disabled,
DIRECTION SELECT AND STEP LINES
(TWO LINES)
When the drive is selected, a true (low) pulse
on the Step line, with a t im e dur at ion greater
than on e m i c r osecond, i n i t i a te s t h e a c c ess
motion. The direction of motion is determined
b y the logic state of th e D i r ection Select li n e
w hen a s t e p p u l se i s i s sued. The m o t io n i s
toward the center ofthe disk if the Direction
Select line is in the true (low) state. The direct ion of motion is away f rom th e center of t h e
disk if th e D i r ection Select line is in the false
The Drive Select address isdetermined by a
select shunt on the circuit board. Drive Select
lines 1 through 4 provide a means of daisy
chaining a maximum of four drives to acont roller. Only one can be t ru e ( l ow) at a t i m e .
An undefined operation might r esult if t w o or
more drives are assigned the same address or
i f tw o or m o r e D r i v e Select l i nes are i n t h e
t rue ( l o w ) s t a t e s i m u l t a n eously. A Dri ve
S elect l in e m u s t r e m a i n s t a bl e i n t h e t r u e
(low) st at e u n t i l a n y o p e r a t ion i n p r o g r ess
(Step, Read/Write) is completed.
(high) state.
To ensure p r oper p ositioning, t h e D i r e c t i on
S elect line should be stable at l east 1 m i c r osecond. priorto the corresponding rising edge
of the step pulse, and remain stable 100 nanoseconds afterit.
U sing S id e S e lect o p t i on s 1 8 t h r o u g h 4 8 ,
Drive Select lines may be used as Side Select
lines for the TM848-2E (see Section 3.6).
3-3
NOTE
p atterns an d a d j u s t t h e W r i t e D a t a w a v e form. Although a value cannot be specified for
w rite p r e compensation, T a n do n s u g gests a
value of 125 nanoseconds for systems using
MFM double density recording format.
T M848-1 E
a n d T M 8 4 8 -2 E
drives include a microprocessorcontrolled buffered seek capability. The controller may i s sue
step pulses of one microsecond
m inimu m w i d t h , a n d f i f t e e n
microseconds minimum spacing
between trail ing edges. Internal
drive electronics issue step commands at a
r ate of three
milliseconds.
WRITE GATE
W hen t h i s s i g n a l i s t r u e ( l o w ) , t h e w r i t e
e lectronics are prepared for w r i t i n g d at a an d
the read electronics are disabled. This signal
turns on W r i t e Curr ent i n t h e selected Read/
Write head. Data is wr i t t en u nder the control
of the Composite Write Data and Side Select
input li n es. When the Wr it e Gate line is false
(high), all write electronics are disabled.
The drive electronics ignore step pulses when
one of five conditions exists:
1. The Write Gate is true (low).
2 . Th e D i r e c t ion S e lect i s f a l s e ( h i g h ) ,
and the head is positioned at Track 0.
When a write protected diskette is installed in
a drive, the write electronics are disabled, irrespective of the state of the Wr it e Gate or Side
Select lines. With th e N P j u m p er i n s t a l led, a
diskette cannot be write protected.
3. The drive isnot selected.
4. When trying toseek beyond Track 76.
NOTE
5. When the diskette lever is opened.
C hanges of s t at e o f t h e W r i t e
G ate l i n e s h o ul d o c cur b e f o r e
the first Write Data pulse.
COM P O SITE WRITE DATA
When the drive is selected, this interface line
p rovides the bit serial Composite Wr it e D a t a
p ulses that control the switching of the Wr i t e
Current in t h e selected head. The wr it e elect ronics must be conditioned for wri t in g by th e
Write Enable line.
IN USE
This strappable feature controls the lever lock
solenoid when the DL option is installed.
For each high-to-low transition on the Composite Write Data li ne, a flux change is produced
a t th e w r i t e h e a d g a p . T h i s c a u ses a fl u x
change to be recorded on the media.
WRITE CURRENT SWITCH
Normally, Wr it e Cu r r ent sw i t c h ing i s accomp lished by t h e h o s t c o n t r oller. A t r u e ( l o w )
l evel on t hi s l i n e r e duces the W r it e C u r r ent .
Using o p t i o n I C , t he dr i v e a u t o m a t i c all y
reduces Write Current at Track 43.
When a double-frequency type encoding technique is used in which data and clock form the
c ombined W r i t e D a t a s i g n al , i t i s r e c o m mended that the repetition of the hi gh -to-low
transitions, while wri t in g all zeros, be equal to
the nominal data r a te, ~ 0 . 1 percent, and th e
repetition of the high-to-low transitions, while
writing all ones, be equal to twice the nominal
data rate, ~ 0.1 percent.
SIDE SELECT
The Side Select int er f ace line, available only
on Tandon's TM848-2E, defines which side of
a two-sided di skett e i s u s e d f o r r e a d in g o r
w riting. A n o p e n c i r c u it , f a l s e ( h i gh ) l e v el
Host controllers may implement write precompensation ci r cuit s t h a t r e c ognize worst ca se
3-4
selects the Read/Write head on side zero,the
lower head of the dr i ve. A t r u e (l ow) level on
this line selects the Read/Wr it e head on side
one, the upper head ofthe drive. When switching from one head to th e ot h er, a 100 mi crosecond delay is required before any Read or
Write operation can be initiat ed.
WRITE P ROTECT
T he Writ e P r otect signal i s pr ovided to i n d i cate to the user that a write protected diskette
is installed. This signal is true (low) when the
diskette's W r i t e P r o t ect n o tch i s u n c overed.
When the Writ e Pr otect signal is false (high),
t he wr it e e l ectronics are enabled, and w r i t e
operations can beperformed.
H EAD LOAD LINE/MOTOR CONTR O L
This line ma y b e u sed to control t h e spindle
m otor a n d /o r t h e l e v e r l o c k s o l e n oi d ( s ee
Section 3.6).
READ DATA
The Read Data line tr ansmits data to the controller when the drive is selected and not
w riting. It pr ovides a pulse for each flux tr a n sition recorded and detected onthe diskette by
t he drive electronics. Normally, this signal i s
f alse (hi gh) . I t b e c omes t r u e ( l ow ) f o r t h e
active state.The Read Data output line goes
true (low) for a duration of 200 nanoseconds,
~ 50 nanoseconds, for each ch ange r ecorded
on the diskette.
OUTPUT CONTROL LINES
There are eight output l i n es, five of which are
standard and three of which are strappable
f eatures. Th e s t a n d ar d o u t pu t s i g n al s a r e :
Index/Sector, Tr ac k 0 , W r i t e P r o t e ct , R e ad
D ata, and Ready. The strappable output s i g n als are D i s k C h a n ge, Tw o-Sided, and T r u e
Ready.
READY
INDEX
The Ready i n t e r f ace signal i n d i cates a di sk ette has been inserted into the drive. Ready
w ill no t r e t u r n t o t h e f a l s e s t at e u n t i l t h e
lever isopened, and is not affected by Spindle
Motor Control.
T he Index signal represents the output of t h e
Index sensor. An Index pulse isprovided once
every revolution, 166.67 milliseconds nominal,
t o indicate t h e b e g i n n in g o f a t r a c k t o t h e
c ontroller. Th e l e a d in g e d g e o f t h i s s i g n a l
m ust a l w a y s be u s e d t o en s u r e t im i n g
a ccuracy. The Index l in e r em ains in t h e t r u e
(low) state for the duration of the Index pulse,
which is nominally four mi l l i seconds.
W hen a s i n g l e -sided d i s k e tt e i s in s t a l l e d ,
Ready is activ e (l ow) i f s i d e zero is selected.
Ready is false (high) if side one is selected on
t he TM848-1E. When a t w o -sided diskette i s
installed, Ready is active when either side of
the disketteisselected on the TM848-2E.
TRACK 0
TRUE READY
W hen the drive is selected, the Track 0 i n t er f ace signal indicates to the controller that t h e
Read/Write head is positioned on Track 0, the
o utermost t r a ck . T h i s s i g n a l r e m a i n s t r u e
( low) u n t i l t h e R e a d / W r i t e h e a d i s m o v e d
away from Track 0. This signal is false (high)
when the selected drive's Read/Writ e head is
not on Track 0.
The True Ready interface signal indicates the
diskette is r o t a t in g a t 3 6 0 RP M a n d a s e ek
operation is complete, i.e.,the head has
settled. This may be used to indicate seek complete when using the buffered seek operation.
3-5
NOTE
TYPICAL INTERFACE
CHARACTERISTICS
T his i s a st r a p p a bl e f e a t u r e
w ith th e M o tor Control 3 i n p u t
signal line.
Lines between the controller and the drive
have the following characteristics:
DISK CHANGE
V,
True
= + 0.4 volt maximum at I
=
48 milliamperes, maximum
This strappable feature provides a tru e (l owl
s ignal t o t h e i n t e r f ace when D r i v e Select i s
activated if th e d r iv e has gone from a Ready
to a N o t R e ad y c o n di t ion w h i l e d e selected.
This line is reset on the true-to-false transition
o f Dr iv e S elect i f t h e d r i v e h a s g on e t o a
Ready condition.
Figure 3- 1 c o n t ain s t h e e l e ct r i cal i n t e r f a ce
characteristics. Figure 3-2 contains the control
and data timing reauirements.
TWO-SIDED
3.5 D . C. POWER
T his o p tio n i s ava i l a b l e o n l y on M ode l
T M848-2E. Tru e ( l ow ) i n d i cates t ha t a t w o sided diskette is installed.
D. C. power is supplied to the dr ive thr ough a
s ix-pin A M P c o n n ector, J2, m o u n ted on t h e
c ircuit b o a r d . T h e mat i n g c o n n e ctor, n o t
V,
F a l s e = + 2.4 volts minimum open
collector at I, = 250
microamperes, maximum
+5V
150 OHMS
?4LS14 OR
EQUIVALENT
+ TRUE
+ TRUE
TRANSMISSION
LINE ~
7438 OR
LEQUIVALENT
10 FEET
DRIVER
I RECEIVER
FIGURE 3-1
ELECTRICAL INTERFACE CHARACTERISTICS
3-6
D. C. POWER
90 MILLISECONDS MINIMUM
VALID CONTROL
OUTPUT SIGNALS
500 NIINOSECO N D S MAX IMUM
DRIVE SELECT
$
SIDE SELECT
(TM848-2E ONLY)
100 MICROSECONDS MAXIMUM
I
DIRECTION
SELECT
1 MICROSECO N D
1 MICROSECOND MINIMUM
MINIMUM
1 MICROSECON D
MINIMUM
13 MILLISECOND
1 MICROSECOND MINIMUM
STEP
15 MICROSECONDS MINIMUM
90 MILLISECONDS
18 MILLISECONDS
MINIMUM
TRUE READY
WRITE GATE
1 00 MICROSECON D S
MINIMUM
A
9n sgI I
I
WRITE DATA
I
I I
SE A
N AP
ENS
M I N I MUM
SEE NOTE
4 MICROSECO NDS MAXIMUM
I
16 MILLISECONDS MINIMUM
50 MICROSECONDS
MINIMUM
VALID READ DATA
SIG NAL
SEE NOTE
90 MILLISECONDS MAXIMUM
NOTE: 150 MILLISECONDS, MINIMUM, DELAY MUST BE INTRODUCED AFTER DRIVE SELECT TO ALLOW TIME FOR THE D. C.
MOTOR TO REACH 360 RPM OR THE OPTIONAL TRUE READY LINE MUST BE MONITORED.
FIGURE 3-2
C O N T R O L AN D DATA TIMING REQ U IR E M E N T S
3-7
supplied, i s A M P P a r t N u m b e r 1 - 4 8 0270-0,
using AM P c o n t act P ar t N u m b e r 6 0 6 191-1.
Pin assignments are found in Table 3-2.
time. Drive Select is implemented by shorting
o ne of the f our connections, using a shorti n g
plug. The drive comes equipped from the factory with DS1 installed. All outputs are gated
with drive select, as set-up at the factory.
T he ch assis s h ould b e c o n n ected t o e a r t h
ground to ensure proper operation.
DS1 DS2 DS3
TABLE 3-2
D . C.POWER CONNECTO R
PIN ASSIGNMENTS
DS 4 D R IVE SELECT
X
Selects Drive 0 via
J1-26.
X
Pin
Selects Drive 1 via
J1-28.
Supply Voltage
Selects Drive 2 via
J1-30.
+24 volts D. C.
24 volts Return
5 volts Return
X
+5 volts D. C.
Return
Selects Drive 3 via
J1-32.
HEAD SELECT OPTIONS
(S1 — S3 and 1 B — 4B)
3.6 D R IVE ADDRESS AND
OPTION STRAPPING
The Side Select options allow the user to select
the heads by various means. They are im pl em ented by r e m oving t h e sh ort in g p lu g f r o m
the DS1 — DS4 option pads.
The drive address and option strapping is
determined by the different ju m per configurat ions r e quired f o r s p e ci fi c s y s tem a p p l i c a tions. If j u m p e r c onfi gur ati ons are changed,
power should be cycled off and on so the microprocessor can recognize the new configuration.
HEAD SELECT USING DRIVE SELECT
T o use th e D r i v e S e l ect l i n e s t o s e lect t h e
h eads, etch cut S2 an d i n s t al l S 3 al ong w i t h
one of the 1B — 4B jumpers. The 1B — 4B control signal selected may not be the same control line used for Drive Select, or an undefined
c ondition results. When th e control l i n e t h a t
c orresponds t o t h e D r i v e S e l ect j u m p e r i s
driven low (true), the drive is enabled, and the
lower head, Head 0, is selected. When the control l i n e t h a t c o r r e sponds t o t h e 1 B — 4B
j umper i s d r i v e n l o w (t r u e ) , t h e d r i v e i s
enabled, an d t h e u p p e r h e a d , H e a d 1 , i s
selected.
T he d escription o f u s e r - selectable o p t i o n s
should be used in conjunction with Table 3-3.
Throughout Section 3.6, an X denotes jumper
i nstallation , a n d a das h de n o t e s j u m p e r
removed.
DRIVE SELECT (DS1 — DS4)
This option allows the user to daisy chain up
to four drives, and to enable one drive at a
3-8
TABLE 3-3
OPTION PATCHING
As Shipped
Option
Trace
Designator
Not
Installed
Installed
Drive Select
DS1 — DS4
DS1
DS2 — DS4
Head Select
S1 — S3
S2
S1, S3
Head Select Using Drive Select
1B — 4B
Power Save
PS
Stepper Power From Head Load Line
HL
Spindle Motor Control
Ml, M3, M4
Motor Control Signal, Low True
MOL
Motor Control Signal, High True
MOH
Motor Control Select
MC1 — MC4
X
X
M1, M3
X
Ready
True Ready
Lever Lock Solenoid
DL
X
In Use, Lever Lock Option
D
X
In Use, Latched
LL
X
In Use, Not Latched
NL
X
Disk Change
DC
X
Two-Sided Diskette Installed
2S
Inhibit Wr it e When Write Protected
Allow Write When Write Protected
NP
External Wr ite Current Switch
XC
Internal Wr ite Current Switch
IC
X
Diagnostic Mode
DM
X
3-9
X
X
HEAD SELECT USING DIRECTION SELECT
During a Read or Write operation, the state of the Direction Select line is undefined. Hence, it may be
used to selectthe desired head. A high enables Head 0. A low enables Head 1. To incorporate this
o ption, etch cut S2 and install Sl .
S1
S2
S3
1B
2B
3B
4B
HEAD SELECT
X
X
Head Select via J1-14.
Head Select via J1-26.
Head Select via J1-28.
Head Select via J1-30.
Head Select via J1-32.
Head Select via J1-34.
X
X
X
X
STEPPER MOTOR POWER
(PS, PS*, DS, HL)
turn off delay of the spindle motor is activated
o n th e t r a i l i n g e d g e o f t h e M o t o r C o n t r o l
signal.
When t h e P S j u m p e r i s i n s t a l l ed, s t epper
motor power is controlled by the Dr iv e Select
l ine, DS, or t h e H e a d L oa d l i n e , H L . W h e n
either line is t r u e (l ow), the stepper motor i s
driven with full power, and is ready for a Seek,
Read, or Writ e operation. When either l in e is
false (high), + 5 v ol t s t a nd-by current is supplied tothe stepper motor to hold the head carr iage assembly i n p o s i t i on . W h e n t h e P S *
option is i n , t h e s t epper m otor cont i nuously
receives full power. PS* is diametrically opposite PS (see Figures 3-3 and 3-4).
W ith M o t o r C o n t r o l u s i n g D r i v e S e l ect o r
Head Load, the M3 and M4 jumpers determine
which method of M otor Control is enabled. If
o ption M 3 o r M 4 j u m p er s ar e i n s t a l l ed, t h e
Motor On Control, MC1 — MC4, options operate
i n a l o g i ca l O R m a n n e r w i t h t he c o n t r o l
signal(s)selected by the M3 and M4 jumpers.
PS PS~ D S
HL STE P PER POWER
X
Stepper Power
continuously on.
X
X
-
-
X
-
NOTE
If the Motor Delay Timer option
(M1) i s i n st a l l e d , t h e f iv e
second turn off delay is in effect
regardless of which M3/M 4 configuration is implemented.
M1
M3
M4
Enables five-second
motor offdelay timer.
Stepper Power on with
Drive Select.
X
MOTO R CONTROL
Motor Control only
with MC1 — M4 options.
Stepper Power on with
Head Load line J1-18.
X
SPINDLE MOTOR CONTROL OPTIONS
(M1, M3, M4, MOL, MOH, MG1 — MG4)
X
Ml is used to enable the motor off delay timer.
When this j u m per i s i n s t a l led, a f i v e second
3-10
Motor Control using
Drive Select.
X
Motor Control using
Head Load.
X
Motor Control using
Drive Select and Head
Load, logical AND.
MOL
MOH
MC1
M C2
MC3
MC4
MOTOR CONTROL
X
X
Motor Control signals are low
(true) active.
Motor Control signals are high
(true) active.
Motor Controlselected via J1-4.
Motor Controlselected via J1-6.
Motor Controlselected via J1-8.
Motor Control selected via J1-24.
X
X
4S Ooo DS4
3S OOO DS 3
2S Ooo DS2
I S oOO DS I
Oo R
Oo D
Oo S3
OO S2
OONL
OOMOH
U7
OO
OOHL
OODM
OODL
Oo M4
OOM3
OOMI
O PS
rg
I
pe PS+
FIGURE 3-3
LSI CIRCUIT BOARD ASSEMBLY
3-11
Oo S I
Oo DC
Oo 2S
Oo TR
Oo MC4
Oo MC3
Oo MC2
Oo MC I
Oo IC
Oo XC
4
3
2
I
B
B
B
B
00 0
00 0
00 0
00 0
00
00
D S4
DS3
DS2
DSI
R
D
00 S3
00 S2
00 SI
00 DC
00 2S
00 TR
0 MOH
0
0 MDL
UID
OLL
0
ONL
M 10 0
M30 0
M4 00
DL 0 0
DM op
OWP
0
UI 3
ONP
0 PS
tpl
LOJ PS +
HL OO
FIGURE 3-4
NON-LSI CIRCUIT BOARD ASSEMBLY
3-12
00 MC4
00 MC3
00 MC2
00
00
00
MC I
IC
XC
READY AND TRUE READY (R AND TR)
DISK CHANGE (DC)
T his outpu t i s u s e d t o i n d i c at e t o t h e c o n troller that a disk change has been made. The
internal s i g na l i s g a t e d w i t h D r i v e S e l ect.
When th e l e ver i s o pened, the D is k C h a nge
l ine goes low (true), and remains low until t h e
trailing edge of the next Drive Select.
When th e R j u m p e r i s i n s t a l l ed, th e R eady
signal is available at th e i n t e r f ace. When the
TR jumper is installed, the True Ready signal
is available at the interface.
The R j u m p e r i s s t a n d a rd , w h i l e t h e TR
jumper is optional. These two l i nes are independent functions, and may be used separately
or together.
R
X
TR
-
DC
Disk Change signal not available.
Disk Change signal available via
J1-12.
READY O R TRUE READY
Ready signal via J1-22.
Tr ue Re a d y signal via J1-8.
X
DISK CHANGE
TWO-SIDED DISKETTE INSTALLED (2S)
W hen a t w o- s i d e d d i s k e t t e i s i n s t a l l e d ,
i nternal circuitry gates this signal wit h D r i v e
S elect. I t s e nd s a l o w ( t r u e ) s i g na l t o t h e
controller, i n d i c a t in g t h a t a d oub l e -sided
d iskett e i s i ns t a l l e d ( i n d e x h o l e t wo i s
present). This option is factory installed.
NOTE
W hen u s in g t h e Tr u e R e a d y
option, Motor Control 3 may not
be used.
2S
LEVER LOCK OPTIONS (D, DL,LL, NL)
TW O - S IDED DISKETTE
Two sided di sk e tt e s i rr na1 n nt
available.
Two-sided diskette signal available
via J1-10.
The lever lock solenoid, an optional feature,
can be controlled by the In Use in t er face line
J1-16.
D
X
X
DL
X
X
LL
-
X
NL
X
LEVE R LOCK
SOLENOID
WRITE PROTECT (WP AND NP)
L atched with Dri v e
Select.
L at c h e d by In Use
via J1-16, true (low).
Active energizes
solenoid.
T his WP option is used to lock out th e W r i t e
G ate w h e n a wr it e pro t e cted d i s k e tt e i s
installed. It is factory installed.
T he NP option al l ows the controller t o w r i t e
o n any d i s k et te, w h ether o r n o t i t i s w r i t e
protected. It d oes not stop th e W r i t e P r otect
signal from b e ing sent on t h e i n t e r f ace li n e.
T his option is im plemented by removing WP ,
and installing NP .
Latched by In Use
via J1-16. Active low,
in conjunction with
Drive Select, latches
the solenoid. The
solenoid remains
latched until In Use
is false (high) on the
leading edge ofDrive
Select.
WP
NP
X
X
3-13
WRITE PROTECT
Disables Write Protect, for
write protecteddiskette.
Allows writing on any
diskette.
WRITE CURRENT SWITCH (XC AND IC)
3. Reinstall th e j u m p ers in t h eir or i g i n al
configuration.
T he XC op tion a l l ows t h e h ost c ontr oller t o
switch the Write Current independently of the
d rive's onboard m i c r oprocessor. It i s f a c t or y
installed.
4. Power on the drive.
3.7 D I SKETTES
T o implement th e I C o p t i on, r emove the X C
jumper, then install a jumper at IC.
XC
IC
X
X
WRITE CURRENT
SWITCHING
The TM848-1E and T M 8 4 8-2E dr i ves use an
I BM-compatible, e i g h t - i nc h d i s k e t te . D i s k ettes are available with a single index hole or
with mult i ple (index and sector) holes.
External Write Current
switch.
Microprocessor automatically switches Write Current at Track 43.
Diskettes wit h a s i n g l e h ol e ar e u sed w h en
s oft sector f o r ma t i s r e q u i r ed. M u l t i pl e h o l e
diskettes provide sector i n f orm a t ion t h r o u gh
the use of an index sensor and electronics.
F igure 3-5 i l l u st r ates the di skette used wi t h
t he drive. This r ecording m edia i s a fl e x i b l e
d iskette enclosed in a p r o t ective j a ck et. Th e
d iskette, free t o r o t at e w i t h i n t h e j a c k et , i s
c ontinuously cleaned by it s soft f a b ri c l i n i n g
during normal operation.
DIAGNOSTIC MODE OF OPERATION
(DM, DL, M1, M3, M4)
The test programs allow the user to test some
aspects of drive operation without the use of
s pecial t est e q u i pment. Th e p r o grams a l l ow
t he user to isolate the problems of th e dr i v e.
The diagnostic m ode p r o v ides 1 6 t e st s ( see
Table 3-4).
LOADING THE DISKETTE
The drive is loaded by inserting th e di skette,
with its head aperture forward, into the front
slot of the drive. Access to the diskette loading
slot is obtained by opening the front lever.
To enter the diagnostic mode:
1 . M ak e a n o t e o f wh i c h j u m p e r s a r e
installed fo r n o r m a l o p er at in g c ondi tions (see Table 3-3).
The diskette should be carefully inserted until
it is solidly against the back stop.
2. Remove t h e D L , M 1, M 3, a n d M 4
jumpers.
CA UTION
Damage to the center o f the diske tte may r e sult if th e d oo r i s
c losed when th e d i skette is n o t
properly i nserted. This p r events
reliable recovery of the recorded
data.
3 . I n st al l t h e D M j um p e r , a n d s u p p l y
power to the drive.
4. U s i n g
t he D L , M l , M 3, and M 4
j umpers, s e lect t h e di a g n o sti c t e s t
desired by inserting the jumper according to Table 3-4.
WRITE PROTECT TAB
To exit the diagnostic mode:
1. Remove power from the drive.
The drive i s e q u i pped w it h a W r i t e P r o t e ct
Sensor Assembly. This sensor operates in conj unction w i t h t h e d i s k et te, wh ich ha s a s l o t
cut in the protective jacket.
2 . Remove the DM , DL , M 1 , M3, and M 4
jumpers.
3-14
TABLE 3-4
DIAGNOSTIC MODE OF OPERATION
DL
M4
M3
Ml
Test
Description of Test
Seek to Track 0, and turn on spindle motor. This t e st
seeks the carriage to Tr ack 0, and tu rns on the spindle
motor. It
may be used to check the Track 0 status.
Seek to Track 1, and turn on spindle motor. This test
seeks the carriage to Tr ack 1, and t u rns on the spindle
m otor. It m a y b e u sed fo r i n d ex-to-data burst t e s t i n g
with an alignment diskette.
Seek to Track 3 8 f r o m T r ack 0 , a n d t urn on spindle
motor. T his test seeks the carriage to T r a ck 0, t h en t o
T rack 38. It m a y b e u sed for r a d ial a l i g n m ent a d j u st ment with an alignment diskette.
Seek to Track 38 f rom T rack 76, and turn on spindle
motor. This test seeks the carriage to Track 76, then to
Track 38. This test, along with th e previous one, is used
to measure hysteresis.
X
Seek to Track 76, and turn on spindle motor. This test
seeks the carriage to Track 76, and turns on the spindle
motor. Thi s t est m a y b e u s e d t o c h eck i n d ex-to-data
burst and azimuth .
Seek to Track 75, and turn on spindle motor. This test
seeks the carriage to Track 75, and turns on the spindle
motor.
X
X
Toggle front panel L.E.D. with each revolution of the disk.
This test t oggles the f r ont p a nel L . E.D. at th e l eading
edge of each side zero index pulse. A single-sided disk
should be used for this test.
X
Toggle front panel L.E.D. with each revolution of the disk.
This test t oggles the f r on t p a nel L . E.D. at th e l eading
edge of each side one index pulse. A double-sided disk
should be used for this test.
Alternate seek between Track 0 and Track 76 with spindle
motor on. Th is t e st c o n t i n u o usly m o v es t he c a r r i a g e
between Tracks 0 and 76. This test is used to exercise
the positioner system.
Seek to Track 2, and monitor the Track 0 sensor. This
test moves the carriage to Track 2, and displays the
state of th e T r ack 0 sensor. The Track 0 sensor sho"ld
change state at Track 2.
3-15
TABLE 3-4 (CONTINUED)
DIAGNOSTIC MODE OF OPERATION
DL
M4
M3
X
X
X
N otes:
X
Ml
X
Test
Description of Test
10/A
Monitor the write protect sensor. T his test c hecks t h e
write protect sensor. The front panel L.E.D. should tur n
on and off by moving a disk,which has the write protect
notch covered, in and out of th e d r i ve. The L.E.D. is on
when write protect is true.
11/B
Alternate seek between Track 0 and Track 4 with spindle
motor on. This test is used in conjunction with a scope to
d~namicall~ test the Track 0 sensor.
12/C
Monitor the status of the lever position switch. This test
i s used t o c h eck t h e l e ver p o sition s w i t ch . Th e f r o n t
p anel L .E.D. fl a shes on an d of f w i t h t h e o p ening a n d
closing of the diskette lever position switch.
13/D
Alternate seek between Track 74 and Track 76 with spindle motor on. By w r i t i n g d a t a o n T r a c k 7 5 , t h i s t e s t
determines if the head movement over that tr ack causes
any erasure. A time of 30 mil l i seconds is allowed for the
head to settleat the end of each seek.
14/E
Turn spindle motor off. T h is t e st t u r n s o ff t h e s p i n d le
motor.
15/F
Flash version number. T his t e st o u t p u ts t he f i r m w a r e
version number to the front panel L.E.D.
X = Jumper In
-
=
Open
3-16
S.O INCH
SEALED
PROTECTIVE
JACKET
INDEX HOLE
OXIDE COATED
MYLAR DISK
SPINDLE
ACCESS HOLE
LINER
HEAD
APERTURE
WRITE PROTECT NOTCH
FIGURE 3-5
RECORDING MEDIA
W hen th e s l o t i s c o v ered w i t h a n o p t i c a l l y
opaque, self-adhesive tab, the diskette is writ e
enabled. When the tab is removed, the diskette
is write protected.
and to enhance the service life of the diskette,
the following handling procedure should be
observed.
1. Retur n t h e d i s k e tt e t o t h e p r o t ective
jacket when not in use.
DISKETTE HANDLING AND STORAGE
2 . A v oi d e x p osing t h e d i s k e tt e t o a n y
magnetizing force in excess of 50
oersted.
It is important the diskette be handled and
stored correctly so the integrity of the recorded
d ata is m a i n t a i n ed. A d a m a ged or c ont am i nated diskette can impair or prevent recovery
o f data , an d c a n r e s ul t i n d a m a g e t o t h e
Read/Write heads.
NOTE
The 50-oersted level magnetizing force is reached approximately t h r e e i n c h e s f r o m a
typical source,e.g.,motors, generators,or transformers.
Figure 3 - 5 c o n t a in s a n i l l u s t r a t io n o f t h e
p hysical conf i gur a t ion o f t h e d i s k e t te . T h e
7 .88-inch d i s k e tt e i s o x i d e -coated, f l e x i b l e
mylar. It i s e n closed in a n e i g h t - inch square
protective jacket. In addition, openings for the
drive hub and diskette index hole are provided,
3. To avoid warping the diskette, do not
store it in direct sunlight ,
4. Do not u se a lead pencil or a ballpoint
pen to write on the label. Use a felt
t ipped pen, an d m a r k l i g h t l y o n t h e
label.
Figure 3-6 provides some helpful h i nt s on th e
care and handling of the drive and diskettes,
In addition, t o en sure t r o u ble-free operation
3-17
DO NOT WRITE ON THE
JACKET WITH PEN OR
P ENCIL. USE A F E L T
TIPPED PEN.
D O NOT TOU C H P
R EC IS ION S U RFACE W I T H
YOUR FINGERS.
K EEP TH E D I S K E T T E
A WAY F R O M M A G NETIC FIELDS.
TO AVOID DA MAG E TO
THE DISKETTE AND TO
YOUR DRIVE, I NSERT
DISKETTE CAREFULLY
UNTIL THE BACKSTOP
IS ENCOUNTERED.
D ISKETTES S H O U L D
BE STORED AT
10'C to 52'C
5 0 F to1 2 5 ' F
RETURN THE DISKETTE
TO ITS J A CKET WHEN
NOT IN USE.
HANDLE WITH C A R E;
BENDING AND F O L DING
MA Y D A M A G E
DISKETTE.
FIGURE 3-6
DISKETTE CARE AND HANDLING
an
on
CORPORATE OFFICES
20320 PRAIRIE STREET
CHATSWORTH, CA 91311
TELEPHONE NO.: (213) 993-6644
TELEX NO.: 194794
TWX NO.: 910-494-1721
P/N 179049.001A (T5007A 5-83)
PRINTED IN U.S.A.