1
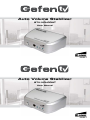
Auto Volume Stabilizer
GTV-VOLCONT
User Manual
Auto Volume Stabilizer
GTV-VOLCONT
User Manual
ASKING FOR ASSISTANCE
Technical Support:
Telephone
(818) 772-9100
(800) 545-6900
(818) 772-9120
Fax
Technical Support Hours:
8:00 AM to 5:00 PM Monday thru Friday Pacific Time.
Write To:
Gefen LLC
c/o Customer Service
20600 Nordhoff St
Chatsworth, CA 91311
www.gefentv.com
[email protected]
Notice
Gefen LLC reserves the right to make changes in the hardware, packaging and any accompanying
documentation without prior written notice.
GefenTV Auto Volume Stabilizer is a trademark of Gefen LLC
Manufactured under license from Dolby Laboratories.
“Dolby” and the double-D symbol are trademarks of
Dolby Laboratories.
© 2011 Gefen LLC, All Rights Reserved
All trademarks are the property of their respective owners.
Rev A3
CONTENTS
1
Introduction
2
Operation Notes
3
Features
4
Panel Layout
5
Panel Descriptions
6
Connecting and operating the Auto Volume Stabilizer
7
Auto Volume Stabilizer Remote Description
8
Specifications
9
Warranty
CONTENTS
1
Introduction
2
Operation Notes
3
Features
4
Panel Layout
5
Panel Descriptions
6
Connecting and operating the Auto Volume Stabilizer
7
Auto Volume Stabilizer Remote Description
8
Specifications
9
Warranty
INTRODUCTION
Congratulations on your purchase of the GefenTV Auto Volume Stabilizer. Your complete satisfaction is very important
to us.
GefenTV
GefenTV is a unique product line catering to the growing needs for innovative home theater solutions. We specialize
in total integration for your home theater, while also focusing on going above and beyond customer expectations to
ensure you get the most from your hardware. We invite you to explore our distinct product line and hope you find your
solutions. We will be happy to assist you in finding a solution for your particular needs. Please call us so we can better
assist you with your particular needs.
The GefenTV Auto Volume Stabilizer
Annoyed by loud commercials? Enjoy listening to the same volume levels when watching any TV program or during
commercials, no matter what is on. The GefenTV Auto Volume Stabilizer product is a high-quality volume stabilizer. It
actually makes the volume adjustments in such a subtle way that you won’t even notice the change.
An additional feature includes a bypass button that allows the pass-through of unmodified incoming audio. Using
Dolby Volume technology, the unit senses changes in volume levels, and then maintains a steady volume level for any
input sound coming from DVD, Blu-ray Disc or multimedia source. Listen to movies and TV shows easily without the
inconvenience of continuously fiddling with the volume levels.
How It Works
Place the GefenTV Auto Volume Stabilizer somewhere close to where you want to connect it. Connect the audio
source into the back of the unit (either digital audio or analog). Connect the audio output of the unit to an A/V receiver.
Connect the included 5V DC external power supply to the back of the unit. The LED in the front will light up red showing that the unit is in “standby mode.” Next push the “Bypass” button or press the “Power” button on the supplied IR
remote control, and the LED next to the “Bypass” button will go out while one of the three audio input LEDs will also
light up bright blue. This corresponds to the chosen audio input at the back. Press the audio selector button at the
back of the unit to select the audio input type.
1
OPERATION NOTES
READ THESE NOTES BEFORE INSTALLING OR
OPERATING THE GEFENTV AUTO VOLUME STABILIZER
•
GefenTV Auto Volume Stabilizer will use Dolby Volume technology to adjust volume automatically.
It is best used for TV programming where the level of sound rises and falls to an unacceptable
level.
•
The device can be bypassed in situations where a wide dynamic range is appropriate (such as
movies and classical symphony concerts.)
•
The Stabilizer is best installed next to the TV or audio receiver where the signal emanates. Then,
the remote can be used to control it from the comfort of an armchair.
•
This unit will only accept and output 2-channel analog and digital audio formats. Discrete multichannel audio formats are not supported.
2
FEATURES
Features
• Dolby Volume certified
• Prevents fluctuations in audio volume using Dolby Volume technology
• Accepts and outputs 2-channel analog audio
• Accepts and outputs 2- channel TOSLINK and S/PDIF digital audio
• Boosts low and high-frequency content dynamically
• Volume Leveler: Enables consistent volume levels at all times between TV channels and between
program materials
• Volume Modeler: Delivers the perception of a full-range audio experience at any volume level
• Bypass Mode permits audio to pass through unchanged
Package Includes
(1) Auto Volume Stabilizer
(1) Analog Audio L/R Cable
(1) 5V DC Power Supply
(1) IR Remote
(1) User’s Manual
3
PANEL LAYOUT
Back Panel
Front Panel
7
8
10
9
1
2
3
13
11
12
14
4
5
6
4
PANEL LAYOUT
Back Panel
Front Panel
7
8
10
9
1
2
3
4
5
6
4
13
11
12
14
PANEL DESCRIPTIONS
1
Bypass Button
Used to place the unit in Bypass Mode,
allowing the signal to pass through
unmodified.
2
Bypass LED
Indicated the current state of the unit. See
Page 6 for details.
3
IR Port
Used to communicate with the included IR
remote
4
L/R LED
The LED will turn blue to indicate the audio
source is set to L/R analog
5
8
Input Select Button
Used to select between L/R audio, Coax, and
Optical inputs
9
Optical (TOSLINK) Input
Connect an Optical cable from this port to the
Optical output port on the A/V equipment
10
Coax (S/PDIF) Input
Connect a Coax cable from this port to a Coax
input port on the A/V equipment
11
Analog L/R (RCA) Input
Connect an RCA L/R stereo pair from these
ports to the RCA L/R output pair on the source
device
Coax (S/PDIF) LED
Turns blue to indicate that the audio input is
set to Coax
12
Optical (TOSLINK) Output
Connect an optical cable from this port to the
Optical input port on the A/V equipment
6
Optical (TOSLINK) LED
Turns blue to indicate that the audio input is
set to Optical
13
Coax (S/PDIF) Output
Connect a Coax cable from this port to a Coax
input port on the A/V equipment
7
5V DC Power Receptacle
14
Connect the included 5V DC power supply to
this port
Analog L/R (RCA) Output
Connect a L/R RCA stereo pair from this output
to a L/R RCA stereo input pair on the A/V
equipment
5
PANEL DESCRIPTIONS
1
Bypass Button
Used to place the unit in Bypass Mode,
allowing the signal to pass through
unmodified.
2
Bypass LED
Indicated the current state of the unit. See
Page 6 for details.
3
IR Port
Used to communicate with the included IR
remote
4
L/R LED
The LED will turn blue to indicate the audio
source is set to L/R analog
5
8
Input Select Button
Used to select between L/R audio, Coax, and
Optical inputs
9
Optical (TOSLINK) Input
Connect an Optical cable from this port to the
Optical output port on the A/V equipment
10
Coax (S/PDIF) Input
Connect a Coax cable from this port to a Coax
input port on the A/V equipment
11
Analog L/R (RCA) Input
Connect an RCA L/R stereo pair from these
ports to the RCA L/R output pair on the source
device
Coax (S/PDIF) LED
Turns blue to indicate that the audio input is
set to Coax
12
Optical (TOSLINK) Output
Connect an optical cable from this port to the
Optical input port on the A/V equipment
6
Optical (TOSLINK) LED
Turns blue to indicate that the audio input is
set to Optical
13
Coax (S/PDIF) Output
Connect a Coax cable from this port to a Coax
input port on the A/V equipment
7
5V DC Power Receptacle
14
Connect the included 5V DC power supply to
this port
5
Analog L/R (RCA) Output
Connect a L/R RCA stereo pair from this output
to a L/R RCA stereo input pair on the A/V
equipment
CONNECTING AND OPERATING THE AUTO VOLUME STABILIZER
How to Connect the GefenTV Auto Volume Stabilizer
1.
Connect audio sources to audio input jacks on the GefenTV Auto Volume Stabilizer using the
appropriate audio cables (e.g. Optical, Coax, or L/R analog audio).
2.
Connect audio cables from the audio outputs on the Stabilizer to external A/V equipment.
3.
Connect the included 5V DC power adapter to the rear panel. The LED near the BYPASS button
turns RED. All input source LEDs are now dark. The unit is now in Standby (power saving) Mode.
4.
To power up the unit, press BYPASS once briefly. The BYPASS LED turns OFF and the unit
powers up. Dolby Volume™ processing is now ON. An LED glows indicating the chosen audio
input. Smooth, balanced audio is now output. Audio at low volumes is enhanced at the low and
high frequency ranges to create a more pleasing, dramatic effect. This mode is best for enjoying
commercial broadcasts where sudden volume irregularities can occur.
5.
To turn off Dolby Volume™ processing, press the BYPASS button again briefly. The BYPASS LED
is now ON (BLUE). Bypass Mode is now active. Incoming audio passes through the GefenTV Auto
Volume Stabilizer unprocessed. Movies and music sound best in Bypass Mode.
6.
Further brief presses of “BYPASS” will toggle between Dolby Volume™ Mode and Bypass Mode.
NOTES:
•
Select audio sources with INPUT SELECT (unit back panel) or SELECT (IR remote).
•
Once an audio input is selected, all outputs are active concurrently (digital or analog).
•
Standby Mode can be re-initiated by pressing the STANDBY button on the IR Remote or by holding
the BYPASS button for more than 2 seconds on the front panel of the unit.
6
AUTO VOLUME STABILIZER REMOTE DESCRIPTION
Power On/Off
Bypass
Select Input
Insert Battery Underneath
7
AUTO VOLUME STABILIZER REMOTE DESCRIPTION
Power On/Off
Bypass
Select Input
Insert Battery Underneath
7
SPECIFICATIONS
Input (analog) ......................................................................................................... 1x RCA-type connector
Input (digital) ............................................................................................... 1x SPDIF RCA-type connector
Input (digital) ................................................................................................1x TOSLINK optical connector
Output ..................................................................................................................... 1x RCA-type connector
Output ......................................................................................................... 1x SPDIF RCA-type connector
Output ..........................................................................................................1x TOSLINK optical connector
Power supply .....................................................................................................................................5V DC
Power Consumption (max) .....................................................................................................................5W
Accepts ................................................................................................... LPCM (2-Channel) or L/R Analog
SNR ...................................................................................................................................................>90dB
Frequency Response Deviation ................................................................................................. < +/-0.5dB
Distortion .....................................................................................< 0.001% at 0dBFS or 2vRMS Analog In
Audio In Clipping Level .................................................................................................................2.2VRMS
Input Impedance .................................................................................................................................... 47k
Max Output Level ....................................................................................................................1.51.7VRMS
Output Impedance ....................................................................................................................... < 500ohm
Operating Temp ......................................................................................................................... 0°C ~ 40°C
Certifications ............................................................................................................... UL, CE, EMC, RoHS
8
WARRANTY
Gefen warrants the equipment it manufactures to be free from defects in material and workmanship.
If equipment fails because of such defects and Gefen is notified within two (2) years from the date of
shipment, Gefen will, at its option, repair or replace the equipment, provided that the equipment has not
been subjected to mechanical, electrical, or other abuse or modifications. Equipment that fails under
conditions other than those covered will be repaired at the current price of parts and labor in effect at the
time of repair. Such repairs are warranted for ninety (90) days from the day of reshipment to the Buyer.
This warranty is in lieu of all other warranties expressed or implied, including without limitation, any
implied warranty or merchantability or fitness for any particular purpose, all of which are expressly
disclaimed.
1.
Proof of sale may be required in order to claim warranty.
2.
Customers outside the US are responsible for shipping charges to and from Gefen.
3.
Copper cables are limited to a 30 day warranty and cables must be in their original condition.
The information in this manual has been carefully checked and is believed to be accurate. However,
Gefen assumes no responsibility for any inaccuracies that may be contained in this manual. In no event
will Gefen be liable for direct, indirect, special, incidental, or consequential damages resulting from any
defect or omission in this manual, even if advised of the possibility of such damages. The technical
information contained herein regarding the features and specifications is subject to change without
notice.
For the latest warranty coverage information, please visit Gefen’s Warranty web page at http://www.
gefen.com/kvm/aboutus/warranty.jsp
PRODUCT REGISTRATION
Please register your product online by visiting Gefen’s web site at
http://www.gefen.com/kvm/Registry/Registration.jsp
9
*ma-GTV-VOLCONT*
Rev A3
20600 Nordhoff St., Chatsworth CA 91311
1-800-545-6900
818-772-9100
www.gefentv.com
fax: 818-772-9120
[email protected]
Pb
*ma-GTV-VOLCONT*
Rev A3
20600 Nordhoff St., Chatsworth CA 91311
1-800-545-6900
818-772-9100
www.gefentv.com
Pb
fax: 818-772-9120
[email protected]