1
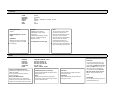
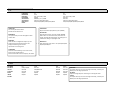
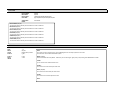
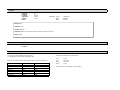
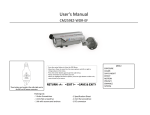
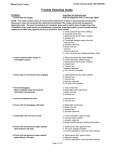
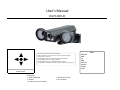
User's Manual
CHLP120IR‐EF
Press the center Button to Enter the OSD Menu.
Move Up or Down to move thru the menu options and left or right to change values on the menu.
Once changed just exit and settings will be saved automatically.
If using a RS485 connection, use these settings:
Pelco‐D ,2400bps ,ID 01, press IRIS OPEN to enter the menu .
Use UP/DOWN LEFT/RIGHT on the PTZ controller or DVR to go through the This Button is located inside the Housing in the back of the Box Camera. Packing List:
‐ 1 Arlen Screwdriver ‐ 1 Bracket
‐ 1 kit with screws and anchors ‐ 1 Specification Sheet
‐ 1 DC connector MENU
GENERAL
AWB
AE
D&N
MOTION
PRIVACY
COMM
RESET
1. GENERAL
ZOOM
NEGA/POSI
SHARPNESS
MIRROR
ECLIPSE
SYNC
INITIAL
ZOOM:(Digital Zoom)
ON/OFF
NEGA/POSI:(Negative or Positive Image)
SHARPNESS:
Adjusts the Shapness of the Image the bigger the number the sharper the image gets.
ON/OFF
POSI/NEGA
0‐15
NORMAL ‐ HORIZONTAL ‐ VERTICAL ‐ ROTATE
ON/OFF
INT
ON/OFF
MIRROR:
NORMAL‐ normal position
HORIZONTAL ‐ flip the image horizontally
VERTICAL‐ flip the image vertically
ROTATE ‐ rorates the image 90 degrees clockwise
ECLIPSE:(Blocks an Intense light)
SYNC:
The Line‐Lock (L/L) feature allows the camera to synchronize its
frame rate to the power line phase. The function is only available
when the camera is operated by AC power. It allows the reduction
of the fluorescent lights color rolling effect. When using 12v DC
power, the camera is automatically h
i
i ll
set to internal (INT) synchronization
2. AWB
WB MODE
RED CONT.
BLUE CONT
PUSH AUTO
COLOR GAIN
INITIAL
ATW ( Auto Tracking White Balance)
It Automatically adjusts the color between 1.800K and 10500K.
Use this option if the lighting conditions changes constantly AWC ( Preset White Balance)
Use this option when many white objects appears on the scene and also when a object merges to the scene with similar color shade
ATW/ AWC / MANUAL / PUSH
NOT USE / NOT USE / 70
NOT USE / NOT USE / 50
NOT USE / OFF / NOT USE
SET / SET / SET
ON/OFF ‐ ON/OFF ‐ ON/OFF
MANUAL(Adjust the color manually)
Adjust the RED and BLUE settings with values ranging from 0~255
PUSH
Adjust the white balance by focusing at a white object or white sheet of paper and pres s enter to adjust the color.
RED CONT.
Adjust the RED gain settings with values ranging from 0~255
BLUE CONT.
Adjust the BLUE gain settings with values ranging from 0~255
PUSH AUTO.
It is used in environment full of non “white” light (like bright yellow light) which affect the AWB and cause a falls color under AWB.In this case you can take a white paper in natural light environment and choose PUSH. The WB values will be set from now and will not change automatically any more.
COLOR GAIN.
R for red (0~20); B for blue (0~20). The system default valve is 15. 3. AE
LENS SELECT
BRIGHTNESS
BACKLIGHT
FLICKERNESS
SHUTTER SPD.
AGC MAX SET
MAX FLD SET
INITIAL
DC 0~60
OFF / LOW / MID / HIGH
ON/OFF
NORMAL, 1/25~1/10000
AGC OFF / LOW / MID / HIGH
OFF/2FLD/4FLD/8FLD/16FLD/32FLD/64FLD
LENS SELECT DC‐ License plate camera mode
ELECTR‐Uses an electronic iris ELC
0~60
OFF / LOW / MID / HIGH
NOT USE
NOT USE
AGC OFF / LOW / MID / HIGH
OFF/2FLD/4FLD/8FLD/16FLD/32FLD/64FLD
SHUTTER SPD
Adjusts the Shutter Speed (Normal, 1/25~1/10000)
BRIGHTNESS
This option allows you to set the brightness of the
camera video
AGC MAX SET
Automatic Gain Control can be set to LOW, MEDIUM, HIGH or OFF. In a dark environment, when AGC is set
to High, the image becomes brighter. The setting here is related to the setting in Day & Night mode.
BACKLIGHT
What this will do is brighten the object up in the
foreground and dim everything down in the background allowing you to see the
object better in the foreground
MAX FLD SET
Slow shutter have many estate:OFF 2/FLD 4/FLD 8/FLD 16/FLD32/FLD 64/FLD
FLICKERNESS
Select this mode if flickering occurs on the screen, because of an irregular balance
between illumination and scan frequency The shutter 4. D&N
D/N MODE
EXT INPUT
LUX SET
FILTER DLY
BURST
INITIAL
RETURN
EXT
LOW/HI COLOR
NOT USE
NOT USE
ON/OFF
ON/OFF
AUTO
NOT USE
LOW/MID HIGH
0~10 SEC
ON/OFF
ON/OFF
DAY
NOT USE
NOT USE
NOT USE
ON/OFF
ON/OFF
NIGHT
NOT USE
NOT USE
NOT USE
ON/OFF
ON/OFF
D/N MODE
This Option allows you to mirror the image horizontally , vertically and Rotate (turns the image Upside down.
EXT INPUT
Adjust the Image Sharpness decreasing or Increasing the Values LUX SET
This Option allows you to mirror the image horizontally , vertically and Rotate (turns the image Upside down.
5. MOTION
DETECT MODE
MD DISPLAY
DETECT AREA
USER AREA
SENSITIVITY
ALARM TIME
INITIAL
ON/OFF
ON/OFF
CENTER/OUT/UPPER/WHOLE/USER
NOT USE/NOT USE/NOT USE/NOT USE/SET
0~8
1SEC~60SEC
DETECT MODE (ON/OFF)
This Function allows to identify the area where the motion is detected
MD DISPLAY(ON/OFF)
This Function allows to identify the area where the motion is detected
DETECT AREA (ON/OFF)
This Function allows to identify the area where the motion is detected
USER AREA(ON/OFF)
This Function allows to identify the area where the motion is detected
SENSITIVITY(ON/OFF)
This Function allows to identify the area where the motion is detected
ALARM TIME(ON/OFF)
This Function allows to identify the area where the motion is detected
6. PRIVACY
AREA
MASK
COLOR
START X
END X
START Y
END Y
INITIAL
1~4
ON/OFF
BLACK / GRAY / WHITE
0~187
2~189
0~124
2~126
AREA
This camera has up to 8 masking areas. These 8 Masking Areas can be setup anywhere in the screen.
and each mask can be enabled or disabled anytime.
MASK (ON/OFF)
Enables or Disables the Privacy Masks . Make sure you are selecting the right privacy mask, looking at the MASK SELECT number.
COLOR you can choose from 7 different mask colors.
START X
This sets the start of horizontal part of the mask END X (ON/OFF)
This sets the end of horizontal part of the mask START Y
This sets the start of Vertical part of the mask END Y
7. COMM
PROTOCOL
CAMERA ID
ID DISPLAY
ZONE LABEL
VERSION
INITIAL
P/D
1
OFF/ON
ON/OFF
VER 1.1
ZONE LABEL UP/DN
LE/RI
MENU
CHAR SELECT
POSITION
RETURN
PROTOCOL P/D
CAMERA ID ‐ 000
ID DISPLAY (ON/OFF)
ZONE LABEL (ON/OFF) set the camera label and location of the label on the screen
VERSION‐ (N/A)
8 RESET
8. RESET
OFF STATE
Dipswitches Settings
For License plate Camera Mode: Dipswitch #10 ‐ ON
For High Resolution Camera Mode: Dipswitch#10 ‐ OFF
Also Adjust the Dipswitches for LUX Sensitivity
When Set to License Plate Mode, please select the Shutter Speed in the OSD Menu
1/50 sec
1/100 sec
1/250 sec
1/500 sec
1/1000 sec
1/2000 sec
1/4000 sec
1/10000 sec
20mph
30mph
40mph
50mph
75mph
90mph
110mph
135mph
30kph
45kph
60kph
80kph
120kph
150kph
180kph
220kph
1 LUX
2 LUX
4 LUX
10 LUX
1,2 OFF
1 OFF 2 ON
1 ON 2 OFF
1,2 ON
The IR LED will turn on depending on the LUX setting