1
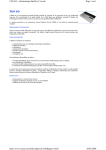
Eurobraille sas
Esytime Manual
User manual version 1.1.0
Didier Poitou (c) Copyright 2011-2012 - Eurobraille sas
10/24/2012
1|Page
Documentation en cours d'écriture...
Summary
In the box
Description of Esytime
Top Side
Back side
Left lateral side
Right lateral side
General information
Transport caution
Battery charge
Start-up
Esytime and screen readers
Using Esysuite
General
How does it work?
Esytime menus (not based on application)
Window menu
Application menu
Tools menu
Help menu
Parameter menu
Esynote
File menu
Edit menu
Format menu
Table menu
Braille type menu
Play menu
Math menu
Music Menu
Esycalc
File menu
Calculate menu
Esydico
File Menu
Esydaisy
2|Page
File menu
Menu Edition
Read menu
Esyfile
File menu
Favorites menu
Edit menu
Esyweb
Braille presentation of a web page
File Menu
Menu Proceed to
Favorites menu
Esysudoku
File menu
Mode menu
Esybomb
File menu
Level menu
Scripts
Esytime keyboard and buttons
On the Left side: 4 Vertical keys (from top to bottom)
On the Right side: 4 Vertical keys (from top to bottom)
Other PC keyboard functions
Esytime Joysticks
Joystick1
Joystick2
Joystick Combinations
Keyboard shortcuts
Global shortcuts
Menu application shortcuts
Window menu shortcut
Esyfile shortcuts
Esynote shortcuts
Esytime braille keyboard
Braille functions (Bramigraf)
Computer Braille (8 dot)
Reminder – Grade1 Braille rules
The 63 signs
Numbers and arithmetic signs
3|Page
Symbols
Reminder musical Braille rules
4|Page
In the box
- 1 x wall socket connection (Input: 100-240V / 50-60Hz, Output: 19V - 1,2A).
- 1 x battery 10,8V - 4400mAh (47Wh).
- 1 x USB key "bootable" for system reinstallation.
- 1 x USB cable when connecting Esytime as Braille display only.
- 1 x Softcase
Description of Esytime
Esytime is available in two versions: Esytime standard and Esytime. The difference between
the two devices is the mechanical cursor routing keys on Esytime standard, and the use of
optical sensors for cursor placement (Esycell) including other functions described further in
this documentation in Esytime.
Top Side
The top side of Esytime includes, starting from the upper right hand side:
- On/Off button (“I-shaped”)
- Braille line with 32 cells / 8 pins per cell
- Above the braille line, 32 cursor routing keys
- Above the Braille line there is a small opening in the housing which includes the integrated
microphone.
- Under the braille display;
* 2 joysticks with 5 contacts (up-, down-, right-, left- and center click) which are situated just
under each side of the braille line.
* 2 vertical lines with 4 function keys each, situated on the right and the left side of the
device.
* 1 braille keyboard with 10 keys (dots 1-8, space and backspace).
- On the lower right front of the device, 4 LED lights which indicate from left to right:
* On/Off position. LED is lit when the device is turned on. When the light is blinking, Esytime
is in Suspend-to-RAM- mode. When this LED is turned off, the device is off.
* The battery charge status is displayed in the following way:
_ 95% to 100%: Green light.
_ 11% to 94%: Orange light.
_ 0% to 10%: blinking Orange light.
* Hard disk activity: flashing light when data is written or red.
* WiFi / Bluetooth LED is lit when the function is active.
Back side
The back hand side of Esytime includes two buttons for unlocking and removal of the
battery. To remove the battery, pull the two buttons on the lateral sides of the device in the
opposite direction and slide the battery out. To return the battery to its place, simply place
the battery inside the slot, push it gently into place and it will automatically lock in position.
Attention:
Before removing the battery, make sure that operating system is closed down and the
device is turned off. Removing the battery while the operating system is running will put the
5|Page
device in a repair mode which can only be reversed using a computer mouse and a
connected monitor/screen.
The battery pack should never be dismantled; it must be purchased as part of a single unit.
Caution:
-The bottom side of Esytime can become very hot. Be careful when handling it during
operation or when it has been recently used. A high temperature is normal during charge or
usage. Do not place Esytime on a soft surface such as a bed or a sofa that may block the
ventilation openings.
Do not place Esytime on your lap or other body part in order to prevent risk of injury from
heat exposure.
Left lateral side
- 1 x AC input (avoid damage to Esytime and its battery, by always using the supplied adapter
for charging).
Caution: The adapter can become very hot. Do not cover it and keep it away from heat
sensitive surfaces.
- 1 x D-Sub port 15 PINS VGA (monitor connection)
- 1 x USB 2.0 port
- 1 x ventilation fan. Make sure that it is not obstructed by anything.
- 1 x USB 1.0 port, for connection to another computer
Right lateral side
- 1 x LAN RJ45 (10/100Mbits) port
- 1 x security port Kensington®
- 2 x USB 2.0 ports
- 1 x microphone input
- 1 x headphone input
- 1 x SD/SDHC/MMC slot
General information
Esytime is a combination of a PC-computer and a user interface consisting of a 32 cell Braille
display, 32 cursor routing keys, a Braille keyboard and control buttons. These 2 interfaces
are internally connected via USB.
The Braille interface can be used independently with another PC. It is possible to exchange
data using the external USB connection or when active, via the integrated Esytime PC.
Transport caution
Always turn off Esytime using the On/Off button and disconnect all peripherals to protect
the device ports before transport. The hard disk head retracts when the power is turned off
to avoid scratching the disk surface during transport. Esytime should not be carried around
or moved unnecessarily when it is turned on. If transporting Esytime using a bag, make sure
that the On/Off button cannot be turned on by mistake by something inside the bag.
6|Page
Battery charge
When relying on battery power only, always make sure to fully recharge the battery, as well
as any additional battery pack.
Note: Esytime operates using battery or connected to a wall socket. If you use it with the
battery and connect the AC input at the same time, it will recharge the battery. For an
optimal battery life span, charge Esytime at least 8 hours before using it for the first time,
and whenever the battery is completely empty. The battery reaches its maximum capacity
after several charge cycles.
Start-up
Use the On/Off button, to start Esytime.
The Braille line immediately shows: 'Esytime V0.25 21-12-2011".
After this, Windows starts with a screen reading software of your choice or with the Esysuite
application.
Esytime and screen readers
Using Esytime with a screen reader is not different from using a standard Braille display.
Esytime is compatible with most screen reading software. For more information, refer to
your screen reader software documentation found online (requires Internet connection) or
on the installation-CD/DVD.
Using Esysuite
General
Esysuite is a software suite developed for use with Esytime only. It includes the following
applications:
-Esynote
A note-taking tool for different types of Braille (computer Braille, Grade1, Grade2,
mathematical and musical Braille).
-Esyfile
A file manager, which allows storage and transfer of files and folders between different
locations and media (copy, move, delete, rename). It also opens a file whose extension is
known by an Esysuite application.
-Esycalc
Executes simple calculations. Use memory functions to store your results.
-Esyplay
Multimedia player based on a literature list.
-Esydico
Is a set of dictionaries (French encyclopedia, synonyms, verb conjugations and also EnglishFrench, French-German, Spanish-French, French-Italian, Dutch-French in both directions).
Esydico is also accessible via the Esynote context menu, here it interacts with the word
where the cursor is currently placed.
7|Page
-Esyweb
A web browser (this application is being developed at the time of the writing of this
documentation).
-Esysudoku
A part of the Esygame group. The aim of the game is to fill the grid according to Sudoku
rules. This application is an example of an external application. (See the "Scripting" section)
-Esybomb
A part of the Esygame group. The aim of the game is to fill a grid without activating a bomb.
This game is based on “Minesweeper”, a game known by all Windows users. This application
is an example of an external application. (See the "Scripting" section)
How does it work?
By default Esysuite launches the application Esynote on start-up. The Braille line shows:
"< B0 > _"
This is the editing area of a document in Esynote. '< B0 >' is a tag that tells you the active
Braille type. In this case, computer Braille.
Comparable with any software in Windows, Esysuite is composed of:
- a title/header bar
- a menu bar
- a box containing the active application document,
- a status bar
Braille simulation/Braille visualizer
It is also possible to open a window showing a braille simulation/braille visualizer and a
preview window. The Braille visualizer allows the user to graphically see the content of the
current row (what is currently visible on the Braille line). These 2 windows are not enabled
by default because they serve only as an indicator when a monitor/screen is connected to
Esytime.
Menu and submenus
The menu bar contains all menu options and adapts to the Esysuite operation mode. Some
menu items will appear/disappear depending on the currently active application.
To activate/act on a menu item; center-click the left joystick or press the ALT –key twice
(second button from the bottom in the group of 4 keys on the right).
The Braille display reads:
"Edt:File Edit Format Table"
Characters in the menu items including dot 7, indicates that this is also the shortcut
letter/character to activate this menu option. A menu option can also be opened/activated
by using one of the cursor routing keys placed above any of the letters in the menu item.
Each of the 2 keys, closest to the Braille line, in the left and right group of 4 keys, allows you
to move forward or reverse the characters on the Braille line.
To return to a document without activating any menu options, simply press the Escape key
(left key immediately below the key for reversing the Braille line). Another way to move
through the menus is to use the 4 arrow directions (joystick on the right hand side). Using
this method, the selected menu item is presented in first position on the Braille line. Press
8|Page
Enter to validate the menu item selected (center-click, right hand side joystick). The
disadvantage of this method is that the direction of motion depends on how the menus are
graphically displayed.
When a menu item is active, the submenu associated with this item is displayed. For
example, for the Esynote file menu the Braille line reads:
"Fil:New'Ctrl+N Open...'Ctr"
Submenus are constructed in the same way as the main menu. Viewing a sub menu item can
be done using the direct shortcut (letter including dot 7), or using a shortcut, for example is
"New" associated with the keyboard shortcut Ctrl + N.
Submenu items can be of four types:
-Simple function, activation leads to the realization of the function.
-Dialog box, selection opens a dialog box. The name of these menu items are always
followed by "...".
- Submenu, selection of this option opens a submenu, its name is followed by "> s ”.
- Menu items can be checked/unchecked. When the item is checked the name is followed by
"> c". It is possible to change the state of an item (checked/unchecked) and close the menu.
Note: Some menu items may be located in a gray state that indicates that this command is
not available. Their name is followed by "> g".
Dialogbox
The dialog box must be closed using one of its menu buttons. Most of the time, it is “Ok” or
“Cancel”, sometimes “Yes” or “No” as an answer to a question.
A dialog box can contain different objects:
-Texts.
-Editable areas (EditBox).
-Editable or non-list (ComboBox) boxes.
-Drop-down boxes (SpinBox).
-Checkboxes (Checkbox).
-Buttons.
It is possible to use reverse/advance the Braille line to read the dialog boxes inside a menu.
Alternatively, you can move the focus from one object to another using the Tab function
(second button in the group of 4 keys on the left) and Shift + Tab (press the 2 keys nearest
you in the group of 4 keys on the left). The selected object will be displayed at the beginning
of the Braille line and all other functions will depend on it.
Management of various objects:
List boxes
Space: Open list.
Up/Down: move up/down in the list.
Start: Focus first element.
End: Focus last element.
Enter: Close list with active list item validation (Ok/Enter).
Escape: Close list without validation (back to the item before opening the list).
9|Page
Tree-folder structure:
The tree-folder structure is composed of 2 types of elements, the path and folders:
-Drives contain other drivers or paths. A path may be displayed in a non-expanded way (its
content is not visible) or expanded (the elements are visible).
Using Braille, the name of items in a tree-folder structure is prefixed by 2 characters:
-The first character may be 'f' for file, 'r' for a closed folder and 'd’ for an expanded folder.
-The second character is the rank of the element in the tree-folder structure.
Up - Down: movement up/down inside the tree-folder-structure.
Left - Right in a path: Right - path is expanded.
Start: First element position.
End: Last visible element position.
Enter: validation of current element.
Dropdown boxes
Up/Down: next/previous item.
Check boxes
Space: Use the Space key to check/uncheck options/items.
Esytime menus (not based on application)
Window menu
The window menu assists the user to:
- Switch from one document to another.
- Configure the application’s graphic appearance.
- Activate/deactivate the Braille simulator/visualizer and the accompanying preview window.
The Braille simulator/Braille visualizer is a graphical window which is placed at the bottom of
the currently open application (it can be detached and moved around with the mouse). It
displays what is currently shown on the Braille line using a graphic Braille pattern and the
corresponding black ink characters. A settings menu allows the user to display buttons and
key strokes in the mouse cursor RegExp and while pressing the Ctrl keys.
The preview window is a window that works with Esynote when a screen/monitor is
attached to Esytime. It visualizes a graphic translation of the current row of the Braille line.
The preview window is very useful for a seeing person who can use the keyboard and the
visualization of the Braille characters to modify a mathematical formula, a musical score or
contracted Braille text.
By default, the Braille visualizing and preview windows are not active, because they are only
useful when a monitor is connected to Esytime.
10 | P a g e
Application menu
This menu assists the user to open one of the Esysuite applications. It also contains
commands to end, put in stand-by mode or restart the Esytime operating system.
Tools menu
The Tools menu contains a set of utilities to view the battery status, the system date and
time, safely remove hardware and for launching a Braille line test function.
The battery menu displays the remaining battery capacity in percent or the currently used
power source. Activating this menu will display a dialog box giving you more information
about the current power supply (external power supply connected, charging...)
The date and time menu displays the system date and time. To alter date or time, open the
menu and use the dialog box to change date and/or time.
The remove hardware menu is gray until a USB-key, SD-card or removable hard disk is
detected by the system. When an external hardware is connected this menu opens a
submenu containing a list of de-connectable devices. Acting on one of these submenus
opens a dialog box for safe removal of the hardware. The status is communicated.
Note: It is important to go through this last step before disconnecting a removable unit.
Window 7 can keep in-memory cache of data exchanged with the unit, proper removal is
necessary to empty this cache.
Test menu
This menu assists the user to activate 3 Braille line test functions:
-
Dot by dot: Pins are raised one by one.
Column by column: 4 columns are raised periodically from the left to the right on the
display.
Line by line: 1.4 pins then 2.5 then 3.6 and 7.8 pins are raised cyclically on the Braille
line.
Press any keyboard key to stop the test run.
Help menu
This menu provides access to:
- Device documentation
- Eurobraille company information
- The characteristics of Esytime, such as Esysuite software version number, the serial number
and the device keyboard version
Parameter menu
This parameter menu includes the Esysuite configuration possibilities. They are grouped in
dialog boxes accessible via the following menus:
11 | P a g e
Braille settings
This dialog box includes all parameters which relates to the presentation of menu items on
the Braille line.
The first group of parameters refers to the presentation of objects.
The second group refers to the presentation of a text by determining the type of text
markup that is displayed.
The third group refers to display of HTML text with or without its specific tags.
Parameter list for presentation of menu objects in Braille:
-One menu option per line
When this setting is enabled a single object appears on the Braille line, there will be a
presentation of the type "Menu: option. To read the following or preceding items use the
up/down arrow keys.
-One list item only
This setting allows the user to act on one list item per time and the previous setting will
apply to all object types.
-Long tags
This setting affects the shape of the tags in a text, they can be displayed in full or
abbreviated in the shape of one letter. This parameter can be toggled by acting on the last
character of a tag.
-Shortcuts inside a menu
Depending on what is selected in this setting, menus will be displayed including the
keyboard shortcut or not.
-Submenu names
A construction of object begins with the display of the main object followed by the character
':' submenu objects. In general the main object is presented in a short form up to 3 letters.
This setting affects the display of submenu options in long or abbreviated form.
-Cursor placed at beginning of Braille line
When this setting is enabled, and a text is opened in Esynote, the cursor will always be
placed at the beginning of the Braille line.
-Word wrap
Activating/deactivating this setting has an effect on the presentation of a word in an object
list. When activated, the Braille line will show only complete words. If a word cannot fit in
full at the end of the Braille line it will be moved to the beginning. 2 keyboard keys; J1
down+ Next 32 char and J1 down + Previous 32 char toggles between showing only complete
words or not.
Keyboard settings
-Using a “Lock application”-feature it is possible to block a number of keyboard shortcuts
which allows the user to interchange applications (Alt + F4 for example).
12 | P a g e
-Use the “Lock Bramigraph”-feature to block the generation of all the Braille keyboard
function keys. Doing so will result in that Braille keys pressed in combinations with key 9 or A
will be ignored. Use the 2 commands; J1 down + J2 left and J1 down + J2 right to lock or
unlock the Bramigraph function.
Voice settings
Use this dialog box to change any of the voice synthesizer settings. Available options:
- Voice list (available synthetic voices)
- Speed control setting ranging from -10 to + 10, position 0 is the initial value
- Adjustment of volume from 0 to 100 (accessible via the shortcut Alt + Up and Alt + Down)
- "Follow focus" – check/uncheck
- "Follow read finger" is available only in the optical version of Esytime. When this item is
checked the speech synthesizer reads the word which is located on the Braille line out loud
whenever the user puts his finger on the first character of the word.
- "Echo any" – check/uncheck to enable or disable voice feedback for all types of echoes for
striking character.
- "Echo char." check/uncheck to enable or disable voice feedback of all characters inserted
by the user.
- "Echo word" to enable or disable voice feedback of complete words inserted by the user.
Esynote settings
This menu item opens a dialog box that contains 2 lists of parameters.
General settings:
-The "default file type" sets the file format which will be selected when a new document is
created in Esynote.
-The “default Braille type” defines the type of Braille (computer, Grade1, Grade2,
mathematic...) used in the first paragraph of a new file.
-The “open default Braille type document" defines which type of Braille (computer science,
literary or short) will be used to convert the text lines in a file when it opens. This setting
affects mainly *.txt, *.rtf, *.pdf, *.docx, and *.html documents.
Grade1 Braille specific settings:
-The "Highlighting" parameter assists the user to associate a highlighted Braille combination
with a literary Braille combination (dots 4-5-6) which indicates a normal bold, italic and
underlined character. It is only possible to highlight the 1st level in Esynote.
-Use the quotation mark setting to select which type of quotation mark should be associated
with the literary Braille quotation mark pattern (dots 2-3-5-6).
This setting only affects the level 1 quotation mark. Esynote also manages 2nd level quotation
marks (dots 4-5 followed by 2-3-5-6 for the opening quote and dots 2-3-5-6 followed by dots
4-5 for closing quote) which will always be represented in black ink characters by a less thansign for the opening quote and more than-sign for the closing quote.
A few examples:
13 | P a g e
AbcAbc
ABCABC
between level 1 quotation mark "a"
between level 2 quotation mark ‹a›
word in bold abc abc
Letter b in bold in a word abc abc
Esyweb settings
Set Home page for web browser.
Battery settings
This menu item allows the user to define at which battery level a warning should be given
that it is time to switch off the device or connect it to an external power supply. As standard,
a warning is given when the charge level reaches 10%. Use the “Default” button to quickly
replace this value.
When this parameter is set, a dialog box will appear as soon as the battery level is less than
or equal to the set percentage. Close this box by choosing not to see it again until the next
shut down of the unit or at warning; “battery charge has reached less than 1%”.
Dialog box settings
Use this menu item to put Esytime in a simplified/reduced access mode.
In the reduced access mode, hard disk navigation is limited through limited access to the
Documents folder, its subfolders and the possibility to connect a USB key. In this menu
mode, the dialog boxes “Open”, “Save As”, and “Esyfile” are affected.
Auto launch settings
Acting on this menu item will open an available applications list submenu. Use the Space key
to check list items/applications that should be launched by default when Esysuite starts.
Braille simulator/visualizer settings
- Select "Include short cut keys" to show the Braille characters including short cut key
commands. Focus is on arrow keys and advance/reverse Braille line.
- Select "Include cursor routing keys" to display the row of buttons above the Braille line.
- Select "Visualization of enabled buttons" (using left Ctrl) to simulate actions on these
buttons. It is enough to place the mouse on the button and press and release the left Ctrl key
of a keyboard.
Language settings
Use this menu to change the language currently used in Esysuite.
Available languages:
- French
-English
More languages are under development
14 | P a g e
Connection parameters
This setting is visible only in the evaluation version of Esysuite. It allows the user to select
the USB or serial port when using Esytime as a Braille device only. Recognized devices are
Esytime, Iris series and Esys series.
Esynote
Esynote is a notepad application compatible with different types of Braille (Computer,
Grade1, Grade2, mathematical and musical Braille). The literary Braille used in Esynote
(French version) is consistent with the "French Braille Code standardized for the conversion
of printed texts (CBFU)" available on the website of AVH or Inja.
File menu
-New
Create a new document. This document type is defined in the Esynote general settings
menu. By default a *.mbe file will be created.
-Open
Select document to open.
This dialog box is a standard Windows “Open” dialog box. The Braille line will immediately
allow the user to type the name of the file:
"Fil:₋"
If you did not change the directory, just type the name of the file and confirm. As soon as the
first letter is entered, the arrow down key lets you browse the list of files that starts with
that letter. Confirm selected file.
To display the list of files do Shift + Tab. In this list the folders are prefixed "d-", "-f" files and
shortcuts 'r-'. Empty folders end with the character ' /'.
Using Tab you can access the different items in the “Open” dialog box:
* The file type
* The "Open" button
* The "Cancel" button
* The header indicating the full path for the displayed folder.
* The new folder button, after pressing this button an editable area is opened, allowing you
to specify a name for the new folder.
* An editable area which is allows the file name entry.
* A list that contains the various items in the folder, open a folder with the Enter key and go
down in the folder using the Backspace button.
- Save
Save changes made in the current document. For a new document, you will be asked to
“Save as”.
-Save as
This menu item opens a dialog box allowing the user to save the current document by
changing the name, document type and/or location.
15 | P a g e
- Close
Close current document. If changes have been made to the document, a dialog box will open
allowing you to save or discard changes.
-Import
Assists the user to open files which are not automatically recognized by Esysuite or when file
import is accompanied by significant data loss.
Managed file types are:
RTF: Rich Text Format
PDF: Adobe Acrobat file.
BRL and BRF: output file (formatted or unformatted) for Duxbury format.
NAT: NAT braille output file.
-Export
Opens a dialog box allowing you to save documents in formats that cannot be displayed in
Esysuite.
Formats are associated with the following file types:
*.mid: file 'midi' for the audio output of musical scores
*.PDF: Adobe Acrobat files
-Emboss
Opens a print dialog box where the user can select embosser and print mode settings (single
sided/double sided printing, margins and number of copies).
Supported embossers are Index version 2, 3 and 4. If required, launch the installation of the
Index printer driver which is pre-installed on Esytime.
-Print
Select printer, paper type, orientation of the paper, print range and copies (all, current page,
pages and selected part).
This function supports printing to black ink printers only.
-Print Preview
Display the document as it will be printed. This dialog box also allows you to print the
document using the previous function.
Edit menu
-Undo (Ctrl + Z)
Undo last changes made. Press key combination several times to undo multiple times.
-Redo (Ctrl + Y)
This command is the opposite of “Undo”. It also allows reverting changes previously made.
-Bookmark
Use this menu to manage bookmarks. A bookmark is a character in the text including dot 8
and it is presented graphically in the form of a small green ball. The number of bookmarks
which can be entered in a document is not limited.
16 | P a g e
This submenu contains 3 commands:
*Add/remove bookmark (Ctrl + F2)
*Go to bookmark (F2): moves the cursor to the next bookmark from the current cursor
position in a document. When the find bookmark function is active, the search starts over
from beginning of document.
*Clear all bookmarks (Ctrl + Shift + F2): this command removes all bookmarks in the current
document.
-Search (Ctrl + F)
This command opens a dialog box allowing the user to search a text. Enter search object and
Braille type in the 2 combo boxes to begin search.
-Find next (F3)
Restart search using the same parameters as those defined last time.
- Replace (Ctrl+H)
This dialog box is similar to the control function. It includes an editable area to define the
replacement text.
-Replace and find next (F4)
This command is useful after running the replace command. This command allows the user
to replace desired text and search for the next occurrence. Move to next position without
replacement by using the “Find next” function.
-Replace all (F5)
This command replaces all occurrences in the document.
Note: the search and replace functions are not case sensitive (uppercase and lowercase are
treated equally). Accented characters are considered full characters (for example 'e' and 'é'
are not treated differently).
- Next Braille type (Alt + Next page)
This command moves the cursor forward in the document from the current Braille type until
the first new Braille type character.
-Previous Braille type (Alt + Previous Page)
This command moves the cursor back in the document from the current Braille type until the
first new Braille type character.
- Cut (Ctrl + X)
Cut out selected text and place it on the Clipboard.
- Copy (Ctrl+ C)
Copy selected text to the Clipboard.
17 | P a g e
-Paste (Ctrl + V)
This command inserts the content of the Clipboard into the document. If a text section is
highlighted, it will be replaced.
-Delete (del).
Use this command to erase selected text in a document.
-Start selection (F8)
This command allows you to enter a mode or all cursor movements lead to an extension or
reduction of the selection. Leave this mode using the ESC key or F8.
-Select all (Ctrl + A).
This command selects the entire document.
-Insert file
This command allows the insertion of a file in the current document. It opens a dialog box
identical to that of the “Open” menu item.
Format menu
This menu includes all the Esysuite supported formatting options for characters and
paragraphs. This menu is only available in combination with Computer Braille. Different
formats are displayed in Braille format as tags e.g. < B > for bold. Use the tags settings in the
Font dialog box to set the visibility of all attributes related to Braille characters.
The setting for paragraph tags allows the user to set the visibility of the tag that indicates the
alignment of a paragraph.
-Character
This submenu opens an attribute list, options are checked or not depending on the
characteristics of the selected characters.
- Font
This submenu provides access to 3 dialog boxes:
* Font name list box: this dialog box presents a list of available fonts.
*Font size list box: this dialog box shows the character sizes available. However, it is also
possible to enter a size in between 2 values.
* Font color: this dialog box allows you to change the character color and background color
for the selected text or the next inserted characters.
-Paragraph
This submenu opens a list showing the paragraph alignment. Depending on number of
selected paragraphs, more than one option can be marked. The paragraphs may be aligned
right, left, centered, or justified.
18 | P a g e
Table menu
Esysuite displays tables in Braille format with the help of tags containing the coordinates of
each cell. Columns are indicated using letters from “A to Z” and lines are numbered.
Meaning < A1 > tag indicates the first column of the first row of the table. It is advisable to
enable the Braille setting table 'tags' to show this type of tag when working with tables. The
width of the cells in a table is automatically sized to the longest word in each column. If a cell
contains many words they are preferably placed on multiple lines in the cell and the length
of the cell changes accordingly.
The principle of automatic cell sizing is simple and corresponds to the design of tables using
one word per cell. There is no defined keyboard shortcuts to move from one cell to another,
the easiest way is to use the key “Next 32char” to move through the cells in a row and the
Up/Down arrows to scroll through a column.
-Insert table
This command allows the insertion of a table at the cursor position.
-Insert line above
This command adds a new row to the table above the line in which the cursor is placed.
-Insert column to the left
This command inserts a new column to the left of the cursor.
-Insert line above
This command adds a new row to the table above the line in which the cursor is placed.
-Insert column to the left
This command inserts a new column to the left of the cursor.
-Merge cells
With this command it is possible to merge several cells. Select the selected cells and run
merge cells command.
-Split cells
Use this command to cancel the merge of 2 cells. It does not allow the splitting of a cell.
Braille type menu
Esysuite knows how to handle the following types of Braille:
-- Computer Braille (tag < B0 >) (Alt + 0): Braille character coding and conversion are carried
out in 8 dot format. In this mode text formatting and Braille text may be set up and
controlled using tags. At the end of this documentation, you will find the table that is used
for the conversion.
19 | P a g e
-- Literary Braille (tag < B1 >) (Alt + 1): this is the traditional 6 dot Braille. Capital letters and
numbers are indicated using a specified Braille prefix combination.
--Contracted Braille (< B2 >) (Alt + 2): using this menu option it is possible to edit Braille in
contracted form. See separate chapter in this documentation for more details. The text will
automatically become translated into non-contracted form before printing or saving in
*.docx, *.html, *.txt or *.PDF format.
-- Mathematical Braille (tag < B3 >) (Alt + 3): using this menu option it is possible to edit
Braille in contracted form. See separate chapter in this documentation for more details.
-- Musical Braille (tag < B4 >) (Alt + 4): using this menu option it is possible to edit or create
musical Braille partitions for printing on a black ink printer or store in midi format.
In the dialog box Braille settings, the "Braille type tags" check box allows you to display or
hide Braille type.
-Change
Use this command to define the currently used Braille type. If part of the document has been
previously selected, the selected Braille will be used for associating a Braille type with the
continued section without conversion.
-Convert
This command assists the user to convert a document into a selected Braille type. If a section
of the document is selected, only the selected text will be converted.
Note: Certain types of Braille cannot simply be converted, this is the case for musical or
mathematical Braille. If these types of Braille are present in a document, a dialog box will
open asking to convert the remaining text into Braille, ignoring the non-convertible sections.
Play menu
The play menu associates a set of voice features to the document opened. It is available to
read a character, word, line of words and the next or previous paragraph from the position
of the cursor.
Math menu
This menu appears when the cursor is in an area of mathematical Braille. It contains the
following submenus:
-Insert
This menu provides access to a large number of commands classified by theme.
They enable to insert the cursor where the corresponding braille on the behalf of the
chosen command sequence.
-Calculate
Use this menu to start calculating the expression or row of numbers where the cursor is
placed.
20 | P a g e
-Check
Use this menu to check the calculation of an expression or row of numbers starting from the
cursor.
Mathematical example:
𝑎 = 11
𝑎 =a+1
𝑎 =a+2
Mathematical Braille insertion must follow the rules established by the commission for the
development of French Braille (Sub commission mathematical Braille), issued before
September 2007.
- Options
This submenu assists the user to set up calculations and display the result.
The display result settings:
Notation: select "not defined format" for a classic view, 'Scientific' or 'Engineer' for more
demanding calculations.
Precision: allows to setting the number of decimals after the decimal point.
Calculation parameter:
Angle: to define the angle unit (Degree or Radian).
Music Menu
This menu appears when the cursor is placed in an area of musical Braille. It provides access
to the following submenus:
- Insert
This submenu provides access to a large number of commands sorted by theme. It assists
the user to insert the cursor in a corresponding Braille area based on selected features.
A chapter at the end of this documentation is devoted to the rules of musical Braille.
Esycalc
Esycalc is a calculator based on a line of editable text accompanied by a set of buttons
corresponding to all inputs or possible functions. These buttons are present primarily for
display on screen and to use with a mouse. The easiest way to use the calculator is via input
using the Braille keyboard keys.
The calculator also supports the following mathematical Braille operators:
Operator
Addition +
Subtraction Multiplication *
Braille pattern
235
36
236
21 | P a g e
Divided by ÷
Equal =
Square root √
Percent %
256
2356
345
345678
File menu
-New
Opens a new calculation.
-Close
Closes the calculator application.
Calculate menu
-Memory
This sub-menu includes all memory functions for storing a value.
-Operator
This sub-menu includes the calculator operators with the exception of the 5 basic operators
(+, -, *, / and =).
Esydico
Esydico is a very easy to use application. It has an edit field named 'Research' where you can
type the first characters of the word you want defined. Use the Tab key to proceed to the
second box which contains the closest definition of the word that was typed in the search
field. This menu option is multi-lined, it is possible to read the information by
advancing/reversing the Braille line in the same way as in an editor. Once a few characters
are typed into the search field, it is possible use the up/down arrows to move from
definition to definition. The search field is then refreshed at the same time as the definition
is displayed.
File Menu
-Dictionary
Select the dictionary to use.
- Close (Ctrl+F4)
Close dictionary.
Esydaisy
Esydaisy is a reader that reads and supports document in Daisy2 format (audio and
combined text). The reader displays available files in a tree-folder structure containing a
summary of the document and a text box where the entire document is displayed when
available. Use the Tab function to jump directly from the summary of the book to the
complete text document. When you start reading the document, the corresponding text
segment is highlighted on the screen and the cursor in the text is placed at the beginning of
this area. When reading a header in the summary, and the area is exceeded, the cursor
jumps to the next header.
22 | P a g e
It's the same when entering the summary section, the position in the text is updated to start
at the beginning of the summary text. A shift in the text also triggers a synchronization of the
table of contents.
File menu
- Open (Ctrl+O)
Use this menu option to select a ncc.html or ncc.htm file inside the main daisy documents
folder.
- Close (Ctrl+F4)
Close application.
- Properties
Displays a dialog box containing the main characteristics of the currently open book (title,
author, date, duration, summary level).
-Last opened files
At the end of the file menu the 5 most recently opened files are displayed.
Menu Edition
- Collapse/expand summary
Allows the user to select a folder containing all document files.
- Search table of contents (Ctrl + M)
Opens a dialog that allows to search in the summary portion of text. In a comboBox the
direction of the search can be entered, and a check box allows the user to set the characters
case sensitivity.
-Search text (Ctrl + T)
Opens a dialog box that lets the user search in the document text. In the same way as when
a search is performed in the summary section, use the comboBox to select the direction of
the search, and the check box to set the characters case sensitivity.
- Find next (F3)
Restarts a search using the same parameters as last time.
Read menu
-Read
Launches the document reader at the selected summary item.
- Pause
Pauses the reading function. The reader will resume reading at the place it was paused.
- Stop
Stop reading.
- Next - Previous
Moves to the next/previous readable item in summary.
Esyfile
Esyfile is a file manager which assists the user to perform different actions in and on a
document such as search, copy, move, rename...
23 | P a g e
Esyfile is also a quick way to open your documents inside the different applications of
Esysuite. It is possible to define Esyfile as an application launched at startup (Auto launch
settings > auto launch) and use it as an alternative to File > Open and File > New in Esynote.
Esyfile consists of a directory list containing folders and files.
Use the described functions below to move through the directories:
Up/Down: move up/down in the items list.
Start: Position on the first element.
End: Position on the last item.
Enter: When in a folder, using the Enter command displays the folder content in list format.
It also takes the user one step down in the disk directory tree. When a file is focused, using
the Enter command opens the document if the file format is recognized by Esyfile.
Backspace: Rebuilds the main folder list content or it takes the user one step down in the
disk directory tree.
File menu
-New
Use this menu option to create a new folder or document. The editable area can be used to
give the file or folder a name.
-Send to
Use this command to copy/transfer files and/or folders between disk units. This menu
option is mainly used to copy files or folders to a USB key.
-Move to
This command performs a similar operation to "Send to" but erases files or source folder up
on transfer.
-Delete (del).
This command deletes the current selection. Attention: Esysuite does not put files or folders
in a trashbin, so this command is irreversible.
-Rename (F2)
This command deletes the current selection, it does not work on multiple selections.
Warning: Esysuite does not put files or folders in a trashbin, so this command is irreversible.
-Properties (Alt + Enter)
This command opens a dialog box that displays the properties of the selected file or folder. It
does not work on multiple selections.
-Close (Alt + Enter)
Close application.
-Search
Display search field (Ctrl + F): activating this menu option modifies the presentation of
Esyfile, an editable area is added to the list of files where the search word can be entered
and a list that contains the results of the latest search.
You can move from one object to another using the Tab function.
Begin the search by typing a key word then press Enter. The list of documents found is
immediately accessible, so you can view it even if the search is not complete. This allows you
to stop the search if the document you're looking for is already available in the list.
When the search is finished, a dialog box will inform you.
24 | P a g e
Start/stop search: this menu can change its label, allowing you to search for the entered key
word or stop the current search.
View folder containing file: this menu allows you to view the folder that contains the file or
folder selected in the list of found files.
Favorites menu
This menu includes the most common locations:
-Documents: Personal documents folder
-Workstation: List of available drives
-USB key: List of available USB keys
Edit menu
-Path (Ctrl + P)
Opens a dialog box containing an editable line edit showing the current folder path. A help
function assists you when you want to change the path, simply type a ' \' for example and
then use arrow functions Up/Down, to see the list of proposed folders.
-Multiple selection (F8)
This command allows the user to mark a multiple selection. A list item is selected when its
wording is framed by the characters ' < ' and ' > '. By default, a single item is selected in the
main list and it is also automatically shown on the Braille display. Using the command
'Multiple selection', it is possible to add one item after another without losing the selection.
When typing a Space, displayed items can added or removed from the selection.
-End selection (F8 or ESC.)
This command terminates the multiple selection possibility. As soon as the focus is moved
on list selection, this will be cancelled and only the currently presented list item will be
selected.
-Select all (Ctrl + A)
This command selects all folders/files from the list.
-Invert selection (Ctrl + I)
This command inverts the list selection.
Esyweb
Esyweb is a web browser. It is composed of an address bar and an area where the web page
is rendered (later simply called web page). The shortcut ALT + d display the content of the
address bar where it is also possible to enter a web site address of your choice. If the text
written in the address bar does not match a valid web address, a Google search will
automatically launch using this text. To validate the text typed in the address bar, press the
Enter key. To return to the web page from the address bar, use the tab key.
25 | P a g e
Braille presentation of a web page
The content of the web page is presented on the Braille display with tags to identify the
links, images, formatting (bold, italic), form elements (edit box, button, check box, dropdown list). Tags can be displayed as a tag long, short, or reduced.
Tag link: < link > or < ln > or _
Image tag: < image > or < img > or _
Tag bold: < bold > or < g > or _
Italics tag: < italic > or < i > or _
Tag edit box: < text > or < te > or _
Tag button < button > or < btn > or _
Tag check box: < check box > or < cac > or _
Tag drop-down list: < list combo > or < ld > or _
The transition from one display mode to another is done by clicking on the character ' > ' tag.
Change of display mode is done in the following order: long, short and reduced, reduced,
short, long, etc. The default display (long or short tag) is done in the dialog box Settings >
Braille.
File Menu
Menu Proceed to
-Link (N)
Moves the focus of the Braille line to the next link.
-Previous link (SHIFT + N)
Moves the focus of the Braille line to the previous link.
-Next edit box (E)
Moves the focus of the Braille line to the next edit box. To enter edit mode, click on the
cursor routing key located just after the sign '='.
-Previous edit box (SHIFT + E)
Moves the focus of the Braille line to the previous edit box. To enter edit mode, click on the
cursor routing key located just after the sign '='.
-Next drop-down list box (Z)
Moves the focus of the Braille line to the next drop-down list box.
-Previous drop-down list box (SHIFT + Z)
Moves the focus of the Braille line to the previous drop-down list box.
-Next (N) button
Moves the Braille display on the next button.
26 | P a g e
-Previous button (SHIFT + N)
Displays the previous button the Braille line.
-Beginning of next block (N)
Moves the focus of the Braille line to beginning of the next block.
-Beginning of previous block (SHIFT + N)
Moves the focus of the Braille line to the beginning of previous block.
-Top of page (N)
Go to beginning of web page.
-End of page (SHIFT + N)
Go to end of web page.
-Beginning of block (N)
Displays the beginning of the current block on the Braille line.
-End of block (SHIFT + N)
Displays the end of the current block on the Braille line.
-Search... (CTRL + F)
Opens a search dialog box. The search dialog box contains a text field to enter the search
text and a check box to set the case sensitivity. The buttons "Search next" and "Search
previous" begins a search forwards or backwards in the current document. Use the 'Cancel'
button to close the dialog box without starting a search.
-Find next (F3)
Moves the focus of the Braille line to the next occurrence (search text and case sensitivity
are defined in the search box).
-Search previous (SHIFT + F3)
Moves the focus of the Braille line to the previous occurrence (search text and case
sensitivity are defined in the search box).
Favorites menu
A favorite is stored in the form of a name of page and a web address (URL). Stored web
pages can be organized into folders. Folders are visible in the Favorites menu and its
submenus. Each folder (or menu) may itself contain other folders (or menus). The menu
Favorites and all submenus (represented by folders) begin with 2 menu items assisting the
user to add current page to Favorites and create a new folder.
-Add current page to Favorites...
Opens the dialog box "New page" which contains 2 editable areas where the name of the
page should be defined and the address of the page. The 2 editable fields are automatically
27 | P a g e
filled with information that corresponds to the current web page. A bookmark is created and
added to the current submenu.
-New folder...
Use the editable area in the “New folder” dialog box to give the new folder a name. Once
the new folder is created, a submenu with the folder name is automatically added. It is then
possible to add the current page in this folder.
-Manage Favorites...
Opens the “Manage Favorites” dialog box that contains a tree-folder structure (which
displays the available folders and Favorites) a checkbox "Hide address" and 10 buttons to
manage the organization of Favorites.
28 | P a g e
Esysudoku
EsySudoku is an external application (i.e. Script) based on the rules of the game Sudoku. The
purpose of the game is to fill a 9 x 9 grid in way that each row, each column and each group
of 9 boxes are filled with all digits from 1 to 9. Figures that cannot be changed are displayed
in the form of a letter from a to i with a = 1, b = 2 up to i = 9. The figures added by the player
are displayed using the digits 1 to 9.
During a game, the set values at the beginning of the game are represented by a letter which
each represents a digit (the 'a' is associated with 1, the 'b' in 2...). Do not confuse these
letters with the figures entered by the player. Digits which should be discovered by the
player are marked by the character 'x'.
To fill out the Sudoku grid, replace an 'x' by moving the cursor above and type the number
that should be placed there. If you change your opinion simply replace the number by the
character 'x' in the same way.
To validate the grid upon completion, use the Braille input function (buttons 9+A).
Esysudoku will tell you if you have lost or won.
Here is an example of a correctly filled out grid:
dga | 3fi | b8e
beh | 1dg | if3
3fi | beh | 17d
------------------8b5 | g14 | fci
93f | hbe | gda
adg | 9c6 | 852
------------------e8b | 47a | 3if
fi3 | e8b | dag
g1d | fi3 | e2h
File menu
-New game (Ctrl + N)
Start a new game.
-Close (Ctrl + F4)
Close the Esysudoku application.
Mode menu
-Line (Alt + 1)
The Braille line shows a line beginning with 'L' followed by the line number. The lines are
numbered from top to bottom.
29 | P a g e
-Column (Alt + 2)
The Braille line shows a column, starting with 'C' followed by the column number. The
columns are numbered from left to right.
-Group (Alt + 3)
The Braille line shows a group, it starts with 'G' followed by the number of the group. The
groups are ordered from left to right and top to bottom.
30 | P a g e
Esybomb
Esybomb is external application (i.e. Script) based on the rules of the Windows game
“Minesweeper”.
The aim of the game is to explore a grid of 10 x 10 boxes without triggering one of the
hidden bombs. When a box is successfully explored, all the boxes nearby are released and a
digit is present in those that are close to a bomb. The digit is representative to the number
of bombs adjacent to this box.
Using the clues (digits), it becomes possible to discover other boxes without the risk of
triggering a bomb and to mark those where a bomb is suspected to be found. The grid is
displayed in the shape of lines, on the Braille line each line begins with the letter "L"
followed by a number. The lines are numbered from top to bottom. Undiscovered boxes are
marked with an 'x'.
To explore a box simply move the cursor above and press Space (Braille keyboard key “A”).
To mark a location which is suspected to be a bomb, place the cursor above the box and
type 'b' or press Backspace (Braille keyboard key “9”).
The aim of the game is to empty the complete grid without triggering one of the hidden
bombs.
File menu
-New game (Ctrl + N)
Start a new game.
-Close (Ctrl + F4)
Close the Esybomb application.
Level menu
-Beginner
When you start a new game 5 bombs will be placed inside the grid.
-Advanced
When you start a new game 10 bombs will be placed inside the grid.
-Expert
When you start a new game 15 bombs will be placed inside the grid.
31 | P a g e
Scripts
As of version 1.1.0 Esysuite is open for adding and creating applications with the help of
JavaScript scripting. Knowledge of the software programs “Qt library” and “JavaScript” is
necessary for the development of scripts for Esysuite. An example of this type of script is the
Esysudoku application.
New applications must be installed in the folder "My Documents/Esysuite/scripts/" in order
to accessible by Esysuite. Interested developers can find files related to Esysudoku in
“C:\Programme\eurobraille\Esysuite\scripts" as well as an API documentation (list of
available functions) accessible via Start > All programs > Eurobraille > Esysuite > EsyAPI.
A good way to start is to copy the esysudoku.esp file and the esysudoku file in the folder "My
Documents/Esysuite/scripts /" then edit the esysudoku.esp file and change the name of the
plugin (directive name:). At the next launch of Esysuite a new game plugin will be available
with the new name. Files can be renamed when the references to these files are altered also
in the Esysudoku.esp file.
It is necessary to modify the .ui file which is the form of the new application file and edit the
Javascript files according to your needs. A menu allowing entry in the debugger is activated
by modifying the directive 'debug' by ' debug: true ' which is located in the esysudoku.esp
file.
32 | P a g e
Esytime keyboard and buttons
Most Esytime Braille keyboard keys emulate those on a standard keyboard. However, unlike
when using a PC keyboard, it is not necessary to press the Ctrl, Alt or Windows keys
simultaneously with another key to create a shortcut. For example, if you want to select an
entire text, press and release the Ctrl key first, followed by the dot “a”.
On the Left side: 4 Vertical keys (from top to bottom)
Previous 32 characters
Esc
Tab
Shift
On the Right side: 4 Vertical keys (from top to bottom)
Next 32 characters
Ins
Alt
Ctrl
Other PC keyboard functions
Esc+Tab = Windows
Esc+Shift=> Context Menu
Esc+Alt = Suppr.
Ctrl+Alt = Ctrl+Alt
Shift+Tab = Shift+Tab
Ctrl+Tab = Ctrl+Tab
Alt+Tab = Alt+Tab
Ctrl+Esc = Open Windows menu
Esc+Previous 32 char = Alt+Shift+1 (emulate Arabic keyboard, Arabic version)
Esc+Next 32 char = Alt+Shift+2 (emulate US keyboard, Arabic version)
Alt + Ins + Next 32 char = Ctrl+End (Document End)
Previous 32 char + Esc + Tab = Ctrl+Home (Document Home)
Esytime Joysticks
Using the Esytime keys, it is possible to simulate PC shortcuts in the following way:
Joystick1
Center-click = Alt+Alt (menu bar)
Joystick2
Left = Left arrow
Right = Right arrow
Up = Up arrow
Down = Down arrow
Center-click = Enter
33 | P a g e
Joystick Combinations
J1 up + J2 down = Bramigraph on
J1 up + J2 down = Bramigraph off
J1 down + J2 up = Activate external USB braille interface port
J1 down + J2 down = Activate internal USB braille interface
J1 down + Previous 32 char + Esc = 1 unimanuel braille keyboard
J1 down + Tab + Shift = 2 unimanuel braille keyboard
J1 down + Ins + Next 32 char = standard braille keyboard
J1 down + Next 32 char = read without using word wrap.
J1 down + Previous 32 char = read including word wrap.
Keyboard shortcuts
Global shortcuts
ALT+Up = Increase speech volume (vocal (vocal syntheziser)
ALT+Down = Decrease speech volume (vocal (vocal syntheziser)
ALT+Right Arrow = Decrease the volume of the Esyplayer
ALT+Left Arrow = Increase the volume of the Esyplayer
Menu application shortcuts
CTRL+SHIFT+N = Move focus to Esynote
CTRL+SHIFT+F= Move focus to Esyfile
CTRL+SHIFT+C = Move focus to Esycalculator
CTRL+SHIFT+P = Move focus to Esyplay
CTRL+SHIFT+W = Move focus to Esyweb
CTRL+SHIFT+F4 = Close application
Window menu shortcut
CTRL+1 to CTRL+9 = Open document 1 to 9
Esyfile shortcuts
Del = Delete a file or folder
F2 = Rename a file or folder
ALT + Return = display the properties of a file or folder
CTRL + F = display search fields
Esynote shortcuts
Dialog box
CTRL + N = create a new document in Esynote
CTRL + O = display the Open dialog box
CTRL + S = opens the Save/Save As dialog box
CTRL + P = opens the Print dialog box
34 | P a g e
Editing
CTRL + Z = Undo last change
CTRL + Y; CTRL + SHIFT + Z = Redo last modified
DEL = Erase the selection or the character
Search/Replace
CTRL + F = Display Search dialog box
F3 = moves on the next character search string
CTRL + H = Display Replace dialog box
F4 = replaces the searched character string
F5 = replaces all the searched character strings
Clipboard
CTRL+X = Cut selection to Clipboard
CTRL+C = Copy selection to Clipboard
CTRL+V = Paste content from Clipboard
Bookmark
F2 = Go to next bookmark
CTRL+F2 =Add/Remove bookmark
CTRL+SHIFT+F2 = Remove all bookmarks
Attributes
CTRL + A = Select entire document
CTRL + G = Toggle Bold
CTRL + I = Toggle Italic
CTRL + U = Toggle Underlined
CTRL + L = Align paragraph to the left
CTRL + R = Align paragraph to the right
CTRL+E = Centre paragraph
CTRL+J = Justify paragraph
Mathematical Braille
CTRL + M = calculate the formula on the current line
CTRL + T = calculate formulas by combining the calculations located in the rows before and
after the cursor
CTRL + D = check the correction of current calculations
CTRL + K = check the correction of calculations located in the rows before and after the
cursor
Braille Type
ALT + 0 = Computer Braille section
ALT + 1 = Literary Braille section
ALT + 2 = Contracted Braille section
ALT + 3 = Mathematical Braille section
ALT + 4 = Braille Music section
35 | P a g e
ALT + Next Page = Move cursor to the next Braille type
ALT + Previous Page = Move cursor to previous Braille type
Tag management
CTRL + ALT + T = tags short/long form
CTRL + ALT + G = bold tags displayed/hidden
CTRL + ALT + I = italic tags displayed/hidden
CTRL + ALT + S = underline tags displayed/hidden
CTRL + ALT + R = strikethrough tags displayed/hidden
CTRL + ALT + A = tag table cell displayed/hidden
CTRL + ALT + H = tag paragraph alignment displayed/hidden
CTRL + ALT + C = tag bullet 'small circle'
CTRL + ALT + D = tag bullet "little disk"
CTRL + ALT + B = tag bullet "small cube"
CTRL + ALT + L = tag all bullets displayed/hidden
Esytime braille keyboard
The Braille keyboard constitutes of 10 keys, 8 finger keys and 2 thumb keys. Each finger key
responds to a Braille dot.
They are line out like this, from left to right: '7 3 2 1 4 5 6 8' .
The 2 thumb keys are assigned from left to right: '9' and 'A'.
Unlike when using short cut keys on a PC, you have to press and release the Esytime key
followed by the next key when you want make a short cut combination. For example: to do
ctrl+alt+a you have to press and release ctrl, press and release alt and then press and release
“a”.
If you want to do alt followed by a letter just press and release alt followed by the letter. If
you want to do alt alone (go to menu bar) it is necessary to press and release the key
combination for alt twice.
When using a screen reader software and the key combination Alt + Tab is required to open
the Window Panel application, it is necessary to use other combinations for the ALT key.
Using the Braille combination 81A (Alt) and 84A (Alt released) allows to lock and unlock the
state of the ALT key.
For example to do Alt, followed by press and release Tab twice and then release Alt, it is
necessary to use the Braille combinations 81A, 256A, 256A and 84A. The same functionality
is available for the Ctrl key using the Braille combinations 78A, 781A and 784A.
36 | P a g e
Braille functions (Bramigraf)
9 - Backspace
A - Space
9A - Enter
1245A - Escape
236A - Del
256A - Tabulation
235A - Shift+Tabulation
345A - Enter
123A - Home
456A - End
13A - Page up
46A - Page down
2A - Left
5A - Right
4A - Up
6A - Down
35A - Insert
135A - Insert
36A - Del
1346A - Print screen
14A - Pause
246A - Enter
23A - Home
56A - End
12A - Page up
45A - Page down
24A - Left
15A - Right
1A - Up
3A - Down
26A - Insert
2356A - Del
12349 - Start menu (to do win+m press12349 then m)
569 - Contextual menu
19 - F1
129 - F2
149 - F3
1459 - F4
159 - F5
1249 - F6
12459 - F7
1259 - F8
249 - F9
2459 - F10
139 - F11
37 | P a g e
1239 - F12
259A – Divided by/slash on numpad
359 – Multiplied by/star on numpad
369 – Subtraction/minus on numpad
2359 – Addition/plus on numpad
79 - Caps lock.
89 - Caps unlock
39 - Numpad lock
69 - Numpad unlock
7A - Shift
78A - Ctrl
178A Ctrl pressed (outside Esysuite only)
478A - Ctrl released (outside Esysuite only)
8A - Alt
18A - Alt pressed (outside Esysuite only)
48A - Alt released (outside Esysuite only)
Computer Braille (8 dot)
The Braille table used in the Esysuite is the computer braille table defined in 2007, by the
commission for the Evolution of French Braille, for the CP-1252 character set.
ANSI Code – Braille dots – Character description
0-123458 - Null
1-1234678 - beginning of-head
2-1258-beginning of text
3 - 123468 - end of text
4 - 14578 - end of transmission
5-158 - Request
6 - 12478 - Confirmation
7 - 12458 - Tone
8 - 12578 - BACKSPACE
9 - 124678 - horizontal tab
10 - 24568 - Line spacing
11 - 138 - vertical tab
12 - 12378 - page forward
13 - 13478 - carriage return
14 - 13458 - out shift
15 – 2368 - in shift
16 - 123478 - data link escape
17 - 1234578 - control device (1)
18 - 123578 - command device (2)
19 - 23478 - command device (3)
20 - 234578 - command device (4)
21 - 13678 - negative confirmation
22 - 123678 - Synchronization
23 - 245678 - end of transmission block
38 | P a g e
24 - 134678 - Cancellation
25 - 12368 - end of support
26 - 15678 - Substitution
27 - 125678 - Exhaust
28-14678 - separator file
29-12678 - group separator
30-2357 - record separator
31-2367 - separator unit
32 - Space
33 - 235 - exclamation point
34-2356 - Quotes
35 - 34568 - Sharp
36 - 357 - Dollar
37 - 3468 - percent
38 - 1234568 - copyright
39 - 3 - Apostrophe
40 - 236 - Left paraenthesis
41 - 356 - right parenthesis
42 - 35 - Asterisk
43-23578 - More
44 - 2 - decimal
45 - 36 - Indent
46-256 - Point
47 - 34 - slash, slash
48-3456 - Zero
49 - 16 - One
50 - 126 - Two
51 - 146 - Three
52-1456 - Four
53 - 156 - Five
54-1246 - Six
55 - 12456 - Seven
56-1256 - Eight
57 - 246 - Nine
58 - 25 - two - points
59. 23 - point - decimal
60 - 238 - Lower
61 - 235678 - Equal
62 - 567 - Superior
63 - 26 - question mark
64 - 345 - a commercial, at-sign
65 – 17 - uppercase a
66 - 127 - uppercase b
67 - 147 - uppercase c
68-1457- uppercase d
69-157 - uppercase e
70-1247- uppercase f
39 | P a g e
71 - 12457 - uppercase g
72-1257- uppercase h
73 - 247 - uppercase i
74-2457- uppercase j
75 - 137 - uppercase k
76-1237- uppercase l
77-1347- uppercase m
78 - 13457 - uppercase n
79-1357 - uppercase o
80 - 12347 - uppercase p
81 - 123457 - uppercase q
82 - 12357 - uppercase r
83-2347 - uppercase s
84 - 23457 - uppercase t
85-1367- uppercase u
86 - 12367 - uppercase v
87 - 24567 - uppercase w
88 - 13467 - uppercase x
89-134567 - uppercase y
90 - 13567 - uppercase z
91 - 23678 - left bracket
92 - 348 - backslash
93 - 35678 - right bracket
94 - 4 - circumflex
95 - 578 - stressed
96 - 6 - grave accent
97 - 1A - small
98 - 12 - lowercase b
99 - 14 - lowercase c
100 - 145 - lowercase d
101 - 15 - lowercase e
102 - 124 - lowercase f
103-1245-lowercase g
104 - 125 - lowercase h
105 - 24 - lowercase i
106 - 245 - lowercase j
107 - 13 - lowercase k
108 - 123 - lowercase l
109 - 134 - lowercase m
110-1345-lowercase n
111 - 135 - lowercase o
112-1234-lowercase p
113 - 12345 - lowercase q
114-1235-lowercase r
115-234 - lowercase s
116-2345- lowercase t
117 - 136 - lowercase u
40 | P a g e
118-1236 - lowercase v
119-2456 - lowercase w
120-1346 - lowercase x
121-13456 - lowercase y
122-1356 - lowercase z
123-2378 - left curly bracket
124 - 4568 - vertical bar
125-5678 - right curly bracket
126 - 38 - tilde
127-1238 - cancellation character
128-1578 – euro sign
129 - 12345678 - not used
130 - 67 - quote - less comma
131-1248 - f tiny hook
132 - 56 - quote - comma double bottom
133 - 368 - ellipsis
134-3568 - dagger
135-3567-double dagger
136 - 48 - accent circumflex
137 - 34678 - per thousand
138-234678 - capital s caron
139 - 57 - single quotation mark to the left
140-2467-capital oe
141 - 12345678 - not used
142 - 135678 - uppercase z with caron
143 - 12345678 - not used
144 - 12345678 - not used
145 - 68 - quote - apostrophe tumbled
146 - 37 - quote - apostrophe
147 - 378 - quote - apostrophe double tumbled
148 - 678 - quote - double apostrophe
149 - 124578 - chip
150 - 478 - indent half - em
151 – 4578 - em dash
152 - 467 - lowercase tilde with hunting
153 - 23458 - trademark
154-23468 - s lowercase caron
155 - 58 - single quotation mark to the right
156 - 2468- lowercase oe
157 - 12345678 - not used
158 - 13568 - lowercase z with caron
159 - 145678 - umlaut capital y
160 - 7 - non-breaking space
161-2358 - point inverted exclamation
162-1478 - penny
163 - 237 - book
164 - 45 - currency symbol
41 | P a g e
165-25678 - yen
166 - 458 - broken vertical bar
167 - 12348 - < paragraph >
168 - 46 - umlaut with hunting
169 - 148 - copyright
170 - 1678 - feminine ordinal indicator
171 - 23568 - left quotation mark
172-2567 - negation
173 - 78 - hyphen
174 - 12358 - trademark
175-1348 - macron with hunting
176-267 - degree
177 - 3678 – plus/minus
178 - 457 - superscript two
179 - 4567 - superscript three
180 - 5 - acute accent with hunting
181-257 - micro
182 - 45678 - < end of paragraph > fly foot
183 - 8 - middle dot
184 - 456 - cedilla with hunting
185 - 47 - one Exhibitor
186-2678-masculine ordinal indicator
187 - 23567 - straight quotation mark
188 - 1368 – one quarter
189 - 468 – one half
190 - 13468 - three quarters
191 - 268 - inverted question mark
192 - 123567 - has capital grave accent
193 - 1235678 - a with acute capital
194 - 167 - a with circumflex capital
195 - 178 - a capital with tilde
196 - 34567 - a capital with diaeresis
197 - 27 - a capital ring above
198-3457-capital ae
199 - 123467 - capital c with cedilla
200-23467 - capital e grave accent
201-1234567 - capital e with acute
202-1267 - capital e with circumflex
203-12467 - capital e umlaut
204-2478 - capital i grave accent
205 - 347 - capital i with acute
206-1467 - capital i with circumflex
207 - 124567 - capital i umlaut
208-1278-capital eth
209 - 134578 - capital n with tilde
210 - 13578 - capital o grave accent
211-3467 - capital o with acute
42 | P a g e
212 - 14567 - capital o with circumflex
213-1378 - capital o with tilde
214 - 24678 - capital o with diaeresis
215-3578 - multiplication
216 - 345678 - crossed obliquely capital o
217 - 234567 - u accent grave shift
218 - 2345678 - capital u with acute
219-1567 - capital u with circumflex
220 - 12567 - capital u with diaeresis
221-1345678 - capital y with acute
222 - 24578 - capital thorn
223-2348 - lowercase hard s, German sz
224 - 12356 - lowercase a grave accent
225 - 123568 - lowercase a with acute
226 - 168 - lowercase a with circumflex
227 - 18A - small tilde
228 - 34578 - lowercase a with diaeresis
229 - 28 - lowercase a ring above
230-3458-lowercase ae
231 - 12346 - c, lowercase cedilla
232-2346 - lowercase e grave accent
233-123456 - lowercase e with acute
234-1268 - lowercase e with circumflex
235-12468 - lowercase e with diaeresis
236 - 248 - lowercase grave i
237 - 3478 - acute lowercase i
238 - 1468-lowercase i circumflex
239 - 124568 - lowercase i Dieresis
240 - 128 - lowercase eth
241 - 1245678 - lowercase n tilde
242 - 1358 - serious lowercase o
243 - 346 - acute lowercase o
244 - 14568 - lowercase o circumflex
245-4678 - lowercase o tilde
246 - 358 - lowercase o with diaeresis
247-2578 - division
248 - 568 - lowercase o crossed obliquely
249 - 23456 - lowercase serious u
250 - 234568 - lowercase u acute u
251-1568-tiny circumflex u
252 - 12568 - u with diaeresis tiny
253-134568 - y with acute lowercase
254-2458- lowercase thorn
255-2568 - y with diaeresis tiny
43 | P a g e
Reminder – Grade1 Braille rules
The 63 signs
BRAILLE - ANSII - SIGNIFICATION
1 - 97 - a
12 - 98 - b
14 - 99 - c
145 - 100 - d
15 - 101 - e
124 - 102 - f
1245 - 103 - g
125 - 104 - h
24 - 105 - i
245 - 106 - j
13 - 107 - k
123 - 108 - l
134 - 109 - m
1345 - 110 - n
135 - 111 - o
1234 - 112 - p
12345 - 113 - q
1235 - 114 - r
234 - 115 - s
2345 - 116 - t
136 - 117 - u
1236 - 118 - v
1346 - 120 - x
13456 - 121 - y
1356 - 122 - z
12346 - 135 - ç
123456-130-e acute accent
12356 - 133 - a grave accent
2346-138-e accent grave
23456 - 151 - u accent grave
16 - 131 - a with circumflex
126-136 - e with circumflex
146 - 140 - i with circumflex
1456 - 147 - o with circumflex
156 - 150 - u with circumflex
1246-137-e umlaut accent
12456 - 139 - i with diaeresis
1256 - 129 - u with diaeresis
246-14-e in o
2456 - 119 - w
2 - 44 - comma
23-59 - semicolon
44 | P a g e
25-58 - 2 points
256 - 46 - point
26 - 63 - Question mark, indicator of early identification of 2nd type within a Word
235 - 33 - exclamation point
2356 - 34 - opening or closing Quote
236 - 40 - Open parenthesis
35 - 42 – Question mark, end of 2nd type within a word highlighting
356 - 41 - Closed parenthesis
3-39 - Apostrophe, Point, space between numbers
34-47 - slash
345 - 64 - At symbol
3456 - 216 - Empty set
346 - 243 - Footnote indicator
36-45 - Union line, line of conduct
4 - 94 - Exhibitor or elevation indicator
45 - 164 - Modifier 1
456 - 184 - General highlighting indicator
46 - 168 - Shift indicator
5-180 - Modifier 2, continuation notice in mathematical, computer or scientific expressions
56-132 - Base value indicator, general indicator of end of being prominent within a Word
6 - 96 - Mathematical modifier
Numbers and arithmetic signs
BRAILLE - REPRESENTATION - SIGNIFICATION
3456 - 0 - Zero
16 - 1 - One
126 - 2 - Two
146 - 3 - Three
1456 - 4 - Four
156 - 5 - Five
1246 - 6 - Six
12456 - 7 - Seven
1256 - 8 - Eight
246 - 9 - Nine
235 - + - Plus
36 - - - Minus
35 - x – Multiply by
25 - ÷ - Divide by
2356 - = - Equal to
Symbols
BRAILLE - SIGNIFICATION
246, 135 - Chip
256, 256, 256 - Ellipsis
36, 36 - Indent
5, 14 - Copyright
45 | P a g e
5, 135 - Degree
5, 1234 - Symbol of paragraph, section
5, 1235 - Trademark
5, 2345 - Trademark
5, 123456 - At commercial, ampersand
5, 26 - Tilde
5, 35 - Asterisk
5, 3456 - Sharp
5, 346 - Percent
5, 346, 346 – Parts per thousand
5, 36 - Line underscore
5, 34 - Backslash
45, 14-Cent
45, 15 - Euro
45, 123 - Book
45, 234 - Dollar
45, 13456 - Yen
45, 2356 - Quote opening level 2
2356, 12 - Quotation mark closing level 2
6, 6, 2356 - Quote opening level 3
2356, 3, 3 - Close quote level 3
45, 236 - Hook opening
356, 12 - Bracket
6, 6, 236 - Brace opening
356, 3, 3 - Closing brace
5, 126 - Less than
5, 345 - Greater than
45, 126 - Less than or equal to
45, 345 - Greater than or equal to
235,36 - More or less
46,2356 - Unequal to
45, 1234 - pi
46 | P a g e
Reminder musical Braille rules
Braille music is based on the "New International Manual of Braille Music Notation"
specification published by "World Blind Union”. Before starting to write or editing a musical
score, we recommend making yourself familiar with these rules.