1
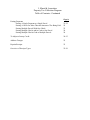
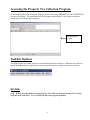
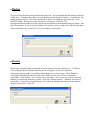
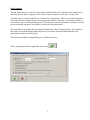
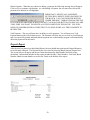
J. Mauel & Associates Property Tax Collection Program User Manual Update: November, 2015 TECHNICAL SUPPORT: (800)561.6823 J. Mauel & Associates Property Tax Collection Program Table of Contents Page(s) Welcome 1 Technical Assistance 1 System Requirements 1 Accessing the Tax Collection Program 2 Taskbar Options - System Backup Restore Setup Database Options Change Year Exit 3 3 4-7 7 7 8 Taskbar Options – Batch Options View A Batch Close and Print a Batch Edit A Batch Deposit Report 9 10 10-12 12 Taskbar Options – Data Transfer Import Data From County Import Data From Third Party Import Data From Web Transfer Data to County Transfer Data to Municipality 13 14 14 14-15 15 Taskbar Options – Reports 16-19 Taskbar Options – Miscellaneous 19 Taskbar Options – About 19 Main Program Screen Features – Overview Choosing Selected Parcels Select All, Unselect All, Select Block Searching for Parcel or Bill Number View Payment History, Special Assessments or MFL/FCL 20 20 20-21 21 21 J. Mauel & Associates Property Tax Collection Program Table of Contents - Continued Page(s) Posting Payments Posting A Single Payment to a Single Parcel Posting A Check for More Than the Amount of Tax Being Paid Posting Multiple Parcels With One Check Posting Multiple Checks and/or Cash to One Parcel Posting Multiple Checks/Cash to Multiple Parcels 21-22 22 23 24 24 To Adjust a Lottery Credit 24-25 Address Changes 25 Reprint Receipts 25 Overview of Receipts Types 25-26 Welcome The Property Tax Collection Program has been designed to assist municipalities in making payments, deposits and reporting on a daily basis. It stores the important information that allows the municipality to keep an accurate detail of payment history. The program allows the user to print comprehensive reports to fit their specific municipal needs. Technical Assistance J. Mauel & Associates provides technical assistance with your yearly maintenance fee. Please call (920) 532-0540 and should you receive voicemail, please leave your name, phone number and message and we will return your call in the order it was received. For training manuals, tutorials and installation instructions, please go to www.jmauelassociates.com . System Requirements Windows 7, 8, 8.1 or Windows 10 - compatible Highspeed Internet Connection (preferred). This is used for any technical support should a technician need to log into your pc to help you. -1- Accessing the Property Tax Collection Program To access the Property Tax Collection Program, double-click on the PROPERTY TAX COLLECTION icon on your desktop. The main menu screen will appear (shown below). This screen is the main navigation screen for the entire program. Main Program Screen Taskbar Options The taskbar items are located at the top of the Main Program Screen (above). When the user clicks on one of the taskbar items, a drop-down screen will appear with more options for the user to choose. System FAQ – Will the program backup both the Property Tax Collection Program and the Pet Licensing Program at the same time? No, you MUST backup each program separately. -2- ■ Backup The user will be allowed to backup data at their discretion. We recommend that data backup is done on a daily basis. To backup data, choose System, Backup from the System Task Bar. A message box will appear (example below). Click on the destination in which you would like the backup file. Click BACKUP button. Backup successful message box will appear. Click OK. The propertytaxcollection.mdb file has been placed on your desktop or the destination that you choose. Exit out of the program. If you saved your backup to the desktop, you may right-click on the file and choose Send to and send a copy of the file to a CD or a flashdrive (removable). ■ Restore The Restore is needed should your hard drive crash, purchase of a new computer, etc. To Restore, Click on System, Restore and the following screen will appear. If you have copied the propertytaxcollection.mdb to your desktop, bullet desktop or you may insert a CD or flashdrive (removable) and bullet other and click the yellow folder to select your CD drive or flashdrive (removable). Click Restore. You will now receive a message “Are you sure you want to restore the database to a previously backed up version? Click OK. Message appears….Database was restored successfully. You need to close the Property Tax Collection Program and restart it for the database changes to take effect. Click OK. -3- Setup The screen below allows the user to input the data based on their individual needs. Each municipality must enter this after the program is installed on their computer. Municipality Tab This tab allows the user to input the information for their particular municipality (example screen below). The user MUST input all applicable data. Payment Options - Tab This tab allows the user to choose the default on the payment options. For example, if the treasurer has most people paying First Installments, then they should click on the circle next to the First Installment and then the field will be bulleted. This will follow through to the Main Payment Screen and the user will notice that whenever a parcel is chosen, the “Payment Type” is already bulleted for them. This information will be the same for all stations if you are on a network setup. -4- Search Options – Tab This tab allows the user to choose Default Search Criteria. The selected item here will become the default search criteria on the main payment screen. For example, if you always search for parcels by last name, then choose last name here. This information is local to this machine and, therefore, will not be the same for every station if you are on a network setup. To choose the search option that you would use the most, simply click on the circle next to the selection name and then click on the “checkmark” (which means OK). The user can change this at any time to suit their needs. Export Options – Tab The selected item below will become the default export criteria when exporting files. For example, if you frequently export a range of batches, then bullet Export Range of Batches. This information is local to the machine and can be changed at any time. Export Type – This is defaulted to Original unless J. Mauel and Associates requests you to change it. -5- Receipt Options -Tab This tab allows the user to choose the Number of Receipts to Print as well as choose Receipt type (see Sample of Receipt Types in Table of Contents). A Real Estate Receipt Message can also be added to each receipt that is printed. For example, Thank you for your payment. Bank Account Number can be entered if the municipality would like it to be printed on their Deposit Report. Print Receipt by Default - If the box is checked, the print receipt checkbox on the payment screen will always be checked. Therefore, a receipt will always print. Post Feb. Payment in Jan. until – this should be changed only if requested by J. Mauel staff. Printer Options - Tab This tab allows you to choose the printer that you would like your reports and receipts to print to or leave it as the default printer. This information is local to the machine and, therefore, will not be the same for every station if you are on a network setup. By clicking on the “down arrow” next to the Printer text box, the user can change the printer destination. Click on the “Checkmark” to accept the change. -6- Other Options This tab allows the user to enter his or her initials and the initials will be defaulted in the Initials Field each time the user makes a payment. This feature was developed to save the user “keying” time. The Bank Code is used for banks that are collected for a municipality. There are several municipalities in the state that have multiple banks collecting payments for them. Therefore, each bank would have a code and this code is used in printing reports. The code that is used for the banks is a fictitious code and your municipality can choose any number to identify the individual banks. The Send Refunds from Bank has been added for banks that collect for municipalities. By clicking on this feature, any refunds that the bank has paid out will transfer when the bank downloads to the municipality (usually on a daily basis). All other items should be changed by direct of J. Mauel staff only. After completing the fields as applicable, click on the -7- . Database Options Network Users would use this function because the database for networks is located on the server. The user would install on each standalone computer as usual. However, after installing, the user must then point the program to the database location in order to access the database. If the user is a standalone PC, then the user simply clicks on Create Database. If the user is networked, then the user would click on Open Database and browse for the database on the server which would be propertytaxcollection.mdb and is located in the Property Tax Data Folder. Change Year This feature gives the user the ability to look at prior year data. By clicking on System>Change Year>Previous Year, the user may then access the prior year data. Note: After reviewing any prior year data, you should change the year back to the “current” year. To do this, click on System>Change Year>Current Year. Exit By clicking on System>Exit, the user is has the ability to exit the system. Please note, the user has the option to minimize the Property Tax Collection Program as well (click on the box with the underline in it in the upper right corner). -8- Batch Options View a Batch This option allows the user to view any batch that has been entered. By clicking on the arrow next to the text box, the batch numbers will appear and the user is able to choose the batch. The user must then click on the “checkmark”. The information shown on the View a Batch report includes Bill Number, Property Type, Owner, Paid By, Receipt Number, Receipt Data, Check Number, Operators Initials, Check Paid, Cash Paid and Refund. Please note that totals are shown on the bottom on the report. If you wish to simply “view” the information on the screen without printing, click the “x” in the upper right corner to get out of the screen and back to the program. Example of View a Batch below. -9- Close and Print a Batch After the user is done entering in the current batch, the user must then choose Close and Print a Batch from the Batch Options taskbar item. It is highly recommended that the user Views a Batch prior to Close and Print a Batch. During busy season, it is highly recommended that the user keeps the batches between 50 & 100 payments. Should you have a problem reconciling at the end of the day, it is much easier to find the error in a smaller batch. After printing the batch, review and retain for your records. NOTE: The Batch Report will automatically print. Edit a Batch (Deleting Payments) Edit a Batch is used when the user would like to go back to a previous batch and add or delete a batch item. Choose Batch Options>Edit a Batch. Choose the batch number from the drop-down arrow on the right side of the text box (example screen below) and click on the checkmark. -10- The screen below will appear and the user has the ability to choose (by clicking on the parcel and highlighting it) Add Payment, Edit Payment, Delete Payment or Delete All Payments. Add Payment – By choosing add payment, the payment screen will appear and you will notice a message indicating that you are working in a batch number other than the current batch. The user may enter and post the payment with the normal posting procedures. After the payment has been posted, the user should click on Return to Current Batch (located in upper-middle of screen). Edit Payment – When the user chooses Edit Payment, the screen below will appear. The user must first choose a parcel by clicking on it (it will highlight). Notice the user may only change the items that are not disabled. Payment amount changes may not be done in Edit Payment. The payment must be Deleted and then re-entered under Add Payment. -11- Delete Payment – When the user chooses to delete a payment, the following message box will appear. Click on Yes to continue with deletion. As with Editing a Payment, the user must first click on the payment to be deleted (it will highlight). IMPORTANT: DELETE ALL PAYMENTS BUTTON WILL DELETE EVERY PAYMENT IN THE BATCH. YOU CAN FIND THIS BUTTON UNDER THE MISC. TASBAR ITEM ON THE TOP OF YOUR MAIN PROGRAM SCREEN. DO NOT CLICK ON THIS BUTTON UNLESS YOU ARE VERY SURE YOU WANT TO DELETE ALL THE PAYMENTS IN THE BATCH. YOU WILL NEED TO CONFIRM SEVERAL TIMES THAT YOU WOULD LIKE ALL THE PAYMENTS TO BE DELETED. Void Payment – The user will now have an ability to void a payment. You will now see a Void Payment button in the Edit A Batch screen. The function will allow the user to click on Void Payment and a receipt will be printed indicated that the payment was voided and the program will automatically delete the payment from the batch. Deposit Report After the user has printed our their Batch Report, the user should then print out the Deposit Report to reconcile totals collected. The Deposit Report is accessed by choosing Batch Options>Deposit List. The screen below will appear and the user must then choose the batch number and click on the checkmark. Information included on this report include Paid By, Check Number, Total Paid, Batch Number, Bank Account Number as well as the Totals at the bottom of the report. -12- Data Transfer Import Data from County Saving your Import File to the Desktop Below is an example of an Outlook Account. If you use a program other than Outlook, the steps will be similar but you may call our office if you need assistance. Open the email from the County. Right Click on the attachment from the County. The file name: Munitax.dat (or the County may name it your municipality name) Left click on Save As… . In the Save Attachment Text Box, scroll in the left text box and choose “Desktop”. Click Save and exit out of your email. Now that import file has been saved to your desktop, follow the steps below to import the data: Double-click on your Property Tax Program Click Data Transfer Click Import Data from County. Click on Choose Import Location. The Open Box will appear. Near the top of this box you will see Look In: (or This PC) with a down arrow to the right of it. Click on the down arrow and choose Desktop or you can choose Desktop from the column on the left. Click on the file from the county (usually named MUNITAX.dat or your municipality name). Click Open. The next box reads………Would you like to move this years data to last years? If you are importing the data for the second time this year—because of an error the first time—you must select NO, otherwise you will delete last year’s data. CLICK ON “YES” because it is the first time you are trying to import your tax data from the county. Current database was successfully moved to previous year will appear. If you receive an error after this point, do not move this year’s database to last year when attempting to import the county data again. Click “OK” to continue. You will see a blue progress bar run across the screen (this usually takes less than 30 seconds to load the data). Click OK when finished. Print the Import Totals Report for your records. Your data has been successfully loaded. You may now “X” out of the Import Totals Report and begin processing payments. -13- Import Data from Third Party This feature is used for financial institutions that assist the municipality in collections. The bank/financial institution will send the data to the municipality and the municipality must then import the data into their program. To do this, the municipality must click on Data Transfer (from Taskbar), Import Data from Third Party. Click on Choose Import Location. The Open Box will appear and the municipality must use the Down Arrow to the right of the Look In: test box to choose the file. The file from the bank/financial institution is 3rdparty.dat. Click on 3rdparty.dat and Click on Open (bottom right). The program will indicate that the import has been completed once the process is finished. Import Data from Web If the user is having a financial institution collect using the web-based tax collection program, to import the data into the municipality program, please follow the steps below: 1. 2. 3. 4. 5. 6. 7. The batch file (from the financial institution) will be emailed to you directly out of the J. Mauel Web Tax Program. Save the file to your desktop. Click Data Transfer (taskbar item) Click Import Data from Web Select the Import File. Import Complete will appear. Click on Batch Options, View A Batch and print off the batch for your records. The program will automatically begin a new batch for municipal tax processing. Transfer Data to County At the end of the collection period (or whenever the County requests the collections), the user must send the data to the County. To transfer the data back to the county, Click on Data Transfer (from Taskbar), Click on Transfer Data to County. The Select Batch Range Box will appear. Export All Batches will be bulleted. Click OK. The Message Box below will appear……You may choose to send the file to the Desktop or Other (then choose destination). Click Export. -14- The next screen appears. Click OK. You will now see the Export Totals Report on your screen. Please keep a printed copy for your records. Your data for the county has been placed on your desktop (or at the destination that you choose) titled MUNIPMT.dat. You can now email the file, copy it to a flashdrive to give to the county or copy it to a CD for the county. Transfer Data to Municipality (for financial institutions that use Windows Program Based on the agreement between the municipality and financial institution (usually daily), the financial institution needs to transfer the data back to the municipality. To transfer the data to the municipality, Click on Data Transfer (from Taskbar), Click on Transfer Data to Municipality. The Select Batch Range Box will appear. Export Last Batch will be bulleted or you may choose your range of batches. Click OK. Confirm the batch number to be exported. Click OK. Progress Bar….Please Wait The following screen will appear indicating that the file has been exported. Click OK. You will now see the Export to Municipality Totals Report on your screen. You may now click the “X” (click on the box on the upper right side of screen). You will be brought back to the Main Program Screen. Your data for the county has been placed on your desktop or the destination that you have chosen titled 3rdparty.dat. You can now copy the file to flashdrive, burn it to a CD (by right-clicking on the file and sending it to your CD burner – you must know how your burning program works) or email the file to the municipality. -15- Reports NOTE: The report will be displayed and if the user wishes to print, click on the picture of the printer on the upper right side of the screen. If the user would like to export the file (so the file can be emailed or saved to their documents) click on the Export Button and export it (usually in PDF format) and save the report to the desktop, Documents or wherever the user wishes. Lottery Credit Reports Late Claim Lottery Credits Report – This report lists the changes in the lottery credit made by the local treasurer. Detail of late lottery credits and reduced lottery credits (pre-certified lottery credits that were canceled) on all closed batches will be listed, along with totals. Lottery Credit Detail Report – This report will list the detail on the lottery credits. This report list the owner name, parcel number and lottery credit amount on each parcel. The report is totaled on the last page and a total count of lottery credits is given. Lottery Credit Summary Report – This report will be a summary of the lottery credits as printed on the tax bills. The report lists the total lottery credits claimed and the total lottery credit dollars claimed. Mailing Labels Reports Mailing Labels Reports can be chosen by Property Type, Selected Parcels, Zip Range and Address 1. The labels are formatted to use Avery 8160 (or generic equivalent). MFL/FCL Reports Detail Report – This report shows the status of your MFL and FCL detail. Information shown on this report includes Name, Parcel Number, Bill Number, Description, Tax Amount, Tax Paid, Tax Due and Grand Totals. MFL/FCL Amount Paid Per Code (All Payments)-This report shows the Code, Description and Amount Paid. Please note, payments from previous batches/batch range/date ranges are not taken into account for these totals. They are only taken into account if you run the report for your entire range of collection. This report may also be chosen to run by Batch, Batch Range and Date Range. Miscellaneous Reports Address Changes – Select this option to print the Address Change Report for the County. When you make an address change, your file is updated immediately. The County keys in all of the address changes. They do not get transferred with your data at the end of collection so it is important to print this report for the County. Some County Treasurers or Tax Listers may request this report several times throughout the year or may just want it at the end of collections and before the new tax bills are printed. Please note that the address change report will provide you with the old address as well as the new address. -16- Batch Edit by Operator Initials – This report allows the user to choose a batch and the batch will be sorted by operator initials. This report is useful for municipalities where more than one person is collecting payments. The report will provide all of the Batch information as well. Import Totals – This report allows the user to reprint the import totals that initially print out when they do the first step in the collection process which is “Import Data from County”. Should the treasurer lose the printout or perhaps they had an issue with their printer, they can simply reprint the report. Export Totals (Data will be from last export ran) – This report allows the user to reprint the export totals that print out when “Transferring Data Back to County”. Should the treasurer lose the printout or perhaps they had an issue with their printer, they can simply reprint the report. The data will be from last export ran so if the treasurer decides to run the report during the middle of collection, all totals will not be valid. The treasurer must do the “Transfer Data Back to County” before they can run this report for accurate totals. Other Payment Reports – Other Payments Report – The other category is for posting any payment made along with the tax payment on a check, but not listed on the tax bill. Some examples are property owners paying another invoice along with the taxes on one check, such as gravel purchased from the municipality, extra principal on a special assessment like water or sewer main, or even a monthly or quarterly water/sewer bill added along on the same check with the taxes. In order for your deposit total to match your checks, post the extra amount to the other category. The “other” payments do not get transferred to the County because it was for payment of something not found on the tax bill and was retained by the municipality. Information contained in this report would include Name, Batch #, Parcel #, Bill #, Receipt Data, Property Type, Other Paid, Other Description and Grand Totals. Payment Detail Reports Delinquent Personal Property Report – This report will list personal property parcels that have not had the 1st installment posted as paid year-to-date. There are some personal property classifications that by law can be split in two payment installments, this report will only consider the 1st installment. In most cases, the 1st installment on a personal property tax bill is also the full payment. If you select this report before January 31st, the parcels listed are not yet delinquent. Delinquent Real Estate Report – This report will display/print the name, parcel number, bill number, total tax (includes special assessments/charges/delinquencies less lottery credit claimed), amount paid, postponed and delinquent amounts on Real Estate parcels. It will not include any parcels that have been paid in full, they are not postponed or delinquent. Totals will list at the end of the report. Postponed Reports (Personal Property and Real Estate) - The user has a choice between Personal Property and Real Estate report. This report will display the name, parcel number, bill number, total tax (includes special assessments/charges/delinquencies less lottery credit claimed), amount paid, postponed and delinquent amounts. It will not include any parcels that have been paid in full as they are not postponed. Totals will list at the end of the report. Payments Sorted by Parcel Number or by Name – This report’s sort can be chosen by Parcel Number or by Name. The report will include all payments made. Information included on this report is Parcel Number, Receipt Data, Bill Number, Payment Amount, Name, Property Type and Tax Amount. Grand Totals are displayed at the bottom of the report. -17- Payments Less than First Installment Report – This report will provide a listing of any parcel that has had a payment posted, but does not meet or exceed the 1st installment amount. If your County allows a variance under the 1st installment before the parcel is considered delinquent, this may be a helpful report to give to the County Treasurer. It may also be helpful to you, the treasurer, to notify those taxpayers that owe a small amount under the 1st installment. This report will not list the parcels where no payments were made. To print those parcels, select Zero Paid Report found in the Payment Detail Reports. Personal Property Detail – This detail report will display/print every personal property record in the file. It will list the name, bill number, tax amount, tax paid and balance due. Totals will print at the end of the report. Tax Escrow List by Selected Parcels Report – In order to compile this report, the user must first choose the parcels on the Main Screen. For a list that contains more than one parcel, the user must hold down the CTRL key and click on the desired parcels. Another option is to use the features below (which are found on the Main Screen) to choose desired parcels. Zero Paid Report – This report will list any parcel (real estate or personal property) that has not had any payment applied to it. This report can be useful if the treasurer reminds property owners that their taxes will go delinquent if not paid immediately. Payment Summary Reports Total Collected by Date Paid Report – This report will display a total for each day that payments were posted. The report will be sorted by dates. The report will list the receipt date, deposit, tax paid, other paid, check refunds and cash refunds. Total Tax Collected Reports – This report can be chosen to sort by Date Range, by Batch, by Batch Range. The report will display totals in categories by the selected receipt dates. Use this report to fill out January and February settlement statements and/or to balance for a day, week, month or total collections. Check the individual category totals on this report and confirm that they agree with the report that prints when your data is copied to diskette for county processing. YTD Batch Recap Report – This report will list Batch Number, Deposit, Tax Paid, Other Paid, Check Refunds and Cash Refunds. Total for all batches will be listed at the end of the report. Compare this report to your deposits. YTD Postponed/Delinquent – This report will display all year-to-date totals for postponed and delinquent parcels. The report will separate Personal Property and Real Estate. Reprint Receipts Alphabetically – The program will reprint all of your receipts in alphabetical order. Reprint Receipts by Batch – By choosing this option, the program will display a message box which will request a batch number. After choosing a batch number, click on the checkmark and the receipts for the entire batch will print. -18- Check Refunds By Batch & Check Refunds by Date - We have provided you with two options. You may sort by batch or by date. Your Board/Council needs to approve the refunds before issuing checks. Use this option to provide the Board/Council backup documentation. These reports will be sorted by alphabetical order. Special Assessment Reports The program offers the user to choose from various Special Assessment Reports Per Code. Report sorts include by All Payments, By Batch, By Batch Range and By Date Range. Items displayed on this report include Code, Description and Amount Paid. Special Assessment Amount Paid Per Code Detail Report - The user can choose this report by Date Range, by Batch Range, Date Range (choose code) and Batch Range (choose code). Information included on this report is as follows: Code, Description, Parcel Number, Owner, Amount Paid and Total For All Codes. Special Assessment Delinquent Report – This report provides the user with all of the delinquent Special Assessments. Information contained on this report is as follows: Name, Parcel Number, Bill Number, Special Assessment Description, Tax Amount, Tax Paid and Tax Due. Special Assessment Detail Report – This report provides the user with all information regarding the Special Assessments. Information contained on this report is as follows: Name, Parcel Number, Bill Number, Special Assessment Description, Tax Amount, Tax Paid and Tax Due. Special Assessment for Individual Parcel – This report allows the user to choose a parcel and then display detail for the individual parcel. To create this report, simply highlight (by clicking on the parcel), choose Reports (from main taskbar), choose Special Assessment for Individual Parcel. Note: If you would like to choose more than one parcel, hold down the “ctrl” key and click on the parcels you would like to view. Miscellaneous Please do not proceed into this taskbar item unless instructed by J. Mauel & Associates personnel. About This taskbar item will show you the version of the program. The version number is useful when troubleshooting with J. Mauel & Associates. You may be asked to look for the version in the troubleshooting process. -19- Main Program Screen Features - Overview The Property Tax Collection Main Program Screen is the screen that displays immediately upon “double-clicking” on the desktop icon titled Property Tax Collection. From the Main Program Screen the user controls the functions of the program including taskbar items, searching and making payments to parcels, selecting blocks of parcels and the ability to navigate into the Pet Licensing Program. Main Payment Screen – Search by Parcel No., Receipt Date, Partial Parcel Number, Last Name, Bill No., Check Number or Amount Paid. Choosing Selecting Parcels The treasurer uses this feature for reports such as Escrow Report where you need to select your parcels before choosing the report. Click on the Select by Parcel button (located next to the Search button on the main screen). A message box will appear requesting the user to type in the parcel number. Press OK. A message box will now appear asking the user if they would like to enter another parcel. Choose “YES” to continue entering parcels. If you are done entering the parcels, choose “NO” and all the parcels that you have entered will now appear on the main screen. Choose Select All button and now you may run the report that you need. YOU MUST CHOOSE YOUR PARCELS PRIOR TO CHOOSING THE REPORT. Select All, Unselect All, Select Block Select All Button – This is helpful to the user should they need a report that would include all of the parcels on the screen. By clicking on Select All, the user will notice that the page is highlighted and the user can now choose a report. -20- Unselect All – Allows the user to cancel out their selection. Select Block – This feature is helpful to the user for paying multiple parcels and reports. The user must first click on the first parcel, then hold down the ctrl key and click on the last parcel in their range. Simply click on Select Block and the program will highlight all parcels between (and including) the first and last parcels. Searching for Parcel or Bill Number Please note that you must type in the Parcel Number and Bill Number exactly as the county has downloaded it. For example, your parcel numbers may have a space or dash in it. View Payment History, Special Assessments or MFL/FCL The treasurer may wish to view payments, Special Assessments or MFL/FCL made on particular parcels. In order to do this the treasurer should choose (highlight parcel), click Process and then click on Payment History (or Special Assessments or MFL/FCL depending on the information they need) on the upper folder item. After reviewing the history, the user should click on Exit. REMINDER: REMEMBER TO FILL IN ALL DEFAULTS UNDER SYSTEM>SETUP PRIOR TO ENTERING YOUR PAYMENTS. Posting A Single Payment to a Single Parcel To post one payment to a single parcel, the user must first choose the sort feature which is used the most often for their municipality. To change the default, the user must choose System>Setup>Search Options and click on the default desired (i.e. Parcel No., Last Name, Bill No., Check Number or Amount Paid). If the user chooses to change the search they may do it by simply clicking on one of the search options located on the Main Program Screen (example screen above). Remember, the default will always stay the same unless the user changes it manually on the Main Program Screen. In the example above, an “a” was entered and the search button was clicked on. Notice all the parcels starting with the letter “a” have been displayed. The user may then choose the parcel and then click on process (bottom-left). By clicking on the parcel and the parcel will automatically be highlighted. The following screen will appear and the user should choose the installment option. Note that the user chooses a default Payment Option when initially in the Setup Screen (System>Setup>Payment Options). The user must then input the Check No. or click on Cash and must enter their initials. Note that the default initials may be set up under System>Setup>Other Options. The amount of the specified tax payment type will be displayed in the Amount paid box. If the check is for an amount other than the tax amount, key in the amount of the check. The user must then click on Post (bottom of input -21- screen) and the receipt will print. In a case where the user does not wish to print a receipt, simply click on Print Receipt and the checkmark will disappear for that particular parcel only. The Paid By field is automatically defaulted to the owner. The user may change this field if desired by clicking on the Paid By Text Box and entering the information. A receipt note can also be entered through System>Setup>Receipt Note. The Main Program Screen will appear after the payment is posted and the treasurer can now enter the next payment. FAQ – If the treasurer receives a check by December 31 and doesn’t enter it on that receipt date how would the treasurer record the payment? Enter the payment and check the “Postmarked December” (box shown below). Installment Options Postmarked December Note: You will notice that there are “F” keys behind certain functions. These are shortcut keys. For example, you can either click on the Post button or push the F8 key on your keyboard. Posting A Check for More Than the Amount of Tax Being Paid If the amount of the check was for more than the specified tax payment, an Overpayment box will appear (example screen below). The amount of the Refund Amount will be displayed. The user may either choose to Refund, complete Other Amount (amount owed to the municipality other than tax bill) or enter an amount for a Pet. Note that if an amount is chosen for a Pet Type and the “checkmark” is checked, the program will immediately display the Pet Program. After the payment has been posted, the program will return to the Main Program Screen to resume payment processing. -22- Reminder: Pay close attention to the Refund Type when confirming the refund. Choose the type that applies. Posting Multiple Parcels With One Check Change Parcel Search By order to Last Name. Key in last name of first few letters of last name. Next, choose the parcels that should be paid by clicking on the first parcel and highlighting it and then hold down the Ctrl and click on the other desired parcels and click on the Process Button. The screen below will appear confirming the totals. Key in the check number and amount paid (if different). Click on the checkmark. The first payment screen will appear confirming amount to be paid to the parcel and will automatically display the check number. Click on the Post Button. The payment screen for the 2 nd bill will now appear and the same process should be followed. Note: If the amount is an amount other than displayed when posting (includes dog, cat or other payments), key in the actual amount of the check and then click on Post. The overpayment screen will appear and the user can then license the pet or issue a refund. -23- Posting Multiple Checks and/or Cash to One Parcel Choose the Parcel to be paid. Key in all information including amount of check and check number. Click on Post and Return. A message box will appear indicating that your payment was posted. Click “OK”. You will notice that the receipt will print and the parcel payment screen will appear again. Key in the information including amount of check and check number. This process may be repeated to complete the payment process. On the last check to be entered the user should click on Post and that completes the process. Posting Multiple Checks/Cash to Multiple Parcels Choose the Parcels to be paid (select by block or hold down the CTRL key and highlight each parcel). Key in all information including the total amount of all checks. Next you must key in a check number. Use the first check number as your check number. Click on the checkmark. The next screen that will appear is the first payment screen of the parcels that you have chosen. Post each payment with the applicable amount. You will notice that the check number entered will automatically default on each payment screen. Example: You received 5 checks for a total of $2,000. The check numbers are 100-104. First choose the parcels. Next key in $2,000 with the check number being 100. Post each payment for the amount to be posted. Should there be a refund at the end of your posting process, the refund screen will appear. Note: Do not license a dog within a posting of Multiple Checks and Multiple Parcels. This process should be done separately. To Adjust a Lottery Credit A lottery credit can be adjusted with or without posting a payment. It will be added to the current batch or you can also choose to adjust in a previous batch. To adjust a lottery credit, choose the parcel and click on the Process button (button left of screen). At the top of the Posting Screen you will notice a folder titled “Lottery Credit” . By clicking on the Lottery Credit folder, the screen below will appear. Next click on the Claim/Adjust Lottery Credit button. The amount of the lottery credit calculated for your municipality will automatically be displayed. If you wish to change the amount you may do so by clicking on the text box and entering the desired amount. Click OK and the amount will automatically be adjusted on the Main Posting Screen. -24- Note: You may adjust a lottery credit that has been previously paid by using the process above. However, if you need to make an adjustment to a parcel that has been paid in full, you must go back into that batch and delete the entire payment and re-enter payment and include the lottery credit adjustment. Address Changes Address changes can be made while posting a payment or by choosing the parcel (highlighting) and clicking on the Process Button (bottom left). Key in the new address and choose Save New Address. A confirmation screen will then appear. You may either continue with the payment or exit out of the parcel. Reprinting Receipts After choosing the parcel (highlighting), the Reprint Receipt button is enabled on the bottom of the screen. Simply click on the Reprint Receipt button and your receipt will be printed. Overview of Receipts Types Receipt A (most used by municipal treasurers) Fits Standard #10 Envelope. Includes County Name, Date, Tax Year, Municipal information, Total Tax, Less Lottery Credit Claimed, Less Tax Paid, Balance Due, Legal Description, Parcel Number, Bill Number, Physical Address, Mailing Address, Land Assessment, Improvement Assessment, Total Assessment, EFMV, Special Assessments, MFL/FCL, Acreage and Payment Information (Receipt Date, Operator, Receipt Number, Paid by, Check #, Batch #, Tax Paid, Refund, Other and Total Paid). Receipt B Fits Standard #10 Envelope – more of a condensed version. Includes Tax Year, County Name, Parcel Number, Physical Address, Municipal Information, Bill Number, Date, Acreage, Taxpayer Mailing Address, Tax Amount, Special Assessments, MFL/FCL, Lottery Credit Claimed, Total Tax, Total Paid, Balance Due. -25- Receipt C Receipt is the same as Receipt A but fits the old tax envelopes. Receipt D Receipt is the same as Receipt A but the mailing address has a 1 ½ inch left mailing address margin. Receipt E Receipt is the same as Receipt A but gives you a 1.25 inch top margin. This receipt is used if you are printing your receipts on letterhead. Receipt F Receipt is like Receipt A, but prints 2 receipts per page. Receipt G Receipt is like Receipt B, but 3 receipts per page. Receipt H Receipt is like Receipt A, but the user doesn’t use a network. -26-