1
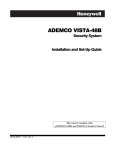
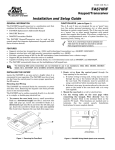
6160EX Keypad
User Instructions
Contents
Glossary .....................................................................................3
Introduction ...............................................................................4
Day Mode, Full Setting and Unsetting .....................................5
Part And Night Setting ..............................................................7
Cancelling Alarms .....................................................................8
Resetting After an Alarm ..........................................................8
Viewing the event log................................................................9
Omitting Zones From the System. .........................................10
Chime .......................................................................................11
Setting the Time and Date ......................................................11
Adding and Removing Keyfobs. ............................................12
Adding and Removing Keytags.............................................12
Adding and Changing User Codes ........................................13
User Descriptors......................................................................14
Testing the System..................................................................15
System Indications..................................................................16
Keypad Tones ..........................................................................16
Hotkeys ....................................................................................17
Additional Information ............................................................17
Zone Information .....................................................................18
2
Glossary
The following terms will be used in this manual:
Alarm:
A panel detection circuit has been tripped.
Cancel:
The action of stopping an alarm condition.
Keyfob:
A remote control device for setting and unsetting. Each
fob will belong to a user.
Keytag:
A tag or card which can be used for setting and
unsetting. Each tag will belong to a user.
Keypad:
The user interface device that displays system
conditions and allows user control.
Reset:
The action of clearing the alarm or fault condition and
restoring the system to the steady state condition.
Tamper:
A fault condition on a detector or system module.
User:
Any person who accesses the system. This system can
have up to 8 users (number 1 to 8).
User Code:
A 4 digit code used to identify a particular user to the
system.
Zone:
A unique detection circuit to which a detector is
connected. There are also 'internal' system zones which
monitor the health of the system.
3
Introduction
Your Galant panel has various system functions, which can be accessed
by one of three methods:
•
type a user code at a keypad
•
press a button on an RF keyfob or
•
present a keytag to a proximity reader.
The system can support up to 8 users. User 1 is assigned as the master
user. Each user can have a user code (master user code is 1234 by
default) and either a fob or a tag. Your installer will indicate which
methods are available on your system.
The following diagram shows an RF keyfob:
1. Unset/Cancel
2. Begin Full Set procedure
3. Begin Part Set procedure
4. Begin Night Set procedure
The following diagram shows a proximity card reader and keytag
Keytag presented to
proximity reader to set
and/or unset system.
keytag
4
Day Mode, Full Setting and Unsetting
Day mode is the normal mode for the system. In
this state the display will be similar to that
shown on the right, with the time and date.
Galant V2
21-01-02 09:54
Full Setting the System
To full set the system (keypad)
1. Type your User Code.
2. Press 1 (FULL)
A constant exit tone will sound.
The exit tone will become broken as the user
passes detectors on the exit route. The exit tone
will become constant, when the last detector on
the exit route has been passed.
FULL SETTING
Exit Now
Open
Zn:02
Exit Now
Two confirmation beeps indicate that the system
has set and the screen will go Blank.
Note: To abort the setting procedure during the
exit time, press the * key.
To full set the system (keyfob)
Press the ON button on the keyfob. Full setting will commence as in
point 2 for keypad setting.
Note: To abort the setting procedure during the exit time, press the
OFF button.
To full set the system (keytag)
Keytags can be used to full set the system and to unset from any set
state.
Hold keytag in front of LED’s for 3 seconds. Full setting will
commence as in point 2 for keypad setting.
Note: To abort the setting procedure during the exit time, hold keytag
briefly in front of LED’s.
5
Unsetting the System from any Set State
To unset the system (keypad)
1.
Proceed to the keypad via the approved
route. A pulsed tone will indicate that the
entry timer is counting down.
2.
Type in your User Code at the keypad
before the expiry of the entry time. The
tones will stop and the keypad will return to
the Day Mode display.
Galant V2
21-01-02 09:54
To unset the system (keyfob)
Press the OFF button on the keyfob. The system unsets with a double
beep.
To unset the System (keytag)
Hold card briefly in front of keypad LED’s. The system unsets with a
double beep.
Note:
If no response is obtained after 3 seconds, when presenting a
card, then the card is not recognized by the system. If a triple
beep is heard after holding the card, there is a fault on the
system. Refer to keypad display for details.
Unsetting from Part or Night Set
Unsetting from Part set and Night set conditions is identical to
unsetting from a Full set.
6
Part And Night Setting
It is possible to set the system but leave certain detectors switched off.
This is useful, for example, at night while the bedrooms are occupied,
or when leaving pets within the premises. Your installer can set up
these detectors.
To Part set the system, proceed exactly as for
Full setting except instead of pressing 1(Full):
Galant V2
21-01-02 09:54
Press 2 (PART) to Part set
PART SETTING
OR
Exit Now
Press 3 (Night) to Night set
The keypad tones may be silenced during Part or
Night setting as agreed with your installer.
Two confirmation beeps indicate that the system
has set and the screen will go Blank.
7
Cancelling Alarms
If an alarm activation is in progress, whether the
system is set or unset, proceed directly to the
keypad and type in your User Code. This will
cancel the alarm condition and the display will
show the source of the alarm. Typically, this will
be the detection zone that caused the alarm
condition.
Intruder
ZN:07
RF SUP. ZN:14
Please see the table at the end of this manual for a full list of alarm and
fault condition displays.
If the system is set and in alarm, the alarm can be cancelled using a
keyfob or keytag, by unsetting in the normal manner.
Resetting After an Alarm
After an alarm has been cancelled and displayed, it must be reset. This
is typically done by typing your User Code again. The display will
return to the Day Mode display.
If the alarm message remains on the display, it may be that the alarm
condition has not been cleared. Check the source and type your User
Code again.
Installer Resets
Under certain conditions, it may not be possible to reset the alarm panel
by typing your User Code.
If you see this display, an installer reset is
required. Please contact your installer.
1.
If you see this display, an ‘Anti-Code’ is
required from the monitoring station. Phone
the Station quoting the number on your
keypad display.
8
Call Engineer
Reset Required
Call Engineer
Quote 12345
Viewing the Event Log
The Galant alarm panel has an Event Log history that records every
event which occurs on the system. This includes setting, unsetting,
alarm activations and fault conditions. To view the event log:
1. Type in your User Code.
2. Press the # key then 0 (LOG).
3. The display will show the most recent event
on the system.
08:30
10/01/03
4. You can scroll backwards and forwards
Unset
User 03
through the log as follows:
Key 1= Scroll Back one event.
Key 3= Scroll Forwards one event.
Key 4= Scroll Backwards 10 events.
Key 6= Scroll Forwards 10 events.
Pressing the # Key at any point can show additional information, such
as zone description, on the bottom line of the display.
Pressing the * key escapes from the event log and returns to the Day
Mode display.
The event log display has the following format:
Time
Date
09:54
Intruder
21/4/03
Zone 06
Event type
(Alarm/set etc)
Event Source
(Zone or User)
9
Omitting Zones From the System.
To allow flexibility, you can temporarily disable individual detection
zones. This is called ‘Omitting’. Once a zone is omitted, it will be
disabled for the duration of the next set period. When the panel is next
unset, the zone will be enabled again.
To Omit any zone:
1.
2.
3.
Type in your User Code.
Press 6 (OMIT).
Type the zone number to be omitted. Each
zone number is a double digit (e.g. 03 or
14). The display will show the zone.
Omitted ZN:03
4. Repeat step 3 for any other zone if needed.
Zone 3
5. Press the * key to finish or wait 5 seconds.
The system can now be set in the normal way.
Clearing Omitted zones (Un-omit)
To un-omit zones and return to normal operation:
1.
2.
3.
Type in your User Code.
Press 6 (OMIT).
Press the * key.
When you hear the two confirmation beeps, all zones will be reenabled.
10
Chime
The Chime function allows you to set up a zone to cause a chime tone
to activate on the internal sounder and keypad, every time a particular
zone is opened. This is particularly useful to warn if a door has been
opened.
To set up a zone for Chime:
1.
Type in your User Code.
2.
Press 9 (CHIME).
3.
Type in the zone number for the zone to be
set up for chime. Each zone is a double
digit (e.g. 03 or 14).
4.
Repeat step 3 for any other zones.
5.
Press the * key to finish. The display will
Show that the Chime function is activated.
Chime
To disable the Chime function:
1.
2.
3.
Type in your User Code.
Press 9 (CHIME)
Press the * key.
Setting the Time and Date
The system contains a clock which, is used to mark every event
recorded in the event log. This can be set, if required, as follows:
1.
2.
3.
Type in the Master Code
Press # then 7.
Type in the time and date in the following
order with 2 digits each for day, month,
year, hours and minutes. (24 hr format.)
11
00-00-00 00 : 00
dd-mm-yy hh:mm
01-06-02 14 : 55
dd-mm-yy hh:mm
Adding and Removing Keyfobs.
The Keyfobs used on this system employ high security KEELOQTM
Rolling Code Encryption to make them virtually impossible to
duplicate.
Adding Keyfobs
With the system in DAY mode at the keypad:
1. Enter master user code, 8 (CODE), and user number (1-8).
2. Wait for double beep. Display says awaiting fob.
3. Press all four buttons on the fob (receiver may beep at this point),
then release buttons (on the 6160RF and 6128RF keypads, the fob
serial number will be displayed).
4. Press any three buttons on the fob until a double beep is heard,
then release buttons).
5. Press and release any single button on the fob. A moment later a
double beep is heard.
The fob is now added to the system.
Note:
If at any time a triple beep is heard, the procedure has failed.
Removing Keyfobs
Any keyfob can be removed from the system as follows:
1. Enter master user code, 8 (CODE), and user number (1-8).
2. Wait a couple of seconds for a double beep.
3. Press *. A double beep confirms deletion.
Adding and Removing Keytags
Adding Keytags
With the system in DAY mode at the keypad:
1. Enter master user code, 8 (CODE), and user number (1-8).
2. Wait for double beep. Display says awaiting fob.
3. Hold card in front of LED’s to add it in.
4. Wait for double beep then remove card.
5. Ignore request to press a button (this is for RF fobs).
12
6. After second double beep the card has been added successfully.
Note:
If at any time a triple bleep is heard, the learn procedure has
failed.
Removing Keytags
Any keytag can be removed from the system as follows:
1. Enter master user code, 8 (CODE), and user number (1-8).
2. Wait a couple of seconds for a double beep.
3. Press *. A double beep confirms deletion.
Adding and Changing User Codes
The system can support up to 8 User Codes. User number 1 is the
Master Code. Users 2 to 8 are normal User Codes. The Master Code
can alter the 4-digit code for itself and other User Codes, and add new
User Codes. Normal Users can only change their own code.
To change or add a user code:
1. Enter master user code or the user code to be deleted
2. Press 8 (CODE).
3. Press the user number that you want to program (1 to 8).
4. Enter the new 4-digit code. A double beep confirms the code
change.
To delete a user code:
1. Type in the master user code or the User Code to be deleted.
2. Press 8 (CODE).
3. Press the user number to be deleted (2 to 8).
4. Press *. A double beep confirms deletion.
Note: The Master Code cannot be deleted.
Duress Code
The Installer can enable user 8 as a Duress code. If this is has been
enabled, the User 8 Code can set and unset the system normally. This
only difference is that a Duress signal will be transmitted to the
monitoring station each time that it is entered. No audible or visible
indication will be given.
13
User Descriptors
Each user code on the system can have a 6-character tag assigned. This
tag or descriptor makes it easy to identify users who accessed the
system when viewing the event log.
User descriptors are entered in a similar way to entering SMS text
messages on mobile phones. To change the descriptor for a particular
user,
1. Type the Master code.
2. Press the # key then 8 (Code)
3. Press the user number (1-8)
4. The current descriptor is now shown.
5. To edit the descriptor, the following buttons are used
Key
#
1
2
3
4
5
6
7
8
9
0
¹
Output
Delete the last character.
1,&,dash,@,’,/,(,),full stop, comma, #,*
A,B,C,2,a,b,c,Ä,Å,Æ,ä,å
D,E,F,3,d,e,f
G,H,I,4,g,h,i
J,K,L,5,j,k,l
M,N,O,6,m,n,o,Ö,ö
P,Q,R,S,7,p,q,r,s,t
T,U,V,8,t,u,v,∞,∫
W, X,Y,Z,9.w,x,y,z
SPACE or 0
Save descriptor and exit
Pressing a number button repeatedly will cycle around the characters
assigned to it. A three-second pause saves the character and moves onto
the next one.
The ¹ button saves the descriptor and exits back to Day Mode.
14
Testing the System
A test function is available which allows a user to manually test the
sensors and alarm sounders on the system. This test is carried out as
follows:
From normal Day mode;
1. Type in the user code.
2. Press 5 (Test)
3. The system will ring the outside bells for 5 seconds and switch on
the strobe light. The strobe light will stay on for the duration of the
test.
4. When the bells switch off the system enters walk test mode to
allow testing of the sensors.
5. Activate each detector in turn. As each detector is activated, the
keypads will beep twice and the zone number will be shown on the
display. When several detectors have been activated, the display
will scroll through all the activated zone numbers.
6. After activating all the detectors, check to make sure all the
corresponding zone numbers are displayed.
7. To end the test, type in the user code again. The strobe light will
switch off.
Note: The Test mode will not operate if there is a fault condition
present.
15
System Indications
In addition to the displays shown previously, the following fault
displays may appear on the keypad. If the fault cannot be rectified,
please contact your installer, explaining the exact detail on the display.
Keypad Display
Tamper ZN:xx
Line Fail
Comms Fail
NO AC
Batt Low/Fail
Keypad Lockout
RF Supervision
RF Low Batt
Call Engineer
Fire
Panic
Assistance
Meaning
A tamper fault has occurred on the zone shown.
The telephone line has a fault.
The system cannot communicate with the monitoring
station via the phone line.
The mains electrical supply has gone down.
The back-up battery is not serviceable.
5 wrong codes have been entered. The keypads will
lockout for 10 minutes. Do not touch the keypad
during this time, as this extens the time.
The system has lost the signal from a radio detector.
The battery on the radio detector on the zone number
shown has gone low. Contact your installer to have
this replaced.
Contact your installer to have the system checked.
Fire alarm is in progress.
Panic alarm is in progress.
The Assistance Hotkey has been pressed.
Keypad Tones
Continuous Tone on setting
Dual tone – other times
Rapid Pulsing
Long interrupted tone
Long Pulsed Tone
Exit timer running
Alarm/Fault Condition
Zone is open during exit time
Entry timer counting down
Fire Alarm
16
Hotkeys
Hotkeys are key combinations on the keypad that can cause an instant
alarm condition. Both keys must be pressed simultaneously to activate
the alarm. Hotkeys can be enabled or disabled by your installer. The
following Hotkey functions are available:
Function
Panic Alarm
Assistance
Fire
Button Combination
#+*
1+*
3+#
Additional Information
System Settings
Entry time delay :
Exit time delay
:
Hotkeys enabled :
Yes / No
Alarm Company Contact details
Company Name :
Daytime Phone
:
Emergency phone :
Monitoring Station :
Account Number :
17
Zone Information
Zone
1
Location
Full
2
3
4
5
6
7
8
9
10
11
12
IU1-1233 Rev 1.2
18
Part
Night