1
Supervisor Express
Product Manual
www.monitorbm.com
Monitor Express Product Manual
Copyright © 2014 Monitor Business Machines Ltd
The software contains proprietary information of Monitor
Business Machines Ltd. It is provided under a license
agreement containing restrictions on use and
disclosure and is also protected by copyright law.
Reverse engineering of the software is prohibited.
Information in this document is subject to change
without notice. Companies, names, and data used in
examples herein are fictitious unless otherwise noted.
No part of this document may be reproduced or
transmitted in any form or by any means, electronic or
mechanical, for any purpose, without the express written
permission of Monitor Business Machines Ltd.
All rights reserved. No part of this work may be
reproduced in any form or by any means - graphic,
electronic, or mechanical, including photocopying,
recording, taping, or information storage and retrieval
systems - without the written permission of the
publisher.
While every precaution has been taken in the
preparation of this document, the publisher and the
author assume no responsibility for errors or
omissions, or for damages resulting from the use of
information contained in this document or from the use
of programs and source code that may accompany it. In
no event shall the publisher and the author be liable for
any loss of profit or any other commercial damage
caused or alleged to have been caused directly or
indirectly by this document.
Monitor Business Machines Ltd.
31a Normanby Road,
Mt Eden, Auckland 1024,
NEW ZEALAND
Printed: March 2014
The Monitor Logo and Supervisor™ are registered
trademarks of Monitor Business Machines Ltd.
Any other products that are referred to in this document
may be either trademarks and/or registered trademarks
of the respective owners. The publisher and the author
make no claim to these trademarks.
Contents
Product Overview
1
Requirements
2
Compatible Transactional Hardware ................................................................................................................................... 2
Installation Notes
Getting Started
3
................................................................................................................................... 8
Configuration
9
General
................................................................................................................................... 10
Debug Logging
......................................................................................................................................................... 10
After Card Read .................................................................................................................................................. 11
After Applying Filter.................................................................................................................................................. 11
When Sending to Server
.................................................................................................................................................. 11
Skype Assistance ......................................................................................................................................................... 12
USB Kiosk Control Board
......................................................................................................................................................... 12
Hardw are Pow er Management
......................................................................................................................................................... 12
Stop Netw ork Card..................................................................................................................................................
Sleep
12
Stop USB Device Sleep
.................................................................................................................................................. 13
Supervisor
................................................................................................................................... 13
Supervisor Net Server......................................................................................................................................................... 13
Port
......................................................................................................................................................... 13
Primary Creation
......................................................................................................................................................... 13
PIN support
......................................................................................................................................................... 14
Bonus Amounts
......................................................................................................................................................... 14
Prompt for Suffix
......................................................................................................................................................... 15
Card Settings
Add Value Fee
Eftpos Add Value
Cash Add Value
Max Balance
Auto Insert
Card Readers
................................................................................................................................... 16
......................................................................................................................................................... 16
......................................................................................................................................................... 16
......................................................................................................................................................... 16
......................................................................................................................................................... 16
......................................................................................................................................................... 16
................................................................................................................................... 17
Eftpos Reader
......................................................................................................................................................... 17
Keyboard Reader
......................................................................................................................................................... 17
Serial Card Reader ......................................................................................................................................................... 18
Card Reader Settings
.................................................................................................................................................. 18
D3000 Controller
......................................................................................................................................................... 18
Filter
......................................................................................................................................................... 18
Start Character
.................................................................................................................................................. 18
End Character
.................................................................................................................................................. 18
Ignore Card Reads ..................................................................................................................................................
With x Digits Or Less
18
Conversion
.................................................................................................................................................. 19
Functions
................................................................................................................................... 19
Add Value
......................................................................................................................................................... 19
Payment Method .................................................................................................................................................. 20
Limit
.................................................................................................................................................. 20
Disbursements
.................................................................................................................................................. 20
Account Selection .................................................................................................................................................. 20
Use Card Reader........................................................................................................................................... 21
Enter Account Number
........................................................................................................................................... 21
Contents
i
Enter Account ID........................................................................................................................................... 21
Enter Username/Passw
...........................................................................................................................................
ord
21
Mobile Phone (QR
...........................................................................................................................................
Code)
21
Show Welcome Page
.................................................................................................................................................. 21
Enable Card Association
.................................................................................................................................................. 22
View Balance
......................................................................................................................................................... 22
Buy Card
......................................................................................................................................................... 24
Options
.................................................................................................................................................. 24
Min Transaction Amount
........................................................................................................................................... 24
Max Initial Amount
........................................................................................................................................... 24
Prompt to Buy Another
...........................................................................................................................................
Card
24
Payment Method .................................................................................................................................................. 24
Allow Cash
........................................................................................................................................... 24
Allow Eftpos
........................................................................................................................................... 25
Disbursements
.................................................................................................................................................. 25
Hardw are
.................................................................................................................................................. 25
Card Dispenser ........................................................................................................................................... 25
Com Port
........................................................................................................................................... 25
Baud Rate
........................................................................................................................................... 25
Bin Capacity
........................................................................................................................................... 25
Card Refund
......................................................................................................................................................... 25
Options
.................................................................................................................................................. 26
Refund Type
........................................................................................................................................... 26
Manual Refund Type
........................................................................................................................................... 27
Min Refund Amount
........................................................................................................................................... 27
Card must be inserted
...........................................................................................................................................
in D3000 Controller
27
Charge Manual Refund
...........................................................................................................................................
Fee For Donations
27
Data Entry Masks .................................................................................................................................................. 27
Phone Number ........................................................................................................................................... 27
Bank Field 1
........................................................................................................................................... 28
Use Bank Field 2........................................................................................................................................... 28
Bank Field 2
........................................................................................................................................... 28
Disbursements
.................................................................................................................................................. 28
After Refund
.................................................................................................................................................. 28
Reset Primary Fields
........................................................................................................................................... 29
Delete Primary ........................................................................................................................................... 29
Buy Ticket
......................................................................................................................................................... 29
Payment Method .................................................................................................................................................. 29
Allow Cash
........................................................................................................................................... 29
Allow Eftpos
........................................................................................................................................... 29
Allow Zero Value........................................................................................................................................... 29
Disbursements
.................................................................................................................................................. 30
Ticket Options
.................................................................................................................................................. 30
Number Length ........................................................................................................................................... 30
Max Value
........................................................................................................................................... 30
Primary Default ........................................................................................................................................... 30
Ticket Expires ........................................................................................................................................... 30
Enable Combine Tickets
........................................................................................................................................... 30
Combining Ticket
......................................................................................................................................
Disbursement
30
Calculator
......................................................................................................................................................... 30
Enable Calculator .................................................................................................................................................. 31
Show On Cash/Eftpos
..................................................................................................................................................
Pages
31
Label
.................................................................................................................................................. 31
Disbursement
.................................................................................................................................................. 31
Extension
.................................................................................................................................................. 31
Application Laucher ......................................................................................................................................................... 32
Enabled
.................................................................................................................................................. 33
ii
Contents
Application
.................................................................................................................................................. 33
Parameters
.................................................................................................................................................. 34
Label
.................................................................................................................................................. 34
Payment Methods
......................................................................................................................................................... 34
Cash
.................................................................................................................................................. 35
Show Cash Instructions
...........................................................................................................................................
Page
35
Note/Coin Reader........................................................................................................................................... 36
Com Port
........................................................................................................................................... 36
Coins
........................................................................................................................................... 36
Notes
........................................................................................................................................... 36
Eftpos
.................................................................................................................................................. 36
Amounts
........................................................................................................................................... 36
Minimum Value
...................................................................................................................................... 37
Maximum Value
...................................................................................................................................... 37
Preset 1 - 5 ...................................................................................................................................... 37
Whole Dollar Mounts
......................................................................................................................................
Only
37
Small Value Transactions
........................................................................................................................................... 37
Limit
...................................................................................................................................... 37
Fee
...................................................................................................................................... 37
Fee Disbursement
...................................................................................................................................... 37
Fee Account ...................................................................................................................................... 37
Error Handling ........................................................................................................................................... 37
Refund
...................................................................................................................................... 37
Retry Until Successful
...................................................................................................................................... 37
Eftpos Terminal ........................................................................................................................................... 37
Terminal Type...................................................................................................................................... 38
Allow Credit Cards
...................................................................................................................................... 38
Exit Options
First Click
Second Click
Set Exit PIN
Printing
................................................................................................................................... 38
......................................................................................................................................................... 38
......................................................................................................................................................... 39
......................................................................................................................................................... 39
................................................................................................................................... 39
Printer Type
......................................................................................................................................................... 40
Prompt to Print Receipt......................................................................................................................................................... 40
Continue if Out of Paper
......................................................................................................................................................... 40
Override Default Paper
.........................................................................................................................................................
Width
40
Eftpos Font Size
......................................................................................................................................................... 40
Receipts/ Tickets
......................................................................................................................................................... 40
Ticket Type
.................................................................................................................................................. 41
Use Header
.................................................................................................................................................. 41
Use Footer
.................................................................................................................................................. 42
Line Elements
.................................................................................................................................................. 42
Card Number
........................................................................................................................................... 43
Date of Purchase........................................................................................................................................... 43
Encrypted Card Number
........................................................................................................................................... 44
Expiry Date
........................................................................................................................................... 44
Horizontal Line ........................................................................................................................................... 44
Image
........................................................................................................................................... 44
Net Amount
........................................................................................................................................... 44
New Balance ........................................................................................................................................... 44
Payment Amount........................................................................................................................................... 44
Payment Method ........................................................................................................................................... 44
Refund Reference
...........................................................................................................................................
Number
44
Tax
........................................................................................................................................... 44
Terminal ID
........................................................................................................................................... 44
Text
........................................................................................................................................... 45
Contents
iii
Ticket Number ........................................................................................................................................... 45
Ticket Number Barcode
........................................................................................................................................... 45
Transaction Fee ........................................................................................................................................... 45
Transaction Reference
...........................................................................................................................................
Number
45
Verticle Spacer ........................................................................................................................................... 45
Add Line Element .................................................................................................................................................. 45
Edit Line Element .................................................................................................................................................. 46
Edit Style
........................................................................................................................................... 47
Edit Position
........................................................................................................................................... 48
Delete Line Element
........................................................................................................................................... 49
Default Font
.................................................................................................................................................. 49
Header
......................................................................................................................................................... 50
Footer
......................................................................................................................................................... 51
Appearance
................................................................................................................................... 53
Hide Mouse Cursor ......................................................................................................................................................... 53
Button Positions
......................................................................................................................................................... 53
Busy Indicator
......................................................................................................................................................... 53
Common
......................................................................................................................................................... 53
Number Pad
......................................................................................................................................................... 56
Keyboard
......................................................................................................................................................... 57
Main
......................................................................................................................................................... 59
Calculator
......................................................................................................................................................... 60
Calculator
.................................................................................................................................................. 60
Payment Method .................................................................................................................................................. 61
Account Selection ......................................................................................................................................................... 62
Select Primary
.................................................................................................................................................. 63
Select Suffix
.................................................................................................................................................. 64
Select Secondary .................................................................................................................................................. 65
Invaild Account
.................................................................................................................................................. 66
Locked Account .................................................................................................................................................. 67
Non-Reloadable Account
.................................................................................................................................................. 68
At Maximum Balance
.................................................................................................................................................. 70
Add Value Unavailable
.................................................................................................................................................. 71
Validate ID No PIN .................................................................................................................................................. 73
Card Association
......................................................................................................................................................... 73
Association Instructions
.................................................................................................................................................. 73
Validate User
.................................................................................................................................................. 75
Confirm Association
.................................................................................................................................................. 76
Association Failed .................................................................................................................................................. 77
Card Refund
......................................................................................................................................................... 78
Insert/ Sw ipe Card .................................................................................................................................................. 78
Enter Account PIN .................................................................................................................................................. 80
Confirm Refund .................................................................................................................................................. 80
No PIN Set
.................................................................................................................................................. 82
Balance Too Low .................................................................................................................................................. 83
Manual Refund Options
.................................................................................................................................................. 84
Manual Refund Data
..................................................................................................................................................
Entry
84
Confirm Refund Details
.................................................................................................................................................. 85
Donation Thank You
.................................................................................................................................................. 86
Retry Send Refund..................................................................................................................................................
Email
87
No Refund Payable.................................................................................................................................................. 88
Select Cash/ Eftpos ......................................................................................................................................................... 89
Cash Payment
......................................................................................................................................................... 91
Not Available Messages
.................................................................................................................................................. 91
Instructions
.................................................................................................................................................. 91
Cash Entry
.................................................................................................................................................. 92
Add Value
........................................................................................................................................... 92
iv
Contents
Buy Card
........................................................................................................................................... 93
Buy Ticket
........................................................................................................................................... 94
Calculator Cash Entry
.................................................................................................................................................. 95
Add Value
........................................................................................................................................... 95
Buy Card
........................................................................................................................................... 96
Buy Ticket
........................................................................................................................................... 97
Buy Card Insufficent
..................................................................................................................................................
Amount
98
Cash Not Available.................................................................................................................................................. 99
Eftpos Payment
......................................................................................................................................................... 100
Preset Amounts .................................................................................................................................................. 100
Enter Amount
.................................................................................................................................................. 101
Add Value
........................................................................................................................................... 101
Buy Card
........................................................................................................................................... 102
Buy Ticket
........................................................................................................................................... 103
Calculator Enter Amount
.................................................................................................................................................. 104
Add Value
........................................................................................................................................... 104
Buy Card
........................................................................................................................................... 105
Buy Ticket
........................................................................................................................................... 106
Invalid Amount .................................................................................................................................................. 107
Confirm Amount .................................................................................................................................................. 108
Add Value
........................................................................................................................................... 108
Buy Card
........................................................................................................................................... 109
Buy Ticket
........................................................................................................................................... 110
Eftpos Transaction
.................................................................................................................................................. 111
View Balance
......................................................................................................................................................... 112
Add Value Welcome......................................................................................................................................................... 113
Combine Tickets
......................................................................................................................................................... 114
Card Dispensed
......................................................................................................................................................... 115
D3000 Collect Card ......................................................................................................................................................... 116
Print Receipt?
......................................................................................................................................................... 117
Buy Another Card? ......................................................................................................................................................... 118
Supervisor Transaction
......................................................................................................................................................... 119
Refund to Ticket
......................................................................................................................................................... 120
No Receipts Warning......................................................................................................................................................... 121
Maintenance
......................................................................................................................................................... 122
Tech Access
.................................................................................................................................................. 123
Exit
.................................................................................................................................................. 124
Out of Service .................................................................................................................................................. 125
PIN Support
......................................................................................................................................................... 126
Set New PIN
.................................................................................................................................................. 126
Confirm New PIN .................................................................................................................................................. 127
Configuration Appendix 1: Manual Refunds
129
Activating Manual Refund functionality
................................................................................................................................... 129
Setting the fees
................................................................................................................................... 130
If account balances are
.........................................................................................................................................................
less that the fees
131
Set the data entry masks
................................................................................................................................... 132
Customise the field names
................................................................................................................................... 132
Decide what happens to refunded accounts
................................................................................................................................... 133
Configuring the email system
................................................................................................................................... 133
Using a standard card swipe unit ................................................................................................................................... 135
Using a D3000 automatic card acceptor
...................................................................................................................................
with Mifare reading module
136
Enable the D3000 ......................................................................................................................................................... 136
Enable the serial card
.........................................................................................................................................................
reader
137
Mandate that it must .........................................................................................................................................................
be used for refunds
137
Contents
v
Configuration Appendix 2: Add Value Bonus
139
Configure Add Value Bonus amounts
................................................................................................................................... 139
Make the user spend their own money
...................................................................................................................................
first
139
Enable Add Value Bonus in Express................................................................................................................................... 140
Disable the Calculator screens
................................................................................................................................... 141
User Guide
142
Making a Transaction
................................................................................................................................... 142
Add Value
......................................................................................................................................................... 143
Error Messages .................................................................................................................................................. 146
Please Try Again
...........................................................................................................................................
Later
146
Can not Add Value
...........................................................................................................................................
to this Account
147
Invalid Card
........................................................................................................................................... 148
Buy Card
......................................................................................................................................................... 150
Buy Ticket
......................................................................................................................................................... 151
Combine Tickets
......................................................................................................................................................... 152
Add Value - Card Association
......................................................................................................................................................... 153
PIN Support
.................................................................................................................................................. 157
Add Value - Payment.........................................................................................................................................................
by Cash or Eftpos
159
By Cash
.................................................................................................................................................. 159
By Cash w ith Calculator
.................................................................................................................................................. 162
By Eftpos
.................................................................................................................................................. 167
By Eftpos w ith Calculator
.................................................................................................................................................. 171
Buy Card - Payment .........................................................................................................................................................
by Cash or Eftpos
175
By Cash
.................................................................................................................................................. 175
By Cash w ith Calculator
.................................................................................................................................................. 178
By Eftpos
.................................................................................................................................................. 183
By Eftpos w ith Calculator
.................................................................................................................................................. 187
Invalid Amount .................................................................................................................................................. 192
Insufficent Cash Entered
.................................................................................................................................................. 192
Buy Ticket - Payment.........................................................................................................................................................
by Cash or Eftpos
194
By Cash
.................................................................................................................................................. 194
By Cash w ith Calculator
.................................................................................................................................................. 197
By Eftpos
.................................................................................................................................................. 202
By Eftpos w ith Calculator
.................................................................................................................................................. 206
Invalid Amount .................................................................................................................................................. 209
Insufficent Cash Entered
.................................................................................................................................................. 210
Card Refunds
......................................................................................................................................................... 212
Automatic Refunds
.................................................................................................................................................. 212
Too Low Balance
...........................................................................................................................................
to Refund
214
Manual Refunds .................................................................................................................................................. 216
Refund to Bank...........................................................................................................................................
Account
218
Refund by Cheque
........................................................................................................................................... 220
Make a donation........................................................................................................................................... 222
Processing an Eftpos.........................................................................................................................................................
Transaction
223
After Payment Received
......................................................................................................................................................... 226
Printing a Receipt?.................................................................................................................................................. 226
Buy Another Card?
.................................................................................................................................................. 226
Completed Transaction
.........................................................................................................................................................
Message
227
Help & Support
................................................................................................................................... 228
Using the On-Screen.........................................................................................................................................................
Calculator
228
Calculator
.................................................................................................................................................. 228
Cancelling a Session......................................................................................................................................................... 230
Tech Access Screens
......................................................................................................................................................... 230
Alarm Settings
......................................................................................................................................................... 232
vi
Contents
Out of Service Error .........................................................................................................................................................
Message
232
Offline Message
......................................................................................................................................................... 233
Contents
vii
Product Overview
Monitor's Express application is a multi-purpose self-service kiosk application that can be
configured to support the following functionality:
· Add value to a Supervisor Net account using notes, coins, EFTPOS and credit cards
· Dispense cards
· Dispense casual tickets with optional expiry dates
· Launch other applications
· Display a configurable welcome message or advertising
· Ability to re-skin the application (Using Microsoft WPF) to conform to the operating
environment
· Provides a calculator to help the user decide how much to add to their account to use
various services
Express is suited for situations such as:
· Replacing aging autoloader fleets with a more user friendly, multi-functional alternative
· Self service situations such as a library or copy shop
It allows user to buy a Card or Ticket that can be used to purchase services, such as
photocopying and printing, controlled by Monitor's Supervisor Net transaction management
solution. The user can also reload the card or ticket by depositing any value using either cash
and coin, or EFTPOS.
Each Card or Ticket represents an account within Supervisor Net.
The user swipes the Card or enters the number printed on the Ticket to access services, up to
the value they purchased or re-loaded.
1
Product Overview
Requirements
Express is a kiosk software application that is designed to work with the following
components:
· A touch-screen kiosk, with a screen resolution of 1024x768.
· Express is designed to run at 96 DPI.
· A server running Supervisor Net 6.4.0 or later.
· 1 x EFT registration license.
· Microsoft Windows XP or later.
· Microsoft .NET Framework 4.0
· 50MB free hard drive space.
· 1GB RAM.
· EFTPOS client software, supplied by your bank, installed on the computer. (If EFTPOS or
credit card reload is required) *
· EFTPOS terminal. (If EFTPOS or credit card reload is required) *
It is assumed that the above components are installed and working before the installation of
Express.
* This manual does not cover the installation of the EFTPOS system and is based on Express
version 3.0.1
Compatible Transactional Hardware
Compatible Transactional Hardware to the Express software include (but not exclusive to):
· AL7000 Interactive Kiosk
· GBA ST1 Note Acceptor
· ICT A7 Note Acceptor
· MUNZ EMP 890 Coin Acceptor
· NP-2411D Serial Receipt Printer
Requirements
2
Installation Notes
Ensure you have installed the prerequisites described in the Requirements section.
Express is distributed as an executable installer, typically called Express Setup.exe.
You can either install the application on each kiosk, or install it on a central server and access
it through a network drive. If you intend to run Express from a central server, it is
recommended that you choose a shared path that the client machines can access read-only.
The administrator on the server will require read/write access to allow saving the configuration.
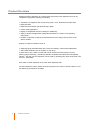
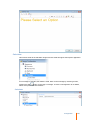
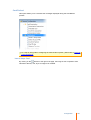
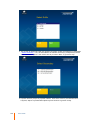
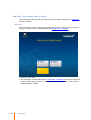
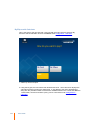
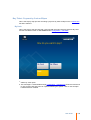
1. When you run or double click on the installer you will be lead through the installation by a
standard install wizard. Select Next to commence the Install wizard.
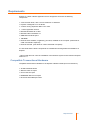
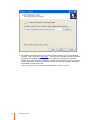
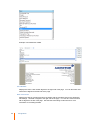
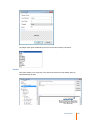
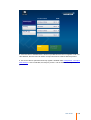
2. You are able to select the disk location where you want Express to be installed by clicking
on Browse.
3
Installation Notes
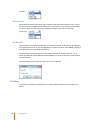
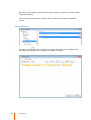
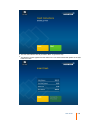
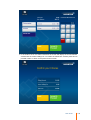
3. Click on the disk location and then select OK.
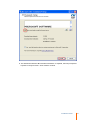
4. The Setup window will show you the disk location select. Click on Next to continue or
Browse to reselect new disk location.
Installation Notes
4
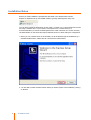
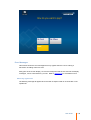
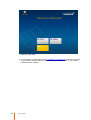
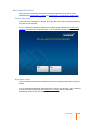
5. The software will check the PC to see if Microsoft.Net Framework 4 is on the installation
computer. This is a Express requirement. If the check finds that Microsoft.Net Framework
is required or an updated version is required, the application will attempt to install the
software directly from the Microsoft website. This will not be possible if there is no internet
connection available, and in this case the framework will have to be manually downloaded
and installed on the express kiosk.
Tick to accept the terms of the license and then select Install to continue.
5
Installation Notes
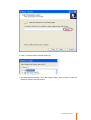
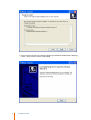
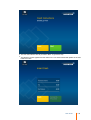
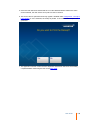
6. The wizard will install the Microsoft.Net Framework 4 if required, then will prompt that
Express is ready for install. Click Install to continue.
Installation Notes
6
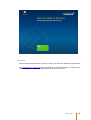
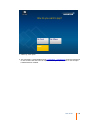
7. Once Express has been successfully installed, the wizard will advise with the following
screen. Click Finish to exit the setup wizard.
7
Installation Notes
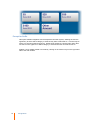
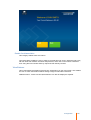
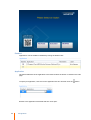
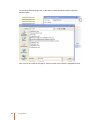
Getting Started
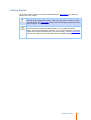
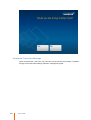
The installer creates shortcuts in the drive selected during the setup wizard. The following
shortcut icons are created.
Start Express
Opens the Express application ready to Add Value, Buy Card or Tickets via Cash
and, or EFTPOS. See User Guide section for a walk-through of the process a user
will go through to do a transaction.
Configure Express
Opens the Express configuration dialog where you can change and activate
settings. Once you have made your changes, you can choose whether you want to
start the main Express application when you exit the dialog. See the Configuration
section of this manual for more information about the available settings.
Installation Notes
8
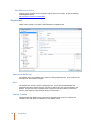
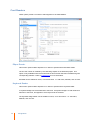
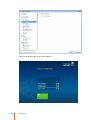
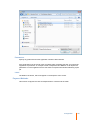
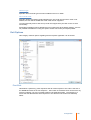
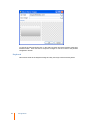
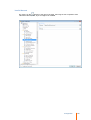
Configuration
Express has a large number of configuration options to customise the application for your site.
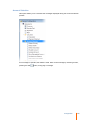
The configuration application is run by double clicking on the Config.exe within the Express
folder.
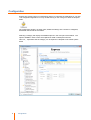
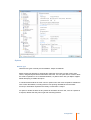
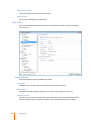
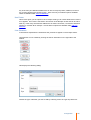
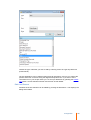
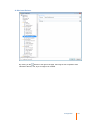
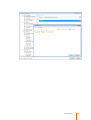
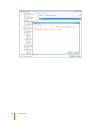
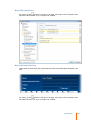
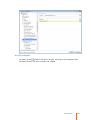
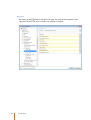
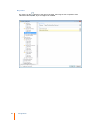
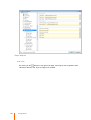
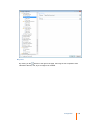
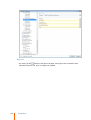
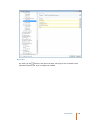
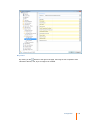
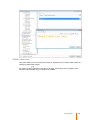
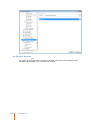
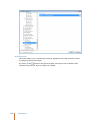
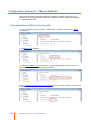
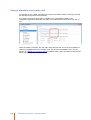
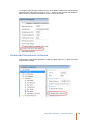
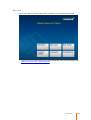
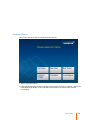
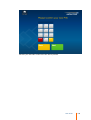
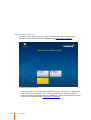
The configuration window, as shown here, divides the settings into a number of categories,
listed down the left side of the window.
Selecting a category will display the available options in the main part of the window. The
options available in each section are explained in detail in subsequent sections.
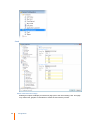
This icon
listed.
9
Configuration
represents that the category can be expand or collapsed to see further options
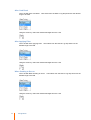
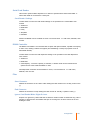
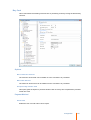
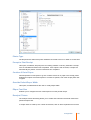
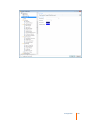
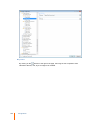
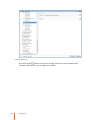
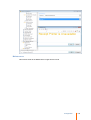
General
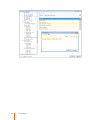
Debug Logging
This is a system setting that generates a detailed background record of all actions by the
Express software. The information generated by this feature may be used by technical staff to
rectify an issue.
You may be asked to enable this option in order to diagnose a particular issue.
Configuration
10
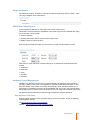
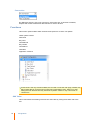
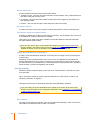
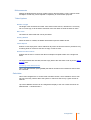
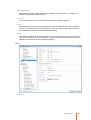
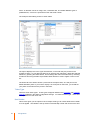
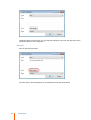
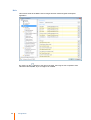
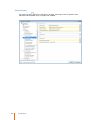
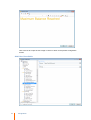
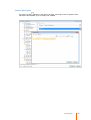
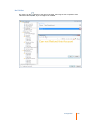
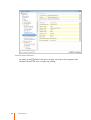
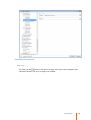
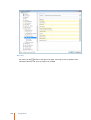
After Card Read
Tick to enable After Card Read. Then select from the Data to Log drop down box the desired
range to be read.
Using the arrow key select the desired read digits from the card.
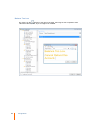
After Applying Filter
Tick to enable After Applying Filter. Then select from the Data to Log drop down box the
desired range to be read.
Using the arrow key select the desired read digits from the card.
When Sending to Server
Tick to enable When Sending to Server. Then select from the Data to Log drop down box the
desired range to be read.
Using the arrow key select the desired read digits from the card.
11
Configuration
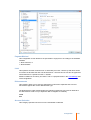
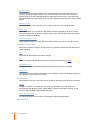
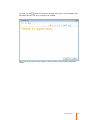
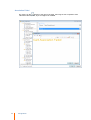
Skype Assistance
By enabling this option, assistance calls can be made through Skype from the Kiosk. Enter
your skype address into the field below.
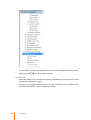
USB Kiosk Control Board
Kiosks supplied by Monitor will come fitted with a kiosk control board.
This board is used to extend the capabilities of the kiosk beyond what is possible with using
just a computer. These include:
· Intrusion detection
· Disabling the alarms when a special access card is used
· Battery backup circuit for the siren
Even though the interface is USB, the connection is a serial communications channel.
Alter these to match the Kiosk computer settings or as specified in the Kiosk board user
manual.
· Serial Port
· Baud Rate
· Parity
· Stop Bits
· Data Bits
Hardware Power Management
Windows may attempt to shut down the network adaptor and USB ports during periods of
inactivity in order to save power. This behaviour is generally undesirable for a kiosk, as they
there are usually many periods of inactivity during the day. When the device 'wakes up', it
takes time to re-establish connection to the peripherals and can result in the message 'Busy'
being displayed for a number of seconds before the user can begin their activities at the kiosk.
The following options have been included to help mitigate this Windows behaviour.
Stop Network Card Sleep
Express makes changes to the computer's registry each time it starts, as per the following
knowledgebase articles.
XP http://support.microsoft.com/kb/837058
Window 7 http://support.microsoft.com/kb/2740020
Configuration
12
Stop USB Device Sleep
Express makes changes to the computer's registry each time it starts, as per the following
knowledgebase article.
http://support.microsoft.com/kb/314634
Supervisor
These options provide a connection and integration to Supervisor Net.
Supervisor Net Server
The network name or IP address of the machine running Supervisor Net. This machine must
be visible from the Express computer.
Port
The network port used to connect to Supervisor Net. If there are firewalls between the
Supervisor Net server and the Express computer or Kiosk, this port must be opened in the
firewall. This port must also correspond to the Supervisor Net Port setting in the Server
section of the Supervisor Net Settings dialog in Administrator.
Primary Creation
This determines the default record used when a Supervisor Net account is created. The
created account will inherit its settings from this default record.
13
Configuration
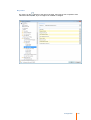
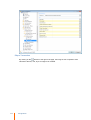
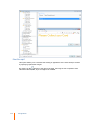
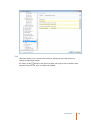
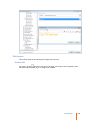
PIN support
This applies to the Add Value Function, where a PIN will be requested if it is enabled in the
user's account. If the user's account's PIN status is 'Set New', it will prompt for user to set a
new PIN.
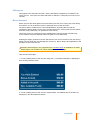
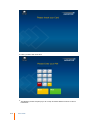
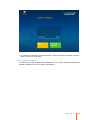
Bonus Amounts
Bonus amounts are values gifted to the user based upon how much money they insert during
that session. It is an incentive for users to add larger sums to their accounts.
Any bonus value is credited to the user's Quota Balance. Supervisor Net can then be
configured to deduct funds from the user's normal balance first, ensuring that the user spends
their own money before they can spend their bonus money.
This bonus system is configured on the Autoloader tab of the EFT SETUP terminal setup
record. Please consult the Supervisor Net user guide for more information.
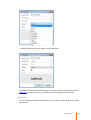
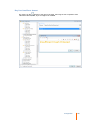
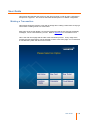
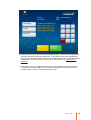
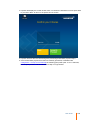
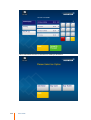
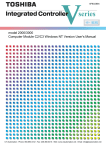
Enabling the display of 'Bonus Amounts' will show the user how much bonus they are earning
based upon the value they are reloading their account by. Bonus value is also applicable to the
purchase of casual user tickets.
Add value bonus display is only supported if the calculator option is disabled for the Cash/
Eftpos pages. The calculator can still be displayed on the main page.
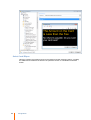
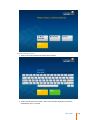
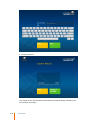
Here are some examples:
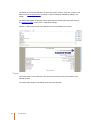
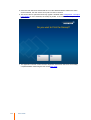
1. A user is adding value to their account using cash. A complete break-down is displayed to
them as they insert the funds:
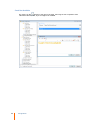
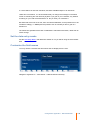
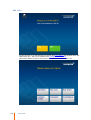
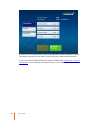
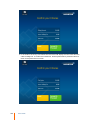
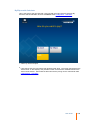
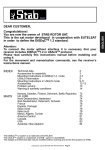
2. A user is adding value to their account using EFTPOS. The available bonus amounts are
displayed on the value selection buttons:
Configuration
14
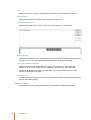
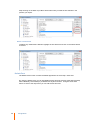
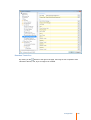
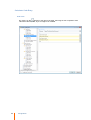
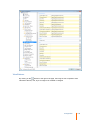
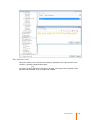
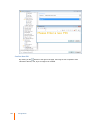
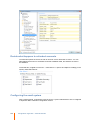
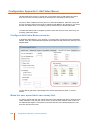
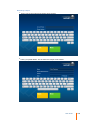
Prompt for Suffix
This option enables integration with the Supervisor Net suffix system, allowing the user the
opportunity to select which category of services they want to add funds to. It should only be
used if you are using suffixed accounts. Enable suffix support by checking this option then
use the Account Types list to define category of services the user can have access to.
Suffixes can be Added, Edited or removed by clicking on the function keys on the right hand
side of the main window.
15
Configuration
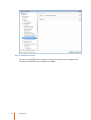
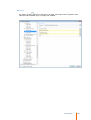
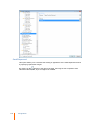
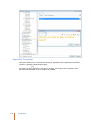
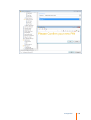
Card Settings
These options enable the functions on the account card.
Add Value Fee
This enables a fee to be charged when value added.
Eftpos Add Value
This enables the card to add value by EFTPOS.
Cash Add Value
This enables the card to add value using Cash.
Max Balance
This shows the maximum balance allowed on the account. See Functions-Add Value to set
this maximum balance.
Auto Insert
This function, if ticked will create an account within Supervisor Net, if the Card account is not
found. If this box is left un-ticked, the card will be rejected if account not set up in Supervisor
Net.
Configuration
16
Card Readers
These options provide a connection and integration to the Card Readers.
Eftpos Reader
This function option enables Express PC or Kiosk to operate with an EFTPOS reader.
The account number is obtained by the card being swiped on the EFTPOS pinpad. This
option is only available where the PC-EFTPOS or DPS terminal has been installed along with
corresponding software. Refer to requirements for more information.
EFTPOS can be enabled on some, or for all functions .i.e. Add Value, Refunds, Tech Access.
Keyboard Reader
This function option enables Express PC or Kiosk to operate with a Keyboard reader.
A keyboard wedge unit will be attached to the kiosk. A keyboard wedge is a card reader that
attaches to the kiosk, and appears to be a keyboard to the software.
The keyboard wedge reader can be enabled on some, or for all functions .i.e. Add Value,
Refunds, Tech Access.
17
Configuration
Serial Card Reader
This function option enables Express PC or Kiosk to operate with a Serial Card reader. A
serial card reader is connected to a serial port.
Card Reader Settings
To alter these to match the card reader settings or as specified in the card reader's user
manual
· Serial Port
· Baud Rate
· Parity
· Stop Bits
· Data Bits
Serial Card Reader can be enabled on some or for all functions .i.e. Add Value, Refunds, Tech
Access.
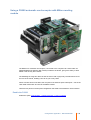
D3000 Controller
The D3000 card reader is a motorised card acceptor and optional reader, capable of accepting
a user's card, reading a mifare card (option) and 'swallowing' a card (For purposes such as
automated refunds).
To alter these to match the card dispenser settings or as specified in the card dispenser's
user manual
· Serial Port
· Baud Rate
· Card Capacity - Once this capacity is reached, no further cards can be inserted until a
special access card 'CARD ACCESS' is used.
Card Dispenser Controller can be enabled on some, or for all functions .i.e. Add Value,
Refunds, Tech Access.
Filter
Start Character
Defines the character on the card to start reading the card number from. Usually a semi-colon
(;).
End Character
Defines the character to stop reading the card number at. Usually a question mark (?).
Ignore Card Reads With x Digits Or Less
Express can ignore any cards read that are below a certain number of characters long. This is
primarily to ignore those card readers that put out a string such as 'Error' if there is an error
reading the card.
Configuration
18
Conversion
By default this option is set to No Conversion. If the option Hex To Decimal is enabled,
Express will convert hexadecimal data read from a card to decimal.
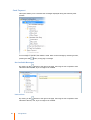
Functions
This function option enables which services the Express PC or Kiosk can operate.
These options include:
Add Value
Buy Card
Card Refunds
Buy Tickets
Card Refund
Calculator
Application Launcher
If Add Value is the only function enabled, the user will not see the main page; instead, they
will be taken directly to the account number entry/card swipe screen. There is no point
asking the user what function they would like to perform if there is only one function to
choose from.
Add Value
This screen allows the enabling of the function Add Value by ticking the Enable Add Value
box.
19
Configuration
Payment Method
This configuration screen allows for the specification of payment to according to the hardware
installed:
· allow Cash and, or
· allow EFTPOS
Limit
This specifics what the maximum limit on Secondary accounts. Use the up and down arrows
to increase or decrease the limit in $100 increments. The limit amount can also be typed over
should the limit be a specific amount i.e. $2,550.
Maximum balances on Primary accounts is set on a per-prefix basis in the Card Settings area
of the configuration.
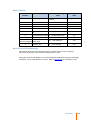
Disbursements
This category allows you to enter the disbursement name from Supervisor Net to record
transactions against the correct disbursement type.
The disbursement codes entered against the following transaction type must be identical to
the disbursement code set up in Supervisor Net to integrate successfully.
Load
Fee
Account Selection
This category specifies how the Account/ Card Number is obtained.
Configuration
20
Use Card Reader
The user swipes their card to enter their account information.
Enter Account Number
The account number is typed in manually by the user on an on-screen keyboard.
Enter Account ID
The account ID (Primary ID Field) is typed in manually by the user on an on-screen keyboard.
Enter Username/Password
The user's network username and password is typed in manually by the user on an on-screen
keyboard. These credentials are authenticated by Supervisor Net using its external interface,
which is configured using Supervisor Administrator is the system settings.
Mobile Phone (QR Code)
A QR code is displayed on the main page and card swipe screen in Express. Express can
then be activated using the mobile application.
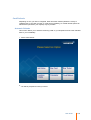
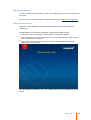
Show Welcome Page
Tick to enable an initial Welcome page for users, which displays their account current
balance.
21
Configuration
Enable Card Association
This category enables Card Association.
Card Association enables the user to swipe a card that does not exist in Supervisor Net. They
will then enter their network username and password, and a new account will be created for
them using that card number that they swiped as their Primary Number.
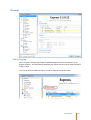
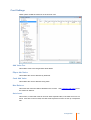
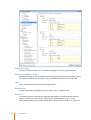
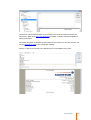
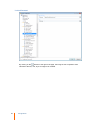
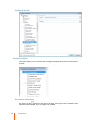
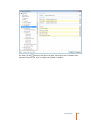
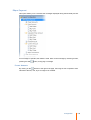
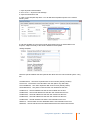
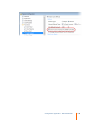
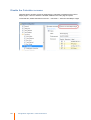
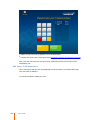
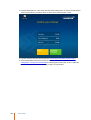
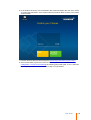
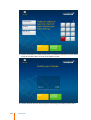
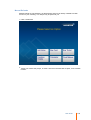
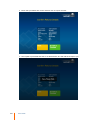
View Balance
This screen allows the enabling of the function View balance on the main screen. This enables
the user to check their balance without having to begin an add value transaction.
Additional items - Credit Limit and Quota Balance can also be displayed if required.
Configuration
22
Here is an example of this screen when enabled:
23
Configuration
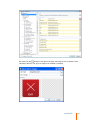
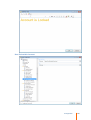
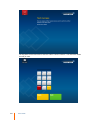
Buy Card
This screen allows the enabling of the function of purchasing a Card by ticking the Enable Buy
Card box.
Options
Min Transaction Amount
The minimum amount that can be loaded on to the card when it is purchased.
Max Initial Amount
The maximum amount that can be loaded onto the card when it is purchased.
Prompt to Buy Another Card
This option gives the Option to purchase another card once they have completed the purchase
of their first card.
Payment Method
Allow Cash
Enable the use of a note and/or coin acceptor.
Configuration
24
Allow Eftpos
Enable the use of an EFTPOS terminal for debit or credit card transactions.
Disbursements
A list of disbursements (Pricing models) used by Express for various functions.
The cost of the card is obtained from the pricing model associated with the Card Fee.
Hardware
Card Dispenser
Select from the drop down menu the dispenser hardware installed. Currenty supported units
are:
M100A - Card dispenser with card reader (To read the card number as its being dispensed)
and reject card bin.
Kiosk Board - Simple card dispenser with card empty and card jam sensor.
Com Port
Specifies where the card dispenser/ USB device is connected. This must match the COM
port used by the FTDI VCP (Virtual Com Port) USB driver. Note that the VCP driver should be
configured to use COM port 3 or 4, since the TL Technologies device will not work with a
higher port setting.
Baud Rate
To match the card reader settings or as specified in the card reader's user manual.
Bin Capacity
Specifies how many reject cards can be held in the dispenser before it has to be cleared by a
technician. Only applicable for the M100A card dispenser.
Card Refund
This screen allows the enabling of the function of Card Refunds by ticking the Enable Card
Refund box.
A card refund is a convenient way for a user to be given their money back when they are
leaving a site for good. Some example of this are a student leaving University, or a patient
leaving hospital.
To activate this feature, tick the Enable Card Refund box.
25
Configuration
Options
Refund Type
There are two types of refund process available - Eftpos and Manual.
Eftpos refund type attempts to automatically refund the user back to a bank card of their
choice, using the Eftpos terminal attached to the kiosk. It is now quite rare for a bank to allow
this mode of operation in an un-attended situation, so please check with your Eftpos supplier
before attempting to enable this option.
A manual refund would be the most common option used. This mode of operation enables the
user to enter their details, including bank account (if being refunded back to their bank
account) or information required for the facility to write them a cheque.
An option to donate the funds is also present for situations where a user, such as a patient in
a hospital, decides that they wish to gift their remaining balance.
Configuration
26
Manual Refund Type
If a Manual Refund is being used, there are three options:
· To Bank Account - The user must enter their bank account details, and an administrator will
then direct-credit that user's account
· By Cheque - The user must enter details including the name to appear on the cheque and
their postage details
· Donation - The user has the option of donating their credit to the facility
Min Refund Amount
A minimum amount can be set to prevent excessive administration costs for small amounts.
Card must be inserted in D3000 Controller
If enabled, a D3000 card acceptor must be fitted to the kiosk. The advantage of this unit is that
it will swallow the card once the refund is complete.
This option is only viable if the card is a Mifare card and the D3000 unit has been fitted with
the optional Mifare reader module.
Why have this option? Why not just disable the ability for the other card mechanisms to
process refunds? The reason for this is that the Serial Card Reader option needs to also be
enabled for refunds, as this is the Mifare card reader fitted to the D3000 unit.
Charge Manual Refund Fee For Donations
In order to cover administrative overheads, a site may elect to charge a fee for processing the
manual refund.
Depending on how the administration of the site is set up, one department may handle the
refunds and therefore require a portion of a donation for processing the refund. On other sites,
the administration may be handled by the same department receiving the donation, therefore a
refund fee does not have to be applied to the donation.
Data Entry Masks
Data Entry Masks enable the ability for the user to be constrained as to what they can enter
for a given field.
This is achieved by entering a series of special characters as a data mask, as well as any
formatting characters, as required.
Valid special characters are 9 (Optional character) and 0 (Mandatory character).
If you are wanting to rename the fields as they appear on the screen to the user, these
strings can be found later in the configuration application under Appearance -> Card Refund
-> Manual Refund Data Entry
Phone Number
The mask for the phone number field. Care must be taken when defining a mask, as there are
often different combinations that are valid. For example:
27
Configuration
09 555 5555
021 555 5555
021 555 555
In this situation, the first few digits are variable, therefore should be made optional, and the
very last digit must be optional also. The mask should therefore be 999 000 0009. Other
characters such as brackets around the area code and dashes between numbers can also
make it easier to read. The final version of the mask would therefore be (999) 000-0009.
The user would be presented with this form:
After filling it in, it may end up looking like this (They don't have a last digit on their number):
Bank Field 1
The mask for the first field of the bank account number. You may get away with only having to
use one bank account field if enough information can be entered on the single line.
Use Bank Field 2
Tells Express whether or not to display the second bank account field on the screen. The
second bank account may not be necessary if everything was able to fit nicely on the first
field.
Bank Field 2
The mask for the second field of the bank account number.
Disbursements
The disbursements (Pricing Models) used for different aspects of the refund process. Refund
and Donation are only for display in the transactions for refunds and donations respectively.
Manual Refund Fee also sets the price of the fee, if applicable. To alter the fee amount, edit
the ADMIN CHARGE pricing model in Supervisor Net, setting the Variable Rate -> Count item
price to the amount of the fee.
After Refund
These options determine what happens to the account once the refund has completed.
Configuration
28
Reset Primary Fields
The chosen fields in the account are blanked out.
Delete Primary
The account is deleted from the database.
Buy Ticket
This screen allows the enabling of the function of purchasing a Ticket by ticking the Enable
Buy Tick et box.
Payment Method
Sets the methods of payment available in Express.
Allow Cash
Enable the use of a note and/or coin acceptor when purchasing a ticket.
Allow Eftpos
Enable the use of an EFTPOS terminal to buy a ticket using a debit or credit card.
Allow Zero Value
Allow the user to issue themselves with a zero value ticket. Often used in situations where a
ticket is required to book computers or facilities, but the booking itself is free of charge.
29
Configuration
Disbursements
Defines the disbursements (Pricing models) used for the transactions. This is split into Cash
and Eftpos so that they can be reported on separately for reconciliation purposes.
Ticket Options
Number Length
The length of the casual ticket number. Don't set this value too low, otherwise it is a security
risk. If set too high, it will be hard to remember if the user does not have the ticket on them.
Max Value
The maximum value ticket that can be purchased.
Primary Default
When the ticket is created, the details will be based upon this default record.
Ticket Expires
Enforce a ticket expiry date. This is defined in days from the time the ticket is purchased. Any
remaining funds on a ticket at the time of expiry cannot be used.
Enable Combine Tickets
Enables the the user to combine the value of multiple un-expired tickets onto a single new
ticket.
The original tickets are canceled, and the expiry date of the new ticket is set as per the Ticket
Expires value.
Combining Ticket Disbursement
This is the disbursement (Pricing Model) that will be recorded in the transaction when tickets
are combined.
Calculator
This screen configures the on-screen funds calculator function, which enables a user to work
out how much they need to add to the system in order to be able to buy a given number of
services.
Up to three different services can be configured for display to the user. These are shown as
Disbursement 1 - Disbursement 3.
Configuration
30
Enable Calculator
Turns the calculator function on. A new button will appear on the main page of Express.
Show On Cash/Eftpos Pages
Determines whether or not the calculator function will be used while the user is adding funds to
the system. If disabled, the calculator is only accessible via the button on the main page.
Label
This is a user-friendly label for the service being offered.
Disbursement
A disbursement (Pricing Model) number matching an entry in Supervisor Net.
Extension
A read-only field that is automatically populated with values once a disbursement number is
chosen. These values are the various sub-types for the disbursement chosen, e.g. the
disbursement number may be Copies12345, and the extensions are A4 B&W, A4 Colour, etc.
31
Configuration
Application Laucher
This enables you to configure third party applications to appear as a button on Express's main
page. Clicking the button will launch the specified application.
In the example below, the button MiniPOS has been placed on the main screen. Clicking this
button would launch the MiniPOS product.
Configuration
32
Enabled
Applications can be enabled or disabled by ticking the Enabled box.
Application
The path and filename of the application to be launched when the button is clicked on the main
page.
To specify an application, click the into the application text box and then click the
Browse to the application executable and then click Open.
33
Configuration
button.
Parameters
Specify any parameters that the application should be launched with.
If the application must be told to close completely after completing the task, this should be
supplied as a parameter. An example of this is Supervisor Print Release. It will require the
parameters /x to be supplied so that it exits back to Express when finished releasing a print
job.
Label
The label for the button, which will appear on the Express's main screen.
Payment Methods
This section configures the cash and Eftpos devices connected to the kiosk.
Configuration
34
Cash
Show Cash Instructions Page
Enabling this option will display an instruction page prior to the user inserting cash. This page
may contain text, graphics or animations to assist the user with the process.
35
Configuration
Note/Coin Reader
This specifics the type of Note/ Coin Reader installed in the PC or Kiosk. If no Note/ Coin
Reader is installed this should be None.
Com Port
The communication port that connects with the Note/ Coin Reader hardware.
Coins
This specifies the Coin types that the hardware accepts and the value of the coins accepted
by each of the channels in the coin mechanism. Once the communication port connects to
the hardware this information should automatically display.
Notes
This specifies the Note types that the hardware accepts and the value of the bills accepted by
each of the channels in the coin mechanism. Once the communication port connects to the
hardware this information should automatically display.
Eftpos
Amounts
Configuration
36
Minimum Value
The minimum value is the smallest amount, via an EFTPOS transaction, that the user can
choose to add to their Card or Ticket. This is enforced if the user chooses to enter their
amount on the on-screen keyboard rather than selecting a preset amount. If the value they
enter is less than this amount they will see an error message prompting them to enter a higher
amount.
Maximum Value
This is the maximum value that the user can add to their account in a single session.
Preset 1 - 5
This screen allows you to specify the five present amounts displayed for the user to select
from when prompted for an amount to add to their account. The last two presets are optional
and can be disabled individually.
Whole Dollar Mounts Only
When enabled, the user may only add whole dollar amounts (no cents) on to their account.
Small Value Transactions
This function enables a facility to charge a fee for any add value transaction that falls below a
preset threshold.
Limit
The threshold, below which a fee will be charged.
Fee
The fee to charge if the add value transaction is below the threshold set in Limit.
Fee Disbursement
The disbursement (Pricing Model) used for the transaction when a fee is charged.
Fee Account
The Primary Number of the account that the fee is credited to. This is for auditing purposes to
track the flow of money within the system.
Error Handling
This specifies the action in the event of an error after EFTPOS payment has been processed.
Refund
The Eftpos payment is refunded back to the account specified by the user when they
performed the add value transaction. Not all Eftpos systems are capable of refunds, check
with your Eftpos provider before enabling this option.
Retry Until Successful
As soon as Supervisor Net is online, the transaction will be attempted again.
Eftpos Terminal
37
Configuration
Terminal Type
Specifies which terminal type has been installed on the PC or Kiosk.
Allow Credit Cards
Specifies whether the Eftpos reader will attempt to use credit card accounts. If this is not
enabled, the user will be notified that credit cards are not supported.
You will most likely have to have set up credit card support with your bank for this to work
successfully.
Some Eftpos providers need to disable the use of credit cards at the Eftpos gateway, and it is
not possible to disable them using this option. Please check with your Eftpos provider.
Exit Options
This category contains options regarding how the Express application can be closed.
First Click
This defines a special key press sequence that will cause Express to exit. This is the first of
two DOUBLE CLICKS in the exit sequence. The location of the double click can be set to any
of the four settings: Top Left, Top Right, Bottom Left and Bottom Right. The purpose is to
ensure that the administrator has a sequence to exit that the user would not accidentally
select.
Configuration
38
Second Click
This defines the second special key press sequence that will cause Express to exit. This is
the final of the two DOUBLE CLICK sequences to exit Express. It is strongly recommended
for security that this second click be in a different location to the first click selected.
Set Exit PIN
After the double click sequence has been successfully achieved, an Exit button with appear in
the top right hand corner. To exit the application, this button must be clicked twice. Clicking it
once will return you to the express application.
The final stage of the exit sequence is that a PIN is required to complete the exit. An onscreen keyboard will appear allowing the administrator to type in the PIN, then press Enter to
complete the exit.
This configuration option allows the PIN to be set and confirmed.
Printing
This section configures the receipt printer, and the information printed on the receipts and
tickets.
39
Configuration
Printer Type
The drop down box will list the printer hardware connected to the PC or Kiosk to choose from.
Prompt to Print Receipt
This option, if selected, will prompt the user asking whether or not they would like a receipt
once an add value transaction has completed. If this option is left un-ticked, a receipt will
automatically be printed once the transaction has completed.
Continue if Out of Paper
Normal operation is for Express to go out of service if there is no paper in the receipt printer.
Enabling this option will cause Express to continue to operate, even if the receipt printer has
no paper.
Override Default Paper Width
This option, if selected allows the user to modify Paper Width.
Eftpos Font Size
Enables you to configure the size of the Eftpos font on the printed receipt.
Receipts/ Tickets
The receipts/ tickets formatting allows you to create and customise the format used for the
printed receipt/ ticket.
A receipt/ ticket is made up of a number of elements, each of which represents a line of the
Configuration
40
ticket. An element can be an image, text, a horizontal line, and several different types of
predefined text, such as the purchase amount and ticket number.
The receipt/ tickets editing screen is shown below.
The top list displays the Tick et Type line elements, in the order they are printed on the
receipts/ tickets. You can add new elements by pressing the Add button, delete the selected
element by pressing the Delete button, and re-arrange the order of the elements by selecting
an element and using the Move Up and Move Down buttons to move it higher or lower in the
list.
The lower half of the window shows a preview of the receipt/ tickets, as it will print on the
default Windows printer. If you want to display it as it will print on the kiosk, you should set
your printer to the same as the printer in the kiosk.
Ticket Type
There are seven ticket types. Ticket types will appear based on the Functions and Payment
Methods selected in the earlier configuration settings. To create the ticket type - select from
the drop down box then click Add.
Use Header
This tick box gives you the option for each receipt/ ticket type to choose whether the Header
is to be applied. The Header is the top section of the Receipt/ Ticket and can be set to have
41
Configuration
any of the many line elements added such as Text for Company Name, Address, Phone no
etc or Image showing the company's logo. There are many line element options available.
These are detailed under Add Line Elements.
Use Footer
This tick box gives you the option for each receipt/ ticket type to choose whether the Footer is
to be applied. The Footer is the bottom/ end section of the Receipt/ Ticket and can be set to
have any of the many line elements added such as Date of Purchase, Transaction Reference
Number or Terminal ID for example. All line element options are detailed under Add Line
Elements.
Line Elements
A line element represents the information that you'd like to appear on the receipt/ tickets.
Line elements can be created by clicking the Add or Edit button on the right side of the
window.
This displays the following dialog:
Choose the type of element you want to add by selecting it from the Type drop-down box:
Configuration
42
Example of Line Elements added:
Card Number
Displays the user's card number aligned to the right side of the page. You can also enter text
which will be aligned to the left side of the page.
Date of Purchase
Displays the date of purchase and time consistent with the formatting used in the Supervisor
Net settings. The date is aligned to the right side of the page. You can also enter text which
will be aligned to the left of the page. See the Date Formatting Codes section for more
information on formatting the date
43
Configuration
Encrypted Card Number
Displays the card number as a encrypted series of letters aligned to the right side of the page.
The line can also include text that is aligned to the left edge of the page.
The card number can be decrypted in Supervisor Administrator if you need to find the account
that matches the receipt.
Expiry Date
Displays the expiry date and time consistent with the formatting used in the Supervisor Net
settings. The date is aligned to the right side of the page. You can also enter text which will
be aligned to the left of the page. See the Date Formatting Codes section for more information
on formatting the date.
Horizontal Line
Displays a horizontal line. The thickness of the line can be set using the Thickness setting.
Image
Displays a jpg, png, tiff, bitmap image. Select the file containing the image using the Select
button in Other Properties. A preview will be shown in the lower part of the dialog. You can
also adjust the horizontal alignment of the image on the page to Left, Center, Right.
Net Amount
Displays the value of the receipts/ tickets. The value will be aligned to the right side of the
page. You can also enter text which will be aligned to the left side of the page.
New Balance
Displays the updated value of the users account following the successful transaction.The value
will be aligned to the right side of the page. You can also enter text which will be aligned to the
left side of the page.
Payment Amount
Displays the amount paid for the Card/ Ticket include any fee. The amount will be aligned to
the right side of the page. You can also enter text which will be aligned to the left side of the
page.
Payment Method
Displays the method used to pay for the Card/ Ticket. The method description will be aligned
to the right side of the page. You can also enter text which will be aligned to the left side of the
page.
Refund Reference Number
Enter topic text here.
Tax
Displays the tax component of the Receipt/ Tickets. The tax rate is set using the Rate edit
box. The amount will be aligned to the right side of the page, and you can also enter text
which will be aligned to the left side of the page.
Terminal ID
Displays the terminal ID code on the Receipt/ Ticket.
Configuration
44
Text
Displays a line of text. The font and alignment of the text can be adjusted as necessary.
Ticket Number
Displays the casual ticket number. (When printing a casual ticket)
Ticket Number Barcode
Displays the casual ticket number as a barcode. (When printing a casual ticket).
Transaction Fee
Displays the fee deducted from the payment amount. The fee will be aligned to the right side of
the page. You can also enter text which will be aligned to the left side of the page.
Transaction Reference Number
Displays the terminal generated reference number of the transaction. This transaction
reference number can be queried from the database in the future to find the transaction.
The fee will be aligned to the right side of the page. You can also enter text which will be
aligned to the left side of the page.
Verticle Spacer
Creates a vertical space (like a blank line) on the Receipts/ Tickets. The height of the space is
given by the Spacing setting.
Add Line Element
Add new elements by pressing the Add button. This displays the dialog shown below:
45
Configuration
Choose the type of element you want to add by selecting it from the Type drop-down box
(shown above).
The text appearance can be selected using the Edit Style button, and you can change the
position of the text on the line using the alignment drop-down box. If you want to use a
consistent font on your receipt/ ticket you can set up a default font by pressing the Default
Font button. All new elements will then use that font as their default.
Edit Line Element
Attributes of the line elements can be edited by pressing the Edit button. This displays the
dialog shown below:
Configuration
46
Within this Edit Tick et Item box you can edit and change the Type from the drop down menu
and amend the text, font or alignment.
Edit Style
Click on the edit style button.
The Font Family, Size and Weight can be selected from the drop down boxes.
47
Configuration
A preview of the selection style appears in the preview pane.
If you wish to edit the the default font to have a consistent style on all line elements refer to
Default font. By choosing Inherit, you are electing to use the value in the default font.
Edit Position
You can also edit the position of the line element by clicking on either the Move Up or Move
Down buttons.
Configuration
48
Keep clicking on the Move Up or Move Down button until you have the line element in the
position you require.
Delete Line Element
To delete any unwanted line element highlight the line element and click on the Delete button
to remove.
Default Font
The Default Font function controls the default appearance of the receipt / ticket text.
By using the Default Font you can standardise all text and line elements (that haven't already
been individually customised) to pre-defined font styles and sizes. Using the arrow down
button on each of the drop boxes you can edit the font and size.
49
Configuration
The weight option gives additional style to the font and size chosen (see below).
Header
This option allows you to enter text or any other line element into the Header space on
selected Receipt/ Tickets.
Configuration
50
The header is a recommended option for reoccurring items such as Tick et No, Image or Text.
Refer to the list of Line Elements for details on the line elements available for adding to the
header.
The Header will appear on Receipt/ Tickets where the Use Header option has been ticked in
the Receipts/ Tickets section of the configuration settings.
There is no limit to the number of line elements that can be added to the Header.
Footer
This option allows you to enter text or any other line element into the Footer space on the
Receipt/ Tickets.
The Footer space begins at the bottom of the main line elements.
51
Configuration
The footer is a recommended option for reoccurring items such as Date of Purchase and
Terminal ID. Refer to the list of Line Elements for details on the line elements available for
adding to the footer.
The Footer will appear on Receipt/ Tickets where the Use Footer box has been ticked in the
section Receipts/ Tickets of the configuration settings.
There is no limit to the number of line elements that can be added to the Footer.
Configuration
52
Appearance
Hide Mouse Cursor
Specifies whether the Windows cursor is visible on-screen. In general this should be turned off
for a touch-screen kiosk, but it may be useful to have it on during setup or if the application is
being used with a mouse.
Button Positions
Select special function buttons position - either Top Left or Top Right. Special functions are
things such as the Home button, Exit and call for assistance.
Busy Indicator
Enter the text message for when Express is thinking/ busy. Click on Edit Style to customise
the font and size of message.
Common
This section holds all the Common images for Background, Button and Button Text used
throughout the Express application.
53
Configuration
By clicking on the
buttons to the right of the page, the image or text is opened to view.
This allows the text, font, style or image to be modified or changed.
Configuration
54
To change the selected image click on the side box button and select another image from
another location.
Then click OK to accept the changes or Cancel to return to the previous configuration Screen.
55
Configuration
Number Pad
This section holds all the Button images and Button Text used for the Number Pad.
By clicking on the
buttons to the right of the page, the image or text is opened to view.
This allows the text, font, style or image to be modified or changed.
Configuration
56
To change the selected image click on the side box button and select another image from
another location. Then click OK to accept the changes or Cancel to return to the previous
configuration Screen.
Keyboard
This section holds all the Keyboard image and Key Text Style used for the Keyboard.
57
Configuration
Configuration
58
Main
This section holds all the Main Function images and text used throughout the Express
application.
By clicking on the
buttons to the right of the page, the image or text is opened to view.
This allows the text, font, style or image to be modified.
59
Configuration
Calculator
This section holds all the Calculator images and text used throughout the Express application.
If no message is specified, the default is used. Enter a new message by selecting an item,
pressing the Edit
button, and typing a message. To reset a message back to its default,
select it and press the Cancel button.
Calculator
Configuration
60
By clicking on the buttons to the right of the page, the image is opened. This allows another
image to be selected.
Then click OK to accept the new image or Cancel to return to the previous configuration
Screen.
Payment Method
By clicking on the
buttons to the right of the page, the image or text is opened to view.
This allows the text, font, style or image to be modified or changed.
61
Configuration
Account Selection
This option allows you to customise the messages displayed during the Account Selection
process.
If no message is specified, the default is used. Enter a new message by selecting an item,
pressing the Edit
button, and typing a message.
Configuration
62
Select Primary
By clicking on the
buttons to the right of the page, the image or text is opened to view.
This allows the text, font, style or image to be modified.
63
Configuration
Select Suffix
By clicking on the
buttons to the right of the page, the image or text is opened to view.
This allows the text, font, style or image to be modified.
Configuration
64
Select Secondary
By clicking on the
buttons to the right of the page, the image or text is opened to view.
This allows the text, font, style or image to be modified.
65
Configuration
Invaild Account
By clicking on the
buttons to the right of the page, the image or text is opened to view.
This allows the text, font, style or image to be modified.
Configuration
66
Locked Account
By clicking on the
buttons to the right of the page, the image or text is opened to view.
This allows the text, font, style or image to be modified.
67
Configuration
Non-Reloadable Account
Configuration
68
By clicking on the
buttons to the right of the page, the image or text is opened to view.
This allows the text, font, style or image to be modified.
69
Configuration
At Maximum Balance
By clicking on the
buttons to the right of the page, the image or text is opened to view.
This allows the text, font, style or image to be modified.
Configuration
70
Then click OK to accept the new image or Cancel to return to the previous configuration
Screen.
Add Value Unavailable
71
Configuration
By clicking on the
buttons to the right of the page, the image or text is opened to view.
This allows the text, font, style or image to be modified.
Then click OK to accept the new image or Cancel to return to the previous configuration
Screen.
Configuration
72
Validate ID No PIN
Card Association
This option allows you to customise the messages displayed during the Card Association
process.
Association Instructions
By clicking on the
buttons to the right of the page, the image or text is opened to view.
This allows the text, font, style or image to be modified.
73
Configuration
Configuration
74
Validate User
There are no strings to configure for this section, as they are shared with other screens and
edited in the common section.
75
Configuration
Confirm Association
By clicking on the
buttons to the right of the page, the image or text is opened to view.
This allows the text, font, style or image to be modified.
Configuration
76
Association Failed
By clicking on the
buttons to the right of the page, the image or text is opened to view.
This allows the text, font, style or image to be modified.
77
Configuration
Card Refund
This option allows you to customise the messages displayed during the Card Refund
process.
For a step by step guide to configuring the manual refund system, please refer to Appendix
1: Manual Refunds.
Insert/ Swipe Card
By clicking on the
buttons to the right of the page, the image or text is opened to view.
This allows the text, font, style or image to be modified.
Configuration
78
79
Configuration
Enter Account PIN
By clicking on the
buttons to the right of the page, the image or text is opened to view.
This allows the text, font, style or image to be modified.
Confirm Refund
By clicking on the
buttons to the right of the page, the image or text is opened to view.
This allows the text, font, style or image to be modified.
Configuration
80
81
Configuration
No PIN Set
By clicking on the
buttons to the right of the page, the image or text is opened to view.
This allows the text, font, style or image to be modified.
Configuration
82
Balance Too Low
By clicking on the
buttons to the right of the page, the image or text is opened to view.
This allows the text, font, style or image to be modified.
83
Configuration
Manual Refund Options
By clicking on the
buttons to the right of the page, the image or text is opened to view.
This allows the text, font, style or image to be modified.
Manual Refund Data Entry
These fields are used during the manual refund process for the field labels displayed to the
user:
By clicking on the
buttons to the right of the page, the image or text is opened to view.
This allows the text, font, style or image to be modified.
Configuration
84
Confirm Refund Details
By clicking on the
buttons to the right of the page, the image or text is opened to view.
This allows the text, font, style or image to be modified.
85
Configuration
Donation Thank You
By clicking on the
buttons to the right of the page, the image or text is opened to view.
This allows the text, font, style or image to be modified.
Configuration
86
Retry Send Refund Email
By clicking on the
buttons to the right of the page, the image or text is opened to view.
This allows the text, font, style or image to be modified.
87
Configuration
No Refund Payable
By clicking on the
buttons to the right of the page, the image or text is opened to view.
This allows the text, font, style or image to be modified.
Configuration
88
Select Cash/ Eftpos
This area contains the images and text for the Eftpos and Cash selection buttons, including
the additional text added to the button if the particular function is unavailable for whatever
reason.
89
Configuration
By clicking on the
buttons to the right of the page, the image or text is opened to view.
This allows the text, font, style or image to be modified or changed.
Configuration
90
Cash Payment
This option allows you to customise the messages displayed during the Cash Payment
process.
If no message is specified, the default is used. Enter a new message by selecting an item,
pressing the Edit
button, and typing a message.
Not Available Messages
By clicking on the
buttons to the right of the page, the image or text is opened to view.
This allows the text, font, style or image to be modified
.
Instructions
By clicking on the
buttons to the right of the page, the image or text is opened to view.
This allows the text, font, style or image to be modified.
91
Configuration
Cash Entry
Add Value
By clicking on the
buttons to the right of the page, the image or text is opened to view.
This allows the text, font, style or image to be modified.
Configuration
92
Buy Card
By clicking on the
buttons to the right of the page, the image or text is opened to view.
This allows the text, font, style or image to be modified or changed.
93
Configuration
Buy Ticket
By clicking on the
buttons to the right of the page, the image or text is opened to view.
This allows the text, font, style or image to be modified or changed.
Configuration
94
Calculator Cash Entry
Add Value
By clicking on the
buttons to the right of the page, the image or text is opened to view.
This allows the text, font, style or image to be modified.
95
Configuration
Buy Card
By clicking on the
buttons to the right of the page, the image or text is opened to view.
This allows the text, font, style or image to be modified.
Configuration
96
Buy Ticket
By clicking on the
buttons to the right of the page, the image or text is opened to view.
This allows the text, font, style or image to be modified.
97
Configuration
Buy Card Insufficent Amount
By clicking on the
buttons to the right of the page, the image or text is opened to view.
This allows the text, font, style or image to be modified.
Configuration
98
Cash Not Available
By clicking on the
buttons to the right of the page, the image or text is opened to view.
This allows the text, font, style or image to be modified.
99
Configuration
Eftpos Payment
This option allows you to customise the messages displayed during the EFTPOS process.
If no message is specified, the default is used. Enter a new message by selecting an item,
pressing the Edit
button, and typing a message.
Preset Amounts
By clicking on the
buttons to the right of the page, the image or text is opened to view.
This allows the text, font, style or image to be modified.
Configuration
100
Enter Amount
Add Value
By clicking on the
buttons to the right of the page, the image or text is opened to view.
This allows the text, font, style or image to be modified.
101
Configuration
Buy Card
By clicking on the
buttons to the right of the page, the image or text is opened to view.
This allows the text, font, style or image to be modified.
Configuration
102
Buy Ticket
By clicking on the
buttons to the right of the page, the image or text is opened to view.
This allows the text, font, style or image to be modified.
103
Configuration
Calculator Enter Amount
Add Value
By clicking on the
buttons to the right of the page, the image or text is opened to view.
This allows the text, font, style or image to be modified.
Configuration
104
Buy Card
By clicking on the
buttons to the right of the page, the image or text is opened to view.
This allows the text, font, style or image to be modified.
105
Configuration
Buy Ticket
By clicking on the
buttons to the right of the page, the image or text is opened to view.
This allows the text, font, style or image to be modified.
Configuration
106
Invalid Amount
By clicking on the
buttons to the right of the page, the image or text is opened to view.
This allows the text, font, style or image to be modified.
107
Configuration
Confirm Amount
Add Value
By clicking on the
buttons to the right of the page, the image or text is opened to view.
This allows the text, font, style or image to be modified.
Configuration
108
Buy Card
By clicking on the
buttons to the right of the page, the image or text is opened to view.
This allows the text, font, style or image to be modified.
109
Configuration
Buy Ticket
By clicking on the
buttons to the right of the page, the image or text is opened to view.
This allows the text, font, style or image to be modified.
Configuration
110
Eftpos Transaction
By clicking on the
buttons to the right of the page, the image or text is opened to view.
This allows the text, font, style or image to be modified.
111
Configuration
View Balance
By clicking on the
buttons to the right of the page, the image or text is opened to view.
This allows the text, font, style or image to be modified or changed.
Configuration
112
Add Value Welcome
By clicking on the
buttons to the right of the page, the image or text is opened to view.
This allows the text, font, style or image to be modified or changed.
Note that the {Primary.Name} value is replaced by the user's name before it is displayed to
them.
113
Configuration
Combine Tickets
This option allows you to customise the wording or appearance of the Combine Tickets
screens by specifying replacement images.
By clicking on the
buttons to the right of the page, the image or text is opened to view.
This allows the text, font, style or image to be modified.
Configuration
114
Card Dispensed
This option allows you to customise the wording or appearance of the Card Dispensed screens
by specifying replacement images.
By clicking on the
buttons to the right of the page, the image or text is opened to view.
This allows the text, font, style or image to be modified.
115
Configuration
D3000 Collect Card
This option allows you to customise the wording or appearance of the Collect Card screens by
specifying replacement images.
By clicking on the
buttons to the right of the page, the image or text is opened to view.
This allows the text, font, style or image to be modified.
Configuration
116
Print Receipt?
This option allows you to customise the wording or appearance of the Print Receipt? screens
by specifying replacement images.
By clicking on the
buttons to the right of the page, the image or text is opened to view.
This allows the text, font, style or image to be modified.
117
Configuration
Buy Another Card?
This option allows you to customise the wording or appearance of the Buy Another Card?
screens by specifying replacement images.
By clicking on the
buttons to the right of the page, the image or text is opened to view.
This allows the text, font, style or image to be modified.
Configuration
118
Supervisor Transaction
This option allows you to customise the wording or appearance of the Supervisor Transaction
screens by specifying replacement images.
By clicking on the
buttons to the right of the page, the image or text is opened to view.
This allows the text, font, style or image to be modified.
119
Configuration
Refund to Ticket
By clicking on the
buttons to the right of the page, the image or text is opened to view.
This allows the text, font, style or image to be modified.
Configuration
120
No Receipts Warning
By clicking on the
buttons to the right of the page, the image or text is opened to view.
This allows the text, font, style or image to be modified.
121
Configuration
Maintenance
This section holds all the Maintenance images and text used.
Configuration
122
If no message is specified, the default is used. Enter a new message by selecting an item,
pressing the Edit
button, and typing a message.
Tech Access
This option allows you to customise the wording or appearance of the Tech Access screens
by specifying replacement images.
By clicking on the
buttons to the right of the page, the image or text is opened to view.
This allows the text, font, style or image to be modified.
123
Configuration
Exit
This option allows you to customise the wording or appearance of the Exit screens by
specifying replacement images.
By clicking on the
buttons to the right of the page, the image or text is opened to view.
This allows the text, font, style or image to be modified.
Configuration
124
Out of Service
This option allows you to customise the wording or appearance of the Out of Service screens
by specifying replacement images.
By clicking on the
buttons to the right of the page, the image or text is opened to view.
This allows the text, font, style or image to be modified.
125
Configuration
PIN Support
This section holds all the PIN Support images and text used.
Set New PIN
By clicking on the
buttons to the right of the page, the image or text is opened to view.
This allows the text, font, style or image to be modified.
Configuration
126
Confirm New PIN
By clicking on the
buttons to the right of the page, the image or text is opened to view.
This allows the text, font, style or image to be modified.
127
Configuration
Configuration
128
Configuration Appendix 1: Manual Refunds
This section will guide you through all the steps required to configure the system to give
manual refunds, including the email configuration required to send the manual refund request
to a system administrator.
Activating Manual Refund functionality
1. In the configuration, under Functions -> Card Refund -> Options, Tick the option Enable
Card Refund
2. Set Refund Type to Manual.
3. Under Manual Refund Type, Choose which types of manual refund to offer the user. The
options are To Bank Account, By Cheque or Donation.
4. Set a minimum allowable amount to be refunded. Any account with less than this will not be
refunded.
129
Configuration Appendix 1: Manual Refunds
Setting the fees
Fees are optional, but a good way to cover administration costs. If this is enabled, the fee will
be deducted from the user's account prior to the refund application being sent to the
administrator.
1. Choose which disbursement (pricing model) you wish to use for the fee. Where possible,
this should be left at the default value of ADMIN CHARGE.
2. Open Supervisor Administrator and then go to Transaction -> Pricing Model
3. Find the pricing model defined in step 1, and edit it.
4. Open the Variable Rate tab and change the Count Item - Price to the value of the refund
fee.
5. If you wish to deduct a refund fee prior to the donation being processed, enable the option
Charge Manual Refund Fee For Donations in the Express configuration tool.
Configuration Appendix 1: Manual Refunds
130
If account balances are less that the fees
There will be situations when a user's account balance is less than the refund fee that you
have set. In addition to this scenario is whether or not a donation is subject to the refund fee,
as described earlier. These two scenarios are covered in more detail below:
1. User's balance is less than refund fee, donations are subject to an admin fee.
Under this circumstance, the user will see the following message:
If they do not respond to the message before the timer expires, it is the same as if they
clicked the No button.
Either way, an Admin Charge transaction is generated and the card is swallowed. There is no
donation transaction generated.
131
Configuration Appendix 1: Manual Refunds
2. User's balance is less than refund fee, donations are NOT subject to an admin fee.
Under this circumstance, it is recommended that you change the message on the above
screen to something like "No refund is payable. If you give us your card back, any balance
remaining on your card will be donated to us. Do you want your card back?"
Be aware that if the user clicks 'No', their card will be swallowed, so the question has to be
worded accordingly. i.e. Don't pose the question such as "Would you like to give us a
donation?"!!
The transaction generated if the card is swallowed is a Donation transaction, rather than an
Admin Charge.
Set the data entry masks
Set the Data Entry Mask s and determine whether or not you will be using the second bank
field.
Customise the field names
You may need to customise the field names that are displayed to the user:
Navigate to Appearance -> Card Refund -> Manual Refund Data Entry
Configuration Appendix 1: Manual Refunds
132
Decide what happens to refunded accounts
You have two options for what to do with an account once a refund has occurred. You can
either delete the account or re-initialise a number of different fields, but leave the account in
the database.
To achieve this, navigate to Functions -> Card Refund -> Options and adjust accordingly in the
section called After Refund.
Configuring the email system
With a manual refund, a notification must be sent to a system administrator. This is configured
in Supervisor Net's notification configuration section.
133
Configuration Appendix 1: Manual Refunds
1. Open Supervisor Administrator
2. Go to Tools -> Supervisor Net Settings...
3. Open the Notifications tab
4. Click on the Template drop down. You will find three templates specific to the manual
refund system
5. Edit the template for each of the manual refund options that you have enabled. The
recipient, subject and body of the email is defined in the template.
There are special variables that are replaced with values from the manual refund system. They
are:
%CardNumber% - The user's Supervisor Net account number (Primary Number)
%Amount% - The amount to be refunded to the user (Minus any refund fee)
%AccountName% - The user's Supervisor Net account name (Primary Name)
%PhoneNumber% - The phone number that the user entered into the form
%Address1% - The first address line that the user entered into the form
%Address2% - The second address line that the user entered into the form
%Address3% - The third address line that the user entered into the form
%Address4% - The forth address line that the user entered into the form
%Address5% - The fifth address line that the user entered into the form
%Bank1% - The first bank account detail field that the user entered into the form
%Bank2% - The second bank account detail field that the user entered into the form
Configuration Appendix 1: Manual Refunds
134
Using a standard card swipe unit
It is possible to use a serial card swipe unit, keyboard emulation reader or the swipe unit built
into the Eftpos terminal for manual refunds.
If you want to use one of these device, navigate to the Card Readers section of the
configuration application and enable the option Use for Refund for those devices you wish to
use.
When the refund is complete, the user walks away with the card. This may be acceptable on
sites using disposable tickets or cheaper cards, but for sites using Mifare card, it may be
better to fit a D3000 card accepting device and Mifare reader, which will keep the card after the
refund completes.
135
Configuration Appendix 1: Manual Refunds
Using a D3000 automatic card acceptor with Mifare reading
module
The D3000 is a motorised card acceptor, connected to the computer via a serial cable. An
additional Mifare unit (Monitor MF_Inserter) is fitted to the device, giving it the ability to read
Mifare cards as they are inserted.
The advantage of using this device is that the user's card is physically removed from them at
the time of the refund, enabling a site to recycle costly cards.
When a kiosks has this unit fitted, the computer must have two spare serial ports - one for the
card reader mechanism and one for the Mifare module.
There are two places in the Express configuration that need to be enabled to use this device:
Enable the D3000
Enable the option Card Readers -> D3000 Controller -> Use For Refund
Configuration Appendix 1: Manual Refunds
136
Enable the serial card reader
The serial card reader option must be enabled, as this is the interface to the Mifare reader
fitted to the D3000.
1. Enable the option Card Readers -> Serial Card Reader -> Use For Refund
2. Change the option Card Readers -> Serial Card Reader -> Baud Rate to 19200
Mandate that it must be used for refunds
If you want cards to only be inserted into the D3000 for refunds, enable the option Functions ->
Card Refund -> Options -> Card must be inserted in D3000 Controller
137
Configuration Appendix 1: Manual Refunds
Configuration Appendix 1: Manual Refunds
138
Configuration Appendix 2: Add Value Bonus
The add value bonus system is a great way to incentivise users to add greater amounts to
their account each time they either buy a casual ticket or add funds to their account.
Any bonus value credited to the user goes on to their Quota Balance, whilst the money that
the user actually inserts into the kiosk is credited to their Balance. By doing this, any refund
that the user obtains does not include any bonus value that they have been allocated.
To enable this feature and to configure Express to show the user how much bonus they are
receiving, follow these steps:
Configure Add Value Bonus amounts
In Supervisor Administrator, go to Terminal -> Terminal Setup, and find the record called EFT
SETUP. Open the Autoloader/Cash Register tab and alter the add value bonus settings to the
desired bands.
You are able to give either a percentage of the amount they add as a bonus, or a fixed
amount.
Make the user spend their own money first
It is wise to ensure that the user spends their own money before being able to use their bonus
credit, otherwise a user may put a lot of money on their account and then obtain a refund. If
the administrator forgets to remove the bonus value from the user's Quota Balance account,
that user now has free money.
139
Configuration Appendix 2: Add Value Bonus
To configure Supervisor Net to debit the user's Quota Balance before their normal Balance,
open Supervisor Administrator and go to Tools -> Supervisor Net Settings and enable the
option Deduct from Quota After Balance, which is on the Server tab.
Enable Add Value Bonus in Express
In the Express configuration application, enable the option Supervisor -> Bonus Amounts ->
Display Bonus Amount
Configuration Appendix 2: Add Value Bonus
140
Disable the Calculator screens
Add value bonus amounts will not be displayed if the calculator is enabled for the Cash or
Eftpos pages. It is fine to have the calculator enabled on the main page of express.
To achieve this, disable the feature Functions -> Calculator -> Show On Cash/Eftpos Pages
141
Configuration Appendix 2: Add Value Bonus
User Guide
This section demonstrates the process a user will go through in order to make a transaction
and process a payment. The screens that follow show Express in its default configuration.
Making a Transaction
This section shows the process a user will go through when making a transaction of buying a
Card/ Ticket or Adding Value to a Card/ Ticket.
Many parts of the screen display, such as the background and the text used for the display
messages, can be customised for your site. Refer to appearance for more detail on this.
This is the main home page and the start of the transaction process. At any stage of the
process the Start Again button can be selected to return to this main page, or if a transaction
is canceled the system will return to this screen.
User Guide
142
Add Value
The above screen is an optional Welcome Screen with user balance that appears when user
swipes their card. This can be enabled under configuration - Add Value.
This function allows the user to Add Value to a Supervisor Account on their card.
143
User Guide
1. By Selecting the Add Value button from the Main Page, the following Swipe Card prompt
will appear.
2. Once the card is swiped and the Supervisor Net account is verified, this optional screen will
appear if enabled under Prompt for Suffix in Configuration. If enabled, the user selects the
relevant Suffix for the value to be added against. Then select Next to proceed or Back to go
back a step.
User Guide
144
3. This screen is optional and will only appear if Secondary Codes are enabled in Configuration
- Select Secondary. If so, the user selects the relevant Secondary (i.e Department) for the
value to be added against. Then select Next to proceed or Back to go back a step.
4. Express will then prompt for payment method. Then select Cash to proceed with Cash
Payment, Eftpos to proceed with Eftpos Payment or Back to go back a step.
145
User Guide
Error Messages
This section shows the error messages that may appear when the user is making a
transaction of Adding Value to a Card.
Many parts of the screen display, such as the background and the text used for the display
messages, can be customised for your site. Refer to appearance for more detail on this.
Please Try Again Later
The following message will appear when the Cash or Eftpos reader is unconnected or nonoperational.
User Guide
146
Can not Add Value to this Account
The following message will be displayed when the User has entered a value that exceeds the
Maximum allowed balance. By selecting OK, the User will return to the keypad or preset
amounts to re-enter an amount that does not exceed the allowed balance set in Configurations
- Limit.
147
User Guide
Invalid Card
This message will appear where a card or account is not able to be verified by Supervisor Net.
See Configurations - Auto Insert under Card Settings to enable this function, if ticked this will
create a new account within Supervisor Net if the account is not found.
User Guide
148
149
User Guide
Buy Card
This function allows the user to Buy Card to purchase a new Supervisor Net account.
1. Once the User has selected Buy Card it will automatically direct the user through to the
"How do you want to pay?" payment screen.
User Guide
150
Buy Ticket
This function allows the user to Buy Tick et to purchase a new temporary/ casual Supervisor
Net account.
1. Once the User has selected Buy Tick et it will automatically direct the user through to the
"How do you want to pay?" payment screen.
151
User Guide
Combine Tickets
This function allows the user to Combine existing Tickets.
1. Select Combine Tick ets
2. Using the keypad enter the ticket numbers of the Tickets you wish to combine. The current
ticket balance will display on the right side of the screen once ticket number entered
successfully.
User Guide
152
3. Select Accept & Proceed to generate a new combined ticket.
4. Express will confirm with a message that the transaction has been successfully completed.
Note: Once the new Combined Tick et has been printed the previous tick ets will become
immediately void.
Add Value - Card Association
This is the step-by-step process of establishing Card Association to a windows server login
once Add Value is selected.
You will be prompted to Swipe your Card.
153
User Guide
Once card has been processed the following screen will appear.
Click Next to proceed. Enter windows network login User Name and Password. Then click
Next to proceed.
User Guide
154
The following screen will appear requesting confirmation to associate the Card with the
Windows server User and password. Click Yes to accept and No to cancel.
155
User Guide
Click Yes to accept and proceed to Add Value - Payment by Cash or Eftpos, or No to cancel.
User Guide
156
PIN Support
Where the System Administrator has enabled for PIN Support, you will be prompted to set a
new PIN when swiping your card for the first time.
Enter new PIN, then click Next, or Back to return to the Swipe Card screen.
157
User Guide
Re-enter your new PIN to confirm and click Next to proceed.
User Guide
158
Add Value - Payment by Cash or Eftpos
This is the step-by-step process of making a payment by Cash or Eftpos once a transaction
has been selected.
By Cash
This is the step-by-step process that a user will walk through if selecting payment By Cash
and the Calculator function is not enabled under Configuration - Calculator.
1. Select By Cash option.
2. This message is customisable through Configuration - Appearances where the instructions
for how to load cash and coins can inputted reflecting the specific cash or note acceptor
hardware devices installed.
159
User Guide
3. The user then selects Next to proceed or Back to go back a step
4. The following screen appears and the value on the You have Entered will update as the user
loads their cash.
User Guide
160
5. Once the cash has been entered and the You Have Entered balance reflects the same
amount entered, the user selects Accept & Proceed to continue.
6. This next screen is optional and will only appear if enabled under Configuration - Prompt to
Print Receipt. If Yes is selected, the receipt is printed. If No is selected a receipt is not
generated.
7. The application will then confirm that the Supervisor Transaction has been successfully
completed before re-directing the user to the Main page.
161
User Guide
By Cash with Calculator
This is the step-by-step process that a user will walk through if selecting payment By Cash
and the Calculator function is enabled under Configuration - Calculator.
User Guide
162
1. Select By Cash option.
2. This message is customisable through Configuration - Appearances where the instructions
for how to load cash and coins can inputted reflecting the specific cash or note acceptor
hardware devices installed.
163
User Guide
3. The user then selects Next to proceed or Back to go back a step
4. The following screen will then show the amount You Have Entered, the account holder's
New Balance and cash reloading Fee. The screen also displays the possible number of
transactions available based on the current New Balance.
User Guide
164
5. Once the User is satisfied with the amount up-loaded and that amount appears under You
Have Entered, then the User can select Accept & Proceed to continue with the process.
6. This next screen is optional and will only appear if enabled under Configuration - Prompt to
Print Receipt. If Yes is selected, the receipt is printed. If No is selected a receipt is not
generated.
165
User Guide
7. The application will then confirm that the Supervisor Transaction has been successfully
completed before re-directing the user to the Main page.
User Guide
166
By Eftpos
This is the step-by-step process that a user will walk through if selecting payment By
EFTPOS and the Calculator function is not enabled under Configuration - Calculator.
1. Select By EFTPOS option.
167
User Guide
2. The User can select a preset amount or select Other Amount. If Other Amount is selected
the following keypad screen is displayed and the User can enter a specific amount and
press Next or Back to return to the preset amount screen.
User Guide
168
3. Express will display the chosen Add Value - Card Value less the Reload Fee. To confirm
the transaction amount press Next to proceed or Back to return to the preset amount
screen.
4. Express will then take the User through the processing an EFTPOS payment steps .
5. Once the EFTPOS payment has been successfully processed, if enabled under
Configuration - Prompt to Print Receipt the following prompt will apear. If Yes is selected,
the receipt is printed. If No is selected a receipt is not generated.
169
User Guide
6. The application will then confirm that the Supervisor Transaction has been successfully
completed before re-directing the user to the Main page.
User Guide
170
By Eftpos with Calculator
This is the step-by-step process that a user will walk through if selecting payment By
EFTPOS and the Calculator function is enabled under Configuration - Calculator.
1. Select By EFTPOS option.
2. Using the keypad, the User enters their desired Add Value. The screen then displays the
Add Value amount including the Reload Fee. It also display's the User's New Balance
along with the possible number of transactions available based on the current New Balance.
These labels, services and service pricing can be customised under Configurations Calculator.
171
User Guide
3. In the instance of an Add Value transaction the screen will display the chosen Reload
Amount less the Value Loading Fee. To confirm the transaction amount press Next to
proceed or Back to return to the preset amount screen.
User Guide
172
4. Express will then take the User through the processing an EFTPOS payment steps.
5. Once the EFTPOS payment has been successfully processed, if enabled under
Configuration - Prompt to Print Receipt the following prompt will apear. If Yes is selected,
the receipt is printed. If No is selected a receipt is not generated.
6. The application will then confirm that the Supervisor Transaction has been successfully
completed before re-directing the user to the Main page.
173
User Guide
User Guide
174
Buy Card - Payment by Cash or Eftpos
This is the step-by-step process of making a payment by Cash or Eftpos once a transaction
has been selected.
By Cash
This is the step-by-step process that a user will walk through if selecting payment By Cash
and the Calculator function is not enabled under Configuration - Calculator.
1. Select By Cash option.
2. This message is customisable through Configuration - Appearances where the instructions
for how to load cash and coins can inputted reflecting the specific cash or note acceptor
hardware devices installed.
175
User Guide
3. The user then selects Next to proceed or Back to go back a step
4. The following screen appears and the value on the You have Entered will update as the user
loads their cash.
User Guide
176
5. Once the cash has been entered and the You Have Entered balance reflects the same
amount entered, the user selects Accept & Proceed to continue.
6. This next screen is optional and will only appear if enabled under Configuration - Prompt to
Print Receipt. If Yes is selected, the receipt is printed. If No is selected a receipt is not
generated.
7. The application will then confirm that the Supervisor Transaction has been successfully
completed before re-directing the user to the Main page.
177
User Guide
By Cash with Calculator
This is the step-by-step process that a user will walk through if selecting payment By Cash
and the Calculator function is enabled under Configuration - Calculator.
User Guide
178
1. Select By Cash option.
2. This message is customisable through Configuration - Appearances where the instructions
for how to load cash and coins can inputted reflecting the specific cash or note acceptor
hardware devices installed.
179
User Guide
3. The user then selects Next to proceed or Back to go back a step
4. The following screen will then show the amount You Have Entered, the account holder's
Card Balance less Fee. The screen also displays the possible number of transactions
available based on the current Card Balance.
User Guide
180
5. Once the User is satisfied with the amount up-loaded and that amount appears under You
Have Entered, then the User can select Accept & Proceed to continue with the process.
6. This next screen is optional and will only appear if enabled under Configuration - Prompt to
Print Receipt. If Yes is selected, the receipt is printed. If No is selected a receipt is not
generated.
181
User Guide
7. The application will then confirm that the Supervisor Transaction has been successfully
completed before re-directing the user to the Main page.
User Guide
182
By Eftpos
This is the step-by-step process that a user will walk through if selecting payment By
EFTPOS and the Calculator function is not enabled under Configuration - Calculator.
1. Select By EFTPOS option.
183
User Guide
2. The User can select a preset amount or select Other Amount. If Other Amount is selected
the following keypad screen is displayed and the User can enter a specific amount and
press Next or Back to return to the preset amount screen.
User Guide
184
3. Express will display the Card Value less the Value Loading Fee. To confirm the transaction
amount press Next to proceed or Back to return to the preset amount screen.
4. Express will then take the User through the processing an EFTPOS payment steps.
5. Once the EFTPOS payment has been successfully processed, if enabled under
Configuration - Prompt to Print Receipt the following prompt will apear. If Yes is selected,
the receipt is printed. If No is selected a receipt is not generated.
185
User Guide
6. The application will then confirm that the Supervisor Transaction has been successfully
completed before re-directing the user to the Main page.
User Guide
186
By Eftpos with Calculator
This is the step-by-step process that a user will walk through if selecting payment By
EFTPOS and the Calculator function is enabled under Configuration - Calculator.
1. Select By EFTPOS option.
2. Using the keypad, the User enters their desired Card Value. The screen then displays the
Card Value amount including the Fee. It also gives the option of viewing the possible
number of transactions available based on Card Balance. These services listed and service
pricing can be customised under Configurations - Calculator.
187
User Guide
3. Using the keypad, the User enters their desired Add Value. The screen then displays the
Add Value amount including the Reload Fee. It also display's the User's New Balance
along with the possible number of transactions available based on the current New Balance.
These labels, services and service pricing can be customised under Configurations Calculator.
4. In the instance of an Add Value transaction the screen will display the chosen Reload
Amount less the Value Loading Fee. To confirm the transaction amount press Next to
proceed or Back to return to the preset amount screen.
User Guide
188
5. In the instance of an Buy Card transaction the screen will display the Card Value less the
Value Loading Fee. To confirm the transaction amount press Next to proceed or Back to
return to the preset amount screen.
189
User Guide
6. In the instance of an Buy Tick et transaction the screen will display the cost of the Ticket.
To confirm the transaction amount press Next to proceed or Back to return to the preset
amount screen.
7. Express will then take the User through the processing an EFTPOS payment steps.
8. Once the EFTPOS payment has been successfully processed, if enabled under
Configuration - Prompt to Print Receipt the following prompt will apear. If Yes is selected,
the receipt is printed. If No is selected a receipt is not generated.
User Guide
190
9. The application will then confirm that the Supervisor Transaction has been successfully
completed before re-directing the user to the Main page.
191
User Guide
Invalid Amount
This message will appear to notify when an invalid amount is entered. This may be due the
amount being under the Minimum or Maximum limited set in Configurations - Buy Card. By
clicking the Back button, the User can re-enter another amount.
Insufficent Cash Entered
When selecting a Buy Card transaction the cash entered must be higher than the Minimum
Limit set in Configurations - Buy Min and Max. If the cash is below the minimum the
transactions can't proceed, so the User is instructed to take the receipt to an administrator for
a refund.
User Guide
192
193
User Guide
Buy Ticket - Payment by Cash or Eftpos
This is the step-by-step process of making a payment by Cash or Eftpos once a transaction
has been selected.
By Cash
This is the step-by-step process that a user will walk through if selecting payment By Cash
and the Calculator function is not enabled under Configuration - Calculator.
1. Select By Cash option.
2. This message is customisable through Configuration - Appearances where the instructions
for how to load cash and coins can inputted reflecting the specific cash or note acceptor
hardware devices installed.
User Guide
194
3. The user then selects Next to proceed or Back to go back a step
4. The following screen appears and the value on the You have Entered will update as the user
loads their cash.
195
User Guide
5. Once the cash has been entered and the You Have Entered balance reflects the same
amount entered, the user selects Accept & Proceed to continue.
6. This next screen is optional and will only appear if enabled under Configuration - Prompt to
Print Receipt. If Yes is selected, the receipt is printed. If No is selected a receipt is not
generated.
7. The application will then confirm that the Supervisor Transaction has been successfully
completed before re-directing the user to the Main page.
User Guide
196
By Cash with Calculator
This is the step-by-step process that a user will walk through if selecting payment By Cash
and the Calculator function is enabled under Configuration - Calculator.
197
User Guide
1. Select By Cash option.
2. This message is customisable through Configuration - Appearances where the instructions
for how to load cash and coins can inputted reflecting the specific cash or note acceptor
hardware devices installed.
User Guide
198
3. The user then selects Next to proceed or Back to go back a step
4. The following screen will then show the amount You Have Entered, the account holder's
Ticket Balance. The screen also displays the possible number of transactions available based
on the balance on the ticket.
199
User Guide
5. Once the User is satisfied with the amount up-loaded and that amount appears under You
Have Entered, then the User can select Accept & Proceed to continue with the process.
6. This next screen is optional and will only appear if enabled under Configuration - Prompt to
Print Receipt. If Yes is selected, the receipt is printed. If No is selected a receipt is not
generated.
User Guide
200
7. The application will then confirm that the Supervisor Transaction has been successfully
completed before re-directing the user to the Main page.
201
User Guide
By Eftpos
This is the step-by-step process that a user will walk through if selecting payment By
EFTPOS and the Calculator function is not enabled under Configuration - Calculator.
1. Select By EFTPOS option.
User Guide
202
2. The User can select a preset amount or select Other Amount. If Other Amount is selected
the following keypad screen is displayed and the User can enter a specific amount and
press Next or Back to return to the preset amount screen.
203
User Guide
3. Express will display the chosen Ticket Value. To confirm the transaction amount press Next
to proceed or Back to return to the preset amount screen.
4. Express will then take the User through the processing an EFTPOS payment steps .
5. Once the EFTPOS payment has been successfully processed, if enabled under
Configuration - Prompt to Print Receipt the following prompt will apear. If Yes is selected,
the receipt is printed. If No is selected a receipt is not generated.
User Guide
204
6. The application will then confirm that the Supervisor Transaction has been successfully
completed before re-directing the user to the Main page.
205
User Guide
By Eftpos with Calculator
This is the step-by-step process that a user will walk through if selecting payment By
EFTPOS and the Calculator function is enabled under Configuration - Calculator.
1. Select By EFTPOS option.
2. Using the keypad, the User enters their desired Ticket value. The screen then displays the
Ticket Value. It also display's the possible number of transactions available based on the
Ticket Value entered. These services listed and service pricing can be customised under
Configurations - Calculator.
User Guide
206
3. Express will display the chosen Ticket Value. To confirm the transaction amount press
Accept & Proceed or Back to return to the previous screen.
4. Express will then take the User through the processing an EFTPOS payment steps .
207
User Guide
5. Once the EFTPOS payment has been successfully processed, if enabled under
Configuration - Prompt to Print Receipt the following prompt will apear. If Yes is selected,
the receipt is printed. If No is selected a receipt is not generated.
6. The application will then confirm that the Supervisor Transaction has been successfully
completed before re-directing the user to the Main page.
User Guide
208
Invalid Amount
This message will appear to notify when an invalid amount is entered. This may be due the
amount being under the Minimum or Maximum limited set in Configurations - Buy Card. By
clicking the Back button, the User can re-enter another amount.
209
User Guide
Insufficent Cash Entered
When selecting a Buy Card transaction the cash entered must be higher than the Minimum
Limit set in Configurations - Buy Min and Max. If the cash is below the minimum the
transactions can't proceed, so the User is instructed to take the receipt to an administrator for
a refund.
User Guide
210
211
User Guide
Card Refunds
Depending on how your site is configured, either automatic refunds (Where the money is
credited back to your bank account or credit card immediately) or manual refunds (Where an
administrator processes your request) may be possible.
Automatic Refunds
This function allows you to have the remaining credit on your Supervisor Net account refunded
back to you immediately.
1. Select Card Refund.
2. You will be prompted to insert your Card.
User Guide
212
3. Enter your PIN. Then click Next.
4. The following screen will prompt you to Accept & Confirm Refund or Back to cancel
transaction.
213
User Guide
5. You will then be directed to Payment Methods - where the refund is processed to either a
Bank Account or a Credit Card.
Too Low Balance to Refund
The following message will appear when the balance on your card is lower than the Minimum
allowed to Refund as set by the System Administrator.
User Guide
214
215
User Guide
Manual Refunds
Manual refunds are processed by an administrator and may be directly credited to a bank
account of your choosing, or a cheque may be posted to you.
1. Click Card Refund
2. Swipe your card at the prompt, or insert it into the motorised card acceptor, if one of these
is fitted.
User Guide
216
3. Enter your PIN
4. Choose the refund method, or make a donation.
217
User Guide
Refund to Bank Account
1. Enter your account name and contact phone number.
2. Enter your bank account number. This screen will alter depending on what the
requirements are in your area.
User Guide
218
3. Confirm the refund.
Your request is then processed by an administrator and will be directly credited to your
account within a few days.
219
User Guide
Refund by Cheque
1. Enter your account name and contact phone number.
2. Enter your postal details. This is where the cheque will be mailed.
User Guide
220
3. Check that your details are correct and then click Accept & Proceed.
4. Your request is processed and sent to an administrator, who will mail the cheque to you.
221
User Guide
Make a donation
1. A message of appreciation is displayed while your donation is being processed
2. You will be given the option to print a receipt after donating. This may be used for tax
purposes.
User Guide
222
Processing an Eftpos Transaction
1. Express will prompt for the Eftpos Card to be swiped.
2. Once the EFTPOS hardware has processed the card swipe the following screen will appear
prompting the user to select their bank account for payment.
223
User Guide
3. Next the user will be prompted to Enter their PIN.
4. The following screen will appear as the EFTPOS transaction is processed and verified.
User Guide
224
5. Notification of completed transaction will appear if successful.
225
User Guide
After Payment Received
After payment is successfully processed, the following optional prompt screens can be
enabled through Configurations - Printing and Configurations - Prompt to Buy Another Card.
Printing a Receipt?
At the end of any Transaction, Add Value, Buy Card, Buy Tick et, the user will be prompted if
they wish to Print a Receipt.
If Yes is selected, the receipt is printed and a message appears advises that transaction is
complete and returns them to the Main page. If No is selected a receipt is not generated.
Buy Another Card?
At the completion of the Buy Card Transaction the User is prompted if they wish to purchase
another.
If Yes is selected the application takes them back to the Buy Card process. If No is selected,
a screen message notifying that their transaction is complete, then the application
automatically returns to the main page.
User Guide
226
Completed Transaction Message
When the Transaction, Add Value, Buy Card, Buy Tick et has been successfully completed
and payment received the following notification message will appear.
227
User Guide
Help & Support
Using the On-Screen Calculator
The on-screen calculator is a support tool for the user. The icon appears at the top of the
screen and is available for use at any stage through the initial transaction process.
Calculator
Select a service on the left, then a specific activity (i.e. A4 Black and White). The User can
then type in the number of copies they wish to do using the keypad. The cost or value of the
Buy Card/ Ticket or Add Value will show at the top of the screen.
Once the User is satisfied, they can click on Accept & Proceed to continue, or Back to return
to the previous screen.
User Guide
228
This screen allows the user to continue on to making a transaction.
229
User Guide
Cancelling a Session
To cancel a User session, the User can click on the Start Again icon on the top right hand of
the screen.
For a Technician or an Administrator to cancel a session refer to EXIT under Configuration.
Tech Access Screens
These are screens available to the administrators and technicians when conducting
maintenance.
The Administrator or Technician should have 3 swipe cards available to them:
1. Tech Access Card - for general Tech Maintenance and Kiosk/ PC Support
2. Cash Access Card - This card resets the counts on the Cash held and is used when the
Cash is collected from the Kiosk.
3. Card Access - This card resets the count of physical cards held and is used when
restocking or removing cards.
The Administrator or Technician may swipe multiple cards at a time for greater concurrent
access.
User Guide
230
The keypad is for the Technician to enter the code to cancel a session. The Technician enters
the Exit pin here.
231
User Guide
Alarm Settings
Alarm ID/
Number
Alarm Description
On Screen Message
Email Sent
(Y/N)
(Y/N)
Cards Empty
No – Buy card button is
disabled
Yes
6
Low Cards
No
Yes
8
Card Jam
Yes – Out of Service
Yes
55
Low Paper in printer
No
Yes
19
No Paper in printer
Yes – Out of Service
Yes
18
Receipt Printer Fault/
Jam
Yes – Out of Service
Yes
11
Unauthorised Door Open No – Audible Alarm Only
Yes
50
Card Bin full
No – Buy card disabled
Yes
Yes – Out of Service
Yes
No – Cash disabled
Yes
7
57
EFTPOS Terminal
(Can be changed) Modem Error
9
Note/Coin Jam
Out of Service Error Message
This section shows the error messages that may appear when the user is making a
transaction of buying a Card/ Ticket or Adding Value to a Card.
Many parts of the screen display, such as the background and the text used for the display
messages, can be customised for your site. Refer to appearance for more detail on this.
User Guide
232
Offline Message
This section shows the error messages that may appear when the user is making a
transaction of buying a Card/ Ticket or Adding Value to a Card/ Ticket.
Many parts of the screen display, such as the background and the text used for the display
messages, can be customised for your site. Refer to appearance for more detail on this.
233
User Guide
User Guide
234
Monitor Business Machines Ltd
31a Normanby Road,
Mt Eden, Auckland 1024,
New Zealand.
Phone: +64 9 623 5000
Web: www.monitorbm.com