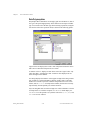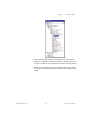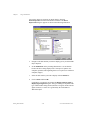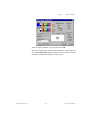
1
Lookout™ Direct
Getting Started Guide
License Agreement
“Valued Technology”
This License Agreement is your proof of license. Please treat it as valuable property.This is a legal agreement between you (either
an individual or entity) the end-user of this product, and Automation Direct. If you do not agree to the terms of this Agreement,
promptly return the package and any accompanying items to Automation Direct for a full refund.
LookoutDirect SOFTWARE LICENSE
1. GRANT OF LICENSE — This LookoutDirect License Agreement (“License”) permits you to use one copy of the specified
version of the LookoutDirect software product (“Software”) on any single computer, provided the Software is in use on only
one computer at any time. If you have multiple Licenses for the Software, then at any time you may have as many copies of
the Software in use as you have Licenses. The Software is deemed “in use” on a computer when it is loaded into the temporary
memory (i.e. RAM) or installed into the permanent memory (i.e. hard disk, CD--ROM or other storage device) of that
computer, except that a copy may be installed on a network server for the sole purpose of distribution to other computers that
are not currently “in use”. If the anticipated number of Software users will exceed the number of applicable Licenses, then you
must have a reasonable mechanismor process in place to assure that the number of persons using the Software concurrently
does not exceed the number of Licenses. If the Software is permanently installed on the hard disk or other storage device of a
computer (other than a network server) and oneperson uses that computer more than80%of the timeit is in use, then that person
may also use the software on a single portable computer or a single computer at home.
2.
COPYRIGHT —The Software is owned by Automation Direct or its suppliers and is protected by United States copyright
laws and international treaty provisions. Therefore, you must treat the Software like any other copyrighted material (e.g., a
book or musical recording) except that you may:
a. Make one backup copy of the Software solely for backup or archival purposes.
b. Transfer the Software to a single hard disk provided you keep the original and the backup solely for archival purposes. You
may not copy any written materials that may accompany the Software.
3. OTHER RESTRICTIONS—This LookoutDirect License Agreement is your proof of license toexercise therights
grantedherein andmust beretained by you. You may not rent or lease the Software, but you may transfer your rights under this
LookoutDirect License Agreement on a permanent basis provided that you transfer this License Agreement, the Software, and
all accompanying written materials and retain no copies. The recipient must also agree to unequivocally abide by the terms
contained in this License Agreement. You may not reverse engineer, decompile, or disassemble the Software. Any transfer of
the Software must include the most recent update and all prior versions. If the Software is acquired within the United States,
you may not export the Software outside of the United States without first complying with all applicable USexport laws and
regulations. You acknowledge that the Software will not function without a certain hardware key. This hardware key will be
furnished to you by Automation Direct and you agree that such hardware key is to be used solely with the Software provided.
DISTRIBUTION LIMITATIONS
If you have acquired the development/runtime package, you may distribute process files created with the Software, provided that:
1.
each recipient of your process file has a valid license for a separate runtime copy of the Software;
2.
you include the following copyright notice, either on--screen in your process file’s About Box or written documentation, with
each distributed copy of your
3.
process file: “Copyright E [year] Automation Direct by Koyo, Inc. (Based on materials of National Instruments Corporation).
All Rights Reserved”;
4.
you do not use Automation Direct’s or National Instruments’ (”NI”) names, logos, or trademarks to market your process file
without written permission; and
5.
you agree to indemnify, hold harmless, and defend Automation Direct and NI (including their officers, directors, employees,
and agents) and their suppliers fromand against any claims.
LIMITED WARRANTY
1. Automation Direct warrants the Software will perform substantially in accordance with the written materials for a period of
ninety (90) days from the date of receipt.
2. Automation Direct warrants that any hardware accompanying the Software will be free fromdefects in materials and
workmanshipunder normal use andservice for a period of one (1) year from the date of receipt.
NO OTHER WARRANTIES. EXCEPT AS EXPRESSLY SET FORTHABOVE, THE SOFTWARE IS PROVIDED“AS IS”
WITHOUT WARRANTYOF ANYKIND, AND NO OTHER WARRANTIES, EITHER EXPRESSED OR IMPLIED ARE
MADE WITH RESPECT TO THE SOFTWARE, INCLUDING BUT NOT LIMITED TO ANY IMPLIED WARRANTIES OF
MERCHANTABILITY, FITNESS FOR A PARTICULAR PURPOSE, TITLE OR NON--INFRINGEMENT, OR ANY OTHER
WARRANTIES THAT MAY ARISE FROM USAGE OR TRADE OR COURSE OF DEALING. Automation Direct AND ITS
SUPPLIERS DO NOT WARRANT, GUARANTEE, OR MAKE ANY REPRESENTATIONS REGARDING THE USE OF OR
THE RESULTS OF THE USE OF THE SOFTWARE IN TERMS OF CORRECTNESS, ACCURACY, RELIABILITY, OR
OTHERWISE AND DO NOT WARRANT THAT THE OPERATION OF THE SOFTWARE WILL BE
UNINTERRUPTED OR ERROR FREE. Automation Direct AND ITS SUPPLIERS EXPRESSLY DISCLAIM ANY
WARRANTIES NOT STATED HEREIN.
Customer Remedies —Automation Direct’s entire liability and your exclusive remedy shall be at Automation Direct’s option.
Automation Direct will either refund the price paid, or repair or replace the Software or hardware that does not meet Automation
Direct’s Limited Warranty. You must return the product to Automation Direct with a copy of your purchase receipt. This Limited
Warranty is void if failure of the Software or hardware has resulted from accident, abuse, or misapplication. Any replacement
Software will be warranted for the remainder of the original warranty period or thirty (30) days, whichever is longer.
No Other Warranties — Automation Direct DISCLAIMS ALL OTHER WARRANTIES, EITHER EXPRESSED OR IMPLIED,
INCLUDING BUT NOT LIMITED TO IMPLIED WARRANTIES OF MERCHANTABILITY AND FITNESS FOR A
PARTICULAR PURPOSE, WITH RESPECT TO THE SOFTWARE, AND ANY ACCOMPANYING WRITTEN MATERIALS
OR HARDWARE. THIS LIMITED WARRANTY GIVES YOU SPECIFIC LEGAL RIGHTS. YOU MAY HAVE OTHERS,
WHICH VARY FROM STATE TO STATE.
No Liability for Consequential Damages — In no event shall Automation Direct or its suppliers be liable for any damages
whatsoever (including, without limitation, damages for loss of business profits, business interruption, loss of business information,
or other pecuniary loss) arising out of the use of or inability to use this Automation Direct product, even if Automation Direct or
its suppliers have been advised of possibility of such damages.
U.S. GOVERNMENT RESTRICTED RIGHTS
The Software and documentation are provided with RESTRICTED RIGHTS. Use, duplication, or disclosure by the Government
is subject to restrictions as set forth in subparagraph (c) (1) (ii) of the Rights in Technical Data and Computer Software clause at
DFARS 252.227--7013 or subparagraphs (c) (1) (2) of the Commercial Computer Software -- Restricted Rights at 48 CFR
52.227--19 as applicable. Contractor/manufacturer is Automation Direct by Koyo, Inc. / 3505 Hutchinson Road, Cumming, GA
30040 (under license from National Instruments Corporation, 11500 N. Mopac Expressway, Austin, Texas 78759--3504).
This agreement is governed by the laws of the State of Georgia.
WARNING
(1) THE SOFTWARE IS NOT DESIGNED WITH COMPONENTS AND TESTING FOR A LEVEL OF RELIABILITY
SUITABLE FOR USE IN OR INCONNECTION WITH SURGICAL IMPLANTS OR AS CRITICAL COMPONENTS IN
ANY LIFE SUPPORT SYSTEMS WHOSE FAILURE TO PERFORM CAN REASONABLY BE EXPECTED TO CAUSE
SIGNIFICANT INJURY TO A HUMAN.
(2) IN ANY APPLICATION, INCLUDING THE ABOVE, RELIABILITY OF OPERATION OF THE SOFTWARE CAN BE
IMPAIRED BY ADVERSE FACTORS, INCLUDING BUT NOT LIMITED TO FLUCTUATIONS IN ELECTRICAL
POWER SUPPLY, COMPUTER HARDWARE MALFUNCTIONS, COMPUTEROPERATINGSYSTEMSOFTWARE
FITNESS, FITNESS OF COMPILERS ANDDEVELOPMENT SOFTWARE USED TO DEVELOP AN APPLICATION,
INSTALLATION ERRORS, SOFTWARE AND HARDWARE COMPATIBILITY PROBLEMS, MALFUNCTIONS OR
FAILURES OF ELECTRONIC MONITORING OR CONTROL DEVICES, TRANSIENT FAILURES OF ELECTRONIC
SYSTEMS (HARDWARE AND/OR SOFTWARE), UNANTICIPATED USES OR MISUSES, OR ERRORS ON THE PART
OF THE USER OR APPLICATIONS DESIGNER (ADVERSE FACTORS SUCH AS THESE ARE HEREAFTER
COLLECTIVELY TERMED ”SYSTEM FAILURES”). ANY APPLICATION WHERE A SYSTEM FAILURE WOULD
CREATE A RISK OF HARM TO PROPERTY OR PERSONS (INCLUDING THE RISK OF BODILY INJURY AND
DEATH) SHOULD NOT BE RELIANT SOLELY UPON ONE FORM OF ELECTRONIC SYSTEM DUE TO THE RISK
OF SYSTEM FAILURE. TO AVOID DAMAGE, INJURY, OR DEATH, THE USER OR APPLICATION DESIGNER MUST
TAKE REASONABLY PRUDENT STEPS TO PROTECT AGAINST SYSTEM FAILURES, INCLUDING BUT NOT
LIMITED TO BACK--UP OR SHUT DOWN MECHANISMS. BECAUSE EACH END--USER SYSTEM IS
CUSTOMIZED AND DIFFERS FROM UTILIZED TESTING PLATFORMS AND BECAUSE A USER OR
APPLICATION DESIGNER MAY USE THE SOFTWARE IN COMBINATION WITH OTHER PRODUCTS IN A
MANNER NOT EVALUATED OR CONTEMPLATED BY PLCDIRECT OR ITS SUPPLIERS, THE USER OR
APPLICATION DESIGNER IS ULTIMATELY RESPONSIBLE FOR VERIFYING AND VALIDATING THE
SUITABILITY OF THE SOFTWARE WHENEVER THE SOFTWARE IS INCORPORATED IN A SYSTEM OR
APPLICATION, INCLUDING, WITHOUT LIMITATION, THE APPROPRIATE DESIGN, PROCESS AND SAFETY
LEVEL OF SUCH SYSTEM OR APPLICATION.
Lookout is a registered trademark of National Instruments Corporation.
Lookout Direct
TM
Getting Started Guide
Please include the Manual Name and the Manual Issue, both shown below, when
communicating with Technical Support regarding this publication.
Manual Name:
LookoutDirect Getting Started Guide
Issue:
First Edition, Rev. A
Issue Date:
11/02
Publication History
Issue
Date
Description of Changes
First Edition
10/01
Orginal
Rev. A
11/02
Corrected information in Chapter 3 on
inserting objects
Contents
Chapter 1
Introduction
Overview........................................................................................................................1-1
Document Conventions ...................................................................................1-1
Related Documentation ...................................................................................1-2
Installation .....................................................................................................................1-2
Development and Runtime Applications.........................................................1-2
Package Contents.............................................................................................1-2
About the Hardware Key ..................................................................1-3
System Requirements ......................................................................................1-3
Development Systems.......................................................................1-3
Runtime System ................................................................................1-3
Installing LookoutDirect .................................................................................1-3
Setting System Options..................................................................................................1-5
Computer Name Setting ..................................................................................1-5
Citadel Database Settings ................................................................................1-5
Virtual Keyboard Settings ...............................................................................1-6
Log Alarms Setting..........................................................................................1-6
Security Level Settings....................................................................................1-6
Panel Navigation Arrows ................................................................................1-6
Startup Process File Setting ...........................................................................................1-7
Chapter 2
How LookoutDirect Works
Architecture ...................................................................................................................2-2
What is an Object?...........................................................................................2-2
LookoutDirect Object Classes and Functionality............................................2-4
Parameters .......................................................................................................2-4
Object Databases and Data Members..............................................................2-5
Logical Data Members......................................................................2-7
Numeric Data Members ....................................................................2-7
Text Data Members...........................................................................2-13
(implicit) Data Members...................................................................2-13
Data Polymorphism...........................................................................2-14
Data Quality Attributes .....................................................................2-15
Connections .....................................................................................................2-16
Client and Server Processes.............................................................................2-18
Supervisory Control.........................................................................................2-18
Event-Driven Processing .................................................................................2-19
© Automationdirect.com
v
Getting Started Guide
Contents
Advantages of Active Notification....................................................2-20
LookoutDirect Environment Services .............................................................2-21
Serial Port Communication Environment Service ............................2-21
Database Environment Service .........................................................2-22
Graphics Environment Service..........................................................2-22
Alarm Environment Service..............................................................2-22
Multimedia Environment Service .....................................................2-22
Security Environment Service...........................................................2-23
Historical Logging Environment Service..........................................2-23
ODBC Environment Service.............................................................2-23
DDE Environment Service................................................................2-23
Networking Environment Service.....................................................2-24
Redundancy Environment Service ....................................................2-24
LookoutDirect Windows Services .................................................................................2-24
Chapter 3
Getting Started with LookoutDirect
Basic Features Tour .........................................................................................3-2
Starting a New Process......................................................................3-2
Adding an Object ..............................................................................3-4
Creating and Working with Expressions...........................................3-6
Saving Your Work ............................................................................3-8
Connecting Objects ...........................................................................3-8
Creating Useful Interactions Between Objects .................................3-11
Dressing Up the Control Panel..........................................................3-15
Adding Alarms ..................................................................................3-21
Connected Tour ...............................................................................................3-23
Toggling a Discrete PLC Output.......................................................3-23
Writing and Reading a Numeric Value .............................................3-27
Reading a Discrete Signal .................................................................3-29
Displaying the Number of Scans.......................................................3-30
Advanced Features Tour..................................................................................3-31
Creating Panel Navigation Buttons ...................................................3-31
Importing Custom Graphics ..............................................................3-33
Creating Alarm Management Buttons...............................................3-33
Process Data Logging........................................................................3-36
Getting Started Guide
vi
www.Automationdirect.com
Contents
Chapter 4
LookoutDirect Basics: Windows, Tools, Files, and Path Names
Starting LookoutDirect ..................................................................................................4-1
Logging on to LookoutDirect..........................................................................4-1
Opening a Process File......................................................................4-2
The LookoutDirect Screen.............................................................................................4-3
Title Bar...........................................................................................................4-4
Menu Bar .........................................................................................................4-4
Status Bar.........................................................................................................4-4
LookoutDirect Workspace...............................................................................4-5
Object Explorer ...............................................................................................4-5
Control Panels .................................................................................................4-8
Alarm Window ................................................................................................4-9
Operator Input and Navigation ......................................................................................4-10
Virtual Keypad ................................................................................................4-10
Virtual Keyboard .............................................................................................4-10
Connection Browser ......................................................................................................4-11
Connection Browser Options ............................................................4-14
LookoutDirect Application Files ...................................................................................4-15
Process File......................................................................................................4-15
Source Code File .............................................................................................4-16
State File..........................................................................................................4-17
Security File.....................................................................................................4-17
Configuration Shortcuts .................................................................................................4-18
Mouse Shortcuts ..............................................................................................4-18
Remembering Object Names...........................................................................4-19
Path Names in LookoutDirect........................................................................................4-20
© Automationdirect.com
vii
Getting Started Guide
Contents
Chapter 5
Using LookoutDirect
Overview of the Process Development Cycle................................................................5-23
Building Client and Server Processes ............................................................................5-24
LookoutDirect Navigation .............................................................................................5-25
Creating A LookoutDirect Process ................................................................................5-26
Creating Objects.............................................................................................................5-28
Choosing Objects.............................................................................................5-28
Create an Object ..............................................................................................5-28
Object Names...................................................................................................5-32
Connecting Objects ........................................................................................................5-34
Connecting Data Members to Parameters ......................................................5-35
Identifying Object Data Members ...................................................................5-36
Connecting Data Members to Data Members .................................................5-36
URL Connections ............................................................................................5-40
Remote Position Source Connections ...............................................5-41
Symbolic Link Connections ..............................................................5-41
HyperTrend Item Connections ..........................................................5-42
Displaying Data Members on Control Panels................................................................5-42
Glossary
Index
Getting Started Guide
viii
www.Automationdirect.com
1
Introduction
Overview
This guide contains LookoutDirect installation instructions and an
introduction to LookoutDirect’s features and functionality. It includes general
information to help acquaint you with important elements of LookoutDirect
and tutorial exercises that introduce you to the basics of building a Lookout
process.
Document Conventions
The following document conventions are used in this manual.
»
Indicate the path for nested menu and command selections.
Example: Start » Programs » xxx
Indicates a tip that provides helpful information related to the
current procedure or topic.
Indicates a important supplementary information pertinent
to the current procedure or topic.
Denotes a caution statement. Failure to follow the guidance
provide in the caution statement could result in a loss of
data or an interruption to a critical process being controlled
or monitored by LookoutDirect.
© Automationdirect.com
bold face text
Denotes the name of dialog boxes, property sheet items,
application features, and menu commands that you select as
part of a procedure.
italic
Denotes references to dialog boxes, property sheet items,
application features, and menu commands that are not part
of the current procedure, or key concepts.
monospace
Denotes characters that you enter from the keyboard,
code/syntax examples. The monospace font is also used to
express proper names of disk drives, paths, directories,
programs, subprograms, subroutines, device names,
functions, operations, variables, filenames and extensions.
1-1
Getting Started Guide
Chapter 1
Introduction
Related Documentation
The following documents are cross-referenced in this guide.
•
LookoutDirect Developer’s Manual
Provides in-depth coverage of LookoutDirect functionality including
LookoutDirect services.
•
LookoutDirect Object Reference Manual
Contains detailed description of all LookoutDirect system and driver
objects. The Object Reference Manual can be found in the
documentation directory of the LookoutDirect CD-ROM in Portable
Document Format (PDF). To view this file, you must have Adobe
Acrobat Reader 3.0 or later installed. If you do not have Adobe Acrobat
Reader installed, you can install it from the LookoutDirect
documentation directory or from the Adobe web site at
www.adobe.com.
Installation
Development and Runtime Applications
The LookoutDirect software is available in both a development and runtime
version.
•
PC-LKD-DEV contains both the LookoutDirect development
application and one license for the runtime application.
•
PCD-LKD-RTE contains only a single license for the LookoutDirect
runtime application. The runtime version can only be used to run
compiled process files that have been developed using the
PC-LKD-DEV application.
Package Contents
The application package should contain the following items:
Getting Started Guide
•
CD-ROM
•
Hardware key
•
Getting Started Guide
•
Developers’s Manual
•
Object Reference Manual
•
Registration Card
1-2
www.Automationdirect.com
Chapter 1
Introduction
If you are missing any of the items listed above, contact Automation Direct
at 1-770-844-4200.
About the Hardware Key
In order to run LookoutDirect, you must install the hardware key provided
onto the parallel port of the PC running LookoutDirect (development or
runtime version). The hardware keys provided with the development and
runtime version are not interchangeable. Each hardware key is matched to the
software licence number of the application it is provided with.
System Requirements
Development Systems
•
Pentium 133 MHz or faster
•
Windows 95/98/NT
•
32 MB RAM
•
100 MB available hard disk space
•
CD-ROM drive
•
640 x 480 color monitor
Runtime System
•
Pentium 133 MHz or faster
•
Windows 95/98/NT
•
32 MB RAM
•
100 MB available hard disk space
•
CD-ROM (optional if you have a network)
•
640 x 480 color monitor or flat-panel display for HMI
Installing LookoutDirect
To install the application:
1.
Insert the Product Showcase CD into your CD-ROM drive.
If autorun is enabled on your system, the DirectSOFT32 window will
appear and you can skip to step 4.
© Automationdirect.com
2.
From the Start menu, select Run.
3.
Type X:\setup.bat substituting "X" with the letter designation of
your CD-ROM drive, and click OK.
1-3
Getting Started Guide
Chapter 1
Introduction
4.
From the DirectSoft32 window, select Install Software.
5.
In the password dialog, enter the 16-digit product key that corresponds
to your software license. The product key can be found on back of the
Product Showcase CD case. The product key is case-sensitive and
requires hyphens. The OK button becomes available when you enter a
valid product key.
6.
Click OK.
The password dialog box appears.
7.
Press CTRL + V to paste the product key, which you entered previously,
into the password text box. The OK button becomes available when you
enter a valid product key.
8.
Click Continue.
The LookoutDirect setup window and Welcome dialog box appears.
9.
Follow the LookoutDirect setup instruction that appear on the screen.
When the LookoutDirect setup is complete, the NI Logos Installation
Wizard appears. NI Logos is used to install third-party application
components that are licensed to AutomationDirect.
10. Follow the NI Logos Installation Wizard instructions.
When the NI Logos installation is complete, the LookoutDirect
installation screen returns
11. Select to view the readme file or launch LookoutDirect.
Getting Started Guide
1-4
www.Automationdirect.com
Chapter 1
Introduction
Setting System Options
Once LookoutDirect is installed, make adjustments to the system settings.
Access to the system settings is based on the security level assigned to each
process by the Administrator. Contact your system administrator for
assistance if you cannot access or make changes to a system setting.
1.
Select Options » System.
The System Options dialog box appears. Some default settings may be
different for your computer.
2.
Note
Select option you want, and then click OK.
Only users logged on with security levels or 9 or greater can change system options.
Computer Name Setting
The computer name field shows the network name of the computer you are
working on. If this field is blank, and you intend to use the networking
capability of LookoutDirect, you need to check your network settings to
make sure your computer is properly named for network operations.
Citadel Database Settings
The Citadel Database fields set the default destination for Citadel data
logged by LookoutDirect. All processes running under a single instance of
LookoutDirect will use this data path to log data to Citadel, unless you
override this setting when you create the process.
© Automationdirect.com
1-5
Getting Started Guide
Chapter 1
Introduction
You set the Default path and the Default computer separately. Use the
complete path name for the Default path setting, and the fully qualified
computer name for the Default computer setting.
Virtual Keyboard Settings
LookoutDirect features a virtual keyboard that you can access when in run
mode by clicking on a control that accepts a text or numeric input. You can
set whether a right-click or a left-click pops up this keyboard in the Virtual
Keyboard Pops Up On field in the System Options dialog box.
Log Alarms Setting
If you have a printer directly connected to your computer, you can direct that
all alarms can be printed when they occur. Set the Log alarms to box in the
System Options dialog box to the communications port to which your printer
is connected. See Chapter 9, Alarms, in the LookoutDirect Developer’s
Manual for information on the alarm and event logging features of
LookoutDirect. You can also capture a network printer port on Windows
98/95 machines. Consult your operating system documentation for
information on this procedure.
Security Level Settings
You can set local limits on how LookoutDirect runs when users with different
security levels are logged on. Use the If security level is below: selection
boxes in the System Options dialog box to set these limits. See Chapter 6,
Security, in the LookoutDirect Developer’s Manual for full details on the
security features of LookoutDirect.
Panel Navigation Arrows
Select the Show panel navigation arrows in status bar check box if you
want to use panel navigation arrows. These arrows, located in the right side
of the status bar, activate control panels in the order in which you last
accessed them. This feature is most convenient when you have a large number
of control panels in a process and need to cycle through a subset of them
several times in a short period of time.
Getting Started Guide
1-6
www.Automationdirect.com
Chapter 1
Introduction
Startup Process File Setting
If your computer runs LookoutDirect 24 hours a day, you may want to ensure
that the system can automatically reboot and begin executing your processes
in the event power to the system is lost and later restored.
Note In order for the startup file settings to work, LookoutDirect must be setup in Windows
as a startup application. Refer to your Windows documentation for information on enabling
startup applications.
1.
Select Options » Startup.
The Startup Process Files dialog appears.
2.
Click Add.
The Add Startup Files dialog box appears.
3.
Navigate to, and then select the process file(s) you want to run when
power is restored to the system running LookoutDirect.
You can add as many process files as you want. The files will open in the
order in which they are entered in the Startup Process Files dialog box.
To edit a path name to a file, highlight the file name and click on the Edit
button.
© Automationdirect.com
1-7
Getting Started Guide
Chapter 1
Introduction
Getting Started Guide
1-8
www.Automationdirect.com
How LookoutDirect Works
2
This chapter explains the basics of how LookoutDirect works, including
descriptions of objects, data members, connections, processes, and services.
LookoutDirect is a powerful yet easy-to-use Human-Machine Interface
(HMI) and Supervisory Control and Data Acquisition (SCADA) software
package for industrial automation. LookoutDirect runs under Windows and
communicates with field I/O from Programmable Logic Controllers (PLCs),
Remote Terminal Units (RTUs), and other devices. Typical LookoutDirect
projects include continuous process monitoring and supervisory control,
discrete manufacturing, batch applications, and remote telemetry systems.
Object-oriented and event-driven, LookoutDirect is a configurable package
that requires no programming or scripting. Instead, you use LookoutDirect to
create graphical representations on a computer screen of real-world devices
such as switches, dial gauges, chart recorders, pushbuttons, knobs, sliders,
meters, and then link your images to the actual field instruments using PLCs,
RTUs, data acquisition boards, or other I/O devices.
LookoutDirect has many diverse capabilities such as Statistical Process
Control (SPC), recipe management, Structured Query Language (SQL),
built-in security, flexible data logging, running multiple processes on one
computer, sophisticated animation, complex alarming, radio and dial-up
telemetry support, audit trails of events and setpoint adjustments, multimedia
support, touch screen compatibility, networking (including multiple client and
server processes running on one or many computers), Dynamic Data
Exchange (DDE & NetDDE), and more.
With LookoutDirect you can develop an application completely online,
without shutting down. You do not have to recompile or download a database
every time you make a modification, nor do you have to switch back and forth
between programs. You do not even have to run separate development and
configuration programs. Instead, you can add, delete and modify control
panels, logic, graphics, PLCs, RTUs, I/O, and other field devices without ever
interrupting your process.
Because LookoutDirect is object-oriented and event-driven, you can use
LookoutDirect with other programs in the Microsoft Windows multitasking
environment. For example, while LookoutDirect monitors and controls your
© Automationdirect.com
2-1
Getting Started Guide
Chapter 2
How LookoutDirect Works
process, you can use a spreadsheet to analyze production figures of hourly
average flow rates, then start a word processor to generate a memorandum,
paste the spreadsheet into the memo and send it to a laser printer.
The remainder of this chapter describes LookoutDirect architecture—the
components and how they work together. This will help you understand fully
how to use LookoutDirect for all your continuous process, discreet, or batch
applications.
Architecture
Once you understand the basic LookoutDirect components and the
fundamentals regarding object-oriented and event-driven structure, using the
program becomes much easier.
LookoutDirect consists mostly of objects and their data members,
connections, and services. Developing a LookoutDirect application is a
matter of creating, configuring, and connecting objects. Objects are software
representations of everything from potentiometers and switches to PLCs and
RTUs connected physically to the computers you have running
LookoutDirect. You then make connections between the software objects.
LookoutDirect, and the LookoutDirect services handle the connections
between your computer and various PLCs or other controllers; between your
computer and various sensors; between your computer and other computers;
and between your computer and the LookoutDirect database, Citadel.
Add to this the idea of client and server processes and you are well on your
way to understanding the basic structure of all LookoutDirect applications.
What is an Object?
A LookoutDirect object is a self-contained software unit designed to do
something specific in your HMI/SCADA application. What each object does
is generally referred to as its functionality. Each object has a set of data
members you can log to a predefined database, and a set of parameters. The
following diagram depicts the functionality, data members, and parameters of
an object.
Getting Started Guide
2-2
www.Automationdirect.com
Chapter 2
How LookoutDirect Works
Functionality
Parameters
Text
Values
Logical
Values
Numeric
Values
Name
Text Data
Members
Logical Data
Members
Numeric Data
Members
Database
Figure 2-1. Objects Encapsulate Data Members, Parameters, and Functionality
Think of an object as a software model of something physical. For example,
a potentiometer is something physical. You can adjust it up and down. In
LookoutDirect, a Pot object represents the physical potentiometer. You can
adjust it too.
Parameters define the limits of object functionality. For example, parameters
set the minimum and maximum values of the Pot, the size of the smallest
interval of adjustment, and other elements of the Pot’s functionality.
The object data members contain information about the current state of the
object, such as the value, whether the control is visible or hidden, and so on.
The database can store data member information depending on what you
want recorded, at what level of detail.
© Automationdirect.com
2-3
Getting Started Guide
Chapter 2
How LookoutDirect Works
LookoutDirect Object Classes and Functionality
A LookoutDirect object is a specific instance of a LookoutDirect object class.
You can think of an object class as the generalized form for an object. When
you create an object, you are taking the general form described by an object
class, defining it with specific parameters, giving it a name, and putting it to
work as a software object. You can make as many objects as you need from
each LookoutDirect object class, each specifically configured to perform the
task you need that particular object to perform.
For example, LookoutDirect has both Pot and Switch object classes, from
which you might create 20 pots and 30 switches. In this case, you would be
creating a total of 50 objects using only two object classes.
Different object classes are designed to perform different functions, or tasks.
For example, the Pot (potentiometer) object class operates differently from
the Switch object class. This is the functionality built into every object class.
Global object classes are a special kind of object class. Each contains global
system data such as the number of currently active alarms. You cannot create,
modify or delete a global object, but you can use its data members just as you
would use any other object data members.
When you create or open a LookoutDirect process file, LookoutDirect
automatically creates three global objects: $Alarm, $Keyboard, and $System.
Functionality is the way an object class works, operates, or performs a task.
Functionality is a general concept that applies in the same way to all objects
in a given object class. Parameters, however, can be unique, and define the
specific functionality of an individual object.
The object class definitions, found in the LookoutDirect Object Reference
Manual, outline the functionality of each object class.
Parameters
An object’s parameters define its characteristics. LookoutDirect uses object
parameters to complete the definition of the object functionality. For
example, Data rate, Parity, and Stop bits are a few of the parameters that
define how a Modbus object works. Other examples include the Control
security level of a Switch object; Minimum, Maximum, and Resolution of
a Pot object; and Data of an Average object.
Every object class supports a set of parameters that you must fill in or select
when creating a new object. Many parameters are expressions, which means
you can change parameters programatically. Others require constant values.
Some require you to pick specific settings.
Getting Started Guide
2-4
www.Automationdirect.com
Chapter 2
How LookoutDirect Works
Parameters that accept expressions appear as yellow data entry fields. These
parameters can receive signals (that is, they are writable). See Chapter 1,
Expressions, of the LookoutDirect Developer’s Manual for more detailed
information on expressions.
All the parameters for any given class are visible in the object definition
dialog box. For information on how to create this object, see the Creating &
Managing Communication Links section of Chapter 4.
Figure 2-2. Pot Definition Dialog Box
Object Databases and Data Members
Each object has its own built-in database. The individual parts of this
self-contained database are called data members. Some object classes have a
very limited database, while others have extensive databases. The database of
an object representing a PLC might have hundreds of data members; but a
Switch object database has only six data members. You do not have to build
a database—the data members are automatically available when you create
the object.
In the case of a switch, the implicit value of the object is a part of the
self-contained database. Data members can either generate (write) signals,
receive (read) signals, or both.
© Automationdirect.com
2-5
Getting Started Guide
Chapter 2
How LookoutDirect Works
Every data member contains a single value that can be one of three types:
numeric, logical, or text. LookoutDirect is not strongly typed, however, so
you can connect one type data member to another, and LookoutDirect will not
generate an error message. See the Data Polymorphism section of this chapter
for more information on how LookoutDirect interprets data of different types.
The built-in data members for each object are referred to as native members,
and can be thought of as the default or automatic data members. You can add
to and modify the database to suit your specific needs, attaching one or more
aliases to a given data member, each with a different set of associated alarm,
logging, or scaling properties.
Every object class has an explanation of its database in its class
documentation, which you can access by clicking on the Help button in the
dialog box used to create or modify an object. The following is an example of
the switch object class database explanation.
Table 2-1. Switch Data Members
Data Members
Type
Read
Write
Description
(implicit)
logical
yes
no
Switch Position
enable
logical
no
yes
If TRUE (the default), enables DDE. If
FALSE, disables DDE. The default value
is ON. This input is ignored for non-DDE
Switch objects.
reset
logical
no
yes
While this value equals TRUE, the control
will be set to the value in resetvalue.
resetvalue
numeric
no
yes
Sets the value a control will take when the
reset data member transitions from
FALSE to TRUE.
value
numeric
yes
yes
The current value of the control. If you
have remoted this control, then value is
the current value of the position source.
visible
logical
no
yes
When FALSE, the switch object cannot be
seen on the display panel. When TRUE,
the switch can be seen and controlled.
Getting Started Guide
2-6
www.Automationdirect.com
Chapter 2
How LookoutDirect Works
Logical Data Members
Logical data members contain a value that represents a binary or on/off state.
A light switch is a logical device—it is either on or off.
Logical data members are typically used to control equipment that can be
turned on and off, to indicate that a piece of equipment is running, or indicate
whether a limit switch is open or closed.
The Switch object generates a logical signal that is on when the switch is up
and off when the switch is down. In the same way, the Pushbutton object
generates a logical value that is on while the pushbutton is depressed. The
Pulse object generates a logical signal that turns on and off at prescribed
intervals, creating a logical pulse.
The logical signals that some objects generate can be displayed graphically
on a control panel. See Chapter 2, Graphics, of the LookoutDirect
Developer’s Manual, for more information on graphical displays.
LookoutDirect recognizes the following logical constants as expressions:
•
Logical constants that represent an on state: yes, true, on
•
Logical constants that represent an off state: no, false, off
LookoutDirect is not case sensitive, so case variations such as On, ON, or oN
will all be interpreted as ON.
See the Data Polymorphism section of this chapter for information on how
LookoutDirect interprets numeric or text data when it is passed to a logical
data member.
Numeric Data Members
A numeric data member is a floating point number representing analog values
such as tank level, pressure, flow rate, voltage, and temperature. Numeric
data members also represent time, either as a time period (span) or as an
absolute time (that is, a particular time of day/week/month/year).
The Pot (potentiometer) object generates a numeric signal compatible with
the numeric signals that monitor and control the analog input and output
points on a PLC Numeric signals range from –1.7 × 10275 to 1.7 × 10275.
See the Data Polymorphism section of this chapter for information on how
LookoutDirect interprets logical or text data when it is passed to a numeric
data member.
© Automationdirect.com
2-7
Getting Started Guide
Chapter 2
How LookoutDirect Works
Numeric constants are entered using decimal digits (0 – 9), the minus sign (–),
the exponent symbol (E or e), and the time format separator (:).
Some examples of numeric constants would be as follows:
•
0
•
–123.779999
•
1.5E7 (15,000,000)
•
–3.7E-3 (–0.0037)
•
–.0036
•
23356636.234579
Time or Time signals are stored by LookoutDirect as numeric values that
represent days and fractions of a day. For example, you enter one hour as
1:00:00. LookoutDirect interprets the number to the right of the rightmost
colon (:) as seconds, the number to the right of the second colon from the right
as minutes, the next number as hours, and the number to the left of the third
colon from the right as days. If there are no colons in the entry, the time period
is assumed to be given in days.
When your operating system switches in or out of daylight savings time,
LookoutDirect corrects for the change relative to universal time so that there
is no data discontinuity or loss in the Citadel database.
Table 2-2. Examples of LookoutDirect Time Constants
Time Period
Constant
Getting Started Guide
LookoutDirect Interpretation
0:23
23 seconds, or 0.0002662 days
75:00
75 minutes, 0 seconds, or 0.05208 days
12:00:05:01
12 days, 0 hours, 5 minutes, 1 second, or
12.003484 days
199::
199 hours, 0 minutes, 0 seconds, or 8.2917 days
0:10.023
10.023 seconds, or 0.0001160 days
12.75
12.75 days
17:64:22.5
invalid number: because hours are specified,
minutes must be ≤59
2-8
www.Automationdirect.com
Chapter 2
How LookoutDirect Works
You may enter one hour as 1:00:00, but LookoutDirect stores the number as
0.04167 (or 1/24 of a day). Days are represented by the integer portion of the
number. The number zero represents Jan. 1, 1900. You may also find it
helpful to know that one second = 0.000011574 and one minute =
0.000694444.
Tip If you display a numeric signal on a control panel, LookoutDirect provides a long list
of numeric formats to choose from. You can set the format when you first create the display,
or by right-clicking on the display and selecting Display Properties. The different possible
formats are listed in the following tables.
Table 2-3. General Numeric Format Examples
Numeric Format
Value
Display
(General)
123.78
Displayed as 123.78
(General)
123.789
Displayed as 123.789
Note: General format displays the value in the most compact form possible.
Table 2-4. Leading Zeroes Numeric Format Examples
Numeric Format
Value
Display
000000000
123.789
Displayed as 000000124
00000000
123.789
Displayed as 00000124
0000000
123.789
Displayed as 0000124
000000
123.789
Displayed as 000124
00000
123.789
Displayed as 00124
0000
123.789
Displayed as 0124
000
123.789
Displayed as 124
00
123.789
Displayed as 124
0
123.789
Displayed as 124
© Automationdirect.com
2-9
Getting Started Guide
Chapter 2
How LookoutDirect Works
Table 2-5. Fractional Numbers with Trailing Zeroes Format Examples
Numeric Format
Value
Display
0.0
123.789
Displayed as 123.8
0.00
123.789
Displayed as 123.79
0.000
123.789
Displayed as 123.789
0.0000
123.789
Displayed as 123.7890
0.00000
123.789
Displayed as 123.78900
0.000000
123.789
Displayed as 123.789000
0.0000000
123.789
Displayed as 123.7890000
0.00000000
123.789
Displayed as 123.78900000
Table 2-6. Exponential/Scientific Notation Format Examples
Numeric Format
Value
Display
0E0
123.789
Displayed as 1E+2
0.0E+0
123.789
Displayed as 1.2E+2
0.00E+0
123.789
Displayed as 1.24E+2
0.000E+0
123.789
Displayed as 1.238E+2
0.0000E+0
123.789
Displayed as 1.2379E+2
0.00000E+0
123.789
Displayed as 1.23789E+2
0.000000E+0
123.789
Displayed as 1.237890E+2
0.0000000E+0
123.789
Displayed as 1.2378900E+2
0.00000000E+0
123.789
Displayed as 1.23789000E+2
Getting Started Guide
2-10
www.Automationdirect.com
Chapter 2
How LookoutDirect Works
Table 2-7. Hexadecimal Format Examples
Numeric Format
Value
Display
0x0
123.789
Displayed as 0x7
0x00
123.789
Displayed as 0x7
0x000
123.789
Displayed as 0x07
0x0000
123.789
Displayed as 0x007
0x00000
123.789
Displayed as 0x0007
0x000000
123.789
Displayed as 0x00007
0x0000000
123.789
Displayed as 0x000007
0x00000000
123.789
Displayed as 0x0000007
You can also use numeric signals to represent absolute times and periods of
time. Because dates and times are represented by numeric values, you can
add, subtract, and include dates and times in expressions, just as you would
any other numeric signals.
A time period represents a span of time or a duration. Time periods are
indicated in hours, minutes, seconds, and fractions of seconds. Numeric
formats that represent time periods are characterized by capital letters (that is,
H rather than h).
Table 2-8. Time Period Display Examples
Time Format
Value
Display
H
0.4789
Displayed as 11 (hours)
H.H
0.4789
Displayed as 11.5 (hours)
H.HH
0.4789
Displayed as 11.49 (hours)
M
0.4789
Displayed as 690 (minutes)
M.M
0.4789
Displayed as 689.6 (minutes)
M.MM
0.4789
Displayed as 689.62 (minutes)
S
0.4789
Displayed as 41377 (seconds)
S.S
0.4789
Displayed as 41377.0 (seconds)
S.SS
0.4789
Displayed as 41376.96 (seconds)
© Automationdirect.com
2-11
Getting Started Guide
Chapter 2
How LookoutDirect Works
Table 2-8. Time Period Display Examples (Continued)
Time Format
Value
Display
HH:MM
0.4789
Displayed as 11:29 (11 hours, 29 minutes)
HH:MM:SS
0.4789
Displayed as 11:29:36 (11 hours, 29 min, 36 seconds)
HH:MM:SS.S
0.4789
Displayed as 11:29:36.9
HH:MM:SS.SS
0.4789
Displayed as 11:29:36.96
HH:MM:SS.SSS
0.4789
Displayed as 11:29:36.960
MM:SS
0.4789
Displayed as 689:36 (689 minutes, 36 seconds)
MM:SS.S
0.4789
Displayed as 689:36.9
MM:SS.SS
0.4789
Displayed as 689:36.96
MM:SS.SSS
0.4789
Displayed as 689:36.960
Absolute dates and times indicate a specific moment in time. LookoutDirect
stores all absolute dates and times as numeric signals. It uses the 1900 date
system in which the number 1 corresponds to midnight, January 1, 1900. The
number 2 corresponds to midnight, January 2, 1900 and so on. For example,
the number 34491.5 represents noon, June 6, 1994.
Numeric formats that represent absolute times are characterized by lower
case letters (for example, hh:mm instead of HH:MM).
Table 2-9. Absolute Date and Time Display Examples
Time Format
Value
Display
hh:mm
34668.7889
Displayed as 18:56 (6:56 p.m.)
hh:mm:ss
34668.7889
Displayed as 18:56:02
mm/dd hh:mm
34668.7889
Displayed as 11/30 18:56
mm/dd hh:mm:ss
34668.7889
Displayed as 11/30 18:56:02
mm/dd/yy
34668.7889
Displayed as 11/30/94
mm/dd/yy hh:mm
34668.7889
Displayed as 11/30/94 18:56
mm/dd/yy hh:mm:ss
34668.7889
Displayed as 11/30/94 18:56:02
dd/mm hh:mm
34668.7889
Displayed as 30/11 18:56
dd/mm hh:mm:ss
34668.7889
Displayed as 30/11 18:56:02
Getting Started Guide
2-12
www.Automationdirect.com
Chapter 2
How LookoutDirect Works
Table 2-9. Absolute Date and Time Display Examples (Continued)
Time Format
Value
Display
dd/mm/yy
34668.7889
Displayed as 30/11/94
dd/mm/yy hh:mm
34668.7889
Displayed as 30/11/94 18:56
dd/mm/yy hh:mm:ss
34668.7889
Displayed as 30/11/94 18:56:02
Text Data Members
Text data members contain text character strings. These character strings
consist of all displayable characters. You can use text signals to display alarm
descriptions on the alarm panel, to display labels on a control panel, and in
parameters or expressions. You can enter text signals as constants, or you can
construct them with the many text functions available in expressions. Be sure
to enclose text constants within double quotes (“ ”) when using them within
expressions.
Some examples of text constants would be the following:
•
“Water Temperature:”
•
“”
•
“Low level in ‘Polymer 2’ tank”
•
“gpm”
(empty text string)
See the Data Polymorphism section in this chapter for information on how
LookoutDirect interprets logical or numeric data when it is passed to a text
data member.
(implicit) Data Members
Many object classes have an (implicit) data member. This implicit value
is either logical, numeric, or textual, depending on the object class, and
follows the same rules that apply to all other data members. The implicit
member represents what LookoutDirect considers to be the most commonly
used data member of that object class. In many cases, it is the only data
member of a class. It saves you time and reduces the amount of typing
required to designate a data member.
For example, LookoutDirect could make you specify the numeric signal
generated by a Pot object by typing Pot1.numeric where Pot1 is the name
and numeric is the current value of the Pot. Instead, you enter Pot1 and
LookoutDirect knows you are referring to the implicit value of the Pot. If you
examine the Pot definition in the LookoutDirect online help, you will see that
the (implicit) data member is the current value of the Pot.
© Automationdirect.com
2-13
Getting Started Guide
Chapter 2
How LookoutDirect Works
Data Polymorphism
Polymorphic data is data that is not strongly typed. In LookoutDirect, data of
one type is interpreted appropriately when connected to an input of another
type. You can also select the data type when inserting expressions, using the
selection box below the expression field, as shown in the following picture.
Logical values are displayed as 0 and 1 when interpreted as numeric values
and as ON or OFF when interpreted as text values.
A numeric value of 0 displays as OFF when viewed as a logical value. Any
value other than 0 is displayed as ON. A numeric value displayed as text
shows the digits of the number.
Text strings displayed as numeric values appear as digits if the string consists
only of digits in a valid LookoutDirect display format, such as a decimal
number or a scientific expression. Numeric interpretation of text in a time
format, such as 10:05:30 is interpreted as number (the fraction of one day
represented by the time quantity) in scientific notation.
Any text string that does not consist of digits in a valid LookoutDirect format
is interpreted as a 0, with the exception of ON or TRUE, which display as 1.
OFF or FALSE are interpreted as 0, by default. The terms On, Off, True, and
False are not case sensitive.
Getting Started Guide
2-14
www.Automationdirect.com
Chapter 2
How LookoutDirect Works
Text strings displayed as logical values are interpreted as a 0 or as OFF, except
when the text string consists of a 1, On, or True, all of which are interpreted
as ON. Again, a text string consisting of 0, Off, or False is interpreted as
OFF, by default. Again, the terms On, Off, True, and False are not case
sensitive.
Once you have placed an expression on your panel, you cannot change the
data type in that expression. You have to delete that expression and place a
new one if you want to change data types.
Expressions used as parameters in LookoutDirect objects do not permit you
to select the data type because the object interprets input according to the data
type required by that object. You can, however, use output of a data type
different from that required by an object, as long as the output can be
interpreted meaningfully by the object.
Polymorphic data types affect the DataTable object. In versions of
LookoutDirect earlier than LookoutDirect 4.0, the DataTable used data
members such as A1.logical to set the type of data in a particular cell.
Some LookoutDirect developers used the DataTable to create, in effect,
polymorphic data.
The LookoutDirect 3.xx DataTable data members are preserved in
LookoutDirect 4 for the sake of compatibility. But it is not necessary to use
the data-typed data members to simulate polymorphic data. To achieve this
compatibility, however, LookoutDirect DataTable data is still strongly typed.
You must input numeric data to DataTable numeric data members, logical
data to DataTable logical data members, and so on.
Data Quality Attributes
LookoutDirect uses data quality attributes to keep track of any problems with
your data. If there is a communications failure with a device, if the network
connection to the source of the data is bad, if the data source is undefined, if
the value is stale, or if some other problem arises, LookoutDirect creates an
alarm to report the condition.
Because the alarm may only be visible on the local computer, and not on a
computer accessing that data from another location, LookoutDirect places a
red X over the affected control or expression when there is a data quality
problem.
Check the Alarms panel of the process reporting the data quality problem for
details on the problem. You can also use the data quality functions to monitor
data quality and report problems. See the Data Quality Functions section of
Chapter 1, Expressions, of the LookoutDirect Developer’s Manual.
© Automationdirect.com
2-15
Getting Started Guide
Chapter 2
How LookoutDirect Works
You can also set your computer to monitor alarms from processes running on
other computers. See Chapter 9, Alarms, in the LookoutDirect Developer’s
Manual for information on how.
Connections
All the LookoutDirect objects you create either take the place of physical
objects such as switches or potentiometers, or serve as your interface to some
physical object connected to your computer, such as a PLC, and RTU, or
another computer on the network that is connected to such objects.
You can connect all these objects in LookoutDirect, allowing signals to pass
between them—much the same way you would wire a time delay relay to a
motor starter relay, for instance. You can do this by connecting database
members to each other, or by connecting database members to parameters.
In the broadest sense, one way to understand LookoutDirect is in terms of
these connections. The following figure shows a data member to parameter
connection, and a data member to data member connection.
Functionality
Functionality
Numeric
Parameters
Numeric
Text
Text
Logical
Logical
Name
Name
Numeric
Database
Parameters
Numeric
Text
Text
Logical
Logical
Database
Connections between
two objects
Figure 2-3. Example Connections Between Two Objects
For example, you might make the numeric data member of a Pot object the
source for the High Limit parameter of an Alarm object. When you adjust the
Pot, the Alarm High Limit changes.
In this way LookoutDirect handles the connections between your computer
and various PLCs or other controllers; between your computer and various
sensors; between your computer and other computers; and between your
computer and the LookoutDirect database, Citadel.
Getting Started Guide
2-16
www.Automationdirect.com
Chapter 2
How LookoutDirect Works
Alarming, report generation, trending, data analysis, and a fast and flexible
database are all built in; all you do is configure objects and data points, then
create the connections, using the LookoutDirect dialog boxes.
LookoutDirect connections vary. Some control hardware directly by
determining settings, some control or report on processes interactively, some
analyze and present data. To all this capability, LookoutDirect adds a
powerful yet simple way of making LookoutDirect connections across a
network.
Connections and objects taken together are called a process. Because
LookoutDirect runs multiple processes, and because networking has been
made so simple, you can create as many or as few processes as you need,
small or large, to increase the efficiency of your control systems.
Fortunately, you need not worry about creating drivers or databases or
displays in LookoutDirect—all these things are either LookoutDirect objects,
or contained in LookoutDirect objects. All you have to do is place objects
where you want them, and make the necessary connections to and from them.
You do not have to worry about elaborate timing systems and polling loops,
either. Because LookoutDirect is event driven, your connections report on
and react to changes and other events as they happen, not in some arbitrary
order built into your programs.
You can make the following kinds of connections in LookoutDirect:
© Automationdirect.com
•
Direct—Made with the Edit Connections dialog box, these connections
are fixed and work in one direction only. This sort of connection should
only be made from a server process to hardware installed on the server’s
computer, or between objects contained within the same process.
•
URL remote—A URL remote connection is a flexible type of fully
reciprocal connection between a LookoutDirect control and a
LookoutDirect object read/write data member. Changing the control
changes the data member, as you would expect, but if the value of that
data member changes from some other cause, the control value changes
as well. This sort of connection is what you use to connect a client
process to a server process, or to link two client processes through a
server. (See the next section for an explanation of client and server
processes.)
•
Complex—You can make complex connections using variables and logic
tests to respond dynamically to changing needs and circumstances. You
can make direct complex connections, and with the LookoutDirect
Symbolic Link object, make remote complex connections as well.
2-17
Getting Started Guide
Chapter 2
How LookoutDirect Works
Client and Server Processes
LookoutDirect processes are programs you create to perform some specific
function. LookoutDirect can run any number of processes at one time. You
can open and close a process without disturbing other processes that are
running at the time. Your processes can report and analyze data and control
machinery, all while interacting with other LookoutDirect processes running
on your computer and others scattered across the network.
It is important to make a distinction between client and server processes as
you design and develop your LookoutDirect HMI.
•
Computers running LookoutDirect servers should be properly connected
to external industrial automation hardware such as FieldPoint from
National Instruments. Computers running clients only should not be
connected to external hardware. In other words, servers connect directly
to hardware; clients connect remotely, through the server.
•
Servers control and monitor; clients watch, report, and make adjustments
to server settings. Servers can do all things clients do; clients act through
servers.
•
Client applications can move from computer to computer, and so must
have no direct dependencies in order to run. In other words, nothing in a
client application should refer directly to or depend on the computer
running it. You should always use a remote source connection from a
client control to a server rather than making a direct connection, so that
the control reports settings as well as changing them.
As you might expect, you can have more than one client process attempting
to alter a value in a single server process. When this happens, LookoutDirect
accepts input as it arrives, so the first client input to arrive is executed before
the next.
Supervisory Control
As you create and connect objects, you form a web, or system, containing
many objects, all linked to perform a supervisory control strategy.
It is how you design your supervisory system, behind the control panel, that
makes your process run. Your system routes signals from field components to
bar graphs and visual indicators on control panels. It activates and deactivates
alarms. You can design it to make complex decisions based on the values of
field control signals and setpoints adjusted through pots and switches on
control panels. You can include complex spreadsheet-style formulas as a part
of your supervisory design.
Getting Started Guide
2-18
www.Automationdirect.com
Chapter 2
How LookoutDirect Works
Event-Driven Processing
An important concept to understand is that LookoutDirect is entirely
event-driven, not loop-driven. To understand the significance of this design
requires a digression, to explain how standard loop-driven programs work.
Loop-driven applications execute code sequentially from top to bottom, and
loop back to the top to execute the same code over and over, as shown in
Figure 2-4.
Loop Driven
Paradigm
Endless do loop,
constantly reading
and writing values
to and from the
central database.
Loop driven logic
needlessly and
perpetually
retesting values
and rules.
Ce
ntr
al D
ata
bas
e
r
e
alu
lV
rive
lD
co
oto
a
gic
Lo
Pr
e
xt
Te
lu
Va
Driver Is Separate Application
Rule 1
Rule 2
er
eg
Int
lue
Va
e
alu
tV
Rule 3
in
Po
ing
at
Flo
Rule 4
Passive Notification
Figure 2-4. Example of Conventional, Loop-Driven Software Program
In this programming model, a given section of code or rule may execute
millions of times before the result changes. This wastes computer processor
time and slows down responses to frequent events.
The more rules you add to loop-based systems, the slower the response time.
Also, as you add more names to the central database, speed and overall
performance degrades. This is because many central databases use a passive
notification system in which the rules of the loop-driven logic must scan an
ever larger database for their appropriate values. The larger the database, the
longer it takes the rule to find the data it needs to resolve its function.
© Automationdirect.com
2-19
Getting Started Guide
Chapter 2
How LookoutDirect Works
In sharp contrast to this programming model, LookoutDirect is entirely
event-driven. Each object remains quiescent, doing nothing until an event
occurs, as shown in Figure 2-5.
Events
(Active Notification)
Switch
Timer
Data
Logger
Formula
Control
Panel
PLC
Objects
Driver is just another object
Figure 2-5. LookoutDirect Object-Oriented and Event-Driven Architecture
An event is a change in a data value. When an incoming signal changes, the
object activates, processing the value according to its functionality. Objects
only send out signals when the result of their processing changes. This is how
an event propagates throughout your system, creating a chain-reaction that
affects only the objects in the chain. This is called active notification.
Individual objects activate only when notified of an event. This event-driven
paradigm closely simulates the responsiveness of physical switches,
pushbuttons, and relays, and is the reason LookoutDirect is so fast.
Advantages of Active Notification
Consider the advantages of active notification over passive notification.
Active notification is inherently event-driven while passive notification
requires a constant do-loop to check for a change in a data value.
A good example would be two people trying to exchange information. One
person could ask the other for information, and that person would respond.
This would require one person to ask the other repeatedly if anything has
changed. This is what loop-driven rules do when they constantly query the
central database.
Getting Started Guide
2-20
www.Automationdirect.com
Chapter 2
How LookoutDirect Works
Alternatively, one person could just inform the other when something
happens. This is what happens when you connect two objects in
LookoutDirect.
Adding objects in LookoutDirect adds significantly less demand for
processor time than adding new rules or enlarging the central database of a
traditional loop-driven system.
Because LookoutDirect is entirely event-driven, the order in which you create
the objects and connect them does not affect how your supervisory strategy
works.
LookoutDirect Environment Services
While the cornerstone of object technology is the object itself, objects need
an environment in which to function. Objects require the use of system
resources like the serial port, hard disk, multimedia functions, and more. For
example, multiple PLC objects may need to use the same communication port
on your computer. In such a situation, LookoutDirect must provide an
environment service—that is, a mechanism the objects can use to gain access
to the communication port in an orderly and timely fashion.
An environment service, then, is a tool that LookoutDirect makes available to
objects, or a function LookoutDirect performs outside of its object-oriented
structure. Each environment service provides a special function. The
following sections describe LookoutDirect environment services.
Serial Port Communication Environment Service
You can configure certain protocol object classes to represent and
communicate with PLCs and RTUs through the serial ports of your computer.
This environment service arbitrates serial port usage between objects
representing PLCs and RTUs. For example, a single two-way radio connected
to a serial port on the computer can communicate with several different
brands of RTUs out in the field, each one using a different protocol. See
Chapter 4, Serial Communications, in the LookoutDirect Developer’s
Manual for more information on configuring communications.
© Automationdirect.com
2-21
Getting Started Guide
Chapter 2
How LookoutDirect Works
Database Environment Service
With the database environment service you can define or modify native data
member parameters.
For example, the Modbus object class includes a native data member called
40001. You can give this native data member an alias such as PumpSpeed,
and define associated unit scaling, alarming, deadband, and other parameters.
With LookoutDirect you can also directly import database information from
external packages like Siemens APT. See Chapter 7, Logging Data and
Events, and Chapter 8, Structured Query Language, of the LookoutDirect
Developer’s Manual for more information on database services provided by
LookoutDirect.
Graphics Environment Service
LookoutDirect has an extensive library of standard graphics. These include
various switches, potentiometers, pushbuttons, bar graphs, valves, tanks,
pumps, and so on. You can also create your own custom graphic and add it to
your LookoutDirect library. See Chapter 2, Graphics, of the LookoutDirect
Developer’s Manual for more information on graphics.
Alarm Environment Service
The alarm subsystem is a powerful and flexible mechanism for generating,
displaying, logging, and printing alarms. This subsystem has several distinct
parts including the alarm window, object parameters like Alarm Group and
Alarm Priority, alarm filters, display parameters, and print settings.
LookoutDirect permanently archives alarms to disk. You can easily print this
alarm history. See Chapter 9, Alarms, of the LookoutDirect Developer’s
Manual for additional information.
Multimedia Environment Service
LookoutDirect also provides a multimedia environment service you can use
to play sound wave files. See the online help description of the Playwave
object for more information on using this feature.
Getting Started Guide
2-22
www.Automationdirect.com
Chapter 2
How LookoutDirect Works
Security Environment Service
LookoutDirect has a highly sophisticated and comprehensive security system
for both local and network security. You can configure control security,
viewing security, and action verification. You can selectively determine
which operators have control of what objects, which operators can view what
control panels, and which objects prompt operators for verification of
commands. See Chapter 6, Security, of the LookoutDirect Developer’s
Manual for more information on security.
Historical Logging Environment Service
With the logging environment service you can store real-time system
information to disk in comma-delimited ASCII files, or in a special
LookoutDirect database called Citadel.
The LookoutDirect Event Logger keeps track of who did what, and when they
did it. LookoutDirect logs operator commands, from closing a process file to
flipping a switch or adjusting a Pot. Along with each event, LookoutDirect
logs the account name (operator), date and time of the event, name of the
object adjusted, and the before and after settings of the object. See Chapter 7,
Logging Data and Events, of the LookoutDirect Developer’s Manual for
additional information on logging environment services.
ODBC Environment Service
Because of the LookoutDirect Open Database Connectivity (ODBC)
environment service, you can use other applications, such as Microsoft
Access, to query the LookoutDirect historical database. See Chapter 8,
Structured Query Language, of the LookoutDirect Developer’s Manual for
additional information on ODBC environment services.
DDE Environment Service
LookoutDirect can send its live process values to other applications, and it
can receive real-time values from other applications. The LookoutDirect
system acts as both a DDE client and a DDE server. See Chapter 5, Dynamic
Data Exchange, of the LookoutDirect Developer’s Manual for further
information on DDE.
© Automationdirect.com
2-23
Getting Started Guide
Chapter 2
How LookoutDirect Works
Networking Environment Service
LookoutDirect provides a full client-server networking environment service
through the use of TCP/IP. With this environment service, you can monitor
and control your processes from multiple workstations on a network.
See Chapter 4, Networking, of the LookoutDirect Developer’s Manual for
information on networking LookoutDirect computers.
Redundancy Environment Service
Use the LookoutDirect redundancy environment service to configure two
computers for redundancy, providing automatic transfer of monitoring
and control should one of the computers fail. See Chapter 10, Redundancy, of
the LookoutDirect Developer’s Manual for information on configuring
computer redundancy.
LookoutDirect Windows Services
LookoutDirect requires three background services that run in Windows
outside of the LookoutDirect application itself to be running on your
computer while it is running: Citadel Server, Classified Ads, and Time
Synchronization. In your Windows NT task manager, these services appear
as Classifieds, TimeService, and CitadelService. Under Windows NT, these
services run automatically as NT services. If you need to interact with these
services, use the NT Services utility, found in Start»Settings»Control
Panel»Services.
In Windows 98/95, LookoutDirect installs a services manager during
installation, denoted by a small lighthouse icon at one end of your Windows
task bar, as shown in the following illustration.
When you right-click on this icon you will see the following menu.
You can start or stop any of the LookoutDirect Windows services using this
tool.
Getting Started Guide
2-24
www.Automationdirect.com
Getting Started with LookoutDirect
3
This chapter contains the following three guided tours. Each tour is designed
to provide you with practical hands-on exposure to LookoutDirect.
Basic Features Tour—Introduces the basics of the LookoutDirect
process development cycle. You will use LookoutDirect’s most common
features to create a process that will run locally on your PC without
requiring a connection between the PC running LookoutDirect and your
PLC.
Connected Tour — Provides an immediate demonstration of
bi-directional communications between LookoutDirect and your PLC
using both numeric and logical signals. To complete this tour, the PC on
which you are running LookoutDirect must be properly connected to a
DirectLogic controller. Refer to Appendix B for information on
establishing a communications link.
Advanced Features Tour—Demonstrates how to create functionality
within LookoutDirect that you can use to enhance and manage the
processes that you create.
To gain full benefit from the tours, we recommend that you complete each
tour in the order given. Before starting the tours, ensure that the hardware key
supplied with LookoutDirect is installed on the parallel port of your PC.
Without the hardware key, the functionality of LookoutDirect will be limited
to one hour of use and ten input/output points. Refer to Chapter 1, About the
Hardware Key, for additional information on using the hardware key.
After completing the three tours, you may feel you are ready to begin creating
your own process. If you would like more in-depth information on
LookoutDirect, read Chapter 4, LookoutDirect Basics: Windows, Tools,
Files, and Path Names and Chapter 5, Using LookoutDirect.
© Automationdirect.com
3-1
Getting Started Guide
Chapter 3
Getting Started with LookoutDirect
Basic Features Tour
In this tour, you will create a process that contains some simple functionality
associated with a water treatment plant. The completed process file created
by this tour can be found in
C:\DirectSoft32\Projects\Examples\LookoutDirect\WaterWorks.l4p.
You may find it helpful to have the example process open while you complete
this tour.
Starting a New Process
You will begin the process-development cycle by starting LookoutDirect,
naming your process, and creating your first control panel.
The first time you start a development version of LookoutDirect, the Administrator
user account has no password. Any time the Administrator account has no password,
LookoutDirect opens with Administrator logged in and active, without requiring any log in.
This is a convenience for you when creating your LookoutDirect processes, but you must be
sure to assign a password to the Administrator account before allowing others who should
not have Administrator privileges to use your copy of LookoutDirect. Refer to Creating an
Account later in this section for more information.
Note
1.
Click Start » Programs. Point to DirectSOFT32 » LookoutDirect
Tools, and then click LookoutDirect.
The LookoutDirect main screen appears. When you start a new process,
LookoutDirect opens in the edit mode.
2.
Select File » New.
The Create Process dialog box appears.
3.
In the Process Name box, type WaterWorks. This is the name of the
example process.
4.
Click OK.
The New Control Panel dialog appears. Notice that the alarm panel
appears at the bottom of the main screen.
Getting Started Guide
3-2
www.Automationdirect.com
Chapter 3
5.
Getting Started with LookoutDirect
In the Name box, type PNLOverview.
This is the name of the control panel object. In the Title box, type
Overview. This is the title that will appear at the top of the control panel.
The control panel you created serves as a pallet on which you will build
and organize the process.
Leave the remaining dialog box properties as they are. You will have the
opportunity to change the way the control looks later in this tour.
Tip Begin the name of each object that you create with the two or three letter abbreviation
for the type of object. For example, the abbreviation PNL is used above to designate the panel
object. By consistently using this object naming convention, you will be able to quickly
locate objects in the process directory tree that you will use throughout the three tours.
6.
Click OK.
The new Overview control panel appears. Maximize the control panel.
Note that the title of the control panel moves to the window title bar.
7.
Select Alarms » Display Options and set the window style to Bottom
and the window height to 5 lines.
This establishes the location and capacity of the alarm window.
If the PC on which you are creating a process does not share the same monitor
resolution as the PC(s) on which the process will be run, set the monitor resolution of the
development PC to match the resolution of the lowest resolution monitor on which you
expect the process to be displayed.
Note
© Automationdirect.com
3-3
Getting Started Guide
Chapter 3
Getting Started with LookoutDirect
Adding an Object
Adding objects is the essence of building a process using LookoutDirect.
In this part, you will begin by adding a potentiometer object to the new
control panel. The potentiometer will be used to control the water level in a
simulated tank.
1.
Select Object » Object Explorer.
The Object Explorer dialog box appears. Notice that the WaterWorks
process name appears in the tree structure. Drag the Object Explorer to
the right side of the control panel to keep it out of the way of the control
panel.
Object Explorer provides a single, convenient location from which you can access and
modify the object that you add to your LookoutDirect processes. Refer to Chapter 4, Getting
Started with LookoutDirect, Object Explorer for information on using Object Explorer.
Note
2.
Right-click on WaterWorks, and select New Object.
The Select Object Class dialog box appears.
3.
Double-click on the Control folder, and then navigate down the list of
objects and highlight the Pot object.
Information on any object that you highlight (before selecting), in this
case the Pot object, appears on the right side of the dialog box.
Note Deselecting the Categorize check box, located at the top of the Select Object Class
dialog box, changes the object directory from a folder format to a continuous list format.
When displayed in a list format, objects can be found by typing the first letter of the object’s
name. As you become familiar with the names of an increasing number of objects, you will
find it useful to locate them in this manner.
4.
Click OK.
The Select Location for new object dialog box appears. The dialog box
displays the structure of your network in a directory tree format. In this
example the name of your computer and the WaterWorks process should
be visible in the directory tree.
Getting Started Guide
3-4
www.Automationdirect.com
Chapter 3
5.
Getting Started with LookoutDirect
Select WaterWorks, and then click OK.
The properties dialog box for the new potentiometer object appears.
6.
Complete the dialog box properties.
•
Tag: POTSimLevel
This is the name of the new potentiometer object. Note that we
began the name of the new object with the three-letter abbreviation
for Potentiometer.
•
Minimum and Maximum: 0 and 50 respectively.
For this object, the minimum and maximum values you enter
represent the incremental range of the potentiometer.
•
Resolution: .1
7.
Leave the remaining properties of the dialog box as they are and click
OK.
8.
Select the new object from the Object Explorer tree, and then drag it onto
the panel.
A dialog box appears that contains the graphic that can be used to
represent the new potentiometer object.
9.
Select the vertical slider, and then click OK.
The new potentiometer object appears on the control panel.
© Automationdirect.com
3-5
Getting Started Guide
Chapter 3
Getting Started with LookoutDirect
Try out the new potentiometer by pressing Ctrl + Space to toggle out of
the edit mode, and then click and drag the slider up and down. Return to the
edit mode when you are finished.
Creating and Working with Expressions
Because the POTSimLevel potentiometer object has an associated numeric
range, you can visually represent that range using an expression. For this
example, you will create a graphical expression in the form of a bar graph and
a numeric expression in the form of a digital display.
1.
Click Insert » Expression.
The Insert Expression dialog box appears. The Insert Expression dialog
box provides a convenient method to locate objects and their data
members and Paste them into a single completed expression.
2.
Expand the network directory tree under the name of your PC until the
list of objects under the WaterWorks process is revealed, and then select
PotSimLevel.
Tip By making the WaterWorks process the root of the directory tree, you can avoid having
to repeatedly expand the tree each time you want to select an object. To make the WaterWorks
process the root of the tree, right-click WaterWorks and select Make Root.
3.
Leave the remaining dialog box properties as they are and click Paste.
POTSimLevel appears in the yellow expression field.
4.
Click OK.
The Display numeric signal dialog box appears. This particular dialog
box appears because the Display type property, selected by default on the
Insert Expression dialog box, was set to numeric. LookoutDirect allows
you to select the display properties of a numeric signals.
5.
Complete the Display numeric signal dialog box.
•
Display Style: Bar (up)
•
Bar Color: deep blue
•
Minimum and Maximum: 0 and 50 respectively.
Note that these values match the range you selected previously for
the POTSimLevel object.
Getting Started Guide
3-6
www.Automationdirect.com
Chapter 3
6.
Getting Started with LookoutDirect
Leave the remaining dialog box properties as they are and click OK.
The bar graph appears on the control panel.
Creating the Digital Display
1.
Select the bar graph, hold down the Shift key, and then drag the bar graph
in any direction and release it.
A duplicate copy of the bar graph is created. Duplicating objects in this
manner is a convenient way to create new objects.
2.
Right-click on the duplicate bar graph, and then select Display
Properties.
3.
In the Display Style group box, click Digital, and then click OK.
The display format of the duplicate expression changes from a bar graph
to a digital readout. The readout will initially display as "####". Increase
the width of the readout display box, by dragging a handle, to correctly
display the numeric value.
4.
© Automationdirect.com
Move the new digital display to the right of the bar graph.
3-7
Getting Started Guide
Chapter 3
Getting Started with LookoutDirect
Toggle out of the edit mode, and then move the potentiometer slider up and
down to see both graphical expressions function.
Saving Your Work
As with any application, it’s a good idea to save your work often.
1.
Select File » Save.
The Select process to save dialog appear with the WaterWorks
process—the only one open—highlighted.
2.
Click OK, and then Save to save the process under the name
WaterWorks.l4p.
Connecting Objects
Earlier in this tour, you created the POTSimLevel object and graphically
displayed its value at a fixed point in time using a bar graph. In this part of the
tour, you will create a hypertrend object that will monitor the state of the
POTSimLevel object and display, in real-time, its value in the form of a trace
line on a simulated chart recorder.
To begin, you will create a hypertrend object, and then assign the signal from
the POTSimLevel object to the hypertrend. To enable the hypertrend to
display the activity of the POTSimLevel object, you will activate real-time
logging of the POTSimLevel signal to a historical database.
Create the Hypertrend Object
Getting Started Guide
1.
In the Object Explorer, right-click on WaterWorks, and then select New
Object.
2.
Locate and select the HyperTrend object from the directory tree, and
then click OK.
3-8
www.Automationdirect.com
Chapter 3
3.
Getting Started with LookoutDirect
Select the WaterWorks process and click OK.
The Create HyperTrend dialog box appears.
4.
In the Name text box, type HTTanks.
5.
Click Add Group.
The Add Group dialog box appears. The add group function allows you
to logically organize and display multiple signals at one time. In this
example however, you will only be adding one signal to the group.
6.
In the Name text box, type WaterTankTrend, select deep blue as the
Grid Color, and then click OK.
Add a Signal to the Hypertrend
1.
Click Add Item.
The Add Item dialog box appears. The properties of this dialog box
define the source of the signal you are adding to the TankLevel group.
2.
Right-click in the green URL= field.
The URL Editor dialog box appears. The URL Editor dialog box is
used to quickly locate the source of a remote signal.
3.
Expand the directory tree, select the POTSimLevel object, and click
Paste.
The URL for the POTSimLevel object is pasted into the green URL field.
4.
© Automationdirect.com
Click OK.
3-9
Getting Started Guide
Chapter 3
Getting Started with LookoutDirect
The source, or URL, of the POTSimLevel signal appears in the URL field
of the Add Item dialog box.
5.
Select red as the color for Line color, and then click OK.
The new item is added to the WaterTankTrend group in the Create
HyperTrend dialog box.
6.
Click OK, and then select the new object from the Object Explorer tree
and drag it onto the panel.
A dialog box appears that contains the graphics that can be used to
represent the new object.
7.
Select the desired graphic and click OK.
The new virtual chart recorder appears on the control panel.
8.
Drag the new recorder off to the left, and then resize it by dragging one
of the corner grips.
The objects you have added to the control panel so far may seem out of
proportion or poorly arranged. You will clean up the control panel later
in this tour.
Enable the Historical Database
If you toggle out of the edit mode (Ctrl + Shift) and adjust the level of
the POTSimLevel object, you will notice that a trace line does not appear on
the hypertrend chart. In order for the trace line to appear, you must first
activate real-time data logging of the POTSimLevel object to a historical
database.
1.
Toggle back to the edit mode, and then right click on the PotSimLevel
object in Object Explorer.
The Edit Object Database dialog box appears.
2.
Double-click the POTSimLevel object.
The database dialog box appears. The title of the dialog box reflects the
name of the object you are editing.
Getting Started Guide
3-10
www.Automationdirect.com
Chapter 3
Getting Started with LookoutDirect
3.
In the Filters group box, type .1 for the deviation.
4.
Click Log to historical database.
5.
Click Save, and then Quit.
To test the new hypertrend object, toggle out of the edit mode and move the
the potentiometer slider up and down. As you move the slider, a red trace line
representing the signal from the POTSimLevel object appear as a trace line on
the recorder.
Creating Useful Interactions Between Objects
To add a degree of automation to the process, you will now create a second
potentiometer object, this time in the form of a hand-off-auto (HOA) switch;
a neutralzone object that will monitor a pre-determined deadband of the
POTSimLevel object; and an logical expression that will take the form of a red
or green pump graphic and which will have as its variables, data members
from both the HOA and neutralzone objects. Together, these objects will
create functionality that will automatically start the pump (as simulated by
our logical expression) only when the HOA switch is in the automatic position
and the POTSimLevel (our simulated water tank level) is between 40 and 46.
Create the Hand-Off-Auto Switch
1.
Use Object Explorer to add a new Pot object to the WaterWorks process.
After you select the WaterWorks process as the location for the new
object, the New Potentiometer dialog box appears.
2.
Complete the New Potentiometer dialog box.
•
© Automationdirect.com
Name: POTHOA
3-11
Getting Started Guide
Chapter 3
Getting Started with LookoutDirect
•
Minimum: 1
This is the low end of the potentiometer’s range.
•
Maximum: 3
This is the high end of the potentiometer’s range.
•
Resolution: 1
We use one as the potentiometer’s resolution since we want the
potentiometer’s range to be segmented into three parts: hand, off,
and auto.
•
Leave the remaining dialog box properties as they are.
3.
Click OK.
4.
Select the new object from the Object Explorer tree, and then drag it onto
the panel.
The Insert: (POTHOA) dialog box appears.
5.
Select the knob graphic, and then click OK.
6.
Drag the knob to an open area on the control panel.
Toggle out of the edit mode and try out the new three-position switch. For
now, we will leave the positions of the switch unmarked. Later in the tour we
will add descriptive nameplates to aid in identifying each switch position.
Getting Started Guide
3-12
www.Automationdirect.com
Chapter 3
Getting Started with LookoutDirect
Create the Neutralzone Object
1.
Use Object Explorer to add a new Neutralzone object to the WaterWorks
process.
After you select the WaterWorks process as the location for the new
object, the Create Neutralzone dialog box appears.
2.
Complete the Create Neutralzone dialog box.
•
Name: NZPumpAuto
This is the name of the new object.
•
Signal: POTSimLevel
This designates that it is the value of the POTSimLevel object which
is being assigned a neutral zone (deadband).
Tip If our example process was complex, and you were unsure of the location or exact name
of the POTSimLevel object, you could right-click in the yellow expression text box to display
the Expression Editor. Using the Expression Editor, you could locate the POTSimLevel
object (the signal) and then use the Paste function.
3.
•
High limit: 46
•
Low limit: 40
Click OK.
Create the Logical Expression
1.
Select Insert » Expression.
The Expression Editor dialog box appears.
© Automationdirect.com
3-13
Getting Started Guide
Chapter 3
Getting Started with LookoutDirect
2.
In the yellow expression text box, type
POTHOA = 1 or (POTHOA = 3 and NZPumpAuto.below).
This expression sets up the condition where the pump will only run if the
HOA switch is in the position 1 or if the HOA switch is in position three
(Auto) and the tank level is within the deadband (the Neutralzone).
3.
Click OK.
The Display logical signal dialog appears because the default display
type for an expression is a logical signal. From this dialog box you can
select how you want the logical outcome of the expression to be
displayed.
4.
Click Custom, and then click the On graphic box.
The Select Graphic dialog appears.
5.
Navigate to the Pumps folder, and then double-click the green
Pmp_3gn.wmf pump graphic.
The pump graphic appears in the Display logical signal dialog box as the
On graphic.
6.
Getting Started Guide
Click on the Off graphic group box, and then double-click the red
Pmp_3rd.wmf pump graphic.
3-14
www.Automationdirect.com
Chapter 3
Getting Started with LookoutDirect
Both the On and Off graphic group boxes should now be selected.
7.
Click OK.
The green pump graphic appears on the control panel.
8.
Drag the pump to the right side of the control panel.
To test the new functionality, toggle out of the edit mode and drag the
indicator mark on the POTHOA switch from the left-hand position (position
1 or Hand) around to the twelve-o’clock position (position 2 or Off) to see the
pump graphic change from green to red. Now drag the indicator mark around
to the far right-hand position (position 3 or Auto), and then slide the
POTSimLevel potentiometer up and down. The pump graphic should turn
green when the POTSimLevel is between 40 and 46.
Dressing Up the Control Panel
Now that you have created the functionality for the WaterWorks process, your
control panel should look similar to the following illustration.
To make the control panel intuitive and easy to use, you will now resize and
arrange objects and add various graphics, text name plates, and scales.
Resizing and Arranging Objects on the Control Panel
1.
© Automationdirect.com
Ensure that you are in the edit mode, and then select the HyperTrend
chart and resize it so that it takes up about one-half of the control panel.
3-15
Getting Started Guide
Chapter 3
Getting Started with LookoutDirect
2.
Drag the chart to the left side of the control panel.
3.
Select, resize, and arrange each of the remaining objects until your
control panel looks similar to the illustration that follows.
Adding Graphics
1.
Select Insert » Graphic, open the Tanks folder, and double-click on the
Tank1_A.wmf graphic.
The tank graphic appears on the control panel. The tank graphic will
serve as a stencil over the bar graph giving the appearance of the water
level in the tank raising and lowering.
2.
Resize both the bar graph and tank until the blue portion of the bar graph
fills the tank at its widest point. You may need to toggle out of the edit
mode and adjust the POTSimLevel potentiometer to check the fit of the
tank over the bar graph.
3.
Move the digital display of the POTSimLevel to the middle of the tank.
When you are finished, your control panel should look similar to the
following illustration.
Getting Started Guide
3-16
www.Automationdirect.com
Chapter 3
Getting Started with LookoutDirect
Adding Labels
In this procedure you will create text plates to label the three positions of the
HOA switch.
1.
Select Insert » Text/Plate/Inset.
The Insert Text/Plate/Inset dialog box appears. Use this dialog box to
design text labels and add background panels to the control panel.
Available design options include the ability to change the style of the
background plate; font type, color, and size; and text justification.
2.
In the Text box, type Hand, and then select black for the text color.
As you type, the text appears in the preview window in the default font
(10 pt. Arial, bold).
You can experiment with other fonts, background colors, and frame
styles or you can accept the default settings.
© Automationdirect.com
3.
Click OK.
4.
Drag the new text plate to the left side of the HOA switch.
5.
Using the Shift + drag method, make two duplicate copies of the Hand
text plate, and then move one of the text plates to the top of the HOA
switch and the other to the right side of the HOA switch.
6.
Change the text of the middle text plate to Off and the text of the
right-hand plate to Auto, by right-clicking each text plate, selecting
Display Properties, and then editing the contents of the Text box.
3-17
Getting Started Guide
Chapter 3
Getting Started with LookoutDirect
7.
To make it easier to reposition the HOA switch and text plates, drag a box
around all four objects, and then select Arrange » Group.
Adding Scales
Enhance the usability of hypertrend chart and POTSimLevel potentiometer
object by adding scale bars.
1.
Select Insert » Scale.
The Insert Scale dialog box appears.
2.
Complete the dialog box.
•
Orientation group box: Right side, increasing up scale style.
•
Minimum: 0
•
Maximum: 50
•
Major Unit: 10
•
Minor Unit: 2.5
3.
Leave the other properties as they are and click OK.
4.
Drag the new scale to the right side of the hypertrend chart and resize it
to align with the top and bottom of the chart.
To make more room on the right side of the chart, you will now change the
display properties of the POTSimLevel potentiometer from a vertical slider to
a horizontal slider and add a scale to it.
Getting Started Guide
3-18
www.Automationdirect.com
Chapter 3
Getting Started with LookoutDirect
5.
Right-click the POTSimLevel potentiometer and select Display
Properties.
6.
Select the Horizontal slider, and then click OK.
7.
Move the horizontal slider to beneath the chart and resize to the width of
the chart.
8.
Duplicate the scale used on the right side of the chart, change the scale’s
display properties to a Bottom, increasing right scale, move it beneath the
horizontal slider, and then resize the scale to fit the slider.
For practice, finish dressing up the control panel by:
•
adding text plates, without any text, behind the HOA switch and
horizontal slider,
•
labeling the chart,
•
resizing and arranging the tank above the HOA switch group,
•
removing the plates from behind the HOA switch position labels,
•
moving the digital display of the POTSimLevel inside the top of the
tank graphic, and
•
creating and placing a large text plate, without text, behind all of the
objects on the control panel using the commands provided in the
Arrange menu.
When finished, your control panel should look similar to the following
illustration.
© Automationdirect.com
3-19
Getting Started Guide
Chapter 3
Getting Started with LookoutDirect
Getting Started Guide
3-20
www.Automationdirect.com
Chapter 3
Getting Started with LookoutDirect
Adding Alarms
To complete the basic features tour, you will now add alarm functionality to
the WaterWorks process. You will create both a simple alarm and a database
generated alarm. A simple alarm is an alarm object that activates only when
an alarm-specific parameter is met. A database generated alarm differ from a
simple alarm in that it can use the value or condition of one or more data
members of an existing object for its activation parameters.
Creating a Simple Alarm
1.
Use Object Explorer to add a new Alarm object to the WaterWorks
process.
The Create Alarm dialog box appears.
2.
Complete the dialog box.
•
Name: AlarmManMode
•
Alarm Area: Main
•
Message: “Pump in Manual Mode”
This is the message that will appear in the alarm panel. Note that the
message text must be enclosed in quotation marks.
•
Condition: POTHOA=1
This simple expression specifies that the alarm should activate when
the POTHOA switch is in the hand position.
3.
Leave the other properties as they are and click Ok.
Toggle out of the edit mode and set the POTHOA switch to Hand. The alarm
you just created should activate. To silence the alarm, right-click in the alarm
panel and select Acknowledge All. You can enter a comment for the alarm or
just click Ok.
© Automationdirect.com
3-21
Getting Started Guide
Chapter 3
Getting Started with LookoutDirect
Creating a Database Generated Alarm
1.
In Object Explorer, under WaterWorks process, right-click the
POTSimLevel object, and then select Edit Database.
The database dialog for the POTSimLevel object appears.
2.
Complete the properties of the Alarm conditions group box.
•
Area: Main
•
HiHi: 48 , priority 8
•
Hi: 42 , priority 6
•
Lo: 22 , priority 5
•
LoLo: 10 , priority 7
•
Deadband: 3
These properties specify that an alarm should activate when the numeric
value of the POTSimLevel object is 48, 42, 22, or 10.
3.
Click Update, and then Quit.
Toggle out of the edit mode and move the potentiometer up and down. As the
numeric value of the POTSimLevel object changes, each alarm activates
in-turn.
Getting Started Guide
3-22
www.Automationdirect.com
Chapter 3
Getting Started with LookoutDirect
Connected Tour
If you have already set up your PLC and established communications
between the PLC and the PC running LookoutDirect, this tour will
demonstrate LookoutDirects’s ability to read and write numeric and logical
data to and from your PLC. If you have not already setup your PLC or
established communications between the PLC and the PC that is running
LookoutDirect, refer to Appendix B.
The examples in this tour demonstrate the following types of connectivity
between LookoutDirect and your PLC.
•
using a virtual switch to toggle a discrete PLC output,
•
writing a numeric value to a PLC register, and then reading the value
back and displaying it in the form of a virtual trend line,
•
reading a discrete signal back from the PLC and use a graphic expression
to display its status in the form of a light, and
•
Using a digital counter to display the number of scans since the last
power-up or program-to-run transition.
The example process file used for this tour can be found in
C:\DirectSoft32\Projects\Examples\LookoutDirect\ConnectedTour.l4p.
Refer to the Basic Features Tour for information on how to create and
manage objects using LookoutDirect.
Toggling a Discrete PLC Output
In this example, you will create a driver object, and then link the object to a
discrete output on your PLC using a new or an existing connection. To test
the connection between the driver object and your PLC, you will create a
switch object to toggle the discrete output. To indicate the state of the output
on the control panel, you will create a logical expression in the form of an
indicator light.
Creating the Driver Object
1.
Create a new process. Use ConnectedTour as the tag name and
PNLConnectedTour as the title of the control panel.
2.
Select Object » Object Explorer.
Move Object Explorer to the right side of the display.
3.
© Automationdirect.com
Use Object Explorer to add a new DirectLogic driver object to the
ConnectedTour process.
3-23
Getting Started Guide
Chapter 3
Getting Started with LookoutDirect
The Create DirectLogic dialog appears.
4.
Rename the driver object to DRConnectedTour, and then click the
ellipses button to the right of the Comm Link text box.
Tip When you create your own driver objects, use the DR prefix to identify the object as a
driver and the name of your PLC’s CPU as the tag’s suffix.
The Select Link dialog box appears.
5.
6.
Do one of the following.
•
If the Links list box contains active communications links found by
the links wizard during the installation process, highlight the link
you want to use.
•
If no active link is available, or, if you do not want to use one of the
active links, click Add, and then follow the directions provided in
the Links Wizard. Click Finish to close the wizard.
On the Select Links dialog box, click Select.
The name of the new link appears in the Comm Link text box.
7.
Click OK, and then go to Creating the Switch Object.
Creating the Switch Object
1.
Use Object Explorer to add a new Switch object to the ConnectedTour
process.
The New Switch dialog box appears.
Getting Started Guide
3-24
www.Automationdirect.com
Chapter 3
2.
Getting Started with LookoutDirect
Rename the switch SWDiscreteOutput, and then click OK.
The Display Switch dialog box appears.
3.
Select one of the standard switch options, and then click OK.
The switch appears on the ConnectedTour control panel.
4.
Go to Linking the Switch Object to a PLC Output
Linking the Switch Object to a PLC Output
1.
In Object Explorer, right-click on the DRConnectedTour object, and then
select Edit Connection.
The connections dialog box for the driver object appears.
2.
In the Writable members scroll list, double-click the Y0 member. If the
Y0 member is in use, select any other available and writable data
member.
3.
In the Signals group box, navigate through the directory tree to the
ConnectedTour process, and then double-click SWDiscreteOutput.
Look in the middle of the connections dialog box. Notice that the
connection between the driver object and the switch is defined as
DRConnectedTour.Y0 = SWDiscreteOutput.
4.
© Automationdirect.com
Click Accept, and then Quit.
3-25
Getting Started Guide
Chapter 3
Getting Started with LookoutDirect
Creating the Indicator Light
1.
Select Insert » Expression, select SWDiscreteOutput from the directory
tree, double-click value in the Contents pane, and then click OK.
The logical signal display dialog box appears.
2.
Click Custom, and then click in the On group box.
3.
Open the Indicators folder, and then double-click on the green light
named Light0G.wmf.
4.
Click in the Off group box, and then double-click on the red light named
Light0R.wmf.
5.
Click OK.
The light representing the logical expression appears.
Toggle out of the edit mode and test the connection between the
LookoutDirect switch object and the PLC. When the switch is turned on, both
the output LED on the PLC and virtual indicator on the control panel should
light. If the connection did not work and an alarm error occurred, check the
PC-to-PLC connection. If the connection did not work and no alarm error
occurred, there is a problem with the connection setup. Review this procedure
and confirm that the connection was set-up correctly.
Getting Started Guide
3-26
www.Automationdirect.com
Chapter 3
Getting Started with LookoutDirect
Writing and Reading a Numeric Value
In this example, you will use a potentiometer object, in the form of a digital
input, to write a numeric value to the PLC. To confirm that data is being
written to the PLC, you will create a hypertrend object to read back and
display the numeric values sent to the PLC.
Creating the Potentiometer Object
1.
2.
Create a new digital potentiometer object. Use the following values to
complete the New Potentiometer dialog box.
•
Name: PotNumRWTest
•
Min: 0
•
Max: 9999
•
Resolution: 1
Click OK.
Connecting the Potentiometer Object to the PLC
1.
In Object Explorer, right-click on the DRConnectedTour object, and then
select Edit Connection.
2.
In the Writable Members scroll list, double-click V1400-7377.
V1400 appears in the selection text box.
3.
Note
Replace the V1400 selection with V2000.
The V2000 register is used since it is common to all DirectLogic PLCs.
4.
© Automationdirect.com
In the Signals group box, double-click the PotNumRWTest object.
3-27
Getting Started Guide
Chapter 3
Getting Started with LookoutDirect
5.
Click Accept, and then Quit.
The new digital potentiometer appears on the control panel.
Creating the Hypertrend Object
1.
Create a new hypertrend object named HyperRWTest.
2.
Add a group to the hypertrend. Use the following values to complete the
Add Group dialog box.
3.
•
Name: RWTest
•
Major increments: 10
•
Minor increments: 1
Add an item to the RWTest group. Use the following values to complete
the Add Item dialog box.
•
Numeric Minimum: 0
•
Numeric Maximum: 9999
4.
Right-click in the URL= field.
5.
In the URL Editor dialog box, highlight DRConnectedTour, and then
double-click V1400-7377 in the Contents pane.
6.
In the URL text box, replace V1400 with V2000, and then click OK.
7.
Click OK in both the Add Item and Create HyperTrend dialog boxes.
The new hypertrend object appears on the control panel.
Getting Started Guide
3-28
www.Automationdirect.com
Chapter 3
Getting Started with LookoutDirect
8.
Enable data logging for the new hypertrend object. Select Object » Edit
Database and select the DRConnectedTour object.
9.
In the Native members scroll list, double-click V1400-737, replace
V1400 with V2000, and then update the database dialog box.
•
Deviation: 0.1
•
Log to historical database: selected
10. Click Update, and then Quit.
Test the connection between the digital potentiometer and PLC by toggling
out of the edit mode, clicking on the potentiometer object, and entering a new
value. The hypertrend object displays the change to the value entered.
Reading a Discrete Signal
In the previous example, you were able to toggle a discrete PLC output using
a switch object. In this example, you will read a discrete signal from the PLC
and display its status using an indicator object.
1.
Select Insert » Expression.
2.
In the Insert Expression dialog box, double-click the DRConnectedTour
object.
3.
Edit the yellow expression field so that the expression reads:
DRConnectedTour.SP4, and then click OK.
Note The .SP4 refers to a special relay feature in the DirectLogic controller that provides a
one second pulse signal.
4.
In the Standard group box, select any indicator, and then click OK.
The logical expression, in the form of the indicator you selected, appears
on the control panel and begins to flash at a one second interval.
To confirm that the expression is displaying the signal from the SP4 relay,
toggle out of the edit mode, switch off the PLC, and observe that the indicator
stops flashing.
© Automationdirect.com
3-29
Getting Started Guide
Chapter 3
Getting Started with LookoutDirect
Displaying the Number of Scans
In this connected tour example, you will create a numeric expression that will
actively display the instantaneous total for the number of scans performed by
your DirectLogic controller.
1.
Select Insert » Expression.
2.
In the Insert Expression dialog box, double-click the DRConnectedTour
object.
3.
Edit the yellow expression field so that the expression reads:
DRConnectedTour.V7765:B, where ":B" is the data modifier that
specifies conversion of the data to BCD (16 bit) format. Refer to
Appendix B, Data Modifiers, for information on using data modifiers.
4.
In the Display Type drop-down list, select Numeric, and then click OK.
5.
In the Display numeric signal dialog box, accept the default settings and
click OK.
The numeric readout appears on the control panel and immediately
begins displaying the total number of scans.
Getting Started Guide
3-30
www.Automationdirect.com
Chapter 3
Getting Started with LookoutDirect
Advanced Features Tour
Much of LookoutDirect’s functionality—control panels, alarm functions,
security services, etc.—are themselves part of an object class and can,
therefore, be customized and to create useful process management
functionality. This tour will introduce you to some of LookoutDirect’s
advanced features that you can use to enhance and manage a process.
In this tour you will:
•
create buttons that will allow you to quickly navigate between control
panels,
•
import a custom graphic into a process control panel,
•
create a shortcut push-button to acknowledges and silence alarms
•
establish security permissions to limit access to all or part of your
process, and
•
create a data log to record process activities to a spreadsheet file
This tour assumes you are understand the process development concepts
introduced in Basic Features Tour.
Creating Panel Navigation Buttons
In situations where LookoutDirect is displayed on a touch-panel display,
where no PC mouse is available, it may be necessary to provide a means of
navigating between process control panels. In this example you will create a
set of simple push-button that will allow you to navigate between the
connected tour control panel (PNLConnectedTour) and a new panel you will
create in this example. The second portion of this example explains how to
create a “Home panel” for your process.
The functionality created in this example can be found in the
ConnectedTour.l4p process file in the examples folder.
1.
Create a new panel object named PNLNavTest in the ConnectedTour
process. Give the panel the title Navigation Test.
2.
Select the Connected Tour control panel.
3.
Create a new push-button object named PBNavTest. In the Button Text
box, type Navigation Test.
4.
In Object Explorer, right-click on the PNLNavTest object, and then select
Edit Connection.
The edit connection dialog box appears.
© Automationdirect.com
3-31
Getting Started Guide
Chapter 3
Getting Started with LookoutDirect
5.
In the Writable members scroll list, double-click activate, and then
double-click PBNavTest in the Signals group directory tree.
The logical connection you just created between the Navigation Test
panel and the Navigation Test push-button appears in the center of the
dialog box.
Take a moment to review the Writable member scroll list to learn about other actions
you can generate when editing a connection.
Note
6.
Click Accept, and then Quit.
Test the new inter-control panel push-button by toggling out of the edit mode
and clicking the new button.
Continue by creating a second push-button to return to the Connected Tour
panel.
7.
With the Navigation Test panel still selected, create a new push-button
object named PBNavTestReturn. Type Return for the button’s text.
8.
In Object Explorer, right-click on the PNLConnectedTour object, and
then select Edit Connection
9.
In the Writable members scroll list, double-click activate, and then
double-click PBNavTestReturn in the Signals group directory tree.
The logical connection you just created between the Navigation Test
control panel and the new Return push-button appears in the center of the
dialog box.
Toggle out of the edit mode and test the new Return push-button.
Creating a Home Panel
To ensure users do not get lost when switching between panels, you might
define one panel as your master control panel, or home panel or computer
main menu. You could connect the activate data member of your home panel
to $Keyboard.Shift.F1, or perhaps to a pushbutton object. If connected to the
Getting Started Guide
3-32
www.Automationdirect.com
Chapter 3
Getting Started with LookoutDirect
function key, any time the user presses <SHIFT-F1> (no matter what panel he
or she is looking at), the home panel is called, returning the operator to a
familiar control panel.
You might also want the home panel to maximize upon startup. If you have
already created a pushbutton to call the home panel, you can connect it to the
maximize data member.
The exclamation point (!) instructs LookoutDirect to use the opposite of the
pushbutton value. At startup, the pushbutton is not depressed so its value is
FALSE. But because you are using the opposite of the pushbutton value,
Panel1.maximize is TRUE at startup. Any time a user depresses CallHomePb
after this connection is made, nothing happens until the pushbutton is
released—at which time the panel is called.
Importing Custom Graphics
While LookoutDirect’s graphics library is quite extensive, you may
occasionally want to customize a process control panel using your own
graphics. You can import graphics saved in either the windows metafile
(.wmf) or bitmap (.bmp) file format. To insert your own graphic, first save the
graphics in C:\DirectSOFT32\Bin\Graphics, and then insert it using the
Insert » Graphic command.
Creating Alarm Management Buttons
To more efficiently acknowledge process alarms, you can create push-button
objects that can acknowledgment or silence an alarm with a single mouse
click. Normally, acknowledging and silencing alarms requires a multi-step
procedure that must be executed from the Alarms menu.
The functionality created in this example can be found in the
ConnectedTour.l4p process file in the examples folder.
1.
Create two new push-button objects, one named PBAlarmAck with
Alarm Ack as its button text and the other named PBAlarmSilence with
Silence as its button text.
2.
In Object Explorer, right-click on the $Alarm object, and then select Edit
Connection.
$Alarm Connections dialog box appears.
3.
© Automationdirect.com
In the Writable Members list box, double-click Ack, and then, in the
Signals directory tree, double-click PBAlarmAck.
3-33
Getting Started Guide
Chapter 3
Getting Started with LookoutDirect
The logical connection that provides alarm auto-acknowledgement
functionality appears in the center of the dialog box.
4.
Click Accept.
5.
In the Writable Members list box. double-click Silence, and then, in the
Signals directory tree, double-click PBAlarmSilence.
The logical connection that provides the alarm silencing functionality
appears in the center of the dialog box.
6.
Click Quit.
Establishing Object Security Permissions
To prevent unauthorized or accidental changes to your process, you can
restrict access to specific process-level objects using security permissions.
Typically, security permissions are assigned to control-type objects such as
pots, switches, etc., but they can also be assigned to the process as a whole or
to a control panel within the process. When a user, who is logged into the
process under a valid account containing their security level, attempts access
an object with a security permission, the user’s security level is compared to
that of the object’s, and then access to the object is either granted or denied.
Creating an Account
Complete the following procedure to create accounts for four fictitious users.
1.
Select Options » User Manager.
The User Manager dialog box appears.
2.
Select User » New User.
The New User dialog box appears.
3.
Create the first of the four users by completing the New User dialog box.
•
Getting Started Guide
Username: User1
3-34
www.Automationdirect.com
Chapter 3
4.
•
Full Name: UserOne
•
Password: 1111
•
Confirm Password: 1111
•
Security Level = 1
Getting Started with LookoutDirect
Click OK.
User1 appears on the User Manager window.
5.
Repeat step 2 through 4 to create accounts for users named User2, User3,
and User4. Use 2222 as User2’s password and assign a security level of
2. Continue this sequence for the other three users.
Setting an Object’s Security Level
1.
Open the BasicSecurity.L4p process file located in the examples folder.
This process contains a control panel with four simple switch objects.
2.
Right-click switch #1 and select Object Properties.
3.
In the Control security level dialog box, type 1.
4.
Edit the object properties for each of the remaining three switches,
setting their security level to 2, 3, and 4 respectively.
To test the security levels you established for the four switches, you will now
log into LookoutDirect under each of the user accounts you created.
5.
Select File » Log On.
The Login dialog appears.
6.
© Automationdirect.com
Log in as User1 (password=1111), and then click OK.
3-35
Getting Started Guide
Chapter 3
Getting Started with LookoutDirect
7.
Toggle out of the edit mode and activate switch #1. Now attempt to
activate any of the other switches.
When you point at switch #2, 3, or 4, notice that the cursor changes to a
prohibition symbol. The prohibition symbol indicates that the current
account does not have permission to use these controls.
8.
Log in as User2 and then User3 and finally User4, each time you log in
as a new user, attempt to activate the remaining switches to see which
you have access to.
Process Data Logging
An extremely valuable feature of LookoutDirect is its ability to log process
events to file. Using the Spreadsheet logging object you can dynamically save
the state or value of any data member to a comma separated value spreadsheet
file.
In this example, you will create a logging spreadsheet object to record, at 10
second intervals, the value of two objects that you created during the
connected tour. To automate the data logging process, you will create a
push-button and an indicator object to start the logging process.
The functionality created in this example can be found in the WaterWorks.l4p
process file in the examples folder.
Getting Started Guide
3-36
www.Automationdirect.com
Chapter 3
Getting Started with LookoutDirect
Creating the Spreadsheet Object
1.
Open the WaterWorks process file in the examples folder, and then
maximize the Overview control panel.
2.
Add a new Spreadsheet object to the WaterWorks process.
The Create spreadsheet storage object dialog appears.
3.
Complete the dialog box properties.
•
Name: SSDataLogging
•
File Configuration / File Name: “ProcessData”
The complete file name will appears in windows as
ProcessData.csv.
•
Interval Logging / Interval: 00:00:10.00
This specifies that data will be written to the spreadsheet file every
10 seconds.
4.
In the Data fields group, select (new field), and then right-click in the
yellow expression text box.
The expression editor appears.
5.
In the Signals group directory tree, select the POTSimLevel object,
double-click the value data member in the Contents list box, and then
click OK.
6.
Click Save.
The value of the simulation level potentiometer is added to the list of data
fields that will be included on the ProcessData spreadsheet.
7.
© Automationdirect.com
Repeat step 4 through 6, except this time, add the value data member of
the POTHOA object to the Data fields list box.
3-37
Getting Started Guide
Chapter 3
Getting Started with LookoutDirect
8.
Click OK.
Creating the Push-button to Start the Data Logging
1.
Create a new push-button object named PBStartLogging in the
WaterWorks process. Use Start Logging as the button text.
2.
Create a new Flipflop control object named FFStartLogging in the
WaterWorks process. When the Create Flipflop dialog appears,
right-click in the Input= expression text.
The expression editor appears.
3.
Double-click the PBStartLogging object, and then click OK.
4.
Click OK to close the Create Flipflop dialog box.
The expression editor appears again.
Getting Started Guide
5.
Click OK.
6.
Select a green (On) and red (Off) custom indicator light, and then click
OK.
7.
Group the PBStartLogging push-button and flipflop indicator light in the
lower right corner of the control panel.
3-38
www.Automationdirect.com
Chapter 3
8.
Getting Started with LookoutDirect
Select Object » Object Explorer, right-click on the SSDataLogging
object, and select Properties.
The Revise spreadsheet storage object dialog appears.
9.
Right-click in the Logging expression field, double-click
FFStartLogging, and then click OK.
Testing the Data Logging Functionality
1.
Toggle out of the edit mode, and then click Start Logging.
2.
Move the HOA switch to Auto (or Hand if it’s already in Auto), and
then move the simulation level slider back and forth across its full range
of motion.
3.
Repeat step 2 approximately every 10 seconds, for one minute.
4.
Click Start Logging again to stop logging.
5.
Use Microsoft Excel or another spreadsheet program to open the
ProcessData.csv file located in:
C:\DirectSOFT32\Projects\[Year]\[Month]. Notice that the file contains
a time column plus the columns for the two data members you selected
when you created the SSDataLogging object.
The Excel spreadsheet file must be closed before logging is started or the data cannot
be written to it.
Note
© Automationdirect.com
3-39
Getting Started Guide
Chapter 3
Getting Started with LookoutDirect
Getting Started Guide
3-40
www.Automationdirect.com
LookoutDirect Basics: Windows,
Tools, Files, and Path Names
4
This chapter explains how to start and get around within LookoutDirect. It
describes the LookoutDirect screen and introduces some important mouse
and keyboard shortcuts.
Starting LookoutDirect
Logging on to LookoutDirect
Note If you are using LookoutDirect outside of the United States, you may be required to
use a hardware key. Be sure to plug the key into the parallel port on your computer before
activating LookoutDirect. If you do not, the program will not run.
Launch LookoutDirect by selecting Start»Programs»National Instruments
LookoutDirect»LookoutDirect.
When you first install LookoutDirect, the built-in Administrator account has
no password. When the Administrator account has no password,
LookoutDirect opens without requiring any log-in. The Administrator is
logged in automatically.
Note Server and Client run-time versions of LookoutDirect open with the (nobody) user
account logged in, no matter what the password setting for the Administrator account.
Once you provide an Administrator password, LookoutDirect requests a
log-in before opening with the following dialog box.
© Automationdirect.com
4-1
Getting Started Guide
Chapter 4
LookoutDirect Basics: Windows, Tools, Files, and Path Names
Enter the appropriate password in the Password field and click on OK.
LookoutDirect is not case sensitive in this instance.
You set passwords with the LookoutDirect User Manager. As long as the administrator
password is empty (that is, if you do not insert one of your own), LookoutDirect will always
log on with the administrator as the user, and will not require anyone opening LookoutDirect
to log on. This can be a great convenience to you as a developer of LookoutDirect processes,
but be sure to set and administrator password before allowing others access to your
development copy. See Chapter 6, Security, of the LookoutDirect Developer’s Manual for
more information about the LookoutDirect User Manger, passwords, and LookoutDirect
security in general.
Note
The Idle time field determines how long a period of inactivity LookoutDirect
will wait before logging off the current user. When set to 0, LookoutDirect
leaves the current user logged in until that user logs off, a new user logs on,
or LookoutDirect is shut down.
You can alter passwords and create or edit user accounts and groups with the
user manager, accessed by selecting Options»User Manager. See Chapter 6,
Security, in the LookoutDirect Developer’s Manual for more detailed
information on the user manager and other security considerations.
Opening a Process File
1.
If you have a LookoutDirect process file available, select the File»Open
menu item from the LookoutDirect menu bar. You can look in the
Examples folder for sample processes to start with.
2.
In the File name data field, enter the name of a LookoutDirect process
file (they have a .l4p file extension), or choose a process file from the
list and select OK.
If you select a valid process file, LookoutDirect opens the file and
immediately begins executing the process.
When a process file opens, LookoutDirect makes additional menu selections
available and displays control panels and the alarm window.
Getting Started Guide
4-2
www.Automationdirect.com
Chapter 4
LookoutDirect Basics: Windows, Tools, Files, and Path Names
You can open and run as many process files at one time as you want in
LookoutDirect, and close them individually or all together. While there is no
theoretical upper limit to how many process files you can run on one
computer, in practical terms you may begin to see degraded performance with
a very large number of processes, depending on your computer’s hardware
resources and other variables. Running multiple instances of LookoutDirect
on one computer, or distributing LookoutDirect processes on networked
computers can increase performance.
The LookoutDirect Screen
LookoutDirect first appears on your screen maximized, taking up the entire
screen.
LookoutDirect has both edit and run modes. You can toggle between them by
pressing <Ctrl-Space> on your keyboard, or by selecting or deselecting Edit
Mode in the Edit menu. The following illustration shows a LookoutDirect
screen in edit mode.
1
2
11
10
9
3
4
5
6
© Automationdirect.com
7
8
4-3
Getting Started Guide
Chapter 4
1
2
3
LookoutDirect Basics: Windows, Tools, Files, and Path Names
Menu Bar
Root Selection Box
LookoutDirect Object
Explorer
4
Alarm Window
(appearance depends
on Alarms»Display
Options setting)
5
6
7
8
Status Bar
Object Location
Object Size
Object Name
9
LookoutDirect
Workspace
10 Selected Display
Element
11 Process Control Panel
Figure 4-1. The LookoutDirect Screen
Title Bar
The title bar at the top of the LookoutDirect window displays the program
name and the name of the currently active process. If a control panel is
maximized, the control panel name appears in the title bar.
Menu Bar
The menu bar displays the currently available menu commands, which
change depending on whether LookoutDirect is in run mode, edit mode, or is
open without any processes running. These commands may or may not be
available to the operator, depending on his or her security level.
Status Bar
The status bar is at the bottom of the LookoutDirect window, as shown in
Figure 4-1. It changes when toggled into and out of edit mode. When not in
edit mode, the status bar is gray and the time and date are displayed on the left
end of the bar. The account name of the currently logged on operator comes
next. The company name as entered during registration appears in the middle,
and the alarm status is on the right end of the status bar. The control panel
navigation arrows may or may not be visible, depending on your system
options settings.
When in edit mode the status bar turns yellow. The X and Y coordinates of
the currently selected item (if any) appear on the left end of the bar. The width
and height of the currently selected item come next. The name, filename, or
expression of the selected item appears in the middle, and the alarm status
appears on the right end of the status bar.
To toggle in and out of edit mode, select Edit»Edit Mode, or press
<CTRL-Space>.
Getting Started Guide
4-4
www.Automationdirect.com
Chapter 4
LookoutDirect Basics: Windows, Tools, Files, and Path Names
LookoutDirect Workspace
The LookoutDirect workspace is the area between the menu bar and the status
bar. The workspace is the area in which you view and operate control panels.
The alarm window also appears within the workspace. You organize and
arrange control panels in this workspace area.
In Figure 4-1 the LookoutDirect workspace contains the LookoutDirect
Object Explorer (visible only when you are in edit mode) and the Reader
process control panel.
The visible workspace on your screen is only a window into the
LookoutDirect virtual workspace. If control panels or their associated icons
are partially or completely outside the visible workspace, LookoutDirect
automatically displays horizontal and vertical scroll bars along the right side
and bottom of the visible workspace. If scroll bars are visible, you can scroll
around in the virtual workspace to see all of your control panels.
Object Explorer
The LookoutDirect Object Explorer is a useful tool for creating and editing
your LookoutDirect processes. You can access the LookoutDirect editing
functions from this window by right-clicking on objects displayed there
(options change depending on what item you click on). You can also create
processes, objects, folders within processes, and then organize objects by
moving them from one location to another within a process, create objects,
drag displayable objects and display expressions to different panels, and
more.
To use the LookoutDirect object browser, make sure LookoutDirect has a
process running and is in edit mode, then select Object»Object Explorer.
The initial window along with a somewhat expanded Object Explorer are
shown in the following illustration.
© Automationdirect.com
4-5
Getting Started Guide
Chapter 4
LookoutDirect Basics: Windows, Tools, Files, and Path Names
Getting Started Guide
4-6
www.Automationdirect.com
Chapter 4
LookoutDirect Basics: Windows, Tools, Files, and Path Names
Right-clicking inside the explorer displays some variation of the following
menu.
As you can see, depending on what you selected in the explorer before
right-clicking, you can:
•
create an object
•
create a folder
•
create a symbolic link
•
change the root computer or process.
•
modify an object or process by selecting Properties
•
rename an object or process by selecting Properties
•
delete an object or a folder
•
edit object connections or an object database
•
configure security permissions for a computer, process, object or
collection of objects
When you create a displayable object in the Object Explorer, it appears in the
explorer window but not on a control panel. To place the displayable part of
an object on a control panel, you can drag and drop it. If there is no
displayable component to the object, LookoutDirect creates an expression
(if possible).
© Automationdirect.com
4-7
Getting Started Guide
Chapter 4
LookoutDirect Basics: Windows, Tools, Files, and Path Names
If you drag and drop an object or data member from one process to a control
panel in another process, LookoutDirect inserts an expression to display the
value represented. You cannot place the displayable part of an object on a
control panel in a process other than the one in which the object was created.
When you leave edit mode, the LookoutDirect Object Explorer window
closes. Switching into edit mode restores the explorer window in the same
location and at the same size it was when you left edit mode.
You can rename folders and relocate objects with the LookoutDirect Object
Explorer as well.
LookoutDirect also has a complimentary tool called the Connection Browser,
not shown above, that you can use to trace the connections you make between
objects. See the Connection Browser section later in this chapter for more
information on the Connection Browser.
Control Panels
Control panels provide the display area for any collection of switches, knobs,
bar graphs, digital displays, trend graphs, and other components that you want
to use to visually monitor and control your operations. Panels can be
full-screen, minimized, or any size in between. You can move the panels
around the screen by grabbing the title bar of a panel with the mouse cursor
and dragging it to a new location. Control panels can also “pop up” when an
event occurs such as when a pushbutton is pressed or when an alarm is
activated. There is no limit on the number of control panels you can create or
the number of objects displayed on any one panel.
When in edit mode you can access some of the LookoutDirect editing
functions by right-clicking on an object or expression in the panel, or on the
panel itself.
There are three types of control panels: normal, pop-up, and pop-up with no
icon. A normal control panel can be maximized, normal size, or minimized
within the LookoutDirect workspace. A pop-up control panel in either a
pop-up state or minimized. When a pop-up control panel is displayed, it
remains on top of all other panels until you minimize it.
Control panels do not have a standard appearance. You can customize
each control panel for your particular control strategy with switches,
potentiometers, and other graphical objects. Some control panels may only
display information, while others combine control and display information.
The information displayed always represents the most current values
available to LookoutDirect through its communications with your I/O
devices.
Getting Started Guide
4-8
www.Automationdirect.com
Chapter 4
LookoutDirect Basics: Windows, Tools, Files, and Path Names
With LookoutDirect you have considerable latitude in how you make control
panels look and operate. For example, you can draw your own switches and
substitute them in place of the standard switches. You can easily make a
pushbutton or switch work backwards from the way one might ordinarily
expect. You might insert time delays and conditions behind the panel that may
not be obvious just from viewing the panel.
Control panels are windows into your process you use to control equipment
by flipping switches, pressing buttons and turning knobs. Unlike real
switches and knobs, you can assign security levels to individual controls,
as well as entire control panels within LookoutDirect. You can use this
feature to lock out operators that do not have high enough security levels for
specific devices. See Chapter 6, Security, of the LookoutDirect Developer’s
Manual for more information on security.
Unlike physical switches and knobs, you can display the same control object
multiple times in a given process by using multiple displays, both on the same
control panel and on different control panels. For example, when you turn a
knob in one location, all copies of that knob turn at the same time, in each
location of that control. The same control object may appear differently in
each location. You might display a potentiometer as a horizontal slide on one
panel, a pair of increment/decrement buttons on another panel, and a knob on
yet another panel.
You can have the same sort of synchronous operation between controls in
different processes running on your computer, or between controls running in
processes on different computers in your network. LookoutDirect networking
makes this possible, using remote position sources and objects such as the
Symbolic Link.
Alarm Window
Below the LookoutDirect Object Explorer and the Reader Control Panel in
Figure 4-1 is the alarm window. You can choose how the alarm window is
displayed by selecting Alarms»Display Options. In Figure 4-1 the alarm
window is set to display at the bottom of the workspace.
© Automationdirect.com
4-9
Getting Started Guide
Chapter 4
LookoutDirect Basics: Windows, Tools, Files, and Path Names
Operator Input and Navigation
There are numerous methods for plant operators to make setpoint adjustments
or switch from one control panel to another. These include mouse, trackball,
touchscreen, and keyboard activated commands.
When the cursor moves over a controllable object, the cursor turns into a
hand, indicating you now have control of the object. Controllable objects
include such things as switches, Pots, and pushbuttons.
When using a keyboard, the arrow keys move the cursor around the screen.
The <Tab> key jumps the cursor from one controllable object to another, and
the <Space> bar acts as the left mouse button, so you can click on a
controllable object without actually using a mouse.
You can also tie keyboard function keys to control panels and other objects,
so you can switch between control panels or issue control commands just by
pressing a function key.
Virtual Keypad
When you are in operating mode, you can click on a digital Pot control and
bring up a virtual numeric keypad to enter numeric values, either with a
mouse or a touch-sensitive screen.
Virtual Keyboard
LookoutDirect also has a virtual keyboard you can use with a touch-sensitive
screen or a mouse.
To enable the virtual keyboard, select Options»System and then check Left
Mouse Click or Right Mouse Click in the Virtual Keyboard Pops Up
section of the dialog box.
Getting Started Guide
4-10
www.Automationdirect.com
Chapter 4
LookoutDirect Basics: Windows, Tools, Files, and Path Names
When this feature is enabled, clicking in a data entry field or touching the
field on a touch-sensitive screen displays the virtual keyboard, as shown in
the following illustration.
Connection Browser
Use the Connection Browser to register network computers, navigate quickly
between objects, follow connections, identify orphans (unused objects), and
organize the objects in a process.
To access the Connection Browser, select Object»Connection Browser. The
following dialog box appears.
See the Registering Computers section in Chapter 4, Networking, in the
LookoutDirect Developer’s Manual for information on using the Connection
Browser to register networked computers in LookoutDirect.
To create and modify objects as well as edit connections and the object
database in the Connection Browser, right-click on the object you want to
modify.
You can also create folders and move objects into and out of folders.
© Automationdirect.com
4-11
Getting Started Guide
Chapter 4
LookoutDirect Basics: Windows, Tools, Files, and Path Names
Some planning on how you want to arrange the objects in each process,
combined with an awareness of how path relativity in LookoutDirect works,
can protect you from most inconveniences in this respect. See Chapter 5,
Using LookoutDirect, for more information on how a change in location can
affect object connections.
To browse the connections in your LookoutDirect processes, LookoutDirect
must be in edit mode. After opening the browser, click on your local computer
name, and select the process you want to browse. You will then be presented
with a list of objects in that process.
You can use the Connection Browser to create or rename folders inside your
process, and you can move objects from one location into another inside a
given process, using the typical Windows drag-and-drop technique.
You can also create new objects or edit existing objects, connections, or the
database through the Connection Browser. Right click in the Connection
Browser to get the menu to choose one of these operations.
Getting Started Guide
4-12
www.Automationdirect.com
Chapter 4
LookoutDirect Basics: Windows, Tools, Files, and Path Names
When you select an individual object to show connections, your browser
screen looks something like the following illustration.
In this example, the Pot object named Client_Pot1 has been selected. All
the various display sites and connections are shown, including the way this
Pot is remote connected to a data member in another process.
The $Alarm and Timer1 object icons are faded in appearance. This indicates
that this object is an orphan, meaning that its output is not being used by any
other object.
By clicking on input or output objects you can trace chains of connections in
your processes. By right clicking on an object or parameter, you can edit the
object or parameter from the Connection Browser.
While you can browse from one process to another when both processes are
open on one computer, you cannot browse across the network to a process
running on another computer. The Connection Browser will show a network
object on the screen, but cannot browse that object.
LookoutDirect also has a complimentary tool called the Object Explorer that
you can use to trace the connections you make between objects. See the
Object Explorer section earlier in this chapter for more information on the
Object Explorer.
© Automationdirect.com
4-13
Getting Started Guide
Chapter 4
LookoutDirect Basics: Windows, Tools, Files, and Path Names
Connection Browser Options
You can simplify the Connection Browser view by selecting what elements
of an object are displayed. The LookoutDirect default is for all settings to be
enabled.
Click on the Options button to activate the Connection Browser Options
dialog box, shown in the following illustration.
If you want to eliminate object parameters (in order to focus on data member
connections) disable the Show parameters option.
Disabling the Show display objects removes all display components from
the Connection Browser view of a control panel.
Disabling the Show constant connections removes all static values
connected to an object parameter or data member. Disabling this option can
help you focus on variables and connections to changing values originating
in other objects.
Select Save settings on exit to keep your configured options for the
Connection Browser the next time you open the browser in a LookoutDirect
session.
Selecting Play sound effects enables your Windows system alarm sound
when you attempt an illegal operation in the Connection Browser.
Getting Started Guide
4-14
www.Automationdirect.com
Chapter 4
LookoutDirect Basics: Windows, Tools, Files, and Path Names
LookoutDirect Application Files
Using LookoutDirect you can quickly develop a complete process file. All
development is interactive. You do not have to program or compile. Just
create objects and connect them as needed. The development cycle creates
four unique files for every application: a process file, a source code file, a
state file, and a security file.
Lookout
Source
Code
File
(.lks)
Process
File
(.l4p)
State
File
(.l4t)
Security
File
(.lka)
If you develop a LookoutDirect process on one computer and want to run it
on another computer, you must copy the process (.l4p) and security (.lka)
files to the new computer for your process to run properly.
You can also copy the source and state files, if you want, but LookoutDirect
can recreate these files in the new location if necessary.
Process File
A process file is a compiled file that contains the LookoutDirect process you
want to run. It is updated every time you select the File»Save command.
Process files are binary files with an .l4p (LookoutDirect Process) file name
extension. You do not directly edit or modify process files with a text editor.
Rather, LookoutDirect compiles the .l4p file on an object-by-object basis as
you create each object. With this approach you can stay online while creating,
updating, or editing your application. There is no need to shut down your
process. LookoutDirect does not cease operation while you add or delete
controllers, I/O, graphics, or modify your logic. It is recommended that you
save your process often while editing, so that you do not lose changes in the
event of a power failure.
© Automationdirect.com
4-15
Getting Started Guide
Chapter 4
LookoutDirect Basics: Windows, Tools, Files, and Path Names
Source Code File
LookoutDirect also automatically updates a corresponding source code file
when you invoke the File»Save command, LookoutDirect can compile this
file to create an .l4p file, so it includes object definitions, names, I/O
configuration, communications, control logic, control panel layout and other
object parameters.
Source code files have an .lks (LookoutDirect Source) file name extension.
These are standard ASCII text files that you can print or view with any word
processor or text editor. You can use this information for debugging and
documentation purposes.
Because the binary format of LookoutDirect process files both past and future is
subject to change for efficiency reasons, you should always keep your .lks source files
backed up. This is the file you will recompile to open a process created in an older version of
LookoutDirect with any new version of LookoutDirect released in the future.
Note
You can recompile LookoutDirect source files through the Open command,
or manually, using a DOS window.
To open and compile a source file inside LookoutDirect, select File»Open.
The following dialog box opens.
Set the Files of type to LookoutDirect Source Files (*.lks) and
select the source file you want to compile.
To compile a LookoutDirect source file manually, consult the instructions in
Appendix B, The CBL Compiler, in the LookoutDirect Developer’s Manual.
Getting Started Guide
4-16
www.Automationdirect.com
Chapter 4
LookoutDirect Basics: Windows, Tools, Files, and Path Names
State File
The state file contains the actual values of object data members. These values
include setpoints and other important data held within and used by objects.
You might think of the state file as permanent memory for LookoutDirect
setpoints and real-time trends. LookoutDirect uses the state file to store the
position of switches, potentiometers, and trend lines. When LookoutDirect
first loads an application, it reads the appropriate state file to determine what
state the Pots, switches, trend lines, and so on should be in upon startup.
The state file updates any time you save, close or exit the LookoutDirect
application file. It can also update on a periodic basis as defined in the process
properties dialog box or the Loader object. You invoke this dialog box by
selecting the File»Modify Process menu command. State files have an .l4t
(LookoutDirect State) file name extension.
Security File
Every LookoutDirect process has an attached security file, identified by the
.lka extension. All the security information for a LookoutDirect process is
kept in the .lka file for that process. You must keep the .lka file in the same
directory as the .l4p file for your security settings to work. If you misplace
the .lka file, all users will have complete access to all parts of the process.
To reconstruct the file, you would have to reset all your security permissions.
See Chapter 6, Security, of the LookoutDirect Developer’s Manual for more
detailed information on LookoutDirect security.
© Automationdirect.com
4-17
Getting Started Guide
Chapter 4
LookoutDirect Basics: Windows, Tools, Files, and Path Names
Configuration Shortcuts
Mouse Shortcuts
This manual references a number of mouse-implemented shortcuts.
Becoming familiar with mouse commands is easy and pays significant
dividends during application development.
Function
Mouse Action
select object display, graphic, text,
expression, or any item on a
display panel
Click: Select the item by pointing
the cursor at the item and clicking
the left mouse button. (See Note.)
create a new object from an
existing object
CTRL-drag: Select the item(s)
you want more of. Hold the CTRL
key down and drag the selected
item(s). This makes a completely
new instance of the control:
<CTRL>-dragging Pot1 will
produce a new object named Pot2.
copy object display, graphic, text,
expression, or any item on a
display panel
Shift-drag: Select the item(s) to
be copied. Hold the <Shift> key
down and click the left mouse
button while dragging the item(s).
This makes a duplicate of the
selected object that is linked to the
original. Both the original and the
duplicate have the same name.
modify display or object
parameters of an object, graphic,
text, expression, or any item on a
display panel
Right-click: Select the item(s) to
modify. Position the cursor over
the item(s) and click the right
mouse button.
You can select multiple items on a display panel by clicking in a panel and dragging
the box outline around the objects you want to work with. Subsequent commands affect the
entire group at once or toggle from one item to the next, prompting you for new instructions.
You can stop this process at any time by holding the <Shift> key down and selecting either
the OK or Cancel buttons in the current dialog box.
Note
Getting Started Guide
4-18
www.Automationdirect.com
Chapter 4
LookoutDirect Basics: Windows, Tools, Files, and Path Names
Remembering Object Names
Many dialog boxes contain expression fields. Expression fields are yellow to
indicate that you can get help identifying or remembering an object name and
associated data members by pressing the right mouse button (right-clicking
on the selected expression field).
Assume, for example, that you want to average some value. You start to create
an expression for this value, but you cannot remember the name of the object
or data member you want to have an average value for. Right-click on the
expression field (the field in which you normally type the a data member you
want to connect or display).
When you right-click any expression field, LookoutDirect presents the
Revise expression dialog box, as shown in the following diagram.
Figure 4-2. Expression Editor Activated by Right-Clicking on a Yellow Data Field
© Automationdirect.com
4-19
Getting Started Guide
Chapter 4
LookoutDirect Basics: Windows, Tools, Files, and Path Names
Using the expression editor, you can easily paste object names and their data
members directly into the expression field. Navigate through processes and
objects until you have selected the object and data member you want. Paste
them into the expression editor data field, either by clicking on the Paste
button or double-clicking on the data member. Click on OK, and
LookoutDirect writes your expression into the expression data field of the
object, such as the Data field in the Create Average Object dialog box
shown in the following illustration.
Path Names in LookoutDirect
In versions of LookoutDirect prior to LookoutDirect 4.0, you could only have
one process running in any instance of LookoutDirect, and there were no
folders in a process to organize objects. Networking was done through DDE,
which used specific paths.
In LookoutDirect 4 and greater, the relationship between objects running in
different processes on different computers is far more flexible and potentially
complicated. When you insert an expression on a LookoutDirect panel or
make a connection to or between data members, you might be displaying a
value that comes from the process containing that panel. You might also need
to display a value that comes from another process running on the same
computer or from a process running on some other computer in your network.
A path can be absolute, starting with a computer’s fully qualified network
name and leading through nested directories and subdirectories to a single
object; or relative, instructing the computer to search for an object in some
directory defined not from the computer down, but relative to the currently
active folder.
In order to provide maximum programming flexibility, you can use a number
of different levels of relativity, or path relativity modes, in setting the path to
the data when you create an expression. These modes operate very much like
Getting Started Guide
4-20
www.Automationdirect.com
Chapter 4
LookoutDirect Basics: Windows, Tools, Files, and Path Names
other relative paths used in DOS operations, spreadsheet cells, and Web page
addressing.
You can set a path for each individual object or connection, using a different
level of relativity. These path relativity modes include:
•
Relative (the LookoutDirect default)
•
Process Relative
•
Computer Relative
•
Absolute
The level of path relativity you choose makes a difference in how your
process operates when copied or moved to another computer. For instance,
suppose you have a client process running on computer Alfred that refers to
objects in a server process also running on computer Alfred. If you run that
client process on computer Bert, will it refer to objects on computer Alfred or
computer Bert?
Setting the level of path relativity is how you can control which objects your
processes refer to. The key point to remember about path relativity modes in
LookoutDirect is that the modes are distinguished by the path prefix.
In Relative mode, the form of the path is:
object
or
folder\object
without prefix.
Relative mode is the default mode in LookoutDirect 4. All paths are relative
to the folder or process that contains the expression you are creating or the
object you are connecting to. Use Relative mode when connecting objects
that should be grouped together and that should be copied or moved as a
group.
Connections between objects in a folder should use Relative mode so that
they can be copied and moved elsewhere while maintaining the same
relationship with each other.
Process Relative mode is indicated by a single prefixed backslash (\)
followed by a folder or object name, as in:
\folder\...folder\object
or
\object
© Automationdirect.com
4-21
Getting Started Guide
Use Process Relative mode when you want to make a connection between
two objects in different folders in the same process.
Computer Relative mode in indicated by a prefix consisting of two
backslashes, a period, and a backslash (\\.\) followed by a process name,
as in
\\.\process\folder\...folder\object
Use Computer Relative mode when you want to reference other processes
running on the same computer.
For instance, if you had a process called Station_Control that called a
number of other processes by name on computer Alfred, you could use that
same Station_Control process on computer Bert, to refer to the
identically named processes running on computer Bert.
Absolute mode is indicated by two backslashes (\\) followed by a
complete network path, as in:
\\computer.place.com\process\folder\...folder\object
Absolute mode is, in effect, a URL. Use Absolute mode when you want to
refer to a particular process on a particular computer. Any references to a
PLC, for instance, should be in Absolute mode so as to always refer to the
computer physically connected to that PLC—no matter where the process
making the reference is running.
Note Though Relative mode is the LookoutDirect default, when you use an object outside
the immediate location of your expression, the path becomes more specific. The addition
of two periods (..) at the beginning of a path, for instance, can be used to specify the parent
of the first folder listed.
The reason for manually changing a path mode to a level beyond that strictly necessary
under your current circumstances is to ensure that your process will still work properly if
you relocate it, completely or partially.
5
Using LookoutDirect
Overview of the Process Development Cycle
The first step in developing a process file is creating a process file. After the
file is created, control panels are added. Control panels are windows you use
to place other objects, such as switches, Pots, and trends to be displayed. You
can make them look like physical control panels, complete with switches,
push buttons, bezels, insets, lamps, gauges, and so on. Your imagination is the
only limit to how the control panels look and function.
After you create at least one control panel, you can then create and display any
number of other objects. Remember that objects can be displayed on a single
control panel or on multiple control panels. For example, you can insert the
same switch on several panels. If you flip the switch on one panel it
immediately flips on all the other panels.
The first objects you might want to create could be those that represent your
Plus and Ruts. These type of object classes often use your computer
communication ports, so you may have to configure your ports for radio,
dial-up modem, or hard-wired connection, as appropriate. See Chapter 3,
Serial Communications, in the LookoutDirect Developer’s Manual for
information on configuring communications.
When you create an object that represents a PLC, RTU, or other I/O device,
its associated functionality and database are part of the object. The
functionality built into this type of object class includes a protocol driver,
enabling the object to talk with the physical device. The native (default)
database includes all registers, bits, I/O signals, parameters and other values
that the physical device can transmit to or receive from LookoutDirect.
At this point, you may want to add data members to the native databases
for your objects. Such new data members, called aliases, can include
descriptive names, signal scaling parameters, alarming parameters, and so on.
You can create more than one alias for a given native data member, using
different scaling or alarm parameters for each.
As you create objects, you can connect them to other objects. The type of
objects you create (such as Pot, Switch, Madcaps, Trend, and so on) and the
© Automationdirect.com
5-1
Getting Started Guide
Chapter 5
Using LookoutDirect
manner in which you connect them determine how your system interacts with
your process.
Many object classes you use take advantage of LookoutDirect services. For
example, you can assign a security level to a Pot object, and the Alarm object
class uses the Alarm processing subsystem. As you create objects that take
advantage of these services, you should configure the services to custom fit
your application requirements.
Tip You can save a process file with any name you choose. Your process file name does not
have to be identical to your process name. You can copy (or Save As) LookoutDirect files to
retitle them and run the process just as you would run the original files. You cannot, however,
run two processes with the same process name in a single instance of LookoutDirect. If you
have a basic process that you need to make several variations on, you can rename the process
in each file by right-clicking on the process name in the LookoutDirect Object Explorer and
selecting Rename.
Building Client and Server Processes
As explained in the Client and Server Processes section of Chapter 2, How
LookoutDirect Works, LookoutDirect server processes are run on computers
with physical connections to your hardware. LookoutDirect clients run on
computers that can communicate with the computers running LookoutDirect
servers.
You build these clients and servers by choosing objects and making
connections.
Getting Started Guide
5-2
www.Automationdirect.com
Chapter 5
Using LookoutDirect
LookoutDirect Navigation
Many LookoutDirect dialog boxes that you use to create an object, display an
expression, make a connection, and so on contain some variation of the
following dialog box. This dialog box is used to locate any object in any
LookoutDirect process running on your network.
Each computer registered as running LookoutDirect appears in this dialog
box. Clicking on the computer to open the full display reveals the processes
currently running on that computer. Clicking on a particular process reveals
all the objects in that process that you can access.
The pull-down combo box at the top of such displays indicates the root
location. To display all the computers registered as running LookoutDirect as
well as displaying your own computer as local, you set Universe as your root.
You can set your local computer, the network of registered LookoutDirect
computers, any specific computer in the network, or any process as the root
by right-clicking on that node and selecting Make Root.
Note LookoutDirect cannot edit processes over the network, so what you can do with
computers and processes running under the Network node is limited. To edit a process, you
must work from your computer’s local node (or a process running on it).
You can distinguish between LookoutDirect’s local and network
representation of your computer in the root selection window by looking at
the computer icon. The network representation of your computer name has
red arrows representing the network I/O connection, as shown on the right in
the following illustration. The local representation, on the left, has no I/O
arrows.
© Automationdirect.com
5-3
Getting Started Guide
Chapter 5
Using LookoutDirect
See Chapter 4, Networking, in the LookoutDirect Developer's Manual for
more information on registering computers and navigating through
LookoutDirect processes on your network.
Creating A LookoutDirect Process
The following explains the basic procedure for creating a new process file.
1.
Select File » New.
The Create Process dialog box appears.
2.
Enter a LookoutDirect process name in the Process Name field. This
name must follow the same conventions as a LookoutDirect object name.
See the Object Names section for detailed information on LookoutDirect
naming conventions.
3.
Make selections in the State Information group. Each control is
explained below.
If you are going to have a backup computer in your network that will come online and
run this process in the event that your primary computer crashes, you should include a
location on that computer as one place to save the process state file. See Chapter 10,
Redundancy, of the LookoutDirect Developer’s Manual for more information about setting
up backup computers and processes.
Note
Getting Started Guide
5-4
www.Automationdirect.com
Chapter 5
4.
Using LookoutDirect
•
Select Save State File with Process File to save the state file in the
location where the process file was opened. This is the default
behavior.
•
Select Save State File in LookoutDirect Folder to save the state
file in the LookoutDirect folder of the copy of LookoutDirect your
are currently running. The state file name will be the same as the
process name. This is useful if multiple computers are sharing a
process file. In this case, each computer maintains its own state file
locally.
•
Select the Save Standby State File check box to save one or more
extra copies of the state file in a location of your choosing. Enter a
complete path, including state file name, to each location you want
to save a state file. If you are saving the state file to more than one
backup or alternative location, separate the paths with the vertical
bar (|) symbol.
•
To set the frequency that LookoutDirect saves the state file, check
the Save state file(s) every check box and fill a value for the number
of minutes you want to pass between each save. Remember that
saving files uses system resources, so if you have a number of
processes, each saving one or more state files fairly often, you may
experience some performance problems.
Make selection in the Citadel Database group. Each control is
explained below.
•
If you check the Use default values check box, LookoutDirect uses
the default location set in the System Options dialog box of any
instance of LookoutDirect running the process.
•
If you enter a computer name and a path on that computer to a
specific folder, LookoutDirect logs data to that location on that
computer, no matter what computer is running the process.
•
To designate a specific computer and path for your process to log
data to, enter the fully qualified network name for the target
computer in the Citadel database computername field, and the
complete path to the target database directory in the Citadel
database folder field.
Note State Information and Citadel Database settings you make when creating a process
override any settings you may have made in the System Options dialog box.
© Automationdirect.com
5-5
Getting Started Guide
Chapter 5
Using LookoutDirect
Creating Objects
Choosing Objects
How do you decide what objects to use and what connections to make?
Some decisions are easy—you will certainly use driver objects for the
different PLCs, RTUs and other devices you need to monitor and control.
Other decisions are driven by what you want to do.
To solve problems with LookoutDirect, ask yourself which object does what
you need done.
LookoutDirect has many object classes with obvious uses, such as push
buttons, switches, and trend displays. Other LookoutDirect object classes
may not be as immediately obvious as to how they might be used. To
familiarize yourself with LookoutDirect object classes, you can browse
through the online help LookoutDirect Object Reference topic, or the PDF
LookoutDirect Object Reference Manual that was installed along with
LookoutDirect.
The Select Object Class dialog box that appears when you create a new
object has short descriptions of each object class. Browsing through these
descriptions is another good way to acquaint yourself with LookoutDirect
functionality. You can find a list of these descriptions in Appendix A,
LookoutDirect Object Descriptions.
After you become familiar with the LookoutDirect object classes, you have a
better idea of which object to create—or which object classes to
investigate—to solve the problem you are facing at the moment.
Create an Object
Complete the following steps to create a LookoutDirect object.
1.
Open or create a new process if one is not already open in LookoutDirect.
Make sure you are in edit mode. (Select Edit»Edit Mode or press
<Ctrl-Shift> if necessary.)
2.
There are two ways to create new objects in LookoutDirect:
•
Getting Started Guide
Select Object»Object Explorer from the menu to activate the
LookoutDirect Object Explorer. Right-click on the process you want
to create an object in and select New Object. For this example,
select the Pot class of objects, found in the Control category.
5-6
www.Automationdirect.com
Chapter 5
•
3.
Using LookoutDirect
Select the Object»Create command from the LookoutDirect menu
bar. For this example, select the Pot class of objects, found in the
Control category.
The Select object class dialog box appears, as shown in the following
illustration.
Figure 5-1. Select Object Class Dialog Box
The first time you create a LookoutDirect object, the Select object class
dialog box appears with the Categorize option checked. Some object
classes are contained in more than one category, depending on their
versatility.
If a category is open, you can jump to the object class you want by type
in the first few letters. To have access to all object classes with this
technique, disable the Categorize option by clicking the Categorize
check box.
When you select an object class, a dialog box you use to define the
parameters for a specific object appears, as shown in the following
example for creating a Pot object.
© Automationdirect.com
5-7
Getting Started Guide
Chapter 5
Using LookoutDirect
Figure 5-2. Object Definition Dialog Box
4.
Assign a unique name to the object. Valid names are described in the next
section, Object Names.
5.
Define the object parameters. Each object class has unique parameters,
described in the LookoutDirect help file or the LookoutDirect Object
Reference Manual.
Ordinary parameters that can only be set in the object definition dialog
box are indicated by white fields.
Some parameters, however, are expressions, denoted by a yellow field.
Expressions let you set a parameter value programmatically by
connecting the parameter to a data member of another object. You can
also manipulate data using the expression functions, which are roughly
the equivalent of spreadsheet formulas. See the Connecting Objects
section of this chapter for a basic explanation of using expressions, and
Chapter 2, Expressions, of the LookoutDirect Developer’s Manual for
detailed information on expressions and expression functions. The
tutorial exercise in Chapter 3, Getting Started with LookoutDirect, also
demonstrates using expressions.
6.
Leave Position source set to Local.
The Position source determines what value your control takes when
your process first opens, and also affects the way the control operates.
Getting Started Guide
5-8
www.Automationdirect.com
Chapter 5
Using LookoutDirect
Selecting Local configures your control to take its value from the state
file when the process opens. The value of the control will not change
unless you adjust it manually or programmatically using a direct
connection to the control’s value data member.
Selecting Remote configures your control to take its initial value from a
read/write data member of some other LookoutDirect object. To
accomplish this you enter a URL to the data member, wherever its host
process may be running. This connection is reciprocal; adjusting the
control changes the value of the data member, and any change in the data
member from some other cause adjusts the value of the control. See the
Remote Position Source Connections section of this chapter for more
information on remoting controls.
The remote position source has changed in LookoutDirect 4.0. If you are accustomed
to developing processes in earlier versions of LookoutDirect, make sure to read the Remote
Position Source Connections section of this chapter in order to understand the changes and
make the best use of this feature.
Note
You can select DDE as your position source if you want to use DDE
networking or if you need to connect your control to an application other
than LookoutDirect, such as Microsoft Excel. See Chapter 5, Dynamic
Data Exchange, of the LookoutDirect Developer’s Manual for detailed
information on using this feature.
DDE networking was used in versions of LookoutDirect earlier than
LookoutDirect 4.0. In general, the TCP/IP networking built into
LookoutDirect 4.0 and greater is more efficient and easier than DDE
networking. If you are maintaining an old LookoutDirect process, or
have some special need to use DDE networking, you can find detailed
information on this function in Appendix A, Networking with DDE, of
the LookoutDirect Developer’s Manual.
7.
Select OK to create the new object.
Many object classes do not have components (other than a data member
value) that you can display on a control panel, such as a protocol driver
for a typical PLC, or an object class such as Neutralzone or Pulse (both
LookoutDirect object classes with special functionality).
Some objects, like Pots, can be displayed on a control panel. When you
create such an object, LookoutDirect presents you with a dialog box you
use to define how the object is displayed on the currently active panel
(if there is one).
8.
© Automationdirect.com
If you created your object using the LookoutDirect Object Explorer, it
will appear in the Object Explorer window but not on any control panel.
To display the pot, you will have to drag and drop it to the control panel
5-9
Getting Started Guide
Chapter 5
Using LookoutDirect
you want it to appear on. If you created your object using the menu, the
display properties dialog box appears as soon as you click on OK to
finish defining the object.
Figure 5-3. Pot Display Dialog Box
9.
In the display dialog box, choose how you want the object to be
represented and select OK.
10. Position the object on the control panel and adjust the size.
Note You can copy objects to paste onto another LookoutDirect panel in the same process,
but if the panels are of different sizes, the pasted objects may not appear in the proper location
on the new panel. In general it is easier just to drag the object to the new panel from the
LookoutDirect Object Explorer.
Object Names
A name is how you identify a specific object. You must assign each object a
unique name. LookoutDirect does not allow you to create or modify an object
if the name is not unique or if it does not follow the proper naming
convention.
Rules for choosing names are as follows:
Getting Started Guide
•
Names may include the characters A – Z, a – z, 0 – 9, and the underscore
character ( _ ).
•
Names must begin with a letter.
•
Names may be up to thirty two (32) characters long.
•
Spaces and tabs are not allowed.
•
LookoutDirect recognizes uppercase and lowercase characters as the
same character, so SW2 and sw2 are the same name.
•
Names cannot be LookoutDirect keywords (object class names and
function names). For example, you cannot use terms such as Switch,
5-10
www.Automationdirect.com
Chapter 5
Using LookoutDirect
DelayOn, STDEV, Modbus, nif, and Trend. You can, however, use
Switch1, Switch2, and so on.
Some example of valid names are as follows:
•
Pump3_HOA
•
HighServicePump3_Run
•
ClearWellLvl_at_Hiway289_and_I35
•
ShaftTempF
•
Pushbutton1
•
runtime
•
Sw1
•
Sw2
Some examples of invalid names are as follows:
© Automationdirect.com
•
3Pump_HOA, which begins with a number
•
_HighServicePump3_Run, which begins with an underscore
•
ClearWellLvl at Hiway289 and I35, which contains spaces
•
#ShaftTempF, which begins with #
•
Pushbutton, which is a reserved word
•
ThisnameIsWellOverThirtyTwoCharacters, which is too long
•
and, which is a reserved word
5-11
Getting Started Guide
Chapter 5
Using LookoutDirect
Connecting Objects
In LookoutDirect, you connect objects to pass control signals between
objects. Once connected, objects pass signals between their various data
members and parameters.
There are a number of different kinds of connections in LookoutDirect, and
different ways to make those connections. The method you use depends on
what you are trying to accomplish.
You can connect one data member to another. You can connect a data member
to an object parameter, or an object parameter to a data member. Finally, you
can make a URL connection as a remote position source for a LookoutDirect
control or symbolic link, or as a trace item for a HyperTrend object.
You can make these LookoutDirect connections in the following ways:
•
Direct—Made with the Edit Connections dialog box, these connections
are fixed and work in one direction only. This sort of connection should
only be made from a server process to hardware installed on the server’s
computer, or between objects contained within the same process.
•
URL remote—A URL remote connection is a flexible type of fully
reciprocal connection between a LookoutDirect control and a
LookoutDirect object read/write data member. Changing the control
changes the data member, as you would expect, but if the value of that
data member changes from some other cause, the control value changes
as well. This sort of connection is what you use to connect a client
process to a server process, or to link two client processes through a
server.
•
Complex—You can make complex connections using variables and logic
tests to respond dynamically to changing needs and circumstances.
Complex connections can apply mathematical operations to data,
processing it for use by another object. You can make direct complex
connections, and with the LookoutDirect Symbolic Link object, make
remote complex connections as well.
Tip Remember, when you choose an object in the Edit Connections dialog box, always
select the object you want to connect to.
Getting Started Guide
5-12
www.Automationdirect.com
Chapter 5
Using LookoutDirect
Connecting Data Members to Parameters
The following example uses the (implicit) data member of a Pot object as the
Data source of an Average object to illustrate the simplest type of
LookoutDirect connection. You can tell that Data is a parameter because it
appears in the Average object dialog box.
Suppose you create a Pot object as shown in the following illustration.
Next you might create an Average object. Connect the potentiometer numeric
signal to the Data parameter by entering Pot1 as the Average object’s Data
parameter. The Average object calculates the average level of Pot1 over time,
as described in the Average object definition in LookoutDirect help or the
LookoutDirect Object Reference Manual.
This is the simplest case for making a direct connection in LookoutDirect;
connecting the input for one object to the output of an object in the same
process. In many cases you will have to connect objects in one process to
objects in another process on the same computer, or on another computer on
© Automationdirect.com
5-13
Getting Started Guide
Chapter 5
Using LookoutDirect
the network. For these connections you may find it more convenient to use
the expression editor, which you access by right-clicking in the yellow
expression field. The tutorial examples in Chapter 3, Getting Started with
LookoutDirect, guide you through making connections in detail.
Identifying Object Data Members
Because many objects generate multiple signals you can use as inputs to other
objects, the object name is not always sufficient to identify the desired signal.
You must identify both the object name and the appropriate data member. For
example, a Modbus object generates thousands of signals, some logical and
some numeric. To specify exactly which signal you want from a particular
Modbus object, enter the object name followed by a period (.) and the data
member you want.
If you have a Modbus object with a name PLC1, and you want to display the
value residing in holding register 40001 and the status of coil 100, reference
those particular data members by typing PLC1.40001 in one expression and
PLC1.100 in another expression.
Connecting Data Members to Data Members
The following information expands on the previous example, in which you
created a potentiometer named Pot1. In this example, you create a Modbus
object and connect the numeric signal generated by the pot to a 16-bit holding
register at address 40001 on the PLC.
Getting Started Guide
1.
Create a Modbus object. You do not have to have a real PLC connected
to your system. Just accept the default parameter settings in the Modbus
dialog box and click OK.
2.
If your Object Explorer is open, right-click on the Modbus object you
just created and select Edit Connections from the pop-up menu.
Otherwise select Object»Edit Connections from the LookoutDirect
menu bar. You use this the Edit Connections dialog box any time you
are connecting to the database of another object.
3.
If you use the Object»Edit Connections menu command, the Edit
Object Connections list box appears. Choose the object that contains the
data member you are connecting to.
5-14
www.Automationdirect.com
Chapter 5
Using LookoutDirect
The Current location combo box at the top of this dialog box should
show your computer as root. See the LookoutDirect Navigation section
for more information on how to set the root in a LookoutDirect dialog
box.
Because you are connecting the Pot1 signal to data member 40001 in the
Modbus object, select the Modbus1 object and click on OK. The Edit
Connections dialog box appears.
© Automationdirect.com
5-15
Getting Started Guide
Chapter 5
Using LookoutDirect
The top part of this dialog box contains information on the object you are
connecting to. You select a writable data member from those listed in the
Writable members list, and the selected member appears to the left of
the yellow expression field in the center of the dialog box.
The lower part of the dialog box lets you navigate to the data member you
want to connect to the data member you select in the upper portion of the
box. You can also enter a data member directly in the yellow expression
field.
4.
Enter the data member you want to connect to in the list box to the right
of the Select button. You can type the data member you want directly, or
you can choose it by scrolling through the list of writable members and
clicking on the data member (or range of data members) you want. You
can edit the number that appears in the selection box.
Click on the Select button to identify the data member to be written
to. Notice the dialog box now reflects the specific member;
Modbus1.40001 =. Also notice the equal (=) sign. This prompts you to
connect an expression to Modbus1.40001. In this case, use the
expression Pot1.
5.
Getting Started Guide
Inside the Signals section of the dialog box, set the your local computer
as the root in the In field. Navigate to Pot1 and select it by clicking on
5-16
www.Automationdirect.com
Chapter 5
Using LookoutDirect
it. Click on the (implicit) data member in the Contents (readable)
list and then click on the Paste button.
Notice that the data type of the data members you have selected are
displayed to help you make sure you are connecting like type to like type.
Notice too that you can easily edit existing connections by clicking on the
list in the Existing connections field.
Just above the Contents (readable) list in the Signals section, you will notice a list box
named Path Mode. This is an important setting for developing networked processes in
LookoutDirect. See the Path Names in LookoutDirect section for more detailed information
on how to use this feature. Using different path settings is demonstrated in the exercises
contained in Chapter 3, Getting Started with LookoutDirect.
Note
6.
Click on the Accept button. This confirms the connection. You should
see a message confirming the action. You will also see data member
40001 added to the Existing connections list box.
You have now connected a data member of one object to a data member of
another object. Any change in the (implicit) value of Pot1 is, by definition,
an event, sending a signal to all the other objects Pot1 is connected to.
Because it is now connected to Modbus1.40001, adjusting Pot1 changes the
value of data member 40001 in object Modbus1.
© Automationdirect.com
5-17
Getting Started Guide
Chapter 5
Using LookoutDirect
URL Connections
A URL (Universal Resource Locator) connection is distinct from a
connection made through an expression because it cannot contain any
condition checking or mathematical operations. It is also designed to permit
reciprocal flow of data through the connection. A control connected to a PLC
register using a URL connection changes the register value when it is
adjusted. But if the register value changes from some other cause, the control
will also change to match the current register value.
You can only make a URL connection to data members that are writable,
or both readable and writable. You cannot make a URL connection to a
read-only data member. Remote position source connections, Symbolic
Links, and the HyperTrend object require URL connections, as indicated by
a green field.
You can edit a URL by right-clicking in the green field, which opens the
LookoutDirect URL Editor dialog box, shown in the following illustration.
You can use the tree view in the left window to locate the object you want,
and select the data member in the right window. Click on the Paste button to
insert the complete string into the URL field.
You control the path relativity of your URL with the Path Mode selection
box. See the Chapter 4, Path Names in LookoutDirect section for more
information on using the Path Mode selection.
Getting Started Guide
5-18
www.Automationdirect.com
Chapter 5
Using LookoutDirect
Remote Position Source Connections
Remote position source connections are the preferred method for connecting
a control in a client process to a server process in LookoutDirect.
Because you ordinarily want to be able to have your client processes work
from any computer on your network without having to edit them, it is best to
make connections from client processes to server processes, and not from
servers to clients. Because server processes usually need to be run from the
same computer all the time, you can use absolute paths to make sure your
client processes will connect to your server processes no matter where the
clients are run.
Symbolic Link Connections
LookoutDirect Symbolic Link objects have several important uses in
LookoutDirect. The following figure shows the Create Symbolic Link
dialog box.
You can make a URL connection in the Static source field to an entire process
with a Symbolic Link and then access any object in that process through the
link. This is a crucial part of LookoutDirect redundancy, which is described
in Chapter 10, Redundancy, of the LookoutDirect Developer’s Manual.
© Automationdirect.com
5-19
Getting Started Guide
Chapter 5
Using LookoutDirect
You can enter a complex expression in the symbolic link Dynamic source
field, and then make a URL connection to the symbolic link itself,
circumventing the restriction on complex expressions in remote position
source connections for controls.
HyperTrend Item Connections
Because the HyperTrend trends data from the Citadel database, every item
you display on a HyperTrend object is accessed through a URL connection.
If you need to trend a complex expression, you can create a named expression
by creating an (expression) object. You can enter the complex expression you
want to trend, log it to the historical database, and then display it as a
HyperTrend item.
If you convert a LookoutDirect process created in a version earlier than LookoutDirect
4.0, LookoutDirect will automatically create and log a named expression for your
HyperTrend object to display when it recompiles the .lks source file.
Note
Displaying Data Members on Control Panels
Follow these steps to display a data member on a control panel:
Getting Started Guide
1.
Make sure LookoutDirect is in edit mode and open the Object Explorer
by selecting Object»Object Explorer.
2.
Navigate to the object or data member you want to display on your panel.
In the following illustration, a data member from a waveform object
running on a server process located on another computer on the network
has been selected.
5-20
www.Automationdirect.com
Chapter 5
© Automationdirect.com
Using LookoutDirect
3.
Drag and drop the data member onto the panel you want the data to
display in. LookoutDirect inserts an expression to display the data. You
may have to adjust the size of the display for the data to appear properly.
4.
Right-click on the display to change its display characteristics, modify
the expression, change the data format, or alter any other properties of the
display.
5-21
Getting Started Guide
Chapter 5
Using LookoutDirect
You can also insert an expression to display data by choosing
Insert»Expression from the LookoutDirect menu bar. The Insert
Expression dialog box appears as shown in the following illustration.
5.
Navigate to the data member you want to display, just as you did with the
Object Explorer.
6.
Set the Path Mode. In the preceding illustration it is set to absolute
because the data is being displayed on a client process panel in one
computer (paroikos) and originating from a server process on a different
computer (tripper).
7.
Select the data member you want to display in the Contents list.
8.
Click on Paste and then OK.
LookoutDirect responds by presenting the Display numeric signal or
Display logical signal dialog box. The type of dialog box depends on the
type of data member being inserted (numeric or logical). In this case the
signal is numeric, a cosine wave generated by the LookoutDirect
Waveform object.
Getting Started Guide
5-22
www.Automationdirect.com
Chapter 5
Using LookoutDirect
Select the display parameters you want, and click on OK.
You can also drag an object from the Object Explorer to a panel. When you
do, the Insert Expression dialog box appears, and you can proceed as you
did when you invoked this dialog box from the menu.
© Automationdirect.com
5-23
Getting Started Guide
Chapter 5
Using LookoutDirect
Getting Started Guide
5-24
www.Automationdirect.com
LookoutDirect Object Descriptions
A
This appendix provides descriptions of the LookoutDirect system objects and
LookoutDirect driver objects.
You build LookoutDirect processes by creating LookoutDirect objects and by
making select connections. LookoutDirect has two kinds of objects:
LookoutDirect system objects, which you use for control, monitoring, data
analysis, and data presentation, and LookoutDirect driver objects, which you
use to connect to hardware, such as PLCs (Programmable Logic Controllers),
RTUs (Remote Terminal Units), computer boards, and other hardware.
LookoutDirect System Objects
The following table lists the LookoutDirect system objects, along with their
categories and a description of what each one does.
Table A-1. LookoutDirect System Objects
Object Class
Category
Description
Accumulator
Calculation,
Control
Accumulate a running total by adding a sampled value to
the previous total each time a sample trigger fires. A reset
trigger is also available.
Alarm
Logging
Define specific alarm conditions that can trigger alarms
via complex conditions, or as a result of numeric inputs
going out of range or based on rate of change. Attach
audible (.wav) files to these alarms that play back
whenever the alarm conditions is triggered.
Animator
Display
Dynamically animate graphics files through any
combination of horizontal and vertical motion, resizing,
visibility, and color changes. Play consecutive filmstrip
images from a bitmap to simulate complex motions on the
screen.
© Automationdirect.com
A-1
Getting Started Guide
Appendix A
Table A-1. LookoutDirect System Objects (Continued)
Object Class
Category
Description
Average
Calculation,
Control
Calculate the average of a variable input over time.
Optionally control when averaging is active via the Enable
input, and reset the average to the current input via the
Reset input. The results of up to 35 previous averages are
available, and the current average is updated
approximately once per second.
Counter
Control,
Logging
Count and record the number of times a logical signal
turns on. Optionally reset the count with the Reset input.
Maximum count is approximately 2^52.
DataTable
Control,
Networking
Multiplex multiple data sets into a single control panel by
allowing the operator to alter the table cursor setting.
Import and export entire tables of data between other
applications via DDE and NetDDE. A DataTable consists
of a matrix of cells arranged into rows and columns.
DdeLink
Networking
Import a single live value into LookoutDirect from another
application via DDE or NetDDE.
DdeTable
Networking
Import a table of values into LookoutDirect from another
application via DDE or NetDDE. DdeTable is a subset of
the DataTable object class which allows the bidirectional
flow of DDE and NetDDE data.
DelayOff
Control,
Timers
Introduce a variable time delay between the time the input
signal turns off and this timer turns off.
DelayOn
Control,
Timers
Introduce a variable time delay between the time the input
signal turns on and this timer turns on.
Derivative
Calculation,
Control
Calculate the rate of change of a numeric signal,
specifying the time unit.
DialGauge
Display
Display a numeric signal as a sweeping dial. Specify the
starting position and angle of sweep.
ElapsedTime
Control,
Logging,
Timers
Calculate and record the cumulative elapsed time that a
particular signal has been on. Optionally use the Reset
input to reset the elapsed time at any time.
Event
Logging,
Monitoring
Permanently record the occurrence a particular event to
the event log.
Flipflop
Control
Change the state of this object from on to off, or from off
to on each time the input signal goes high.
Getting Started Guide
A-2
www.Automationdirect.com
Appendix A
Table A-1. LookoutDirect System Objects (Continued)
Object Class
Category
Description
Gauge
Display
Display a numeric value as a digital value or as a bar
graph, and change the color of the bar or digits based on
any set of conditions.
HyperTrend
Display,
Logging
Display and peruse historical data as a moving chart, and
zoom in on data of interest or search the Citadel historical
database for maxima, minima, and other points of interest.
Scroll back in time, or leap to any specific date and time
instantly.
Integral
Calculation,
Control
Totalize a numeric input signal that represents a rate with
respect to time, specifying the time unit. Totalizing the
flow based on a measured flow rate is a typical use of the
Integral.
Interval
Control,
Timers
Introduce a variable time delay between the time the input
signal turns on and this timer turns off. The timer turns on
immediately when the input turns on, and remains on for
the timer duration or until the input signal goes low.
L3OPCClient
Obsolete
Obsolete LookoutDirect OPC client. Use OPC client
version 4.0 instead. This class is included for
compatibility.
L3Pot
Obsolete
A LookoutDirect 3.8-style potentiometer to track and/or
alter the value of a numeric variable. A Pot can be
displayed on a panel as a slider, rotating knob, or digital
display/input. This class is included for backward
compatibility with LookoutDirect 3.xx.
L3Pushbutton
Obsolete
A LookoutDirect 3.8-style push button to navigate
between control panels within LookoutDirect, or to initiate
any other action, such as executing an external application,
or latching a pump on or off. This class is included for
backward compatibility with LookoutDirect 3.xx.
L3Switch
Obsolete
A LookoutDirect 3.8-style toggle switch to track and/or
alter the value of a logical variable. A Switch can be
displayed on a panel in a variety of ways. This class is
included for backward compatibility with LookoutDirect
3.xx.
© Automationdirect.com
A-3
Getting Started Guide
Appendix A
Table A-1. LookoutDirect System Objects (Continued)
Object Class
Category
Description
L3TextEntry
Obsolete
A LookoutDirect 3.8-style text-entry object to track and
modify a text value via a control panel, using either the
computer keyboard or a keyboard display on the screen.
This class is included for backward compatibility with
LookoutDirect 3.xx.
LatchGate
Control
Latch the output of this object on or off based on
whichever of two input signals last went high.
Loader
Control
Load or unload a process file when input goes high.
Maximum
Calculation,
Control
Calculate the maximum of a variable input over time.
Optionally control when maximum monitoring is active
via the Enable input, and reset the maximum to the current
value via the Reset input. The results of up to 35 previous
maxima are available.
Meter
Display
Display a numeric value as a vertical bar graph or
speedometer. Complete displays provide bar/needle, label,
scale, and background.
Minimum
Calculation,
Control
Calculate the minimum of a variable input over time.
Optionally control when minimum monitoring is active
via the Enable input, and reset the minimum to the current
value via the Reset input. The results of up to 35 previous
minima are available.
Monitor
Networking
Monitor a single network I/O point and output true if the
data quality is bad.
Multistate
Display
Display a unique graphic for each of up to six different
conditions.
Neutralzone
Control
Control the on/off status of a signal based on an incoming
numeric signal, and based on two potentially variable
upper and lower control limits. Use a Neutralzone to
control whether a pump is running based on the varying
level in a water storage tank, for example.
OneShot
Control,
Timers
Introduce a variable time delay between the time the input
signal turns on and this timer turns off. The timer turns on
immediately when the input turns on, and remains on for
the timer duration, and then turns off irrespective of the
input signal.
Getting Started Guide
A-4
www.Automationdirect.com
Appendix A
Table A-1. LookoutDirect System Objects (Continued)
Object Class
Category
Description
Pager
Monitoring
Call a numeric or alphanumeric pager and automatically
deliver messages based on specified conditions or alarms
in your process.
Pipe
Display
Display rectangles on the screen, and control their colors
based on a set of up to six different conditions.
PlayWave
Display
Play a standard Windows audio (.wav) clip based upon the
satisfaction of a specified condition.
Pot
Control,
Display
Create a potentiometer to track and/or alter the value of a
numeric variable. A Pot can be displayed on a panel as a
slider, rotating knob, or digital display/input.
Pulse
Control,
Timers
Create a periodic pulse train of a specified and variable
period and duration. The pulse train can be turned on and
off based on the state of the On/Off signal.
Pushbutton
Control,
Display
Create a push button to navigate between control panels
within Lookout, or to initiate any other action, such as
executing an external application, or latching a pump on
or off.
RadioButtons
Control,
Display
Create a set of buttons only one of which can be active at
a time. The radio buttons can be displayed in a variety of
ways.
Recipe
Control,
Display
Create a set of recipes in a spreadsheet application such as
Microsoft Excel and import them into a Recipe to allow
the user to select a particular recipe. Recipe supports any
number of ingredients—each column in the spreadsheet
represents a specific ingredient.
Run
Control
Invoke a Windows application or DOS batch command
with a variable set of command line parameters, whenever
the Run When input signal turns on.
Sample
Calculation,
Control
Take a sample of a numeric variable whenever the Reset
input goes high. Optionally control when sampling is
active via the Enable input, and reset first sample to the
current value via the Reset input. The results of up to 35
previous samples are available.
© Automationdirect.com
A-5
Getting Started Guide
Appendix A
Table A-1. LookoutDirect System Objects (Continued)
Object Class
Category
Description
SampleText
Calculation,
Control
Take a sample of a text variable whenever the Reset input
goes high. Optionally control when sampling is active via
the Enable input, and reset first sample to the current value
via the Reset input. The results of up to 35 previous
samples are available.
Scale
Display
Create a dynamic scale where the range and
minimum/maximum can change dynamically based upon
variable inputs.
Sequencer
Control
Create a sequencer object that generates a sequence of
states with associated outputs. The sequencer will remain
in the current state until that state’s time limit is reached or
until a Goto or Jump input causes it to transition to another
state.
Spinner
Display
Display a small rotating disk that rotates at a speed that
varies according to a numeric input value. A Spinner can
spin in both directions and can also be controlled by a
simple logical input.
Spreadsheet
Logging
Permanently log data to disk in industry-standard
comma-separated-value (.csv) spreadsheet files. Specify
which variable to sample in each column and set up a
logical trigger that will log the set of data each time the
trigger goes high or log data at specified time intervals.
Switch
Control,
Display
Create a toggle switch to track and/or alter the value of a
logical variable. A Switch can be displayed on a panel in a
variety of ways.
TextEntry
Control,
Display
Allow the operator to track and modify a text value via a
control panel, using either the computer keyboard or a
keyboard display on the screen.
TimeOfDay
Control,
Timers
Schedule a periodic pulse of a specified duration that will
occur at some offset into each day. This time can be
enabled and disabled via the On/Off input signal.
TimeOfHour
Control,
Timers
Schedule a periodic pulse of a specified duration that will
occur at some offset into each hour. This time can be
enabled and disabled via the On/Off input signal.
Getting Started Guide
A-6
www.Automationdirect.com
Appendix A
Table A-1. LookoutDirect System Objects (Continued)
Object Class
Category
Description
TimeOfMinute
Control,
Timers
Schedule a periodic pulse of a specified duration that will
occur at some offset into each minute. This time can be
enabled and disabled via the On/Off input signal.
TimeOfMonth
Control,
Timers
Schedule a periodic pulse of a specified duration that will
occur at some offset into each month. This time can be
enabled and disabled via the On/Off input signal.
TimeOfWeek
Control,
Timers
Schedule a periodic pulse of a specified duration that will
occur at some offset into each week. This time can be
enabled and disabled via the On/Off input signal.
TimeOfYear
Control,
Timers
Schedule a periodic pulse of a specified duration that will
occur at some offset into each year. This time can be
enabled and disabled via the On/Off input signal.
Waveform
Calculation
Create sine, square, saw tooth, triangle, and random
waveforms with specified values for the period, amplitude,
offset, phase, and sampling rate.
© Automationdirect.com
A-7
Getting Started Guide
Appendix A
LookoutDirect Driver Objects
The following table lists the LookoutDirect driver objects, along with their
categories and a description of what each one does.
Table A-2. LookoutDirect Driver Objects
Object Class
Category
Description
AB_PLC5
Drivers
Communicate with Allen-Bradley PLC5 line of
programmable controllers via serial port, Data Highway
Plus (KT, KTx, PCMK, S-S 5136SD), and TCP/IP
Ethernet.
AB_SLC500
Drivers
Communicate with Allen-Bradley SLC5xx line of
programmable controllers via serial port, Data Highway
Plus (KT, KTx, PCMK, S-S 5136SD), and DH485
(AB1747-KE, AB1770-KF3, KTx, PCMK).
ASCII
Drivers
Communicate with any device that transmits and accepts
formatted strings of ASCII data. Extract numeric, logical
and text values from messages and incorporate them into a
LookoutDirect process. For example, one can use the
ASCII object class to read the output from a barcode
scanner.
DeltaTau
Drivers
Communicate with the Delta Tau Data Systems PMAC
Motion Controller cards via dual-ported memory.
DirectLogic
Driver
Communicate with all AutomationDirect
(formerly PLCDirect) PLCs through the DirectSoft32
communications server. Supports RS232 and Ethernet.
Allows sharing of communications connection between
DirectSoft32 - Programming, DSData, and
LookoutDirect.
GE_Series90
Drivers
Communicate with GE Series 90-30 and 90-70
programmable logic controllers via RS-232 using the
SNPX serial protocol, or via Ethernet using the GE
TCP/IP communication module.
Modbus
Drivers
Communicate with any device that supports the Modbus
serial protocols, has a Modbus+ port, or has a Quantum
Ethernet module. Modbus+ requires the Modicon Modbus
Plus network card and support software to be installed in
the computer. The serial protocol communicates via both
the ASCII and RTU protocols.
Getting Started Guide
A-8
www.Automationdirect.com
Appendix A
Table A-2. LookoutDirect Driver Objects (Continued)
Object Class
Category
Description
ModbusMOSCAD
Drivers
Communicate with Motorola MOSCAD PLCs and RTUs
via the Modbus serial protocols. Supports the Motorola
data naming convention.
ModbusSlave
Drivers
Allow other devices or computers to read and write
variables in your process by polling a serial port on your
computer with the Modbus RTU protocol.
National
Instruments Field
Point
Drivers
Communicate with National Instrument’s FieldPoint
modular distributed I/O system via RS-232 or RS-485
serial communications or Ethernet.
NIDAQDevice
Drivers
Communicate with National Instruments data acquisition
cards and SCXI hardware connected in parallel mode. Use
the NISCXI object class to communicate with SCXI
hardware connected in multiplex mode. This object class
requires NI-DAQ 5.0 software or better to be installed.
NISCXI
Drivers
Communicate with National Instruments data acquisition
devices connected in multiplex mode to SCXI hardware.
This object class requires NI-DAQ 5.0 software or better
to be installed.
Omron
Drivers
Communicate with Omron PLCs using the Host Link
serial protocol.
OPCClient
Drivers
Communicate with OPC (OLE for Process Control)
servers. Use the shortcut objects OPCFieldPoint and
OPCNIDAQ to make OPC connections to National
Instruments FieldPoint modules and data acquisition
boards.
Tiway
Drivers
Communicate with the Siemens TI5x5 line of PLCs and
other equipment via the serial port using the TBP or NITP
protocol, via the TIWAY card or Unilink Host Adapter, or
via the CTI or Siemens TCP/IP Ethernet NIM card. Import
APT tag files once a Tiway object is created via the
Options»Import APT database menu command.
© Automationdirect.com
A-9
Getting Started Guide
Appendix A
Getting Started Guide
A-10
www.Automationdirect.com
Creating & Managing
Communication Links
B
Certain object classes represent and such as PLCs, RTUs, and controllers.
LookoutDirect uses the term driver to refer to these types of object classes.
The functionality built into driver objects enables them to communicate with
the physical devices that they represent. LookoutDirect communicates with
the outside world primarily through driver objects.
The drivers are not separate applications. They work as any other object in the
LookoutDirect event–driven environment, except that they communicate
with external devices.
With traditional systems, a particular driver is assigned to a specific serial
port. In these configurations, multiple drives cannot share a single serial port.
LookoutDirect does not associate baud rate, data bits, parity, or stop bits with
a particular serial port. In this configuration, drivers that implement different
protocols and baud rates can use the same port and the same modem or radio
frequency (RF).
This capability allows you to mix and match PLCs, RTUs, and other devices
over a single RF without communications conflicts or special hardware. This
is possible because of LookoutDirect’s communication service. Objects use
the communications service to gain access to serial ports in an orderly and
timely fashion.
Some LookoutDirect driver objects communicate with physical devices through
dedicated hardware. These driver objects do not use serial ports but instead rely on their own
proprietary network cards for interfacing to the outside world. A few examples include
Modbus Plus (SA85 card), Data Highway (KT card), and DeltaTau (PMAC card). You do not
need to configure serial ports for these object classes. Refer to the appropriate object class
documentation in Online Help or the Reference manual to verify if a particular object class
uses a serial port.ion in Online Help.
Note
© Automationdirect.com
B-1
Getting Started Guide
Appensix B
Understanding the Communications Service
The LookoutDirect serial communication service allocates serial port usage
between driver objects. At the frequency of the object Poll Rate, a driver
object notifies the communications service that it needs to use a specific serial
port to poll a device. If the requested serial port is not in use, LookoutDirect
allocates the serial port to the driver object. When the driver object takes
control of the serial port, it defines port communications parameters such as
baud rate and protocol and polls its device. When polling is complete, the
driver object releases the port so the communications service can allocated it
to other driver objects.
You can uniquely configure each serial port for hardwired, radio, or dial–up
communications through the Serial Port Settings dialog box.
You must define serial port communication settings on both the
Development/Runtime and Runtime only LookoutDirect products.
Note
Defining Serial Port Connections
This section provides the necessary steps to configure serial port settings for
hardwired, radio, and dial–up communications.
1.
From the LookoutDirect menu bar, select Options Serial Ports...
The Serial Port Settings dialog box appears.
Getting Started Guide
B-2
www.Automationdirect.com
Appendix B
2.
In the Serial Port data field, select the communication port you are
defining. In this example we are using COM 1.
3.
Define the serial port parameters for the appropriate communication
port.
4.
Click on Accept to save the parameter changes for the serial port.
5.
Click on Quit to exit the dialog box.
Selecting the Serial Port
The Serial Port data field is a drop–down list box. Use it to select the
communication port you are defining. Windows supports up to nine serial
ports; however, most computers support only two serial ports without
additional hardware.
Setting the Receive Gap
The Receive gap setting is available for all serial connection types. This
number specifies the number of empty bytes (or amount of time) a driver
receives from a controller before the driver recognizes the end of a message
frame and asks for another message. Normally you should leave this at the
default setting of 20. However, if you are experiencing garbled
communication alarms, you might try increasing this number to allow more
dead time before LookoutDirect decides it has received a complete message.
For example, with a slow baud rate of 1200, you might have to increase the
Receive gap setting to approximately 30.
Hardwired Settings
Hardwired serial connections require no hardware handshaking for line
control. Use this setting for all serial communication types except dial–up
telephone and remote radio transceivers. You should also use this setting
when directly connecting to the Master Repeater on a radio system or through
a leased–line modem. Because a Master Repeater is a full duplex device that
does not require keying and unkeying of the frequency, it acts much like a
physically hardwired network. Other hardwired connection types include
RS–232, RS–422, RS–485, and leased telephone lines.
© Automationdirect.com
B-3
Getting Started Guide
Appensix B
RTS/CTS Handshaking Settings
RTS/CTS is a local hardware handshaking mechanism between the local
computer and the local communication device. Use the Radio (RTS/CTS)
serial connection when connecting the serial port to a device that requires
RTS/CTS hardware handshaking, such as a radio transceiver that must be
keyed up during data transmission and unkeyed during data reception. Other
half–duplex communication media such as RS–485 may require RTS/CTS
hardware handshaking.
When you select RTS/CTS hardware handshaking, LookoutDirect controls
the RTS, or request–to–send pin, and monitors the CTS, or clear–to–send pin,
during data transmission (pins 4 and 5 on a 25–pin RS–232 connector).
Therefore, you must have at least the RTS pin (pin 4) wired straight through
on your RS–232 cable. The CTS pin (pin 5) is optional.
LookoutDirect initiates a serial transmission on an RTS/CTS port by first
asserting RTS to key the radio. It then begins monitoring the state of the CTS
pin. When the radio transmitter is fully keyed and ready to transmit, the radio
asserts CTS and immediately begins data transmission. If the radio does not
assert CTS within the CTS timeout setting (default is 100 msecs),
LookoutDirect assumes the radio is ready to transmit and transmits anyway.
The CTS timeout setting is the maximum amount of time that LookoutDirect
waits after asserting RTS for CTS before transmitting. Most radios typically
take between 10 and 80 milliseconds to key up. Consult your radio
specifications and DIP switch settings to determine the key–up delay on your
radio.
If your radio can assert CTS when it is ready to transmit, add about 50
milliseconds to the radio key–up delay specification and use this total value
for the CTS timeout. If your radio does not assert CTS, you should begin by
adding about 20 milliseconds to your radio key-up time. Then increase this
value in 10 millisecond increments until the remote radio begins to correctly
receive the first bytes of the message.
Some radios may assert CTS before they are actually ready to transmit. In this
case, disconnect the CTS line (pin 5 on a 25–pin RS232 connector) and set
the CTS timeout to a value high enough to let the radio fully key before
transmission.
After it transmits the last byte of data, LookoutDirect continues to assert RTS,
keeping the radio keyed until the RTS delay off time period expires. You
should set this value to the default of zero milliseconds so that LookoutDirect
un-keys the radio as soon as possible to prepare to receive the response.
Getting Started Guide
B-4
www.Automationdirect.com
Appendix B
When un-keyed, most radios generate an audible squelch tail that the remote
device might decode as unexpected garbage bytes. Some remote devices
reject the entire message instead of just decoding the valid data and ignoring
the extra garbage bytes. In this case, keep the radio keyed for several
milliseconds using the RTS delay off setting. This time period delays the
squelch tail long enough for the remote device to recognize the last data frame
as valid before receiving garbage bytes caused by the squelch tail.
If you set the RTS delay off setting too high, the remote device begins
transmitting its response before the local radio is un-keyed, causing a
communication alarm in LookoutDirect.
Dial-Up Modem Settings
Use the Dial–up serial connection when you use a modem in conjunction with
a switched telephone line (not leased line). You can customize the dial–up
settings for your particular modem and phone line.
The default Dialing prefix settings are based on the Hayes Corporation AT
command set, which is an industry standard for data modems. The following
table explains the LookoutDirect default settings. For additional commands,
refer to your modem operation manual.
Table B-1 Default Dial-Up Modem Settings
AT
Attention code that must precede all commands
D
Dial phone number with these modifiers: P for pulse; T for
tone
En
Local echo mode: E for no echo
Mn
Speaker on or off: M for speaker always off
Vn
Verbal or numeric result codes: V for numeric result codes
Xn
Result code and dialing options: X4 waits for dial tone
before dialing and recognizes busy signal.
When you use an external dial–up modem with LookoutDirect, the DTR line
in your cable between the modem and the computer must be wired straight
through. This line is pin 20 on a 25–pin RS–232 connector and pin 4 on a
9–pin connector. LookoutDirect uses the DTR line to command the modem
to disconnect (hang up) and return to the command mode.
© Automationdirect.com
B-5
Getting Started Guide
Appensix B
Some factory modems are not configured to respond to the DTR line. After
LookoutDirect first successfully dials out to a remote modem and finishes the
polling cycle, it drops the DTR line but the modem remains connected. If the
modem does not respond after several seconds of attempting to raise and drop
the DTR line, LookoutDirect generates an alarm stating that the modem is not
responding. If you receive this alarm message, your modem is not configured
to monitor the DTR line.
The Hayes Corporation standard command for configuring the modem to
hang up and enter command mode upon loss of DTR is &D2. You can use a
terminal program to make this setting permanent on most modems by
entering the modem command AT&D2&W to store the setting permanently
in nonvolatile modem memory. Or you can just add &D2 into the Dialing
prefix. The default Dialing prefix is ATX4MVEDT, so you might change it to
AT&D2X4MVEDT.
Retries specifies the number of times LookoutDirect dials the specified phone
number and attempts to connect to the modem at the other end of the line. If
it fails to connect after the specified Retries, it generates an alarm and moves
on to the next phone number in the polling queue (if a queue has formed).
Wait for connection specifies the length of time LookoutDirect waits to
receive a connect signal back from the modem it is calling. The time period
begins when LookoutDirect first sends the local modem the dialing prefix
command. The time should be long enough for the local modem to receive a
dial tone, dial the phone number, allow the remote modem to pick up the line,
and send back a connect message. If the specified time is too short, your
system could be operating correctly but never make a connection.
Pause between calls is the length of wait time after hanging up before it sends
the local modem the next dialing prefix signal. If the specified time is too
brief, your system may not hang up the existing call but instead attempt to call
the next number.
Specific modems, radios, and local phone lines may operate faster or slower than the
default settings. You may need to use a trial–and–error approach to find the best settings for
your system.
Note
Getting Started Guide
B-6
www.Automationdirect.com
Appendix B
DirectLogic Data Members
Protocol driver objects contain a great deal of data. V–memory registers,
inputs, outputs, internal control relays are all included within this object.
Therefore, as soon as you create a DirectLogic object you have immediate
access to the entire data member set of the object. As with all LookoutDirect
drivers, you can access I/O points and other data through data members. The
following tables contain data members currently supported by the
DirectLogic object class.
Data Modifiers
In order to have the DSData Server peform data conversions as it moves data
in and out of the PLC, the data modifier presented in the following can be
added to the end of a data item.
Table B-2
Recognized by
(DirectLogic PLC)
Modifier
Description
No modifier
Decimal value (16 bits)
All
:D
Decimal value (32 bits)
All
:B
Convert to BCD (16 bits)
All
:DB
Convet to BCD (32 bits)
All
:nn
Read a specific bit in a
Word (not available for
writing bits)
All
:R
Convert to Real (32 bits)
DL250, DL350, and
DL450
:W
Word (16 bits)
DL330, DL330P, DL340,
and DL305
:WB
Word (16 bits), converts
to BCD
DL330, DL330P, DL340,
and DL305
The range of data members shown in the following tables may be beyond the capacity
of the specific DirectLogic PLC or compatible CPU that you are using OR may not include
some of the data members shown. Consult the appropriate PLC family user manual for the
specific memory types and ranges available for your PLC CPU.
Note
© Automationdirect.com
B-7
Getting Started Guide
Appensix B
05/105/205/350/405 DirectLogic PLC Family Data Members
Table B-3. 05/105/205/350/405 DirectLogic PLC Data Members
Data Member
Type
Read
Write
Description
Activated
Logical
Yes
No
Object-generated signal when TRUE, this
flag signifies an active5 communication
connection between the process file and
the PLC.
C0 – C3777
Logical
Yes
Yes
Control Relays – addressed in octal and
mapped to V40600 – V40777.
CT0 – CT377
Logical
Yes
Yes
Counter status (done) bits – addressed in
octal and mapped to V41140 – V41157
CTA0:B –
CTA377:B
Numeric
Yes
Yes
Counter current value words BCD –
addressed in octal and mapped to V01000
– V01377
CTA0:DB –
CTA376:DB
Numeric
Yes
Yes
Counter current value double words (two
adjacent addresses; 32-Bit) BCD –
addressed in octal and mapped to V01000
– V01377
Failed
Logical
Yes
No
Object-generated signal when TRUE, this
flag signifies the process file is no longer
communicating with the PLC.
GX0 – GX3777
Logical
Yes
Yes
Remote I/O Inputs – addressed in octal
and mapped to V40000 – V40177
GY0– GY3777
Logical
Yes
Yes
Remote I/O Outputs – addressed in octal
and mapped to V40200 – V40277
Paused
Logical
Yes
No
Object-generated signal when TRUE, this
flag signifies that the communication
connection has paused but is still active
and will go FALSE when its paused
condition is satisfied. Usually caused by
modifying the Link while it is in use.
S0 – S1777
Logical
Yes
Yes
Stage status (active) bits – addressed in
octal and mapped to V41000 – V41077
SP0 – SP777
Logical
Yes
No
Special Relays (system status bits) –
addressed in octal and mapped to V41200
– V41237
Getting Started Guide
B-8
www.Automationdirect.com
Appendix B
Table B-3. 05/105/205/350/405 DirectLogic PLC Data Members
T0 – T0377
Logical
Yes
Yes
Timer status (done) bits – addressed in
octal and mapped to V41100 – V41117
TA0:B – TA377:B
Numeric
Yes
Yes
Timer current value words BCD –
addressed in octal and mapped to V00000
– V00377
TA0:DB –
TA376:DB
Numeric
Yes
Yes
Timer current value double words (two
adjacent addresses; 32-Bit) BCD –
addressed in octal and mapped to V00000
– V00377
V0 – V41237
Numeric
Yes
Yes
Single (16-Bit) V-memory registers
decimal
V0:D – V41237
Numeric
Yes
Yes
Double (two adjacent registers; 32-Bit)
V-memory registers decimal
V0:B – V41237:B
Numeric
Yes
Yes
Single (16-Bit) V-memory registers BCD
0- 9999
V0:DB –
V41236:DB
Numeric
Yes
Yes
Double (two adjacent registers; 32-Bit)
V-memory registers BCD 0- 99999999
V0:R - V41236:R
Numeric
Yes
Yes
Double word V-memory registers signed
real (IEEE 32-Bit Floating Point)
V0:S - V41237:S
Numeric
Yes
Yes
Single (16-Bit) V-memory registers
signed decimal ranging from -32768 to
32767
VC0 – VC3760
Numeric
Yes
Yes
Single (16-Bit) V-memory word registers
decimal Aliases for mapped Control
Relays C0 – C3777
VC0:B – VC3760:B
Numeric
Yes
Yes
Single (16-Bit) V-memory word registers
BCD Aliases for mapped Control Relays
C0 – C3777
VCT0 – VCT360
Numeric
Yes
Yes
Single (16-Bit) V-memory word registers
decimal Aliases for mapped Counter
Status (done) bits CT0 – CT377
VCT0:B –
VCT360:B
Numeric
Yes
Yes
Single (16-Bit) V-memory word registers
BCD Aliases for mapped Counter Status
(done) bits CT0 – CT377
© Automationdirect.com
B-9
Getting Started Guide
Table B-3. 05/105/205/350/405 DirectLogic PLC Data Members
VGX0 – VGX3760
Numeric
Yes
Yes
Single (16-Bit) V-memory word registers
decimal Aliases for mapped Remote I/O
Inputs GX0 – GX3777
VGX0:B –
VGX3760:B
Numeric
Yes
Yes
Single (16-Bit) V-memory word registers
BCD Aliases for mapped Remote I/O
Inputs GX0 – GX3777
VGY0 – VGY3760
Numeric
Yes
Yes
Single (16-Bit) V-memory word registers
decimal Aliases for mapped Remote I/O
Outputs GY0 – GY3777
VGY0:B –
VGY3760:B
Numeric
Yes
Yes
Single (16-Bit) V-memory word registers
BCD Aliases for mapped Remote I/O
Outputs GY0 – GY3777
VS0 – VS1760
Numeric
Yes
Yes
Single (16-Bit) V-memory word registers
decimal Aliases for mapped Stage status
(active) bits S0 – S1777
VS0:B – VS1760:B
Numeric
Yes
Yes
Single (16-Bit) V-memory word registers
BCD Aliases for mapped Stage status
(active) bits S0 – S1777
VSP0 – VSP760
Numeric
Yes
Yes
Single (16-Bit) V-memory word registers
decimal Aliases for mapped Special
Relays (system status bits) SP0 – SP777
VSP0:B – VSP760:B
Numeric
Yes
Yes
Single (16-Bit) V-memory word registers
BCD Aliases for mapped Special Relays
(system status bits) SP0 – SP777
VT0 – VT360
Numeric
Yes
Yes
Single (16-Bit) V-memory word registers
decimal Aliases for mapped Timer Status
(done) bits T0 – T377
VCT0:B –
VCT360:B
Numeric
Yes
Yes
Single (16-Bit) V-memory word registers
BCD Aliases for mapped Timer Status
(done) bits T0 – T377
VX0 – VX1760
Numeric
Yes
Yes
Single (16-Bit) V-memory word registers
decimal Aliases for mapped Inputs X0 –
X1777
Appendix B
Table B-3. 05/105/205/350/405 DirectLogic PLC Data Members
VX0:B – VX1760:B
Numeric
Yes
Yes
Single (16-Bit) V-memory word registers
BCD Aliases for mapped Inputs X0 –
X1777
VY0 – VY1760
Numeric
Yes
Yes
Single (16-Bit) V-memory word registers
decimal Aliases for mapped Outputs Y0 –
Y1777
VY0:B – VY1760:B
Numeric
Yes
Yes
Single (16-Bit) V-memory word registers
BCD Aliases for mapped Outputs Y0 –
Y1777
X0 – X1777
Logical
Yes
Yes
Inputs – addressed in octal and mapped to
V40400 – V40477
Y0 – Y1777
Logical
Yes
Yes
Outputs – addressed in octal and mapped
to V40500 – V40577
© Automationdirect.com
B-11
Getting Started Guide
Appensix B
305/305S Direct Logic PLC Family Data Members
Table B-4. 305/305S DirectLogic Data Members
Data Member
Type
Read
Write
Description
Activated
Logical
Yes
No
Object-generated signal when
TRUE, this flag signifies an active
communication connection
between the process file and the
PLC.
C160 – C373
Logical
Yes
No
Control Relays – addressed in octal
Logical
Yes
No
Special Relays – addressed in octal
Failed
Logical
Yes
No
Object-generated signal when
TRUE, this flag signifies the
process file is no longer
communicating with the PLC.
IO0 – IO157
Logical
Yes
No
Inputs and Outputs – addressed in
octal
Paused
Logical
Yes
No
Object-generated signal when
TRUE, this flag signifies that the
communication connection has
paused but is still active and will go
FALSE when its paused condition is
satisfied. Usually caused by
modifying the Link while it is in
use.
R0 – R777
Numeric
Yes
Yes
Single (8-Bit) byte registers
decimal
R0:W – R776:W
Numeric
Yes
Yes
Single (16-Bit) word registers
decimal
R0:WB – R776:WB
Numeric
Yes
Yes
Single (16-Bit) word registers BCD
RC160 – RC370
Numeric
Yes
Yes
Single (8-Bit) byte Control Relay
and Special Relay registers decimal
Aliases.
C1000 – C1067
C374 – C377
C770 – C777
C1070 – C1077
IO700 – IO767
RC760RC1000 – RC1070
Getting Started Guide
B-12
www.Automationdirect.com
Appendix B
Table B-4. 305/305S DirectLogic Data Members
Data Member
Type
Read
Write
Description
RC160:W – RC360:W
Numeric
Yes
Yes
Single (16-Bit) word Control Relay
and Special Relay registers decimal
Aliases.
Numeric
Yes
Yes
Single (16-Bit) word Control Relay
and Special Relay registers BCD
Aliases.
Numeric
Yes
Yes
Single (8-Bit) byte registers
decimal Aliases for mapped Inputs
and Outputs IO0 – IO157 and
IO700 – IO767
Numeric
Yes
Yes
Single (16-Bit) word registers
decimal Aliases for mapped Inputs
and Outputs IO0 – IO157 and
IO700 – IO767
Numeric
Yes
Yes
Single (16-Bit) word registers BCD
Aliases for mapped Inputs and
Outputs IO0 – IO157 and IO700 –
IO767
RS400 – RS570
Numeric
Yes
Yes
Single (8-Bit) byte Shift Registers
decimal
RS400:W – RS560:W
Numeric
Yes
Yes
Single (16-Bit) word Shift Registers
decimal
RS400:WB – RS560:WB
Numeric
Yes
Yes
Single (16-Bit) word Shift Registers
BCD
SR400 – SR577
Logical
Yes
No
Shift Register Status Bits –
addressed in octal
T600 – T677
Logical
Yes
No
Timer/Counter status (done) bits –
addressed in octal
TCA600:WB –
TCA677W:WB
Numeric
Yes
Yes
Timer/Counter current value words
BCD – addressed in octal and
mapped to R600 – R677
RC760:W
RC1000:W – RC1060:W
RC160:WB – RC360:WB
RC760:WB
RC1000:WB – RC1060:WB
RIO0 – RIO150
RIO700 – RIO760
RIO0:W – RIO140:W
RIO700:W – RIO750:W
RIO0:WB – RIO140:WB
RIO700:WB – RIO750:WB
© Automationdirect.com
B-13
Getting Started Guide
Appensix B
Establishing DirectLogic PLC Links
LookoutDirect will use “Links” to easily build and store the communication
settings for the DirectLogic PLC connection(s). This will also remove the
guess work from communication settings. There are three different types of
Links you can create.
• a standard serial link that uses COM1 through COM4 directly to the
PLC port
• a serial link that will connect through a pair of modems to the PLC port
• a link that will connect through a network card to an Hx–ECOM
module
The majority of communications links can be quickly established using the
LinkWizard. The LinkWizard automatically searches for established
communications links.
Note If you have a network of PLCs, you must build a communications link for each
different PLC. For example, it is possible that all PLCs on a network have the same
communications settings (protocol, baud rate, etc.). However, each one would have a unique
station address, therefore you must build a separate link for each one.
Establishing a Communications Link Using the LinkWizard
1.
Select Object »Create Drivers, choose DirectLogic as the object class,
and then click OK.
The Create DirectLogic dialog box appears with no Comm Link
selected.
2.
Click the link button (...).
The Select Link dialog appears. Existing communications links that are
links found by the Link Wizard are displayed in the Links gallery.
Getting Started Guide
B-14
www.Automationdirect.com
Appendix B
Note If no links appear in the Links gallery, refer to Using the Link Wizard to Add a Serial
Communications Link below.
3.
Double-click the desired link.
The links name appears on the Create DirectLogic dialog box in the
Comm Link text box.
4.
Click OK to establish the link.
Using the Link Wizard to Add a Serial Communications
Link
The wizard will guide you through the creation of a communications link
between LookoutDirect and your PLC.
1.
In the Select Link dialog, click Add.
The Link Wizard opens.
2.
Select the correct communications port, and then click Next.
3.
Select the PLC family. Click Not Sure if you do not know what family
your PLC belongs to. Click Next after making your family selection.
If you are using a AutomationDirect compatible PLC, the Link Wizard
will attempt to detect the family automatically.
4.
Select the correct protocol. The correct protocol will already be
highlighted if a PLC family was selected in the previous step. Click Next
after making your protocol selection.
LookoutDirect attempts to establish communications with the PLC using
the node address and protocol you selected. The first attempt at
communicating with the PLC will be made using 9600 baud and odd
parity. If the first attempt is unsuccessful, a second attempt will be made
using an autobauding sequence. If both attempts at establishing
communication with the PLC are unsuccessful, use the Link Editor to
manually adjust the port configuration until communications are
established.
Note
The choice of protocol is determined by two factors.
• Whether or not the PLC supports the protocol on the port where you are connecting. Refer to your PLC user manual for a list of protocols available for ports on
PLCDirect and compatible CPUs.
• If you need to perform write operations to individual Discrete I/O points or control relays. In this case you must select the K-sequence protocol. DirectNET protocol cannot write to individual bit locations.
© Automationdirect.com
B-15
Getting Started Guide
Appensix B
5.
Enter a unique name for the link that is no more than 16 characters in
length and a description of that is no more than 32 characters in length,
and then click Finish.
The name of the new link appears in the Link gallery of the Select Link
dialog box.
6.
Click Select.
The abbreviated name for the communications link you selected appears
in the Comm Link text box in the Create DirectLogic dialog box.
Note The Poll Rate and Poll= text boxes are used to for Modem/RF communications links
or to compensate for noisy networks. Under normal circumstances, it is unnecessary to
complete these text boxes. Refer to the online help for further information.
Using the Link Wizard to Add an Ethernet Link
The following provides the procedure for configuring a communications link
between a standard network interface card and an Ethernet communications
module.
Refer to Windows online help for information on configuring your network and
installing network protocols.
Note
1.
In the Select Link dialog, click Add.
The Link Wizard opens.
2.
Select Ethernet, and then click Next.
3.
Select the correct transport and protocol, and then click Next.
LookoutDirect scans the network for ethernet modules.
Note
The following restriction apply to the transport layer:
• If the Operating System is Windows NT 4.0, the only Transport option available to
you is Winsock. Windows 95/98 allow you to choose either IPX interrupt or Winsock.
• If you select UDP/IP as the Transport Protocol, you must change the IP address of
the module from its default value of 255.255.255.255 before you can connect to it.
Getting Started Guide
4.
Select the device and addressing mode. If you selected the UDP/IP
protocol in the last step, enter correct the IP address of the network card.
Refer to Making Changes to the Device and Addressing Mode below
further information.
5.
Click Next.
B-16
www.Automationdirect.com
Appendix B
LookoutDirect attempts to communicate with the ethernet module.
6.
Enter a unique name for the link that is no more than 16 characters in
length and a description of that is no more than 32 characters in length,
and then click Finish.
The name of the new link appears in the Link gallery of the Select Link
dialog box.
7.
Click Select.
The abbreviated name for the communications link you selected appears
in the Comm Link text box in the Create DirectLogic dialog box.
Making Changes to the Device and Addressing Mode
Module List Group
Each ethernet module is assigned a unique 12 digit address at the factory,
called the Ethernet address. A sticker located either on the back of the PC
board in the module or on the side of the module itself, will have the Ethernet
address printed on it. The Module List will display any ethernet modules it
finds on the network, sorted by their Ethernet address. If you select any device
in the Module List, the current configuration for that device is displayed in
the fields in the Address Mode section.
• The Query button executes a rescan of the network for Ethernet modules using the same Transport and Transport Protocol specified in the
previous dialog.
• The Setup... button displays a dialog box that allows you to assign a
Name, Description and IP address to the selected module.
• The Link Editor button displays a dialog box that will let you manually
configure the Link parameters for a specific Ethernet module.
© Automationdirect.com
B-17
Getting Started Guide
Appensix B
Address Mode Group
Each ethernet module must have some way of uniquely identifying itself on
a network. The Ethernet address, which is assigned at the factory, is most
always unique, but it is not always the most convenient identifier to
remember.
Fortunately there are three user-configurable identifiers available: the
Module ID, the Name, and the IP Address (the Ethernet address is not user
configurable). The Address Mode selection determines which of these
indentifiers LookoutDirect will use to locate the ethernet modules on your
network. The important thing to remember is that whichever identifier you
choose for the Address Mode, it must be unique on the network.
If you want to change the module’s configuration, click the Setup button and
make any adjustments needed for your network.
Setup Button
Selecting a module in the Devices section will display the current
configuration for that module in the Configuration section. Before you
change any of the values, look at each of the options in more detail.
• The Module ID is a unique numerical identifier given to each module on
the network. This number can be either the module’s dipswitch setting,
or a user configured address (if the dipswitches are set to address 0).
Refer to the Ethernet module’s user manual, part number
H24–ECOM–M, for detailed information on assigning an address.
• The Name field can contain a 32 character alphanumeric string. The
value assigned at the factory is “Name”. If you intend to use the Name
field as the identification method, you must change the default value
from “Name” in order to make it unique on the network.
• The Description field can contain a 32 character alphanumeric string.
• The IP Address field must contain a valid IP address that is unique on
your network. You must be careful not to duplicate IP addresses on a
network (you will not be able to complete the link configuration if the IP
address is not unique). Your Network Administrator should be able to
tell you what addresses are available to use. If you intend to use IP
Address, you must change the value from its default value.
Getting Started Guide
B-18
www.Automationdirect.com
Appendix B
You must be careful not to duplicate information in these user–configurable fields in
any module on the network. You will not be able to complete the Link creation process if you
choose an identifier that has been duplicated on another module.
Note
If you enter new values for a field, click the Update Module button to write
these new values to the EEPROM in the Ethernet module. The Query
Network button will initiate a rescan of the network using the Transport and
Transport Protocol previously specified.
© Automationdirect.com
B-19
Getting Started Guide
Appensix B
Getting Started Guide
B-20
www.Automationdirect.com
Glossary
Prefix
Meanings
Value
µ-
micro-
10 – 6
m-
milli-
10 –3
k-
kilo-
10 3
M-
mega-
10 6
A
absolute date
absolute time
Numeric system LookoutDirect uses for keeping track of dates and times,
in which midnight (0 hours), January 1, 1900 is represented by 1, midnight
of January 2, 1900 is represented by 2, and so on. The absolute date/time
number 36234.47222250 represents 11:20 AM, March 15, 1999.
The numeric value for 1 second in LookoutDirect is .000011574, the
numeric value for 1 minute is .000694444, and the numeric value for 1
hour is .041666667.
ACK
Acknowledge (an alarm or event).
active notification
A feature of event-driven software systems in which the application is
alerted of value changes when they occur instead of through continuous,
loop-driven queries.
address space
An OPC term for the area you browse to find what items are available on
an OPC server. Part of the standard OPC interface, this space may arrange
items hierarchically.
alarm
Software notification of a condition in a process. This alarm may call
attention of a value that has exceeded or fallen below certain levels, set in
the object database or in an Alarm object.
alias
Name given to a data member using the Edit Database dialog box. This
name can be descriptive or mnemonic, and may be associated with other
data member configurations such as scaling, logging, and alarming. A data
member can have more than one alias, each with different associated
configurations.
© Automationdirect.com
G-1
Getting Started Guide
Glossary
B
baud rate
Measurement of data transmission speed, formally defined as the number
of electronic state changes per second. Because most modems transmit
four bits of data per change of state, is sometimes misused or
misunderstood—a 300 baud modem is moving 1200 bits per second.
See BPS.
.bmp files
Graphic files in bitmap format. If you are using a .bmp file in
LookoutDirect, you cannot resize it on screen. See Windows metafile.
BPS
Bits per second—measure of the rate of transfer of data.
C
CBL compiler
LookoutDirect uses the CBL (Control Block Language) compiler to
compile a LookoutDirect source file (.lks) into a binary file (.l4p).
.cbx file
A LookoutDirect file containing a LookoutDirect object class. A .cbx
(Control Block Extension) file may have one or more object classes in it.
checksum
A method of verifying that the number of bits received is the same as the
number of bits transmitted. Used by TCP/IP and serial protocols.
Citadel
The LookoutDirect historical database that stores your data for access
later.
classes
See object classes.
client
A LookoutDirect process that monitors a LookoutDirect server process.
LookoutDirect clients should be computer independent so that they can be
run from any computer on your network. LookoutDirect server processes
run on computers actually connected to your control hardware.
comm port
Term sometimes used for a serial port.
connection
Input to a LookoutDirect object’s writable data members. For more
information, refer to Chapter 4, Using LookoutDirect.
control objects
LookoutDirect objects you use to control a process, change a data value,
adjust a register, and so on.
controllable objects
LookoutDirect objects you can control with a LookoutDirect control
object.
Getting Started Guide
G-2
www.Automationdirect.com
Glossary
.csv files
Comma Separated Value file, a format widely accepted by spreadsheet and
other data handling programs.
CTS
Clear to Send. Part of a handshaking protocol for certain devices that
connect the serial port of a computer. See the RTS/CTS Handshaking
Settings section of Chapter 3, Serial Port Communications, in the
LookoutDirect Developer’s Manual for detailed information.
cursor (data table)
The LookoutDirect data table can activate one row of data at a time using
the data table cursor. See the data table reference in the LookoutDirect
online help or the LookoutDirect Object Reference Manual.
D
DAQ
Short for Data AcQuisition.
data member
Data source or sink associated with a LookoutDirect object. A readable
data member, or source, may be used in expressions or as inputs to
other objects. A writable data member, or sink, may have at most one
connection into it, created using the Object»Edit Connections dialog
box. A data member may be both readable and writable. See also native
data member and alias.
data type
Kind of value (numeric, logical, or text) that a parameter or data member
can hold.
database
Collection of data stored for later retrieval, display, or analysis.
datagram
Message sent between objects in LookoutDirect. A datagram contains
a route and a value.
DCOM/COM
Distributed Component Object Model, a Microsoft standard in which
client program objects request services from server program objects.
The Component Object Model (COM) is a set of interfaces, clients, and
servers used to communicate within the same computer (running
Windows 98/95 or Windows NT).
DDE
© Automationdirect.com
Dynamic Data Exchange, currently used in LookoutDirect to exchange
data with other programs (such as Microsoft Excel) running on your
network.
G-3
Getting Started Guide
Glossary
deadband
A value that must be exceeded for an alarm to sound or a change in state
to be recorded. For instance, if you have a low-level alarm set at 5 with a
deadband of 2, the alarm will not trigger until the value being monitored
drops to 5. The alarm will then stay active until the value being monitored
moves above 7. A deadband keeps small oscillations of value from
triggering an alarm and then canceling it too rapidly.
deviation
Set a deviation to filter out small changes in value when logging data.
Before being logged to a database, a value must change by at least the
deviation amount of the last logged value.
dialing prefix
Part of the Hayes AT command set for use with modems. See the Dial-Up
Modem Settings section of Chapter 3, Serial Port Communications, in the
LookoutDirect Developer’s Manual for detailed information.
displayable objects
A LookoutDirect object class that has a displayable component, such as a
Pot, a Switch, or a Pushbutton.
DLL
A Dynamic Link Library, which is a collection of small, special purpose
programs which can be called by a larger program running on the
computer. Sometimes called Dynamically Linked Library.
driver objects
Lookout Directobjects used to communicate with PLCs, RTUs, and other
I/O devices.
E
edit mode
LookoutDirect mode in which you can alter and create objects within a
process. Switch in and out of edit mode by pressing <Ctrl-space> or by
selecting Edit»Edit Mode.
engineering unit
In LookoutDirect, used to refer to scaled or converted data. Thermocouple
data, for instance, arrives in volts as the raw unit, and must be converted
to degrees, an engineering unit.
environment services
Tasks LookoutDirect performs as a part of making your SCADA/HMI
work easier. LookoutDirect environment services include serial
communications, database and logging, security, networking, alarming,
and so on.
Ethernet
A widely used, standardized local area networking technology, specified
in the IEEE 802.3 standard.
Getting Started Guide
G-4
www.Automationdirect.com
Glossary
event
Anything that happens can be an event. In LookoutDirect, events include
such things as adjusting a control value, entering or exiting edit mode,
opening or closing a control panel, and logging in or logging out of the
system.
expression functions
Mathematical, logical, and other functions used by LookoutDirect
expressions.
expressions
LookoutDirect expressions are often paths to a data member. They can
also function like variables that, using a spreadsheet cell type formula,
become capable of performing flexible, real-time math operations,
condition testing, and other complex operations functions. See Chapter 1,
Expressions, in the LookoutDirect Developer’s Manual for more
information on expressions.
F
failover
A failover is the takeover of a process by a standby computer when the
primary computer fails for any reason.
FieldBus
An all digital communication network used to connect process
instrumentation and control systems.
FieldPoint
A National Instruments hardware product line for industrial automation,
control, monitoring, and reporting.
frame
Sequence of bytes sent from a computer to a device or vice versa. The
syntax of the frame depends on the protocol being used. A read frame
contains enough information to specify a set of variables whose values
the device should return. A write frame specifies a variable in the
device and a new value to write into that variable. Some protocols
support the writing of multiple variables in a single frame. A response
frame is returned from the device to the computer, indicating whether
the frame just sent to it was received successfully. If the frame just
received was a read frame, the response frame contains a set of
requested values.
functionality
The way an object works, operates, or performs a task. Functionality is a
general concept that applies in the same way to all objects in a given object
class. Parameters define the specific functionality of an individual object.
functions
See expression functions.
© Automationdirect.com
G-5
Getting Started Guide
Glossary
G
gray proximity
A term used in LookoutDirect color animation. This sets what percentage
of gray will be replaced by a given color as conditions change in a
monitored value or set of values.
H
Hi and HiHi
Alarm settings. Both warn that a value has gone above some setpoint.
Generally a Hi alarm is used to alert an operator of a need for intervention.
A hihi alarm is usually used to alert an operator that the value has been
exceeded by an even greater margin than a hi alarm indicates, and is
usually used to indicate an urgent need for action.
historical logging
The process of storing data in a database for use at another time, or from
another location.
HOA
Hand-Off-Auto control, used to set whether a value must be changed
manually, is completely turned off, or functions automatically. You can
use a Pot object and a complex expression to create this sort of control in
LookoutDirect, or you can use a RadioButton object, depending on the
particular requirements of the task you need to accomplish.
I
I/O point
Every read-only, write-only, or read-write connection LookoutDirect
makes to external hardware is counted as an I/O point. LookoutDirect is
licensed for use with a set number of I/O points. If you exceed the number
you are licensed to use with your copy of LookoutDirect, a warning
message appears on your computer screen warning you to shut down one
of your processes within a specified time before LookoutDirect cuts back
on I/O usage.
(implicit) data member
A LookoutDirect data member containing the fundamental data for certain
object classes. When you make a connection to an (implicit) data member,
you only use the name of the object, not the name of the object followed
by the data member name.
Getting Started Guide
G-6
www.Automationdirect.com
Glossary
L
.l4p files
File extension for LookoutDirect process files. These are the compiled
files LookoutDirect runs when it runs a process.
.l4t files
File extension for a LookoutDirect state file, which stores the values for
LookoutDirect controls and other objects with state information.
.lka files
File extension for LookoutDirect security files.
.lkp files
File extension for LookoutDirect process files in versions of
LookoutDirect earlier than LookoutDirect 4.
.lks files
File extension for a LookoutDirect source file, which LookoutDirect
compiles to make a LookoutDirect process file that LookoutDirect can
run. This is the file you should make sure you keep backed up in case you
need to recreate a corrupted process file, or in case some future version of
LookoutDirect cannot run a process file compiled in an earlier version of
LookoutDirect.
logging
The process of storing data in a computer database file. See Chapter 7,
Logging Data and Events, in the LookoutDirect Developer’s Manual for
more information on logging data in LookoutDirect.
logical data member
A LookoutDirect data member of the logical data type.
.lst files
Extension for the LookoutDirect state file in versions of LookoutDirect
earlier than LookoutDirect 4.
M
multiplex
© Automationdirect.com
A method of working with more than one data stream using only one
communications channel. There are a number of different methods of
multiplexing, depending on the hardware and software being used. A
number of LookoutDirect driver objects support multiplexing hardware.
G-7
Getting Started Guide
Glossary
N
native data member
Data members built into a LookoutDirect object class, as opposed to data
members you create by using aliases.
NetDDE
A way of networking using DDE (dynamic data exchange), retained in
LookoutDirect 4 and later for compatibility with earlier versions of
LookoutDirect.
numeric data member
A LookoutDirect data member of the numeric data type.
O
object
A specific instance created from an object class.
object classes
Software modules you use to create individual objects to perform tasks in
LookoutDirect.
object connections
Software links between objects used to transmit data and commands from
one object to another.
ODBC
Open DataBase Connectivity, a standard application programming
interface (API) for accessing a database. You can use ODBC statements to
access files in a number of different databases, including Access, dBase,
DB2, and Excel.
ODBC is compatible with the Structured Query Language (SQL)
Call-Level Interface. ODBC handles SQL requests by converting them
into requests an ODBC database can use.
OPC
Getting Started Guide
OLE for Process Control, an industry standard interface providing
interoperability between disparate field devices, automation/control
systems, and business systems. Based on ActiveX, OLE, Component
Object Model (COM), and Distributed COM (DCOM) technologies.
G-8
www.Automationdirect.com
Glossary
P
parameter
Input to an object, similar to a writable data member, whose value is
specified in the object parameter list in a LookoutDirect source (.lks)
file. Typically, parameter values are set in the object Object»Create or
Object»Modify dialog box.
ping
A small utility program in Windows and DOS that checks to see if a
computer can be reached across a network. Also used to indicate the
running of that program.
pixel
Picture Element, the smallest bit of a picture. Has one color or shade of
grey. The number of pixels per inch determine the resolution of an image.
PLC
Programmable Logic Controller.
poll
A software event in which a computer checks some value in a device or
register. In LookoutDirect, a logical command that forces a device poll to
check data member values.
poll rate
How often a device is polled.
pop-up panel
One variety of LookoutDirect control panel that can only be displayed at
the size set by the process developer, and which cannot be maximized.
When open, a popup panel remains on top of other panels until minimized.
process
In LookoutDirect, process refers to a LookoutDirect “program,” used for
industrial automation, control, monitoring, or reporting.
process file
The LookoutDirect binary file LookoutDirect executes when running a
process. Carries the .l4p extension.
R
raw unit
Data as it arrives in your process, such as voltage or amperage.
Thermocouple data, for instance, arrives in volts as the raw unit, and must
be converted to degrees, an engineering unit.
receive gap
A serial communications setting that determines the number of empty
bytes (or amount of time) a driver receives before recognizing the end of
a message frame and requesting another message. See the Setting Receive
Gap section of Chapter 3, Serial Communications, in the LookoutDirect
Developer’s Manual for more information about the receive gap.
© Automationdirect.com
G-9
Getting Started Guide
Glossary
redundancy
A system for making sure that a computer can come online and run a
LookoutDirect process if the computer currently running that process fails
for some reason.
remote
In the context of LookoutDirect, remote is a position source location for a
control. See the Remote Position Source Connections section of
Chapter 4, Using LookoutDirect, for detailed information on the
LookoutDirect remote position source.
resolution
The smallest signal increment that can be detected by a measurement
system. Also, the number of pixels per inch on a computer monitor screen
or dots per inch in printer output.
RTS
Request to Send, part of a handshaking protocol for certain devices that
connect the serial port of a computer. See the RTS/CTS Handshaking
Settings section of Chapter 3, Serial Communications, in the
LookoutDirect Developer’s Manual for detailed information.
RTU
Remote Terminal Unit, a device similar to a PLC for use at a remote
location, communicating with a host system through radio or telephonic
connections.
run mode
LookoutDirect mode in which processes run but no editing changes can be
made. Switch in and out of run mode by pressing <Ctrl-space> or selecting
Edit»Edit Mode.
S
SCXI
Signal Conditioning eXtensions for Instrumentation, a National
Instruments product line for conditioning low-level signals.
security accounts
Also called user and group accounts, LookoutDirect uses security
accounts to define what users or group of users have different operation
privileges in LookoutDirect. See Chapter 6, Security, in the
LookoutDirect Developer’s Manual for detailed information on
LookoutDirect security.
server
A process that provides data (services) to client processes. In
LookoutDirect, server processes are intended to be run on one computer
only, with direct connections to field hardware. Client processes interact
with field hardware through server processes.
source file
LookoutDirect file that can be compiled to produce a binary
LookoutDirect process file that runs a process. Uses a .lks file extension.
Getting Started Guide
G-10
www.Automationdirect.com
Glossary
SQL
Structured Query Language, used to get information from and update
information in a database.
standby
A computer standing by to take over running a process if the primary
computer fails or falls offline.
startup file
A LookoutDirect process file (.l4p) you designate in the System
Options dialog box that LookoutDirect will open and run any time
LookoutDirect is opened.
state file
The LookoutDirect file that stores the value of all LookoutDirect control
parameters and object data members in use in a process. Uses the file
extension .l4t.
system objects
LookoutDirect objects used to control other objects or process and analyze
data.
T
TCP
TCP/IP
Transmission Control Protocol, a method (protocol) for sending data
between computers. Used with IP, the Internet Protocol.
TCP/IP sends data as packets, with IP handling the delivery of data and
TCP keeping track of the individual packets.
text data member
LookoutDirect data member used for text data.
trace
A term for data from a single source over some period of time, stored in
an ODBC-compliant database.
traces table
ODBC databases present data in the form of traces tables. A traces table
contains a field or column of data for each data member being logged,
along with a field you can use to query the database.
trend
Historical data showing the change in a value over time. Often used in
connection with graphing the data for display.
W
.wav files
© Automationdirect.com
File extension given to sound files. You can play a .wav file in
LookoutDirect to add sounds or speech to alarms or events.
G-11
Getting Started Guide
Glossary
Windows metafile
A standard graphics file type for use in the Microsoft Windows operating
environment. If you use a metafile graphic in LookoutDirect, you can
enlarge or reduce it on the screen, use them as masks without specifying
transparent pixels, and use the LookoutDirect Animator to animate the
colors of the graphic.
.wmf file
File extension given to Windows Metafile graphic files.
X
.xls file
Getting Started Guide
File extension given to Microsoft Excel files.
G-12
www.Automationdirect.com
Index
A
logical data members, 2-7
numeric data members, 2-7
text data members, 2-13
displaying on control panels, 5-42
Switch object class (table), 2-6
types of, 2-5
database
historical, enabling, 3-10
database service, 2-22
datalogging, process, 3-36
dates/times
absolute (table), 2-12
DDE (dynamic data exchange)
DDE service in LookoutDirect, 2-23
development environment
process file, 4-15
source code file, 4-16
state file, 4-17
development process, overview of, 5-23
document, conventions used in, 1-1
documentation
related documentation, 1-2
absolute dates and times (table), 2-12
active notification, 2-20 to 2-21
alarms
adding to process, 3-21
database generated, 3-22
log settings for, 1-6
overview, 2-22
architecture of LookoutDirect, 2-2
C
Citadel database, setting for, 1-5
configuration shortcuts, 4-18 to 4-20
connecting objects, 5-34 to 5-39
data members to data members,
5-36 to 5-39
data members to parameters, 5-35
example (figure), 2-16
identifying object data members, 5-36
overview, 2-16 to 2-18
selecting target object (note), 5-34
supervisory control, 2-18
connecting, objects, 3-8
control panels, 4-8 to 4-9
normal, 4-8
overview, 4-8 to 4-9
conventions, document, 1-1
conventions, manual, 1-1 to ??
copying and pasting objects (note), 5-32
creating objects, 5-28 to 5-33
E
environmental services, 2-21
alarm service, 2-22
database service, 2-22
DDE service, 2-23
graphics service, 2-22
historical logging service, 2-23
multimedia service, 2-22
network services, 2-24
ODBC service, 2-23
redundancy service, 2-24
security service, 2-23
serial port communication service, 2-21
event-driven processing, 2-19 to 2-21
D
data members
connecting
identifying data members, 5-36
to data members, 5-36 to 5-39
to parameters, 5-35
definition of, 2-5
(implicit) data members, 2-13
© Automationdirect.com
I-1
Getting Started Guide
Index
advantages of active notification,
2-20 to 2-21
architecture (figure), 2-20
loop-driven applications compared with,
2-19 to 2-20
exponential/scientific notation (table), 2-10
Expression editor dialog box, 4-19 to 4-20
expression fields
definition, 4-19
remembering tagnames, 4-19
LookoutDirect screen
control panels, 4-8 to 4-9
illustration of, 4-3 to 4-4
menu bar, 4-4
operator input, 4-10 to 4-11
status bar, 4-4
title bar, 4-4
workspace, 4-5
loop-driven applications, compared with
event-driven processing, 2-19 to 2-20
F
M
fractional numbers with trailing zeroes (table),
menu bars
overview, 4-4
mouse shortcuts, 4-18
multimedia service, 2-22
2-10
G
global object classes
definition, 2-4
graphics
LookoutDirect graphics service, 2-22
graphics, importing custom, 3-33
N
name, computer setting of, 1-5
normal control panels, 4-8
numeric constants, 2-8
numeric data members, 2-7
absolute dates and times (table), 2-12
constants for, 2-8
exponential/scientific notation (table),
H
Hardware key, about, 1-3
hexadecimal formats (table), 2-11
historical logging service, 2-23
I
2-10
importing graphics, 3-33
fractional numbers with trailing zeroes
(table), 2-10
general numeric format (table), 2-9
hexadecimal formats (table), 2-11
leading zeroes (table), 2-9
time or time signals, 2-8 to 2-9
time period (table), 2-11 to 2-12
numeric signal, format (table), 2-9
K
keyboard, virtual settings, 1-6
keyboard, virtual. See virtual keyboard
keypad, virtual, 4-10
L
leading zeroes (table), 2-9
LookoutDirect
architecture of, 2-2
automatic process loading, 1-7
configuration shortcuts, 4-18 to 4-20
features, advanced tour of, 3-31
installation of, 1-2
installing, 1-3
navigation in, 5-25
overview, 2-1 to 2-2
starting, 1-7, 4-1 to 4-3
Gettting Started Guide
O
object classes
definition, 2-4
global, 2-4
overview, 2-4
object databases
database service, 2-22
object parameters
connecting to data members, 5-35
I-2
© Automationdirect.com
Index
definition, 2-4
overview of, 2-4
objects
adding to process, 3-4
connecting, 3-8
data members to data members,
5-36 to 5-39
data members to parameters, 5-35
example (figure), 2-16
identifying object data members,
purpose and use, 4-15
process, creation of, 5-26
process, starting new, 3-2
R
redundancy
LookoutDirect redundancy service, 2-24
related documentation, 1-2
requirements, system, 1-3
S
scientific notation (table), 2-10
security
level, settings for, 1-6
LookoutDirect security service, 2-23
Select Object Class list box (figure), 5-29
selecting objects, 5-28
serial communications
LookoutDirect serial port communication
service, 2-21
settings, system options, 1-5
source code file, definition of, 4-16
starting LookoutDirect, 4-1 to 4-3
state file
purpose and use, 4-17
status bar, 4-4
Switch object class
data members (table), 2-6
overview, 2-5 to 2-6
$System global object
created automatically, 2-4
System requirements, 1-3
5-36
overview, 2-16 to 2-18
selecting target object (note), 5-34
supervisory control, 2-18
copying and pasting (note), 5-32
creating, 5-28 to 5-33
steps for, 5-28 to 5-32
tagnames for, 5-32
databases and data members, 2-5
definition, 2-2 to 2-3
functionality, 2-4
remembering names of, 4-19
selecting, 5-28, 5-28
tagnames. See tagnames
ODBC
LookoutDirect ODBC service, 2-23
operator input, 4-10 to 4-11
options, system settings, 1-5
P
Panel object class
See also control panels
passive notification system, 2-19
popup control panels, about, 4-8
power failure, automatic process loading after,
T
tagnames
characters allowed in tagnames, 5-32
definition, 5-32
remembering, 4-19
valid names for (example), 5-33
time
absolute dates and times (table), 2-12
stored as numeric values, 2-8
time period constants (examples), 2-8
time periods (table), 2-11 to 2-12
1-7
process data logging, 3-36
process development, overview of, 5-23
process files
definition, 4-15
loading automatically, 1-7
opening, 4-2 to 4-3
© Automationdirect.com
I-3
Getting Started Guide
Index
title bars
overview, 4-4
trailing zeroes (table), 2-10
V
virtual keyboard
enabling, 4-10
virtual keypad, 4-10
W
workspace, 4-5
Z
zeroes
fractional numbers with trailing zeroes
(table), 2-10
leading zeroes (table), 2-9
Gettting Started Guide
I-4
© Automationdirect.com