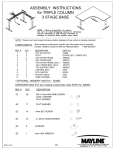
Download RGE – 2 Leg Base
Transcript
USER MANUAL/ ASSEMBLY INSTRUCTIONS
RGE – 2 Leg Base
Bifma Range Height Adjustable Table
1
Contents
1 Important Information... ....................................................................3
1.1 IMPORTANT SAFETY INFORMATION ...............................................................................3
1.2 USER INFORMATION...................................................................................................5
1.3 BEFORE YOU START ...................................................................................................5
2 Maintenance & Repairs......................................................................6
2.1 REPAIRS ...................................................................................................................6
2.2 CARE INSTRUCTIONS (FRAME) ......................................................................................6
3 Mounting Guidelines..........................................................................7
3.1 ASSEMBLY INSTRUCTION .............................................................................................7
4 Assembly Instructions ........................................................................8
4.1 BASE AND HARDWARE COMPONENTS ............................................................................8
4.2 BASE ASSEMBLY ........................................................................................................9
4.3 ASSEMBLY DETAILS ..................................................................................................10
5 Control System................................................................................. 11
5.1 USER MANUAL .......................................................................................................11
5.2 CONNECTING CONTROL UNIT .....................................................................................11
5.3 RESETTING UNIT ON FIRST USE ..................................................................................11
5.4 RESETTING AFTER REPLACING CONTROL UNIT ...............................................................12
5.5 INSTALLATION, HANDSET UNIT ....................................................................................13
2
Important Information
1.1 Important Safety Information
Danger: Make sure to read all relevant instructions and safety warnings before using the table.
WARNING!
During the raising or lowering of the table there exists a risk of squeezing or pinching-related
injuries occurring.
Please note the following:
There exists a risk of squeezing between the moving desktop and fixed objects. The necessary safety
margins depend on the greatest type of injury risk that can be predicted. Where there exists a risk of
squeezing fingers, use at least a 1.5” safety margin and for body or head (especially where children may be
present) a minimum of 16”.
Under no circumstances put your fingers on the desk legs while operating desk upwards or downwards.
During the lowering or raising of the desktop, the operator must ensure that no person or object risks being
harmed by the operation.
This tag (enclosed in packaging) is to be put on the desktop by the installer after assembly
3
Important Information
Caution: Do not open handset/control unit under any circumstance. There is danger of electric shock.
Caution: The control unit is not designed for continuous operation. Changing the desk position without
interruption must not exceed the duty cycle indicated on the nameplate.
Caution: Control unit may only be operated with mains voltage as specified on the label.
Caution: Only use the power cord supplied with the control unit. Check that is not damaged. Never operate
the control unit if the power cord is damaged.
Danger: It is not allowed to connect self-constructed products to handset/motor controls. To prevent
damage of the unit, use only components suitable for handset/motor controls.
Danger: Do not expose the control unit to moisture, drips or splashes.
Caution: Before connecting and disconnecting handset, you must unplug the power cord.
Caution: In the event of a malfunction (i.e. the control unit keeps adjusting the desk because a movement
button is jammed), please unplug the unit immediately.
Danger: When changing the desktop position there is a risk of pinching.
You must therefore ensure that no people or objects are located in the
hazardous area or may reach into it.
Danger: Risk of electrical shock – Connect this furnishing to a properly grounded outlet only.
Caution: To disconnect, turn all controls to the off position, then remove plug from outlet.
Danger: Risk of injury – Keep children away from foot support
Danger: To reduce the risk of burns, fire, electric shock or injury to persons:
Unplug from outlet before putting on or taking off parts. Use this furnishing only for its intended use as
described in these instructions. Do not use attachments not recommended by the manufacturer. Never
operate this furnishing if it has a damaged cord or plug, if it is not working properly, if it has been dropped
or damaged, or dropped in water. Return the furnishing to a service center for examination or repair. Keep
the cord away from heated surfaces. Never drop or insert any object into any opening. Do not operate
where aerosol (spray) products are being used or where oxygen is being administered.
Danger: Always unplug this furnishing from the electrical outlet before cleaning
Danger: The table may only be operated while in an upright position and must under no circumstances be
operated while upside down.
Warning: The table must not be overloaded. The maximum allowable load is 220lbs, 100kg.
Danger: The table is only to be used as a desk or work surface, which allows the user stepless adjustment of
the desktop between sitting and standing positions.
Danger: The table must be operated in a dry, enclosed space, such as an office or similar, never outdoors.
Danger: Do not modify or make any changes to the control unit.
4
Important Information
Danger: Do not operate the control unit in a potentially explosive atmosphere
Danger: In the event of a fault (motor or component), whenever the desktop attempts to adjust the height
it may move slightly before the safety cut-out is triggered. Please note there is a potential risk of pinching in
this case.
Danger: Intelligent system protection is not enabled during all resets. Please note there is a potential risk of
pinching in this case.
Danger: This device is not intended for use by individuals with limited physical, sensory or mental abilities
or with lack of experience and/or lack of expertise, unless they are supervised by a person responsible for
their safety or have received instructions from that person how to use the control unit.
Danger: Children must be supervised at all times to ensure that they do not play with the control
unit/table.
Danger: If the power cord is damaged, it must be replaced by the manufacturer, customer service or similar
qualified person in order to prevent any risks.
Note: Only clean the handset/control unit with a dry or slightly moist cloth. Before cleaning, you must
always unplug the power cord.
Danger: The table may not be used to lift people.
Danger: The table may not be structurally or technically altered or modified in any way. During repair or
maintenance work, the power cable must be disconnected from the power outlet.
Danger: The table is not to be used by persons (including children) with reduced physical, sensory or
mental capabilities or by individuals lacking the knowledge or experience to operate the table, unless
monitored or otherwise instructed regarding its use by a person responsible for their wellbeing. Children
should be monitored at all times to prevent them from playing with the table.
Danger: Any changes or modifications to the electric control unit are strictly forbidden and voids warranty!
1.2 User Information
The table is suitable for household and public occupancies use.
The motors may only be used continuously for 1 minute at a time, after which they must be left inactive for
nine minutes before they can be used again. The control unit regulates this automatically.
FOR COMMERCIAL AND HOUSEHOLD USE
This furnishing has not been evaluated for flammability or cigarette ignition resistance.
1.3 Before You Start
Make sure that there is nothing blocking the travel of the desk in the space where it will operate.
Before first use, the control unit must register the lowest point of elevation (reset).
To do this, simply lower the table to the lowest position by pressing and holding the “Down” button until
the table reaches the lowest position. The control unit has now registered the lowest elevation and is ready
to use.
5
Maintenance & Repairs
2.1 Repairs
Check all screws and bolts after first week of use and tighten screws and bolts where necessary to ensure
safe operation of the table.
If the table cannot be raised or lowered, check the cable connection between the handset unit and the
motor units (leg system), as well as between the power unit and the mains outlet.
If the table still does not respond, the handset unit may have triggered the overheating protection or the
intermittency protection. Please wait for at least nine minutes and try again before proceeding with other
measures.
If a control unit must be replaced, it must first be reset before it can be used. To do this, follow these steps:
1.
Press and hold "Up" and "Down" button simultaneously for 7 seconds
2.
Lower table to lowest point by pressing "Down" button
3.
Table is ready to use
Should the table still not work as intended after taking these measures, please contact your vendor for
further assistance. For instructions on the installation and care of the desktop, please follow the
instructions from the manufacturer.
2.2 Care Instructions (frame)
Clean the frame by wiping it down with a microfiber cloth moistened with a standard household cleaning
solution. Never use solvents or abrasive or corrosive compounds.
6
Mounting Guidelines
3.1 Assembly Instruction
Assemble the frame according to the assembly instructions (page 8)
Motor Cable
Handset Unit
Make sure to ask your desk vendor for an approved combination of desktop and frame.
Always check desktop thickness against the length of the mounting screws before mounting the desktop to
ensure they are appropriate and not long enough to protrude through the top surface once screwed in.
Connect the two motor cables and the cable from the power supply to the handset unit. Take care to route
all cables so that they cannot be damaged by normal operation. Please refer to the assembly instructions
for this and use the supplied cable routing materials to secure the cables.
Connect the power cable to a power outlet and make sure that the cable is not in danger of being
squeezed, nicked, twisted or otherwise damaged.
The table is now ready to use. The motors will switch off automatically when the frame reaches its
maximum or minimum elevations.
7
Assembly Instructions - Base/Top
4.1 Base and Hardware Components
Note: Please count and inspect all pieces before disposing of any carton or packing material.
Base Components: For Base Models 80224MB and 80230MB.
When ordering components, specific color and/or size information may be required. Please Contact a Mayline
Customer Service Representative at 1-800-822-8037. **Denotes Color Code. B=Black and S=Silver
Item #
Qty.
Description
Part#
1
2
Bifma Height Actuator
Z507**
2
2
Foot
A8648** (24”) A8649** (30”)
3
2
Adjustable Crossbar
A8650**
4
1
2 Button Handset
Z508
Hardware Bag - Screws: For any missing components order Part No. A8651.
Item #
Qty.
Description
5
8
6
12
7
8
Screw - 3/16”x 2 1/8” Wood
8
6
Cable Tie
9
1
Allen Wrench, M8
Screw - M8x16mm Socket
Screw - M8x25mm Cap
Hardware Bag – Hole Plugs: For any missing components order Part No. A8654**.
Item #
Qty.
10
12
Description
Hole Plug – Adjustable Crossbar
Hardware Bag – End Caps: For any missing components order Part No. A8655**.
Item #
Qty.
11
4
Description
End Cap - Tube
Replacement Pre-Installed Components:
Part #
Description
Part #
Description
Q665
Replacement Leveling Glide
Z509
Replacement Motor
8
Assembly Instructions - Base/Top
4.2 Base Assembly
1) Place Actuator (1) upside down on clean surface, assemble Foot (2) to bottom of actuator using
16mm screws (5), Qty 4 per foot. CAUTION: Do Not use 25mm screw (5) to attach foot, this will
cause damage to the internal components of the actuator.
2) Loosen crossbar adjustment screws to allow crossbar sections to move freely.
3) Place table top face down on a clean non-abrasive surface. Place both Actuators (1) and Crossbars
(3) in approximate mounting locations.
Note: Use Frame Alignment Holes and outer mounting holes in crossbar as a guide.
4) Attach crossbars to actuator housing using 25mm screws (6), Qty 4 per bar. Cap tube using End Cap
(11) and Hole Plug (10). Refer to Detail 1 on Page 9 for reference.
5) Adjust crossbar to required length by lining up crossbar mounting holes with frame alignment holes
and fasten crossbars to top using 2 1/8” Wood Screws (7).
6) Once base is fully attached, crossbar sections can then be re-tightened.
Caution: Crossbar Cord Passage Hole must be centered in opening. Refer to Detail 2 on page 9.
7) Mount the Handset (4) in desired location wood screws supplied with switch. Refer to Section 4.6
8) Pass motor cords though crossbar and attach to handset. Attach Cable Ties (8) to desired locations
on the underside of the top for cord management.
9) Using one person per side, carefully rotate table onto the base. Plug power cord into handset and
then into wall outlet. See Section 5.3 for setting up handset for first time use.
Note: If optional Mayline Keyboard Platform 19503ATW was ordered, please refer to the Assembly
Instructions provided with that hardware bag.
9
Assembly Instructions - Base/Top
4.3 Assembly Details
Detail 1: Crossbar Attachment
Detail 2: Crossbar Cord Passage
10
Control System
5.1 User Manual
5.2 Connecting Control Unit
1.
2.
3.
4.
Mount the control unit to the desktop in the desired location.
Connect the motor cables.
Connect the power unit to the control unit and the power outlet.
Remember to reset the unit on first use.
5.3 Resetting Unit On First Use
Before the table can be used, the control unit must be reset to establish the lowest point of the table. This
is achieved by first lowering the table as far as it will go. Until this is done, it will not be possible to elevate
the table.
11
5.4 Resetting After Replacing Control Unit
If a control unit is replaced or switched, the new control unit must first be reset to establish the lowest
point of the table. To do this, press and hold the “Up” and “Down” buttons simultaneously for at least 7
seconds and then press “Down” to bring the table to the lowest point. The control unit will now have
registered the lowest point and the table is ready for use. Verify correct functionality by elevating the table
to the highest point and then back to the lowest point.
The control unit is equipped with safety features; the intermittency function and the overheating
protection and memory function.
•
Intermittency function – The intermittency factor of the control unit is 10%, meaning it
can be operated for 1 minute
after which it must remain inactive for 9 minutes. If the
one-minute limitation is exceeded, the table will become inoperable until the control box
resets automatically.
•
Overheating protection – The table will become inoperable if the overheating protection is
triggered and will return to operation automatically once the heat has dissipated
sufficiently.
•
Memory function – The control unit will retain information regarding the elevation of the
table at all times. This information will remain stored even in case of power failure or if
the power cable is disconnected from the power outlet.
Soft start – Progressive acceleration allows for soft starts and stops.
Speed – the speed of the table varies with load.
12
5.5 Installation, Handset Unit
Caution: the power cord must be unplugged while the handset unit is being installed.
Mount the handset unit underneath the desktop, using appropriate screws in the provided mounting holes
(3)
Screw Location
Screw Location
I832 REV 3 2/2014
13


