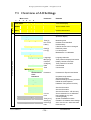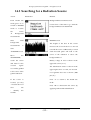
1
identiFINDER
User´s Manual
systemelectronic gmbh
© target systemelectronic gmbh. - All rights reserved
User’s Manual
identiFINDER
User’s Manual
−1−
identiFINDER
© target systemelectronic gmbh. - All rights reserved
Congratulations on your purchase of the identiFINDER. Please make
sure to read the following instructions before using the device for the
first time.
NOTICE
target systemelectronic gmbh reserves the right to make changes to any
product to improve reliability, function or design and does not assume
any liability arising from either application or use of any product or
circuit described herein.
The information presented in the publication has been carefully checked
and is believed to be entirely reliable; however, no responsibility is
assumed for inaccuracies.
Furthermore, the information does not convey to the user any license
under the patent rights of target systemelectronic gmbh or others.
LIMITED RIGHTS LEGEND
The data in this manual is considered “proprietary data”. It may be
duplicated and used by or on behalf of the customer with the express
limitations the “proprietary data” may not be disclosed outside the
customer or be used for purposes of manufacture without prior
permission of the seller.
This legend shall be marked on any reproduction of this data in whole or
in part.
Publication Number
Copyright
1.1
© target systemelectronic gmbh, 2005
All rights reserved.
Printed in Germany
User’s Manual
−2−
identiFINDER
© target systemelectronic gmbh. - All rights reserved
Contact
For North- and South America
target instruments inc.
100 Midland Road
Oak Ridge, TN 37830
USA
Phone
+1 – 865 220 – 8700/Ext.100
Fax +1 – 865 220 – 7181
E-mail
[email protected]
For Africa, Asia, Australia and Europe
target systemelectronic gmbh
Kölner Str. 99
42651 Solingen
Germany
Phone
+49 – 212 – 22 20 90
Fax +49 – 212 – 20 10 45
E-mail
User’s Manual
[email protected]
−3−
identiFINDER
© target systemelectronic gmbh. - All rights reserved
Table of Contents
1 Introduction .................................................................................................. 7
2 Start of the Instrument.............................................................................. 12
3 User Modes ................................................................................................. 15
4 The DOSE Rate Mode............................................................................... 16
5 The FINDER Mode.................................................................................... 18
6 The Nuclide Identification (IDENT) Mode ......................................... 20
6.1
Procedure to identify a source ................................................... 20
7 Expert User Modes..................................................................................... 25
7.1
Overview of All Settings ............................................................. 26
7.2
Gamma/N Counting................................................................... 27
7.3
Finder Options.............................................................................. 28
7.4
Dose rate Settings......................................................................... 29
7.5
Alarm Options .............................................................................. 31
7.6
Show Spectrum............................................................................. 35
7.7
Identify Options ........................................................................... 41
7.8
Presets Setup ................................................................................. 46
7.9
Do Calibration .............................................................................. 47
7.10
Setup Disp./Time......................................................................... 49
7.11
Maintenance Menu ...................................................................... 51
7.12
Stabilization................................................................................... 59
7.13
Calibration Source........................................................................ 59
7.14
Data Logging ................................................................................ 60
8 Connecting the identiFINDER to the PC.............................................. 61
8.1
Serial Connection without interface box .................................. 61
8.2
Serial Connection with the interface box.................................. 61
User’s Manual
−4−
identiFINDER
© target systemelectronic gmbh. - All rights reserved
8.3
USB Connection............................................................................ 63
8.4
Starting the winTMCA32 or Transfer Software ...................... 64
9 Basics of the winTMCA32 Software ...................................................... 66
9.1
Load Actual Spectrum................................................................. 66
9.2
Load All Spectra ........................................................................... 67
9.3
Nuclide Selection.......................................................................... 67
9.4
Send Spectrum to Device ............................................................ 68
9.5
Nuclide Identification.................................................................. 68
10
Basics of the Transfer Software.......................................................... 70
11
Maintenance........................................................................................... 72
11.1
Battery Indication......................................................................... 72
11.2
Charging the powerPACK plus................................................. 72
11.3
Replacing the powerPACK plus battery pack......................... 75
11.4
Replacing the powerPACK or inserting standard batteries .. 76
12
Trouble Shooting .................................................................................. 78
12.1
Cannot switch on the device ...................................................... 78
12.2
Failing initial calibration ............................................................. 78
12.3
Apparently wrong dose rate indication ................................... 78
12.4
Apparently wrong nuclide identification ................................ 79
12.5
Nuclide identification not possible or ‘Not in Library’.......... 79
12.6
Neutron Alarm but no source present...................................... 79
12.7
No sound in case of alarm .......................................................... 80
12.8
No vibration in case of alarm ..................................................... 80
12.9
No LED indication in case of alarm .......................................... 80
12.10
FINDER Mode does not show anything .................................. 81
12.11
Device switches off automatically ............................................. 81
12.12
Password is set but unknown .................................................... 81
12.13
No Spectrum Transfer to PC ...................................................... 81
User’s Manual
−5−
identiFINDER
© target systemelectronic gmbh. - All rights reserved
13
Specifications......................................................................................... 83
14
Quick Reference Guide ....................................................................... 90
14.1
At a Glance .................................................................................... 90
14.2
Switching ON the identiFINDER .............................................. 91
14.3
Searching for a Radiation Source............................................... 92
14.4
Source Characterization / Nuclide Identification .................. 93
User’s Manual
−6−
identiFINDER
© target systemelectronic gmbh. - All rights reserved
1 Introduction
The identiFINDER NHG is a digital hand held gamma spectrometer
designed for in situ operation with special features of
• Searching for single radioactive gamma sources or for areas of
contamination with gamma radio nuclides,
• Automatic identification of radio nuclides based on measured
gamma ray spectra,
• Gamma dose and dose rate measurement,
• Indication of the presence of neutrons in the radiation field by
presenting neutron count rate and accumulated neutron counts.
It carries out qualitative and quantitative analysis of gamma radiation
using a ∅1.4″×2″ NaI(Tl) (other customized detectors may be available
for special applications, e.g. for EOD) and an internal Geiger Mueller
(GM) tube. An on-board DSP (Digital Signal Processor) with
sophisticated software and an internal data base enables the
identiFINDER to carry out the above mentioned functions. The neutron
indication is based on a moderated 3He tube.
Small size and low weight as well as the three-button menu-driven
operation combined with a reliable self-calibration make the
identiFINDER convenient to use for anyone. The initial calibration and,
furthermore, the permanent and continuous stabilization running in the
background in parallel to any performed measurement, are based on an
internal Cs-137 stabilization source.
Digital signal analysis replaces the “old fashioned” analogous signal
shaping.
The standard delivery of an identiFINDER instrument consists of the
following components (Figure 1 or Figure 2):
• Aluminum or plastic carrying case with
• Hand held spectrometer identiFINDER,
• neutron moderator box (optional),
• box with Potassium for enhanced K-40 background (optional),
User’s Manual
−7−
identiFINDER
© target systemelectronic gmbh. - All rights reserved
• powerPACK plus (includes rechargeable batteries),
• powerPACK (for the use of standard AA-size batteries),
• external battery charger (optional),
• identiFINDER system cable for connecting to a PC using the USB
or RS232 interface and for recharging the batteries,
• external power supply,
• external earphones for silent alarms (optional, requires Hardware
modifications),
• source kit (only for EOD applications),
• holster with belt attachment tool and strap,
• winTMCA32 and identiFINDER transfer software CD-ROM,
• User’s manual.
Figure 1
Scope of supply, including-power supply, -powerPACK, -accessories
(optional), -software CD, -miniUSB cables, -interface box, identiFINDER in holster, -source kit (optional), -miniUSB to serial cable
User’s Manual
−8−
identiFINDER
© target systemelectronic gmbh. - All rights reserved
Figure 2
Scope of supply, including 1-neutron moderator (optional), 2- interface box,
3- miniUSB to serial cable, 4-earphones (optional), 5-miniUSB cable,
6- miniUSB to miniUSB cable, 7-battery packs (powerPACK and powerPACK
plus), 8-Potassium (K-40) box (optional), 9-identiFINDER in holster,
10-european mains adaptor (optional), 11-UK mains adaptor (optional),
12-wrist strap, 13-mains power supply, 14-external battery charger (optional)
User’s Manual
−9−
identiFINDER
© target systemelectronic gmbh. - All rights reserved
Figure 3
Overall view of the identiFINDER (front view) with -battery compartment
lock, -ON/OFF button, -blue LED (neutron alarm, optional), -selection
buttons, - command line, -red LED (gamma alarm), - internal GM tube,
-internal He-3 tube (neutron detection, optional), -internal NaI(Tl)
scintillation detector
The bottom part of the display shows a black shadowed command
line with up to three commands which can be executed using one
of the buttons “L”, “M” or “R” for left, middle and right keys,
respectively.
Before switching on the identiFINDER you should
• Remove it from all dirt,
• Check it for visible damage,
• Check whether powerPACK plus is inserted before connecting the
battery charger: Open the screw “battery pack lock” and shift off
the handle.
Alternative one can use the additional powerPACK with 4 standard AAsize batteries.
Please make sure to read Chapter 0 (“Maintenance”) on how to open the
device and handling the powerPACK or powerPACK plus.
User’s Manual
− 10 −
identiFINDER
© target systemelectronic gmbh. - All rights reserved
The powerPACK plus is not charged on reception of the
instrument. The powerPACK plus has to be inserted into the
identiFINDER and the device has to be connected to power supply
before operation.
It must be charged for at least 12 h before switching the device on!
The powerPACK can NOT be used to charge any batteries inside
the device, even rechargeable batteries will not be charged! This
feature prevents overheating or even explosion of nonrechargeable batteries. Make sure to charge rechargeable batteries
outside the identiFINDER with an external charging unit.
The device cannot be used without batteries and just connected to
the mains supply. This will cause wrong dose rate values and
Identification results. Please make sure to have a battery pack
inserted at any times.
User’s Manual
− 11 −
identiFINDER
© target systemelectronic gmbh. - All rights reserved
2 Start of the Instrument
After charging the powerPACK plus for at least 12 hours (see chapter 1
and 11.2), the device can be operated. To switch on the instrument press
the ON/OFF button
until the red and blue alarm LEDs illuminate.
Soon the display will show the initialization screen (Figure 4):
Figure 4
identiFINDER startup screen
After start-up (Figure 4) the energy calibration of the identiFINDER
starts (Figure 6). Within about 20 seconds the high voltage and the fine
gain will be adjusted according to the measured gamma ray spectrum of
the calibration source (i.e. Cs-137). A successful calibration ends with a
message and the display of fine gain and HV values. If the calibration
cannot be finished correctly an error message shows up. The device can
then not be operated correctly, which is indicated by a “C” in the upper
right hand corner. Please refer to Chapter 7.9 and 12 for troubleshooting
tips.
Maintenance of the energy calibration is necessary also during operation
since temperature or count rate changes introduce a shift in the detection
devices. The identiFINDER needs to be stabilized with the aid of the
internal Cs-137 source. The background energy stabilization will be done
automatically in normal operation, indicated by the letter “S” in the
upper right hand corner. Presence of strong sources may disturb the
stabilization and calibration of the identiFINDER. The device will then
switch off the stabilization and display an “N” in the upper right hand
corner in order to warn the user that the stabilization is currently not
available. A precise energy calibration though is essential for the
identification of any nuclides found in the field.
User’s Manual
− 12 −
identiFINDER
© target systemelectronic gmbh. - All rights reserved
Figure 5
The identiFINDER display during initialization
Figure 6
The identiFINDER display during the calibration
The letter in the right hand corner shows the status of the
calibration and stabilization:
“S” indicated a working stabilization, i.e. everything is working
fine,
“N” stands for a failed initial calibration or the stabilization is
contemporarily switched off (the external radiation field is too
strong to stabilize on the weak calibration sources), please switch
the device off and back on or use the “Do Calibration” menu (see
Chapter 7.9).
The identiFINDER is now ready for operation and enters
automatically the DOSE rate mode (Figure 7).
User’s Manual
− 13 −
identiFINDER
© target systemelectronic gmbh. - All rights reserved
Figure 7
DOSE rate screen
The DOSE rate screen is the basic screen of the identiFINDER. All other
functions can be accessed from this screen by means of the “L”, “M”, and
“R” buttons.
To switch off the identiFINDER press the ON/OFF button until a tone
sounds – simultaneously the display will show “POWER OFF”
User’s Manual
− 14 −
identiFINDER
© target systemelectronic gmbh. - All rights reserved
3 User Modes
The identiFINDER is usually operated in the so called EASY USER
MODES. This is the default mode after switching on the device.
The EASY USER MODES allow to access different user screens
(measuring modes) which provide for
• Gamma dose and gamma dose rate measurements (DOSE rate
mode),
• Search for single radioactive gamma sources or for areas of
contamination with gamma radio nuclides (FINDER mode),
• Automatic identification of radio nuclides based on measured
gamma ray spectra (IDENTification mode),
• Indication of neutron radiation, gamma dose / dose rate alarms or
optional neutron alarms (DOSE, FINDER and IDENT modes).
The EASY USER MODES are the standard modes for non-expert users.
They provide sufficient information to observe the local radiation level,
to detect any increase of the radiation level due to radioactive sources or
contaminations, to localize and to classify these sources. Any increase of
the local gamma or neutron radiation field which may be harmful to
health or giving hints on terrorist activities is indicated immediately by
the corresponding alarms (acoustic, visible, and vibration alarm signals).
To obtain very detailed information in case of emergency or to change
parameters and settings of the identiFINDER the device must be
switched to the EXPERT USER MODES. This is done by pressing the
right button („OPTIONS“) in the DOSE or the FINDER screen. However,
the EXPERT USER MODES can be protected by a password if required.
The EXPERT USER MODES allow accessing various menu screens.
Many parameters like alarm thresholds, times for identification, units
(e.g. Sievert and rem) and the language of the user interface can be
changed. The EXPERT USER MODES also provide for a spectrum
display. A detailed description of these features is not addressed here
but is given in the corresponding chapters of the EXPERT USER’s
MANUAL.
User’s Manual
− 15 −
identiFINDER
© target systemelectronic gmbh. - All rights reserved
4 The DOSE Rate Mode
The DOSE rate mode is the starting point for all other identiFINDER
features. Figure 8 shows the DOSE screen which automatically appears
when the startup procedure is finished successfully.
Figure 8
identiFINDER screen for the DOSE rate mode
On the DOSE screen the gamma dose rate – or more precisely the
ambient dose rate equivalent H*(10) – is numerically and graphically
displayed.
The length of the horizontal black bar represents the actual dose rate
reading in a logarithmic scale. The limits are 0.01 µSv/h up to 1 Sv/h (or
1 mrem/h up to 100 rem/h, depending on the choice of units). The small
vertical separator (here above the number ”30”) displays the dose alarm
value.
Additionally the count rate for neutrons in counts per seconds (cps) is
given in this display.
The letters “S” or “N” in the upper right hand corner indicate a working
(“S”) or not working (“N”) stabilization.
By pressing the left (“FINDER”) or middle (“IDENT”) button the
identiFINDER is switched to the FINDER or the IDENTification mode.
Choose the right key (“OPTIONS”) if you intend to enter the EXPERT
USER MODES.
User’s Manual
− 16 −
identiFINDER
© target systemelectronic gmbh. - All rights reserved
Figure 9
Menu overview of the EASY USER MODES
If the detected radioactivity exceeds the alarm levels, a warning message
will be shown on the top line of the display.
On very high dose rates (above 500µSv/h), the scintillation detector will
be switched off and the GM tube is responsible for the dose rate display.
User’s Manual
− 17 −
identiFINDER
© target systemelectronic gmbh. - All rights reserved
5 The FINDER Mode
The FINDER mode can be used to localize the radiation source if an
increase of the dose rate level is detected. Follow the identiFINDER
display and the acoustic signals to easily locate the source or
contamination.
From the DOSE rate mode the FINDER mode can be entered by pressing
the left button. The identiFINDER will now switch to the FINDER screen
shown in Figure 10.
Figure 10
Searching for a hidden source using the FINDER mode (1)
The initial screen is empty and starts being filled from right to left by a
histogram representing the actual dose rate reading shown in the bottom
line.
In general: The higher the bar the closer the source.
A typical course of a search for a hidden source is shown in the three
figures (Figure 10 to Figure 12).
When starting the search (Figure 10) the identiFINDER is far away from
the source and is moved gradually towards it (Figure 11). The actual
dose rate reading is 0.26 µSv/h which is indicated by the vertical bar
most right. Afterwards the identiFINDER is shifted away (Figure 12), the
source is located.
User’s Manual
− 18 −
identiFINDER
© target systemelectronic gmbh. - All rights reserved
Figure 11
Searching for a hidden source using the FINDER mode (2)
Figure 12
Searching for a hidden source using the FINDER mode (3)
The default time scale of the FINDER mode (i.e. the number of
data entries per second) can be changed by the expert user
(EXPERT USER MODES).
From the FINDER mode the automatic identification process can be
started by pressing the middle key (“IDENT”) in case that a source or
area of contamination was found. With the left button (“DOSE”) one can
go back to the DOSE rate mode. With the right button (“OPTIONS”) the
EXPERT USER MODES can be entered.
User’s Manual
− 19 −
identiFINDER
© target systemelectronic gmbh. - All rights reserved
6 The Nuclide Identification
(IDENT) Mode
Pressing the middle key (“IDENT”) from DOSE rate mode or FINDER
mode will turn the instrument into the nuclide IDENTification mode.
The display shown in Figure 13 will appear.
Figure 13
Starting screen for the IDENT mode
6.1 Procedure to identify a source
In the IDENT mode the instrument is acquiring the gamma ray spectrum
of the unknown source or contamination. The operator must point the
instrument to the source of radiation, which can be determined using the
FINDER mode.
The device needs to acquire sufficient information from the gamma
source, i.e. good count rates. Optimum results will be obtained if the
count rate is in the range indicated by the two arrows ( and ).
Depending on the special application, a lower level (arrow pointing
right) may not be available. If the count rate is too small a message
“MOVE CLOSER TO SOURCE IF POSSIBLE” (Figure 13) will appear. In
case that the count rate is too high the message “MOVE AWAY FROM
SOURCE” will be shown. In the advised count rate range, the
identification algorithm will give the best results. The data collection can
be aborted by pressing the right button (“EXIT”).
User’s Manual
− 20 −
identiFINDER
© target systemelectronic gmbh. - All rights reserved
During the spectrum accumulation the actual dose rate (in Figure 13:
0.05 µSv/h), the actual count rate (59 cps), and the dead time (0 %) are
shown together with the remaining acquisition time (24 s).
If the spectrum acquired has not reached sufficient statistics, the
instrument shows a message (Figure 14). In this case either the
acquisition time was too short or the radiation level was too low, and the
identification algorithm is not started.
Figure 14
Acquisition has not reached enough statistics to identify the radioactive source
The user has to choose one of two options: With “YES” the
identiFINDER resumes data acquisition. The data is added to the data
already acquired in the previous identification run. “NO” causes a
message “Nuclide listing: Counts too low”, and after quitting this
message with “EXIT” the identiFINDER returns to the DOSE rate or
FINDER mode.
If the measurement was successful and the spectrum contains sufficient
counts for a nuclide analysis, the instrument processes the spectrum. The
results are displayed as a nuclide listing (Figure 15).
Figure 15
Result of a nuclide analysis of a spectrum measured in IDENT mode
User’s Manual
− 21 −
identiFINDER
© target systemelectronic gmbh. - All rights reserved
The data given in the nuclide listing (Figure 15) are interpreted as
follows:
The spectrum analysis suggests that the analyzed source contains
and maybe 22Na.
60Co,
The supposition is rated between 1 (unlikely) and 10 (very likely). A very
weak indication is displayed as “–“. In the example shown the 60Co is
very likely to be present – indicated by the 9; there may be an admixture
of 22Na.
The nuclides found are classified according to their basic field of
application:
Medical nuclides (MED) are mainly used for medical diagnostics and/or
therapy,
Industrial nuclides (IND) are applied in the industry, and
Nuclides marked as NUC originate from or occur as by-product in the
production process of fissile material for nuclear power plants and for
nuclear weapons.
NORM indicates Naturally Occurring Radioactive Materials.
Corresponding nuclides may be present in various materials like
fertilizers, ceramics, welding rods etc. and in the natural environment.
OSI library contains all isotopes that may be present at On Site
Inspections of Nuclear Test Fields.
Figure 16
Results of identification: Not in Library
If the message Nuclide listing: Not in Library! (Figure 16) appears the
identiFINDER acquired sufficient data and executed the identification
algorithm, but did not find a matching spectrum in the library selected.
User’s Manual
− 22 −
identiFINDER
© target systemelectronic gmbh. - All rights reserved
During the data acquisition either a dose rate warning (optional feature;
tone sequence) or a dose rate alarm (permanent tone) indicates that the
dose rate exceeds the corresponding thresholds, but no message is
displayed.
After a (successful or non-successful) identification the operator can
choose one of the following actions by pressing the corresponding
button:
SAVE/SPECTRUM:
The measured spectrum will be stored (non-experts) or can be viewed
(expert users, only) depending on the access rights of the user. Stored
spectra can be transferred to a PC for a more detailed offline analysis.
Altogether 100 spectra can be stored (numbers 0, 1, 2, … 99). If the
spectrum memory is full and you try to store a spectrum, the instrument
displays the message
“No empty slot found - do you want to overwr. old spec.?”
Accepting this by pressing “OVERWRITE” opens an entry field, and by
using the “SKIP” command the operator can select the spectrum to be
overwritten.
EXIT:
The instrument returns to the menu selected previously.
If the detected radiation exceeds the alarm levels during the acquisition
time, the vibrator as well as the beeper will not be switched on. The red
LED will (even if the LED is switched off) indicate a dose rate alarm with
flashing, a dose alarm with permanent illumination. The blue LED will
accordingly show the neutron detection.
The main reasons for failures in identifying unknown sources are:
• The source to be characterized is an irresolvable mixture of several
nuclides.
• The source is heavily shielded.
• The stabilization may temporarily be switched off, go back to the
DOSE screen and check the letter in the upper right hand corner. If
the device indicates “N”, try a recalibration (please refer to Chapter
12 for troubleshooting tips).
User’s Manual
− 23 −
identiFINDER
© target systemelectronic gmbh. - All rights reserved
CONTINUE (optional, can be added by factory on request):
The instrument will prolong the data acquisition for another period and
may hence improve identification for weak sources.
User’s Manual
− 24 −
identiFINDER
© target systemelectronic gmbh. - All rights reserved
7 Expert User Modes
These advanced modes allow access to a multitude of device parameters
and options of the identiFINDER. However, this requires expertise in the
field of nuclear spectroscopy and nuclear instrumentation; therefore
these settings can be protected by a password. The password is a
sequence of seven letters (“L”, “M”and “R”) (see Chapter 7.11). If the
advanced user has entered the optional password once, the access to the
EXPERT USER MODES will be permitted until the device is switched
off.
Selecting the function “OPTIONS” (right key) from the DOSE rate or
FINDER mode will open the password window and after a successful
identification as an expert user, the options menu (Figure 17) appears.
One out of five different items can be marked (move the highlighted
field “DOWN” with the left key). Use the left key to “SELECT” the item
afterwards.
Figure 17
Options menu
User’s Manual
− 25 −
identiFINDER
© target systemelectronic gmbh. - All rights reserved
7.1 Overview of All Settings
Menu Level
3
4
2
EASY MODES
1
Parameter
5
Remarks
6
DOSE RATE
Dose Rate display
FINDER
Source Finder mode
IDENT
Nuclide Identification
OPTIONS
More Options
Show Spectrum
Identify Options
Identify Settings
Expert User Modes
Spectrum display
Time [s]
No. of Nuc
Library
Edit Isotope List
Presets Setup
Real [s]
Live [s]
XPERT USER MODES
Do Calibration
Advanced Options
Setup Disp./Time
Display Settings
Date / Time
Maintenance
Change Password
Set Password
Clear
Password
Show Status
Factory Defaults
Erase all Spectra
Factory Test
Stabilization
Source Stab.Status
PSA Stab.Status
LED Stab.Status
Calibration Source
Gamma/N Counting
Finder Options
Doserate Options
User’s Manual
Measuring time
Nuclides to be identified
Nuclide library
Libraries entries can be changed
Real time preset
Live time preset
Maintenance: re-calibration
Language
BkLight [s]
Contrast
A.Off[min]
Date
Time
Language selection
Time preset for display illumination
Display contrast correction
Time preset for Auto-OFF
Current date
Current time
Password
Password for Expert User Modes
No password protection
Service information
Reset all settings to factory defaults
Delete all stored Spectra
Hardware Test (service function)
Cs-137
K-40
Time [0.1s]
Sensit.[%]
IntTime [s]
Unit
− 26 −
Service information
Service information
Service information - idF ultra only
Source selection for re-calibration
Not available in any case
Counting display
Speed of FINDER functions
Indication of radiation above backgr.
Aver. time for curr. dose rate value
Dose rate unit
identiFINDER
© target systemelectronic gmbh. - All rights reserved
Alarm Options
Alarm Indications
Dose alarm Lv
Doserate Alarm Lv
Neutron Alarm Lv
Sound
Vibrate
Light
Dose alarm
Dose warning
Dose rate alarm
Dose rate warn.
N cpm
Acoustic alarm indication
Silent alarm indication
Visual alarm indication
Dose alarm setting
Dose warning setting
Dose rate alarm setting
Dose rate warning setting
Neutron count rate alarm setting
Table 1
Overview of the EXPERT USER MODES menu
7.2 Gamma/N Counting
In the Gamma/N Display (Figure 18) three values are displayed:
N-rate:
The actual neutron count rate value is given in counts per second (cps).
N-counts:
The accumulated neutron counts are displayed. This value (together
with G-counts and T-count) can be stopped (“STOP CNT”) and reset
(“RESET CNT”) using the middle button. The corresponding time frame
is given by T-count.
G-counts:
The accumulated gamma counts are displayed. This value (together with
N-counts and T-count) can be stopped (“STOP CNT”) and reset (“RESET
CNT”) using the middle button. The corresponding time frame is given
by T-count.
T-count:
The time expired since the start of the N-counts and G-counts is available
here. It is given in seconds and can be stopped (“STOP CNT”) and reset
(“RESET CNT”) together with N-counts and G-counts using the middle
button.
G-dose:
The accumulated gamma dose is displayed. It is given in the selected
unit (i.e. Sv or rem). This value (together with T-dose) can be reset (“RES.
DOSE”) using the left button. The corresponding time frame is given by
T-dose.
User’s Manual
− 27 −
identiFINDER
© target systemelectronic gmbh. - All rights reserved
T-dose:
The time expired since the start of G-dose is available here. This value is
given in seconds and can be reset (“RES. DOSE”) together with the Gdose using the left button.
Figure 18
Gamma/GM display
7.3 Finder Options
Opening the Finder Options from the OPTIONS Menu will provide the
opportunity to change two parameters (Figure 19):
Figure 19
Options for FINDER settings
To change either the finder detection speed (“Time[0.1s]”) or the
detection sensitivity (“Sensit[%]”) move the inverted field “DOWN”
with the right button and press “SELECT” to make changes.
Time[0.1s]
User’s Manual
− 28 −
identiFINDER
© target systemelectronic gmbh. - All rights reserved
This parameter defines the speed of the FINDER mode detection. The
larger the time, the slower the reaction time, but this means the device is
more sensitive to find smaller sources.
If the value 2 has been chosen, every 0.2 s one value will be added to the
FINDER mode display representing the average dose rate during this
last period.
Sensit[%]
This parameter defines the dose rate level Ds above which the
identiFINDER emits an audible signal together with every new vertical
bar appearing. The identiFINDER measures the ambient dose rate
equivalent and determines the average background dose rate <BDR>
and its variation σ= sqrt(<BDR>).
It is Ds = <BDR> + 3.5 * σ * 100/Sensit.
The frequency of the finder tone follows the dose rate. The FINDER
mode display rescales automatically according to the highest value
measured.
If either the threshold for dose rate alarm or dose rate warning is
exceeded, an appropriate message (“RATE WARNING”, “RATE
ALARM”) is faded into the top line of the FINDER mode display.
7.4 Dose rate Settings
Figure 20
Options selectable in “DR Settings” menu
Mark either the selection of the integration time (“IntTime[s]”) or the
dose rate unit (“Unit”) by moving the inverted field (“DOWN”) and
press “SELECT” to make changes.
User’s Manual
− 29 −
identiFINDER
© target systemelectronic gmbh. - All rights reserved
IntTime[s]
In the DOSE rate mode the dose rate reading is actualized every second.
The shown value is the average dose rate during the last “IntTime[s]”
seconds. Values between 1 and 30 can be selected by pressing “+” or “–“
followed by “ACCEPT”. The default setting is 15 s. The larger the
integration time, the less the dose rate reading fluctuates. The averaging
process is suppressed when large dose rate changes are detected.
Unit
Possible settings for the dose rate unit are Sv/h or rem/h; additionally
the unit Bq can be selected which is true only for a defined geometry (i.e.
1 meter distance to the source). All units – including the limits for dose
and dose rate alarm – will be converted according to the rule 1 Sv = 100
rem.
Especially for medical applications (e.g. Iodine-131 treatment) the unit
“Bq” for an activity determination is available. Using this setting the
display in the DOSE rate mode will change to the following (Figure 21):
Figure 21
Activity mode for Iodine measurements
The display shows the calculated Iodine activity if the identiFINDER is
placed in 1 meter distance from the patient.
The usage of the unit Bq is advisable only after prior consultation
of the manufactory including special calibration and training of
the operator.
User’s Manual
− 30 −
identiFINDER
© target systemelectronic gmbh. - All rights reserved
7.5 Alarm Options
Selecting the Alarm Options the following display (Figure 22 or similar)
will appear:
Figure 22
Display after selecting “Alarm Options”
Alarm Indications
This type of identiFINDER instrument has three alarm indications
(Figure 23):
• Sound (acoustic alarm)
• Vibrate (silent alarm)
• Light (red LED for visual alarm).
If the alarm sound is switched off, also the button click tone will
not be available.
Figure 23
”Alarm Indications” menu
User’s Manual
− 31 −
identiFINDER
© target systemelectronic gmbh. - All rights reserved
To change the alarm indication settings, mark the related entry by
moving the frame (“DOWN”). Unlock the entry to make the
amendments (“SELECT”). Modify the actual setting by “+” or “–“ and
save the final setting (“ACCEPT”).
In course of changes the step size which is effected by “+” or “–“
increases gradually. It might be necessary to reset the step size to
0.1 by changing the direction from “+” to “–“ or from “–“ to “+”,
respectively.
With the optional earphones (note: this accessory requires hardware
changes and will not work without an upgrade by the factory), the
sound setting allows three values:
OFF:
no sound in any case
INT:
the general loud speaker will give alarm
EXT:
external connected earphones used for speakers
Please check Figure 24 for how to connect the external headphones. To
control the volume of the external speakers, the wheel on the earphone
adaptor box can be used.
The target adaptor box must be used to allow the connection of
external earphones, whereas the earphone itself may be exchanged
by any commonly available headphone with mini phone jack
(mono).
User’s Manual
− 32 −
identiFINDER
© target systemelectronic gmbh. - All rights reserved
Figure 24
Connection of earphones to the identiFINDER
Dose Alarm Lv
For the cumulative gamma dose an alarm as well as a warning level can
be defined by the operator. For doing this the operator has to mark the
entry which should be changed by moving the frame (“SKIP”) and
afterwards by unlocking the entry for amendments (“SELECT”). The
actual setting can be modified by using the “+” or “–“ keys. The final
setting will be accepted by pressing the “ACCEPT” button. Possible
settings are:
dose warning:
0.001 µSv ..... 1 Sv
or 1 nrem ..... 100 rem
User’s Manual
− 33 −
identiFINDER
© target systemelectronic gmbh. - All rights reserved
dose alarm:
0.001 µSv ..... 1 Sv
or 1 nrem ..... 100 rem
Values of more than the maximum limits are clipped automatically.
Depending on the special application, a warning level may not be
available.
Doserate Alarm Lv
For the gamma dose rate an alarm as well as a warning level can be
defined by the operator. For doing this the operator has to mark the
entry which should be changed by moving the frame (“SKIP”) and
afterwards by unlocking the entry for amendments (“SELECT”). The
actual setting can be modified by using the “+” or “–“ keys. The final
setting will be accepted by pressing the “ACCEPT” button. Possible
settings are:
dose rate warning:
0.001 µSv/h ..... 1 Sv/h
or 1nrem/h ..... 100 rem/h
dose rate alarm:
0.001 µSv/ ..... 1 Sv/h
or 1 nrem/h ..... 100 rem/h
Values of more than the maximum limits are automatically clipped.
Depending on the special application, a warning level may not be
available.
Neutron Alarm Lv
For the neutron rate an alarm level can be defined by the operator.
Unlock the entry N cpm for amendments (“SELECT”). The actual setting
can be modified by using the “+” or “–“ keys . The final setting will be
accepted by pressing the “ACCEPT” button. Possible settings are:
neutron alarm level:
0 cpm ..... 500 cpm
Values of more than the maximum limits are automatically clipped.
The neutron alarm level can be set in counts per minute (cpm)
only. The display instead shows counts per second (cps). The
transformation is 1 cpm = 60 cps.
User’s Manual
− 34 −
identiFINDER
© target systemelectronic gmbh. - All rights reserved
7.6 Show Spectrum
The most important feature of the advanced options is the SPECTRUM
mode. This mode can be entered by selecting “Show Spectrum” in the
“More Options”-Menu or after the radionuclide identification from the
IDENTification mode.
Figure 25
Command line structure in the SPECTRUM mode (1)
User’s Manual
− 35 −
identiFINDER
© target systemelectronic gmbh. - All rights reserved
Figure 26
Command line structure in the SPECTRUM mode (2)
User’s Manual
− 36 −
identiFINDER
© target systemelectronic gmbh. - All rights reserved
The main part of the display shows the spectrum histogram. It is
updated during data acquisition. There are five entries on top,
representing (from right to left) the actual cursor position in keV or
channels – depending on the users choice (e.g. “662 keV” or “221Cha”),
the time, the spectrum y axis (“LIN”, “LOG” and “SQR”), “S” and “ “,
respectively for subtraction or no subtraction of the optional background
spectrum and the number of counts at the cursor position.
The second line on the right hand side shows the letters “S” or “N”
respectively. “S” stands for a working stabilization, “N” indicates that
the stabilization is currently being switched off (because of missing
calibration source or high radiation level) or the initial calibration was
not carried out successfully.
The status line below indicates whether the identiFINDER takes data
(“ACQ”) or not (“STOP”) and shows the timing information like real
time (“RT”) or live time (“LT”), the remaining real or live time after a
preset (“PRRT” or “PRLT”). These times are shown in seconds; the dead
time (“DT”) in per cent.
Possible commands in the SPECTRUM mode are:
ACQ
Starts a new or resumes the previous measurement. Both, display and
memory will not be cleared. The status line entry will display the current
state (“ACQ”) whereas the command line entry will change from “ACQ”
to “STOP”.
STOP
This command stops the data acquisition. The status line entry will
change to show the actual state (“STOP”) whereas the command line
entry will change from “STOP” to “ACQ”.
CURLEFT / CURRIGHT
The cursor will move left or right, respectively. The actual position will
be displayed in channels or in units of keV. A vanishing cursor on the
left (right) edge of the display will appear on the right (left) edge again.
If the cursor meets a predefined position, the identiFINDER will suggest
some isotopes (131I, 57Co, 133Ba, 58Co, 137Cs, 60Co and 40K) in the right hand
corner of the status line.
User’s Manual
− 37 −
identiFINDER
© target systemelectronic gmbh. - All rights reserved
ZOOM
For a more detailed look at a spectrum “ZOOM” expands the portion of
the display around the actual cursor position, first. To decompress the
spectrum to the complete range, press “ZOOM” again.
CLEAR
This command deletes the actual spectrum after asking again “Clear
current spectrum?”
SAVE
The actual spectrum will be stored according to running numbers.
In maximum 100 spectra can be stored (0, 1, 2, …, 99). If you try to store
an additional spectrum, the instrument will display the following
message “No empt. Slot found Do you want to overwr. old spec.?”
Accepting this by pressing “OVERWRITE” will open an entry field and
by using the “SKIP” command the operator can select the spectrum that
will be overwritten.
LOAD
This command returns the selected spectrum to the display. The shown
history helps to make a proper selection which is made by “SKIP” and
needs to be confirmed by “LOAD” afterwards.
IDENTIFY
The identiFINDER will start the identification algorithm using the
spectrum currently displayed.
SUB
This command is thought to remove a background from the spectrum by
subtracting a background spectrum that can be measured and stored by
the factory or a trained expert. On reception of the device this
background spectrum is empty. The command line entry will change
from “SUB“ to “NOSUB” and the top line will display an additional “S”
to show the current setting.
NOSUB
This command disables the background subtraction which was enabled
previously by “SUB”. The command line entry will change from
“NOSUB“ to “SUB” and the “S” in the top line will vanish, telling the
user that the background spectrum will not be subtracted.
User’s Manual
− 38 −
identiFINDER
© target systemelectronic gmbh. - All rights reserved
LOG
The vertical axis will be scaled logarithmically. The command line entry
will change to “SQRT”. The current selection (i.e. LOG) is displayed in
the top line of the spectrum window.
SQRT
The y axis will be scaled proportional to square root. The command line
entry changes to “LIN”. The current selection (i.e. SQR) is displayed in
the top line of the spectrum window.
LIN
The vertical axis will be scaled linear. The command line entry changes
to “LOG”. The current selection (i.e. LIN) is displayed in the top line of
the spectrum window.
CHANNEL
The actual cursor position will be displayed in “Cha” (channels). The
command line entry will change from “CHANNEL” to “ENERGY”.
ENERGY
The actual cursor position will be displayed in units of keV. The
command line entry will change from “ENERGY” to “CHANNEL”.
TESTM
Some control parameters for testing and servicing the identiFINDER will
appear on the spectrum display. They are not of any importance to the
user. To get rid of the excess information, just wait about ten seconds.
The test mode will not vanish by pressing the middle button (“TESTM”)
again.
RT
The expired time is shown in the status line. It will be changed to real
time (“RT”) and the command line will change to live time (“LT”). The
active
setting
is
indicated
in
the
status
line.
If a real time preset has been set (Chapter 7.8), “RT” is replaced by
“PRRT” and the time will count down instead.
User’s Manual
− 39 −
identiFINDER
© target systemelectronic gmbh. - All rights reserved
LT
Selects the expired time information to live time (“LT”) and the
command line will change to real time (“RT”). The active setting is
indicated in the status line.
If a live time preset has been set (Chapter 7.8), “LT” is replaced by
“PRLT” and the time will count down instead.
SLibSPEC
The identiFINDER allows the user to store 5 additional spectra as
reference spectra which are added to the internal data base. For each
reference spectrum
• a number
• the normal usage (“Nuc”, “Med”, or “Ind”) and
• a name (format “Xx – nnn”, e.g. Cs – 137, as used in nuclide tables)
must be entered. Existing user defined references can be overwritten.
User defined reference spectra are treated as elements of the internal
library and hence will be used for nuclide identification algorithm (see
Chapter 6.2, “Identify Options”).
A user defined reference spectrum cannot be erased from the data base.
It can be overwritten by a new defined reference spectrum only.
To exit the spectrum display independently of the current menu
selection, it is possible to use the ON/OFF button instead.
User’s Manual
− 40 −
identiFINDER
© target systemelectronic gmbh. - All rights reserved
7.7 Identify Options
Selecting “Identify Options” from the menu will open a display with two
options (Figure 27):
Figure 27
Display after opening the “Identify Options”
Mark either “Identify Settings” or “Edit Isotope List” by moving the
black background with the left key (“DOWN”) and press “SELECT” to
make changes.
Identify Settings
In the Identify Settings the following changes can be made:
Figure 28
”Ident. Settings” menu
Time[s]
This parameter defines the duration (in seconds) of the data acquisition
for the nuclide identification. Weak sources need longer measuring time.
User’s Manual
− 41 −
identiFINDER
© target systemelectronic gmbh. - All rights reserved
The higher the natural background or the lower the activity of the
unknown source (use the DOSE rate mode first) or the more shielded or
the more mixed the source is, the larger “Time” should be chosen.
Values between 0 s and 1000 s can be chosen. A setting of 0 s will force
the identiFINDER instrument to acquire the gamma ray spectrum until a
total number of 3000 counts are collected. Modify the actual setting by
“+” or “–“ (step size: 1) and save the final setting with the middle button
(“ACCEPT”).
No. of Nuc
The “number of nuclides” defines the maximum number of recognized
isotopes displayed after the identification algorithm. Possible settings are
“1”, “2”, “3” or “4”, respectively.
The reliability of nuclide identification increases with decreasing
number of nuclides to be identified. The recommended setting for
most applications is “2”.
Library
The “Library” inherits the input data base for the identification
algorithm. Only nuclides can be identified which belong to the selected
data base. Possible settings are “Secur.” (library for security
applications), “Customs” (library for customs authorities), “OSI” (library
for On Site Inspection), “Nuclear” (library for nuclear industry and
nuclear research facilities), “Medical” (library for medical applications)
and “Indust.” (library for industrial applications). Depending on what
library is selected, different isotopes will be available for identification.
Each of these libraries can be modified except the OSI library. The
modification is carried out in the display “Edit Isotope List”.
Edit Isotope List
All stored nuclide references are listed with the normal field of
appearance (i.e. “OSI.” for On Site Inspection, “Nuc.” for nuclear
isotopes, “Med.” for isotopes used in therapy or diagnosis, “Ind.” for
industrial and “NORM” for Natural Occurring Radioactive Material) in
front, the isotope name and its mass (except for special entries e.g.
“Annih.Rad.” for annihilation radiation spectrum) plus the libraries
which inherit this isotope. By using “DOWN” or “UP” each individual
entry can be marked for making changes with “SELECT”. Each press of
User’s Manual
− 42 −
identiFINDER
© target systemelectronic gmbh. - All rights reserved
“SELECT” toggles through all combinations of library possibilities. The
abbreviations stand for:
“O” “N”
“M”
“I”
“C”
“S”
OSI Nuclear
Medical
Industrial Customs
Security
To exit the isotope list, it is possible to use the ON/OFF button
instead of scrolling up to the first nuclide available.
No entry can be added to or removed from the “OSI” library.
The default settings for the different libraries are summarized in Table 2:
Nuclide
description
OSI
library
OSI Ba-140
X
OSI Cd-115
X
OSI Ce-141
X
OSI Ce-144
X
OSI I-132
X
OSI La-140
X
OSI Mo-99
X
OSI Nb-95
X
OSI Nd-147
X
OSI Pr-144
X
Nuc WG(1) Pu
X
OSI Ru-103
X
OSI Sb-125
X
OSI Te-132
X
OSI Xe-131m
X
Med Xe-133
X
OSI Xe-133m
X
OSI Xe-135
X
User’s Manual
Nuclear
library
Medical
library
Industrial Customs
library
library
Security
library
X
X
− 43 −
identiFINDER
X
© target systemelectronic gmbh. - All rights reserved
OSI Zr-95
X
Med I-131
X
X
X
X
Med Tc-99m
X
X
X
X
Med Ga-67
X
X
X
X
Med I-123
X
X
Med I-125
X
X
Med In-111
X
X
Med Pd-103
X
X
Med Tl-201
X
X
X
X
Ind Ag-110m
X
Ind Am-241
X
X
X
Ind. Ba-133
X
X
X
Ind Bi-207
X
X
X
Ind Cd-109
X
Ind Co-57
X
X
X
Ind. Co-58
X
Ind Co-60
X
X
X
Ind Cs-134
X
X
X
Ind Cs-137
X
X
X
Ind Cr-51
X
Ind Eu-152
X
X
X
Ind Eu-155
X
Ind Fe-59
X
Ind Ir-192
X
NORM K-40
X
X
X
Ind Mn-54
X
X
X
Ind Na-22
X
X
X
NORM Ra-
X
X
X
User’s Manual
− 44 −
X
identiFINDER
© target systemelectronic gmbh. - All rights reserved
226
Ind Se-75
X
X
NORM Th232
X
X
X
Nuc U-238
X
X
X
Ind Zn-65
X
Nuc Pu-239
X
X
Nuc U-233
X
X
X
Nuc U-235
X
X
X
X
X
Ind Ac-228
Ind. Ag-108m
Annih. Rad.
Ind Be-7
Ind Bi-212
Ind. Bi-214
Ind Ce-139
Ind Hf-181
Ind I-133
Ind. I-134
Ind I-135
Ind Mn-56
Ind Pb-214
Nuc RG(2) Pu
X
Ind Sb-124
Ind Sb-127
Ind Tl-208
Ind Y-88
Ind DU(3)-238
User’s Manual
X
− 45 −
identiFINDER
© target systemelectronic gmbh. - All rights reserved
Nuc Np-237
X
Nuc Pu-240
Med Lu-177
X
X
X
X
Table 2
Nuclide library, (1)-weapon grade, (2)-reactor grade, (3)-depleted uranium
7.8 Presets Setup
In “Presets” (Figure 29) mark either “Real” or “Live” by moving the
highlighted field (“DOWN”) and press “SELECT” to make changes.
“BACK” returns the identiFINDER to the prior display.
Figure 29
Possible pre-settings for time of data taking in the SPECTRUM mode
Real
Pre-sets the real time for data taking in the SPECTRUM mode (i.e. after
the selected time the data acquisition will stop automatically). Values
from 0 to 7,200 seconds are possible. In the SPECTRUM mode the entry
in the status line changes from “RT” to “PRRT”.
Live
Pre-sets the live time for data taking in the SPECTRUM mode (i.e. after
the selected live time has expired the data acquisition will stop
automatically). Values from 0 to 7,200 seconds are possible. In the
SPECTRUM mode the entry in the status line changes from “LT” to
“PRLT”.
User’s Manual
− 46 −
identiFINDER
© target systemelectronic gmbh. - All rights reserved
In course of changes the step size for both parameters which is
effected by “+” or “–“ increases gradually. It might be necessary to
reset the step size to 1 by changing the direction from “+” to “–“ or
from “–“ to “+”. To disable a preset, chose the setting “none”,
which can be found in the sequence below “1”.
If one preset parameter is different from “none” the identiFINDER
stops data taking after the pre-set period. The spectrum must be
stored or cleared before a new data acquisition can be started.
It is not possible to set both presets (real and live time)
simultaneously.
7.9 Do Calibration
This entry provides a means for re-calibrating the device. Re-calibration
is not a routine operation but may be used in order to improve the
identification by re-calibrating the device. The identiFINDER performs
the identical calibration procedure as after starting the device.
This command starts the re-calibration of the identiFINDER instrument
immediately after selecting it. Before pressing this menu item, please
make sure that little external radiation is present.
Figure 30
Re-Calibration of the device
If the calibration fails, e.g. due to unfavourable radiation background
conditions or insufficient statistics of the radiation, the failure is
substantiated by an error message (see Table 3 for troubleshooting tips)
and an advice of how to proceed.
User’s Manual
− 47 −
identiFINDER
© target systemelectronic gmbh. - All rights reserved
Error Message Possible Reason
What to do
real time = 0
Internal error
Call service
no counts
No detector
available, Detector
failure or HV
failure.
Check detector by using
a radioactive source and
the SPECTRUM mode.
Unknown
source present.
Remove all
sources and
press AGAIN
Radiation
background too
high to find the
correct gamma line
or wrong
adjustment of
noise level.
Check for presence of
radiation sources.
Leave the area of
increased background
activity.
Move the calibration
source (if external Cs-137
available) away from
device.
Check count rate in low
background area.
No reference
source present
Cannot adjust
fine gain.
Remove all
sources and
press AGAIN.
Wrong HV value
(detector
exchanged, device
temperature out of
range) or low
activity.
Try using an external Cs137 source (if available)
for calibration.
Activity too low to
for calibration or
very strong
temperature step.
Check for presence of
radiation sources.
Check temperature of
the device.
Leave the area of
increased background
activity.
Use stronger calibration
source (if applicable) to
increase the desired
gamma activity.
Check temperature of
User’s Manual
− 48 −
identiFINDER
© target systemelectronic gmbh. - All rights reserved
the device.
Calibration
interrupted by
user
Calibration
procedure aborted
by the user.
The re-calibration was
aborted and can be
repeated at any time.
Table 3
Calibration Errors
In case of an unsuccessful calibration, the user is given three options:
“CONTINUE” to go on acquiring data for calibration, which is the most
efficient way to precede in case of low count rate errors (i.e. “No
reference source present”). The “AGAIN” option should be used if the
device shows “Unknown source present” or “Cannot adjust fine gain”,
since the calibration will start from scratch. If the “EXIT” button is used,
the calibration will terminate unsuccessfully.
7.10 Setup Disp./Time
To change the settings for the display or the internal clock, mark one of
the entries shown in Figure 31 by moving the highlighted field with the
left key (“DOWN”) and press “SELECT” to enable changes.
Figure 31
Selectable options in menu “Setup Disp./Time”
Display Settings
In the display settings menu (Figure 32) mark either “Language”,
“BkLight[s]”, “Contrast” or “AutoOff[m]” by moving the inverted field
(“DOWN”) and press “SELECT” to make changes. “BACK” returns the
identiFINDER to the prior display.
User’s Manual
− 49 −
identiFINDER
© target systemelectronic gmbh. - All rights reserved
Figure 32
Options in the menu “Display Settings”
Language
This command is used to select the language. Possible settings are
“ENG” for English, “FRA” for French, “SPA” for Spanish, “DEU” for
German or “RUS” for Russian.
Make sure you will be able to operate the identiFINDER in the
language you have selected. The language will change after
confirming with the middle key (“ACCEPT”) and leaving the
screen.
BkLight[s]
Every button operation illuminates the display for the selected period.
Values from 5 to 60 seconds are possible (step size 1).
Contrast
The LCD display is very sensitive to the ambient temperature. This effect
is internally compensated. Extreme temperatures might require a
manual readjustment. Values from 0 to 40 are possible (step size 1).
A.Off[min]
In all modes except for DOSE rate and FINDER mode, the identiFINDER
will automatically switch off a selectable time after the last button
operation. Values from 1 to 60 minutes or ”never” are possible (step size
1). Shortly before the device switches off a tone sounds (only if the
speaker has been enabled!). Within the next 5 seconds the switch off can
be disabled by pressing one of the left, middle or right keys twice.
Date/Time
In this menu the internal date and time can be set.
User’s Manual
− 50 −
identiFINDER
© target systemelectronic gmbh. - All rights reserved
Figure 33
Display for setting internal date and time
Each digit must be changed separately. Mark the digit by moving the
black background (“SKIP”) and modify by “+”. “EXIT” returns the
identiFINDER to the prior display.
Date
The requested format is Dd.Mm.Yy. Due to internal consistency checks,
it may be necessary to change d before D (or vice versa) and m before M
(or vice versa) in order to achieve an allowed setting at all times.
Time
The requested format is Hh.Mm. Due to internal consistency checks, it
may be necessary to change h before H (or vice versa) in order to achieve
an allowed setting at all times.
7.11 Maintenance Menu
After opening the “Maintenance” menu of the identiFINDER instrument
the display shown in Figure 34 will appear:
User’s Manual
− 51 −
identiFINDER
© target systemelectronic gmbh. - All rights reserved
Figure 34
”Maintenance” display
One of five different entries can be marked (move the inverted field by
“DOWN”) and selected (“SELECT”) afterwards:
Change Password
This menu item provides for two options to set and clear the password
that allows access to the EXPERT USER MODES.
Set Password
Figure 35
Display for setting password
The password is defined as a combination of exactly seven letters (“L”,
“M” and “R”). After entering the desired combination of seven letters,
confirm the password with the right key (“ACCEPT”) or “CHANGE”
the password with the left key. To “ABORT” the password selection, use
the middle button. In Figure 36 the password protection of the EXPERT
USER MODES is summarized:
User’s Manual
− 52 −
identiFINDER
© target systemelectronic gmbh. - All rights reserved
Figure 36
Password protection of the EXPERT USER MODES
When setting a password, make sure to remember it. There is no
way to enter the EXPERT USER MODES without a valid
password (once the EXPERT USER MODES have been exited).
Clear Password
Selecting “Clear Password” will erase the existing password without any
additional notice.
Show Status
User’s Manual
− 53 −
identiFINDER
© target systemelectronic gmbh. - All rights reserved
Three main status parameters are shown immediately, some more can be
reached by “MEMORY”. The “MEMORY” display shows the software
version installed and performs a test of its SRAM memory. The device
Serial number is displayed as well as the current date and time
information.
The first line of the “Show Status” menu reports the software (“SW”) and
hardware (“HW”) revision of the device.
The parameter “Battery” displays the voltage of the powerPACK or
powerPACK plus, the nominal voltage of which is roughly 5V (all 4 AA
Batteries fully charged). The device will switch off automatically, if the
battery level drops below a specific voltage level.
The “BackupBat” entry shows the status of the internal battery
supporting the memory of the identiFINDER. Possible displays are “OK”
or “EMPTY” (data acquisition is still possible when “EMPTY” is
displayed). This backup battery is not accessible for the customer, to
replace it please contact the manufacturer.
Also the High Voltage applied to the photomultiplier tube can be read.
Factory Defaults
If this choice is confirmed once more, the device will automatically
restore the factory settings and the unit will switch off automatically.
This function will erase all user defined settings. It is advisable to
use this feature only in emergency cases.
EXPERT USER MODES
EASY MODES
1
Menu Level
2
3
4
5
Parameter
Default
(ANSI)
Default
(IAEA)
Time [s]
No. of Nuc
Library
30
2
Secur.
60
2
Secur.
none
none
none
none
6
DOSE RATE
FINDER
IDENT
OPTIONS
More Options
Show Spectrum
Identify Options
Identify Settings
User’s Manual
Edit Isotope List
Presets Setup
Real [s]
Live [s]
− 54 −
identiFINDER
© target systemelectronic gmbh. - All rights reserved
Do Calibration
Advanced Options
Setup Disp./Time
Display Settings
Date / Time
Language
BkLight [s]
Contrast
A.Off[min]
Date
Time
Maintenance
Change Password
Password
Set Password
Clear Password
Show Status
Factory Defaults
Erase all Spectra
Factory Test
Stabilization
Source Stab.Status
PSA Stab.Status
LED Stab.Status
Cs-137
Calibration Source
K-40
Gamma/N Counting
Time [0.1s]
Finder Options
Sensit.[%]
IntTime [s]
Doserate Options
Unit
Alarm Options
Sound
Alarm Indications
Vibrate
Light
Dose alarm
Dose alarm Lv
Dose warning
Dose rate alarm
Doserate Alarm Lv
Dose rate
warning
N cpm
Neutron Alarm Lv
ENG
20
40
never
Dd.Mm.Yy
Hh:Mm
ENG
20
40
never
Dd.Mm.Yy
Hh:Mm
none
none
x
(n.a.)
x
(n.a.)
5
100
15
Sv/h
5
100
15
Sv/h
ON
ON
ON
ON
ON
ON
0.20 Sv
0.20 Sv
0.15 Sv
0.10 mSv/h 0.10 mSv/h
0.04 mSv/h
10 cpm
-
Table 4
Factory Defaults
Erase all Spectra
This feature will erase all stored spectra of the instrument. The user is
asked “Erase all stored Spectra?” and has to reconfirm by pressing the
middle key (“YES”).
User’s Manual
− 55 −
identiFINDER
© target systemelectronic gmbh. - All rights reserved
Factory Test
Although there is no danger using this feature, it should be used only by
service engineers and/or trained users. It provides tools for testing some
components of the identiFINDER instrument.
The identiFINDER will start the test routines immediately after this
Menu Item has been selected.
First, the keys will be checked: The identiFINDER will ask the user to
press the buttons (see Figure 37).
Figure 37
Hardware test: Keyboard-left key
If the left key signal is recognized, the test will proceed to the next point,
automatically. If the key press is not recognized or the user did press a
wrong button, the device will display:
Keyboard Error
Left key not ok!
Then, the user must press the middle key (similar to Figure 37).
If the middle key signal is recognized, the test will proceed to the next
point, automatically. If the key press is not recognized or the user did
press a wrong button, the device will display:
Keyboard Error
Middle key not ok!
Last remaining test is the right key (similar to Figure 37). If the right key
signal is recognized, the test will proceed to the next point,
automatically. If the key press is not recognized or the user did press a
wrong button, the device will display:
User’s Manual
− 56 −
identiFINDER
© target systemelectronic gmbh. - All rights reserved
Keyboard Error
Right key not ok!
Next, the functionally of the display can be verified. The device will
show three different pictures on screen: the checker board, a plain black
and plain white display.
The following screens will tell the operator:
Hardware test
Displaying for 2 s
Checker board
The display should switch into a black and white pixilated picture. And
after two seconds, the test proceeds with the question:
Figure 38
Hardware test: After display of the checker board
A confirmation with YES will direct the device to the next test, if the
operator doesn’t do anything or presses the NO button, the test will
proceed after a short while.
Hardware test
Displaying for 2 s
Black display
The display should turn black, completely. And again the user needs to
confirm the functionality of the display (similar to Figure 38).
A confirmation with YES will direct the device to the next test, if the
operator doesn’t do anything or presses the NO button, the test will
proceed after a short while.
User’s Manual
− 57 −
identiFINDER
© target systemelectronic gmbh. - All rights reserved
Hardware test
Displaying for 2 s
White display
The display should turn white.
Figure 39
Hardware test: After display of the white screen
A confirmation with YES will direct the device to the next test, if the
operator doesn’t do anything or presses the NO button, the test will
proceed after a short while.
The tests for the alarm LEDs will follow:
Figure 40
Hardware test: During flashing LEDs
Please observe the red and blue LEDs during this display. They should
toggle on and off (one at a time).
Here, neither the confirmation with YES nor the denial will show any
influence on the test.
User’s Manual
− 58 −
identiFINDER
© target systemelectronic gmbh. - All rights reserved
Last but not least the speaker will be checked. Please make sure, the
correct speaker setting has been selected (MENU “Options”, “Alarm”,
“Alarm Indications”). The test will work for both the head set and the
internal speaker setting. If the sound has been switched off, the
hardware test will not alarm.
Figure 41
Hardware test: During speaker performance test
7.12 Stabilization
The states of the stabilization are important for the technical staff only.
They will not be described in detail.
There are different menu entries for the different stabilization processes:
Source Stab. Status: Stabilization is done with an external source (on
request only; use “Do Calibration”, Chapter 7.9, therefore).
PSA Stab. Status: PSA is the abbreviation for Pulse Shape Analysis; this
mechanism uses the width of the detected signal to determine different
system variables (e.g. discrimination of noise events).
7.13 Calibration Source
This entry allows selecting a source type for the re-calibration
procedure. Please note the comments and explanations made in
Chapter 7.9 (“Do Calibration”)
User’s Manual
− 59 −
identiFINDER
© target systemelectronic gmbh. - All rights reserved
7.14 Data Logging
The identiFINDER is able to store dose rate and neutron count rate
values together with the time information in a log file. Up to 40,000
entries can be stored, before old values are overwritten. Before starting a
new log file, the memory can be cleared.
Timer
The storage time frequency can be selected; possible entries are 2 seconds
up to 30 minutes. The timer must be larger than zero in order to be able
to start the data logger. After the start of the new session, the user is
asked whether to delete the old data.
Status
The status of the logger is either on or off.
The data logging will activated only as long as the device is
switched on. As soon as the device is off, the data logger will be
switched off as well. The data will still be available for read-out.
To review the dose rate and neutron rate log file, a connection to the PC
is mandatory. Please refer to Chapter 10 for details.
Figure 42
Dose rate and neutron count rate logging
User’s Manual
− 60 −
identiFINDER
© target systemelectronic gmbh. - All rights reserved
8 Connecting the identiFINDER to
the PC
Before connecting the device to a PC, please install the delivered target
software winTMCA32 and identiFINDER transfer according to the
installation guide that can be found on the CD cover.
In any case you may only operate one program at a time. It is not
possible to use both software packets simultaneously.
There are now several possibilities to connect the device to the PC, be
aware that the device must be switched on before connecting it to the
computer.
8.1 Serial Connection without interface box
Connect the corresponding miniUSB-to-serial cable to a COM port of the
PC and the other side to the instrument.
8.2 Serial Connection with the interface box
Connect the miniUSB-to-serial cable to a COM port of the PC and the
other side to the interface box. Use a miniUSB-to-miniUSB cable to
connect the interface box with the device. Additionally the power supply
can be (but does not necessary have to be) connected between mains
socket and interface box.
User’s Manual
− 61 −
identiFINDER
© target systemelectronic gmbh. - All rights reserved
Figure 43
Charging the batteries and connection to PC with -orange LED (trickle
charge), -green LED (external power), -mini USB connection to
identiFINDER, -USB connection to PC, -external power supply, interface box, -serial connection to PC
User’s Manual
− 62 −
identiFINDER
© target systemelectronic gmbh. - All rights reserved
8.3 USB Connection
Use a miniUSB-to-miniUSB cable to connect the interface box with the
device. Connect the USB-to-USB cable to a USB port of the PC and the
other side to the interface box. Additionally the power supply can be
(but does not necessary have to be) connected between mains socket and
interface box.
The operating system will detect a new USB device and try to install two
separate drivers. Please have the installation CD prepared when
connecting the identiFINDER to the USB port of the PC for the first time.
Installing the driver for the Interface box
Connect the interface box to your PC (USB port) and insert the software
CD into your CD ROM drive.
Click “Next” when you are supposed to
(recommended) and choose your CD ROM drive.
search
for
driver
Accept the driver that was found (ftdibus.inf). If necessary, browse to the
directory of your CD.
Finish the first part of the installation.
Now a second INF file will be installed (ftdiport.inf). Follow the
instructions on the screen accordingly.
Changing the COM port number of a USB port
From Device manager, select “view devices by type” then “Ports (COM
and LPT)”. Select the USB serial port and click “Properties”. Select the
“Port Settings” tab and then click “Advanced”. Choose the required
COM port number from the list and click OK.
If a modem is attached to the USB serial port when the port
number is changed, it will continue to work under the new port
number.
If a modem had been attached to the USB serial port but was not
connected when the port number was changed, it will not work
when re-attached under the new port number. In this case, the
modem must be removed from the system and re-installed.
User’s Manual
− 63 −
identiFINDER
© target systemelectronic gmbh. - All rights reserved
In general, if there are devices in use that have been previously attached
to the USB serial port, they may not work after the port number has been
changed. If this is true, remove the device from the system and re-install
it.
8.4 Starting the winTMCA32 or Transfer
Software
The software should detect the connected device automatically (the
device must be running). The first pop up (Figure 44 or similar) may be
ignored; it does not contain any important information. Click “NO” – it
will never show up again.
Figure 44
Pop-up when software has been started for the first time
A second pop up window (Figure 45) should appear stating an
identiFINDER has been connected. Please confirm by clicking OK and
the software will start.
Figure 45
Message when the identiFINDER has been detected by the software
If the device is not found (i.e. the pop up does not appear) a new text file
named TMCAINIT.TXT must be created in the winTMCA32 installation
path subdirectory .\CONFIG containing the following line:
p=1,F,n,384
User’s Manual
− 64 −
identiFINDER
© target systemelectronic gmbh. - All rights reserved
The ‘n’ represents the COM port number where the identiFINDER is
connected to. If you use the serial COM port (RS232) n is in most cases
equal to 1, whereas if you use the USB interface, n is in general larger
than 2.
User’s Manual
− 65 −
identiFINDER
© target systemelectronic gmbh. - All rights reserved
9 Basics of the winTMCA32 Software
This chapter will give a rough overview of the basic winTMCA32
functions, available for the identiFINDER. For a detailed guide and
additional information, please refer to the winTMCA32 manual.
Switch on the device and start your winTMCA32 software.
Enter the “identiFINDER” menu. You will be given the choice of four
selections (Figure 46):
Figure 46
winTMCA32 software and important menus
9.1 Load Actual Spectrum
This menu item loads the current spectrum from the identiFINDER
memory to the winTMCA32 display. The preliminary spectrum name
will be aktspecf.spc. If you get an error message when downloading the
spectra check all cable connections first. Please make sure that no other
application is trying to access your serial or USB port.
User’s Manual
− 66 −
identiFINDER
© target systemelectronic gmbh. - All rights reserved
9.2 Load All Spectra
This menu item loads all available spectra from the identiFINDER
memory to the winTMCA32 display. Each spectrum will appear in the
spectrum window temporarily. The last spectrum will remain at the
display and all others will be stored in the spectrum folder of the
winTMCA32 installation directory. The names will be composed of the
identiFINDER serial number, the date and time information, when the
spectrum has been stored and the storage position in the identiFINDER
memory.
9.3 Nuclide Selection
The automatic identification algorithm of the winTMCA32 software has
an independent library of nuclides available for identification (Figure
47). Hence they can be switched off or on with this menu.
The nuclide identification of the winTMCA32 software is done with the
menu “compute” “identify one” for one possible component in the
radioactive source or “compute” “identify two, three, four” for two,
three or four possible element indications.
User’s Manual
− 67 −
identiFINDER
© target systemelectronic gmbh. - All rights reserved
Figure 47
winTMCA32 nuclide library for identification
9.4 Send Spectrum to Device
Any spectrum can be transferred to the identiFINDER from the
winTMCA32, except spectra with a length that is not equal to 1024
channels. Please be aware that the actual spectrum in the device will be
erased. It will take a couple of seconds to transfer the spectrum.
9.5 Nuclide Identification
A spectrum displayed by the winTMCA32 can be analysed according to
its compounds. Use the menu “compute” “identify one” for one
possible component in the radioactive source or “compute” “identify
two, three, four” for two, three or four possible elements.
A pop up window (Figure 48) will appear, giving the information on the
nuclide identification.
User’s Manual
− 68 −
identiFINDER
© target systemelectronic gmbh. - All rights reserved
Figure 48
winTMCA32 nuclide identification results
The results of the nuclide identification may vary slightly between the
results of the identiFINDER and the winTMCA32.
User’s Manual
− 69 −
identiFINDER
© target systemelectronic gmbh. - All rights reserved
10 Basics of the Transfer Software
This chapter will give an overview of the identiFINDER transfer
software.
Switch on the device and start the identiFINDER transfer software.
Click on the button “Preview” in order to scan for all stored spectra and
log files available on the connected identiFINDER. Depending on the
amount of data this transfer may take some time. The received data will
be displayed in the central window below the label “Stored files”.
The central part of the status bar indicates the amount of lines that have
been read out of the log files (in Figure 49, 4 Lines have been stored in
that file). As long as this number is counting, there are still data
downloaded from the identiFINDER.
The file names of the received data are composed of the identiFINDER
serial number, the storage date and time as well as the type of file:
Names of stored spectra are e.g.
“ident2650-89_2005_06_15_16-27-46-002.spc”, stating the origin device’s
serial number 2650-89, the date of storage 15th of June 2005 at 4:27:46PM
on memory position 2.
Names of log files are e.g.
“ident2650-89_Alarm_Log_2005_06_15_16-27-46-002.txt”, stating the
origin device’s serial number 2650-89, the date of last entry to the alarm
log file was 15th of June 2005 at 4:27:46PM.
The dose rate logger has to be switched on in order to receive any data.
This can be done with the menu “Data Logging” (Chapter 7.14).
The right window shows the content of the destination directory of the
PC. This directory can be altered using the button
, which opens a
folder select dialog.
Use the mouse to select one or more files of the stored ones. If one or
more are selected you have the choice to copy them to the desired folder
on the PC ( ) or send them as attachment via email ( ). Pressing the
button
copies all files to the specified folder.
If only one file is highlighted a rough preview is shown in the display
window on the left. This is also true for one selected file in the
destination folder.
User’s Manual
− 70 −
identiFINDER
© target systemelectronic gmbh. - All rights reserved
Double-clicking on files that have already been transferred to the PC
(hence these are displayed on the right hand side), the adequate program
will open to review this file more detailed.
Alarm Log: The device stores up to 150 alarm events, the last ones will
be overwritten if necessary. If the log file is not cleared, only the last 150
data records are available.
Dose Log: Up to 40500 dose rate and neutron count rate values
(including time information) can be stored in the device memory. The
frequency of storage can be chosen individually.
If there is no memory left, the oldest data will be erased and overwritten.
Only the last 40500 values can be extracted from the identiFINDER.
Per default, this data logger is not available. To switch it on, a time
interval has to be chosen which defines the speed of data logging.
The syntax of the entries is the following:
“NNNNN dd.mm.yyyy HH:MM:SS g.ggg n.nnn” with
NNNNN
position of storage (descending)
dd.mm.yyyy
date of storage
HH:MM:SS
time of storage
g.ggg
dose rate value
n.nnn
neutron count rate value (optional)
To exit the identiFINDER transfer software, use the button “Quit”.
Figure 49
identiFINDER transfer software screen
User’s Manual
− 71 −
identiFINDER
© target systemelectronic gmbh. - All rights reserved
11 Maintenance
11.1 Battery Indication
The actual measured voltage is shown in the battery symbol
at the
upper left hand corner the display. Typical values are 5V for fully
charged batteries or 6V in case the powerPACK plus is currently being
charged.
In case of the message “Low Battery Warning” accompanied by an
audible signal the power will5.break down within a few minutes. If you
are using the powerPACK plus, connect the battery charger immediately
or save all data and switch off the identiFINDER to replace the
powerPACK.
If the voltage drops below 3.9V, the device will switch off
immediately.
On the back side of the device, two LED are indicating the state of
charging: The green LED on the right hand side illuminates when the
external power supply is connected to the identiFINDER, the orange
LED on the left hand side is switched on only while the powerPACK
plus is currently being charged up in trickle charge mode.
11.2 Charging the powerPACK plus
You need the following equipment
• Power supply (charger),
• identiFINDER system cable,
• powerPACK plus inserted into the device
to charge the powerPACK plus.
Connect the power cable to the mains socket and the device directly.
Observe the back sided LEDs.
An alternative is using the interface box: Connect the identiFINDER
system cable to the identiFINDER interface box and charging socket
User’s Manual
− 72 −
identiFINDER
© target systemelectronic gmbh. - All rights reserved
using the mini-USB cable (Figure 50). Then connect the power cable to
the interface box of the identiFINDER and the power supply to your
walls outlet. The green LED on the back side of the identiFINDER is
indicating that the device is now operated with external power.
The powerPACK plus is charged in parallel. As long as the powerPACK
plus of the identiFINDER is charged in the fast charging mode the
orange charge control LED on the back side of the instrument is ON. If
the powerPACK plus is fully charged the charge control logics switches
to the “trickle charge” mode, and the charge control LED is OFF.
Do not open the powerPACK plus. The warranty will be void if
seal is broken.
The powerPACK can NOT be used to charge any batteries, even
rechargeable batteries will not be charged inside the device! This
feature prevents overheating or even explosion of nonrechargeable batteries. Make sure to charge rechargeable batteries
outside the identiFINDER with an external charging unit.
User’s Manual
− 73 −
identiFINDER
© target systemelectronic gmbh. - All rights reserved
Figure 50
Charging the batteries and connection to PC with -orange LED (trickle
charge), -green LED (external power), -mini USB connection to
identiFINDER, -USB connection to PC, -external power supply, interface box, -serial connection to PC
User’s Manual
− 74 −
identiFINDER
© target systemelectronic gmbh. - All rights reserved
11.3 Replacing the powerPACK plus battery
pack
To replace the powerPACK plus
• Switch off the identiFINDER.
• Turn the screw (battery pack lock) on the battery lid anti-clockwise
until the lid can be removed (Figure 53), it is not necessary to
unscrew the lock completely.
• Shift off the handle towards the back side of the device.
• Take the powerPACK plus out of the handle and replace it with a
new one. Do not open the powerPACK plus. With the additional
powerPACK you need 4 AA-size batteries.
When re-assembling the instrument
• Make sure that the powerPACK plus is in the correct position and
orientation as shown in Figure 53,
• Make sure that the lid fits tight and that the housing is closed
accurately and the screw fixed,
• Connect the power supply in order to re-charge the powerPACK
plus, check the LEDs on the back side of the device. At least the
green LED should light up indicating the external power
connection.
The batteries are not fully charged on reception of the Instrument.
Batteries have to be inserted into the identiFINDER and the device
has to be connected to power supply before operation for at least
12 hours.
Do not open the powerPACK plus. The warranty will be void if
seal is broken.
User’s Manual
− 75 −
identiFINDER
© target systemelectronic gmbh. - All rights reserved
Figure 51
target’s battery pack powerPACK plus
11.4 Replacing the powerPACK or inserting
standard batteries
To replace the powerPACK or insert other standard AA-size batteries
• Switch off the identiFINDER.
• Turn the screw (battery pack lock) on the battery lid anti-clockwise
until the lid can be removed (Figure 53), it is not necessary to
unscrew the lock completely.
• Shift off the handle towards the back side of the device.
• Take the powerPACK out of the handle.
• Open the powerPACK by unscrewing the screw completely. Insert
4 (fully charged) AA-size batteries as demonstrated on Figure 52.
Make sure to charge rechargeable batteries outside the
powerPACK with an external charging unit. Be aware that it is not
possible to charge any kind of batteries using the powerPACK.
Figure 52
Placing standard batteries into the powerPACK
User’s Manual
− 76 −
identiFINDER
© target systemelectronic gmbh. - All rights reserved
• Close the powerPACK and tighten the screw.
When re-assembling the instrument
• Make sure that the powerPACK plus is in the correct position and
orientation as shown in Figure 53,
• Make sure that the lid fits tight and that the housing is closed
accurately.
Figure 53
Replacing the powerPACK or powerPACK plus
User’s Manual
− 77 −
identiFINDER
© target systemelectronic gmbh. - All rights reserved
12 Trouble Shooting
12.1 Cannot switch on the device
Check the batteries: Open the battery-box at end of the grip. Check if the
powerPACK plus or powerPACK with 4 AA-size batteries is inserted
and well charged.
Charge the powerPACK plus if necessary with the internal charger:
Connect the device with the provided cable and power supply to a mains
socket. Or insert a new set of batteries into the powerPACK.
Press ON button for a few seconds until the lights flash up.
Try again 3-4 times if necessary.
If these steps are not successful the identiFINDER must be sent back to
the manufacturer.
12.2 Failing initial calibration
Switch identiFINDER OFF and wait a few seconds. Switch the
identiFINDER back ON.
Wait for the result of the initial calibration.
There are a couple of reasons for a failing calibrations and ways to avoid
this failure; they are summarized in Chapter 7.9.
If this problem persists, the device must be sent back to the manufacturer
12.3 Apparently wrong dose rate indication
Switch identiFINDER OFF and wait a few seconds. Switch the
identiFINDER back ON.
Wait for the result of the initial calibration.
If the initial calibration is completed successfully, and the displayed
value is still out of range, please contact the manufacturer.
User’s Manual
− 78 −
identiFINDER
© target systemelectronic gmbh. - All rights reserved
12.4 Apparently wrong nuclide identification
Possible reasons for wrong isotope identification are:
Failed energy calibration
Failed gain stabilization
The best way to adjust the energy scale is to start with a new initial
energy calibration. The calibration is easiest done by switch OFF/ON the
device, or in the EXPERT USER MODES with “Do Calibration.
12.5 Nuclide identification not possible or
‘Not in Library’
Possible reasons that the device is not able to identify the nuclide are:
The count-rate is too low: move closer to source if possible.
The calibration or stabilization has failed or is temporarily switched off.
Calibrate the identiFINDER (by either switching the device OFF and
back ON or using the “Do Calibration” menu in the EXPERT USER
MODES) and wait for the “Calibration successful”-message.
The identification libraries may have been altered, check the settings in
the “Identify Options” menu (Chapter 7.7).
If the count-rate is high enough, the calibration is renewed but still a
‘Not in Library’ appeared, save the spectrum and ask an expert.
12.6 Neutron Alarm but no source present
The neutron averaging is done in a time frame of one minute. If the
device had been close to a neutron source it takes one minute to show
the actual count rate. The only possibility to suppress a neutron alarm
duration of one minute after the detection, switch the device OFF and
back ON.
User’s Manual
− 79 −
identiFINDER
© target systemelectronic gmbh. - All rights reserved
12.7 No sound in case of alarm
Check the “Alarm Indications” in the “Alarm Options” menu: Is the
sound switched on?
Check the alarm levels in the “Alarm Options” menu: Is the value
appropriate?
If the sound is switched on and the dose/dose-rate/neutron
measurement is above the adjusted alarm level but still no acoustic
signal resounds, choose the “Maintenance” menu in the EXPERT USER
MODES to check for hardware failures.
12.8 No vibration in case of alarm
Check the “Alarm Indications” in the “Alarm Options” menu: Is the
vibrator switched on?
Check the alarm levels in the “Alarm Options” menu: Is the value
appropriate?
If the vibrator is switched on and the dose/dose-rate/neutron
measurement is above the adjusted alarm level but still no vibration
signal appears, choose the “Maintenance” menu in the EXPERT USER
MODES to check for hardware failures.
12.9 No LED indication in case of alarm
Check the “Alarm Indications” in the “Alarm Options” menu: Is the LED
indication (“Light”) switched on?
Check the alarm levels in the “Alarm Options” menu: Is the value
appropriate?
If the light is switched on and the dose/dose-rate/neutron measurement
is above the adjusted alarm level but still no LED signal flashes up,
choose the “Maintenance” menu in the EXPERT USER MODES to check
for hardware failures.
User’s Manual
− 80 −
identiFINDER
© target systemelectronic gmbh. - All rights reserved
12.10
FINDER Mode does not show
anything
The diagram in FINDER mode will be rescaled with every new dose rate
value. Wait a few seconds until the display has changed.
You may also press DOSE to leave the FINDER mode and FINDER to
enter it again.
12.11
Device switches off automatically
There are two reasons why the identiFINDER switches off automatically:
The powerPACK or powerPACK plus is empty. Check the voltage and
connect the external power supply to the device. Refer to Chapter 0
(“Maintenance”) for details.
The function “Auto-Power-Off” has been enabled. Check the setting in
the menu “Setup Disp./Time”,”Display Settings” (Chapter 7.10).
12.12
Password is set but unknown
The device is only usable in the EASY USER MODES or must be sent
back to the service.
12.13
No Spectrum Transfer to PC
Check all cables and connections.
Switch the device on before starting the software, if necessary close up
the software wait a few seconds and then start it again.
Check for the pop-up window (Figure 45), if it does not appear, create a
text file as described in Chapter 8.4.
Make sure no other application is using the desired COM port, if
necessary close up this application (also, it is not possible use the
winTMCA32 and the Transfer software simultaneously).
User’s Manual
− 81 −
identiFINDER
© target systemelectronic gmbh. - All rights reserved
If you are using the USB port it may be necessary to check the settings,
please refer to Chapter 8.3 for details.
User’s Manual
− 82 −
identiFINDER
© target systemelectronic gmbh. - All rights reserved
13 Specifications
Features
Functions
Dose rate display, radiation guard
and alarm annunciator, source
finder, gamma ray spectrometer,
spectrum
analyser,
nuclide
identifier, spectrum memory, dose
rate logger, neutron indicator
Main detector
∅ 1.4″ × 2“ NaI(Tl) scintillator
(other detectors available on
request)
Integrated ancillary detectors
Geiger-Mueller tube (GMT) for
high dose rate
measurements;
moderated He-3 tube (He3T) for
neutron detection
Integrated electronics
Digital Multi-Channel Analyzer for
main detector: Flash, ADC, Digital
Signal Processor (DSP), Enhanced
Filter Coprocessor (EFCOP); LED
pulser; HV power supplies for main
and ancillary detectors; Shaping
Amplifiers and Discriminators for
ancillary detectors (GMT, He3T);
serial interface (RS232, USB)
Physical Dimensions
Weight
1250 g including batteries and
NaI(Tl) detector
Temperature range
– 15 °C to + 55 °C
Protection class
IP54 (Splash proof, dust tight)
Drop test
0.8 m on concrete
Dimensions
248 mm × 94 mm × 76 mm
User’s Manual
− 83 −
identiFINDER
© target systemelectronic gmbh. - All rights reserved
Spectrometry System Specifications
Detector type
NaI(Tl)
HV-Bias
200 – 1275 V
Shaping
Digital filter
Resolution
7.0 % to 7.5 % at 662 keV (typical)
Throughput rate
>100,000 cps
Energy range
15 keV to 3 MeV
INL, top 99%
<0.05 %
DNL, top 99%
<0.1 %
Spectrum characteristics
spectrum length 1024 channels;
linearized,
calibrated,
and
stabilized energy scale
Spectrum memory
100 spectra at 1024 channels
Real time presets
1 s – 1,000,000 s or none
Live time presets
1 s – 1,000,000 s or none
Dose / dose rate measurement specifications
Sensitivity (137Cs)
>500 cps per µSv/h
or >5000 cps per mrem/h
Dose rate range (total)
0.01 µSv/h to 1 Sv/h
or 1 µrem/h to 100 rem/h
Dose rate range NaI
0.01 µSv/h to 500 µSv/h
Dose rate range GM Tube
500 µSv/h to 1000 mSv/h
Dose range
0.1 µSv to 1 Sv
or 10 µrem to 100 rem
Energy range
NaI(Tl): 30 keV to 3.0 MeV
GM:
Alarm levels
User’s Manual
60 keV to 1.6 MeV
Four preset levels
− 84 −
identiFINDER
© target systemelectronic gmbh. - All rights reserved
Special Features
Stabilization
Internal Cs-137 stabilization source
Stability
±1.0 % to ±1.5 % (typical)
(-15°C to +55°C, 30 to 100,000 cps)
Calibration
Automatic energy calibration and
stabilization;
detector efficiency calibration
Remote Control
RS232 interface, USB adapter;
setup and control including online
measurements
Language
English, French, German, Russian,
Spanish (choice of 4)
Batteries and Accessories
Battery pack
powerPACK plus (rechargeable)
Standard batteries
powerPACK for 4 pieces AA-size
1.2 V - 1.8 V batteries (rechargeable
NiMH, NiCd or non-rechargeable
Alkaline, MnO, Li)
Operating time
Up to 8 hours with 2300 mAh
NiMH in DOSE rate mode
Accessories
AC adapter for stationary use and
recharging
powerPACK
plus;
RS232 and USB connecting cables
and
connector
box;
holster, carrying case
Optional: earphones for alarm
indication, external battery charger,
neutron moderator, Potassium box,
car adaptor, EOD source kit
User’s Manual
− 85 −
identiFINDER
© target systemelectronic gmbh. - All rights reserved
Controls, Display, Interfaces
Keyboard
4 soft buttons
Alarm indicators
Light (red and blue
sound, and vibration
External power indicator
LED (green) on the backside
Charger indicator
LED (orange) on the backside
Display type
Monochrome LCD with backlight,
61 mm × 43 mm
Interface
RS232 and USB
LEDs),
Firmware
identiFINDER SW0.2.xxx
Installed on internal flash memory;
upgrade on request via serial port
Auxiliary PC Software
winTMCA32
Transfer
of
spectra
from
identiFINDER to PC and vice versa;
spectrum
visualization
and
analysis; remote setup and control
including batch procedures
identiFINDER Transfer
Transfer of multiple spectra from
identiFINDER to PC and vice versa;
transfer of logger data files
Hardware requirements
Personal
computer
(IBM
or
compatible) with Pentium or higher
processor, clock rate ≥ 500 MHz
MS Windows 98, ME, 2000,or XP
20 MB free disk space
XVGA graphic card
USB or RS232 interface
User’s Manual
− 86 −
identiFINDER
© target systemelectronic gmbh. - All rights reserved
(This space was intentionally left free for personal notes)
User’s Manual
− 87 −
identiFINDER
© target systemelectronic gmbh. - All rights reserved
(This space was intentionally left free for personal notes)
User’s Manual
− 88 −
identiFINDER
© target systemelectronic gmbh. - All rights reserved
(This space was intentionally left free for personal notes)
User’s Manual
− 89 −
identiFINDER
© target systemelectronic gmbh. - All rights reserved
14 Quick Reference Guide
14.1 At a Glance
User’s Manual
− 90 −
identiFINDER
© target systemelectronic gmbh. - All rights reserved
14.2 Switching ON the identiFINDER
Action
Illustration
Press
the
Remark
ON
Start-up screen
button
Red and blue
LED
flare
up
Start-up
screen
Initialization
screen
Wait
until
initial
the
Initialization screen.
Cs-137
calibration
After the initial calibration is finished
has
successfully, the instrument is ready to
finished
operate – the dose rate screen appears.
DOSE
rate
mode
The
instrument
is
ready
DOSE rate screen
to
Battery voltage in Volt is shown in the
operate.
upper left corner (“5.7”).
Dangerous
radiation
The stabilization status is shown in the
levels
upper right corner: “S”-OK, “N”-not OK
are indicated by
visual
Dose rate is shown in big letters and
and/or vibration
indicated by the (logarithmic) dose rate
alarms.
bar.
acoustic,
Neutron count rate is shown
All alarms are active
User’s Manual
− 91 −
identiFINDER
© target systemelectronic gmbh. - All rights reserved
14.3 Searching for a Radiation Source
Action
Illustration
Remark
From DOSE rate
Background measurement screen
mode, press “L” to
Count down of the time to go until the
switch to FINDER
background has been determined.
mode to localize
the
source
Background
measurement
Wait
until
FINDER screen
background
The height of the bars in the screen
measurement
is
increases the closer the device is moved
done
towards the source. Additionally a sound
FINDER screen
Move
with increased pitch will lead to the
source if the radiation is above the
the
background level.
identiFINDER,
watch the screen
Battery voltage in Volt is shown in the
and listen for the
upper left corner (“5.7”).
acoustic
signal.
The stabilization status is shown in the
You will be guided
upper right corner: “S”-OK, “N”-not OK
to the source of the
Local gamma dose rate is shown (“0.05
gamma radiation.
µSv/h”)
If the source is
Press “L” to return to the DOSE rate
located, you may
mode
- measure the local
dose
-
identify
Press “M” to characterize the source by
rate
applying radionuclide identification
the
nuclide
User’s Manual
− 92 −
identiFINDER
© target systemelectronic gmbh. - All rights reserved
14.4 Source Characterization / Nuclide
Identification
Action
Illustration
Remark
IDENT measurement screen
From DOSE rate or
FINDER mode, press
“M”
to
set
identiFINDER
Optimum identification results will be
the
obtained if the vertical black bar is in
in
the range indicated by the two arrows.
IDENT mode
The data collection can be aborted by
If possible follow the
pressing the right button (“EXIT”).
recommendations
“Move
closer
During the acquisition the actual dose
to
rate (0.05 µSv/h), the actual count rate
source” (count rate
(59 cps), and the dead time (0 %) are
too low for confident
shown together with the remaining
nuclide
acquisition time (24 s).
identification)
or
If the detected radiation exceeds the
“Move away from
alarm levels, the vibrator as well as the
source” (count rate
too
high
for
beeper will not be switched on. Only
an
the LEDs will (even if the LED is
optimum resolution)
switched off) indicate an alarm.
Wait for the results
Nuclide
of
characterizing the confidence of the
the
nuclide
analysis
list
comprises
a
number
identified nuclide(s) (1 to 10 for
increasing confidence, hyphen for a
Nuclide listing
weak signal), the nuclide classification
To store (“SAVE”) or
(Industrial, Medical, Nuclear, NORM
check
(“SPECTRUM”)
for Naturally Occurring Radionuclides
the
or OSI for On Site Inspections), and the
spectrum: button ‘M’
(depending
nuclide name and mass
on
current access rights)
User’s Manual
− 93 −
identiFINDER
© target systemelectronic gmbh. - All rights reserved
If the source activity
is too low, you may
continue
the
data
acquisition to obtain
better statistics
If the source can’t be
If the nuclide identification is finished,
identified, the device
press
shows:
(“SPECTRUM” or “SAVE”) key to
Not
in
Library!
(“EXIT”)
or
middle
switch back to the FINDER or DOSE
rate
To store or check the
mode
or
to
store/view
spectrum.
spectrum: button ‘M’
User’s Manual
right
− 94 −
identiFINDER
the