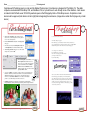
1
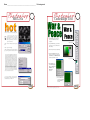
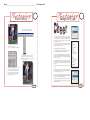
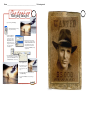
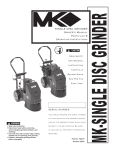
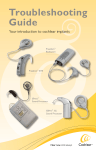
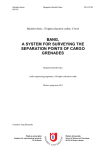
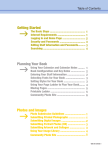
Name _____________________________________________ Club assignment:
Complete each Photoshop lesson in order, and the Wanted Poster project. Each lesson is designed for PhotoShop CS. The eMac
computers are loaded with PhotoShop CS3, and the iMacs CS5, so you will have to work through some of the directions. Each lesson
is located in the PubTech server 2013-2014 yearbook space in the Photography folder > PhotoShop lessons. Completion of each
lesson must be approved (red check in circle to right) before beginning the next lesson. (Images here contain the first page only of each
lesson)
Pho to s ho p
Cut Out Backgrounds
1. Open an image in Photoshop. (These instructions can be
used to remove any unwanted portions of an image, but here
we refer only to the background.)
2. From the Window menu select Layers. The Layers palette
will appear.
3. There will be just one layer listed, Background. Double-click
on the Background layer to unlock it and make it editable.
4. A New Layer options box will appear. Leave all the default
settings as they are and click OK.
PhoGlowing
to s ho p
1. Choose New from the file menu.
2. The New dialog box appears
Enter “Glowing” (or your headline) in the name field. Use the tab key to
move around the dialog box and enter the data as follows: Color Mode RGB
Width: 7in Height: 3 in Click OK. Your new canvas should appear.
3. Use the type tool to enter the text.
I used AYTDaria at 100 points. Any
font is fine. After typing your headline, flatten
your image. To flatten, ChooseLayers - Flatten Image.
5. From the Tools palette select the Eraser. On the
Eraser options bar beneath the menus across
the top of the screen, click the drop-down button
next to the brush diameter and set the Master
Diameter to 150 and the Hardness to 100%.
Further to the right on the options bar set both the
Opacity and Flow to 100%.
6. As you move the Eraser over your image you will see a large circle representing the eraser’s
brush stroke. Each time you click the eraser it will remove exactly what is inside that circle.
Click on the background area a couple of times to see the result. If it is erasing too
much at once, reduce the Master Diameter. You can continue to click individual
portions or you can click and drag to erase whole sections at once.
7. In Photoshop, transparent space is represented by a gray checkerboard. Continue erasing the
background until you see only the part of the image you want to keep and the rest as gray checkerboard.
This tutorial is for Photoshop CS & CS2. If you are using an earlier version of the software contact Jostens Tech Support with questions: 800 328-2435.
1
4. Next, Choose Filter - Artistic - Neon Glow. When the Neon
Glow window appears, adjust the glow size and brightness.
Also, double-click on the color swatch to choose the outer glow.
When you click OK, the background will become black creating
a multi-color glow effect, ranging from white to the color you
selected. If your not happy with the color, immediately go to Edit
- Undo and try another color.
Name _____________________________________________ Club assignment:
PhoHottoLava
s ho p
Pho
to s ho
Camouflage
Textp
1. File > New. Choose to have a black background.
2. Layer > New > Layer or click on
the New Layer button in the Layers
palette. Select "d" then "x" to change the
Foreground color to white. Click AltDelete (Option-Delete) to fill the new
layer with with white.
3. Filter > Render > Difference Clouds. Repeat step
twice.
4. Filter > Stylize > Find Edges.
5. Edit > Fade Find Edges. In the window that pops
up, select Pin Light for the Blend Mode. This will
Example after Difference Clouds 2x
1. From the File menu select New and
create a new RGB file with a white
background.
Paint Bucket Tool
2. Using the Text Tool type your headline.
A bold typeface such as AYT Genuine
will work best.
3. From the Layer menu select New Layer.
4. Click on the Foreground color swatch
and select a deep shade of green from the
Color Picker. Use the Paint Bucket Tool
to fill the layer with this new color.
Color Picker
Foreground Color
Example after Pin Light is applied
serve as the texture for the hot lava.
6. Layer > New Fill Layer > Solid Color. Name
the layer "Red Fire". Select Group with Previous.
Set Blend Mode to Color Burn. OK.
5. From the Filter menu
select Artistic >Sponge.
Make the Brush Size 2,
Definition 12, and
Smoothness 5.
Click OK.
6. From the Filter menu
select Noise > Median.
Make the Radius 7.
Click OK.
This tutorial is for Photoshop CS & CS2. If you are using an earlier version
of the software contact Jostens Tech Support with questions: 800 328-2435.
1
Name _____________________________________________ Club assignment:
Pho
toAway
s ho p
Paint
1. Open a color RGB image.
Pho
toinsType
ho p
Image
2. Click on the Brush tool and change the
mode of the brush from normal to color.
1. After opening the image and making sure the photograph
has enough resolution (follow the Digital Imaging Guidelines
in the 2006 YearTech User Manual), double-click on the
name Background in the Layers palette. This will change the
Background layer into Layer 0.
2. Using the text tool, begin typing the headline. Make sure the
type is the correct point size and font before doing any more
steps. This will create a text layer.
3. From the Brushes palette,
choose a soft-edged, medium-sized brush.
Remember, bold fonts works best for this effect.
3. After typing the headline and formatting the text, drag the text
layer in the layers palette to the bottom of the stack.
4. Start painting. You can adjust your stroke
to whatever works best for you. With every
stroke the color will disappear leaving behind
the grayscale image.
This technique is used in a lot of commercial
ads on television and in popular magazine
layouts. A popular example would be the
Gatorade ads with the Gatorade staying in
color and the rest of the scene in black-nwhite. Have fun with this one.
4. While Layer 0 is selected (highlighted in the Layers palette), go
to the Layer menu (pull down menu listed at top of Photoshop)
to Group with Previous(Photoshop 7) or Create Clipping Mask
(Photoshop CS or CS2).
5. Your layer palette should have two layers. The top layer will
be indented with a crooked arrow pointing down below and the
bottom layer will be underlined showing which layer it is being
clipped to.
The final results are all the rage in popular magazine layout and
design.
6. After clipping the content, go to Layer/Flatten Image and Save
As a Tiff. Use the crop tool to resize headline if needed. Make
sure the image is RGB or Grayscale .
To remove the white background after placed in PageMaker
or InDesign, follow the Clipping Path Instructions for the final
removal of the white background if needed.
For other cool effects, try a shape layer insead of a text layer.
Or instead of a photograph, try a texture or one of Jostens
Backgrounds. Have Fun!
This tutorial is for Photoshop CS & CS2. If you are using an earlier version of the software contact Jostens Tech Support with questions: 800 328-2435.
Name _____________________________________________ Club assignment:
Pho
toinsStory
ho p
Picture
Use an image to tell a story by
grouping it with text.
1. Go to File > Open and open the image for
the desired effect. An image with some strong
Brightness and Contrast will be a better
choice for this effect.
Trim Size 9 - 9 x 12
3. Go to Layer > New > Layer From Background. In the Name field type Image, select
OK.
Pho to s ho p
Darken / Brighten Images
For a quick “no-brainer” image contrast adjustment you can always go to Image > Adjustments > Auto-Levels. This
automatically applies the most common brightness and contrast standards and may be all you need to get your image
to acceptable levels. Often times, though, you will want much more control over the result. Here’s how:
1. Open an image that’s either too dark or too light in Photoshop.
4. Go to Layer > Duplicate Layer. In the Name
field type Photocopy. Drag this Photocopy layer
to the bottom of the Layers palette.
2. Go to Image > Image Size and change the
Width and Height to the size of your page and 5. Select "D" on your key board, changing your
change your resolution to 300dpi.
swatches back to the default settings.
(Black on top, white on bottom) With
Trim Size 7 - 7 3/4 x 10 1/2
the Photocopy layer still selected, go
Trim Size 8 - 8 1/2 x 11
to Filter > Sketch > Photocopy. Set
Detail to 20 and Darkness
to 20. Select OK.
2. Go to Layer > New Adjustment Layer >
Levels. Name your new layer or just click
OK to the default name.
6. Change the Opacity of this layer
to 45% (located in the top of the
layers palette).
Black point
slider
7. Open your typed text file. This
can be a Word file or text typed in
Adobe InDesign or Adobe PageMaker. Go to Edit > Select All,
then Edit > Copy. Close the text
file.
8. In Photoshop,
select the Text tool.
In the Text Options
palette at the top,
change the font to
Arial Bold, 6 pt
and change the font color to white.
Before pasting, drag the text box
Midtone
slider
White point
slider
The Levels window will appear. On the Input Levels
Graph, the triangular, chocolate-kiss-shaped points
are called Input Level Sliders. The Black slider will
Darken your images. The Gray Midtone slider will
adjust the Shadows and Highlights in your images.
And the White slider will Lighten your images.
3. In the Levels window, move the sliders to
the left or right to get the desired effect. This
may take some practice. Be sure to check the
Preview box so you can see your adjustments
as you make them. Play around with dragging
all three sliders back and forth until you get a
feel for the effect. Make note of the combined
effects as well. Once you achieve the desired
result, click OK.
4. Choose Flatten Image from the flyout menu
and save the file as a JPG or TIF with a new
name to preserve the original.
You can also adjust the brightness and contrast of your
images by using the Curves or Brightness / Contrast
windows under the New Adjustment layer menu.
Name _____________________________________________ Club assignment:
Pho
to Images
s ho p
Merging
1. Open both images in Photoshop.
2.2.
With
thethe
Move
tooltool
drag
oneone
image
on
With
Move
drag
image
top ofonthe
image.
topother
of the
other image.
3. In the Layers palette you
will see both images in
separate layers. Double
click on the layer named
Background and rename
it Layer 0. The layer you
dragged over from the other
image is automatically
named Layer 1.
4. If
If the
the images
images are
are not
not the
the right
right size,
size,
each
layer
cancan
be be
resized
by by
going
to the
each
layer
resized
going
to
Edit/Transform/Scale.
SelectionSelection
points
the Edit/Transform/Scale.
willpoints
appear
in appear
each corner;
points
will
in eachthese
corner;
canthese
be resized
points while
can beholding
resizeddown
whilethe
Shift-key
keepthe
it Shift-key
porportional.
holdingtoo
down
too keep
it porportional.
5. Select the Eraser tool. Click the arrow
next to the brush size to open the Eraser
Options and set the Hardness to 0% and
the Master Diameter to around 100px.
6. Set the Opacity to 100%.
7. Now brush away the portion
of the picture you would
like to merge into the other
image.
7. In the Layers palette click on the fly-out menu and
choose Flatten image.
8. Save the file with File/Save as and set the file type
to JPG.
This tutorial is for Photoshop CS & CS2. If you are using an earlier version of the software contact Jostens Tech Support with questions: 800 328-2435.