1
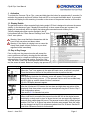
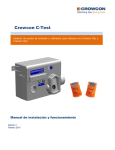
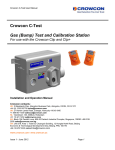
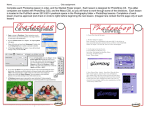
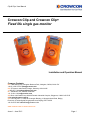
Clip & Clip+ User Manual Crowcon Clip and Crowcon Clip+ Fixed life single gas monitor Installation and Operation Manual Crowcon Contacts: UK: 2 Blacklands Way, Abingdon Business Park, Abingdon, OXON, OX14 1DY +44 (0) 1235 557700 [email protected] US: 21 Kenton Lands Road, Erlanger, Kentucky 41018-1845 +1 859 957 1039 [email protected] NL: Vlambloem 129, 3068JG, Rotterdam +31 10 421 1232 [email protected] SG: Block 194 Pandan Loop, #06-20 Pantech Industrial Complex, Singapore, 128383 +65 6745 2936 [email protected] CN: Unit 316, Area 1, Tower B, Chuangxin Building, 12 Hongda North Road, Beijing Economic & Technological Development Area, Beijing, PRC 100176 +86 10 6787 0335 [email protected] www.crowcon.com or www.crowcon.us Issue 1 - June 2012 Page 1 Clip & Clip+ User Manual READ FIRST BEFORE OPERATION Crowcon Clip and Crowcon Clip+ personal monitors are personal safety devices accordingly please read and understand the manual ensuring you have been properly trained on the use of the equipment and appropriate actions in the event of an alarm condition. WARNING STATEMENTS If the personal monitor is past the “Activate Before Date” on the package, please do not activate. Do not attempt part replacement or substitution as this could impair the intrinsic safety rating and will void the warranty of the product Before daily use check the following: -Sensor and Audio ports are clear of any obstructions i.e. debris or blockage -Perform the “Self Test” to ensure proper operation of visual, audible, and vibrating alarms -Confirm receipt of a check mark in the upper left hand corner signalling a successful “Self Test” Calibrate the O2 personal monitor at least every 30 days. Make sure to calibrate in a clean air environment. See O2 personal monitor section for instructions on calibration. Both the CO and H2S versions of the Crowcon Clip and Crowcon Clip+ do not require calibration for the life of the product, however we do offer this capability with the C-Test and recommend regular Bump Tests please see our bump test recommendations below: Bump Test the personal monitor at least every 90 days by challenging the sensor with a known concentration of the target gas to be detected. Recommended target gas concentrations (H2S: 25/15 ppm, CO: 200/100 ppm, O2: 18%). Bump Tests can be performed either manually or with the C-Test. If a manual test is to be performed make sure to test in a clean air environment. If a personal monitor fails the Self Test or Bump Test please discontinue use of the personal monitor The personal monitor contains a lithium battery that must be disposed of by a qualified recycler and in accordance with the EU WEEE Regulations. Do not substitute internal components as this may interfere with the intrinsic safety of the device, and will void all warranties. Do not attempt to replace the battery or sensor, this product is designed to be disposable. Changing these components will void the warranty. If you suspect any malfunction or have any technical problems please contact Crowcon your local Crowcon office, regional sales manager or registered service centre. Issue 1 - June 2012 Page 2 Clip & Clip+ User Manual Prologue Thank you for purchasing the new Crowcon Clip or Crowcon Clip+. At Crowcon we recognise the need for reliable and robust personal monitors which are sized to be worn without intruding on primary tasks and are simple to use. The Clip and Clip+ are personal single gas monitors, designed to detect the presence of specific toxic gases; Carbon monoxide (CO) or Hydrogen sulphide (H2S) or Oxygen (O2) deficiency. Focused on users and fleet managers alike, Crowcon offers application focused fixed system and portable solutions to protect personal and plant from flammable, toxic and oxygen hazards. For further information on this or any other Crowcon product please contact your local regional office, regional sales manager or service centre. Contents 1. Activation ........................................................................................................................................ 4 1.1. Display Details ......................................................................................................................... 4 1.2. Day to Day Usage ................................................................................................................... 4 2. Additional Steps: ............................................................................................................................. 5 3. Alarms ............................................................................................................................................ 6 3.1. Alarm Types ............................................................................................................................ 6 3.2. Alarm Set Points ...................................................................................................................... 6 4. Event Log ....................................................................................................................................... 7 5. Bump Test Interval.......................................................................................................................... 7 6. Oxygen Calibration ......................................................................................................................... 7 7. Hibernation Instructions – Clip+ only............................................................................................... 8 8. Certifications/Specifications ............................................................................................................ 9 9. Warranty (Clip & Clip+) ................................................................................................................... 9 9.1. Limited Warranty ..................................................................................................................... 9 9.2. Warranty Procedure................................................................................................................. 9 9.3. Warranty Disclaimer .............................................................................................................. 10 10. IR Link Software User Guide:........................................................................................................ 11 10.1. Software Installation ........................................................................................................... 11 10.2. Getting started ................................................................................................................... 11 10.3. Changing Settings .............................................................................................................. 11 10.4. Firmware Upgrade ............................................................................................................. 12 10.5. Hibernating Clip+ ............................................................................................................... 12 10.6. Troubleshooting ................................................................................................................. 13 10.7. Warranty (IR Link) .............................................................................................................. 13 Issue 1 - June 2012 Page 3 Clip & Clip+ User Manual 1. Activation To activate the Crowcon Clip or Clip+, press and hold down the button for approximately 5 seconds. On activation the personal monitor will vibrate, flash red LED’s, and sound the audible alarm. A successful activation will display the life remaining in months on the screen of the personal monitor as 24 months. 1.1. Display Details The personal monitor utilises a special high viewing angle LCD that is designed to enhance the screen visibility. In the absence of gas, it displays life remaining. In those cases where gas is present, the display will automatically shift to a display that shows gas concentration and a battery icon. *Note the displayed number can be changed in the IR Link software with the "Show Sensor Readings" and "Hide Clock" user options. Warning: Users must familiarize themselves with the icons in both non-alarm and alarm states Warning: If the display is missing icons or cannot be clearly read, please contact Crowcon or your local registered outlet immediately 1.2. Day to Day Usage Prior to daily use, the personal monitor will prompt the user to perform a self test by showing the test reminder icon, this process is a simple and effective way to ensure safe operation of the personal monitor. During the “Self Test” the audio, visual, and vibrating alarms are activated and the sensor is tested. Below is a step by step process for performing the test: Screen Display Detail Screen 1: When the “Test” Icon appears in the upper left hand corner, a self test is required. Press the button on the front of the personal monitor to perform the test. Screen 2: After pressing the button the following screen will appear. During the self test ensure that the following occurs: (1) The personal monitor emits one audible beep, all LED’s light up, and the vibrate function is activated (2) All LCD display elements appear. Screen 3: After the full element LCD screen, the low alarm and high alarm set points will be displayed. Note these alarm set points can be adjusted using the IR Link or Clip CTest configuration options. See section 5.2 for standard set points Screen 7: (see Sections 4-6 for additional screen displays) When a self test is successful the personal monitor will turn to the original screen and display a check mark in place of where the test icon was previously displayed and one short audible beep will sound. The personal monitor will by default prompt another “Self Test” in 20 hours from when the button was pressed. Note this value can be changed via the IR Link software anywhere from 8 to 20 hours. See the IR Link Quick Reference Guide for further detail. Issue 1 - June 2012 Page 4 Clip & Clip+ User Manual 2. Additional Steps: A self test can be performed at any time during operation. Simply press the button, wait for the low alarm level to show and press the button once more. This will activate the self test mode allowing a user to verify the personal monitor’s functionality. Above we outlined the most common screen configurations. However if the personal monitor has been programmed via the IR Link or has been exposed to gas additional screens may appear Screen 4 (If applicable): If programmed with a “User ID”, after the alarm set points are displayed, a combination of numbers and or letters will scroll across the screen. This will be a max of 2 screens with a maximum character limit on the “User ID” of 6 characters. The “User ID” can be changed/modified via the IR Link software Screen 5 (if applicable): If the personal monitor has been exposed to gas exceeding the low alarm set point a value will appear with “max” next to it. This represents the peak value (highest) that the personal monitor has seen. After this screen there will be another screen displaying a value with (hours, days, or months) this represents the amount of time past since the peak reading. Screen 6 (if applicable): After the peak reading and time since screens, a screen will appear with CLP (this stands for ‘clear peak’). If the user presses the button down at while this is displayed, the peak value on the personal monitor will be reset. Note while the value will be cleared on the display the value will be held in the personal monitor’s log. See the event log section for further details. This value can be cleared on the next screen. Failures/FAQ’s If the self test fails, the personal monitor emits five short beeps and flashes before displaying “Test”. Repeat the self test. If the self test fails three (3) consecutive times the personal monitor will enter Fail Safe mode. Please contact Crowcon or your local service centre for a replacement personal monitor During normal operation, the battery is continuously monitored. If the battery is low for more than (3) hours the personal monitor enters Fail Safe mode. If the battery self test fails (5) consecutive times the LCD will go blank. In case of a blank LCD discontinue use and contact Crowcon or your local service centre for a replacement personal monitor. Issue 1 - June 2012 Page 5 Clip & Clip+ User Manual 3. Alarms 3.1. Alarm Types Screen Display Detail LOW ALARM Audible Alarm: One (1) slow beep every second Visual Alarm: One (1) slow flash every second Vibrating Alarm: One (1) slow vibration every second HIGH ALARM and OVER LIMIT (OL) ALARM Audible Alarm: Two (2) fast beeps every second Visual Alarm: Two (2) fast flashes every second Vibrating Alarm: Two (2) fast vibrations every second PERSONAL MONITOR LIFE COUNTDOWN ALARM Once less than One (1) month of life is remaining, the display will switch to days remaining, when it is less than One (1) day remaining the display will switch to hours remaining. Once the Eight (8) hours are remaining, it will begin to beep, flash, and vibrate; Eight (8) slow beeps per minute Eight (8) slow flashes per minute Eight (8) slow vibrations per minute To discontinue the alerts and end the unit life, press the button. When the battery life remaining clock displays 0 hours the personal monitor will operate for (8) hours before deactivating 3.2. Alarm Set Points In order to comply with the 3 main regional alarm requirements, Crowcon offer the following standard Default factory set points: Gas H2S CO O2 Option 1 Low 5 ppm / High 10 ppm Low 25 ppm / High 50ppm Min 19.5% / Max 23.5% Option 2 Low 10 ppm / High 15 ppm Low 35 ppm / High 50 ppm or Min 19% / Max 23.5% Option 3 Low 2ppm / High 5 ppm Low 30 ppm / High 100 ppm N/A *Note these set points can be changed using the Crowcon IR Link. Please refer to section XX for further details. To display the personal monitor alarm set points press the button on the front of the personal monitor. Use caution when changing alarm set points. Confirm these levels with your company safety officer. DO NOT use IR communications when an explosive atmosphere may be present. Issue 1 - June 2012 Page 6 Clip & Clip+ User Manual 4. Event Log By default the personal monitor stores the last twenty five (25) alarm events. The system stores events by first in first out, i.e. the 26th event will replace the first event and so on. This information can be downloaded using the Crowcon IR Link. For each alarm event the personal monitor records the following: The personal monitor serial number Bump Test (Yes or No) Life remaining on the personal monitor Number of self tests performed Number of events Alarm Condition (Low, High, or OL) Specific event date and time Peak gas concentration in ppm or %. 5. Bump Test Interval Using the IR Link, personal monitors can be programmed to alert the user if a bump test is due. This interval can be set anywhere from 1 to 365 days. *Note the default is to have no bump interval programmed. If a personal monitor is due for a bump test, the personal monitor will emit alternating flashes (left and right) every 5 seconds. And the “test” icon will remain even after a button push. This alert can be cleared by either placing the personal monitor in a C-Test Station or manually performing a Bump Test. To manually perform a Bump Test, affix the flow plate to the sensor aperture and ensure the correct level of gas is connected via a fixed flow regulator (0.5 l/m). An exhaust pipe should be used into a safe area where no personal are present. Press the button down once, the word "GAS" will show on the display while the TEST icon flashes. The personal monitor will wait for 45 seconds for the target gas to be applied, or a button press to skip the bump test. If the Crowcon Clip or Crowcon Clip+ is bumped while showing "GAS", then it will record as a bump test in the event log instead of as an exposure. If no gas is applied, it will return to the normal screen and will not record anything in the event log. 6. Oxygen Calibration Crowcon recommends users of the O2 Crowcon Clip to bump test the personal monitor before using each day. The Crowcon Clip Oxygen (O2) personal monitor factory default will prompt the user to calibrate the personal monitor every 30 days. The user will be prompted by the screen flashing CAL, please see calibration instruction below: Only perform O2 calibration in clean air (20.9% Oxygen) that is free of hazardous gases. Issue 1 - June 2012 Page 7 Clip & Clip+ User Manual Calibration Instructions 1. Press and hold down the operator button for four (4) seconds 2. The screen will display CAL and the O2 icon will flash in the lower left hand side 3. After a successful calibration, the personal monitor will emit one (1) beep, vibration and LED flash 4. After an unsuccessful calibration, the personal monitor will not beep or flash and continue to display calibration. If after a few failed calibration please contact Crowcon customer support or your local service centre. 7. Hibernation Instructions – Crowcon Clip+ only Crowcon Clip+ Hibernation via the IR Link 1. Check that you have installed the IR Link Software and the IR Link USB connections are plugged in 2. Click Read Device on the IR Link Software 3. Note; when the monitor is hibernated the event log will be cleared. It is highly recommended to save the event log by pressing the save event log before hibernating. 4. Click on the Hibernate Button, acknowledge the event log message 5. Keepthe Clip+ in front of the IR Link until the "Hibernate OK" message is displayed at the bottom of the IR Link Software 6. Confirm the monitor screen is blank 7. If you encounter any problems please contact Crowcon or your local service centre. Crowcon Clip+ Hibernation via C-Test 1. Check that the C-Test is turned on and the USB memory stick is present 2. The Clip C-Test is capable of hibernating the Crowcon Clip+, place the monitor in the CTest 3. Press and hold the bump test and calibration buttons down simultaneously for approx 2 seconds 4. A successful hibernation will result in a GREEN light on for the C-Test 5. Note the event log will be automatically stored on the C-Test USB memory 6. Confirm the monitor screen is blank 7. If you encounter any problems please contact Crowcon or your local service centre Issue 1 - June 2012 Page 8 Clip & Clip+ User Manual 8. Certifications/Specifications Intrinsic Safety Class I, Groups A, B, C, D T4 ETL 4003191 0359 II 1 G Ex ia IIC T4 Ga IECEx Ex ia IIC T4 Ga ITS 12ATEX2547 IECEx ETL 12.0007 -35°C<Tamb<50°C- O2 -40°C<Tamb<50°C-H2S -40°C<Tamb<50°C-CO Humidity: 5% to 95% non-condensing relative humidity Alarms: Visual, vibrating, audible (minimum 95dB) Battery Life: 24 months of operation/ 4 minutes of alarm per day Size: 85mm x 50mm x 28mm / 3.3 in x 2.0 in x 1.1 (HxWxD) Weight: 76 g / 2.7 oz Event Log Storage: Last 25 events. Newer events replace older events. 9. Warranty (Clip & Clip+) 9.1. Limited Warranty Crowcon warrants this product to be free from defects in material and workmanship under normal use and service for a period of one year beginning upon the date of delivery for all Crowcon C-Test monitors. This warranty extends only to the sale of new and unused products to the original buyer. 9.2. Warranty Procedure To facilitate efficient processing of any claim, contact your local Crowcon agent/distributor, a Crowcon regional office or our global customer support team (English working language) on +44 (0)1235 557711 or [email protected] to obtain a returns form for identification and traceability purposes. This form may be downloaded from our website ‘crowconsupport.com’ and requires the following information: • Your company name, contact name, phone number and email address. • Description and quantity of goods being returned, including any accessories. • Instrument serial number(s). • Reason for return. Products will not be accepted for warranty without a Crowcon Returns Number (CRN). It is essential that the address label is securely attached to the outer packaging of the returned goods. The guarantee will be rendered invalid if the instrument is found to have been altered, incorrectly stored, modified, dismantled, tampered with, or has not used Crowcon spares for replacement parts including sensors) or has been serviced or repaired by any party not authorised and certified by Crowcon to do so. The warranty does not cover misuse or abuse of the unit including use outside of specified limits. Issue 1 - June 2012 Page 9 Clip & Clip+ User Manual 9.3. Warranty Disclaimer Crowcon accept no liability for consequential or indirect loss or damage howsoever arising (including any loss or damage arising out of the use of the instrument) and all liability in respect of any third party is expressly excluded. This warranty does not cover the accuracy of the calibration of the unit or the cosmetic finish of the product. The unit must be maintained in accordance with the instructions in this manual. The warranty on replacement consumable items supplied under warranty to replace faulty items, will be limited to the unexpired warranty of the original supplied item. Crowcon reserves the right to determine a reduced warranty period, or decline a warranty period for any sensor supplied for use in an environment or for an application known to carry risk of degradation or damage to the sensor. Our liability in respect of defective equipment shall be limited to the obligations set out in the guarantee and any extended warranty, condition or statement, express or implied statutory or otherwise as to the merchantable quality of our equipment or its fitness for any particular purpose is excluded except as prohibited by statute. This guarantee shall not affect a customer’s statutory rights. Crowcon reserves the right to apply a handling and carriage charge whereby units returned as faulty, are found to require only normal calibration or servicing, which the customer then declines to proceed with. For warranty and technical support enquiries please contact: Customer Support Tel: +44 (0) 1235 557711 Fax: +44 (0) 1235 557722 Email: [email protected] Issue 1 - June 2012 Page 10 Clip & Clip+ User Manual 10. IR Link Software User Guide: 10.1. Software Installation Up to date software is available from your local service agent, www.crowcon.com or from your local Crowcon office. This software will work with Windows versions XP, Vista, and Windows 7. 10.2. Getting started Below are instructions on how to use the IR Link software. Once you have successfully installed the software and click on the IR Link icon, you will see the screen to the right: In order to interact with your Clip & Clip+ make sure to have the IR Link plugged into your computer. Place the monitor face down at least 2 inches in front of the IR Reader, with the top side facing the IR Reader. Then click “Read Device” if the read was successful you will see a green bar at the bottom of the screen. 10.3. Changing Settings Both the Clip & Clip+ monitors allow you to change the following fields, below is a brief description of each field and changes possible: a. High Alarm/Low Alarm Set Points: Adjust the high/low alarm set point. Note: When doing so make sure to set the alarm limit not to exceed the local or site guidelines. Some sites may have different set points than others. b. Bump Interval: In order to help with bump test accountability users can adjust the Bump Interval. If a unit has not been bump tested within the time frame the unit will emit a flash until it has been tested either manually or via the C-Test Station. c. User ID: Each individual unit can now have a unique electronic user ID. You are able to program in up to 6 characters. Note: Some alphabetic characters do not display well. d. Self Test Interval: By default all Clip & Clip+ monitors have a default 20 hour self test. Frequency can be set anywhere from 8 to 20 hours. e. Show Sensor Readings: Once the unit starts to see gas the unit will display the real time reading with a 0.1 ppm resolution. If this is unchecked the unit will always display the life remaining or flash low/high alarm in an alarm condition f. Hide bump due LED Flashing: If you prefer to not have the units flash when due for a bump test, please make sure to check this box. g. Hide Clock: This will turn the monitor into a real time ppm display monitor. By default always showing a real time ppm reading. Issue 1 - June 2012 Page 11 Clip & Clip+ User Manual After you have made your requested changes click on the Write Device Button. If a successful write has occurred you will see a green bar at the bottom (see above). 10.4. Firmware Upgrade Both the Clip & Clip+ monitors allow for Firmware upgrades to occur during the lifetime of the unit. These may be product improvements to add additional features or to enhance monitor performance. Most firmware upgrades are not required unless notified by Crowcon. In order to perform a firmware upgrade, make sure to position your monitor in front If the IR reader as instructed in the “Getting Started” section. Be sure to read the device before performing any upgrades to insure a connection has been established. Once a successful read has occurred, click on the Folder Icon located in bottom middle right. Select the firmware file you would like to upgrade to and then click Upgrade Firmware. This process will take approx 30 seconds to perform. DO NOT move the unit during a firmware upgrade. Once a successful upgrade has occurred a green bar will appear with “download image…ok”. Firmware upgrades may also be performed through the Clip Dock Docking station. 10.5. Hibernating Clip+ Your Crowcon Clip+ unit allows you to place the monitor in hibernate mode when it is not being used. In order to perform hibernation, place your monitor in front of the IR Reader as instructed in the “Getting Started” Section. Be sure to read the device before performing hibernation to insure a connection has been established. Note before you perform hibernation, it is recommended that you save the event log on the monitor. To save the log, click on the Save Event Log button. This will allow you to select a specific folder to save the event log. Once hibernation has occurred, all prior event log information will be erased. Once the log has been saved, you can proceed with hibernation. To hibernate the unit, press the Hibernate button. A screen will pop up asking if you would like to save the event log. If you have already saved the log click yes. Successful hibernation will give an OK green bar. Issue 1 - June 2012 Page 12 Clip & Clip+ User Manual 10.6. Troubleshooting Connection Problems Clip Connect Error: This error occurs when the IR Link cannot communicate with the unit. The screenshot to the right displays the error. If this error occurs check the following items: Make sure the unit is placed face down in front of the IR Link at least 2 inchs. Also check that the IR window on the unit is not clogged with dirt or debris. Finally make sure the area where the unit and link are is not in a high light area (i.e. bright light bulb or bright sunlight) as light can interfere with IR connectivity. IR Link Connect Error: This error occurs when the IR Link is either not connected to the computer or the driver did not install correctly. Make sure to check the USB connection on both the computer and the IR Link itself to insure all connections are secure. If all connections are secure attempt to uninstall and reinstall the software. 10.7. Warranty (IR Link) Limited Warranty Crowcon warrants this product to be free from defects in material and workmanship under normal use and service for a period of one year beginning upon the date of delivery. This warranty extends only to the sale of new and unused products to the original buyer. Warranty Procedure & Warranty Disclaimer Please see sections 9.2 & 9.3 Issue 1 - June 2012 Page 13