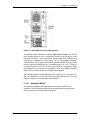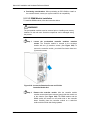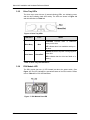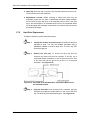
1
MAVERICK-II
Installation and Hardware
Reference Manual
8-BAY SAS to SATA II RAID Cube Subsystem
Version 1.0
Maverick-II Installation and Hardware Reference Manual
Contact Information
RAID INCORPORATED
5 Branch Street
Methuen, MA 01844
800-330-7335
[email protected]
ii
Maverick-II Installation and Hardware Reference Manual
Copyright 2008
This Edition First Published 2008
All rights reserved. This publication may not be reproduced, transmitted,
transcribed, stored in a retrieval system, or translated into any language or
computer language, in any form or by any means, electronic, mechanical,
magnetic, optical, chemical, manual or otherwise, without the prior written
consent of RAID Inc., Inc.
Disclaimer
RAID Inc. makes no representations or warranties with respect to the contents
hereof and specifically disclaims any implied warranties of merchantability or
fitness for any particular purpose. Furthermore, RAID Inc. reserves the right
to revise this publication and to make changes from time to time in the content
hereof without obligation to notify any person of such revisions or changes.
Product specifications are also subject to change without prior notice.
iii
Maverick-II Installation and Hardware Reference Manual
Warnings and Certifications
Restricted Access Location:
This equipment is intended to be installed in a RESTRICTED ACCESS
LOCATION only.
Electric Shock Warning!
To Prevent Electric Shock:
Access to this equipment is granted only to trained operators and service
personnel who have been instructed of and fully understand the possible
hazardous conditions and the consequences of accessing non-field-serviceable
units, e.g., system backplane.
FCC (applies in the U.S. and Canada)
FCC Class B Radio Frequency Interference Statement
This equipment has been tested and found to comply with the limits for a Class B
digital device, pursuant to Part 15 of the FCC Rules (47 CFR, Part 2, Part 15 and
CISPR PUB. 22 Class B). These limits are designed to provide reasonable
protection against harmful interference when the equipment is operated in a
residential installation. This equipment generates, uses, and can radiate radio
frequency energy and, if not installed and used in accordance with this user’s
guide, may cause harmful interference to radio communications. However, there
is no guarantee that interference will not occur in a particular installation. If this
equipment does cause harmful interference to radio or television reception,
which can be determined by turning the equipment off and on, you are
encouraged to try to correct the interference by one or more of the following
measures:
♦
Reorient or relocate the receiving antenna.
♦
Increase the separation between the equipment and receiver.
♦
Connect the equipment into an outlet on a circuit different from that to
which the receiver is connected.
♦
Consult the dealer or an experienced radio/TV technician for help.
This device complies with Part 15 of FCC Rules. Operation is subject to the
following two conditions: 1) this device may not cause harmful interference, and
iv
Maverick-II Installation and Hardware Reference Manual
2) this device must accept any interference received, including interference that
may cause undesired operation.
Warning:
A shielded power cord is required in order to meet FCC emission limits and also
to prevent interference to nearby radio and television reception.
Use only shielded cables to connect I/O devices to this equipment. You are
cautioned that changes or modifications not expressly approved by the party
responsible for compliance could void your authority to operate the equipment.
This device is in conformity with the EMC.
China RoHS
In Compliance with AeA China RoHS Regulations (SJ/T 113642006)
CB
(Certified Worldwide)
This device meets the requirements of the CB standard for
electrical equipment with regard to establishing a satisfactory
level of safety for persons using the device and for the area
surrounding the apparatus. This standard covers only safety
aspects of the above apparatus; it does not cover other matters,
such as style or performance.
CCC
For Power Supplies’ compatibility to China Compulsory
Certification.
v
Maverick-II Installation and Hardware Reference Manual
ITE BSMI Class A, CNS 13438 (for Taiwan)
This device is in conformity with UL standards for safety.
RAID is committed to being properly prepared and taking all the
necessary steps that will result in our compliance with the new
European directive, RoHS (2002/95/EC), on or before the
specific dates set forth in those applicable laws and regulations.
RAID is applying its own internal efforts and expertise and is
working closely with customers and suppliers to achieve
compliance while maintaining an uninterrupted supply of quality
products. RAID is currently investigating, evaluating, and
qualifying our materials and components to ensure that products
sold on or after 1 July 2006, in such territory, are in compliance
with the above regulations.
vi
Maverick-II Installation and Hardware Reference Manual
Table of Contents
CHAPTER 1 INTRODUCTION
1.1. PRODUCT OVERVIEW ........................................................................................................1-1
1.1.1
Product Introduction ................................................................................................1-1
1.1.2
Enclosure Chassis...................................................................................................1-2
1.1.2.1
1.1.2.2
1.1.2.3
1.1.2.4
1.1.2.5
Chassis Overview............................................................................................................ 1-2
Physical Dimensions (tower configuration)...................................................................... 1-3
Front Panel Overview...................................................................................................... 1-3
Rear Panel Overview ...................................................................................................... 1-4
Backplane Board ............................................................................................................. 1-5
1.2. COMPONENTS...................................................................................................................1-6
1.2.1
LCD Keypad Panel ..................................................................................................1-6
1.2.2
Drive Trays ..............................................................................................................1-7
1.2.3
RAID Controller Module ..........................................................................................1-8
1.2.4
Controller Module Interfaces ...................................................................................1-8
1.2.5
DIMM Module ........................................................................................................1-10
1.2.6
BBU Modules (Optional Item)................................................................................1-11
1.2.7
Power Supply Units ...............................................................................................1-12
1.2.8
Cooling Fan Modules ............................................................................................1-13
1.2.9
Footplates..............................................................................................................1-13
1.3. SUBSYSTEM MONITORING ...............................................................................................1-14
1.3.1
I2C bus ..................................................................................................................1-14
1.3.2
LED Indicators .......................................................................................................1-14
1.3.3
Audible Alarms ......................................................................................................1-15
1.4. HOT-SWAPPABLE COMPONENTS ......................................................................................1-15
1.4.1
Hot-swap Capabilities............................................................................................1-15
1.4.2
Components ..........................................................................................................1-16
1.4.3
Normalized Airflow ................................................................................................1-16
CHAPTER 2 HARDWARE INSTALLATION
2.1. INSTALLATION OVERVIEW ..................................................................................................2-1
2.2. INSTALLATION PRE-REQUISITES .........................................................................................2-1
2.3. STATIC-FREE INSTALLATION...............................................................................................2-2
2.4. GENERAL INSTALLATION PROCEDURE ................................................................................2-3
2.4.1
Installation Steps .....................................................................................................2-3
2.4.2
Installation Procedure Flowchart .............................................................................2-4
2.5. UNPACKING THE SUBSYSTEM ............................................................................................2-5
2.6. ROTATING THE LCD PANEL ...............................................................................................2-5
2.7. INSTALLING THE FOOTPLATES ............................................................................................2-7
2.7.1
Installing Footplates to a Tower Subsystem ...........................................................2-8
2.7.2
Installing Footplates to a Desktop Subsystem ........................................................2-8
2.8. HARD DRIVE INSTALLATION .............................................................................................2-11
2.8.1
Hard Drive Installation Overview ...........................................................................2-11
2.8.2
Hard Drive Installation Prerequisites .....................................................................2-12
2.8.3
SATA Drive Installation .........................................................................................2-12
2.9. DRIVE TRAY INSTALLATION ..............................................................................................2-13
2.10. POWER CORD PLUG-IN ...................................................................................................2-15
2.10.1 About Power Cord Plug-in.....................................................................................2-15
2.10.2 Plugging In the Power Cord ..................................................................................2-15
2.11. OPTIONAL INSTALLATION .................................................................................................2-17
2.11.1 Installation Steps ...................................................................................................2-17
2.11.2 Installing the Additional PSU Module ....................................................................2-17
2.11.3 Memory Module Installation ..................................................................................2-21
vii
Maverick-II Installation and Hardware Reference Manual
2.11.3.1
2.11.3.2
2.11.3.3
2.11.4
Memory Module Installation Overview........................................................................... 2-21
Selecting the Memory Modules ..................................................................................... 2-21
DIMM Module Installation .............................................................................................. 2-22
Optional BBU Module Installation .........................................................................2-24
2.11.4.1
2.11.4.2
BBU Module Installation Overview ................................................................................ 2-24
BBU Module Installation ................................................................................................ 2-24
CHAPTER 3 SUBSYSTEM MONITORING
3.1. SUBSYSTEM MONITORING OVERVIEW ................................................................................3-1
3.2. STATUS-INDICATING LEDS ................................................................................................3-2
3.2.1
Brief Overview of the LEDs .....................................................................................3-2
3.2.2
Controller Module LEDs ..........................................................................................3-3
3.2.2.1
3.2.2.2
3.2.2.3
3.2.2.4
System Status LEDs ....................................................................................................... 3-3
SAS Port LEDs................................................................................................................ 3-4
LAN Port LEDs ................................................................................................................ 3-4
Restore Default LED ....................................................................................................... 3-5
3.2.3
LCD Keypad Panel ..................................................................................................3-5
3.2.4
BBU LED .................................................................................................................3-7
3.2.5
Drive Tray LEDs ......................................................................................................3-8
3.2.6
PSU Module LED ....................................................................................................3-8
3.3. AUDIBLE ALARM ................................................................................................................3-9
3.3.1
Default Threshold Values ........................................................................................3-9
3.3.2
Failed Devices .......................................................................................................3-10
3.4. I2C MONITORING .............................................................................................................3-10
CHAPTER 4 SUBSYSTEM STACKING AND OPERATION
4.1
SUBSYSTEM STACK...........................................................................................................4-1
4.2
POWER ON .......................................................................................................................4-2
4.2.1
Check List................................................................................................................4-2
4.2.2
Power On Procedure ...............................................................................................4-3
4.2.3
Power On Status Check ..........................................................................................4-4
4.2.4
LCD Screen .............................................................................................................4-5
4.3
POWER DOWN PROCEDURE ..............................................................................................4-6
CHAPTER 5 SUBSYSTEM MAINTENANCE
5.1. INTRODUCING SUBSYSTEM MAINTENANCE..........................................................................5-1
5.1.1
Maintenance ............................................................................................................5-1
5.1.2
General Notes on Component Replacement ..........................................................5-2
5.2. REPLACING CONTROLLER MODULE COMPONENTS..............................................................5-2
5.2.1
Notes on Controller Module Maintenance ...............................................................5-2
5.2.2
Removing the Controller Module.............................................................................5-3
5.2.3
Replacing the DIMM Module ...................................................................................5-3
5.2.4
Installing the Controller Module...............................................................................5-5
5.3. REPLACING THE BBU MODULE ..........................................................................................5-6
5.4. REPLACING A FAILED PSU MODULE ..................................................................................5-8
5.4.1
Notes on PSU Module Maintenance .......................................................................5-8
5.4.2
Replacing the PSU Module .....................................................................................5-8
5.5. COOLING MODULE MAINTENANCE....................................................................................5-10
5.5.1
Notes on Cooling Module Maintenance ................................................................5-10
5.5.2
Replacing a Cooling Module .................................................................................5-10
5.6. LCD KEYPAD PANEL REPLACEMENT ................................................................................5-12
5.6.1
Notes on LCD Panel Replacement .......................................................................5-12
5.6.2
LCD Panel Replacement .......................................................................................5-13
5.7. DISK DRIVE MAINTENANCE ..............................................................................................5-15
5.7.1
Notes on Hard Drive Maintenance ........................................................................5-15
5.7.2
Hard Drive Replacement .......................................................................................5-16
viii
Maverick-II Installation and Hardware Reference Manual
APPENDIX A SPECIFICATIONS
A.1. TECHNICAL SPECIFICATIONS............................................................................................. A-1
A.2. CONTROLLER SPECIFICATIONS ......................................................................................... A-3
A.2.1
Configuration .......................................................................................................... A-3
A.2.2
RAID Controller Architecture .................................................................................. A-4
A.2.3
Environmental Specifications ................................................................................. A-4
A.3. DRIVE TRAY SPECIFICATIONS ........................................................................................... A-4
A.4. POWER SUPPLY SPECIFICATIONS ..................................................................................... A-5
APPENDIX B SPARE PARTS AND ACCESSORIES
B.1.
B.2.
SPARE PARTS.................................................................................................................. B-1
ACCESSORIES ................................................................................................................. B-3
APPENDIX C PINOUTS
C.1.
C.2.
C.3.
C.4.
SAS CONNECTOR PINOUTS ............................................................................................. C-1
COM1 SERIAL PORT CABLE............................................................................................. C-2
ETHERNET PORT PINOUTS ............................................................................................... C-3
MAIN POWER ................................................................................................................... C-3
ix
Maverick-II Installation and Hardware Reference Manual
Safety Precautions
Precautions and Instructions
•
Prior to powering on the subsystem, ensure that the correct power range
is being used.
•
The Maverick-Il subsystem comes with 8 drive bays. Leaving any of
these drive bays empty will greatly affect the efficiency of the airflow
within the enclosure, and will consequently lead to system overheating,
which can cause irreparable damage.
•
If a module fails, leave it in place until you have a replacement unit and
you are ready to replace it.
•
Airflow consideration: please leave the airflow clearance of 20cm the
least at the front and rear of the subsystem.
•
Handle subsystem modules using the retention screws, extraction levers,
and the metal frames/faceplates. Avoid touching PCB boards and
connector pins.
•
To comply with safety, emission, or thermal requirements, none of the
covers or replaceable modules should be removed. Make sure that
during operation, all enclosure modules and covers are securely in place.
•
Provide a soft, clean surface to place your subsystem on before working
on it. Servicing on a rough surface may damage the exterior of the
chassis.
•
If it is necessary to transport the subsystem, repackage all drives
separately.
•
The “dummy” metal sheets (which cover the reserved module slots) on
the rear panel should NEVER be removed. An open module slot will
seriously disrupt the circular airflow within the chassis.
ESD Precautions
Observe all conventional anti-ESD methods while handling system modules.
The use of a grounded wrist strap and an anti-static work pad are recommended.
Avoid dust or debris in your work area.
x
Maverick-II Installation and Hardware Reference Manual
About This Manual
This manual:
•
Introduces the 8-BAY SAS to SATA II RAID Cube Subsystem.
•
Describes all the active components in the subsystem.
•
Provides recommendations and details about the hardware installation
process of the subsystem.
•
Briefly describes how to monitor the subsystem.
•
Describes how to maintain the subsystem.
This manual does not:
•
Describe components that are not user-serviceable.
•
Describe the configuration options of firmware, using terminal emulation
programs, or the SANWatch GUI that came with your subsystem.
•
Give a detailed description of the subsystem controllers embedded within the
subsystem.
Related Documentation
•
Firmware Operation Manual
•
SANWatch User’s Manual
Firmware Operation Manual can be found in the Product Utility CD, while
SANWatch User’s Manual can be found in the SANWatch CD. Both CDs came
with your subsystem.
Conventions
Naming
Important messages that users should be aware of is indicated with the following
icons:
xi
Maverick-II Installation and Hardware Reference Manual
WARNING!
Warnings appear where overlooked details may cause damage to the equipment
or result in personal injury. Warnings should be taken seriously.
CAUTION!
Cautionary messages should also be heeded to help you reduce the chance of
losing data or damaging the system.
NOTE:
These messages inform readers of essential but non-critical information. They
should be read carefully as any directions or instructions contained therein can
help you avoid making mistakes.
Steps
Steps describe the sequential tasks in a specific work procedure. Following the
steps in their proper order helps guarantee effectiveness and lowers the chance
of making mistakes.
Lists
Bulleted Lists: Bulleted lists are statements of non-sequential facts. They can be
read in any order. Each statement is preceded by a diamond
shaped dot.
Numbered Lists: Numbered lists describe sequential steps you should follow in
order.
Software and Firmware Updates
Please contact your system vendor, visit RAID’s Support site at
www.raidinc.com/support.php for the latest software or firmware updates. NOTE
that the firmware version installed on your system
should provide the
complete functionality listed in the Firmware Operation Manual. We
provide special revisions for various application purposes. Therefore, DO
NOT upgrade your firmware unless you fully understand what a firmware
revision will do.
Problems that occur during the updating process may cause unrecoverable
errors and system down time. Always consult technical personnel before
proceeding with any firmware upgrade.
xii
Chapter 1
Introduction
1.1.
Product Overview
1.1.1
Product Introduction
This hardware manual briefly introduces the 8-BAY SAS to SATA II RAID Cube
Subsystem (Maverick-II Cube) 8-bay SAS-to-Serial ATA II (SAS-to-SATA II)
subsystem shown in Figure 1-1. For Maverick-II, the enclosure comes with
the host-side connectivity of four (4) PHYs via one (1) 4x wide SFF-8088 Mini-SAS
connector and STP bridge function to eight (8) hot-swappable 3Gbps SATA-II disk
drives. As to Maverick-II, the enclosure comes with the host-side connectivity of
eight (8) PHYs via two (2) 4x wide SFF-8088 Mini-SAS connector (4 PHYs in each
port) and STP bridge function to the same number of drives.
Figure -1: Maverick-II Cube as a Desktop or Tower Subsystem
1
The Maverick-II Cube subsystem, as shown in Figure 1-1, can be configured
as either a tower or desktop subsystem. It comes with a single (1) RAID SASto-SATA RAID controller. The controller provides complete RAID functions and
the computing power to accelerate data flow between host and individual disk
drives. The controller board has one (1) pre-installed 256MB ECC DIMM memory
module. Depending on different usage requirements, it also supports 512 MB and
Maverick-II Installation and Hardware Reference Manual
1 GB modules. For how to do memory module replacement, please refer to
Section 2.11.3.
The controller module can be accessed through the rear of the subsystem. The
4x wide Mini-SAS connector(s) (1 for MAVERICK-II-S and 2 for Maverick-II-R) on
the rear panel of the controller module connect the enclosure to host
computers equipped with SAS interface HBAs. One (1) RS-232C (audio jack)
serial port connector is also located on the rear-facing faceplate of the
controller module. The serial port (COM) enables serial communication between
the controller and the PC used as management station. This PC runs a terminal
emulation program that can be used to configure and manage the RAID
subsystem. One (1) RJ-45 Ethernet connector, also located on the controller
module faceplate, allows for web-based management of the subsystem.
I/O signals/commands transmitted between the controller and the drives at the
front of the subsystem pass through a non-user-serviceable backplane board.
The backplane is connected to a maximum of eight (8) SATA hard drives that you
purchase separately. These drives should be installed into the eight (8) drive
trays that come with the subsystem, and the drive trays must be installed in the
drive bays.
Both models contain two (2) redundant, hot-swappable, single-fan cooling
modules, which protect the subsystem from overheating. The fans will be
automatically switched to the high or low speed mode depending on the thermal
conditions of the enclosure. The switching function is not user-serviceable. When
in the high speed mode, the noise is lower than 60dBA; when in the low speed
mode, it is lower than 41dBA. As to the power supply unit (PSU) modules, A08SC2131 has one (1) 250W power supply unit (PSU), while MAVERICK-II-R has
two (2), which are hot-swappable and fully redundant. Although MAVERICK-II-S
is only equipped with one (1) PSU, you can manually add another PSU to this
model for PSU redundancy. With the dual-PSU configuration, you can prevent
power-down accidents from corrupting your data or causing system downtime.
For how to install the additional PSU, please see Section 2.11.2. A battery
backup unit (BBU) module can also be installed on the rear module socket of
the subsystem to support cached data in memory. The modular nature of the
subsystem and the easy accessibility to all the major components ensure that the
Maverick-II Cube can be easily and efficiently operated and maintained.
1.1.2
Enclosure Chassis
1.1.2.1
Chassis Overview
The subsystem enclosure is a metal chassis that can be set as tower or desktop
configuration. The orientation of the LCD keypad panel can be changed with the
configurations. The backplane board divides the interior of the enclosure into
front and rear sections. The front section accommodates eight (8) drive trays
(with their associated hard drives) and one (1) removable LCD keypad panel.
The rear section accommodates two (2) PSU bays (MAVERICK-II-S is preinstalled
1-2
Chapter 1: Introduction
with 1 PSU module and MAVERICK-II-R with 2), two (2) single-fan cooling
modules, one (1) RAID controller module and one (1) BBU bay (the installation of
the BBU module is optional).
CAUTION!
When you work with the subsystem, it is important to use tools with extreme
care. Do not place tools or other items on top of the enclosure to help avoid
damaging the outward appearance of the chassis.
1.1.2.2
Physical Dimensions (tower configuration)
The subsystem comes in a standard chassis with the following dimensions:
♦
155 mm x 370 mm x 343 mm (width x height x depth)
1.1.2.3
Front Panel Overview
Figure -2: Subsystem Front View
1
As shown in Figure 1-2, the front of the subsystem features a 1x8 (tower) or 8x1
(desktop) layout for eight (8) drive trays that accommodate eight (8) standard 3.5inch SATA-II disk drives. The front of the subsystem also has one (1) LCD
keypad panel. If the subsystem has been configured as a tower, the slots are
numbered 1 to 8, from top to bottom; if it has been configured as a desktop, the
slots are numbered 1 to 8, from left to right when viewed from the front. The LCD
keypad panel enables you to both configure the subsystem and monitor its
operational status. Footplates (see Figure 1-3) can also be installed at the
bottom of the chassis to provide increased stability to the tower configuration and
when multiple subsystems are stacked in the desktop configuration.
1-3
Maverick-II Installation and Hardware Reference Manual
Figure 1-3: Location of Footplates
1.1.2.4
Rear Panel Overview
Figure -4: Subsystem Rear View of Maverick-II-S
1
1-4
Chapter 1: Introduction
Figure 1-5: Subsystem Rear View of Maverick-II-R
The rear panel of the subsystem is shown in Figure 1-4 and Figure 1-5. The rear
panel provides access to all the components located in the rear section of the
subsystem enclosure. These components include 250W PSU module(s) that
connect(s) the subsystem to main power, two (2) hot-swappable single-fan
cooling modules, one (1) SAS-to-SATA RAID controller module, and one (1) BBU
module (optional). MAVERICK-II-S is pre-installed with only one (1) PSU but
an empty bay with a metal filler is reserved for dual-PSU configuration. When
the subsystem is set to dual-PSU configuration, which is the default setting of
A08S- C2132, the two PSUs are hot-swappable and redundant.
The controller module rear panel has Mini-SAS connector(s) (1 for Maverick-II-S
and 2 for Maverick-II-R), one (1) RS-232C (audio jack) serial port, one (1) RJ-45
Ethernet connector, and six (6) status-indicating LEDs.
1.1.2.5
Backplane Board
An integrated backplane board separates the front and rear sections of the
subsystem. This PCB board provides logic level signals and low voltage power
paths. It contains no user-serviceable components.
1-5
Maverick-II Installation and Hardware Reference Manual
WARNING!
Accessing the backplane board may lead to fatal damage of the subsystem.
Any interference with this board may lead to critical and irreversible damage.
For example, short-circuiting may occur if you accidentally touch the
backplane with a screwdriver.
1.2.
Components
1.2.1
LCD Keypad Panel
Figure -6: LCD Keypad Panel
1
Functional Description
The removable LCD panel consists of a 16 characters x 2 lines LCD screen with
push buttons and LED status indicators. (See Figure 1-6) The LCD front panel
provides full access to all RAID configurations and monitoring. After you power
up the subsystem, the initial screen will show the subsystem model name.
Different Orientations of the LCD Panel
To convert the default tower configuration into a desktop configuration (lying on
the long side), the LCD panel must be removed and reinstalled in a different
orientation. With a different configuration, the four (4) footplates should also be
fastened to the different pre-drilled holes on the chassis.
A floating captive screw secures the LCD module from the inside of the chassis.
The LCD panel can be extracted from the subsystem only after the screw has
been loosened. The LCD panel has a single connector at the back that must be
plugged into one of matching connectors in the interior of the subsystem when
1-6
Chapter 1: Introduction
installed in the subsystem. The default orientation for the LCD panel is for a
tower configuration.
1.2.2
Drive Trays
Figure -7: Drive Tray Front View
1
Each Maverick-II Cube subsystem comes with eight (8) drive trays. The front
panel of each drive tray (see Figure 1-7) contains a bezel lock mechanism that
secures the drive tray to the enclosure and a latch that facilitates the
removal and installation of the drive tray. Two (2) status-indicating LEDs and
one (1) release button that opens the front panel are also located on the front
of the drive tray. Retention screw holes are located on the sides of the drive tray.
These holes are reserved for securing hard drives to the trays.
WARNING!
Be careful not to warp, twist, or contort the drive tray in any way (e.g., by
dropping it or resting heavy objects on it). The drive tray has been customized
to fit into the drive bay in the Maverick-II Cube subsystem. If the drive tray
frame is deformed or altered, the drive tray may not fit into the drive bay.
1-7
Maverick-II Installation and Hardware Reference Manual
1.2.3
RAID Controller Module
The RAID controller module contains a main circuit board, a pre-installed
256MB ECC DIMM memory module and an interface faceplate. The
controller supports memory modules with capacities from 256MB to 1GB.
The controller board is located in the controller module and can only
be seen after the controller module has been removed from the
subsystem enclosure. The controller module rear panel has two (2)
hand screws that secure the controller module to the subsystem
enclosure.
WARNING!
Although the controller module can be removed, the only time you
should touch the controller itself is to upgrade/replace memory modules.
Unnecessary tampering with the subsystem controller can damage the
controller and render the subsystem unusable.
1.2.4
Controller Module Interfaces
Figure 1-8: RAID Controller Module Rear-facing Faceplate of Maverick-II-S
Figure 1-9: RAID Controller Module Rear-facing Faceplate of Maverick-II-R
1-8
Chapter 1: Introduction
The faceplate of the RAID controller module is shown in Figure 1-8 & 1-9. All
external interfaces that connect to external devices are located on the controller
module faceplate. The interfaces are listed below.
♦
SAS channel ports: There is one (1) SAS channel port (CH0) on
Maverick-II-S and two (2) (CH0 & CH1) on Maverick-II-R. Each
channel is assigned with an LED which indicates the link condition of the
PHYs on the port. These ports are meant for the connection with host
adapter cards. They are not meant for the connection to other Cube
subsystems for expansion.
♦
RS-232C (audio jack): The controller module comes with one (1) RS-232C
(audio jack) serial port that can be used for management over terminal
emulation.
♦
Ethernet port: A single (1) RJ-45 Ethernet port is used for remote
management through an Ethernet network. There are two LEDs on the port,
which indicates its link status. For detailed information on the LEDs, please
see Section 3.2.2.3.
♦
LED indicators: The controller module rear panel has six (6) system
status-indicating LEDs labeled from 1 to 6. Please refer to Section 3.2.2.1
for information on how to monitor your subsystem using these LED
indicators.
♦
Restore Default (non-latch button & LED):
The “Restore Default” button is a non-latch type push button accessed
through a round opening near the Restore Default LED. It can be used to
restore firmware default settings.
CAUTION!
The Restore NVRAM Default push button is a function that carries some risks.
Firmware restoration will not destroy the existing logical drive configurations;
however, if the existing logical drives cannot be adequately associated with
host ID/LUNs after firmware default restoration, data loss or inconsistencies
may occur.
Listed below are the necessary procedures to complete before using
this button:
1. Before you press this button to restore firmware defaults, it is highly
advised that you make a list of the existing ID/LUN mapping information.
You will need the list to redo the ID/LUN mapping after restoring
defaults. Default restoration will erase the ID/LUN mapping associations
(e.g., which logical drive is associated with which host ID/LUN), and it is
necessary to restore the host ID/LUN mapping after firmware default
Maverick-II Installation and Hardware Reference Manual
restoration in order to access data on the previously configured arrays.
2. You may also use the “Save NVRAM” firmware function to have a safe
copy of configuration profile.
3. Some of the latest firmware updates may be incompatible with the
firmware currently running on your subsystem. These updates may
require restoring firmware defaults before firmware upgrade can
actually take place. Before you use the button, it is highly advised to
practice the following:
․
Stop host I/Os,
․
Backup your data,
․
Save NVRAM or manually make a list of host ID/LUN mapping
information for future references.
․
It is also recommended to keep a record of all configuration
parameters such as the performance preferences, specific stripe
sizes, etc.
4. Another condition that requires restoring defaults is when the
administrator forgets the password configured to control the access to
a RAID subsystem. Before pushing this button, also practice the
precaution steps listed above. You can access array information even
without a password.
How to use the button?
After the subsystem is powered down, you can use a straightened paper
clip to press the button. Press and hold the button down, power on the
subsystem, and wait for the associated LED and the subsystem Ready
LED to light up. The “Restore Def.” LED indicates successful restoration of
firmware defaults.
1.2.5
DIMM Module
The controller module comes with a pre-installed 256MB ECC DIMM module.
The subsystem supports memory modules with capacities of 256 MB, 512 MB
and 1GB. The DIMM socket is located on the solder side of the controller board.
(See Figure 1-10)
1-10
Chapter 1: Introduction
Figure -10: DIMM Module
1
1.2.6
BBU Modules (Optional Item)
The (optional) Li-Ion BBU module can sustain 1GB of cache memory for 72 hours.
The use of a BBU is highly recommended in order to safeguard data integrity. For
how to install the BBU module, please refer to Section 2.11.4.
The BBU module consists of a BBU cell pack, which is housed in a metal bracket.
(See Figure 1-11) It can be readily installed to the BBU bay between the PSU
modules and the cooling modules on the subsystem rear panel and secured to
the chassis with two (2) retention screws.
In accordance with the international transportation regulations, the BBU is only
charged to between 35% and 45% of its total capacity when shipped. Therefore,
after you power on the subsystem, the BBU will start charging to its full capacity.
It normally requires approximately nine (9) hours for the battery to be fully
charged. If the battery is not fully charged after nine (9) hours, there may be a
problem with the BBU and you should contact your subsystem vendor
immediately. While the battery is being charged, the LED on the BBU rear panel
will flash slowly. You can also check the status of the battery module via
SANWatch or the firmware.
1-11
Maverick-II Installation and Hardware Reference Manual
Figure -11: BBU Cell Pack Module
1
1.2.7
Power Supply Units
The Maverick-II Cube subsystems are equipped with 250W PSU module(s).
(See Figure 1-12) In the dual-PSU configuration, the two PSUs are redundant
and hot-swappable. The PSU module(s) can be accessed from the rear panel of
the subsystem. (See Figure 1-4 & 1-5)
Figure -12: PSU Module Rear View
1
Each PSU comes with a single power socket for power cord plug-in and has its
own power switch so you can turn the PSU on and off. Each PSU also comes
with one (1) embedded cooling fan to provide sufficient airflow to keep the PSU
cool. A single LED indicates the PSU status. A handle at the back of the PSU
allows you to remove the PSU while the subsystem is still online. However, this
should only be done if the PSU has failed and needs to be replaced.
A specially designed bracket secures the PSU to the enclosure. If the PSU needs
to be removed, the bracket must first be displaced. After installing a new PSU
1-12
Chapter 1: Introduction
module, fasten the bracket.
PSU specifications are shown in Appendix B.
1.2.8
Cooling Fan Modules
The subsystem comes with two (2), hot-swappable, redundant, single-fan,
cooling modules (shown in Figure 1-13) pre-installed in the subsystem. One (1)
thermal fan is housed in each cooling module. When the internal temperature is
high and during the system power-up stage, the fan rotates at 4500rpm with a
total airflow of 1.9m3/min. In this high-speed mode, the noise would be lower than
60 dBA. When the subsystem internal temperature is lower, the fan rotates at
1800rpm and the total airflow is 1.1m3/min. In this low-speed mode, the noise
would be below 41 dBA.
The cooling modules generate a cooling airflow from the front to the rear of the
subsystem, extracting the heat generated by the SATA hard drives. The two (2)
cooling fan modules are installed directly above the PSUs and are connected to
the enclosure with a cable connector.
Figure -13: Cooling Fan Module
1
1.2.9
Footplates
Four (4) footplates (see Figure 1-14) are shipped as accessory items and can be
used to provide further balance and additional protection to the subsystem
chassis.
1-13
Maverick-II Installation and Hardware Reference Manual
Figure -14: Included Footplate and Its Rubber Stopper
1
The footplates must be installed before the drive trays. It should be noted that the
footplates are installed differently depending on whether the subsystem will be
configured as a tower or desktop. Complete installation instructions are given in
Chapter 2.
1.3.
Subsystem Monitoring
The subsystem comes with several monitoring methods to give you constant
updates on the status of the subsystem and its individual components. The
following monitoring features are included.
1.3.1
I2C bus
The presence detection circuitry and temperature sensors are interfaced through
a non-user-serviceable I2C bus. It can be used to monitor the presence of PSU
modules, cooling modules, and the internal temperature of the subsystem. If any
problem is detected, it will be reported in various ways, such as through the
embedded firmware utility or SANWatch Enclosure View.
1.3.2
LED Indicators
The following active components all come with LEDs that indicate the status of
the individual component:
1-14
♦
RAID controller (10 LEDs for Maverick-II-S, and 11 for Maverick-II-R,
including 6 LEDs for system status, 2 for RJ-45 Ethernet link, 1 for Restore
Default, and 1 for each SAS channel link)
♦
PSU modules (1 LED each)
♦
BBU module (optional) (1 LED)
♦
LCD module (3 LEDs)
♦
Drive trays (2 LEDs each)
Chapter 1: Introduction
1.3.3
Audible Alarms
The subsystem comes with audible alarms that are triggered when certain active
components fail or when certain controller or subsystem thresholds are exceeded.
When you hear an audible alarm emitted from the Maverick-II Cube subsystem, it
is imperative that you determine the cause and rectify the problem immediately.
WARNING!
Failing to respond when an audible alarm is heard can lead to permanent
damage of the subsystem. Therefore, when an audible alarm is heard, rectify
the problem as soon as possible.
1.4.
Hot-swappable Components
1.4.1
Hot-swap Capabilities
The Maverick-II Cube subsystem protects data written on hard disk drives. A
failed drive can be replaced while the subsystem is online without
affecting the operational integrity of the subsystem. Depending on the RAID
level your array is configured to, the maximum number of drives which can fail
without leading to the loss of data will differ. Please see the table below.
RAID Level
Max. No. of Failed Drives
RAID 0
No fault tolerance!
RAID 1
2 (if the two are not in a mirrored pair)
RAID 3/5
1
RAID 6
2
A disk drive should only be removed from the subsystem when it is indicated as
failed. The disk drives’ operating status is constantly safeguarded and monitored
through a variety of firmware mechanisms. At no other time should the disk
drives be removed from the subsystem.
Except for the RAID controller, other major components, such as power supplies
and cooling modules, can be replaced online to eliminate the chance of down
time caused by single module failure. Please note that if you use Maverick-II-S,
1-15
Maverick-II Installation and Hardware Reference Manual
you can replace the power supply online only after you install and power on the
extra PSU you separately purchase.
1.4.2
Components
The following components are all hot-swappable:
1.4.3
♦
PSU modules (in dual-PSU configuration)
♦
Cooling modules
♦
Hard disk drives
Normalized Airflow
Proper subsystem cooling is referred to as “normalized” airflow. Normalized
airflow ensures the sufficient cooling of the subsystem and is only attained when
all the components are properly installed. Therefore, a failed component,
including PSUs and cooling modules, should only be hot-swapped when a
replacement is available. If a failed component is removed leaving an empty
component bay and the system is still online, regular airflow will be disrupted and
permanent damage to the subsystem can result. This rule also applies to the
metal sheet covering the empty BBU bay and the dummy module filling the
empty PSU bay of Maverick-II-S. Please do not remove them unless you have
prepared the module for installation.
1-16
Chapter 2
Hardware Installation
2.1.
Installation Overview
This chapter gives detailed instructions on how to install the Maverick-II
Cube subsystem. When you install the subsystem, it is necessary to correctly
position the LCD keypad panel and install the included footplates, BBU module
(optional), and hard disk drives along with drive trays. It is also advisable to verify
that all of the components listed on the printed Unpacking List that came
with the subsystem package were indeed shipped with it.
CAUTION!
Please note that the installation instructions described in this manual should be
carefully followed in order to avoid damage to the system.
2.2.
Installation Pre-requisites
1. Static-free installation environment: The Maverick-II Cube subsystem
must be installed in a static-free environment to minimize the
possibility of electrostatic discharge (ESD) damage. (See Section 2.3)
2. Component check: Before installing the subsystem, you should make sure
that you have received all the required components by checking the package
contents against the included Unpacking List.
3. LCD keypad panel orientation: The subsystem is configured as a tower by
default. If you wish to change it into desktop configuration, it is necessary to
change the orientation of the LCD module. (See Section 2.6)
Maverick-II Installation and Hardware Reference Manual
4. Footplates: Correctly install the four (4) footplates onto the base of the
subsystem. (See Section 2.7)
5. Hard drives: SATA hard drives must be purchased separately prior to
installing the subsystem. (See Section 2.8.3)
6. PSU modules: If you purchase MAVERICK-II-S subsystem and would like
to change it into redundant PSU configuration, an additional PSU has to
be purchased and installed into the empty PSU bay on the rear panel.
(See Section 2.11.2)
7. Memory modules: If you wish to change the pre-installed memory modules,
the separately purchased modules must be installed. (See Section 2.11.3)
8. Cabling: One (1) 120cm Mini-SAS to Mini-SAS cable is shipped with the
subsystem. (See Figure 2-1) If you want to configure one more host
connection on Maverick-II-R, an additional SAS cable must be purchased
separately. Depending on the connector type of host bus adapters, you may
also need to purchase SFF-8088 to SFF-8470 cables.
Figure 2-1: External SAS Cable
CAUTION!
All SAS cables are sensitive and must be handled with care. To prevent
interference within a rack system, the cable routing paths must be carefully
planned and the cables must not be bent.
2.3.
Static-free Installation
Static electricity can damage the electronic components of the system. Most of
the ill-functioned controllers returned for repair are the result of improper
2-2
Chapter 2: Hardware Installation
installation and ESD damage. To prevent ESD damage, follow these precautions
before touching or handling any of the components:
♦ When installing the subsystem, you should wear an anti-static wrist band or
touch a grounded metal surface to discharge any static electricity from your
body.
♦ Avoid carpets, plastic, vinyl, and styrofoam in the work area.
♦ Handle all components by holding their edges or metal frame. Avoid touching
PCB boards or connector pins.
2.4.
General Installation Procedure
2.4.1
Installation Steps
Detailed, illustrated instructions for each step are given in the following sections.
To have your subsystem installed correctly and efficiently, please follow the steps
outlined below.
Step 1.
Unpack. Unpack the subsystem and make sure that no required
subsystem component is missing.
Step 2.
Select subsystem configuration. Before the initial installation,
you should decide whether to configure the subsystem as a tower,
which is the default orientation, or as a desktop subsystem, which
allows you to stack subsystems one on the top of another.
Step 3.
Make sure the LCD panel is in the correct orientation. The
LCD keypad panel is correctly oriented for a tower configuration
by default. If the subsystem will be set to a desktop configuration,
the LCD panel must be removed, re-oriented, and reinstalled.
Step 4.
Install the footplates. The four (4) footplates are packed in the
accessory box and must be installed to the subsystem before any
other component is installed.
Step 5.
Install hard drives. Separately purchased SATA II hard drives
must be individually installed into the drive trays.
2-3
Maverick-II Installation and Hardware Reference Manual
2.4.2
Step 6.
Install drive trays. After the hard drives have been installed into
the drive trays, the drive trays must be installed into the
enclosure itself.
Step 7.
Connect the cables. Use the supplied power cable(s) to connect
the subsystem to main power. Depending on the connector type
of host bus adapters, use Mini SAS to Mini SAS or SFF-8088 to
SFF-8470 cables to connect the host ports to the host computers.
Step 8.
Power on. Once all of the components have been properly
installed and all the cables properly connected, the subsystem
can be powered on (See Section 4.2) and the RAID array
configured.
Installation Procedure Flowchart
Figure 2-2 shows a flowchart of the general installation procedure. As you
complete each step, check off the Done box on the right. Please use this
flowchart in conjunction with the instructions that follow.
Figure 2-2: General Installation Procedure Flowchart
2-4
Chapter 2: Hardware Installation
2.5.
Unpacking the Subsystem
The Maverick-II Cube subsystem components are packed in five (5) boxes.
WARNING!
For a detailed packing list, refer to the included Unpacking List. Do not rely on
the non-definitive, summarized unpacking list shown below—it is for reference
only.
The following items are packed in individual boxes and are not pre-installed:
♦ Eight (8) drive trays
♦
Accessory items
The enclosure chassis, with its pre-installed components, is located at the bottom
of the package. The pre-installed components include:
♦ One (1) controller module
♦ One (1) PSU module for MAVERICK-II-S and two (2) for Maverick-II-R
♦ Two (2) cooling modules
♦ One (1) LCD keypad panel
♦ One (1) backplane board
2.6.
Rotating the LCD Panel
WARNING!
The LCD panel is not hot-swappable and it should therefore not be removed
while the subsystem is running.
The LCD panel is, by default, oriented correctly for a tower subsystem. The LCD
panel orientation only needs to be changed if you want to configure it as a
desktop subsystem. To change the LCD panel orientation, please follow these
steps:
2-5
Maverick-II Installation and Hardware Reference Manual
Step 1.
Make sure all the drive trays are removed. The drive trays
should be removed for two reasons. First, the LCD keypad panel
is secured by a floating screw and the screw can only be
accessed when drive trays have been removed. Second, the
hard drives are delicate and may be damaged if the subsystem is
maneuvered with disk drives within.
CAUTION!
RAID subsystems support “Configuration on Drives.” Information of logical
configurations is stored on each hard drive. Although it does not matter
installing the removed disk drives into different drive bays, it is still
recommended to use sticky notes to indicate the original locations. In this way,
you won’t mix the hard drives even when you are working on more than one
subsystem.
Step 2.
Loosen the floating screw. The LCD panel is secured to the
enclosure with a floating screw inside the enclosure. Once all the
drive trays have been removed, loosen the floating screw. (See
Figure 2-3)
Figure 2-3: Loosening the Floating Screw
Step 3.
2-6
Remove the LCD panel from the enclosure. To remove the
LCD panel from the enclosure, pass a screwdriver through the
access hole above the LCD module and gently lever the LCD
Chapter 2: Hardware Installation
module out of the enclosure by pushing the screwdriver inwards.
(See Figure 2-4)
Figure 2-4: Levering Out the LCD Panel
2.7.
Step 4.
Position the enclosure subsystem. Change the subsystem into
the desired configuration.
Step 5.
Reinstall the LCD panel in the proper orientation. Re-orient
the LCD panel and align the connector at its back with the
connector in the subsystem. Once the LCD panel has been
inserted, secure it by tightening the floating screw inside the
chassis.
Installing the Footplates
Four (4) footplates and their associated retention screws are included in the
Accessory box. The footplates provide additional balance when the subsystem is
installed in a tower configuration. In the desktop configuration, the footplates
elevate the subsystem above the surface to create some clearance. When
multiple Maverick subsystems are stacked one on top of the other, the
rubber stoppers on the footplates prevent subsystems from sliding. The
footplates should be installed before any other components.
2-7
Maverick-II Installation and Hardware Reference Manual
2.7.1
Installing Footplates to a Tower Subsystem
To install a footplate to a subsystem configured as a tower, follow these steps:
Step 1.
Correctly position the footplates so that the footplate’s flat side
(the side a rubber pad is attached to later) is facing downwards
and the recessed holes on the flange portion are facing out. (See
Figure 2-5)
Figure 2-5: Installing Footplates to a Tower Subsystem
2.7.2
Step 2.
Insert the retention screws. Align the screw holes on the
footplate with those on the subsystem. When they are correctly
aligned, insert and secure two (2) retention screws to each
footplate. (See Figure 2-5)
Step 3.
Install the remaining three (3) footplates. Make sure that all
four (4) footplates are correctly installed on the subsystem.
Installing Footplates to a Desktop Subsystem
If you are installing and configuring the 8-BAY SAS to SATA II RAID Cube
Subsystem as a desktop subsystem, secure four footplates to the bottom
side of the subsystem. If multiple subsystems are to be stacked, install
eight footplates onto the first subsystem on the bottom. Four footplates will
be secured underneath the subsystem, and another four will be used to
support the second subsystem placed on top of the first subsystem. If there
is a third subsystem, install four footplates to the top of the second subsystem.
(See Figure 2-6) Please note that stacking is not a necessary element for the
cabling of this subsystem. Multiple subsystems connected to multiple hosts can
be stacked together only to make the configuration economic in space.
2-8
Chapter 2: Hardware Installation
Figure 2-6: Stacking Multiple Chassis
To install a footplate on a subsystem configured as a desktop, follow these steps:
Step 1.
Carefully flip the chassis over to reveal the mounting holes on
its bottom side.
Step 2.
Correctly position the footplate so that the footplate’s flat side
(the side a rubber stopper is attached to later) is facing
downwards (the downward position when installation is
completed) and the recessed holes on the flange portion are
facing out. (See Figure 2-7)
Step 3.
Insert the retention screws. Align the screw holes on the flat
side of the footplate with those on the bottom of the subsystem.
When they are correctly aligned, insert two (2) retention screws.
(See Figure 2-7)
2-9
Maverick-II Installation and Hardware Reference Manual
Figure 2-7: Installing Footplates to a Desktop System
Step 4.
Install the remaining three (3) footplates. Make sure that all
the footplates are correctly installed on the subsystem. Attach a
rubber stopper to the flat side of each footplate as shown in
Figure 2-8.
Figure 2-8: Attaching a Rubber Stopper to a Footplate
Step 5.
2-10
Install another four (4) footplates if another subsystem is to be
stacked on top of it. Make sure the recessed holes on the flange
portion are facing upwards, and the flat side with a rubber
stopper should be facing out. Drive two (2) screws to secure
each footplate. Repeat the process if you wish to stack other
enclosures. (See Figure 2-9)
Chapter 2: Hardware Installation
Figure 2-9: Installing Footplates on Top Cover for Stacking Enclosures
Step 6.
Once the footplates are in place, another subsystem can be
placed on top of the first subsystem.
2.8.
Hard Drive Installation
2.8.1
Hard Drive Installation Overview
WARNING!
1. Hard drives are very delicate and must be handled with extreme care.
Dropping a drive onto a hard surface (even from a short distance) and
hitting or touching the circuits on a drive with your tools may cause
damage to the drive.
2. Observe all ESD prevention methods when installing drives.
The subsystem supports only 3Gbps SATA-II hard drives.
2-11
Maverick-II Installation and Hardware Reference Manual
2.8.2
Hard Drive Installation Prerequisites
NOTE:
The hard drives and drive trays should only be installed into the subsystem
after the subsystem has been properly placed in the desired tower or
desktop configuration. If the hard drives are installed first, it may be difficult
to maneuver the subsystem because of its weight.
Hard drives for the subsystem must be purchased separately. When you
purchase the hard drives, the following factors must be considered:
Capacity (MB/GB): RAID arrays use a “least-common-denominator” approach.
The maximum capacity of each drive used in the array is the maximum capacity
of the smallest drive. Therefore, it is suggested that you use the drives with the
same capacity. Please also be aware that problems will occur if you assign a
spare drive to a logical drive whose member has capacity larger than the spare
drive. For more information, please refer to the included Firmware Operation
Manual.
Profile: The drive trays and bays of the system are designed for 3.5-inch wide x
1-inch high hard drives.
2.8.3
2-12
SATA Drive Installation
Step 1.
Correctly orient the hard drive. Prior to installing the hard
drive into the drive tray, make sure that the connector at the
back of the drive is facing the open side of the drive tray and
the label side is facing up.
Step 2.
Insert the hard drive. Place the hard drive gently into the drive
tray. (See Figure 2-10)
Chapter 2: Hardware Installation
Figure 2-10: Securing the Hard Drive with Retention Screws
Step 3.
Insert retention screws. After the drive has been properly
placed into the drive tray, insert four (4) retention screws
through the mounting holes on the sides of the drive tray to
secure the hard drive. (See Figure 2-10) Secure the drive with
the four (4) supplied 6/32 flat-head screws.
WARNING!
Only use the screws supplied with the drive canisters. Longer screws may
damage the drive.
the drive’s location until the mounting holes in the drive canister are aligned with those on the hard drive.
Drive Tray Installation
2.9.
Drive Tray Installation
Once the hard drives have been installed in the drive trays, the drive trays can be
installed into the subsystem.
Step 1.
Make sure the bezel lock is in the unlocked position. If the
groove on the face of the bezel lock is in a vertical orientation, it
means the bezel lock is locked. Use the small-sized Phillips
screwdriver to unlock it by turning the groove into the horizontal
orientation. (See Figure 2-11)
2-13
Maverick-II Installation and Hardware Reference Manual
Figure 2-11: Front View of an Individual Drive Tray with the Bezel Lock
in the Unlocked Position
Step 2.
Open the front flap on the drive tray. To open the flap, push
the release button (shown in Figure 2-12) on the front of the
drive tray.
Figure 2-12: Opening Drive Tray Front Flap
Step 3.
Step 4.
2-14
Align the drive tray up with the bay in which you wish to
insert it. Make sure that it is resting on the rails inside the
enclosure. Once the drive tray is lined up with the bay, gently
slide it in. This should be done smoothly and gently. DO NOT
slam the drive tray into place! Doing so will damage the backend connectors.
Close the front flap on the drive tray. Make sure the front flap
is closed properly. Closing the front flap ensures that the backend connector of the hard drive is firmly connected to the
corresponding connector on the backplane board. If the front
flap is not closed properly, the connection between the hard
drive and the subsystem will not be secure.
Chapter 2: Hardware Installation
Step 5.
Lock the flap into place. To lock the flap into place, turn the
bezel lock until the groove on its face is in a vertical orientation.
WARNING!
All the drive trays must be installed into the enclosure even if they do not
contain a hard drive. If the drive trays are not installed, then the ventilation
required for cooling will not be normalized and the subsystem will be
irreparably damaged.
2.10.
Power Cord Plug-in
2.10.1
About Power Cord Plug-in
The PSU module(s) at the back of the subsystem are held in place by a specially
designed rotational bracket. The left side of the bracket has two grooves that are
used to secure the power cord in place and ensure that the cable cannot
accidentally be unplugged from the subsystem.
2.10.2
Plugging In the Power Cord
To plug in the power cord, follow the instructions below.
Step 1.
Pass the cable through the bracket groove. Make sure that
there is more than 10cm of the cable through the bracket
groove. (See Figure 2-13)
2-15
Maverick-II Installation and Hardware Reference Manual
Figure 2-13:Passing the Power Cord through the Bracket Groove
Step 2.
Circle the cable around the rotational bracket. When closing
the bracket, make sure that the cable is made into a loop
around the bracket (as shown in Figure 2-14). Do not pull the
loop tight. Make sure the cable is held properly in the groove
so that the bracket does not damage the cable coating. Secure
the bracket by tightening the retention screw on the left-hand
side.
Figure 2-14: Looping the Power Cord around the Bracket
Step 3.
2-16
Plug the power cord(s) in. Once the rotational bracket has
been firmly secured to the chassis, plug the power cord(s) into
the subsystem.
Chapter 2: Hardware Installation
2.11.
Optional Installation
If you are a user of Maverick-II-R, you can choose to install the memory module
with greater capacity and the BBU module. As to the user of Maverick-II-S,
besides the two choices, you can also choose to install the additional PSU.
2.11.1
Installation Steps
With the optional installation steps inserted in, your installation procedure will be
like the flowchart in Figure 2-15:
Figure 2-15: Installation Procedure Flowchart with Optional Steps
2.11.2
Installing the Additional PSU Module
MAVERICK-II-S is pre-installed with only one PSU module but an additional
PSU bay is left for you to install an additional module when configuring redundant
PSU setting. In the dual-PSU configuration, the power supplies are redundant and
hot- swappable.
The installation procedure is illustrated below.
Step 1.
Loosen the PSU bracket retention screw. The PSU module is
held in place by a customized bracket. To loosen the retention
screw, turn it counterclockwise. (See Figure 2-16)
2-17
Maverick-II Installation and Hardware Reference Manual
Figure 2-16: Loosening the PSU Bracket Retention Screw (MAVERICK-II-R
as an example)
Step 2.
Remove the top cover. Loosen the screw that fastens the top
cover to the chassis frame. (See Figure 2-17) Slide the tabs of
the top cover out of the slots along the edge of chassis and
remove the top cover. (See Figure 2-18)
Figure 2-17: Retention Screw Hole for the Top Cover
2-18
Chapter 2: Hardware Installation
Figure 2-18: Remove the Top Cover
Step 3.
Remove the right side cover. Push the right side cover (when
viewed from the front) backward to slide its tabs out of the slots.
(See Figure 2-19)
Figure 2-19: Remove the Side Cover
Step 4.
Remove the metal filler. After the right side cover is removed,
you can see two holes on the chassis frame. (See Figure 2-20)
Pass the screwdriver through the holes to loosen the screws
fastening the metal filler and remove it.
2-19
Maverick-II Installation and Hardware Reference Manual
Figure 2-20: Loosen the Retention Screws for the Metal Filler
Step 5.
Install the additional PSU module. Insert the PSU module you
separately purchase into the empty bay and fasten the bracket
back to the chassis frame with the retention screws. (See
Figure 2-21)
Figure 2-21: Install the PSU Module
2-20
Chapter 2: Hardware Installation
Step 6.
2.11.3
Reinstall the right cover and the top cover. Enter the tabs of
the right cover back into the slots and then do the same to the
top cover. Tighten the retention screw for the top cover by
turning it clockwise, making the top cover fastened to the
chassis frame.
Memory Module Installation
2.11.3.1 Memory Module Installation Overview
The Maverick-II Cube comes with a pre-installed 256MB (or above) ECC
DIMM module on the controller. The controller supports memory up to 1GB. If
an ECC DIMM module with different capacity needs to be used, the pre-installed
modules must be removed and the new ones installed. If you want to replace the
memory modules, please refer to the installation procedure below.
WARNING!
The controller board in the controller module consists of sensitive components.
Please ensure that all anti-static precautions stipulated above are strictly
adhered to. Only qualified engineers should replace the DIMM module.
2.11.3.2 Selecting the Memory Modules
If the memory module on the controller module is going to be replaced, the
following factors must be considered when you purchase replacement DIMM
modules:
♦ Pre-installed ECC DIMM: The subsystem comes with a 256MB (or above)
ECC DIMM module pre-installed on the controller board. If you wish to
change its capacity, then a new, separately purchased DIMM must be
installed.
♦ ECC DIMM modules supported: The subsystem supports ECC DIMM
modules with memory capacities of 256MB, 512MB and 1 GB.
♦ Installation considerations: When you install the ECC DIMM module, it is
necessary to handle the controller module. The controller board is more
susceptible to damage than the other components and must therefore be
handled with extreme care. ALL anti-static precautions specified in Section
2.3 must be strictly adhered to.
♦ Secure installation: When replacing the DIMM module, make sure that the
new DIMM module is firmly in place prior to installing the controller module. If
the DIMM module is not firmly in place, the subsystem will not run and the
controller will need to be removed and the DIMM module correctly installed.
2-21
Maverick-II Installation and Hardware Reference Manual
♦ Purchasing considerations: When purchasing an ECC DIMM to install on
the controller board, contact your system vendor for its compatibility.
2.11.3.3 DIMM Module Installation
To install the DIMM module, follow the instructions below:
WARNING!
The pre-installed modules must be removed prior to installing new memory
modules. Do this with care. Sensitive components can be damaged during
the process.
Step 1.
Loosen the pre-installed controller module’s retention
screws. The controller module is secured to the enclosure
chassis with two (2) retention screws. (See Figure 2-22) To
remove the controller module, you should first loosen these two
(2) retention screws.
Figure 2-22: Loosen the Retention Screws and Pull the
Controller Module Out
Step 2.
2-22
Remove the controller module. After the controller module
retention screws have been loosened, gently slide the module out
of the chassis. (See Figure 2-22) The DIMM module and the
DIMM socket are located on the solder side of the controller
board. Carefully place the controller module on a static-free
surface with the solder side facing upwards.
Chapter 2: Hardware Installation
Step 3.
Remove the previously installed DIMM module from the
DIMM socket. To do this, push the white clips on either side of
the DIMM module in an outward direction. The previously
installed module will be ejected from the DIMM socket. (See the
Figure 2-23)
Figure 2-23: Push Back the White Clips on the Sides of the DIMM
Module
Step 4.
Remove the DIMM module. Gently pull the DIMM module out of
the socket and then carefully remove it out of the controller
module.
Step 5.
Align the new DIMM module with the DIMM socket. Carefully
align the notches on the DIMM with DIMM socket. Position the
DIMM module so that it can be easily inserted into the DIMM
socket. (See Figure 2-24)
2-23
Maverick-II Installation and Hardware Reference Manual
Figure 2-24: Insert the New DIMM Module
2.11.4
Step 6.
Insert the new DIMM module into the DIMM socket. Once the
DIMM module has been correctly aligned with the DIMM socket,
gently push the DIMM module into the socket. The white clips on
the sides of the socket will close automatically and secure the
DIMM module into the socket. (See Figure 2-24)
Step 7.
Re-install the controller module. Once the DIMM module has
been replaced, re-install the controller module into the subsystem.
To re-install the controller module, align it with the controller
module bay and then gently push it into the subsystem. Once the
controller module is completely inserted into the subsystem
enclosure, secure the controller module by tightening the
retention screws on either side of the controller module rear
panel.
Optional BBU Module Installation
2.11.4.1 BBU Module Installation Overview
A BBU module is an optional item for the subsystem. The BBU can support data
cached in memory during power outage and its use is highly recommended.
2.11.4.2 BBU Module Installation
To install the BBU module, follow the instructions below.
Step 1.
2-24
Remove the metal sheet covering the BBU bay from the
chassis. A metal sheet covers the BBU module bay on the rear
panel of the subsystem. The metal sheet is attached to the
Chapter 2: Hardware Installation
chassis with two (2) screws. To loosen the screws, turn them
counterclockwise. (See Figure 2-25)
NOTE:
It may be difficult to remove the metal sheet as it is embedded in the
subsystem chassis. If you are unable to dislodge the sheet, wedge the head
of a flat-head screwdriver between the metal sheet and the chassis and
then gently nudge the metal sheet out of the chassis.
Figure 2-25: Remove the Metal Sheet Retention Screws
Step 2.
Install the BBU module. After the metal sheet covering the BBU
bay has been removed, the BBU module can be installed. Align
the BBU module with the bay from which the metal sheet was
removed, and then gently push the BBU module into the bay.
(See Figure 2-26)
2-25
Maverick-II Installation and Hardware Reference Manual
Figure 2-26: Install the BBU Module
Step 3.
Secure the BBU module to the enclosure. Tighten the two (2)
retention spring-screws on the back of the BBU module.
2-26
Chapter 3
Subsystem Monitoring
3.1.
Subsystem Monitoring Overview
The subsystem is equipped with a variety of self-monitoring features that keep
you informed of the subsystem’s operational status. These monitoring features
provide vital feedback to help you maintain the operational integrity of the
subsystem. Prompt response to warnings and component failure notifications will
improve the overall operation and help ensure the longevity of the subsystem.
Self-monitoring features include:
♦ Management firmware (FW): The subsystem controller comes with preinstalled firmware. Device status information can be obtained from the
firmware management interfaces using either the LCD keypad panel or a PC
hyper-terminal. The subsystem can be connected to a PC hyper-terminal
through the RS-232C (audio jack) serial COM port. Firmware related
configurations are fully described in the Firmware Operation Manual that
comes with the subsystem. Please refer to this manual for further details.
♦ SANWatch: SANWatch is a Java-based program specifically designed for use
in managing the Maverick-II RAID subsystems. Besides the userfriendly interface that graphically represents disk array elements and
simplifies the normally complicated process of array configuration, SANWatch
also provides real-time reporting on the status of the entire array. With its
help, the task of monitoring disk arrays can be made virtually
effortless.
For
detailed information, please refer to SANWatch User’s
Manual.
♦ LEDs: Device status indicating LEDs are placed on all the ES active
components. These LEDs inform users of the integrity of a given component
or link. You should become familiar with the different LEDs that are present on
the subsystem and be aware of their functions.
♦ Audible alarm: An audible alarm is present on the subsystem controller board
and will be triggered if any threatening events occur. These events usually
jeopardize the functional and operational integrity of the controller board and
must be heeded at all times. Events such as a breach of the temperature
Maverick-II Installation and Hardware Reference Manual
threshold will trigger the alarm and if an onsite subsystem manager is present,
the manager should use either the LCD panel or the PC hyper-terminal to
determine the cause of the alarm and take the appropriate corrective
measures.
♦ I2C: An I2C bus connects to temperature sensors and presence detection
circuits that reside on PSUs, cooling modules, and the BBU. If any problem is
detected, it will be reported in various ways, such as through the embedded
firmware utility.
Subsystem monitoring is a necessary part of subsystem management. When
failure events or other disruptive events are detected and reported, the
subsystem manager must take the appropriate action to rectify the problem.
Failure to act in a properly specified manner to a system event (such as
overheating) can cause severe and permanent damage to the subsystem.
3.2.
Status-indicating LEDs
3.2.1
Brief Overview of the LEDs
Some of the Maverick-II Cube subsystem components have status-indicating
LEDs that show the operational status and integrity of the subsystem
components. Table 3-1 shows the number of LEDs assigned to each
component on each model.
Component
Controller Modules
LEDs/Component
10 for Maverick-II-S;
11 for Maverick-II-R
Maverick-II-S
LEDs
Maverick-lI-R
LEDs
10 (1 controller)
11 (1 controller)
PSU Module
1
1 (1 PSU)
2 (2 PSU)
BBU Module (Optional)
1
1 (1 BBU)
1 (1 BBU)
LCD Keypad Panel
3
3 (1 LCD)
3 (1 LCD)
Drive Trays
2
16 (8 drive
trays)
16 (8 drive
trays)
Table -1: LED Distribution
3
3.2.2
Controller Module LEDs
There are 10 LEDs in total for Maverick-II-S, including six (6) system statusindicating LEDs (numbered from 1-6), two (2) LEDs for LAN link status, one (1)
3-2
Chapter 3 Subsystem Monitoring
LED for default restoration and one (1) LED for SAS channel link status. (See
Figure 3-1) MAVERICK-II-R has one more LED on its controller module than
Maverick-II-S since it provides two SAS ports. (See Figure 3-2)
Figure 3-1: RAID Controller Module Rear-facing Faceplate of Maverick-II-S
Figure 3-2: RAID Controller Module Rear-facing Faceplate of Maverick-II-R
3.2.2.1
System Status LEDs
The system status LEDs are numbered from 1 to 6 and located on the controller’s
rear-facing faceplate. The definitions are shown in Table 3-2.
3-3
Maverick-II Installation and Hardware Reference Manual
LED
1
Name
Ctrl
Status
Color
Status
Green/
GREEN indicates that the controller is active and
operating normally.
Amber
AMBER indicates the controller is being initialized
or has failed. The controller is not ready.
2
C_Dirty
Amber
ON indicates that data is currently cached in
memory or is supported by the BBU during a
power loss.
3
Temp.
Amber
ON indicates that one of the preset temperature
thresholds is violated.
4
BBU Link
Green
ON indicates BBU is present.
5
6
Hst Bsy
Drv Bsy
Green
Green
FLASHING indicates there is active traffic
through the host ports.
OFF indicates there is no activity on the host
ports.
FLASHING indicates there is active traffic on the
drive channels.
OFF indicates there is no activity on the drive
channels.
Table 3-2: System Status LED Definitions
3.2.2.2
SAS Port LEDs
The controller module houses one (1) (Maverick-II-S) or two (2) (Maverick-II-R)
SAS 4x wide host port(s). Each of these SAS ports has one (1) LED for
displaying the operating statuses. When the LED is steady Green, it means all 4
PHYs are validly linked to external devices. When it is Blinking, it means any of
the 4 PHYs has failed. When the LED is Off, it means all 4 PHYs are offline.
3.2.2.3
LAN Port LEDs
A shielded Ethernet cable is recommended for connecting the RJ-45 Ethernet
management port to a local network after you configure an IP address. This
enables you to manage your subsystem via LAN or WAN. Two (2) LEDs on the
Ethernet port indicate connection statuses (as shown in Figure 3-3). See the
figure below for the locations of the LED indicators. Refer to Table 3-3 for the
LED definitions.
3-4
Chapter 3 Subsystem Monitoring
Figure 3-3: LAN Indicators
Name
Color
Status
Link Status
Green
ON indicates the management port is
connected to a node or networking
device.
LAN Activity
Green
BLINKING indicates active transmission.
Table 3-3: LAN Port LED Definitions
3.2.2.4
Restore Default LED
A restore default LED is located beneath the restore default push button on the
lower right corner of the controller faceplate. Before restoring defaults, use the
“Save NVRAM” firmware function to keep a configuration profile. To restore
firmware defaults, use a straighten paper clip to press and hold the button down
while you turn on the subsystem. Once the factory defaults are successfully
restored, the restore default LED will light green. Then you can release the button.
3.2.3
LCD Keypad Panel
The LCD keypad as shown in Figure 3-4 consists of five (5) buttons, three (3)
LEDs, and a 2-row x 16-character LCD screen that provides access to the
firmware-embedded utility. Press the ENT button for two (2) seconds on the initial
screen to enter the main menu. Press the ESC button to clear the current event.
Press the UP and DOWN arrow key buttons to select viewing items. As to the
MUTE button, it is used to silence the alarm temporarily until the next controller
event occurs. For more information on how to use these buttons, please refer to
the Firmware Operation Manual.
The definitions of LEDs on the panel are given in Table 3-4 below.
3-5
Maverick-II Installation and Hardware Reference Manual
Figure -4: LCD Panel LEDs
3
LED
Name
Color
Status
ON indicates that power is being supplied to the
subsystem.
PWR
Blue
OFF indicates that no power is being supplied to the
subsystem.
ON indicates that there is activity on the host/drive
channels.
BUSY
White
OFF indicates that there is no activity on the host/drive
channels.
ON indicates that a component failure/status event has
occurred.
ATTEN
Red
OFF indicates that the subsystem and all its components
are operating correctly.
Table -4: LCD Keypad Panel Definitions
3
3-6
Chapter 3 Subsystem Monitoring
NOTE:
The ATTEN LED will be turned on during the power up process. If the subsystem
boots up correctly, the ATTEN LED will be turned off after the boot up procedure
is complete.
3.2.4
BBU LED
Related locations of BBU LEDs are shown in Figure 3-5. For BBU LED
definitions, please refer to Table 3-5.
Figure 3-5: Location of the BBU LED
Color
Status
Flashing
Amber
The LED flashes to indicate the BBU is being
charged.
Static Amber
OFF
The BBU has failed.
The BBU is fully charged and is able to sustain
cached data.
Table 3-5: BBU LED Definitions
3-7
Maverick-II Installation and Hardware Reference Manual
3.2.5
Drive Tray LEDs
The drive trays come with two (2) status-indicating LEDs, one indicating power
and the other indicating hard drive activity. The LEDs are shown in Figure 3-6
and their definitions in Table 3-6.
Figure -6: Drive Tray LEDs
3
LED Name
Color
Status
FLASHING indicates
activity on the drive.
Drive Busy
Blue
there
is
read/write
OFF indicates there is no read/write activity on
the drive.
GREEN indicates that power is being supplied
to the drive.
Drive Status
Green/Red
RED indicates that the drive has failed or is
missing.
Table -6: Drive Tray LED Definitions
3
3.2.6
PSU Module LED
The PSU module has one (1) LED located just above the power switch. (See
Figure 3-7) The LED indicates the operational status of the PSU module. Please
refer to Table 3-7 for PSU LED definitions.
Figure -7: PSU Module Rear LED
3
3-8
Chapter 3 Subsystem Monitoring
Color
Status
Blinking
Green
The power supply has not been turned on. The PSU module
LED will blink when the subsystem is connected to a power
source but not yet turned on.
Static Green
Static Red
The PSU is operating normally.
The PSU has failed and is unable to continue providing power
to the subsystem.
OFF
The PSU is not turned on. When the power switch is turned off,
the PSU module LED will remain off even if the power cable
has been plugged in.
Table -7: PSU Module LED Definitions
3
3.3.
Audible Alarm
Different controller environmental and operational parameters (such as
temperature, etc.) have been assigned a range of values between which they can
fluctuate. If either the upper or lower thresholds are exceeded, an audible alarm
will automatically be triggered. The alarm will also be triggered when an active
component of the Maverick-II Cube subsystem fails. If the subsystem manager
is onsite and is alerted by the alarm, the manager needs to read the error
message on the LCD screen or on the PC terminal to determine what has
triggered the alarm, and then take appropriate actions to rectify the problem.
WARNING!
Whenever an alarm is triggered, you must identify the problem. If the audible
alarm is ignored or not taken seriously and the problem is not rectified,
permanent damage to the system can result.
3.3.1
Default Threshold Values
Table 3-8 shows the default threshold values for the subsystem. If any of these
values are surpassed, the alarm will sound:
3-9
Maverick-II Installation and Hardware Reference Manual
Parameter
Upper
Threshold
Lower
Threshold
Backplane Board
Temperature
60ºC
0ºC
+3.3V
+3.6V
+2.9V
+5V
+5.5V
+4.5V
+12V
+13.2V
+10.8V
CPU Temperature
90ºC
0ºC
Board Temperature
90ºC
0ºC
Table -8: Default Threshold Values
3
The thresholds in the table above are the default threshold values. To see how to
change these values, please refer to the Firmware Operation Manual that came
with your system.
3.3.2
Failed Devices
If any of the following devices fail, the audible alarm will be triggered:
♦ RAID controller module
♦ Cooling modules
♦ PSU module(s)
♦ BBU module (optional)
♦ Hard drives
3.4.
I2C Monitoring
The PSU, BBU, temperature sensors, and cooling fan modules are monitored
using detecting devices strung over an I2C bus. If any of these modules fails, the
failure will be detected and you will be notified through the various methods
described above.
3-10
Chapter 4
Subsystem Stacking and Operation
4.1
Subsystem Stack
WARNING!
It is advisable to stack the subsystems on top of each other before the hard
drives are installed. Otherwise, the weight of the subsystems will make it more
difficult to install the footplates and to place the subsystems on top of each
other.
The SAS channel port(s) on the subsystem are meant for the connection with
host adapter cards and not for the connection to other Cube subsystems for
expansion. However, when you use multiple subsystems connected to multiple
hosts, you can use footplates to stack these subsystems on the top of each other
to make them economic in space. (See Figure 4-1) The subsystem’s internal
bracket is strong enough to support the configuration with four subsystems
stacked together.
Maverick-II Installation and Hardware Reference Manual
Figure 4T-1: Four Subsystems Stack
When a subsystem set to the desktop configuration is connected to another also
set to the desktop configuration, it is possible to stack the subsystems on top of
each other.
The footplates on subsystems that are being stacked onto other subsystems are
installed differently. Please refer to Section 2.7.2 for more details on how to
install the included footplates when stacking subsystems.
4.2
Power On
Once all the components have been installed in the subsystem, and the host
channels have been connected to the host, the subsystem can be powered on.
4.2.1
Check List
BEFORE powering on the Cube subsystem, please check the following:
4-2
‰
Memory module: The cache memory usually comes as a pre-installed
module. If a separately-purchased memory is applied, make sure the
memory module has been correctly installed on the controller boards.
‰
BBU: Make sure BBU(s) have been properly installed before power-on.
‰
Hard drives: Hard drives have been correctly installed in the drive trays.
Chapter 4: Subsystem Stacking and Operation
4.2.2
‰
Drive trays: All the drive trays, whether or not they contain a hard drive,
have been installed into the subsystem.
‰
Cable connections: The subsystem has been correctly connected to host
computer(s) and management computers
‰
Power cords: The power cords have been connected to the PSUs on the
subsystem and plugged into the main power source.
‰
Ambient temperature: All subsystem components have been acclimated to
the surrounding temperature.
Power On Procedure
When powering on the Maverick-II subsystem, please follow these steps.
Step 1.
Power on the RAID subsystem. Use the included power cords
to connect both power sockets on the subsystem’s power
supplies to the main power source. Power on using the power
switches on power supplies. (See Figure 4-2) Each switch
controls a single PSU. Make sure both switches are turned on if
there are two power modules.
Figure 4-2: Maverick-II Subsystem Power Switches
4-3
Maverick-II Installation and Hardware Reference Manual
CAUTION!
Although the PSUs are redundant in MAVERICK-II-R and a single PSU
can provide sufficient power to the system, it is advisable to turn on both
power supplies. If only one (1) PSU is operating and that PSU fails, system
down time will occur.
Step 2.
4.2.3
Power on the host computers. The host computers should be
the last devices that are turned on. Please refer to the
documentation that came with your host computers to see their
power on procedures.
Power On Status Check
Once the Maverick-II Cube subsystem has been powered on, you should
begin verifying subsystem status via the following monitoring interfaces:
1. Controller module LEDs: The Ctrl_Status and BBU_Link (if BBU is installed)
LEDs should light constantly green.
2. Drive tray LEDs: The blue status LEDs on all drive trays that contain a hard
drive should light up, showing that power is supplied to the disk drives. The
Drive Busy LEDs should also start flashing, indicating that system is
attempting to access hard drives.
3. LEDs on LCD keypad panel: The blue LED on the LCD keypad panel
should illuminate after the system initialization process complete, indicating
that system status is ready. System initialization may take three to five
minutes and the system fault LED may light up during the process. The
system fault LED will be off after a successful boot-up process.
4. SAS port LEDs: The Link LED beside each SAS port should illuminate
green, indicating successful connection has been established.
5. BBU LED: The LED on the BBU rear panel should start flashing amber,
indicating that the BBU is currently being charged.
6. PSU LEDs: If the PSU operate normally and experience no problem after
powered on, the LED on the PSU should light green.
7. Firmware and SANWatch: Once the subsystem has been successfully
initialized, you may examine details of the operating statuses using the
embedded firmware utility or the SANWatch GUI software.
4-4
Chapter 4: Subsystem Stacking and Operation
8. Audible alarm: If any errors occur during the initialization process, the
onboard alarm will sound in a hastily repeated manner.
4.2.4
LCD Screen
When you power on the subsystem, the following messages should appear on
the front panel LCD screen. Wait for the front panel LCD to show “READY” or
“No Host LUN” before the host boots up. Refer to Figure 4-3 on how to read the
screens.
Model Name:
Ready
Status/Data Transfer Indicator
Figure -3: The LCD Screen Segments (MAVERICK-II-R as
an example)
4
The LCD screen startup sequence is shown and described in the sequence
below (MAVERICK-II-R as example):
Initializing….
Please Wait...
This screen appears when the PSUs
are turned on.
Power on Self
Test, Please Wait..
This screen appears when the
subsystem is processing with the test
on the integrity of firmware and
hardware components.
Power on Self
Test Completed
This screen appears after the self test
is completed.
Maverick-II-R
256MB RAM, Wait…
Maverick-II-R
No Host LUN
This screen shows the memory size.
If properly initialized, the subsystem
should correctly indicate the memory
size now.
System is ready. You can now start to
configure the subsystem.
4-5
Maverick-II Installation and Hardware Reference Manual
4.3
Power Down Procedure
To power down the Maverick-II subsystem, please follow these steps:
NOTE:
When powering down the Maverick-II subsystem, please ensure that no
time- consuming processes, like a “logical drive parity” check or a “Media
Scan,” are running.
Step 1. Stop I/O access to the system. Close the application software
on the server to stop all I/O accesses to the subsystem. Please
refer to the documentation provided with your application server.
Step 2. Disconnect the host computer. Disconnect the SAS cables from
both the application server and the Maverick-II subsystem.
Step 3.
Flush the cache. Use the Shutdown Controller firmware function
to flush all cached data. This prepares the RAID subsystem to be
powered down and minimize the chance of data inconsistency.
Step 4. Turn off the power. Turn off the power switch at the rear panel of
the subsystem.
4-6
Chapter 5
Subsystem Maintenance
5.1.
Introducing Subsystem Maintenance
5.1.1
Maintenance
Regular monitoring and maintenance of your subsystem will minimize subsystem
downtime and preserve the working integrity of the system for a longer period of
time. If any of the subsystem components fail, they must be replaced as soon as
possible.
WARNING!
Do not remove a failed component from the subsystem until you have a
replacement on hand. If you remove a failed component without replacing it,
the internal airflow will be disrupted and the system will overheat and cause
damage to the subsystem.
All of the following components can be replaced in case of failure:
1. Controller module – Section 5.2
2. DIMM module – Section 5.2.3
3. Optional BBU module – Section 5.3
4. PSU modules – Section 5.4
5. Cooling modules – Section 5.5
6. LCD keypad panel – Section 5.6
7. Hard drives – Section 5.7
Maverick-II Installation and Hardware Reference Manual
5.1.2
General Notes on Component Replacement
♦ With the exception of the RAID controller module, the LCD keypad panel and
the BBU module (if installed), all of the components on the subsystem,
including the PSU modules (in dual-PSU configuration), cooling modules,
and drive trays, are hot-swappable. They can be changed while the
subsystem is still in operation.
♦ Qualified engineers who are familiar with the subsystem should be the only
ones who make component replacements. If you are not familiar with the
subsystem and/or with RAID subsystem maintenance in general, it is strongly
advised that you refer subsystem maintenance to a suitably qualified
maintenance engineer.
♦ Normalized airflow is directly dependent upon the presence of all subsystem
components. Even if a subsystem component fails, it should not be removed
from the subsystem until a replacement is readily at hand for installation.
Removing a subsystem component without replacing it can lead to
permanent subsystem damage.
♦ When you replace any hot-swappable component, caution should be taken to
ensure that the components are handled in an appropriate manner. Rough or
improper handling of components can lead to irreparable damage.
♦ When removing the controller module from the subsystem, ensure that the
power has been turned off and that all precautionary measures, without
exception, are adhered to. The controller board is very sensitive and can be
easily damaged.
5.2.
Replacing Controller Module Components
5.2.1
Notes on Controller Module Maintenance
♦ When you replace the controller module, it is not recommended to re-use the
DIMM module on the replaced controller unless you have a similar system to
test the used module.
♦ When replacing the controller module, all previously stipulated safety
precautions (see Section 2.3) must be strictly adhered to. Since the
controller board is one of the most sensitive components in the subsystem,
failure to adhere to these precautions can result in permanent damage and
result in timely delays.
♦ For your own safety and that of the subsystem, make sure that no power is
being supplied to the system prior to replacing the controller module.
5-2
Chapter 5: Subsystem Maintenance
5.2.2
Removing the Controller Module
To remove the controller module:
Step 1.
Power down the subsystem. If possible, properly power down
the subsystem following the instructions given in Section 4.3. If
you are unable to power down the subsystem correctly, turn off
the power switches on the PSU modules.
Step 2.
Disconnect all the cables. Disconnect all the cables, including
the SAS cables, Ethernet cable and serial port communications
cable, from the rear of the chassis.
Step 3.
Loosen the retention screws. The controller module is secured
to the subsystem enclosure with two (2) retention screws on its
faceplate. To remove the controller, loosen the retention screws
using a Phillips screwdriver to turn them counterclockwise. (See
Figure 5-1)
Figure -1: Loosening the Retention Screws and Removing
Controller
5
Step 4.
5.2.3
Remove the controller module. Once the retention screws have
been loosened, gently pull the controller module out of the
subsystem enclosure.
Replacing the DIMM Module
If a DIMM module fails or a DIMM module with a higher memory capacity is
required, the onboard DIMM module must be replaced.
5-3
Maverick-II Installation and Hardware Reference Manual
♦ Failed DIMM module: A DIMM module failure is often reported as parity
errors or a DIMM is missing. If a DIMM module has failed, turn off all PSU
modules, disconnect all the cables connected to the controller, and then
remove the controller module.
♦ DIMM module replacement: If a DIMM module is going to be replaced,
correctly power down the subsystem, disconnect all the cables connected to
the controller, and then remove the controller module.
NOTE:
When you replace a DIMM, the whole subsystem needs to be powered down.
Therefore, you should carefully select the time when the replacement will be
made in order to minimize the overall disruption to service.
To replace the DIMM module:
Step 1. Remove the controller module. (See Section 5.2.2) After
removing the controller module, place the controller module on a
static-free surface with the solder side facing up.
Step 2. Remove the previously installed DIMM module from the
DIMM socket. Push the white clips on either side of the DIMM
module in an outward direction. The previously installed module
will be ejected from the DIMM socket. (See Figure 5-2)
Figure -2: Removing the DIMM Module
5
Step 3. Pull the DIMM module out of the controller module. Gently
pull the DIMM module out of the socket and then carefully
remove it out of the controller module box.
5-4
Chapter 5: Subsystem Maintenance
Step 4. Align the new DIMM module with the DIMM socket. Note how
the DIMM module is keyed and position it so that it can be easily
inserted into the DIMM socket.
Step 5. Insert the new DIMM module into the DIMM socket. Once the
DIMM module has been correctly aligned with the DIMM socket,
gently push the DIMM module into the socket. (See Figure 5-3)
DO NOT USE FORCE! Forcing the DIMM module can damage
the socket if the module is not correctly aligned. The white clips
on the sides of the socket will close automatically and secure the
DIMM module into the socket.
Figure -3: Inserting a New DIMM
5
5.2.4
Installing the Controller Module
To install the controller module:
Step 1.
Make sure all components are installed. Before you install the
controller module into the enclosure, make sure that the DIMM
module has been installed (See Section 5.2.3).
Step 2.
Align the controller module with the controller module bay.
Step 3.
Insert the controller module. After the controller module has
been correctly aligned with the controller module bay, insert it into
the bay and gently slide it in until you feel with your hands the
docking connectors make contact. (See Figure 5-4)
Step 4.
Tighten the retention screws. After the controller module has
been inserted into the subsystem enclosure, secure the controller
module by tightening the retention screws. (See Figure 5-4)
5-5
Maverick-II Installation and Hardware Reference Manual
Figure -4: Insert the Controller Module
5
Step 5. Reconnect the controller module cables. After the controller
module has been correctly installed into the subsystem, reconnect
the cables that were previously removed. These cables may
include one (1) or two (2) host SAS cables, one (1) Ethernet cable
and one (1) RS-232C audio-jack-to-serial-port cable.
Step 6. Power on the subsystem. After the cables have been
reconnected to the controller module, the subsystem can be
powered on.
5.3.
Replacing the BBU Module
To replace the BBU module, please follow these steps:
Step 1.
5-6
Remove the BBU module The BBU module is secured to the
enclosure with two (2) retention spring-screws. Loosen these
screws by turning them counterclockwise. After the retention
spring-screws have been loosened, gently slide the module out of
the enclosure. Once removed, gently place the bracket on a
static-free surface. (See Figure 5-5)
Chapter 5: Subsystem Maintenance
Figure -5: Extracting the BBU Module
5
Step 2.
Insert the replacement BBU. Carefully align the BBU module
with the BBU module bay in the rear of the subsystem, and then
gently slide it into the subsystem. (See Figure 5-6)
Figure -6: Installing the New BBU Module
5
Step 3. Tighten the retention spring-screws. After the BBU module
has been correctly inserted into the subsystem enclosure, tighten
its two (2) retention spring-screws to ensure that it is properly
secured.
5-7
Maverick-II Installation and Hardware Reference Manual
5.4.
Replacing a Failed PSU Module
5.4.1
Notes on PSU Module Maintenance
When a PSU module fails, ideally it should be replaced immediately. Do not
remove the failed PSU module unless a replacement is readily available. In a
redundant PSU configuration, removing a PSU without a replacement will cause
severe disruptions to the internal airflow and the subsystem will overheat,
possibly leading to irreparable damage to some of the subsystem components.
WARNING!
Although in MAVERICK-II-R the PSU modules are fully redundant, it is
not advisable to run the Maverick-II subsystem with a single PSU module for
a long period of time. If the only PSU module fails, the subsystem will shut down.
5.4.2
Replacing the PSU Module
To replace a failed PSU, please follow these steps:
Step 1.
Turn off the failed PSU. Turn it off using the power switch. (See
Figure 5-7)
Figure 5-7: Maverick-II Subsystem Power Switches
5-8
Chapter 5: Subsystem Maintenance
Step 2.
Remove the power cable. Once the PSU module has been
turned off, remove the power cable that connects the failed PSU
module to the main power.
Step 3.
Loosen the PSU bracket retention screw. The PSU module is
held in place by a customized bracket. To rotate the bracket out
of the way, the screw that secures it to the chassis must be
loosened. (See Figure 5-8)
Figure 5-8: Loosening the PSU Bracket Retention Screw
Step 4.
Swing the bracket to the side. After the retention screw has
been loosened, the bracket that secures the PSU module can be
rotated out of the way. (See Figure 5-8)
Step 5.
Pull the PSU module out of the enclosure. After the PSU
retention bracket has been rotated out of the way, gently pull the
PSU module out of the enclosure. (See Figure 5-9)
Figure -9: Removing the PSU from the Subsystem
5
5-9
Maverick-II Installation and Hardware Reference Manual
Step 6 Install the PSU replacement module. Once the faulty PSU has
been removed, insert the new PSU module into the subsystem.
DO NOT slam the module into place! Doing so will damage the
back-end connector or the backplane. Rotate the retention
bracket back into its correct position and tighten the retention
screw by turning it clockwise.
5.5.
Cooling Module Maintenance
5.5.1
Notes on Cooling Module Maintenance
♦ Two (2) redundant cooling modules: The subsystem is equipped with two
(2) redundant, hot-swappable, single-fan cooling modules. These cooling
modules control the internal operational temperature of the subsystem and
therefore their working integrity should be maintained at all times.
♦ Detecting a failed cooling fan module: If a cooling module fails, you can
choose to be notified of the failure by the LED located at the back of the module,
an audible alarm, the firmware event messages, the SANWatch Enclosure View,
or the event notifications via Notification Manager utility.
♦ Replacing a cooling module: When you are notified that a cooling module
has failed, it should be replaced as soon as possible. A failed cooling module
should be removed from the subsystem only when you have a replacement
module ready for installation.
WARNING!
Although the cooling fan modules are fully redundant, it is not advisable to run
the Maverick-II subsystem with a single cooling module for a long period of
time. If the only cooling module fails, the system is at risk of irreparable damage.
5.5.2
Replacing a Cooling Module
To replace a cooling module, please follow these instructions:
Step 1.
5-10
Loosen the retention screw. The cooling modules are secured
to the chassis with a single retention screw. To remove the
cooling module, loosen the retention screw. (See Figure 5-10)
Chapter 5: Subsystem Maintenance
Figure -10: Removing the Cooling Module Retention Screw
5
Step 2.
Remove the cooling module from the enclosure. After the
retention screw has been loosened, gently pull the failed cooling
module out of the enclosure. (See Figure 5-11)
Figure -11: Removing the Cooling Module
5
Step 3. Disconnect the cable connectors. After the cooling module has
been fully extracted from the enclosure, disconnect the cooling
module cable connector from the enclosure’s cable connector
shown in Figure 5-12.
5-11
Maverick-II Installation and Hardware Reference Manual
Figure -12: Disconnect the Cable Connectors
5
Step 4.
Install the new cooling module. After the faulty cooling
module has been removed, the replacement module can be
installed. First connect the cable connectors, insert the cooling
module into the chassis and then tighten the cooling module
retention screw.
5.6.
LCD Keypad Panel Replacement
5.6.1
Notes on LCD Panel Replacement
♦ Power down the subsystem: The LCD keypad panel is not a hotswappable component, so the subsystem must be powered down before you
replace the LCD panel. Additionally, all the drive trays must be removed from
the subsystem so that you can access the inside of the chassis to loosen the
LCD retention screw.
♦ Subsystem position: When you replace the LCD panel, it is better to set the
subsystem in the tower position. This will make it easier to access the inside
of the chassis to loosen the LCD retention screw.
5-12
Chapter 5: Subsystem Maintenance
CAUTION!
RAID subsystems support “Configuration on Drives.” Information of logical
configurations is stored on each hard drive. Although it does not matter
installing the removed disk drives into different drive bays, it is still
recommended to use sticky notes to indicate the original locations. In this way,
you won’t mix the hard drives even when you are working on more than one
subsystem.
5.6.2
LCD Panel Replacement
When a LCD panel fails, it needs to be replaced. Please follow the steps below:
Step 1.
Power down the subsystem. If possible, properly power down
the subsystem following the instructions given in Section 4.3. If
you are unable to power down the subsystem correctly, turn off
the power switches on the PSU modules.
Step 2.
Remove all the drive trays. See Section 5.7.2, step 2-4.
Step 3.
Loosen the floating screw. The LCD panel is secured to the
enclosure from the inside of the chassis. Once all the drive trays
have been removed, loosen the floating screw. (See Figure 5-13)
5-13
Maverick-II Installation and Hardware Reference Manual
Figure -13: Loosening the Floating Screw
5
Step 4.
5-14
Remove the LCD panel from the enclosure. To remove the
LCD panel from the enclosure, pass a screwdriver through the
access hole above the LCD panel and gently lever the LCD panel
out of the enclosure by pushing the screwdriver inwards. (See
Figure 5-14)
Chapter 5: Subsystem Maintenance
Figure -14: Levering Out the LCD Panel
5
Step 5.
Step 6.
Step 7.
Install the replacement LCD panel. Align the connector at the
back of the LCD panel with the connector in the subsystem.
Once the LCD panel has been inserted, tighten the floating screw
inside the chassis.
Reinstall the hard drives. After the LCD panel has been
replaced, the hard drives placed in drive trays can be reinstalled.
Power on the subsystem. After the LCD panel and hard drives
have been correctly reinstalled, power on the subsystem.
5.7.
Disk Drive Maintenance
5.7.1
Notes on Hard Drive Maintenance
♦ Hot-swappable drive trays: The drive trays are all hot-swappable. If a hard
drive fails, it can be replaced while the subsystem is still running.
♦ Remove drives slowly: When removing a drive tray, withdraw it from the
enclosure slowly.
5-15
Maverick-II Installation and Hardware Reference Manual
♦ Open flap: Once the flap on the drive tray has been opened, the drive tray
must be removed from the subsystem.
♦ Replacement on-hand: Before removing a failed hard drive from the
subsystem, make sure you have a replacement hard drive readily available.
Do not leave the drive bay open for an extended period of time. If the drive
bay is left unoccupied for an extended period of time, the normalized airflow
will be disrupted and subsystem components will overheat and may become
permanently damaged.
5.7.2
Hard Drive Replacement
To replace a hard drive, please follow these steps:
Step 1.
Identify the location of the drive tray that contains a hard drive
indicated as faulty. You may use firmware embedded utility or
SANWatch software to locate a faulty drive. The drive tray LED
should also light red.
Step 2.
Remove the drive tray. To remove the drive tray from the
enclosure, the bezel lock must be unlocked. To do this, use a
small-sized Phillips screwdriver to turn the bezel lock on the front
of the drive tray until the groove on its face is in a horizontal
orientation. (See Figure 5-15)
Figure 5-15: Front View of an Individual Drive Tray with the Bezel Lock in
the Unlocked Position
Step 3.
5-16
Open the front flap. Once the bezel lock is unlocked, open the
front flap by pushing the release button on the front of the drive
tray. The drive tray front flap will spring open. (See Figure 5-16)
Chapter 5: Subsystem Maintenance
Figure 5-16: Opening Drive Tray Front Flap
Step 4.
Step 5.
Remove the drive tray by pulling it one inch away from the drive
bay. Wait for at least 30 seconds for the disk drive to spin down
(if the disk drive is removed for a different purpose, e.g., cloning
the members of a logical drive or Copy & Replace), and then
gently and carefully withdraw the drive tray from the chassis.
Remove the retention screws. The hard drive is secured to the
drive tray with four (4) retention screws (two on each side).
Remove them by turning them counterclockwise. (See Figure 517)
Figure 5-17: Removing the Retention Screws of the Hard Drives
5-17
Maverick-II Installation and Hardware Reference Manual
Step 6.
Install the new hard drive. After the old hard drive is removed,
install the replacement drive. Please refer to Section 2.8.3 for the
complete hard drive installation procedure.
Step 7.
Re-install the drive tray back to the subsystem. Refer to Section
2.9.
5-18
Appendix A
Specifications
A.1.
Technical Specifications
Environmental Specifications
Humidity
5 to 95% (non-condensing)
Temperature
Operating: 0º to 35ºC
Non-operating: -40º to 60ºC
Power Supply Requirements
DC
12V @ 16A
5V @ 25A
3.3V @ 20A
AC Input
90VAC to 260VAC with PFC
Power
Consumption
250W
Dimensions
Height
370 mm
Width
155 mm
Depth
343 mm
Not including footplates
Maverick-II Installation and Hardware Reference Manual
System Weight
11.4 kg (Maverick-II-S)
Net
12.5 kg (Maverick-II-R)
12.9 kg (Maverick-II-S
Gross
14.0 kg (Maverick-II-R)
EMI/EMC
•
•
•
•
FCC Class-B
CE/FCC
BSMI
CCC (for PSU)
Safety Requirements
•
•
•
UL
CB
BSMI
Shock
Half-sine
Operating: 5G peak, 11ms duration
Non-operating: 15G, 11ms, half-sine
Square
240G, 2ms, half-sine
Vibration
Operating
5 to 500Hz, 0.2G, X/Y/Z
Non-operating
5 to 500Hz, 1G, X/Y/Z
Warning Alarms
•
•
•
•
A-2
Audible alarms
LCD screen messages
System LEDs
Event notification via the SANWatch Manager
Appendix A: Specifications
A.2.
Controller Specifications
A.2.1
Configuration
Specification
RAID Levels
0, 1(0 + 1), 3, 5, 6, 10, 30, 50, 60
Host O/S Compatibility
Host O/S independent
Host Interface
SAS
Host Channels
Pre-configured host channel; each with four (4) PHYs; CH0
for Maverick-II-S; CH0 & CH1 for Maverick-II-R
Drive Interface
Supports up to eight (8) channels of 3.0Gbps SATA-II
Drive Channels
Eight (8); all drive channels are preset and cannot be
changed
Cache Mode
Write-through or write-back
Cache Memory
Up to 1GB ECC DIMM
Firmware on Flash
Memory
Yes
Drive Hot-swapping
Yes
RAID Controller in a
Removable Module
Yes
A-3
Maverick-II Installation and Hardware Reference Manual
A.2.2
RAID Controller Architecture
Specification
CPU
PowerPC RISC processor
DIMM Slot
Memory Module
Supported
Female, right angle
ECC DIMM
ASIC
RAID ASIC400
Flash ROM
8 MB (3.3V)
NVRAM
32Kb with RTC (real-time clock)
Hardware XOR
Yes
Real-time Clock
For event messages with time record and task scheduler for the
Media Scan operation
A.2.3
Environmental Specifications
Specification
Input Voltage
Operating
Temperature
+5V DC +12V DC
0 to 40ºC
Relative Humidity
0 to 90% non-condensing
Altitude
Operation: 12,000ft, 35ºC
Non-operation: 40,000ft, 0ºC
A.3.
Drive Tray Specifications
Specification
A-4
Tray Pitch
28mm
Tray Width
< 110mm
Tray Carrier Depth
180mm
Tray Plastic Depth
27mm
Total Depth
210mm ( = 180mm + 30mm)
Key-lock
Yes
Appendix A: Specifications
A.4.
Power Supply Specifications
Specification
Dimensions
258.5 mm (D) x 83 mm (W) x 40 mm (H)
Nominal Power
DC Output
250W
12.0V: 16A
5.0V: 25A
3.3V: 20A
Input Frequency
47 to 63Hz
AC Input
90VAC @ 5A to 264VAC @ 2.5A with PFC
Power Factor Correction
Yes
Hold-up Time
At least 16ms at 115/230VAC full load after a loss of AC
input
I2C
Through backplane to controller
Over-temperature
Protection
Lost cooling or excessive ambient temperature
Cooling Fans
One fan for each unit (inside PSU)
A-5
Maverick-II Installation and Hardware Reference Manual
This page is intentionally left blank.
A-6
Appendix B
Spare Parts and Accessories
B.1.
Spare Parts
Spare Part
Controller
Module
Model Name
IFT-81AS21CE08C-0010
IFT-81AS21CE08CM2-0010
IFT-81AS21CE08-0010
IFT-81AS21CE08M2-0010
Description
SAS-to-SATA
RAID
controller
module,
for
MAVERICK-II-S
subsystem, 1x (SAS 4x wide) host
connectors, 8x SATA-II drive
channels
SAS-to-SATA
RAID
controller
module,
for
MAVERICK-II-S
subsystem, 1x (SAS 4x wide) host
connectors, 8x SATA-II drive
channels, pre-installed with 256 MB
memory module
SAS-to-SATA
RAID
controller
module,
for
MAVERICK-II-R
subsystem, 2x (SAS 4x wide) host
connectors, 8x SATA-II drive
channels
SAS-to-SATA
RAID
controller
module,
for
MAVERICK-II-R
subsystem, 2x (SAS 4x wide) host
connectors, 8x SATA-II drive
channels; pre-installed with 256 MB
memory module
Maverick-II Installation and Hardware Reference Manual
LCD Keypad
Panel
IFT-9271CLCD1-0030 (Black)
LCD keypad panel, Type-II panel,
for Cube/8-bay subsystems
IFT-9271CLCD1-0050 (Silver)
HDD
Tray
Drive
IFT-9273CDTray-0030 (Black)
Drive tray, Type-II bezel and TypeII LED lightpipe
IFT-9273CDTray-0050 (Silver)
PSU Module
IFT-9271CPSU-0010
Power supply module, for
Cube/8-bay subsystems, 250W
Cooling
Module
IFT-9271ECFanMod-0010
Single cooling fan module, for
Cube/8-bay
subsystems,
Low
acoustics
Fan
Table -1: Spare Parts
B-2
Appendix B: Spare Parts and Accessories
B.2.
Accessories
Spare Part
Model Name
Description
SAS
External
Cable
IFT9270CmSASCab20030
SAS external cable, SFF-8088 to SFF8088, 120 cm
IFT9270CmSASCab40030
SAS external cable, SFF-8088 to SFF8470, 120 cm
Serial Cable
IFT-9270ASCab0010
RS-232C audio-jack-to-DB-9 serial
communications cable
Null Modem
IFT-9011
Null modem
DDR
DIMM
Memory Module
DDRESCM2-0010
256MB DDR DIMM module
DDRESCM5-0010
512MB DDR DIMM module
DDRESCMA-0010
1G DDR DIMM module
IFT-9271CBT
BBU module that includes battery cells
BBU Module
Table -2: Accessories
B-3
Maverick-II Installation and Hardware Reference Manual
This page is intentionally left blank.
B-4
Appendix C
Pinouts
C.1.
SAS Connector Pinouts
The mini SAS host ports comply with SFF-8088 specification.
Figure C-1: Mini SAS SFF-8088 Connector
Pin
Description
Pin
Description
A1
GND
B1
GND
A2
RX0+
B2
TX0+
A3
RX0-
B3
TX0-
A4
GND
B4
GND
A5
RX1+
B5
TX1+
A6
RX1-
B6
TX1-
A7
GND
B7
GND
A8
RX2+
B8
TX2+
A9
RX2-
B9
TX2-
A10
GND
B10
GND
Maverick-II Installation and Hardware Reference Manual
A11
RX3+
B11
TX3+
A12
RX3-
B12
TX3-
A13
GND
B13
GND
Table C-1: SAS Port Pinout Definitions
C.2.
COM1 Serial Port Cable
Figure C-2: Serial Cable Pinouts
The COM 1 Cable is used to connect a PC running terminal emulation
program.
P2 & P3 Pin Number
Pin Name
1
2
3
GND
TXD
RXD
CN2 Pin Number
Pin Name
1
2
3
4
5
6
7
8
9
NC
RXD
GND
DTR (Shorted)
TXD
DSR (Shorted)
RTS (Shorted)
CTS (Shorted)
NC
Table C-2: Serial Cable Pin Out Definitions
C-2
Appendix C: Pinouts
C.3.
Ethernet Port Pinouts
Pin
Pin Name
Pin
Pin Name
1
LAN_TXP
7
LAN_RXP
2
LAN_TXN
8
LAN_RXN
3
CT
9
Pulled high for Pin 10
4
N1
10
LAN_LEDG (Link OK)
5
N1
11
Pulled high for Pin12
6
CT
12
LAN_LEDY (data transfer)
Table C-3: Ethernet Port Pinouts
C.4.
Main Power
IEC-type receptacle.
C-3
Maverick-II Installation and Hardware Reference Manual
This page is intentionally left blank.
C-4