1
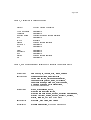
MacIvory Delivery User’s Manual Overview of the MacIvory Delivery Software MacIvory Delivery software provides a framework in which to quickly deliver applications with significantly reduced disk space requirements and marginally increased performance. The world size of MacIvory Delivery is less than half that required for Development Genera. Paging file requirements are reduced by a lesser, application-dependent amount. You will find a slight performance improvement due to the decreased working set and fully linked software. See the section "Direct Calls: a Linking Feature for Ivory-based Machines", for further information. Naturally, the complete functionality of Genera cannot be provided with such a drastic reduction in world size. However, most applications will run under MacIvory Delivery with little or no modification. The exceptions are applications that reference systems such as Zmail that are not included in MacIvory Delivery, or that call undocumented internal functions. If your application requires any features missing from MacIvory Delivery, you may be interested in delivering your application in a Custom Delivery world. See the section "Customizing MacIvory Delivery Worlds". MacIvory Delivery is not suitable for application development or debugging. Unlike the Symbolics 3610AE, which includes all of Development Genera but with some portions disabled, MacIvory Delivery is tailored for delivery environments; it does not include many program-development systems or debugging databases necessary to develop and debug software. Any site doing software development work requires Development Genera. Note that it is a violation of the Symbolics software license agreement for anyone to run Development Genera without purchasing the Development Genera option. It is illegal to copy Development Genera or any portion thereof to any machine for which that option has not been purchased. Technical Description of the MacIvory Delivery Software MacIvory Delivery excludes many application-level and development-only features of Development Genera. Except where indicated, these features are not available individually, and can only be purchased as part of the bundled Development Genera package. The software excluded is: Converse Dialnet Display Debugger Document Examiner Encryption FSEdit Flavor Examiner Frame-Up Peek Presentation Inspector Screen Dimmer SCSI Manager Serial Source Compare Source Files Spell Checker Page 1092 Hardcopy Inspector Installation Tools LMFS math package Metering Tape Terminal Who-Calls Zmacs Editor Zmail A list of functions and variables removed appears at the end of this section. See Table !. To determine if your application software calls a function that is not defined in the delivery world, you can call the undocumented function si:showundefined-functions. This will also list some calls to undefined functions by the system software, which you can safely ignore. Support for making a Delivery machine a server of any sort (file, mail, domain, tape, or namespace servers, for example) is not included in MacIvory Delivery. Some development features of Genera are only partially usable in MacIvory Delivery. The affected areas are the Debugger, Compiler, Help Utilities, and Windows. • • • • Some Common Lisp functions that are really development tools (see Table !) are excluded from the Delivery Software. The Debugger is usable only for proceeding, aborting, viewing a short backtrace, or writing a full backtrace to a file for bug reporting. Most information in the Genera Debugger is not present, such as names and values of arguments, local variables, and internal functions. Advanced features such as returning from arbitrary functions, breakpoints, stepper, monitor, entry and exit traps, evaluation in the Debugger lexical environment, and source-level debugging are not provided. In short, the Debugger can be used by programs that depend on the Debugger to provide proceed options, but only for remedial debugging of applications during porting and bug-reporting in the field. The Lisp compiler does not support compilation of files. However, it fully supports compilation to core, so programs that write and compile code (such as flavor method combination) will operate correctly. A number of help utilities such as SYMBOL-HELP are not provided. However, many simpler help features such as command completion and keyword argument documentation remain. A portion of the window system is obsolete and has not been completely documented. Because its data structures take up a disproportionate amount of space, this portion has been removed from the Delivery world. The removed portion was partially documented in the following sections of the Programming the User Interface volume of the Genera documentation set. Note that all of these facilities have been superseded by Dynamic Window facilities. ° Flashy Scrolling (documented in the section "Scrolling Windows") Page 1093 ° ° ° ° ° ° ° ° ° ° • zl:cursorpos "The User Option Facility" prompt-and-read (partially removed) "Scroll Windows" "Text Scroll Windows" "The Choose Variable Values Facility" "The Margin Choice Facility" "The Mouse-Sensitive Items Facility" "The Multiple Choice Facility" "The Multiple Menu Choose Facility" The Command Processor substrate is included, but many of the commands having to do with development (for example, Debug Process, Compile File, Monitor Variable) have been removed. The following features are present in MacIvory Delivery. Except where noted, the systems are present in their entirety. Symbolics Common Lisp (except as noted below) Lisp Evaluator Lisp Compiler (except as noted above) Flavors Garbage Collector Table System System Construction Tool (see below) Scheduler Linker Error System Chaosnet Generic File System Window System (except as noted above) Dynamic Windows Presentation System (Semanticue) Command Processor (except as noted above) Debugger (delivery version only) Macintosh File System support Macintosh Toolbox support Macintosh Remote Procedure Call (RPC) The portion of the System Construction Tool (SCT) included in MacIvory Delivery is for loading systems and patches, but not for compiling, distributing, or patching systems. Netboot and Color are currently unavailable on Ivory, but may be included in a future release. When they are released, they will be included in MacIvory Delivery. LMFS and Tape support are not included in MacIvory Delivery. Delivery configurations not having network access should use the Macintosh file system and tape. This approach saves disk space, simplifies file transfer and backup procedures, and allows LMFS utilities to be excluded from the delivery world. Many layered products are not available for MacIvory Delivery, or are available only in runtime versions. As of March 1990, the availability of Symbolics Layered products for MacIvory Delivery is shown in Table !. This information is subject to change; contact your sales representative for current information. Page 1094 Table 3. Availability of Layered Products Product Delivery Version Availability CLOE Developer Concordia Delivery DocEx DNA unavailable unavailable Concordia runtime version available unavailable IP/TCP Joshua MACSYMA NFS available runtime version available unavailable unavailable Plexi S-products SNA Statice X11 unavailable unavailable unavailable runtime version available unavailable Table 4. Some Functions and Variables Not Present in the Delivery World cl functions compile-file, ed, inspect, step, trace, untrace scl functions choose-user-options, compile-system, define-user-option, define-user-option-alist, describe-system,grindef, mexp, print-sends, reset-user-options, uncompile, what-files-call, who-calls, who-uses, write-user-options, plus some listed above zl functions zl:bug, zl:cursorpos, zl:dbg, zl:define-site-alist-user-option, zl:define-site-user-option, zl:dired, zl:display-notifications, zl:grind-top-level, zl:mail, zl:peek, zl:qreply, zl:qsend, zl:step, zl:zmail, plus some listed above scl variables step-form, step-value, step-values zl variables zl:trace-compile-flag, plus some listed above Page 1095 Customizing MacIvory Delivery Worlds You may find MacIvory Delivery inappropriate for your application. MacIvory Delivery may be too large, contain unneeded software, and/or exclude software critical to your applications. You can include delivery versions of development systems such as Zwei, Hardcopy, or Tape, which are not part of the basic delivery world. You can also include layered systems such as IP/TCP in the compressed world. You may be able to address some of these problems yourself by including small amounts of code from Development Genera in your products shipped with MacIvory Delivery. Contact the Symbolics Consulting Group at 617-221-1000 for more information on licensing and obtaining delivery versions of various Genera development systems. If your needs diverge greatly from MacIvory Delivery, contact the Symbolics Consulting Group at 617-221-1000 for information about the Custom Delivery program. Symbolics is committed to supporting the delivery of all customers’ applications, through our Custom Delivery program. Under this program, Symbolics consultants will provide cost-effective custom versions of Genera tailored to your needs. The consultants can produce a world with exactly the software needed for your application, and include your configured application in the compressed world if desired. Installation of the MacIvory Delivery Software MacIvory Delivery software comes as a preconfigured disk from Symbolics, or as an upgrade kit containing the board, a world tape, and diskettes. If you have purchased the preconfigured disk, you can skip to "Adding a Delivery MacIvory to Your Site". If you have purchased the upgrade kit, you must configure your Macintosh disk and install the Symbolics MacIvory Delivery Software. Setting up a Disk for Use with MacIvory This section tells you how to set up a SCSI hard disk for use with a MacIvory system. If you need information about Ivory Partitions, see the section "Background Information About Ivory Partitions". The procedure to set up a disk consists of these general steps: 1. Deciding how much of the disk to dedicate to Ivory use, and how much to Macintosh use. 2. Creating the necessary Macintosh disk partitions. 3. Installing Macintosh system software and device drivers. 4. Installing Symbolics software that runs on the Macintosh half of the MacIvory system. 5. Creating the necessary Ivory disk partitions. Page 1096 6. Installing software that runs on the Ivory half of the MacIvory system. Decide How Much of the Disk to Dedicate to Ivory Use, and How Much to Macintosh Use You must decide how to partition your disk between the Macintosh and the Ivory. This decision is based on what types of software you are going to run on the system, what size disk you have, and whether you are networked to a file server or need to store all your files locally. We can give some general guidelines here. There are three different units of measurement of disk capacity in common use: megabytes, kilobytes, and pages. It is helpful to know how to convert among them. Disk hardware sizes are quoted in megabytes. A megabyte is 1,048,576 bytes. These are sometimes unformatted capacities, which slightly overstate the amount of data you can store on the disk. For example, a 300-megabyte disk might actually hold around 287 megabytes, and a 380-megabyte disk might actually hold around 333 megabytes. Some disk partitioning tools also quote sizes in megabytes. Macintosh disk partitions are measured in kilobytes. A megabyte is 1024 kilobytes. When the Finder tells you "288,167K in disk, 3,132K available", for example, this means the disk’s size is 291,299 kilobytes, of which all but 3,132 kilobytes are in use to store files. The actual numbers will be different on your disk, of course. Ivory disk partitions are measured in Ivory pages of 256 40-bit words (1280 bytes) each. There are 800 Ivory pages in 1000 kilobytes, and there are 819.2 Ivory pages in a megabyte. Each 1000 Ivory pages occupies 1250 kilobytes or 1.22 megabytes. If you have a 300-megabyte disk, you might create an Ivory partition of 200,000 Ivory pages. This will occupy 250,000 kilobytes, leaving about 40,000 kilobytes for Macintosh files. If you needed more space for Macintosh files, either to run a large number of Macintosh applications or to use the Macintosh file system to store your Genera files, you might decrease the Ivory partition to 150,000 pages, leaving about 100,000 kilobytes for Macintosh files. On the other hand, if you were going to make very little use of the Macintosh file system, you could reduce its size to 20,000 kilobytes and create a 217,000-page Ivory partition. The considerations for other disk sizes are similar. A typical partitioning of a 760 megabyte disk (with an actual capacity of about 650,000 kilobytes) might be 85,000 kilobytes for Macintosh files and a 450,000-page Ivory disk partition. On a 160megabyte disk used with a small system, you might create a 100,000-page Ivory disk partition (just enough to hold the FEP files, one world, and a modest amount of paging space) and leave 20,000 kilobytes for Macintosh files. Create the Macintosh Disk Partitions If you are using a disk that already contains a Macintosh file system and Macintosh system software, skip to step 4. If this is a fresh disk, start by formatting it and creating the Macintosh partitions, following the disk manufacturer’s instructions. If you decide to put the Ivory parti- Page 1097 tion in its own Macintosh partition, compute the size of that partition as outlined above, then figure out how much is left for Macintosh files. For rough calculations, assume 1-1/4 megabytes per 1000 Ivory pages. Depending on your disk software, in most cases you will need to first create the partition for Macintosh files that will hold the system folder. Then, create the Macintosh partition that will contain the Ivory partition. Install Macintosh System Software and Device Drivers (Note: if you are adding an additional disk to a MacIvory system and you do not want the new disk to be usable as a Macintosh startup disk, skip this step and skip installing the Symbolics Macintosh software. Proceed to "Create the Ivory Disk Partitions".) Install the Macintosh system software onto the disk from diskettes according to Apple’s instructions. Install any necessary device drivers according to the instructions that came with them. For example, if you have an Ethernet card, install its device driver. Now install your Symbolics Macintosh software. See the section "Installing the MacIvory Diskettes" or see the section "Installing Macintosh Software From a CDROM". Create the Ivory Disk Partitions 1. Bring up the MacIvory control panel. To find it, pull down the Apple menu and click on Control Panel. The left-hand side of the control panel is a list of control panel element icons. Scroll through this list to the MacIvory icon and click on it; this brings up the MacIvory control panel. If you don’t see a MacIvory icon, recheck what you did in step 4. 2. Create an Ivory disk partition using the MacIvory Disk Partitions pane. Begin by clicking on the [New] button in the pane. The partition will be contained in the Macintosh disk partition displayed in the lower left corner of the control panel; if this is not the right disk partition, click on it until you see the disk partition you want. Once you have selected the disk partition, the control panel displays the number of Ivory pages available and fills in the size box. You can edit the size box and name box as needed. When you are finished, click on the [Make] button. If you are creating multiple Ivory partitions, for example, if you have multiple disk drives, repeat this procedure as necessary. For help with the MacIvory control panel, click on the [Help] button. If this is not a fresh disk, it might be fragmented. The number of Ivory pages available on a fragmented disk can be smaller than the amount of free space. If you cannot create an Ivory partition of the desired size, you may need to run a disk compaction utility first. Such utilities are available from third-party software Page 1098 vendors. Alternatively, you can delete some of the files on the disk and restore them from backup copies later. Install Software That Runs on the Ivory Half of the MacIvory System As a final step, fill the Ivory disk partition you just created with a FEP file system containing the desired software and paging files. There are three different ways to do this, depending on what equipment you have available: • • • If you have a Macintosh and a disk configured for MacIvory use, you can duplicate the existing disk provided one of the disks is an internal disk. See the section "Copying a FEP File System with a Macintosh". If you have a MacIvory with two disks attached, you can set up the second disk while running from the first disk. See the section "Copying a FEP File System Using Your MacIvory System". If your MacIvory does not have an initialized MacIvory disk you can load software from tape. You will need a QIC 100 tape drive on the local MacIvory for this operation. See the section "Loading a FEP File System From Tape for MacIvories". In summary, the first method is fast but inflexible, the second method is fast and flexible; but both require an already initialized MacIvory disk. The last option requires a tape drive. Note: For both disk-to-disk methods of copying, you should power down the Macintosh when adding or removing SCSI devices. The following sections present detailed instructions for each method. Copying a FEP File System with a Macintosh This procedure requires that you have an initialized MacIvory disk that contains an Ivory partition of exactly the same size as the partition to be initialized. It also requires you to connect two disks to one Macintosh. Since a Macintosh can have only one internal disk drive, either the good disk or the disk to be initialized must be an external drive. Be sure that your disk has been configured for use with MacIvory as described in steps 1 through 5 of "Setting up a Disk for Use with MacIvory". Refer to your disk manufacturer’s instructions if you need information about how to set SCSI ID switches on the disk and what kind of cables and terminators to use. Page 1099 Procedure 1. Connect both disk drives. 2. Bring up the MacIvory control panel and click on the [Copy] button to bring up the Disk Copy/Compare utility. 3. You should see two lists of Ivory disk partitions. Select the existing partition on the left (labelled "from") and the partition to be initialized on the right (labelled "to"). The SCSI ID and size of the selected partitions appear underneath. Be sure that you have selected the intended partitions before clicking on the [OK] button. If by accident you copy onto your good disk, there is no way to recover its contents. After you click on [OK], the utility first copies one partition into the other and then compares the two partitions to make sure there are no disk errors. The bar at the bottom of the window shows the progress of this operation, which takes a few minutes. 4. After you copy the FEP file system, both copies will have the same Hello.boot file. Since the Hello.boot file defines the network address, if you put the two disks on different MacIvory systems they will think they are the same machine. You have to set the network address by hand the first time you boot the new machine. After booting the machine, you will need to edit the Hello.boot file to contain the correct network address and reboot. This is not an issue for standalone machines. Large sites that perform this procedure frequently may wish to dedicate an external disk drive as a master disk. This disk can be connected to any MacIvory at the site to provide that MacIvory’s own disk with the desired software. For mass production of disks, you can also copy an entire Macintosh partition, including both Macintosh files and Ivory partitions. Click on "Macintosh disks" in the upper left-hand corner of the Disk Copy/Compare utility to enable this operation. This procedure does not require the Ivory coprocessor; it can be performed on a plain Macintosh II. Install the MacIvory control panel document as indicated in Step 4 of procedure documented in "Setting up a Disk for Use with MacIvory" and you will be able to copy disks. If you do have an Ivory coprocessor, it must not be running while you are copying disks. If the Ivory writes into its paging files, the compare operation will find differences between the two disks. If you have just restarted the Macintosh, the Ivory will not be running. Otherwise, you can stop it by dragging down the Ivory menu and clicking on Transfer to FEP. You can start it again later with Transfer to Lisp. Copying a FEP File System Using Your MacIvory System If you have a working MacIvory system with a good disk on it, you can connect a second disk to the system and load software onto the second disk. Since a Macintosh can have only one internal disk drive, either the good disk or the disk to be initialized must be an external drive. Be sure that your disk has been configured Page 1100 for use with MacIvory as described in steps 1 through 5 of "Setting up a Disk for Use with MacIvory". Refer to your disk manufacturer’s instructions if you need information about how to set SCSI ID switches on the disk and what kind of cables and terminators to use. Procedure 1. Connect both disks to the MacIvory system. 2. Bring up the MacIvory control panel. You will see a list of Ivory disk partitions. The good partition(s) should be at the top and the partition to be initialized should be the last in the list; this ensures that existence of the new partition does not renumber any FEP file systems. 3. If the new partition is not last, rename it by clicking on it to select it, then click on the name box, editing the name, and click on the [Rename] button. For example, if you have two partitions named "MacIvory FEP0", you can rename the one on the new disk to "MacIvory FEP1". After renaming a partition, close the control panel. 4. Boot the Ivory by double-clicking on the Genera icon. 5. Once you reach Genera command level, pull down the Ivory menu and click on Transfer to FEP. You will use the FEP to create an empty FEP file system on the new disk. The .flod file that contains the command to do this is normally not scanned by the Hello.boot file, to avoid accidents. 6. Type Scan I325-disk and press RETURN (substitute your FEP version number for I325 if you are running a different version; the default filename shown by the Scan command includes this version). 7. Now type Create Initial FEP File System and the unit number of the new disk partition. Specify unit number 1 if the MacIvory system you are using has one good disk. Press RETURN. 8. Double-check the unit number before answering the confirming question; if you accidentally specify the unit number of a good disk, its previous contents will be lost. 9. Pull down the Ivory menu and click on Transfer to Lisp. a. Now that you have an empty FEP file system, you must load software into it. To copy the FEP files, use Genera’s Copy Flod Files command. Use the :Disk Unit argument to specify the Ivory partition being initialized. By default this will copy from the SYS host; you can also specify :From Directory FEP0:> to copy from the FEP files installed on the good disk. Page 1101 b. To copy the world, use Genera’s Copy World command. If the world you booted is FEP0:>Genera-8-1.ilod and the Ivory partition being initialized is FEP1:, you would write Copy World FEP0:>Genera-8-1.ilod FEP1: c. To create a paging file, use Genera’s Create FEP File command. For example, :Create FEP File FEP1:>Page.page.newest 100000 d. The above commands offer to create Hello.boot and Boot.boot files. The final step is to edit these files and make any necessary corrections. If you remove the disk and attach it to a different MacIvory system, it will be renumbered from FEP1: to FEP0: and the network address will be changed. Edit any numbers appearing in these files accordingly and save the files. If you renamed the partition at the beginning of the procedure, go into the control panel and rename it back. Shut down the Macintosh and disconnect the newly initialized disk. Loading a FEP File System From Tape for MacIvories You can use a tape drive to load a FEP file system into an Ivory disk partition on a MacIvory. Use this method when you do not have a working disk initialized for MacIvory to start from. If the MacIvory system does not normally have a tape drive connected to it, borrow your site’s QIC-100 tape drive and connect it to the MacIvory system whose disk is to be initialized. Be sure that your disk has been configured for use with MacIvory. See the section "Background Information About Ivory Partitions". Procedure 1. Install the Macintosh software, see the section "Setting up a Disk for Use with MacIvory".. Place the FEP tape in the tape drive or the CD-ROM in the CD-ROM drive. 2. Run the Ivory Breath of Life Application, found in the MacIvory Applications folder. This loads the FEP kernel from the Macintosh File System. Caution: The Ivory Breath of Life Application (or BOL FEP) prevents you from warm booting your Lisp system. Do not try to boot Lisp using the BOL FEP, and do not experiment with it. A dialogue box comes up displaying a list of available MacIvory FEP partitions. The chosen one is highlighted and its disk icon appears next to the list. If you have more than one partition, click on the one that you are initializing. Choose the appropriate parameters: Page 1102 Figure 101. The Ivory Breath of Life a. Whether you are restoring from tape or CD-ROM. Page 1103 b. Whether you have enough disk space. See the section "Disk Space Requirements for Genera 8.1". The total number of available blocks is displayed. c. Number of blocks to allocate for paging. The default number of blocks to allocate for paging is half of the total available disk space. d. Whether or not you are running as a standalone site. The default is standalone. If you have more than one Symbolics machine at your site, Click on the box next to Standalone to deselect standalone and type in the correct network address. e. Select Restore Files Only if you are just installing new software. Select Create New Filesystem if you are initializing a new disk. Caution: Create New Filesystem destroys the previous contents of the disk. Be sure you have the appropriate disk selected. When you are satisfied, check that the FEP tape or CD-ROM is in the drive and click on Restore. 3. The cold load stream is displayed and the Disk Restore command is issued automatically for you. This loads all the files on the tape into the FEP file system, and sets up default paging files and boot files. If the FEP files take more than one tape, it pauses when it comes to the end of each tape and prompts you to mount the next one. Once this operation is complete, quit the Ivory Breath of Life Application by clicking on Quit in the Ivory menu. You can do an additional disk restore from the Ivory menu, if you wish. However, if you have additional tapes to load, it is preferable to boot Genera and use the FEP Tape Application under Lisp. Double-click on the Genera icon to cold boot. CAUTION: Disk Restore using this method destroys the previous contents of a disk. Use the Ivory Breath of Life (BOL) application with care. Adding a Delivery MacIvory to Your Site If your Delivery MacIvory is a standalone machine, skip to the section "Booting the MacIvory Delivery World". Choosing a Name and Network Address for the New Machine Select a name and network address(es) for the new machine. For information about network addresses, see the section "Choosing Machine Names and Network Addresses". Page 1104 Note: All preconfigured machines come from Symbolics with Chaosnet address 52525. Unless you have a standalone machine, this is not a desirable Chaosnet address. Using the Namespace Editor to Describe the New Delivery MacIvory Machine (This step is optional if your Delivery MacIvory is going to be a standalone machine.) 1. Use the Namespace Editor on the namespace server to add the new Ivory machine to the namespace. For information about using the Namespace Editor, see the section "Using the Namespace Editor". 2. Create a host object for each new Delivery MacIvory at the site. The system type is "Lispm". The machine type is "MacIvory". Supply the appropriate Chaosnet address for each machine. Here is a sample namespace database entry for a Delivery MacIvory host object: Site: SCRC Nickname: CINN Machine Type: MACIVORY System Type: LISPM Address: CHAOS 12345 Pretty Name: Cinnamon Console Location: SCRC 3 J Lown’s office Printer: FIGARO Bitmap Printer: FIGARO Service: CHAOS-STATUS CHAOS-SIMPLE CHAOS-STATUS Service: CONFIGURATION CHAOS CONFIGURATION Service: LISPM-FINGER CHAOS-SIMPLE LISPM-FINGER Service: SHOW-USERS CHAOS NAME Service: TIME CHAOS-SIMPLE TIME-SIMPLE Service: UPTIME CHAOS-SIMPLE UPTIME-SIMPLE File Control Lifetime: 15 minutes Booting the MacIvory Delivery World 1. Position and power up the new MacIvory machine. 2. Cold boot the MacIvory by double-clicking on the Genera icon. 3. If you received your MacIvory with a preconfigured disk from Symbolics, your MacIvory will come up at the standalone site. If you will not be using your Delivery MacIvory as a standalone machine, you must edit the hello.boot file Page 1105 to remove the standalone namespace information and to change the Chaosnet address. To do this: a. At a Lisp Listener, type: Edit File FEP0:>hello.boot :Editor Simple (The Simple editor mode uses input editor commands only, and lets you edit small files from the Lisp Listener.) b. Edit the file to look like this: Scan FEP0:>I317-lisp.flod Scan FEP0:>I317-loaders.flod Scan FEP0:>I317-info.flod Scan FEP0:>I317-debug.flod Initialize Hardware Tables Declare Paging Files FEP0:>Paging-1.Page,FEP0:>Paging-2.Page Set Boot Options :Network Address Chaos| Set Boot Options :IDS Enable Press END this-machine’s-Chaos-address to save the file with your edits. Making a Site-Configured Delivery World for MacIvories (This step is optional if your Delivery MacIvory is going to be a standalone machine. The MacIvory comes fully configured as a standalone site.) To make a site-configured version of the world and save it: 1. Cold boot the MacIvory. 2. Use the Set Site command to configure the machine for your site. For information about the Set Site dialogue, see the section "Set Site Dialogue". 3. Load your application (for example, using the Load System command) and link it by calling (cli::link-to-functions t). 4. Save the new world, using either the Save World Complete command or the Save World Incremental command, depending on your circumstances. Information is available to help you make this decision. See the section "Save World Command" and see the section "Optimize World Command". This example shows how to save an incremental version of the world for Genera 8.0 MacIvory Delivery: Save World Incremental FEP0:>Inc-Delivery-Genera-8-0.ilod Page 1106 This site-configured world will serve as the base world for all Delivery Ivory worlds you build at your site. Loading Systems Into Delivery Worlds You can load the following systems into UX and MacIvory Delivery Worlds; dependencies are as shown, with the bottom system loaded first: Hardcopy | Serial | Zwei Binaries for these systems were shipped to you on the "Genera 8.0 Sources" tape.