1
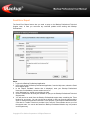
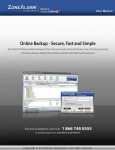
Last modified on 17-06-2011 for application version 7.1.4 IBackup Professional User Manual TABLE OF CONTENTS Introduction.................................................................................................................................... 4 Features.......................................................................................................................................... 5 System Requirements................................................................................................................... 7 Login to IBackup Professional..................................................................................................... 7 Proxy Settings................................................................................................................................ 9 About the Main Screen................................................................................................................ 10 Menu Bar ...................................................................................................................................... 12 File............................................................................................................................................. 12 Backup Restore......................................................................................................................... 12 Bandwidth Test.......................................................................................................................... 13 Tools.......................................................................................................................................... 13 Help ........................................................................................................................................... 15 Tool Bar ........................................................................................................................................ 16 Schedule Manager .................................................................................................................... 16 Sync .......................................................................................................................................... 16 Search ....................................................................................................................................... 16 Delete ........................................................................................................................................ 16 Refresh...................................................................................................................................... 16 Time Line Restore ..................................................................................................................... 16 Other Options............................................................................................................................... 17 Working with IBackup Professional .......................................................................................... 18 Backup Files and Folders.......................................................................................................... 18 Backup Most Common Data and Application Types................................................................. 19 Backup Open Files .................................................................................................................... 20 Backup the Mapped Drive......................................................................................................... 21 Schedule Backup ...................................................................................................................... 23 Manage all the Scheduled jobs ................................................................................................. 25 General tab options ................................................................................................................... 26 Exclude Files and Folders......................................................................................................... 28 Synchronize Data ...................................................................................................................... 29 Search ....................................................................................................................................... 31 Restore Files and Folders ......................................................................................................... 31 Delete files and folders.............................................................................................................. 32 Send Error Report ..................................................................................................................... 33 Timeline Restore ....................................................................................................................... 34 Advanced Options ....................................................................................................................... 35 MS SQL Server Backup ............................................................................................................ 35 MS SQL Server Restore ........................................................................................................... 37 Exchange Server Backup.......................................................................................................... 39 Exchange Server Restore ......................................................................................................... 40 Dismounting Databases ............................................................................................................ 41 MS Exchange Server Mailbox Backup...................................................................................... 43 Giving rights to Mailboxes ......................................................................................................... 45 Copyright © Pro Softnet Corporation. All Rights Reserved. 2 Exchange Server Mailbox Restore............................................................................................ 48 System State Data Backup ....................................................................................................... 50 System State Data Restore....................................................................................................... 51 Web Based Backup set / Schedule Management..................................................................... 52 Working with the IBackup Professional Tray icon................................................................... 53 Uninstall IBackup Professional.................................................................................................. 54 Version Update ............................................................................................................................ 54 Technical Support ....................................................................................................................... 55 Copyright © Pro Softnet Corporation. All Rights Reserved. 3 Introduction IBackup Professional is a reliable online backup and restore application. It safeguards your critical data against any eventuality, by automatically backing it up. Customization options include the provision to modify you Backup set and its schedule, reporting options and more. Your data is encrypted both on storage and at rest, ensuring its security. The other key features include data compression during file transfers that ensure quick backups, incremental backups that economize the internet bandwidth usage and lead to quick backups, Versioning that makes available older copies of files backed up to your account for restore and Open file and Mapped drive backup, among others. Copyright © Pro Softnet Corporation. All Rights Reserved. 4 Features Basic Features Unicode Compliant: Supports character sets of all languages including English, French, Spanish, German, Chinese, Japanese, Hebrew, Italian and Portuguese. Intuitive user interface: The graphical interface makes it easy for you to navigate through the application. Efficient Backups: Effective utilization of your Internet bandwidth as the data files are compressed during transmission. Further, only the modified portions of your files are backed up, resulting in quick backups. Effective Bandwidth usage: You can adjust the Internet bandwidth usage for the IBackup Professional application so that other web-based applications can also run smoothly. Automated backups: You can schedule the backup of data as per your convenience and forget it. It is backed up automatically at the scheduled time. Continuous Data Protection: The application automatically recognizes the modified parts of files / folders and backs them up in real time, thus offering you hands-free backup of data. True Archiving/Sync: Data is not removed from your account until you manually delete it or run sync to match your desktop data to your account. You control your backup data. Proxy / firewall friendly: Advanced settings help you to connect to IBackup Professional servers via proxy servers and enable them to easily backup data. Advanced Features File Versioning: Retrieve any of the previous 30 backed up versions of a file to your local machine. Mapped Drive support: Your mapped drives are backed up - even when your computer is in the ‘Log-Off’ state. Open file backup: Reliable backups of your open / locked files like Outlook files (.pst), QuickBooks, MS-Excel and so on. Automatic power-off after the scheduled backup: Selecting this option will automatically shut down your computer on completion of the scheduled backup. Start missed schedule backup: Selecting this option will start the missed scheduled backup immediately, once the computer is turned on. Copyright © Pro Softnet Corporation. All Rights Reserved. 5 Timeline Restore: View and restore data as of a particular timeline to your local machine. Security Features Encryption: All your data is secured using 128-bit SSL encryption during transfer and 256-bit AES encryption on storage. IBackup Professional enforces a user-defined encryption key that is known only to you. Not even our personnel have access to it, thereby making your data secure. However, if you opt for the default encryption, the application provides the key, without the need for you to remember it. Enterprise Class Redundancy: User data is periodically backed up to local RAID devices and optionally periodically mirrored to an alternate data center for additional redundancy.* Web-Based Access Restore data to any local machine: You can restore data to any local computer, without installing the application on your machine. Manage Multiple Accounts: You can create multiple accounts using the web interface and group them for easy management. Retrieve data from any location: You can login via any web browser to your account and access backed up data, view log reports and restore data to your local machine. Web-based Search: You can locate files / folders backed up to your account, from anywhere, through the web. View Logs: You can view the log files of backups, restores, scheduled backups, and details of files / folders deleted from your account from any computer, using any browser. *This is an optional feature involving additional charges. Write to us at [email protected] to seek a quote on across the data center mirroring in addition to local data backup. Copyright © Pro Softnet Corporation. All Rights Reserved. 6 System Requirements Microsoft Windows 7, Windows Server 2008, Windows Vista, Windows XP Home/Professional, Windows Server 2003, Windows Me/ 98 SE/, Windows 2000 Advanced Server, Windows NT/2000. (Administrator privileges to install and use the application). Internet Explorer 6 or later. 512 MB RAM, 10 MB Free Hard Disk space for installed program, 20 MB or more recommended for local caching MS SQL Server: http://www.ibackup.com/professional/online-backup-sql-server.htm MS Exchange Server: http://www.ibackup.com/professional/online-backup-exchange-serverbackup.htm Login to IBackup Professional After installation, you can login to the IBackup Professional application in two ways: Double-click the IBackup Professional icon on your desktop Start > Programs > IBackup Professional > IBackup Professional > the Login window is displayed. Login window options The Login window has the following options: Copyright © Pro Softnet Corporation. All Rights Reserved. 7 Username or Email address: Enter the 'Username' or 'email address' provided while registering for your IBackup Professional account. Password: Enter the Password used to register for the IBackup Professional account. Remember Username / Email address and other settings: Saves the 'Username' and 'Password'. This option is selected by default, and can be changed. Connect: Login to the IBackup Professional for Windows application. Close: Cancels the login operation and close the Login window. Advanced: Specify the proxy server settings and provide authentication. New User Sign up: Takes you to the IBackup Professional website from where you can register for an account. Forgot password: Retrieve your password, which is mailed to your email address provided during registration. Upgrade account: Takes you to the page on the website from where you can upgrade to a higher plan. Firewall guidance: Obtain information on the port number, IP address and executable files that require firewall access. Logout from IBackup Professional for Windows To logout, go to the File menu and select the 'Disconnect' option. To exit the application, go to the File menu and select the 'Exit' option. Note: Closing the IBackup Professional for Windows will not log you out from IBackup Professional for Windows application. Copyright © Pro Softnet Corporation. All Rights Reserved. 8 Proxy Settings Using the Advanced option on the Login screen, you can set the proxy settings and proxy user authentication. Steps 1. Click 'Advanced' on the Login screen. The ‘Proxy Settings’ screen is displayed. 2. Change the settings and click 'Apply Proxy Settings' to save the settings or 'Reset' to enter the settings afresh. There are two types of proxy settings, one for the Internet and the other for the server authentication. To set the Proxy server for your computer, select the Enable HTTP / Socks Proxy option using the check box provided. This enables the following options: Enable HTTP Proxy Enable Socks Proxy Select the desired option and enter the Proxy Address and its Port Number. If the Internet Explorer browser has proxy settings, use the Get IE Settings button to get the proxy setting information and set this as default. Enable Proxy Authentication To set proxy server credentials, select the ‘Enable Proxy Authentication’ option using the check box. Next, enter the Username and Password. Note: The updates will reflect on subsequent login. Copyright © Pro Softnet Corporation. All Rights Reserved. 9 About the Main Screen On a first time login to an IBackup Professional account, by default, the application selects the 'My Documents' and 'Desktop' folders for backup, with the frequency set to a random off-peak hour. Note: For Windows Vista and higher Operating System, the 'Desktop', 'Documents', 'Pictures', 'Videos' and 'Music' folders are backed up by default. You can edit the 'Default Backupset' and its schedule, using the buttons below: Edit my Backup set: It takes you to the main screen of the IBackup Professional for Windows application, from where you can update the 'Default Backupset' and schedule its backup Edit Schedule Parameter: It opens the 'Scheduler' screen from where you can modify the scheduled backup options like day, time, frequency and notification options Click the 'Close' button to exit the screen. Copyright © Pro Softnet Corporation. All Rights Reserved. 10 The IBackup Professional main screen is displayed, as shown below: The IBackup Professional Main Screen has the 'Backup' and 'Restore' tabs with the respective Menu and Tool Bar options. The 'Backup' tab helps you perform various backup and scheduling functions, while the 'Restore' tab lets you restore your backed up data to the local machine. The main screen can be categorized as follows: Menu Bar Tool Bar Other Options (consists of various buttons present on the main window) Copyright © Pro Softnet Corporation. All Rights Reserved. 11 Menu Bar File Connect Logs you into the IBackup Professional application. This option is enabled on disconnecting from the application. How to Connect? File Menu > Connect > The 'Login' window is displayed > Enter your 'Username/Email address' and 'Password' > Click the 'Connect' button. Disconnect Disconnects you from your IBackup Professional account. This option is enabled on connecting to the application. How to Disconnect? File Menu > Disconnect > A message 'Do you want to disconnect?' with 'Yes' and 'No' options is displayed > Click 'Yes' to disconnect (Log off). Exit Closes the IBackup Professional application, without logging you off. Note: A scheduled backup / restore operation will continue even after exiting the IBackup Professional application Backup Restore The Backup-Restore menu has the following options: Automatic Selection Allows you to select the commonly used applications and file types for automatic backup. o See also SQL Server Backup Backup the MS SQL Server database files (*.dmp) to your IBackup Professional account and restore the database backup files (*.dmp) from your IBackup Professional account to the MS SQL Server. o See also Copyright © Pro Softnet Corporation. All Rights Reserved. 12 Exchange Server Backup the MS Exchange Server databases to your online account without interrupting the running MS Exchange Server services. o See also System State data Backup system components like Boot files, COM+ CLASS registration database and so on and view the backup details of the system state components and their status. o See also Bandwidth Test The Bandwidth Test menu has options that let you know the current upload / download speed and the estimated time required by application to backup / restore 1 GB of data at this speed. These include: Upload Speed Find out the amount of data that can be uploaded per second, and the time that it will take to backup 1 GB of data to your IBackup Professional account at this speed. Download Speed Find out the amount of data that can be downloaded per second, and the time that it will take to restore 1 GB of data to your local machine at this speed. Tools The Tools menu has the following options: Preferences Backup your open files, exclude files/folders from backup, adjust bandwidth usage of the application and so on. It has two tabs: General Exclude Files and Folders Mapped Drive Setup This option allows you to backup the files/folders present on your network drive. o See also Copyright © Pro Softnet Corporation. All Rights Reserved. 13 Activity Log View the logs of all the interactive / scheduled backup, delete and restore jobs. Copyright © Pro Softnet Corporation. All Rights Reserved. 14 Help The Help menu has the following options: Help Topics Provides access to the IBackup Professional Help Guide. Send Error Report Allows you to contact the support team for any technical issues / suggestions pertaining to the application. o See also Quick Demo Takes you through a guided tour on how the IBackup Professional application works. Visit https://www.ibackup.com/professional/online-backup-demo.htm to view the demo. Website Takes you to the IBackup Professional website. Check for Updates Upgrades you to the latest version of the IBackup Professional application About IBackup Professional Displays information on the IBackup Professional application installed on your computer. Copyright © Pro Softnet Corporation. All Rights Reserved. 15 Tool Bar The IBackup Professional Tool bar has the following options: Schedule Manager Manage your scheduled backup jobs. o See also Sync Brings the data in your IBackup Professional account to be in sync with that on the local computer, for the selected files / folders. o See also Search Helps you locate files backed up to your IBackup Professional account. Delete Deletes, selected files / folders from your IBackup Professional account. It is enabled only on Restore tab. Refresh Refreshes the backed up data in your account with the latest updates. Time Line Restore View and restore data as of a particular timeline to your local machine. Copyright © Pro Softnet Corporation. All Rights Reserved. 16 Other Options Search Locate data backed up to your IBackup Professional account. Recalculate Find out the amount of space used by the data backed up to your IBackup Professional account. Upgrade Account Upgrade to a higher storage plan for uninterrupted backups. Reduce Storage Delete unwanted items from your online backup account or bring the data in your account to be in sync with that on your local computer - thereby removing redundant data. Backup Now Take an immediate backup of your data. Schedule Backup Schedule the backup of your data for a future day and time. Restore Now Restore data from your IBackup Professional account to your computer. Enable Continuous Backup Backs up the selected files and folders in almost real time data. Timeline Restore View and restore data as of a particular timeline to your local machine. Copyright © Pro Softnet Corporation. All Rights Reserved. 17 Working with IBackup Professional Backup Files and Folders You may backup files / folders to your account in the following ways: Using the 'Backup Now' button 1. Connect to application and click the 'Backup' tab. 2. Select the files / folders to be backed up or backup the existing Default Backup set. 3. Click the 'Backup Now' button. From the IBackup Professional tray icon Right-click the IBackup Professional tray icon and select the 'Backup Now' option. This starts an immediate backup of the existing Backup set. Note: Ensure that you have logged into the application at least once before using this option. Schedule Backup 1 2 Select the files / folders under 'My Selection' that you wish to backup (or schedule the Default Backup set for backup). Click the 'Schedule Backup' button to schedule the Backup set for a future date and time. Note: Once the files and folders available under a particular drive / folder have been selected for backup, you would see a checkmark against that particular drive / folder. o See also Copyright © Pro Softnet Corporation. All Rights Reserved. 18 Backup Most Common Data and Application Types You can set your most common application and data types for backup. From the Backup-Restore menu, select the 'Automatic Selection' option. Select the data and application types that you want to backup and click the 'Close' button. Steps to schedule the Automatic Selection data for backup 1. Select the 'Automatic Selection' entry displayed at the very top of the 'Contents of my Backup set' pane. 2. On the main application screen, click the 'Backup Now' button to take an immediate backup or the 'Schedule Backup' button to schedule it for the future. Copyright © Pro Softnet Corporation. All Rights Reserved. 19 Backup Open Files The 'Open file Backup' option allows you to backup files when they are in use. The common open files that can be backed up using this option are Outlook files (.pst), QuickBooks, Quicken, ACT, MS-Money, MS-Word, MS-Excel, MS-Access, MS FoxPro and so on. Steps to backup Open Files: 1. Connect to the application. 2. From the menu bar, go to 'Tools' and select the 'Preferences' option. 3. On the 'General' tab, select the 'Enable Open file Backup (available for Windows Vista, Windows XP, and Windows 2003)' check box provided 4. Select the temporary folder using the 'Browse' button and click the 'Close' button. 5. On the main application screen, select the files / folders containing the open files that you want to backup to your IBackup Professional account. Copyright © Pro Softnet Corporation. All Rights Reserved. 20 Note: 1) This feature works only for Windows XP, Windows 2003 and Windows Vista Operating Systems. 2) The selected temporary folder should have sufficient space for the Open files. Backup the Mapped Drive This option lets you backup the contents of your mapped drive to your IBackup Professional account. Steps to backup mapped drives: 1. Open the Windows Explorer. 2. Right-click 'My Computer' and select the 'Map Network Drive' option from the sub menu, as shown below: Copyright © Pro Softnet Corporation. All Rights Reserved. 21 3 Select the network folder that you want to connect to as a mapped drive, using the 'Browse' button. 4 8 To connect to the computer using a different Username, click the 'Connect using the different username link. Enter the 'Username' and 'Password' and click 'OK'. You can see a mapped drive named (ex: 'Z') in the 'My Computer' entries. The mapped drive thus created is now available on the IBackup Professional application. Select the files / folders to be backed up from the 'My Computer' pane. From the menu bar, go to 'Tools' and select the 'Mapped Drive Setup' option. The 'Mapped Drive Setup' screen is displayed, as shown below: Enter the valid 'Username' and 'Password' for the mapped drive that you have selected. 9 Click 'Save Settings' to save the settings and schedule the backup job. 5 6 7 Note: The IBackup Professional application performs the scheduled backup of mapped drives even when your computer is in Log-Off mode. Copyright © Pro Softnet Corporation. All Rights Reserved. 22 Schedule Backup The 'Schedule Backup' option allows you to schedule the backup of files/folders for a particular day, time and frequency. Steps to schedule backups: 1 2 Connect to the application. Click the 'Backup' tab and then the 'Schedule Backup' button. The 'Scheduler' screen is displayed as shown below. Select the day, time and other options for backup as per your convenience and click 'Save Settings'. The application will backup the selected files/folders at the scheduled time. Note: The IBackup Professional application performs scheduled backup job even when your computer is in Log-Off mode. Copyright © Pro Softnet Corporation. All Rights Reserved. 23 Options in Scheduler Screen Date, Time and Frequency of backup The options available to set day, time and frequency of backups are: Week-Day: Schedule backup on any day(s) of the week. Month: Schedule the backup any one day of the month at a particular day and time. Start the backup immediately: Lets you take an immediate backup of your files/folders. No Backup Schedule: Lets you delete the scheduled backup job. Minor Tweaks Auto-Pause: It makes intelligent guesses on pausing and resuming backup to enable optimum desktop appearances during user activity. Desktop Notification: Receive notifications on your desktop regarding the status of scheduled backup jobs. For this, select the option 'Show desktop notification on the completion of scheduled backup'. Start the missed scheduled backup when the computer is turned on: It allows the application to resume the scheduled backup automatically whenever the computer is turned on. Cut-off Time: It stops the scheduled backup at the specific time, set by you. The backup is resumed at the next scheduled time from the point it was stopped. This ensures that the scheduled backups are not executed when the normal computer operations are going on. Email Notification: This option allows you to receive email notifications on the status of the scheduled backup jobs. For this, select the 'Notify always' or 'Notify on failure' option and enter the email address in the 'Mail to' field. You can set multiple email addresses using the + button and receive log details of the scheduled backup job along with the email notification by selecting the 'Send log extract' option. You may opt to not receive any notification by selecting the 'Do not notify' option. The 'Under the Hood' button opens the ‘Preferences’ screen from where you can set the Advanced options including Hibernate / Sleep mode settings, Open File Backup, Auto-Pause and more. Copyright © Pro Softnet Corporation. All Rights Reserved. 24 Manage all the Scheduled jobs This option makes it easy for you to manage the scheduled backup jobs. You can view the view the scheduled backup jobs of all the users on the computer. Also, you can delete the scheduled backup jobs of the expired accounts while retaining the scheduled jobs of the others. To view and manage all the scheduled job, right-click the 'IBackup Professional tray icon' and select the 'Manage all the Scheduled Jobs' option. The Manage all the Scheduled jobs screen is displayed, as shown below, with the following Tool bar items: Edit: Lets you edit the selected scheduled job. You can not edit the scheduled job with the status ‘In Progress’. Delete: Deletes the selected scheduled job. You cannot delete the scheduled job with the status ‘In Progress’. Refresh: Refreshes the scheduled jobs list. Stop Transfer: Stops the progress of the selected scheduled job. Copyright © Pro Softnet Corporation. All Rights Reserved. 25 Note: You do not have the provision to change the Backup set of other users. General tab options To access the General tab, from the menu bar, go to Tools > Preferences. A screen is displayed as shown below: The General tab has the following options: Bandwidth Throttle The Bandwidth Throttle feature helps optimize the bandwidth consumption so that your backups can take place uninterrupted and without hindrance to other applications. You can set separate bandwidths for the backups when the system is in use and when it is not. Bandwidth Throttle (when system is not in use): This option lets you set the bandwidth to be used by your system for backups, when it is not in use. By default, it is set to 100%. Copyright © Pro Softnet Corporation. All Rights Reserved. 26 Note: The percentage set for Bandwidth Throttle is applicable to scheduled and interactive backups. Auto Pause: Select the 'Auto-Pause' option from the check box to use this option. It makes intelligent guesses on pausing and resuming backup to enable optimum desktop experience during user activity. This option lets you set the bandwidth to be used by your system for backups, when it is in use. Thus, other applications can run without hindrance. By default, it is set to 25%. Restore Destination On selecting this option, you are prompted to select the destination folder to which you want to restore your data. Open file Backup This option allows you to backup open files like Outlook files (.pst), QuickBooks, Quicken, ACT, MS-Money, MS-Word, MS-Excel, MS-Access, MS FoxPro etc. This feature is available only for Windows XP, Windows 2003 servers and Windows Vista. Advanced scheduling options Prompt to view log after each backup and restore operation: This option enables you to view the log files on completion of every backup / restore operation. Alert me if the scheduled backup fails: On selecting this option, you receive a desktop alert in case your backup has not taken place. Automatic power off after scheduled backup: This option shuts down the computer automatically on completion of the scheduled backup job. Wake up the computer from the Hibernate/Sleep mode: If you select this option, IBackup Professional puts your computer in to active mode in case it has gone into the Hibernate / Sleep mode and performs the scheduled backup. Automatic Sync: Automatically sync files between your desktop and your account with a lag of 30 days. In other words, if data is deleted from your desktop that is already backed up, the corresponding data in your account would be deleted after 30 days. This helps in keeping your account size optimal. As a precautionary measure, in case the files to be deleted are greater than 5% of the total account content, you would have to run a manual sync. * Note: Since this may result in automatic deletion of data in your account, set this option carefully. * The percentage mention refers to files considered for deletion in your account as a percentage of total number of files. The purpose of this percentage-based control is to avoid large deletion of files in your account due to some unforeseen event on your PC. Copyright © Pro Softnet Corporation. All Rights Reserved. 27 Exclude Files and Folders The 'Exclude files/folders' option allows you to exclude files/folders from being backed up. For this, on the Menu bar, go to Tools > Preferences > Exclude files / folders tab. The screen that is displayed has the following options: You can exclude files / folders based on the following criteria: Exclude files / folders based on full path name Folders with full path name Files with full path name Exclude files/folders based on partial name Folders with part / full name Files with full / part name Note: The excluded folders are marked in Red color on the 'My Computer' pane. Copyright © Pro Softnet Corporation. All Rights Reserved. 28 Following are the ways to add the files/folders to the exclude list. Through the Preferences menu option Follow the steps given below to exclude a file / folder from being backed up: 1 2 3 4 Right-click anywhere in the 'Folders with full path name' or 'File with full path name' pane. Select the 'Add' option from the menu. Select the directory / folder / file from your local computer to be excluded from the Backup set. Click 'Close' to close the screen. Through the IBackup Professional Interface Follow the steps given below to exclude files / folders from Backup set: 1 2 Right-click the file / folder on the top pane. Select the 'Exclude this file from being a part of the backup list / Exclude this folder from being a part of the backup list' option to exclude the selected file / folder from the Backup set. Steps to exclude files/folders from backup: 1 2 3 4 Right-click anywhere on the 'Files with part/full name' or 'Folders with part / full name' pane. Select the 'Add' option from the drop down menu. The 'Enter File / Folder Name' screen is displayed. Enter the partial name of the file/folder using the wildcard characters -- * and ? that you want to exclude and click the 'Exclude' button. Click 'Close' to close the screen. Note: 1) ? replaces a single character in the file name. 2) * replaces one or more / no character(s) in the file name. 3) To remove the files / folders from the 'Exclude Files and Folders' tab, right-click the required folders / files and select the 'Remove' option. 4) The files / folders can be excluded from being backed up using IBackup Professional interface only. Synchronize Data The 'Sync' feature lets you match the contents of your IBackup Professional account with that of your local computer, for the selected folders. It is useful especially when you have been taking backups regularly or removed some data from your local computer or your account. Copyright © Pro Softnet Corporation. All Rights Reserved. 29 To sync data, follow the steps given below: 1 2 3 Connect to the application. Select the folder to be synchronized and click 'Sync'. A message explaining the sync operation is displayed. Click 'Continue' to proceed. The following 'File Synchronization' screen listing the files available in the selected folder is displayed. Only files present on your IBackup Professional account but not on your computer, are listed. 4 Click the 'Sync' button to start the process. Copyright © Pro Softnet Corporation. All Rights Reserved. 30 Search 1 2 3 To locate your data, click the 'Search' button on the Tool bar. On the 'Search' screen that is displayed, enter the full or partial file name in the text box provided and select the appropriate options, using the check boxes. Click ‘Start Search’. This will display the files that match the search criteria. Restore Files and Folders You can restore files / folders from your IBackup Professional account to your local computer. Steps to restore your data: 1 2 3 Connect to the application and click the 'Restore' tab. Select the files/folders to be restored. Click the 'Restore Now' button. The 'Restore Destination' screen is displayed. Copyright © Pro Softnet Corporation. All Rights Reserved. 31 'Browse' to select the restore destination on your local computer and click the 'Restore' button To restore an older copy of your backed up file, follow the steps below: 1 2 Connect to the application and click the 'Restore' tab. Double-click a file or right-click the file and select the 'View History' option from the dropdown menu. The 'Restore - File Version' screen is displayed, as shown below. 3 Select the version that you want to restore to your local machine and click the 'Restore' button. Delete files and folders Steps to delete backed up data from your account: 1 2 3 4 Connect to the application. Open the 'Restore' tab and select the files/folders that you want to delete from your IBackup Professional account. Click the 'Delete' toolbar option. The ‘File Deletion’ screen listing the selected file(s) is displayed. Click the 'Delete' button to delete the listed file(s) from your IBackup Professional account. Copyright © Pro Softnet Corporation. All Rights Reserved. 32 Send Error Report The Send Error Report feature lets you send a query to the IBackup Professional Technical Support team, in case you encounter any technical problem while working with IBackup Professional. Steps: 1 Login to the IBackup Professional application. 2 In the main window of IBackup Professional application, from the Help menu, select the 'Send Error Report' option. 3 In the 'Report Feedback' window that is displayed, enter your IBackup Professional Username, email address, contact number and so on. 4 In the 'Message' box, explain your problem in detail. 5 Click the 'Send' button to send your feedback or query to the IBackup Professional Technical Support team. 6 You will receive an email from the IBackup Professional support team containing the Ticket Number for your query. You can use this as a referral in case you face the same problem again or find that it has not been resolved. For this purpose, in the 'Report Feedback' window, a text box for Trouble Ticket No is provided. Here, enter the Ticket Number sent to you from the support team. You can do the same from IBackup Professional Monitor tray icon present on the system tray. Copyright © Pro Softnet Corporation. All Rights Reserved. 33 Timeline Restore It displays all the data backed up till the selected date and time. You can select and restore any file/folder to your local machine. Copyright © Pro Softnet Corporation. All Rights Reserved. 34 Advanced Options MS SQL Server Backup This feature allows you to backup the MS SQL Server database files without interfering with the already running MS SQL Server services. To access the SQL Server Backup option, on the application menu, go to Backup-Restore > SQL Server > SQL Server Backup. Steps to Backup SQL Server On selecting the 'SQL Server Backup' option, you are prompted to enter the relevant Authentication Information. SQL Server Authentication: Login Information IBackup Professional provides two modes of MS SQL Server authentication: Windows Authentication Mode When you connect through a Microsoft Windows® user account, MS SQL Server validates the account name and password, using information present on the ‘Windows Operating System.' MS SQL Server authentication The MS SQL Server authentication lets you access the MS SQL Server using the information given in the MS SQL Server. Note: If you attempt to connect to an instance of the MS SQL Server providing a blank login name, MS SQL Server uses Windows Authentication. Copyright © Pro Softnet Corporation. All Rights Reserved. 35 1 Select the SQL database(s) that you want to backup, from the list displayed. 2 'Browse' to select a temporary folder on your computer where the backed up database files would be stored and then click the 'Next' button. 'IBSQLTEMP' is the default folder. For example, if you have selected the 'D' drive as your local backup path, then your SQL destination path would be 'D:\IBSQLTEMP'. Ensure that the selected folder has sufficient disk space to hold the database files. 3 Select a folder in your IBackup Professional account that will used to backup the SQL server files to your account and click the 'Next' button. 4 You may opt to schedule the data for backup for a future day and time or take an immediate backup. Copyright © Pro Softnet Corporation. All Rights Reserved. 36 MS SQL Server Restore This feature allows you to restore the MS SQL Server database files without interfering with the already running MS SQL Server services. To access the SQL Server Restore option, on the application Menu Bar, go to Backup-Restore > SQL Server > SQL Server Restore. Restore options Restore the SQL Server database backup file (*.dmp) from your IBackup Professional account to your MS SQL Server. 1 On selecting the SQL Server Restore option, the 'SQL Server Restore Wizard' is displayed. Choose the 'Restore the SQL Server database backup file (*.dmp) from your IBackup Professional account to your SQL Server' option. 2 The 'SQL Server Login' screen is displayed. It contains two authentication options. Select the appropriate option, enter the 'Username' and 'Password' and click the 'Login' button. In the 'What to Restore' screen, select the .dmp file(s) and click the 'Next' button. 3 Copyright © Pro Softnet Corporation. All Rights Reserved. 37 4 5 In the 'Where to Restore' screen, select a temporary location on your local computer where the files would be stored and click the 'Restore' button Once the data is restored to your local machine, the 'Restore the database backup file to MS SQL Server' screen is displayed listing the database files restored on your computer. Click the 'SQL Restore' button to restore the database backed up files from your computer to your SQL Server. You may restore your database backup file (.dmp) to a different database by providing a new database name. Further, it is possible to change the Data and Transaction log file location as desired. 6 A message 'The MS SQL server database file that is being restored will be overwritten. Do you want to continue?' is displayed with 'Yes' and 'No' buttons. Click the 'Yes' button to complete the restore process. Restore the SQL Server database backup file (*.dmp) from your local computer to your MS SQL Server. 1 On selecting the SQL Server Backup option, the 'SQL Server Restore Wizard' is displayed. Choose the 'Restore the SQL Server database backup file (*.dmp) from your local computer to your MS SQL Server' option. Copyright © Pro Softnet Corporation. All Rights Reserved. 38 2 Enter the relevant authentication information in the SQL Server Login dialog and click the Login button. 3 In the 'Restore the database backup file to MS SQL Server screen' that is displayed, 'Browse' to select the database backup file that you wish to restore from your computer and click the 'SQL Restore' button. You may restore your database backup file (.dmp) to a different database by providing a new database name. Further, it is possible to change the Data and Transaction log file location as desired. 4 A message 'The MS SQL server database file that is being restored will be overwritten. Do you want to continue?' is displayed with 'Yes' and 'No' buttons. Click the 'Yes' button to complete the restore process. 5 On successful restore, the 'Status' column in the 'Restore the database backup file to MS SQL Server’ window will change from 'In Progress' to 'Completed'. 6 Depending on the status of the restore process, the Status column displays In progress / Completed / Failed status as applicable. In case you are unable to restore, an error message is displayed. Close the same and try again. Else, click the 'View Error Log' button to see the logs. Note: You can simultaneously restore multiple database files with the same instance, but can not restore multiple instances of database files. Exchange Server Backup This feature allows you to backup the MS Exchange Server databases without interrupting the already running MS Exchange Server services. To access the MS Exchange Server Backup option, on the application menu, go to Backup-Restore > Exchange Server > Exchange Server Backup. Exchange Server Backup 1 2 3 4 5 In the 'Exchange Server Backup' wizard that appears on selecting the Exchange Server Backup option, select the Public Folder Store or the Mailbox Stores that you wish to backup. 'Browse' to select a temporary location and click the 'Next' button. Ensure that the selected temporary directory on the local computer has sufficient free space. In the Scheduler Wizard for Destination, select the destination in your IBackup Professional account and click the 'Next' button. Schedule the backup for a future day and time or take an immediate backup. You can monitor status of the backup job from the IBackup Professional for Windows Monitor present on the system tray. The backed up MS Exchange Server databases are stored in the selected folder of the 'IBackupProfExchBackupset.' Note: Modifying the contents of 'IBackupProfExchBackupset' may cause failure of the restore operation done using this Backup set. Also, do not use this as a destination folder for any other backup/restore operation. Copyright © Pro Softnet Corporation. All Rights Reserved. 39 At any given point in time, you can maintain only one backup job 'IBExchangeServerBkset' for the Exchange backup operation. Exchange Server Restore This feature allows you to restore the MS Exchange Server databases without interrupting the already running MS Exchange Server services. Before starting the MS Exchange Server Restore operation, you need to dismount the databases. To access the Exchange Server Restore option, on the application menu, go to Backup-Restore > Exchange Server > Exchange Server Restore. Restore options On selecting Exchange Server Restore option, an MS Exchange Server Restore Wizard appears. The wizard displays two options for restoring the Exchange Server databases. Restore the MS Exchange Server database backup from your IBackup Professional account to your MS Exchange Server 1 Select the first option in the 'MS Exchange Server Restore Wizard' and click the 'Next' button. Copyright © Pro Softnet Corporation. All Rights Reserved. 40 2 3 4 5 In the 'What to Restore' screen, select the Exchange Backup folder 'IBackupProfExchBackupset' from the IBackup Professional account. To restore even a single storage group or database, you need to restore the complete Exchange Backup folder 'IBackupProfExchBackupset' from your IBackup Professional account. In the 'Where to Restore' screen, select a folder under 'My Computer', which acts as a destination for restoring the Exchange Backup folder 'IBackupProfExchBackupset' and click the 'Restore' button to start the restore process. On successful restore of database files to your computer, in the 'Exchange Server Restore' window, 'Browse' to select a temporary location for the restore operation. Select the database files that you want to Restore and click the 'Restore' button to proceed. Note: This process takes time depending on the file size. Do not to interrupt the restore process. On successful restore of the database files from your computer to the MS Exchange Server, these files will be automatically mounted on to the MS Exchange System Manager (the Public Folder Store/the Mailbox Stores). Restore the MS Exchange Server database backup from your local computer to your MS Exchange Server 1 2 3 Select the second option in the MS Exchange Server Restore Wizard and click the 'Next' button. 'Browse' to select the Exchange Backup folder 'IBackupProfExchBackupset' from the local computer and select a temporary location for the restore operation. Select the database files and click the 'Restore' button to continue the restore operation. Note: This process takes time depending on the file size. Do not to interrupt the restore process. On successful restore of the database files from your computer to the MS Exchange Server, these files will be automatically mounted on to the MS Exchange System Manager (the Public Folder Store/the Mailbox Stores). Dismounting Databases For MS Exchange Server 2000 and 2003 Steps to Dismount Follow these mandatory steps before you begin with the MS Exchange Server Restore operation: Start the MS Exchange System Manager from Start > Programs > Microsoft Exchange > System Manager > Exchange System Manager window appears. Here, right-click the Public Folder Store/Mailbox Store that you wish to restore > choose the 'Dismount Store' option. Copyright © Pro Softnet Corporation. All Rights Reserved. 41 Right-click the Public Folder Store / Mailbox Store > choose the Properties option. In the Properties dialog, select the Database tab and enable the option 'This database can be overwritten by a restore' Now, click the 'Apply' button followed by the 'OK' button to confirm the operation. Repeat Steps 3 and 4 for all the individual databases that need to be restored. On performing the above steps, close the MS Exchange System Manager before initiating the restore operation. Note: An off-line backup of MS Exchange Server databases before the restore operation is recommended as databases are overwritten. For MS Exchange Server 2007 and 2010 Steps to Dismount Follow these mandatory steps before you begin with the MS Exchange Server Restore operation: 1 2 3 4 Start the MS Exchange Management Console from Start > Programs > Microsoft Exchange Server 2007/2010 > Exchange Management Console appears. Right-click the Public Folder / Mailbox database that you wish to restore > choose the Dismount Database option. Right-click the Public Folder/Mailbox database > choose the Properties option. In the Properties dialog > click the 'General' tab for 2007 Exchange Server and ‘Maintenance’ tab for 2010 Exchange Server and then enable the option "This database can be overwritten by a restore." Now, click the 'Apply' button followed by the 'OK' button to confirm the operation. Repeat Steps 3 and 4 for all the databases that need to be restored. After performing the above steps, close the Exchange Management Console before initiating the restore operation. Note: An off-line backup of MS Exchange Server databases before the restore operation is recommended as databases are overwritten Copyright © Pro Softnet Corporation. All Rights Reserved. 42 MS Exchange Server Mailbox Backup This feature allows you to backup individual mailboxes of the MS Exchange Server Store to your IBackup Professional account. The contents of these mailboxes are backed up to a personal folder (.pst) which can be accessed using Microsoft Outlook. Before backing up the mailboxes, proper mailbox rights should be granted to the individual mailboxes. The Exchange Brick-Level Mailbox Backup is not a method of complete backup or recovery of the Exchange Server databases. To access the Exchange Brick-Level Mailbox Backup option. on the application Menu Bar, go to Backup-Restore > Exchange Server > Exchange Brick-Level Mailbox > Backup. Exchange Server Mailbox Backup Steps 1 2 On selecting the Exchange Brick Level Backup option, the 'Exchange Server Mailbox Backup' screen is displayed. Here, select the individual mailboxes for backup. 'Browse' to select a temporary location on your computer where the Exchange Server Mailboxes will be stored as personal folder (.pst) file and click the 'Next' button. Note: Ensure that the selected temporary location has sufficient disk space. If you have logged in from a remote location, you cannot select a temporary location. 3 Select a folder in your IBackup Professional account to backup the .pst files to it and click the 'Next' button. 4 Schedule the backup for a future day and time or take an immediate backup of the selected mailboxes. Setting the criteria for Mailbox backup In the 'Exchange Server Mail Backup' screen, select any option to customize your mailbox backup. Copyright © Pro Softnet Corporation. All Rights Reserved. 43 Backup all the messages: Backs up the entire mailbox contents. This is set as a default option. Date wise: Backs up the mail messages falling within a specified date and time. Message details: Backs up the mail messages based on subject / attachment. Search criteria: Backs up messages within the selected folder (s) like Inbox, Sent Items, Deleted Items, Calendars, Tasks, Journals, and so on. Copyright © Pro Softnet Corporation. All Rights Reserved. 44 Giving rights to Mailboxes Before taking a backup of the Exchange Server Mailboxes, proper mailbox rights have to be granted to you to access the mailboxes. This is because the Microsoft Exchange 2000 and Exchange Server 2003 accounts having Enterprise Administrators rights, by default, do not have the permission to access all the mailboxes. Granting rights to a specific mailbox Steps to access the Exchange 2007 or Exchange 2010 mailbox: Method 1: 1. Open the Exchange Management console. Choose the Mailbox for which you want to grant permission. Right-click and select the 'Manage Full Access Permission' menu option. Copyright © Pro Softnet Corporation. All Rights Reserved. 45 2. In the 'Manage Full Access Permission' screen, grant full access to the Domain Admins user and click the 'Manage' button. 3. Click 'Finish' to complete the operation. Method 2: 1. Open the Exchange 2007/2010 management shell and enter the following syntax: 2. Add-MailboxPermission -identity <mailbox name> -accessRights fullAccess -User "<Domain name>\Domain Admins" 3. Example: To grant full access to the Mailbox 'Adams'. 4. Add-MailboxPermission - identity Adams - accessRights fullAccess - User "MyWorld\Domain Admins" Note: To perform Exchange 2007/2010 Brick-Level Backup, install the standalone version of MAPI from the Microsoft site. Download Standalone version of MAPI Copyright © Pro Softnet Corporation. All Rights Reserved. 46 Steps to access the Exchange 2000 or Exchange 2003 mailbox: 1 Start the Active Directory Users and Computers > from the View menu, select the Advanced Features option. Note: For Exchange Server 2003, this is not necessary, as the Exchange Advanced tab will be exposed by default. 2 3 4 5 6 7 Select a mailbox and right-click > select the 'Properties' option. A Test mailbox Properties screen is displayed. Click the 'Mailbox Rights' button in the Exchange Advanced tab. Click the' Add' button > select the user or group that you wish to grant access to this mailbox > click the 'OK' button. Make sure that the same user or group is selected in the Name box. In the Permissions for Testmailbox section > select Allow for Full mailbox access > click the 'OK' button. In the Testmailbox Properties dialog > click the 'OK' button. Granting rights to mailboxes of a specific mailbox store To grant access to mailboxes (Exchange 2000 or Exchange 2003) of a specific mailbox store, follow the steps given below: 1 2 3 4 5 6 7 Start the Exchange System Manager and select the Servers folders. Click the plus mark to expand the Servers folder and select the required mailbox store present within the appropriate Storage Group. Right-click and select the 'Properties' option. In the' Properties' dialog > open the Security tab > click the 'Add' button. Select the user or group that you wish to grant access to the mailbox > click the 'OK' button. Make sure that the same user or group is selected in the Name box. In the Permissions for testmailbox section, select 'Allow for Full Control' and click the 'OK' button. Note: Ensure that the Deny option is not selected for Send As and Receive As. 8 In the Mailbox Store Properties dialog> click the 'OK' button to finish. Copyright © Pro Softnet Corporation. All Rights Reserved. 47 Granting rights to mailboxes located on a specific server To grant access to mailboxes (Exchange 2000 or Exchange 2003) found on a specific server, follow the steps given below: For this, you should have appropriate Exchange administrative permissions. 1 2 3 4 5 6 Start Exchange System Manager> select the Servers folders. Click the plus mark to expand the Servers folder > select the appropriate Storage Group. Right-click > select Properties option. In the Properties dialog > open the Security tab > click the 'Add' button. Select the user or group to which you wish to grant access to the mailboxes and click the 'OK' button. Make sure that the same user or group is selected in the Name box. In the Permissions for testmailbox section, select Allow for Full Control > click the 'OK' button. Note: Make sure that the Deny option is not selected for Send As and Receive As. 7 Click the 'OK' button to finish. Note: It might take a while for changes to take effect. The number of domain controllers, Global Catalogs, site replication schedules and intervals will influence this. On a domain with one site containing multiple domain controllers, it might take up to 15 minutes before these new permissions become effective. On single servers, which are also DCs, the process will speed up on restarting the Information Store service. Exchange Server Mailbox Restore The Exchange Brick-Level Mailbox Restore option allows you to restore individual emails from a Personal Folder (.pst) file to the MS Exchange Server Store. The contents of these mailboxes are restored in the corresponding Exchange Server Mailbox. Ensure that appropriate mailbox rights are granted to the selected mailboxes. The Exchange Brick-Level Mailbox Restore is not a method for complete recovery of the Exchange Server databases. Note: To perform the MS Exchange server backup / restore operation, download and install the ‘Advanced Backup Plug-in’ after installing the ‘IBackup for Windows’ application. To access the Exchange Brick-Level Mailbox Restore option, on the application menu, go to Backup-Restore > Exchange Server > Exchange Brick-Level Mailbox > Restore. Copyright © Pro Softnet Corporation. All Rights Reserved. 48 Exchange Server Brick-Level Mailbox Restore Steps 1 2 3 On accessing Restore option, the 'Exchange Server Mail Restore' window is displayed. 'Browse' to select the (.pst) file that you wish to restore to your Exchange Server Mailbox. Select the Exchange Server Mailbox to which you want restore the emails from your Personal Folder (.pst) file. Choose the appropriate restore option and import procedure to copy the email to the Exchange store. Setting the criteria for the Mailbox restore To customize your mailbox restore, select any one among the options listed below: Restore all the messages: This option will be selected by default .It allows you to restore the entire (.pst) file contents to your Exchange Server store. Date wise: Restore email messages falling within the specified date and time. Message details: Restore emails based on their subject / attachment. Search criteria: Restore emails within the selected folders like Inbox, Sent Items, Deleted Items, Calendars, Tasks, Journals, and so on. Import procedures Copy data into the Exchange store: On selecting this option, the application copies the emails to the Exchange store even if it is already present, resulting in duplication of the messages in the Exchange store. Merge data into the Exchange store: On selecting this option, the application checks whether the copied emails are already present in the Exchange store. If so, they are not copied. Replace existing data in the Exchange store: On selecting this option, the application checks whether the copied emails are already present in the Exchange store. If so, the emails are first deleted from the Exchange store and then copied. 4 Click the 'Restore' button to initiate the job. You may opt to view the logs by clicking the 'View Log' button, which appears once the restore operation is complete. Copyright © Pro Softnet Corporation. All Rights Reserved. 49 System State Data Backup The System State Data option allows you to perform backup of system components like Boot files, COM+ CLASS registration database and so on. To access the System State Backup option, on the application menu, go to Backup-Restore > System State Data > System State Backup. Backup System State Data Steps 1 2 3 On selecting the System State Data Backup option, the 'System State data backup' screen is displayed. 'Browse' to select a temporary location on your computer for the initial System State Data backup and click the 'Next' button. Select a folder in your IBackup Professional account where the System State Data / components can be stored and click the 'Next' button. Schedule the backup for a future day and time or take an immediate backup. Copyright © Pro Softnet Corporation. All Rights Reserved. 50 System State Data Restore This option is available only with Vista OS and higher. To access the System State Restore option, from the application menu, go to Backup-Restore > System State Data > System State Restore. Restore System State Data Steps 1 On selecting the System State Restore option, the 'System State data restore' screen is displayed 2 'Browse' to select the System State folder 'IBSystemStateData' on your local computer. 3 4 Click the 'Restore' button. You are prompted to restart your computer to complete the restore process. Click 'Yes' to complete the restore job. Copyright © Pro Softnet Corporation. All Rights Reserved. 51 Web Based Backup set / Schedule Management You can manage your Default Backup set, schedule backup jobs and view detailed logs from the IBackup Professional web interface, using any web browser. Remote Manage To manage Backup set contents from directly off the web, click the 'Remote Manage' icon. Adding Contents to Backup set 1 2 To add files / folders to the Backup set, select the file / folder from the check box. The file/folder(s) are displayed at the bottom of the page. Click the 'Update Backupset' button to update the Backup set. Deleting contents from the Backup set 1 2 To remove files / folders from the Backupset, clear the item from the check box. Click the 'Update Backupset' button to update the Backup set. Scheduling a Job 1 2 Click the 'Schedule Manager' icon at the top of the web page. Select the required parameters (scheduling frequency etc.) View backup/restore log information To view the logs of the backups / restores, follow the steps mentioned below: 1 2 3 4 Login to your IBackup Professional account through any standard browser. Click the 'Backup/Restore Log' icon. Logs of all operations performed via the application and web will be displayed. Click on the corresponding 'View details' link for details of a specific operation. To view all activities performed via the web: 1 2 3 Login to your IBackup Professional account. Click on the icon 'Activity Report'. Select the start and end date for which you want to view/generate the report and click 'Generate Report'. Copyright © Pro Softnet Corporation. All Rights Reserved. 52 Working with the IBackup Professional Tray icon On installing the IBackup Professional application, the IBackup Professional icon is displayed on the system tray of your computer. On right-clicking it, a shortcut menu is displayed, with the following options: Status: Lets you know the progress of the job that is in progress. Activity Log: Opens the 'Session Log' screen from where you can view the log details of all the backup, restore and other operations performed during the current session. Web Management: Manage your Backup sets, schedule backups and view logs through any web browser Continuous Backup: Allows the IBackup Professional application to automatically recognize and perform the backup of files/folders that have recently been updated (within the last 10 minutes). The color of the IBackup Professional tray icon toggles between yellow and green to indicate that the Continuous Data Protection is in progress. Stop Scheduled Backup: Stops all the scheduled backup jobs. Disabled Scheduled Backup: Lets you disable all the scheduled backup jobs. Copyright © Pro Softnet Corporation. All Rights Reserved. 53 Manage All the Scheduled Jobs: This option makes it easy for you to manage the scheduled backup jobs. Backup Now: Lets you take an immediate backup of your Backup set. Check for Updates: Upgrades you to the latest version of the IBackup Professional application. Send Error Report: Lets you contact IBackup Professional technical support team for queries, suggestions or to provide feedback. Help: Provides access the IBackup Professional Help Guide. Exit: Lets you close the IBackup Professional tray menu Uninstall IBackup Professional Follow the steps given below to remove IBackup Professional completely from the local computer: Go to Start > Programs > IBackup Professional > Uninstall IBackup Professional. A message to stop all the scheduled backup jobs and to confirm the uninstallation is displayed. Click 'Yes' to continue the uninstallation. Note: The conventional method of removing application using Control Panel > Add or Remove Programs options is not recommended Version Update To update IBackup Professional with newer versions, from the IBackup Professional tray menu, click the 'Check for Updates' option. A message confirming if you want to update to the latest version is displayed. Click 'Yes' to proceed. Copyright © Pro Softnet Corporation. All Rights Reserved. 54 Technical Support Pro Softnet Corporation, IBackup Division, 26115 Mureau Road, Suite A, Calabasas, CA 91302. Telephone: 1-800-949-3555 ext 3 within USA 1-818-251-4200 ext 3 outside USA Monday - Friday, 6:00 AM to 6:00 PM PST Fax: 1-818-878-9208 Email: [email protected] Website: http://www.ibackup.com/professional Demo: https://www.ibackup.com/professional/online-backup-demo.htm Copyright © Pro Softnet Corporation. All Rights Reserved. 55