1
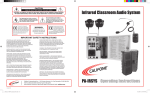
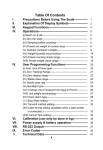
High precision counting scale
Operation Manual
l RCZ-A Series
TABLE OF CONTENTS
I.
PRECAUTIONS BEFORE USING THE SCALE ··································· 1
II. EXPLANATION OF DISPLAY SYMBOLS·········································· 2
III. KEYPAD FUNCTIONS·································································· 4
IV. OPERATIONS ············································································· 5
SWITCH ON&OFF ······························································ 5
ZERO THE SCALE
SAMPLING BEFORE COUNTING··········································· 5
PRESET UNIT WEIGHT IN NUMERIC KEYS ···························· 5
SUBTRACT CONTAINER’S WEIGHT ······································ 7
WEIGHT/QUANTITY ACCUMULATION ·································· 8
PRESET COUNTING CHECK RANGE ···································· 11
PRESET WEIGHT CHECK RANGE ········································13
V. USER PROGRAMMING FUNCTIONS ·············································14
AUTO.SHUT OFF TIME SPAN ··············································16
ZERO TRACKING RANGE···················································16
ZERO DISPLAY RANGE ······················································16
STABLE CLASS RANGE······················································17
ZERO RETURN RANGE ······················································18
BACKLIGHT TYPE ····························································19
CHANGE UNIT OF MEASURE FROM Kg/g TO POUND··············19
UNIT WEIGHT RECOMPUTING············································21
CHECK ALARM TYPE ························································21
VI. CALIBRATION ··········································································22
VII. POWER SUPPLY&BATTERY OPERATION ·······································24
VIII. RS-232 OUTPUT ·······································································26
IX. ERROR CODES··········································································28
-1-
. Precautions Before Using The Scale
Environment
The scale should always be used in an environment, which is free from excessive air
currents, vibration, and temperature or humidity extremes. These factors will affect
displayed weight reading.
DO NOT install the scale:
l Next to open windows or doors causing drafts or rapid temperature changes.
l Near air conditioning or heating vents.
l Near vibrating, rotating or reciprocating equipment.
l Near magnetic fields or equipment that generates magnetic fields.
l On an unstable work surface
l In a dusty environment
l In direct sunlight.
Protection in the transportation
When the initial use, please refer to the following drawing to take off the protection
screw. When the transportation will be made, please install the protection screw on the
machine to avoid any damage sensitive components.
Leveling the Scale
The scale is equipped with a level indicator on the left bottom side of the front panel
and four adjustable leveling feet. Adjust the leveling feet until the bubble appears in
the center circle of the indicator.
Turn on Scale
Do not turn on scale with anything on the platform. The switch is located on the side
of the scale. The scale will start to count down from nine to zero and will display the
min. Capacity of the scale in the WEIGHT display. The scale is then ready for use.
Give a warm-up for 15~30 minutes before use.
. Explanation Of Display Symbols
-2-
Display Windows
l Weight DisplayTotals 6 digits for weight accumulated or being measured on the pan.
l Unit Weight DisplayTotals 6 digits for unit weight or times of weight accumulated.
l Total Pieces DisplayTotals 6 digits for number accumulated or being counted on the pan.
Indicated Symbols
Scale is in TARE mode.
:
:
Scale is in ZERO mode.
:
Scales is in ACCUMALATION mode.
:The display reading is in STABLE condition.
:Lack of Sample Weight
If the total sample weight on the pan is less than 10 display divisions, a
triangular annunciator will appear to remind the user to add more samples until the
annunciator disappears.
Lack of Unit Weight
a triangular
If the unit weight is less than 1/10 display divisions
annunciator will appear to remind the user that the displayed unit weight is too small
for getting accurate quantity calculations.
Low Voltage
. Keypad Functions
0
~
9
Numeric keys
Decimal point key
-3-
or CLEAR :Use this key to clear out the displayed numeric readings.
or ZERO
If there is a minor weight displayed without anything on the
pan, hit the zero key to clear the display.
Or TARE
Use this key to subtract the container’s weight.
Indicates that the current weight reading is net weight.
Or SMPL : Use this key to input sample size.
OrU.Wt :Use this key to input the known unit weight of item to be
counted.
Or ALARM Use this key to input the HIGH &LOW weight/quantity limit
for check function.
Or ADD:Use this key to accumulate weight/quantity measured.
OrTOTAL:Use this key to recall total weight, count&accumulation
times.
Or P.TARE:Use this key to preset TARE weight.
IV.Operations
Ⅲ ) Switch on & off
Push the ON/OFF switch to
the scale.
Zero the scale
Press
I
position to turn on the scale & to
O position to turn off
or ZERO key to return the display to zero in case there is any zero drifting
while unloaded.
Sampling before counting
Unknown unit weight
1 Place a few pieces of item to be counted on the pan.
Sample weight
-4-
2 Input the quantity of item on the pan
Sample weight
3 press
input sample size
or SMPL key
Sample weight
sample
4 The sampling operation is completed while stable display appears as below
Sample weight
unit weight
*
The larger sample size
*
Press
sample size
the more accurate unit weight
or SMPL key to recomputing unit weight during counting process.
Known unit weight
1 Input the known unit weight..
Known unit weight
2 Press
or U.WT key to complete sampling operation & enter into counting mode.
-5-
(IV) Preset unit weight in numeric keys
How to store unit weight in memory cells
1 To obtain unit weight by inputting the known value (ex.35g) or by sampling operation
mentioned before
2 Keep pressing
or U.WT key for approx.2seconds
3 Press any of the numeric keys (
numeric key.
)to store the unit weight in this selected
How to recall the unit weight stored
Press the numeric key with stored unit weight inside & keep pressing
twice.
The stored unit weight will appear in the unit weight display.
(V)Subtract container's weight
Container's weight unknown
1 Place a container on the pan.
Container's weight
2 Press
or TARE key
3 The scale will enter into counting mode while stable display appears as below.
-6-
or U.Wt key
Container's weight known
1 Nothing on the pan
-7-
2 Scale is loaded
Eliminate TARE
Remove all on the pan & the weight display will show a negative (—) container's weight. Pressing
or TARE key at this moment will bring the weight display to zero and TARE triangular
annunciator (1) will disappear.
-8-
(VI)Weight/Quantity accumulation
1 Place item to be weighed/counted on the pan.
Weight on the pan
2 Press
or ADD key
3 Display readings to be stable as below.
Total accumulated total accumulation total ccumulated
Weight
times
count
* Accumulation effective only when stays at zero.
4 Press
mode.
or TOTAL key or wait approx. 2 seconds., the scale will return to counting
Weight on the pan
unit weight
count
or TOTAL key to enter into accumulation status mode. At this moment, total
5 Press
accumulated weight is shown in WEIGHT window, total accumulation times is shown in UNIT
WEIGHT window and TOTAL PLECES window displays accumulated count.,
Press
or TOTAL key again to revert to counting mode.
Clear accumulation
Press
or TOTAL key to enter into accumulation status mode and press
CLEAR key to clear all accumulated data.
-9-
or
(VII)Preset counting check range
Users can set a Hi Lo range for counting check, when the number of objects on the pan is
within the preset counting check range, the alarm will sound beeps repeatedly.
Procedures
1 Press
or ALARM key while the scale is either loaded or unloaded.
High limit
window for displaying
window for displaying
High limit value to be input low limit value to be input
2 Key in the desited high limit value.
or CLEAR key to erase the value keyed in )
(Use
High limit
3 Press
High limit value keyedin
window for displaying
Low limit value to be input
or ALARM key again and key in the desired low limit value as indicated
below.(Low limit value effeclive only after high limit is preset)
Low limit
4 Press
High limit value keyed in
low limit value keyed in
or SMPL key to complete counting check range preset procedures and
return to normal counting mode
- 10 -
Low limit High limit value keyed in Low limit value keyed in
(VIII) Preset weight check range
Users can set a Hi LO range for weight check when the weight of objects on the pan is within
the preset weight check range.the alarm will sound beeps repeatedly.
Procedures
1 Press
High limit
or ALARM key while the scale is either loaded or unloaded.
window for displaying
window for displaying
High limit value to be input low limit value to be input
2 Key in the desired high limit value.
(Use
or CLEAR key to erase the value keyed in )
3 Press
or ALARM key again and key in the desired low limit value as indicated
below.
(*low limit value effective only after high limit is preset)
4 Press
or U.Wt key to complete weight check rang preset procedures and return to
normal counting mode .
- 11 -
Clear high /low value preset
Follow the above rpeset procedures and key in
0 or press
CLEAR key directly for
high and low limit value.
V. User Programming Function
(I)Auto. Shut off
time span
1 Turn on the scale &press
key 4times one after another during counting down
(self-check )to zero to enter into USER PROGRAMMING FUNCTION MODE.
The displays will indicate as below eventually.
2 Press
or TARE key to revolve the system-preset time span (2min,5min ,8min,and 0)
3 Press
or CLEAR key to determine and return to normal counting mode or press
or TOTAL key for determination and move to next.
(II)Zero Tracking Range
1 Keep pressing
or TOTAL key in USER PROGRAMMING FUNCTION MODE
and release until the following displays appear.
2 Press
or TARE key to revolve the system-preset zero tracking range(0,1,2,3,4).The
larger number selected.the wider rang.
- 12 -
3 Press
or CLEAR key to determine and return to normal counting mode or press
or TOTAL key for determination and move to next .
(III) Zero display range
1 Keep pressing
or TOTAL key in USER PROGRAMMIN FUNCTION MOOD
and release until the following displays appear.
2 Press
or TARE key to revolve the system-preset zero display range(0,1,2,3,4).The
larger number selected, the wider range.
3 Press
or CLEAR key to determine and return to normal counting mode or press
or TOTAL key for determination and move to next.
(IV) Stable class range
1 Keep pressing
or TOTAL key in USER PROGRAMMING FUNCTION MODE
and release until the following displays appear.
2 Press
or TARE key to select the system-preset stable class range (0,1,2,3,4,5).The
bigger number selected, the shorter time for display stability.
3 Press
or CLEAR key to determine and return to normal counting mode or press
or TOTAL key for determination and move to next.
(V)Zero return range
1 Keep pressing
or TOTAL key in USER pROGRAMMING FUNCTION MODE
and release until the following displays appear
- 13 -
2 Press
or TARE key to revolve the system preset zero retun range (0,1,2,3,4,5).The
larger number selected, the more stable zero point.
3 Press
or CLEAR key to determine and return to normal counting mode or press
or TOTAL key for determination and move to next.
(VI)Backlight type
1 Keep pressing
or TOTAL key in USER PROGRAMMING FUNCTION MODE
and release until the following displays appear.
2 Press
or TARE key to revolve the system-preset zero return range(0,1,2,3,4,5). The
larger number selected, the more stable zero point.
3 Press
or CLEAR key to determine and return to normal counting mode or press
or TOTAL key for determination and move to next.
(VI) Backlight type
1 Keep pressing
or TOTAL key in USER PROGRAMMING FUNCTION MODE and
release until the following displays appear.
- 14 -
2 Press
or TARE key to revolve the system-preset backlight type (0—auto.
Backlight.1—manual backlight )
or CLEAR key to determine and return to normal counting mode or press
3 Press
or TOTAL key for determination and move to next .
• Auto.backlight
Backlight will be going on automatically whenever the scale is loaded by objects weigh greater
than 9 display resolution or any of keys is pressed. And it will be going off also automatically
approx. 5 seconds after the scale returns to zero.
• Manual backlight
Press
(decimal point ) key to switch on and off backlight
* Scale will keep the backlight type selected in memory for next use.
(VII) Change unit of measure from kg/g to Pound
1 Keep pressing
or TOTAL key in USER PROGRAMMING FUNCTION MODE and
release until the following displays appear.
2 Press
or TARE key to revolve the system-preset units of Measure.(0—kg or g,1
—1b)
3 Press
or CLEAR key to determine and return to normal counting mode or press
or TOTAL key for determination and move to next.
(VIII) Unit weight recomputing
1 Keep pressing
or TOTAL key in USER PROGRAMMING FUNCTION MODE
and release until the following displays appear.
- 15 -
2 Press
or TARE key to revolve the system-preset Recomputig modes.
0—disable recomputing function
1—enable recomputing function
3 Press
or CLEAR key to determine and return to normal counting mode or press
or TOTAL key for determination and move to next.
*The unit weight will be averaged again if you add the remaining quantity ,gradually, by several
lots. This will help eliminate errors caused by the Possible weight variation among each object
and lead to more accurate results.
When adding objects to the pan ,be sure that the quantity is LESS THAN those already on the pan.
The alarm will sound a beep when the unit weight is averaged again.
*Recomputing function effective only after sampling operation is done.
(IX) CHeck alarm type
or TOTAL key in USER PROGRAMMING FUNCTION MODE
1 Keep pressing
and release until the following displays appear.
2 Press
or TARE key to revolve the system-preset check alarm types.
0— inside type ,1—Outside type
3 Press
or CLEAR key to determine and return to normal counting mode or press
or TOTAL key for determination and move to next.
*inside type
- 16 -
The alarm sounds beeps only when either total weight or total count falls inside the set range.
Ex.1 Counting check alarms
Ex.2 Weight check alarms
*Outside type
The alarm sounds beeps only when either total weight or total count falls outside the set range.
Ex.1 Counting check alarms
Ex.2 Weight check alarms
*Turn off the scale after all USER PROGRAMMING FUNCTIONS are ste and restart for
use .
VI.Calibration (can only be done in kg)
1 Turn on the scale and be sure it is zeroed.
2 Keep pressing
instance)
or ZERO key until the following displays appear.(Take 6kg scale for
3 Put a weight same as what exactly shown in the UNIT WEIGHT window on the pan .
The displayed readding in the UNIT WEIGHT window starts blinking.The scale will stop blinking
and return to normal counting mode.
Calibration is now completed
*Required weight for calibration can be changed by using numeric keys while in step 2 above.
- 17 -
*Press
or ZERO key to escape from calib ation mode at any time
VII. Power supply & battery operation
POWER SUPPLY
• AC 220V
• DC 12V/800mA
BATTERY OPERATION
The scale can be operated from the battery if desired. The battery life is approximately 80 hours.
When the battery needs charging a symbol “
” on the TOTAL PIECES display will turn
on .The battery should be charged when the symbol is on .The scale will still operate for about 10
hours after which it will automatically switch off to protect the battery .
To charge the battery, simply attach the power supply module to the scale and plug in .The scale
does not need to be turned on .
The battery should be charged for 12 hours for full capacity.
There is an LED to indicate the status of battery charging on the right of display. When the scale is
plugged into the mains power the internal battery will be charged. If the LED is Green the battery
has been charged. If it is Red the battery is nearly discharged and Yellow indicates the battery is
increasing the charge level.
As the battery is used it may fail to hold a full charge. If the battery life becomes unacceptable the
contact your distributor.
Note: The battery should be recharged every 3 months if the scale is not used for long time.
VIII.RS-232 OUTPUT
The scale can be ordered with as optional RS-232 output
1 MODE E1 A-RS 232C'S UART signal
2 Format:
Baud rate : 2400 BPS
Data bits:
8
BITS
Stop bit:
1
BIT
Code ASCII
Connector:9 Pin Socket
Pin3 Output
Pin5 Signal Ground
3 Transmit Formal ,when it is in Accumulation model and transmit by pressing the following
- 18 -
keys:
Press the “
Record#01
Net 02000.0
U/W 000000
Pcs 000000
Press the “
Record#02
Net 03000.0
U/W 000000
Pcs 000000
Press the “
” or ADD key
g
g
” or ADD key again
g
g
” or TOTAL key again
Total
Net
05000.0 g
U/W 000000
Net=net weight Pcs=Quantity U/W=Unit Weight
IX.ERROR CODES
During the initial power-on testing it is possible the scale may show error message.
The meaning of the error messages is described below.
ERROR CODE
POSSIBLE CAUSES
HANDLING
E1,E2,E3
1.The scale pan is placed
incorrectly.
Place the scale pan correctly
2.Turn
on
scale
with
something on the scale pan.
Take away the goods, and
switch on again.
OL
Recharge the battery
1. If the “
” symbol
apperars.the
battery
provided low-volfage.
2.Overload
has
Take off the weight
immediately.
If the error message still is shown after above ways, please recalibrate.If the problem still can not
be solved then contact your dealer for further support.
- 19 -