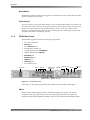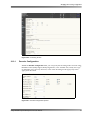
1
 ®
Dolby DP580
Professional Reference
Decoder Manual
Issue 1
Part Number 9111530
Dolby Laboratories, Inc.
Corporate Headquarters
Dolby Laboratories, Inc.
100 Potrero Avenue
San Francisco, CA 94103‐4813 USA
Telephone 415‐558‐0200
Fax 415‐863‐1373
www.dolby.com
European Headquarters
Dolby Laboratories, Inc.
Wootton Bassett
Wiltshire SN4 8QJ England
Telephone 44‐1793‐842100
Fax 44‐1793‐842101
DISCLAIMER OF WARRANTIES:
EQUIPMENT MANUFACTURED BY DOLBY LABORATORIES IS WARRANTED AGAINST DEFECTS IN MATERIALS AND WORKMANSHIP FOR A PERIOD OF ONE YEAR FROM THE DATE OF PURCHASE. THERE ARE NO OTHER EXPRESS OR IMPLIED WARRANTIES AND NO WARRANTY OF MERCHANTABILITY OR FITNESS FOR A PARTICULAR PURPOSE, OR OF NONINFRINGEMENT OF THIRD‐PARTY RIGHTS (INCLUDING, BUT NOT LIMITED TO, COPYRIGHT AND PATENT RIGHTS).
LIMITATION OF LIABILITY: IT IS UNDERSTOOD AND AGREED THAT DOLBY LABORATORIES’ LIABILITY, WHETHER IN CONTRACT, IN TORT, UNDER ANY WARRANTY, IN NEGLIGENCE, OR OTHERWISE, SHALL NOT EXCEED THE COST OF REPAIR OR REPLACEMENT OF THE DEFECTIVE COMPONENTS OR ACCUSED INFRINGING DEVICES, AND UNDER NO CIRCUMSTANCES SHALL DOLBY LABORATORIES BE LIABLE FOR INCIDENTAL, SPECIAL, DIRECT, INDIRECT, OR CONSEQUENTIAL DAMAGES (INCLUDING, BUT NOT LIMITED TO, DAMAGE TO SOFTWARE OR RECORDED AUDIO OR VISUAL MATERIAL), COST OF DEFENSE, OR LOSS OF USE, REVENUE, OR PROFIT, EVEN IF DOLBY LABORATORIES OR ITS AGENTS HAVE BEEN ADVISED, ORALLY OR IN WRITING, OF THE POSSIBILITY OF SUCH DAMAGES.
. Dolby, Pro Logic, and the double‐D symbol are registered trademarks of Dolby Laboratories. Dialogue Intelligence, Dolby Digital Plus, and Surround EX are trademarks of Dolby Laboratories.
All other trademarks remain the property of their respective owners.
© 2013 Dolby Laboratories. All rights reserved.
ii
Part Number
9111530
Issue 1
S13/26130/26607
Dolby® DP580 Professional Reference Decoder Manual
Regulatory Notices
FCC
NOTE: This equipment has been tested and found to comply with the limits for a Class A digital device, pursuant to Part 15 of the FCC Rules. These limits are designed to provide reasonable protection against harmful interference when the equipment is operated in a commercial environment. This equipment generates, uses, and can radiate radio frequency energy and, if not installed and used in accordance with this instruction manual, may cause harmful interference to radio communications. Operation of this equipment in a residential area is likely to cause harmful interference in which case the user will be required to correct the interference at his own expense.
Canada
This Class A digital apparatus complies with Canadian ICES‐003.
EU/EMC
This is a class A product. In a domestic environment this product may cause radio interference in which case the user may be required to take adequate measures.
Important Safety Instructions
1. CAUTION: Troubleshooting must be performed by a trained technician. To reduce the risk of electric shock, do not attempt to service this equipment unless you are qualified to do so.
2. Do not defeat the safety purpose of the polarized or grounding‐type plug. A polarized plug has two blades with one wider than the other. A grounding‐type plug has two blades and a third grounding prong. The wide blade or the third prong is provided for your safety. If the provided plug does not fit into your outlet, consult an electrician for replacement of the obsolete outlet.
3. This apparatus must be earthed (grounded) by connecting to a correctly wired and earthed power outlet.
4. Ensure that your mains supply is in the correct range for the input power requirement of the unit.
5. In order to reduce the risk of electrical shock, the power cord must be disconnected when the power supply assembly is removed.
6. This equipment is intended to mount in a suitably ventilated 19” rack; ensure that any ventilation slots in the unit are not blocked or covered.
7. CAUTION: This equipment contains a lithium battery. Danger of explosion if the battery is incorrectly replaced. Replace only with the same or equivalent type. Do not disassemble, crush, puncture, short external contacts, or dispose of in fire or water. Dispose of the used battery in accordance with local law.
8. The mains power disconnect device for this unit is the IEC320 C13 plug‐in mains cord rather than a power switch. The mains cord must remain readily accessible for disconnecting mains power.
Dolby® DP580 Professional Reference Decoder Manual
iii
Regulatory Notices
9. To avoid exposure to dangerous voltages and to avoid damage to the unit, do not connect the rear panel Ethernet port to telephone circuits.
10. As the colours of the cores in the mains lead may not correspond with the coloured markings identifying the terminals in your plug, proceed as follows:
•
The green and yellow core must be connected to the terminal in the plug identified by the letter E, or by the earth symbol , or coloured green, or green and yellow.
•
The blue core must be connected to the terminal marked with the letter N or coloured black.
•
The brown core must be connected to the terminal marked with the letter L or coloured red.
11. This apparatus must be earthed.
Figure 2‐1 CAUTION – Danger of explosion if battery is incorrectly replaced. Replace only with the same or equivalent type. Dispose of used batteries according to local law.
PRODUCT END‐OF‐LIFE INFORMATION
This product was designed and built by Dolby Laboratories to provide many years of service, and is backed by our commitment to provide high‐quality support. When it eventually reaches the end of its serviceable life, it should be disposed of in accordance with local or national legislation.
For current information, please visit our website at: www.dolby.com/environment.
Figure 2‐2 This symbol that appears on the unit rear panel is intended to alert the user to the presence of uninsulated “dangerous” voltage within the product’s enclosure that may be of sufficient magnitude to constitute a risk of electric shock to persons.
Figure 2‐3
Figure 2‐4 This symbol is intended to alert the user to the presence of important safety operating and maintenance instructions.
Figure 2‐5
iv
Dolby® DP580 Professional Reference Decoder Manual
Regulatory Notices
IMPORTANT SAFETY NOTICE
This unit complies with safety standard EN60950-1 as appropriate. The unit shall not be exposed to dripping or splashing and no objects filled with liquids, such as
coffee cups, shall be placed on the equipment. To ensure safe operation and to guard against potential shock hazard or risk of fire, the following must be
observed:
GB
o
Ensure that your mains supply is in the correct range for the input power requirement of the unit.
o
The unit must be earthed by connecting to a correctly wired and earthed power outlet.
o
The power cord supplied with this unit must be wired as follows:
Live—Brown
Neutral—Blue
Earth—Green/Yellow
IMPORTANT – NOTE DE SECURITE
Ce materiel est conforme à la norme EN60950-1. Ne pas exposer cet appareil aux éclaboussures ou aux gouttes de liquide. Ne pas poser d'objets remplis de liquide, tels
que des tasses de café, sur l'appareil. Pour vous assurer d'un fonctionnement sans danger et de prévenir tout choc électrique ou tout risque d'incendie, veillez à observer
les recommandations suivantes.
o
Le selecteur de tension doit être placé sur la valeur correspondante à votre alimentation réseau.
o
Le materiel doit être correctement relié à la terre.
F
o
Le cordon secteur livré avec le materiel doit être cablé de la manière suivante:
Phase—Brun
Neutre—Bleu
Terre—Vert/Jaune
WICHTIGER SICHERHEITSHINWEIS
Dieses Gerät entspricht der Sicherheitsnorm EN60950-1. Das Gerät darf nicht mit Flüssigkeiten (Spritzwasser usw.) in Berührung kommen; stellen Sie keine Gefäße,
z.B. Kaffeetassen, auf das Gerät. Für das sichere Funktionieren des Gerätes und zur Unfallverhütung (elektrischer Schlag, Feuer) sind die folgenden Regeln unbedingt
einzuhalten:
o
Der Spannungswähler muß auf Ihre Netzspannung eingestellt sein.
D
o
Die Erdung des Gerätes muß über eine geerdete Steckdose gewährleistet sein.
o
Das mitgelieferte Netzkabel muß wie folgt verdrahtet werden:
Phase—braun
Nulleiter—blau
Erde—grün/gelb
NORME DI SICUREZZA – IMPORTANTE
Questa apparecchiatura è stata costruita in accordo alle norme di sicurezza EN60950-1. Il prodotto non deve essere sottoposto a schizzi, spruzzi e gocciolamenti, e
nessun tipo di oggetto riempito con liquidi, come ad esempio tazze di caffè, deve essere appoggiato sul dispositivo. Per una perfetta sicurezza ed al fine di evitare
eventuali rischi di scossa êlettrica o d'incendio vanno osservate le seguenti misure di sicurezza:
o
Assicurarsi che il selettore di cambio tensione sia posizionato sul valore corretto.
I
o
L'apparecchiatura deve avere un collegamento di messa a terra ben eseguito; anche la connessione rete deve
avere un collegamento a terra.
o
Il cavo di alimentazione a corredo dell'apparecchiatura deve essere collegato come segue:
Filo tensione—Marrone
Neutro—Blu
Massa—Verde/Giallo
AVISO IMPORTANTE DE SEGURIDAD
Esta unidad cumple con la norma de seguridad EN60950-1. La unidad no debe ser expuesta a goteos o salpicaduras y no deben colocarse sobre el equipo recipientes con
liquidos, como tazas de cafe. Para asegurarse un funcionamiento seguro y prevenir cualquier posible peligro de descarga o riesgo de incendio, se han de observar las
siguientes precauciones:
o
Asegúrese que el selector de tensión esté ajustado a la tensión correcta para su alimentación.
o
La unidad debe ser puesta a tierra, conectándola a un conector de red correctamente cableado y puesto a tierra.
E
o
El cable de red suministrado con esta unidad, debe ser cableado como sigue:
Vivo—Marrón
Neutro—Azul
Tierra—Verde/Amarillo
VIKTIGA SÄKERHETSÅTGÄRDER!
Denna enhet uppfyller säkerhetsstandard EN60950-1. Enheten får ej utsättas för yttre åverkan samt föremål innehållande vätska, såsom kaffemuggar, får ej placeras på
utrustningen. För att garantera säkerheten och gardera mot eventuell elchock eller brandrisk, måste följande observeras:
o
Kontrollera att spänningsväljaren är inställd på korrekt nätspänning.
o
Enheten måste vara jordad genom anslutning till ett korrekt kopplat och jordat el-uttag.
S
o
El-sladden som medföljer denna enhet måste kopplas enligt foljande:
Fas—Brun
Neutral—Blå
Jord—Grön/Gul
BELANGRIJK VEILIGHEIDS-VOORSCHRIFT:
Deze unit voldoet aan de EN60950-1 veiligheids-standaards. Dit apparaat mag niet worden blootgesteld aan vocht. Vanwege het risico dat er druppels in het apparaat
vallen, dient u er geen vloeistoffen in bekers op te plaatsen. Voor een veilig gebruik en om het gevaar van electrische schokken en het risico van brand te vermijden,
dienen de volgende regels in acht te worden genomen:
o
Controleer of de spanningscaroussel op het juiste Voltage staat.
NL
o
Aansluiting van de unit alleen aan een geaarde wandcontactdoos.
o
De netkabel die met de unit wordt geleverd, moet als volgt worden aangesloten:
Fase—Bruin
Nul—Blauw
Aarde—Groen/Geel
Dolby® DP580 Professional Reference Decoder Manual
v
Confidential Information
Table of Contents
Chapter 1 Introduction
1.1 DP580 Front and Rear Panels ...........................................................................................2
1.1.1 DP580 Front Panel ..................................................................................................2
1.1.2 DP580 Rear Panel ...................................................................................................4
Chapter 2 Using the DP580
2.1 Installing the Hardware ......................................................................................................8
2.1.1 Connecting the Multichannel Analog Output............................................................9
2.1.2 Starting Up the System ............................................................................................9
2.2 Configuring the Network Settings ......................................................................................9
2.3 Connecting to the DP580 .................................................................................................10
2.4 Exploring the Web Client User Interface...........................................................................11
2.4.1 Navigation Bar .......................................................................................................11
2.4.2 DP580 Display Bar.................................................................................................12
2.4.3 Input Source Display..............................................................................................12
2.4.4 Output Mode and Compression Controls...............................................................12
2.4.5 Audio Output Meter................................................................................................12
2.4.6 Loudness Displays.................................................................................................13
2.5 Monitoring IP Input ...........................................................................................................13
2.6 Monitoring AES Input........................................................................................................16
2.7 Monitoring ASI/SDI Input ..................................................................................................18
2.8 Monitoring HDMI Input......................................................................................................21
2.9 Generating Media Files ....................................................................................................22
2.9.1 Playing Media Files................................................................................................22
2.9.2 Generating A/V Sync Files.....................................................................................24
2.9.3 Streaming External Files........................................................................................24
2.9.4 Monitoring HDMI Audio Return Channel Transmitter Output.................................25
2.10 Monitoring HDMI Audio Return Channel Receiver Input ..................................................25
2.11 Checking the Loudness Status .........................................................................................26
2.11.1 Changing the Loudness Display ............................................................................27
2.11.2 Downloading Loudness Logs ................................................................................29
2.11.3 Loudness Parameters ...........................................................................................29
2.11.4 Checking the Event Logs.......................................................................................30
2.12 Modifying the Processing Configuration ...........................................................................32
2.12.1 Decoder Configuration...........................................................................................33
2.12.2 Dolby TrueHD ........................................................................................................37
2.12.3 Dolby Digital and Dolby Digital Plus Configuration ................................................37
2.12.4 Dolby E Configuration............................................................................................39
2.12.5 AAC and HE AAC Configuration ...........................................................................39
2.12.6 Dolby Pro Logic Configuration ...............................................................................40
2.13 Configuring Loudness Measurement................................................................................43
2.13.1 Measurement Configuration Parameters...............................................................43
Dolby® DP580 Professional Reference Decoder Manual
vii
Table of Contents
Confidential Information
2.14 Modifying the Output Configuration ..................................................................................44
2.14.1 Output Configuration .............................................................................................45
2.14.2 Volume Configuration ............................................................................................46
2.14.3 HDMI Sink Device Status ......................................................................................46
2.14.4 EDID Configuration................................................................................................47
2.15 Modifying the Network Settings ........................................................................................47
2.16 Using the Administrative Controls.....................................................................................48
2.17 Resetting Factory Defaults from the User-Control Screen ...............................................52
Chapter 3 Associated Audio Mixing
3.1 Configuring Associated Audio Mixing ...............................................................................53
3.1.1 Mixing Associated Audio from a Single PID...........................................................54
3.1.2 Monitoring an Associated Stream Only (Single PID) .............................................55
3.1.3 Manually Mixing an Alternative Associated Stream ...............................................56
3.2 Mixing Associated Audio with Dual Packet Identifiers ......................................................56
Chapter 4 Dolby E Decoding Behavior
4.1 Dolby E Program Selection ..............................................................................................59
4.2 Dolby E Metadata Emulation ............................................................................................59
Appendix A Dolby DP580 Specifications
A.1 Processing Capabilities ....................................................................................................61
A.2 Environmental Characteristics ..........................................................................................62
Index.............................................................................................................................. 63
viii
Dolby® DP580 Professional Reference Decoder Manual
Confidential Information
List of Figures
Figure 1-1
Figure 1-2
Figure 2-1
Figure 2-2
Figure 2-3
Figure 2-4
Figure 2-5
Figure 2-6
Figure 2-7
Figure 2-8
Figure 2-9
Figure 2-10
Figure 2-11
Figure 2-12
Figure 2-13
Figure 2-14
Figure 2-15
Figure 2-16
Figure 2-17
Figure 2-18
Figure 2-19
Figure 2-20
Figure 2-21
Figure 2-22
Figure 2-23
Figure 2-24
Figure 2-25
Figure 2-26
Figure 2-27
Figure 2-28
Figure 2-29
Figure 2-30
Figure 2-31
Figure 2-32
Figure 2-33
Figure 2-34
Figure 2-35
Figure 2-36
Figure 2-37
Figure 2-38
Figure 2-39
Figure 2-40
Figure 2-41
Figure 2-42
Figure 2-43
Figure 2-44
Figure 2-45
Figure 2-46
DP580 Front-Panel Components .......................................................................................... 2
DP580 Rear Panel................................................................................................................. 4
Connecting the Inputs and Outputs ....................................................................................... 9
25-Pin D-Connector Pinout.................................................................................................... 9
Front-Panel Navigation Keys............................................................................................... 10
DP580 Web Client Input Screen.......................................................................................... 11
Navigation Bar ..................................................................................................................... 11
DP580 Display Bar .............................................................................................................. 12
Input Source Display ........................................................................................................... 12
Output Mode and Compression Display.............................................................................. 12
Audio Output Meter ............................................................................................................. 13
Loudness Display Menu ...................................................................................................... 13
Select IP Bookmarks in the Setup Menu ............................................................................. 13
IP Bookmarks Screen (No Entries)...................................................................................... 14
IP Bookmarks Screen with Populated Bookmarks List........................................................ 14
Select Input in the Home Menu ........................................................................................... 14
Select IP as the Input .......................................................................................................... 15
Select a Source IP............................................................................................................... 15
Source IP Information (Transport Stream with Metadata) ................................................... 15
Source IP Information (Dolby E Transport Stream with Metadata) ..................................... 16
Select Input in the Home Menu ........................................................................................... 16
Select AES as the Input....................................................................................................... 17
Select AES Input Source (Dolby Digital with Metadata) ...................................................... 17
Select AES Input Source (Dolby E with Metadata).............................................................. 18
Select ASI/SDI Input Source (ASI with Metadata)............................................................... 19
Select ASI/SDI Input Source (HD-SDI with Metadata) ........................................................ 19
Select ASI/SDI Input Source (HD-SDI [Dolby E with Metadata])......................................... 20
Select ASI/SDI Input Source (ASI [Dolby E with Metadata]) ............................................... 20
Select Input in the Home Menu ........................................................................................... 21
Select HDMI as the Input..................................................................................................... 21
HDMI Input Source .............................................................................................................. 21
Home/Input Menu ................................................................................................................ 22
Input/Generate Selection..................................................................................................... 22
Setup/Generate Menu ......................................................................................................... 23
Stream Generation Configuration........................................................................................ 23
File Filters and File Selection Menu .................................................................................... 24
Internal and External Files................................................................................................... 24
Stream Generation Control.................................................................................................. 25
Select Input in the Home Menu ........................................................................................... 25
Select HDMI ARC as the Input ............................................................................................ 25
Select ARC Receiver Input Source (Dolby Digital with Metadata) ...................................... 26
Select Loudness in the Status Menu ................................................................................... 26
Loudness Screen (Transport Stream Example) .................................................................. 27
Select Loudness Parameter ................................................................................................ 28
Download Loudness Logs Screen....................................................................................... 29
Select Event Logs in the Status Menu................................................................................. 30
Event Logs Screen Level..................................................................................................... 31
Level Menu .......................................................................................................................... 31
Dolby® DP580 Professional Reference Decoder Manual
ix
List of Figures
Confidential Information
Figure 2-47
Figure 2-48
Figure 2-49
Figure 2-50
Figure 2-51
Figure 2-52
Figure 2-53
Figure 2-54
Figure 2-55
Figure 2-56
Figure 2-57
Figure 2-58
Figure 2-59
Figure 2-60
Figure 2-61
Figure 2-62
Figure 2-63
Figure 2-64
Figure 2-65
Figure 2-66
Figure 2-67
Figure 2-68
Figure 2-69
Figure 2-70
Figure 2-71
Figure 2-72
Figure 2-73
Figure 2-74
Figure 2-75
Figure 2-76
Figure 2-77
Figure 2-78
Figure 2-79
Figure 2-80
Figure 2-81
Figure 2-82
Figure 2-83
Figure 2-84
Figure 2-85
Figure 2-86
Figure 2-87
Figure 2-88
Figure 2-89
Figure 2-90
Figure 2-91
Figure 2-92
Figure 3-1
Figure 3-2
Figure 3-3
Figure 3-4
Figure 3-5
Figure 3-6
Figure 3-7
Figure 3-8
Figure 3-9
Figure 3-10
Category Menu .................................................................................................................... 31
Start Time/End Time Fields ................................................................................................. 32
Select Processing in the Setup Menu.................................................................................. 32
Processing Screen .............................................................................................................. 33
Decoder Configuration Options ........................................................................................... 33
Decoder Output Mode Options............................................................................................ 34
Dolby Pro Logic II Options................................................................................................... 34
Dolby Pro Logic IIx Options ................................................................................................. 35
Compression Mode Options ................................................................................................ 35
Line Cut Menu ..................................................................................................................... 36
Stereo Downmix Mode Menu .............................................................................................. 36
Tech Bulletin 11 Option ....................................................................................................... 37
Tech Bulletin 11 Target Level Menu.................................................................................... 37
Dolby TrueHD Configuration ............................................................................................... 37
Dolby Digital and Dolby Digital Plus Configuration Parameters .......................................... 38
Associated Audio Mixing Menus......................................................................................... 38
Dolby Digital and Dolby Digital Plus Error Concealment Menu ........................................... 38
Dolby Digital Plus MS10 Emulation Option ......................................................................... 39
Dolby E Configuration Metadata Emulation Option ............................................................. 39
AAC and HE AAC Configuration Parameters...................................................................... 39
AAC and HE AAC Default Program Reference Level Menu ............................................... 40
AAC and HE AAC Error Concealment Menu....................................................................... 40
Dolby Pro Logic Configuration Parameters ......................................................................... 40
Dolby Pro Logic IIx Mode Menu .......................................................................................... 41
Dolby Pro Logic II Mode Menu ............................................................................................ 41
Dolby Pro Logic II Music Mode Menus ................................................................................ 42
Select Loudness in the Setup Menu.................................................................................... 43
Loudness Screen................................................................................................................. 43
Metering Mode Menu........................................................................................................... 44
Peak and Loudness Filter Options ...................................................................................... 44
Select Monitoring in the Setup Menu................................................................................... 44
Monitoring Screen ............................................................................................................... 45
AES 1/2 Menu ..................................................................................................................... 45
Volume Control and Dim Gain Menus ................................................................................. 46
HDMI Sink Device Screen ................................................................................................... 47
Extended Display Identification Data Configuration ............................................................ 47
Extended Display Identification Data Configuration ............................................................ 47
Select Network in the System Menu.................................................................................... 48
Network Screen ................................................................................................................... 48
Select Admin in the System Menu....................................................................................... 48
Admin Screen (Current Software Displayed)....................................................................... 49
After Uploading/New Software Found (Current Software and New Software Displayed) ... 50
Upgrade in Progress............................................................................................................ 50
Upgrade Done/DP580 Rebooting........................................................................................ 50
Admin Screen Displays New Software Version After Rebooting......................................... 51
Front-Panel Navigation Keys............................................................................................... 52
Select Processing in the Setup Menu.................................................................................. 53
Processing Screen .............................................................................................................. 54
Associated Audio Mixing Menus.......................................................................................... 54
Select a Single PID Input Source with Associated Audio .................................................... 54
Main and Associated Audio Stream Information (Single-PID Mixing) ................................. 55
Associated Stream Monitor Control: Solo............................................................................ 55
Main Stream Monitor Status: Muted .................................................................................... 55
Force Mixing with an Alternative Stream ............................................................................. 56
Select a Dual Packet Identifier Input Source with Associated Audio................................... 56
Associated Audio Stream Information (Two Audio Packet Identifiers) ................................ 57
x
Dolby® DP580 Professional Reference Decoder Manual
Confidential Information
Figure 3-11
Figure 3-12
List of Figures
Mix as Associated Audio ..................................................................................................... 57
Dual Packet Identifier Mixing Enabled................................................................................. 58
Dolby® DP580 Professional Reference Decoder Manual
xi
List of Tables
Confidential Information
List of Tables
Table 1-1
Table 1-2
Table A-1
Table A-2
xii
Front-Panel LED Indicators ....................................................................................................3
Channel Name Abbreviations.................................................................................................6
Audio Frame Latency: AES, SDI, HDMI ...............................................................................61
Video Resolutions and Frame Rates................................................................................... 62
Dolby® DP580 Professional Reference Decoder Manual
Chapter 1
Introduction
Welcome to Dolby® professional reference decoding!
The Dolby DP580 Professional Reference Decoder is the latest in the Dolby family of professional broadcast products. It is the first reference Dolby TrueHD decoder and serves all Dolby audio codecs, including Dolby Digital, Dolby Digital Plus™, HE AAC with metadata, Dolby TrueHD, Dolby E, and Dolby Pro Logic® II technologies. It also supports advanced Dolby technologies, such as associated audio mixing. The DP580 provides a real‐time reference tool for generating signals for Dolby TrueHD, Dolby Digital, and Dolby Digital Plus. It also enables validation of associated Metadata‐enhanced Audio Transmission (MAT) encoded Dolby TrueHD signals, which has previously not been available in any testing environment. These features enable consumer and professional device manufacturers to use the DP580 to test the integration of Dolby technologies in their products.
The DP580 offers comprehensive monitoring and quality control (QC) through a web‐based user interface that provides easy selection and monitoring for downmixing, listening, and compression modes. Front‐panel controls also allow selective monitoring through standard headphones. These features help broadcasters ensure that listeners at home enjoy the highest‐quality audio experience. Extensive input capabilities allow broadcasters to perform QC at any point within their head‐end. This enables monitoring and display of all audio‐related metadata as well as measuring program loudness, using Dolby Dialogue Intelligence™ technology with ITU‐R BS.1770‐1, ITU‐R BS.1770‐2, and Leq(A) loudness estimation. The DP580 also supports EBU loudness.
Dialogue Intelligence features an advanced measurement technology capable of quantifying the subjective loudness of speech in broadcast programming. We developed this technology to analyze the input signal and make measurements only when dialogue is present. Quantifying the dialogue level simplifies a crucial step in broadcasting. When switching between programs, most home listeners adjust their television volume controls in an effort to achieve consistency in dialogue levels between programs. By properly monitoring the dialogue level, you can verify whether the Dolby dialogue level metadata parameter is accurate.
The DP580 provides these additional features:
•
Monitoring capabilities for broadcaster QC set‐top box (STB) labs
•
A consumer emulation mode for Dolby Digital Plus and Dolby Pulse decoders found in consumer TVs and set‐top boxes, as well as H.264 and MPEG‐2 video decoding
•
High‐Definition Multimedia Interface™ (HDMI™) 1.4a I/O compatibility
•
HDMI Extended Display Identification Data (EDID) device emulation (emulates HDMI repeater/sink device: audio/video receiver [AVR], TV, STB)
•
Error detection and information logging (pause burst, IEC 61937 data types, Consumer Electronics Control [CEC] message)
Dolby® DP580 Professional Reference Decoder Manual
1
Introduction
•
HDMI Audio Return Channel (ARC) support
•
HDMI pass‐through mode
This chapter covers the following:
1.1
•
DP580 Front Panel
•
DP580 Rear Panel
DP580 Front and Rear Panels
This section describes the DP580 front‐ and rear‐panel components.
1.1.1
DP580 Front Panel
The DP580 front panel includes the following components:
•
Input LED
•
Audio LED
•
Video LED
•
Error LED
•
User‐control screen
•
Navigation keys
•
Volume knob
•
Headphone jack
•
Dim button
•
Over‐temperature indicator
•
Reset button
•
Power button
•
Two USB 2.0 ports Figure 1‐1
Following is a description of the DP580 front‐panel components.
Figure 1‐2
Input LED
User-control screen
Over-temperature indicator
Audio LED
Video LED
Navigation keys
Error LED (currently nonfunctional)
Figure 1-1
2
Volume
Headphones
Reset
Dim
Power
USB
DP580 Front-Panel Components
Dolby® DP580 Professional Reference Decoder Manual
DP580 Front and Rear Panels
Front-Panel LEDs
The color of each front‐panel LED indicates the state of the selected input (see Table 1‐1).
Table 1-1
Front-Panel LED Indicators
Input LED
Audio LED
Video LED
Green: Valid data is Green: Audio data is Green: Video data is detected detected on the selected input, detected on the selected input, on the selected input, and no and no errors occurred in past and no errors occurred in past errors occurred in past five seconds.
five seconds.
five seconds.
Off: No audio data is Off: No video data is Off: No data is detected on the selected input.
detected on the selected input. detected on the selected input.
Red: A video processing Red: A cyclic redundancy Red: A CRC error has check (CRC) error, transport occurred, or sync is not found. error has occurred.
error, or PA spacing error has occurred.
User-Control Screen
Displays system status and allows a user to configure networking.
Navigation Keys
Provide up, down, left, right, escape, and enter functions for user‐control screen menu navigation.
Volume Knob
Controls the headphone output, two‐channel analog output, and digital outputs, depending on the Volume Control setting, as described in Volume Configuration.
Headphone Output
6.35 mm (1/4‐inch) standard stereo headphone port.
Dim Button
Reduces the audio level by a configurable value. (Default is –20 dB.) You can configure this attenuation control through the Monitoring screen, as shown in Figure 2‐78. When you press this button to activate the current dim setting, its LED illuminates in red.
Over-Temperature LED
This LED blinks in red when the CPU temperature approaches the maximum temperature specified by the manufacturer (or if an internal fan fails). If this occurs, verify that the ambient temperature is within the DP580 operating temperature limits (10°C to 35°C) and there is proper airflow to the DP580 front‐panel vents. If the red LED blinks in red because an internal fan fails, the other fans operate at their highest speed, which is audible.
Dolby® DP580 Professional Reference Decoder Manual
3
Introduction
Reset Switch
Restarts the hardware without cycling power. Use this button if you cannot shut down the system using the power button.
Power Button
To power up the system, press this button for one second and then release it. It will take 45 seconds for the unit to boot up. To properly shut down the system, always use the power button. Press this button for one second and then release it. The user‐control screen displays a message indicating that the unit is shutting down. It takes approximately ten seconds for the unit to shut down properly.
1.1.2
DP580 Rear Panel
The DP580 rear panel includes the following components:
•
AC power connector
•
AES IN port
•
Four AES OUT ports
•
Multichannel analog out
•
Gigabit Ethernet port (COMMAND)
•
Gigabit Ethernet port (MEDIA)
•
ASI/SDI IN port
•
ASI/SDI OUT port
•
HDMI IN port
•
HDMI OUT port
•
Two USB 2.0 ports Figure 1‐3
ASI/SDI out
AC power
AES in
AES out
Multichannel
analog out
ASI/SDI in
HDMI out
HDMI in
Command
Media
(gigabit Ethernet) (gigabit Ethernet)
Figure 1-2
DP580 Rear Panel
Following is a description of the functional DP580 rear‐panel inputs and outputs.
AES In
Receives PCM, Dolby Digital, Dolby E, and Dolby Digital Plus signals. The system recognizes each signal type and processes the signal appropriately. This input is an unbalanced 75Ω female high‐density BNC connector per AES‐3id‐1995 (SMPTE 276M). 4
Dolby® DP580 Professional Reference Decoder Manual
DP580 Front and Rear Panels
AES Out
Outputs PCM or coded audio streams through four unbalanced, 75Ω female high‐density BNC connectors. Signal levels per AES‐3id‐1995 (SMPTE 276M). The output type depends on the Output Configuration setting, as described in Output Configuration.
ASI/SDI In
Autodetects the incoming signal as either ASI or SDI. Supports embedded audio/video via SD‐SDI (SMPTE 259M‐1998), 1.5 Gbps HD‐SDI (SMPTE 292M‐1998), or 3 Gbps HD‐SDI (SMPTE 424M‐2006), or as part of an MPEG transport stream via DVB‐ASI (ETSI TR 101 891 v1.1.1).
Command Port (Gigabit Ethernet)
Connects a network to administer the unit through a PC web‐based user interface.
HDMI In
Receives uncompressed video, and uncompressed or compressed audio. HDMI Out
Sends uncompressed video, and uncompressed or compressed audio.
Media Port (Gigabit Ethernet)
Connects a network to receive MPEG transport streams over User Datagram Protocol (UDP) and Real‐time Transport Protocol (RTP). Multichannel Analog Out
Requires a male 25‐pin D‐connector that is compliant to the TASCAM® pinout standard.
SDI Out
This feature will be enabled in a future software release.
Dolby® DP580 Professional Reference Decoder Manual
5
Introduction
Channel Abbreviations
The channel name abbreviations used throughout this document are listed in Table 1‐2.
Table 1-2
Channel Name Abbreviations
Abbreviation
L
C
R
Ls
Rs
LFE
Bsl
Bsr
Lb
Cb
Rb
Channel Name
Left Center Right Left Surround Right Surround Low‐Frequency Effects
Back Surround Left
Back Surround Right
Left Back
Center Back
Right Back
Send Us Your Feedback
If you have a question or a comment regarding this manual, send us an email.
6
Dolby® DP580 Professional Reference Decoder Manual
Chapter 2
Using the DP580
This chapter shows you how to use the Dolby® DP580 Professional Reference Decoder. It covers the following:
•
Installing the Hardware
•
Configuring the Network Settings
•
Connecting to the DP580
•
Exploring the Web Client User Interface
•
Monitoring IP Input
•
Monitoring AES Input
•
Monitoring ASI/SDI Input
•
Monitoring HDMI Input
•
Generating Media Files
•
Monitoring HDMI Audio Return Channel Receiver Input
•
Checking the Loudness Status
•
Modifying the Processing Configuration
•
Configuring Loudness Measurement
•
Modifying the Output Configuration
•
Modifying the Network Settings
•
Using the Administrative Controls
•
Resetting Factory Defaults from the User‐Control Screen
Dolby® DP580 Professional Reference Decoder Manual
7
Using the DP580
2.1
Installing the Hardware
To install the DP580:
1.
Rack mount the DP580 in a 1‐U rackspace. The DP580 measures 44 × 483 × 394 mm
(1.75 × 19 × 15.5 inches), so the rack must be at least 16 inches deep.
Caution: To ensure proper ventilation, do not block the front‐panel ventilation area (above the Dolby logo).
2.
Connect your video outputs and inputs:
HDMI
•
Connect one end of an HDMI™ cable to the DP580 HDMI OUT port. Then connect the other end of the cable to the HDMI input on a compatible receiving device.
•
Connect one end of an HDMI cable to the DP580 HDMI IN port. Then connect the other end of the cable to the HDMI output on a compatible receiving device.
ASI/SDI
•
Connect one end of an ASI/SDI cable to the DP580 ASI/SDI IN port, and connect the other end of the cable to a compatible output device.
Note:
ASI/SDI OUT is not enabled yet. It will be enabled in a future software release.
Note:
Dolby provides a high‐density BNC cable.
3.
Connect your audio inputs and outputs:
Digital Audio
•
Connect one end of a high‐density BNC cable to the AES IN port. Connect the other end of the cable to a high‐density BNC‐to‐BNC adapter, and then to a standard BNC cable that you can connect to your external digital audio outputs.
•
Connect one end of a high‐density BNC cable to each of the four AES OUT ports. Connect the other end of the cables to a high‐density BNC‐to‐BNC adapter, and then to a standard BNC cable that you can attach to your external digital audio inputs.
Analog Audio
•
Note:
4.
8
Connect the 25‐pin D‐connector of the breakout cable to the DP580 ANALOG OUT port. Then connect each of the eight analog connectors (for example, XLR or TRS) on the other end of the breakout cable to your external analog audio input.
To connect your audio output, use a 25‐pin D‐connector cable with a TASCAM® standard pinout.
Connect the provided power cable to the AC connector.
Dolby® DP580 Professional Reference Decoder Manual
Configuring the Network Settings
Figure 2‐1
Figure 2‐2
Multichannel
analog out
AES out
AES in
AC power
ASI/SDI in
HDMI out
ASI/SDI out
HDMI in
Command
Media
(gigabit Ethernet) (gigabit Ethernet)
Figure 2-1
2.1.1
Connecting the Inputs and Outputs
Connecting the Multichannel Analog Output
To output multichannel analog audio, use a 25‐pin D‐connector cable. The DP580 uses the TASCAM pinout standard. The DP580 maps the audio channels to the multichannel analog output.
Note:
Dolby does not provide this cable. You must purchase the TASCAM 25‐pin D‐connector analog breakout cable.
Channel
Pinout
Figure 2-2
2.1.2
L
1
R
2
C
3
LFE
4
Ls
5
Rs
6
Bsl
7
Bsr
8
25-Pin D-Connector Pinout
Starting Up the System
To start up the system, press and release the power button. After 45 seconds, the unit starts up, and when the boot process is complete, the user‐control screen displays the following:
Figure 2‐3
SRC: None
No Audio
2.2
Configuring the Network Settings
The DP580 uses two network connections. The COMMAND port connects to your management network through a web browser, and the MEDIA port connects directly to your media network. By default, the COMMAND port IP address is 192.168.1.2 and the Dolby® DP580 Professional Reference Decoder Manual
9
Using the DP580
MEDIA port is 192.168.2.2. To configure these ports, use the front‐panel navigation keys (see Figure 2‐3).
Figure 2‐4
Up arrow
Enter
Left arrow
Right arrow
Escape
Figure 2-3
Down arrow
Front-Panel Navigation Keys
To configure the COMMAND port:
1.
Press the escape key.
The DP580 menu is displayed.
2.
Press the enter key three times to display the IP Settings menu.
Two options are displayed: Command Interface and Media Interface.
3.
4.
Press the right arrow to display the Network Mode menu for the Command Interface.
Press the right arrow twice to display Static, then press the down arrow to select Apply, and press enter.
5.
Press the down arrow to select Static IP Settings, then press enter to activate the corresponding field.
6.
Use the arrow keys to enter a static IP address, then press enter. 7.
Repeat steps 5 and 6 for the Netmask and Gateway, select Apply, then press enter. 8.
Press the down arrow to select Host Name, then press enter. The Host Name menu is displayed.
9.
Press enter to activate the Host Name field.
10. Use the arrow keys to enter a host name, select Apply, then press enter.
To configure the MEDIA port:
1.
Press the escape key until you return to the IP Settings menu.
2.
Press the down arrow key to select Media Interface.
3.
Repeat steps 4–10 in the previous procedure (for the COMMAND port) to configure the MEDIA port.
Note:
2.3
After starting up the system and configuring the network settings, you can use your web browser to perform most DP580 functions, as described in the following sections. This includes network settings management, as shown in Figure 2‐85.
Connecting to the DP580
You connect to the DP580 through your management network using a web browser. Currently, the DP580 is compatible with Mozilla® Firefox® 3.5 or later, Google™ Chrome™
5.0 or later, and Microsoft® Internet Explorer® 8.0 or later. Internet Explorer, in particular, 10
Dolby® DP580 Professional Reference Decoder Manual
Exploring the Web Client User Interface
provides limited functionality; for example, the signal meters have a reduced update level rate and the graphics are different.
Open your browser, and type the DP580 IP address into the URL bar (for example, http://192.168.1.2). The DP580 web client Input screen is displayed, as shown in Figure 2‐4 for a standard transport stream.
Figure 2‐5
I
Input
information
source
Output
mode
Software
version
Loudness
display
Input
summary
display
Navigation
bar
Figure 2-4
2.4
Compression
Audio output meter
DP580 Web Client Input Screen
Exploring the Web Client User Interface
Following is a description of the web client user interface.
2.4.1
Navigation Bar
The DP580 navigation bar provides access to all of the DP580 status and setup screens (and the user manual). Click in the desired menu to display the corresponding screen.
Figure 2‐6
Figure 2-5
Navigation Bar
Dolby® DP580 Professional Reference Decoder Manual
11
Using the DP580
2.4.2
DP580 Display Bar
Figure 2‐6 shows the DP580 display bar. This bar provides the following:
•
Input Source Display
•
Output Mode and Compression Controls
•
Audio Output Meter
•
Loudness Displays
•
Input source information
Figure 2-6
2.4.3
Output mode Compression
Loudness
display
Audio output meter
DP580 Display Bar
Input Source Display
This display shows the current input source (for example, IP, SDI, or AES), and the selected program, audio, and video streams.
Figure 2‐7
Figure 2-7
2.4.4
Input Source Display
Output Mode and Compression Controls
This display shows the current output mode and compression modes, which you can modify by checking and unchecking the respective boxes.
Figure 2‐8
Figure 2-8
2.4.5
Output Mode and Compression Display
Audio Output Meter
This meter shows the audio levels for each output channel.
12
Dolby® DP580 Professional Reference Decoder Manual
Monitoring IP Input
Figure 2‐9
Figure 2-9
2.4.6
Audio Output Meter
Loudness Displays
These display boxes at the upper‐right corner of the screen show the current values for specific loudness parameters. You can change the currently displayed loudness parameter by clicking the small triangle at the lower‐right corner of each box, as shown in Figure 2‐10. For more details on the loudness parameters, see Loudness Parameters.
Figure 2‐10
Figure 2-10 Loudness Display Menu
2.5
Monitoring IP Input
To ingest MPEG transport streams (using UDP and RTP) over IP:
1.
Select IP Bookmarks in the Setup menu at the left side of the Input screen, as shown in Figure 2‐11.
Figure 2‐11
Select Setup/
IP Bookmarks
Figure 2-11 Select IP Bookmarks in the Setup Menu
The IP Bookmarks screen is displayed, as shown in Figure 2‐12. In this screen, you can save bookmarks for the desired IP input sources.
Dolby® DP580 Professional Reference Decoder Manual
13
Using the DP580
Figure 2‐12
Figure 2-12 IP Bookmarks Screen (No Entries)
2.
To add an input source:
•
3.
Click in the Name field, and enter a name for your media source.
•
Click on the Mode menu, and select a mode (Multicast or Unicast).
•
For Multicast, click on the Multicast Group field and enter the appropriate multicast group address, if required.
•
For Multicast, click on the IGMPv3 Source IP field and enter the IP address of the source device, if required.
•
Click on the Port field, and enter a port for your source.
•
Click Save.
Repeat step 2 for each input source you want to add.
After you save one or more input sources, your entries appear in the Bookmarks list, as shown in Figure 2‐13. You can double‐click a bookmark to monitor an input source.
Figure 2‐13
Figure 2-13 IP Bookmarks Screen with Populated Bookmarks List
4.
Select Input in the Home menu.
Figure 2‐14
Select Home/Input
Figure 2-14 Select Input in the Home Menu
The Input screen is displayed, in which you can select IP in the Input drop‐down menu, as shown in Figure 2‐15.
14
Dolby® DP580 Professional Reference Decoder Manual
Monitoring IP Input
Figure 2‐15
Figure 2-15 Select IP as the Input
After you select IP as the input, the Source IP menu is displayed, in which you can select the desired IP source, as shown in Figure 2‐16.
Figure 2‐16
Figure 2-16 Select a Source IP
5.
Select an IP source in the Source IP menu.
The system monitors the first program in the transport stream and displays the corresponding metadata, a list of all included program streams, the packet identifier (PID) for each program, and the audio and video types contained in each packet, as shown in the examples in Figure 2‐17 (for a standard transport stream) and Figure 2‐18 (for a Dolby E transport stream). At the top of the screen, the system displays the input source, program, audio and video information, and the dialnorm and true peak values. The compression meter and the audio output meter are now active.
The system also identifies the input source on the front‐panel user‐control screen.
Figure 2‐17
Figure 2-17 Source IP Information (Transport Stream with Metadata)
Dolby® DP580 Professional Reference Decoder Manual
15
Using the DP580
6.
To use the Decoder and Compression options, check the respective boxes.
7.
To monitor another PID, double‐click on it at the left side of the screen.
8.
To monitor another program in a standard transport stream, double‐click on it at the left side of the screen.
9.
To monitor a single program in a Dolby E transport stream, click the Monitor field at the right side of the screen and select the desired program in the drop‐down menu, as shown in Figure 2‐18. (For a description of Dolby E metadata emulation and instructions on enabling this setting, see Dolby E Configuration.)
10. To display the information for another input source, use the Input drop‐down menu.
11. If you connected the DP580 HDMI output to a compatible receiving device, the audio plays on the receiver speakers and the video is displayed on the receiver screen.
Figure 2‐18
Select
program
to
monitor
Dolby E
stream
Figure 2-18 Source IP Information (Dolby E Transport Stream with Metadata)
2.6
Monitoring AES Input
To stream media over AES:
1.
Figure 2‐19
Select Input in the Home menu.
Select Home/ Input
Figure 2-19 Select Input in the Home Menu
The Input screen is displayed.
2.
16
Select AES in the Input drop‐down menu.
Dolby® DP580 Professional Reference Decoder Manual
Monitoring AES Input
Figure 2‐20
Figure 2-20 Select AES as the Input
The system displays information for the current AES input source, as shown in the examples in Figure 2‐21 (for a Dolby Digital stream) and Figure 2‐22 (for a Dolby E stream). To monitor a single program in a Dolby E transport stream, click the Monitor
field at the right side of the screen and select the desired program in the drop‐down menu, as shown in Figure 2‐22. (For a description of Dolby E metadata emulation and instructions on enabling this setting, see Dolby E Configuration.) The compression meter and the audio output meter are now active.
Figure 2‐21
Figure 2-21 Select AES Input Source (Dolby Digital with Metadata)
Dolby® DP580 Professional Reference Decoder Manual
17
Using the DP580
Figure 2‐22
Select
program
to
monitor
Dolby E
stream
Figure 2-22 Select AES Input Source (Dolby E with Metadata)
The system also identifies the AES source on the front‐panel user‐control screen.
2.7
3.
To use the Output Mode and Compression options, check the respective boxes.
4.
To display the information for another input source, use the Input drop‐down menu.
Monitoring ASI/SDI Input
The system automatically detects the input as ASI or SDI, then displays information for the current input source, as shown in Figure 2‐23 and Figure 2‐24 (for standard streams) and Figure 2‐25 and Figure 2‐26 (for Dolby E streams). To monitor a single program in a Dolby E transport stream, click the Monitor field at the right side of the screen and select the desired program in the drop‐down menu, as shown in Figure 2‐25 and Figure 2‐26. (For a description of Dolby E metadata emulation and instructions on enabling this setting, see Dolby E Configuration.)
18
Dolby® DP580 Professional Reference Decoder Manual
Monitoring ASI/SDI Input
Figure 2‐23
Figure 2-23 Select ASI/SDI Input Source (ASI with Metadata)
Figure 2‐24
Figure 2-24 Select ASI/SDI Input Source (HD-SDI with Metadata)
Dolby® DP580 Professional Reference Decoder Manual
19
Using the DP580
Figure 2‐25
Select
program
to
monitor
Dolby E
stream
Figure 2-25 Select ASI/SDI Input Source (HD-SDI [Dolby E with Metadata])
Figure 2‐26
Select program
to monitor
in Dolby E
stream
Figure 2-26 Select ASI/SDI Input Source (ASI [Dolby E with Metadata])
The system also identifies the ASI/SDI source on the front‐panel user‐control screen.
20
Dolby® DP580 Professional Reference Decoder Manual
Monitoring HDMI Input
2.8
5.
To use the Output Mode and Compression options, check the respective boxes.
6.
To display the information for another input source, use the Input drop‐down menu.
Monitoring HDMI Input
To monitor HDMI input:
1.
Select Input in the Home menu.
Figure 2‐27
Select Home/ Input
Figure 2-27 Select Input in the Home Menu
The Input screen is displayed.
2.
Figure 2‐28
Select HDMI in the Input drop‐down menu.
Figure 2-28 Select HDMI as the Input
The system displays information for the current input source, as shown in Figure 2‐29 for an HDMI input source.
Figure 2‐29
Figure 2-29 HDMI Input Source
Dolby® DP580 Professional Reference Decoder Manual
21
Using the DP580
2.9
Generating Media Files
You can generate and play the following types of files using the DP580:
2.9.1
•
Dolby TrueHD
•
Dolby Digital Plus™
•
Dolby Digital
•
Dolby playlist
Playing Media Files
To play media files:
1.
Select Input from the Home menu.
Figure 2‐30
Select Home/ Input
Figure 2-30 Home/Input Menu
The Input screen is displayed.
2.
Figure 2‐31
Select GENERATE from the Input drop‐down menu.
Figure 2-31 Input/Generate Selection
3.
22
Select Generate from the Setup menu.
Dolby® DP580 Professional Reference Decoder Manual
Generating Media Files
Figure 2‐32
Select Setup/Generate
Figure 2-32 Setup/Generate Menu
The Stream Generation Configuration screen is displayed.
Figure 2-33 Stream Generation Configuration
4.
Select the type of media file you want to generate individually or in combination: Dolby TrueHD, Dolby Digital Plus, or Dolby Digital.
The File Filter option as shown in Figure 2‐34 enables you to view only the files types you select. Use the file field drop‐down menu to retrieve the file from a collection of streams located internally in the DP580.
Dolby® DP580 Professional Reference Decoder Manual
23
Using the DP580
Figure 2‐33
Figure 2-34 File Filters and File Selection Menu
2.9.2
Generating A/V Sync Files
Selecting the A/V Sync button in the Stream Generation Configuration options enables Dolby TrueHD, Dolby Digital Plus, or Dolby Digital flash pop file streaming.
2.9.3
Streaming External Files
To stream external files:
1.
Connect a USB device that hosts your media files.
2.
Choose the USB option, and then browse for the file you want from the media streams on the USB device. See Figure 2‐35.
The DP580 supports the following audio streams from USB:
•
.ac3
•
.ec3
•
.vr •
.mlp
•
.dlb
Figure 2‐34
Figure 2-35 Internal and External Files
You can also select and play a series of files from a Dolby playlist file on the USB device. When you select the playlist file, the DP580 streams the individual files in sequence. To set up a playlist file:
•
All files you want to stream must use the .dlb format.
•
The playlist must be a text file with the individual file names separated by lines.
•
The individual files must reside in the same location as the playlist file.
After you create and load the playlist file on the USB device, you can play the file by selecting it in the same way as any other file on the device.
24
Dolby® DP580 Professional Reference Decoder Manual
Monitoring HDMI Audio Return Channel Receiver Input
Figure 2‐36 shows the Stream Generation Control option. This feature displays the playback progress of the file. You can select Loop Mode to play back the file in Loop mode. Click the Start and Stop buttons to start and stop the playback.
Figure 2‐35
Figure 2-36 Stream Generation Control
2.9.4
Monitoring HDMI Audio Return Channel Transmitter Output
If you have an HDMI device that supports ARC reception connected to the DP580 for file generation, the generated content is transmitted through the designated outputs, and is also transmitted back through the ARC transmitter to the HDMI device connected to the DP580 HDMI input.
2.10
Monitoring HDMI Audio Return Channel Receiver Input
The ARC receiver feature connects the HDMI output to a TV HDMI input that supports ARC transmission.
To monitor ARC receiver input:
1.
Figure 2‐36
Select Input in the Home menu.
Select Home/Generate
Figure 2-37 Select Input in the Home Menu
The Input screen is displayed.
2.
Figure 2‐37
Select HDMI ARC in the Input drop‐down menu.
Figure 2-38 Select HDMI ARC as the Input
Dolby® DP580 Professional Reference Decoder Manual
25
Using the DP580
The system displays information for the current ARC receiver input source, as shown in Figure 2‐39.
Figure 2‐38
T
Figure 2-39 Select ARC Receiver Input Source (Dolby Digital with Metadata)
Figure 2‐39
The system also identifies the ARC receiver source on the front‐panel user‐control screen.
2.11
3.
To use the Output Mode and Compression options, check the respective boxes.
4.
To display the information for another input source, use the Input drop‐down menu.
Checking the Loudness Status
The DP580 continuously measures the subjective loudness of audio programs. The system measures loudness using multiple methods, as described in Loudness Parameters.
To check the loudness status, select Loudness in the Status menu.
Figure 2‐40
Select Status/Loudness
Figure 2-40 Select Loudness in the Status Menu
The Loudness screen is displayed for the selected input source. Figure 2‐41 shows the loudness status for the first program and PID in a transport stream. 26
Dolby® DP580 Professional Reference Decoder Manual
Checking the Loudness Status
Figure 2‐41
Loudness values
(flash on and off when
measurement is
paused)
Select
time
range, value
range,
and
value center
Check/uncheck
to display the
desired parameters
Check/uncheck to
pause/resume
Click to reset
Click to clear peaks
Click to download logs
Click to clear logs
Figure 2-41 Loudness Screen (Transport Stream Example)
In this screen, you can perform the following functions:
2.11.1
•
Display the loudness status for a specific time range, value range, and value center by clicking in the corresponding field and selecting an option in the respective drop‐down menu •
Plot the desired parameters by checking the corresponding boxes at the right side of the graph •
Change the displayed loudness parameters
Changing the Loudness Display
To change the displayed loudness parameter in any of the three loudness value boxes (located above the graph), click the small triangle at the lower‐right corner of a box. A drop‐down menu is displayed, in which you can select a loudness parameter, as shown in Figure 2‐42. The loudness value for the selected parameter is displayed in the display box.
Dolby® DP580 Professional Reference Decoder Manual
27
Using the DP580
Figure 2‐42
Figure 2-42 Select Loudness Parameter
In the Loudness screen (see Figure 2‐41), you can also:
•
Reset all loudness measurements by clicking Reset Measurements.
•
Pause all loudness measurements by checking the Pause Measurements box. (Loudness values flash on and off.) To resume measurements, uncheck this box. When the measurement process resumes, the system compares the current loudness values to the previous loudness values (before the measurement was paused). If the before and after values are the same, the measurement resumes; if the before and after values are different, the measurement process resets (begins a new measurement). The measurement process also resets if the Channel Mode, Sample Rate, or LFE stream properties change.
•
Download or clear loudness logs.
•
Clear all peaks by clicking Clear Peaks.
Figure 2‐43
Note:
28
To display the loudness status for another input source, select Home > Input, select the desired input source, and then reselect Status > Loudness.
Dolby® DP580 Professional Reference Decoder Manual
Checking the Loudness Status
2.11.2
Downloading Loudness Logs
The DP580 maintains a two‐week database of loudness measurements at a half‐second resolution. You can export these measurements as a comma‐separated value (.csv file extension) for a specific source and a date and time interval. To download loudness logs:
1.
Click Download Logs in the Loudness screen.
The Download Loudness Logs screen is displayed, as shown in Figure 2‐43.
Figure 2‐44
Figure 2-43 Download Loudness Logs Screen
2.
For every source, click All, then click Download.
3.
For a specific source, click Select, select the source, then click Download.
4.
For every date and time, click All for the Starting Time and Ending Time, then click Download.
2.11.3
5.
For a specific time range, click Custom for the Starting Time and Ending Time, enter a starting and ending date and time, then click Download.
6.
To delete all the loudness logs, click Clear Logs in the Loudness screen, as shown in Figure 2‐41.
Loudness Parameters
Following are descriptions for the DP580 loudness parameters.
dialnorm
The dialogue normalization metadata parameter, as contained within the input bitstream.
Sample Peak
The instantaneous digital signal level.
True Peak
The 4× oversampled peak value, as calculated per ITU‐R BS.1770 Annex 2.
Integrated Measurement
Integrated, Level Gated
A gated integrated measurement.
Dolby® DP580 Professional Reference Decoder Manual
29
Using the DP580
Integrated, Speech-Gated
A Dolby Dialogue Intelligence™ gated, integrated measurement. Integrated Ungated
An ungated integrated measurement.
Short Ungated (10s) Measurements
An ungated ten‐second sliding window measurement.
Short Term Ungated
An ungated ten‐second sliding window measurement.
Short Term Speech-Gated
A Dialogue Intelligence gated ten‐second sliding window measurement.
Short Term 3s Ungated
A three‐second sliding window measurement, as per EBU Tech 3341.
Maximum Momentary
A 400 ms sliding window measurement, as per EBU Tech 3341.
Loudness Range
The EBU Loudness Range descriptor, as per EBU Tech 3341 (not plotted in the graph view).
Note:
2.11.4
All measurements, except for Short Term 3s Ungated, Maximum Momentary, and Loudness Range are based on ITU‐R BS.1770. Short Term 3s Ungated, Maximum
Momentary, and Loudness Range are based on EBU.
Checking the Event Logs
The event logs display information regarding the incoming signal and the system. To check the event logs status, select Event Logs in the Status menu.
Figure 2‐45
Select Status/Event Logs
Figure 2-44 Select Event Logs in the Status Menu
The Event Logs screen is displayed. You can filter the logs by Level, Category, and Start
time/End time by clicking the respective area and making the desired selection, or by 30
Dolby® DP580 Professional Reference Decoder Manual
Checking the Loudness Status
clicking Show All to remove all filters. In addition, you can download a .zip file by clicking Download or clear the list of events by clicking Clear Events. Figure 2‐46
Figure 2-45 Event Logs Screen Level
When you click the Level field, the corresponding drop‐down menu is displayed, in which you can select the user log display level, as shown in Figure 2‐46.
Figure 2‐47
Figure 2-46 Level Menu
Category
When you click the Category field, the corresponding drop‐down menu is displayed, in which you can select the user log display category, as shown in Figure 2‐47.
Figure 2‐48
Figure 2-47 Category Menu
Start Time/End Time
When you click the Start time or End time field, two options appear: All and Custom. All specifies a log for all time frames. Custom activates the date and time fields, where you can Dolby® DP580 Professional Reference Decoder Manual
31
Using the DP580
select a specific time frame. Click the to display the specified log. If you click the , the system displays all time frames (same as All).
Figure 2‐49
Figure 2-48 Start Time/End Time Fields
2.12
Modifying the Processing Configuration
The processing configuration controls the DP580 audio processing operation. To modify the processing settings:
1.
Figure 2‐50
Select Processing in the Setup menu, as shown in Figure 2‐49.
Select Setup/Processing
Figure 2-49 Select Processing in the Setup Menu
The Processing screen is displayed, as shown in Figure 2‐50. In this screen, you can change the current audio processing settings. 32
Dolby® DP580 Professional Reference Decoder Manual
Modifying the Processing Configuration
Figure 2‐51
Figure 2-50 Processing Screen
2.12.1
Decoder Configuration
Within the Decoder Configuration field, you can specify the decoding modes for each of the DP580 decoders (Dolby Digital, Dolby Digital Plus, AAC and HE AAC, Dolby Pro Logic® II, and Dolby Pro Logic IIx). However, some of the decoding modes apply only to the appropriate decoders.
Figure 2‐52
Figure 2-51 Decoder Configuration Options
Dolby® DP580 Professional Reference Decoder Manual
33
Using the DP580
Decoder Output Mode
The system provides four decoder output options: 1/0, 2/0, 3/2L, and 3/4L. Figure 2‐53
Figure 2-52 Decoder Output Mode Options
Here are the descriptions of the decoder output options:
•
1/0 mono output
•
2/0 stereo output
•
3/2L 5.1 output
•
3/4L 7.1 output
Note:
For a Dolby Digital, Dolby Digital Plus, AAC, HE AAC, or Dolby E stereo downmix, the Decoder Output Mode also applies the selected option in the Stereo
Downmix Mode menu. Pro Logic II
Pro Logic II specifies the mode for the Dolby Pro Logic II decoder.
Auto performs Dolby Pro Logic II decoding based on the Dolby Surround Mode flag in the input bitstream.
On always performs Dolby Pro Logic II decoding if the incoming signal is stereo (acmod of 2/0).
Off disables Dolby Pro Logic II decoding.
Figure 2‐54
Figure 2-53 Dolby Pro Logic II Options
Pro Logic IIx
Pro Logic IIx specifies the mode for the Dolby Pro Logic IIx decoder.
Auto performs Dolby Pro Logic IIx decoding based on the Dolby Surround EX flag in the input bitstream.
On always performs Dolby Pro Logic IIx decoding if the incoming signal is 5.1 (acmod of 3/2).
34
Dolby® DP580 Professional Reference Decoder Manual
Modifying the Processing Configuration
Off disables Dolby Pro Logic IIx decoding. Figure 2‐55
Figure 2-54 Dolby Pro Logic IIx Options
Compression Mode
Compression Mode provides four options: None, Line, RF, and Auto.
Figure 2‐56
Figure 2-55 Compression Mode Options
You can enable a compression option only when the unit is decoding a Dolby signal. RF applies the strongest compression profile available, equivalent to an RF connection to a TV set or small speakers. Line applies what some consumer decoders call light compression; this is usually the default setting for DVD players and STBs. In this mode, you can control the compression Cut and Boost settings.
With the exception of Dolby TrueHD, Auto mode scales the Line mode profile, based on the Compression Cut and Compression Boost settings. Auto is a separate mode for Dolby TrueHD, where the compression settings are based on the metadata.
None applies only the dialogue normalization parameter (dialnorm), but no dynamic range compression.
Note:
When downmixing, the DP580 automatically applies enough compression at peak moments to prevent signal overload, even when a compression mode is not selected.
Compression Mode Line Settings
The Line mode compression settings define cut and boost scaling factors when the Compression Mode is set to Line. When downmixing, any scaling defined for the cut factor is ignored, and the system applies the full cut dynamic range compression. The factory setting for Line is 0 percent. At that setting, selecting Line turns dynamic range compression off. To customize your compression settings:
1.
Click Line for Compression Mode.
The Compression Cut and Compression Boost fields are now active. When you click on either of these fields, the corresponding drop‐down menu is displayed, as shown in Figure 2‐56 for Compression Cut. Both of these drop‐down menus display the same options.
Dolby® DP580 Professional Reference Decoder Manual
35
Using the DP580
Figure 2‐57
Figure 2-56 Line Cut Menu
Stereo Downmix Mode
Stereo Downmix Mode specifies how the Dolby Digital, Dolby Digital Plus, AAC and HE AAC, and Dolby E decoders perform stereo downmixing when the Decoder Output
mode is set to 2/0. When you click the Stereo Downmix Mode field, a drop‐down menu is displayed, in which you can select from three stereo downmixing options, as shown in Figure 2‐57.
Figure 2‐58
Figure 2-57 Stereo Downmix Mode Menu
Following is a description of each Stereo Downmix Mode option:
•
Auto follows the preferred downmixing instructions specified in the bitstream metadata. •
Lt/Rt produces an output compatible with Dolby Surround Pro Logic decoding. It is a two‐channel signal that is similar to a program encoded as Dolby Surround. A properly encoded Dolby Digital program includes metadata that controls downmix delivery, so if a user has a Dolby Pro Logic system, but not Dolby Digital, the program plays back taking full advantage of Dolby Pro Logic. Program metadata also customizes downmix delivery for a stereo system. Lt/Rt enables the Dolby Pro Logic decoder to convert a two‐channel downmixed stream back to its original configuration (for example, back to Dolby Digital 5.1). •
36
Lo/Ro outputs only two channels (for example, a headphone output stream), but with this type of downmix you cannot convert the stream back to 5.1. We recommend that program mixers designate Lo/Ro as the source for mono downmixes. However, a mono output of the Lt/Rt mix is also possible.
Dolby® DP580 Professional Reference Decoder Manual
Modifying the Processing Configuration
•
For correct emulation of consumer products, the LFE channel is discarded in Lt/Rt and Lo/Ro downmixing modes, but not in the Phantom and 3 Stereo listening modes. Note:
Both Lt/Rt and Lo/Ro output to the Left and Right channels. If you apply Dolby Pro Logic decoding, the decoded output is sent to Left, Right, Center, and a mono Surround channel output, which is then sent to both the Left Surround and Right Surround outputs to feed both surround speakers. Mono outputs to the Center channel only.
Tech Bulletin 11
Check this box if you want to reconcile the loudness level differences between MPEG‐1 LII and Dolby Digital Plus audio.
Figure 2‐59
Figure 2-58 Tech Bulletin 11 Option
Tech Bulletin 11 Target Level
Select the desired loudness level in the Tech Bulletin 11 Target Level menu, as shown in Figure 2‐59.
Figure 2‐60
Figure 2-59 Tech Bulletin 11 Target Level Menu
2.12.2
Dolby TrueHD
This configuration enables you to turn off dialnorm and dynamic range control (DRC), as shown in Figure 2‐60.
Figure 2‐61
Figure 2-60 Dolby TrueHD Configuration
2.12.3
Dolby Digital and Dolby Digital Plus Configuration
This configuration provides Associated Audio Mixing, Error Concealment, and MS10
Emulation parameters, as shown in Figure 2‐61.
Figure 2‐62
Dolby® DP580 Professional Reference Decoder Manual
37
Using the DP580
Figure 2‐63
Figure 2-61 Dolby Digital and Dolby Digital Plus Configuration Parameters
Dolby Digital Plus Associated Audio Mixing
A Dolby Digital Plus input may include one or more (maximum of seven) associated audio streams. The Dolby Digital Plus decoder can mix the main audio stream with any available associated audio stream, as specified for Digital Video Broadcasting in Annex E of ETSI TS 101 154.
When you click the Associated Audio Mixing field, the corresponding drop‐down menu is displayed, allowing you to turn this option on or off, as shown in Figure 2‐62. The Dolby Digital Plus metadata specifies the audio level when you enable associated audio mixing.
When you click the Default Associated Audio Type field, the corresponding drop‐down menu is displayed with seven options, as shown in Figure 2‐62. In this menu, you can specify which available audio stream you want to mix with the main audio stream.
Figure 2‐64
Figure 2-62 Associated Audio Mixing Menus
For complete details on associated audio mixing, see Chapter 3.
Error Concealment
When you click the Error Concealment field, the corresponding drop‐down menu is displayed with two options, as shown in Figure 2‐63. If you select On, the system repeats the previous frame up to four times when a stream error occurs. When you select Off, the system mutes the current frame when a stream error occurs.
Figure 2‐65
Figure 2-63 Dolby Digital and Dolby Digital Plus Error Concealment Menu
38
Dolby® DP580 Professional Reference Decoder Manual
Modifying the Processing Configuration
Dolby Digital Plus MS10 Emulation
Check this box if you want the Dolby Digital Plus decoder to emulate a Dolby MS10 Multistream Decoder. This function sets the Stereo Downmix mode to Lo/Ro and the Compression mode to RF.
Figure 2‐66
Figure 2-64 Dolby Digital Plus MS10 Emulation Option
2.12.4
Dolby E Configuration
The Dolby E Configuration field provides Metadata Emulation and Dolby E Latency Mode parameters, as shown in Figure 2‐65.
Figure 2‐67
Figure 2-65 Dolby E Configuration Metadata Emulation Option
Metadata Emulation
Check this box if you want the Dolby E decoder to apply the metadata parameters to baseband PCM audio. This emulation function eliminates the encode/decode cycle, allowing you to preview the effects of downmixing, setting dialogue level, Dolby Pro Logic decoding, and the other functions controlled by metadata and experienced by consumers.
Dolby E Latency Mode
Dolby E Latency Mode provides two options for decoding Dolby E bitstreams: Lenient Mode and Strict Mode. In Lenient Mode, the system absorbs PA spacing errors in up to 130 samples before performing a correction, which results in many inaudible errors. However, this may result in latency inaccuracies in up to 130 samples. In Strict Mode, the system corrects all Pa spacing errors and the system always maintains the correct latency.
2.12.5
AAC and HE AAC Configuration
The AAC and HE AAC Configuration field provides Default Program Reference Level and
Error Concealment parameters, as shown in Figure 2‐66.
Figure 2‐68
Figure 2-66 AAC and HE AAC Configuration Parameters
Default Program Reference Level
When you select Default Program Reference Level, the corresponding drop‐down menu is displayed, as shown in Figure 2‐67. In this menu, you can select a default dialogue Dolby® DP580 Professional Reference Decoder Manual
39
Using the DP580
normalization value (0 to –31.75 dBFS) that the AAC and HE AAC decoder applies until the system receives dialnorm metadata. You need to set this parameter to the dialogue level specified in the broadcast standards for the intended market. In file‐based content, the average loudness information may be expressed as replay gain metadata. In this case, you should set the default dialnorm parameter accordingly. Figure 2‐69
Figure 2-67 AAC and HE AAC Default Program Reference Level Menu
Error Concealment
When you click the Error Concealment field, the corresponding drop‐down menu is displayed with two options, as shown in Figure 2‐68. If you select Yes, the system repeats the previous frame when a stream error occurs. When you select No, the system mutes the current frame when a stream error occurs.
Figure 2‐70
Figure 2-68 AAC and HE AAC Error Concealment Menu
2.12.6
Dolby Pro Logic Configuration
The Dolby Pro Logic Configuration field provides Dolby Pro Logic IIx Mode, Dolby Pro Logic
II Mode, Panorama Mode, Dimension, and Center Width parameters, as shown in Figure 2‐69.
Figure 2‐71
Figure 2-69 Dolby Pro Logic Configuration Parameters
40
Dolby® DP580 Professional Reference Decoder Manual
Modifying the Processing Configuration
Dolby Pro Logic IIx Mode
When you select the Dolby Pro Logic IIx Mode field, the corresponding drop‐down menu is displayed, as shown in Figure 2‐70.
Figure 2‐72
Figure 2-70 Dolby Pro Logic IIx Mode Menu
Dolby Digital EX
Dolby Digital EX is electrically equivalent to Dolby Digital combined with Dolby Pro Logic IIx Movie mode with 6.1‐channel outputs. However, to maintain continuity with current products and with Dolby Digital Surround EX™ content, it continues to be known as Dolby Digital EX. We do not recommend the use of a single Cb speaker in any system. Ideally, the product has a 7.1‐channel output capability to readily support Ls, Lb, Rb, and Rs speakers. When a 7.1‐channel product is in Dolby Digital EX mode, the Cb signal is divided equally (after being attenuated by –3 dB) to the Lb and Rb speakers.
Music Mode
Music mode allows users to obtain optimal results from conventional stereo programs. If a program was produced in Dolby Surround, it is ideally decoded with Movie mode, even when the program is music oriented.
Movie Mode
Movie mode allows users to obtain optimal results from both surround‐encoded programs and conventional stereo programs. In addition, Movie mode offers greater spatial capabilities than 6.1 type decoders, including Dolby Digital EX. As a result, we recommend this mode for decoding Dolby Digital Surround EX soundtracks.
Dolby Pro Logic II Mode
When you select the Pro Logic II Mode field, the corresponding drop‐down menu is displayed, as shown in Figure 2‐71.
Figure 2‐73
Figure 2-71 Dolby Pro Logic II Mode Menu
Dolby® DP580 Professional Reference Decoder Manual
41
Using the DP580
Music Mode
Music mode is the most versatile Dolby Pro Logic mode. It activates the settings on the Panorama Mode, Dimension, and Center Width menus; these settings can help users optimize a stereo (Lo/Ro) automotive entertainment environment or home theater system for multichannel listening.
When you select Music in the Pro Logic II Mode drop‐down menu, the Panorama Mode, Dimension, and Center Width menus are now accessible, as shown in Figure 2‐72.
Figure 2‐74
Figure 2-72 Dolby Pro Logic II Music Mode Menus
•
Panorama Mode sends the stereo signal to the Left and Right speakers, as well as the surround speakers. This mode is not functional if Music is not selected in the Pro Logic
II Mode drop‐down menu.
•
Dimension refocuses the signal from the front speakers to the rear speakers. If Music is not selected in the Pro Logic II Mode drop‐down menu, the system sets the Dimension mode to 0 (Center).
•
Center Width splits the Center output signal into the Center, Left, and Right outputs. If you set this mode to -3, the system sends all of the Center output to the Center channel. If you set this mode to L/R, the system outputs equally to the Left and Right channels, with no output sent to the Center channel.
Movie Mode
The standard setting for programs with video. This mode is based on the original Dolby Pro Logic decoding scheme, but the system separates the mono Surround channel into Left Surround and Right Surround channels.
Dolby Pro Logic Mode
Reproduces the original Dolby Pro Logic decoding system. Because consumer decoders now offer Dolby Pro Logic II as the default Dolby Surround decoding system, this emulation mode is available to reproduce the original Dolby Pro Logic decoding if the 42
Dolby® DP580 Professional Reference Decoder Manual
Configuring Loudness Measurement
consumer wishes to hear it. (This option is not available on all consumer decoders made with Dolby Pro Logic II.)
Matrix Mode
Optimizes radio reception in an automotive environment. This mode is similar to the original passive Dolby Surround decoder without Dolby Pro Logic directional steering.
It can also enhance mono programs, and clean up weak radio signals in automobiles. You can apply Matrix to a mono input by selecting the applicable Lo/Ro downmix mode, and then Pro Logic II. If you select a Mono downmix, Pro Logic II and Pro Logic do not function. 2.13
Configuring Loudness Measurement
The loudness measurement settings specify the DP580 measurement algorithm and the speech detection mode. To modify the current settings:
1.
Figure 2‐75
Select Loudness in the Setup menu, as shown in Figure 2‐73.
Select Setup/Loudness
Figure 2-73 Select Loudness in the Setup Menu
The Loudness screen is displayed, as shown in Figure 2‐74. In this screen, you can use the drop‐down menus to configure the loudness measurement settings.
Figure 2‐76
Figure 2-74 Loudness Screen
2.13.1
Measurement Configuration Parameters
Measurement configuration parameters consists of Metering Mode, Speech Threshold, True
Peak DC Block Filter, True Peak Pre-emphasis Filter, and Display all Loudness Measurements.
Dolby® DP580 Professional Reference Decoder Manual
43
Using the DP580
To modify the Metering Mode, click the Metering Mode field to display the corresponding options, as shown in Figure 2‐75, then select the desired option.
Figure 2‐77
Figure 2-75 Metering Mode Menu
To enable the True Peak DC Block Filter, True Peak Pre-emphasis Filter, and Display all
Loudness Measurements, check the respective boxes.
Figure 2‐78
Figure 2-76 Peak and Loudness Filter Options
2.14
Modifying the Output Configuration
The monitoring output configuration specifies the output for each AES pair, depending on the input source. To change the AES output configuration, select Monitoring in the Setup menu, as shown in Figure 2‐77.
Figure 2‐79
Select
Setup/Monitoring
Figure 2-77 Select Monitoring in the Setup Menu
The Monitoring screen is displayed, as shown in Figure 2‐78. 44
Dolby® DP580 Professional Reference Decoder Manual
Modifying the Output Configuration
Figure 2‐80
Figure 2-78 Monitoring Screen
Note:
2.14.1
You can modify the output configuration only for a Dolby Digital, Dolby Digital Plus, PCM, or Dolby TrueHD input source.
Output Configuration
The Output Configuration parameters are AES 1/2, AES 3/4, AES 5/6, AES 7/8, HDMI, HDMI
ARC, and Headphone. You can use the corresponding fields and drop‐down menus to configure these parameters. Figure 2‐79 shows the drop‐down menu options for AES 1/2. These options are identical for AES 3/4, AES 5/6, AES 7/8, HDMI, and HDMI ARC. HDMI
controls the HDMI audio output mode; HDMI ARC controls the HDMI ARC transmission output mode. Headphone controls which audio channel is sent by the headphone output. Headphone options are Stereo, L, R, C, Lfe, Ls, Rs, Bl, and Br.
Figure 2‐81
Figure 2-79 AES 1/2 Menu
The system supports the Dolby Digital and Passthrough configurations, as follows.
Dolby Digital Configuration
The system supports Dolby Digital output for the following input types:
•
Dolby Digital
•
Dolby Digital Plus •
HE AAC with Dolby metadata
Dolby® DP580 Professional Reference Decoder Manual
45
Using the DP580
If you select Dolby Digital for the output configuration and the input is not one of these types, the system outputs a two‐channel PCM downmix.
Pass-Through Configuration
The system supports pass‐through output for the following input types:
•
Dolby Digital •
Dolby Digital Plus
•
Dolby TrueHD (valid only for HDMI output, not AES)
If you select Passthrough for the HDMI output configuration, and the input is not supported by the HDMI downstream device, the system outputs multichannel PCM based on the input and HDMI downstream device capability.
If the output mode selected and the input type are not compatible, the DP580 outputs a two‐channel downmix over the specified output, except for HDMI.
2.14.2
Volume Configuration
There are three Volume Configuration parameters. You can select a Volume Control and Dim
Gain option from their respective drop‐down menus and adjust the Master Volume by using the master volume up/down arrows (see Figure 2‐80). You can also adjust this parameter by turning the volume knob on the DP580 front panel (see Figure 1‐1). As you turn the knob, the Master Volume value in the Monitoring screen changes in real time.
Figure 2‐82
Figure 2-80 Volume Control and Dim Gain Menus
In addition, when setting parameters in the Volume Configuration menu, the following applies:
2.14.3
•
Volume Control specifies the outputs affected by the master volume.
•
When you click the Dim check box, the system applies the attenuation value selected in the Dim Gain menu.
HDMI Sink Device Status
If an HDMI sink device is connected, the system displays information regarding the current connection (lock status, number of channels, supported codecs, and supported speakers), as shown in Figure 2‐81.
46
Dolby® DP580 Professional Reference Decoder Manual
Modifying the Output Configuration
Figure 2‐83
Figure 2-81 HDMI Sink Device Screen
2.14.4
EDID Configuration
There are four EDID Configuration parameters: Number of Channels, Dolby Digital, Dolby
Digital Plus, and Dolby TrueHD. Extended display identification data (EDID) sends a signal over HDMI to the source device, specifying the input signals that are currently acceptable to the DP580.
You check or uncheck the corresponding Dolby codecs to specify which codecs the DP580 will accept as an input source.
Figure 2‐84
Figure 2-82 Extended Display Identification Data Configuration
Number of Channels
This parameter specifies the number of channels that the DP580 will accept as an input source (two, six, or eight channels).
Figure 2-83 Extended Display Identification Data Configuration
Dolby® DP580 Professional Reference Decoder Manual
47
Using the DP580
2.15
Modifying the Network Settings
The network settings specify the DP580 command and media IP configurations, as well as the Network Time Protocol (NTP) configuration. To modify the current network settings, select Network in the System menu, as shown in Figure 2‐84.
Figure 2‐85
Select System/
Network
Figure 2-84 Select Network in the System Menu
The Network screen is displayed, as shown in Figure 2‐85. In this screen, you can change the current Command, Media, and NTP configurations. Figure 2‐86
Figure 2-85 Network Screen
2.16
Using the Administrative Controls
These administrative controls allow you to upgrade the DP580 and perform other tasks.
1.
Select Admin in the System menu, as shown in Figure 2‐86.
Figure 2‐87
Select System/
Admin
Figure 2-86 Select Admin in the System Menu
The Admin screen is displayed, as shown in Figure 2‐87. 48
Dolby® DP580 Professional Reference Decoder Manual
Using the Administrative Controls
Figure 2‐88
Figure 2-87 Admin Screen (Current Software Displayed)
Upgrading the System Software
To upgrade the software:
1.
Obtain the upgrade .dlb file from Dolby Laboratories, and copy it to your PC.
2.
Navigate to the Admin page.
3.
Click Browse to locate the upgrade file on your PC.
4.
Click Upload to upload the file to the DP580.
5.
Click Upgrade. 6.
Wait until the following message is displayed: Upgrade Done. Please power cycle the
system.
7.
Power cycle the system by pressing the power button on the right side of the unit (see Figure 1‐1). Caution: Do not reboot or remove power to the DP580 while upgrading. Caution: Please check the version numbers in the System Info section of the Admin screen.
If the MicroBlaze version is 1, the upgrade did not successfully complete and you must perform the upgrade again. If the field‐programmable gate array (FPGA) and MicroBlaze versions are both 0, press the Reboot button in the Admin screen and check again.
If the FPGA and MicroBlaze versions remain at 0 after rebooting, contact your Dolby technical representative.
A series of messages appear on the screen, as shown in Figure 2‐88, Figure 2‐89, and Figure 2‐90, and then the system completes the upgrade, reboots, and displays the upgraded version of the software in the Admin screen, as shown in Figure 2‐91.
Dolby® DP580 Professional Reference Decoder Manual
49
Using the DP580
Figure 2‐89
Figure 2-88 After Uploading/New Software Found (Current Software and New Software Displayed)
Figure 2‐90
Figure 2-89 Upgrade in Progress
Figure 2‐91
Figure 2-90 Upgrade Done/DP580 Rebooting
50
Dolby® DP580 Professional Reference Decoder Manual
Using the Administrative Controls
Figure 2‐92
nn
Figure 2-91 Admin Screen Displays New Software Version After Rebooting
Reboot Button
To reboot the system at any time, click the Reboot button.
Reset System Settings
This function allows you to reset the system to default settings.
•
Two options in the Reset System Settings field, Include IP Bookmarks and Include Network Configuration, allow you to delete either or both of these settings by clicking the respective box. Otherwise, the system retains the two settings when resetting the defaults.
•
The Full Factory Defaults (Includes IP Bookmarks and Network Configuration)
option allows you return the system to all of the factory defaults, deleting all current settings.
•
To reset the system settings, click the Reset button.
Reset System Clock
This function allows you to reset the time zone and the date and time by clicking in the respective fields.
Download System Logs
If you experience any system issues, these logs provide detailed troubleshooting information that you should send to Dolby Laboratories. To download system logs, click the Download button in the System Logs field. Note:
After you click the Download button, a dialog box is displayed, in which you can open or save the corresponding .zip file. System Info
This section displays the DP580 serial number.
Dolby® DP580 Professional Reference Decoder Manual
51
Using the DP580
2.17
Resetting Factory Defaults from the User-Control Screen
To reset the DP580 to factory defaults from the user‐control screen, use the front‐panel navigation keys.
Figure 2‐93
Up arrow
Enter
Left arrow
Escape
Right arrow
Down arrow
Figure 2-92 Front-Panel Navigation Keys
1.
Press the escape key to select the DP580 menu.
2.
Press enter to select System Settings.
3.
Press enter again to display the System Settings menu.
4.
Press the down arrow, then enter to display the Reset Settings menu. Be sure that Factory is displayed to the right of the Reset line.
5.
Press the down arrow to select Apply.
6.
Press enter to reset the system to the factory defaults.
The unit automatically reboots and takes a while to start up. 7.
52
When the unit reboots, press the right arrow to display the CMD Interface settings and wait until the IP address is 192.168.1.2.
Dolby® DP580 Professional Reference Decoder Manual
Chapter 3
Associated Audio Mixing
A Dolby® Digital Plus™ input may include one or more (maximum of seven) associated audio streams. The Dolby Digital Plus decoder can mix the main audio stream with any available associated audio stream, as specified for Digital Video Broadcasting in Annex E of ETSI TS 101 154. The system transmits a descriptive track as a separate bitstream alongside the main soundtrack and can mix the tracks within the decoder. The associated audio stream and the main audio stream can reside in a single PID or in separate PIDs. This associated audio mixing approach can deliver directors’ commentaries or audio descriptions for the visually impaired while maintaining the highest possible bandwidth efficiency. Associated audio mixing eliminates the need to prepare and transmit multiple final mixes to support different audience needs and preferences. The Dolby Digital Plus metadata specifies the audio level for associated audio mixing.
3.1
Configuring Associated Audio Mixing
To configure associated audio mixing:
1.
Select Processing in the Setup menu, as shown in Figure 3‐1.
Figure 3‐1
Select Setup
Processing
Figure 3-1
Select Processing in the Setup Menu
The Processing screen is displayed. In this screen, you can set up associated audio mixing for a Dolby Digital Plus configuration, as shown in Figure 3‐2. Dolby® DP580 Professional Reference Decoder Manual
53
Associated Audio Mixing
Figure 3‐2
Figure 3-2
2.
Click the Associated Audio Mixing field, and select On to enable this option.
3.
Click the Default Associated Audio Type field, and specify which available audio stream you want to mix with the main audio stream.
Figure 3‐3
Figure 3-3
3.1.1
Processing Screen
Associated Audio Mixing Menus
Mixing Associated Audio from a Single PID
To mix an available associated stream from a single PID, in the Input screen, select an IP source that contains a single PID with one or more associated audio streams, as shown in Figure 3‐4.
Figure 3‐4
Figure 3-4
Select a Single PID Input Source with Associated Audio
The Input screen displays information for the selected IP source, which contains one program with two PIDs. PID 256 contains the video stream, and PID 258 contains the main audio stream and the associated audio stream, as shown in Figure 3‐5. The system mixes an available associated stream by default. It is highlighted in gray with green borders under PID 238 at the left side of the display. The gray highlighting indicates that it is the currently selected stream. The green border indicates that associated stream mixing is activated (also indicated under the Monitor Status on the right). The corresponding bitstream, downmixing, and mixing metadata, as well as other information, is also displayed on the right for the main stream and the associated stream (see Figure 3‐5).
54
Dolby® DP580 Professional Reference Decoder Manual
Configuring Associated Audio Mixing
Figure 3‐5
Main audio stream
Associated audio
stream
Figure 3-5
3.1.2
Main and Associated Audio Stream Information (Single-PID Mixing)
Monitoring an Associated Stream Only (Single PID)
To monitor only the associated stream, click Solo associated audio under Monitor Control. The Monitor Status indicates Mixed as associated (soloed), as shown in Figure 3‐6.
Figure 3‐6
Figure 3-6
Associated Stream Monitor Control: Solo
In solo mode, when you select the main stream, it is highlighted in gray and the Monitor
Status indicates Main substream (muted), as shown in Figure 3‐7.
Figure 3‐7
Figure 3-7
Main Stream Monitor Status: Muted
To play only the main stream, turn off associated audio mixing.
Dolby® DP580 Professional Reference Decoder Manual
55
Associated Audio Mixing
3.1.3
Manually Mixing an Alternative Associated Stream
If the specified associated stream is unavailable, the Monitor Control/Mix as associated
audio check box is now activated. You can force the system to mix an alternative stream by selecting the stream and clicking on this check box. You can also check the Solo associated
audio box to activate solo mode. Figure 3‐8
Figure 3-8
3.2
Force Mixing with an Alternative Stream
Mixing Associated Audio with Dual Packet Identifiers
To mix an available associated stream from two PIDs:
1.
In the Input screen, select an IP source that contains a dual PID with one or more associated audio streams, as shown in Figure 3‐9.
Figure 3‐9
Figure 3-9
Select a Dual Packet Identifier Input Source with Associated Audio
The Input screen displays information for the selected IP source, which contains one program with three PIDs. PID 256 contains the video stream, PID 258 contains the main audio stream, and PID 259 contains the associated audio stream. On the right, associated audio information is displayed, as shown in Figure 3‐10. 56
Dolby® DP580 Professional Reference Decoder Manual
Mixing Associated Audio with Dual Packet Identifiers
Figure 3‐10
Figure 3-10 Associated Audio Stream Information (Two Audio Packet Identifiers)
2.
Figure 3‐11
To mix an associated audio stream, select the stream to highlight it, then check the Monitor Control/Mix as associated audio box, as shown in Figure 3‐11 (for PID 259).
Figure 3-11 Mix as Associated Audio
Dolby® DP580 Professional Reference Decoder Manual
57
Associated Audio Mixing
The selected associated stream is now highlighted in green, and the Monitor Status indicates Mixed as associated. Information for both the main and associated streams is also displayed (see Figure 3‐12).
Figure 3‐12
Figure 3-12 Dual Packet Identifier Mixing Enabled
Note:
Figure 3‐13
58
To monitor only an associated stream, double‐click the stream. To monitor only the main stream, double‐click the main stream.
Dolby® DP580 Professional Reference Decoder Manual
Chapter 4
Dolby E Decoding Behavior
The DP580 supports reference decoding of Dolby® E over AES, ASI/SDI, and transport streams through SMPTE 302M. The system performs the following functions:
4.1
•
Monitors multichannel audio (one program at a time from a Dolby E stream)
•
Monitors two‐channel audio from the selected Dolby E program
•
Displays Dolby E metadata for all programs
•
Emulates Dolby E metadata for multichannel output (configurable) and two‐channel output Dolby E Program Selection
The DP580 enables you to select a single program to monitor from a Dolby E stream. For example, if the Dolby E program configuration is 5.1+2, you can listen to the 5.1‐channel program (program 1) or the two‐channel program (program 2). By default, program 1 is always selected when monitoring a new Dolby E stream. The AES outputs reflect the currently selected program. The headphone and two‐channel outputs always provide a confidence downmix of the currently selected program. If you specify Downmix or Dolby Digital for the output configuration, the system routes a two‐channel downmix of the currently monitored program to that AES pair.
4.2
Dolby E Metadata Emulation
The DP580 provides an option that allows you to emulate the effects of the Dolby Digital encode/decode process, which simulates the end‐user listening experience. The emulation process performs the following:
•
Application of dialogue normalization
•
Dynamic range control computation and application
•
Worst‐case downmix level calculation to prevent clipping
•
Downmixing with metadata application
Metadata emulation is enabled or disabled as specified in the respective configuration.
Dolby® DP580 Professional Reference Decoder Manual
59
Appendix A
Dolby DP580 Specifications
A.1
Processing Capabilities
Audio Formats Supported
Dolby® Digital, Dolby Digital Plus™, Dolby E, AAC, HE AAC, HE AAC v2, MPEG‐1 LII, PCM, and Dolby TrueHD
Audio Frame Latency
During the decoding process, the system maintains audio frame latency on the AES and SDI inputs for the applicable codecs, as shown in Table A‐1.
Table A-1
Audio Frame Latency: AES, SDI, HDMI
Input
Frame Rate
Codec
Latency (ms)
AES AES AES AES SDI SDI SDI SDI SDI SDI
N/A
N/A N/A N/A 25 29.97 30 50 59.94 60 PCM AC‐3 E‐AC‐3 AAC All All All All All All 32 32 32 42.7 (approximate) 40 33.4 (approximate)
33.3 (approximate)
40 33.4 (approximate)
33.3 (approximate)
Note:
Audio latency over HDMI™ will be added in a future release.
Dolby® DP580 Professional Reference Decoder Manual
61
Video Formats Supported
H.264 and MPEG‐2
Table A‐2 shows the video resolutions and frame rates supported for high‐definition and standard‐definition displays.
Table A-2
Video Resolutions and Frame Rates
High-Definition
Resolutions
High-Definition
Frame Rates (fps)
StandardDefinition
Resolutions
StandardDefinition Frame
Rates (fps)
1080i 25, 29.97, 30
480i 29.97
720p 59.94, 60, 50
576i 25
Peak Measurement
Determines the unweighted true‐peak level per ITU‐R BS.1770 Annex 2
A.2
Environmental Characteristics
Power Specifications
100–240 VAC; 50–60 Hz; 350 W; front‐panel power switch
Dimensions and Weight
1‐U rackmount: 44 × 483 × 394 mm (1.75 × 19 ×15.5 inches)
Net: 6.5 kg (14.5 lb)
Environmental Conditions
Operating temperature range: +10°C to +35°C
Humidity range: 5% to 90% (noncondensing)
Regulatory Notices
UL, FCC, CE, and RoHS compliant
62
Dolby® DP580 Professional Reference Decoder Manual
Index
administrative controls...................................... 48–52
AES
input source ................................................... 16–18
ASI/SDI
input source ................................................... 18–21
associated audio mixing..............................37, 53–58
command interface
configuring............................................................. 9
configuring
decoder ................................................................. 33
configuring the network
command interface ............................................... 9
media interface .................................................... 10
connecting to the DP580.......................................... 11
decoder configuration ....................................... 33–43
decoder output options ........................................... 34
Dolby Digital Plus
associated audio mixing .............................. 53–58
Dolby E
AES input ............................................................. 17
behavior................................................................ 59
metadata emulation...................................... 39, 59
program selection ............................ 16, 17, 18, 59
SDI/ASI input ...................................................... 18
transport stream .................................................. 16
DP580
front panel components ................................... 2–4
rear panel components..................................... 4–5
event logs............................................................. 30–31
hardware
installing................................................................. 8
HDMI
input source ......................................................... 21
monitoring Audio Return Channel receiver in‐
put ......................................................... 25
monitoring Audio Return Channel transmitter
output ................................................... 25
input source......................................................... 12–26
AES.................................................................. 16–18
ASI/SDI ........................................................... 18–21
HDMI.................................................................... 21
installing hardware .................................................... 8
logs
loudness................................................................ 29
system ................................................................... 51
Dolby® DP580 Professional Reference Decoder Manual
loudness
logs.........................................................................29
measurement configuration parameters ..........43
parameters ............................................................29
loudness display
changing................................................................27
loudness logs
downloading ........................................................29
loudness parameters.......................................... 29–30
loudness status
checking ................................................................26
media interface
configuring ...........................................................10
monitoring
modifying output ................................................45
modifying volume ...............................................46
Pro Logic II mode......................................................41
matrix mode .........................................................43
movie mode ..........................................................42
music mode ..........................................................42
processing ........................................................... 32–43
AAC and HE AAC ....................................... 39–40
default program reference level .....................39
error concealment.............................................40
compression mode...............................................35
decoder
tech bulletin 11..................................................37
Dolby Digital EX mode .......................................41
Dolby Digital Plus
associated audio mixing........................... 38, 53
MS10 emulation................................................39
Dolby Digital/Dolby Digital Plus ............... 37–39
error concealment.............................................38
Dolby E
metadata emulation .........................................39
Pro Logic ........................................................ 40–43
Pro Logic II mode ................................................41
center width mode ...........................................42
dimension mode...............................................42
movie mode.......................................................42
music mode .......................................................42
panorama mode................................................42
Pro Logic mode.................................................42
Pro Logic IIx Mode ..............................................41
Pro Logic IIx mode
movie mode.......................................................41
music mode .......................................................41
stereo downmix mode ........................................36
63
Index
software
upgrading....................................................... 49–51
streaming external files ........................................... 24
system logs ................................................................ 51
transport stream
input source ................................................... 13–16
ip bookmarks ....................................................... 13
upgrading software............................................ 49–51
web client user interface.......................................... 11
64
Dolby® DP580 Professional Reference Decoder Manual