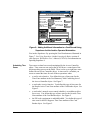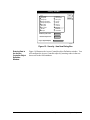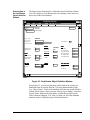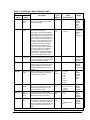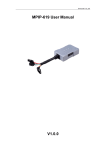
1
Metasys Network Technical Manual 636 Objects Section Technical Bulletin Issue Date 1297 Access Control System Objects Introduction Page 3 • Before You Begin 3 • Introduction 3 • Quick Start 3 Engineering Overview 11 • Overview of Operation *11 • NCM Capabilities *14 • Operation of an Access Controller Object 15 • Operation of a Card Reader Object 24 • Operation of a Binary Input Object 28 Data Base Generation 31 • Overview 31 • Configuring the D600 Controller 32 • Defining an Access Controller Object 32 • Creating Time Zones 39 • Defining a Card Reader Object 44 • Adding Access Cards to the Data Base 51 • Defining a Binary Input Object 61 • Maintaining Your D600 Data Base 61 * Indicates those sections where changes have occurred since the last printing. © 1997 Johnson Controls, Inc. Code No. LIT-636077 1 Reference Tables 63 • Description of Terms *63 • Command Table * Indicates those sections where changes have occurred since the last printing. 2 Objects—Access Control System Objects 71 Introduction Before You Begin This document describes Access Control System objects configured online using an Operator Workstation. Before you begin defining these objects online, you should have a general understanding of the IAC-600 system’s capabilities and theory of operation. Note: This document does not apply to Data Definition Language (DDL) programming. DDL users should refer to the DDL Programmer’s Manual (FAN 630). IMPORTANT: Introduction Use the Operator Workstation for adding, modifying, and viewing the IAC-600 data base. Do not use a local I/O for these functions because lost data can result. Metasys Access Control Management consists of three object types: Access Controller (AC), Card Reader (CR), and Binary Input (BI). • The Access Controller object defines the hardware interface between the NCM and D600 Access Controller. The NCM supports up to two D600s (Metasys Release 6.0 software and later). There is only one Access Controller object defined per D600 Controller. • A Card Reader object is a software object that provides the door control function for a card reader terminal. A Card Reader object represents an STI (Smart Terminal Interface) and its corresponding card reader. • A Binary Input object is a software object that tracks the status of a binary alarm point in the IAC-600 system. Together, the Access Controller, Card Reader, and Binary Input objects integrate access control management functions with the Metasys Facility Management System (FMS). Quick Start This section tells you how to quickly define Access Control System objects from your Operator Workstation. For additional information about defining or modifying Access Control System objects, configuring the D600 Controller, viewing device summaries, adding cards, or defining time zones, see the Data Base Generation section. Objects—Access Control System Objects 3 1. Defining an Access Controller Object To define an Access Controller object: Note: Only two Access Controller objects can be defined per NCM. An Access Controller object must be created before a Card Reader object, and a Card Reader object must exist before its associated binary alarm points can be mapped to Binary Input objects. 1. Go to the System Summary in which you want to add the object. 2. Select Item from the Menu bar. Then, select New from the Item menu. A dialog box for selecting object types appears. Hardware System, Hardware Object, and Copy (System/Object) fields are not used for this object type. 3. Select N2 device. Click OK. A dialog box for Adding the N2 device appears. 4. Select D600. Click OK. The Access Controller object Definition window appears. See Figure 1. Access Controller Definition Item Edit View Action Go To HDQTRS Headquarters WEST West Wing SECURITY Security Bldg. System Name Object Name Expanded ID NC Name 0 0 Wiegand/Proximity 0 0 N-Crypt 0 Magnetic Stripe ID Encoding # Process Timer 0 240 Comm Disabled Hardware: N2 Trunk Device Address Poll Priority Device Type Facility Codes Parameters bookmark SECURITY AC1 Access Cntrl #1 NC5 Graphic Symbol # Operating Intr. # Help Accessory 1 1 3 D600 Flags Auto Dialout Time Zone Checks 5-Digit PIN IN_OUT_Readers Suppress Valid Reports 1 N Y N N N mins adefine Figure 1: Access Controller Object Definition Window 4 Objects—Access Control System Objects Note that some of the fields in the window are blank and some are already filled in. You must fill in the blank attribute fields (e.g., Object Name). The attribute fields that are already filled in contain default values, which you may either accept or change. The following table explains the attributes without default settings. The Access Controller Object Attribute Table in the Reference Tables section describes all Access Controller object attributes. The Operator Workstation User’s Manual (FAN 634) explains the general procedures for entering and changing data in detail. Table 1: Access Controller Attributes Without Default Settings Attribute Description Entry Values Object Name Identifies the object (i.e., Cntrller). The object name cannot be duplicated in the system. 1 to 8 alphanumeric characters Expanded ID (optional) Further identifies the object (i.e., FMS Access Cntrl Center). 1 to 24 alphanumeric characters 5. To save the new Access Controller object, select Item from the Menu bar. Then, select Save. A dialog box appears to indicate the item has been saved. The Access Controller object is added to the NCM data base. Modifying and Monitoring the Access Controller Object Once the Access Controller object is defined, you can modify or monitor its attribute values online using the Access Controller object Focus window. You’ll find more information in the Operator Workstation User’s Manual (FAN 634). 2. Defining a Card Reader Object To define a Card Reader object: 1. Go to the System Summary in which you want to add the object. 2. Select Item from the Menu bar. Then, select New from the Item menu. A dialog box for selecting object types appears. 3. Select Card Reader. In the Hardware System and Hardware Object fields, type the system on the network and Access Controller (AC) object this Card Reader object will be mapped to. (The AC object must already be defined.) Click OK. The Card Reader object Definition window (Figure 2) appears. Objects—Access Control System Objects 5 Card Reader Definition I tem E dit V iew A ction HDQTRS W EST S E C U R IT Y Headquarters West Wing Security Bldg S yste m N am e O b jec t N am e E x pa nde d ID L oc al R ea de r ID SECURITY Graphic Symbol # Operating Intr. # 0 0 Go b o o k m ark Comm Disabled Hardware System Name Object Name RDR Number Timers Door Access Time Door Shunt Delay Anti-Passback SECURITY AC1 1 Report Type 15 120 60 secs secs mins Parameters Reader Type Card Type H elp A ccessory To NORMAL ALARM NONE CRIT4 Messages ACCESS MAGSTRIP Alarm # 0 N Flags Auto Dialout NO ALM on EXIT FAC Code on Backup PIN Code on Backup Anti-Tailgate Check Anti-Passback Check N Y N N N N Time Zone Number Reader Active Override PIN Suppress 8 4 6 cdefine Figure 2: Card Reader Object Definition Window Note that some of the fields in the window are blank and some are already filled in. You must fill in the blank attribute fields (e.g., Object Name). The attribute fields that are already filled in contain default values, which you may either accept or change. Note: The attribute Local Reader ID is optional. You do not have to fill in a value for this field. The following table explains the attributes without default settings. Table 9: Card Reader Object Attribute Table in the Reference Tables section describes all Card Reader object attributes. The Operator Workstation User’s Manual (FAN 634) explains the general procedures for entering and changing data in detail. 6 Objects—Access Control System Objects Table 2: Card Reader Attributes without Default Settings Attribute Description Entry Values Object Name Identifies the object (i.e., Reader4). The object name cannot be duplicated in the system. 1 to 8 alphanumeric characters Expanded ID (optional) Further identifies the object (i.e., Basement). 1 to 24 alphanumeric characters Local Reader ID (optional) Further identifies the location of the reader. 1 to 16 alphanumeric characters 4. To save the new Card Reader object, select Item from the Menu bar. Then, select Save. The Card Reader object is added to the NCM data base. Note: Up to 16 Card Reader objects can be defined per D600 Controller. Modifying and Monitoring the Card Reader Object Once the Card Reader object is defined, you can modify or monitor its attribute values online using the Card Reader object Focus window. You’ll find more information in the Operator Workstation User’s Manual (FAN 634). If you need information on the overall process of defining Access Control System objects online, see the Data Base Generation section of this document. If you need information about the functions and purposes of the Access Control System objects, read the next section, Engineering Overview, which explains how these components work together. 3. Defining a Binary Input Object To define a Binary Input object: 1. Go to the System Summary in which you want to add the object. 2. Select Item from the Menu bar. Then, select New from the Item menu. A dialog box for selecting object types appears. 3. Select Binary Input. In the Hardware System and Hardware Object fields, type both the system on the network and Access Controller object this Binary Input object will be mapped to. Click OK. The Binary Input object Definition window (Figure 3) appears. Note that some of the fields in the window are blank and some are already filled in. You must fill in the blank attribute fields (e.g., Object Name). The attribute fields that are already filled in contain default values, which you may either accept or change. Objects—Access Control System Objects 7 Binary Input (D600) Definition Item E dit V iew A ction G o To A H elp c cessory Headquarters HDQTRS West Wing WEST SECURITY SECURITY Security Bldg. System Name Object Name Expanded ID SECURITY Graphic Symbol # Operating Instr. # 0 0 Parameters Normal State Alarm Delay (sec) NONE 30 Card Reader Data RDR Number BI Point Number Input Type PT Enabled Alarm Suppression Time Zone Alarm if Set Quiet if Reset Hardware Object: D600 System Name SECURITY Object Name AC1 Engineering Data State 0 (STOP) units State 1 (START) units off on Comm. Disabled N Flags Auto Dialout Enable PT History Save PT History Latching Point N Y N N Report Type NORMAL ALARM OVERRIDE Messages Alarm # NONE NONE NONE 0 2-STATE Y 0 N N d600def Figure 3: Binary Input Object Definition Window The following table explains those attributes that map the BI objects to the IAC-600 system. The other attributes, illustrated in the Definition window, are also applicable to defining binary alarm point, but are covered in separate documentation. See the Binary Input (BI) Object Technical Bulletin in this manual for a complete description. The Operator Workstation User’s Manual (FAN 634) explains the general procedures for entering and changing data in detail. 8 Objects—Access Control System Objects Table 3: Attributes That Map BI Objects to IAC-600 Attribute Description Entry Values Reader Number Identifies the STI/card reader that this Binary Input object is mapped to. Integer 1 to 16 BI Point Number Identifies the binary alarm point (in an STI) this Binary Input object is mapped to. Integer 1 to 8 PT Enabled Determines whether the point is enabled or disabled. 0 = disabled Time Zone Determines which time zone schedule is linked to this binary alarm point. Integer 1 to 8 Alarm if Set Determines whether any alarms linked to this binary alarm point are enabled or disabled. 0 = not set on alarm Determines whether to automatically reset the binary alarm point after an alarm has been acknowledged at an Operator Workstation. 0 = not reset if acknowledged Quiet if Reset 4. Input 1 should be assigned to the door monitor alarm, and Input 2 to the STI enclosure tamper. 1 = enabled 1 = set on alarm 1 = reset if acknowledged To save the new BI object, select Item from the Menu bar. Then, select Save. The BI object is added to the NCM data base. Modifying and Monitoring the Binary Input Object Once the Binary Input object is defined, you can modify or monitor its attribute values online using the Binary Input object Focus window. You’ll find more information in the Operator Workstation User’s Manual (FAN 634). If you need information on the overall process of defining Access Control System objects online, see the Data Base Generation section of this document. If you need information about the functions and purposes of the Access Control System objects, read the next section, Engineering Overview, which explains how these components work together. Objects—Access Control System Objects 9 10 Objects—Access Control System Objects Engineering Overview Access Controller (AC), Card Reader (CR), and Binary Input (BI) objects have separate responsibilities. Together, they exchange information in order to maintain a complex access control management system integrated with Metasys. See Figure 4. Overview of Operation N1 Access Card Data Base Time Zone Data Base BI CR_1 CR_2 NCM AC The Time Zone data base is created in the AC object Focus window at an Operator Workstation. The Access Card data base is created from the access card summary. Both data bases provide information to both Access Controller and Card Reader objects. Access Controller (AC), Card Reader (CR), and Binary Input (BI) Objects in NCM N2 Bus STI Mapped To Card Reader Object 1 D600 Controller The AC object communicates with the D600 Controller over the N2 Bus. Information about STI/card readers and card transactions is passed to the appropriate CR object. Binary alarm point activity is passed on to the appropriate BI objects. STI Mapped to Card Reader Object 2 Binary Input object mapped to this motion detector. acop Figure 4: Operation of the Access Controller, Card Reader, and Binary Input Objects Objects—Access Control System Objects 11 Access Controller Object An Access Controller object defines the D600 Controller in the NCM. It is the hardware object or communication link between the D600 Controller and the NCM to which the controller is connected. The Access Controller object resides in the NCM and polls the D600 Controller via the N2 Bus. It uses this information to monitor the controller’s overall status, report changes-of-state, enter access cards into the system, and trigger control processes. The Access Controller object also processes all upload/downloads to the D600 Controller and routes messages intended for other objects. Only two D600 Controllers can be connected to an NCM. Card Reader Object A Card Reader object is a software object that tracks the status of one STI and its associated card reader. You can define up to 16 Card Reader objects per D600. Although each Card Reader object receives information about its STI/card reader from the Access Controller object, the Card Reader object is responsible for monitoring the STI/card reader, reporting changes-of-state, and reporting card transactions. Most of the automatic interaction between the IAC-600 system and other parts of Metasys is handled through Card Reader objects. Access Card In Out State There are three possible states in the In Out State field: In: The card was last used to enter a building or area. The card can only be used to leave the building or area, which changes the state to Out. Out: The card was last used to leave a building or area. The card can only be used to enter the building or area, which changes the state to In. N/A: The card can be used to either enter or leave a building or area. This is the state that the card is saved to any time the Modify Card dialog box is opened and saved (by clicking OK). The next time the card is used at an In or Out reader, its state (In or Out) is recorded in the In Out State field. If you are using In and Out Card Readers, and an access card holder does not use an access card to enter or leave an area, the holder is prevented from using the card to enter or leave the next time it is necessary. To remedy this, change the In Out State to N/A. N/A is the default for the In Out State field, and it is the only status you can define using the OWS. 12 Objects—Access Control System Objects To change the In Out State to N/A: 1. Open the Modify Card dialog box. 2. Click OK. (There is no need to change any of the fields in the dialog box.) A message box appears telling you that the data has been saved, and the card is automatically saved with the In Out State field set to N/A. The next time the card is used at an In or Out reader, its state (In or Out) is recorded in the In Out State field. Note: Downloading the D600 Access Controller saves all access cards for the controller to the N/A state. Each card remains in that state until it is used again to either enter or leave a building/area. Binary Input Object A Binary Input object is a software object that tracks the status of one binary alarm point linked to a Smart Terminal Interface (STI). You can define up to eight binary alarm points per STI in the system. Similar to the Card Reader object, the BI object receives information about its associated alarm point from the Access Controller object. Based on the status of the binary alarm point, the BI object can report changes-of-state and trigger control processes within Metasys. You must use BI objects to monitor door switches; do not map door switches to CS objects. Note: Input point number 1 at the STI should be connected to the door monitor alarm. Input point number 2 at the STI is factory connected to the STI enclosure tamper. We recommend that you use these two inputs for their intended purposes. Objects—Access Control System Objects 13 NCM Capabilities The NCM contains the Access Controller, Card Reader, and Binary Input objects. For connecting the N2 Bus to the NCM and NCM device limitations, see the Network Control Module 200 Technical Bulletin in the Metasys Network Technical Manual (FAN 636). IMPORTANT: NCM Capabilities It is recommended that you use the same archive PC for all Access NCs. Otherwise, the Access Card data bases could become unsynchronized. The following list provides the NCM capabilities. The NCM supports: • • • • • • • 2 D600 Controllers per NCM 16 Card Reader objects per D600 Controller 8 Binary Input objects per STI installed in the system software point types and associated objects including the BI software features including: - Upload/Download - Dial-up I/O - GPL Processing - Calendar/Holiday/Date/Time - Password - Point History - Report Router - Scheduling - Totalization - Trend miscellaneous hardware and software: - NC direct PC connection - NT connection - NCM printer port - Dialup Port - N1 LAN - N2 Communications Bus - NCSETUP and Diagnostic Tool N2 devices - Expansion Modules - Air Handling Unit (AHU) Controller, Variable Air Volume (VAV) Controller, Unitary (UNT) Controller, Variable Air Volume Modular Assembly (VMA) Controller - LCP, DR9100, DC9100, DX9100, XT9100, and XTM Controllers (NCM200 only) 14 Objects—Access Control System Objects Operation of an Access Controller Object Figure 5 illustrates the functions performed by the Access Controller object: Hardware Interface, Change of State (COS) Reporting, Control Process Triggering, Time Zone Creation, Access Card Maintenance, and Global Door Access Control. Hardware Interface Change-of-State Reporting Time Zone Maintenance Global Door Access Control AC Access Card Maintenance Triggers function Figure 5: Access Controller Object Functional Model Hardware Interface The D600 Controller is physically connected to the NCM via the N2 Bus. From a software standpoint, you’ll need to define one Access Controller object to map to each D600 Controller. This allows the AC object to poll the D600 and communicate D600 actions and changes-of-state to Metasys. The Access Controller object must reside in the same NCM that is connected to the D600. Hardware Settings AC object hardware settings for the hardware interface include: • NC Trunk Number • Device Address • Poll Priority For a description of these attributes, see Access Controller Object Attribute Table in the Reference Tables section of this document. Unreliable and Offline States The Access Controller object may become unreliable due to an offline condition (communication break). When this happens, the following attributes become unreliable: • Report Alarm • Local Operator Change • Access • N2 Download Active • UPS Battery Backup Low • UPS AC Power Fail • AC Tampered Objects—Access Control System Objects 15 Note: If any of these attributes become unreliable and are associated with a control process (trigger), the control process results could be affected. For example, the unreliability can be passed onto Card Reader objects. How Do I Find Out If An Access Controller Object Is Unreliable? You can determine if an Access Controller object is unreliable by looking at the Focus window or System Summary displaying the object. In the Focus window, the Object Offline attribute will display a “Y” in its text box, and other offline attributes will show “?.” In the System Summary, the Value text associated with the object will read “offline.” It is important to note that if a D600 is offline, by convention the STIs and card readers are also offline. However, if a D600 is online, the individual STI/card readers may or may not be online. In the latter case, check the individual Card Reader objects for unreliability. Change-of-State Reporting The D600 Controller continuously monitors and analyzes changes-of-state within its system and communicates those changes via the Access Controller (AC) object during polling. In turn, the object can send a COS report to Operator Workstations and printers for viewing. The AC object can support multiple changes-of-state simultaneously and independently. For example, the D600 can be experiencing an alarm at the same time as normal operations are taking place. The Access Controller object will categorize and process the multiple changes-of-state in order of priority (i.e., alarm, normal). COS Settings The following AC object attributes initiate a COS report. These attributes are mapped to internal points and parameters in the D600 and their changes-of-state are recorded in the Access Controller Report file. • Suppress Valid Reports • AC Tampered • Report Alarm • Local Operator Change • Global Access • UPS AC Power Fail • UPS Battery Backup Low • N2 Download Active 16 Objects—Access Control System Objects When the preceding parameters initiate a COS, these messages are recorded in a Change-of-State report: • Access Controller Has Restarted • Invalid System Facility Code • Access Controller Alarm Has Been Acknowledged • Access Controller Has Been Tampered With • Access Controller Tamper Has Been Cleared • Local Operator Has Changed The Data Base • All Doors Are Restored To Normal Operation • All Doors Are Emergency Unlocked • Field Hardware AC Power (Normal/Alarm) • Field Hardware UPS Battery (Normal/Alarm) • Field Hardware Data Base Download Required (Normal/Alarm) Report Types The Access Controller Report provides two report types: • Normal Report Type is generated in the Access Controller Report when the D600 detects a COS to normal within the system (e.g., All Doors Are Restored To Normal Operation). • Alarm Report Type is generated in the Access Controller Report when the D600 detects a COS to alarm within the system (e.g., Access Controller Has Been Tampered With). These report types are internally specified by the AC object and do not appear on the Focus window. Their messages are displayed in dialog boxes (pop-up windows) at Operator Workstations and are automatically sent to the Access Controller Report file to be viewed and printed. Triggers Certain AC object attributes can trigger control processes. This means that when the value of a “triggering” attribute changes, this change can cause a GPL control process to run within Metasys. Triggerable Settings The following Access Controller object attribute fields are triggerable: • Object Offline • 64 Control Interlock Group Attributes. (See Card Access-Lighting/HVAC Interlocks next.) Objects—Access Control System Objects 17 Card Access-Lighting/HVAC Interlocks Another form of control process triggering is the card access-lighting/HVAC interlocks. These are internal triggering attributes which are not displayed in the AC Focus window. If an access card successfully gains entry to a building, an assigned group of lights and HVAC hardware can go on for a specified period of time to support the card holder’s work area. The process will be initiated regardless of where the card was read and is not limited to one D600. Up to 64 of these groups can be defined for an AC object. Lock/Unlock Triggers Lock/Unlock triggers are used to enable/disable triggering processes. For example, if there is construction going on in the building, and it is setting off unwanted alarms, you may want to lock the triggers function to disable all binary alarm points. When you want to resume normal security, unlock the triggers function. You will find this function under the Action-Communications menu in the AC object Focus window. Refer to Data Base Generation section for the procedure used to lock/unlock this flag. Note: If you command the Triggers Locked flag to Y, all triggering processes associated with this object will be disabled. Access Card Data Base Maintenance You can enter, modify, delete, and view access cards (badges) from the Access Cards summary, which is accessed from the Network Map. Access cards can be numbered from 1 to 65535. Access cards are resident in the NCM data base. Each access card is downloaded to the D600, where it is used to decide locally whether to admit the card holder at a given door. The Metasys-integrated D600 with expanded memory (MX-1) can handle up to 16,000 card records. Without expanded memory, it can maintain up to 4400 cards. Your system’s card capacity cannot exceed 16,000 card records. See Connecting the IAC-600 System to Metasys Network Technical Bulletin in the Metasys Network Technical Manual (FAN 636). Access card types that may be defined include: magnetic stripe, barium ferrite, Wiegand, and proximity (uses the Wiegand card type). Figure 6 shows the Access Cards summary. You can view, modify, and delete cards from this summary. You must have a password level of one to add, modify, delete, display, or print all access cards in the system. If you have a password level of three or two, then your password must allow you access to the Access Controller hardware object for which the access card is to be (or has been) defined to add, modify, display, print, or delete an access card. 18 Objects—Access Control System Objects Access Cards Summary A Item E dit V iew A ction G o To c cessory PREVIOUS Card ID 1 2 3 4 5 6 7 8 9 10 Last Name First Name Vairavan Rasmo Shetty Copass Peot Martocci Bronikowski Jefferson Kremkowski Singer Vairavan David Sanjay Cliff Paul Jerry Alan Robert Mary Jo Anthony H elp NEXT Card Issue Level 1 1 1 2 1 3 1 1 1 2 Exec Privilege Y Y N N Y N N N N N summary Figure 6: Access Controller Object Access Cards--Summary Screen Figure 7 shows an Card Summary--Add Card dialog box. You can add access cards from this menu. The new values will reside in the D600 data base. Note: You may add or modify card data if one or more D600s are offline. If you add a card while one or more D600s are offline, any additions you make to offline D600s will not be saved. If you modify card data while one or more D600s are offline, global data may become unsynchronized and any changes to offline D600s will not be saved. You may not delete a card if there are any D600s offline. Objects—Access Control System Objects 19 Access Card Parameters There are two levels in which you can maintain an access card data base: • limited access to the card data base through any Operator Workstation. See Figure 7. • complete access to detailed card holder information through one archive Operator Workstation with the runtime version of Superbase 4, which is included with your Metasys software. See Figure 8. With Superbase 4, you can add personal information to an archive card data base such as driver’s license number, photo, home phone, and address. Superbase 4 can only be run on an archive Operator Workstation, and its data base does not operate online with Metasys. Therefore, do not use Superbase 4 to add card records to your online card data base. Its purpose is to maintain more information on card holders (i.e., personnel files) and generate card transaction summaries, reports, and queries. See your Operator Workstation User’s Manual (FAN 634) for more information on generating summaries, reports, and queries. Card Summary - Add card Card ID Last Name First Name Card Issue Level Executive Privilege Time Zone 0 N Access Controllers Bldg1/Security3 Bldg3/Security4 Bldg4/Security1 Bldg6/Security7 Dining/Room Central/Lab Basement West/Wing East/Wing Floor1 Floor2 Floor3 0 Process Group 0 In/Out State N /A SAVE QUIT USER DATA Valid Readers Bldg1.Door2 Bldg5/Door5 Bldg7/Door5 Bldg1/Door5 Bldg5/Door1 OK CANCEL * Indicates Card in Controller ADDCARD2 Figure 7: Adding Access Cards at an Operator Workstation 20 Objects—Access Control System Objects Add Record Entry 10 Jan, 94 4:56 am A ccess C ontrol Card Entry Form EM PLO Y EE LAST NAME Doe FIRST NAME John DEPARTMENT MAIL STATION CARD ID 1023 WORK PHONE INITIAL BLD/FLOOR COMPANY ID FAX NUMBER USER DEFINABLE DATA FIELD NAMES P-1 P-2 P-3 Save Figure 8: Adding Additional Information to a Card Record Using Superbase 4 at the Archive Operator Workstation You invoke Superbase 4 by pressing the User Data button as illustrated in Figure 7. See Using Superbase 4 in the Learning the Basics section of your Operator Workstation User’s Manual (FAN 634) for information on operating Superbase 4. Scheduling Time Zones Time zones are data base records maintained by the Access Controller object. Time zones are not used at the NCM, but are a central part of the decision making process at the D600. There can be up to eight time zones defined for an Access Controller object. A time zone is a schedule you create to control the times for each of these operations when: • a card is active/inactive. You define this type of time zone for the Time Zone attribute in the Card Summary--Add Card dialog box of the Access Controller object. See Figure 7. • a card reader is active/inactive. You define this type of time zone for the Reader Active Time Zone attribute of the Card Reader object. See Figure 2. • a card reader’s normal access control schedule is overridden to allow free access. You define this type of time zone for the Override Time Zone attribute of the Card Reader object. See Figure 2. • the PIN code requirement is enabled/disabled. You define this type of time zone for the PIN Suppress Time Zone attribute of the Card Reader object. See Figure 2. Objects—Access Control System Objects 21 • a binary alarm point is suppressed. You define this type of time zone for the Alarm Suppression Time Zone attribute of the Binary Input (D600) object. See Figure 3. Note: Defining an alarm suppression time zone for a BI point associated with a card reader is not recommended because it will cause the point to stop tracking the state of the field hardware when that time zone is active at the D600. In addition, when the time zone expires, the state of the BI point will become unreliable. We recommend that you enter zero (0) as the alarm suppression time zone, which disables alarm suppression for that BI point (in other words, enables alarm reporting). Use Metasys to schedule report and/or trigger lock commands to suppress alarms as needed. Each time zone has up to eight different day-schedules, one for each day of the week and one for holidays. Each day-schedule can have up to 16 times defined. Each time defined will either enable or disable the operation being controlled. Figure 9 illustrates a time zone schedule for card readers. The example shows time zone number 5. This means a Card Reader object, scheduled for time zone number 5, will have the following schedule. The reader is enabled to read cards starting at 6:00 a.m. Monday and disabled at 5:00 p.m. Monday. Then, it is enabled again from 6:00 p.m. to 10:00 p.m. Monday and disabled after 10:00 p.m. You can develop other schedules for the rest of the days of the week as well as a holiday schedule. It is important to note that for any given day (i.e., Monday), you cannot have two disable times or enable times scheduled back-to-back. There are certain types of time zones you may want to construct, such as one for free access through a door (Override Time Zone), and one for suppressing PIN codes (PIN Suppress Time Zone). You may also want to design more than one time zone for times a reader can be active. Notes: D600 time zone schedules use the same holiday dates as defined globally for the rest of Metasys. For more information about the Metasys calendar schedule, see the Operator Workstation User’s Manual (Fan 634). The D600 Controller must be online with Metasys in order to add time zones using online generation. 22 Objects—Access Control System Objects 6FKHGXOH $GG0RGLI\ 7LPH =RQH Time Zone No. SAVE 5 'D\V CANCEL Weekdays Holiday Sunday Monday Tuesday Wednesday Sat Sun DELETE Thursday Friday Saturday PRINT Enable Time (hh:mm) Disable Time (hh:mm) Time Periods 1. 6:00 Enable 9. 2. 17:00 Disable 10. 3. 18:00 Enable 11. 4. 22:00 Disable 12. 5. 13. 6. 14. 7. 15. 8. 16. zone5 Figure 9: Schedule-Add/Modify Time Zone Dialog Box Global Door Access Control Another function of the AC object is to control the locking and unlocking of all the doors simultaneously via an NT or Operator Workstation. Under the AC object Focus window Action-Operation menu, you can globally allow resetting of all IAC-600 alarms, emergency opening of all doors, and returning all doors to normal operation. See Figure 10. Refer to the Data Base Generation section for more information on this function. Operation - D600 Operation Reset All Alarms Access All Doors Return All Doors To Normal Report Valid Cards Suppress Valid Card Reports OK CANCEL D600 Figure 10: Access Controller Action-Operation-D600 Dialog Box Objects—Access Control System Objects 23 Operation of a Card Reader Object Figure 11 illustrates the functions of a Card Reader (CR) object: STI/Card Reader Mapping, Change-of-State Reporting, Triggers, and Local Door Access Control. Change-of-State Reporting STI/Card Reader Mapping CR_2 Triggers Local Door Access Control crobj Figure 11: General Operation of a Card Reader Object STI/Card Reader Mapping The CR object represents a card reader and its associated Smart Terminal Interface (STI). Card readers communicate the card numbers to the D600 through the STI. The D600 checks the card information against the parameters defined in the data base to grant or deny access. If access is granted, the STI unlocks the door to admit the card holders. Although a CR object does not physically communicate with the card reader, it is responsible for monitoring the STI/card reader’s status and facilitating the interaction between that STI/card reader and the rest of Metasys. All communication between the CR object and its designated STI/card reader is channeled through the Access Controller object. All data displayed or printed about a Card Reader object comes from the NCM, not directly from the D600 Controller. Up to 16 CR objects can be defined per D600 (one per STI/card reader). Note: A Dual Smart Terminal Interface (DST) provides two STIs in one enclosure. A separate CR object must be mapped to each STI. Hardware Settings Hardware settings for the hardware interface with the Access Controller object include: • Hardware System Name • Hardware Object Name • Hardware Reader Number 24 Objects—Access Control System Objects Unreliable or Offline States A Card Reader object may become “unreliable” due to an offline condition (communication break). The Access attribute in the Focus window becomes unreliable due to an offline condition. In addition, the Value attribute in the Object Summary screen displays an asterisk (*) in an offline situation. How Do I Find Out If A Card Reader Object Is Unreliable? You can determine if a Card Reader object is unreliable by looking at the Focus window or System Summary displaying the object. In the Focus window, the Object Offline attribute will display a “Y” in its text box. In the System Summary, the Value text associated with the object will read “offline.” Change-of-State Reporting The parameters you set up in object Definition windows and data bases dictate whether a change-of-state (COS) occurs. A COS is issued when: • either an attribute associated with the CR object changes value (e.g., secure to access mode) • or an action taken at the STI/card reader (e.g., invalid card) does not match the information in the NCM data bases Card Reader Object COS Messages COS messages are recorded in reports. There are two reports generated from the CR object: Card Reader and Card Transaction. Both these reports can be sent to one or more devices, including Operator Workstations and report printers. The Card Reader Report tracks changes-of-state related to the STI/card reader hardware (e.g., door-open). The CR object compares the action taken at the STI/card reader with specified parameters set up in the CR object, AC object, card access, and time zone data bases. Objects—Access Control System Objects 25 These are the Card Reader COS messages recorded in a Change-of-State report: • Card Proximity Battery Is Too Low • Operator Has Admitted Someone At This Reader • Card Has The Wrong Facility Code For This Reader • Card Reader Is Inactive At This Time • Door Is Open • Door Has Been Opened Under Duress • Entry Denied-Multiple PIN Code Errors • Door Has Been Forced Open • Card Has Parity Error • Door Is In Secure Mode • Door Is In Access Mode Access Card messages are generated when a card transaction takes place at a card reader. These are the Access Card COS messages recorded in an Operator Transaction Report Summary: • Access Granted • Access Granted--Executive Privilege • Card Number Is Invalid • Card Is In Anti-Passback Delay • Card Is Invalid At This Reader • Card Required Valid In/Out Sequence • Pin Code Is Invalid • Invalid Issue Level Note: A detailed explanation of COS reporting is contained in the Report Router/Alarm Management Technical Bulletin, later in this manual. 26 Objects—Access Control System Objects COS Report Settings The Card Reader object provides two report type attribute fields in the Definition window: • Normal Report Type can generate a report when the STI/card reader associated with this object changes to a normal condition. • Alarm Report Type can generate a report when the STI/card reader associated with this object changes to an alarm condition. You can specify different settings for these report types (i.e., Critical 1-4, Follow-up, Status, and None [default]). Your settings determine the priority and destination of a COS report. Higher priority reports are displayed at Operator Workstations before lower priority reports. CRIT1 reports override all other reports in terms of priority. All Crit (critical) reports are displayed in dialog boxes (pop-up windows) at Operator Workstations. If you specify None, the COS will not generate a report. All COS reports, except None, may be sent to files or printers at the Operator Workstation. These files may be viewed and printed. For more information, see the Card Reader Object Attribute Table in the Reference Tables section. Triggers Certain field attributes in the Focus window can trigger a control process. This means that when the value of a triggering attribute changes, it can cause a control process to run. For example, if someone is holding the door open longer than the allowed door shunt time, a special horn can sound to alert security personnel. Triggerable Settings The following Card Reader object attribute fields are triggerable: • Object Offline • Reader State (Access/Secure) Lock Unlock Triggers The Triggers Locked flag indicates whether the triggering processes associated with an STI/card reader is enabled or disabled. For example, if a door is ajar, Metasys could trigger alarms to alert building security that there may be unauthorized persons on the premises. However, if the door is ajar because authorized workers are moving material through it, you may want to disable the process by commanding the Triggers Locked flag to Y (Yes). Note: If the Triggers Locked flag is set to Y (Yes), all triggering processes will be disabled for this object. Objects—Access Control System Objects 27 Local Door Access Control You can manually control the mode of access of a single door from the CR Focus window or standard System Summary. There are three types of local door access control for each STI/card reader: Open Door, Secure Door, and Access Door. See Figure 12. OPERATION - READER Operation Open Door Secure Door Access Door OK CANCEL reader Figure 12: Controlling the Mode of Access of a Single Door from the Action--Operation Menu Open Door Operation The open door command allows you to open the door and give temporary access to a person even though the person does not have a valid card. This command expires when the alarm shunt time of the door expires, usually within a minute. Secured Operation A secure door command locks the door at your command. Card holders must use their cards to gain entry. This command stays in effect until another operator command or the next local time zone change. Access Operation An access door command unlocks a specified door at your command. The card reader access light is green, indicating no card is necessary to enter the door. This command remains in effect until another operator command or until the next local time zone change. See the Data Base Generation section for more information. Operation of a Binary Input Object The Binary Input object has many functions and applications. Only those functions relevant to IAC-600 system applications are discussed here. For more detail on the Binary Input object, refer to the Binary Input (BI) Object Technical Bulletin in this manual. Figure 13 illustrates the functions of a Binary Input object when defined for the IAC-600 system: STI Binary Alarm Input Mapping, Change-of-State Reporting, Triggers, Override Command, Current Value, Point History, Alarm Analysis, Alarm Delay, Adjusting Sensor Parameters, and Latching. 28 Objects—Access Control System Objects Latching Current Value STI Binary Alarm Point Mapping Change-of-State Reporting Point History Override Command BI Adjusting Sensor Parameters Triggers Alarm Analysis Alarm Delay biobj Figure 13: General Operation of a Binary Input Object Defined for the IAC-600 System STI Binary Alarm Input Mapping The Binary Input object is the software representation of a binary alarm point in an STI. Each STI can have up to six binary input alarms to monitor the door and other security locations. Two of the binary inputs are assigned to the door-open detector and STI’s tamper detector. Subsequently, for each STI installed in an IAC-600 system, up to eight BI objects can be defined. These normally closed BI objects are functionally like other BI objects in Metasys. Trend, Totalization, and Point History options are supported. Although a BI object does not physically communicate with the binary alarm point, it is responsible for monitoring its status and facilitating the interaction between that binary alarm input and the rest of the Metasys FMS. All communication between the BI object and its designated binary alarm input is channeled through the Access Controller object to the NCM. In turn, the NCM determines any access action or changes-of-state for that binary alarm point and sends the data to the respective BI object. All data displayed or printed about a Binary Input object comes from the NCM, not directly from the D600 Controller. Objects—Access Control System Objects 29 Access Control Settings The settings for the STI Binary Alarm Point interface with the Binary Input object include: • Reader Number • BI Point Number • Input Type • PT enabled • Time Zone Alarm Suppression • Alarm if Set • Quiet if Reset Note: For details on the Binary Input object functions, refer to the Binary Input (BI) Object Technical Bulletin in this manual. 30 Objects—Access Control System Objects Data Base Generation Overview This section instructs you how to define Access Controller and Card Reader objects and bring them online with the D600 Controller using a Metasys Operator Workstation. In addition, you will find information on monitoring and modifying objects from the Focus window, adding and viewing access cards, and creating time zones. Figure 14 shows the definition process. The individual steps are explained after the flowchart. Install/configure the IAC-600 System onto Metasys Network START AC Time Zone Data Base Define an Access Controller Object Create Time Zone Schedules Define Card Reader Objects CR_1 Access Card Data Base BI Create Access Card Records Define Binary Input Objects See Binary Input (BI) Object Technical Bulletin. END acsobj Figure 14: Defining Access Control System Objects Objects—Access Control System Objects 31 Configuring the D600 Controller Defining an Access Controller Object $& Selecting the Access Controller Object from the Definition Dialog Box You use Metasys to define Access Control System objects, command the D600 Controller, and maintain access card records and time zone schedules. However, defining an Access Control System object is part of a larger process, which includes: • installing IAC-600 system hardware--enclosures, printed circuit boards, power supplies, STIs, card readers, and auxiliary equipment. See Cardkey D600 Installation Instructions. • connecting the N2 Bus between the D600 Controller and NCM. To connect the N2, see the Application Specific Controllers section, Connecting the IAC-600 System to the Metasys Network Technical Bulletin in the Metasys Network Technical Manual (FAN 636). • configuring the D600 Controller for use with Metasys. See the Application Specific Controllers section, Connecting the IAC-600 System to the Metasys Network Technical Bulletin in the Metasys Network Technical Manual (FAN 636). The following section explains the steps involved in defining an Access Controller object. In addition, you’ll find information on modifying and initiating commands from the AC object Focus window. Also, see your Operator Workstation User’s Manual (FAN 634) for information on general procedures. Note: You must use a level three password to display Access Control object Focus windows. Complete this procedure: 1. Go to the System Summary in which you want to add the object. 2. Select Item from the Menu bar. Then, select New from the Item menu. A dialog box for selecting object types appears. See Figure 15. 3. Select N2 device. Click OK. A dialog box for Adding the N2 device appears. Note: Hardware System, Hardware Object, and Copy (System/Object) fields are not used for this object type. 4. Select D600. Click OK. The Access Controller object Definition window appears. See Figure 16. 32 Objects—Access Control System Objects Security - Item New Type Accumulator Analog data Analog input Analog output digital Analog output setpoint Binary data Binary input Binary output MS data MS input OK MS output Control system DL/LR group LC group PID loop Fire Zone L2 devices N2 devices S2 devices Card Reader CANCEL Hardware system name: Hardware object name: Copy of (System\Object): ac_dia1 Figure 15: Security - Item New Dialog Box Entering Data in the Access Controller Object Definition Window Figure 16 illustrates the Access Controller object Definition window. You will configure the Access Controller object by entering values in the text boxes next to the field attributes. Objects—Access Control System Objects 33 Access Controller Definition Item Edit View Action Go To HDQTRS Headquarters WEST West Wing SECURITY Security Bldg. System Name Object Name Expanded ID NC Name 0 0 Wiegand/Proximity 0 0 N-Crypt 0 Magnetic Stripe ID Encoding # Process Timer 0 240 Comm Disabled Hardware: N2 Trunk Device Address Poll Priority Device Type Facility Codes Parameters bookmark SECURITY AC1 Access Cntrl #1 NC5 Graphic Symbol # Operating Intr. # Help Accessory 1 1 3 D600 1 Flags Auto Dialout Time Zone Checks 5-Digit PIN IN_OUT_Readers Suppress Valid Reports N Y N N N mins adefine Figure 16: Access Controller Definition Window Fill in the blank attribute fields (e.g., Object Name). Some of the attribute fields that are already filled in contain default values, which you may either accept or change. Note that NC Name and System Name are fields that you cannot change. Use Table 4 to help you fill in the definable attributes. 34 Objects—Access Control System Objects Definable Access Controller Object Attributes Table 4: Definable AC Object Attributes Attribute Description Entry Values Object Name Identifies the object (i.e., Cntrllr). The object name cannot be duplicated in the system. 1 to 8 alphanumeric characters Expanded ID (optional) Further identifies the object (i.e., Access Cntrl Center). 1 to 24 alphanumeric characters Graphic Symbol # Displays the reference number of Integer 0 to 32767 a graphic symbol used to represent the object in Operator Workstation Graphics. Operator Instr. # Displays the reference number of Integer 0 to 32767 a message used when help is requested at the Operator Workstation. Comm Disabled Specifies whether or not N = enabled communication is disabled Y = disabled between the object and the D600 Controller. NC Trunk Number Denotes the N2 trunk number that connects the D600 Controller to the NCM. Integer 1 to 2 Device Address Denotes the D600 address on the N2 network. Integer 0 to 255 Poll Priority Represent the priority at which the D600 Controller is polled by the NCM. Integers 0 to 3 Zero is the highest priority. Wiegand/Proximity Represents the facility code that 1-99999 (Must match the is imprinted on Wiegand or facility code encoded on the proximity type access cards. customer’s access cards.) The facility code is a master code identifying each customer’s facility. N-Crypt Represents the facility code 1-99999 (Must match the encoded on Wiegand N-Crypt facility code encoded on the (encryption encoding algorithm) customer’s access cards.) type access cards. The facility code is a master code identifying each customer’s facility. Continued on next page . . . Objects—Access Control System Objects 35 Attribute (Cont.) Description Entry Values Magnetic Stripe Represents the facility code 1-99999 (Must match the imprinted on magnetic stripe type facility code encoded on the access cards. The facility code customer’s access cards.) is a master code identifying each customer’s facility. Auto Dialout Specifies whether or not critical reports (Crit 1-4) force a dial up to a remote Operator Workstation. N = no Y = yes (recommended if a remote terminal is present) Time Zone Checks Specifies whether to use time N = no zone schedules for cards, card Y = yes readers, and binary alarm points. 5-Digit PIN Specifies whether to enable N = no 5-digit PIN codes when using Y = yes access cards to enter the facility. Card Readers that do not contain PIN code entry pads will automatically be ignored. IN_OUT_Readers Specifies whether any card N = no reader should be designated as Y = yes IN or OUT readers for such functions as IN-X-IT. For example, a card with OUT status will be changed to IN status after it is used in an IN reader. A card with IN status will change to OUT status after used in an OUT reader. Suppress Valid Reports Determines whether valid card transactions are reported at Metasys I/O devices. N = no Y = yes ID Encoding # * Represents a mathematical Integer 0 to 7 algorithm used to verify Wiegand N-Crypt access card PINs. Process Timer Defines a period of time in minutes for which a GPL interlock process (e.g., lights turned on) is activated. * Integer 0 to 480 The integer value selected will determine the PIN number for each valid card holder. Contact Cardkey Systems at 805-522-5555 for a PIN Code Reference Manual. The Access Controller Object Attribute Table in the Reference Tables section gives further detail on Access Controller object attributes. Saving the New Access Controller Object To save the new Access Controller object, select Item from the Menu bar. Then, select Save. The Access Controller object is added to the NCM data base. 36 Objects—Access Control System Objects Monitoring and Modifying an Access Controller Object Once you have defined an Access Controller object, you can modify and monitor its attributes online in the object Focus window. See Figure 17. Access Controller Focus I tem E dit V iew HDQTRS W EST S E C U R IT Y AC1 A ction G o To A ccessory H elp Headquarters West Wing Security Bldg. Access Cntrl #1 S y stem N am e O b je ct N am e E x p an d ed ID N C N am e b o o k m ark SECURITY AC1 Access Cntrl #1 NC5 T rig g er L o ck ed C o m m D isab led O b ject O fflin e N N N H ard w a re: N 2 G rap h ic S y m b o l # O p eratin g In tr. # T ru n k D ev ice A d d ress P o ll P rio rity D ev ice T y p e 0 0 1 1 3 D600 F a cility C o d es W ieg a n d /P ro x im ity N -C ry p t M ag n etic S trip 0 0 0 P a ra m eter s ID E n c o d in g # P ro ce ss T im er 0 240 mins F la g s A u to D ialo u t T im e Z o n e C h e ck s 5 -D ig it P IN IN _ O U T _ R ead e rs S u p p re ss V alid R ep o rts R ep o rt A larm G lo b al A cce ss U P S B attery B ac k u p L o w U P S A C P o w e r F ail A C T am p ered L o ca l O p erato r C h an g e N 2 D o w n lo ad A ctiv e N Y N N N Y N N N N N N N afocus Figure 17: Access Controller Object Focus Window Monitoring an Access Controller Object You can monitor the attribute fields of an Access Controller object from its Focus window. Some of the attributes are automatically refreshed in realtime, and other attributes must be updated by reselecting the object. Attribute fields automatically updated in the Focus window are: • Report Alarm • AC Tampered • Global Access • Local Operator Change • UPS Battery Backup Low • N2 Download Active • UPS AC Power Fail Note: UPS Battery Backup Low is only an early warning of battery failure when running on UPS power. It is invalid when using AC power. Objects—Access Control System Objects 37 Modifying an Access Controller Object Attributes that you can modify from the Focus window include: Communications Commands from the AC Object Focus Window Action Menu • Expanded ID • NC Trunk Number • Graphic Symbol # • Device Address • Operating Instr. # • Poll Priority • Wiegand/Proximity Facility Code • Device Type • N-Crypt Facility Code • Auto Dialout • Magnetic Stripe Facility Code • Time Zone Checks • ID Encoding # • 5-Digit PIN • Process Timer • IN_OUT_Readers You can modify certain Focus window attribute fields from the Action menu. See Figure 18. Communication - AC Communication Enable Communications Disable Communications Unlock Triggers Lock Triggers OK CANCEL ac Figure 18: Action Menu Communication Dialog Box To modify communication commands, follow this procedure: 1. Click the Action option in the Menu bar. Select the Communication option. The Communication dialog box appears. 2. Select the desired values by clicking on the round radio buttons. To save, click OK. The values for these attributes will change when the Focus window is reselected. See Command Table in the Reference Tables section of this document for more information. 38 Objects—Access Control System Objects Door Control Commands from the AC Object Focus Window Action Menu You can modify certain door control functions from the Operation option of the Action menu. See Figure 19. Operation - D600 Operation Reset All Alarms Access All Doors Return All Doors To Normal Report Valid Cards Suppress Valid Card Reports OK CANCEL D600 Figure 19: Action Menu Operation Dialog Box To modify door operation commands, follow this procedure: 1. Click the Action option in the Menu bar. Select the Operation option. The Operation dialog box appears. 2. Select the desired values by clicking on the radio buttons. To save, click OK. The values for these attributes will change when the Focus window is reselected. It is important to note that these commands globally apply to all the doors controlled by the IAC-600 system. For example, if you want to unlock one door, command that door from its corresponding Card Reader object. See Command Table in the Reference Tables section of this document for more information. Creating Time Zones 7LPH =RQH 'DWD %DVH Time zones are time tables used to enable/disable access cards, PIN codes, card readers, and binary alarm points. You can schedule up to eight different time zones per Access Controller object. The figure below shows one time zone’s schedule. Each time zone can have eight different days, each day with 16 different time periods scheduled. Each time period represents the time, for example, a card reader is enabled or disabled. See Scheduling Time Zones in the Engineering Overview section earlier in this document for more information on time zone functions. Objects—Access Control System Objects 39 Time Zone 1 Time Periods Up to 16 time periods per zone 1 01:00 E 2 05:30 D 3 06:00 E 4 08:00 D 5 10:45 E 6 12:00 D 7 13:15 E 8 16:45 D 9 17: 15 E 11 10 18: 15 D 12 13 14 15 16 Monday Tuesday Wednesday Up to 8 days per time zone Thursday Friday Saturday Sunday Holiday tz1 Figure 20: Example--Building a Time Zone Schedule Adding a Time Zone Follow this procedure: 1. Select the Schedule option in the GoTo menu of the AC object Focus window. A dialog box appears asking if you want to copy and existing schedule. If you would like to copy a schedule from another AC object, click Yes. If you want to create a new schedule, click No. The scheduling window for the AC object appears. 2. Select the Action menu, Add Access Time Zone option. The Time Zone--Add dialog box appears. See Figure 21. 40 Objects—Access Control System Objects 6FKHGXOH $GG0RGLI\ 7LPH =RQH Time Zone No. SAVE 'D\V CANCEL Weekdays Holiday Sunday Monday Tuesday Wednesday Sat Sun DELETE Thursday Friday Saturday PRINT Enable Time (hh:mm) Disable Time (hh:mm) Time Periods 1. 9. 2. 10. 3. 11. 4. 12. 5. 13. 6. 14. 7. 15. 8. 16. schedtz Figure 21: Schedule - Add/Modify Time Zone Dialog Box 3. Enter the Time Zone No. (from 1 to 8). The time zone data cannot be entered until this number is specified. 4. Select the day to add to the time zone schedule. Selecting Weekdays allows you to add the same schedule for all weekdays. Selecting Sat Sun allows you to add the same schedule for Saturdays and Sundays. You can have as many as eight different days scheduled for this time zone. Note: You can enter three different holiday schedules for each of the time zones. The dates defined as holidays, are selected in the Metasys Schedule Calendar and apply globally to the entire Metasys FMS. These dates are downloaded to the D600 to apply to the time zone schedules. See your Operator Workstation User’s Manual (FAN 634), for more information. 5. Click your cursor on a time period to highlight it (numbers 1 to 16). 6. Enter a time in the Enable or Disable Time (hh:mm) box for the highlighted time period. The time you enter appears in the time period list. A maximum of 16 times (one for each period) can be entered for each day in the time zone schedule. Note: Enter times in sequence, with Time 1 being the earliest assigned time and Time 16 being the latest. A blank entry indicates that there is no time period defined for the schedule. Objects—Access Control System Objects 41 7. Select either an Enable Time or Disable Time for each time period. You cannot schedule two sequential enable times or disable times in the same day. Note: The scheduled time period can be erased by highlighting it, then pressing the Delete key. 8. Save the schedule by pressing the Save button. The Scheduling window appears. Note: If you press Cancel, the Add/Modify Time Zone dialog box is erased and the Scheduling window appears. The Print button prints the schedule at a designated printer. Modifying, Printing, and Deleting a Time Zone Modifying a Time Zone Follow this procedure for modifying a time zone: 1. Select Schedule from the GoTo menu. The Scheduling window appears. 2. Select Modify Access Time Zone from the Action menu to display the Time Zone Modify window. 3. Enter the Time Zone No. to be modified. 4. Select the day to be modified. The currently defined time periods for that day are displayed in the dialog box. (Only one day can be modified at a time.) 5. Click on the time period to be modified. Note: To delete the time period from the schedule, press Delete. 6. Enter the modified time in the Enable or Disable Time (hh:mm) box. The new time is echoed in the time period list box. 7. Press Save to save the modifications. Note: Cancel erases the modifications that were not previously saved. Printing a Time Zone Follow this procedure to print a time zone: 1. Select Schedule from the GoTo menu. The Scheduling window appears. 2. Select Add/Modify Access Time Zone from the Action menu to display the Time Zone Modify window. 3. Enter the Time Zone Number to be printed. 4. Click on Print. (If you make modifications to the time zone, be sure to save them to the NCM data base before you print. Otherwise, the modifications will not be included in the print out.) 42 Objects—Access Control System Objects Deleting a Time Zone You cannot delete an entire time zone at one time. You must delete each time period for the schedule individually. Follow this procedure: 1. Select Schedule from the GoTo menu. The Scheduling window appears. 2. Select Modify Access Time Zone from the Action menu to display the Time Zone Modify window. 3. Enter the Time Zone No. 4. Select the day that contains the time period to be deleted. 5. Click on the time period to be deleted. Follow this procedure for every time period to be deleted. 6. Press Save to send the data to the NCM data base. Objects—Access Control System Objects 43 Defining a Card Reader Object &5B Selecting the Card Reader Object from the Definition Dialog Box The following section describes the procedure used to define a Card Reader object. You use the Card Reader object Definition window to configure a new card reader online, which automatically downloads to the controller. You can then monitor or modify Card Reader object attributes from the object’s focus window. This section also provides information on commanding the Card Reader object from its focus window. Use your Operator Workstation User’s Manual (FAN 634) for information on general procedures. Use the following procedure: 1. Go to the System Summary in which you want to add the Card Reader object. 2. Select Item from the Menu bar. Then, select New from the Item menu. A dialog box for selecting types of object appears. See Figure 22. 3. Select Card Reader. In the Hardware System box, type the name of the system to which this object belongs. In the Hardware Object field, type the Access Controller object name this Card Reader object will be mapped to. Click OK. See Figure 23. Security - Item New Type Accumulator Analog data Analog input Analog output digital Analog output setpoint Binary data Binary input Binary output MS data MS input OK MS output Control system DL/LR group LC group PID loop Fire Zone L2 devices N2 devices S2 devices Card Reader CANCEL Hardware system name: Hardware object name: Copy of (System\Object): ac_dia2 Figure 22: Security - Item New Dialog Box 44 Objects—Access Control System Objects Entering Data in the Card Reader Object Definition Window The figure below illustrates the Card Reader object Definition window. You will configure a Card Reader object by entering values in the text boxes next to the field attributes. Card Reader Definition I tem E dit V iew A ction HDQTRS W EST S E C U R IT Y Headquarters West Wing Security Bldg S yste m N am e O b jec t N am e E x pa nde d ID L oc al R ea de r ID SECURITY Graphic Symbol # Operating Intr. # 0 0 Go b o o k m ark Comm Disabled Hardware System Name Object Name RDR Number Timers SECURITY AC1 1 Report Type Door Access Time Door Shunt Delay Anti-Passback 15 120 60 secs secs mins Parameters NORMAL ALARM NONE CRIT4 Messages Reader Type Card Type H elp A ccessory To ACCESS MAGSTRIP Alarm # 0 N Flags Auto Dialout NO ALM on EXIT FAC Code on Backup PIN Code on Backup Anti-Tailgate Check Anti-Passback Check N Y N N N N Time Zone Number Reader Active Override PIN Suppress 8 4 6 cdefine Figure 23: Card Reader Object Definition Window From Figure 23, you can see that some of the fields in the window are blank and some are already filled in. Fill in the blank attribute fields (e.g., Object Name). Some of the attribute fields that are already filled in contain default values, which you may either accept or change. Note that System Name, Hardware System Name, and Hardware Object Name values cannot be changed. Use Table 5 to help you fill in the definable attributes in the Card Reader object Definition window. Objects—Access Control System Objects 45 Definable Card Reader Object Attributes Also, see Card Reader Object Attribute Table in the Reference Tables section. Table 5: Definable Card Reader Object Attributes Attribute Description Entry Values Object Name Identifies the object (e.g., Reader14). 1 to 8 alphanumeric The object name cannot be duplicated characters in the system. Expanded ID (optional) Further identifies the object (e.g., LOBBY). 1 to 24 alphanumeric characters Local Reader ID (optional) Identifies the card reader address at the D600 Controller. 1 to 16 alphanumeric characters Graphic Symbol # Displays the reference number of a graphic symbol used to represent the object in Operator Workstation graphics. Integer 0 to 32767 Operator Instr. # Displays the reference number of a Integer 0 to 32767 message used when help is requested at the Operator Workstation. Reader No. Identifies the address at which the STI/card reader resides in the D600. Integer 1 to 16 Comm Disabled Specifies whether or not communications are disabled with the D600. N = enabled Y = disabled Auto Dialout Specifies whether or not critical reports N = no reports (Crit 1-4) force a dial up to a remote Y = yes Operator Workstation. NO ALM on EXIT Specifies whether to disable the exit N = enabled request input on the STI. When Y = disabled enabled, mechanical means must be used to gain auxiliary access through a controlled door. When disabled, an auxiliary access switch connected to the STI may be used to open the door. FAC Code on Backup Specifies whether the STI/card reader should grant access by facility code if communication is lost with the D600 data base. N = no access Specifies whether the STI/card reader should grant access by PIN code if communication is lost with the D600 data base. N = no access Specifies whether to lock the door immediately after it is shut, or to allow the door to be reopened any time before the shunt time expires. N = wait to lock until after shunt time expires Specifies whether to report access cards that have violated the anti-passback time set for the card reader. N = no PIN Code on Backup Anti-Tailgate Check Anti-Passback Check Continued on next page . . . 46 Objects—Access Control System Objects Y = grant access Y = grant access Y = lock immediately Y = yes Attribute (Cont.) Description Entry Values Reader Type Specifies the card reader’s type of operation: disabled reader, ACCESS reader (exempt from IN/OUT status), IN type card reader, or OUT type card reader. Type one of the following: DISABLED ACCESS IN READ OUT READ Door Access Timer Specifies how long a door is unlocked 0 to 25 (seconds) after a card is passed through the card reader. Override Local Schedule Specifies whether an operator has overridden the Reader Active Time Zone to allow free access. Y = override Card Type Specifies the type of card technology being used at the reader: no card, Wiegand/proximity, Wiegand N-Crypt, magnetic stripe, barium ferrite (no parity check), or barium ferrite (parity check). Type one of the following in the text box: Note: Proximity technology uses the WIEGAND definition. N = normal operation NO CARD WIEGAND (Includes proximity) N-CRYPT MAGSTRIPE B/F NPAR B/F PAR Door Shunt Delay Timer Specifies the time a door can remain 0 to 255 (seconds) open after a card is passed through the card reader. This attribute is tied to the Anti-Tailgate Check attribute. Anti-Passback Timer Specifies the amount of time that must 0 to 60 (minutes) pass before a card holder may reenter a facility. Report Type Normal Specifies the type of COS report that is none = no report generated when the STI/card reader crit 1 status changes to normal. crit 2 crit 3 crit 4 followup status Report Type Alarm Specifies the type of COS report that is none = no report generated when the STI/card reader crit 1 status changes to alarm. crit 2 crit 3 crit 4 followup status Continued on next page . . . Objects—Access Control System Objects 47 Attribute (Cont.) Description Entry Values Alarm Message # Displays the reference number of an alarm user message sent to Operator Workstations and report printers when the panel detects an alarm condition. Integers 0 to 225 Zero means no message. Reader Active Time Zone Specifies the time zone number that Integer 1 to 8 this reader is linked to during normal operation. The time zone designates the times the reader is enabled to read cards and disabled. Override Time Zone Specifies the time zone number this reader is linked to when the normal schedule (Reader Active Time Zone) is manually overridden to allow free access (Override Time Zone). This free access time zone allows the door to be continuously unlocked. Integer 1 to 8 PIN Suppress Time Zone Specifies the time zone number this reader is linked to when card holders are not required to enter their PIN codes at keyboard readers. Integer 1 to 8 Saving the New Card Reader Object To save the new Card Reader object, select Item from the Menu bar. Then, select Save. The Card Reader object is added to the NCM data base. 48 Objects—Access Control System Objects Monitoring and Modifying a Card Reader Object Once you have defined a Card Reader object, you can modify and monitor its attributes online in the object Focus window. Card Reader Focus I tem E dit V iew A ction Go A ccessory To Headquarters HDQTRS West Wing W EST Security Bldg S E C U R IT Y Assembly Building READER5 S ystem N am e O bject N am e E x p an ded ID L ocal R ead er ID SECURITY READER5 Assembly Building Local Reader 1 G ra p h ic S y m b o l # O pe ra tin g Intr. # 0 0 b o o k m ark R epo rts L o ck ed T rig ger L o ck ed C om m D isabled O b jec t O fflin e H a rd w a re SECURITY AC1 1 S y stem N am e O bject N am e R D R N u m b er R ep ort T ype T im ers D o or A c c e ss T im e D o o r S h un t D e la y A n ti-P a ssb a c k 15 120 60 secs secs mins R e a d er T yp e C a rd T y p e R e a d er S tate NONE CRIT4 NORM AL ALARM ACCESS MAGSTRIP SECURE N N N N NORMAL Flags A u to D ialou t N O A L M o n E X IT F A C C od e on B acku p P IN C o d e o n B ack up A n ti-T a ilg ate C h eck A n ti-P assb ack C heck N Y N N N N T im e Z one N um ber M essages P a r a m e te r s H elp A larm # 0 R ea der A ctive O v erride PIN Su pp ress 8 4 6 cardfoc Figure 24: Card Reader Object Focus Window Monitoring a Card Reader Object You can monitor the attribute fields of a Card Reader object from its Focus window. The attributes, Object Offline and Reader State (Access/Secure), are automatically refreshed in realtime. Objects—Access Control System Objects 49 Modifying a Card Reader Object Most of the attributes of a Card Reader object can be modified in the Focus window. They include: Communications Commands from the CR Object Focus Window Action Menu • Expanded ID • Reader State • Local Reader ID • NC Trunk Number • Graphic Symbol # • Device Address • Operating Instr. # • Poll Priority • Door Access Time • Device Type • Door Shunt Delay Time • Auto Dialout • Anti-Passback Time • Time Zone Checks • Reader Type • 5-Digit PIN • Card Type • IN_OUT_Readers You can modify certain Focus window attribute fields from the Action menu. See Figure 25. COMMUNICATION - RDR Communication Enable Communications Disable Communications Unlock Reporting Lock Reporting Unlock Triggers Lock Triggers OK CANCEL rdr Figure 25: Communication - RDR Dialog Box Follow this procedure: 1. Click the Action option in the Menu bar. Select Communication option. The Communication dialog box appears. 2. Select the desired values by clicking on the round radio buttons. To save, click OK. The values for these attributes will change when the Focus window is reselected. See Command Table in the Reference Tables section of this document for more information. 50 Objects—Access Control System Objects Door Control Commands from the CR Object Focus Window Action Menu You can modify certain door control functions from the Action menu. See Figure 26. OPERATION - READER Operation Open Door Secure Door Access Door OK CANCEL reader Figure 26: Operation - Reader Dialog Box Follow this procedure: 1. Click the Action option in the Menu bar. Select Operation option. The Operation dialog box appears. 2. Select the desired values by clicking on the round radio buttons. To save, click OK. The values for these attributes will change when the Focus window is reselected. See Command Table in the Reference Tables section of this document for more information. Adding Access Cards to the Data Base Access Card Data Base After you have defined the AC object, Time Zones, and CR objects, you can, at any time, enter access card data. There are two levels of adding and viewing card data: • standard access from any Operator Workstation. • expanded access to the card data base through an NC archive Operator Workstation. Expanded access also requires Superbase 4 (runtime version), which is a realtime data base manager included with Metasys. Note that you must add the card using the standard method before adding expanded data base information. In addition, you can view, modify, or delete card data. Objects—Access Control System Objects 51 Adding Card Data Use the following procedure to enter both standard card data or expanded card data using Superbase 4: 1. Go to the Network Map and click Summary. The following menu appears: Network Map - Summary ACCESS CARDS ALARM CRITICAL DISABLED FOLLOW-UP LIMITS LIST SELECTED ITEMS LOCKOUT OFFLINE OVERRIDE DISPLAY PRINT CANCEL NEW... EDIT... DELETE sumdb Figure 27: Network Map--Summary Dialog Box 2. Select Access Cards in the Network Map--Summary list box. Click the words “Access Cards” to highlight them. 3. Click Display. The Access Cards summary appears. Note: If any NC is offline on the network, the system displays a warning message indicating that card data in the summary may be incomplete. The Access Cards summary is displayed either by card number or by last name, depending on the filter you have selected in the Filter dialog box. (The filter’s default setting displays the first 30 cards by number). Access Cards Summary A Item E dit V iew A ction G o To c cessory PREVIOUS Card ID 1 2 3 4 5 6 7 8 9 10 Last Name First Name Vairavan Rasmo Shetty Copass Peot Martocci Bronikowski Jefferson Kremkowski Singer Vairavan David Sanjay Cliff Paul Jerry Alan Robert Mary Jo Anthony H elp NEXT Card Issue Level 1 1 1 2 1 3 1 1 1 2 Exec Privilege Y Y N N Y N N N N N summary Figure 28: Access Cards Summary Dialog Box 4. Click the Add Card in the Action menu. The Card Summary--Add Card dialog box appears, listing the names of all the Access Controllers defined on the Metasys data base. See Figure 29. 52 Objects—Access Control System Objects Card Summary - Add card SAVE Card ID Last Name First Name Card Issue Level Executive Privilege QUIT 0 USER DATA N Access Controllers Bldg1/Security3 Bldg3/Security4 Bldg4/Security1 Bldg6/Security7 Dining/Room Central/Lab Basement West/Wing East/Wing Floor1 Floor2 Floor3 Figure 29: Add Card Data Dialog Box 5. 6. Fill in the Card ID, Last Name, First Name, Card Issue Level, and Executive Privilege fields. These fields are described in Table 6. Double-click the Access Controller that you want to validate for the card you are defining. The selected controller appears highlighted and the Card Reader list box appears listing all of the defined Card Readers for that controller as well as the definition fields specific to the Card Readers. See Figure 30. Card Summary - Add card Card ID Last Name First Name Card Issue Level Executive Privilege Time Zone 0 N Access Controllers Bldg1/Security3 Bldg3/Security4 Bldg4/Security1 Bldg6/Security7 Dining/Room Central/Lab Basement West/Wing East/Wing Floor1 Floor2 Floor3 0 Process Group 0 In/Out State N /A SAVE QUIT USER DATA Valid Readers Bldg1.Door2 Bldg5/Door5 Bldg7/Door5 Bldg1/Door5 Bldg5/Door1 OK CANCEL * Indicates Card in Controller ADDCARD2 Figure 30: Add Card Dialog Box After Double Clicking Access Controller Objects—Access Control System Objects 53 Note: You can only add cards after the Access NC, Access Controller, and Card Reader objects are selected for the D600 system. 7. Click your cursor on each reader this card will be authorized to use to access the building. The authorized readers are highlighted. (You can deactivate highlighted readers by clicking the cursor again.) Fill in the Time Zone and Process Group fields. See Table 6 for a description of these fields. Table 6: Access Card Definition Fields Attribute Description Entry Values Card ID Describes the unique identification number encoded on the card. This number is supplied with the cards. 1 to 65535 Card Holder’s Last Name Self explanatory 10 characters (optional) Card Holder’s First Name Self explanatory 8 characters (optional) Card Issue Level Specifies the number of times a particular card has been issued. The first time a card holder receives a card, the issue level is zero (0). This allows the card to be replaced, should it be lost, damaged, or stolen, without redefining a new card number. Only one issue level of a card can be active at a time. A card can have up to eight issue levels before a new card must be defined. 0-7 Process Group Number Specifies the JC-BASIC/GPL process interlock group in which the card is linked. Integer 0 to 64 (optional) See your GPL Programmer’s [email protected] (FAN 631) or JC-BASIC Programmer’s [email protected] (FAN 632) for more information. Executive Privilege Time Zone Used 54 Objects—Access Control System Objects Zero means that the card is not linked to a process group. Specifies whether the card holder possesses executive privilege. Executive privilege allows a card unlimited access to all operational doors (using that card technology) controlled by the IAC-600 system. This function is usually enabled for top management or security personnel. Y = yes Identifies the times of the week a card holder may access authorized doors. Enter the Time Zone No. this card is linked to: Integer 1 to 8. N = no 8. Click OK to confirm the selection in the Card Reader list box. The Card Reader list box disappears from the Add Card dialog box. To add another controller for this card, double-click the controller and repeat Steps 6 through 8. 9. At this point you can save the new card by pressing Save, or if you are at the archive OWS, add additional card data using Superbase 4 via the User Data button. 10. Pressing Save sends the card data to the selected D600s. The Add Card window displays again, allowing you to add more cards. Selecting Quit on the Add Card window erases the card data and returns you back to the Access Card Summary. User Data Button/ Superbase 4 Superbase 4 is a data base management tool that can process large amounts of data. Its primary purpose is to do queries, sort data, and generate reports on card transactions. In addition, you can use it to maintain detailed employee records. This user data is stored at the PC and not the NCM; therefore, you can only access it through the archive Operator Workstation. To execute the Superbase 4 program, press the User Data button in the Add Access Card dialog box. The screen in Figure 31 will appear. Objects—Access Control System Objects 55 Add Record Entry 10 Jan, 94 4:56 am A ccess C ontrol Card Entry Form EM PLO Y EE LAST NAME Doe FIRST NAME John DEPARTMENT MAIL STATION CARD ID 1023 WORK PHONE INITIAL BLD/FLOOR COMPANY ID FAX NUMBER USER DEFINABLE DATA FIELD NAMES P-1 P-2 P-3 Save Figure 31: Add Record Entry Screen Table 7 describes the fields you define when you define access card information in Superbase 4. Some of the information that you defined in Metasys, such as the Card ID, Last Name, and First Name, are copied to the Superbase 4 record. These fields (outlined in red) must be modified in Metasys. Once the Superbase 4 information has been entered and saved, you must use the appropriate Superbase 4 Modify screen to change the information. The Modify screens are shown in the Using Superbase 4 section of the Operator Workstation User’s Manual (FAN 634). 56 Objects—Access Control System Objects Table 7: User Data Fields In Superbase 4 Page Number Field Name Description Page 1 Employee Information (To modify, go to Employee menu.) Department The card holder’s work department Mail Station The department/card holder’s mail station Work Phone The card holder’s work phone number Initial The card holder’s middle initial Bld/Floor The building and floor of the card holder’s work area Company ID The card holder’s company ID number Fax Number The card holder’s facsimile number User Definable Data Information (To modify, go to Employee menu.) User Data 1 User Data 2 User Data 3 User Data 4 Page 2 Information entered in these fields is decided by the user. Each field holds up to 24 alphanumeric characters. Replace the field titles (e.g., User Data 1) with your own titles by clicking on Exit to go the Main menu for the Card Data and clicking Mod User. Vehicle 1 and Vehicle 2 Information (To modify, go to Vehicle menu.) License The license number of the card holder’s vehicles Year The year of the card holder’s vehicles Make Color The make of the card holder’s primary and secondary vehicles (e.g., Ford, Chevrolet, Toyota) The model of the card holder’s vehicles (e.g., Taurus, Corsica, Corolla) The color of the card holder’s vehicles Parking Lot The parking lot(s) the car is allowed to park in Model Badge Information (To modify, go to Badge menu.) Pin The Personal Identification Number of the card holder Badge Type Issue Date The type of card the card holder is issued (i.e., permanent, temporary, visitor) The composition of the card the card holder is using (i.e., WIEGAND, N-CRYPT, MAGSTRIP, B/F NPAR, B/F PAR) The date the card was issued to the card holder Expire Date The date the card expires Badge Media Continued on next page . . . Objects—Access Control System Objects 57 Page Number (Cont.) Field Name Description Personal Information (To modify, go to Personal menu.) Page 3 Address The street address of the card holder’s residence City The city of the card holder’s residence State The state of the card holder’s residence Zip Code The zip code of the card holder’s residence Home Phone The home area code and telephone number of the card holder Social Security The card holder’s social security number Emergency Filename The file name of the file that is displayed in Superbase 4 when you display the Personal menu. This file can be created only if you have the full Superbase 4 package; however, you can copy the example file that comes with Metasys and save it under another name to create Emergency files for all of your card holders. The Emergency file can be used to record emergency information, such as the name and contact information for the person to be notified in case of emergency. Positive ID Information (To modify, go to Identity menu.) Viewing, Modifying, and Deleting Access Cards Photo Filename The file name containing the photo of the card holder that is shown when you display the Identity menu. This photo must be electronically scanned into your computer data base and saved under the correct path and file name specified in this field in order to appear in the Identity menu. Signature Filename The file name containing the signature of the card holder that is shown when you display the Identity menu. This signature must be electronically scanned into your computer data base and saved under the correct path and file name specified in this field in order to appear in the Identity menu. You can view, modify, or delete existing cards from the Access Card Summary. Viewing an Access Card You can search and view selected access cards by either a starting card number or last name. Follow this procedure: 1. From the Access Cards Summary, choose Filter from the View menu. The Access Cards Filter is displayed. See Figure 32. 58 Objects—Access Control System Objects Card Summary - Filter Cards DISPLAY Starting Card Number CANCEL Last Name Card Number: Card Holders Last Name: filter Figure 32: Access Card Filter Dialog Box 2. Select either the Starting Card Number or Last Name button. 3. If you selected the Starting Card Number, enter the desired card number in the box provided. If you selected Last Name, enter the desired name (or first letter of the name) in the appropriate box provided. You may also do a wild card search (i.e., *,?). 4. Press Display to show the Access Card Summary or Print to print the desired card information. Cancel returns you to the Focus window. Modifying an Access Card Follow this procedure: 1. Follow the procedure above described in Viewing an Access Card. 2. Highlight the card you want to modify by clicking on it in the summary. 3. Select the Modify Card Data option from the Action menu. 4. Modify the desired parameters on the Modify Card Data dialog box. An asterisk (*) appears to the left of valid controllers containing the card in the their data base when you open this dialog box. See Table 6 in the Adding Access Cards to the Data Base section. Note: It is possible that an asterisk (*) could appear to the left of valid controllers, but when double-clicked, no card readers are selected in the Card Reader list box. This would happen if someone added a card with an empty reader list using DDL. Clicking on OK without selecting any readers will delete the card from the D600. If you are modifying Card Reader data, double-click the appropriate Access Controller and modify the information that appears in the Card Reader list box to the right of the Access Controller list box. To deselect a Card Reader, click the highlighted Card Reader you wish to deselect. The Card Reader will no longer appear highlighted. Objects—Access Control System Objects 59 To save the new Card Reader information, be sure to click OK in the Card Reader list box. To deselect an Access Controller, double-click the Access Controller in the Access Controller list box. The Card Reader list box appears. Deselect all highlighted readers and click OK. The asterisk in front of that Access Controller disappears, indicating that it has been deselected. Note: Metasys will not allow you to save modified card data if you deselect all Access Controllers. At least one access Controller must be selected to save modifications. If you want to delete an access card from the system, use the procedure found in Deleting an Access Card below. 5. Click Save to enter the data. Click Quit to revert to the previous version. The Access Card Summary screen is shown. Note: If you modify the card on the archive PC, then you can also modify the user data in Superbase 4. See Using Superbase 4 in your Operator Workstation User’s Manual (FAN 634) for more information. Deleting an Access Card 1. Follow the procedure above described in Viewing an Access Card. 2. With your cursor, highlight the card you want to delete. 3. Select the Delete Card option from the Action menu. 4. Select OK on the Delete Card dialog box (Figure 33). The Access Card Summary screen is then shown. Access Cards - Delete ? Delete Access Card ID 19 Card Holder's Last Name is Doe Card Holder's First Name is John This card will be removed from each D600 for which it is defined and removed from the network. * Note: User Data will be deleted if this is an Archive PC. Figure 33: Delete Card Dialog Box Note: If you delete the card on the archive PC, then the user data in the Superbase 4 program is also automatically deleted. 60 Objects—Access Control System Objects Defining a Binary Input Object Because the Binary Input object is a general object type with many applications, it is explained in separate documentation. See the Binary Input (BI) Object Technical Bulletin in the Metasys Network Technical Manual (FAN 636) for information on defining the BI object. %, Maintaining Your D600 Data Base Suggestions to keep your D600 and Metasys data bases synchronized: • Only use Metasys operator devices to make D600 data base changes. Do not use a TP-3 or other local operator device at the D600 to create or revise the D600 data base (e.g., add or delete access cards). Metasys does not recognize data base changes made locally at the D600, nor can the D600 upload those changes to the NCM. In addition, any future NCM downloads to the D600 will erase those local changes. • Keep your NCM archive data base up-to-date in case you would ever need to use it to download to the D600 Controller data base. Because you will be frequently updating your access cards records the D600 data base is one of the most dynamic data bases on the Metasys Network. For this reason, be sure that you keep your NCM archive (master copy) data base up-to-date. If the NCM loses its operational data base, it would obtain a copy from its archive. If the NCM archive possesses many old card records, those cards would be used to restore the NCM’s operational data base. At this point, your D600 data base, (which is up-to-date) does not match your NCM data base, and the D600 provides no upload capabilities to the NCM. Reconciling the NCM data base could be a tedious process. • If you use DDL to create or revise your Metasys data base, perform a download from the NCM to the D600 Controller. DDL programming does not automatically download to an N2 device. To perform a D600 download follow this procedure: 1. Go to the Access Controller object Focus window. 2. Select the Action--Download Controller option on the Menu bar. 3. A dialog box appears. Click OK to proceed with download. Objects—Access Control System Objects 61 62 Objects—Access Control System Objects Reference Tables Description of Terms See Binary Input (BI) Object Technical Bulletin--for BI Object Attribute Table. This section contains three tables that will help you define, modify, and command Access Control System objects. The Access Controller Object Attribute Table lists the attributes common to the Access Controller object. The Card Reader Object Attribute Table contains all Card Reader object attributes. The Access Control System Objects Commands table lists the user commands available from the OWS and NT. The terms described below may be helpful in using the tables. Definable You can set a value for the attribute, using Data Definition Language, Graphic Programming Language, or the Object Definition window. Writable You can modify the attribute using the Object Focus window. Object Default A time saving function used in JC-BASIC programming. Allows you to omit the attribute name when writing the logic. When omitted, the attribute name is assumed by the program. Array The attribute is part of an array. JC-B Writable A JC-BASIC process or GPL template can write to the attribute. Triggerable The attribute can trigger (cause) a control process. Range Check The software verifies that JC-BASIC has correctly written to (modified) the attribute. CMD Value is changed by using a command from the Action Menu. PMI The attribute appears in the Object Focus window. 66 [] Default. The value in brackets is the default value and remains in effect until you change it. String ASCII alphanumeric characters, such as System\Object name Boolean 0 or 1, with 0 and 1 representing logical states, such as True and False. Integer Whole numbers from -32767 to +32767, such as 22. Floating Point Values that contain decimal places, such as 67.5. The code/default column shows numbers and ASCII text. The numbers are used when defining the object in DDL, and the ASCII text is used in Definition and Focus windows. For example, for ALR_RPT (Alarm Report Type): 0 = none 1 = crit1 2 = crit2 where: 0 is used in DDL none is used in Definition window Objects—Access Control System Objects 63 Table 8: Access Controller Object Attribute Table AC Attribute Software PMI Label Name AC_FAIL AC_TAMP BAT_LOW Description Type/ Range Code/ [Default Value] AC Power Fail The AC Power Fail flag indicates when the D600 Controller switches to battery power due to AC power loss. Boolean/ [0 = n = normal] 0 or 1 1 = y = failed AC Tamper Boolean/ [0 = n = normal] 0 or 1 1 = y = tamper UPS Battery Backup Low This Access Controller Tamper specifies “Y” when someone is tampering with the IAC-600 system. The UPS Battery Low flag specifies whether the Boolean/ D600 Controller’s battery charge is low. This flag 0 or 1 does not indicate that the battery has been fully recharged; it only indicates normal battery voltage has returned. Usage [0 = n = normal] 1 = y = low CARD_CAP integer Card Capacity This internal attribute specifies the maximum number of cards that the D600 system can maintain. You specify this value at the time you connect the N2 Bus. See Connecting the IAC-600 System to the Metasys Network Technical Bulletin in Metasys Network Technical Manual(FAN 636). DEV_ADDR Device Address This field specifies the D600 address on the N2 Bus. integer 0 to 255 Definable DIAL_UP Auto Dial-out Auto Dial-out specifies whether or not critical reports (Crit1-4) force a dial up to a remote Operator Workstation. Boolean/ 0 = no 0 or 1 [1 = yes] JC-B Writable, Definable, Writable Definable DL_IN_PR N2 Download Active Download In Progress determines whether or not Boolean/ a download to the D600 Controller has begun. 0 or 1 [0 = n = complete] ENCODE Encoding Number This field represents a mathematical algorithm used to verify Wiegand N-Crypt access card PINs (Personal Identification Numbers). 1 to 7 Writable, Range Check, Definable G00 to G64 Interlock Group 0 to Interlock 64 These are 65 separate internal attributes Array numbered 0 to 64. Interlock Groups 1 to 64 represent GPL interlocks in which the AC object triggers other Metasys process to run (e.g., turn lights on). Interlock Group 0 denotes no interlock process is tied to the AC object. 0 to 64 Writable, Triggerable, Array, GPL Menu GLO_ACC Global Access Global Emergency Access is an AC object command that can be accessed via an OWS or NT. When enabled, this attribute opens all doors on the IAC-600 system. Boolean/ [0 = normal operation] CMD 0 or 1 1 = globally open doors integer GRAPHIC Graphic Symbol # ILK_TIME Process Timer Process Timer Number represents the amount integer # of time a GPL interlock process is active. The timer is restored to its maximum time every time the process is reactivated, even if the process in the middle of its cycle. 1 = y = not complete Graphic Symbol Number is a reference number integer/ [0 = none] that identifies the symbol used to represent the 0 to 32767 object in Operator Workstation graphics. A value of zero means no graphic will be displayed. Continued on next page . . . 64 Objects—Access Control System Objects 0 to 480 (minutes) JC-B Writable, Definable, Writable, Range Check JC-B Writable, Writable, Range Check, Definable AC Attribute (Cont.) Software PMI Label Name INXIT INSTRUCT IN_OUT_ Readers Operator Instr. # Description Type/ Range 0 = IN status Operator Instruction Number is a reference number that identifies the text displayed when Help is requested at the Operator Workstation. A value of zero means no message will be displayed. integer/ [0 = none] JC-B Writable, Definable, Writable, Range Check 1-99999 Writable, Range Check, Definable 1 = OUT status This number represents the valid facility code at the facility’s magnetic stripe card readers. long NAME Expanded ID Expanded ID further identifies the object (i.e., FMS Security Center). string/ NC Name defines the name of the Metasys Network Controller where the Access Controller object resides (i.e., Eastwing). string/ Definable, Writable [2 = N/A] 0 to 32767 Magnetic Stripe Facility Code NC Name Usage This attribute specifies whether an individual integer reader should be designed as either an IN reader 0 to 2 or OUT reader for such functions as IN-X-IT. For example, a card with OUT status will be changed to IN status after it is used at an IN reader. A card with IN status will change to OUT status after used in an OUT reader. A card holder cannot use the card at two IN or two OUT readers consecutively. MAG NC_Name Code/ [Default Value] Definable, Writable 24 char. max. 8 char. max. NCRYPT N-Crypt Facility Code This number represents the valid facility code at long the facility’s Wiegand N-Crypt type card readers. 1-99999 Writable, Range Check, Definable NOREPVCD Suppress Valid Reports This flag determines whether to report valid card Boolean/ transactions at selected Metasys I/O devices. 0 or 1 0 = n = report valid cards CMD Object Name Hardware Object Name identifies the object (i.e., AC1). The object name cannot be duplicated in the system. string/ The Object Offline flag is set to “Y“ if the D600 Controller is offline. Boolean/ 0 = n = online 0 or 1 1 = y = offline OBJECT OFFLINE OP_CHANG PIN_5 POLL_PRI PREFIX Object Offline 1 = y = don’t report valid cards Definable 8 char. max. Local Operator Change This flag defines whether a operator has made a Boolean/ change at a D600 I/O device (e.g., PC-8300). 0 or 1 [0 = n = normal] 5-Digit PIN Code This flag specifies whether card holders have to enter a 5-digit Personal Identification Number (PIN) on a card reader key pad. Those readers without keypads are automatically exempt. Boolean/ [0 = n = no PIN required] 0 or 1 1 = y = PIN required Poll Priority Poll Priority represents the priority at which the D600 controller is polled by the NCM. A poll every second is ideal. We suggest you select a value of 0 or 1 because of the equipment’s life safety functions. integer/ 0 is highest priority Off Normal Indicator indicates if the D600 has reported an abnormal condition to the Access Controller object. This attribute can be found in Operator Workstation Summaries. Boolean/ [0 = no PMI] 0 or 1 1 = * = off normal * Triggerable, Object Default 1 = y = operator change made 0 to 3 Writable, Definable Writable, Range Check, Definable Continued on next page . . . Objects—Access Control System Objects 65 AC Attribute (Cont.) Software PMI Name Label REP_ALM Type/ Range Code/ [Default Value] Usage Report Alarm shows whether the alarm reporting feature has been enabled at the IAC-600 system. Boolean/ [0 = n = normal] Alarm 0 or 1 1 = y = alarm Definable, Writable REPORT Reports Locked Reports Locked specifies whether or not the object sends COS reports to operator devices. Boolean/ [0 = n = unlocked] CMD 0 or 1 1 = y = locked SCAN Comm Disabled Communications Disabled specifies whether or not communication is disabled between the object and the D600 Controller. Boolean/ [0 = n = enabled] Definable, 0 or 1 1 = y = disabled CMD System Name Hardware System Name specifies an existing system name in the network such as SECURITY SYSTEM. string/ Trigger Locked Trigger Locked prevents the object from triggering any control processes. This applies to all triggerable attributes of the object. Boolean/ [0 = n = unlocked] 0 or 1 1 = y = locked Definable, CMD NC Trunk Number Trunk Number denotes the N2 trunk number that connects the D600 to the NCM. Be sure that the value you enter is associated with the N2 line. integer/ [1] Definable 1 or 2 2 Time Zone Checks Time Zone Checks specifies whether to enable time zone schedules for cards, card readers, and binary alarm points. Boolean/ 0 = n = disable time zones 0 or 1 [1 = y = enable time zones] Wiegand/ Proximity Facility Code This number represents the valid facility code at the facility’s Wiegand or Proximity type card readers. long 1-99999 SYSTEM TRIGGER TRUNK TZ_CHEK WIEG Report Description 66 Objects—Access Control System Objects Definable 8 char. max. Writable, Definable Writable, Range Check, Definable Table 9: Card Reader Object Attribute Table CR Attribute Software PMI Name Label Description Type/ Range Code/ [Default Value] Usage ACC_INT Door Access Timer Door Access Timer specifies how long a door remains unlocked after a card has passed through the card reader. integer 0 to 25 (seconds) JC-B Writable, Writable, Range Check, Definable ACC_SEC Reader State Reader State specifies the mode of access in which the reader is operating. Boolean/ 0 = Access 0 or 1 [1 = Secure] Writable, Range Check, Definable, CMD, Triggerable At your OWS, if you find that this attribute is toggling between Access and Secure modes (every few seconds), then a problems exists in which the Door Access Timer attribute is set to a time less than it takes the D600 to poll the reader. This is causing the door locking mechanism to lock when the door access time expires and unlock when the D600 resignals the reader to maintain Access mode. To solve this problem, increase the Door Access Timer field to a value higher than the D600 polling rate. In addition, readers that are operating offline delay the D600 polling rate. Disable offline readers to quicken the D600 polling response time. AL_SHUNT Door Shunt Delay Timer Door Shunt Delay Timer specifies how long a door can remain open after a card has passed through the card reader. This attribute is tied to the Anti-Tailgate Check attribute. integer 0 to 225 (seconds) JC-B Writable Writable, Range Check, Definable ALR_MSG Alarm # Alarm Message Number displays the reference number of a user message sent to Operator Workstations and report printers when the STI/card reader detects an alarm condition. integer 0 to 255 JC-B Writable Definable, Writable, Range Check ALR_RPT Report Type Alarm Report Type Alarm specifies the type of COS report that is generated when the STI/card reader status changes to alarm. integer/ 0 = no report 0 to 6 [1 = crit1] JC-B Writable, Definable, Writable, Range Check 2 = crit2 3 = crit3 4 = crit4 5 = follow-up 6 = status ANTI_TAI ANTI_PAS AUX_ACC Anti-Tailgate Check Anti-Tailgate Check determines whether to lock the door immediately after it is shut, or to allow the door to be reopened at any time before the shunt time expires. Boolean/ AntiPassback Check Anti-Passback Check specifies whether to report access cards that have violated the antipassback time set for the card reader. Boolean/ 0 = no 0 or 1 [1 = yes] No ALM on Exit This attribute specifies whether to disable the door-open alarm when the door is being used to exit a facility. For instance, a card holder may need to badge in to enter the facility, but need not badge out to open the door from inside. Boolean/ 0 = enable door-open alarm 0 or 1 0 = no: wait to lock until after shunt time expires [1 = yes: lock immediately] 0 or 1 [1 = disable door-open alarm] JC-B Writable, Writable, Definable JC-B Writable, Writable, Definable JC-B Writable, Writable, Definable Continued on next page . . . Objects—Access Control System Objects 67 CR Attribute (Cont.) Software PMI Label Name CARDTYP Card Type Description Type/ Range Code/ [Default Value] Card Type specifies the type of card technology integer being used at the reader. 0 = no card Note: 2 = N-Crypt Proximity technology uses the Wiegand card value. 1 = Wiegand Usage JC-B Writable, Writable, Definable 3 = B/F NPAR (Barium Ferrite - no parity check) 4 = MAGSTRIPE 5 = B/F PAR (Barium Ferrite - parity check) DIAL_UP FAC_BAK GLO ACC Auto Dialout Facility Code on Backup Flag indicating whether or not (y or n) critical reports (Crit1 - Crit4) force a dialup to a remote Operator Workstation. Boolean/ 0 or 1 [0 = no] 1 = yes JC-B Writable, Definable, Writable Facility Code on Backup specifies whether the STI/card reader should grant access based on facility code if communication is lost with the D600 data base. Boolean/ 0 = no 0 or 1 [1 = yes] JC-B Writable, Writable, Definable, Global Access Global Emergency Access is an AC object Boolean/ command that can be accessed via an OWS or 0 or 1 NT. When enabled, this attribute opens all doors on the IAC-600 system. [0 = normal operation] 1 = globally open doors Triggerable, CMP GRAPHIC Graphic Symbol # Graphic Symbol Number is a reference number integer/ [0 = none] that identifies the particular symbol used to 0 to 32767 represent the object in Operator Workstation graphics. A value of zero means no graphic will be displayed. JC-B Writable, Definable, Writable, Range Check HW_OBJCT Hardware Object Name Hardware Object Name identifies the Access Controller object this Card Reader object is mapped to. Definable HW_SYSTM INSTRUCT string/ 8 char. max. Hardware Hardware System Name identifies the system System Name name this Card Reader object is mapped to. string/ Operator integer/ Instr. # Operator Instruction Number is a reference number that identifies the text displayed when Help is requested at the Operator Workstation. A value of zero means no message will be displayed. Definable 8 char. max. [0 = none] JC-B Writable, Definable, Writable, Range Check 1 to 15 characters Definable 0 to 32767 LOCAL_ID. Local Reader Local Reader ID describes the reader name in ID relationship to the D600 (e.g., local reader 1). string NAME Expanded ID Expanded ID further identifies the object (i.e., FMS Security Center). string/ Report Type Normal specifies the type of COS report that is generated when the STI/card reader status changes to normal. integer/ 0 = no report 0 to 6 1 = crit1 NOR_RPT Report Type Normal Definable, Writable 24 char. max. 2 = crit2 3 = crit3 [4 = crit4] 5 = follow-up 6 = status Continued on next page . . . 68 Objects—Access Control System Objects JC-B Writable, Definable, Writable, Range Check CR Attribute (Cont.) Software PMI Label Name OBJECT OFFLINE Object Name Description Software Object Name identifies the object (e.g., Reader14). The object name cannot be duplicated in the system. Type/ Range Code/ [Default Value] string/ Usage Definable 8 char. max. Object Offline The Object Offline flag is set to “Y” if the STI/card reader is offline. Boolean/ [0 = n = online] 0 or 1 1 = y = offline Override Local Schedule Override Local Schedule means that the operator overrides the current time zone schedule to allow free access. Boolean/ [0 = n = normal] 0 or 1 1 = y = override OVER_TZ Override Time Zone Time Zone Override specifies the alternative integer time zone number this reader is linked to when the normal schedule is overridden to allow free access. This free access time zone is set up to allow the door to always be unlocked and the card reader’s green indicator lamp lit. 1 to 8 (corresponds with the JC-B existing time zone Writable, scheduled for free access) Writable, Range Check, Definable PASS_INT AntiPassback Time Anti-Passback Time specifies the amount of time that must pass before a card holder may reenter a facility. 1 to 60 minutes JC-B Writable, Writable, Range Check, Definable PIN_BAK PIN Code on Backup This attribute specifies whether the STI/card Boolean/ reader should grant access by PIN code if 0 or 1 communication is lost with the D600 data base. [0 = n = no PIN backup] JC-B Writable, Definable OVER_SCH integer 1 = y = PIN backup PIN_TZ PIN Suppress Specifies the time zone number this reader is Time Zone linked to when the PIN code function is suppressed. integer 1 to 8 PREFIX * Boolean/ [0 = no PMI] 0 or 1 1 = * = off normal RDR_TYP Reader Type Off Normal Indicator indicates if the STI/card reader has reported an abnormal condition. Reader Type specifies the card reader’s type of integer operation: disabled, access type, IN type, OUT type. The ALR_READ option is not supported. 1 = DISABLED 2 = ACCESS 3 = IN READ 4 = OUT READ Triggerable Definable JC-B Writable, Writable, Range Check, Definable JC-B Writable, Writable, Range Check, Definable RDR_TZ Reader Active Time Zone Reader Active specifies the time Time Zone zone number that this reader is linked to during normal operation. integer 1 to 8 JC-B Writable, Writable, Range Check, Definable REPORT Reports Locked Reports Locked specifies whether or not the object sends COS reports to operator devices. Boolean/ [0 = n = unlocked] CMD 0 or 1 1 = y = locked SCAN Comm Disabled Communications Disabled specifies whether or not communications are disabled between the object and STI/card reader. Boolean/ [0 = n = enabled] 0 or 1 1 = y = disabled Definable, CMD Continued on next page . . . Objects—Access Control System Objects 69 CR Attribute (Cont.) Software PMI Label Name STATDISP Prefix Description Type/ Range Code/ [Default Value] The status of the object as displayed in summaries. integer/ 0 to 15 [0=normal, blank] This attribute displays the address at which the STI/card reader resides in the D600. integer/ 1 to 16 Definable Definable 2=RPT, report locked 3=TRG, trigger locked 5=LW, Low Warning 6=HW, High Warning 7=LA, Low Alarm 8=HA, High Alarm 10=SWO, Software Override 12=DIS, communication disabled 14=UNR, unreliable 15=OFF, offline 16=DCT, disconnect STI_NO Reader Number SYSTEM System Name Software System Name specifies an existing system in the network. string/ Trigger Locked Trigger Locked prevents the object from triggering any control processes. This applies to all triggerable attributes of the object. Boolean/ [0 = n = unlocked] 0 or 1 1 = y = locked Reader State Reader State specifies the mode of access in which the reader is operating. Boolean/ 0 = Access 0 or 1 [1 = Secure] TRIGGER VALUE Usage At your OWS, if you find that this attribute is toggling between Access and Secure modes (every few seconds), then a problem exists in which the Door Access Timer attribute is set to a time less than it takes the D600 to poll the reader. This causes the door locking mechanism to lock when the door access time expires and unlock when the D600 resignals the reader to maintain Access mode. To solve this problem, increase the Door Access Timer field to a value higher than the D600 polling rate. In addition, readers that are operating offline delay the D600 polling rate. Disable offline readers to quicken the D600 polling response time. 70 Objects—Access Control System Objects 8 char. max. CMD Object Default Command Table If an object is offline or its communications are disabled, commands to the AC or CR object are not executed, but are stored. The commands are issued when the object comes back online or communications are enabled. Table 10: Access Control System Objects Commands PMI Label OWS Menu Option Description Commanded From Operator Device Used Access All Doors Action MenuOperation This command unlocks all access controlled doors. It remains in effect until another operator command returns doors to normal control. Access Controller Object Operator Workstation Network Terminal Access Door Action MenuOperation This command unlocks a specific door. It remains in effect until another operator command or until the next time zone change. Card Reader Object Operator Workstation Network Terminal Communications Disabled Action MenuCommunication Stops the object from triggering control processes, sending COS reports, and accepting commands (except Communications Enabled). Access Controller Object Card Reader Object Operator Workstation Network Terminal Communications Enabled Action MenuCommunication Allows the object to trigger control processes, send COS reports, and accept commands. Access Controller Object Card Reader Object Operator Workstation Network Terminal Lock Reports Action MenuCommunication Stops the object from sending COS reports to operator devices. Card Reader Object Operator Workstation Network Terminal Lock Triggers Action MenuCommunication Prevents the object’s triggerable attributes from triggering control processes. Access Controller Object Card Reader Object Operator Workstation Network Terminal Open Door Action MenuOperation Temporarily opens a given door to allow access to a person who does not have an access card. This command expires when the alarm shunt time of the door expires, usually within a minute. Card Reader Object Operator Workstation Network Terminal Report Valid Cards Action MenuOperation Reports to designated Metasys I/O devices all valid card transactions performed at readers. Access Controller Object Operator Workstation Network Terminal Reset All Alarms Action MenuOperation Resets all alarm relays connected to the IAC-600 System. Access Controller Object Operator Workstation Network Terminal Return All Doors to Normal Action MenuOperation Returns all doors to the control of the time zone that is currently enabled. Used to return doors to normal operation that were previously commanded by the Access All Doors command. Access Controller Object Operator Workstation Network Terminal Secure Door Action MenuOperation Locks a designated door. Card holders must use their access cards to gain entry. Command remains in effect until another operator command or the next time zone change. Card Reader Object Operator Workstation Network Terminal Suppress Valid Card Reports Action MenuOperation Prevents valid card transactions from being reported to Metasys I/O devices. Access Controller Object Operator Workstation Network Terminal Unlock Reports Action MenuCommunications Allows the object to send COS reports to operator devices. Card Reader Object Operator Workstation Network Terminal Unlock Triggers Action MenuCommunications Allows the object’s triggerable attributes to trigger control processes. Access Controller Object Card Reader Object Operator Workstation Network Terminal Objects—Access Control System Objects 71 Notes Controls Group 507 E. Michigan Street P.O. Box 423 Milwaukee, WI 53201 72 Objects—Access Control System Objects FAN 636 Metasys Network Technical Manual Release 9.0 Printed in U.S.A.