1
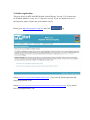
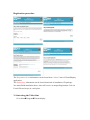
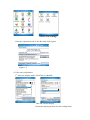
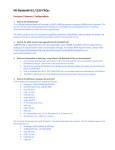
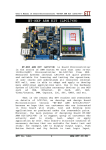
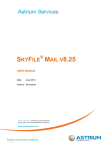
Content
Inside Package……………………………………………………….
System and installation Requirement………………………………
Real Time Display Installation and Configuration
1. Driver Installation
2. Online registration
3. Start the program
4.Video out configuration
a. VGA output configuration
b. Video and S-video output configuration
5. Adjust your PDA screen with virtual display
6. About the Virtual Display function
1.
Install the Real Time Display driver from the Installation CD
Click the Video-Out
then Select the Real time display
It will automatically install the Driver, please check your mobile device
screen to see if additional steps are necessary to complete this installation.
2. Online registration
This new driver for SDV-841(IBS-Nyditot Virtual Display, Version 5.32) is shareware
for Window Mobile 5.0 only. It’s a 7 days trial version. If you are intend to use it for
the long term, please register the serial number on CD.
Please go to http://www.spectec.com.tw/ and Click
tag.
Select Click here if you purchased a Nyditot Product online, if you already finish registration but
forgot Registration Code.
Select Click here if you purchased a hardware product which includes a Nyditot Product, if you would
like to get Registration Code.
Registration procedure
The Registration Seed information can be found from “About” item of VirtualDisplay
application.
The Product key information can be found from back of installation CD package.
You msut finish installation above, then will receive an unique Registration Code via
E-mail. Please keep it in a safe place.
3. Start using the Video-Out
Go to StartÎProgramÎVirtual display
<Select VD Setting>
. Enter the registration code in the Box then click register
(figure 3.3)
4. Video out configuration
1st Select the display mode (1024x768 or 640x480)
.
Then tab external display
Select the output type then save the configuration.
Click OK, the PDA will reboot.
After restart the PDA, it will show a black screen. Just tag the (|) button.
Connect the VOTG power supply and plug in the adapter.
5. Adjust screen with virtual display.
Adjust.lnk
Tag the center button.
Configure the display to fit your screen.
To close this application just go to the configuration select disable virtual display.
7. About Virtual display function
About Configurations and Schemes
The Virtual Display Settings Applet allows you to create an unlimited
number of named configurations and schemes. A configuration consists
of a set of properties that define a virtual display. Properties include the
virtual width and height, orientation, zoom (e.g.. 100%, Fit to Display) and
several other characteristics. Likewise, schemes consists of a set of
system color and font properties. By grouping property values under a
configuration/scheme name, it is possible to quickly change multiple
properties by simply selecting a configuration/scheme.
For example, you might like to use a simple landscape mode on your
Pocket PC for reading eBooks. You could create a configuration named
"eBook Reading" with default width and height and rotated into a
landscape orientation. Another example might be web browsing. Most
web sites require a minimum horizontal resolution of 640 pixels in order to
display their content properly. You could create a configuration named
"Web Browsing" with a width of 640, height of 480 and rotated into a
landscape orientation. You might then choose to compress the virtual
display to fit the physical display allowing you to view the entire 640x480
page on your 320x240 display without panning.
The NVD setup program creates a number of sample configurations and
schemes to give you some ideas. You may modify, copy or delete any of
these configurations/schemes or you may create entirely new ones of
your own. There a two special virtual display configurations. The first,
"(Disable Virtual Display)" should be selected when you do not wish to
use any of NVD's features. This configuration restores your device's
video properties to their factory values. The second, "(Current
Configuration)" simply resets all of the properties to those of the current
virtual display mode, in case you change you mind and what to get back
where you started. The third, "(Standard Configuration)" sets the
properties to mimic those of the nominal factory settings. NVD is NOT
disabled in this case. Similarly there are two special schemes. "(Current
Scheme)" resets all of the properties to the current values for the system.
"(Standard Scheme)" restores your device to its factory color and font
properties.
Modifying Virtual Display Properties
The various properties for the virtual display configuration are organized into
five separate tabs. To modify and apply virtual display properties, follow the
steps below. Although it is not required, if you use the same property values
repeatedly you should save them to a named configuration.
1. Start the Virtual Display Settings Applet.
2. Select the Configuration Tab.
3. If you have already created a named configuration and wish to use it,
select the name from the Configuration drop down list. Selecting the
"(Current Configuration}" configuration will restore all virtual display
property values to those currently in use.
4. Set the various properties for the virtual display. Within the
Configuration Tab are five more tabs which organize the properties. The
following list describe each of the five tabs and the properties within.
Orientation
Sets the orientation of the display.
Width1
Sets the width of the virtual display. Choose from the pick list or enter your own
custom value.
Height1
Sets the height of the virtual display. Choose from the pick list or enter your
own custom value.
Zoom
Sets the magnification level of the display. Choose from the pick list or enter
your own custom value. Choose "Fit Display" to cause the virtual display to be
compressed or stretched to fit exactly within the physical display.
DPI
Sets the dot-per-inch (also known as logical pixels per inch). The operating
system uses DPI to calculate the sizes of various display elements with
higher values resulting in smaller elements allowing for more information to
be displayed. Most devices only support one DPI in which case this property
setting will be disabled. The DPI selection may require installation of a DPI
Resource Pack which are available through the Nyditot Web Site.
Darken
Sets the amount of darkening applied to black and white areas. During pixel
averaging necessary for compression/magnification, black text can become
fuzzy or grayed. This setting may improve text legibility.
Physical Mode
Sets the physical mode of the display. For best results, choose the physical
mode that is closest to the virtual width and height. Most devices only
support one physical mode in which case this property setting will be
disabled.
Pan with Onscreen Control
When checked, the virtual display can be panned using the onscreen control.
Pan with Edge Touches
When checked, the virtual display can be panned by touches one of the four
edges of the display.
Pan with Arrow Keys
When checked, the virtual display can be panned using the hardware arrow
keys. NOTE: When this option is checked, the arrow keys can NOT be used
for other purposes such as scrolling list or menus when this option is
checked.
Step Size
Sets the step size, in pixels, for each of the panning methods discussed
above.
Show Pointer
When checked, a mouse pointer will be displayed at the current stylus or
mouse location.
Use Internal Display as Touch Pad
When checked, the device's internal display will function as a touch pad
pointing device. NOTE: This option will only take effect when an external
monitor is active.
Adapter
Selects the external display adapter. Only supported adapters that have been
installed properly will appear in the pick list. For a complete list of supported
Adapters please visit the Nyditot Web Site.
Output Type
Set the the of video output for the external display adapter. Some adapters
can output more that one type of signal such as VGA, S-Video or Composite
Video.
Physical Mode
Sets the physical mode of the external display. You will be asked if you wish
to change the virtual display size to match this resolution. This is usually the
best choice when creating a desktop system.
Orientation
Sets the orientation of the external display.
Zoom
Sets the magnification level of the external display. Choose from the pick list
or enter your own custom value.
Darken
Sets the amount of darkening applied to black and white areas on the
external display.
Keep Setting After Reset
When checked, the virtual display configuration will be maintained after a soft
reset. When not checked settings will return to the factory defaults after a soft
reset. WARNING: PRESERVE AFTER RESET SHOULD BE USED WITH
GREAT CAUTION. If you choose configuration settings that render your
device unusable, you will need to perform a HARD-RESET resulting in a
LOSS OF ALL DATA on your device. You should test the configuration
thoroughly before checking this option.
Swap Width and Height on Rotate
When checked, the virtual display width and height will be swapped
whenever the display is rotated by 90 degrees.
Scroll Zoom
Sets the magnification level for scroll bars.
Today Zoom
Sets the magnification level of the Today Screen background.
5. If you wish, save your settings to a named configuration by pressing the
Save icon (floppy disk).
6. Press OK to apply the virtual display property values and exit.
Notes:
1. Width and Height units are in pixels. Although these dimensions could
hypothetically be any value, keep in mind that large virtual displays will require
significant memory and may reduce system performance. If NVD cannot
accommodate the desired size upon startup, it will disable itself and reset the
system.
Modifying Scheme Properties
To modify and apply scheme properties, follow the steps below. Although it is
not required, if you use the same property values repeatedly you should save
them to a named scheme.
1. Start the Virtual Display Settings Applet.
2. Select the Scheme Tab.
3. If you have already created a named scheme and wish to use it, select
the name from the Scheme drop down list. Selecting the "(Current
Scheme}" scheme will restore all scheme property values to those
currently in use.
4. Set the various properties for the scheme. The following table describes
each property.
Item
Selects the Windows item to which the various properties will be
applied. Alternatively, you may select the Windows item by clicking on its
representation in the Preview Window.
Back
Sets the background color of the selected Windows item. When clicked a
color selection dialog box will appear.
Text
Sets the foreground color of the selected Windows item. When clicked a color
selection dialog box will appear.
Font
Sets the font typeface for the selected Windows item. Note that many
Windows CE applications do not honor system font settings, hence you may
not notice any difference in these application even though you have modified
the font.
Size
Sets the size (in points) for the font for the selected Windows
item. WARNING: Selecting large fonts can render the device unusable and
may require a HARD-RESET. First select a font only slightly larger than the
current setting and test the effect..
Bold
When checked, the font for the selected Windows item will be bolded.
Italic
When checked, the font for the selected Windows item will be italicized.
Preview Window
Displays a representation of how the various Windows items will appear
when the property values are applied. Clicking on a Windows item will cause
that item to be selected.
5. If you wish, save your settings to a named scheme by pressing the
Save icon (floppy disk).
6. Press OK to apply the scheme property values and exit.
Saving Configurations and Schemes
You can create an unlimited number of configurations and schemes. To save a
configuration or scheme follow these steps:
1. Start the Virtual Display Settings Applet.
2. Modify the various configuration or scheme properties.
3. Press the Save icon (floppy disk) next to the configuration/scheme drop
down list.
4. Enter the desired name for the new configuration/scheme.
5. A confirmation dialog box will appear. Press OK to create the new
configuration/scheme or Cancel to abort the action.
Copying Configurations and Schemes
You can quickly create new configuration or scheme based on an existing
one. To copy a configuration or scheme, follow these steps:
1. Start the Virtual Display Settings Applet.
2. Select the configuration or scheme you wish to copy from the drop
down list.
3. Press the Save icon (floppy disk) next to the configuration/scheme drop
down list.
4. Enter the desired name for the new configuration/scheme. The prompt
will default to the configuration/scheme you selected in Step 2.
5. A confirmation dialog box will appear. Press OK to create the new
configuration/scheme or Cancel to abort the action.
Deleting Configurations and Schemes
You may delete any configuration except for "(Disable Virtual Display)" and
"(Current Configuration)" and "(Standard Configuration)" or any scheme
except for "(Standard Scheme)" and "(Current Scheme)". To delete a
configuration or scheme, follow these steps:
1. Start the Virtual Display Settings Applet.
2. Select the configuration or scheme you wish to delete from the drop
down list.
3. Press the Delete icon (red X) next to the configuration/scheme drop
down list.
4. A confirmation dialog box will appear. Press OK to delete the
configuration/scheme or Cancel to abort the action.
Applying Configurations and Schemes
Once you have defined a configuration or scheme you can change all the
property values at once by selecting the named item.
1. Start the Virtual Display Settings Applet.
2. Select either the Configuration Tab or the Scheme Tab.
3. Select the configuration or scheme you wish to apply from the drop
down lists.
4. Press OK to apply the configuration/scheme and exit.
Setting Miscellaneous Options
In addition to configuration and scheme settings there are a few other options.
1. Start the Virtual Display Settings Applet.
2. Select either the Options Tab.
3. Set the various options. The following table describes each option.
Show Today Screen Item1
When checked, the Today Screen will display the virtual display status.
Show Today Toolbar Icon1
When checked, the Today Screen toolbar will display an virtual display popup
menu icon allowing for quick access to various virtual display settings. This is
the same popup menu that can be access via the onscreen control.
4. Press OK to apply the options and exit.
Working with a Virtual Display
Aside from the following added features, your device behaves the same as
always when used with NVD. The following topics discuss those features
unique to a virtual display:
Onscreen Control
Cursor Key and Edge Panning
Popup Menu
Using the Utility Programs
Assigning Hot Keys
Calibrating the Touch Screen
Disabling the Virtual Display
Onscreen Control
When a virtual is active the onscreen control will appear. This control has
several functions packed within it:
Pan Arrows
The four single arrows are used to pan the view window either up and down
or right and left. Holding down any one of the arrows causes the view window
to pan continuously in the indicated direction. Clicking one of the arrows will
nudge the view window. These arrows will not be present when the virtual
display fits within the physical display.
Jump Arrows
The four double-arrows are used to move the view window to one of the four
corners of the virtual display. These arrows will not be present when the
virtual display fits within the physical display.
Drag / Popup Menu
The dot in the center of the control has three functions. First it is used to
move the onscreen control. This might be desired when the onscreen control
is obscuring some part of the virtual display that you wish to see. Simply
press down and drag the onscreen control to the desired location. Secondly,
it can be used to pan the view window by holding it down and dragging the
onscreen control to one of the one of the edges of the physical
display. Holding the onscreen control at the edge will cause the view window
to pan continuously. Finally, double-click (or or click-and-hold on CE 3.0
devices) the dot to display the popup menu. The menu can be cancelled by
clicking anywhere else on the screen.
Cursor Key and Edge Panning
In addition to using the onscreen control, the view window can also be panned
by pressing a cursor key or by moving the pen to one of the edges of the
physical display. If the pen is held at an edge, the view window will pan
continuously in very small increments until it reaches the edge of the virtual
display.
To use the cursor keys for panning you must check the Pan with Arrow Keys
property as described in Modifying Configuration Properties.
Popup Menu
The NVD Popup Menu is activated by either double-clicking or
click-and-holding the dot in the center of the onscreen control or by running VD
Menu (If used often, you might want to assign VD Menu to a hot key).
The popup menu has the following options:
Disable Virtual Display
When clicked, the virtual display will be disabled.
Previous Configuration
When clicked, the configuration settings prior to the most recent change will be restored.
Standard Configuration
When clicked, the Standard Configuration settings will be applied.
Named Configuration
The settings for the named configuration will be applied.
Show Pointer
When checked, a mouse pointer will be displayed at the current stylus or mouse location.
Use Internal Display as Touch Pad
When checked, the device's internal display will function as a touch pad pointing device.
This option will only take effect when an external monitor is active.
Show Onscreen Control
When checked, displays the onscreen control.
Use Arrow Key for Panning
When checked, allows panning the virtual display using arrow keys.
Note: Arrow key presses will NOT be sent to applications when this option is checked.
Swap Width and Height on Rotate
When checked, the virtual display width and height to be swapped whenever the display
is rotated by 90 degrees.
Using the Utility Programs
NVD provides several small programs that make NVD functionality more
accessible. These programs can be assigned to hot keys for even greater
control.
VD Settings
Runs the Virtual Display Settings Applet
.
.
VD Menu
Shows the virtual display popup menu. This is the same menu that is accessed
via the Onscreen Control
VD Power
Toggles the display power between on and off. NOTE: This feature is not
available on all devices.
VD Restore
Restores your device to its factory display settings.
VD Previous
Toggles between the last two configurations. For example, this might be used
to toggle between two configurations as you go back and forth between two
applications.
Assigning Hot Keys
NVD provides several small programs that make NVD functionality more
accessible. These programs can be assigned to hot keys for even greater
control.
On Pocket PC devices these program shortcuts are located in:
\Windows\Start Menu\Programs\Virtual Display
On Handheld PC devices these program shortcuts are located in:
\Windows\Programs\Virtual Display
These shortcuts can be assigned to hardware buttons using your devices
Buttons Control Panel applet. Please consult your device's user manual for
instructions on assigning hardware buttons.
Calibrating the Touch Screen
You do not need to recalibrate your pen when switching between virtual
display configurations. NVD automatically adjusts the pen physical location to
virtual display coordinates. The only consideration when calibrating is that
CALIBRATION CAN ONLY BE PERFORMED WHEN NVD IS DISABLED. If
you attempt to calibrate in any other mode, you will receive a warning and
calibration will abort.
Additionally, when using compressed configurations it is even more important
that the pen be precisely calibrated since each element on the screen
becomes smaller. Uncompressed configurations are more forgiving of sloppy
calibration.
Saving Power
NVD allows you to turn off the video display thereby saving precious
power. This might be useful when listening to audio files or when using a
remote display application.
The NVD installation program creates several application icons under the Start
> Programs > Virtual Display. The VD Power toggles the display power
between on and off each time it is executed. Assigning Hot Keys explains how
to assign this icon to a hardware button.
NOTE: This feature is not available on some devices.
Disabling the Virtual Display
Choosing the configuration named "(Disable Virtual Display)" restores your
device's display settings to their factory default values.
Alternatively, if your device should behave abnormally or become unusable
after switching to a new virtual display configuration, simply press the device
RESET button. This will return the device to the factory default display
settings. This action will not harm your device but you may loose unsaved data
in any running programs. Note that this behavior can be overridden by
checking the Preserve after Reset when Modifying Configuration Properties.
This option should be used with great caution.
If you still experience problems you may need to perform a hard reset as a last
resort. This will restore your device to its factory setting. Note: This will result in
a loss of transient AND stored data. Consult your device owner manual for
instruction for performing a hard reset.