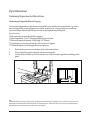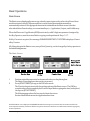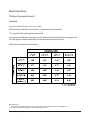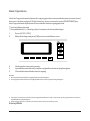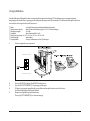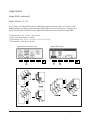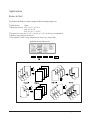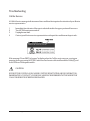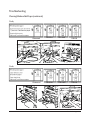
1
Recycled paper is used for the inside pages of this book.
Konica 2230/2330
Copier
User’s Manual
As an ENERGY S TAR Partner, Konica Business Machines U.S.A., Inc. has determined
that this product meets the ENERGY STAR guidelines for energy efficiency.
1997 Konica Business Machines U.S.A., Inc.
MAINTENANCE AGREEMENT
The KONICA 2230/2330 copier will give you many years of trouble-free service. To ensure high
quality copying performance and to prevent premature wear and failure of precision parts and
components, periodic cleaning and routine adjustments should be scheduled.
We recommend that you contact your service center to discuss the benefits and advantages of
Konica’s Customer Service Maintenance Agreement and to be shown how a maintenance plan can
be tailored to your individual copying needs.
NOTICE:
Konica Business Machines U.S.A., Inc. has made every effort to ensure that the information in this
manual is complete and accurate. However, constant efforts are also being made to improve and
update the product. Therefore, Konica Business Machines U.S.A., Inc. shall not be liable for errors
in this manual or for any consequential damages resulting from the use of this manual. The
information contained herein is subject to change without notice.
FEDERAL OR STATE STATUTES MAY PROHIBIT THE COPYING OF CERTAIN
DOCUMENTS OR INFORMATION, RESULTING IN FINES OR IMPRISONMENT FOR
VIOLATORS.
MANUAL PART NUMBER:
OP-01-2230/2330
CORRESPONDENCE:
Correspondence regarding this manual may be mailed to the address shown below.
KONICA BUSINESS MACHINES U.S.A., INC.
Digital Systems Solutions Group
& New Product Development
500 DAY HILL ROAD
WINDSOR, CT 06095
Contents
Section 1: Introduction
To the User ................................................................................................................. 1-2
Overview of the User's Manual ............................................................................. 1-3
Copier Features .......................................................................................................... 1-4
Standard Equipment .............................................................................................. 1-4
Optional Equipment............................................................................................... 1-4
Section 2: Safety Information
User Instructions ........................................................................................................ 2-2
Machine Safety Labels ............................................................................................... 2-3
Regulations ................................................................................................................. 2-4
FCC Regulations ................................................................................................... 2-4
Canadian Department of Communications Regulations ...................................... 2-4
Machine Installation and Power Requirements .......................................................... 2-5
Machine Handling and Care ....................................................................................... 2-7
Routine Safety Check ................................................................................................. 2-9
Section 3: Machine Information
Machine Layout ......................................................................................................... 3-2
Site Requirements ...................................................................................................... 3-6
Control Panel Layout ................................................................................................. 3-8
LCD Screen ................................................................................................................ 3-9
Basic Screen .......................................................................................................... 3-9
Initial Settings .......................................................................................................... 3-10
Auto/Reset Mode ..................................................................................................... 3-10
Auto Shut-Off Mode ................................................................................................ 3-10
Automatic Paper Selection (APS) ............................................................................ 3-10
Automatic Magnification Selection (AMS) ............................................................. 3-10
Automatic Exposure Selection (AES) ...................................................................... 3-11
i
Contents
Automatic Tray Switching (ATS) ............................................................................ 3-11
Power Saver Mode ................................................................................................... 3-11
Key Operator Settings .............................................................................................. 3-12
Auto Low Power Timer ....................................................................................... 3-12
Non-Image Area Erase ........................................................................................ 3-12
RADF Frame Erasure Selection .......................................................................... 3-12
Odd-Even Original Counter ................................................................................ 3-12
Count of Sheet Insertion Originals ...................................................................... 3-12
Weekly Timer Option .......................................................................................... 3-13
LCD Panel Contrast............................................................................................. 3-13
Service Settings ........................................................................................................ 3-14
Cascade Mode...................................................................................................... 3-14
OK Key ................................................................................................................ 3-14
AMS Display - –A– ............................................................................................. 3-14
Staple Sheet Limitation ....................................................................................... 3-14
Maximum Print Quantity Limitation .................................................................. 3-14
Master Key Code Setting for ECM/Weekly Timer ............................................ 3-14
Auto Copy - Original Size and Off-Timer .......................................................... 3-14
Section 4: Paper Information
Positioning Originals on the Platen Glass .................................................................. 4-2
Positioning an Original for Manual Copying ....................................................... 4-2
Using the Reversing Automatic Document Feeder (RADF) ..................................... 4-3
Positioning Originals ............................................................................................. 4-4
Positioning Mixed Originals ................................................................................. 4-5
Paper in Main Body/Drawer Base Unit...................................................................... 4-6
Paper in Multi-Sheet Bypass ...................................................................................... 4-6
Paper in Automatic Duplex Tray ............................................................................... 4-6
Paper in Sorter ............................................................................................................ 4-7
Paper Weight Compatibility Chart ............................................................................. 4-7
ii
Contents
Section 5: Basic Operations
Basic Screen ............................................................................................................... 5-2
Copy Mode ............................................................................................................ 5-3
1-1, 1-2, 2-2, 2-1............................................................................................... 5-3
1s2 Mode Odd-Even Original Counter On ................................................... 5-6
Copy Density ......................................................................................................... 5-7
Automatic Exposure Selection (AES) ............................................................. 5-7
Manual Mode (Lighter, Normal, Darker) ........................................................ 5-7
Lens Mode ............................................................................................................. 5-8
Automatic Magnification Selection (AMS) .................................................... 5-8
Special Ratio Table .......................................................................................... 5-9
Selecting a Special Ratio for Non-Standard Paper ........................................ 5-10
Preset and User Set Ratios ............................................................................. 5-11
Zoom Mode .................................................................................................... 5-12
Copy Size ............................................................................................................. 5-13
Auto Copy ................................................................................................................ 5-14
Interrupt Mode ......................................................................................................... 5-15
Check Mode ............................................................................................................. 5-16
Entering a User Password ........................................................................................ 5-17
Section 6: Output Modes
Sorter Specifications .................................................................................................. 6-2
Non-Sort Mode ........................................................................................................... 6-5
Cascade Mode ............................................................................................................ 6-6
Sort Mode ................................................................................................................... 6-7
Group Mode ............................................................................................................... 6-8
ST-217 In-Bin Stapler Sorter: Staple Sort Mode ....................................................... 6-9
ST-217 In-Bin Stapler Sorter: Manual Staple Sort In-Bin ...................................... 6-11
ST-217 In-Bin Stapler Sorter: Manual Staple in the Top Bin ................................. 6-12
ST-103/216 Off-Line Stapler ................................................................................... 6-13
iii
Contents
Section 7: Job Memory
Job Store ..................................................................................................................... 7-2
Job Recall ................................................................................................................... 7-4
Job Memory Form ...................................................................................................... 7-5
Section 8: Applications
Application Function Menu ....................................................................................... 8-2
Sheet/Cover Insertion ................................................................................................. 8-3
OHP Interleave ........................................................................................................... 8-8
Book Copy ............................................................................................................... 8-10
Image Shift ............................................................................................................... 8-11
Simplex Mode (1-1, 2-1) ..................................................................................... 8-11
Duplex Mode (1-2, 2-2)....................................................................................... 8-13
Reduce & Shift ......................................................................................................... 8-15
Frame/Fold Erasure .................................................................................................. 8-17
Thin/Thick Paper ...................................................................................................... 8-19
Mixed Original Mode ............................................................................................... 8-20
2 in 1 Format ............................................................................................................ 8-21
Photo Mode ..............................................................................................................8-22
Photo Mode.......................................................................................................... 8-22
Photo-Text Mode ................................................................................................. 8-22
Moisture Paper ......................................................................................................... 8-23
Section 9: Key Operator Mode
To the Key Operator ................................................................................................... 9-2
How to Access the Key Operator Mode ............................................................... 9-2
Function Menu Map ................................................................................................... 9-3
Initial Setting Mode [1] .............................................................................................. 9-5
iv
Contents
How to Access the Initial Setting Mode ............................................................... 9-6
Copy Mode [1]....................................................................................................... 9-7
Copy Density [2] ................................................................................................... 9-8
Lens Mode [3] ....................................................................................................... 9-9
APS/Paper Tray [4] ............................................................................................. 9-10
Output Mode [5] .................................................................................................. 9-11
Preset/User Set Ratio(s) [2] ...................................................................................... 9-12
ECM (Electronic Copy Monitor) Setting [3] ........................................................... 9-13
ECM Setting Menu .............................................................................................. 9-14
Password Setting [1] ............................................................................................ 9-15
Count/Limit Setting [2] ....................................................................................... 9-17
Reset E.C.M. [3] .................................................................................................. 9-18
ECM ON/OFF Setting [4] ................................................................................... 9-20
Set Copy Limit-Machine Disable [5] .................................................................. 9-21
Job Memory Setting [4] ........................................................................................... 9-22
Screen Contrast Adjustment [5] ............................................................................... 9-24
OK Key Timer Setting [6]........................................................................................ 9-25
Weekly Timer Functions [7] .................................................................................... 9-27
Weekly Timer Setting Menu ............................................................................... 9-28
Weekly Timer ON/OFF Setting [1] .................................................................... 9-29
Summertime Setting [2] ...................................................................................... 9-30
Date, Time Setting [3] ......................................................................................... 9-31
Set Weekly ON/OFF Timer [4] ........................................................................... 9-32
Specify Copier Working Days [5]....................................................................... 9-34
Machine Working Day Setting [6] ...................................................................... 9-35
Lunch Hour ON/OFF Setting [7] ........................................................................ 9-36
Time Off Password [8] ........................................................................................ 9-38
Memory Switch Setting [8] ...................................................................................... 9-39
Section 10: Maintenance
Loading Paper .......................................................................................................... 10-2
Adding Toner ........................................................................................................... 10-6
Inserting a New Staple Cartridge ............................................................................. 10-8
ST-217 In-Bin Stapler ......................................................................................... 10-8
Off-Line Stapler................................................................................................. 10-10
v
Contents
Preventive Maintenance ......................................................................................... 10-11
Reading the PM Count ...................................................................................... 10-11
Reading the Total Count ................................................................................... 10-11
Cleaning the Document Glass and Cover .............................................................. 10-12
Cleaning the Platen Glass ..................................................................................10-12
Cleaning the Inner Surface of the Document Cover......................................... 10-12
Cleaning with the Wire Cleaning Knob ............................................................10-12
Section 11: Troubleshooting
Call for Service ........................................................................................................ 11-2
Clearing Mishandled Paper ...................................................................................... 11-3
Clearing a Wedged Staple from the Off-Line Stapler Unit .................................... 11-13
Copying Tips .......................................................................................................... 11-14
Section 12: Machine Specifications
Specifications ........................................................................................................... 12-2
vi
Section 1: Introduction
To the User
Overview of the User's Manual
Copier Features
Standard Equipment
Optional Equipment
Introduction
To the User
Welcome to the Konica 2230/2330 copier product, which provides a high technology LCD screen
for performing a full range of features in your working environment. General product information is
given below.
Key Operator Functions
Custom settings can be made by the key operator (or anyone who is responsible for the machine).
Access to the Key Operator mode may require a master password, if previously set by service. Use
the password system to limit use of key operator functions to a person who is authorized to handle
the responsibility.
Copier Service, Repairs & Supplies
Copier service and repairs should be performed only by an authorized Konica service
representative. To maintain personal safety, and to avoid machine damage, never disassemble the
machine for any reason. To ensure optimal copy quality, use only supplies that are recommended
by Konica Business Machines, U.S.A., Inc. For convenience, use the form located at the end of
Section 10: Maintenance to record all service, repair, and supply orders.
Machine Labels
Information labels are affixed to the copier to provide quick and easy instructions on basic
copying, loading paper, adding toner, and clearing mishandled paper. In addition, safety labels are
attached to various internal areas of the copier and top bin of the ST-217 In-Bin Stapler Sorter,
providing cautionary information to prevent personal injury or damage to the copier. Sample
machine safety labels are shown in Section 2: Safety Information.
Control Panel
The 2230/2330 control panel is designed for user friendliness and ease of operation. The basic
section on the right consists of a keypad as well as the keys for selecting Print Quantity, Power
Saver, Interrupt and Start Print; the mid section includes special mode keys for selecting Auto Copy,
Check, Application, Job Memory and Auto Reset; adjacent to these keys, on the left, is the LCD
screen with an array of four interactive function keys and an OK key below; the far left portion of
the control panel includes Output mode keys for Group, Staple and Sort functions.
Copying modes, selections, and setting changes can be made from the LCD screen and the
Function keys. The upper portion of the LCD screen automatically displays machine status
information, as required.
1-2
Introduction
Introduction
To the User (continued)
Overview of the User’s Manual
To enjoy optimal performance, read this manual before using the copier. Be sure to handle the
machine and perform all copying operations only as recommended in the manual. Keep the manual
located with the machine so that all users may refer to it, as needed.
Manual Organization:
The User’s Manual is made up of twelve main copier sections, plus a glossary of copier terms.
Section pages list topics covered in each section. Highlights are as follows:
Machine Information in Section 3 can be used as a reference for all copying operations. This
section contain specifications that are useful for many copying jobs, especially when capacities,
sizes and weights are factors.
Paper Information in Section 4 contains specifications on paper capacity, paper size, paper weight,
compatibility, etc.
Basic Operations in Section 5 provides information on using the LCD screen and making all
copying selections, such as Copy Mode, Copy Density, Lens Mode, and Copy Size.
Applications in Section 8 is devoted to special copying functions, which are easy to use.
Key Operator Mode in Section 9 describes key operator functions, and shows you how to make
machine setting changes to customize the machine for your working environment. The key
operator mode should be used only by an authorized person.
Troubleshooting in Section 11 provides instructions on clearing mishandled paper, and offers
troubleshooting hints to help prevent and solve problems.
Page Design:
The page layout of this manual is designed to help you perform each operation quickly and easily.
The basic format includes an introductory explanation of each function; step-by-step procedures;
and illustrations to enhance many of the procedures. Caution statements specific to the topic are
included on the page, so that they will catch your eye before procedures are started. Special notes
are located on the page, as required.
Introduction
1-3
Introduction
Copier Features
30 CPM
2 IN 1 FORMAT
AUTO COPY
AUTOMATIC DUPLEX
AUTOMATIC EXPOSURE SELECTION (AES)
AUTOMATIC MAGNIFICATION SELECTION (AMS)
AUTOMATIC PAPER SELECTION (APS)
AUTOMATIC TRAY SWITCHING (ATS)
AUTO RESET
BOOK COPY
CHECK SCREEN
ELECTRONIC COPY MONITOR (ECM)
FRAME/FOLD ERASURE
IMAGE SHIFT
JOB MEMORY
KEY OPERATOR MODE
LCD SCREEN WITH INTERACTIVE FUNCTION KEYS
MIXED ORIGINAL
MOISTURE PAPER
OHP INTERLEAVE
BLANK SHEET INTERLEAVING
COPY SHEET INTERLEAVING
PHOTO MODE
PHOTO-TEXT MODE
POWER SAVER MODE
REDUCE & SHIFT
SHEET/COVER INSERTION
THIN/THICK PAPER
Standard Equipment
2330 Main Body with 2 Paper Trays (500/500)
2330 Main Body with Automatic Duplex Unit (ADU) and 1 Paper Tray (500)
Reversing Automatic Document Feeder (RADF)
Configuration Options:
with Multi-Sheet Bypass (100 sheets)
with Plain Stand
with 1 Paper Tray (500) and Storage (DB-206A)
with 3 Paper Trays (500) (DB-206B)
with 1 Paper Tray (500) and Large Capacity Tray (1,500) (DB-606)
Optional Equipment
ST-217, a 20-Bin Stapler Sorter with in-bin stapling
ST-216, a 20-Bin Sorter with off-line stapling option
Weekly Timer
Key Counter
1-4
Introduction
Section 2: Safety Information
User Instructions
Machine Safety Labels
Regulations
FCC Regulations
Canadian Department of Communications Regulations
Machine Installation and Power Requirements
Machine Handling and Care
Routine Safety Check
Safety Information
User Instructions
The following pages include important safety information, which should be read and understood
before you attempt to operate the machine. If you have any concerns about safety matters, please
contact your service representative.
Keep this manual permanently located with the machine, and in good, legible condition. The
manual should be readily available to all users.
Machine safety labels are attached to some inside areas of the machine. The purpose of the safety
labels is to alert you of imminent or potentially hazardous situations or conditions. Examples of
machine safety labels are shown on the following page.
The following standard safety categories are commonly used on product labelling.
DANGER:
Danger indicates an imminent hazardous situation, which, if not avoided, will result in
death or serious injury.
WARNING:
Warning indicates a potentially hazardous situation, which if not avoided, could result in
death or serious injury.
CAUTION:
Caution indicates a potentially hazardous situation, which, if not avoided, may result in
minor or moderate bodily injury.
Note:
2-2
The DANGER category is not required for this product, and is included here for general user information.
Safety Information
Safety Information
Machine Safety Labels
If you touch any machine area that you are advised by any caution label to avoid, you may be
burned or injured.
Do not remove caution labels. If any caution label is illegible due to soilage, clean the label. If
cleaning does not render the label legible, please contact your Konica service representative.
Sample Machine Safety Labels
Safety Information
2-3
Safety Information
Regulations
FCC Regulations
Warning: The Konica 2230/2330 copier generates, uses, and can radiate radio frequency energy. If
it is not installed and used in accordance with the instruction manual, interference with radio
communications may result. This equipment has been tested and found to comply with the limits
for a Class A computing device, pursuant to Subpart B, Part 15, of FCC rules, which are designed
to provide reasonable protection against interference from such equipment when it is operating in a
commercial environment.
Users operating this equipment in a residential area are likely to cause interference, in which case
they may be required to correct the interference at their own expense.
Canadian Department of Communications Regulations
Le présent appareil n’émet pas de bruits radioélectriques dépassant les limites applicables aux de
Classe A prescrites dans le règlement sur la brouillage radioélectrique édicté par Le Ministère des
Communications du Canada.
This equipment does not exceed the Class A limits for radio noise emissions as set out in the radio
interference regulations of the Canadian Department of Communications.
2-4
Safety Information
Safety Information
Machine Installation and Power Requirements
CAUTION:
FAILURE TO HEED THE FOLLOWING CAUTIONS MAY RESULT IN BODILY INJURY
AND/OR COPIER DAMAGE
❒
FIRE PREVENTION
Install copier away from materials that can catch fire, such as curtains; flammable or volatile
materials; and dampness.
❒
WATER DAMAGE
Do not install or operate the copier outdoors near a lake, pond, or river, etc.; and do not allow the
machine to come in contact with splashes of rain, water, or any liquid.
❒
TEMPERATURE AND HUMIDITY
Install copier away from direct sunlight, heat sources (stoves, heaters) and cold temperatures (air
conditioners). Avoid any environment that is outside 50°~91.4°F (10°~33°C), with 10~80%
humidity.
❒
VENTILATION
Do not allow the machine to come in contact with dust or ammonia gas, or fumes from printing or
cleaning solutions, etc.; otherwise, image quality will be poor. Install the machine in a wellventilated area, for comfort; otherwise, an ozone odor will be detected during large copy runs.
When in use, the copier generates ozone in amounts too small to be hazardous to the human body.
❒
VIBRATIONS
If the machine is constantly vibrated or jolted, trouble may occur. Install the machine on a level
and horizontal floor, free from vibrations.
❒
SPACE ALLOTMENT
Install copier in an area with adequate space for performing copier operations; replacing supply
items; and for conducting preventive maintenance. (See p. 3-6 to p. 3-7.)
❒
MACHINE RELOCATION
Before moving the copier to another location, contact your Konica service representative.
Safety Information
2-5
Safety Information
Machine Installation and Power Requirements (continued)
CAUTION:
FAILURE TO HEED THE FOLLOWING CAUTIONS MAY RESULT IN COPIER DAMAGE,
OVERHEATING, RISK OF ELECTRICAL SHOCK, AND/OR PERSONAL INJURY
❒
PLUG SOCKET
A plug socket is limited in capacity. Use an exclusive power source for the copier; otherwise, an
accident from overheating and/or smoking may occur. The total power consumption of the copier,
including all possible options, must not exceed the capacity of the main power supply.
❒
PLUG AND CORD (LEAD)
Unless the power plug is firmly inserted into the socket, an accident from overheating and/or
smoking may occur. Firmly insert the power cord plug into the electrical outlet before turning the
copier power switch On. If the inserted plug is loose in the socket, disconnect it, and consult an
electrician for repair; but, do not attempt to operate the copier.
A damaged power cord may result in overheating, short circuit or fire. Do not bend, crush, wind, or
kick the cord; or impact it with a desk or any item; or roll up the power cord. If the copier power
cord is bent or damaged, immediately contact your Konica service representative; and do not
attempt to repair it yourself, or continue to operate the copier.
The electrical-outlet shall be installed near the equipment and shall be easily accessible.
❒
ADAPTERS AND PLURAL LOADS
Never use adapters; and never connect plural loads or a branched socket to one socket outlet;
otherwise an accident may occur from overheating or fire.
❒
EXTENSION CORDS (LEADS)
An extension cord or lead is limited in capacity, and unless the cord or lead has adequate capacity,
smoking may occur, and an accident may be caused from overheating. Should smoking and/or
overheating occur, contact an electrician immediately. If you require further information about
power requirements, power consumption, extension cords, adapters and connectors, please contact
your Konica service representative, and also consult your electrician.
2-6
Safety Information
Safety Information
Machine Handling and Care
CAUTION:
FAILURE TO HEED THE FOLLOWING CAUTIONS MAY RESULT IN COPIER DAMAGE,
OVERHEATING, AND/OR PERSONAL INJURY
❒
MACHINE CONTACT
Never touch internal high voltage, high temperature or magnetism areas indicated with a
CAUTION HIGH TEMPERATURE label. Never touch the drum surface.
Never touch the inside of the copier for any purpose other than for removing mishandled paper or
adding toner.
❒
MACHINE CARE
Do not drop paper clips, staples and other small metallic objects into the copier; or spill water or
any other liquid into the copier.
Do not use the copier surface to support vases, books, etc. These items will interfere with the work
space and may cause damage to the copier or to originals.
❒
ABNORMAL CONDITIONS
If any abnormal sound, odor, or smoke generates from the copier, immediately stop using the
machine, turn off the main power switch, disconnect the plug and contact your Konica service
representative.
If a circuit breaker is tripped or if a fuse blows, stop using the copier and contact an electrician. If
information is needed regarding the power source or power consumption of the copier, contact
your Konica service representative.
❒
MACHINE MODIFICATION
Do not modify the machine in any way or remove any part or screw; and never attempt to perform
any maintenance function that is not specifically described in this manual. Do not connect the
machine with any options other than those specified.
❒
EXCEEDING TOP BIN CAPACITY
The top bin capacity of each sorter is 100 sheets.
If print quantity exceeds the 100-sheet top bin capacity, remove copies before the limit is reached;
otherwise mishandled paper may occur.
Safety Information
2-7
Safety Information
Machine Handling and Care (continued)
CAUTION:
FAILURE TO HEED THE FOLLOWING CAUTIONS MAY RESULT IN COPIER DAMAGE,
OVERHEATING, AND/OR PERSONAL INJURY
❒
TOTAL BIN CAPACITY IN CASCADE MODE
ST-217 In-Bin Stapler Sorter and ST-216 Off-Line Stapler Sorter feature the Cascade mode which
can be activated by Service.
Using the ST-217 In-Bin Stapler Sorter
Do not set the copy count above 700; otherwise, paper misfeed may occur. If you should set the
print quantity above 700, be sure to remove the copies delivered to the 20th bin before the
maximum capacity is reached.
Using the ST-216 Off-Line Stapler Sorter
Do not set the copy count above 670; otherwise, paper misfeed may occur. If you should set the
print quantity above 670, be sure to remove the copies delivered to the 20th bin before the
maximum capacity is reached.
❒
MANUAL STAPLE BUTTON
If the Manual staple button is pressed while your hand is inserted in any the bins of the ST-217 InBin Stapler Sorter, you may be injured. Do not insert your hand deeply into any bin.
2-8
Safety Information
Safety Information
Routine Safety Check
CAUTION:
❒
FIRE PREVENTION
Check for abnormal heat from power cord and/or plug. Do not use flammable liquids, thinners or
alcohol near the machine; these materials may cause a fire.
❒
PERIODICAL CHECK
Check for loose connection on power plug, damage to power cord and/or plug (creasing, fraying,
etc.) Be sure the plug is inserted fully, and is not scratched or cut. If any abnormality occurs, do not
continue to operate the machine.
❒
SERVICE MESSAGES
If a service message displays, turn the machine off, disconnect the power cord from the outlet, and
report the condition to your service representative.
❒
TONER
Check to be sure toner in storage is out of the reach of children, or anyone incapable of using
supplies safely. Although toner is non-toxic, do not inhale toner or allow it to come in contact with
eyes. If inhalation or eye contact occurs, immediately consult a physician. Please refer to the
appropriate material safety data sheet for additional toner safety information.
❒
PAPER
Check paper to be sure it is according to specifications outlined in Section 4.
❒
CLEANING MATERIALS
Check the type of cleaning material used on your machine to be sure it is recommended by Konica.
If necessary, check with your Konica representative. Never use cleaning materials for purposes
other than cleaning, and be sure to keep all cleaning materials out of the reach of children or
anyone who is incapable of using them safely.
❒
POWER SAVER
Use Power Saver mode for short periods of machine inactivity. When not using the machine for
long periods of time, turn power off, except when the weekly timer function is operating.
❒
DISPOSAL OF THE COPIER
Dispose of this copier according to your local regulations.
Safety Information
2-9
Section3: MachineInformation
Machine Layout
Site Requirements
Control Panel Layout
LCD Screen
BasicScreen
Initial Settings
Auto Reset Mode
Auto Shut-Off Mode
Automatic Paper Selection (APS)
Automatic Magnification Selection (AMS)
Automatic Exposure Selection (AES)
AutomaticTray Switching (ATS)
Power Saver Mode
Key Operator Settings
Auto Lower Power Timer
Non-ImageAreaErase
RADFFrameErasureSelection
Odd-EvenOriginalCounter
CountofSheetInsertionOriginals
Weekly Timer Option
LCDPanelContrast
Service Settings
CascadeMode
OK Key
AMSDisplay-–A–
StapleSheetLimitation
MaximumPrintQuantityLimitation
Master Key Code Setting for ECM/Weekly Timer
Auto Copy - Original Size and Off-Timer
MachineInformation
MachineLayout
3-2
MachineInformation
MachineInformation
MachineLayout(continued)
1
2
3
4
5
6
7
8
9
RADF (ReversingAutomaticDocumentFeeder)automaticallyfeedsmultipleoriginalsoneat
atimetotheplatenglassforcopying,thendischargesthem.
POWER SWITCH turns power to the copier ON/OFF alternately, when pressed.
LCD SCREEN displays interactive operation screens.
CONTROL PANEL controls copier operations in conjunction with the Function keys under
the LCD screen.
MULTI-SHEET BYPASS holds 100 sheets (max.) of regular paper, or 1 sheet of thin, heavy
stock.
KEY COUNTER INLET for inserting the optional Key counter.
FRONTDOOR openstotheinnercopierforclearingmishandledpaperandreplenishing
toner.
UPPER RIGHT SIDE COVER opens to allow removal of mishandled paper.
LOWER RIGHT SIDE COVER opens to allow removal of mishandled paper.
Konica2230
10
11
12
12
13
13
14
15
TRAY 1 is initially fixed at 8.5"x11"R and holds 500 sheets.
TRAY2(universaltray)isuseradjustableandholds500sheetsofeither11"x17"/8.5"x11"/
8.5"x11"R/or5.5"x8.5".
TRAY3(DB-206A/206B)isinitiallyfixedat8.5"x11"andholds500sheets.
TRAY3 (DB-606) is initially fixed at 8.5"x14" and holds 500 sheets.
TRAY4 (DB-206B) is initially fixed at 8.5"x14" and holds 500 sheets.
TRAY4 (DB-606)isinitiallyfixedat8.5"x11"andholds1,500sheets.
TRAY5 (DB-206B) is initially fixed at 11"x17" and holds 500 sheets.
Storage accommodatescopypaper,copymaterials,etc.
Konica2330
10
11
12
12
13
13
14
15
ADU is used for duplex copying.
TRAY1(universaltray)isuseradjustableandholds500sheetsofeither11"x17"/8.5"x11"/
8.5"x11"R/or5.5"x8.5".
TRAY2(DB-206A/DB-206B)isinitiallyfixedat8.5"x11"andholds500sheets.
TRAY2 (DB-606) is initially fixed at 8.5"x14" and holds 500 sheets.
TRAY3 (DB-206B) is initially fixed at 8.5"x14" and holds 500 sheets.
TRAY3 (DB-606)isinitiallyfixedat8.5"x11"andholds1,500sheets.
TRAY4 (DB-206B) is initially fixed at 11"x17" and holds 500 sheets.
Storage accommodatescopypaper,copymaterials,etc.
16
IN-BIN STAPLER SORTER (option) device that sorts, staples & sorts, and groups.
MachineInformation
3-3
MachineInformation
MachineLayout(continued)
1
2
3
4
5
6
3-4
MANUAL STAPLE BUTTON manually staples copies in-bin or after being positioned in
firstbin.
TOP BIN receives non-sorted copies; and in the ST-217 In-Bin Stapler Sorter staples sheets
thataremanuallyplacedhere.
FIRST BIN is the first bin of the sorter.
CARTRIDGE HOLDER accommodates new cartridge replacing an empty cartridge.
PAPER JAM ACCESS DOOR opens to allow removal of jammed paper in the sorter.
OFF-LINE STAPLER staples sheets manually.
MachineInformation
MachineInformation
MachineLayout(continued)
1
2
3
4
5
6
7
Toner unit
Drum unit
Knob 3
Lever 1
Knob 2
Fixing unit
Total counter
MachineInformation
3-5
MachineInformation
SiteRequirements
3-6
MachineInformation
MachineInformation
SiteRequirements(continued)
MachineInformation
3-7
MachineInformation
ControlPanelLayout
1
2
3
4
5
6
7
8
9
10
11
12
13
14
15
16
17
18
19
20
3-8
GROUP selects Group mode.
STAPLE selects Staple-sort mode.
SORT selects Sort mode.
LCD SCREEN displays machine and copying status; and interactive screens for the four
Functionkeys.
FUNCTION KEYS interact with the LCD screen.
[OK] completestheselectionmadebythefourFunctionkeys.
AUTOCOPY automaticallyactivatescopyingeachtimetheDocumentFeederisclosed.
CHECK displays a screen showing all settings that are selected for the current job.
APPLICATION displaysamenuforselectingspecialapplicationfunctions.
JOB MEMORY displays screens for selecting job store/job recall functions.
AUTO RESET restores copier to automatic mode settings or to key operator settings.
KEYPAD enters numeric values.
[P] accessesprogrammingmodesforsettingspecialfunctions.
[0] RECALL recalls the print quantity for the current job.
STOP/CLEAR stops the copying sequence; allows resetting of print quantity.
PRINT QUANTITY indicator displays the current print quantity setting.
INTERRUPT stops copying in progress to allow copying from the platen glass.
START PRINT activates copying.
TIMER lights when the timer function is set.
POWER SAVER activates energy-saving mode for times when the copier is inactive, or
activatestimeroffmodewhenweeklytimerfunctionisactive.
MachineInformation
MachineInformation
LCDScreen
TheLCDdisplaysinteractivescreensformakingcopyjobselections.Selectionsmadebypressing
thefourFunctionkeysarehighlighted.Thescreensalsoworkwiththeconventionalcontrolpanel
keys.
Afterthepowerswitchisturnedon,theBasicscreendisplays.Then,themessage“pleasewait
Copieriswarmingup”displaysforapproximately1min.30sec.,untilthefixingtemperatureis
reached.
When the Basic screen is displayed, the four Function keys become interactive. The interactive
conditionenablesyoutocommunicatedirectlywiththecopiersystemsimplybypressingthe
Functionkeysorbypressingconventionalkeys,asrequired.Inaddition,thescreensautomatically
displayinformationregardingmachineandcopyingstatus.
BasicScreen
The Basic screen displays after the power switch is turned on. The Basic screen includes a twolinemessagebaratthetop,andmodeindicatorsatthebottomforCopyMode,CopyDensity,Lens
Mode, and Copy Size. This screen enables you to use the four Function keys under the screen
plusconventionalkeystoselectmodes,functions,settings,papertrays,etc.Copyingconditions
afterwarm-upcanbesetintheInitialSettingmenuoftheKeyOperatormode.
CAUTION:
The LCD screen of the control panel is covered with glass. Do not drop heavy items on the glass,
orputexcessweightorpressureonit;otherwisetheglassmaybreakorbecomescratched.
MachineInformation
3-9
MachineInformation
InitialSettings
Initialsettingsrepresenttheinitialfull-automachineconditionwhenpoweristurnedon;whenECM
passwordisset;orwhenAutoResetmodeisrestored,eithermanuallyorautomatically.
PrintQuantity
MagnificationRatio
RADF
Copymode
AES:(AutomaticExposureSelection)
APS:(AutomaticPaperSelection)
Sorter
:1
:100%
: ON
:2230;1-1,2330;1-2
: ON
: ON
:OFF
Note: All settings can be set by the key operator except Print Quantity.
AutoResetMode
TheAutoResetfunctioncanbesetforOFF/30seconds/1minute/1.5minute/2minutes/2.5
minutes/3minutes.Initially,themodeissettofunctionafter1minuteofcopierinactivity.TheAuto
Resetkeyfunctionalsore-displaystheBasicscreen,unlessthesettingsarechangedbythekey
operatorintheInitialsettingsmenu.Forthekeyoperatorsetting,seep.9-39to9-43.
AutoShut-OffMode
Thismodeautomaticallyshutsoffthemainpowerafteraspecifiedperiodofcopierinactivity.The
Autoshut-offfunctioncanbesetfor30minutes/60minutes/90minutes/120minutes/240minutes.
Initially,themodeissettofunctionafter60minutesofcopierinactivity.
Forthekeyoperatorsetting,seep.9-39to9-43.
AutomaticPaperSelection(APS)
When APS is highlighted on the LCD screen, the appropriate copy paper size is automatically
selected. When copying from the platen glass or document feeder, APS detects the sizes indicated
below.Forthekeyoperatorsetting,seep.9-39to9-43.
PLATEN GLASS: 11"x17", 8.5"x14", 8.5"x11", 8.5"x11"R
ADF (1-1 OR 1-2 MODE): 11"x17", 8.5"x14", 8.5"x11", 8.5"x11"R
RADF (2-2 OR 2-1 MODE): 11"x17", 8.5"x14", 8.5"x11", 8.5"x11"R
AutomaticMagnificationSelection(AMS)
AMSfunctionsautomaticallywhenCopySizeispressedinthefull-automode.Anappropriateratio
is selected, based on the relationship of copy size to original size.
3-10 MachineInformation
MachineInformation
AutomaticExposureSelection(AES)
WhenAESishighlightedonthetouchscreen,theappropriateexposurelevelisautomatically
selectedtomatchthecopydensityoftheoriginal.ManualdensityadjustmentsoverrideAES.
AutomaticTraySwitching(ATS)
Whentheselectedpapertraybecomesemptywhilecopyingisinprogress,automatictrayswitching
detectsthesamecopypapersizeloadedinanothertraytoallowcopyingtobecontinuedwithout
interruption.TheMulti-sheetbypasstrayisnotincludedintrayswitching.
Power Saver Mode
To activate Power Saver mode, press the Power Saver button. The Power Saver mode enables
youtomaintainalowerfixingtemperatureuntilthePowerSaverbuttonispressedagain.When
Power Saver is on, all other indicators except the Power Saver indicator will go off.
CAUTION:
Turn the power off during long periods of copier inactivity.
Use Power Saver Mode when copier is inactive for short periods of time.
MachineInformation 3-11
MachineInformation
KeyOperatorSettings
The Key Operator can change settings and customize the copier so that it handles the needs of
your particular working environment. See Section 9 to review the entire list of Key Operator
functionsthatareavailabletoyou.
AutoLowPowerTimer
The Auto Low Power Timer enables you to maintain a lower fixing temperature during periods of
copier inactivity. When Auto Low Power Timer is on, all other indicators will be off; and the initial
modedisplaysadimmerback-litmessage.
The Auto Low Power Timer is available in the Application selection mode; Basic mode; or during
idling.AutoLowPowerTimerisunavailableduringamishandledpapercondition.Thefeatureis
activatedinKeyOperatormode.Seep.9-39top.9-43.
Non-ImageAreaErase
When copying from the platen glass with the document cover open only, the image area is copied,
erasing the exposed area of the platen glass outside the document. This function can be set by key
operator mode, to be activated with any copying conditions, with APS or AMS selected, or not to be
activated.Seep.9-39to9-43.
RADFFrameErasureSelection
When copying using the RADF, the four edges of the document will be erased by five millimeters
each.ThisfunctionissetON/OFFbykeyoperatormode.Seep.9-39to9-43.
Odd-EvenOriginalCounter
Theodd-evenoriginalcounterautomaticallycountsoriginalsin1s2modeandInsertionmodes.
Oddstatusisadjustedautomaticallybyinsertionofanextrasheet.Theodd-evenoriginalcounteris
setbykeyoperatormode,seep.9-39to9-43.
CountofSheetInsertionOriginals
WhenthisfunctionisactivatedandSheetInsertionmodeisselected,thecopierautomaticallycounts
the number of RADF originals, so that the original count is detected by the copier in advance of
startingthejob.ThisfunctionissetON/OFFbykeyoperatormode.WhenthisfunctionissetOFF,
theoriginalcountshouldbeenteredmanually.Seep.9-39to9-43.
3-12 MachineInformation
MachineInformation
KeyOperatorSettings(continued)
WeeklyTimerOption
The weekly timer allows the copier to be programmed to turn on and off according to the needs of
eachworkenvironment.Forexample,turnmainbodypowerOff/Ondailyorweekly,duringlunch
time,onholidays,andalsoenablethetimerinterruptmode,whichallowstemporaryuseofthe
machineevenwhenthemachineisinthedaily,weekly,orholidayOffmode.Seep.9-27to9-38.
LCDPanelContrast
ThecontrolpanelcontrastfeaturecanbeadjustedintheKeyOperatormode.Seep.9-39to9-43.
MachineInformation 3-13
MachineInformation
ServiceSettings
The following functions can be provided by your Konica Service Representative, who is
authorizedtochangeDIPswitchsettings.Contactyourservicerepresentativeifsettingchanges
are required.
CascadeMode
ST-217In-BinStaplerSorterandST-216Off-LineStaplerSorterfeaturetheCascademodecanbe
activatedinusual.Refertop.6-5andfordetailsoftheCascademode.
OKKey
ServicecansetthecopiertoreturntotheBasicscreenautomaticallywithoutyourhavingtopress
the OK key after selecting the desired copying condition.
AMSDisplay-–A–
WhentheAMSfunctionisinoperation,“–A–”willbedisplayedintheMagnificationwindowofthe
Basicscreen,providedthesettingtodisplay“–A–”isactivatedbyService.
StapleSheetLimitation
The staple sheet capacity is set to 50 ( legal, letter, letter/R) / 30 (ledger) for ST-217 In-Bin Stapler
Sorter.Servicecanchangethecapacityto45/20or40/20.
MaximumPrintQuantityLimitation
ThemaximumprintquantitycanbesetbyService.
MasterKeyCodeSettingforECM/WeeklyTimer
Master key codes for ECM (8 digits) and for the Weekly timer (4 digits) are to be set by Service.
AutoCopy-OriginalSizeandOff-Timer
AutoCopycanbemadetofunctionwithoriginalsthataresmallerthan5.5"x8.5"throughaservice
setting.Whenthissettingisactivated,themachinestartsevenwhennooriginalisplacedonthe
platenglass.
TheAutoCopyOff-timercanbesetfor10seconds/20seconds/30secondsbyservice.Initially,the
timer is set to release after 20 seconds of copier inactivity.
3-14 MachineInformation
Section4: PaperInformation
Positioning Originals on the Platen Glass
PositioninganOriginalforManualCopying
Using the ReversingAutomatic Document Feeder (RADF)
PositioningOriginals
PositioningMixedOriginals
Paper in Main Body/Drawer Base Unit
Paper in Multi-Sheet Bypass
Paper inAutomatic Duplex Tray
Paper in Sorter
PaperWeight Compatibility Chart
PaperInformation
PositioningOriginalsonthePlatenGlass
PositioninganOriginalforManualCopying
Usetheplatenglasswhenoriginalsarenotsuitableforusewiththedocumentfeeder,e.g.,when
size is incompatible, or when originals are folded, stapled, torn, or in generally poor condition.
AutomaticPaperSelection(APS)operateswhencopyingfromtheplatenglass.
Specifications
❒ Allcapacitiesarestatedfor20lbbondpaper
❒ Max.originalsize:11"x17"(280mmx432mm),sheetorbook
❒ Max.bookweight/thickness:15lb[6.8kg]/1.2"[30mm]
❒ Originalplacement:Facedownoncenterleftportionofglass
❒ Orientation(portrait-landscape):Sameascopypaper
1
2
3
Raisethedocumentcover,asshownintheillustrationbelow.
Place original face down along the left measuring guide.
Gentlycloseandslide-upthedocumentcover,topreventtheoriginalfromshiftingonthe
glass.
TIP:
ToeliminateblackcopymarksonedgeswhencopyingfromabookwithoutselectingBookCopymode,selectFrameErasurein
Applicationmode.Ifthebookdoesnotcompletelycovertheplatenglass,orifthedocumentcovercannotbecompletelyclosed,
placewhitepaperoverexposedglasstoreducetonerconsumption.
4-2
PaperInformation
PaperInformation
UsingtheReversingAutomaticDocumentFeeder(RADF)
Specifications
❒ Allcapacitiesarestatedfor20lbbondpaper
❒ Max.RADFtraycapacity:50sheets
❒ Max.originalexittraycapacity:50sheets
❒ Originalsizerange:11"x17",8.5"x14",8.5"x11",8.5"x11"R,5.5"x8.5"
(280mmx432mm~140mmx216mm)[seeNote1]
❒ Originalplacement:Facedown;orientationsameascopypaper
❒ Orientation(portrait-landscape):Sameascopypaperfeedingdirection
❒ Originalweight:20lb~24lb(nospecialstock)
❒ Curlingtolerance/stackheight:10mmorless/20mmorless
ADF MODE 1-1, 1-2
Originalsize:11"x17",8.5"x14",8.5"x11",8.5"x11"R,5.5"x8.5"
Max.feedercapacity:50originalsheets
RADF MODE 2-2, 2-1
Originalsize:11"x17",8.5"x14",8.5"x11",8.5"x11"R
Max.feedercapacity:50originalsheets
MIXED MODE
Originalsize:11"x17"and8.5"x11"combined;or8.5"x14"and8.5"x11"Rcombined
Mixedfeedercapacity:25originalsheets
Unsuitable RADF Originals
PLEASE NOTE:
1 WithAPS,5.5"x8.5"originalsselect8.5"x11"andnon-standardoriginalsselectthenextlargersize.
2 UseonlypaperrecommendedbyKonicaBusinessMachinesU.S.A.,Inc.
PaperInformation
4-3
PaperInformation
UsingtheReversingAutomaticDocumentFeeder(RADF)(continued)
PositioningOriginals
Thedocumentfeeder(RADF)automaticallyfeedsupto50originalsdirectlytotheplatenglass,
startingwiththetopsheet.TheRADFshouldonlybeusedforunstapled,unfolded,smooth,flat
originals.
❒ Originalsizedetectionrequiresaccuratepaperguideadjustment
❒ APSdetectssize11"x17",8.5"x14",8.5"x11"and8.5"x11"R
❒ Sizeweight,capacityarespecifiedforallcopymodesonp.4-3
Before placing originals in the tray, be sure the document feeder is closed fully.
1
Position original(s) face down on the document feeder tray.
• Place two-sided originals with page one face down.
• If necessary, open the tray extension to support large originals.
2
Adjustpaperguides.
4-4
PaperInformation
PaperInformation
UsingtheReversingAutomaticDocumentFeeder(RADF)(continued)
PositioningMixedOriginals
UsethemixedoriginalmodewiththeRADFtocopymixed-sizeoriginalsfromthedocument
feeder. APS and AMS function in this mode. In APS mode copy paper will match original size, if
available.Otherwise,anappropriateavailablesizewillbeselectedfor1:1mode.
❒ Mixedoriginalcombinations:
Ledger11"x17"&Letter8.5"x11"
Legal8.5"x14"&8.5"x11"R
❒ RADFcapacity:
Max.50sheets
❒ Printquantity:
Max.999sheets
❒ Incompatible:Usingplatenglass,Sheet/CoverInsertion,OHPInterleave,BookCopy,2in1Format
Before using the Mixed Original mode, be sure the document feeder is closed completely.
1
Arrangeoriginalsinorder,andplacethemasdescribedbelow:
Place11"x17"/8.5"x14"originalsfacedownorside1downinthedocumentfeeder,in
landscapeorientation,i.e.,withshortedgefeeding.
Position8.5"x11"sizeinportraitorientation,i.e.,withlongedgefeeding.
2
Open the document feeder tray extension to support ledger size.
3
Insertoriginalsintothedocumentfeeder,whileadjustingthepaperguides.
PaperInformation
4-5
PaperInformation
PaperinMainBody/DrawerBaseUnit
PaperWeight/Orientation:16~24lb/orientationsameasoriginal
TotalPaperCapacity: 2230
Mainbody(withPlainStand);1,100sheets,including100-sheetMulti-SheetBypass
MainbodywithDB-206A;1,600sheets,including100-sheetMulti-SheetBypass
MainbodywithDB-206B;2,600sheets,including100-sheetMulti-SheetBypass
MainbodywithDB-606;3,100sheets,including100-sheetMulti-SheetBypass
Tray1:500sheets20lb/fixedto11"x17",8.5"x14",8.5"x11"/R,5.5"x8.5",A4,orA4R(serviceadjustable)
Tray2:500sheets20lb/user-adjustabletoanystandardsizefrom11"x17"~5.5"x8.5":orientationsameasoriginal
Tray3(DB-206A/206B):500sheets20lb/fixedto11"x17",8.5"x14",8.5"x11"/R,or5.5"x8.5"(serviceadjustable)
Tray3(DB-606):500sheets20lb/fixedto11"x17",8.5"x14",8.5"x11"/R,or5.5"x8.5"(serviceadjustable)
Tray4(DB-206B):500sheets20lb/fixedto11"x17",8.5"x14",8.5"x11"/R,or5.5"x8.5"(serviceadjustable)
Tray4(DB-606):1,500sheets20lb/fixedto8.5"x11"or8.5"x11"R(serviceadjustable)
Tray5(DB-206B):500sheets20lb/fixedto11"x17",8.5"x14",8.5"x11"/R,or5.5"x8.5"(serviceadjustable)
Total Paper Capacity:2330
Mainbody(withPlainStand);600sheets,including100-sheetMulti-SheetBypass
MainbodywithDB-206A;1,100sheets,including100-sheetMulti-SheetBypass
MainbodywithDB-206B;2,600sheets,including100-sheetMulti-SheetBypass
MainbodywithDB-606;2,600sheets,including100-sheetMulti-SheetBypass
Tray1:500sheets20lb/user-adjustabletoanystandardsizefrom11"x17"~5.5"x8.5":orientationsameasoriginal
Tray2(DB-206A):500sheets20lb/fixedto11"x17",8.5"x14",8.5"x11"/R,or5.5"x8.5"(serviceadjustable)
Tray3(DB-206B/606):500sheets20lb/fixedto11"x17",8.5"x14",8.5"x11"/R,or5.5"x8.5"(serviceadjustable)
Tray3(DB-606):1,500sheets20lb/fixedto8.5"x11"or8.5"x11"R(serviceadjustable)
Tray4(DB-206B):500sheets20lb/fixedto11"x17",8.5"x14",8.5"x11"/R,or5.5"x8.5"(serviceadjustable)
PaperinMulti-SheetBypass
PaperSize/Orientation:Adjustablefrom11"x17"~5.5"x8.5";orientationsameasoriginal
PaperWeight:16~32lb;Special(OHPtransparencies,labels,holepunch,ragcontent)
Multi-SheetBypassCapacity:10020lb-sheetsstacked:singlefeedspecialstock
PaperinAutomaticDuplexTray
PaperSize:11"x17",8.5"x14",8.5"x11"/R,A4,A4R
PaperOrientation:Orientationsameasoriginal
PaperWeight:16~24lb
DuplexTrayCapacity: 50sheets20lb
30sheets(11"x17")
PLEASENOTE:ReliabilityandcopyqualityarenotguaranteedforallSpecialpapers.Useonlypaperthatisrecommendedby
Konica.
4-6
PaperInformation
PaperInformation
PaperinSorter
ST-103Off-LineStaplerSorteracceptsLedger11"x17",Legal8.5"x14"andLetter/R8.5"x11"/R
papersizes.
ST-216Off-LineStaplerSorteracceptsLedger11"x17",Legal8.5"x14",Letter/R8.5"x11"/Rand
5.5"x8.5"papersizes.
ST-217In-BinStaplerSorteracceptsLedger11"x17",Legal8.5"x14"andLetter/R8.5"x11"/R
(5.5"x8.5"inNon-sort,SortorGroupmode)
ST-103 Off-Line Stapler Sorter (capacities at 20lb, unless otherwise indicated)
Sortmodemax.bincapacity:50Letter/Ledger/Legal/8.5"x11"R
Groupmodemax.bincapacity:30Letter/Ledger/Legal/8.5"x11"R
Non-sortmodemax.topbincapacity:100Letter/Ledger/Legal/8.5"x11"R
Staplingmodemax.sheetcapacity:25sheets
Paperweight:16~24lb
ST-216 Off-Line Stapler Sorter (capacities at 20lb, unless otherwise indicated)
Sortmodemax.bincapacity:50Letter/Ledger/Legal/8.5"x11"R/5.5"x8.5"
Groupmodemax.bincapacity:30Letter/Ledger/Legal/8.5"x11"R/5.5"x8.5"
Non-sortmodemax.topbincapacity:100Letter/Ledger/Legal/8.5"x11"R/5.5"x8.5"
Cascademodeoverallbincapacity:100sheetsinTopbin+(19binsx30sheets)=670sheets
Staplingmodemax.sheetcapacity:25sheets(samesizeassortmode)
Paperweight:16~24lb
ST-217 In-Bin Stapler Sorter (capacities at 20lb, unless otherwise indicated)
Sortmodemax.bincapacity:50Letter/Legal/8.5"x11"R/5.5"x8.5";30Ledger
Groupmodemax.bincapacity:30Letter/Ledger/Legal/8.5"x11"R/5.5"x8.5"
Non-sortmodemax.topbincapacity:100Letter/Ledger/Legal/8.5"x11"R/5.5"x8.5"
Cascademodeoverallbincapacity:100sheetsinTopbin+(20binsx30sheets)=700sheets
Staplingmodemax.sheetcapacity:50Letter/Legal/8.5"x11"R;30Ledger
Paperweight:16~32lb;16~24lbinstaplesortmode
PaperWeightCompatibilityChart
PLEASENOTE:ReliabilityandcopyquantityarenotguaranteedforallSpecialpapers.Useonlypaperthatisrecommendedby
Konica.
PaperInformation
4-7
Section5: BasicOperations
Basic Screen
Copy Mode
1-1,1-2,2-2,2-1
1s2ModeOdd-EvenOriginalCounterOn
CopyDensity
AutomaticExposureSelection(AES)
ManualMode(Lighter,Normal,Darker)
Lens Mode
AutomaticMagnificationSelection(AMS)
SpecialRatioTable
SelectingaSpecialRatioforNon-StandardPaper
PresetandUserSetRatios
ZoomMode
Copy Size
Auto Copy
Interrupt Mode
Check Mode
Entering a User Password
BasicOperations
BasicScreen
The Basic screen displays after warm-up, when the power is turned on; when Auto Power Saver
modeisactivated;whenECMpasswordisset;orwhenAutoResetmodeismanuallyor
automaticallyrestored.AllcopyingselectionscanbeinitiatedfromtheBasicscreen,whether
selectedwithfourFunctionkeys,orconventionalkeys,i.e.,Application,Output,andJobMemory.
WhentheElectronicCopyMonitor(ECM)isactivated,avalid5-digituserpassword,assignedby
the Key Operator, must be entered before copying can be performed. See p. 5-17.
If a Key Counter is required, the message PLEASE INSERT KEY COUNTER is displayed. Insert
a Key Counter.
All of the settings in the Basic screen, except Print Quantity, can be changed by the key operator in
theInitialSettingsmenu.
The Basic Screen
1
2
Positionoriginaldocumentinthedocumentfeederorontheplatenglass.
The Basic screen displays when any key is pressed.
Press [START PRINT] to copy in the Full-auto mode.
The Function keys interact with the setting options of the Basic screen. The [OK] key
completestheselectionmadebytheFunctionkeys.Makecopyingselections,asrequired,
then press [START PRINT].
The following pages describe how to select basic functions.
Section8describeshowtoselectApplicationfunctions.
NOTE: If the Basic screen displays ADJUSTMENT MODE in the message area, this means that the machine was left in the
serviceadjustmentmodebyatechnician.Ifthisoccurs,pleasecontactthetechniciantoturnOffthemode;otherwisecopyingmay
be adversely affected.
5-2
BasicOperations
BasicOperations
TheBasicScreen(continued)
CopyMode
1-1, 1-2, 2-2, 2-1
The [F1 (RADF)] is used to display the Copy mode screen, from which all copy modes can be
selected:1-1,1-2,2-1,2-2.
Copy Mode Specifications:
Incompatible functions
1-1: None
1-2: Multi-sheet bypass; Auto Copy; OHP Interleave; Book Copy; Thin/Thick Paper
2-1: Auto Copy; Book Copy
2-2: Multi-sheet bypass; Auto Copy; OHP Interleave; Book Copy; Thin/Thick Paper
RADF capacity
1-1,1-2,2-2,2-1:50sheets
(copying can be resumed after removing paper from bins)
ADF/RADF original size requirements
1-1,1-2,11"x17",8.5"x14",8.5"x11",8.5"x11"R,5.5"x8.5"
2-2,2-1,11"x17",8.5"x14",8.5"x11",8.5"x11"R
Copy paper weight requirements
16 lb ~ 24 lb (Max. range 16 lb ~ 32 lb)
Copy paper size requirements
1-1:11"x17",8.5"x14",8.5"x11",8.5"x11"R,5.5"x8.5"
1-2,2-1,and2-2:11"x17",8.5"x14",8.5"x11",8.5"x11"R
Sort mode paper size using ST-103 Off-Line Stapler Sorter
11"x17",8.5"x14",8.5"x11",8.5"x11"R
Sort mode paper size using ST-216 Off-Line Stapler Sorter or ST-217 In-Bin Stapler Sorter
11"x17",8.5"x14",8.5"x11",8.5"x11"R,5.5"x8.5"
Staple mode paper size
11"x17",8.5"x14",8.5"x11",8.5"x11"R
BasicOperations
5-3
BasicOperations
TheBasicScreen(continued)
CopyMode(continued)
Thefollowingillustrationsshowexamplesof1-2,2-1and2-2copymodes.
5-4
BasicOperations
BasicOperations
TheBasicScreen(continued)
CopyMode(continued)
Before selecting Copy Mode shown on the screen below, read specifications on the previous page,
andseeSection4forinformationonpositioningoriginals.
Basicscreen
1
2
3
4
5
Copy mode screen
Position original(s) face down in the document feeder or on the platen glass.
If 1-2 mode is required, count originals before placing in document feeder, as you will be
promptedtoinputtheamountlater.
If the Odd/Even original counter is set to on by the key operator, see procedure on the
nextpage.
Press [F1 (RADF)] to display the Copy mode screen.
Available key: [OK]
Press[F2]toselectdesiredmode:1-1,1-2,2-1,or2-2.
Acopymodekeywillappeardimmedifitisincompatiblewithotherselectionsmade.
Press[OK]tocompletethesettingandreturntotheBasicscreen.
When all settings are acceptable, press [START PRINT].
To cancel the mode after returning to the Basic screen, select Copy mode screen again,
press the [F2] for the desired Copy Mode, then press [OK].
NOTES:
1 In1-1,2-1,2-2modes,whenthenumberoforiginalsandprintquantitycausesthesorterbinstofillupbeforethecopyrun is
completed,amessagewillpromptyoutoremovethepaperfromthebins;andtopressstarttoresumecopying.
2 Service can set the copier to return to the Basic screen automatically without the need to press [OK] after selecting desired
copyingcondition.
BasicOperations
5-5
BasicOperations
TheBasicScreen(continued)
CopyMode(continued)
1s2 Mode Odd-Even Original Counter On
Theodd-evenoriginalcounterisakeyoperatorsettingfunctionthatautomaticallycountsoriginals,
andinsertsablankcopysheetiftheoriginalcountisodd.
Basicscreen
1
2
3
4
5
6
7
8
5-6
Copy mode screen
Position original(s) face down on the document feeder.
Press [F1 (RADF)] to display the Copy mode screen.
Press[F2]toselect1-2mode.
Press[OK]tocompletethesettingandreturntotheBasicscreen.
When all settings are acceptable, press [START PRINT].
Press [P] to activate the counting cycle. Originals will exit after they are counted.
Reloadoriginalsondocumentfeederattheprompt.Thecountingresultwillbedisplayed.
If the count is even, press [START PRINT].
If the count is odd, press [AUTO RESET].
Copying will begin.
Ablanksheetwillbeinsertedonlyforoddoriginals,automatically.
BasicOperations
BasicOperations
TheBasicScreen(continued)
CopyDensity
Automatic Exposure Selection (AES)
AESoperatesinthefull-automodebydetectingthedensityoftheoriginalimageandautomatically
selecting the appropriate exposure for the copy.
When manual density is selected, press [AUTO RESET] to reset to AES mode.
Manual Mode (Lighter, Normal, Darker)
Selectmanualcopydensitytoadjustexposure(density)whenoriginalsaretoolightortoodark.
Manualadjustmentscanbemadein7levels.
Basicscreen
1
2
3
Copydensityscreen
Press [F2 (AES)] to display the Copy density screen.
Press [F2 (t)] or [F3 (s)] to select the desired exposure level, from lighter, to normal, to
darker.
Or, press [F4 (AES)] to select AES.
Press [OK].
BasicOperations
5-7
BasicOperations
TheBasicScreen(continued)
LensMode
Automatic Magnification Selection (AMS)
AMSfunctionsinthefull-automodewhenCopySizeisselectedmanually.
❒ Incompatible:APS,ChangeMagnification,Reduce&Shift
Anappropriatereductionorenlargementratiowillbeautomaticallyappliedtotheimageforthe
selectedcopysize.AMSautomaticallycalculatesandselectsthecorrectratio.
AMSratiosareshowninthetablebelow.
PLEASE NOTE:
1 Tocopy5.5"x8.5"originalstosize5.5"x8.5",select5.5"x8.5"COPYSIZE,thenselect1.00magnification.
2 Todetermineratiowhencopyingnon-standardoriginals,seep.5-9.
5-8
BasicOperations
BasicOperations
TheBasicScreen(continued)
LensMode(continued)
Special Ratio Table
1 Locateoriginalwidthonthehorizontalaxis.Locatecopywidthontheverticalaxis.
2 Locateoriginallengthonthehorizontalaxis.Locatecopylengthontheverticalaxis.
3 Entertheappropriateratio,usingPresetorZoommode.(Usesmallerratioforreduction,largerratioforenlargement,keeping
withintheavailable0.50~2.00magnificationrange.)
BasicOperations
5-9
BasicOperations
TheBasicScreen(continued)
LensMode(continued)
Selecting a Special Ratio for Non-Standard Paper
Todeterminereductionorenlargementratioswhenusingnon-standardpapersizes,refertothe
Special Ratio Table on the previous page, and follow the procedure below.
1
First,determinethecorrectratio,asfollows:
Original-Copy Width
Locatetheoriginalwidthonthehorizontalaxis.
Then, locate the copy width on the vertical axis.
Findtheratioonthetablewherethesetwovaluesmeet.
Original-Copy Length
Locatetheoriginallengthonthehorizontalaxis.
Then, locate the copy length on the vertical axis.
Findtheratioonthetablewherethesetwovaluesmeet.
Determining an Appropriate Ratio
Use the smaller ratio for reduction, or use the larger ratio for enlargement.
2
3
4
5
6
Press[F3(1:1)]toentertheMagnificationselectionscreen.
Press [F1 (ZOOM)] to display the Zoom screen.
Use the keypad to enter the desired reduction or enlargement ratio, in 3 digits; or, press
[F3 (▼)] and [F4 (▲)] to scroll to the desired ratio.
When the desired ratio is displayed, press [OK] to complete the setting and return to the
Basicscreen.
To cancel the setting, press [AUTO RESET].
When all other settings are acceptable, press [START PRINT].
5-10 BasicOperations
BasicOperations
TheBasicScreen(continued)
LensMode(continued)
Preset and User Set Ratios
UsethePresetandUserSetratiostoincreaseordecreasemagnificationinfixedamounts.
Six Preset ratios are initially set as shown below, and are adjustable in the Key Operator mode, if
necessary.Inaddition,threeUserSetratiosareadjustablebythekeyoperator.Allratiosremain
effective until they are replaced.
❒
❒
❒
❒
1:1mode(nomagnification)
6Presetratios:50%,65%,77%,129%,155%and200%
3Usersetratios:Programmablebykeyoperatorasselectedfrom50%~200%
Tocopy5.5"x8.5"originalsto5.5"x8.5"copypaper,select5.5"x8.5"CopySize,thenselect100%magnification.
Basicscreen
1
2
3
4
Magnificationselectionscreen
Press[F3(1:1)]toentertheMagnificationselectionscreen.
Press [F3 (▼)] and [F4 (▲)] to select PRESET. The selected PRESET will be highlighted
andthePRESETratiowillbedisplayed.
Or, press [F2 (USERSET)] to select USER 1, 2 or 3. The selected USER indicator will be
highlightedandtheUsersetratiowillbedisplayed.
Press[OK]tocompletethesettingandreturntotheBasicscreen.
To cancel the setting, press [AUTO RESET].
When all settings are acceptable, press [START PRINT].
BasicOperations 5-11
BasicOperations
TheBasicScreen(continued)
LensMode(continued)
Zoom Mode
Use the Zoom mode to reduce or enlarge the copied original image in 1% increments.
❒ Zoomrange:50%~200%
Basicscreen
Magnificationselectionscreen
Zoomscreen
1
2
3
4
5
Press[F3(1:1)]toentertheMagnificationselectionscreen.
Press [F1 (ZOOM)] to enter the Zoom screen.
Use the keypad to enter a 3-digit zoom ratio; or press [F3 (▼)] and [F4 (▲)] to scroll to the
desired ratio. The zoom ratio will be displayed.
Press[OK]tocompletethesettingandreturntotheBasicscreen.
To cancel the setting, press [AUTO RESET].
When all settings are acceptable, press [START PRINT].
5-12 BasicOperations
BasicOperations
TheBasicScreen(continued)
CopySize
Copy Size is used to display the selection screen where you may reset the APS mode, or select a
specific paper tray. When a specific tray is selected, the copy size may require a ratio adjustment.
WhenusingtheRADFwithautomaticsettings,aratiowillbeselectedautomatically.
Traylocationscorrespondtotrays1,2,3,4,5shownonp.3-2.
❒ Whenaselectedtrayisempty,anout-of-papericonwillflashonthePapertrayselectionscreen,alongwithamessagetoload
paperintheemptytray.
❒ Whenatrayisempty,butnotselectedorinuse,theout-of-papericonwillappear,butwillnotflashinthemessagearea.
❒ Ifatraysizeischangedbytheservicetechnician,thenewpapersizewillbereflectedonthescreen,automatically.
❒ IncompatiblewithAMS:APS,Reduce&Shift,ChangeMagnification.
1
2
Press [F4 (APS)] to display the Paper tray selection screen.
Press [F1 (APS)]; or press [F3] to select a specific paper tray.
Basicscreen
3
4
Paper tray selection screen
When the desired selection is highlighted, press [OK] to return to the Basic screen.
To cancel the setting, press [OK].
When all settings are acceptable, press [START PRINT] from the Basic screen.
AutoCopy
BasicOperations 5-13
BasicOperations
UseAutoCopytoautomaticallystartthecopyingoperationassoonasthedocumentcoverisclosed
down over the platen original. With this feature, there is no need to press [START PRINT] key.
AutoCopyautomaticallyactivates20secondsafterthelastcopyingoperation.
❒ AutoCopyOff-timer:20seconds
❒ Incompatible:RADF,2-2,2-1,BookCopy,Sheet/CoverInsertion,2in1Format,MixedOriginal
1
2
Press [AUTO COPY].
Makeallsettings,andpress[OK]toreturntotheBasicscreen.
3
4
5
Usekeypadtoenterprintquantity.
Openthedocumentfeeder,andplaceoriginalfacedownontheplatenglass.
Closethedocumentfeedertostartcopying.
NOTES
1. AutoCopyfunctionsonlywhenanoriginalisplacedontheplatenglass.
2. AutoCopydoesnotfunctionwhenanoriginalsmallerthan5.5"x8.5"isplacedontheplatenglass.
3. AutoCopycanbesetbyservicetofunctionfororiginalssmallerthan5.5"x8.5".Inthatcase,AutoCopyfunctionsevenwhenno
originalisplacedontheplatenglass.
4. TheAutoCopyOff-timercanbesetfor10seconds/20seconds/30secondsbyservice.
InterruptMode
5-14 BasicOperations
BasicOperations
Use the Interrupt mode to interrupt a copy job in progress to perform a simple job from the platen
glass.WhenInterruptcopyingiscompleted,thesettingsfortheinitialjobrestoreautomaticallyand
the Basic screen displays. The original copy job can be resumed by pressing [START PRINT]
key.
❒ Compatible:Magnification1.00,APS,AMS,AES,CopyDensity,LensMode,Copysize
❒ Incompatible:RADF,1-2,2-2,2-1,Sorter,ADU,BookCopy,MixedOriginal,OHPInterleaving,Sheet/CoverInsertion,2in1
Format,JobMemory
1
2
3
4
5
6
Press[INTERRUPT].AnydocumentremaininginsidetheRADFwillexitautomatically.
Other documents left on the RADF tray do not need to be removed.
Ifrequired,removeanydocumentfromtheplatenglass.
Placetheoriginalontheplatenglassandclosethedocumentfeeder.
Select copying features (Copy Density, Lens Mode, Paper Size), if desired.
Press [START PRINT].
WhenInterruptcopyingiscompleted,removeoriginalfromtheplatenglass.
If the initial job was from the platen glass, replace the initial original. Close cover.
Press [START PRINT] to resume the initial copy job.
Ininterruptmode,pressingInterruptagaincancelsthemode.
NOTE:When[CHECK]ispressedduringInterruptCopying,theinformationdisplayedreflectstheinitialcopyjobsettings.Check
modewillnotdisplayInterruptcopyjobinformation.
CheckMode
BasicOperations 5-15
BasicOperations
Use Check mode to confirm copying selections before pressing [START PRINT] key.
❒ AllsettingsmadecanbeviewedintheCheckmodescreen.
1
Press[CHECK]todisplaythecurrentsettings.
2
3
Verify the settings made for the current job.
Press [OK] or [CHECK] to exit from the Check mode and return to the Basic screen.
If settings are OK, press [START PRINT] to start copying.
Otherwise, adjust settings, press [OK]; then press [START PRINT] when the Basic screen
isdisplayed.
4
NOTE:When[CHECK]ispressedinInterruptmode,theoriginalcopyjobsettingswilldisplay,nottheinterruptcopyjobsettings.
EnteringaUserPassword
5-16 BasicOperations
BasicOperations
A user password is required only when the Electronic Copy Monitor (ECM) feature is activated; a
UserPasswordisassigned;and“EnterE.C.M.password”isdisplayedonthescreen.
1
2
3
4
Enteryour5-digitpassword,usingthekeypad.
If the password is invalid, the copier will reset to the initial mode.
Inthatcase,enterthecorrectpassword;orcontactthekeyoperator.
Press [START PRINT].
The current Copy Count will be displayed for a few seconds.
If your Copy Limit is reached or exceeded, “Copy limit reached” will be displayed.
Inthatcase,contactthekeyoperatortoresetyourcopylimit.
Makecopyingselections,andenterprintquantity,asrequired.
When all settings are acceptable, press [START PRINT].
BasicOperations 5-17
Section6: OutputModes
Sorter Specifications
Non-Sort Mode
Cascade Mode
Sort Mode
Group Mode
ST-217 In-Bin Stapler Sorter: Staple Sort Mode
ST-217 In-Bin Stapler Sorter: Manual Staple Sort In-Bin
ST-217 In-Bin Stapler Sorter: Manual Staple in the Top Bin
ST-103/ST-216 Off-Line Stapler
OutputModes
SorterSpecifications
UseonlypaperthatisrecommendedbyKonicaandstoredundertheenvironmentalconditions
statedforcopyquality.Specialstockisnotguaranteedforreliabilityorcopyquality.MultiSheetBypass,Interrupt,OHPInterleave,andMixedSizeOriginalw/Staplingareincompatiblewith
sorteruse.
SORTER TYPES
❒ ST-10310-BinSorterwithoff-linestaplingoption;fixed-bintype
❒ ST-21620-BinSorterwithoff-linestaplingoption;fixed-bintype
❒ ST-21720-BinSorterwithin-binstapling;moving-bintype
SORT MODE
ST-217
16lb~32lbBond
ledger,legal,letter,
letterR,5.5"x8.5"
50sheets/30ledger
STAPLE SHEET
CAPACITY
16lb~24lbBond
ledger,legal,
letter,letterR
50sheets/30ledger
GROUP MODE
16lb~32lbBond
ledger,legal,letter,
letterR,5.5"x8.5"
30sheets
TOP BIN
NON-SORT
16lb~32lbBond
ledger,legal,letter,
letterR,5.5"x8.5"
100sheets
Cascade:700sheets
[100+(30x20bins)]
ST-216
16lb~24lbBond
ledger,legal,letter,
letterR,5.5"x8.5"
50sheets
16lb~24lbBond
25sheets
16lb~24lbBond
ledger,legal,letter,
letterR,5.5"x8.5"
30sheets
16lb~24lbBond
ledger,legal,letter,
letterR,5.5"x8.5"
100sheets
Cascade:670sheets
[100+(30x19bins)]
ST-103
16lb~24lbBond
ledger,legal,letter,
letterR,50sheets
NOTE:Capacitiesarestatedfor20lb
6-2
OutputModes
16lb~24lbBond
25sheets
16lb~24lbBond
ledger,legal,letter,
letterR,30sheets
16lb~24lbBond
ledger,legal,letter,
letterR,100sheets
OutputModes
SorterSpecifications(continued)
NON-SORT MODE; Paper size 11"x17", 8.5"x14", 8.5"x11", 8.5"x11"R, or 5.5"x8.5" (ST216/217 only)
❒ Copypaperweight:16~24lb;Specialstock(32lb,OHP,labels,holepunch,ragcontent)
❒ ST-103topbincapacityfor20lb:100sheets
❒ ST-216topbincapacityfor20lb:100sheets
ST-216cascademodeoverallbincapacity:100sheetsintopbin+(19binsx30sheets)=670sheets
❒ ST-217topbincapacityfor20lb:100sheets
ST-217cascademodeoverallbincapacity:100sheetsintopbin+(20binsx30sheets)=700sheets
SORT MODE: Paper size 11"x17", 8.5"x14", 8.5"x11", 8.5"x11"R , or 5.5"x8.5" (ST-216/
217 only)
❒ ST-103Off-LineStaplerSorter
Copypaperweight:16~24lb
Bincapacityfor20lb:50sheets
Max.originals:50
Max.printquantity:10(ifexceeded,10willbeused)
❒ ST-216Off-LineStaplerSorter
Copypaperweight:16~24lb
Bincapacityfor20lb:50sheets
Max.originals:50
Max.printquantity:20(ifexceeded,20willbeused)
❒ ST-217In-BinStaplerSorter
Copypaperweight:16~32lb
Bincapacityfor20lb:50letter,legal,8.5"x11"R;30ledger
Max.originals:50
Max.printquantity:20(ifexceeded20willbeused)
GROUP MODE: Paper size 11"x17", 8.5"x14", 8.5"x11", 8.5"x11"R, or 5.5"x8.5" (ST216/217 only)
❒ ST-103Off-LineStaplerSorter
Copypaperweight:16~24lb
Bincapacityfor20lb:30sheets
Max.originals:10
Max.printquantity:30(ifexceeded,30willbeused)
❒ ST-216Off-LineStaplerSorter
Copypaperweight:16~24lb
Bincapacityfor20lb:30sheets
Max.originals:20
Max.printquantity:30(ifexceeded,30willbeused)
❒ ST-217In-BinStaplerSorter
Copypaperweight:16~32lb
Bincapacityfor20lb:30sheets
Max.originals:20
Max.printquantity:30(ifexceeded,30willbeused)
OutputModes
6-3
OutputModes
SorterSpecifications(continued)
STAPLING MODE: Paper size 11"x17", 8.5"x14", 8.5"x11", or 8.5"x11"R
❒ ST-103Off-LineStaplerSorter
25sheets20lb/corner13±3/5mm(serviceadjust.to5mm)/side10±5mmfromedge
❒ ST-216Off-LineStaplerSorter
25sheets20lb/corner13±3/5mm(serviceadjust.to5mm)/side10±5mmfromedge
❒ ST-217In-BinStaplerSorter
50sheets(letter,legal,8.5"x11"R)30sheets(ledger);16~24lb
Corner7±2mmfromsideedge,8±2mmfromtopedge
Max.printquantity:20(ifexceeded,20willbeused)
NOTE:Fordetailsonpaperweight,size,andcapacitieswhenusingthesorter,pleaseseeSection4.
6-4
OutputModes
OutputModes
Non-SortMode
Use the Non-sort mode when making a large number of copies of a single original or when using
special stock. Copies exit to the top bin of the sorter.
❒ Topbincapacity:
❒
❒
❒
❒
1
2
3
ST-103Off-LineStaplerSorter
:max.100sheets
ST-216Off-LineStaplerSorter
:max.100sheets
ST-217In-BinStaplerSorter :max.100sheets
Topbinpaperweight:16~24lb;Specialstock(32lb,OHP,labels,holepunch,ragcontent)
Max.originalsinNon-Sortmode:100sheets20lbbond
Binpaper:11"x17",8.5"x14",8.5"x11",8.5"x11"R,5.5"x8.5"(ST-216/217only)
Incompatible:Sort,Group,Staple
Placeoriginals,asrequired.
Press [SORT]/[GROUP]/[STAPLE] to turn off each indicator light.
Enter desired print quantity, then press [START PRINT].
Press [AUTO RESET] to clear settings.
CAUTION:
Ifprintquantityexceedsthe100-sheettopbincapacity,removecopiesbeforethelimitisreached;
otherwisemishandledpapermayoccur.
OutputModes
6-5
OutputModes
CascadeMode
Use the Cascade mode to allow continuous delivery of non-sort copies from the top bin to
subsequentbinsofthesorter.Selectthecascademodewhentheprintquantityamountexceedsthe
100-sheetcapacityofthetopbin.
TheCascademodeallowsyoutoincreasetheoverallbincapacityupto670/700sheets,byusing
thetopbinplussomeorallofthe19/20regularbins.Copiedsheetsexceedingthiscapacitywillbe
deliveredtothe20thbin(thebottombin).(SeeCautionstatement.)
NOTE: TheCascademodecanbeactivatedbyserviceduringsetup.
❒ Copypaper:
❒ Overallbincapacity:
ST-216Off-LineStaplerSorter:
ST-217In-BinStaplerSorter:
❒ Printquantity:
❒ Incompatible:
1
2
3
11"x17",8.5"x14",8.5"x11"R,8.5"x11",5.5"x8.5"
100sheetsinTopbin+(19binsx30sheets)=670sheets
100sheetsinTopbin+(20binsx30sheets)=700sheets
Max.999sheets(SeeCautionstatement.)(Sheetsover670/700requireremovalfrom
bottombin)
Sort,Group,Interrupt
Placeoriginals,asrequired.
Press [SORT]/[GROUP]/[STAPLE] to turn off each indicator light.
Enter desired print quantity, then press [START PRINT].
Press [AUTO RESET] to clear settings.
NOTES
1 InCascademode,interruptcopyingcanbeused,however,thecascadefunctioncannotbeusedinInterruptmode.
2 Fordetailsonpaperweights,sizes,andcapacitieswhenusingthesortmode,pleaseseeSection4.
CAUTION: TOTAL BIN CAPACITY IN CASCADE MODE
Shouldyousettheprintquantityabovethemax.670/700-sheetcapacity,besuretoremovethe
copiesdeliveredtothe20thbinbeforethemaximumcapacityisreached;otherwise,apaper
misfeedmayoccur.
6-6
OutputModes
OutputModes
SortMode
Use the Sort mode to sort copies of the original set into bins, one set per bin. Up to 20 bins are
availableinST-216/217.Upto10binsareavailableinST-103.
❒ Bins:
❒
❒
❒
❒
❒
❒
❒
ST-103Off-LineStaplerSorter:Topbin+9bins=10bins
ST-216Off-LineStaplerSorter:Topbin+19bins=20bins
ST-217In-BinStaplerSorter:20bins(TopbinisnotusedinSortmode)
Bincapacity:
ST-103/216Off-LineStaplerSorter:max.50sheets
ST-217In-BinStaplerSorter:max.50sheets(letter,legal,8.5"x11"R);30sheets(ledger)
Binpaperweight:
ST-103/216Off-LineStaplerSorter:16~24lb
ST-217In-BinStaplerSorter:16~32lb
Max.originalsinSortmode:50sheets20lb~24lb
1-1(50originals);1-2(100originals);2-2(50originals);2-1(25originals)
Binpaper:
ST-103/216Off-LineStapler:11"x17",8.5"x14",8.5"x11",8.5"x11"R,5.5"x8.5"(ST-216only)
ST-217In-BinStaplerSorter:11"x17",8.5"x14",8.5"x11",8.5"x11"R,5.5"x8.5"
Printquantity:
ST-216/217;Max.20(ifexceeded,20willbeused),ST-103;Max.10(ifexceeded,10willbeused)
Incompatible:Group,OHPInterleave,Thin/ThickPaper
1
Placeoriginals,asrequired.
2
3
Press [SORT] to light the SORT indicator.
Enter desired print quantity, then press [START PRINT].
Press [AUTO RESET] to clear settings.
NOTE:Fordetailsonpaperweights,sizes,andcapacitieswhenusingthesortmode,pleaseseeSection4.
OutputModes
6-7
OutputModes
GroupMode
UsetheGroupmodetomakemultiplecopiesofeachoriginalsheet,andgroupthemineachbin.
❒ Bins:
❒ Bincapacity:
❒ Binpaperweight:
❒ Originals:
❒ Binpaper:
❒ Printquantity:
❒ Incompatible:
1
2
3
ST-103Off-LineStaplerSorter:Topbin+9bins=10bins
ST-216Off-LineStaplerSorter:Topbin+19bins=20bins
ST-217In-BinStaplerSorter:20bins(TopbinisnotusedinGroupmode)
ST-103/216Off-LineStaplerSorter:max.30sheets20lb
ST-217In-BinStaplerSorter:max.30sheets20lb
ST-103/216Off-LineStaplerSorter:16~24lb
ST-217In-BinStaplerSorter:16~32lb
Max.20sheets20lb
ST-103/216Off-LineStapler:11"x17",8.5"x14",8.5"x11",8.5"x11"R,5.5"x8.5"(ST-216only)
ST-217In-BinStaplerSorter:11"x17",8.5"x14",8.5"x11",8.5"x11"R,5.5"x8.5"
ST-103/216/217;Max.30(ifexceeded,30willbeused)
Sort,Staple,Sheet/CoverInsertion,OHPInterleave,Thin/ThickPaper
Placeoriginals,asrequired.
Press [GROUP] to light the GROUP indicator.
Enter desired print quantity, then press [START PRINT].
Press [AUTO RESET] to clear settings.
NOTE:Fordetailsonpaperweights,sizes,andcapacitieswhenusingthegroupmode,pleaseseeSection4.
6-8
OutputModes
OutputModes
ST-217In-BinStaplerSorter:StapleSortMode
UsetheIn-BinStaplerSorterinStapleSortmodetoautomaticallystaplethecopiedsetineachbin
immediatelyaftertheyaresorted(collated).Eachbinholdsacopiedandcollatedsetoftheoriginals.
❒
❒
❒
❒
❒
❒
Bins:21(only20binsareusedinStapleSortmode)
Staplesheetcapacity:max.50sheets(letter,legal,8.5"x11"R);30sheets(ledger)
Binpaperweight:
16lb~24lb
Binpaper(copysize):11"x17",8.5"x14",8.5"x11",8.5"x11"R
Originals:Max.50sheets20lb
Stapleoccurs: 1-1(50originals;letter,legal,8.5"x11"R)(30originals;ledger)
1-2(100originals)
2-2(50originals;letter,legal,8.5"x11"R)(30originals;ledger)
2-1(25originals;letter,legal,8.5"x11"R)(15originals;ledger)
❒ ST-217stapleposition:Corner7±2mmfromsideedge,8±2mmfromtop-sideedge
❒ Printquantity:Max.20(ifexceeded,20willbeused)
❒ Incompatible:Group,OHPInterleave,BookCopy,Thin/ThickPaper,2in1Format,5.5"x8.5",PlatenGlass
ST-217In-BinStaplerSorter:StapleSortMode(continued)
OutputModes
6-9
OutputModes
1
Placeoriginals,asrequired.
2
3
Press [STAPLE] to light the STAPLE and SORT indicators.
Enter desired print quantitiy, then press [START PRINT].
Press [AUTO RESET] to clear settings.
NOTES:
1 Fordetailsonpaperweights,sizes,andcapacitieswhenusingtheStaplesortmode,pleaseseeSection4.
2 Copieswillbestapledwhenbinsarefullevenifcopyingisnotcompleted;amessagewillfirstpromptyoutoremovepaperfrom
thebins,andthenyouwillbepromptedtopress[STARTPRINT]toresumecopying.
ST-217In-BinStaplerSorter: ManualStapleSortIn-Bin
6-10 OutputModes
OutputModes
UsetheManualStaplebuttontomanuallystapleinthebin(s).Thisfeatureisconvenientwhen
staplingisdesiredaftercopyingisalreadyunderwayintheSortmode.TheManualStaplebuttonis
located on the top surface of the sorter.
❒
❒
❒
❒
❒
❒
❒
Bins:
21(only20binsareusedinManualStapleSortmode)
Staplesheetcapacity:
Max.50sheets20lbletter,legal,8.5"x11"R;30sheetsledger
Binpaperweight:
16~24lb
Originals:
Max.50sheets20lb~24lb
Binpaper(copysize):11"x17",8.5"x14",8.5"x11",8.5"x11"R
Printquantity:
Max.20sets
Incompatible:
Group,OHPInterleave,Thin/ThickPaper
1
Placeoriginals,asrequired.
2
3
4
Press [SORT] to light the SORT indicators.
Press [START PRINT]. Copying will begin.
Whencopyingiscompleted,pressManualstaplebuttonontheSorter.
In-Binstaplingwillbeperformed.
Removestapledcopiesfrombins.
Press [AUTO RESET] to clear settings.
5
OutputModes 6-11
OutputModes
ST-217In-BinStaplerSorter: ManualStapleintheTopBin
UsetheManualStaplebuttontomanuallystapleacopiedsetplacedinthetopbinorthefirstbin.
The Manual Staple button is located on the top of the sorter. The first bin is the sorter bin directly
belowthetopbin.
❒ Topbinstaplingcapacity:Max.50sheets
1
2
3
Evenly align the edges of the sorted set.
Position the sorted set face up into the top bin so that the corner to be stapled is in the front
(forward)rightposition.
TheManualStaplelightwillturngreen.
PresstheManualStaplebuttontostapletheset.
6-12 OutputModes
OutputModes
ST-103/ST-216 Off-Line Stapler
UsetheOff-LineStapleroptiontomanuallystapleacopiedset.
Staplingcapacity:max.25sheets20lb
NOTE:Whencopyingandusingthesorter,the
markoftheOff-LineStaplerbecomesredandthestaplercannotbeused.
Side Stapling
1
Removecopiedsetsfromthesorterbins,andneatly
aligneachsetbeforestapling.
2
While holding the set, insert the sheets on the side to be
stapled. The copied set will be stapled at the inserted
location.
OutputModes 6-13
OutputModes
ST-103/ST-216 Off-Line Stapler (continued)
Corner
1
2
3
Stapling
Pressthestaplerreleasebuttontoopenthestaplerunit.
Removethecornerstaplingadaptordevicefromthelocationshown.
Partiallyclosestaplerandinsertthestaplingadaptorintotheslotindicated.
4
5
Whenadaptorisinserted,closestapler.
Insert upper left corner of paper into stapler. The copied set will be stapled.
NOTE:Wheninsertingtheadaptordonotclosestaplercompletely.
Removing Corner Stapler Adaptor
1
HoldeachsideoftheCornerStaplingAdaptor,liftslightly,thenwithdraw.
2
Pressthestaplerreleasebutton,andopenthestaplerunit.
3
ReturntheCornerStaplerAdaptortoitsoriginalposition,thenclosethestapler.
6-14 OutputModes
Section7: JobMemory
Job Store
Job Recall
Job Memory Form
JobMemory
JobStore
Use Job Store to store up to 12 frequently-used copying jobs, which can be recalled at any time.
Thestoredjobscanbegivenalphabeticalnameswithamaximumof5characters.
❒ Allcopyingfunctionscanbeselected
❒ InterruptmodecannotbeusedwhileinJobMemory
Job Memory Mode
7-2
Jobstore/recallscreen
Jobno.selectionscreen
Jobnamechangeconfirmationscreen
Jobnameregistrationscreen
JobMemory
JobMemory
JobStore(continued)
1
2
3
4
5
6
MakejobselectionsfromtheBasicscreenand/orApplicationselectionscreen.
When all selections are made, press the [JOB MEMORY] key to display the Job store/
recallscreen.
If you wish to cancel the settings made in the procedure below, press [AUTO RESET].
The Basic screen will be restored.
Press [P] button on the Control panel. The Job no. selection screen will be displayed.
Thefirstscreendisplaysframesnumberedfrom1~3tostorethejobnameunderthat
number.The[F4]keycanbeusedtoscrollthroughthe12jobnumbers.
Press job no. to select the job you want to store.
Jobno.withlockmarkdisplayedcannotbeselected.
If you select previously stored job, a message is displayed, "No. ## is stored. Rewrite on?"
TheJobnameregistrationscreenwillbedisplayed.
Press [F1 (t)] and [F2 (s)] to select each character, then press [F3 (SET)] to enter the
character.Theenteredcharactersand/ornumberwillbedisplayed.
The5-digitalphabeticalnamemaybeentered.
NOTE:Ifyouenterthenameincorrectly,highlightthe“BS”ontheJobnameregistrationscreen,thenpress[F3(SET)].
Each pressing the key deletes one character from the last of the entered name. Select again the correct character to
completeenteringthejobname.
7
8
9
When the name is entered, press [OK] to resume the job store/recall screen. If the name is
correct, press [OK] to store it and return to the Basic screen.
If the Job name is correct, press [OK]. The Job store/recall screen is displayed.
To re-enter the Job name, Press [F1] ~ [F3] and [F4] to return to the Job registration
screen.
To finish job store, press [OK] to complete the setting and return to the Basic screen.
NOTES:
1 AlockedjobisindicatedbyalockiconontheJobkeynumber.
2 Onlythekeyoperatorcanlockajob.
3 Alockedjobcannotbeoverwrittenunlessitisunlockedbythekeyoperator.
4 Ablankkeyindicatesthatnojobisstoredunderthatkey.
5 JobMemoryentriescanberecordedontheJobMemoryFormincludedattheendofthissection.
JobMemory
7-3
JobMemory
JobRecall
Use Job Recall to recall jobs that are already stored in Job Memory.
❒ InterruptmodecannotbeusedwhileinJobMemory
Job Memory Mode
Check Mode
1
2
3
4
Jobstore/recallscreen
Checkscreen
Place original(s) in RADF as required for the job you are about to recall.
Press the [JOB MEMORY] key to display the Job store/recall screen.
Eachscreendisplaysthreejobsatatime,startingwithframesnumberedfrom1~3.(Usethe
[F4] to scroll through each of four screens to reach all 12 job numbers.)
Press [F1] ~ [F3] under the frame of the desired job No. to complete the selection and
returntotheBasicscreen.
Thecopierwillbesettothecorrectjobspecification,automatically.
To cancel the job, press [AUTO RESET].
Press [START PRINT].
NOTES:
1 AlockedjobisindicatedbyalockiconontheJobkeynumber.
2 Onlythekeyoperatorcanlockajob.
3 Alockedjobcannotbeoverwrittenunlessitisunlockedbythekeyoperator.
4 Ablankkeyindicatesthatnojobisstoredunderthatkey.
5 JobMemoryentriescanberecordedontheJobMemoryFormincludedattheendofthissection.
7-4
JobMemory
JobMemory
JobMemoryForm
JobMemory
7-5
Section 8: Applications
Application Function Menu
Sheet/Cover Insertion
OHP Interleave
Book Copy
Image Shift
Simplex Mode (1-1, 2-1)
Duplex Mode (1-2, 2-2)
Reduce & Shift
Frame/Fold Erasure
Thin/Thick Paper
Mixed Original Mode
2 in 1 Format
Photo Mode
Photo Mode
Photo-Text Mode
Moisture Paper
Applications
Application Function Menu
When the [APPLICATION] key is pressed, the Application selection screen displays on the LCD
screen. If one function on the menu is incompatible with another, it will appear dimmed.
When a function is selected, it becomes highlighted. If you press the [OK] key when a function is
highlighted, another screen or two will display to enable you to enter the appropriate settings. For
example, you may select Sheet/Cover Insertion from the Application selection screen; and then,
from a subsequent screen, select insertion type. Still, another screen will display for your page
number entries, which designate insertion locations.
When all settings are made for each function, the [OK] key can be pressed to complete the settings,
and return you to the Application selection screen. If no other Applications are desired, the [OK]
key can be pressed again to complete your selections, and bring you back to the Basic screen. In the
Basic screen, you can press [START PRINT] key to perform the operation.
Application selection screen
The Moisture Paper icon is displayed on the Application selection screen if the mode is set in the
key operator mode. This mode enables you to control copy quality when copy paper contains
moisture.
NOTES:
1 The indicator light on the [APPLICATION] will be lit when application selections have been made.
2 When incompatible selections are grayish, the last key pressed will be selected.
3 Select highlighted application, press [OK] to cancel function.
To cancel all application selections, press [AUTO RESET] on the Control panel.
8-2
Applications
Applications
Sheet/Cover Insertion
Use Sheet/Cover Insertion in copy mode or blank mode to insert Chapter sheets or slip sheets into
the finished set. Sheet insertions from the Universal tray (Konica 2230, tray 2; Konica 2330, tray 1)
may be used in conjunction with Front or Front & Back cover insertions from the Multi-sheet
bypass tray. All other trays may be used for regular copied sheets.
Specifications for Sheet/Cover Insertion
❒ Max. insert sheets: 15 locations, from 1~99, except front and back covers
❒ Original paper: Max. 50 sheets 11"x17", 8.5"x14", 8.5"x11", 8.5"x11"R, 20 lb~24 lb
❒ Sheet Insertion (Universal tray): 500 sheets/20 lb bond recommended; 11"x17", 8.5"x14", 8.5"x11",
8.5"x11"R: plain or colored paper
❒ Cover Insertion (Multi-sheet bypass tray): 500 sheets/20 lb~32 lb; 11"x17", 8.5"x14", 8.5"x11", 8.5"x11"R:
plain or colored paper
❒ Regular copy paper (tray 2, 3, 4 or 5): 20 lb bond recommended; 11"x17", 8.5"x14", 8.5"x11", 8.5"x11"R
❒ AMS Automatic Magnification Selection: Functions when a different copy size is selected
❒ Incompatible: Using platen glass, APS, Group, OHP Interleave, Book Copy, Mixed Original, 2 in 1 Format,
Interrupt
Cover/Sheet selection screen
Front Cover Mode
This mode is classified as two types, namely; Front blank and Front copy. The Front blank mode
inserts a non coped plain or colored sheet from the Multi-sheet bypass into the finished set, as a
Front cover. The Front copy mode copies and inserts a plain or colored sheet from the Multi-sheet
bypass into the finished set, as a Front cover.
The Hard cover mode can be used in conjunction with the Front Cover Mode when feeding thick
paper from the Multi-sheet bypass.
Back Cover Mode
This mode is classified as two types, namely; Back blank and Back copy. The Back blank mode
inserts a non copied plain or colored sheet from the Multi-sheet bypass into the finished set, as a
Back cover. The Back copy mode copies and inserts a plain or colored sheet from the Multi-sheet
bypass into the finished set, as a Back cover.
The Hard cover mode can be used in conjunction with the Back Cover Mode when feeding thick
paper from the Multi-sheet bypass.
Applications
8-3
Applications
Sheet/Cover Insertion (continued)
When using the Front Cover Mode and/or Back Cover Mode, the sheets are usually fed from the
bypass tray; however, the Universal tray can also be used. The Multi-sheet bypass tray is required
when the Hard cover mode is selected.
Insertion ModeThis mode is classified as two types, namely; Blank insertion and Copy
insertion. The Blank insertion mode inserts non copied plain or colored sheets from the
Universal tray at locations designated in the page setting screen. The Copy insertion mode
copies and inserts plain or colored sheets from the Universal tray at locations designated in the
page setting screen.
Multi-Sheet Bypass Tray – 20 lb~32 lb (Stack mode 20 lb)
COVER INSERTION: The Multi-sheet bypass is used in the copy mode or blank mode to feed front
and/or back sheets, as cover inserts; and is required when the Hard cover mode is selected for thick
paper (up to 32 lb). Cover insertion from the Multi-sheet bypass tray can be used in conjunction
with sheet insertion from the Universal tray.
Universal Tray (Konica 2230, Tray 2; Konica 2330, Tray 1) – Regular paper 20 lb
SHEET INSERTION: The Universal tray is used in the copy mode or blank mode to insert chapter
sheets or slip sheets into the finished set. In copy mode, sheets are copied to match originals
designated in the Page selection screen. In blank mode, sheets are inserted without being copied.
Sheet insertion from the Universal tray can be selected with cover insertion from the Multi-sheet
bypass.
8-4
Applications
Applications
Sheet/Cover Insertion (continued)
Applications
8-5
Applications
Sheet/Cover Insertion (continued)
Sheet Covers Selection
Application selection screen
Cover/Sheet selection screen
Page selection screen
Original quantity screen
Max. insertion locations: 15
Max. originals: 50 sheets
1
2
3
First, load insert sheets in the Universal tray (Konica 2230, Tray 2; Konica 2330, Tray 1),
and load regular sheets in any compatible tray.
If covers are required, load 20 lb cover sheets in the Multi-sheet bypass tray. Use the Hard
cover mode to insert the front and/or back cover that is thicker than 20 lb.
Determine whether the key operator setting for Count of sheet originals is turned On. If the
setting is On, originals will be counted automatically. If the setting is Off, be sure to count
originals manually before placing them in the document feeder, as you will be prompted to
enter the number of originals.
NOTE: In 1-2 mode, determine if Original quantity count for Odd-Even status is On. If On, originals will be
counted automatically. If counter is Off, be sure to count originals before placing them on the RADF, as you
will be prompted to enter the original count during the procedure.
8-6
Applications
Applications
Sheet/Cover Insertion (continued)
4
5
6
7
8
9
10
11
Press [APPLICATION] on the control panel to display the Application selection screen.
Press [F1] to align the arrow to the “Sht./Cover Insertion” indicator, then press [OK]. The
Cover/Sheet selection screen will be displayed.
Select Front Cover Insertion.
(1) Press [F1 (Front)] to select “Front copy” or “Front blank”. To deselect Front Cover
Insertion, display “Front”.
(2) To insert a hard cover, press [F4 (Hard Cover)] to highlight “Hard Cover”.
(3) Proceed to step 7 to select Sheet Insertion, if desired.
(4) Proceed to step 8 to select Back Cover Insertion, if desired.
(5) Press [OK] to return to the Application selection screen.
Select Sheet Insertion.
(1) Press [F2 (Insertion)] to select “Copy” or “Blank”. To deselect Sheet Insertion,
display “Insertion”.
(2) Proceed to step 6 to select Front Cover Insertion, if desired.
(3) Proceed to step 8 to select Back Cover Insertion, if desired.
(4) Press [OK] to display the page selection screen.
(5) Use the keypad to enter the page number of each insertion location.
Press [START PRINT] after each entry.
Example: If p. 4 is entered in blank mode, a blank sheet is inserted between p. 4 and
p. 5; in copy mode, a copied sheet is inserted at p. 4.
(6) When all page numbers are entered, press [OK].
If the manual counter is on, the Original quantity enter screen will be displayed. Enter
the number of originals using the keypad, then press [OK].
Select Back Cover Insertion.
(1) Press [F3 (Back)] to select “Back copy” or “Back blank”. To deselect Back Cover
Insertion, display “Back”.
(2) To insert a hard cover, press [F4 (Hard Cover)] to highlight “Hard Cover”.
(3) Proceed to step 6 to select Front Cover Insertion, if desired.
(4) Proceed to step 7 to select Sheet Insertion, if desired.
(5) Press [OK] to return to the Application selection screen.
Position originals face down in the document feeder, then press [START PRINT].
If the automatic original counter is On, originals will be counted.
Reload originals. The original count will be displayed.
Press [START PRINT].
Or, in 1-2 mode, you will be prompted to press [START PRINT] if the original count is
even, and to press [AUTO RESET] if the original count is odd.
Applications
8-7
Applications
OHP Interleave
Use the OHP Interleaving function in 1-1 or 2-1 mode to copy onto overhead projection
transparencies, and output a blank or copied interleaf sheet with each copied transparency.
In Blank Sheet Interleaving, a blank interleaf sheet may be output with each transparency to keep
the film material from sticking together.
In Copy Sheet Interleaving, a copied interleaf sheet may be output with each transparency to be
used for reference during a presentation; for photocopying; and for filing or inserting into a binder.
❒
❒
❒
❒
❒
❒
❒
Transparency (OHP) source: Multi-sheet bypass
Transparency size: 8.5"x11"
Interleaving paper source: Tray 1~5
Interleaving paper size: 8.5"x11"
Multi-sheet bypass capacity: 1 sheet
Number of originals/number of copies: 1
Incompatible: Sort, Group, Staple, Thin/Thick Paper, Sheet/Cover Insertion, Book Copy, Mixed Original,
2 in 1 Format, 1-2, 2-2 copy modes, Moisture paper
Application selection screen
8-8
Applications
OHP interleave mode screen
Applications
OHP Interleave (continued)
1
2
3
4
5
6
Position original, then load OHP transparencies in the Multi-sheet bypass, and interleaving
paper in any other tray, 1~5.
Press [APPLICATION] to display the Application selection screen.
Press [F1] to align the arrow to the “OHP interleave” indicator, and press [OK]. The OHP
interleave mode selection screen will be displayed.
Press [F2 (Blank)] or [F3 (Copy)].
Press [OK].
Make additional application selections, or press [OK] to return to the Basic screen.
Option: Press [CHECK] to view selections; then press [OK] to return to the Basic screen.
7
Press [START PRINT].
Press [AUTO RESET] to restore Application mode.
Check screen
NOTE: Use only OHP transparencies recommended by Konica Business Machines U.S.A., Inc.
Applications
8-9
Applications
Book Copy
Use Book Copy mode from the Platen glass to copy an original, such as an opened book; a ledger
size sheet; or two 8.5"x11" sheets placed size by side. In 1-1 mode, the left and right facing pages of
the original will be copied separately onto two 8.5"x11" sheets. In 1-2 mode, the left and right
facing pages of the original will be copied separately and duplexed onto one 8.5"x11" sheet. If a
copy size other than 8.5"x11" is selected, Book Copy will function incorrectly.
Tips: If a book does not cover the Platen glass, place paper over exposed glass to reduce toner consumption. Speed
manual copying by placing two letter sheets side by side on glass and selecting Book Copy or Non image area erase.
❒ Original Size: Max. 11"x17" (ledger) sheet or open book
❒ Copy Paper Size: 8.5"x11" (letter)
❒ Incompatible: APS, AMS, RADF, Staple-Sort, Change Magnification (compatible only for 65%, 121% and
200 % magnifications), Sheet/Cover Insertion, Reduce & Shift, Frame Erasure, Mixed Original, 2 in 1
Format, OHP Interleave, 2-2, 2-1 modes
Application selection screen
1
2
3
4
5
6
7
Load an even number of 8.5"x11" sheets in a tray or in the Multi-sheet bypass.
Position the open book or sheet, adjusting the center to that of the scale on the left edge of
platen.
Gently close the document cover.
Press [APPLICATION] to access the Application selection screen.
Press [F1] to align the arrow to the “Book Copy” indicator, and press [OK]. The “Book
Copy” indicator will be highlighted.
Make additional application selections, or press [OK] to return to the Basic screen.
Use keypad to enter print quantity.
Option: Press [CHECK] to view selections; then press [OK] to return to the Basic screen.
8
Press [START PRINT]. In 1-1 mode, two letter-size sheets will be output.
In 1-2 mode, one two-sided letter-size sheet will be output.
8-10 Applications
Applications
Image Shift
Simplex Mode (1-1, 2-1)
In 1-1 and 2-1 mode, create a left binding margin by positioning originals with page heading at top.
(See example below.) A right margin will be created if originals are positioned with page heading at
bottom. If image loss is likely, select Reduce & Shift from the Application selection screen, instead
of Image Shift.
❒
❒
❒
❒
Shift amount: 5 mm, 10 mm, 15 mm, 20 mm
Only left binding margin is available
Original/copy size: 11"x17", 8.5"x14", 8.5"x11", 8.5"x11"R
Incompatible: AMS, Reduce & Shift
Application selection screen
Image shift screen
Applications
8-11
Applications
Image Shift (continued)
Simplex Mode (1-1, 2-1) (continued)
1
2
3
4
5
6
7
8
9
Place original(s) face down in the document feeder or on the platen glass.
Select 1-1 or 2-1 copy mode from the Basic screen, as required.
Press [APPLICATION] to enter the Application selection screen.
Press [F2] to align the arrow to the “Image Shift” indicator, and press [OK]. The Image
shift screen will be displayed.
If selecting 1-1 copy mode in step 2, the “Front” indicator is highlighted.
Press [F3 (▼)] or [F4 (▲)] to select the desired shift amount: 5 mm, 10 mm, 15 mm, 20
mm.
If selecting 2-1 copy mode in step 2, press [F2 (Back)] to highlight the “Back” indicator.
When creating the margin on the simplex copying image, press [F1 (Front)]. The “Front”
indicator will be highlighted.
Press [F3 (▼)] or [F4 (▲)] to select the desired shift amount: 5 mm, 10 mm, 15 mm, 20
mm.
Press [OK].
Select additional application functions, or press [OK] to return to the Basic screen.
Enter the desired print quantity.
Option: Press [CHECK] to view selections; then press [OK] to return to the Basic screen.
10
Press [START PRINT].
8-12 Applications
Applications
Image Shift (continued)
Duplex Mode (1-2, 2-2)
In 1-2 mode, use Image Shift to create a binding margin on side two only. In 2-2 mode, a left
binding margin is created on side one and a right margin is created on side two. If image loss is
likely, select Reduce & Shift from the Application selection screen, instead of Image Shift.
❒
❒
❒
❒
Shift amount: 5 mm, 10 mm, 15 mm, 20 mm
Only left binding margin is available
Original/copy size: 11"x17", 8.5"x14", 8.5"x11", 8.5"x11"R
Incompatible: AMS, Reduce & Shift
Application selection screen
Image shift screen
Applications
8-13
Applications
Image Shift (continued)
Duplex Mode (1-2, 2-2) (continued)
1
2
3
4
5
6
7
8
9
Place original(s) face down in the document feeder or on the platen glass.
Select 1-2 or 2-2 copy mode from the Basic screen, as required.
Press [APPLICATION] to enter the Application selection screen.
Press [F2] to align the arrow to the “Image Shift” indicator, and press [OK]. The Image
shift screen will be displayed.
If selecting 2-2 copy mode in step 2, press [F1 (Front)] and [F2 (Back)] to highlight the
“Front” and “Back” indicators.
Press [F3 (▼)] or [F4 (▲)] to select the desired shift amount: 5 mm, 10 mm, 15 mm, 20
mm.
If selecting 1-2 copy mode in step 2, press [F2 (Back)] to highlight the “Back” indicator.
When creating the margin on the simplex copying image, press [F1 (Front)]. The “Front”
indicator will be highlighted.
Press [F3 (▼)] or [F4 (▲)] to select the desired shift amount: 5 mm, 10 mm, 15 mm, 20
mm.
Press [OK].
Select additional application functions, or press [OK] to return to the Basic screen.
Enter the desired print quantity.
Option: Press [CHECK] to view selections; then press [OK] to return to the Basic screen.
10
Press [START PRINT].
8-14 Applications
Applications
Reduce & Shift
Use Reduce & Shift to create a margin without causing image loss.
❒ Shift amount:
10mm
❒ Reduction amount: 97%; 11"x17", 8.5"x14"
96%; 8.5"x11"R
95%; 8.5"x11", 5.5"x8.5"
❒ Original size/copy size: 11"x17", 8.5"x14", 8.5"x11" (20 lb copy recommended)
❒ Binding margin appears on the left
❒ Incompatible: AMS, Change Magnification, Book Copy, Image Shift
Application selection screen
Applications
8-15
Applications
Reduce & Shift (continued)
1
2
3
4
5
Place originals face down in the document feeder or on the platen glass.
Press [APPLICATION] to enter the Application selection screen.
Press [F2] to align the arrow to the “Reduce & Shift” indicator, and press [OK]. The
“Reduce & Shift” indicator will be highlighted.
Select additional application functions, or press [OK] to return to the Basic screen.
Enter the desired print quantity.
Option: Press [CHECK] to view selections; then press [OK] to return to the Basic screen.
6
Press [START PRINT].
8-16 Applications
Applications
Frame/Fold Erasure
Use Frame/Fold Erasure to eliminate black copy marks along borders.
❒
❒
❒
❒
❒
❒
Frame erasure amount: 5mm, 10mm, 15mm
Initial frame erasure value: 10mm
Fold erasure amount: 10mm, 20mm 30mm
Initial fold erasure value: 10mm
Original/copy paper size: 11"x17", 8.5"x14", 8.5"x11"
Incompatible: Multi-Sheet Bypass, Book Copy (compatible with Frame Erasure only), 2 in 1 Format
Application selection screen
Frame/Fold erasure screen
Applications
8-17
Applications
Frame/Fold Erasure (continued)
1
2
3
4
5
6
Place original(s) face down in the document feeder or on the platen glass.
Select desired Copy Size.
Press [APPLICATION] to enter the Application selection screen.
Press [F2] to align the arrow to the “Frame/Fold Erasure” indicator, and press [OK]. The
Frame/Fold erasure screen will be displayed with Fold Erasure already highlighted as the
default. To switch between Fold Erasure and Frame Erasure, simply press [F1] for Frame
and [F2] for Fold. Selection of both Frame and Fold is also available.
If Fold Erasure is required, be sure it is highlighted, then press [F3 (▼)] or [F4 (▲)] to
select the desired fold erasure amount, from 10mm, 20mm or 30mm.
If Frame Erasure is required, be sure it is highlighted, then press [F3 (▼)] or [F4 (▲)] to
select the desired frame erasure amount, from 5mm, 10mm or 15mm.
Press [OK] to complete the setting. The Application selection screen will be displayed.
NOTE: When pressing [OK] without selecting either Frame or Fold, cancel the Application selection screen.
7
8
Make additional application selections or press [OK] to return to the Basic screen.
Enter desired print quantity.
Option: Press [CHECK] to view selections; then press [OK] to return to the Basic screen.
9
Press [START PRINT]. The image on all four edges of the copy will be erased.
NOTE: While copy size and original size generally should be the same, it is possible to use frame/fold erasure to copy an
11"x17" original to 8.5"x11"R by selecting 0.65 reduction after selecting Copy Size.
8-18 Applications
Applications
Thin/Thick Paper
NOTICE: To avoid paper mishandling, Thin/Thick paper must be selected from the Application selection screen, as
described below; not from the Paper tray selection screen.
❒
❒
❒
❒
❒
Copy size: 11"x17", 8.5"x14", 8.5"x11", 8.5"x11"R, 5.5"x8.5"
Thin copy paper weight: 16 lb~19 lb
Thick copy paper weight: 24 lb~32 lb
Thin/Thick paper source: Multi-Sheet Bypass (Single feed mode)
Incompatible: Sort, Group, Staple, OHP Interleave, 2 in 1 Format
Application selection screen
1
2
3
4
5
6
Thin/Thick paper screen
Insert thin or thick stock one sheet at a time in the Multi-Sheet Bypass.
Press [APPLICATION] to access the Application selection screen.
Press [F3] to align the arrow to the “Thin/Thick Paper” indicator, and press [OK]. The
Thin/Thick paper screen will be displayed.
Press [F2 (Thin Paper)] or [F3 (Thick Paper)], as desired. (Thick paper is initially selected.)
Press [OK] to return to the Application selection screen.
Make additional application selections, or press [OK] to return to the Basic screen.
NOTE: When pressing [SORTER], the message “Sorter is unavailable with this application” will be displayed.
7
Use keypad to enter print quantity.
Option: Press [CHECK] to view selections; then press [OK] to return to the Basic screen.
8
Press [START PRINT].
Press [AUTO RESET] to restore the Application mode.
Mixed Original Mode
Applications
8-19
Applications
Use this mode to copy a set of mixed size originals from the document feeder. Automatic paper
selection allows each original to be copied to a copy paper size to match the original, provided the
mixed originals are comprised of either Ledger & Letter or Legal & Letter/R. The mixed original
mode operates only in the RADF mode.
❒ Mixed original size: 11"x17" with 8.5"x11", or 8.5"x14" with 8.5"x11"R mixed (20 to 24 lb)
❒ Original feeding edge: 11"x17" (short edge) with 8.5"x11" (short edge)
8.5"x14" (short edge) with 8.5"x11"R (short edge)
❒ RADF capacity:
Max. 50 sheets
❒ Print quantity:
Max. 999 sheets
❒ Incompatible:
Using platen glass, Sheet/Cover Insertion, OHP Interleave, Book Copy, 2 in 1 Format
1
Place mixed originals face down in the document feeder.
Application selection screen
2
3
4
5
6
7
Press [APPLICATION] to enter the Application selection screen.
Press [F3] to align the arrow to the “Mixed Original” indicator, and press [OK]. The
“Mixed Original” indicator will be highlighted.
Make additional application selections, or press [OK] to exit the Application selection
screen.
APS is activated. APS detects each original size and automatically selects an appropriate
copy paper.
When switching to AMS
(1) Press [F4] on Basic screen to display the Tray selection screen.
(2) Press [F3] to select desired paper size.
(3) The different sized originals loaded in RADF are copied onto copy paper of one size
at respectively automatically selected optimum magnifications.
Enter print quantity.
Option: press [CHECK] to view selections; then press [OK] to return to the Basic screen.
8
Press [START PRINT].
NOTE: Be sure the appropriate copy paper sizes are loaded in separate paper trays.
28-20
in 1Applications
Format
Applications
The 2 in 1 mode copies two originals (pages or sides) onto one side of ledger or 8.5" x11"R paper.
❒ Originals : one-sided or two-sided letter sheets (8.5"x11") from document feeder only
❒ Incompatible: Using Platen glass, Multi-Sheet Bypass, APS, 2-2, 2-1, Staple-Sort, Change Magnification,
Book Copy, OHP Interleave, Sheet/Cover Insertion, Frame/Fold Erasure, Mixed Original, Thin/Thick,
Interrupt
1
Place letter-size originals face down on the document feeder tray with the page heading at
Application selection screen
2
3
4
5
6
the bottom.
Load 11"x17" or 8.5"x11"R copy paper in a tray.
Press [APPLICATION] to enter the Application selection screen.
Press [F3] to align the arrow to the “2 in 1” indicator, and press [OK]. The “2 in 1”
indicator will be highlighted.
Make additional application selections, or press [OK] to exit the Application selection
screen.
Enter print quantity.
Option: press [CHECK] to view selections; then press [OK] to return to the Basic screen.
7
Press [START PRINT].
Photo Mode
Applications
8-21
Applications
Photo Mode
Use the Photo mode to reproduce a half-tone photo image. The copy will closely represent the halftones of the original image.
Photo-Text Mode
Use the Photo-Text mode when the original image includes both half-tones and text. In this mode,
text is improved in comparison to using the Photo mode only; and half-tones are improved in
comparison to using no Photo mode, but may not be as closely represented as with Photo mode
only.
❒ Copy paper: 11"x17", 8.5"x14", 8.5"x11", 8.5"x11"R, 5.5"x8.5" (20 lb recommended)
❒ Incompatible: None
Application selection screen
1
2
3
4
5
6
7
8
Photo screen
Position photo face down in the document feeder or on the platen glass.
Press [APPLICATION] to enter the Application selection screen.
Press [F4] to align the arrow to the “Photo Mode” indicator, and press [OK]. The Photo
screen will be displayed.
Press [F2 (Photo)] or [F3 (Photo/Text)], as required.
Press [OK] to return to the Application selection screen.
Make additional application selections, or press [OK] to exit the Application selection
screen.
Press [OK] to complete the setting and return to the Basic screen.
Enter print quantity.
Option: Press [CHECK] to view selections; then press [OK] to return to the Basic screen.
9
Press [START PRINT].
8-22 Applications
Applications
Moisture Paper
The Moisture Paper feature enables you to control copy quality when the copy paper has been
stored in high humidity. The icon for Moisture Paper will be displayed on the Application Selection
screen shown below, only if the feature is turned ON in the Key Operator setting mode.
NOTE: Do not use the Moisture paper mode for low humidity paper.
❒ Incompatible: OHP Interleave
Application selection screen
1
2
3
Press [APPLICATION] to enter the Application selection screen.
Press [F4] to align the arrow to the “Moisture Paper”, and press [OK]. The “Moisture
Paper” indicator will be highlighted.
Press [OK] to complete the setting and return to the Basic screen.
Applications
8-23
Section 9: Key Operator Mode
To the Key Operator
How to Access the Key Operator Mode
Function Menu Map
Initial Setting Mode [1]
How to Access the Initial Setting Mode
Copy Mode [1]
Copy Density [2]
Lens Mode [3]
APS/Paper Tray [4]
OutputMode[5]
Preset/User Set Ratio(s) [2]
ECM (Electronic Copy Monitor) Setting [3]
ECMSettingMenu
PasswordSetting[1]
Count/LimitSetting[2]
Reset E.C.M. [3]
ECMON/OFFSetting[4]
SetCopyLimit-MachineDisable[5]
Job Memory Setting [4]
Screen ContrastAdjustment [5]
OK Key Timer Setting [6]
Weekly Timer Functions [7]
Weekly Timer Setting Menu
Weekly Timer ON/OFF Setting [1]
SummertimeSetting[2]
Date,TimeSetting[3]
Set Weekly ON/OFF Timer [4]
Specify Copier Working Days [5]
Machine Working Day Setting [6]
LunchHourON/OFFSetting[7]
Timer Off Password [8]
Memory Switch Setting [8]
Key Operator Mode
TotheKeyOperator
The key operator is trained to handle all special key operator functions that are not accessible to
thegeneraluser,suchasmonitoringoverallcopieractivity,machineperformance,andservice
information;modifyingmachinesettings;andcontrollinguseractivity,forbillingpurposes.
Aunique4-digitkeyoperatorpasswordisnormallysetbyserviceatinstallation.Iftheuniquecode
is not set by service, the copier will not display a Password entry screen when the Key Operator
mode is being accessed, and a key operator password will not be required. A service-set 8-digit
ECM master key code must be entered by the key operator to access the Electronic Copy Monitor
functions, and a service-set 4-digit Weekly timer master key code must be entered by the key
operatortoaccesstheWeeklytimerfunctions.
To ensure security of the key operator mode, it is recommended that you establish a unique key
operatorpassword,alongwiththekeyoperatorECMmasterkeycodeandWeeklytimermaster
key code, and keep them in a confidential file.
Key operator password entry screen
Key operator mode screen
HowtoAccesstheKeyOperatorMode
1
2
3
4
9-2
First,besurethecopierpowerswitchisOFF.
Then, turn power back ON while pressing [OK].
The Key operator password entry screen displays when the 4-digit key operator password
is set by service.
If the Key operator password entry screen is displayed, use the keypad to enter your 4digit key operator password; then press [OK], to display the Key operator mode screen.
If the key operator password is not valid, check with your service representative.
Make setting changes from the Key operator mode screen, as described on the following
pages.
Key Operator Mode
Key Operator Mode
FunctionMenuMap
FUNCTION MENU
SUB FUNCTION MENU AND SETTING OPTIONS
[1] Initialsetting
[1]
[2]
[3]
[4]
[5]
Copymode:[RADF;1-1;1-2;2-2;2-1]
Copydensity:[AES;manual]
Lensmode:[AMS;ratio0.50~2.00]
APS/Paper tray: [APS; trays 1, 2, 3, 4, 5, or SPECIAL]
Output:[non-sort;sort;staplesort;group]
[2] Preset/Userset
ratio(s)
[User Set ratio]
[3] ECMsetting
[1]
[2]
[3]
[4]
[5]
Passwordsetting
Count/Limitsetting
ResetECM
ECMON/OFFsetting
SetCopyLimit-Machinedisable
[4] Jobmemory
setting
[1]
[2]
Jobmemorylock
Deletejobmemory
[5] Screencontrast
adjustment
[Darker; Lighter]
[6] OK-Keytimer
setting
[1]
[2]
Openingscreen:[OFF;5seconds;10seconds;15seconds]
Press function key: [OFF; 0.5 seconds; 1.0 seconds; 1.5 seconds]
[7] Weeklytimer
setting
[1]
[2]
[3]
[4]
[5]
[6]
[7]
[8]
WeeklytimerON/OFFsetting
Summertimesetting
Date,timesetting
SetweeklyON/OFFtimer
Specify copier working days
Machineworkingdaysetting
LunchhourON/OFFsetting
Timeroffpassword
Key Operator Mode
9-3
Key Operator Mode
FunctionMenuMap(continued)
FUNCTION MENU
[8] Memoryswitch
setting
9-4
Key Operator Mode
SUB FUNCTION MENU AND SETTING OPTIONS
[1]
[2]
[3]
[4]
[5]
[6]
[7]
[8]
[9]
[10]
[11]
[12]
[13]
[14]
[15]
[16]
[17]
[18]
[19]
[20]
[21]
[22]
[23]
[24]
[25]
AutoResetTimer
Auto Low Power Timer
AutoShutOffTimer
AUTO/RESETKeyFunction
RADF-OriginalEffect
Non Image Area Erase
RADFFrameErasureSelection
CountOriginalsin1-2mode
OriginalCountsinSheetInsertmode
AutomaticTraySwitching
PlatenAPS
RADF APS
ATS/APSSwitch(Tray1)
ATS/APSSwitch(Tray2)
ATS/APSSwitch(Tray3)
ATS/APSSwitch(Tray4)
ATS/APSSwitch(Tray5)
PlatenAMS
RADF AMS
StapleModeReset-Function
JobMemory-AutoJobRecall
DisplayforMoisturePaper
Paper in Sorter, Auto Reset
OK Key LED Flash
AutoShutOffsetting
Key Operator Mode
Initial Setting Mode [1]
Initialsettingsarethesettingsthatdisplayautomaticallywhenthecopierispoweredon,whenAuto
Reset timer is operated, or when [AUTO RESET] key is pressed. These settings can be changed
bythekeyoperator,asshowninthissection.
Initially,i.e.,atinstallation,theBasicscreendisplaysthefollowingconditiontomeetEnergyStar
requirements:
InitialSettingsforKonica2230
InitialSettingsforKonica2330
Copy Mode:
CopyDensity:
Lens Mode:
Paper Tray:
Sorter:
Copy Mode:
CopyDensity:
Lens Mode:
Paper Tray:
Sorter:
1-1
AES
1:1
APS
OFF
1-2
AES
1:1
APS
OFF
WhenInitialsettingsarechangedbythekeyoperator,thenewinitialsettingsdisplaywhenthe
copier is powered on, when Auto Reset timer is reached, or when the [AUTO RESET] key is
pressed.
The following initial settings can be changed by the key operator:
Copymode:[RADF;1-1;1-2;2-2;2-1]
Copydensity:[AES;manual]
Lensmode:[AMS;ratio50%~200%]
Paper tray: [APS; trays 1, 2, 3, 4, 5, or SPECIAL]
Outputmode:[non-sort;sort;staplesort;group]
Setting procedures are described on the following pages.
NOTE:Themostcommonly-usedsettingsareestablishedatinstallation.Beforechanginganyofthecopiersettings,besurethatyou
understandtheoverallandlong-rangeeffectofthechange.
Key Operator Mode
9-5
Key Operator Mode
InitialSettingMode[1](continued)
HowtoAccesstheInitialSettingMode
Key operator mode screen
1
2
3
4
5
6
9-6
Initialsettingmenuscreen
From power off condition: Turn the copier power switch ON, while pressing [OK].
If a 4-digit key operator password is set by service, the Key operator password entry
screenisdisplayed.
Use the keypad to enter your 4-digit key operator password, then press [OK].
The Key operator mode screen will be displayed.
Press [F1 (▼)] and [F2 (▲)] to display “ 1: Initial Setting”, and press [OK]. The Initial setting
menuscreenwillbedisplayed.
Press [F1 (▼)] and [F2 (▲)] for the setting you want to change, and follow instructions
displayed on the screen, pressing [OK] to complete the setting. (See procedures starting on
the next page.)
Wheninitialsettingchangesarecompleted,exittheKeyoperatormodebyturningthe
copierpowerswitchOFF.
After a few seconds, turn the copier power switch ON for normal user operations.
Key Operator Mode
Key Operator Mode
InitialSettingMode[1](continued)
CopyMode[1]
Set copy mode to occur after power on or after auto/reset occurs.
❒ Settingoptions:RADF;1-1;1-2,2-2;2-1
Initialsettingmenuscreen
1
2
3
4
5
6
7
8
9
10
11
Copymodeinitialsettingscreen
While pressing [OK], turn power ON. Enter the key operator password, then press [OK].
Press [F1 (▼)] and [F2 (▲)] to display “ 1: Initial Setting”, and press [OK]. The Initial setting
menuscreenwillbedisplayed.
Press [F1 (▼)] and [F2 (▲)] to display “ 1: Copy mode”, and press [OK]. The Copy mode
initialsettingscreenwillbedisplayed.
Press [F2]to select the copy mode for the initial condition of the copier.
If2-2or2-1modeisselected,RADFwillalsobeselected,automatically.Inthiscase,the
RADF must be in a closed position when power is turned ON, or when Auto Reset is
functioning.Otherwise,themessage“PleasecloseRADFunit”willbedisplayed.
Press [F3 (RADF)]to use the RADF in any copy mode for the initial condition of the
copier.
Press[OK] to complete the setting.
If no further changes are required, proceed to step 10.
If other initial setting changes are required,press [F4 (PREV)]to return to the Initial setting
menu screen. Press[F1 (▼)] and [F2 (▲)]to select another desired menu item, from [1]~[5].
If no other initial settings are required,press [F4 (PREV)] to restore the Key operator
modescreen.
TurnpowerOFF.
Turn the copier power switch back ON to perform copying operations.
InitialSettingMode[1](continued)
Key Operator Mode
9-7
Key Operator Mode
CopyDensity[2]
Set copy density to be effective after power on or after auto/reset occurs.
❒ Settingoptions:AES;manual
1
While pressing [OK], turn power ON. Enter the key operator password, then press [OK].
Initialsettingmenuscreen
2
3
4
5
6
7
8
9
10
Press [F1 (▼)] and [F2 (▲)] to display “ 1: Initial Setting”, and press [OK]. The Initial setting
menuscreenwillbedisplayed.
Press [F1 (▼)] and [F2 (▲)] to display “ 2: Copy density”, and press [OK]. The Copy
density initial setting screen will be displayed.ThedefaultsettingisAES.
Press [F1 (AES)] to select AES mode, or press [F2 (t)] and [F3 (s)] to select the density
level required.
Seven exposure levels are displayed.
Press[OK] to complete the setting.
If no further changes are required, proceed to step 9.
If other initial setting changes are required,press [F4 (PREV)]to return to the Initial setting
menu screen. Press[F1 (▼)] and [F2 (▲)] to select another desired menu item, from [1]~[5].
If no other initial settings are required,press [F4 (PREV)] to restore the Key operator
modescreen.
TurnpowerOFF.
Turn the copier power switch back ON to perform copying operations.
InitialSettingMode[1](continued)
9-8
Copydensityinitialsettingscreen
Key Operator Mode
Key Operator Mode
LensMode[3]
Setthelensmoderatioyouinitiallywanttodisplayaftertheuserturnsthepoweronorafterauto
resetrestorestheinitialsettings.
NOTICE: This setting will be ignored if APS is selected for the initial Paper Tray setting, and an AMS ratio is required for a
manuallyselectedPaperSize.
❒ Settingoptions:AMS;ratio50%~200%
1
2
While pressing [OK], turn power ON. Enter the key operator password, then press [OK].
Press [F1 (▼)] and [F2 (▲)] to display “ 1: Initial Setting”, and press [OK]. The Initial setting
Initialsettingmenuscreen
3
4
5
6
7
8
9
10
Lensmodeinitialsettingscreen
menuscreenwillbedisplayed.
Press [F1 (▼)] and [F2 (▲)] to display “ 3: Lens mode”, and press [OK]. The Lens mode
initial setting screen will be displayed.Thedefaultsettingis100%.
SelectthedesiredsettingfromtheLensmodeinitialsettingscreen:
To select 100% if it is not already displayed, press [F1 (AMS)], then press [F4 (PREV)].
Toselectanotherratio,entera3-digitratiousingthekeypad.
To select AMS, press [F1 (AMS)]. 100% will be displayed in the window.
Press[OK] to complete the setting.
If no further changes are required, proceed to step 9.
If other initial setting changes are required,press [F4 (PREV)]to return to the Initial setting
menu screen. Press[F1 (▼)] and [F2 (▲)]to select another desired menu item, from [1]~[5].
If no other initial settings are required,press [F4 (PREV)] to restore the Key operator
modescreen.
TurnpowerOFF.
Turn the copier power switch back ON to perform copying operations.
InitialSettingMode[1](continued)
APS/PaperTray[4]
Key Operator Mode
9-9
Key Operator Mode
Set paper tray priority to be in effect after power is turned on or after Auto Reset occurs. This
function sets tray priority, not paper size priority. Therefore, if paper size is changed in the tray,
thetraywillstillremaintheprioritytray.
If APS is selected for the initial Paper Tray setting, that setting takes priority over an initial setting
for Lens Mode, as shown on previous page. This allows a required AMS ratio to be selected when
CopySizeismanuallyselected.
❒ Settingoptions:APS;trays1,2,3,4,5orSPECIAL
1
2
While pressing [OK], turn power ON. Enter the key operator password, then press [OK].
Press [F1 (▼)] and [F2 (▲)] to display “ 1: Initial Setting”, and press [OK]. The Initial setting
menuscreenwillbedisplayed.
Initialsettingmenuscreen
3
4
5
6
7
8
9
10
Papertrayinitialsettingscreen
Press [F1 (▼)] and [F2 (▲)] to display “ 4: APS/paper tray”, and press [OK]. The Paper tray
initial setting screen will be displayed.ThedefaultsettingisAPS.
Press [F1 (APS)], or press [F3] to select a specific tray.
Press[OK] to complete the setting.
If no further changes are required, proceed to step 9.
If other initial setting changes are required,press [F4 (PREV)]to return to the Initial setting
menu screen. Press[F1 (▼)] and [F2 (▲)] to select another desired menu item, from [1]~[5].
If no other initial settings are required,press [F4 (PREV)] to restore the Key operator
modescreen.
TurnpowerOFF.
Turn the copier power switch back ON to perform copying operations.
InitialSettingMode[1](continued)
OutputMode[5]
9-10 Key Operator Mode
Key Operator Mode
Set initial output mode to be effective after power is turned on or after Auto Reset occurs.
❒ Settingoptions:Non-sort;Sort;Staple;Group
1
2
3
While pressing [OK], turn power ON. Enter the key operator password, then press [OK].
Press [F1 (▼)] and [F2 (▲)] to display “ 1: Initial Setting”, and press [OK]. The Initial setting
menuscreenwillbedisplayed.
Press [F1 (▼)] and [F2 (▲)] to display “ 5: Output mode”, and press [OK].The Output mode
initial setting screen will be displayed. ThedefaultsettingisNon-sort.
Initialsettingmenuscreen
4
5
6
7
8
9
10
Outputmodeinitialsettingscreen
Press [F1 (▼)] and [F2 (▲)] to display a menu of “1: Non-sort”, “2: Sort”, “3: Staple-sort” or “4:
Group”,toselecttheinitialoutputmode.
IfStaple-sortisselected,Sortisautomaticallyselected.
IfanOutputmodeisincompatible,themenuwillnotappear.
Press[OK] to complete the setting.
If no further changes are required, proceed to step 9.
If other initial setting changes are required,press [F4 (PREV)]to return to the Initial setting
menu screen. Press[F1 (▼)] and [F2 (▲)]to select another desired menu item, from [1]~[5].
If no other initial settings are required,press [F4 (PREV)] to restore the Key operator
modescreen.
TurnpowerOFF.
Turn the copier power switch back ON to perform copying operations.
Preset/UserSetRatio(s)[2]
Preset and User set ratios are used to reduce and enlarge the original image to accommodate copy
paper size, and are available to the user when Lens Mode is selected from the Basic screen. The
displayed ratios may be changed by the Key Operator as shown below.
Key Operator Mode 9-11
Key Operator Mode
❒ Settingoptions:UserSetorPresetratio
1
2
3
While pressing [OK], turn power ON. Enter the key operator password, then press [OK].
Press [F1 (▼)] and [F2 (▲)] to display “ 2: Preset/user set ratio(s)”, and press [OK]. The
Preset/usersetratio(s)settingscreenwillbedisplayed.
Press [F2 (USER SET)] to select USER SET 1, 2 or 3.
Enteraratiofrom50%~200%,usingthekeypad.
If a ratio under 50 is entered, 50% will be displayed.
Key operator mode screen
4
5
6
7
8
Preset/usersetratio(s)settingscreen
If a ratio over 200 is entered, 200% will be displayed.
Press[OK] to complete the setting.
If no further changes are required, proceed to step 7.
If other initial setting changes are required,press [F4 (PREV)] to return to the Key
operatormodescreen.
TurnpowerOFF.
Turn the copier power switch back ON to perform copying operations.
NOTE: The Preset ratios are initially set to be unavailable for the user to change. Please contact your service representative, if
required.
ECM (Electronic Copy Monitor) Setting [3]
This function can only be accessed by the key operator after a unique ECM master key code is
entered. The Electronic Copy Monitor allows you to monitor all copying activity by controlling
passwordaccounts.
9-12 Key Operator Mode
Key Operator Mode
Thisfeaturecantrackcopierusageforindividualusersand/oraccountsaswellaslimitaccesstothe
copiertoauthorizedusers.Copyquantitylimitsforspecificaccountscanalsobeset.UsetheECM
KeyOperatorFormprovidedattheendofthissectiontorecorduserpasswordinformation.
TheECMstoresupto256passwords,eachofwhichrepresentsaseparateaccountthatcanbeused
for billing and record keeping. The number of users assigned to each password may depend upon
thebillingsysteminoperationandthenumberofindividualsanddepartmentsusingthecopier.
When the ECM is activated, copying can be performed only after a valid 5-digit user password is
entered.
If ECM needs to be activated on your machine, contact your service representative.
ThefollowingECMsettingscanbemade:
[1] Password Setting:
Createupto256individualpasswords,001~256.
[2] Count/Limit Setting:
Limitcopycountforeachpasswordtoamax.999,999copies.
[3] Reset ECM:
Read and clear the copy count and copy count limit for all or selected passwords. When each
accountisreset,thecopywillautomaticallyresettozero.
[4] ECM ON/OFF Setting:
Select the function to be ON or OFF. The initial setting is OFF.
[5] Set Copy Limit-Machine Disable:
Setthemachineconditionwhenthecopylimitisreachedtostopimmediately;orafterajobis
completed.
ECM (Electronic Copy Monitor) Setting [3] (continued)
ECMSettingMenu
1
2
While pressing [OK], turn power ON. Enter the key operator password, then press [OK].
If the key operator password is not valid, check with your service representative.
Press [F1 (▼)] and [F2 (▲)] to display “ 3: E.C.M. setting”, and press [OK]. The ECM master
Key Operator Mode 9-13
Key Operator Mode
3
4
5
6
key code screen displays, if a code is required.
Use the keypad to enter your 8-digit ECM master key code, then press [OK].
If the ECM master key code is valid, the ECM setting menu screen will be displayed.
Keyoperatorpasswordentry
screen
Key operator mode screen
ECM master key code screen
ECMsettingmenuscreen
Press [F1 (▼)] and [F2 (▲)] to select the desired ECM function. Follow instructions
displayedonthescreen,andpress[OK]tocompletethesetting.(Seeproceduresstarting
on the next page.)
To exit the ECM mode, press [F4 (PREV)] on ECM setting menu screen.
To exit the Key operator mode, turn the main power switch OFF.
ECM (Electronic Copy Monitor) Setting [3] (continued)
PasswordSetting[1]
Createupto256individualpasswords,from001~256.Usethefollowingproceduretocreatenewor
9-14 Key Operator Mode
Key Operator Mode
changeexistingpasswords.
❒ UserPasswordNo.:PasswordNo.from001~256,designatedbykeyoperator.
❒ UserPassword:Unique5-digitnumericcodeprogrammedbykeyoperatorforuser.
❒ SEARCHPASSWORD:Apasswordscrollingkeyusedtocheckpasswordstatusquickly.
1
2
3
4
5
6
While pressing [OK], turn power ON. Enter the key operator password, then press [OK].
Press [F1 (▼)] and [F2 (▲)] to display “ 3: E.C.M. setting”, and press [OK]. The ECM master
key code screen displays, if a code is required.
Use the keypad to enter your 8-digit ECM master key code, then press [OK].
If the ECM master key code is valid, the ECM setting menu screen will be displayed.
Press
[F1 (▼)]menu
and [F2
(▲)] to display“1: Password
setting”
and press
ECMsetting
screen
Input
password
screen[OK]. The Input
passwordscreenwillbedisplayed.
“No.” indicator will be highlighted. Press [F1 (▼)] and [F2 (▲)] to select a User password
No. and press [OK].
“Password”indicatorwillbehighlighted.Entera5-digitUserpasswordusingthekeypad.
Note:Donotenter“00000”.Theinitialpasswordvalueis“00000”.
ECM (Electronic Copy Monitor) Setting [3] (continued)
PasswordSetting[1](continued)
7
8
Press[OK].“search”indicatorwillbehighlighted.
Press[F1(search)]tocheckthattheinputpasswordisnotduplicated.
Key Operator Mode 9-15
Key Operator Mode
Whenthesamepasswordhasnotbeenusedforanotheraccountnumber,“Passwordnot
used”willbedisplayed.
Ifsearchingisnotnecessary,simplyproceedtostep9.
Whenthesamepasswordhasbeenusedforanotheraccountnumber,“Passwordused/
inputnewNo.”willbedisplayed.
Entera5-digitpasswordagain,press[OK],andpress[F1(search)].
Note:Itispossibletoassignthesamepasswordtodifferentaccountnumbers.Note,however,thatthenumberofcopies
willbecountedonlyforthepasswordwiththesmallestaccountnumber.Copycountfortheotheraccountswillnotbe
monitored.Werecommendthatyoudonotuseduplicatepasswords.
9
Checktheaccountnumberandpassworddisplayedinthesecondlineofthemessage
display.
Note:Werecommendthatyoumakealistofallpasswordsandaccountnumbers.
10
11
12
13
14
15
If no further changes are required, proceed to step 14.
Press [F3 (No.)] if you want to enter another password.
If other ECM setting are required,press [P] to return to theECM setting menu screen.
Press[F1 (▼)] and [F2 (▲)] to select another desired menu item, from [1]~[5].
If no other ECM settings are required,press [F4 (PREV)]to restore the Key operator
modescreen.
TurnpowerOFF.
Turn the copier power switch back ON to perform copying operations.
ECM (Electronic Copy Monitor) Setting [3] (continued)
Count/LimitSetting[2]
Usethissettingtolimitcopycounttoamaximumof999,999copiesforeachpassword.
1
While pressing [OK], turn power ON. Enter the key operator password, then press [OK].
9-16 Key Operator Mode
Key Operator Mode
2
3
4
Press [F1 (▼)] and [F2 (▲)] to display “ 3: E.C.M. setting”, and press [OK]. The ECM master
key code screen displays, if a code is required.
Use the keypad to enter your 8-digit ECM master key code, then press [OK].
If the ECM master key code is valid, the ECM setting menu screen will be displayed.
Press [F1 (▼)]and[F2(▲)]todisplay “2:Count/Limitsetting”andpress[OK].TheCount/
ECMsettingmenuscreen
5
6
7
8
9
10
11
12
13
14
15
Count/limitsettingscreen
limitsettingscreenwillbedisplayed.“No.”indicatorishighlighted.
Use [F1 (▼)] and [F2 (▲)] to display a User password No. from 001~256.
Press[OK]todisplaythecopycountandcopylimitforthatpassword.
To set a copy limit for the password, proceed to step 7.
To just read the copy count, and record it for billing purposes, proceed to step 9.
To set the copy limit for that password, press [F4 (LIMIT)].
Usethekeypadtoentera6-digitcopycountlimit.
Press [OK].
If no further changes are required, proceed to step 14.
Press [F3 (No.)] if you want to read another copy count.
If other ECM setting are required,press [P] to return to theECM setting menu screen.
Press[F1 (▼)] and [F2 (▲)] to select another desired menu item, from [1]~[5].
If no other ECM settings are required,press [F4 (PREV)] to restore the Key operator
modescreen.
TurnpowerOFF.
Turn the copier power switch back ON to perform copying operations.
ECM (Electronic Copy Monitor) Setting [3] (continued)
ResetE.C.M.[3]
ResetECMcountofindividualpasswordNos.orresetthecountforallpasswordNos.
Key Operator Mode 9-17
Key Operator Mode
❒ Settingoptions:ResetIndividualCountersorResetAllCounters
ECM (Electronic Copy Monitor) Setting [3] (continued)
ResetE.C.M.[3](continued)
1
While pressing [OK], turn power ON. Enter the key operator password, then press [OK].
ECMsettingmenuscreen
ResetECMcountscreen
Reset individual counters screen
ResetECMcountscreen
Reset all ECM counters screen
9-18 Key Operator Mode
Key Operator Mode
2
3
4
Press [F1 (▼)] and [F2 (▲)] to display “ 3: E.C.M. setting”, and press [OK]. The ECM master
key code screen displays, if a code is required.
Use the keypad to enter your 8-digit ECM master key code, then press [OK].
If the ECM master key code is valid, the ECM setting menu screen will be displayed.
Press [F1 (▼)] and [F2 (▲)] to display “3: Reset E.C.M.” and press [OK].The Reset ECM
countscreenwillbedisplayed.
Toresetindividualcounters;
(1) Press [F1 (▼)] and [F2 (▲)] to display“1: Reset individual counters” and press [OK].
The Reset individual counters screen will be displayed.
(2) Use [F1 (▼)] and [F2 (▲)] to display a User password No. from 001~256.
(3) Press[OK]todisplaythecopycountandcopylimitforthatpassword.
(4) Press [F3 (RESET)] to reset the count to zero for the password No. The number will
be indicated in the second line of the message area.
To reset all counters;
(1) Press [F1 (▼)] and [F2 (▲)] to display “2: Reset all E.C.M. counters” and press [OK].
The Reset all ECM counters screen will be displayed.
(2) Press[F2(YES)]toresetallcountstozero,andautomaticallyreturntotheECMsetting
menu screen. Or, press [F3 (NO)].
5
6
7
8
9
10
If no further changes are required, proceed to step 9.
Press [F4 (PREV)] to the ECM setting menu screen.
If other ECM setting are required,press [F4 (PREV)] to return to theECM setting menu
screen. Press[F1 (▼)] and [F2 (▲)]to display select another menu item from [1]~[5].
If no other ECM settings are required,press [F4 (PREV)] to restore the Key operator
modescreen.
TurnpowerOFF.
Turn the copier power switch back ON to perform copying operations.
ECM (Electronic Copy Monitor) Setting [3] (continued)
ECMON/OFFSetting[4]
UsethisfunctiontoturnECMONorOFF.
1
While pressing [OK], turn power ON. Enter the key operator password, then press [OK].
Key Operator Mode 9-19
Key Operator Mode
2
3
4
Press [F1 (▼)] and [F2 (▲)] to display “ 3: E.C.M. setting”, and press [OK]. The ECM master
key code screen displays, if a code is required.
Use the keypad to enter your 8-digit ECM master key code, then press [OK].
If the ECM master key code is valid, the ECM setting menu screen will be displayed.
Press [F1 (▼)] and [F2 (▲)] to display“4: E.C.M. ON/OFF setting” and press [OK]. The
ECMsettingmenuscreen
5
6
7
8
9
10
11
ECMON/OFFsettingscreen
ECMON/OFFsettingscreenwillbedisplayed.ThedefaultsettingisON.
Press [F3 (ON)] to activate ECM, or press [F2 (OFF)] to de-activate ECM.
The selected indicator will be highlighted.
If no further changes are required, proceed to step 10.
Press [F4 (PREV)] to the ECM setting menu screen.
If other ECM setting are required,press [F4 (PREV)] to return to theECM setting menu
screen. Press[F1 (▼)] and [F2 (▲)] to select another desired menu item from [1]~[5].
If no other ECM settings are required,press [F4 (PREV)]to restore the Key operator
modescreen.
TurnpowerOFF.
Turn the copier power switch back ON to perform copying operations.
ECM (Electronic Copy Monitor) Setting [3] (continued)
SetCopyLimit-MachineDisable[5]
Usethisfunctiontoselectwhetherthecopierwillstopimmediatelywhenthecountlimitisreached;
ordisplayawarning;orcompletethecopyjobbeforestoppingwhenthemaximumcopycountis
9-20 Key Operator Mode
Key Operator Mode
reached.
1
While pressing [OK], turn power ON. Enter the key operator password, then press [OK].
2
Press [F1 (▼)] and [F2 (▲)] to display “ 3: E.C.M. setting”, and press [OK]. The ECM master
key code screen displays, if a code is required.
3
Use the keypad to enter your 8-digit ECM master key code, then press [OK].
If the ECM master key code is valid, the ECM setting menu screen will be displayed.
4
Press [F1 (▼)] and [F2 (▲)] to display “5: Set Copy Limit-Mach. disable” and press [OK].
ECMsettingmenuscreen
5
6
7
8
9
10
Copylimit-machinedisablescreen
TheCopylimit-machinedisablescreenwillbedisplayed.
Selectsettingoption:
Press [F1 (▼)] and [F2 (▲)] to display“1: Stop immediately”, and press [OK] to stop the
copier when the copy limit is reached.In this case, the paper in process will be completed,
andEnterpasswordwilldisplayafterthecopierstops.
Press [F1 (▼)] and [F2 (▲)] to display “2: Stop after job”, and press [OK] to stop the copier
afterthecurrentjobiscompleted,whencopylimitisreached.
Press [F1 (▼)] and [F2 (▲)] to display“3: Over copy limit warning”, and press [OK] not to
stopthecopierbuttodisplaythecopylimitreached.
If no further changes are required, proceed to step 9.
IfotherECMsettingarerequired,press[F4(PREV)]to returntotheECMsettingmenu
screen. Press[F1(▼)]and[F2(▲)]todisplayselectanothermenuitem,from[1]~[5].
If no other ECM settings are required,press [F4 (PREV)] to restore the Key operator
modescreen.
TurnpowerOFF.
Turn the copier power switch back ON to perform copying operations.
JobMemorySetting[4]
UsethisfunctiontolockordeleteaJobthathasbeenprogrammed.
A locked Job is indicated by a lock icon on the job number of the Job Memory selection screen.
The settings of a locked job cannot be changed.
Key Operator Mode 9-21
Key Operator Mode
❒
❒
❒
❒
Settingoptions:LockJobmemory;DeleteJobmemory
Lock/deleteisavailableforall12storedjobs
Joblockisavailableonlyfornamedjobs
Ablankkeyindicatesthatnojobisprogrammed
JobMemorySetting[4](continued)
1
2
3
While pressing [OK], turn power ON. Enter the key operator password, then press [OK].
Press [F1 (▼)] and [F2 (▲)] to display “4: Job memory setting”, and press [OK]. The Job
memorymenuscreenwillbedisplayed.
Tolockajobmemory,press [F1 (▼)] and [F2 (▲)] to display “1: Job memory lock” and press
Key operator mode screen
Jobmemorymenuscreen
Jobmemorylockscreen
Jobmemorymenuscreen
Delete job memory screen
9-22 Key Operator Mode
Key Operator Mode
4
5
6
7
8
9
10
11
[OK].TheJobmemorylockscreenwillbedisplayed.
Press [F4] to scroll to the desired job number, press [F1]~[F3] to select the job number. The
lock icon is displayed. The displayed lock icon is deleted.
To delete a job memory, press [F1 (▼)] and [F2 (▲)] to display “2: Delete job memory” and
press [OK].Delete job memory screen will be displayed.
Press [F4] to scroll to the desired job number, press [F1]~[F3] to select the job number.
Storedprogramsandthenamearedeletedformthejob.
If no further changes are required, proceed to step 10.
Press [P]to returntotheJobmemorymenuscreen.
If no otherJobmemorysettings are required,press [F4 (PREV)] to restore the Key
operatormodescreen.
TurnpowerOFF.
Turn the copier power switch back ON to perform copying operations.
ScreenContrastAdjustment[5]
Use this feature to adjust the level of brightness of the LCD screen.
Press [F2 (▼)] key to make the LCD screen contrast darker than currently displayed.
Press [F3 (▲)] key to make the LCD screen contrast lighter than currently displayed.
❒ Settingoptions:Darker;Lighter
Key Operator Mode 9-23
Key Operator Mode
1
2
3
4
5
6
While pressing [OK], turn power ON. Enter the key operator password, then press [OK].
Press [F1 (▼)] and [F2 (▲)] to display “5: Screen contrast adjustment”, and press [OK]. The
Contrastadjustmentscreenwillbedisplayed.
Press [F2 (▼)] or[F3 (▲)], as desired.
Press [OK] to complete the selection.
If no further changes are required, proceed to step 7.
Press [F4 (PREV)]to returntothe Key operator mode screen.
Key operator mode screen
7
8
Contrastadjustmentscreen
TurnpowerOFF.
Turn the copier power switch back ON to perform copying operations.
OK Key Timer Setting [6]
Thisfunctionautomaticallyactivatesthe[OK]keywithoutthenecessityofmanualpressing.The
function restores the Basic screen after 5, 10, or 15 sec. have elapsed; when the layer screen of the
Basicscreendisplays;or0.5,1,or1.5sec.aftertheFunction[F1]~[F4]keysarepressed.
Initially,thisfunctionisnotset.
9-24 Key Operator Mode
Key Operator Mode
❒ Settingoptions:
Openingscreen(OFF,5seconds,10seconds,15seconds)
Pressfunctionkey(OFF,0.5seconds,1.0seconds,1.5seconds)
OK Key Timer Setting [6] (continued)
1
2
3
While pressing [OK], turn power ON. Enter the key operator password, then press [OK].
Press [F1 (▼)] and [F2 (▲)] to display “6: OK key timer setting”, and press [OK]. The OK
TimerSettingscreenwillbedisplayed.
Press [F1 (▼)] and [F2 (▲)] to display “1: Opening screen” or “2: Press function key”, and
press [OK].
Key operator mode screen
Key operator mode screen
Screentimersettingscreen
Key operator mode screen
Functionkeytimersettingscreen
Key Operator Mode 9-25
Key Operator Mode
4
Set the period of time.
To display the Screen timer setting screen, press [OK] when “1: Opening screen” is
displayed.
Press [F1 (▼)] and [F2 (▲)] to display “1: OFF”, “2: 5 seconds”, “3: 10 seconds”, or “4: 15
seconds”,thenpress[OK].
5
6
7
8
To display the Function key timer setting screen, press [OK] when “2: Press function key”
isdisplayed.
Press [F1 (▼)]and[F2(▲)]todisplay“1:OFF”,“2:0.5seconds”,“3:1.0seconds”,or“4:1.5
seconds”,thenpress[OK].
If no further changes are required, proceed to step 7.
Press [F4 (PREV)]to returntothe Key operator mode screen.
TurnpowerOFF.
Turn the copier power switch back ON to perform copying operations.
9-26 Key Operator Mode
Section10: Maintenance
Loading Paper
Adding Toner
Inserting a New Staple Cartridge
ST-217In-BinStapler
Off-LineStapler
Preventive Maintenance
ReadingthePMCount
ReadingtheTotalCount
Cleaning the Document Glass and Cover
CleaningthePlatenGlass
Cleaning the Inner Surface of the Document Cover
Cleaning with the Wire Cleaning Knob
Maintenance
LoadingPaper
WhenanemptytrayisselectedautomaticallybyAPS,ormanuallyfromtheTrayselectionscreen,
themessage“Pleaseloadpaperintray#”displaysinthemessageareaoftheBasicscreen.
Add paper indicator ( )
Pressing [F4] key on the Basic screen displays the Tray selection screen. When the paper tray is
empty, the Add paper indicator appears on the left side of the empty tray. Load the copy paper into
thetrayindicated.
Basicscreen
Tray selection screen
Add paper indicator
Tray positions
10-2
Maintenance
Maintenance
LoadingPaper(continued)
Fanning paper
Before loading paper, fan it to prevent sheets from double-feeding.
NOTE:Forbestresults,storepaperonaflatsurfaceinacooldryarea.Donotopenpaperpackagesuntilpaperisneededandkeep
partiallyusedpackagestightlywrappedduringstorage.
Copy paper capacity
Be sure not to stack above the red line of the label as shown below.
Maintenance
10-3
Maintenance
LoadingPaper(continued)
Universal Tray (Konica 2230, Tray 2; Konica 2330, Tray 1)
Load paper with edges curling upward
1
2
Withdrawtheuniversaltrayfromthemainbody.
Remove the rear guide plate, and insert it into the position of your desired paper size.
NOTE:Besuretoalignandsettherearguideplatetothepaper;otherwise,themachinemaymalfunction.
3
4
5
Stackpaperwithcurlsideup.
While pressing the release knob, move the side guide plate against the paper.
Pushintheuniversaltrayuntilitlocksintoplace.
Fixed Tray (Konica 2230, Tray 1, 3, 4 and 5; Konica 2330, Tray 2, 3 and 4)
Load paper with edges curling upward
10-4
Maintenance
Maintenance
LoadingPaper(continued)
1
2
3
4
Withdrawthefixedtray.
While pressing the release knob, move the side guide plate forward.
Loadpaperwithcurlsideup.
Load paper completely into the tray up to the hooks of the paper guides, but not above
them.
NOTE:Donotloadpaperotherthanthepapersizeindicatedatthefrontofthetray;otherwisethemachinemay
malfunction.
5
6
While pressing the release knob, move the side guide plate against the paper.
Pushthetrayintothemachineuntilitlocksintoplace.
LCT (Large Capacity Tray) (Konica 2230, Tray 4; Konica 2330, Tray 3)
Load paper with edges curling upward
1
2
3
WithdrawtheLCT.
Stackpaperwithcurlsideup.
The bottom of the tray will lower a bit due to the weight of stacked paper.
Pushinthetrayuntilitlocksintoplace.
Maintenance
10-5
Maintenance
AddingToner
Whentonersupplyislow,themessage“Pleaseaddtoner”displaysinthemessageareaoftheBasic
screen. Add toner, as shown in the following procedure.
❒ Beforeaddingtoner,readdirectionsonthetonercartridgelabel.
PE<
>HD
<
PE
>HD
PE<
>HD
10-6
Maintenance
PE<
>HD
PE<
>HD
Maintenance
AddingToner(continued)
1
2
3
4
5
6
7
8
9
10
Tapbothtopandbottomofthenewtonercartridgeonsolidsurfaceabout15times,without
removing the flexible outer cap.
Vigorouslyshakethenewtonercartridge.
Remove the flexible outer cap.
Openthecopierfrontdoor,andpulltonerunitout90°totheright.
Invert cartridge over the unit with the HDPE lettering toward you, inserting it at the rear,
thenatfront,untilthecartridgeisfullyseatedovertheunit.
Pressthecartridgetowardyouandslowlyslidethetonerreleaseleverfullytowardyouto
releasetoner,thenmovetheleverbackandforthafewtimesalternatingwithStep5.
Tap cartridge several times to free the toner, until cartridge is empty.
Removeanddiscardemptycartridge.
Pushtonerunitbacktooriginalposition.
Close the copier front door.
NOTE:Iftonergetsonhandsorclothing,brushitoffvigorously.Donotusewater.
CAUTION:
Keep toner cartridge away from children. Although the toner is non-toxic, do not inhale it or allow it
to enter your eyes. In case the toner comes in contact with eyes, please consult your physician.
NOTE:HDPEstandsforhighdensitypolyethylene,apostconsumerrecycledfibermaterialmainlyusedinthemanufactureofthis
tonercartridgecontainer.Theemptycontainerisrecyclableinmanylocations.
Maintenance
10-7
Maintenance
InsertingaNewStapleCartridge
ST-217In-BinStapler
Whenstaplesareemptyinsorter,theReplacestaplecartridgemessagedisplaysontheLCD
screen.
Removing the Empty Cartridge and Inserting a New Staple Cartridge
1
2
3
4
5
10-8
Pull the release lever upward, and move the ST-217 In-Bin Stapler Sorter to the left.
Gentlypulltheemptycartridgeupward,andwithdrawit.
Remove the stopper from the new cartridge while holding the cartridge with the tip (claw
portion) upward. Also remove the red tape from the new cartridge.
Insertcartridgeincorrectposition,thenpushitdown.Returnsortertooriginalposition.
Beforeusingthenewstaplecartridge,performamanualstaplingtest(seep.10-9).
Maintenance
Maintenance
InsertingaNewStapleCartridge(continued)
ST-217In-BinStapler(continued)
Testing the New Staple Cartridge
1
2
Place a few sheets on the top bin.
Themanualstapleindicatorwilllight.
PresstheManualstaplebuttonontheSorter.
Staplingwillbeperformed.
NOTE:Thestaplecartridgeholds5,000Staples.
Maintenance
10-9
Maintenance
InsertingaNewStapleCartridge(continued)
Off-LineStapler
Removing the Empty Cartridge and Inserting a New Cartridge
New cartridge
1
2
3
4
5
6
7
Pressthestaplerreleasebutton,andopenthestaplerunit.
Press the cartridge holder in the direction of the arrow.
Removetheemptycartridge.
Checkthenewstaplecartidgeandremoveanyprotrudingstaples.
Insertthenewcartidge.
Press cartridge holder to lock cartridge in position.
Closethestaplerunit.
Testing the New Staple Cartridge
Insert the corner or the side of a few sheets into the Stapler (see p. 6-12). The sheets will be stapled,
if the cartridge is in the correct position. If stapling is unsuccessful, repeat the procedure for
replacingtheStapler.
NOTE:Thestaplecartridgeholds5,000Staples.
10-10 Maintenance
Maintenance
PreventiveMaintenance
PreventiveMaintenance(PM)serviceisrecommendedformaintainingoptimalcopier
performance.Whenpreventivemaintenanceisdue,themessage“CallforPM”willbedisplayedin
themessageareaoftheBasicscreen.Atthattime,contactyourKonicaservicerepresentativefor
service.
You can read the PM count and estimate when the next PM is due. The first number in the PM
displayrepresentsthedateofthelastPMandthecountofcopiesmadesincethePM,whichis
showninthefirstline.
ReadingthePMCount
1
2
3
4
Press [P] on the control panel keypad.
Press [2], then press [START PRINT] to display the PM count.
Read the PM Count displayed in the message area of the LCD screen.
Press [STOP/CLEAR] to return to the Basic Screen.
YoucanalsoreadtheTotalCounttoseehowmanycopieshavebeenmadesinceinstallation.Use
thefollowingproceduretoreadthetotalcount.
ReadingtheTotalCount
1
2
3
Press [P] on the control panel keypad.
Press [1], then press [START PRINT] to display the Total Count.
Thetotalcountequalsthetotalcountofcopiessinceinstallation.
Press [STOP/CLEAR] to return to the Basic Screen.
Maintenance 10-11
Maintenance
CleaningtheDocumentGlassandCover
Cleantheplatenglassandinnersurfaceofthedocumentcoverdaily,topreventsoilmarksfrom
beingcopied.ConsultyourKonicarepresentativeaboutusingananti-staticsprayontheinner
surfaceofthedocumentcover,topreventstaticchargefromgenerating.
CAUTION
Never use paint solvents, such as benzene or thinners, to clean any portion of the copier.
To avoid copier damage, do not pour or spray water or cleaner directly on the platen glass. Do not
useanyabrasivecleanerstocleantheglass.
CleaningthePlatenGlass
1
2
Raisethedocumentcover.
Cleantheglasswithacleansoftcloth,dampened
slightlywithwaterorananti-staticspray.
CleaningtheInnerSurfaceoftheDocumentCover
1
2
Raisethedocumentcover.
Cleantheinnersurfacewithacleansoftcloth.
CleaningwiththeWireCleaningKnob
If white lines appear on the copy image, use the following
operation.
1
Openthecopierfrontdoor,andpulltonerunit90°to
theright.
2
Slide the wire cleaning knob (green knob) in and out
2or3times.
Afterfinishing,pushthewirecleaningknobinside
completely.Thenpushtonerunitbacktooriginalpositon.
10-12 Maintenance
Section11: Troubleshooting
Call for Service
Clearing Mishandled Paper
Clearing a Wedged Staple from the Off-Line Stapler Unit
CopyingTips
Troubleshooting
Call for Service
ACallforServicemessageindicatesamachineconditionthatrequirestheattentionofyourKonica
service representative.
1
2
3
4
Immediately make note of the report code indicated in the upper portion of the screen.
TurnOFFthemainpowerswitch.
Unplugthemachine.
ContactyourKonicaservicerepresentativeandreporttheconditionandreportcode.
If the message “Press P KEY to bypass” is displayed on the Call for service screen, copying on
paper in the trays or using ADF/ADU which are free from trouble is still available. Press [P], and
turnOFFthenONthepowerswitch.
CAUTION:
EVEN IF THE COPYING JOB CAN BE CONTINUED WITH THE ABOVE OPERATION,
IMMEDIATELY CONTACT YOUR KONICA SERVICE REPRESENTATIVE WHEN THE
CALL FOR SERVICE SCREEN IS DISPLAYED.
11-2
Troubleshooting
Troubleshooting
ClearingMishandledPaper
Whenapapermisfeedoccurs,thecopierstopsmakingcopies;mishandledpapercodesdisplayon
thescreentoindicatemisfeedarea(s);andaflashingcodeindicatestheareathatshouldbecleared
first. Be sure to remove paper from each flashing location until all locations are cleared. See
procedures on the following pages.
Thefollowingmishandledpapercodesdisplayfor13specificareasofthemachine(seecallouts).
Code
[1]
[2]
[3]
[4]
[5]
[6]
[7]
[8]
[9]
[10]
[11]
[12]
[13]
[14]
Location
Tray1(Konica2230),ADU(Konica2330)
Tray2(Konica2230),Tray1(Konica2330)
Tray3(Konica2230),Tray2(Konica2330)
Tray4(Konica2230),Tray3(Konica2330)
Tray5(Konica2330)
Multi-sheetbypassandMainbody
Mainbody
Main body or ADU
Main body or ADU
Main body or ADU
ADU
Sorter
RADF
RADF
Troubleshooting
11-3
Troubleshooting
ClearingMishandledPaper(continued)
CAUTION:
Whenremovingmishandledpaper,besuretoleavenotornpaperinsidethemachine,avoid
touchingthedrumorscratchingitinanyway,andkeepallmetalandmagneticobjects,e.g.,
watches,jewelry,etc.awayfromthedrumarea.
CAUTION:
The fixing unit is internally very hot. To avoid getting burned DO NOT TOUCH the area. Use
carewhenwithdrawingthefixingunit.
CAUTION:
The paper exit unit of the main body (outlet of fixing unit) is very hot. To avoid getting burned DO
NOT TOUCH the area.
CAUTION:
Use care after opening the duplex tray. Keep fingers away from the closing area.
CAUTION:
The drum unit generates high voltage. To avoid bodily electrical shock NEVER TOUCH the area.
11-4
Troubleshooting
Troubleshooting
ClearingMishandledPaper(continued)
Codez(Konica2230)
Plainstand
DB-206A
DB-206B
DB-606
Plainstand
DB-206A
DB-206B
DB-606
Codez(Konica2330)
Troubleshooting
11-5
Troubleshooting
ClearingMishandledPaper(continued)
Codex
Plainstand
DB-206A
DB-206B
DB-206A
DB-206B
DB-606
Codec
11-6
Troubleshooting
DB-606
Troubleshooting
ClearingMishandledPaper(continued)
Codev
DB-206B
DB-606
Codeb
DB-206B
Troubleshooting
11-7
Troubleshooting
ClearingMishandledPaper(continued)
Coden
Plainstand
DB-206A
DB-206B
DB-606
Plainstand
DB-206A
DB-206B
DB-606
Codem
11-8
Troubleshooting
Troubleshooting
ClearingMishandledPaper(continued)
Code,
Plainstand
DB-206A
DB-206B
DB-606
Plainstand
DB-206A
DB-206B
DB-606
Code.
Troubleshooting
11-9
Troubleshooting
ClearingMishandledPaper(continued)
Code¦0
Plainstand
DB-206A
DB-206B
DB-606
Plainstand
DB-206A
DB-206B
DB-606
Code¦1
11-10 Troubleshooting
Troubleshooting
ClearingMishandledPaper(continued)
Code¦2
Plainstand
DB-206A
DB-206B
DB-606
DB-206B
DB-606
Code¦3
Plainstand
DB-206A
Troubleshooting 11-11
Troubleshooting
ClearingMishandledPaper(continued)
Code¦4
Plainstand
11-12 Troubleshooting
DB-206A
DB-206B
DB-606
Troubleshooting
ClearingaWedgedStaplefromtheOff-LineStaplerUnit
1
2
3
4
5
6
7
8
9
10
11
12
Pressthestaplerreleasebuttonandopenthestaplerunit.
Press the cartridge holder in the direction of the arrow, as shown.
Removethecartridge.
Presscartridgeholderbacktocenterposition,then,pressitdownwarduntilitstops.
Whilecartridgeisremoved,closethestaplerunit.
To discharge a wedged staple, insert 2 or 3 sheets of paper as if for side stapling, as shown.
Ifstapledischarges,gotostep12.Ifthestapleremainswedged,continuewithstep8.
If a wedged staple cannot be dislodged remove the bottom cover of stapler, and locate a
magneticplateinside.Removethemagneticplatefromthebottomcover.
Usethemagneticplateasatool,toattractthewedgedstaple.
Returnthemagneticplatetothebottomcoverofthestapler,thenreplacethestaplerbottom
cover.
Beforereplacingthestaplecartridge,removeanyprotrudingstaples.
Pressthestaplerreleasebutton,andre-openthestaplerunit.Replacethecartridge.
Closethestaplerunit.
Troubleshooting 11-13
Troubleshooting
CopyingTips
COPIER DOES NOT OPERATE WHEN POWER SWITCH IS ON
Fullyinsertpapertrays.
Close RADF.
Check to be sure power plug is firmly inserted in electrical socket.
COPY IMAGE IS TOO LIGHT
Manuallyadjustcopydensitytodarkerdensity.
Check the message area of the Basic screen and add toner, if required.
Check paper for dampness. Do not leave paper in copier when humidity is high. Or, Use the
Moisuterpapermode.
COPY IMAGE IS TOO DARK
Manuallyadjustcopydensitytolighterdensity.
Check to see if Photo or Photo-Text mode is required.
COPY IMAGE IS NOT CLEAN OR SHOWS SPOTS
Usecleanoriginalssincedirtmarksmaybecopied.
Keep Platen glass and inner surface of document cover clean.
Call for service if the “Call for PM” is displayed in the message area.
Checkdensityindicatorandlightenifrequired.
COPY PAPER MISHANDLES DURING COPYING
Fan copy paper and load it with edges curling upward. Do not exceed the tray capacity.
COPY IMAGE CAN BE RUBBED OFF
Check copy paper thickness. Use Heavy Stock mode, if paper weight requires it.
MAGNIFICATION CANNOT BE CHANGED
Reduce&Shiftisincompatiblewithmagnification.
Press [AUTO RESET] key and set desired copying conditions without using Reduce & Shift.
DUPLEX MODES CANNOT BE SELECTED
Fully close ADU and RADF, then select Duplex mode again.
AutomaticDuplexcopyingisnotavailableinInterruptmode.
11-14 Troubleshooting
Troubleshooting
CopyingTips(continued)
COPYING DOES NOT BEGIN AFTER PRESSING START PRINT
Insert or adjust the appropriate paper tray for copy size selected
Closedocumentcoverfirmly.
Closefrontdoorcompletely.
COPYING DOES NOT RESUME AFTER MISHANDLED PAPER IS REMOVED
CheckcopierdiagramonLCDscreenforadditionalindicationsofmishandledpaper.
COPY QUALITY IS POOR
Checkpaperfordampness,andreplaceifnecessary.
THE ORIGINAL PAPER IS MISHANDLED OR SKEWED IN THE DOCUMENT
FEEDER
Originalsshouldconformtotherecommendedsizeandweight.
Besureoriginalsarenotstapled.
Align originals evenly in the RADF.
Checktomakesurepaperguidesmeetthewidthofmixedsizeoriginals.
COPY IMAGE IS SKEWED WHEN BYPASS IS USED
Besurecopypaperisinsertedstraight.
USING ECM, COPIES CANNOT BE MADE AFTER PASSWORD IS ENTERED
Checktoseeifthemessage“Exceedlimit”isdisplayed.
Contactkeyoperatortoresetlimit.
SORTER DOES NOT OPERATE
Press [SORT]/ [GROUP]/ [STAPLE] key.
Remove paper misfeed, if any.
RADF INDICATOR WILL NOT LIGHT AFTER AUTO/RESET IS PRESSED
Fully close RADF.
RADF LIGHT IS FLASHING
The document feeder is ready to accept originals.
Insert originals on RADF tray, press [AUTO RESET] key, then [START PRINT] key.
ADD TONER MESSAGE IS DISPLAYED
Newtonersupplyisneeded.Followinstructionsforaddingtoner.
Troubleshooting 11-15
Troubleshooting
CopyingTips(continued)
CALL FOR PM IS DISPLAYED IN MESSAGE AREA
Contact your service representative for Preventive Maintenance.
THE BASIC SCREEN DOES NOT DISPLAY SETTINGS AS DESCRIBED IN USER’S
MANUAL.
Checkwiththekeyoperator,asInitialSettingsmaybechanged.
PLEASE CHECK ORIGINAL
Thismessagedisplayswhenthecopierdetectsanon-standardpapersizeontheplatenglass.Select
copy size and press [START PRINT] key. 100% magnification will be selected automatically.
Ifthismessagecontinuestodisplayafterselectingcopysize,select100%magnification,evenifitis
already indicated, then press [START PRINT] key. If desired, ask your Konica service
representativetoenablethemachinetodefaultto100%magnificationinthissituation.
11-16 Troubleshooting