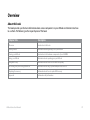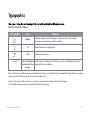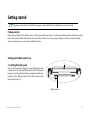
1
LN Book Series User Manual
This model is recommended to install OS version below Windows7 32bit.
Table of Contents
Overview
About this book
Typographics
P.1
P.1
P.2
Getting started
Package contents
Getting your LN Book Series ready for use
Saving power of your LN B ook Series
Expanding the capabilities of your LN Book Series
P.3
P.3
P.3
P.3
P.5
Touring your LN Book Series
Front view
Left side view
Right side view
Bottom view
Indicators
Using your LN Book Series
Using the touchpad
Function hotkeys
Windows key shortcuts and other keys
Using built-in wireless connectivity (select models only)
Connecting to a wireless network
Using Bluetooth (available on select models)
P.7
P.7
P.8
P.9
P.10
P.11
P.11
P.12
P.14
P.15
P.16
P.17
P.18
P.21
LN Book Series User Manual
BIOS Setup Menu
Main menu
Security Menu Default
Set User Password / Set Supervisor Password
Boot Menu Default
Exit Menu
Multi-Boot Menu
P.23
P.24
P.25
P.26
P.28
P.29
P.30
Replacingthe memory
Remove the Storage Device
Inatall the Storage Device
P.31
P.35
P.37
Appendix
P.39
Table of Contents ii
Overview
About this book
This book provides you the main information about various components in your LN B ook and demonstrates how
to use them. The following are the major chapters of this book.
Chapter title
Description
Overview
Introduction to this book
Getting started
Information about beginning to use your LN B ook
Touring your LN B ook
Introduction to the hardware components of your LN BOOK
Using your LN B ook
Information about operating your your LN B ook
Using BIOS setup
Information about how to use the BIOS setup utility
Recovering your system using QDataTrove
Information about using system backup and restore tools
Replacing the memory
Information about how to replace RAM memory
Appendix
Information safety information
LN Book Series User Manual
P.1
Typographics
which are described as follows:
Icon/ Symbol
Item
Meaning
Warning
Information mainly to prevent the damage to components, data, or personal injury
caused by misuse and improper operation or behavior.
Tip
Note
< > or [ ]
Keys on the keyboard;
User Interface (UI) on
the screen
Useful information for completing a task.
Supplementary information.
Indicates a key on the keyboard, or the UI on the screen. Do not actually type the symbols
together with the enclosed letters.
When you first set up your LN Book, you may want to find more information on setups. Refer to the user manual that is supplied with your operating
system, or search from Help and Support in the Start menu in Windows XP.
In this book, the steps needed to reach a menu are shown in condensed form, for example: Start > Help and Support.
The Control Panel options mentioned are organized by the default category view.
LN Book Series User Manual
P.2
Getting started
Depending on the model of your LN Book, the appearance may be different from the illustrations shown in this manual.
Package contents
Before using your LN Book for the first time, please check if you have all the items with you. For details about what should be included in the package,
refer to the Product Specifiction label on the product carton. If any of the items are missing or appear damaged, contact your dealer immediately.
Save the packing in case you need to ship your LN Book for service.
Getting your LN Book ready for use
(1)
1. Installing the battery pack
Close the lid of your LN Book (if open). Turn your LN Book upside down
and place it on a soft clean cloth. With the label side of the battery pack
facing down, slide it gently into the battery compartment until it snaps
into place (1). Move "Battery retainer A" to the Left as shown to lock the
battery pack into place (2).
(2)
Battery retainer A
LN Book Series User Manual
P.3
2. Connecting the power
3. Opening your LN Book
Gently lift up the latch lid that allows you to open the case easily.
4. Performing initial setup
a. Connect the power cord to the power adapter.
b. Connect the power adapter to the power jack
on your LN Book.
c. Connect the power cord to a power outlet.
The LN Book will automatically start charging the battery.
LN Book Series User Manual
Press the Power button to start up your LN Book, And then follow
the on-screen instructions to complete the initial Windows XP
setup.
P.4
Expanding the capabilities of your LN Book
Pay attention to the plug direction when making the
following connections. Incorrect direction may cause
damage to the device.
Connect an external display device (such as a monitor or
projector) to the 15-pin D-sub video jack of your LN Book with
a VGA cable.
To switch to the external display device or simultaneous
display, press the <Fn> + <F7> hotkey combination.
Connect USB peripherals to the USB ports of your LN Book
Insert a Memory Stick, Memory Stick Pro, MMC, and SD
memory card following the direction indicated on the card to
LN Book Series User Manual
P.5
Connect an earphone to the audio output jack to output
sounds.
Access local area network (LAN) by connecting a network cable
to the LAN port of your LN Book.
Connect a microphone to the microphone input jack to record sounds.
LN Book Series User Manual
P.6
Touring your LN Book
About this book
1
Front components
(1) Built-in webcam
A built-in 0.3 megapixel webcam that allows you to cap
ture still images, record videos, and chat online.
2
(2) LCD (Liquid Crystal Display) panel
(3)
Power button
Turns your LN Book on or off.
3
(4) Keyboard
4
9
5
6
7
8
(5) Touchpad
Refer to “Using the touchpad” on page 12 for details.
(6) Right touchpad button
(7) Left touchpad button
(8) Indicators
Refer to “Indicators” on page 11 for details
(9)
LN Book Series User Manual
Built-in microphone
Receives sounds and voices for recording.
P.7
(1)
(2)
(3)
(4)
(6) (5)
Left-side components
(1)
Power jack
Connect AC power supply to power the LN Book and
charge the battery.
(4)
(2)
(5)
Audio output jack
Connect to an earphone/headset or external speaker
for playing the LN Book audio.
15-pin D-sub video jack
Connect external display devices, such as monitors
and projectors.
(3)Vents
Dissipate heat and keep your LN Book at an optimal
temperature.
To prevent overheating, do not obstruct the vents.
For example, do not use the LN Book in bed where
a blanket may inadvertently cover the vents and block
USB port
Connect peripherals such as mice, digital cameras and
MP3 players that use the USB 2.0 interface.
(6)
Microphone input jack
Connect to a microphone for recording sounds.
This jack is for 3.5mm analog audio plugs. It accepts both
mono and stereo plugs.
.
LN Book Series User Manual
P.8
(1)
(2)
(3)
Right-side components
(1) For a Memory Stick, Memory Stick Pro, SD or
MMC memory card.
(2)
USB port
Connects peripherals such as mice, digital cameras and
MP3 players that use the USB 2.0 interface.
LN Book Series User Manual
(3)
LAN (Local Area Network) port (RJ-45
connector)
Allows the LN Book to connect to a 10/
100Mbps fast Ethernet 100BASE-T network.
Please be careful to avoid plugging a RJ-11 phone cable con
nector in the RJ-45 port. This will damage the LAN port.
They look similar, but the RJ-45 connector is wider than the
RJ-11 connector, and has more conductors.
P.9
Bottom view
(4) Memory expansion slot cover
oLio Book . You can replace the existing memory module
of your LN Book from here.
• To remove the cover, a small Phillips head
screwdriver is required.
• For more information about replacing the memory module, the
limit of maximum memory, or the types of certified memory
modules for your LN Book.
Bottom components
(1) Battery pack
Supplies power to the LN Book when external
power is not connected.
LN Book Series User Manual
P.10
Indicators
(1)
Bottom components
(1)
(2)
System status indicator
• When the system is on, it lights up in green.
• When the system is in Sleep mode, it blinks up in green.
(3)
Battery indicator
• When the battery is charging, it blinks up in orange.
• When the battery is fully charged, it lights up in orange.
• When the battery is in use, it lights up in green.
• When the battery is running low, it blinks in green.
(4)
Hard disk/CD-ROM activity indicator
Flashes in green when the LN Book is accessing data in
the hard disk or/and externat CD-ROM.
(5)
Wireless LAN (WLAN)/Bluetooth indicator
• When WLAN or Bluetooth is tuned on it lights up in green.
Power button
(2) (3) (4)
LN Book Series User Manual
(5)
P.11
Using your LN Book
Using the touchpad
(2)
(1)
(3)
The touchpad with its buttons is a pointing device that
functions as an optional external mouse, which can
perform navigation, scrolling and selection functions.
The components of the touchpad are described
as follows.
No.
Component
Function
(1)
Touchpad
Moves the pointer, selects or
activates items on the screen.
(2)
Left touchpad
button
Equivalent to the left button of an
optional external mouse.
(3)
Right touchpad
button
Equivalent to the right button
of an optional external mouse.
• To use the touchpad as an optional external mouse, press the
left and right touchpad buttons, which provide the same click
functions as an external mouse does.
the touchpad and move in the direction as desired.
• Do not use a pen, pencil, or marker on the touchpad.
• To set the touchpad preferences in Windows XP, select
Start > Control Panel > Printers and Other Hardware > Mouse
LN Book Series User Manual
P.12
Function
Left touchpad
button
Right
touchpad
button
Touchpad
Select
Click once.
--
Tap once.
Execute
Click twice quickly.
--
Tap twice quickly.
Drag
Click once and
hold the item,
and then use
--
Tap twice quickly
and hold the item,
and then move
touchpad to drag.
Display the
contextual
menu
--
touchpad to drag.
Click once.
--
• The touchpad is a pressure sensitive device that requires
proper care to avoid damage.
• Do not rest heavy objects on the touchpad or its buttons.
• Do not scratch the touchpad with sharp-pointed objects or your
LN Book Series User Manual
P.13
Function hotkey
Description
Function hotkey
<Fn> + <F1>
Activates or deactivates the touchpad.
<Fn> + <F8>
Decreases screen brightness.
<Fn> + <F9>
Increases screen brightness.
<Fn> + <F2>
<Fn> + <F3>
Turn on/off
Turn on/off M
Mute volume.
<Fn> + <F11>
Description
Switches between 3G, WLAN and Bluby the on-screen display.
3G, WLAN and Bluetooth are available
on select models.
Play/Pause the playback of Windows
Media Player.
<Fn> + <F4>
Sleep button
Make the system entering sleep mode.
<Fn> + <`>
<Fn> + <F5>
Decrease volume.
<Fn> + <Ins>
Activates or deactivates the numeric
keypad (indicated by the light gray
shade in the illustration on the previous page).
<Fn> + <F6>
Increase volume.
<Fn> + <F7>
Switches display between internal LCD
and an external display device (such
as a monitor or projector), or allows
simultaneous display.
<Fn> + <Del>
Activates or deactivates the scroll lock
function. When activated, the screen
moves one line up or down when you
press the up or down arrow key (K, L).
Make sure an external display device (such as a
monitor or projector) has been connected to your
Netbook properly before using this hotkey
combination.
LN Book Series User Manual
Scroll Lock does not work in all programs.
P.14
Function hotkey
Description
Function hotkey
Windows key
Provides quick access to the Start menu.
+ <R>
+ <E>
Function hotkey
<Alt> + <Tab>
<Caps Lock>
LN Book Series User Manual
Activates the Run dialog box.
+ <M>
<Shift> +
+ <M>
Description
Minimizes all open windows that
contain Minimize buttons.
Cancels minimization of all windows.
Opens the My Computer Window for
browsing disks and - les.
Description
Switches between windows.
Function hotkey
Description
Provides the same function as the right
Application key touchpad button, displaying a contextual pop-up menu.
Capitalizes all text entered.
P.15
Using built-in wireless connectivity (select models only)
With the built-in wireless connectivity of your LN Book, you
can access other wireless network enabled devices (such as AccessPoint network stations, Notebook computers, Personal Digital
Assistants, or digital projectors) wirelessly without the constraints
of network cables.
3. Click on the WLAN icon
located at the lower right corner of the desktop. A list of
available wireless networks will be displayed.
To connect with a Local Area Network (LAN) at home or in the
air station to make transmission possible. Outdoors in places such
about an account.
• Wireless LAN (WLAN) is available on select models.
• WLAN connectivity has limited range, depending upon the
equipment being used, the chosen frequency band, radio- wave
interference, and the physical landscape (including building
structure). Circumstances will vary depending upon your
particular situation.
Connecting to a wireless network
1. Make sure you are located within the wireless network service area.
2. To enable WLAN, press the <Fn> + <F11> hotkey combination
a few times until the WLAN/Bluetooth indicator lights up.
LN Book Series User Manual
4. Choose a network and then click Connect. If security
authentication is not required by the network you are
using, there will be a successful message showing that
you have connected to the network.
P.16
• To connect to some networks that require security authentication,
you may have to undergo another authorization process and
enter username and password. For details, please consult your
network administrator.
• For more information, refer to Start > Help and Support in
Windows XP.
• For data security, it is strongly recommended to connect to
security-enabled wireless networks whenever possible.
There is another way for the LN Book to connect with a network. See
“LAN (Local Area Network) port (RJ-45 connector)”.
LN Book Series User Manual
P.17
Using Bluetooth (available on select models)
The Bluetooth function allows you to get connected to various
devices and services that support Bluetooth transmission. You can
connect wirelessly without the need for data cables when printing
documents, synchronizing your Personal Information
Management (PIM) data with your Personal Digital Assistant (PDA)
or another Personal Computer (PC), mobile phone or even sharing
a network connection.
1. Right-click on the Bluetooth icon
located at the lower right corner of the desktop, and then
click Add a Bluetooth Device to launch the wizard.
Bluetooth is available on select models.
Connecting to a Bluetooth device
1. Press the <Fn> + <F11> hotkey combination to turn the Bluetooth
on. When the Bluetooth is turned on, WLAN/ Bluetooth indicator
lights up.
2. Turn on the power of your Bluetooth device and activate its
Bluetooth function. You also need to make your Bluetooth device
“Discoverable”.
2. Click Next.
• For details about how to activate the device’s Bluetooth function,
please refer to its documentation.
LN Book and the Bluetooth device is 10 meters.
LN Book Series User Manual
P.18
3. Please wait while Windows is searching for available Bluetooth
devices. Select the Bluetooth device that you want to add, and
then click Next.
LN Book Series User Manual
4. Refer to the documentation that came with your Bluetooth
Windows will generate a passkey for you.
If the pairing process is not done within a short time, click
Try Again to enter a passkey. And click Next. When you are
prompted to enter the passkey on your Bluetooth device,
follow the on-screen instructions to enter the passkey.
P.19
5. The Bluetooth device is now connected to your LN Book .
A list of available services supported by the connected
Bluetooth device is displayed. Check the desired services and
click Next.
LN Book Series User Manual
6. Click Finish to complete the setup.
P.20
If your Bluetooth device is capable of sending and receiving data,
such as a mobile handset, you can use the Bluetooth connectivity
to transfer data wirelessly between your Bluetooth device and
LN Book.
1. After your LN Book is connected to a Bluetooth device,
right-click the Bluetooth icon
display the pop-up box, and select Quick Connect > File
Transfer, and then the connected Bluetooth device.
and click OK.
LN Book Series User Manual
P.21
4. Before the transmission starts, you may be requested to enter
the passkey again to ensure the connection. After the transmission
starts, you can check the on-screen progress bar for the status of
a mobile handset. To connect to other types of Bluetooth
devices, refer to the online Help for details.
LN Book Series User Manual
P.22
6. BIOS Setup Menu
6.1 Invoking setup
The setup function can only be invoked by pressing F2 when Press <F2> to enter Setup message is prompted on the bottom of
screen during POST.
Main
Allows the user to specify standard IBM PC AT system parameters.
Security
Provides security settings of the system.
Boot
Allows the user to specify the boot options.
Exit
Allows the user to save changes and exit Setup.
During setup, all Fn function keys and power saving functions are disabled.
LN Book Series User Manual
P.23
6.2 Main Menu
The setup function can only be invoked by pressing F2 when Press <F2> to enter Setup message is prompted on the bottom of
screen during POST.
Main
Allows the user to specify standard IBM PC AT system parameters.
Security
Provides security settings of the system.
Boot
Allows the user to specify the boot options.
Exit
Allows the user to save changes and exit Setup.
During setup, all Fn function keys and power saving functions are disabled.
InsydeH2O Setup Utility
Main
S
ecurity
BIOS version
Processor Type
B
oot
R
ev. 3.5
Exit
V0.11
Intel ® ATOM™ C PU
@1.60Ghz
System Bus Speed
533Mhz
System Memory Speed
533Mhz
Cache RAM
0512KB
N270
+-
Select Boot Device
Select Screen
=Select Item
Total Memory
[xxxxMB]
Enter=Select / Sub-Menu
SODIMM 0
[xxxxMB]
F1=General Help
F9=Setup Default
System Time:
[09:00:00]
F10=Save and Exit
System Date:
[01/01/2009]
ESC=Previous Page
LN Book Series User Manual
P.24
6.2 Security Menu Default
The following is Security menu if both of password is disabled, or enter Supervisor password when password is enabled:
User Password is / Supervisor Password is :
Installed :
System Password is set.
Not Installed:System Password is not set.
LN Book Series User Manual
P.25
Set User Password / Set Supervisor Password
Set SupervisorPassword
Please type in your new password [
]
Please confirm your new password[
]
If there is an old password then setup will prompt with the following window instead
Set Supervisor Password
Please type in your password
[
]
Please type in your new password [
]
Please confirm your new password[
]
Setup Notice
Changes have been saved.
[ continue]
LN Book Series User Manual
P.26
The password setting is complete after user presses enter.
If the current password entered does not match the actual current password:
Setup Warning
Invalid password
Re-enter Password
[ continue]
Setup Warning
Password do not match
Re-enter Password
Password on Boot:
happened. The following sub-options are all requires the Supervisor password for changes and
should be grayed out if the user password was used to enter setup.
Allows the user to specify whether or not a password is required to boot.
Option : Disabled / Enabled
Clear User Password:
Clear user password
LN Book Series User Manual
P.27
6.3 Boot Menu Default
This menu allows the user to decide the order of boot devices to load the operating system.
LN Book Series User Manual
P.28
Quiet Boot:
Enabled: Customer Logo is displayed, and Summary Screen is disabled
Disabled: Customer Logo is not displayed, and Summary Screen is enabled.
PXE Boot to Lan
Enabled: Support boot from Lan
Disabled: Don’t Support boot from Lan.
Boot Device Priority
6.4 Exit Menu
LN Book Series User Manual
P.29
6.5 Multi-Boot Menu
BIOS will provide the user with the ability to select the devices for attempting to boot an OS.
The user will be able to specify which system device will be attempted 1st, 2nd, and so on. The
list of possible boot devices will include:
* HDD
* CD-ROM/DVD Drive
* Floppy devices
* Network Boot
bootable state, the system will proceed to the next user selection device. If none of the
selected devices are present or in a bootable condition then the system will halt and display
an error message.
Support USB FDD bootable function and also support Boot Block from USB FDD.
User can press F12 during POST to enter multi-boot menu. In this menu user can change
boot device without entering BIOS SETUP Utility.
LN Book Series User Manual
P.30
Replacing the memory
You can replace the existing memory module with a high
capacity one. Before you upgrade or replace memory, please
check on the web site to determine the module which can
be used, or contact Linkworld Electronic Co., Ltd.
distributor or customer service center.
It is recommended that you take your LN Book to the
Linkworld Electronic Co., Ltd.
distributor or customer service center for the upgrade or
memory replacement.
1. Shut down your LN Book completely. Disconnect the
power adapter and turn over your LN Book.
Battery
For details about the limit of maximum memory, refer to the
product information from http://www.linkworld.com.tw
CAUTION
RISK OF EXPLOSION IF BATTERY IS REPLACED
BY AN INCORRECT TYPE
DISPOSE OF USED BATTERIES ACCORDING
TO THE INSTRUCTIONS
2. Slide “Battery retainer A” to the right to unlock the battery.
Battery retainer A
LN Book Series User Manual
P.31
3. Slide “Battery retainer B” to the left (1) and, while still holding
the retainer, remove the battery from its compartment (2).
Battery retainer B
LN Book Series User Manual
4. The memory cover is secured with 1 screw. Use a
screwdriver to remove the screw.
To remove the screw, a Small Phillips head
screwdriver is required.
P.32
5. Remove the memory cover.
Ground yourself to your LN Book with
professional grounding equipment like an
anti-static wristband, or touch the
metal surface on the inside of your LN Book
to discharge any static electricity.
6. Release the existing memory
module by pushing aside the
memory holders, and remove the
memory.
8. Align the new memory module with
the slot, and then insert it.
When inserting, pay attention to the
direction of the memory module.
7. Remove the memory.
Handle the memory
odule by its edge and
avoid touching the
contacts.
LN Book Series User Manual
9. Gently push the free edge
downwards until the module locks
into place.
If the memory module is
not installed properly,
your LN Book may not
boot properly.
P.33
10. Replace the memory cover.
11. Use a screwdriver to secure the cover with the screw.
12. Place the battery on its original position (1), and then slide
“Battery retainer A” to the left (2). Connect the power adapter.
When you start the LN Book, it will
It is recommended that you go into BIOS to load
setup defaults after installing additional memory.
For details
LN Book Series User Manual
P.34
Remove the Storage Device
1. To remove the cover, please lease the screws by screwdriver.
Before you upgrade or replace the storage device(HDD), You
need to remove the existing one. Please follow the steps on
the manual as figure.
Please check on the web site to determine the module which can
be used, or contact Linkworld Electronic Co., Ltd.
distributor or customer service center.
It is recommended that you take your LN Book to th e
Linkworld Electronic Co., Ltd.
distributor or customer service center for the upgrade or
memory replacement.
For details about the limit of maximum Hard drive, refer to the
product information from http://www.linkworld.com.tw
LN Book Series User Manual
2. Remove the plastic cover to reveal the HDD.
P.35
3. Gently disconnect the HDD from connector
by pulling strap.
5. Remove the connector from the HDD as figure shown.
4. lease the 4 screws on the metal bracket.
LN Book Series User Manual
P.36
Inatall the Storage Device
1. Put the connector into the HDD as figure shown.
You can replace the existing storage device(HDD) with a high capacity
one. Before you upgrade or replace the storage device(HDD), please
check on the web site to determine the module which can
be used, or contact Linkworld Electronic Co., Ltd.
distributor or customer service center.
It is recommended that you take your LN Book to th e
Linkworld Electronic Co., Ltd.
distributor or customer service center for the upgrade or
memory replacement.
For details about the limit of maximum Hard drive, refer to the
product information from http://www.linkworld.com.tw
2. Screw the HDD on the metal bracket by 4 screws.
LN Book Series User Manual
P.37
3. Gently connect the HDD to the connector.
5. Screw the HDD plastic cover by 2 screws.
4. Cover the HDD using the HDD plastic cover.
LN Book Series User Manual
P.38
Appendix
Generalsafety information
When setting up or operating your LN Book, please pay special
attention to the following:
1. Keep this manual in a safe place for easy reference when
needed.
2. Make sure you follow all instructions and warnings related to the
system.
3. Place your LN Book on a stable, level surface, and ensure that
the vents are not obstructed.
4. Do not expose your LN Book to rain or excess humidity, and
keep it away from liquids (such as beverages, faucets, and so on).
5. Do not expose your LN Book to direct sunlight, and keep it
away from sources of heat (such as radiators, space heater, stoves,
and so on).
6. Do not expose your LN Book to heavy impacts or strong vibrations. When closing the LN Book , do not use excessive force.
7. Do not use your LN Book neat a gas leak.
8. Do not store your LN Book in environments where the temperature is below 0°C or above 50°C, nor use your LN Book in
environments where the temperature is below 5°C or above 35°C.
LN Book Series User Manual
9. Do not use your LN Book near water, for example near a
bathtub, wash bowl, kitchen sink or laundry tub, in a wet
basement or near a swimming pool.
10. Do not place the LN Book , in the vicinity of strong mag11. Use an appropriate electrical outlet, and make sure no
heavy objects are placed on the power adapter or power
cord.
12. The power adapter is a high-voltage component. Do not
attempt to repair it yourself. Should it become damaged,
please contact an authorized Linkworld Electronic Co., Ltd.
distributor or service center.
Safety information about the battery
Caution: There is a high risk of explosion if the battery is
incorrectly replaced. Replace only with the same or equivalent type recommended by the battery equipment manufacturer. Discard used batteries according to battery manufacturer’s instructions.
P.39