1
Océ CS 5090
User Manual
Océ-Technologies B.V.
Trademarks
Products in this manual are referred to by their trade names.
In most, if not all cases, these designations are claimed as
trademarks or registered trademarks of their respective
companies.
Copyright
Océ-Technologies B.V. Venlo, The Netherlands © 2001
All rights reserved. No part of this work may be reproduced, copied, adapted,
or transmitted in any form or by any means without written permission from
Océ.
Océ-Technologies B.V. makes no representation or warranties with respect to
the contents hereof and specifically disclaims any implied warranties of
merchantability or fitness for any particular purpose.
Further, Océ-Technologies B.V. reserves the right to revise this publication and
to make changes from time to time in the content hereof without obligation to
notify any person of such revision or changes.
Code number 7114136
Edition 2.0 6/5/01
GB
Contents
Chapter 1
Introduction
How to use this manual 10
Printing with Océ CS 5090 12
Graphic reproductions 13
Choice of print mode 14
Ink cartridge preparation and alignment 14
Chapter 2
Getting started
Operate the CS 5090 16
Start up checklist 16
Locate the control panel 16
Choose menu functions 17
Set the language 17
Load media 18
Use the power media feed and take-up system 18
Load roll media 19
Use the take-up roll 19
Use the second feed roll 21
Load sheet media 22
Use the carriage 23
Move the carriage 23
Install cutter 24
Fill the ink reservoirs 25
Install ink cartridges 26
Cartridge sets 27
Inspect cartridges 28
Place cartridges 29
Prime the ink delivery lines 30
Run a colour test 35
Print the prime pattern 36
Cartridge recognition 38
Align cartridges 39
Paper axis calibration 39
Define calibration units 39
Contents
3
Colour deadband calibration 40
Cartridges calibration 41
Operate the printer 43
Chapter 3
Control panel
Main menu at a glance 46
Menu tree 47
Use the default settings 48
Save user options 50
Adjust the LCD contrast 51
Access printer information 52
Get cartridge information 52
Chapter 4
E-Connect
Prerequisites 54
Connection 55
Configuration 57
Configuration of the E-connect printserver 57
Chapter 5
Printing with HP-GL/2
Overview 60
Access the HP-GL/2 menu options 60
Select the palette 61
Set the ’Control’ function 62
Rotate a print 63
Make reprints 63
Ink reduction 64
Nesting 64
Apply the ink limit 65
Print an HP-GL/2 test file 66
Chapter 6
Handling ink and media
Choose paper options 68
Supply Type 68
Media standard 68
4
Océ 5090 User Manual
Rollfeed media: sizes and maximum printing areas 69
Sheet media: sizes and maximum printing areas 71
Set margins 73
Set auto-load delay 75
Select auto-cut 75
Select auto-cut delay 76
Delay status 76
Save media 77
Choose "feed media" options 78
Detect the "end of media" 78
Use the media counter 79
Ink 81
Refill ink reservoirs 81
Use the dryer 81
Select auto-wipe 83
Change ink types 83
Remove and store ink cartridges 84
Remove reservoirs 85
Install new cartridges 86
Refill ink cartridges 87
Purge ink delivery lines 89
Select ink preheat 89
Chapter 7
Quality
Choose a print mode 92
Select cartridge sets 94
Select quality modes 94
Select a colour mode 95
Select resolution (dpi) 95
Set print passes 96
Set carriage speed 96
Select the print direction 97
Chapter 8
Firmware downloads
Overall 100
Check the firmware version 101
Upgrade the firmware 102
Chapter 9
Contents
5
Maintenance and cleaning
Periodic cleaning 106
Materials to use for cleaning 107
Clean the ink cartridge jet plate 107
Clean the service station 108
Clean the Pinch Rollers and Lower Drive Rollers 110
Clean the slide shaft 111
Clean the encoder strip 112
Clean trailing cables 113
Clean flex cables 113
Clean carriage bushings 114
Clean platen vacuum holes 115
Maintain the Océ Prime tool 116
Transport the printer 116
Chapter 10
Error handling and troubleshooting
Error handling 118
Unrecognized cartridge 118
Check the quality of ink cartridges 119
Run the prime test 119
Compensate for electrically defective jets 121
Clear clogged jets 122
Compensate manually for clogged jets 123
Troubleshooting 125
Troubleshooting areas 125
Isolating problems 125
Printer behaviour 126
Print quality 131
Data transfer 136
Application software 139
Calling for assistance 140
Appendix A
Glossary
Appendix B
Safety information
General safety information 146
Radio interference (EMC) 146
Instructions for safe use 146
6
Océ 5090 User Manual
Safety data sheets 148
Appendix C
Miscellaneous
Notation conventions 150
Reader’s comment sheet 151
Addresses of local Océ organisations 153
Appendix D
Technical specifications
Océ CS 5090 printer specifications 156
Appendix E
Supplies
Caring for inks and media 160
Inks and ink cartridges 160
Caring for your media 161
Inks for Océ CS 5090 printers 162
Océ Standard Colour Inks accessory kits 162
Océ Standard Colour Inks replacement cartridges 162
Océ Standard Colour Inks litre kit 163
Océ Graphic Colour Inks accessory kit 164
Océ Graphic Colour Inks replacement cartridges 164
Océ Graphic Colour Inks litre kit 165
Océ Outdoor Inks accessory kits 166
Océ Outdoor Colour Inks replacement cartridges 166
Océ Outdoor Colour Ink litre kit 167
Media for Océ CS 5090 printers 168
Assortment 170
Miscellaneous Océ CS 5090 accessories 171
Warranty Inkjet Cartridges for Océ 5350-600, CS 5050/5070/5090 172
Priming 173
Causes of the most common problems 174
Return Shipments of defective cartridges 174
Index 175
Contents
7
8
Océ 5090 User Manual
Océ CS 5090
User Manual
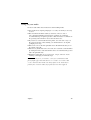
Chapter 1
Introduction
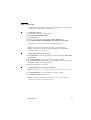
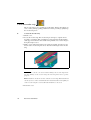
The Océ CS 5090 are wide-format colour printers that give
professional quality output with all the brilliance and gloss
of liquid ink. The Océ CS 5090 printers reduce production
time while maintaining exceptional graphics quality.
9
How to use this manual
There are a number of notation conventions used in this manual. This
consistent style enables you to quickly become conversant with the use of this
manual and consequently the Océ CS 5090.
Description Each section or subsection contains a description of the feature or
operation identified in the title. It might also include possible applications, as
well as any guidelines that you should bear in mind.
Procedures A description is followed by a procedure. A procedure always
begins with a phrase which briefly describes the procedure, followed by a
series of numbered steps that take you, step by step, through all phases of
performing the operation.
Figures and tables Figures and tables are titled and numbered sequentially
throughout this manual. Figures include pictures of product components,
screendumps, examples, and diagrams of concepts discussed in the
description.
Videos Several pages of the manual include short Quick Time videos
illustrating some manipulations or procedures described in the manual. Those
videos are represented with a small screen displaying the first image of the
movie:
All you need to do is to click on the screen. A new page is displayed with the
video on the right and the text on the left. Click the image to launch the video.
If you want to stop the video before the end, click anywhere on the page.
When the video is finished, click ’Back’ to go back to the manual.
Attention getters There are several types of information to which we draw
your attention. This information is classified as follows:
10
Océ CS 5090 User Manual
Note: In a ‘Note’, information is given about matters which ensure the proper
functioning of the machine or application, but useful advice concerning its
operation may also be given.
Attention: The information that follows ‘Attention’ is given to prevent
something (your copy or original, the copier or printer, data files etc.)
being damaged.
Caution: The information that follows ‘Caution’ is given to prevent you
suffering personal injury.
Introduction
11
Printing with Océ CS 5090
The Océ CS 5090 wide format inkjet printers can reproduce graphics up to the
length of a roll of media. Large format colour printing combines the technical
sophistication of the Océ CS 5090 series with the unique qualities of Océ
proprietary inks and media (coated canvas, vinyl, film, paper, etc.)
The Océ CS 5090 printers are 8-cartridge printers, which means that you can
print either with the left four cartridges, the right four cartridges or all eight
cartridges.
With the CS5090 8-colours, you can choose between two different modes:
■
■
The Productivity mode (two sets of cartridges using 4 colours, CMYK). It
offers a great improvement in terms of print speed and flexibility since you
can use different types of ink: Standard Colour in the four left cartridges and
Outdoor Colour in the four right, for instance.
The Quality mode (one set of 8 different colours, CMYK CLMLCMMM1). It
offers a real improvement in the tonal gradation of your prints thanks to the
diluted colours, Light Cyan and Magenta, Medium Cyan and Magenta.
1. L: Light, M:Medium
12
Océ CS 5090 User Manual
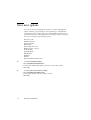
Graphic reproductions
The Océ CS 5090 addresses the following printing needs:
■
Posters
■
Signs
■
Fine art
■
Banners
■
Displays
■
Proofing
■
DTP
■
Imposition proofing
■
Textile design
■
Packaging prototypes
■
Point of purchase
■
Exhibits
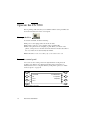
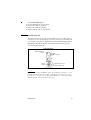
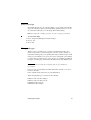
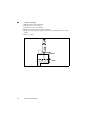
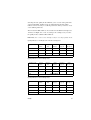
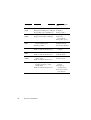
2269
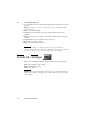
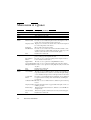
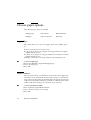
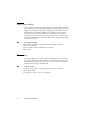
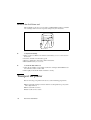
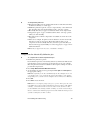
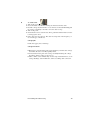
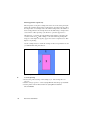
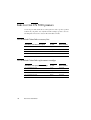
[1] Front view Océ CS 5090 printer
Introduction
13
Choice of print mode
There are several modes of printing, which are compromises between image
quality and speed. When printing heavy renderings, maps, or art graphics,
choose one of the quality printing modes. Certain types of media also require
quality printing modes.
To select the appropriate printing mode for a specific print job, refer to ‘Set
print passes’ on page 96.
Ink cartridge preparation and alignment
Cartridge maintenance and alignment are key factors in printer performance,
which in turn affects colour accuracy and image quality. Use the following
recommendations to keep your cartridges in optimal working condition:
■
■
■
■
14
Keep the printer service stations clean so that the heads stay clean.
Use a loupe to evaluate the registration of test patterns to achieve the best
possible accuracy.
Align and check cartridges to make sure all nozzles work properly.
Re-align all cartridges when you adjust, move, or replace a cartridge, since
even small, one-pixel errors can affect both colour and image quality.
Océ CS 5090 User Manual
Océ CS 5090
User Manual
Chapter 2
Getting started
This section explains the initial setup procedure of the Océ
CS 5090:
■
■
■
■
■
operate the printer
load media
use the carriage
fill ink reservoirs
install, prime, and calibrate ink cartridges
15
Operate the CS 5090
Before printing, make sure that you are familiar with the start-up checklist and
the main menu functions of the control panel.
Start up checklist
!Click for Video
To start the CS 5090, check the following:
■
■
■
The power cord is plugged into the electrical outlet.
The printer connects to your computer using a parallel cable.
Turn on the printer before attempting to print. When you switch on the
printer, carriage moves to the left and checks if there is media loaded. If it is
the case, media size is automatically determined.
Note: In Roll/Sheet mode, the leading edge of the media is detected.
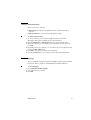
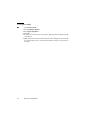
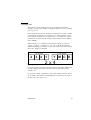
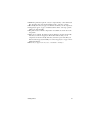
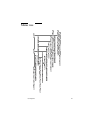
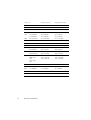
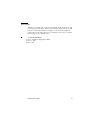
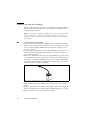
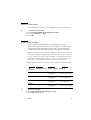
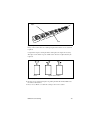
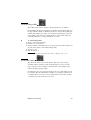
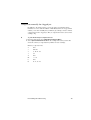
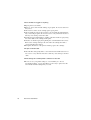
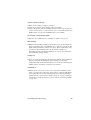
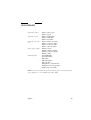
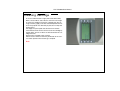
Locate the control panel
You can locate the control panel on the right-hand side of the printer. It
includes seven buttons and a display indicating modes and settings, as
illustrated below. For a complete summary of all printer options, see ‘Main
menu at a glance’ on page 46.
2271
Load Media
Cut
Pause
Reset
[2] Océ CS 5090 control panel
16
Océ CS 5090 User Manual
Feed Media Menu
Set Up Menu
Utility Menu
Choose menu functions
There are two types of menus:
■
action menus provide a list of additional menus or immediate tasks to
perform.
■
▼
selection menus let you view and modify printer settings.
To select menu functions
1 To select a function, press the button displayed next to the function.
The display lists options available for the selected function.
2 Press the Next Option or Prev. Option buttons to display the selections.
3 When the selection you want displays, press the button for that option and
press OK.
4 Depending on the type of menu, you can return to the previous menu level by
pressing the OK or Exit button.
5 Press Exit consecutively to return to the main menu.
6 Press the Cancel button to restore the previous setting and exit the menu.
Set the language
The Océ CS 5090 can display menu items in English, German, French, Italian,
Portuguese, Korean, Japanese, and simplified and traditional Chinese.
▼
To set a language
1 Press Setup/User Setup/Language.
2 Select the language you want.
3 Press OK.
Getting started
17
Load media
You can use either roll media or cut sheets. By default, the printer accepts roll
media. To ensure straight paper loading and avoid skewing, hold the media
parallel to the platen line. Use the load lines on the platen as a guide. The
printer has sensors which detect the presence of media and activate the feed
and take-up mechanisms.
The roll media core must have an inside diameter of 5 cm and a maximum
outside diameter of 15 cm. If your media has an inside diameter of 8 cm, use
the core adapter provided. If you want to store prints on the take-up roll, you
will need to have extra cores available.
Caution: The Océ CS 5090 printers (60” version) can use media up to 60"
(1,52 m) wide. The media roll can be heavy, so have someone help you to
load it. Before printing, check that you have a take-up roll core available
that is the same width as the media roll you are loading.
Attention: If your roll media has wrinkled or damaged edges, cut off the
damaged part of the roll prior to loading to prevent the media from
jamming in the printer. Load only media with a perfectly horizontal edge
into the printer. Take care that your fingerprints do not go on the printing
side of glossy media paper.
Use the power media feed and take-up system
The power media feed and take-up system facilitates long, unattended print
jobs by automatically unwinding and rewinding media as prints are generated.
It includes a feed roll, a take-up roll, and sensors which prevent media from
touching the floor.
When the unit is first turned on, the feeder may turn for a few seconds. If the
take-up turns, it indicates that the sensor is blocked. Clear anything blocking
the sensor before proceeding.
18
Océ CS 5090 User Manual
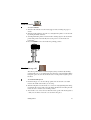
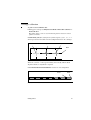
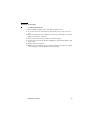
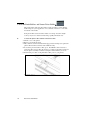
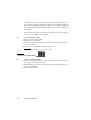
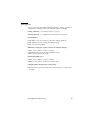
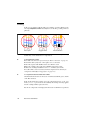
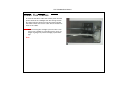
Load roll media
!Click for Video
▼
To load roll media
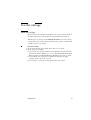
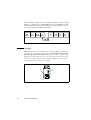
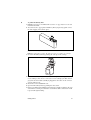
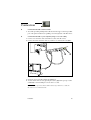
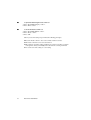
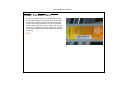
1 Slide the rolled media onto the media (upper) roller, orienting the paper as
shown.
2 Slide the media guide into the roll core, and tighten the guide to secure the roll
by turning the knob clockwise.
3 Standing behind the printer, insert the media's leading edge into the back of the
printer. The printer automatically detects the presence of the media and
forwards it.
4 Press Load Media to move the media into printing position.
[3] Loading media
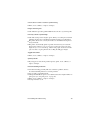
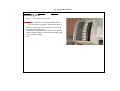
Use the take-up roll
!Click for Video
The take-up roll facilitates unattended print jobs by automatically winding
printed media onto a core. In this mode, the automatic c.utter is disabled. When
using this option, be sure that the media sensor on the printer's right leg is not
blocked.
▼
To install the take-up roll
1 Install an empty core onto the take-up guides. Be sure that the core width
matches the width of the media you are using.
2 Slide the roll guide onto the media core, and secure it by tightening the locking
mechanism. If you moved the sensor mounting bracket before loading the roll
media, be sure to return it to its normal position.
3 Since media cores can be narrower than the media, position the media guide at
3 mm (1/8”) from the end of the core and lock it into place.
Getting started
19
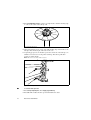
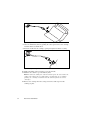
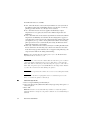
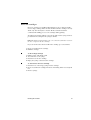
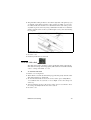
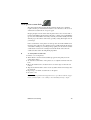
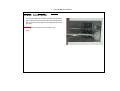
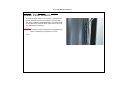
4 Press Feed Media/Forward to advance enough media to allow its leading edge
to come to the center of the take-up roll.
[4] Locking the take-up roll
5 Using at least three pieces of tape, attach the leading edge of the media to the
take-up roll at the left, right, and center of the core.
6 As printing progresses, the media loops down to the front of the take-up core
until the sensor detects it on the printer stand leg. The take-up rolls then
activate to roll the media.
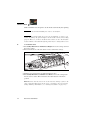
Note: Be sure not to block the sensor!
2273f
[5] Sensors on the printer stand
▼
To set the take-up mode
1 Press Setup /Paper Option, then Supply Type/Take-up.
2 Press OK. This enables the take-up roll and disables the cutter.
20
Océ CS 5090 User Manual
▼
To unload the take-up roll
1 Press the Cut button to cut the media.
2 Remove the roll from the printer.
3 Release the adjustable roll guide.
4 Slide the take-up roll out of the printer.
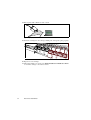
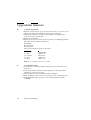
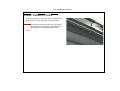
Use the second feed roll
The takeup roll can also be used as a feed roll. If you use the takeup roll as a
feed roll, you cannot use the takeup system. If you want to use the takeup roll
as a feed roll, set the printer to ROLL2 by pressing Setup Menu/Paper Options
Menu/Supply Type/Roll2. Follow the loading instructions in the previous
section using the bottom roll.
Left Side View
Media presence
sensor
Dryer
Feed
Roll2
Media sensors for
feed and take up
[6] Use the second feed roll
Caution: When using the ROLL2 option, the media has a tendency to curl
inward under the bottom roller. This could block the media sensor and
prevent the reed roller from feeding media. Make sure you keep the media
turned outward, away from the media sensor.
Getting started
21
Load sheet media
▼
To load sheet media
1 Press Setup/Paper Options.
2 Press Supply Type/Sheet.
3 Press OK.
4 Load the sheet from the back of the printer, aligning it with the alignment mark
on the platen.
5 Make sure that the media is flat and under the rollers. The printer automatically
senses the media's presence and forwards it until it reaches the start position on
the platen.
22
Océ CS 5090 User Manual
Use the carriage
Move the carriage
When not in use, the cartridges remain in the service station at the right side of
the printer. This device seals the inkjets to prevent them from drying out.
With the power on, always use the Utility/Access menu to move the carriage
away from the service station when you install, change, adjust, or clean the ink
cartridges or the service station.
▼
Move the carriage
1 On the Control Panel, select ’Utility menu’ then ’Access menu’.
2 Three options are available:
■
■
■
’Access Left’: the carriage is then moved completely to the left side of the
printer. Now, the left cartridges 4, 3, 2 ,1 (or, when using diluted inks: Light
Magenta, Light Cyan, Medium Magenta, Medium Cyan) can be accessed.
’Access Right’: the carriage moves a little to the left. Now, the right
cartridges C, M, Y, K can be accessed.
’Access Home’ to place the carriage back to the service station.
Getting started
23
Install cutter
!Click for Video
With an installed cutter, the printer cuts the media automatically after printing.
Caution: Be careful when handling the cutter to avoid injury.
Attention: For normal media, do not use an external knife or cutter to cut
as this can damage the platen and prevent the media sensors from working
properly. However, for heavy media such as canvas, use the "Feed media"
menu to advance the media through the printer before cutting with scissors.
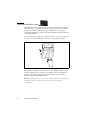
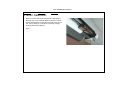
▼
To install the cutter
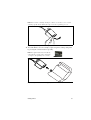
1 Press Utility Menu/Access Menu/Access Right to move the carriage out from
the service station.
2 Press down the lever of the old cutter to remove it from the carriage.
d
[7] Installing the cutter
3 Push the new cutter into the slot until it clicks into place.
4 Press Utility Menu/Access Menu/Access Home to move the carriage back
into the service station. This ensures that the cutter blade is in the home
position.
Note: When the cutter becomes worn, it can cause the carriage to jam or can
cause a ragged media cut. In extreme cases, you might see an error message
stating "Carriage Axis Failure" (see ‘Carriage axis failure’ on page 127).
24
Océ CS 5090 User Manual
Fill the ink reservoirs
!Click for Video
The Océ CS 5090 can handle long, uninterrupted print jobs because each of its
eight reservoirs holds 500 ml of ink. The ink reservoirs are located at the
printer's left side. Use Océ inks for best results.
Note: When running at carriage speeds faster than the default, the ink levels in
the reservoirs should be no more than 375 ml maximum.
4
3
2
1Y
M
C K
[8] Filling the ink reservoirs
Note: To place the ink reservoirs in the right order, see the sticker on the
carriage. Observe the ink order from left to right as follows: 4 (Yellow or Light
Magenta), 3 (Magenta or Light Cyan), 2 (Cyan or Medium Magenta), 1 (Black
or Medium Cyan), Yellow, Magenta, Cyan, Black.
Getting started
25
▼
To fill the ink reservoirs
1 Access the ink reservoirs on the left side of the printer. Unscrew the cap of one
2
3
4
5
6
7
reservoir.
Note: Open only one reservoir at a time to prevent contamination with
other ink colours.
Remove cap from the bottle.
Check that you are using the same type of ink in all the reservoirs and
cartridges.
Fill the reservoir up to 375 ml, or no more than 1/2 inch from the top of the
reservoir.
Check that there is no excess ink on the reservoir cap.
Replace the cap on the reservoir.
Repeat for the remaining reservoirs.
Attention: A complete second set of connections is provided with
colour-coded quick connect fittings for changing to another type of ink. Be
sure that each reservoir is connected to the same colour fitting.
Install ink cartridges
! Click for Video
The process of installing new ink cartridges involves the following phases:
■
■
■
Place the cartridges on the carriage
Prime the ink delivery lines
Print a colour test
Attention: The Océ CS 5090 works with only Océ pre-filled ink cartridges.
Using other cartridges can damage the printer and/or prevent the printer
from printing.
26
Océ CS 5090 User Manual
Cartridge sets
This printer is an 8-head inkjet printer. You can print with the left four
cartridges, the right four cartridges or all eight cartridges (see ‘Select cartridge
sets’ on page 94).
Facing the printer, the left four cartridges are designated as 1 x 4 Left cartridge
set, the right four cartridges are designated as 1 x 4 Right cartridge set and
when using all cartridges they are designated as 2 x 4 cartridge set or (when
available) as 1x8 when using all cartridges with 8 different colours (Diluted
inks + CMYK).
When using the 2 x 4 Cartridge Set mode, the left cartridge set has these
colours: 4 = yellow; 3 = magenta; 2 = cyan; and 1 = black. The following
illustration will help you identify each one of the stalls or slots on the carriage
where the cartridges are installed.
1 X 4 Left
1 X 4 Right
4 3 2 1
Y M C K
[9] Cartridge sets (1x4 & 2x4)
2x4
For a 2x4 cartridge configuration all eight cartridge stalls will be utilized with
cartridge tubing needles connected to the valves on the 'right' side of the
carriage cover.
For 1x4 Left cartridge configuration, such as with a different ink set, only the
4 left cartridge slots will be used with tubing line connections to the valves on
the 'left' side of the carriage cover.
Getting started
27
For 1x8 cartridge configuration, the 8-cartridge set has these colours: 4 = Light
Magenta; 3 = Light Cyan; 2 = Medium Magenta; and 1 = Medium Cyan. The
following illustration will help you identify each one of the stalls or slots on
the carriage where the cartridges are installed.
ML CL MM CM
Y
M C K
1x8
[10] Cartridge sets (1x8)
Inspect cartridges
Note: Visually inspect each cartridge before installing. Make sure the blue tape
is intact on the jet area [C] of the cartridge. (Do not remove the tape at this
time! The tape will be removed later.) Inspect the cartridge recognition chip
[B] on the cartridge. Make sure it is secure and in approximately the location
shown on the following figure. If any cartridge is damaged, contact Océ for
return/replacement of the defective cartridge.
A
C
[11] Inspect cartridges
28
Océ CS 5090 User Manual
B
Place cartridges
When you place the cartridges, follow closely these precautions:
■
■
■
■
■
▼
Do not remove the blue tape from the cartridge until instructed to do so.
Do not touch the jet area or the flex contact area of the cartridge.
Work with only one colour at a time to avoid contamination.
Respect the correct cartridge sequence, especially when using a 1x8
configuration (see ‘Cartridge sets’ on page 27).
Check that the ink delivery lines are not twisted.
To place a cartridge
1 With the printer powered on, press Utility /Access menu/Access Left (to place
one of the cartridges 4, 3, 2, 1) or Access Right (to place one of the cartridges
C, M, Y, K) to move the carriage into position for cartridge installation or
replacement.
2 The cartridges are prefilled and preprimed. Remove the cartridge from the
sealed bag and remove the shipping cap.
3 Place it bottom first into the correct slot on the carriage.
Note: Do not remove the blue tape from the jet plate.
4 Tilt the cartridge up until it clicks into place. Make sure the cartridge is firmly
installed.
Getting started
29
Prime the ink delivery lines !Click for Video
After filling the ink reservoirs, next step consists in priming each of the eight
ink delivery lines to establish ink flow between the reservoirs and cartridges.
You use the Océ Prime tool for this purpose. The Prime tool is a battery
operated ink priming device used to draw ink through the ink delivery lines and
for priming cartridges.
You perform this procedure once, the first time after you set up the printer. It
is not necessary when refilling the reservoirs or replacing ink cartridges.
[12] Océ CS 5090 Prime tool
Your printer is equipped with shutoff valves for the ink delivery lines, on the
carriage. When the valve is pushed to the upright position, the ink delivery
lines are closed at the carriage. This maintains negative pressure while
installing and priming ink delivery lines.
Note: When priming delivery lines, be sure to wipe off any excess ink from the
Océ Prime tool before going on to the next colour to avoid colour
contamination.
30
Océ CS 5090 User Manual
▼
To prime the delivery lines
1 Fill ink reservoirs (see ‘To fill the ink reservoirs’ on page 26). Do not exceed
maximum level line.
2 Attach reservoir to appropriate ink delivery line by depressing quick connect
tab and snapping reservoir into place.
[13] Quick connect fitting
Note: For right order to place the ink reservoirs, see sticker on carriage.
3 Close the ink delivery lines by pushing the valve up on the carriage:
4 Insert the needle assembly connector into the fitting on the carriage. On the left
set of cartridges, there are two connectors for each cartridge (one blue and one
gray). Be sure the needle assembly is plugged into the same colour connector
as in the ink reservoir.
5 Obtain the Océ CS 5090 Prime tool.
6 Open the ink delivery lines by pushing the valve down.
7 Prime each tubing/chain ink line by inserting the cartridge needle into the end
of the Prime tool and press the button several times until a solid stream of ink
is present throughout tubing.
Getting started
31
2298
[14] Inserting the needle into the small opening of the Prime tool
8 Close the ink delivery lines by pushing the valve up and remove the cartridge
needle from the Océ Prime Tool.
9 Insert the needle into the cartridge opening and tighten clockwise securely.
[15] Removing the cartridge needle
10 Tighten the fitting (about 1/4 turn) to prevent air leaks.
11 Push the valve down to open the delivery lines.
Note: The ink in the tubing-line will travel back up into the lines and not be
visible in the tubing-line assembly. This is normal and expected. When
printing, the cartridges will draw back the ink through the lines in the
cartridges.
12 Remove the cartridge from the carriage and remove blue tape from the
cartridge jet plate.
32
Océ CS 5090 User Manual
Note: Do not raise cartridge 30 degrees above electronics cover or turn
cartridge upside down during the tape removal or priming process.
[16] Removing the blue tape from the cartridge jet plate
13 Attach the Prime tool to the cartridge jet plate and prime cartridge with pulses
by pressing the activation button repeatedly.
Note: A helpful method is to break the
seal with the jet plate after each pulse
to improve the priming success rate.
!Click for Video
2301
[17] Attaching the Prime tool to the cartridge jet plate
Getting started
33
14 Blot jet plate with a lint-free towel or cloth.
!Click for Video
[18] Blotting the jet plate
15 Insert the cartridge into the carriage, making sure it snaps into place properly.
[19] Inserting the cartridge into the carriage
16 Repeat for each cartridge.
17 When all cartridges are ready, press Utility menu/Access menu/Access Home
to return the carriage to the service station.
34
Océ CS 5090 User Manual
Run a colour test
An initial colour test checks for correct cartridge priming, to ensure that all
colours print in a uniform and solid pattern.
▼
To print the colour test
1 Check that the printer has media loaded.
2 Press Setup menu/Print Mode menu.
3 Press Print passes.
4 Change to 2-pass mode using the Next or Prev option buttons.
5 Select Utility menu/Service menu/Diagnostics menu/Colour Test menu.
At this stage, you can choose between two different options:
■
■
▼
Print a colour test for each colour separately, one after the other.
Print a colour test for all colours at the same time (only supported by
firmware version 1.13 or above).
To print the test (colours one by one)
1 Press Stall select to select the appropriate colour to test using the Next or Prev
option buttons.
2 Press Density select to set the *colour test percentage to 100%.
3 Press Colour test print. Several print passes will initiate in the chosen colour,
disregard the quality of the colour patterns.
4 Ensure each print passes completes.
▼
To print the test (all colours at the same time
Note: The all colour test is only supported by firmware version 1.13 or above.
1 Press Density select to set the colour test percentage to 100%.
2 Press All Colour test to initiate the test.
Note: No ink starvation should be observed. If you notice ink starvation,
re-prime the cartridge and check the ink level.
Getting started
35
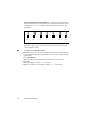
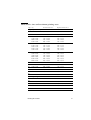
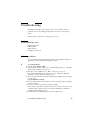
Print the prime pattern
You print the prime pattern to check that the ink cartridges fire properly and to
detect any clogged or electrically defective jets.
▼
To print the prime pattern
1 With media loaded, press Utility menu.
2 Select Prime.
A test pattern prints. The test pattern consists of four coloured double bands
(Black + 1 or Medium Magenta, Cyan + 2 or Medium Cyan, Magenta + 3 or
Light Magenta and yellow + 4 or Light Cyan), a series of lines and a CMYK
header, indicating the compensating print modes for damaged jets. (See
‘Compensate for electrically defective jets’ on page 121.)
▼
To interpret the prime test
■
The bands should be smooth, without dark streaks or white lines. The lines
should not look fuzzy or contain gaps.
A solid bar indicates an
electrically defective
jet. Jet Compensation
will automatically
compensate for that
jet.
2x4
4: 3 4 5
A missing line or "gap",
misdirected line, or a
light-printing line
indicates a clogged jet.
The header lets you know
the number of passes for
which compensation is
available.
3: 3 4 5 2: - - 5 1: - - 5 Y: 3 4 5 M: 3 4 5 C: 3 4
1x4 Right Y: 3 4 6 8 10 M: 3 4 6 8 10 C: 3 4 6 8 1
1X4 Left
4: 3 4 6 8 10 3: 3 4 6 8 10 2: - - 6 - 1
COMPENSATION AVAILABLE IN THE ABOVE
4
Y
3
M
2
C
1
K
1111111111111111111111111111111111111111111111111111111111111111111111111
555555555544444444444443333333333333222222222222111111111111100000000000009999999999998888888888888777777777777766666666666655555555555554444444444444333333333333222222222222211
7654321098765432109876543210987654321098765432109876543210987654321098765432109876543210987654321098765432109876543210987654321098765432109
[20] The upper test pattern of a prime test
36
Océ CS 5090 User Manual
Within the printed test pattern, each jet is represented by a short horizontal
line. Together, these short horizontal lines form a “stair step” pattern.
■ Electrically defective jets appear as solid bars for which you can compensate.
■ Clogged jets appear as gaps or misdirected lines in the “stair step” pattern,
which you clear manually.
■ The print modes for which compensation is available are shown above the
test pattern.
■ In the above example, the prime test shows that there are three electrically
defective jets and one clogged jet. The header indicates that you can
compensate for the electrically defective jets in the 4-pass mode. But you
must clear the clogged jet manually. See ‘Clear clogged jets’ on page 122 for
further information.
Note: If all jets appear to be defective, reinstall the cartridges.
■
Getting started
37
Cartridge recognition
The Océ CS 5090 printer is designed to use only Océ CS 5090 cartridges. To
avoid potential damage to the printer, a cartridge recognition feature checks for
properly installed Océ cartridges. This function activates when the printer
receives a print request (i.e., image data, prime, etc.).
If the system detects a problem, the error message “Unrecognized
Cartridge(s)” displays on the control panel, and the printer beeps three (3)
times. You must clear this error before the printer can proceed with the print
job.
▼
To clear cartridge recognition error
1 Press Access menu/ Access Right or Access Left to move the carriage to the
correct position for replacement of the ink cartridges.
2 Check that there are four installed Océ cartridges.
3 Replace any invalid cartridge.
4 Press OK.
Note: This error can also occur with incorrectly installed Océ cartridges, due
to poor electrical connections between the cartridge and the carriage unit.
Clean the flexcable [A] as well as the electrical contacts on rearside of
cartridges. Special the contacts from the cartridge recognition chip [B].
A
C
[21] Cartridge recognition
38
Océ CS 5090 User Manual
B
Align cartridges
For best results, perform a calibration each time you install a new cartridge.
Paper axis calibration
External factors such as room temperature, storage temperature, and humidity
can have a deforming effect on media. A paper axis calibration corrects for
minor paper length fluctuations, which you carry out using a precision ruler of
at least 34 (850 mm) inches long.
▼
To print the paper axis test
1 Load the media that you want to use. Check that the length is at least 36 (91
cm) inches long.
2 Press Utility/Calibration/Paper Axis Test . The printer prints two marks.
3 Remove the media from the printer and measure the distance between the
witness marks. The distance between the marks should be exactly 838.2 mm
(33.00 ”).
4 If the distance between the marks is different from that shown on the display,
press Paper Axis to enter the value of the distance you have just measured.
■ Press OK.
Define calibration units
You can set the calibration units to English or Metric.
▼
To set calibration units
1 Select Setup/User Setup/Units Select.
2 Choose English or Metric.
Getting started
39
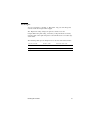
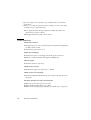
Colour deadband calibration
When printing in bidirectional mode, the velocity of the carriage can cause
certain dots to miss the target area on the media. To alleviate this problem, use
the colour deadband compensation feature to fine-tune dot placement. The
colour deadband test pattern lets you check the velocity deadband values and
adjust them for best printing results.
▼
To print the colour deadband test pattern
1 Press Setup/Utility.
2 Select Calibration/Colour Db menu/Colour Db test. The following pattern
prints out:
100
92
84
76
68
60
52
44
36
28
20
12
( FAST K=44, C=52, M=52, Y=52, SLOW=1)
[22] Colour deadband test pattern
3 For each colour, examine the vertical lines and select the set of straightest lines.
Note the compensation number at the bottom of the set of lines you have
selected.
4 Compare with the existing compensation values printed in the lower right
corner of the test pattern. If any of these differ from the values you selected,
enter the new compensation values by pressing the button corresponding to the
colour deadband you want to change.
5 Use the Next and Previous option buttons to scroll to the desired compensation
value.
40
Océ CS 5090 User Manual
Cartridges calibration
▼
To print a colour calibration test
■
With paper loaded, press Utility/Colour Calibration menu/ Vert. Calib Test or
Horiz. Calib Test.
The printer draws a series of seven horizontal patterns and seven vertical
patterns as follows:
Current Heads (Y, M, C, 1, 2, 3, 4) shows yellow, magenta, cyan, 1, 2, 3, 4 “+”
which represent the horizontal and vertical alignment between the cartridges.
Yellow
Cyan
Magenta
Black
[23] Current Heads (Y, M, C)
When the coloured “+” lines up horizontally and vertically with the black
alignment marks, no adjustment is required.
Colour Vertical Head-To-Head Calibration checks for vertical alignment.
Colour
Black
[24] Colour Vertical Head-to-Head Calibration
Getting started
41
Colour Horizontal Head-To-Head Calibration checks for horizontal alignment.
Three lines similar to the examples below are printed with the following colour
combinations: 4/3, 3/2, 2/1, 1/yellow, yellow/magenta, magenta/cyan, and
cyan/black.
.... - 3
-2
-1
0
1
2
3 ....
[25] Colour Horizontal Head-to-Head Calibration
The numbers below each set of lines represent the different horizontal and
vertical alignment values.
▼
To adjust colour calibration values
1 Examine the patterns to determine which value shows the best horizontal and
2
3
4
5
6
42
vertical alignment between cartridges. These are the values you will set in the
printer menu.
Press Vertical-Cyan.
Enter the value which represents the best alignment for cyan vertical.
Press OK.
Repeat for Magenta, Yellow, 1, 2, 3, 4 vertical.
Repeat procedure for Cyan, Magenta, Yellow, 1, 2, 3, 4 horizontal.
Océ CS 5090 User Manual
Operate the printer
While the printer prints, you can stop it momentarily and then resume printing,
or cancel a print.
▼
To pause the printer while printing
1 Press Pause.
2 Press it again to resume printing.
Note: Banding might occur.
▼
To cancel a print
■
▼
Cancel the print job from the computer using the appropriate command for
your software application.
To clear the buffer after canceling a print
■
Press Reset.
Getting started
43
44
Océ CS 5090 User Manual
Océ CS 5090
User Manual
Chapter 3
Control panel
■
■
■
Menu functions
Default printer settings
Save user options
45
Main menu at a glance
Main menu
Menu options
Load media
Cut
Pause
Reset
Feed Media
Menu
Moves media into/away from platen
Cuts media
Stops print job temporarily
Clears print buffer after job cancellation
Forward
Advances media to the front of printer
Media Counter Provides access to additional options where the length of a roll of
media can be entered and the media counter reset.
Display Counter Displays a screen where the current value of the media length can
be viewed and printed on the media.
Backward
Moves media to the back of printer
End Of Media
Provides access to another screen where the End of Media can be
redefined to look for an abnormally long absence of the loop of media that occurs between the feeder roll and the platen.
Exit
Returns to the main menu
Print Mode Menu Provides access to options for colour, quality, cartridge set, print
passes, carriage speed and print direction.
Paper Option
Provides access to options for loading media, margins, media seMenu
lection and other media features.
Hpgl/2 Menu
Provides access to options for setting HP-GL/2 features.
User Setup Menu Provides access to options for defining and saving user settings.
Ink Option Menu Provides access to options for setting ink preheat, dryer on/off, and
dry time.
Exit
Returns to the main menu
Prime
Prints the prime pattern
Access Menu
Provides access to a further menu for options to move the ink carriage away from the service station to access left and right cartridge
sets for installation/replacement of cartridges and the media cutter.
Colour Calib
Provides access to further menus for printing the colour calibration
Menu
test pattern and for entering values determined by examining the
test patterns.
Calibration Menu Provides access to a further menu for calibration options and diagnostics.
Display Settings Displays information such as paper width and height, on time, cumulative plot time
Print Settings
Prints information about media size, firmware version, RAM size
and plot hours
Service menu
All items except the Colour Test are for use by technical support.
Exit
Returns to the main menu
Setup Menu
Utility
Menu
46
Next options (in italics) or function
Océ CS 5090 User Manual
COLOR MODE
Control panel
QUALITY MODE
LOAD MEDIA
PAUSE
RESET
SELECT USER
SAVE USER
MEDIA STANDARD
FEED MEDIA MENU
PALETTE SELECT
CONTROL
SERVO CYCLE TEST
SERVO PWM TEST
CARRIAGE TEST
EXIT
TEST PRINT
SERVICE MENU
UTILITY MENU
CONTINUOUS TEST
CARTIDGE INFO
PAPER AXIS
EXIT
EXIT
PRINT SETTINGS
INK LIMIT
COLOUR TEST MENU
ABOUT
OPEN JET MENU
HP - GL / 2
EXIT
DISPLAY SETTINGS
REPRINTS
DRYER
EXIT
INK OPTION MENU
DIAGNOSTICS MENU
USE PAPER CALIB
CALIBRATION MENU
NESTING MENU
CALIBRATION MENU
PAPER AXIS TEST
COLOR DB MENU
INK REDUCTION
COLOR CALIB MENU
ROTATION
AUTO-WIPE
ACCESS MENU
ACCESSORY MENU
PRIME
LCD CONTRAST
PRINT SETTINGS
EXIT
USER SETUP MENU
SETUP MENU
INK PREHEAT MENU
DELAY STATUS
SAVE MEDIA
EXIT
INIT SETTINGS
AUTO - CUT DELAY
LANGUAGE
AUTO - CUT
UNITS SELECT
AUTO - CUT MENU
PRINT DIRECTION
EXIT
PAPER OPTION MENU
END OF MEDIA
PRINT MODE MENU
BACKWARD
AUTO-LOAD DELAY
CARRIAGE SPEED
DISPLAY COUNTER
MARGINS
PRINT PASSES
MEDIA COUNTER
CARTRIDGE SET
FORWARD
SUPPLY TYPE
DOTS PER INCH
CUT
EXIT
EXIT
EXIT
Menu tree
47
Use the default settings
The following table shows the factory default printer settings. You can print
these settings for reference.
▼
To print settings
■
▼
To return to factory default settings
■
48
Press Setup/User and Setup/Print Settings to get a listing of current settings.
Be sure to have paper loaded before you start.
Press Setup menu/User Setup menu/Init Settings buttons. All saved user
settings return to default settings.
User Settings
Default
Other options
COLOUR MODE
Colour
Mono, Gray
CARTRIDGE SET
2x4
1x4 Right, 1x4 Left,
1x8
QUALITY MODE
Photo
Production, Enhanced, User
DOTS PER INCH
600
300
PRINT PASSES
8 (1x8)
4 (1x4)
3 (2x4)
1, 2, 3, 4,5, 6, 8, 10
(1x8)
1, 2, 3, 4, 6, 8, 10 (1x4)
1, 2, 3, 4, 5 (2x4)
CARRIAGE SPEED
10
1-10
PRINT DIRECTION
Bi
Uni
AUTO-LOAD DELAY
6
1-12 Seconds
MEDIA STANDARD
All
Us Engr, Us Arch, Iso
A, Met All, Us All,
Graphics, Met Over A,
Iso B, Special
MARGIN
Normal
Expanded
AUTO-CUT
ON
OFF
AUTO-CUT DELAY
0
0:10,0:20,...60:00
Océ CS 5090 User Manual
User Settings
Default
Other options
SAVE MEDIA
ON
OFF
CALIB XY
ON
OFF
SELECT USER
1
1 To 8
SAVE USER
1
1 To 8
UNITS SELECT
English
Metric
LANGUAGE
English
German, French, Italian, Spanish, Portuguese, Japanese.
Chinese, Korean
DRYER
OFF
Auto, On, Fans only
AUTO WIPE
OFF
ON
System settings
Default
Other options
SUPPLY TYPE
Take-up
Sheet, Roll, Roll 2
LCD CONTRAST
4
1-8
END OF MEDIA
Feeder Stop
Normal
MEDIA COUNTER
0
1-500 FT
Calibration settings
Default
Other options
DEADBAND (KCMY1234)
44
0 .... 196
SLOW DEADBAND
0
-2 ... +2
VERTICAL (4321YMC)
0
-9 ... +9
HORIZONTAL (4321YMC)
0
-9 ... +9
PAPER AXIS
33.00
32 - 34
Control panel
49
Save user options
You can save the most frequently used options to avoid reconfiguring the
printer each time you print an image. You can define up to eight different
configurations and save them under a user setting number ranging from 1-8.
Select the desired user setting number before sending an image to the printer.
You can save settings for the following options:
■
■
■
■
■
■
■
■
■
■
■
■
▼
Cut On or Off
Media Standard
Auto load delay
Baud Rate
Auto-Wipe On or Off
Monochrome or Colour
Drying Time
Quality Mode
Print Mode
Margins
Parity
Dryer On/Off/Auto/Fans only
To save user-defined settings
1 Press Setup/User Setup/Save User.
2 Scroll to the number under which you want to save the user settings.
3 Press OK.
▼
To use a previously saved user setting
1 Press Setup/User Setup/Select User.
2 Scroll to the number of the user setting you want.
3 Press OK.
50
Océ CS 5090 User Manual
Adjust the LCD contrast
The LCD contrast option lets you adjust the brightness of the control panel
(with default setting 9). The contrast values range from 1-16, with 16 as the
least contrast.
▼
To set LCD contrast
1 Press Setup/User Setup/LCD Contrast.
2 Choose the contrast value.
3 Press OK.
Control panel
51
Access printer information
The printer can provide you with information on the following:
■
■
■
■
■
■
Plot area
Memory
Calibration settings
“On time” is the total time the machine has stayed powered on
“Plot time” is the total time the machine has been printing
Firmware version
Note: The On time and the Plot time are resetable by Océ service.
▼
To access printer information
1 Select Utility/Print Settings or Utility/Display Settings.
2 Press the button for the item for which you want information.
3 Press OK.
Get cartridge information
The Service menu gives you information about the state of the current
cartridges, such as details about the type and ink colour in each stall, and the
extent of cartridge wear, with changes displayed in millimeters (by 2 ml
increments).
■
■
▼
At 500 ml, you should replace the cartridge
At 1280 ml, the cartridges stops functioning
To get cartridge information
1 From the Utility menu, press Service menu.
2 Press Cartridge Info.
52
Océ CS 5090 User Manual
Océ CS 5090
User Manual
Chapter 4
E-Connect
The E-connect print server, included on the CS5090, offers
a quicker and simpler connection of your printer to your
computer.
This chapter is aimed at explaining how to connect and
configure your printer for the E-connect.
53
Prerequisites
To connect your printer, you need:
■
■
■
■
■
54
a PC running Windows NT with 1 or 2 100Base-T NIC installed,
a Windows NT Operating System CD Rom,
an Océ CS 5090 printer including the E-connect,
a parallel printer cable,
a CAT5 crossover cable.
Océ CS 5090 User Manual
Connection
▼
!Click for Video
Connect the CS 5090 to the E-Connect
1 Attach the provided parallel printer cable between the upper centronics parallel
port of the printer and the lower parallel port on the right side of the E-Connect.
▼
Connect the CS 5090 to your computer (using a crossover cable)
1 Connect one end of the cable to the RJ-45 socket of the E-connect.
2 Connect the other end of the cable to your PC’s second network card (NIC):
B
A
[26] Connect the CS 5090 to your computer via a crossover cable
3 Check the green and yellow lights [A] illuminate.
4 Activate an E-connect test by pressing the test key [B] with a pen tip or other
small blunt tool and holding it no more than 3 seconds.
Caution: If you press the button and hold it longer than 5 seconds, the
E-connect resets automatically.
E-Connect
55
5 If the network is working properly, the printer prints a circular pattern.
56
Océ CS 5090 User Manual
Configuration
▼
Configure your computer
1 On your desktop, right-click ‘Network neighborhood’.
2 Select ‘Properties’ in the popup menu.
3 Click the ‘Protocols’ tab.
4 Double-click the TCP/IP item.
5
6
7
8
Note: If there is no TCP/IP, click the ‘Add’ button, select ‘TCP/IP’ among
the list of protocols and click ‘OK’.
In the ‘Microsoft TCP/IP Properties’, click the ‘IP Address’ tab.
Select ‘Specify an IP address’.
Set the IP Address to ‘192.0.0.193’.
Note: If you need to change the TCP/IP address, please contact your system
administrator or your local Océ service organization.
Set the ‘Subnet mask’ to ‘255.255.255.0’:
[27] Configure IP address
9 Click ‘OK’ and again ‘OK’.
Note: When the configuration is complete, you may be prompted to insert
your Windows Operation System CD Rom. If so, follow the instructions. At
the end, reboot the computer as requested.
Configuration of the E-connect printserver
The default TCP/IP address of the E-connect is ‘192.0.0.192’.
Note: If you need to change this TCP/IP address, please contact your system
administrator or your local Océ service organization.
E-Connect
57
58
Océ CS 5090 User Manual
Océ CS 5090
User Manual
Chapter 5
Printing with HP-GL/2
This section explains the printing parameters generally
used with vector-based files, such as palette selection,
printer control, rotation, reprints, nesting, and ink limit.
Note: HP-GL/2 and HP RTL are trademarks of the Hewlett-Packard Co. AutoCAD is a
trademark of Autodesk, Inc.
59
Overview
The ’Draft’ and ’Production’ modes are the most suitable printing modes for
line drawings or drawings with light solid fills typically created by
computer-aided design.
When printing vector data, you can either control certain options from your
software application or assign the control to the printer settings. The following
section explains the HP-GL/2 print settings on the Océ CS 5090.
Access the HP-GL/2 menu options
The following menu options are available from the HP-GL/2 menu:
■
■
■
■
■
■
▼
To access the HP-GL/2 menu
■
60
Palette select
Control
Rotation
Nesting menu
Reprints
Ink limit
From the main menu, press Setup menu/HP-GL/2 menu.
Océ CS 5090 User Manual
Select the palette
The ’Palette select’ option lets you choose either the HP-GL/2 or AutoCAD
palette. Each palette allows 256 colours with 8 predefined colours, as shown
below:
Pen number
▼
HP-GL/2
AutoCAD
0
White
White
1
Black
Red
2
Red
Yellow
3
Green
Green
4
Yellow
Cyan
5
Blue
Blue
6
Magenta
Magenta
7
Cyan
Black
To choose a palette
1 From the main menu, press Setup menu/HP-GL/2 menu/Palette select.
2 Choose either HP-GL/2 or AutoCAD.
3 Press OK.
Printing with HP-GL/2
61
Set the ’Control’ function
You set control to establish whether it is the software application or the printer
control panel that determine certain printing functions. Control overrides the
following functions in the HP-GL/2 header file:
’Repeat Plot’ (RP): when you set control to the printer, the printer will ignore
RP commands in the print file and output only one print. On the control
panel, you can use the ’HP-GL/2/Reprints’ menu to specify additional
copies.
■ ’Enable Auto Cutter’ (EC): when you set control to the printer, the printer
will ignore EC commands in the print file, and does not cut automatically
after each print. On the control panel, you can enable automatic cutting or
initiate a command for a single cut.
Note: Do not override software control when sending merged raster/vector
data to the printer.
■
▼
To set control
1 From the main menu, press Setup menu/HP-GL/2 menu/Control.
2 Choose either Software or Printer.
3 Press OK.
62
Océ CS 5090 User Manual
Rotate a print
The printer automatically prints an image with the long side on the paper axis.
To fit multiple images and save media, you can use the ’Rotation’ (RO)
function to rotate vector files counter-clockwise 90 degrees at a time.
Note: Only HP-GL/2 files support rotation. RTL files do not support rotation.
When you use this setting, keep in mind the following principles:
■
■
■
■
▼
If you specify a rotation that does not fit on the media or contains raster
images, the file will not rotate.
When you set the rotation value to ’Auto’, the algorithm automatically
rotates the print if this will save media, whether or not you have enabled
’Nesting’.
When you set the rotation value to ’0’, the print does not rotate.
’Control’ does not override the RO command in the print file.
To rotate a print
1 From the main menu, press Setup menu/HP-GL/2 menu/Rotation.
2 Choose the rotation angle (0, 90, 180, 270, Auto).
3 Press OK.
Make reprints
You can print up to 99 copies of a specific vector file. When you set ’Reprint’
to 0, only one copy prints.
▼
To make reprints
1 From the main menu, press Setup menu/HP-GL/2 menu/Reprints.
2 Choose the number of reprints (0 to 99).
3 Press OK.
Printing with HP-GL/2
63
Ink reduction
Ink reduction lets you reduce the percentage of ink laid down by the printer.
This feature applies only to HPGL/2 format images (vector-based images) and
has no effect on continuous tone images. It is especially useful for images with
large amounts of printed area and helps to avoid bleeding or oversaturating the
media. It does, however, change the appearance of colours, so you may want
to run a small test print.
▼
To set ink reduction
1 Press Setup Menu/HP-GL/2 Menu/Ink Reduction.
2 Choose a reduction percentage - 0%,12.5, 25%, 37.5, or 50%.
3 Press OK.
Nesting
The ’Nesting’ function can save media by printing multiple prints across the
horizontal width of the media. It also reduces the time required to print
multiple prints.
When you enable this function, the printer accumulates HP-GL/2 files in a
’nest’. Printing begins when one of the following occurs:
■
■
■
■
■
■
■
■
■
■
■
■
■
■
64
The ’nest’ is full, when no other image can fit across the media
The ’Nesting Wait Time’ is up. This is the length of time during which the
printer idles and waits for the current nest to fill.
The printer runs out of memory
The printer receives a print file with different print settings than those in the
’nest’, such as:
Print quality
Number of passes
Print direction
Speed
Colour mode
DPI
Dry time
Margins
Wipe on/off
Media save
Océ CS 5090 User Manual
The following parameters do not affect nesting:
■
■
■
■
▼
Ink limit
Reprints
Automatic rotation
Automatic cutting: if any print file in the nest has the cutter enabled, the
printer cuts automatically when the nest finishes printing.
To enable nesting
1 From the main menu, press Setup menu/HP-GL/2 menu/Nesting.
2 Choose either On or Off.
3 Press OK.
▼
To set the ’nesting wait time’
1 From the main menu, press Setup menu/HP-GL/2 menu/Nesting.
2 Select the Nest Time menu.
3 Choose the nest time (30 seconds, 1 minute, 2 minutes)
4 Press OK.
Apply the ink limit
The printer can limit the amount of ink laid down when printing polygon fills
and wide vectors. This prevents bleeding when you print on inexpensive inkjet
media. The default setting is ’on’. When you print on high quality media, turn
off this setting.
▼
To apply the ink limit
1 From the main menu, press Setup menu/HP-GL/2 menu/Ink limit.
2 Choose On.
3 Press OK.
Printing with HP-GL/2
65
Print an HP-GL/2 test file
The printer’s memory contains an HP-GL/2 test file to assist in diagnosing
potential problems. The printed colours in this test file are the same RGB
values defined in AutoCAD. Turn off the ’ink limit’ setting to get AutoCAD
colours on high quality media.
▼
To print the test file
■
66
From the main menu, press Utility menu/Service menu/Test print.
Océ CS 5090 User Manual
Océ CS 5090
User Manual
Chapter 6
Handling ink and media
67
Choose paper options
The following paper options are available:
■
Supply Type
■
Save Media
■
Media Standard
■
Margins
■
Auto-Load Delay
■
Auto-Cut
Supply Type
This setting allows you to select your supply options. The available options
are:
■
■
■
■
▼
‘sheet’ if you intend to use cut sheet stock,
‘roll’ if you are about to use roll paper on the upper roll feeder (no takeup
available with this option.)
‘roll2’ if you are going to use roll paper with the lower roll feeder (no takeup
available with this option.)
takeup if you intend to use roll paper with the optional takeup system.
To choose supply type
1 Press Setup ‘Menu/Paper Option Menu/Supply Type’.
2 Choose the supply type.
3 Press ‘OK’.
Media standard
When you print an image, you determine its size from the software application.
Check that you have loaded the media that is wide enough to accommodate the
image size because the printer automatically defines the print area based on the
width of the loaded media. If length is a problem, use roll media. If the media
width is smaller than the image size, the image may be truncated.
▼
To choose the media standard
1 Press ‘Setup/Paper Option/Media Standard’.
2 Choose the size of media you are loading.
3 Press ‘OK’.
68
Océ CS 5090 User Manual
Rollfeed media: sizes and maximum printing areas
Paper size
Normal Print Area
Expanded Print Area
Graphic (U.S. Offset)
A
8.5” x 11.0”
7.3” x 9.8”
8.1” x 10.6”
B
11.0” x 17.0”
9.8” x 15.8”
10.6” x 16.6”
C
17.0” x 22.0”
19.0” x 25.0”
20.0” x 28.0”
22.0” x 26.0”
15.8” x 20.8”
17.8” x 23.0”
18.8” x 26.0”
20.8” x 24.0”
16.6” x 21.6”
17.6” x 24.6”
18.6” x 27.6”
20.6” x 25.6”
D
22.0” x 34.0”
23.0” x 35.0”
24.0” x 29.0”
25.0” x 38.0”
32.0” x 44.0”
20.8” x 32.8”
21.8” x 33.0”
22.8” x 27.0”
23.8” x 36.0”
30.8” x 42.0”
21.6” x 33.6”
21.6” x 34.6”
22.6” x 28.6”
23.6” x 37.6”
30.6” x 43.6”
E
34.0” x 44.0”
35.0” x 45.0”
36.0” x 45.0”
40.0” x 50.0”
48.0” x 65.0”
50.0” x 65.0”
54.0" x 65.0"
60.0" x 65.0"
32.8” x 42.8”
33.8” x 43.0”
34.8” x 43.0”
38.8” x 48.0”
46.8” x 63.0”
48.8” x 63.0”
52.8" x 62.4"
58.8" x 62.4"
33.6” x 43.6”
33.6” x 44.6”
34.6” x 44.6”
38.6” x 49.6”
46.6” x 64.6”
48.6” x 64.6”
53.6" x 62.8"
59.6" x 62.8"
U.S. Architectural
A
9.0” x 12.0”
7.8” x 10.8”
8.6” x 11.6”
B
12.0” x 18.0”
10.8” x 16.8”
11.6” x 17.6”
C
18.0” x 24.0”
16.8” x 22.8”
17.6” x 23.6”
D
24.0” x 36.0”
22.8” x 34.8”
23.6” x 35.6”
E
36.0” x 48.0”
34.8” x 46.8”
35.6” x 47.6”
U.S. Engineering
A
8.6” x 11.0”
7.3” x 9.8”
8.1” x 10.6”
B
11.0” x 17.0”
9.8” x 15.8”
11.6” x 16.6”
C
17.0” x 22.0”
15.8” x 20.8”
16.6” x 21.6”
D
22.0” x 34.0”
20.8” x 32.8”
21.6” x 33.6”
E
34.0” x 44.0”
32.8” x 42.8”
33.6” x 3.6”
Handling ink and media
69
Paper size
Normal Print Area
Expanded Print Area
ISO-A
A4
210 x 297 mm
180 x 267 mm
200 x 287 mm
A3
297 x 420 mm
267 x 390 mm
287 x 410 mm
A2
420 x 594 mm
390 x 564 mm
410 x 584 mm
A1
594 x 840 mm
625 x 880 mm
564 x 810 mm
595 x 815 mm
584 x 830 mm
615 x 825 mm
A0
841 x 1189 mm
811 x 1159 mm
831 x 1179 mm
METRIC-DIN
A4
250 x 337 mm
220 x 307 mm
240 x 327 mm
A3
337 x 460 mm
307 x 430 mm
327 x 450 mm
A2
460 x 634 mm
610 x 860 mm
430 x 604 mm
580 x 795 mm
450 x 624 mm
600 x 805 mm
A1
634 x 881 mm
860 x 1220 mm
604 x 851 mm
830 x 1155 mm
624 x 871 mm
850 x 1165 mm
A0
881 x 1229 mm
1000 x 1414
mm
1189 x 1682
mm
851 x 1199 mm
970 x 1349 mm
1158 x 1617 mm
871 x 1219 mm
990 x 1359 mm
1179 x 1627 mm
B3
250 x 353 mm
220 x 288 mm
240 x 298 mm
B3
353 x 500 mm
323 x 470 mm
343 x 490 mm
B2
500 x 707 mm
470 x 677 mm
490 x 697 mm
B1
707 x 1000 mm
677 x 970 mm
697 x 890 mm
ISO-B
70
Océ CS 5090 User Manual
Sheet media: sizes and maximum printing areas
Paper size
Normal Print Area
Expanded Print Area
Graphic (U.S. Offset)
A
8.5” x 11.0”
7.3” x 9.0”
8.1” x 9.4”
B
11.0” x 17.0”
9.8” x 15.0”
10.6” x 15.4”
C
17.0” x 22.0”
19.0” x 25.0”
20.0” x 28.0”
22.0” x 26.0”
15.8” x 20.0”
17.8” x 23.0”
18.8” x 26.0”
20.8” x 24.0”
16.6” x 20.4”
18.6” x 23.6”
19.6” x 26.6”
21.6” x 24.6”
D
22.0” x 34.0”
23.0” x 35.0”
24.0” x 29.0”
25.0” x 38.0”
32.0” x 44.0”
20.8” x 32.0”
21.8” x 33.0”
22.8” x 27.0”
23.8” x 36.0”
30.8” x 42.0”
21.6” x 32.4”
22.6” x 33.6”
23.6” x 27.6”
24.6” x 36.6”
31.6” x 42.6”
E
34.0” x 44.0”
35.0” x 45.0”
36.0” x 45.0”
40.0” x 50.0”
48.0” x 65.0”
50.0” x 65.0”
32.8” x 42.0”
33.8” x 43.0”
34.8” x 43.0”
38.8” x 48.0”
46.8” x 63.0”
48.8” x 63.0”
33.6” x 42.4”
34.6” x 43.6”
35.6” x 43.6”
49.6” x 48.6”
47.6” x 63.6”
49.6” x 63.6”
U.S. Architectural
A
9” x 12.0”
7.8” x 10.0”
8.6” x 10.4”
B
12.0” x 18.0”
10.8” x 16.0”
11.6” x 16.4”
C
18.0” x 24.0”
16.8” x 22.0”
17.5” x 22.4”
D
24.0” x 36.0”
22.8” x 34.0”
23.6” x 34.4”
E
36.0” x 48.0”
34.8” x 46.0”
33.6” x 46.6”
U.S. Engineering
A
8.5” x 11.0”
7.3” x 9.8”
8.1” x 9.4”
B
11.0” x 17.0”
9.8” x 15.0”
10.6” x 15.4”
C
17.0” x 22.0”
15.8” x 20.0”
16.6” x 20.4”
D
22.0” x 34.0”
20.8” x 32.0”
21.6” x 32.4”
E
34.0” x 44.0”
32.8” x 42.0”
”33.6” x 42.4”
Handling ink and media
71
Paper size
Normal Print Area
Expanded Print Area
ISO-A
A4
210 x 297 mm
180 x 247 mm
200 x 257 mm
A3
297 x 420 mm
267 x 370 mm
287 x 380 mm
A2
420 x 594 mm
390 x 544 mm
410 x 554 mm
A1
594 x 840 mm
564 x 791 mm
564 x 801 mm
A0
841 x 1189 mm
811 x 1139 mm
831 x 1149 mm
METRIC-DIN
A4
250 x 337 mm
220 x 287 mm
240 x 297 mm
A3
337 x 460 mm
307 x 410 mm
327 x 420 mm
A2
460 x 634 mm
430 x 580 mm
450 x 694 mm
A1
634 x 881 mm
604 x 831 mm
624 x 841 mm
A0
881 x 1229 mm
851 x 1179 mm
871 x 1189 mm
ISO-B
72
B3
353 x 500 mm
323 x 450 mm
343 x 460 mm
B2
500 x 707 mm
470 x 657 mm
490 x 667 mm
B1
707 x 1000 mm
677 x 950 mm
697 x 960 mm
Océ CS 5090 User Manual
Set margins
You can set margins to ‘Normal’ or ‘Expanded’. Any part of the image that
extends outside the margin will be clipped.
The ‘Expanded’ setting enlarges the print area and decreases the
margins.When using this setting, check that you align the media accurately
using the guide on the right of the platen so that the ink doesn’t exceed the edge
of the media.
The following tables give the margin sizes for cut sheet and roll feed media:
Cut sheet media
On three sides
Fourth (bottom) side
Normal
15 mm (0.6”)
35 mm (1.4”)
Expanded
5 mm (0.2”)
35 mm (1.4”)
Handling ink and media
73
E
E
G
G
A
A
IM
IM
[28] Cut sheet normal margins and expanded margins
Rollfeed media
All sides
Normal
15 mm (0.6”)
Expanded
5 mm (0.2”)
0.59"(15mm) 0.197"(5mm)
0.59"(15mm)
0.197"(5mm)
0.197"(5mm)
IM
IM
A
A
G
G
E
E
0.59"(15mm)
0.197"(5mm)
0.59"(15mm)
[29] Roll sheet normal margins and expanded margins
▼
To set margins
1 Press ‘Setup/Paper Option/Margins’.
2 Choose ‘Normal’ or ‘Expanded’.
3 Press ‘OK’.
74
Océ CS 5090 User Manual
Set auto-load delay
Auto-load delay is the time lapse between the moment the printer senses the
presence of the media and when it actually starts feeding the media. This gives
you time to reposition manually the media if necessary. The default is 6
seconds, selectable from a range of 1-12 seconds.
▼
To set auto-load delay
1 Press ‘Setup/Paper Option/Auto-load delay’.
2 Choose the delay time.
3 Press ‘OK’.
Note: Only stored in memory in combination with a user-defined setting.
Select auto-cut
With the ‘Auto-cut’ option activated (by default), the printer automatically cuts
the media when printing completes. To ensure that the image is dry before
cutting, turn on the dryer and/or specify a dry time. You can also select to cut
the media manually from the printer control panel at any time.
Note: Auto-cut is disabled when the paper feed option is set to take-up’’.
▼
To set auto-cut
1 Press ‘Setup/Paper Option/Auto-Cut menu/Auto-Cut’.
2 Choose ‘On’ or ‘Off’.
3 Press ‘OK’.
Handling ink and media
75
Select auto-cut delay
Auto-cut delay is the time lapse before the printer automatically performs the
Auto-cut function. It provides additional time for unattended prints to dry. In
addition, you may need to delay auto-cut depending on the media used, the
ambient temperature and the humidity. Auto-cut values range from 0 to 55
seconds in five second intervals and from 1 to 60 minutes in one minute
intervals. Once the delay time has expired, the printer rolls or cuts the image
and begins printing the next image in the buffer. Auto-cut delay is ignored if
Auto-cut is set to ‘Off’.
▼
To set Auto-cut delay
1 From the ‘Setup menu’, ‘select Paper Option menu/Auto-cut menu’.
2 Press ‘Auto-cut delay’.
3 Choose a time using the ‘Next/Prev option’ buttons.
4 Press ‘OK’.
Delay status
Delay status allows users to view the time remaining before Auto-cut and to
cancel the remaining delay time if needed. A countdown timer displays time
left in minutes and seconds. Reset counter forces the count to zero and the
printer initiates the Auto-cut immediately.
▼
To reset counter
1 From the ‘Setup menu’, ‘select Paper Option menu/Auto-cut menu’.
2 Press ‘Delay status’.
3 ‘Select Reset Counter’. ‘Auto-cut’ is initiated.
76
Océ CS 5090 User Manual
Save media
With the ‘Save media’ option activated (by default), the media advances only
far enough to print the image. When not activated, the printer advances the full
print area of the loaded media. For example, if a 36 inch roll is loaded, the
printer advances the entire print area for a standard 36 x 48" sheet, even if the
printed image is only 30 inches long.
▼
To turn off Save Media
1 Press ‘Setup/Paper Option/Save Media’.
2 Choose ‘Off’.
3 Press ‘OK’.
Handling ink and media
77
Choose "feed media" options
The printer’s ‘Feed media’ options allow you to:
■
■
set the "end of media" detection
use the media counter to estimate the remaining media length
Detect the "end of media"
! Click for Video
‘End of media’ enables to detect the end of roll, in order to prevent the printer
from printing on the platen unit.
When the media jams or does not unroll properly from the feeder roll, it cannot
advance through the printer. Yet the carriage sensor still detects the presence of
media, and printing progresses. This damages the print job because the printer
continues to lay down ink on the same portion of media.
The "End of media/Feeder stop" option can limit the damage in these cases.
When the printer detects an abnormally long absence of the media loop
between the feeder roll and the platen, it automatically enters the "pause"
mode, as if you had manually pressed "Pause" on the control panel menu.
The printer beeps 3 times every 20 seconds, and remains in the "pause" mode
until you either:
■
■
78
manually press "Pause" to resume printing ("Pause" is a toggle function)
manually press "Reset" to abort printing. Abort the print job from the
software application as well.
Océ CS 5090 User Manual
When you use this setting, keep in mind the following principles:
■
■
■
■
■
■
▼
This setting does not work with cut sheets as the selected media
This setting is a machine setting and therefore activates each time you switch
on the printer, until you manually turn it off from the control panel menu
You cannot store this setting as a user setting
You cannot change this setting once printing begins
When you manually press "Pause" to resume printing, the "Feeder stop"
detection disables for the remainder of the print
When activated, the "Feeder stop" detection restarts at the beginning of each
print.
To set the "Feeder stop"
1 Press ‘Feed Media/End of Media’.
2 Choose ‘Feeder Stop’.
3 Press ‘OK’.
Use the media counter
The media counter gives you a means of "estimating" the length of media left
on a roll.
■
■
■
▼
When you install a new roll (or used roll of media with a known length), you
enter the length in the media counter on the control panel.
As the printer uses up the media, this value decreases and displays on the
control panel.
When you remove the media roll, you can print the estimated remaining
length on the roll, and enter this value in the media counter the next time you
use this roll.
To enter a media length value
1 Press ‘Feed Media/Media counter’.
2 Enter the media length.
3 Press ‘OK’.
▼
To display the media length value
1 Press ‘Feed Media’.
2 Then, select ‘Display counter’. The current value appears.
Handling ink and media
79
▼
To print the media length value on the roll
1 Press ‘Feed Media/Display counter’.
2 Press ‘Print counter’.
▼
To reset the media counter to 0
1 Press ‘Feed Media/Media counter’.
2 Press ‘Reset counter’.
3 Press ‘OK’.
When you use this setting, keep in mind the following principles:
■
■
■
■
80
Reset the media counter to 0 to avoid confusion when not in use
The media counter does not decrease below 0
This setting is a machine setting and therefore activates each time you switch
on the printer, until you manually turn it off from the control panel menu
You cannot store this setting as a user setting
Océ CS 5090 User Manual
Ink
Refill ink reservoirs
!Click for Video
Keep the reservoirs (on the left side of the printer) always filled with ink. You
can refill them at any time, even while printing. If a reservoir runs out of ink,
the ink delivery lines will deprime and may make the ink leak, and cause
damage to the ink cartridges and the carriage electronics. When refilling ink
reservoirs, take these precautions:
■
■
■
Have paper towels handy
Wear disposable gloves.
Open only one reservoir at a time to prevent an ink colour from accidentally
contaminating another.
Attention: Use of inks other than those supplied by Océ may cause damage
to your printer.
▼
To fill ink reservoirs
1 Access the reservoirs on the left side of the printer.
2 Remove the cap from the reservoir you want to fill.
3 Check that the ink colour and type in the bottle and the one in the ink reservoir
match.
4 Pour the ink into the reservoir to approximately 1/2 inch from the top. Do not
overfill.
5 Replace the cap on the reservoir.
6 Repeat steps 2 to 5 for the remaining reservoirs.
Use the dryer
To ensure prints are dry for unattended printing, the CS5090 features a new
thermal drying system. The system monitors the ambient temperature and
humidity. From these measures, it adjusts the heat in order to optimize drying
time and ensure image quality.
Handling ink and media
81
Four different modes are available:
■
■
■
■
‘Off’: when this mode is selected, the dryer firmware is active (it monitors
the ambient temperature and humidity) but does not take into account any
printing operation. In this case, the dryer is not activated.
‘On’: when this mode is selected, it applies maximum dryer output
temperature for every print job, whatever the ambient temperature and
humidity is.
‘Auto’: when this mode is selected, the dryer firmware monitors the ambient
temperature and humidity and calculates the best drying time to apply for
each print job. It can also increase the output temperature whenever the print
job requires it (for e.g., when a chosen print mode results in an increasing
print speed, the increase is automatically detected by the firmware which
adjusts the drying time consequently).
‘Fans only’: when this mode is selected, the dryer is working but without the
heaters switched on. It is blowing only cold air. It is advised to select this
mode when using specific media that do not support heating. Blowing cold
air prevents the media from curling and deforming.
Note: For more details about the media, please refer to the Media Product
Information Sheets on www.oce.com.
Caution: Never connect the dryer data cable when the dryer power cable is
connected. Always unplug the dryer power cable before connecting the
data cable. When connecting or disconnecting dryer power cord or dryer
data cable, the printer power switch MUST be in the Off position. Failure
to follow these instructions may damage the printer.
Attention: Never open the dryer. There are no user serviceable parts inside.
Caution: Once the dryer is plugged in, there is continuous power to the
dryer, even when the printer is turned off.
▼
Select the dryer mode
1 Select ‘Setup menu/Ink option menu/Dryer’.
2 Choose the dryer mode (Off/On/Auto/Fans only) by pressing ‘Next option’ or
‘Previous option’.
3 Press ‘OK’.
Note: When the dryer is activated, drying continues even after the print is
finished, and as a consequence, the printer cannot be accessed until drying is
finished.
82
Océ CS 5090 User Manual
Select auto-wipe
By default, this options is not activated. When ‘on’, the printer automatically
wipes the cartridge jet plates periodically during printing. However, you can
de-activate this setting if you are having problems with banding.
Note: Not wiping the cartridge jet plates can cause clogging of the inkjets.
▼
To turn on the wiper
1 Press ‘Setup menu/Ink Option menu/Auto-Wipe’.
2 Choose ‘On’.
3 Press ‘OK’.
Change ink types
When you use a new ink type (i.e. from Océ Standard Colour ink to Océ
Outdoor Colour ink), you must change the reservoirs and the cartridges to
match the new ink type. If you are printing with only two different types of inks
using two sets of ink lines, you can use the colour coded quick connect fittings
to change ink types. However, if you use only one set of ink lines for different
ink types, you must purge and rinse the ink delivery lines with distilled water.
Attention: For best results when changing inks, keep in mind these
precautions:
■
■
■
‘Do not’ use Océ Standard Colour inks with Outdoor media or vice versa.
‘Never’ mix inks.
Use only inks developed for the Océ CS 5090 printers.
When changing ink types, you must do the following:
■
■
■
■
Remove and store ink cartridges
Remove and store ink reservoirs
Install new ink reservoirs
Install new ink cartridges
Handling ink and media
83
Remove and store ink cartridges
This procedure explains how to remove, store and reuse cartridges. Following
this procedure will extend the life of your cartridges and prevent ink from
leaking from the cartridges.
Note: If you lay down a cartridge with ink in it, lay it on its front side so that
the flex contacts face up. This prevents ink from leaking out either the top
opening or out the jet area on the bottom. Do not touch the flex contact area of
the cartridge.
▼
To remove and store cartridges
1 On the printer control panel, press ‘Utility Menu/Access Menu/Access Right’.
This moves the carriage away from the service station and enables you to easily
remove the right cartridges (YMCK). To remove the left cartridges (1234),
select ‘Access Left’.
2 Disconnect the cartridge tube from the carriage by lifting up on the valve cover
and removing the septum fitting from the valve connection. Leave the valve
cover in the up position to.
3 Remove the cartridge from the carriage by gently pulling the top edge toward
you, then lifting it out of the carriage. ‘Do not remove the cartridge tube from
the cartridge’. Leaving the tube fitting attached to the cartridge will maintain
the negative pressure inside the cartridge that is required for proper operation.
It also prevents the cartridge from leaking.
[30] Leaving the tube fitting attached to the cartridge
4 Wipe any ink from the septum fitting at the end of the tube using a lint-free
cloth.
5 Insert the cartridge into the cartridge garage. Make sure that the cartridge cap
lip snaps and locks into the cartridge locking tab. This will assure a good seal.
6 Repeat the previous steps for the remaining cartridges.
84
Océ CS 5090 User Manual
Remove reservoirs
▼
To remove the reservoirs
1 Remove all ink cartridges before removing the ink reservoirs.
2 Access the reservoirs on the left side of the printer. Leave on the reservoirs
caps.
3 Disconnect the quick connect fitting for each reservoir, noting the colour of the
fitting to which it was connected.
4 Slide each reservoir forward to remove it from the printer.
5 Store the reservoirs away from direct sunlight in an environment similar to that
of the printer.
6 Replace with new reservoirs.
7 Fill the reservoirs with the appropriate ink and attach to the other set of quick
connect fittings (not used for the previous type of ink).
Handling ink and media
85
Install new cartridges
Your printer uses cartridges that were specifically designed for it. They are not
compatible with cartridges designed for other printer models. Use of other
cartridges may damage the printer and/or prevent it from printing. Ink
cartridges ship prefilled with ink. Be sure all cartridges and reservoirs use the
same ink type.
▼
To install ink cartridges
Note: Do not touch the jet area or the flex contact area of the ink cartridge.
Work with only one ink colour at a time to prevent contamination.
Caution: Never manually move the carriage when the printer is on. Injury
can result from unintentional carriage movement.
1 With printer power on, press ‘Utility Menu/Access Menu/Access Left’ or
‘Access Right’ to move the carriage to the position which allows replacement
of the ink cartridges (use Access Left if you are working on the left bank of
cartridges or Access Right for the right bank of cartridges).
2 Cartridges are prefilled and preprimed. Remove the cartridge from the sealed
bag and remove the shipping cap.
[31]
3 Install the cartridge bottom first into the correct slot on the carrier.
Caution: Do not remove the blue tape from the jet plate
4 Tilt the cartridge up until it clicks into place. Make sure the cartridge is firmly
seated.
5 Close the ink delivery lines by pushing the valve up.
6 For every cartridge, insert the needle assembly connector into the fitting on the
carriage.
7 Open the ink delivery lines by pushing the valves down.
86
Océ CS 5090 User Manual
Refill ink cartridges
New Océ cartridges are prefilled with ink. However, if you must re-install a
used or empty cartridge, make sure that the ink level in the cartridge is exactly
20 ml. Any other level (above or below 20 ml) can interfere with the
continuous ink refilling process to the cartridges during printing.
To refill a used cartridge with the correct level of ink, use the syringe and hose
provided. The hose length of the syringe is 40 mm.
Note: This 40 mm length guarantees the correct amount of ink when you insert
the hose completely into the cartridge.
If you do not know the amount of ink in the cartridge, proceed as follows:
1 Draw excess ink from the cartridge.
2 Refill the cartridge.
▼
To fill an empty cartridge
1 Fill the syringe with 20 ml of ink.
2 Attach the hose to the syringe.
3 Insert the hose into the cartridge.
4 Empty the syringe contents into the cartridge.
▼
To draw excess ink from a cartridge
1 Insert the hose of the empty syringe into the cartridge.
2 Draw excess ink from cartridge. The level of remaining ink is now exactly 20
ml.
3 Remove syringe.
Handling ink and media
87
▼
To refill a cartridge
1 Fill the syringe with 20 ml of ink.
2 Attach the hose to the syringe.
3 Insert the hose into the cartridge.
4 Empty the syringe contents into the cartridge.
5 Draw any excess ink from cartridge. The level of remaining ink is now exactly
20 ml.
6 Remove syringe.
40mm
Ink
[32] Refilling cartridge to correct ink level
88
Océ CS 5090 User Manual
20mL
Purge ink delivery lines
If you are using one set of ink lines for several ink types, you must purge the
ink lines and rinse them with distilled water thoroughly before changing to a
new ink type. You will then have to reprime the lines as described (see ‘Prime
the ink delivery lines’ on page 30).
▼
To purge ink delivery lines
1 Remove all eight cartridges before purging the ink lines.
2 Place cartridges in the plastic garages and close the lids.
3 Open the ink delivery lines pushing the valves down.
4 Remove reservoirs, including connectors.
5 Fill one reservoir with distilled water and place it in the printer, connecting it
with its corresponding cartridge.
6 Connect the Océ Prime tool to a connector at the cartridge side and turn it on
until distilled water is coming through the ink line. Now, the line is clean.
7 Empty the reservoir filled with distilled water and reconnect it.
8 Use again the Océ Prime Tool to remove the water left within the ink line.
9 Repeat the same procedure for all the lines.
Select ink preheat
Cartridge preheat settings are optimized for media being printed in a standard
office environment. If you are experiencing banding, poor fills, or over dot
gain, and you have tried all other means to correct these conditions, you may
want to experiment with the ink preheat settings. These will vary depending on
the ambient temperature where the printer is located and the media and ink
used.
Defaults for the heater setting are determined by the ink type in use.
Default = 0 for each cartridge. This does however not mean that the absolute
values are the same for each cartridge. 0 for Magenta might be a different
setting as 0 for Cyan. The printer determines the ink type by reading the chip
on the back of each cartridge. When you adjust the ink settings, you are
increasing or decreasing the heat from the default temperature. Pressing the
‘Previous’ and ‘Next’ buttons increases or decreases the temperature. When
you have reached the limits of the temperature range, the panel will display
either MAX or OFF. These settings are saved in the printer. If you change to a
different type of ink, you may need to change the heater settings to
accommodate the new ink type.
Handling ink and media
89
If you are working in a cold or dry environment, try turning the heat up for a
larger dot size. If the heat is turned up too far, the ink may run or sputter. If you
are working in a humid or hot environment, turn the heat down for a smaller
dot size.
You can set preheat values for each cartridge in the Left and Right cartridge
sets. The following example sets the preheat value for cartridge 4 of the Left
cartridge set.
▼
To set the ink preheat value for cartridge 4 of the left cartridge set
1 Press ‘Setup Menu/Ink Option Menu/Ink Preheat Menu/Left/4 Preheat’.
2 Choose a preheat value.
3 Press ‘OK’.
The following example sets the preheat value for cartridge Y of the Right
cartridge set.
▼
To set the ink preheat value for cartridge Y of the right cartridge set
1 Press ‘Setup Menu/Ink Option Menu/Ink Preheat Menu/Right/Y Preheat’.
2 Choose a preheat value.
3 Press ‘OK’.
Note: Changing the preheat setting will change the drop size and therefore the
colour appearance. In order to avoid colour changes perform a colour
calibration / linearisation on your software (OGSL or OCC, for instance).
90
Océ CS 5090 User Manual
Océ CS 5090
User Manual
Chapter 7
Quality
This chapter is aimed at describing the different quality
and print modes available on the CS5090:
■ Quality mode
■ Colour mode
■ DPI mode
■ Print passes
■ Carriage speed
■ Print direction
91
Choose a print mode
Your printer offers four quality modes, three of them pre-defined, which let
you make trade-offs between speed and quality.
The quality mode you use depends on various factors, such as your software
application, whether you’re printing in colour or monochrome, and the type of
media you’re using. Each quality mode directly affects the printing speed and
quality of the image you print, so you should understand the differences.
Each of the quality modes attempts to strike a balance between speed and
quality. The default quality mode, Photo, provides quality images at a
reasonable printing speed for most users. Whenever you choose a print mode
other than Photo, you will choose to emphasize either speed or quality.
The quality modes include the following print mode options:
92
■
Colour mode
■
Carriage speed
■
DPI mode
■
Print direction
■
Print passes
Océ CS 5090 User Manual
Selecting the User quality mode will allow you to set each of the print mode
options individually. Quality modes are summarized in the table which
follows. It is not necessary to set all the parameters, unless you want to create
a user-defined print mode.
The 8-heads CS 5090 enables to choose between four different cartridges sets:
1x4 Left, 1x4 Right, 2x4 or 1x8. According to the cartridges sets you select,
the quality modes available will be different.
Note: Make sure you choose the cartridge set before selecting a quality mode.
Quality Modes for 1x4 Right and 1x4 Left Cartridge Sets
Quality mode
Colour
Mode
Dots per
Inch
Print
Passes
Carriage
Speed
Print
Direction
Production
Colour
600
2
10
Bi
Photo
Colour
600
4
10
Bi
Enhanced
Colour
600
6
10
Bi
User
User Defined
Quality Modes for 2x4 Cartridge Sets
Quality mode
Colour
Mode
Dots per
Inch
Print
Passes
Carriage
Speed
Print
Direction
Production
Colour
600
2
10
Bi
Photo
Colour
600
3
10
Bi
Enhanced
Colour
600
4
10
Bi
User
User Defined
Quality Modes for 1x8 Cartridge Sets
Quality mode
Colour
Mode
Dots per
Inch
Print
Passes
Carriage
Speed
Print
Direction
Production
Colour
600
2
10
Bi
Photo
Colour
600
4
10
Bi
Enhanced
Colour
600
6
10
Bi
User
Quality
User Defined
93
Select cartridge sets
▼
Select one of the cartridge sets
1 Press Setup Menu/Print Mode Menu/Cartridge sets.
2 Choose 1x4 Left, 1x4 Right, 2x4 or 1x8 using Next option/Prev option.
3 Press OK.
Select quality modes
There are four print quality modes:
Production - This setting is useful for fast, better than average quality printing
on paper media (for e.g.: CAD/GIS).
Photo - For high quality continuous tone images where quality is more
important than printing speed. (Default)
Enhanced - This is the best pre-defined quality mode.
User defined - Allows you to set each one of the print mode options
individually to meet your unique requirements.
▼
To choose print quality
1 Press Setup Menu/Print Mode Menu/Quality Mode.
2 Choose the desired quality.
3 Press OK.
94
Océ CS 5090 User Manual
Select a colour mode
Colour mode refers to whether you are printing in colour or monochrome.
▼
To choose the colour mode
1 Press Setup Menu/Print Mode Menu/Colour Mode.
2 Choose Colour, Mono or Gray.
3 Press OK.
Select resolution (dpi)
Select your image resolution based on the viewing distance and user
specifications. This resolution is not the same resolution as in the resulting
rasterised file created with OGSL. For best results, check that the printer
resolution (dpi) matches the image resolution of the file you are printing.
Note: Even though a rasterized image at 600 dpi is four times larger than the
same image at 300 dpi, the printing speed does not change (if other settings are
the same.) The printer always prints at 600 dpi, even if the print mode menu
setting displays 300 dpi. This setting refers to the resolution at which your
image was created, and not the actual resolution at which it prints.
Note: OGSL automatically corrects for images with different input resolutions.
▼
RIP
resolution
Printer dpi setting
Result of printed output image
300 dpi
300 dpi
1 input pixel prints as
4 output pixels.
The printed image is
the size of the original.
300 dpi
600 dpi
1 input pixel prints as
1 output pixels.
The printed image is
1/4 the original size.
600 dpi
300 dpi
1 input pixel prints as
1 output pixels.
The printed image is
4x the original size.
600 dpi
600 dpi
1 input pixel prints as
1 output pixels.
The printed image is
the size of the original.
To choose resolution
1 Press Setup menu/Print mode menu/Dots per inch.
2 Select 300 or 600 resolution.
Quality
95
Set print passes
The number of passes indicates how many times the cartridges must fire to lay
down the ink for a complete scan line. You may select multiple passes, so that
on a single pass, the jets fire only a fraction of the dots. If you're printing an
image with heavy fill or shading, setting the print mode to an option that lays
down less ink can help prevent running and bleeding.
Note: When using the 2 x 4 cartridge set, a single pass fires ink from two
cartridges for each colour.
▼
To change the number of passes
1 Choose Setup Menu/Print Mode Menu/Print Passes.
2 Choose Single, Two, Three, Four, Six, Eight or Ten for 1x4 cartridge sets or
Single, Two, Three, Four or Five for 2x4 or Single, Two, Three, Four, Five,
Six, Eight or Ten for 1x8 cartridge set.
3 Press OK.
Note: More print-passes equals higher print quality whereas less print passes
means higher speed.
Attention: Single pass is not recommended forgraphics art printing.
Set carriage speed
Carriage speed lets you determine the number of dots per second that are laid
down as the carriage moves over the media.
▼
To set the carriage speed
1 Press Setup Menu/Print Mode Menu/Carriage Speed.
2 Choose 1, 2, 3, 4, 5, 6, 7, 8, 9 or 10. (10 is the fastest.)
3 Press OK.
96
Océ CS 5090 User Manual
Select the print direction
The print direction determines whether the inkjets fire on both passes of the
carriage over the print area (bidirectional), or simply on the return pass
(unidirectional).
■
Unidirectional printing can reduce running and ink bleeding if you have an
■
Bidirectional printing can decrease your printing time if printer speed is more
image with solid fills and blends.
important.
▼
To change the print direction
1 Press Setup/Print Mode/Print Direction.
2 Choose Unidirectional or Bidirectional.
3 Press OK.
When printing in bidirectional mode, the velocity of the carriage can cause
certain dots to miss the target area on the media. To alleviate this problem, use
the colour deadband compensation feature to fine-tune dot placement. The
colour deadband test pattern lets you check the velocity deadband values and
adjust them for best printing results (see ‘To print the colour deadband test
pattern’ on page 40).
Quality
97
98
Océ CS 5090 User Manual
Océ CS 5090
User Manual
Chapter 8
Firmware downloads
This chapter describes the procedure to follow to upgrade
the firmware version included in your printer.
99
Overall
The Océ 5090 inkjet printer contains firmware that can be upgraded to a newer
version. You may need to upgrade your firmware version for different reasons:
■
■
■
support of new ink
engine improvements
new features
For this reason, Océ gives all owners of an Océ 5090 system access to new
firmware versions via the WWW.
100
Océ CS 5090 User Manual
Check the firmware version
▼
To check the version of your firmware:
1 On the printer control panel, select ‘Utility menu’ then ‘Service menu’.
2 In the ‘Service menu’, press ‘About’.
Vers :
BROM :
0. 9. 1 Date: 9-29-2000
1. 6. 0 Date: 9-6-2000
RAM: 64 Mbytes
Time: 11:34
Time: 13:25
Sice: 42 MB: 87. 27-0
87FF-1c43-0005-DEC8-5
ECP
EXIT
This ‘About’ screen provides information about the firmware version. All you
need to do is to compare your version with the latest versions available on the
‘Océ Downloads’ page of Océ Web site.
Firmware downloads
101
Upgrade the firmware
▼
To get the upgrade files
1 From the ‘Océ Downloads’ page of Océ web site (www.oce.com), select your
printer and software. The ‘Firmware upgrade’ page is displayed.
2 Click the latest firmware download icon available for your printer. The
requested exe-file is downloaded.
3 Run the downloaded file.
4 Indicate the location of a temporary directory where to install the upgrade files.
Three files are placed in the temp directory:
■ install.pdf
■ whatsnew.pdf
■ yyyyxxx.rom
The yyyyxxx.rom file is specific to the printer:
Printer Name
Firmware Name
Océ
Océ
Océ
Océ
5090xxx.rom
600exxx.rom
5050xxx.rom
5070xxx.rom
5090
5350-600
5050
5070
Note: where xxx indicates the release number.
▼
To install the firmware
1 If the printer is connected through an ethernet print server, first remove the
print server.
2 Connect the parallel cable between the parallel port of the printer and the
parallel port of the Océ Server PC.
3 Turn the printer ON and wait until the printer is initialized.
4 From the Windows ‘Start’ menu, select ‘Programs’ and ‘Command prompt’.
5 In the MS-DOS Prompt, type the location of the firmware file (usually
C:\TEMP).
102
Océ CS 5090 User Manual
6 Type ‘PRINT /D:LPT1 <filename>.rom:
[33] Install firmware
7 Press ‘Enter’.
After 20 to 40 seconds, a SINGLE beep from the printer indicates the
installation is successful.
Note: If you hear several beeps or no beep at all, the installation did not
succeed. If so, check the parallel port connections and repeat steps 4 to 8.
After the single beep, the printer automatically re-initializes.
Note: The printer can be manually re-initialized by selecting ‘Setup menu’,
‘User Setup menu’ and ‘Init Settings’.
8 Once the printer is re-initialized, check the revised version of the firmware (see
‘Check the firmware version’ on page 101).
Firmware downloads
103
104
Océ CS 5090 User Manual
Océ CS 5090
User Manual
Chapter 9
Maintenance and cleaning
The chapter describes the periodic maintenance tasks to
carry out in order to maintain consistent quality printing.
105
Periodic cleaning
!Click for Video
For best results, Océ recommends that you clean periodically the cartridges
and service station. The frequency should be daily for heavy use, and weekly
for moderate use. In addition, you should wipe any areas of the printer exposed
to ink and the print shaft with a lint-free cloth moistened with water. The table
gives recommendations for periodic cleaning to keep your printer in optimal
working condition.
Attention: Do not oil the print shaft. Clean with a clean cloth and rubbing
alcohol.
Interval
Component
Cleaning Agent
Immediately
External surfaces
Distilled water
Bi-weekly
Service station seals and wipers /
Cartridge jet area
Distilled water
Weekly
Monthly or
prior to tiling/paneling
As required
106
Trailing cable
Océ Cleaner A or Distilled water
Slide shaft
Encoder strip top and bottom
Isopropyl alcohol
Isopropyl alcohol
Cartridge dimples, flex driver cables,
Distilled water
Carriage bushings
Distilled water
Cutter groove
Toothpick or small
wooden tool
Pinch rollers and lower drive
rollers
Distilled water
Platen vacuum holes
Toothpick or small
wooden tool
Paper sensor
Isopropyl alcohol
Océ CS 5090 User Manual
Materials to use for cleaning
■
■
■
■
■
■
■
■
Isopropyl alcohol (industrial grade)
Lint-free soft cloth/paper wipe
Dry lint-free cloth
Cotton swabs
Ultrasonic cleaner (if available)
Distilled/Reverse osmosis water (purified water)
Canned/compressed air.
Océ Cleaner A
Clean the ink cartridge jet plate
The ink cartridges may require occasional cleaning when used in low humidity.
If repeated priming does not unclog the head, follow the cleaning procedure
below. In addition, cartridges will wear out after prolonged use. If cleaning the
cartridge does not restore print quality, replace it.
▼
To clean the inkjet plate
1 Press ‘Utility Menu’, ‘Access Menu’ then ‘Access Left’ or ‘Access Right’ to
move the carriage away from the service station.
2 Lift the appropriate valve cover on the carriage cover assembly and disconnect
the septum fitting.
3 Remove the ink cartridge from the printer by gently pulling the top of the
cartridge toward you, then lifting it up out of the carriage.
4 Press lightly against the jets with a water-moistened, lint-free, non-paper cloth
(do not use alcohol). Gently blot any excess ink.
Attention: ‘Blot - do not wipe’. Wiping may damage the jets. (Ink will
appear on the cloth; this is normal in this situation.)
5 Reinstall the cartridge in the carriage and reconnect the ink supply line.
6 Close the valve cover.
Attention: Never use alcohol to clean the jet area of the cartridge.
7 Press the ‘Access Home’ button to return the carriage to the service station.
Press Exit once.
Maintenance and cleaning
107
8 Press the ‘Prime’ button to check the cartridges. Repeat two more times, if
necessary. If the cartridges fire correctly, perform the appropriate calibration
procedures.
9 If the cartridge continues to misfire, remove the cartridge. Rinse the ink from
the bottom of the cartridge using warm distilled water. Note that removing the
cartridge too many times may create a large air bubble in the line, which could
lead to pen problems. Refill the lines with ink if necessary.
Note: You can manually compensate for clogged jets.
10 Dry all surfaces of the cartridge, except for the jet plate area. Reinstall the
cartridge and reprime. Check the Prime test pattern and set the print mode as
indicated on the test pattern print. You may also want to run a colour test.
Clean the service station
!Click for Video
Ink and dust can accumulate in the service station causing poor print quality.
Depending on how frequently you print, you may want to clean the service
station daily using the following procedure. We recommend that you replace
the service station about every six months or 2000 plot hours.
▼
To clean and inspect the service station
1 Select ‘Utility Menu’, ‘Access Menu’ then ‘Access Left’ or ‘Access Right’ to
move the carriage away from the service station.
2 Raise the printer cover.
3 Locate the service station release tab at the right end of the service station base.
Move it gently to the left and lift to remove the entire service station assembly.
4 Rinse the service station and wipers with warm water. Use cotton swabs to
clean small spaces.
5 Inspect the seals and wipers. Any damage to these parts can cause the cartridge
jetplate to clog, resulting in misfires.
108
Océ CS 5090 User Manual
Tab
Wiper
Seal
[34] Cleaning the service station
If any of the seals look worn or damaged replacement of the service station is
required.
Compare the wipers to the figure below and replace the wipers if necessary.
The wiper on the left is in good condition, the other two require that they be
replaced.
Good
Replace Service Station
[35] Comparing the wipers
6 Dry the service station and replace it, putting the left side in first. Make sure
the release tab relatches.
7 Press ‘Access Home’ to return the carriage to the service station.
Maintenance and cleaning
109
Clean the Pinch Rollers and Lower Drive Rollers
! Click for Video
The pinch rollers and lower drive rollers require cleaning to ensure that the
media transport system applies the correct amount of traction to control the
movement of the media.
If the pinch rollers and lower drive rollers are not kept clean, line length
accuracy may be encountered and the image quality will deteriorate.
▼
To clean the pinch rollers and the lower drive rollers
1 Lift the cover of the printer.
2 Remove any media if loaded.
3 Take a lint-free cloth moistened with Isopropyl Alcohol and press it against the
pinch roller and the lower drive roller simultaneously.
4 To clean the pinch and drive rollers, press ‘Feed Media’ then ‘Forward’ to
rotate the rollers. Do not allow the cloth to get caught on the rollers and be fed
into the platen assembly. Continue rotating the rollers until they are clean.
5 Perform this procedure on all pinch/drive roller pairs on your printer.
[36] Clean the Pinch rollers
110
Océ CS 5090 User Manual
6 The pinch/drive roller pair that is to the extreme right side of the printer (as you
are looking at it from the front) has a drive gear that is visible. As you rotate
the rollers, make sure that there is no debris between the teeth of the gear. If
any debris is present, remove by using a stiff brush if needed. Do not allow the
debris to remain as this can affect your line length accuracy and cause banding
in your prints.
[37] Right pinch roller
7 Close the cover.
8 Install any media if it was removed
Clean the slide shaft
!Click for Video
The slide shaft requires cleaning to achieve the highest quality output. If the
slide shaft is not kept clean image quality will deteriorate and will eventually
cause a ‘carriage axis failure’ to occur.
▼
To clean the slide shaft
1 Lift the cover of the printer.
2 With a lint-free cloth moistened with isopropyl alcohol gently clean the entire
slide shaft, both the top and bottom.
3 To clean the slide shaft area above the service station, press ‘Utility Menu’,
‘Access Menu’ then ‘Access Left’ or ‘Access Right’ to move the carriage out
of the way.
4 After cleaning the area above the service station, press Access Home to move
the carriage assembly back into the service station.
5 Close the cover.
Maintenance and cleaning
111
Clean the encoder strip !Click for Video
The encoder strip is a very essential part of the printer. If it becomes dirty it can
cause a variety of image quality problems. To ensure great image quality keep
the encoder strip clean.
▼
To clean the encoder strip
1 Lift the cover.
2 Locate the encoder strip. The encoder strip is a thin piece of plastic that is
attached to a metal bar. This assembly is located just below the flex trailing
cable support and runs the entire width of the printable area. Use the image to
the right to help locate it.
3 With a cotton swab moistened in isopropyl alcohol gently clean the top and
bottom of the encoder strip. Be sure to clean the entire length of the encoder
strip.
[38] Encoder strip
Attention: Use extreme care not to bend or damage the encoder strip in any
way. Any damage to the encoder strip can cause the printer not to operate
properly.
Note: Canned air can also be used to clean the encoder strip. This method will
only be effective to remove lint and other dry materials. If ink or any liquid gets
on the encoder strip the cotton swab method will have to be used.
4 Lower the cover.
112
Océ CS 5090 User Manual
Clean trailing cables !Click for Video
The trailing cables require cleaning to keep the printer in top condition.
During high production periods, ink may accumulate on the trailing cables and
its support bracket. If this accumulation of ink is not cleaned off regularly, the
trailing cables will become ‘sticky’ and can interfere with the proper operation
of the trailing cables. This can result in the image quality deterioration and
eventually will cause a ‘carriage axis failure’ to occur.
▼
To clean trailing cables
1 Remove power from the printer.
2 Lift the cover of the printer.
3 Dampen a lint-free towel with water (or soapy water for very dirty cables) and
wipe the entire surface of the white trailing cables.
4 Close the cover.
5 Turn the printer on.
Caution: Do not pull too hard on the cables or damage may occur.
Clean flex cables
!Click for Video
The electrical contact areas on both the flex cables (part of the carriage
assembly) and the cartridges require cleaning. This is necessary to ensure
proper operation of the cartridges to extend the life of the cartridge and to
achieve the highest quality output.
Cleaning these areas are very important due to the ease of which this area can
become dirty. The oils and dirt that accumulate on your fingers and hands can
contaminate these areas. Also excessive ink from the bottom of the cartridge
can find its way to the electrical contact areas.
Maintenance and cleaning
113
If the electrical contact areas on both the flex cables and the cartridges are not
kept clean, image quality can deteriorate. This is due to the firing signals from
the carriage assembly being blocked from getting to the cartridges resulting in
jets not firing when they should. This condition can be seen as a misfiring of
the cartridge.
Always clean each of these areas weekly or whenever you change cartridges
so that excessive buildup does not develop.
▼
To clean flex driver cables
1 Remove power from the printer.
2 Lift the cover of the printer.
3 Dampen a lint-free towel with isopropyl alcohol and wipe the entire surface
area of each cable.
4 Close the cover of the printer and turn the printer on.
Caution: Ensure no fibres remain on the cables.
Clean carriage bushings
▼
!Click for Video
To clean carriage bushings
1 Remove power from the printer or select ‘Access menu/Access Left’ to move
the carriage out of the service station.
2 Dampen a lint-free towel or cotton swab with water and wipe the entire area of
both carriage bushings.
3 Wipe away excess water.
114
Océ CS 5090 User Manual
Clean platen vacuum holes
! Click for Video
The platen (the black metal part directly under the media as it is printing)
requires cleaning to ensure that the media has a smooth surface to move across
and that the vacuum holes do not get clogged.
Keeping the platen clean ensures that the platen surface does not have ink or
media residue build up. If the platen is allowed to continue to have ink building
up on it, the residue will become sticky and tacky and will eventually interfere
with the proper movement of the media, possibly causing line length errors in
your images.
If the vacuum holes on the platen are not kept clean, the media will lift off of
the platen and could cause the cartridge heads to actually hit the media leaving
"head strike" markings on your image. Image quality can also deteriorate if the
actual distance between the cartridge head and the media is less then the
calculated value used in the ink printing algorithm.
▼
To clean platen vacuum holes
1 Lift the cover of the printer.
2 With a lint-free cloth moistened with Isopropyl Alcohol gently clean the
entire platen surface.
3 To clean the vacuum holes on the platen, use a toothpick and insert it into the
hole.
4 Move the instrument in a circular motion to clear the edges of the hole and
remove.
5 Wipe the instrument with a cloth to clean any debris off before inserting it into
the next hole.
6 Repeat step 5 for all the vacuum holes on the platen.
7 Close the cover.
Caution: Do not push lint through platen holes or problems with the stepper
motor gearing might occur, leading to microbanding in image output.
Maintenance and cleaning
115
Maintain the Océ Prime tool
The Océ Prime tool is an accessory used to establish ink flow when you install
new cartridges and reservoirs. It operates using four (4) AA batteries.
[39] Océ CS 5090 Prime Tool
▼
To replace the battery
1 Turn over the Océ Prime tool and remove the battery access cover located on
the bottom.
2 Note the orientation of the battery pack.
3 Remove old batteries and replace with new batteries.
4 Reinstall the battery access cover.
▼
To clean the Océ Prime tool
1 Clean the Océ Prime tool (part that touches the cartridge) with distilled water
and a lint-free cloth to remove ink.
2 Thoroughly wash the ink bottle and allow to air dry.
Transport the printer
Before removing your printer from service, do the following preparations:
■
■
■
116
Remove the ink cartridges and store them in a sealed plastic bag, away from
direct light and heat.
Remove the ink reservoirs.
Wash out the service station.
Océ CS 5090 User Manual
Océ CS 5090
User Manual
Chapter 10
Error handling and troubleshooting
This section is a guide for you to identify and solve
problems that can arise in the course of printing.
117
Error handling
In case of error, the control panel displays the message 'Internal ERROR:
Shutdown' with a specific message to explain the nature of the error.
If you cannot clear it, note the message and the sequence of events leading to
the error, in order for Océ technical support personnel to assist you in solving
the problem.
If the control panel displays a “Servo shutdown message”, turn the printer off
and on again to clear the error.
If the control panel displays an “Unrecognized Cartridge(s)” message, the
error originates from one of three problems:
■
■
■
One or more non-CS 5090 cartridges installed
One or more incorrectly installed Océ cartridges
One or more cartridges not installed
Unrecognized cartridge
If you use any other cartridges than Océ cartridges the message "unrecognised
cartridge" appears. Also, incorrectly installed cartridges lead to the same error
message due to poor electrical connections between the cartridge and the
carriage unit.
▼
To clear the error
1 Press Access menu/Access Left to move the carriage to the position for
replacement of the ink cartridges.
2 Check for the correct installation of CS 5090 cartridges in each position.
3 Replace any non-standard cartridge with an Océ cartridge.
4 Press OK.
Note: The printer can sometimes display a cartridge error even with an Océ
cartridge. This may be due to a build-up of static electricity. Turn off the printer
and unplug it from the outlet. Wait 10 seconds before you plug it back in and
turn on the printer (see ‘Cartridge recognition’ on page 38).
118
Océ CS 5090 User Manual
Check the quality of ink cartridges
Before printing and at regular intervals during printing, check the state and
quality of the ink cartridges to make sure that they are in optimal working
order.
Run the prime test
Running a prime test ensures that your cartridges print at optimal quality. This
prime test gives detailed information about the state of the cartridges and
suggest the appropriate print mode to use when you must compensate for
electronically damaged jets without losing quality during multi-pass printing.
However, when the jets become clogged (due to prolonged exposure to air or
disuse), you must clean them manually or compensate for them.
Océ recommends that you print this test daily to ensure the best possible print
quality and solve related problems before printing.
Error handling and troubleshooting
119
▼
To print the prime pattern
1 With media loaded, press Utility menu.
2 Select Prime. A test pattern prints. The test pattern consists of four coloured
bands (for black, cyan, magenta and yellow), a series of lines and a CMYK
header, indicating the compensating print modes for damaged jets.
A solid bar indicates an
electrically defective
jet. Jet Compensation
will automatically
compensate for that
jet.
2x4
4: 3 4 5
A missing line or "gap",
misdirected line, or a
light-printing line
indicates a clogged jet.
The header lets you know
the number of passes for
which compensation is
available.
3: 3 4 5 2: - - 5 1: - - 5 Y: 3 4 5 M: 3 4 5 C: 3 4
1x4 Right Y: 3 4 6 8 10 M: 3 4 6 8 10 C: 3 4 6 8 1
1X4 Left
4: 3 4 6 8 10 3: 3 4 6 8 10 2: - - 6 - 1
COMPENSATION AVAILABLE IN THE ABOVE
4
Y
3
M
2
C
1
K
1111111111111111111111111111111111111111111111111111111111111111111111111
555555555544444444444443333333333333222222222222111111111111100000000000009999999999998888888888888777777777777766666666666655555555555554444444444444333333333333222222222222211
7654321098765432109876543210987654321098765432109876543210987654321098765432109876543210987654321098765432109876543210987654321098765432109
4
Y
3
M
2
C
1
K
[40] The prime test
120
Océ CS 5090 User Manual
▼
To interpret the prime test
The bands should be smooth, without dark streaks or white lines. The lines
should not look fuzzy or contain gaps.
■ Within the printed test pattern, each jet is represented by a short horizontal
line. Together, these short horizontal lines form a “stair step” pattern.
■ Electrically defective jets appear as solid bars which can be compensated.
■ Clogged jets appear as gaps or misdirected lines in the “stair step” pattern,
which you clear manually.
■ The print modes for which compensation is available are shown above the
test pattern.
■ In the above example, the prime test shows that there are three electrically
defective jets and one clogged jet. The header indicates that you can
compensate for the electrically defective jets in the 4-pass mode. But you
must clear the clogged jet manually. See ‘Clear clogged jets’ on page 122 for
further information.
Note: If all jets appear to be defective, reinstall the cartridges.
■
Compensate for electrically defective jets
▼
To compensate for electrically defective jets
1 Examine the printed test pattern.
2
3
4
5
Each solid bar represents an electrically defective jet. The header indicates the
print mode that can best compensate for the defective jets in each cartridge.
The same print mode must be available for all four print cartridges in order to
provide full compensation.
Press Setup Menu/Print Mode Menu/Print Passes.
Set the number of print passes by pressing the Prev. Option or Next Option to
the appropriate setting.
Note: When printing to the Océ CS 5090 using the Océ Graphics Server L,
you should set the correct print mode in the Setup window of the Printer
Setup dialog box (consult your Océ Graphics Server L Reference Manual).
Press OK.
Press Exit to leave the menu.
Note: If there is a complete groups of nozzles (e.g. 13 or 16 nozzles), the cause
is probably an electrical contact problem between the flex driver cable and the
cartridge, you should clean the electrical contacts on the flex driver cable
(located behind each cartridge) and the cartridge electrical contacts using a
lint-free cloth moistened with isopropyl alcohol. Check that the unit is powered
off while cleaning the flex driver cables.
Error handling and troubleshooting
121
Clear clogged jets
A clogged jet appears in the prime pattern as a gap in the “stair-step pattern”
for each cartridge. The printer does not automatically detect clogged jets, so
you must clear them manually by cleaning and priming the cartridges.
▼
To clear clogged jets
1 Examine the printed test pattern.
2 Unsnap the ink cartridge which shows clogged jets from the carriage.
3 Prime the cartridge using the prime tool. To do so, attach the prime tool to the
4
5
6
7
8
9
cartridge jet plate and prime cartridge with pulses by pressing the activation
button repeatedly.
Clean the cartridge jet plate by blotting the jet plate with a distilled
water/isopropyl saturated lint-free towel.
Note: For severely clogged cartridges completely clean the jet plate
thoroughly by immersing cartridge jet plate into ultrasonic cleaner for
30-40 seconds. As a final attempt, try immersing the jet plate into boiling
water for 10-15 seconds.
After cleaning, reinstall the cartridge.
Select Utility Menu/Service Menu/Diagnostics /Colour Test to clear
water/chemicals from the jets.
Press Prev. Option to change the option ‘10%’ to ‘100%’.
Press OK to start printing.
Rerun the prime pattern to verify whether the jet is cleared of ink clog.
Try to eliminate all gaps in the “stair step” pattern prior to starting your print
job.
If the printed results remain unsatisfactory, run the test several more times.
122
Océ CS 5090 User Manual
Compensate manually for clogged jets
In addition to the prime pattern, you can also print a jet status list which
identifies for each colour the number of individual jets that are clogged. This
enables you to enter manually the jet numbers (by cartridge colour) to initiate
compensation for the clogged jets. The jet compensation data is stored on the
cartridge chip.
▼
To print the manual jet compensation list
1 From the main menu, select Utility Menu/Calibration Menu.
2 Select Open Jet Menu/Print Jet list. In the example below, the jet status list
shows the current jet compensation by number for each cartridge.
Manual jet compensation list
4:
None
3:
100, 204
2:
37, 40, 44, 155
1:
178
Y:
None
M:
1, 3, 10
C:
None
K:
10, 21, 30, 128
Error handling and troubleshooting
123
3 To add a jet to the compensation list, press ’Left’ or ’Right’, according to the
colour of cartridge where the jet is located:
Left
Print Jet List
Right
Exit
[41] Jet compensation list
Edit List: 4
Clear List menu
Edit List: 3
Edit List: 2
Edit List: 1
Exit
[42] Jet Compensation List (Left)
Edit List: Y
Clear List menu
Edit List: M
Edit List: C
Edit List: K
Exit
[43] Jet Compensation List (Right)
4 Select a list.
5 To compensate for a specific jet, press Next Option or Prev. Option until the
panel displays the number of the jet.
6 Press Toggle Jet to switch the jet to OFF.
7 Repeat for any other jet for which you must compensate.
8 Press OK to validate the settings.
Note: Once you have manually compensated for jets in any cartridge,
remember to clear the compensation list when you install a new cartridge
by pressing “Clear List Menu”.
124
Océ CS 5090 User Manual
Troubleshooting
Troubleshooting helps you locate the source of errors and fix common
problems that can arise during printing. However, before you investigate,
check:
■
Is the printer connected to a working power source?
Troubleshooting areas
■
■
■
■
Printer behaviour
Print quality
Data transfer
Application software
Isolating problems
You can quickly isolate problems in the printer, computer/printer interface, or
application software using the following procedure:
▼
To isolate problems
1 Turn the printer OFF, then ON.
2 Load media, then print a prime test to check that all jets fire. (see ‘Check the
quality of ink cartridges’ on page 119)
3 Perform a colour calibration. (see ‘Run a colour test’ on page 35)
4
5
6
7
If your printer fails during any of the above steps, call the Océ helpdesk.
Otherwise, continue with the following steps:
Send a test print directly to the printer through the parallel port. For example,
on a PC, type:
copy /b <filename>.rtl lpt1.
If your computer runs on a network, log on and copy the test file to the printer
over the network.
If steps 4 or 5 fails, try again from another computer.
If any of these steps fail, your printer may not be correctly connected to your
computer and/or network. Contact your systems administrator. Otherwise,
continue with the following steps:
Print directly to the 5090 from several software applications.
Error handling and troubleshooting
125
8 If your computer is on a network, log on and print from several software
applications.
9 If steps 7 or 8 fails, try again from another computer, or remove it from the
network to test on a stand-alone basis.
■
■
If one application fails, but others print successfully, the problem can
originate from a specific software.
If all applications fail to print, call Océ Service.
Printer behaviour
Printer does not turn on
■
■
Check that the power cord is securely attached to the printer and plugged into
a working electrical outlet.
Check that the power switch is on.
Display does not light up
■
■
Check that the power cord is plugged in and the power switch is on.
Push any control panel button. The display should light up.
File will not print
■
Check the electrical connections.
Takeup roll does not turn
■
Check that the paper feed option is set to “Takeup”.
Takeup roll does not stop turning
■
Check that nothing blocks the take-up sensor (between the take-up sensor
and media).
Automatic cutter does not work or tears the paper
■
■
■
126
Make sure the Auto-Cut option is set to ON.
Make sure Media Supply Type is set to Roll.
Make sure the cutter is properly installed. (see ‘Install cutter’ on page 24)
Océ CS 5090 User Manual
▼
To check cutter
1 Turn off the power. ! Click for Video
2 Clean the inside of the black belt using alcohol and a lint-free cloth.
3 Push the carriage back and forth to access all areas of the belt. Manually push
the carriage completely to the left to force the cutter to drop.
4 Turn on the power.
5 Check that the service station lowers. If not, push it left and then down, in order
to disengage the cutter.
6 If the cutter is worn, replace it. The cutter wear depends on the frequency of
use and the type of media cut.
Carriage jams
■
Check for paper jams or blockage.
Carriage axis failure
■
■
■
This may be caused by using matte paper which may curl and cause carriage
axis failure. Be sure to use inkjet quality media.
An obstruction in the path of the carriage assembly hindering the carriage
movement, which you may or may not see.
Other common causes include dirty encoder strip, media interference, worn
carriage bushings, cutter malfunction, and loose trailing cable connection.
Error handling and troubleshooting
127
▼
To check carriage axis
1 If the carriage is in the same spot, check the encoder strip for visible damage
(clear plastic strip under the trailing cable tray and above the belt). See the
figure below:
[44] Plastic strip under the trailing cable
2 Verify that carriage movement is free and smooth by turning the power off and
moving the carriage from one end of the shaft to the other, with nothing
binding or blocking the carriage movement.
Attention: Make sure power is off before performing this step!
3 Clean the top and bottom of the encoder strip using a cotton swab and distilled
water. Let it dry completely for approximately 30 minutes before trying to
operate the printer.
4 Remove the cutter from the left side of the carriage and check it for visible
damage. Make sure cutter version A is installed (see the figure below).
[45] Cutter version A
5 Check the shaft for visible damage (carriage moves back and forth on it during
operation).
6 Clean the shaft with a lint free cloth and isopropyl alcohol. Let it dry
completely for approximately 30 minutes before trying to operate the printer.
128
Océ CS 5090 User Manual
7 Check the belt for visible damage such as fraying and pieces coming apart.
8 Check the trailing cable (cable that moves during printer operation) for visible
damage.
9 Check whether the idler assembly (located at the left end of the belt) moves
freely. Check for cracks or damage.
10 After you’ve checked the above items, reboot the printer.
Note: If the error re-occurs, observe whether the carriage is in the same or
different location.
Cannot draw ink during initial siphon
■
■
Check that the quick release fitting connection to the ink reservoir is secure.
Check whether contaminants have blocked the ink delivery lines. If
necessary, flush the lines with distilled water, then reprime.
Initial siphon cannot be established
■
■
Check that ink reservoirs are full.
Check the ink delivery system for leaks in the lines, at the tubing connection,
and at the quick connect coupling to the reservoir. If leaks cannot be stopped,
call Technical Support.
Ink cartridges do not fire properly
■
■
■
■
■
■
■
Clean cartridges and the service station periodically to maintain good print
quality (see ‘Clean the ink cartridge jet plate’ on page 107).
Cartridges wear out after extended use. Replace the cartridge.
Store cartridges in a sealed container at room temperature when not in use
for extended periods of time.
Make sure you have removed the protective tape from the cartridges.
Remove the cartridge and reinstall it, or clean the electrical contact on the
cartridge and carriage. Check that it is clean and dry, and properly installed
(see ‘Install ink cartridges’ on page 26).
Check that ink goes through the delivery lines. If necessary, use the Océ
Prime tool to force ink out of the nozzle plate and remove trapped air
bubbles.
Check that the ink reservoirs are filled.
Cartridges leak
■
Check that reservoirs are not overfilled.
Error handling and troubleshooting
129
Various nozzles are clogged or stop firing
■
■
■
■
■
■
■
Repeat prime several times.
Remove, clean, and re-install cartridge; repeat prime. Do not use alcohol on
the jet area.
Clean service station; clean cartridge again; repeat prime.
Clean cartridge electrical contacts using a cotton swab moistened with water.
Dry contact. Repeat prime. Do not use acetone or any other harsh cleaner as
this may cause damage to the flex cable.
Nozzle may have failed. Replace cartridge. Check for nozzle clogs by using
the suction bulb on the cartridge nozzle plate.
Check to see whether spray from printing has contaminated the flex contact.
Remove the cartridge and wipe the carrier flex and cartridge flex with a
cotton swab dipped in alcohol.
Run prime. If sections of the print are missing, replace the cartridge.
Ink spills on the flex cable
■
Clean the flex cable gently with a cotton swab moistened with water. Do not
use acetone or any other harsh cleaner as this may cause damage to the flex
cable.
Printer settings are lost when printer is turned off or rebooted
■
130
Be sure to save your printer settings to a User number (see ‘To save
user-defined settings’ on page 50). When you are ready to print, select the
User number with the settings that you saved.
Océ CS 5090 User Manual
Print quality
You can solve most print quality problems by priming, cleaning, replacing, or
calibrating the cartridges. Refer to the following chapters for details:
Priming, calibrating - (see ‘Getting started’ on page 15)
Cleaning, replacing - (see ‘Maintenance and cleaning’ on page 105)
No print appears
■
■
■
Check that you’ve removed the tape from the cartridge printhead.
Check that the software (OGSL) is working properly.
Check for network problems.
White lines or large gaps on print or portions of characters missing
■
■
■
Prime, clean, calibrate, or replace cartridges.
Check if the ink reservoir is empty. Refill if necessary.
Make sure the media feeds freely.
Overall print quality is poor
■
■
Prime, clean, calibrate, or replace cartridges.
Make sure the printer is positioned on level ground.
Cartridge sputters small amounts of ink on paper
■
Nozzle plate may be flooded. Try using a lower firing rate or replacing the
cartridge.
Error handling and troubleshooting
131
Streak marks
■
■
Clean the service station at least once a week, depending on the printing
frequency (see ‘Maintenance and cleaning’ on page 105).
Prime, clean, calibrate, or replace cartridges.
Line drawings bleed
■
■
■
Be sure you are printing on the coated side of the media. Load cut sheet
media so that the notch is on the side closest to the carriage. Load roll feed
media so the coated side is on the outside.
If your application software permits, use gamma correction to lighten
colours.
Too much air may have been drawn into the cartridge during extended
operation. Add 5 ml of ink and reinstall the cartridge.
Colours print as monochrome
■
Check that you have set the Colour/Mono mode to Colour. To change a
specific drawing from monochrome to colour or vice versa, you must switch
the Colour/Mono setting and re-send the file.
Ink smears after removing the print
■
Check that the ink is dry before removing the print. If you are printing area
fills, set the Dry Time option. Turn the dryer on.
Smudged or dark characters
■
■
■
■
Check that you are using the correct type of paper for the application.
Check that the paper is straight and unwrinkled when loading it into the
printer.
Prime, clean, calibrate, or replace cartridges.
Try a different print mode.
Improperly formed or misaligned characters
■
Calibrate cartridges.
Colour problems or shadowing
■
132
Calibrate cartridges.
Océ CS 5090 User Manual
Colours are not correct or sections of print missing
■
Prime, clean, calibrate, or replace cartridges.
Image is the wrong size
■
Check that the dpi setting (300 or 600) matches the size of your image file.
Print only contains a partial image
■
■
■
Check the settings of the margins option. When you set margins to Normal
(default), the print area is smaller than with the margins set to Expanded.
The printer did not size correctly the media. Use the Manual load option to
load your media.
The printer automatically prints in portrait orientation. If you rotated the
image in the software to save to save paper, set the paper size to the next
larger size (i.e. for a C size image, select D size paper). Set the Save media
option to ON to stop the printer from scrolling the full paper height.
Jagged vertical lines
■
Prime, clean, calibrate, or replace cartridges.
Splotchy area fill
■
Try using photo mode. If the problem persists, prime, clean, calibrate, or
replace cartridges.
Excessive banding in area fills
■
■
■
■
■
Consistent banding generally indicates a hardware problem; whereas
inconsistent banding indicates a software problem.
Use specially coated inkjet media.
Change the Print Mode option to User-defined and select a higher number of
print passes (see ‘Set print passes’ on page 96).
Prime, clean, calibrate, or replace cartridges.
Set wiper function to off.
Error handling and troubleshooting
133
Ghosting (parasitic suppression)
The temperature of the print cartridge affects the size of the dots it prints (the
warmer the cartridge, the larger the produced dots). Several factors may affect
the temperature of a cartridge such as the ambient temperature, the number of
dots recently printed or the cartridge heater circuit. This change of temperature
causes what is called ’ghosting’ (also known as ’parasitic suppression’).
Ghosting may occur when selecting unidirectional printing, if the image [1]
contains a white area [2]. The cartridge cools down when not printing this
empty area and a light area [3] may appear next to the non-printed area. This
light area is ghosting.
Use the cartridge heaters to warm the cartridge for these non-printed areas and
you will minimize this phenomenon.
[46] Ghosting
▼
To avoid ghosting
1 Increase the preheat setting on all cartridges (see ‘Select ink preheat’ on
page 89)
2 Set the carriage speed to 5 or lower (Setup/Print mode/Carriage speed/5/OK)
3 Set the printer in the bi-directional mode (Setup/Print mode/Print
direction/BI/OK)
134
Océ CS 5090 User Manual
Portions of lines are missing
■
■
■
Prime, clean, calibrate, or replace cartridges.
Clean service station; clean cartridge again; repeat prime.
Clean carriage flex cable and cartridge electrical contacts; repeat prime. Do
not use alcohol, acetone, or other cleansers. Use a cotton swab moistened in
distilled water. Use tap water if distilled water is not available.
Poor vertical or horizontal line quality
■
Perform colour calibration (see ‘Cartridge recognition’ on page 38).
Microbanding
■
Minimal microbanding normally occurs in the low pass modes with dense
images. Depending on the color fill it may also occur in the 3-pass mode. The
lighter solid pastel shades, solid two-tone grays, blues, and lavender colors
are subject to microbanding in these modes. Ensure cartridges are
functioning properly and that all calibrations are correct. 95% of the time
microbanding is cartridge related.
Ink drop-out
■
If you are experiencing ink dropout or temporary ink starvation conditions it
may be corrected by modifying the preheat settings on your printer.
Symptoms include horizontal bands that recover in all cases and the typical
banding pattern can either be consistent or inconsistent.
Ink starvation
■
Ink starvation of one or more colors can occur between 10 minutes and 4
hours of operation due to improper system setup or a defective ink delivery
system (air leak in the system). Check pressure in the lines by initiating a
Color Test in the 2 pass mode (see ‘Run a colour test’ on page 35). Repeat
several times to verify pressure(see ‘Causes of the most common problems’
on page 174).
Error handling and troubleshooting
135
Data transfer
Printer does not generate a print
■
■
Check that your printer is connected to the port you are sending the file to.
If you are printing over a network, determine whether the problem comes
from the network. Try connecting the printer directly to your computer and
send the file again.
Parallel printing doesn’t work
■
Try using another parallel cable. Check that it is securely connected.
Printer hesitation
Hesitation of the printer (short stops) could occur when:
■
■
■
■
136
Speed of the printer is too high: cartridge speed 10, print direction Bi
(-directional) and 1 print pass
Speed E-connect or network is not optimized
Connection is established with a direct Centronics connection
Hard-software configuration is not performing
Océ CS 5090 User Manual
Testing your E-connect
The E-connect print server will go through the following startup sequence:
1 It will run through a set of power-up diagnostics for a few seconds. If the print
server is operating properly, the TEST LED will blink momentarily and then
go out. If the TEST LED blinks continuously in a regular pattern, there is a
problem. If this is the case, first verify that you have a good Ethernet
connection and then try powering the unit off and then on again. If the problem
persists, refer to the Troubleshooting chapter in the administrator guide.
2 When the test LED goes out, the other LEDs on the print server will come on
as follows:
■ On the E-connect the Link OK LED will blink if the print server detects
activity on the network. The 100baseTX LED will come on if a valid
100baseTX connection is detected (this LED will not come on if 10baseT is
used).
If the LEDs do not come on as described, there may be a cabling problem or a
bad hub port; if this is the case, try a different cable and/or hub port.
B
A
[47] E-connect
Error handling and troubleshooting
137
Connection to the Printer
Before attempting to print, it is very important to verify the connection
between the print server and the printer. If the connection is not correct, you
will not be able to print.
▼
To verify this connection
1 Make sure that both the print server and the printer are powered on and ready.
2 Push the Test button in briefly (more than on-eighth second but less than five
seconds).
■ If the connection is good, a test page will be printed on the printer:
■
138
If nothing prints out, make sure that the cable is good and that it is securely
fastened. If possible, try a different cable. If you have an XConnect II,
XConnect II Lite, or XConnect 100, make sure that you are not exceeding the
1.75 meter (6 foot) cable length restriction. If the cable is OK but you still
can't print the self-test page, you may need to adjust the parallel port settings
as described in the next section.
Océ CS 5090 User Manual
Application software
Isolating a software problem
■
■
Try printing the “Demo Plot” on the Utilities disk. If this prints, the printer’s
health is probably good.
Try printing a simple file from your application or from another application.
If this prints correctly, the problem may be with your use of software.
Difficulty in generating prints ranging from A to E size
■
Many Windows applications limit the maximum print size to “C” or “D” size
due to the way that they map their internal coordinate system to memory.
Error handling and troubleshooting
139
Calling for assistance
If you have tried the suggestions listed previously, and still require assistance,
please contact your Océ service representative.
Before you call for assistance, please have the following information handy:
Printer information
■
■
■
■
■
Model
Firmware
Revision (letter)
Memory
Serial number
Computer information
■
■
■
■
140
Model
Operation system
Connection (serial or parallel)
Software name and version
Océ CS 5090 User Manual
Océ CS 5090
User Manual
Appendix A
Glossary
141
baud rate The rate of data transfer (bits per second between the computer and
printer.
bit The smallest unit of digital information used by a computer or printer.
buffer The part of the printer's memory that is used for receiving and
processing plot files.
calibration The procedures to adjust the ink cartridge alignment and line
length accuracy.
carriage axis The plot area measured parallel to the platen.
Centronics A standard parallel interface.
Colour gamut Range of colours that can be formed by all possible
combinations of the colours of a colour reproduction system.
Colour management Use of the appropriate software, hardware and
methodology to control and adjust colours in an imaging system.
colour test To clear the ink cartridges by forcing them to fire rapidly. Also, to
fill the ink lines with ink.
configuration The way that the computer and printer are connected.
Continuous tone Variation of density within a photographic or printed image,
corresponding to the graduated range of lightness or darkness in the original
copy or scan.
Diluted inks Inks that provide lower density colour than the corresponding full
density version of the same colour for the same area coverage, when printing
at 100% coverage. For eg: Light Magenta, Light Cyan, Medium Magenta,
Medium Cyan.
Dot gain Increase in the size of screen dots caused by printing. This can make
an image appear darker (fuller) and/or colour shifts can occur.
dpi Dots per inch (dpi), the number of dots the printer lays down in an inch.
handshake A method the computer and printer use to communicate.
inkjet The nozzle part of the ink cartridge.
interface cable The cable used to connect the printer to the computer. Océ
printers use a serial or parallel interface cable.
142
Océ CS 5090 User Manual
Linearization A specific type of calibration in which an output device is
adjusted to deliver a straight-line relationship between output and input.
media The surface on which the printer prints the image. Media comes in a
variety of types, including paper, polyester, canvas, and film.
monochrome An image that is printed in only one colour (usually black).
orientation The direction of the plotted image on the page.
palette The available colours for the printer.
paper axis The long side of the plot area measured at right angles to the platen.
parallel interface An interface type in which all bytes are transferred
simultaneously, making it faster than a serial interface.
parity A method for checking the transfer of information between the
computer and printer.
platen The surface on which media is placed to print.
plot area The area in which the printer prints the image, determined by the
width of the media.
Profile A digital signal-processing colour transform or collection of colour
transforms, plus additional information concerning the colour tranforms and
device.
raster image A graphic created by dots called bitmaps.
resolution The sharpness of a printed image as measured by dots per inch.
roll feed Media that is packaged on a roll and is loaded and fed through the
back of the printer.
vector A graphic created by geometric lines. HP-GL and HP-GL/2 files are
vector files.
Glossary
143
144
Océ CS 5090 User Manual
Océ CS 5090
User Manual
Appendix B
Safety information
145
General safety information
Radio interference (EMC)
Note: This is a Class A product. In a domestic environment this product may
cause radio interference in which case the user may be required to take
adequate measures.
Instructions for safe use
Océ designed and tested products in accordance with the strictest international
safety standards. To ensure safety when working with these products, it is
important that you observe the following safety rules:
Maintenance
■
■
■
■
■
■
146
Do not remove any screws from fixed panels.
Do not carry out maintenance activities except for the parts and maintenance
materials mentioned in this manual.
Do not place any liquids on the machine.
Use maintenance materials or other materials for their original purpose only.
Keep maintenance materials away from children.
Do not mix cleaning fluids or other substances.
To avoid the risk of introducing hazards, all modifications to Océ equipment
are strictly reserved to properly qualified and trained service technicians.
Océ CS 5090 User Manual
Connection
■
■
■
■
■
■
If for some reason you have to move the machine yourself, please make sure
that the mains power point has the right fuse capacity. See the Océ CS 5090
safety data sheet in this appendix for information about maximum current.
Do not bridge any mechanical or electrical circuit breakers.
Do not use an extension lead to connect the machine.
This equipment has not been designed for connection to an IT power system.
(An IT power system is a voltage network in which the neutral wire is not
connected to earth).
For equipment connected via a wall socket: locate the machine close to a wall
socket that is easily accessible.
For equipment connected via a fixed connection to the electricity grid: the
disconnect device in the fixed connection should be easily accessible.
Surroundings
■
■
■
■
■
Do not block the ventilation openings of the machine.
Ensure that the machine is placed on a level, horizontal surface of sufficient
strength. See the Océ CS 5090 safety data sheet in this appendix for
information about the weight of the equipment.
Ensure there is sufficient space around the machine. This facilitates
reloading materials as well as maintenance.
Do not place the machine in rooms which are subject to excessive vibration.
Do not place the machine in rooms which are too small and insufficiently
ventilated. See the Océ CS 5090 safety data sheet in this appendix for
information about space and ventilation requirements.
General
■
■
Always use materials recommended by Océ and developed for this Océ
machine. Materials not approved by Océ may result in faults in your
machine.
Do not use the machine when it is emitting unusual sounds. Remove the plug
from the power socket or switch off the fixed connection to the electricity
grid and contact Customer Service.
Safety information
147
Safety data sheets
The disclaimer below is valid for all safety data sheets in this manual.
For questions about Océ products regarding health, safety and environment,
please contact your Océ organisation; you can find the address in the last
appendix of this manual.
Disclaimer The safety data sheets in this manual have been compiled to the
best of our knowledge as a compact guide to safe handling of this product. We
reserve the right to revise safety data sheets as new information becomes
available. It is the user’s responsibility to determine the suitability of this
information for the adoption of safety precautions as may be necessary and to
contact the company to make sure that the sheet is the latest one issued. If and
in so far as limitation of liability is permitted under the applicable laws, we do
not accept liability for any inaccuracy that may occur in this information.
Note: Not all safety data sheets were available at the moment this manual was
published. The Océ organisation in your country will be pleased to send you a
copy of the missing sheets. You can find the address of the Océ organisation in
your country in the last appendix of this manual.
148
Océ CS 5090 User Manual
Océ CS 5090
User Manual
Appendix C
Miscellaneous
149
Notation conventions
There are a number of notation conventions used in this manual. This
consistent style enables you to quickly become conversant with the use of this
manual and consequently the Océ CS 5090.
Description Each section or subsection contains a description of the feature or
operation identified in the title. It might also include possible applications, as
well as any guidelines that you should bear in mind.
Procedures A description is followed by a procedure. A procedure always
begins with a phrase which briefly describes the procedure, followed by a
series of numbered steps that take you, step by step, through all phases of
performing the operation.
Figures and tables Figures and tables are titled and numbered sequentially
throughout this manual. Figures include pictures of product components,
screendumps, examples, and diagrams of concepts discussed in the
description.
Attention getters There are several types of information to which we draw
your attention. This information is classified as follows:
Note: In a ‘Note’, information is given about matters which ensure the proper
functioning of the machine or application, but useful advice concerning its
operation may also be given.
Attention: The information that follows ‘Attention’ is given to prevent
something (your copy or original, the copier or printer, data files etc.)
being damaged.
Caution: The information that follows ‘Caution’ is given to prevent you
suffering personal injury.
150
Océ CS 5090 User Manual
Reader’s comment sheet
Have you found this manual to be accurate?
❏ Yes
❏ No
Could you operate the product after reading this manual?
❏ Yes
❏ No
Does this manual provide enough background information?
❏ Yes
❏ No
Is the format of this manual convenient in size, readability and arrangement
(page layout, chapter order, etc.)?
❏ Yes
❏ No
Could you find the information you were looking for?
❏ Always
❏ Most of the times
❏ Sometimes
❏ Not at all
What did you use to find the required information?
❏ Table of contents
❏ Index
Are you satisfied with this manual?
❏ Yes
❏ No
Thank you for evaluating this manual.
If you have other comments or concerns, please explain or suggest
improvements overleaf or on a separate sheet.
7114136
Miscellaneous
151
Comments:
------------------------------------------------------------------------------------------------------------------------------------------------------------------------------------------------------------------------------------------------------------------------------------------------------------------------------------------------------------------------------------------------------------------------------------------------------------------------------------------------------------------------------------------------------------------Date:
This reader’s comment sheet is completed by:
(If you prefer to remain unknown, please do fill in your occupation)
Name:
Occupation:
Company:
Phone:
Address:
City:
Country:
Please return this sheet to:
Océ-Technologies B.V.
For the attention of ITC User Documentation.
P.O. Box 101,
5900 MA Venlo
The Netherlands
Send you comments by E-mail to : [email protected]
For the addresses of local Océ organizations see: www.oce.com
152
Océ CS 5090 User Manual
Addresses of local Océ organisations
Océ-Australia Ltd.
P.O.Box 363
Ferntree Gully MDC VIC 3165
Australia
Océ-Danmark A.S.
Kornmarksvej 6
DK 2605 Brøndby
Denmark
Océ-Österreich GmbH
Postfach 95
1233 Vienna
Austria
Océ-France S.A.
32, Avenue du Pavé Neuf,
93161 Noisy-le-grand, Cedex
France
Océ-Belgium N.V./S.A.
Avenue J.Bordetlaan 32
1140 Brussels
Belgium
Océ-Deutschland GmbH
Postfach 101454
4330 Mülheim an der Ruhr (13)
Deutschland
Océ-Brasil Comércio e Industria Ltda.
Caixa Postal 3187
01060-970 Sao Paulo, SP
Brazil
Océ (Hong Kong China) Ltd.
12/F 1202 The Lee Gardens
33 Hysan Avenue, Causeway Bay
Hong Kong
Océ-Canada Inc.
525, Logan Avenue,
Toronto, Ontario M4K 3B3
Canada
Océ-Hungária Kft.
P.O.B. 237
1241 Budapest
Hungary
Océ Office Equipment (Beijing) Co Ltd.
Xu Mu Cheng
Chaoyang District
Beijing 100028
China
Océ-Italia S.p.A.
Strada Padana Superiore 2/B
20063 Cernusco sul Naviglio (MI)
Italia
Océ-Èeská republika s.r.o.
Hanusova 18
14021 Praha 4
Pankrác,
Czech Republic
Miscellaneous
Océ Systems (Malaysia Sdn. Bhd.)
#3.01, Level 3, Wisma Academy
Lot 4A, Jalan 19/1
46300 Petalig Jaya
Malaysia
153
Océ-Nederland B.V.
P.O.Box 800
5201 AV ‘s-Hertogenbosch
The Netherlands
Océ (Taiwan) Ltd.
No. 99-24 Nan Kang Road Sec.2
Taipeh, Taiwan
Taiwan, RO
Océ Norge A/S
Postboks 53, Grefsen
0409 Oslo 4
Norway
Océ (Thailand) Ltd.
16th Floor, B.B. Building
54 Asoke Road, Sukhumvit 21
Bangkok 10110
Thailand
Océ-Poland Ltd.
ul. £opuszañska 53
02-232 Warszawa
Poland
Océ-Lima Mayer S.A.
Av. José Gomes Ferreira, 11
Ed. Atlas II Miraflores
1495 Algés
Portugal
Océ (Far East) Pte. Ltd./
Océ (Singapore) Pte. Ltd.,
#03-00 Wisma Gulab
190 MacPherson Road
Singapore 348548
Océ España SA
Business Park MAS BLAU
C/Osona 2, 2-3a Planta
08820 El Prat del Llobregat (Barcelona)
Spain
Océ-Svenska AB
P.O.box 1231
S-164 28 Kista
Sweden
Océ-Schweiz AG
Sägereistrasse 29
CH8152 Glattbrugg
Switzerland
154
Océ CS 5090 User Manual
Océ-U.K.Ltd.
Langston Road
Loughton, Essex IG10 3SL
United Kingdom
Océ-USA Inc.
5450 North Cumberland Av.
Chicago, Ill. 60656
U.S.A.
Océ CS 5090
User Manual
Appendix D
Technical specifications
155
Océ CS 5090 printer specifications
156
Media types
Photo paper, matte paper, drafting films, specialty paper
Media roll parameters
Inner roll core: 2” and 3”
Maximum outside roll diameter: 6”
Maximum roll width: 60”, 42”
Resolution
600 x 600 dpi
300 x 300 dpi RTI
Standard features
Rollfeed with cutter
Power feed and take-up
8 user-savable settings
Power PC 50 MHz processor
Ink cartridges (8)
500 ml ink reservoirs (8)
Two sets of ink lines on one cartridge set (12 lines total)
Ink priming system
Line length accuracy
+/-0.2% in paper and carriage axis using rollfeed, 4 mil
drafting film
Image frame length (X-axis) variation +/- 0.2% and
width (Y-axis) variation +/-0.06% +/- 0.024" (.6mm).
Buffer
One 168-pin PC133 DIMM slot.
64 MB standard
User upgradeable to 128 MB or 256 MB
Interfaces
Bidirectional Parallel (IEEE 1284)
10/100BaseT (RJ45 connector)
Baud rates
9600, 19200, 38400
Power
Consumption
90-246 VAC 47-63 Hz
20 W Idle, 185 W Typical, 285 W Maximum (printer
only, 1485 W Maximum (printer and dryer)
Operating environment
65° - 85°F (18° - 30°C), 20-70% RH non condensing
Storage environment
40° - 95°F (4°- 35°C), 5-80% RH, Non-condensing
Océ CS 5090 User Manual
Certifications
Safety
EMI
CSA, CSE/NRTL,
(equivalent to UL1950)
TUV GS
EN 50 082-1
EN 60 950
UL1950
NOM-019-SCFI-1993
IEC 950
AS/NZS 3260
FCC Class B
CSA C108.8
EN 55 022 Class B
CE Mark
CISPR 22- Class B
AS/NZS 3548
Dimensions
60" model
42" model
Height
(platen above floor)
44" (1.12m)
44" (1.12m)
Width
11" (2.82m)
93" (2.37m)
Depth
28" (0.71m)
28" (0.71m)
Weight
165 lbs.
150 lbs.
Print width
up to 59.6" printable
up to 41.6" printable
Technical specifications
157
158
Océ CS 5090 User Manual
Océ CS 5090
User Manual
Appendix E
Supplies
This section gives a summary of the supplies available for
the Océ CS 5090. For a complete and up to date catalogue
of Océ inks and media, contact your sales representative.
159
Caring for inks and media
Follow these recommendations when handling inks, cartridges, and media for
best results.
Inks and ink cartridges
■
■
■
■
■
■
■
■
■
■
Each of the cartridges and ink reservoirs must contain the same type of ink.
Do not mix inks.
Do not refill containers.
Store ink and cartridges in the same environment as the printer whenever
possible.
Removing a cartridge may result in loss of negative pressure and cause it to
leak through the jet plate.
If you remove a cartridge from the printer, do not leave it exposed to the air
for an extended period because the jet may clog. Replace the original tape on
the jet plate. Place the cartridge in a cartridge garage or a sealed plastic bag
and store it at room temperature and out of direct sunlight.
Open new cartridges only when you are ready to install them.
Use only OCE brand ink refills and cartridges.
Connect cartridges to reservoirs which contain the same colour and ink type
as the cartridge.
Drawings using both black and colour elements must have aligned cartridges
(see ‘Cartridges calibration’ on page 41).
Attention: Handle cartridges only by touching the plastic areas. Touching
the copper electrical interconnect or the inkjets can damage the cartridge.
160
Océ CS 5090 User Manual
Caring for your media
For best results follow these instructions when handling media:
■
■
■
■
■
■
Store media in its original packaging in a cool, dry area until you are ready
to use it.
The environment should be stable (no extremes of heat or cold, or
non-condensing humidity). If temperature conditions are outside the
recommended range for printer operation, allow the media to acclimatise in
the operating environment for at least 48 hours before use.
If you remove a roll of media from the printer, store it in such a way as to
keep it clean and free of dust. Ideally, you should return it to its original
packaging for storage.
Print on the correct side. The printable side of all OCE media always is on
the outside of the roll.
If there is any doubt what is the correct side, the coated side can be identified
by wetting the surface a bit and feel if the surface is somewhat sticky.(coated
side is the printable side).
Handle the media with care to avoid creases, scrapes, and tears. Avoid
crushing or damaging of roll media edges.
Attention: Wear gloves (for instance cotton gloves).Film-based and
photographic paper-based media are very sensitive to scratches and
creases, and may absorb skin oils. Fingerprints on the media before
printing may result in visible fingerprints after the ink is applied.
Supplies
161
Inks for Océ CS 5090 printers
Océ develops its inks and media to work together in order to produce optimal
results from your printer. Use only inks and ink cartridges specific to the Océ
CS 5090 printer model. Use outdoor inks with Outdoor media.
Océ Standard Colour Inks accessory kits
Standard Colour Inks accessory kit
Colour
Article number
Océ CS 5090 SC-2 ink
Cyan
29953500
Océ CS 5090 SC-2 ink
Magenta
29953501
Océ CS 5090 SC-2 ink
Yellow
29953502
Océ CS 5090 SC-2 ink
Black
29953503
Océ Standard Colour Inks replacement cartridges
162
Standard Colour replacement cartridges
Colour
Article number
Océ CS 5090 SC-2 Ink
Cyan
29953558
Océ CS 5090 SC-2 Ink
Magenta
29953559
Océ CS 5090 SC-2 Ink
Yellow
29953560
Océ CS 5090 SC-2 Ink
Black
29953561
Océ CS 5090 User Manual
Océ Standard Colour Inks litre kit
Litre kit
Colour
Article number
Océ CS 5090 SC-2 Ink
Cyan
29953554
Océ CS 5090 SC-2 Ink
Magenta
29953555
Océ CS 5090 SC-2 Ink
Yellow
29953556
Océ CS 5090 SC-2 Ink
Black
29953557
Océ Graphic Colour Inks accessory kit
Accessory kit
Colour
Article number
Océ CS 5090 GC Ink
Cyan
29953545
Océ CS 5090 GC Ink
Magenta
29953546
Océ CS 5090 GC Ink
Yellow
29953547
Océ CS 5090 GC Ink
Black
29953548
Océ CS 5090 GC Ink
Cyan Medium
29953620
Océ CS 5090 GC Ink
Cyan Light
29953619
Océ CS 5090 GC Ink
Magenta Medium
29953621
Océ CS 5090 GC Ink
Magenta Light
29953622
Supplies
163
Océ Graphic Colour Inks replacement cartridges
Graphic Colour replacement cartridges
Colour
Article number
Océ CS 5090 GC Ink
Cyan
29953562
Océ CS 5090 GC Ink
Magenta
29953563
Océ CS 5090 GC Ink
Yellow
29953564
Océ CS 5090 GC Ink
Black
29953565
Océ CS 5090 GC Ink
Cyan Medium
29953648
Océ CS 5090 GC Ink
Cyan Light
29953647
Océ CS 5090 GC Ink
Magenta Medium
29953649
Océ CS 5090 GC Ink
Magenta Light
29953650
Océ Graphic Colour Inks litre kit
164
Litre kit
Colour
Article number
Océ CS 5090 GC Ink
Cyan
29953571
Océ CS 5090 GC Ink
Magenta
29953572
Océ CS 5090 GC Ink
Yellow
29953573
Océ CS 5090 GC Ink
Black
29953570
Océ CS 5090 User Manual
Océ Outdoor Inks accessory kits
*
Outdoor Colour Inks accessory kit
Colour
Article number
Océ CS 5090 Outdoor Colour Ink
Cyan
29953504
Océ CS 5090 Outdoor Colour Ink
Magenta
29953505
Océ CS 5090 Outdoor Colour Ink
Yellow
29953506
Océ CS 5090 Outdoor Colour Ink
Black
29953507
Océ CS 5090 Outdoor Colour Ink
Cyan
Medium
29953615
Océ CS 5090 Outdoor Colour Ink
Magenta
Medium
29953616
Océ CS 5090 Outdoor Colour Ink
Orange
29953617
Océ CS 5090 Outdoor Colour Ink
Green
29953618
Océ Outdoor Colour Inks replacement cartridges
Outdoor Colour replacement cartridges
Colour
Article number
Océ CS 5090 Outdoor Colour Ink
Cyan
29953512
Océ CS 5090 Outdoor Colour Ink
Magenta
29953513
Océ CS 5090 Outdoor Colour Ink
Yellow
29953514
Océ CS 5090 Outdoor Colour Ink
Black
29953515
Océ CS 5090 Outdoor Colour Ink
Cyan
Medium
29953643
Océ CS 5090 Outdoor Colour Ink
Magenta
Medium
29953644
Océ CS 5090 Outdoor Colour Ink
Orange
29953645
Océ CS 5090 Outdoor Colour Ink
Green
29953646
Supplies
165
Océ Outdoor Colour Ink litre kit
166
Litre kit
Colour
Article number
Océ CS 5090 Outdoor Colour Ink
Cyan
29953521
Océ CS 5090 Outdoor Colour Ink
Magenta
29953522
Océ CS 5090 Outdoor Colour Ink
Yellow
29953523
Océ CS 5090 Outdoor Colour Ink
Black
29953524
Océ CS 5090 User Manual
Media for Océ CS 5090 printers
We offer you today's most comprehensive range of supplies for every
wide-format display graphics application. All of them are based on our
in-depth know-how of both systems and supplies.
Due to our extended Océ R&D program and own production facilities for both
inkjet papers and inkjet films, Océ has the opportunity to offer the ideal line of
inkjet media for the Océ CS 5090.
To support this media assortment Océ also offers colour profiles for all the ink
media combinations. Next to this, our laminates give the opportunity to create
the ideal finished print based on these Océ media, so your prints produced on
the CS 5090 will be able to meet every challenge in whatever environment.
With this Océ Supplies Assortment, you are able to meet all the printing needs
in the market.
For precise ordering details, contact your customer service representative.
Supplies
167
Paper type
Description
Suggested application
Photo
paper
■
glossy and satin
ranging from 160 g/m² to 240 g/m²
■ top quality papers with PE layer
■
■
■
Various
paper
■
ranging from 90 g/m² to 170 g/m²
paper-based media, no PE layer
■
Backlit
films
■
Backlit 135 µm Back Print and 185
µm Front Print option
■ translucent film
■
Clear films
■
very clear film from 110 to 120 µm
with or without adhesive layer
■
presentation
overlays
ultra white film from 110 to 120 µm
with or without adhesive layer
■
signs and posters
durable prints
■
■
168
Ultra White
films
■
Outdoor
media
■
Specialties
■
■
posters
displays
■ floor graphics
check prints
glare-free
presentations
■ imposition proofs
■
backlit displays
light box signs
■ trade show displays
■
■
ranging from outdoor banners to
outdoor tyvek
■ with or without adhesive layer
■
ranging from drop-flame
retardancy banners to silver
metallic films
■ with or without adhesive layer
■
Océ CS 5090 User Manual
■
banners
outdoor signs
flame-retardant
banners
■ prestigious
advertisements
■ canvas for artistic
reproductions
Assortment
Inkjet Indoor Papers
Indoor photo papers
Indoor papers
■ Indoor backlit films
■ Indoor white films
■ Indoor clear films
■ Indoor Banner specialties
■ Indoor canvas specialties
■ Indoor textile specialties
■ Indoor Other specialties
■ Outdoor papers
■ Outdoor banner supplies
■ Outdoor adhesive supplies
■ Outdoor films
■ Cold PET films
■ Cold PVC films
■ Hot films
■ Mounting films
■ Special films
■ Supplies for cold lamination
■ Supplies for hot encapsulation
■ Ultra range, warm films
■
■
Inkjet Indoor films
Inkjet indoor specialties
Inkjet outdoor supplies
Laminating films
Note: For more information about our assortment, please visit our internet site
(www. supplies.oce.com) available from Jan 1, 2001.
Supplies
169
Miscellaneous Océ CS 5090 accessories
Article
Reference number
Cutter blades (5 per pack)
310571465
Ink Reservoir Assembly Blue
Ink Reservoir Assembly Purple
Kit Cartridge septum
310571485
Service Station Assembly CS5090
310571484
Print Head Garage for CS 5090 cartridges
29953516
Océ white gloves
170
Océ CS 5090 User Manual
Warranty Inkjet Cartridges for Océ
5350-600, CS 5050/5070/5090
For Océ branded cartridges there is a 500 ml printing warranty. The warranty
does not apply for foreign branded or unbranded or misused cartridges.
When problems occur first check the printed ink volume of the cartridge:
1 Select Utility Menu> Service Menu.
2 Press Cartridge Info.
Note: Warranty only applies when the printing volume has not exceeded
500ml.
To ensure the highest quality and reliable productivity, cartridges will shut off
at 1280ml with a ‘Cartridge End of Life’ message. After this ‘End of Life’
message, cartridges cannot be used anymore.
Supplies
171
Priming
In all cases of printing problems with your cartridges, perform a Prime test by
selecting Utility Menu > Prime. Basically there can be three possible prime test
printouts:
Correct print
Clogged nozzles
Electrical Defects
Clogged nozzles Clogged nozzles are not within the Océ cartridge warranty
because they can be reactivated or compensated.
▼
To reactivate the nozzles
Set 100% Colour Test in 2 pass mode (see ‘Run a colour test’ on page 35)
Use Prime Tools (only max. 5 short pulses of 1 second each)
■ Clean the jet plate with distilled water and a lint-free cloth
■ Place the cartridge 10 seconds in hot distilled water (max 5 mm)
■ Ultrasonic cleaning in distilled water for 1 - 2 minutes (max 5mm)
If not all nozzles can be reactivated, manual compensation is advised (see
‘Compensate manually for clogged jets’ on page 123).
■
■
▼
To compensate electrical defective nozzles
Check whether the electrical contacts are contaminated with ink, grease, debris
or the like and clean.
If the electrical defective nozzles can not be compensated in 4, 6, 8, 10 - pass
mode (or 2, 3, 4, 5 -pass mode for the CS5090), the cartridge warranty applies
and the cartridge will be replaced for free.
Pass mode compensation is displayed in the header of the Prime test printout.
172
Océ CS 5090 User Manual
Causes of the most common problems
Non-recognition of the cartridge Be sure that the cartridge is an Océ branded
cartridge. Check on poor electrical contacts (see section below).
Poor electrical contacts. Poor Electrical Contacts can lead to non-recognition
by the printer or to many electrical nozzle fall-outs. This can be due to ink, ink
debris, oil or grease on the surface of the electrical contacts on either cartridges
or carriage assembly. Clean the electrical contacts with water or isopropyl
alcohol (switch power off before cleaning).
Check cleaning station assembly The cleaning station should be rinsed
regularly, preferably every day, under running water. if not, debris may
contaminate on to the jet plate and nozzles.
Ink starvation Check by performing the Colour Test in 2 pass mode. Ensure
that the cartridge is properly primed and that there is no air in the tubing
system.
Banding In order to prevent or minimize banding, adjust cartridges according
the calibration & ColourDB procedure. Choose the optimal printing mode.
Return Shipments of defective cartridges
Cartridges for warranty should be returned to Océ together with:
■
■
■
printed example of the Prime test
description of the complaint
amount of printed ink volume
Returned cartridges should be:
■
■
■
empty of ink (use syringe to empty)
stored in the printhead garage
packed properly.
Note: Cartridges that can be tested because of leaks or ink debris cannot be
checked and will not apply for warranty.
Supplies
173
174
Océ CS 5090 User Manual
Index
F
Feed media menu 46
end of media 50
media counter 79
A
Auto-cut 75
Auto-load delay 75
Auto-wipe 83
C
Calibration
color deadband 43
paper axis 41
units 39
Carriage
moving 23
Cartridge see Ink cartridge
Cartridge sets 27
Cleaning see Maintenance
Color deadband
calibration 43
Colour mode 95
Control panel 16
Cutter
auto-cut 75
installation 24
D
Default settings 48
Draft mode 94
E
E-Connect 55
Encoder strip
cleaning 112
End of media 50
Index
H
HP-GL/2
applying the ink limit 65
making reprints 63
menu options 60
nesting 64
printing an HP-GL/2 test file 66
printing with HP-GL/2 60
rotating a print 63
selecting palette 61
setting control 62
I
Information
cartridge 119
printer 116
safety 146
Ink
supplies 162
Ink cartridge
care 160
cleaning jet plate 107
error 43
information 119
installation
installing new 86
recognition 43
refilling 87
Ink delivery lines
priming 30
Ink reservoir
changing ink types 83
filling 81
removing 85
175
J
N
Jet plate
cleaning 107
Jets
bypassing clogged jets 123
clearing clogged jets 122
compensating for electrically defective jets
Nesting 64
Nozzle see Jets
O
Operation, see Printer operation
Options see Printing options
L
Language setting 17
LCD contrast 51
Loading media 18
M
Maintenance
cleaning materials 107
cleaning service station 108
cleaning the encoder strip 112
cleaning the slide shaft 111
periodic cleaning 106
Prime tool 113
replacing wipers 111
Margins setting 73
Media
care 161
loading 18, 19
margins 73
rollfeed sizes 69
save 77
sheet sizes 71
standards 68
supplies 168
take-up roll 19
Media counter 79
Menu
Feed media 46
Main menu 46
selection 17
Setup 46
Utility 46
176
Océ 5090 User Manual
P
Paper axis calibration 41
Paper options
auto-cut 75
auto-load delay 75
auto-wipe 83
save media 77
Prime test 119
Prime tool
maintenance 113
use 30
Print direction 97
Print mode options
colour mode 95
print direction 97
print passes 96
quality modes 94
resolution 94
Print modes 50, 107
Print passes 96
Print quality problems 131
Printer
behavior 125, 126
information 116
specifications 156
storage 116
Printer operation
cancel 43
control panel 16
language setting 17
menu selection 17
pause 43
reset 43
start-up checklist 16
Printing options
default settings 48
print modes 50, 107
isolating problems 125
print quality problems 131
printer behavior 125, 126
Q
U
Quality modes 94
draft 94
Quality reproductions
ink cartridge preparation and alignment 14
print mode choice 14
User-defined options
saving 50
Utility menu 46
W
R
Wipers
replacing 111
Reservoir see Ink reservoir
Resolution 94
Roll media see Media
S
Safety
data sheets 148
instructions 146
Save media 77
Service station
cleaning 108
Setup menu 46
Slide shaft
cleaning 111
Software problems 139
Specifications, technical 156
Start up checklist 16
Storage 116
Supplies
inks 162
media 168
T
Take-up roll 19
Troubleshooting
application software 139
data transfer 131
Index
177
Océ CS 5090 User Manual
Auto Media Loading
Always load media from the rear of the printer, never load
media from the front.
Manually feed the media into rear printer guide channel,
align media with the white mark on the platen's left edge.
You must adjust position of the media guides to within 1/8"
or 3 mm of media edges or skewing of the media may occur.
Once the media is fed into the printer there will be a short
delay then the autoload paper sensor will pull the media
into the printer load point.
The printer will then size media by checking the media
edges.
To verify the carriage paper sensor is working check Display settings by selecting Utility Menu - Display settings.
Verify the paper width is correct. The paper width should
be the true width of media, the page width is the maximum
printable area depending on the margins setting selected.
Back
Océ CS 5090 User Manual
End of Media
To prevent the printer from continuing to print after media
runs out select Feed Media Menu, End of Media, Feeder
Stop.
This will pause the printer when the feed sensor is no longer blocked for 15 seconds by the media roll.
Back
Océ CS 5090 User Manual
Loading Ink
Remove 4 or 8 reservoirs from printer.
Note: the right 4 reservoirs are labeled as YMCK while the
Left 4 are labeled 1 through 4, with black being slot 1.
Install ink into reservoirs over a table to ensure spills do
not occur, fill reservoir until full.
Install reservoir into printer. Ensure reservoirs are properly
installed. Tighten reservoir cap and ensure needle is tight
by turning fully clockwise.
Back
Océ CS 5090 User Manual
Install Ink Cartridges
Remove the cartridge from plastic garage. Install the cartridge into the carriage at the appropriate location and remove the black shipping cap by twisting counterclockwise.
Do not remove tape strip from the cartridge at this time.
Retain the garage and shipping cap for cartridge storage.
Repeat process for the other cartridges.
Back
Océ CS 5090 User Manual
Install Media Rollers
On the roll guide adapter note the direction of intended
media travel.
Attach media to media roll guides and lock with the blue
adapter. Attach media core to the other media roll guide.
Install media roll guides into printer.
Back
Océ CS 5090 User Manual
Prime Ink Delivery Line
To prime the ink delivery line, open the valve cover.
Attach the cartridge tubing needle to the appropriate
valve. Press the septum fitting onto the needle securely.
Snap the valve cover closed.
Using the ink prime device located in the ink prime holster
insert the cartridge tubing needle end into the suction tip
of the ink prime 1 cm or approximately ½".
Prime the ink delivery line with a steady burst by depressing and holding the ink prime activation button.
When ink floods the ink delivery line, release the activation
button and disconnect the needle from the ink prime and
insert into the cartridge.
Twist the black cartridge tubing needle clockwise tightly to
secure onto the cartridge. Repeat process for the other ink
lines.
Back
Océ CS 5090 User Manual
Prime Cartridge
To prime the cartridge, first remove tape from the cartridge
jet plate area. Holding the cartridge and ink prime at a 30
degree angle as shown, prime the cartridge with 3 one
second bursts spaced 3-5 seconds apart until ink is visible
in the ink line.
Ensure no large ink bubbles are visible in the ink line. The
priming process should take about 30 to 60 seconds for
each cartridge.
Wipe the cartridge jet plate with the Ink Prime suction tip
to wipe away excess ink.
Caution: Keep bottle upright or spills may be encountered
and do not fill above the mark line, the Ink Prime will
not function efficiently when bottle is too full.
Back
Océ CS 5090 User Manual
Checking Cartridge Ink Level
For ink starvation problems where the color test failed ensure the cartridge has the required ink level.
Using the syringe and extension tube provided, draw 20ml
of ink from the inkbottle or reservoir.
Open valve cover to isolate ink delivery line.
Remove the cartridge-tubing needle from the cartridge
and quickly squeeze the 20ml inside, immediately draw
the excess from the cartridge. Reattach the cartridge-tubing needle to the cartridge.Close the valve cover.
The ink level is now set correctly.
A re-prime of the cartridge may be necessary to establish
the required negative pressure inside the cartridge.
Back
Océ CS 5090 User Manual
Cleaning Cartridge
To access either the left or right print head select Utility
Menu, Access Menu, select Access Left or Access Right.
To clean the cartridge unsnap the cartridge from the carriage assembly (apply a lint-free towel dampened with water to the jet plate area. Blot the jet plate, do not wipe the
gold jet area).
The edges may be wiped and cleaned of ink residue.
Clean the electrical contacts on the rear of the cartridge by
wiping gently, ensure no fibers are left attached to the cartridge surfaces.
Reattach the cartridge to the carriage.
Select Access Home to return the printheads to the service station position when cleaning is complete.
Back
Océ CS 5090 User Manual
Clean Encoder Strip
To clean the encoder strip of ink and debris obtain industrial strength isopropyl alcohol. Remove power from printer. Dampen an industrial cotton swab with the isopropyl
alcohol, clean the top and bottom surfaces of the entire
length of the encoder strip. Several cotton swabs may be
necessary to completely clean the encoder strip. Cleaning
the encoder strip will prevent image output from stepping
or walking.
Back
Océ CS 5090 User Manual
Clean Trailing Cables
To clean the trailing cables of ink and debris, first remove
power from the printer. Dampen a lint-free towel with water
and wipe the entire surface area of the white trailing cables.
Caution: Do not pull too hard on the cables or damage may
occur (do not lift from encoder stabilizer bracket or
bend cables).
For extremely dirty cables soapy water may be necessary.
Clean the top surface of the encoder stabilizer bracket and
the lower surface of the rear bracket as shown. This will
prevent friction between the cables and stationary surfaces.
Back
Océ CS 5090 User Manual
Clean Slide Shaft
To clean the slide shaft first remove power from the printer.
Apply isopropyl alcohol to a lint-free towel and wipe the entire surface area of the slide shaft including the service station area.
Caution: Never use lubricants on the slide shaft
Back
Océ CS 5090 User Manual
Clean Flex Cables
To clean the flex driver cables first remove power from the
printer. Remove the cartridges from the carriage assembly. Apply isopropyl alcohol to a lint-free towel and wipe
the entire surface area of each cable. Ensure no fibers remain on the cables.
Note: Before removing the cartridges open the valve cover
above each cartridge to isolate the ink line. Store cartridges in garages to prevent cartridge jet plate damage.
Back
Océ CS 5090 User Manual
Clean Service Station
To clean the service station first remove the service station. Select Utility Menu, Access Menu, Access Left. Then
pull on the tab at the far right end of the service station, lift
service station free. Rinse service station under water for
1 minute.
Back
Océ CS 5090 User Manual
Clean Pinch Rollers
To clean the pinch rollers ensure power is applied to the
printer and media is removed. Dampen a lint-free cloth
with water. Under the Feed Media Menu, select Backward
or Forward. Place the cloth gently against each set of rollers while rollers are turning.
Caution: Do not allow cloth or foreign matter to get pulled into
printer or damage to the printer may result.
Back
Océ CS 5090 User Manual
Clean Carriage Bushings
To clean the carriage bushings of ink and lint debris first remove power from the printer or select Access Menu to
move carriage out of the service station area. Dampen a
lint-free cloth or cotton swab with water and wipe the entire
edge area of both carriage bushings. Wipe away excess
water. Do not apply alcohol or lubricants to bushing.
Back
Océ CS 5090 User Manual
Clean Vacuum Holes
To clean the platen vacuum holes obtain a toothpick and
gently remove lint and media fiber from platen holes.
Caution: Do not push lint through platen holes or problems
with the stepper motor gearing may eventually occur leading to microbanding in image output.
Back
Océ CS 5090 User Manual
Clean Cutter Groove
Remove media from the printer. To clean the cutter groove
of lint debris use the opposite end of a cotton swab and run
down the entire length of the cutter groove. Ensure no media fibers remain in the cutter groove.
Back
Océ CS 5090 User Manual
Printer Cautions!
Never touch the slide shaft while printer is operating or
damage may occur to printer. Never remove the service
station while printer is in operation or bodily harm may result. Always keep top cover down to prolong carriage
bushing and trailing cable life.
Back
Océ CS 5090 User Manual
Cutter Operation
Ensure cutter is locked securely into left side of carriage
assembly. To activate the cutter select Cut at the main
menu. The cutter actuator engages the cutter, and the media is cut. The cutter retracts upon entering the service station by riding up the service station ramp.
Back
Océ CS 5090 User Manual
Power Up
Attach power cord to the power entry module at left rear of
printer, turn on power switch.
The media system LED's immediately illuminate RED at
power up. The dryer fan will energize for 1 second and turn
off, after approximately 3 seconds the control panel will
display ("Initializing….").
Carriage will move to left end of printing area and return to
service station.
Carriage will check for presence of media and size media
if loaded.
The Main Menu display will appear at control panel.
Back
Océ CS 5090 User Manual
Network Connectivity
The printer comes with a built-in 100BaseT network board
which interfaces via two cables.
Attach the provided parallel printer cable between the upper centronics parallel port and the lower parallel port at
right rear of printer.
Attach an ethernet cable to the E-connect jack.
Verify the green and yellow lights illuminate.
The green light indicates the server is communicating with
the network.
Back