1
www.cleantouch.com.pk
School Management System 3.0 (Full)
User Manual
Cleantouch School Management Sytem 3.0
User Guide/Manual
Guide/Manual-English
By Rizwan Arif
• Part-1,
1, 2 & 3 with Multi User & System Utilities Guide
1
www.cleantouch.com.pk
School Management System 3.0 (Full)
User Manual
Company Profile:
Cleantouch Software Corporation was established in 1999 to provide customized accounting software. Cleantouch is now a reliable name for
Desktop & LAN Based Application. We offer wide range of readymade accounting software. We have successfully implemented our 300+
accounting & management software in more then 1000+ organization. Customer list of Cleantouch have both small & large size of companies &
the number of users is increasing day by day. Most of customers are completely satisfied with the support and services of Cleantouch. We are the
first company, who releases English to Urdu Dictionary, Urdu to English Dictionary and Khazain-ul-Hidayat software application to read, listen and
research within Al-Qur’an-e-Kareem worldwide. Thousands of peoples are using that product. We are the only company of Pakistan, which
have awarded by many download portals for the development of Virus, Adware & Spyware free software. In 2012 our CEO has been nominated as
"Winner" for 10th Teradata National IT Excellence Award in the category of "Excellence in Software Development" Many of our software are listed on
major download websites. Interviews & review of our products get frequently published by News Papers, Magazines & E-News Portals.
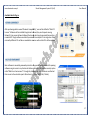
Getting Started Tips:
1. First of all Load CD Roam or Download Link of our sent software
2. Copy Software in your computer’s safe drive e.g. D:\Cleantouch
3. After installation procedure, you may create shortcut icon on your desktop to provide easy access to your program, Software will start by
double clicking to exe file from software folder or from shortcut.
4. When you see the main screen appears you will have to note Computer generated information and call or email us to getting PIN Code
then you can successfully enter into the system for registration.
5. This system uses PIN Code (Personal Identification Number) as a security measure.
6. The default password given is ‘123’, and you have to change it to your own password from system utilities menu to maintain its
confidentiality
7. Multi Users and Network capability enabled users will ask of mapping and access procedure on call or email because of leakage.
8. You may press [F5] Key any time where you don't have remember the code of system
9. In feeding form You may uses the shortcut (Alt+S)for Save, (Alt+R) for refresh, (Alt+D) for delete, (Alt+E) for exit, (Alt+P) for previous,
(Alt+N) for next and (Alt+P) for printing any report.
10. You can email / fax any report of our software to anybody by installation of Winfax 10 or Acrobat Writer
2
www.cleantouch.com.pk
School Management System 3.0 (Full)
User Manual
SYSTEM REQUIRMENTS
Operating System
Microsoft Windows 98 / ME / 2000 / XP...
Minimum Hardware Requirement
Pentium III Computer
512MB Ram with 1000 MB Free Hard Disk Space
Note: All rights reserved, No part of this manual may be reproduced or transmitted, in any form or by any means, electronic, mechanical,
photocopying, recording, or otherwise, without the prior permission of the au
author.
Accounts, Admission, Fee,, Attendance, Examination, Promotion,
School, Colleges, Universities, Institutes, Mad
Madaaris etc.
System Setup
Currency Setup
Repair & Maintenance
Backup Data
Data Restore
Color Scheme Selection
Trial Balance Difference Check
Multi-User Environment
Network Compatibility
3
www.cleantouch.com.pk
School Management System 3.0 (Full)
User Manual
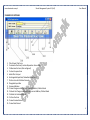
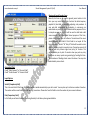
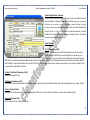
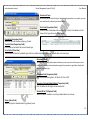
STANDARD OF SOFTWARE
1. Title of Input / Out Form
2. To minimize the Form (Function Depends on Screen Size)
3. To Maximize the Form (Not configured)
4. To close the open Form
5. Label: What to Input
6. Unchangeable Input Box (Yellow Back & Red Text)
7. Click to active list of Master Records
8. Changeable Input Box
9. Command Buttons
10. To Save Changes and Bring form in record Addition / Edition Mode
11. To Revert the Changes and Bring form in record Addition / Edition Mode
12. To Delete the Selected Record
13. To Close the Form
14. To view Previous Record
15. To view Next Record
4
www.cleantouch.com.pk
School Management System 3.0 (Full)
User Manual
Contents:
12345678910111213-
Overview
Account Type
Account Master File
Receipt Voucher
Payment Voucher
Journal Voucher
Shift Registration
Level Registration
Student Registration
Academic Year Setup
Monthly Fee Challan- Due Process
Fee Receipt
Reports Overview
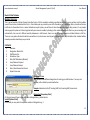
Software Overview:
Cleantouch School Management System is specially developed for school & other institutional organization. This fulfills all the requirements
related to accounts up to Profit & Loss and Balance Sheet. Fees module is very easy in use and very fast in operating. Bank Challan for Students
can also be printed for students. It allow user to define periods of fee collection (e.g. 1. January, 2. February, 3. March, 4. April, June, 5. May, July,
6. August...). Month wise receivable summary allow user to track fees receivable record month wise. User can maintain Loan, Advances & Salary
records of staff with Payroll Module. User can set 5 different monthly allowances in staff account, there is an option to mark allowance as Deduct
Absent or Full Pay. School Management System aimed to provide complete computerized operations in any school. Students can be managed
through Bio-Data (GR No. Allotment), Attendance, Fees, Examination, Leaving modules. Staff records can be computerized by Bio-Data > Staff
Salary > Leaving modules. Accounting module is integrated with all other modules to getting rid of transaction duplication.
There are many option for describe but here we will try to teach you some most important feature step by step. We therefore strive for the best
improvement to support customers in terms of quality. Remember this is the complete user guide but we it distributed in three modules, first we
would describe you about finance then fee, then staff and finally student management module and related topics.
5
www.cleantouch.com.pk
School Management System 3.0 (Full)
User Manual
Modul: 01-Part I Finance Module:
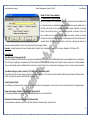
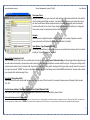
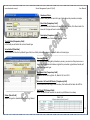
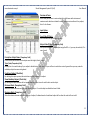
1st Menu-Accounts Type Overview:
Before describing this form we would request to you please read and understand
its content with very carefully because some of the basic points will discuss in
this form which will not be repeated again where appear (Specially in Feeding
Forms). We called this form in our Accounting System as Accounts Type. This
form enables you to create a different head of accounts; usually we already
made all necessary types for our clients. Entered types in this form will be used in
Account Master File. You may also delete or edit your made type at the time of
need by mentioned buttons. Some of accounts head/ types are given below.
Example: Account Receivable, Account Payable, Banks, Capital, Cash, Fixed Assets, Expenses, Fee Income, Suppliers, Profit & Loss ETC.
Input Options
Type Description [Compulsory Field]
This is the compulsory field of this form, saving is not possible without filling this field. Software will never accept duplicate entry in compulsory
field. Take care in spelling in Compulsory Field. When Back Color of Compulsory Field becomes "Yellow" means transaction is in Selected Mode.
You can edit existing option and deleted the transaction in selected mode. You can also select existing type by click on next or previous buttons.
Type Nature/Category: (Assets, Liability, P/L {Profit / Loss}) [Compulsory Field]
You will just select the nature of your type by click on Assets, Liability or P/L. Accounts under Assets & Liability type will shows in Balance Sheet
Profit / Loss type will shows in Net Profit & Loss Report.
Serial # [Optional Field]
In this field you will have to write serial # of your type for balance sheet sequence. You may also click on arrow key button for auto generating.
Show in Receivable / Payable List (Check Box) [Optional Field)
For showing all debtor and creditor list in receivable/payable list , you will check this.
Minimize list in Balance Sheet (Check Box) [Optional Field)
if you would your subsidiary account list will show minimize in balance sheet, you check this.
6
www.cleantouch.com.pk
School Management System 3.0 (Full)
User Manual
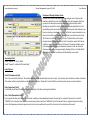
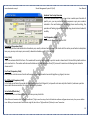
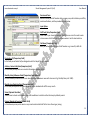
Overview of Form
Here you may create any type of account with necessary information actually this form will be
used to create general ledger accounts. You have to fill all columns as per nature of account,
you must create some system required account, and usually we already made all necessary
accounts with code for our clients. If you change these accounts you will have to change also
from system setup. You may also print out of your account list.
Example
Banks Accounts, Suppliers Accounts, Capital accounts, Cash accounts, Expenses accounts,
income accounts, etc & System Accounts (Discussed later in this help)
Input Options, Type [Compulsory Field]
At this point you will have to select the type as per you would create account, which is entered
already in "Account Types Form" e.g. Bank
Account Code [Compulsory Field]
This is the main field of this form. Here you will enter the code of your account. Logic of Authentic Coding: In this package software generate new
account code automatically as per previous code in same type but never accept duplicate account code for any type. To keep your coding serial #
systematic use numbers only in Account Code. You will have to define account code's starting serial # of type when you will create first account in
any type. For example "100001" in account code field manually next time it will bring account code 100002 automatically. You may edit or delete
your accounts after selection using F5 key.
Description [Compulsory Field]
This is attached with code column and here you will enter the name / title of account. For example Company name of Supplier, Bank Account
Title. ETC.
Contact Person, Address, Telephone #, Mobile #, Fax #, Email [Optional Field]
Here You may enter related information in that fields if you have. In case of unavailability, leave it blank.
Opening Debit, Opening Credit [Optional Field]
You will enter the opening balance of account here. If balance is positive then enter in "Opening Debit" field and if the balance is negative then enter in "Opening Credit" field. For example you
are entering data in this software from "1st Jan 2012" then you will enter closing balance of "31st Dec 2011" , usually there columns are known your opening receivable & payable.
7
www.cleantouch.com.pk
School Management System 3.0 (Full)
User Manual
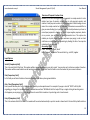
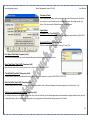
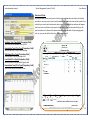
Overview of Receipt Vouchers Form:
Actually this is contain two type of voucher category one is bank receipt
voucher and another is cash receipt voucher form but remember this form
can be use for except fee receiving transaction, the procedure of data
feeding are same but for client’s convenience here we would like to teach
you feeding in cash receipt voucher category step by step that whenever you
have to record your receiving in check or cash form to your receivable or any
source but not from your student, you will have to record transaction here.
All the forms containing "Serial #" & "Entry #" fields will be used to enter
multiple entries in single transaction. Here Transaction means Full Voucher
and Entry means single item (entry) of Voucher. This option enables you to
print receipt voucher when you received a payment in cash or check and
there are many reports are generating by feeding this form. Usually default
page setting is A4 size. You may also understand by screen shots.
Accounting Effect
Debit "Amount" to "Cash / Bank"
Credit "Amount" to Selected "Account Code"
Input Options
Serial # [Compulsory Field]
This is the main field of this form. This number will be created automatically as per last record. You may also say its reference number of voucher.
The number will also used to delete or edit existing transactions. Please don't use this field to enter the number of your manual reference.
Date [Compulsory Field]
In this field you will enter the date of receiving. Basically it will show system generated date.
Cash / Bank [Compulsory Field]
Here you will describe your Cash or Bank Account in which you have deposited amount of receiving. For example if you receive a check of
"500,000" from a donator then you have to select your bank account here "MCB Bank" with the help of F5 key or single clicking of searching
mirror. And suppose your donator gives amount in cash so you will have to record this transaction in by selecting cash account.
8
www.cleantouch.com.pk
School Management System 3.0 (Full)
User Manual
Entry # [Compulsory Field]
This is the sub main field of this form. This number will be created automatically as per last record in above Serial #. Series of Entry #will restart on
each new Serial no. The number will also used to delete or edit existing entries. Press [F5] to view all transaction as following sheet related to
above serial #.
Account Code [Compulsory Field]
Here you will describe the account of donator, other income or etc. which from you have received the amount. To bring the List of existing
accounts press [F5] or click on "Magnifier Button". All the accounts which are added through "Accounts Master File" will appear in the list.
Navigate through arrow keys within the list or you can also press the first word of account title to make it selectable quickly. e.g. ‘A’. You can also
press as maximum as starting words depends on your typing speed to quickly setting focus the accounts e.g. ‘Arif’. To select the account press
Enter Key or Double Click on Account. When you will select account from list or enter the code of account, name / title will appear automatically
as it is written in Accounts Master File.
Narration/Description [Optional Field]
Here you can write your comments, remarks related with transaction which will help you to understand the transaction when you will check
Account Ledger of Cash / Bank / Account.
Amount: [Compulsory Field]
In this column you have to enter received amount.
After all above information click on "Small Save Button" (Top) to save the entry (Not Transaction), after click that button software will generate
next entry # and make all information below to the entry # blank so you can add another receiving. When you have entered all receiving under
single S#, then click on "Big Save Button" (Bottom) to save Transaction. All button (Top) will be used for single entry and buttons (Bottom) will be
used for transaction.
Total Amount
This column will be calculated automatically as per total of amount described in each receiving of above serial #. This column is unchangeable.
9
www.cleantouch.com.pk
School Management System 3.0 (Full)
User Manual
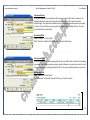
Overview of Payment Vouchers Form
Basically in this form feeding procedure is opposite to receipt voucher it is also
contain two type of voucher category one is cash payment voucher and
another is bank payment voucher form the procedure of data feeding also are
seems like receipt voucher but for customer’s convenience we would like to
give you some feeding tips in payment voucher actually whenever you have to
record your payments in check or cash form to your supplier, expenses, salaries
or any source, you will have to record transaction here. This option also
enables you to print payment voucher whenever you paying in cash or check
and there are many reports are generating by feeding this form. You may also
understand by screen shots.
Accounting Effect
Credit "Amount" to "Cash / Bank"
Debit "Amount" to Selected "Account Code" e.g. Job 101, Supplier
Input Options
Serial # [Compulsory Field]
This is the main field of this form. This number will be created automatically as per last record. You may also say its reference number of voucher.
The number will also used to delete or edit existing transactions. Please don't use this field to enter the number of your manual reference.
Date [Compulsory Field]
In this field you will enter the date of receiving. Basically it will show system generated date.
Cash / Bank [Compulsory Field]
Here you will describe your Cash or Bank Account in which you have paid amount. For example if you pay a check of "1200" to Utility Bills
regarding gas charges first you have to select your bank account here "MCB Bank" with the help of F5 key or single clicking of searching mirror.
And suppose you are paying in cash so you will have to record this transaction in by selecting cash in hand account.
Entry # [Compulsory Field]
This is the sub main field of this form. This number will be created automatically as per last record in above Serial #. Series of Entry #will restart on
10
www.cleantouch.com.pk
School Management System 3.0 (Full)
User Manual
each new Serial no. The number will also used to delete or edit existing entries. Press [F5] to view all transaction as following sheet related to
above serial #.
Account Code [Compulsory Field]
Here you will describe the account of supplier, expenses or etc. which you are paying the amount. To bring the List of existing accounts press [F5]
or click on "Magnifier Button". All the accounts which are added through "Accounts Master File" will appear in the list. Navigate through arrow
keys within the list or you can also press the first word of account title to make it selectable quickly. To select the account press Enter Key or
Double Click on Account. When you will select account from list or enter the code of account, name / title will appear automatically as it is written
in Accounts Master File.
Narration [Optional Field]
Here you can write your comments, remarks related with transaction which will help you to understand the transaction when you will check
Account Ledger of Cash / Bank / Account.
Amount[Compulsory Field]: In this column you have to enter paid amount.
After all above information click on "Small Save Button" (Top) to save the entry (Not Transaction), after click that button software will generate
next entry # and make all information below to the entry # blank so you can add another receiving. When you have entered all receiving under
single S#, then click on "Big Save Button" (Bottom) to save Transaction. All button (Top) will be used for single entry and buttons (Bottom) will be
used for transaction.
Total Amount
This column will be calculated automatically as per total of amount described in each receiving of above serial #. This column is unchangeable.
Preview:
11
www.cleantouch.com.pk
School Management System 3.0 (Full)
User Manual
Overview of Journal Vouchers Form
Basically this form can be used for general journal entries in this
form you may record many kind of entries like detail expense,
payable bill, bad debt, depreciation, adjusting and provisions. A
man who did intermediate or graduation in commerce can
understand very easily. Once you understand the purpose of form.
In simple way we can say that will be used to debit and credit
some accounts. For further detail about purpose of this form,
please check Sample Data of Software. Transaction will be never
saved whenever Total Debit & Total Credit is not equal. All the
forms containing "Serial #" & "Entry #" fields will be used to enter
multiple entries in single transaction. Here Transaction means Full
Voucher and Entry means single item (entry) of Voucher. This
option enables you to print JV voucher when you post any entry
and there are many reports are generating by feeding this form.
The Procedure of feeding almost seems like above. You may also
understand by screen shots.
Accounting Effect
Credit "Debit Amount" to "Account Code"
Credit "Credit Amount" to "Account Code"
Input Options
Serial # [Compulsory Field]
This is the main field of this form. This number will be created automatically as per last record. You may also say its reference number of voucher.
The number will also used to delete or edit existing transactions. Please don't use this field to enter the number of your manual reference.
Date [Compulsory Field]
In this field you will enter the date of receiving. Basically it will show system generated date.
12
www.cleantouch.com.pk
School Management System 3.0 (Full)
User Manual
Account Code [Compulsory Field]
Here you will describe the account of supplier or etc. which from you have received the amount. To bring the List of existing accounts press [F5]
or click on "Magnifier Button". All the accounts which are added through "Accounts Master File" will appear in the list. Navigate through arrow
keys within the list or you can also press the first word of account title to make it selectable quickly. To select the account press Enter Key or
Double Click on Account. When you will select account from list or enter the code of account, name / title will appear automatically as it is written
in Accounts Master File.
Narration [Optional Field]
Here you can write your comments, remarks related with transaction which will help you to understand the transaction when you will check
Account Ledger of Cash / Bank / Account.
Debit Amount [Optional Field]
Enter Amount here if you want to debit above mentioned account
Credit Amount [Optional Field]
Enter Amount here if you want to credit above mentioned account
After all above information click on "Save Button" (Top) to save the entry (Not Transaction), after click that button software will generate next
entry # and make all information below to the entry # blank so you can add another account for debit or credit. When you have entered all
entries under single transaction then click on "Save Button" (Bottom) to save Transaction. All button (Top) will be used for single entry and
buttons (Bottom) will be used for transaction.
Total Debit
This column will be calculated automatically as per debit amount described in each entry of above serial #. This column is unchangeable.
Total CreditWe
This column will be calculated automatically as per credit amount described in each entry of above serial #. This column is unchangeable.
13
www.cleantouch.com.pk
School Management System 3.0 (Full)
User Manual
Modul: 01-Part II Fee Module:
Shift Registration: Overview
Here you will add all your shifts or campus that is operating by your school. For
example Morning & Evening, you may also delete or edit your made shifts at the
time of need by mentioned buttons. Entered shift in this form will be used in
next feeding form. The procedure of feeding is given below
Input Options
Shift Code [Compulsory Field]
Enter code of your choice for example M for Morning & A for Afternoon. Next
time, where you have to select shift, you can enter this code to auto retrieve the
name of shift, you may also treat this as campus master file instead it.
Shift Name [Compulsory Field]
In this field you will have to write Shift or campus name e.g. Morning, Afternoon, Garden Campus etc.
14
www.cleantouch.com.pk
School Management System 3.0 (Full)
User Manual
Levels/Class Registration: Overview
Here you will add your all classes with different charges which are operating by your
school. For example Montessori, Prep, Grade-1, you may also delete or edit your
made levels at the time of need by mentioned buttons. Entered level will be used in
next feeding form. The procedure of feeding is given below
Input Options
Level Code: [Compulsory Field]
Enter code of your choice for example 01 for Nursery, 02 for KG 1, 03 for KG 2, 03 for
1st Class ETC. or G1 for Grade 1. You can enter this code to auto retrieve name of
level each time in software where it ask for level selection
Class Name [Compulsory Field]
In this field you will have to type class name like Play Group, Class V etc.
Charges: [Compulsory Field]
In these fields you may enter eleven types of charges, all of written charges will be applied to all students for the each level, usually we already
made some Important charges but you may customize as per your fee structure, we would suggest you type only whose charges which you are
taking monthly basis whenever you would take annual charges you may type manually in fee due process
Amount: [Compulsory Field]
In this column you will enter the amount of specific charges e.g Monthly Fee= Rs. 3500/Total Fees: Auto
It will auto increase or decrease by writing different charges amount.
15
www.cleantouch.com.pk
School Management System 3.0 (Full)
User Manual
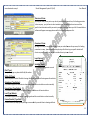
Student Registration: Overview
In this form first you will have to add your all current student data with
pictures which are studying in your school and then whenever new student
will admit to you school, you will record the student by filling this some
necessary option, here you may also delete or edit your made student data
except GR No. at the time of need by mentioned buttons. Entered
students list will be used in next feeding and reporting side. The feeding
procedure step by step are given below
Input Options
G.R. #[Compulsory Field]
This is the most important field of fee module as seems like account
code, basically here GR mean General Registration number or Form
number which you issue at the time of admission so you will first enter
GR# with very concentration because GR# cannot be edit, after giving any one GR #, the software will automatically show you one plus GR # for
Next Student. If your institute would not maintain GR # history you may also start with any six digit serial number, you may check student list by
selecting F5 key with different criteria.
Gender: (Check Box) [Compulsory Field]
Select Student gender here
Full Name: [Compulsory Field]
Enter the full name of Student with his/ her father name, it will show many kind of fee related report with auto adjustment e.g. Rizwan S/o Arif
Picture: [Optional Field)
You may take a picture of specific student by saving file to GR wise in ‘stpics’ folder, this folder is availed in main software folder
Surname: [Optional Field)
Enter surname/cast of student here, if any...
16
www.cleantouch.com.pk
School Management System 3.0 (Full)
User Manual
N.I.C. #, [Optional Field)
Enter father’s National Identity card number here
Address, [Optional Field)
Enter complete postal address of student where school can contact his/her
Contact Info: [Optional Field)
Enter Contact # of student where school can be contact to student or them parent. If there is more than one contact # write in this syntax
e.g. (021-34822714, 0345-2842999)
Religion: [Optional Field)
Enter Religion of Student, e.g. Muslim, Hindi etc. this is by default field
Nationality: [Optional Field)
Enter citizenship of Student, e.g. India, United Kingdom, Pakistan etc. this is by also default field
Date & Place of Birth: [Optional Field)
Enter Place and Date of Birth of student
Shift Code: [Compulsory Field]
Enter code of shift, which is open in Shift Registration Form. If you don't have remember code then click on help button or press [F5] to Retrieve
the List of shifts and select the shift in which student is present.
Level Code: [Compulsory Field]
Enter code of Level/ Class, which is open in Level Registration Form. If you don't have remember code then click on help button or press [F5] to
Retrieve the List of levels and select the level in which student is present. Every year you will have to change level code of successful students.
Section: [Compulsory Field]
Type section of specific class if there is no section in your school then always writes "A" in section field.
17
www.cleantouch.com.pk
School Management System 3.0 (Full)
User Manual
Roll #: [Optional Field)
Enter Class roll # of student which is allocated by Class Teacher. The option is just for information not integrated with any other optio
option.
Opening Dues: [Optional Field)
In this column you may enter the lump sum balance fees amount of each student. For example you are starting feeding in the software from the
month of Jan, 2012 and some students have not yet paid dues of the year 2011. Enter so will write total
otal balance amount here.
Current Status: (Check Box) [Compulsory Field]
You must update the status of all student time to time when
whenever any student leave the school.
Monthly Fees Discount: [Optional Field)
Some school allow special discount,, concession or write off fee from monthly charges to selected student. If the student which is filled here has
been allowed any kind of monthly discount then enter the amount of discount per month
Date of Admission: [Optional Field)
Enter the date when student admitted in school
Date of Leaving: [Compulsory Field]
You must enter the date of leaving
Report Preview:
18
www.cleantouch.com.pk
School Management System 3.0 (Full)
User Manual
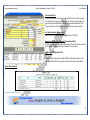
Academic Year Setup: Overview
In this form you will have to create once a time in whole year all months of
specific year, you may customize month sequence as per your academic
schedule in the next feeding will be done by these months setting, the
procedure of feeding is given below step by step, please look and read with
carefully.
Year[Compulsory Field]
You will enter the current year like 2012
Description [Compulsory Field]
In this field you have to write duration of academic year, usually in Asian schools academic year starts with the mid so you will write in description
two year, you may write as per your country’s education schedule e.g 2012-2013 or 2012
Entry [Auto]
This is the sub main field of this form. This number will be created automatically as per last record in above Serial #. Series of Entry #will restart on
each new Serial no. The number will also used to delete or edit existing entries. Press [F5] to view all transaction as following sheet related to
above serial #.
Fee Term:[Compulsory Field]
Here you will write the name of month with sequence, you may also write two month together e.g August, Jan+June
No. Of Months[Compulsory Field]
In this field you will enter the number of above month means that if August=1, but you will write June+July=No of moths 2, whenever you take
two months fee in one months, this is also as per country situation
Set as Default[Check Box]
If you would like to set above setting for next time you may check this
After all above information click on "Small Save Button" (Top) to save the entry, after click that button software will generate next entry # so you can add fee
term. When you have entered all terms under single S#, then click on "Big Save Button" (Bottom) to save Transaction.
19
www.cleantouch.com.pk
School Management System 3.0 (Full)
User Manual
Monthly Fee Due Process: Overview
This is the main feeding form of fee module In this form first you must run this
process on monthly basis for generate a dues and bank voucher to your whole
school’s students, by this feeding software will generate many reports on fee side,
The feeding procedure step by step are given below
Input Options:
Academic year: [Compulsory Field]
Enter the year e.g. 2012
Fee Term: [Compulsory Field]
Select the fee term with the help of F5 key e.g. April
Date: [Compulsory Field]
Please enter the first date of targeted fee term here. E.g. if you want to run process for the month of January 2012 then you will write
01/01/2012
Generate & Copy charges from Level Master File: [Compulsory Field]
Through click on this option, the software will bring all present students from student master file to the above grids (look like excel sheet) and fill
the charges as per level Master File, you may also customize charges field as per student.
Generate & Copy charges from Previous Month Process: [Optional Field]
you may copy your previous due process for your convenience by click this button.
Bank Information:[Optional Field]
Write you bank name, branch address and account number information where student
will deposit voucher
Due Date, Late Fee, Validity:[Optional Field]
You may write in these fiend last due date, late fee (if) and validate of bank voucher.
20
www.cleantouch.com.pk
School Management System 3.0 (Full)
User Manual
Fee Receipt: Overview
You will use this form each time whenever any student will pay their fees, amount of
fee will automatically adjusted in all the statements and reports as well as balance of
cash or bank will automatically increase by the amount of fees. You may also take
printout of fee receipt, here you may also delete or edit your made receipt at the time
of need by mentioned buttons. The feeding procedure step by step are given below
Serial #
Receipt # (Automatic Increase)
Receipt Date: Date of Fee Receiving (System Generated)
Cash / Bank
Here cash code will automatically appear if you want to change this code then click on help button or press [f5] and select other account. Fees
Amount will be added to this account.
Entry #
Automatic Increase if more than 1 students
G.R. #
Enter GR # of student, if not remember then click on help button or press [F5] to retrieve the list of
Students. After selecting software will show all information.
Year
Enter the year of fee term.
Month
Selecting the fee term which paying student with the help of F5 key, write ‘0’ incase of opening balance
Fee Amount
Balance Amount of Selected Month will appear automatically, it is does not appear or previous then
check the statement or enter by hand. Late fee will also show automatcilly incase of after due date.
Total Amount:
we want to remind you that you can make receipt of more than 1 students by one receipt #. This will show total amount of receipt.
21
www.cleantouch.com.pk
School Management System 3.0 (Full)
User Manual
2nd Menu-Reports Overview of 1st Module
After the feeding in all forms software will be generated many kind of accounting reports. We think it does not need to describe about each
report, a good accountant can be understand by himself but here some reports name are listed below you may take preview and printout from
report menu by date and filter wise at the time of need.
Accounts List
Students List
Receipt Vouchers Report
Payment Vouchers Report
Journal Voucher Report
Fee Receipt Register
Fee Challans Register
Vouchers Tally
Fee Challan Printout
Bank Challan Printout
Fee Receipt Printout
Voucher Printout
Journal Voucher Printout
Student Account Statement
Fee Receivable Summary
Month wise Receivable Detail
Student Receivable Note
Cash / Bank Book
Accounts Ledger
Cash Flow
Accounts Receivable / Payable
Trial Balance (2 Column)
Trial Balance (6 Column)
Profit & Loss
Balance Sheet Balance Sheet
22
www.cleantouch.com.pk
School Management System 3.0 (Full)
User Manual
Modul: 02-Staff Module:
Module Overview:
This is second module of School Finance Controller System 3.0, this module is available in professional edition, you may not buy only this module
you will have to buy standard edition first, in this module you may maintain your staff attendance, Loan, Advances, Salary records and Service
certificate etc. Remember this is a manual attendance payroll system, you will have to take attendance by running daily process, it’s very simple
and easy payroll system and it also integrated with your accounts module, by feeding in this module software will effects on your accounting side
automatically. User can set 5 different monthly allowances in staff account, there is an option to mark allowance as Deduct Absent or Full Pay.
There are many option for describe but here we will also try to teach some most important feature step by step. But before that standard edition
manual procedure should keep on your mind.
Contents:
123456789-
Overview
Designation Master File
Staff Master File
Attendance Type
Daily Staff Attendance (Manual)
Loan/ Advance Payment
Loan/ Advance Receipt
Salary Sheet Generation Process
Reports Overview
Overview of Form
Here you will create different designation for sorting your staff member. You may also
preview, edit or delete by mentioned button
Example: Administrator Staff, Teaching Staff, Non-Teaching Staff, Accounts etc.
Designation [Compulsory Field]
At this point you will have to type the name of designation e.g. Administrator
Serial #[Optional Field]
in this field you may write the sequence number of designation e.g. 1
23
www.cleantouch.com.pk
School Management System 3.0 (Full)
User Manual
Overview of Form
Here will create your staff member data, you may save, edit or delete you staff by
mentioned buttons, and the procedure is given below:
Input Option:
Staff Code [Auto/Compulsory Field]
Enter code of your choice for example 100001 You can enter this code to auto
retrieve name of staff each time in software where it ask for level selection
Full Name [Compulsory Field]
Here you will write the full name of staff member e.g. Jameel S/o Jaffar Ali
Designation [F5/Compulsory Field]
In this field you will select his/her designation with the help of F5 e.g. Accounts
Address , Contact Info:[Auto/Compulsory Field]
In these field you may write some contact information regarding his/her.
Monthly Salary/Allownces Detail [Compulsory Field/Optional]
In these columns you will write the basic salary and other allowances name with its amount. E.g. Monthly Salary =Rs. 5000/Monthly Loan Deduction Detail [Compulsory Field]
In this field you may write the deduction amount which decided with staff for every month.
Status [Optional Check Box]
You will have to check on left option when staff would leave to institute rather than keep by default present
Reason/ Remarks of Leaving [Optional Field]
In these boxes you may write reason or any remarks related with staff at the time of leaving or joining.
24
www.cleantouch.com.pk
School Management System 3.0 (Full)
User Manual
Overview of Form
once a time you will create the type of attendance the procedure is simple.
Short Code [Compulsory Field]
Enter the code of attendance for example P for Present, A for Absent and L for
leave etc this type will use to ached feeding .
Description [Compulsory Field]
Write the name of attendance type e.g. Present
Treat As[Select/Compulsory Field]
In this field you will select the nature of made type
Set as Default [Check Box]
The software will take the by default type at the time of daily attendance process so you will check on Present type.
-----------------------------------------------------------------------------------------------------------Overview of Form:
this form used for taking daily attendance process, you must run this process once a
time a day for maintain attendance register the procedure is give below. Sunday will
also treat as present type.
Attendance Date [Compulsory Field]
Enter the current date e.g Date: 15, Month: 02, Year: 2012
Generate a list from Staff Master: [Compulsory Field]
Click this button for brining all staff member, this button will be taken all staff list.
Staff Code: [F5/Optional Field]
Select the specific staff member in case of any staff absent or on leave,
Status: [Select Field]
Select the type for selected staff member e.g. Absent
25
www.cleantouch.com.pk
School Management System 3.0 (Full)
User Manual
Overview of Form:
In this form you may record payment which you pay to your staff as loan or advance, the
feeding procedure is seems like as payment voucher, so we think it does not need to
describe again, This option also enables you to print payment voucher whenever you paying
in cash or check and there are many reports are generating by feeding this form. You may
also understand by screen shots.
Accounting Effect
Credit "Amount" to "Cash / Bank"
Debit "Amount" to Selected "Account Code" e.g. Imran S/o Hussain
-
-
-
-
-
-
-
-
-
-
-
-
-
-
-
-
-
-
-
-
Overview of Form:
In this form you may record receiving which pay by your staff as loan or advance, the feeding
procedure is seems like as previous receipt voucher, whenever you receive any cash or check
there are many reports will generate by this form. You may also understand by screen shots.
Accounting Effect
Debit "Amount" to "Cash / Bank"
Credit "Amount" to Selected "Account Code" e.g. Imran S/o Hussain
26
www.cleantouch.com.pk
School Management System 3.0 (Full)
User Manual
Overview of Form:
After that all necessary feeding at the end of the each month, you will
run this process for generating salary sheet, this form will calculate all
given amount with attendance which you recorded related staff this
form will effect on all necessary reports, the process is given below.
Last date of month: [Compulsory]
Here you must write ending date of month e.g 31-03-2012
Generate a list from Staff Master: [Compulsory Field]
Click this button for brining all staff member, this button will be taken all
staff list with calculation of total attendance and net salary.
Staff Code: [F5/Optional Field]
By this field you may select specific staff for editing his amount or for
loan deduction, after that you will save this with mentioned buttons.
Salary Sheet Preview:
http://dictionary.cleantouch.com.pk/
27
www.cleantouch.com.pk
School Management System 3.0 (Full)
User Manual
3rd Menu-Reports Overview of Staff Module:
After the feeding in all forms software will generate much kind of accounting and management reports. Some reports name are listed below you
may take preview and printout from report menu by date and filter wise at the time of need.
List of Staff
Daily Staff Attendance Summary
Staff Attendance Register
Periodic Attendance Summary of Staff
Loan / Advance Payment Report
Loan / Advance Receipt Report
Loan / Advance Payment Printout
Loan / Advance Receipt Printout
Salary Sheet Printout
Staff Account Ledger
Staff Receivable Summary
Staff Service Certificate
Certificate Preview:
28
www.cleantouch.com.pk
School Management System 3.0 (Full)
User Manual
Modul: 03-Student Mangement Module:
Module Overview:
Student Management System aimed to provide complete computerized operations in any school. Students can be managed through GR No.
Allotment, Attendance, Fees, Examination, Leaving modules. In this module you may maintain daily attendance, Student Mark sheet, leaving
leav and
various certificates etc. Remember this is a manual attendance payroll system; you will have to take attendance by running daily process,
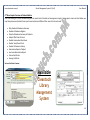
Content:
1Student Attendance Types
2Daily Student Attendance
3Subject Assignment
4Examination Terms
5Grading Setup
6Examination Outcomes
7Student Promotion
8Leaving Certificate
9Reports Overview
29
www.cleantouch.com.pk
School Management System 3.0 (Full)
User Manual
Overview of Form
once a time you will create the type of attendance the procedure is very simple, you may
save and also edit or delete by mentioned button.
Short Code [Compulsory Field]
Enter the code of attendance for example P for Present, A for Absent and L for
leave etc this type will use to ached feeding .
Description [Compulsory Field]
Write the name of attendance type e.g. Present
Treat As [Select/Compulsory Field]
In this field you will select the nature of made type
Set as Default [Check Box]
The software will take the by default type at the time of daily attendance process so you will check on Present type.
----------------------------------------------------------------------------------------------------------------------------------------------------------------------------------------------------
Overview of Form:
This form used for taking daily student attendance process, you must run this process once a
time a day for maintain student attendance register the procedure is give below. Sunday will
also treat as present type.
Attendance Date [Compulsory Field]
Enter the current date e.g Date: 15, Month: 02, Year: 2012
Generate a list from Student Master: [Compulsory Field]
Click this button for brining all current student list.
Student GR No. [F5/Optional Field]
Select the specific student in case of any student absent or on leave.
Status: [Select Field]
Select the type for selected student e.g. Absent, Leave
30
www.cleantouch.com.pk
School Management System 3.0 (Full)
User Manual
Overview of Form:
In this form you will have to create subjects list of all classes with minimum and
maximum marks which are included in exam, you may create sub level of any subject,
this is fix for all exam .
Input Option:
Level Code {F5 Key}:
First of all select the specific class e.g Class I
Subject Code {F5 Key}: [Compulsory Field]
Here you will write any Code for subject assign like 001 or 1, you may also select by F5 in
case of need.
Description: Subject Name: [Compulsory Field]
In this column you will have to write subject name like English, Maths, Science
Type: [Select/Compulsory Field]
Actually this is for marks breakup, if your subject is divided in two or three marks so you will have to select here control type and then you may create his
subsidiary subjects be same coding ahead.
Conditional Subject [Check Box]
By checking this option you may take restriction on result by passing this subject.
Show Subsidiary Subjects [Check Box]
By checking this option software will not appear subsidiary subject in result card of select control subject.
Minimum Marks [Compulsory Field]
Write this column maximum marks of selected type of subject . if control subject are divided so leave it blank.
Maximum Marks [Compulsory Field]
Write this column minimum mark of selected type of subject, if obtained marks of conditional subject will less than this result will treat as fail.
31
www.cleantouch.com.pk
School Management System 3.0 (Full)
User Manual
Overview of Form:
In this form you may create multi type of exam term with different period , this will use
once a year for current academic year, creating technique is describing step by step
below. You may also edit of delete these term in case of need.
Input Option:
Academic Year {Type Field}:
Write here specific year e.g 2012, contain year will appear automatically e.g 2012-2013
Exam Code {F5 Key}: [Compulsory Field]
Write this column a code of specific term e.g 1st term 1112.
Final Exam {Check Box}: [Compulsory Field]
Check this if selected exam term is final, software will promote student classed by this field of exam.
Exam Term Name {Type Field}: [Compulsory Field]
Write here the name of term which you use in your school e.g FIRST TERM 2012-2013.
Period (Date){Type Field}: [Compulsory Field]
In these columns write the from date and the ending date of any specific exam term. e.g from 15-03-2011 to 15-05-2011
Result Serial No.{Type Field}: [Compulsory Field]
In these columns write the numeric number series of selected academic series, software will appear these exam sequences in full result card. E.g 1
Click here to customize level.{Button}: [Compulsory Field]
By clicking this button you will be entered in another form, here you will view your all classes appeared as participated with complete subject history you may
in participate to any class or subject by checking option, you may generate or delete whole setting, same way for all terms.
32
www.cleantouch.com.pk
School Management System 3.0 (Full)
User Manual
Overview of Form:
In this form you may create difference percentage for grading, you will have to decide himself what
grade should happen for obtained percentage, software will calculate automatically in mark sheet
by total and obtained marks. Here we have also designed a sample grading chart; you may follow
and remember this is also multi entry form you may also edit of delete these grading in case of
need.
Input Option:
Date {Type Field}:[Compulsory Field]
Write here starting date e.g 25-04-2012.
Serial No. {Auto}:
This is auto generate column, this will be automatically change after making design any one grade.
From % {Type}:[Compulsory Field]
Write here figure which start for any grade e.g 60
To % {Type}:[Compulsory Field]
Write here figure which for ending grade e.g 60.9
Grade {Type}:[Compulsory Field]
Write here grade which you used for above percentage e.g. B’
33
www.cleantouch.com.pk
School Management System 3.0 (Full)
User Manual
Overview of Form:
By using this form you may enter marks of each term exam of any class and student, the feeding
procedure is very easy you just have to select academic year than exam term and then specific class
info which you want to enter obtain marks when you click Processed button software will appear a
new form here you will have to write marks of each subject of any student when finally you will
press calculate result software will calculate automatically marks sheet with percentage, grade,
rank, etc you may also edit of delete this result in case of need.
Academic Year {Type Field}:[Compulsory Field]
Write here current academic year e.g 2012.
Examination Term {F5 or Type}:[Compulsory Field]
Write or Search by F5 key for term selecting.
Shift Name {F5 or Type}:[Compulsory Field]
Write or press F5 key for selecting a shift.
Level Code {F5 or Type}:[Compulsory Field]
Write or press F5 key for selecting any class
Examination Term {F5 or Type}:[Compulsory Field]
Write in this column any section of class.
34
www.cleantouch.com.pk
School Management System 3.0 (Full)
User Manual
Overview of Form:
By using this form you may enter any class of passed student to next class,
class this feeding procedure
is also very easy, you just have to select academic year than select final exam term and then
specific class information which you want to promote in next class when you click Processed button
software will appear a message please read this be carefully and process this.
Overview of Form:
By using this form you may exit any student from your school because of any reason, this feeding
procedure is so easy, please read below step by step, after this entry your specific student will
show in any report as left, you may edit or delete this entry incase of need.
Input Option:
Serial No. {Auto}:
This column is auto generate as usual.
File# {Type}:
Here you may type any internal officially file number.
GR No. {F5/Type}:
Select the specific student GR which is leaving this school, his profile will auto appear after selection
Attendance {Type/Button}:
If you want to appear his attendance in leaving certificate click on auto button or write manually.
Current Dues {Type/Button}:
If you want to know or appear his balance in leaving certificate so click on auto button.
Level {Type/Button}:
If you want to appear his last passing class with grade so click on auto button or select manually.
Reason/Conduct {Type Field}:
In these columns you may type any message or reason which you would show in leaving certificate.
35
www.cleantouch.com.pk
School Management System 3.0 (Full)
User Manual
4th Menu-Reports Overview of Student Module:
After the feeding in all forms software will generate much kind of student and management reports. Some reports name are listed below you
may take preview and printout from report menu by date and different filter wise at the time of need.
Daily Students Attendance Summary
Students Attendance Register
Periodic Attendance Summary of Students
Subject Offer Sheet Printout
Student Examination Mark sheet
Student Yearly Result Card
Student Performance History
Examination Report of Subject
Level wise Examination Report
Various Certificates
Leaving Certificate
Various Certificate Preview:
Available
Cleantoch
Library
Mangement
System
36
www.cleantouch.com.pk
School Management System 3.0 (Full)
User Manual
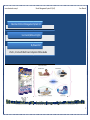
Available Ads On Plug-in:
After purchasing add-on
on named "Network Compatibility", user will be shifted to "Multi
"Multi-PC
License". Software will be installed & registered in Server (Any one Computer among
Network), from server software folder will be shared which can be accessed from another
connected PC. Single software can be fully accessed from multiple PCs at single time. Data
entered by different PCs will be accumulated in server as well as other PCs w
will be updated.
Basic software is secured by password protection. Any person having password for opening
software can get access to any function of software. We also offer advance security system
called "Multi-User Environment". Through this, Administrator can create user and limited
their access to the selected reports & functions (e.g. View / Add / Edit / Delete).
37
www.cleantouch.com.pk
School Management System 3.0 (Full)
User Manual
Last Menu-System Utilities:
This is last menu of software and it’s containing all following heading, it depends on software nature.
System Setup
The option gives to change Software Starting Password, Default Account & Types which used by the software internally. This may contain more
important fields to give user ability to work in customization environment not fixing.
Currency Setup
This option allows to you enter name of currency (e.g. Dollar / Cent, Rupee / Paisa ETC.)
Delete All Records
Use of this process will delete all Data which is entered by you in software without any kind of backup file. Generally the option provided with
password protection in registered version. Password provided by us to the authorized person only. This is very sensitive option so use it on your
own risk.
Rebuild Indexes/ Repair & Maintenance:
If you are using Network Disabled Package then you don't have to click that option, it automatically proceed on starting software but you are
using Network Disabled Package then you must click this option each week, it delete the temporary data which creates automatically by software
for processing report and calculation. This option also increases speed and quality of software. Also click this option in case index missing error.
Data Backup
This option used to make backup copy of all your entered data. Backup in Compressed File & Un-Compressed Files options available in our latest
packages. You can make backup of your data to any media where you want.
Data Restore
This is password protected option. Password provided by us at the time of registration to the authorized person. This process will delete all
current data without any kind of backup and restore data from said location (path asked at the time of restore) of user choice.
Color Scheme Selection
This option available in latest projects only. The option used to customize almost all the colors, used in software. To easily access the package and
using happily as per user's mode and nature.
Thank You
38