Download Backing Up and Restoring Your Computer
Transcript
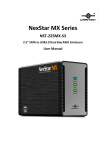
Computer Show & Tell Wednesday, June 27, 2012 BACKUP and RESTORE PART 1 – The Very Essential, Minimum Part Presenter: Brian Bentley Intro – taken from the FreeBSD Handbook: The first requirement in devising a backup plan is to make sure that all of the following problems are covered: Disk failure Accidental file deletion Random file corruption Complete machine destruction (e.g., fire), including destruction of any on-site backups. It is perfectly possible that some systems will be best served by having each of these problems covered by a completely different technique. Except for strictly personal systems with very low-value data, it is unlikely that one technique would cover all of them. Some of the techniques in the toolbox are: Archives of the whole system, backed up onto permanent media offsite. This actually provides protection against all of the possible problems listed above, but is slow and inconvenient to restore from. You can keep copies of the backups onsite and/or online, but there will still be inconveniences in restoring files, especially for non-privileged users. Filesystem snapshots. This is really only helpful in the accidental file deletion scenario, but it can be very helpful in that case, and is quick and easy to deal with. RAID. Minimizes or avoids downtime when a disk fails. At the expense of having to deal with disk failures more often (because you have more disks), albeit at a much lower urgency. It is quite easy to come up with even more techniques, many of them variations on the ones listed above. The important thing is to know what dangers you want to protect against, and how you will handle each. Some Approaches (and background reading material): First, “A basic non-cloud-based personal backup strategy” is a short article that comes quite close to my philosophy and experiences. The recommendations are: Use an imaging tool like Acronis True Image to create images of the machines you REALLY care about. You can also use the System Image tool built into Windows Encrypt your external drives. (disagree with this one) Backup files (and disk images) to two external drives Keep one external drive off-site Test your backups by practicing a restore. The rule of thumb is that backups ALWAYS succeed. It's restores that fail! plus use SyncBack to copy files on a schedule ... Second, a wonderful, detailed presentation can be found here: http://dpbestflow.org/links/39 . Although this article is written for Photographers, it is complete and is relevant for home users and small business. There are some great video tutorials here – like this one we will refer to later. An important lesson: PRIMARY COPY OF DATA (where is it?) EXTERNAL COPY OFFSITE/ONLINE COPY ALL NECESSARY TO CONSTITUTE A BACKUP Elements of a Backup & Restore Plan Productivity Backup Critical Files Backup Restoration Guarantee All tasks must not be a PITA (pain in the a**) Productivity Backup If your hard drive dies, can you be back in production in minutes rather than days? If your motherboard dies, you have a fire, or your PC is stolen, can you be back in production in 4 or 5 hours rather than days? (Includes the time to purchase and bring home a new PC.) The answer is YES, and it can be done easily, cheaply, and reliably – IF, AND ONLY IF, YOU USE THE RIGHT TOOLS. Critical Files Backup Some examples of critical files: Pictures & Videos Music purchases TV shows & Movies Email Business Data Financial Data (banking, tax, investment) Personal documents Medical records Passwords, login info, licences, install keys Some of these files require vastly different treatment. Some Services/Utilities to handle critical file backups are evolving at this time. Critical file backups will be dealt with in Part 2 (and Part 3 if necessary). A “Productivity Backup” does a significant part of the job of “Critical File Backup”. Productivity Backup – Clone a Hard Drive Equipment required: At least 2 hard drives, equal to or larger than your current hard drive, but at least as big as you would want in a new machine. I suggest either Western Digital or Seagate. A docking station, also affectionately known as a “Toaster”. I suggest a USB 3.0 model by Thermaltake. Or spend a little less on the USB 2.0 Vantec. And the part no one ever thinks of, the Vantec EZ-Swap 4. (Note: you must have a usable CD/DVD drive bay available.) This “trayless hard drive rack” is where your Desktop boot drive will live from now on. No need for this part if you have a laptop only. Michael at the PC Shop, corner of Westmount and Highland Road, will match or beat Canada Computers pricing and include installation of the EZ-Swap 4. Tell him Brian sent you. A carrying case for a hard drive: the 1010 Micro Case from Pelican (Adventure Guide sells them); or this protection box by INEO from Canada Computers. Software required: For Western Digital hard drives, get Acronis True Image WD Edition. (Free.) For Seagate hard drives, get Seagate DiscWizard. (Free. Also based on Acronis True Image.) For any other hard drive manufacturers, get Macrium Reflect Free. To burn Boot Disks, if and when you need them, get ImgBurn to get the .iso files on to CDs or DVDs. Why Clone? A clone is an exact, bit for bit, copy of your hard drive. That means it includes all the hidden files needed to boot into, and run, Windows. It also includes all your data files. Once started, cloning a hard drive can be left unattended - for example, while you sleep. If your hard drive dies, or becomes corrupted, or is virused, then just swap in the clone, and boot up! You’re back in business. (Quicker if you have the EZ-Swap tray because you do not have to open up the PC.) If your PC is stolen, then the clone can be used, or can be converted to be used, in a brand new PC, even if the PC maker, or the motherboard manufacturer is different. (This last step requires paid software from Acronis called “The Plus Pack”.)This eliminates the need to build your Windows setup from scatch when faced with a disaster. The clone drive is easily searched in Windows Explorer. You can easily test whether your backup (the clone drive) will actually boot and work. Why 2 (or more) hard drives? They are cheap, and very reliable storage. One drive can always be off-site – safe from fire and theft. The other can be stored elsewhere in your house. Two possibilities for “clean” copies of a critical file. Even your backup hard drive can die! How to Clone a Hard Drive Video from dpBestflow.org Using WD Acronis - shown during presentation (no useful video available, Seagate one will do) Using Seagate DiscWizard - video, 1st part Using Macrium Reflect Free - video How often? Depends on needs for security Depends on tolerance for repeated tasks Depends on discipline (or sometimes nagging!) The Essential Bit – Testing Once clone complete, shutdown the PC. Remove existing boot drive from EZ-Swap drawer. Insert clone in EZ-Swap drawer. Turn on the PC. If the PC boots, and you can perform some normal tasks, your Productivity Backup is golden! Sleep soundly. (Note: all other free software I tried failed this test!) Why a Rescue/Boot Disk? Needed to restore an Image File to a hard drive that will not boot. Sometimes easier (less clicks) to use Boot Disk to clone hard drive. Sometimes needed to create an Image File of a misbehaving hard drive before trying risky troubleshooting actions. Why not use a Rescue/Boot Disk? Most rescue disks are Linux disks and may not work with some motherboards and/or controller drivers. Running the software from Windows avoids this issue. Macrium has a Windows based rescue disk, but it is very difficult to create. Creating a Rescue/Boot Disk WD and Seagate Boot Disks are created from their Windows software. Although they are Linux Disks, you will not notice any difference in the user interface. Macrium’s Linux based Boot Disk is little use to us – it does not offer Cloning. Building a WD Boot Disk will be demonstrated - video. Appendix contains Start-Up Parameters you can use to make a Boot Disk that works for a troublesome system. For example, an Acer Aspire 5640 Desktop requires “noapic” and “acpi=off” to boot many Linux disks. APPENDIX 19 Startup Parameters Additional parameters that can be applied prior to booting Linux kernel. 19.1 Description Additional parameters that can be applied prior to booting Linux kernel Description The following parameters can be used to load Linux kernel in a special mode: acpi=off Disables ACPI and may help with a particular hardware configuration. noapic Disables APIC (Advanced Programmable Interrupt Controller) and may help with a particular hardware configuration. nousb Disables loading of USB modules. nousb2 Disables USB 2.0 support. USB 1.1 devices still work with this option. This option allows using some USB drives in USB 1.1 mode, if they do not work in USB 2.0 mode. quiet This parameter is enabled by default and the startup messages are not displayed. Deleting it will result in the startup messages being displayed as the Linux kernel is loaded and the command shell being offered prior to running the Acronis program. nodma Disables DMA for all IDE disk drives. Prevents kernel from freezing on some hardware. nofw Disables FireWire (IEEE1394) support. nopcmcia Disables PCMCIA hardware detection. nomouse Disables mouse support. [module name]=off Disables the module (e.g. sata_sis=off). pci=bios Forces to use PCI BIOS, and not to access the hardware device directly. For instance, this parameter may be used if the machine has a nonstandard PCI host bridge. pci=nobios Disallows use of PCI BIOS; only direct hardware access methods are allowed. For instance, this parameter may be used if you experience crashes upon boot-up, probably caused by the BIOS. pci=biosirq Uses PCI BIOS calls to get the interrupt routing table. These calls are known to be buggy on several machines and they hang the machine when used, but on other computers it is the only way to get the interrupt routing table. Try this option, if the kernel is unable to allocate IRQs or discover secondary PCI buses on your motherboard. vga=ask Gets the list of the video modes available for your video card and allows selecting a video mode most suitable for the video card and monitor. Try this option, if the automatically selected video mode is unsuitable for your hardware. (NOTE: Extracted from the Acronis User Manual.)


