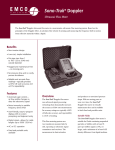
Download Compu-Flow™ Doppler Ultrasonic Flow Meter
Transcript
Jan 2010
Compu-)ORZ'RSSOHU8OWUDVRQLF)ORZ0HWHU
User Manual Compu - )ORZDoppler Ultrasonic Flow Meter
COPYRIGHT
This manual and the information herein is the proprietary property of Compu-)ORZ.
No Part of this manual may be reproduced or copied without the express written
permission. Any unauthorized use of this manual or its contents is strictly prohibited.
Copyright© January 2010. All rights reserved.
DISCLAIMER AND LIMITATION OF LIABILITY
The information contained in this manual is subject to change without prior notice.
Compu-)ORZmakes no warranty of any kind whatsoever, either expressed or implied,
with respect to the information contained herein. Compu-)ORZVKDOOQRWEHOLDEOHIRU
damages, of whatever kind, as a result of the reliance on or use of the information
contained herein.
INTERPRETING THE MANUAL
The following sections explain the document type conventions and the danger, warning,
and caution boxes that provide information about the specific levels of hazard seriousness.
TYPE CONVENTIONS
Please note the following type conventions:
3LQDQGVLJQDOQDPHVDSSHDULQFDSLWDOL]HGLWDOLFV32:(5B21
1HZWHUPVDSSHDULQLWDOLFL]HGWH[W
8QLWODEHOVVZLWFKHVLQGLFDWRUVDQGVRRQDSSHDUin boldface text (ECHO).
&RPPDQGVDQGFRPPDQGQDPHVVHWpoint) appear in boldface, lowercase text.
CAUTION AND ATTENTION BOXES
This symbol represents important notes concerning potential harm to people, this unit, or
associated equipment. Compu-Flow includes this symbol in Warning, Caution, and Attention
boxes to identify specific levels of hazard seriousness.
iii
Compu-)ORZDoppler Ultrasonic Flow Meter
Table of Contents
Chapter 1: Introduction and Theory of Operation
Introduction ............................................................................................................... 1-1
Features of the Compu-)ORZ'RSSOHU8OWUDVRQLF)ORZ0HWHU...1-1
Components of the Compu-)ORZ'RSSOHU8OWUDVRQLF)ORZ0HWHU6\VWHP...1-2
Electronics Enclosure and Display Panel .........................................1-2
Transducers and Cabling .....................................««««««1-2
Theory of Operation .................................................................................................. 1-2
Sonic Reflectors ...........................................................................«1-3
Accuracy .........................................................................................................1-3
Summary ...............................................................................................«1-3
Applications ...............................................................................«««1-4
Chapter 2: Installation and Operation
Before Installing the Unit ........................................................................................... 2-1
Unpacking the Unit ....................................................................................... 2-1
Included Equipment ......................................................................... 2-1
Tools Required for Installation ..........................................................2-2
Pre-installation Procedures and Checks .................................................... ..2-2
Determining if Your Process/Installation is Right for a Doppler Flow Meter ...............2-3
Assessing Particles or Air Bubbles ............................................................... 2-4
Fluctuations in Flow Content ............................................................ 2-4
Process Changes ..............................................................................2-4
Assessing Pipe Material and Condition .......................«2-5
Assessing Flow Profile ................................................................................. .2-5
Straight Run Requirements ...............................................................2-5
Transducer Placement ......................................................................2-7
Compu-)ORZTransit Time Ultrasonic Flow Meters ..........«2-9
Installation Procedures ...............................................................«««2-9
Mounting and Connecting the Transducers .................................................. 2-9
Mounting and Connecting Power to the Electronics Enclosure ................... .2-13
Operation ...................................................................................«2-15
Display Panel ................................................................................................ 2-15
LEDs ..................................................................«2-16
First Time Operation ..................................................................................... 2-17
If You Experience Unstable Readings ..............................................2-20
Advanced Configuration Options ..................................«2-20
3ULPDU\DQG6HFRQGDU\.H\ERDUG)XQFWLRQV««««««««««««««««.2-21
Before Setting Advanced Parameters ..............................................2-22
Setting Advanced Parameters ..........................................................2-22
Normal Operation ..........................................................«2-25
Portable Battery Operation (Portable Units Only) ........................................2-25
v
Chapter 3: Troubleshooting and Customer Support
Troubleshooting the Unit .......................................................................................... 3-1
Flow Meter Troubleshooting Tables ............................................................. .3-2
Status of Unit Power ........................................................................3-2
Status of Echo LED: Off ...................................................................3-3
Status of Echo LED: Flashing ..........................................................3-5
Status of Flow Reading: High or Low ...............«3-6
Status of Flow Reading: Erratic .................................................... ...3-8
Additional Troubleshooting Information ..........................................................3-9
Echo LED Light Considerations .......................................................3-9
Suspended Particle Test For Doppler Signals .............................. ..3-10
Compu-)ORZSystems Support ..............................................................................4-15
Returning Units for Repair .........................................................................................3-12
Warranty ....................................................................................««3-12
Authorized Returns ....................................................................................... .3-13
Warranty Statement .......................................................««3-13
Chapter 4: Specifications and Reference Information
Performance Specifications .......................................................................................4-1
Physical Specifications ..............................................................................................4-2
Functional Specifications ...........................................................««4-3
Dimensional Drawings ..............................................................«««4-6
Electronics Enclosure Dimensions ................................«««4-6
Clamp-On Transducer and Digitizer Dimensions ............................................4-8
Reference Information .............................................................................................. .4-8
Standard Pipe Data ........................................................................................ 4-9
Velocity Conversion Tables .......................................................................... ..4-12
vi
Chapter
1
Introduction and Theory
of Operation
INTRODUCTION
The Compu-)ORZDoppler ultrasonic flow meter provides an accurate and easy-to-use
measuring system for high-solid fluid flow through pipes 0.50 inch to 999 inches
(inside diameter). The Doppler flow meter is well suited for flow measurement
applications such as sludges, slurries, aerated liquids, sewage, dredges, pulp, plastics,
and activated sludges. The Doppler flow meter features clamp-on transducers and a
rugged NEMA 4X enclosure, and is a long-term, maintenance-free solution for your
high-solid flow measurement requirements.
Features of the Compu-)ORZDoppler Ultrasonic Flow Meter
The Doppler flow meter features:
$&RU'&RSHUDWLRQ, Isolated, Regulated, Module
6mart LCD screen featuring high-resolution, 32 character, 2-line alphanumeric
providing rate and totalization simultaneously²in Metric and English units
6SODVKSURRI1EMA 4X case protected from moister and caustic chemicals
(DV\FRQILJXUDWLRQIRUVHWXSDQGRSHUDWLRQZLWKRQ-screen prompting, quick
scrolling menus, display panel keypad, and color coded LEDs
Non- invasive, Submersible, Clamp-on transducers
RS232 via DB9 PORT 9600 Baud
%DWFK&RQWURO,VRODWHG2XWSXWIRU'U\&RQWDFW5HOD\
6HSDUDWH+LJKDQG/RZ$larm outputs for Dry Contact Relay with LED status
'DWD/RJJHU± 32 GB memory USB Flash Drive data transfer
Wireless Signal option from Sensors and/or Receiver (sensor singular)
Optional signal cable lengths up to 5000 ft. No Tuning required.
+LJKDFFXUDF\ even in turbulent flows
:LGHSLSHGLDPHWHUrange 0.50 - 999 inches
0DLQWHQDQFH-free modular construction simplifying field service
Introduction and Theory of Operation
1-1
Components of the Compu-)ORZDoppler Ultrasonic
Flow Meter System
A typical Doppler flow meter system is comprised of an electronics enclosure, with a
display panel, and two clamp-on transducers.
ELECTRONICS ENCLOSURE AND DISPLAY PANEL
The display panel in the electronics enclosure features an easy-to-read LCD screen, a
keypad, and LEDs to interface with the flow meter. The Doppler flow meter can be
wall mounted for permanent installation or a portable option is also available.
TRANSDUCERS AND CABLING
The Doppler flow meter is configured with clamp-on transducers. When installed, the
sensors gather fluid flow data through a pipe and send this information to the system
electronics. The electronics then convert, transmit, and display the received data.
The clamp-on transducers allow you to install the Doppler flow meter without shutting down flow
and are ideal for smooth, clean pipe walls. The transducers are NEMA 6-rated and fully
submersible. Contact ³&RPSX-Flow Systems SuppoUW´RQSDJH-15 for information on configuring
your meter for continuous submersion.
The standard cable length between the electronics enclosure and the transducers is 25
feet. Custom cable lengths up to 5000 feet are available. Wireless Sensor to Display where
applicable. See ³&RPSX-Flow Systems 6XSSRUW´RQSDJH-15 for contact and ordering
information.
THEORY OF OPERATION
The Compu-)ORZDoppler ultrasonic flow meter measures flow velocity by sensing
signals from reflective materials within a liquid and measuring the frequency shift due
to the motion of these reflective materials. The Doppler effect states that the received
frequency is a function of the transmitted frequency and the relative motion between
transmitter and the receiver.
The classic example of the Doppler effect is the train whistle increasing in pitch to the
listener at the station as the train approaches, then decreasing in pitch as the train
moves away from the station. To the person riding on the train, the pitch remains the
same. The increasing pitch is due to phase-front compression and the decreasing pitch
is due to phase-front expansion. The Doppler flow meter uses this effect to measure
the velocity of a liquid through a pipe wall.
1-2
Introduction and Theory of Operation
Compu-FlowDoppler Ultrasonic Flow Meter
Sonic Reflectors
The Doppler flow meter requires sonic reflectors in order to operate. These reflectors
may consist of particles or air bubbles within the flow to be measured. Your readings
may vary slightly with changes in concentration or size of these reflectors as well as
the pipe condition and size.
Note: Glycerin is the only known industrial liquid today that is not sonically
conductive.
The Doppler flow meter uses two similar transducers to sense flow in a pipe. These
transducers are mounted on the outside of a pipe. This configuration presents no
obstruction to flow, and will not cause associated pressure drops.
Accuracy
The Doppler flow meter output signal is linear (as opposed to square root), which
means that accuracy is not a function of flow rate. Within certain application limits,
the meter is ideal because it is not affected by changes of pressure within the process
nor by changes of viscosity, temperature, specific gravity, sound velocity, or electrical
conductivity.
Summary
The Doppler flow meter is a non-intrusive flow meter system which operates by
sensing the frequency shifts of signals reflected from particles, air bubbles, or density
differences within a liquid, producing a linear signal proportional to the flow of the
liquid within the pipe.
1RSLSHVHFWLRQLVUHTXLUHGWRLQVWDOOWKHPHWHU
7KHPHWHULVQRWDIIHFWHGE\FKDQJHVLQWHPSHUDWXUHYLVFRVLW\VSHFLILFJUDYLW\RU
the speed of sound within the liquid.
7Ke liquid does not have to be electronically conductive.
$PLQLPXPSDUWLFOHFRQFHQWUDWLRQRISSP#PLFURQRIVXVSHQGHGVROLGVRU
air bubbles is required.
7KHUHIOHFWRUPXVWKDYHDWOHDVWDGHQVLW\GLIIHUHQFHWKDQWKHOLTXLGPHGLXP
)RUaccurate volumetric measurement the pipe must be full at all times.
7he transducers are normally coupled to the outer pipe wall with greaser, sonic gel or epoxy.
,QRUGHUWRREWDLQDFFXUDWHPHDVXUHPHQWVDGHTXDWHXSVWUHDPDQGGRZQVWUHDP
pipe runs are required. Recommended straight-run requirements from any
disturbance of flow are 10 diameters upstream and 20 diameters downstream.
Introduction and Theory of Operation
1-3
APPLICATIONS
Some of the materials the Compu-FloZDoppler ultrasonic flow meter is well-suited
for measuring include:
1-4
Ag water
Abrasives
Asphalts
Concrete
Dredge flows
Drilling mud
Large contaminates
Extremely viscous substances
Grout
Hazardous wastes
Municipal sludges and wastes
Paper pulp
Rendering products
Reservoirs
Rivers and streams
Runoffs
Sludges
Slurries
Suspended solids
Most all liquids containing suspended particles or air bubbles
Introduction and Theory of Operation
Chapter
2
Installation and Operation
BEFORE INSTALLING THE UNIT
Before installing your Compu-Flow Doppler ultrasonic flow meter,
follow the steps listed below:
1. See ³8QSDFNLQJWKH8QLW´RQSDJH-1.
2. Make sure you have performed the --³3UH-installation 3URFHGXUHVDQG&KHFNV´RQ
page 2-2.
3. Determine if your process/installation is compatible with the requirements of
Doppler flow meter. See --³'HWHUPLQLQJLI<RXU3URFHVV,QVWDOODWLRQLV5LJKWIRUD
'RSSOHU)ORZ0HWHU´RQSDJH-3).
4. Proceed to ³,QVWDOODWLRQ3URFHGXUHV´RQSDJH-9.
Unpacking the Unit
Unpack and inspect the unit carefully, looking for obvious physical damage. If no
damage is apparent, locate and save all documentation and then continue with the
following procedures.
If you see signs of shipping damage, contact your supplier for product support.
(see ³&RPSX-)ORZ6\VWHPV6XSSRUW´RQ page 4-15 for contact information). Save the
shipping container for submitting necessary claims to the carrier.
INCLUDED EQUIPMENT
Table 2-1 lists the standard items that ship with Compu-)ORZ'RSSOHU8OWUDVRQLF
Flow Meter systems.
Installation and Operation
2-1
Table 2-1. Items shipped with the flow meter system
Dedicated unit (C6D model)
(OHFWURQLFVHQFORVXUH
7ZRWUDQVGXFHUVDQGDFDEOH std.
6HQVRU6WUDS.it
6RQLFFRXSOLQJJHO
8VHUPDQXDO
Portable unit (C6P model)
(OHFWURQLFVHQFORVXUH
7ZRWUDQVGXFHUVDQGDFDEOe std.
6HQVRU6WUDS.it
6RQLFFRXSOLQJJHO
User manual
91.2 AH battery
Smart 110 VAC battery charger
$X[LOLDU\ transport handle
Padded Field transport case
&XVWRPOHQJWKVXSWR¶PLQ¶DGGHU
TOOLS REQUIRED FOR INSTALLATION
6DQGSDSHUWRFOHDQWKHSLSHVXUIDFHWREDUHSLSH
7DSHPHDVXUHWRPHDVXUHSLSHVL]H
Pre-installation Procedures and Checks
Before you install your Doppler flow meter, there is a pre-install check you should
perform to ensure that this is the appropriate meter to use for your application. If you
encounter any difficulties during the pre-installation procedures, see ³'HWHUPLQLQJLI
<RXU3URFHVV,QVWDOODWLRQLV5LJKWIRUD'RSSOHU)ORZ0HWHU´RQSDJH-3 before
proceeding with the installation process.
To Perform the Doppler flow meter Pre-installation Check:
1. Mount the transducers side by VLGHEHWZHHQR¶FORFNDQGR¶FORFNRQWKHSLSH
(see ³0RXQWLQJDQG&RQQHFWLQJWKH7UDQVGXFHUV´RQSDJH-9 for more
information).
2. If not already connected, connect the transducers to the electronics enclosure (see
³0RXQWLQJDQG&RQQHFWLQJWKH 7UDQVGXFHUV´RQSDJH-9).
3. Connect AC or DC power to the flow meter (see ³0RXQWLQJDQG&RQQHFWLQJ
3RZHUWRWKH(OHFWURQLFV(QFORVXUH´RQSDJH-13).
4. Turn on the power using the switch on the display panel.
5. After the electronics enclosure powers up and the front display panel lights up,
press soft key 1 to select FPS (feet per second).
6. Estimate your expected flow rate and compare it to the reading in feet per second
on the display panel.
2-2
Installation and Operation
Compu-)ORZDoppler Ultrasonic Flow Meter
If the reading on the display appears to be accurate, continue to the next step.
If you do not see a flow reading on the LCD screen at all, or if the flow reading
is much lower or higher than expected, try repositioning the transducers. If this
does not help, see ³'HWHUPLQLQJLI<RXU3URFHVV,QVWDOODWLRQLV5LJKWIRUD
'RSSOHU)ORZ0HWHU´RQSDJH-3 and consult ³7URXEOHVKRRWLQJWKH8QLW´RQ
page 3-1.
7. Observe the yellow Echo LED on the display panel.
If the Echo LED is on steady, and the flow reading appears to be accurate, your
Doppler flow meter is ready for operation. See ³1RUPDO2SHUDWLRQ´RQ
page 2-25 to configure the flow meter for operation with your system.
If the Echo LED is flashing or not illuminated, see ³'HWHUPLQLQJLI<RXU
3URFHVV,QVWDOODWLRQLV5LJKWIRUD'RSSOHU)ORZ0HWHU´RQSDJH-3 and
consult ³7URXEOHVKRRWLQJWKH8QLW´RQSDJH-1.
DETERMINING IF YOUR PROCESS OR
INSTALLATION IS RIGHT FOR A DOPPLER
FLOW METER
Accurate operation of a Doppler flow meter depends upon your application and
installation site. Doppler flow meters offer many advantages over other flow meter
models when flows are viscous, turbulence is minimal, and piping materials are
appropriate. When conditions are adverse to Compu-Flow'RSSOHUXOWUDVRQLFIORZ
meter operation, the Compu-Flow7UDQVLW7LPHIORZPHWHUPD\RIIHUDQH[FHOOHQW
alternative. Contact ³&RPSX-FlRZ6\VWHPV6XSSRUW´RQSDJH-´ for more
information about this transit time meter.
To determine which flow meter is appropriate for your process and specific
installation, consider the following:
7KHSUHVHQFHRIUHIOHFWLYHSDUWLFOHVLQWKHIORZ
7KHSLSHPDWHULDODQGFRQGLWLRQRISLSHKRXVLQJthe flow
7KHIORZSURILOHPHDQLQJWKDW\RXDUHDEOHWRSURYLGHDFFHSWDEOHVWUDLJKWUXQ
requirements to ensure more accurate readings
The following sections discuss these considerations.
Installation and Operation
2-3
Assessing Particles or Air Bubbles
The ultrasonic beam from the transducer is transmitted through the pipe wall into the
liquid. The particles, air bubbles suspended in the liquid, have to be large enough to
act as reflectors to return the signal back to the transducer so that a measurement may
be taken. It is important to understand that the ultrasonic beam from the Doppler flow
meter does not penetrate air very well. A few bubbles will not affect flow meter
performance, but too many bubbles may cause the meter to malfunction. See
³6XVSHQGHG3DUWLFOH7HVW)RU'RSSOHU6LJQDOV´RQSDJH-10 for information on how
to assess the particulate content of your flow.
Note: At a frequency of roughly 650 kHz, the minimum particle which can be sensed
is 40 microns @ 35 parts per million (ppm) and at least 0.2% density difference
from the liquid.
Attention:
The flow to be measured must always have a sufficient number of sonic
reflectors of ample size in order to provide reflection of the transmitted
sound. If the reflectors do not have sufficient density difference they
will neither rise nor fall in the solution but remain suspended. The
specific gravity will also affect the ability of a particle to reflect sound.
A good example of a reflector is a sand particle or an air bubble. A poor
example is algae or onion skins.
FLUCTUATIONS IN FLOW CONTENT
Wide fluctuations in flow suspended solids content can only be handled by an instrument capable
of monitoring such a wide fluctuation in liquid characteristics. Extreme cases may require the use
of both a transit time flow meter as well as a Doppler flow meter. For example, river water may
require a meter which is capable of measuring both clean and dirty liquids. Depending on
conditions, the river may vary considerably in suspended solid content. In this situation contact
your rep and ask about the Compu-)ORZ+\EULG6\VWHP
PROCESS CHANGES
Changes in the process may cause the meter to cease proper operation. For example, a
Doppler meter had been operating satisfactorily for a long time in a certain
installation, and then suddenly it stopped functioning. The problem was eventually
traced to a particle filter that had recently been placed before the transducers,
effectively eliminating the reflectors from the stream.
Process changes in the other direction are also possible. The meter responds to
bubbles up to a point, but if the liquid starts to foam there may be too many air
bubbles to allow the ultrasonic beam to adequately penetrate the flow stream. This
may cause the Doppler flow meter to produce erroneous flow readings. Similarly, a
sludge may become too dense to allow proper penetration.
2-4
Installation and Operation
Compu-)ORZDoppler Ultrasonic Flow Meter
Assessing Pipe Material and Condition
Doppler flow meter performance is best maximized by using piping that is sonically
conductive. The Doppler flow meter assumes that the path by which the ultrasonic
beam enters the pipe and returns to the transducer is ultrasonically homogenous,
which means that you must use your flow meter with pipes with non-porous smooth
pipe walls. Concrete-lined pipes, old or crystallized cast iron pipes, hand-wrapped
fiberglass pipe, and old piping with air inclusions do not exhibit the required
homogeneity. Avoid using the Doppler flow meter for flow measurement on these
pipes unless proper operation is proven by the manufacturer through demonstration.
Contact ³&RPSX-)ORZ6\VWHPV6XSSRUW´RQSDJH-15 for more information on an
alternate meter if your application is not suitable for the Doppler flow meter.
Note: No clamp-on meter will operate properly if the liner is not solidly attached to
the pipe wall because of the probability of an air gap.
Pipe Vibration
Moderate pipe vibration does not usually adversely affect the Doppler flow meter,
since the vibration of the piping is at a significantly lower frequency than the
ultrasonic beam used to measure flow. However, in situations where the transducer
signal strength is low because of fluid, piping, or other environmental factors,
measurement accuracy may be further decreased by pipe vibration. In these situations
your display panel may register flow when there is none due to the vibration. If you
can not bracket the pipe to reduce vibration, you may be able to rectify the problem by
relocating the transducer to a pipe location with less vibration.
Assessing Flow Profile
STRAIGHT RUN REQUIREMENTS
As with other flow meters such as vortex or magnetic flow meters, the Doppler flow
meter needs a well-developed flow profile to ensure accurate flow measurement. To
assure a well-developed profile, choose a measurement point on a long run of pipe²
well away from elbows, valves, pumps, flanges, and other possible sources of
turbulence.
The ideal placement of the Doppler flow meter is with 20 diameters of straight run
upstream and 10 diameters of straight run downstream between the transducers and
any disturbance of the flow. Most typical flow meter applications use 10 diameters of
straight run upstream and 5 diameters downstream from any disturbance of the flow.
Installation and Operation
2-5
However, when the measured fluid is too clean to provide the proper number of
reflective particles, one may position the transducer near the pump or source of
turbulence in such a manner as to obtain stable readings in a continuous flow full pipe
situation. Using a transit time meter may be another viable option if the Doppler flow
meter is not performing ideally. A point to remember is that turbulence is a non-linear
function of flow, so turbulence can create reflected signals. Interpret readings near
turbulent flows with caution.
Sources of turbulence are elbows, flanges, valves, orifices, wedges, pumps, pipe
openings, and pipe irregularities (rust, corrosion, and buildup). Try to avoid vertical
pipe runs (especially downhill pipe runs).
Table 2-2. Transducer distance from turbulence and reading accuracy
Upstream
Downstream
%Accuracy
20 diameters
10 diameters
±1% to 3% of full scale
10 diameters
5 diameters
±3% to 5% of full scale
5 diameters
2 diameters
±5% to 10% of full scale
Accuracy is dependant on flow profile, and is related to the percentage of sound
reflectors and their size variation and distribution.
Figure 2-1 provides straight run examples.
2-6
Installation and Operation
Compu-)ORZDoppler Ultrasonic Flow Meter
D = Nominal pipe diameter
Figure 2-1. Straight run examples
TRANSDUCER PLACEMENT
You should always avoid measuring liquids in vertical downward flows with any flow
meter. In the case of Doppler flow meters, vertical downward flows cause erroneous
readings by introducing air bubbles. Excessive air bubbles attenuate the measurement
signal by hampering penetration of the ultrasonic beam into the fluid. Bubbles will
tend to rise against the flow, and since the Doppler flow meter is capable of totalizing
in both directions, this will cause erroneous flow measurements as the meter factors in
the backward flow of the bubbles. Additionally, in vertical flows it may be difficult to
keep the pipe full, allowing pockets of air into the pipe. This will drastically reduce
WKHWUDQVGXFHU¶VDELOLW\WRSHQHWUDWHWKHIORZDQGSURGXFHDUHDGDEOHVLJQDO
Installation and Operation
2-7
When the Doppler transducers are mounted on a horizontal pipe, care should be taken
to mount them in WKHR¶FORFNWR R¶FORFNSRVLWLRQVZLWKWKHWRSRIWKHSLSH²the
side furthest from the Earth²FRUUHVSRQGLQJWRWKHR¶FORFNSRVLWLRQ,IWKH
transducer is mounted on the bottom of the pipe, settling particles may attenuate the
signals by introducing an additional sonic barrier. Also, air may agglomerate at the top
of the pipe. Since the ultrasonic frequencies used will not penetrate air efficiently, the
signal will be heavily attenuated so that the meter will not be able to render accurate
results.
Horizontal Pipe Mounting
The recommended placement of the Doppler transducers is a horizontal section of
piping. Figure 2-2 provides horizontal mounting examples.
Transducers
Figure 2-2. Horizontal pipe mounting examples
Vertical Pipe Mounting
Measuring flow at a vertical pipe run is not recommended. If measuring flow in a
vertical run can not be avoided, we recommend you measure at a point where the
direction of flow through the pipe is upwards to help ensure the pipe will remain full
at all times (Figure 2-3). However, measuring flow even with an upward vertical pipe
run will not address all the problems associated with this configuration.
Transducers
Figure 2-3. Vertical pipe mounting examples
2-8
Installation and Operation
Compu-)ORZDoppler Ultrasonic Flow Meter
Compu-)ORZ Transit Time Ultrasonic Flow Meters
In the event the flow to be measured does not contain the minimum required particle
size and/or parts per million count, and the transducer will not read, you may want to
consider the Compu-Flow7UDQVLW7LPHXOWUDVRQLFIORZPHWHUIRU\RXUDSSOLFDWLRQ
Contact your Compu-Flow sales representative with your application questions.
See ³&RPSX-Flow 6\VWHPV6XSSRUW´RQSDJH-15´ for contact information.
INSTALLATION PROCEDURES
After you have performed the pre-install check and determined that the Doppler flow
meter will work for your application, follow these steps to install your meter.
To Install the Compu-)ORZDoppler Ultrasonic Flow Meter:
1. Mount and connect the transducers
2. Mount and connect power to the electronics enclosure (see page 2-13)
3. Turn on power to the electronics enclosure using the motherboard rear panel switch on the
(front panel for portable) and follow display panel for meter set up (see ³2SHUDWLRQ´RQSDJH
2-15 for more information on configuring your meter for operation)
Mounting and Connecting the Transducers
The clamp-on transducers are NEMA 6-rated and fully submersible.
(For continuous submersion secure sensors to pipe with approved epoxy.)
To Mount the Clamp-On Transducers to the Pipe:
1. Ensure the pipe surface is clean. Use sandpaper to remove all paint and scale from
the pipe surface if necessary.
2. Apply sonic gel to the transducer lenses. For best results in most weather
conditions and heat, use Dow Corning® High Vacuum Grease or the supplied
Novagard® JUHDVH*
Attention:
Always apply sonic gel to the transducer lenses before placing on the pipe
The sonic gel must be used to transmit the energy from the transducer crystals
through the pipe wall and into the flow to be measured.
Installation and Operation
2-9
6PDOOSLSHVEHORZ´GRQRWSHUPLWVLGHE\VLGHPRXQWLQJ
3LSHV´-´GLDmeter ± mount sensors 90° apart
Pipes belRZ´GLDPHWHU± mount sensors 180° apart
Compu-)ORZDoppler Ultrasonic Flow Meter
Transducers
Figure 2-5. Clamp-on transducers secured with a bungee and chain
To Connect the Transducers to the Electronics Enclosure:
1. Ensure AC or battery (DC) input power is turned off.
2. Connect the transducer cable to the electronics enclosure by routing the cable
through the appropriate opening (see ³%RWWRPYLHZRIWKHHOHFWURQLFVHQFORVXUH´
on page 4-7 for location of cable access openings). Use a Nema 4Xcable gland and a cable
backing nut to securely fasten the trasnducer cable to the electronics enclosure.
3. Connect the transducer wires to the processor board as shown in Figure 2-6 on
page 2-12 for correct placement. The transducer 4-wire connection is as follows:
White = Digital signal output (0 V to 12 V pulse train)
Green = Echo good logic signal (when used)
Red = 12 VDC at 100 mA nominal power in
Black = Ground / Common
Note: Do not connect bare shield wire to black (common / ground)
Installation and Operation
2-11
Compu-)ORZDoppler Ultrasonic Flow Meter
Figure 2-6. Main electronics board connections
4. Continue with ³0RXQWLQJDQG&RQQHFWLQJ3RZHUWRWKH (OHFWURQLFV(QFORVXUH´RQ
page 2-13.
2-12
Installation and Operation
Compu-)ORZDoppler Ultrasonic Flow Meter
Mounting and Connecting Power to the Electronics Enclosure
The fixed Doppler flow meter model electronics enclosure is wall mounted for
permanent installation. The portable meter model does not need to be mounted.
To Mount the Fixed Electronics Enclosure:
1. Locate the four mounting holes on the base of the electronics enclosure.
Figure 2-7. Wall mounting of the electronics enclosure
2. Using the reinforced holes in the enclosure base, securely mount the electronics
enclosure to the wall.
To Connect Input Power to the Electronics Enclosure:
Note: You can either use AC power or DC/ battery power to operate your Doppler
flow meter.
1. If you are using AC power: (wall module only)
If not already connected, supply input power to the electronics enclosure by
routing the power cable through the appropriate enclosure base opening
(see ³%RWWRPYLHZRI WKHHOHFWURQLFVHQFORVXUH´RQSDJH-7).
Use a Nema 4Xcable gland and a cable backing nut to securely fasten the input power
cable to the electronics enclosure.
Plug AC Power Module into the appropriate outlet.
Installation and Operation
2-13
Figure 2-8. Another view of processor board connections
2. If you are using DC/ battery power:
If not already connected, supply input power to the electronics enclosure by
routing the power cable through the appropriate opening (see ³%RWWRPYLHZRI
WKHHOHFWURQLFVHQFORVXUH´RQSDJH-7).
If needed, connect the DC power cable wires to the 12 VDC PWR section
of the processor board using Figure 2-6 and Figure 2-8 as a guide.
Use a Nema 4Xcable gland and a cable backing nut to securely fasten the input power
cable to the electronics enclosure.
2-14
Installation and Operation
Compu-)ORZDoppler Ultrasonic Flow Meter
Move the switch to the on position. See Figure 2-8 for the switch location.
3. Continue on to ³)LUVW7LPH2SHUDWLRQ´RQSDJH-17.
OPERATION
The following sections describe the display panel in the electronics enclosure, first
time operation, and normal operation of your Doppler flow meter.
Display Panel
The display panel in the Doppler flow meter electronics enclosure provides an
interface for monitoring and controlling the flow meter. The high resolution 2-line
(16-digits per line) display shows operating information and configuration menu
prompts. You may use the 12 key tactile feedback keypad to make selections when
prompted by the configuration menu prompts.
Installation and Operation
2-15
Compu-)ORZDoppler Ultrasonic Flow Meter
LED INDICATORS
If your Doppler flow meter is working properly with your system, when you power up the flow
meter you should see the green Power LED and the yellow Echo LED illuminate. If this is not
the case, consult the table 2-DQGVHH³7URXEOHVKRRWLQJWKH8QLW´RQSDJH-1.
Figure 2-9. Display panel
2-16
Installation and Operation
Compu-)ORZDoppler Ultrasonic Flow Meter
Table 2-3. LED conditions and indications
LED
Condition
Power
Off
Power is not available to the unit.
If you have tried to power up your
unit and this light is off, see
³7URXEOHVKRRWLQJWKH8QLW´RQ
page 3-1.
Is power available to unit.
On
Proceed with normal operation.
Off
Consult ³7URXEOHVKRRWLQJWKH8QLW´
on page 3-1.
Transducer signal is weak.
Flashing
Consult ³7URXEOHVKRRWLQJWKH8QLW´
on page 3-1.
Transducer signal is marginal
On-Illuminated steady
Proceed with normal operation.
Transducer signal is normal
Off
Proceed with normal operation.
No alarm condition exists.
On-Illuminated steady
Your system is running at high or low
alarm flow. Adjust your flow levels or
or your alarm settings consult
³7URXEOHVKRRWLQJWKH8QLW´ on page 3-1.
(Green)
Echo
(Yellow)
Alarm
High or Low
(Red)
Indication
First Time Operation
Once you have successfully completed installation of the Doppler flow meter, you are
ready to configure your unit for operation using the front panel in the electronics enclosure.
Installation and Operation
2-17
Attention:
If your display flashes LOW BAT at any time during setup or
programming, consult ³6WDWXVRI8QLW3RZHU´RQSDJH-2 for
troubleshooting information.
Note: If you are switching from AC (DC) power to battery power and
your battery may need charging.
To Operate Your Doppler Flow Meter for the First Time:
1. Complete all the steps in ³%HIRUH,QVWDOOLQJWKH8QLW´RQSDJH-1.
2. Complete all the steps in ³,QVWDOODWLRQ3URFHGXUHV´RQpage 2-9.
3. Turn on power and observe the display panel LCD. The display will show the
model name and number of the unit.
4. Following the prompts presented by the display panel LCD, and making your
entries using the keypad, configure your unit for operation for English or Metric.
The LCD screen displays SELECT RATE. Select the unit of measure for rate
display: All rate selections may be displayed in seconds, minutes, hours, days,
Time elements. (1=Sec 2=Min 3=Hr 4=Day)
Table 2-4. Rate selection- English
Key Selection Definition 1 2 FPS GAL Feet per second Gallon 3 CF Cubic feet 4 5 MG AF Million Gallons Acre Feet 6 7 BL MPS Barrel 44 gal Meters per second 8 9 LT CM Liter Cubic meter If you select FPS, the flow meter will automatically begin measuring flow in feet
per second. If you select keys 1 through 6, the LCD screen will ask that you enter
your pipe ID in inches. If you select keys 7 through 9, the LCD screen will ask that you
enter your pipe ID in millimeters. See ³6WDQGDUG3LSH'DWD´RQSDJH-9 to estimate your
pipe ID.
2-18
Installation and Operation
Compu-)ORZDoppler Ultrasonic Flow Meter
After you enter your rate time element, the LCD screen will then display SELECT
TOTALIZER. Select the unit of measure for totalizer display:
Table 2-5. Totalizer selection
Key 1 2 3 4 5 6 7 Selection GAL CF MG AF BL LT CM Definition Gallons Cubic feet Millions of gallons Acre feet Barrels 44 gal Liters Cubic meters After you enter your totalizer selection, the LCD screen will then display
Enter Pipe ID. If you select keys 1 through 5, the LCD screen will ask that you enter
your pipe ID in inches. If you select keys 6 through 7, the LCD screen will ask that you
enter your pipe ID in millimeters. See ³6WDQGDUG3LSH'DWD´RQSDJH-9 to estimate
your pipe ID.
Your Doppler flow meter is now configured to measure the flow parameters you have set.
After you set the flow reading parameters you need for your system, you can secure these
settings so they are saved in the event of power loss to the electronics enclosure.
Note: To clear the rate and totalizer SDUDPHWHUV\RXKDYHVHWVHOHFW³´UHVHWRUVZLWFK
the power off using the on/ off switch on the display panel. Until settings are saved
using Key # 8, ³6HFXUH2Q´, the security switch, turning off power clears all previously
set parameters. When you turn on power again, the LCD screen will prompt you to
restart programming.
To Save Your Programmed Flow Reading Settings Using the Secure Function:
1. Complete setting the flow reading parameters (see ³)LUVW7LPH2SHUDWLRQ´RQ
page 2-17 to set parameters).
2. Press and hold key # 8 IRUVHFRQGVXQWLO³6HFXUH2Q´DSSHDUV on the LCD display.
Note: If you need to change your programmingSUHVVDQGKROGNH\³6HFXUH´XQWLO³6HFXUH
2II´DSSHDUVRQWKH/&'GLVSOD\
If you wish to further customize your flow meter system for operation in your process,
continue on to ³$GYDQFHG&RQILJXUDWLRQ2SWLRQV´RQSDJH-20.
Installation and Operation
2-19
IF YOU EXPERIENCE UNSTABLE READINGS
A steady display and solid illuminated Echo lamp indicates a good signal. An erratic
display and/or a flashing Echo lamp indicates a poor signal. Reposition the transducer
heads until readings are steady and the Echo lamp is illuminated solid or select
another position to mount the sensors. Possible reasons for poor signals are:
3DUWLDOO\IXOOSLSH
([WUHPHDHUDWLRQ
,QVXIILFLHQWVXVSHQGHGSDUWLFOHVPLQLPXPSDUWLFOHVL]HDQGFRQFHQWUDWLRQDUH
microns at 35 ppm and greater than 0.2% density difference)
Any fluids with particle size/concentration less than the requirement listed above
should be measured with a transit time flow meter.
([WUHPHWXUEXOHQFH
,QWHUIHUHQFHIURPHOHFWULFPRWRUVRUPRWRUFRQWUROOHUV
If your meter readings do not stabilize, see ³7URXEOHVKRRWLQJWKH8QLW´RQSDJH-1
and ³(FKR/('/LJKW&RQVLGHUDWLRQV´RQSDJH-9 for further assistance.
Advanced Configuration Options
The display panel keypad has a secondary menu for advanced configuration options
(the keypad toggle menu). You may want to use this menu to set 4-20mA analog output,
set up bar graph, select HI/LO alarm set points, and configure batch control. To access the
secondary menu, press appropriate key until the display changes. To exit, press the key again.
Figure 2-10 on page 2-21 provides a visual representation of the toggle menu.
Table 2-6 lists the advanced configuration options accessible from the display
panel keypad.
2-20
Installation and Operation
Compu-)ORZDoppler Ultrasonic Flow Meter
Bar graph
FPS/PWR clear
K factor reset (1 to 256)
Low flow cutoff
(maximum = 2.5 fps)
4-20 mA
Set update time
(1sec,10sec, auto avg.)
MPS/PWR clear
Totalizer reset
High / Low alarm
Figure 2-10. Display unit keypad
Table 2-6. Keyboard Toggle Menu
Key 1 2 3 4 5 6 7 8 9 0 Selection FPS Bar graph K Factor 4-‐20mA Vel Sim Low Flow Cut Off MPS Secure Update Time Reset/ Recall Pipe ID Functional Specifications Feet per second/ clear pwr Analog 16pt bar graph (n/a with batch) Select K factor while running Set up 4-‐20mA analog output Velocity Simulator for systems test Set low flow cut off (maximum = 2.5 fps) Meters per second/ clear pwr Secure parameters On/Off Set update time (0 to 99 sec) Recall pipe ID/configure batch/ system reset HI/LO ALARM TOT RESET Set up HI/LO limit alarms/ reset cursor Reset totalizer while running/ reset cursor Installation and Operation
2-21
BEFORE SETTING ADVANCED PARAMETERS
The default setting for secondary keyboard functions is feet per second (fps), or
meters per second (mps) if the flow meter is configured for metric units. Once the
flow meter is operational and you wish to activate the analog bar graph, 4-20 mA
output, batch control, high or low alarm, or low flow cut-off options, consult advanced
parameter setting.
Sample Parameter Setting
You have a velocity of 5 fps and you would like the 4-20 mA output to be 12 mA or
50% of scale. Push and hold the MA/4 key until the screen changes and then release
the key. Enter a scale value of 10 fps via the keypad. The screen will automatically
return the display to volumetric indication. The 4-20 mA output will read 12 mA at the
terminal strip located on the right side of the main electronics circuit board. You may check
your 4-20mA output setting via the bar graph.
Note: Never adjust any of the potentiometers on the main processor board. These
settings are to be performed by authorized personnel only.
SETTING ADVANCED PARAMETERS
This section explains how to set advanced parameters using the keyboard on
the front panel of the unit.
Bar Graph
To Set the Analog Bar Graph of Flow Rate: (n/a with batch)
1. Press the Bar Graph/2 key. Enter the desired full-scale flow rate in the indicated
engineering unit.
2. To return to the rate and totalizer flow reading, press the Graph/2 key again.
3. To return to the graph, press the Graph/2 key again and select OK.
Batch Control
1. 7RFRQILJXUHEDWFKFRQWUROSUHVV³´ key and select Batch.
2. Select Enable and choose 1=Pulse, 2=Batch.
3. Select Batch volume in preselected engineering units.
K Factor (Correction Factor)
The default K Factor on the Doppler flow meter is set at 90 hZ/ fps for CLT V 6.0 Doppler
Sensors. For nearly all applications, this default K Factor setting should be adequate. There
are only a few circumstances that might merit adjusting the default K Factor setting
on your Doppler flow meter.
2-22
Installation and Operation
Compu-)ORZDoppler Ultrasonic Flow Meter
If the flow rate readings are not as expected, these are factors that may be
contributing:
1. The meter is measuring flow with a high level of turbulence, which may be caused
by too short of a straight run for proper transducer placement.
2. The liquid being measured has high viscosity, is too thick, or contains sound
absorbing materials (for example, homogenous drilling mud or roofing tar).
If either of these conditions exist, and your flow readings appear inaccurate, then you
may need to adjust the K Factor (correction factor) to get the desired flow rate.
Note: The K Factor is linear. Increase the K Factor to lower the flow rate or decrease
the K Factor to increase the flow rate by the percentage that the flow is off.
Again, for most applications, the default K Factor setting ensures the most accurate
reading by your Doppler flow meter. Consult ³7URXEOHVKRRWLQJWKH8QLW´RQSDJH-1
to troubleshoot inaccurate flow readings before making this adjustment.
To Set the K Factor:
1. Press the K FACTOR 3 key.
2. Enter Hz/ FPS. If you want to keep the default setting, enter 090.
3. The LCD screen will return to the rate and totalizer flow reading.
Analog Output
To Set the Analog Output:
1. Press the MA/4 key Enter the full scale preselected engineering unit.
2. After the output level has been set, the LCD screen will return to the rate and
totalizer flow reading.
Low Flow Cutoff
To Set the Low Flow Cutoff:
1. Press the FPS/1 or MPS/7 key to obtain the current reading in feet per second or
meters per second. Press the key again to return to the flow reading parameters
previously shown.
2. Press the LFC/6 key. Enter the cutoff in feet per second or meters per second. If
you enter a parameter that is too high, the LCD screen will display the maximum
allowable cutoff setting and then will return to the prompt for cutoff in feet per
second.
Installation and Operation
2-23
3. After the low flow cutoff is set, the LCD screen will return to the rate and totalizer
flow reading.
Meters per Second/ Power Clear
To Read Meters Per Second:
1. Press the MPS/7 key. The LCD will show the flow reading in meters per second
on the upper line of the LCD screen, replacing the rate parameter previously on
the screen. The totalizer reading remains the same parameter.
2. To return to the previous flow rate reading, press the MPS/7 key again.
Update Time
To Set Update Time:
1.
Press the UT/9 key. To enter the selection screen.
1
= 1 sec 2 = 10 sec 3 = auto;
³$XWR´PRGHZLOOXSGDWHHYHU\VHFRnd when the velocity change is >5%.
When the flow stabilizes to < 5% change the update time resets to a 10
second running average.
2. Enter the update time in 1 second., 10 seconds , or Auto.
3. After the update time is set, the LCD screen will return to the rate and totalizer
flow reading.
Hi/Low Alarms
To Set the High/ Low Alarms:
1.
Press the HI/LO ALARM key. Select Hi, Lo, or Both.
2.
Next enter the high limit alarm in your preselected engineering unit.
3. Now enter the low limit alarm in your preselected engineering unit.
4. After the high and low alarm parameters are set, the LCD screen will return to the
rate and totalizer flow reading.
Totalizer Reset
To Reset the Totalizer While the Unit is Running:
1. Press the TOT RESET key. The totalizer reading will return to zero.
2. The meter will begin taking totalizer readings from zero. The rate reading remains
unchanged.
2-24
Installation and Operation
Compu-)ORZDoppler Ultrasonic Flow Meter
Normal Operation
Once you have set up the Doppler flow meter for operation in your system, you may
virtually forget about it. The system is maintenance free, and does not require
calibration, since the readings do not drift over time. In the event of a power
interruption, your parameters will be saved for up to 99 years in non-volatile
Flash Memory ZKHQ\RXKDYHDFWLYDWHGWKH³6HFXUH2Q´VHWWLQJ
Portable Battery Operation (Portable Units Only)
The LCD screen will flash LOW BAT every second when there is approximately one
half hour of safe operation remaining. Never totally discharge the gel cell battery. The
charger provided with the flow meter will recharge the battery fully in approximately
8 hours. You may leave the battery on the charger overnight, since prolonged
charging periods will not damage the battery. The POWER switch on the flow meter
front panel must be in the OFF position in order for the internal battery to charge. If
the internal battery has been deep discharged, it will be necessary to charge the battery
for a minimum of 30 minutes before the front panel POWER switch is turned ON.
Installation and Operation
2-25
Compu-)ORZSRUWDEOHGLVSOD\
2-26
Installation and Operation
Compu-)ORZDoppler Ultrasonic Flow Meter
Chapter
3
Troubleshooting and Customer
Support
The following sections provide useful information for troubleshooting your Compu-)ORZDoppler
ultrasonic flow meter and process as related to your flow meter. Product warranty, return policy, and
customer support information appears near theend of this chapter.
TROUBLESHOOTING THE UNIT
If you suspect your Doppler flow meter is malfunctioning, please perform the
following checks before calling Compu-Flow Systems Support:
1. Make sure that the unit is properly connected to input power. See ³0RXQWLQJDQG
&RQQHFWLQJ3RZHUWRWKH(OHFWURQLFV(QFORVXUH´RQSDJH-13. Also, see ³6WDWXV
RI8QLW3RZHU´RQSDJH-2.
2. Make sure that the transducers are properly connected to the electronics enclosure
and that they are properly mounted. See ³0RXQWLQJDQG&RQQHFWLQJWKH
7UDQVGXFHUV´RQSDJH-9.
3. Ensure input power is on and power is within specifications. See ³)XQFWLRQDO
6SHFLILFDWLRQV´RQSDJH-3 for power requirements.
4. Is the Echo LED light flashing or off? See ³6WDWXVRI(FKR/(')ODVKLQJ´RQ
page 3-5 or ³6WDWXVRI(FKR/('2II´RQSDJH-3 for troubleshooting
information.
5. Does your Doppler flow meter flow rate reading appear too low, too high, or
erratic, but your Echo light is on? See ³6WDWXVRI)ORZ5HDGLQJ+LJKRU/RZ´RQ
page 3-6 or ³6WDWXVRI)ORZ5HDGLQJ(UUDWLF´RQSDJH-8 for troubleshooting
information. Also, consult ³(FKR/('/LJKW&RQVLGHUDWLRQV´RQSDJH-9 for
more information about the Echo light.
6. Have you performed the above checks and you still have no flow reading?
If you have performed all the above checks and followed troubleshooting
procedures in the ³)ORZ0HWHU7URXEOHVKRRWLQJ7DEOHV´RQSDJH-2 and your
unit is still malfunctioning, contact ³&RPSX-)ORZ6\VWHPV6XSSRUW´RQ
page 3-11.
Troubleshooting and Customer Support
3-1
Flow Meter Troubleshooting Tables
Follow these tables in sequential order for the best use. Answer the heading question
in bold at the beginning of each section before continuing on to the next section.
STATUS OF UNIT POWER
Is the unit receiving power? (Is the green Power light on?)
Yes. If the unit is receiving power, continue on to ³6WDWXVRI(FKR/('2II´
on page 3-3.
No. If the unit is not receiving power, troubleshoot using Table 3-1 below.
Table 3-1. Status of unit power troubleshooting checklist
Question/ Possible Cause
Corrective Action
Is AC or BATTERY (DC)
power properly connected to the
processor board?
Ensure that input power is properly connected.
Is the battery charged if you are
using BATTERY (DC) power,
or is the AC power module
plugged in if you are using AC
power?
If you are using DC battery power, make sure your battery
is charged and that the power cables are securely
connected.
See ³7R&RQQHFW,QSXW3RZHUWRWKH(OHFWURQLFV
(QFORVXUH´RQSDJH2-13.
If you are using AC power, make sure your AC power is
correct and the module is plugged in.
See ³7R&RQQHFW,QSXW3RZHUWRWKHElectronics
(QFORVXUH´RQSDJH-13 and ³3RUWDEOH%DWWHU\2SHUDWLRQ
3RUWDEOH8QLWV2QO\´RQSDJH-25 for more information.
Is the power switch on the Front
display panel on? Portable
Ensure the power switch on the rear display panel is in the
on position.
Is the power switch on the rear
Display panel on? Dedicated
See ³'LVSOD\SDQHO´RQSDJH-16 for the location of this
switch.
3-2
Troubleshooting and Customer Support
Compu-)ORZDoppler Ultrasonic Flow Meter
Table 3-1. Status of unit power troubleshooting checklist
Question/ Possible Cause
Is the power switch set correctly?
Corrective Action
Make sure the switch is in the on position.
BATTERY = 12 VDC input (battery) power
See ³7R&RQQHFW,QSXW3RZHUWRWKH(OHFWURQLFV
(QFORVXUH´RQSDJH-13 and Figure 2-8 on page 2-14 for
the location of the switch.
Is there a LOW BAT flashing in
the display?
If you are switching from BATTERY (DC) power to AC
power and the module does not match
your incoming power, you may see a LOW BAT warning
in the front panel display. Select the correct incoming
power level (12VDC) and this warning should disappear.
If you are using the battery (DC power) to power the unit,
your battery may be low. See ³3RUWDEOH%DWWHU\2SHUDWLRQ
(Portable Units 2QO\´RQSDJH-25.
Is there a blown input power
fuse?
All fuses are carbon pile auto resettable quick-trip fuses
that require no service.
STATUS OF ECHO LED: On or OFF
Is the Echo LED on steady?
Yes. If the Echo LED is on steady or is flashing, continue on to ³6WDWXVRI(FKR
/(')ODVKLQJ´RQSDJH-5.
Note. If the Echo LED is off, troubleshoot using Table 3-2 below.
Note: See ³$GGLWLRQDO7URXEOHVKRRWLQJ,QIRUPDWLRQ´RQSDJH-9 for additional
information about the Echo LED indicator.
Troubleshooting and Customer Support
3-3
Table 3-2. Status of Echo light troubleshooting checklist: Echo off
Question/ Possible Cause
Corrective Action
Are the transducers properly
connected to the processor
board?
Make sure the transducer wires are connected correctly to
the processor board.
See ³7R&RQQHFWWKH7UDQVGXFHUVWRWKH(OHFWURQLFV
(QFORVXUH´RQSDJH-11.
Are the transducers mounted
properly on the pipe?
Make sure that the transducers have been mounted on a
clean, smooth pipe using the required coupling grease.
Ensure that the transducers are securely mounted flush with
the pipe, side by side.
See ³7R0RXQWWKH&ODPS-2Q7UDQVGXFHUVWRWKH3LSH´RQ
page 2-9.
Is there fluid in the pipe? Is the
pipe full?
Verify that the pipe is full of fluid and that the fluid is
flowing above the minimum velocity specifications.
See ³)XQFWLRQDO6SHFLILFDWLRQV´RQSDJH-3 for flow
velocity specifications.
Have the transducers been
placed in the recommended
location on the pipe?
Make sure that the transducers have been mounted in an
acceptable location:
Consider straight run requirements (see ³6WUDLJKW
5XQ5HTXLUHPHQWV´RQSDJH-5 for more
information
Make sure the transducers are mounted flush with the
pipe, facing the same direction
See ³7R0RXQWWKH&ODPS-2Q7UDQVGXFHUVWRWKH3LSH´RQ
page 2-9 for more details.
3-4
Troubleshooting and Customer Support
Compu-)ORZDoppler Ultrasonic Flow Meter
Table 3-2. Status of Echo light troubleshooting checklist: Echo off
Question/ Possible Cause
Has the pipe been cleaned
down to bare metal before
transducer placement? Is this an
old pipe?
Corrective Action
Make sure the pipe was cleaned with sandpaper prior to
transducer placement. Also, check to make sure the type of
pipe in your application is suitable for use with a Doppler
flow meter.
See ³$VVHVVLQJ3LSH0DWHULDODQG&RQGLWLRQ´RQSDJH-5.
Is the measured fluid too clean,
or is the particle content
fluctuating below readable
specifications?
Verify that suspended solid content of fluid is at least 40
microns @ 35 ppm with at least a 0.2% density difference
from the liquid.
See ³6XVSHQGHG3DUWLFOH7HVW)RU'RSSOHU6LJQDOV´RQ
page 3-10 to check your fluid for particle content, and also
consult ³'HWHUPLQLQJLI<RXU3URFHVV,QVWDOODWLRQLV5LJKW
IRUD'RSSOHU)ORZ0HWHU´RQSDJH-3.
Note: Use a transit time meter if the fluid does not meet the
suspended solid specifications of a Doppler flow
meter. Contact ³Compu- Flow 6\VWHPV6XSSRUW´RQ
page 4-15 for more information.
STATUS OF ECHO LED: FLASHING
Is the Echo LED flashing?
No. If the Echo LED light is on steady, continue on to ³6WDWXVRI)ORZ
5HDGLQJ+LJKRU/RZ´RQSDJH-6.
Yes. If the Echo LED light is flashing, troubleshoot using Table 3-3 below.
Note: Review the three questions in Table 3-3. If you can answer yes to all three, and
you have determined that you do not have a power issue, you may have an
application that would be better suited for a transit time meter. See
³'HWHUPLQLQJLI<RXU3URFHVV,QVWDOODWLRQLV5LJKWIRUD'RSSOHU)ORZ0HWHU´
on page 2-3 and ³$GGLWLRQDO7URXEOHVKRRWLQJ,QIRUPDWLRQ´RQSDJH-9.
Troubleshooting and Customer Support
3-5
Table 3-3. Status of Echo light troubleshooting checklist: Echo flashing
Question/ Possible Cause
Have the transducers been
placed in the recommended
location on the pipe?
Corrective Action
Make sure that the transducers have been mounted in an
acceptable location:
Try moving the transducers. Consider straight run
requirements when deciding where they need to be
mounted (see ³6WUDLJKW5XQ5HTXLUHPHQWV´RQ
page 2-5 for more information)
Make sure the transducers are mounted side by side,
flush with the pipe
Make sure the exterior of the pipe was cleaned prior
to mounting the transducers
See ³7R0RXQWWKH&ODPS-2Q7UDQVGXFHUVWRWKH3LSH´RQ
page 2-9 for more details.
Have you performed the
suspended particle test to see if
the liquid in the flow is
compatible with Doppler
operation?
See ³6XVSHQGHG3DUWLFOH7HVW)RU'RSSOHU6LJQDOV´RQ
page 3-10.
Have you consulted the Echo
light consideration section?
See ³(FKR/('/LJKW&RQVLGHUDWLRQV´RQSage 3-9 for
information on whether the Doppler is the right meter for
your application. A transit time meter may work better for
your application if the Echo light continues flashing.
STATUS OF FLOW READING: HIGH OR LOW
Is the flow reading showing a rate that is lower or higher than expected?
No. If the flow reading is erratic rather than low or high, or you are
experiencing another issue, continue on to ³6WDWXVRI)ORZ5HDGLQJ(UUDWLF´
on page 3-8.
Yes. If the flow reading appears too low or too high, troubleshoot using Table
3-4 below.
3-6
Troubleshooting and Customer Support
Compu-)ORZDoppler Ultrasonic Flow Meter
Table 3-4. Status of flow reading troubleshooting checklist: High or low
Question/ Possible Cause
Has the meter been properly
programmed?
Corrective Action
Using the display panel keypad and the LCD screen,
verify that the rate selection and totalizer selection are set
correctly.
See ³7R2SHUDWH<RXU'RSSOHU)ORZMeter for the First
7LPH´RQSDJH-18.
Has the meter been set up with
sufficient straight run piping?
Make sure that the transducers are properly placed for
use with your Doppler flow meter.
See ³6WUDLJKW5XQ5HTXLUHPHQWV´RQSDJH-5 for more
information on correct transducer placement in your
system.
Are the transducers mounted
properly on the pipe?
Make sure that the transducers have been mounted on a
clean, smooth pipe using the required coupling grease.
Ensure that the transducers are securely mounted side by
side.
See ³7R0RXQWWKH&ODPS-2Q7UDQVGXFHUVWRWKH3LSH´
on page 2-9.
Has the pipe been cleaned down to
bare metal before transducer
placement? Is this an old pipe?
Is the inside wall coated or
Contaminated with build up?
Is the pipe diameter correct or has the
pipe been expanded or flattened?
Does your Doppler show a flow
reading that varies from the
reading on your alternative
measurement device?
Make sure the pipe was cleaned with sandpaper prior to
transducer placement. Also, check to make sure the type
of pipe in your application is suitable for use with a
Doppler flow meter.
See ³$VVHVVLQJ3LSH0DWHULDODQG&RQGLWLRQ´RQ
page 2-5.
1.
2.
Pipe wall build up reducing Ida
Incorrect ID due to erroneous data, collapsed pipe, or swollen pipe due to
pressure.
Verify that pumps are operating and that valve settings
are correct. Compare the velocity reading with an
alternative type of flow meter.
If the flow reading on your Doppler is similar to
the reading on your alternative meter, the Doppler
is probably reading correctly.
If the flow reading on your Doppler varies from
the reading on the alternative meter, you may
need to adjust the K Factor accordingly to correct
the flow reading.
See ³.)DFWRU&RUUHFWLRQ)DFWRU´on page 2-22 for
information on adjusting your K Factor.
Troubleshooting and Customer Support
3-7
STATUS OF FLOW READING: ERRATIC
Is the flow reading showing an erratic rate?
Yes. If the flow reading appears erratic, troubleshoot using Table 3-5 below.
No. If you have followed all the troubleshooting steps and procedures and your
Doppler is still not working correctly, contact ³&RPSX-Flow 6\VWHPV6XSSRUW´
on page 4-15 for information on how to proceed.
Table 3-5. Status of flow reading troubleshooting checklist: Erratic
Question/ Possible Cause
Corrective Action
Have the transducers been placed in
the recommended location on the
pipe?
Make sure that the transducers have been mounted in
an acceptable location:
Consider straight run requirements (see
³6WUDLJKW5XQ5HTXLUHPHQWV´RQSDJH-5 for
more information
Make sure the transducers are mounted side by
side
See ³7R0RXQWWKH&ODPS-On Transducers to the
3LSH´RQpage 2-9 for more details.
Has the pipe been cleaned down to
bare metal before transducer
placement? Is this an old pipe?
Make sure the pipe was cleaned with sandpaper prior
to transducer placement. Also, check to make sure the
type of pipe in your application is suitable for use with
a Doppler flow meter.
See ³$VVHVVLQJ3LSH0DWHULDODQG&RQGLWLRQ´RQ
page 2-5.
Is the unit near an electric motor or
motor controller?
Move the transducers away from interference and see
if the flow readings become more stable.
Is your update time allowing for
erratic flow readings?
Change your flow meter update time and see if the
flow readings become more stable.
See ³7R6HW8SGDWH7LPH´RQSDJH-24.
Can you adjust Analog damping to
provide a more accurate reading?
No, there are no analog damping settings other than
update time adjustment.
See ³7R6HW8SGDWH7LPH´RQSDJH-24.
3-8
Troubleshooting and Customer Support
Compu-)ORZDoppler Ultrasonic Flow Meter
Additional Troubleshooting Information
ECHO LED LIGHT CONSIDERATIONS
Compu-Flow'RSSOHUXOWUDVRQLFIORZPHWHUVUHTXLUHVXVSHQGHGVROLGVRUDLUEXEEOHV
to operate. The strict requirement is that sonic discontinuities exist. If the speed of
sound in the solids and liquids are identical, then there are no sonic discontinuities
(which act as ultrasonic reflectors), and most Doppler flow meters will not function.
Some bacterial slurries and chemical slurries may have suspended solids but cannot be
measured with a Doppler flow meter for this reason.
The behavior of the Echo light on the display panel of your Doppler flow meter
electronics enclosure may provide indication as to whether the Doppler flow meter is
the correct one for your application. If after troubleshooting your unit, the Echo light
does not remain on steady while you are operating your unit, you may need to
consider changing the meter to a transit time meter.
See ³'HWHUPLQLQJLI<RXU3URFHVV,QVWDOODWLRQLV5LJKWIRUD'RSSOHU)ORZ0HWHU´RQ
page 2-3 and ³7URXEOHVKRRWLQJWKH8QLW´RQSDJH-1 if you are having trouble
maintaining a steady Echo light during operation of your flow meter.
Table 3-6. Echo light scenarios
Echo light
condition
Flow rate
reading
Applicable Meter
Solution
Illuminated
steady
Yes
Doppler flow meter
If the Echo light is on and the
flow reading appears correct,
the Doppler is the best meter
for your application.
Flashing
Yes
Doppler flow meter
or
Transit time meter
There may be an inadequate
level of reflective materials in
the flow to ensure correct flow
readings. Move the transducers
until you get a steady light, or
replace your Doppler meter
with a transit time meter.
Off
Yes
Transit time meter
There may be an inadequate
level of reflective materials in
the flow to ensure correct flow
readings. Replace your Doppler
meter with a transit time meter.
Off
No flow
Contact Factory
Clamp on transducers may not
be able to provide accurate
flow readings in your
application.
Troubleshooting and Customer Support
3-9
SUSPENDED PARTICLE TEST FOR DOPPLER SIGNALS
Particles in a liquid may be either in suspension or dissolved. Dissolved particles will
not reflect Doppler signals because there is no physical dimension nor density
difference to return the sound to the receiver.
Suspended particles generally will return the Doppler signal if there are enough
present and their size is sufficient to meet the requirements of the transmitted
frequency. Materials such as wood pulp, algae, moss, onion skins, fine sand, or other
materials that do not meet the 35 ppm/ 40 micron/ 0.2% density difference minimum
requirements will not reflect sounds. Instead, the signal simply passes through this
material as if it were water. Usually these materials have a specific gravity of 0.999 or
1.001. This is almost exactly the same as water itself and therefore will neither rise nor
fall in the solution. These materials will move about almost anywhere in the solution
controlled only by the motion of the liquid itself.
Be aware that slow flows carry heavy particulate may allow the reflectors to settle out
even though you have flow. This generally does not occur on flows over 1 fps.
A simple test requires a clear glass container and a sample of the liquid you wish to
measure with the Doppler sensors. Stir the liquid and watch it for about 3 to 5 minutes.
If the visible particles in suspension neither rise nor fall, they are most likely the same
specific gravity as water and may not reflect Doppler signals. If these particles are the
same specific gravity as water, but do have a membrane or shell around them that is at
least 0.2% density difference than the water molecules, than the signals should be
strong enough for the Doppler to report correct flow readings.
If the particles rise or fall in the solution, they should provide adequate sonic
reflection as long as they meet the specified quantity, size, and density requirements
for the Doppler (see ³6SHFLILFDWLRQVDQG5HIHUHQFH,QIRUPDWLRQ´RQSDJH-1 for more
information).
Figure 3-1. Suspended particle test
3-10
Troubleshooting and Customer Support
Compu-)ORZDoppler Ultrasonic Flow Meter
Full Function Field Test System Integrity
Figure 3-2. Bucket test
In figure 3-2 above the Compu-)ORZSRUWDEOH'RSSOHUV\VWHPLVEHLQJ
field tested. With the sensors connected to the display, insert the sensors
into a container of water. Turn on the display and select FPS or MPS.
Stir the water and watch the display to verify readings on the LCD screen
and a solid echo light. This confirms complete system integrity.
If you still do not get good readings after testing your unit then you should
reconfirm the flow information or select a different type of flow meter for the
application.
Troubleshooting and Customer Support
3-11
RETURNING UNITS FOR REPAIR
Before returning any product for repair and/or adjustment, first follow all
troubleshooting procedures. If, after following these procedures, you still have a
problem, or if the procedure instructs you to, contact Compu-Flow Systems and
discuss the problem with a representative. (See also ³$XWKRUL]HG5HWXUQV´RQ
page 4-15).
All returns to Compu-Flow Systems support must be free of harmful, corrosive,
radioactive, or toxic materials, and have purge documentation when appropriate.
If you return a unit without first getting authorization from Comp-Flow
Systems Support and that unit is found to be functional, you will be charged a
retest and calibration fee, plus shipping charges.
To ensure years of dependable service, Compu-)ORZproducts are thoroughly
tested and designed to be among the most reliable and highest quality systems
available worldwide.
WARRANTY
Compu-Flow products are warranted to be free from failures due to defects
in material and workmanship for 18 months after they are shipped from the factory,
or 12 months in service. (please see warranty statement below, for details).
In order to claim shipping or handling damage, you must inspect the delivered goods
and report such damage to us within 30 days of your receipt of the goods. Please note
that failing to report any damage within this period is the same as acknowledging that
the goods were received undamaged.
For a warranty claim to be valid, it must:
%HPDGHZLWKLQWKHDSSOLFDEOHZDUUDQW\SHULRG
,QFOXGHWKHproduct serial number and a full description of the circumstances
+DYHEHHQDVVLJQHGDUHWXUQPDWHULDODXWKRUL]DWLRQRMA number (see below) by
Compu-Flow Systems Support.
All warranty work will be performed at an authorized Compu-Flow service center
(see list of contacts at the beginning of this chapter). You are responsible for obtaining
authorization (see details below) to return any defective units, prepaying the freight
3-12
Troubleshooting and Customer Support
Compu-)ORZDoppler Ultrasonic Flow Meter
costs, and ensuring that the units are returned to an authorized Compu-FORZ service center.
Compu-FORZ will return the repaired unit (freight prepaid) to you by second-day air shipment
(or ground carrier for local returns); repair parts and labor will be provided free of charge.
Whoever ships the unit (either you or CF) is responsible for properly packaging and
adequately insuring the unit.
Authorized Returns
Before returning any product for repair and/or adjustment, call Compu-Flow Systems
Support and discuss the problem with them. Be prepared to provide the model number
and serial number of the unit as well as the reason for the proposed return. This
consultation call will allow Compu-Flow System Support to determine if the unit must
actually be returned for the problem to be corrected. Such technical consultation is
always available at no charge.
Units that are returned without authorization from Compu-Flow Systems Support and
that are found to be functional will not be covered under the warranty (see warranty
statement, below). That is, you will have to pay a retest and calibration fee, and all
shipping charges.
Warranty Statement
The seller makes no express or implied warranty that the goods are merchantable or fit for any
particular purpose except as specifically stated in printed Compu-)ORZ specifications. The sole
responsibility of the Seller shall be that it will manufacture the goods in accordance with its
published specifications and that the goods will be free from defects in material and
workmanship. The seller's liability for breach of an expressed warranty shall exist only if the
goods are installed, started in operation, and tested in conformity with the seller's published
instructions. The seller expressly excludes any warranty whatsoever concerning goods that have
been subject to misuse, negligence, or accident, or that have been altered or repaired by anyone
other than the seller or the seller's duly authorized agent. This warranty is expressly made in lieu
of any and all other warranties, express or implied, unless otherwise agreed to in writing. The
warranty period is 18 months after the date the goods are shipped or 12 months after installed
for service. In all cases, the seller has sole responsibility for determining the cause and nature of
the failure, and the seller's determination with regard thereto shall be final.
Troubleshooting and Customer Support
3-13
Compu-)ORZ'RSSOHU8OWUDVRQLF)ORZ0HWHU
3-14
Troubleshooting and Customer Support
Compu-)ORZ'RSSOHUUltrasonic Flow Meter
Chapter
4
Specifications and Reference
Information
The following sections provide specification and accessory information for the Compu-Flow
Doppler ultrasonic flow meter, as well as useful pipe and conversion data.
PERFORMANCE SPECIFICATIONS
Table 4-1. Performance specifications
Description
Specification
Fluid conditions
Measured fluid
Homogenous liquids with Newtonian flow profiles (sludges,
slurries, sewage, wastewater, and other fluids containing
suspended particles)
State of flow
Axis-symmetric flow in pipe filled with fluid
Fluid type
Liquids containing suspended particles of at least 35 ppm at
40 microns at 0.2% density of undissolved solids or air bubbles
Measurable fluid
temperature range
-40 ºF to 200 ºF (-40 ºC to 93 ºC)
500 ºF Option with Heat Sinks
Velocity range
0.1 fps to 50 fps (0.04 mps to 15.25 mps)
Flow sensitivity
0.01 fps (0.04 mps)
Piping conditions
Pipe diameter range
Velocity & Volumetric indication: 0.5" to 999" (13 mm to 9999 mm)
diameter
Pipe
Including but not limited to: carbon steel, stainless steel, ductile
iron, cast iron, FRP, PVC, PVDF, PE 100,fiberglass, teflon, and
most concrete lined or coated pipes
Pipe lining
Including but not limited to: tar, epoxy, mortar, rubber, teflon,
PVC, and glass
Specifications and Reference Information
4-1
Table 4-1. Performance specifications (Continued)
Description
Specification
Measurement Accuracy
Accuracy
NIST Cent. Available
Typically ± 1% to 3% of full scale
See Table 2-2 on page 2-6 for straight run requirements and
specific accuracies.
Note: Accuracy is a function of flow profile.
Linearity
± 0.5% of full scale
Repeatability
± 0.1% of full scale
Response time
1 second or less
PHYSICAL SPECIFICATIONS
Table 4-2. Physical specifications
Description
Specification
Electronics Enclosure
Dimensions
7.75 X 4.25 X 2.50 inch
Note: See Figure 4-1 on page 4-6 for dimensional
illustrations.
Weight
4 lbs. -C6D 8 lbs. ±C6P
Materials
Enclosure ± Molded ABS FR plastic, Meets Nema type 4, 4X, 12, & 13
Meets IP 66, Meets UL 94 V-01.6 Flammability rating
Light gray RAL 7035
Environmental rating
NEMA 4X (IP65)
Ambient temperature
range
-13 ºF to 132 ºF (-25 ºC to 55 ºC)
Ambient humidity
Less than 100% RH
Transducers
Dimensions
7UDQVGXFHUKHDGV/[:['
(123 mm x 33.8 mm x 34.3 mm)
Note: See Figure 4-3 on page 4-8 for the dimensional
illustration
Weight
4-2
1.0 lb (0.455 kg)
Specifications and Reference Information
Compu-)ORZDoppler Ultrasonic Flow Meter
Table 4-2. Physical specifications (Continued)
Description
Specification
Housing material
Nylon - Hi Density
Mounting
Mounted to the outside of pipe by strap and gear clamps,
nylon belts, bungee and steel chain, or epoxy
Crystal wedge material
Epoxy resin (all transducer models)
Environmental rating
NEMA 6 (IP67) Continuous 6XEPHUVLEOHWR
Ambient temperature
range
-20 ºF to 200 ºF (-29 ºC to 93 ºC)
-20 ºF to 500 ºF with optional heat sinks
Ambient humidity
Less than 100% RH
Transducer cable
Standard cable
25´ (7.6 m) 2 twisted pairs, 24 AWG, belfoil shield
Note: Custom cable lengths are available PLQ
Maximum cable length
5000´ (1524 m) Wireless Optional
FUNCTIONAL SPECIFICATIONS
Table 4-3. Functional specifications
Description
Specification
Power
Dedicated units
Isolated-Regulated-Module
100-240 VAC @ 300mA ± 12VDC
12 VDC (DC operation enabled by barrier strip terminals; see
Figure 4-4 on page 4-14 for switch location)
Portable units
Portable battery charger
Power consumption
Analog output signal
Internal gel-cell, 4-hour continuous operation built-in battery
(without backlight)
Recharge time is 8 hours using the external power adaptor/
charger or DC auto cigarette lighter
Standard adaptor: 115 VAC, 50/60 Hz (± 10%) input delivering
12 VDC, 500 mA output
8 W typical
4-20 mA at 24VDC, 1200 maximum load resistance, internally
Carbon fused, active & passive modes
Specifications and Reference Information
4-3
Compu-)ORZDoppler Ultrasonic Flow Meter
Table 4-3. Functional specifications (Continued)
Description Alarm output RS232 output Data Logger output Power failure backup Specification AC: Separate Power module required for relay/ output Alarms & Batch RS232 via DB9 & USB ports 9300 baud rate Terminal Emulation Software (HyperTerminal for Windows/ ZTerm for Mac) 1-‐32 GB USB Flash drive USB board mount or remote cable Allows the electronics assembly to retain all parameter information and current totalizer value for 99 yrs Standard interface LCD display LED indicators 2-‐line, 16 characters per line, high resolution, backlit ͼ Yellow: Echo signal received ͼ Red: High alarm or low alarm activated ͼ Green: Power available Keypad 12 keys, tactile feedback Note: <ĞLJƉĂĚůŽĐŬŽƵƚǀŝĂĨƌŽŶƚƉĂŶĞůŬĞLJďŽĂƌĚ͖ƐĞĞ͞dŽ^ĂǀĞzŽƵƌ
WƌŽŐƌĂŵŵĞĚ&ůŽǁZĞĂĚŝŶŐ^ĞƚƚŝŶŐƐ͗͟ŽŶƉĂŐĞϮ-‐21 and figure 2-‐10 Display panel Rate selection, totalizer selection, K factor selection, analog output, low flow cutoff, update time (damping), high/ low alarm, fps, or mps selection, totalizer reset, etc Output setting function 4-‐20mA output scaling (from keypad) in selected engineering units Alarm setting function High and low alarms set points (entered in engineering units) Rate indication 4-‐digit LCD, velocity or volume (user selectable) English units: feet per second (fps), gallons (Gal), cubic feet (CF), and million gallons (MG), SMHD Metric units: meters (M), liters (LT), and cubic meters (CM), SMHD Note: Gallons refers to U.S. gallons, BBL=44gallon SMHD= Seconds, Minutes, Hours, Days Totalizer indication 12-‐digit LCD English units: gallons, cubic feet, acre feet, barrels, and millions of gallons Metric units: liters and cubic meters Note: Gallons refers to U.S. gallons. BBL=44gallon Update time (damping) Entered from keypad 1sec ʹ 10sec ʹ Auto Running Avg (75%=1sec) Low flow cutoff 0 fps to 2.5 fps (0 mps to 0.76 mps), entered from keypad K factor A value of 1 to 256, entered from keypad depending upon sensor type. The default is 90 Hz (correction factor) for version 6.0 Doppler sensor Totalizer reset Totalizer reset can be manually reset to zero from keypad Key # function Reset flashing cursor DzͲdz
Resume-‐ Reset Pipe ID-‐ Batch Dzͺdz
Secure On/Secure Off Dzͷdz
Test velocity simulator on/off Dzʹdz
Setup 16 point Bar Graph tracks 4/20mA output (n/a with Batch) 4-4
Specifications and Reference Information
Compu-)ORZDoppler Ultrasonic Flow Meter
Specifications and Reference Information
4-5
Compu-)ORZDoppler Ultrasonic Flow Meter
DIMENSIONS
Electronics Enclosure Dimensions
Inches 7.87L X 4.33W X 2.36D
mm
160
130
60
Figure 4-1. Front view of the electronics enclosure (C6 display panel)
4-6
Specifications and Reference Information
Compu-)ORZDoppler Ultrasonic Flow Meter
Figure 4-2. Bottom view of the electronics enclosure
Wall mount dimensions 179 X 54 mm
CLT V 5.6 Clamp-On Transducer Dimensions
Figure 4-3. Dimensions of clamp-on Doppler
Specifications and Reference Information
4-7
Compu-)ORZDoppler Ultrasonic Flow Meter
REFERENCE INFORMATION
The following section provides reference information for setting up the Doppler flow meter in
your system.
³6WDQGDUG3LSH'DWD´RQSDJH-9 contains three tables to assist in pipe
measurement:
³6WHHOVWDLQOHVVVWHHODQG39&´RQSDJH-9
³&DVWLURQSLSHVWDQGDUGFODVVHV´RQSDJH-10
³'XFWLOHLURQSLSHVWDQGDUGFODVVHVLQVLGHGLDPHWHUV´RQSDJH-11
³9HORFLW\&RQYHUVLRQ7DEOHV´RQSDJH-12 contains three tables to assist in
converting the default flow readings of meters per second or feet per second:
³9HORFLW\FRQYHUVLRQWDEOH036WR/30DQG/36´RQSDJH-12
³9HORFLW\FRQYHUVLRQWDEOH036WR/36DQG0+U´RQSDJH-12
³9HORFLW\FRQYHUVLRQWDEOH)36WR*30´RQSDJH-13
Useful formulas for field calculations on page 4-14
4-8
Specifications and Reference Information
Standard Pipe Data
Table 4-4. Steel, stainless steel, and PVC
Size
Inches
Standard Schedules Inside Diameters
5
10
20
30
STD
40
60
STG
80
100
120
140
180
O.D.
LTWALL
1
1.185
1.097
1.049
1.049
0.957
0.957
0.815
1.25
1.53
1.442
1.380
1.380
1.278
1.278
1.160
1.315
1.660
1.5
1.77
1.682
1.610
1.610
1.500
1.500
1.338
1.900
2
2.245
2.157
2.067
2.067
1.939
1.939
1.687
2.375
2.5
2.709
2.635
2.469
2.469
2.323
2.323
2.125
2.875
3
3.334
3.260
3.068
3.068
2.900
2.900
2.624
3.5
3.834
3.760
3.548
3.548
3.364
3.364
4
4.334
4.260
4.026
4.026
3.826
3.826
3.624
3.438
4.500
5
5.345
5.295
5.047
5.047
4.813
4.813
4.563
4.313
5.563
6
6.407
6.357
6.065
6.065
5.761
5.761
5.501
5.187
6.625
8
8.407
8.329
8.125
8.071
7.981
7.981
7.813
7.625
7.625
7.437
7.187
7.001
6.813
8.625
10
10.482
10.42
10.25
10.13
10.02
10.02
9.750
9.750
9.562
9.312
9.062
8.750
8.500
10.75
12
12.42
12.39
12.25
12.09
12.00
11.938
11.626
11.75
11.37
11.06
10.75
10.50
10.12
12.75
14
13.50
13.37
13.25
13.25
13.124
12.814
13.00
12.50
12.31
11.81
11.50
11.18
14.00
16
15.50
15.37
15.25
15.25
15.000
14.688
15.00
14.31
13.93
13.56
13.12
12.81
16.00
18
17.50
17.37
17.12
17.25
16.876
16.564
17.00
16.12
15.68
15.25
14.87
14.43
18.00
20
19.50
19.25
19.25
19.25
18.814
18.376
19.00
17.93
17.43
17.00
16.50
16.06
20.00
24
23.50
23.25
23.25
23.25
22.626
22.126
23.00
21.56
20.93
20.93
19.87
19.31
24.00
30
29.37
29.00
29.00
29.25
29.250
29.00
30.00
36
35.37
35.00
35.00
35.25
35.25
35.00
36.00
42
41.25
41.25
41.00
42.00
48
47.25
47.25
47.00
48.00
3.500
4.000
Table 4-5. Cast iron pipe (standard classes)
Nominal
Pipe Size
Inches
Class A
O.D.
I.D.
Class B
O.D.
I.D.
Class C
O.D.
I.D.
Class D
O.D.
I.D.
Class E
O.D.
I.D.
Class F
O.D.
I.D.
Class G
O.D.
I.D.
Class H
O.D.
I.D.
3
3.80
3.02
3.96
3.12
3.96
3.06
3.96
3.00
4
4.80
3.96
5.00
4.10
5.00
4.04
5.00
3.96
6
6.90
6.02
7.10
6.14
7.10
6.08
7.10
6.00
7.22
6.06
7.22
6.00
7.38
6.08
7.38
6.00
8
9.05
8.13
9.05
8.03
9.30
8.18
9.30
8.10
9.42
8.10
9.42
8.10
9.60
8.10
9.60
8.00
10
11.10
10.10
11.10
9.96
11.40
10.16
11.40
10.04
11.60
10.12
11.60
10.00
11.84
10.12
11.84
10.00
12
13.20
12.12
13.20
11.96
13.50
12.14
13.50
12.00
13.78
12.14
13.78
12.00
14.08
12.14
14.08
12.00
14
15.30
14.16
15.30
13.98
15.65
14.17
15.65
14.01
15.98
14.18
15.98
14.00
16.32
14.18
16.32
14.00
16
17.40
16.20
17.40
16.00
17.80
16.20
17.80
16.02
18.16
16.20
18.16
16.00
18.54
16.18
18.54
16.00
18
19.50
18.22
19.50
18.00
19.92
18.18
19.92
18.00
20.34
18.20
20.34
18.00
20.78
18.22
20.78
18.00
20
21.60
20.26
21.60
20.00
22.06
20.22
22.06
20.00
22.54
20.24
22.54
20.00
23.02
20.24
23.02
20.00
24
25.80
24.28
25.80
24.02
26.32
24.22
26.32
24.00
26.90
24.28
26.90
24.00
27.76
24.26
27.76
24.00
30
31.74
29.98
32.00
29.94
32.40
30.00
32.74
30.00
33.10
30.00
33.46
30.00
36
37.96
35.98
38.30
36.00
38.70
35.98
39.16
36.00
39.60
36.00
40.04
36.00
42
44.20
42.00
44.50
41.94
45.10
42.02
45.58
42.02
48
50.50
47.98
50.80
47.96
51.40
47.98
51.98
48.00
54
56.66
53.96
57.10
54.00
57.80
54.00
58.40
53.94
60
62.80
60.02
63.40
60.06
64.20
60.20
64.82
60.06
72
75.34
72.10
76.00
72.10
76.88
72.10
84
Compu-)ORZDoppler Ultrasonic Flow Meter
Table 4-6. Ductile iron pipe standard classes (inside diameters)
Size
Inches
Outside
Diameter
Class
50
Class
51
Class
52
Class
53
Class
54
Class
55
3
3.96
3.46
3.40
3.34
3.28
3.22
3.16
4
4.80
4.28
4.22
4.16
4.10
4.04
3.98
6
6.90
6.40
6.34
6.28
6.22
6.16
6.10
6.04
8
9.05
8.51
8.45
8.39
8.33
8.27
8.21
8.15
10
11.10
10.52
10.46
10.40
10.34
10.28
10.22
10.16
12
13.20
12.58
12.52
12.46
12.40
12.34
12.28
12.22
14
15.30
14.64
14.58
14.52
14.46
14.40
14.34
14.28
16
17.40
16.72
16.66
16.60
16.54
16.48
16.42
16.36
18
19.50
18.80
18.74
18.68
18.62
18.56
18.50
18.44
20
21.60
20.88
20.82
20.76
20.70
20.64
20.58
20.52
24
25.80
25.04
24.98
24.92
24.86
24.80
24.74
24.68
30
32.00
31.22
31.14
31.06
30.98
30.90
30.82
30.74
36
38.30
37.44
37.34
37.06
37.14
37.04
36.94
36.84
42
44.50
43.56
43.44
43.32
43.20
43.08
42.96
42.84
48
50.80
49.78
49.64
49.50
49.36
49.22
49.08
48.94
54
57.10
55.96
55.80
55.64
55.48
55.32
55.16
55.00
Note 1 Reduce I.D. by dimension shown; these figures also apply to C.I. pipe
4-11
Class
56
Specifications and Reference Information
Cement Lining Note 1
Standard
Thickness
Double
Thickness
0.125
0.250
0.1875
0.375
0.250
0.500
Compu-)ORZDoppler Ultrasonic Flow Meter
Velocity Conversion Tables
Table 4-7. Velocity conversion table (MPS to LPM and LPS)
Nominal pipe
size (mm)
(10 mm wall)
MPS
0.3
MPS
0.6
MPS
1.0
MPS
1.5
MPS
2.0
MPS
2.5
MPS
3.0
MPS
5.0
MPS
7.0
LPM
LPM
LPM
LPM
LPM
LPM
LPS
LPS
LPS
50
35
71
118
177
236
294
5.9
10
14
75
80
159
265
398
530
663
13.3
22
31
100
141
283
471
707
942
1178
23.6
39
55
150
318
636
1060
1590
2120
2651
53
88
124
200
565
1130
1885
2827
3770
4712
94
157
220
250
884
1768
2945
4418
5890
7363
147
245
344
300
1272
2544
4241
6361
8482
10602
212
353
495
400
2262
4524
7539
11309
15078
18848
377
628
880
Table 4-8. Velocity conversion table (MPS to LPS and M3/Hr)
Nominal pipe
size (mm)
MPS
0.3
MPS
0.6
MPS
1.0
MPS
1.5
MPS
2.0
MPS
2.5
MPS
3.0
MPS
5.0
MPS
7.0
LPS
LPS
LPS
LPS
LPS
LPS
M3/Hr
M3/Hr
M3/Hr
500
59
88
196
295
392
491
35.3
58.9
82.5
600
85
170
283
424
566
707
51
85
119
750
133
266
442
663
884
1104
79.5
132.5
186
1000
236
472
785
1178
1570
1963
141.4
236
330
1200
339
678
1131
1696
2262
2827
204
339
475
1500
530
1060
1767
2651
3534
4418
318
530
(15 mm wall)
Specifications and Reference Information
4-12
Table 4-9. Velocity conversion table (FPS to GPM)
Nominal pipe
size (inches)
Schedule 40
4-13
Velocity in Feet Per Second (fps)
1/2 fps
1 fps
2 fps
3 fps
4 fps
5 fps
6 fps
8 fps
10 fps
15 fps
20 fps
GPM
GPM
GPM
GPM
GPM
GPM
GPM
GPM
GPM
GPM
GPM
1
1.3
2.7
5.4
8
11
13
16
22
27
40
54
1.5
3.2
6.5
13
19
25
32
38
51
64
95
127
2
5.2
10.5
21
31
42
52
63
84
105
157
209
2.5
7.5
15
30
45
60
75
90
119
149
224
299
3
11.5
23
46
69
92
115
138
184
231
346
461
4
20
40
80
119
159
199
238
318
397
596
794
5
31
62
125
187
250
312
374
499
624
936
1248
6
45
90
180
270
360
451
541
721
901
1352
1802
8
78
156
312
468
624
780
936
1248
1561
2341
3121
10
123
246
492
738
984
1230
1476
1968
2460
3690
4920
12
175
349
698
1047
1397
1746
2095
2793
3492
5237
6983
14
211
422
844
1266
1688
2110
2532
3376
4220
6330
8440
16
276
551
1103
1654
2205
2756
3308
4410
5513
8269
11025
18
349
698
1396
2093
2791
3489
4187
5582
6978
10466
13955
20
434
867
1734
2602
3469
4336
5203
6938
8672
13008
17344
24
627
1254
2508
3763
5017
6271
7525
10034
12542
18814
25085
30
1048
2096
4192
6288
8385
10481
12577
16769
20961
31442
41923
36
1522
3044
6089
9133
12177
15221
18266
24354
30443
45664
60886
42
2084
4169
8338
12506
16675
20844
25013
33351
41688
62532
83377
48
2735
5470
10940
16409
21879
27349
32819
43758
54698
82047
109396
54
3441
6882
13764
20646
27528
34410
41292
55056
68821
103231
137641
60
4192
8395
16769
25154
33538
41923
50307
67076
83845
125768
167690
Compu-)ORZDoppler Ultrasonic Flow Meter
Compu-)ORZ6<67(066833257
For system support, please contact your salesman:
Specifications and Reference Information
4-15
OPTIONS
Data Logger Option 1-‐32 GB Flash drive. Built in or remote systems. Extremely user friendly keypad setup, data storage, and transfer. On board or remote cable USB terminal access. Wireless Option Wireless option for receivers and transmitters. Short and long range. Global signal transmission via internet. Wireless radio transducer to receiver available for Doppler, Magnetic, Mechanical, and Hybrid. (optional 2.4gHz wireless-‐ good for 14km LOS) Heat Sink Option Hi temp Doppler sensor heat sinks allows continuous operation up to ϱϬϬȗ&͘ 4-14
Specifications and Reference Information
CUSTOMER FEEDBACK
Compu-Flow's technical writing staff has carefully developed this manual using
research-based document design principles. However, improvement is ongoing, and
the writing staff welcomes and appreciates customer feedback. Please send any
comments on the content, organization, or format of this user manual to:
To order a manual, please contact your salesman:
4-16
Specifications and Reference Information
Compu-)ORZDoppler Ultrasonic Flow Meter
Index
Numerics
4-20 mA output, specifications 4-3
A
AC power
requirements 4-3
troubleshooting 3-2
accuracy 4-2
adaptor, battery 4-3
alarm output, specifications 4-4
analog output
setting parameters 2-23
signals 4-3
assessing flow profile 2-5
transducers 4-2
Doppler flow meter, features 1-1
ductile iron pipe data 4-11
E
ECHO LED
flashing 3-5
off 3-3
unstable readings 2-20
electronics enclosure 4-2
ambient temperature range 4-2
board connections 2-12
dimensions 4-2
overview 1-2
weight 4-2
email, customer support 4-15
B
battery
operation 2-25
power adaptor/charger 4-3
before installing the unit 2-1
C
cables, transducers 1-2, 4-3
cast iron pipe data 4-10
charger, battery 4-3
checklist for troubleshooting 3-1
clamp-on transducers, dimensions 4-8
connecting
AC input power 2-13
DC input power 2-14
electronics board 2-12
input power 2-13
conversion tables, velocity 4-12
correction factor 2-22
crystal wedge material 4-3
customer support, 3-11
D
DC power
requirements 4-3
troubleshooting 3-2
dimensions 4-8
electronics enclosure 4-2
electronics enclosure, illustration 4-6
i
F
features 1-1
first time operation 2-17
flow requirements
assessing profile 2-5
flow sensitivity, specification 4-1
fluid conditions, specifications 4-1
front panel 2-17
functional specifications 4-3
H
hi/ low alarms, setting 2-24
high flow rate reading, troubleshooting 3-6
horizontal pipe mounting 2-8, 2-9
I
illustrations
clamp-on transducer dimensions 4-8
electrical connections 2-12
electronics enclosure 4-6
electronics enclosure mounting 2-13
indications
rate 4-4
totalizer 4-5
input power requirements 4-3
inside diameters, pipes 4-9
installation
horizontal pipe mounting 2-8
pre-installation procedures 2-2
procedures 2-9
straight run requirements 2-5
tools required 2-2
vertical pipe mounting 2-8
introduction 1-1
K
K factor, setting 2-22
keypad
lockout switch 4-4
L
LCD display
rate selection 2-18
totalizer selection 2-19
LEDs
ALARM 2-16
ECHO 2-20
indications 2-16
POWER 2-16
specifications 4-4
lockout switch, keypad 4-4
low flow cutoff
setting 2-23
specifications 4-5
low flow rate reading, troubleshooting 3-6
alarms 4-4
analog output 4-3
P
performance specifications 4-1
physical specifications 4-2
pipe conditions, specifications 4-1
pipe data 4-9
cast iron pipe 4-10
ductile iron pipe 4-11
PVC 4-9
stainless steel 4-9
steel 4-9
pipe material
assessing condition 2-5
portable battery operation 2-25
power adaptor 4-3
power failure, backup 4-4
power requirements
AC 4-3
DC 4-3
procedures
connecting power to electronics enclosure
2-13
connecting transducers to electronics
enclosure 2-11
first time operation 2-18
mounting the electronics enclosure 2-13
mounting transducers 2-6
mounting transducers to the pipe 2-9
process
determining application requirements 2-3
product introduction 1-1
PVC pipe data 4-9
M
main components 1-2
measurement accuracy 4-2
meters per second, reading 2-24
mounting
horizontal pipe 2-8
vertical pipe 2-8
N
normal operation 2-25
O
operating temperature range
electronics enclosure 4-2
transducers 4-3
operation
first time 2-17
normal 2-25
portable battery 2-25
output signals
ii
R
rate indications, units of measure 4-4
rate selection 2-18
reference
pipe data 4-9
velocity conversion tables 4-12
reflectors
air bubbles and particles 1-3
sonic 1-3
repeatability 4-2
returning units for repair 3-12
S
sales, contact information 4-15
sensitivity, flow 4-1
Compu-)ORZDoppler Ultrasonic Flow Meter
setting parameters
advanced 2-22
analog output 2-23
hi/ low alarms 2-24
K factor 2-22
low flow cutoff 2-23
read meters per second 2-24
sample setting 2-22
totalizer reset 2-24
update time 2-24
sonic reflectors 1-3
specifications
flow sensitivity 4-1
fluid conditions 4-1
functional 4-3
input power requirements 4-3
performance 4-1
physical 4-2
pipe conditions 4-1
velocity of fluid 4-1
stainless steel pipe data 4-9
standard pipe data 4-9
steel pipe data 4-9
straight run
examples 2-7
requirements 2-5
support, customer support 4-15
system
components 1-2
overview 1-1
T
theory of operation 1-2
tools for installation 2-2
totalizer
indication, units of measure 4-5
reset, setting 2-24
selection 2-19
transducers
cable length 4-3
cabling 1-2
connecting to electronics enclosure 2-11
dimensions 4-2
housing material 4-2
mounting 2-9
placement guidelines 2-7
positioning guidelines 2-6
unstable readings 2-20
weight 4-2
troubleshooting
additional information 3-9
iii
checklist 3-1
ECHO light flashing 3-5
erratic flow rate 3-8
flow rate high or low 3-6
no ECHO light 3-3
no power to unit 3-2
troubleshooting table 3-2
unstable readings 2-20
U
unpacking the system 2-1
update time, setting 2-24
V
velocity conversion tables 4-12
velocity, measurable fluid 4-1
vertical pipe mounting 2-8
voltage selector switch 2-13
W
warranty
authorized returns 3-13
filing a claim 3-12
returning units 3-13
statement 3-13
web site 4-15
wedge material, crystal 4-3
Notes


