1
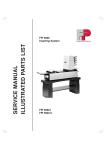
2dF/AAOmega Control Task Manual
Rob Sharp 2006
Based on Chapter 6 of the “2dF User Manual”
by Jeremy Bailey, Karl Glazebrook and Terry Bridges
October 26, 2006
Contents
1 The
1.1
1.2
1.3
1.4
1.5
1.6
1.7
2dF/AAOmega Software System
Scope and introduction . . . . . . . . . .
Starting Up the 2dF System . . . . . . .
Overview of Software . . . . . . . . . . .
The Control Task . . . . . . . . . . . . .
1.4.1 Positioner Control . . . . . . . .
1.4.2 Telescope Control . . . . . . . .
1.4.3 CCD Control . . . . . . . . . . .
1.4.4 ADC Control . . . . . . . . . . .
1.4.5 AAOmega Spectrograph Control
FPI Control . . . . . . . . . . . . . . . .
1.5.1 8-bit VNC display . . . . . . . .
The Engineering interface . . . . . . . .
Sections to add . . . . . . . . . . . . . .
1.7.1 pos stats.eps . . . . . . . . . . .
1.7.2 skycat.eps . . . . . . . . . . . . .
1
.
.
.
.
.
.
.
.
.
.
.
.
.
.
.
.
.
.
.
.
.
.
.
.
.
.
.
.
.
.
.
.
.
.
.
.
.
.
.
.
.
.
.
.
.
.
.
.
.
.
.
.
.
.
.
.
.
.
.
.
.
.
.
.
.
.
.
.
.
.
.
.
.
.
.
.
.
.
.
.
.
.
.
.
.
.
.
.
.
.
.
.
.
.
.
.
.
.
.
.
.
.
.
.
.
.
.
.
.
.
.
.
.
.
.
.
.
.
.
.
.
.
.
.
.
.
.
.
.
.
.
.
.
.
.
.
.
.
.
.
.
.
.
.
.
.
.
.
.
.
.
.
.
.
.
.
.
.
.
.
.
.
.
.
.
.
.
.
.
.
.
.
.
.
.
.
.
.
.
.
.
.
.
.
.
.
.
.
.
.
.
.
.
.
.
.
.
.
.
.
.
.
.
.
.
.
.
.
.
.
.
.
.
.
.
.
.
.
.
.
.
.
.
.
.
.
.
.
.
.
.
.
.
.
.
.
.
.
.
.
.
.
.
.
.
.
.
.
.
.
.
.
.
.
.
.
.
.
.
.
.
.
.
.
.
.
.
.
.
.
.
.
.
.
.
.
.
.
.
.
.
.
.
.
.
.
.
.
.
.
.
.
.
.
.
.
.
.
.
.
.
.
.
.
.
.
.
.
.
.
.
.
.
.
.
.
.
.
.
.
.
.
.
.
.
.
.
.
.
.
.
.
.
.
.
.
.
.
.
.
.
.
.
.
.
3
3
3
3
5
7
9
10
13
14
15
16
17
18
18
18
List of Figures
1.1
1.2
1.3
1.4
1.5
1.6
1.7
1.8
1.9
1.10
1.11
The console of aatlxb . . . . . . . . .
The Control Task main window . . . .
Positioner task window . . . . . . . . .
Telescope control GUI . . . . . . . . .
CCD control GUI . . . . . . . . . . . .
CCD loader and CCD running pop-up
The ADC GUI . . . . . . . . . . . . .
The AAOmega control GUI . . . . . .
AAOmega camera calibration window
The FPI task . . . . . . . . . . . . . .
The Engineering interface . . . . . . .
2
.
.
.
.
.
.
.
.
.
.
.
.
.
.
.
.
.
.
.
.
.
.
.
.
.
.
.
.
.
.
.
.
.
.
.
.
.
.
.
.
.
.
.
.
.
.
.
.
.
.
.
.
.
.
.
.
.
.
.
.
.
.
.
.
.
.
.
.
.
.
.
.
.
.
.
.
.
.
.
.
.
.
.
.
.
.
.
.
.
.
.
.
.
.
.
.
.
.
.
.
.
.
.
.
.
.
.
.
.
.
.
.
.
.
.
.
.
.
.
.
.
.
.
.
.
.
.
.
.
.
.
.
.
.
.
.
.
.
.
.
.
.
.
.
.
.
.
.
.
.
.
.
.
.
.
.
.
.
.
.
.
.
.
.
.
.
.
.
.
.
.
.
.
.
.
.
.
.
.
.
.
.
.
.
.
.
.
.
.
.
.
.
.
.
.
.
.
.
.
.
.
.
.
.
.
.
.
.
.
.
.
.
.
.
.
.
.
.
.
.
.
.
.
.
.
.
.
.
.
.
.
.
.
.
.
.
.
.
.
.
.
.
.
.
.
.
.
.
.
.
.
.
.
.
.
.
.
.
.
.
.
.
.
.
4
5
7
9
10
11
13
14
15
16
17
Chapter 1
The 2dF/AAOmega Software System
1.1
Scope and introduction
This manual is designed as an introduction to the 2dF/AAOmega system. It intends to give an
introduction to the new user prior to training on the operation of 2dF/AAOmega, and to act
as a refresher guide to experienced observes who may not have used the system for some time.
It should be used in tandem with the Observing procedures and “Don’t Panic” survival
guides, which can be found on the web at:
http://www.aao.gov.au/AAO/2df/aaomega/aaomega technical docs.html
Ultimately these documents will be merged into a more coherent documentation set.
1.2
Starting Up the 2dF System
The 2dF system should only be started up and shut down by AAO technical staff
and support astronomers, who should refer to the “2dF/AAOmega Observing procedure” (and the Survival Guide) for details of how to do this. Any ‘serious-looking’
problems should only be dealt with by these people as well.
1.3
Overview of Software
The 2dF/AAOmega software system is controlled through a number of user interface tasks
(seen in Figure 1.1). The 2dF/AAOmega control computer is actually aatlxy and is located in
the electronics rack behind the blue screens and above the CCD VME systems. For technical
reasons, the control tasks appear on the dual headed console of aatlxb.
The control tasks are as follows:
The 2dF Control Task (tdfct) — This task is responsible for loading and initialising all
the others (see Figure 1.2). It contains status windows for all the subsystems it controls
as follows:
• Telescope
• Positioner
• ADC (Atmospheric Dispersion Compensator)
• AAOmega Spectrograph
• CCDs control
3
Figure 1.1: The console of aatlxb showing the 2dF/AAOmega control system in operation
Each of these sections contains basic information on the status of the subsystem and a
More button. Clicking on this button will bring up a control window which provides more
detailed control of the specific subsystem.
FPI Control Task (fpictrl) — This task provides control of the focal plane imaging camera,
and its gantry (see Figure 1.10). It is possible to use this task to drive the FPI to almost
any star in a configuration file. It is used for field acquisition and for the astrometric
calibration process. The images from the FPI camera are displayed by the IMG task
which has its own window. Due to a lack of readily available image display software at
the time of the initial construction of the 2dF system, this custom written display task
requires an 8-bit display and so currently operates within an 8-bit VNC session running
on the console.
The Positioner User Interface (POS) — In recent times the POS task has been largely
superseded by the use of the tdfeng engineering interface (see Figure 1.11). Under normal
operation the main purpose of the POS task is/was to provide a mimic display of the 2dF
positioner. It also includes the ability to control most of the positioner functions. In
normal operation, however, the positioner should be controlled through the control task’s
positioner control window, whenever possible, rather than through the POS task.
4
1.4
The Control Task
The main window of the control task is shown in Figure 1.2. This window contains status displays
for the five subsystems managed by the control task (Telescope, ADC, CCDs, Positioner and
the AAOmega spectrograph). Any of these sections can be removed from the display by clicking
the button in the top right hand corner. It can be restored to the display using the Display
menu.
Figure 1.2: The Control Task Main Window - An individual control window for each of the six subsystems can
be brought up by clicking on the more buttons
A number of options are controlled through the Commands menu which contains the following
commands:
Initialise — This command causes the control task to load and initialise all the subsystems.
Reset — When the system is initialised the Initialise entry is replaced by the Reset entry.
This brings up a dialogue which allows a number of different levels of system reset. The
Recover option is the most useful. This can be used to make the control task reload any
task on aatlxy that has crashed or been deleted. NOTE: don’t reset while the positioner
is running, or the CCD are exposing.
Task Status — This brings up a window showing the status of all the subtasks managed by
the control task.
Report — This outputs information on the subtasks in the messages window.
Delete Tasks — This can be used to delete one of the subtasks. It is most useful if a task
gets hung for some reason. Delete the task and then use Reset/Recover to reload it.
Display Configuration — This can be used to display information about a fibre configuration
file.
5
Find Fibres on Spectrograph — This option runs a sequence which records CCD frames
with each fibre illuminated in turn, which can be used to determine the mapping of pivot
numbers to fibre positions on the slit. This option is only used for maintenance purposes.
Set System Time — Enough said
6
1.4.1
Positioner Control
The Positioner Control window is shown in Figure 1.3. The top section of the display shows
that the plate in the configuring position (Config Plate) is currently field plate 0. This means
that plate 1 is in the observing position. The last configuration file which each plate was set up
with is shown below this. You can double click on the file name to get further details on the
configuration file.
Figure 1.3: The Positioner Control window — This is obtained by clicking on the more button in the Positioner
section of the main Control Task. window
The Fibres Moved? button indicates if any fibres have been moved since the field was set
up. The All Parked button will be on if all the fibres on the plate are parked.
The lower section of the display is a ‘notebook’ widget with most of the main positioner
control functions in the Plate0 page (and duplicated in the Plate1 page).
The Survey... button starts a survey of the grid of fiducial marks in the field plate. This
calibrates the relationship between the encoder units of the gripper or FPI gantry with
the actual XY of the field plate. A field plate survey should be done before any position
critical operations are done with a gantry, such as setting up a field (a survey is now done
automatically when a field is setup), or doing an astrometric calibration with the FPI.
Because of flexure between the gantries and field plates, the survey should be done at the
same telescope position at which the setup or calibration will be done. The Survey...
button brings up a dialogue which allows selection of the FPI or Gripper gantry and
provides options for a number of different types of survey. The All option is the one
normally used for calibration.
The Tumble button ‘tumbles’ the positioner interchanging the positions of the two field plates.
The plate that was at the configuring position now becomes the observing plate. This also
changes the slit within the AAOmega spectrograph. However, the slit will not start to
change until after CCD readout is complete (to prevent scattered light from encoders on
the motors from contaminating data).
The Configure Fibres button initiates the setting up of a fibre configuration. The configuration file to be set up should be entered in the Config file entry section. Clicking on the
button at the right hand end of this will bring up a file section dialogue to enable the file
to be selected.
By default configuration files are ‘tweaked’ before being set up. This involves recalculating
the XY positions of the fibres for a specified observing time and for the current astrometric
7
model and refraction parameters (Weather)). If you are going to tweak your file make sure
that the information in the Weather and Wavelengths pages are correctly set up as
these are used for the refraction calculation. The Obs Time value is used to set the time
in minutes from now which the field will be set up for, or for a given local time. If you turn
off tweaking (though why you would want to do this, we can’t imagine), the XY values in
the configuration file will be used (which may have been calculated using an old model).
It’s hard to imagine a situation where you would want to disable tweaking.
Once the field setup starts, the Configuration Progress section displays a progress bar,
and the number of the fibre currently being positioned. The Configure Fibres will then
change to an Abort setup button.
The Park All button parks all the fibres on the plate.
The Fibre Moves page contains options to move or park individual fibres.
8
1.4.2
Telescope Control
The telescope control window is shown in Figure 1.4. The upper section shows the current
telescope status. The Slew page can be used to slew the telescope to a source. A position can
be entered directly into the Position section (useful for doing standard stars), or the telescope
can be slewed to the field centre position of the configuration file associated with either the
observing or configuring field plate using the buttons in the Config File Positions section:
choose Observation Plate File or Config Plate File, then Load position from file to
input fields, and finally Commence Slew and Track. The ADC can also be set to track the
same source by setting the ADC Track button.
Other pages in this display allow the telescope to be parked at zenith or prime-focus access,
offset control of the telescope, and focus control.
Check with Night Assistant before moving telescope!
Figure 1.4: The Telescope Control window — This is obtained by clicking on the more button in the Telescope
section of the main Control Task window
9
1.4.3
CCD Control
The CCD control window is shown in Figure 1.5. The CCD control works by sending commands
to the observatory standard AAO2 CCD controller system running on a pair of VMS machines.
Figure 1.5: The CCD Control window — This is obtained by clicking on the more button in the CCD section
of the main Control Task window
The upper section of the window specifies the exposure time, the type of run, and whether it is
to be recorded. Since the 2dF data reduction software relies on correct header information, it’s
very important to enter the correct run type; see the sections below for more information. The
options for recording data are as follows:
Normal — A standard run which will be permanently recorded. These runs are assigned a
sequential run number and recorded on the data disk, currently at :
/net/aatlxy/data/aatobs/OptDet data/YYMMDD/ccd N
The run naming convention follows DDmmmCnnnn.fits, e.g. 25oct10010.fits would be
the 0010 run from CCD1 on the 25th October.
Dummy — These are exposures taken during setup which do not need to be kept. They are
written to
/net/aatlxy/data/aatobs/OptDet dummy/YYMMDD/ccd N
Glance — The CCD is read out and displayed but not recorded on disk. These can be used
for checking exposure times etc.
See the Observing guide for more details about actually taking data and calibration frames.
10
The lower section of the display specifies which CCDs are being controlled. The normal situation
is that both CCDs are selected, in which case simultaneous exposures will be taken on both
CCDs. The Repeat Mode allows a single exposure, a continuous sequence of exposures, or a
specified repeat count.
The Window button allows the CCD readout window to be specified. The AAOMEGA 2DF
window should be used for all standard AAOmega/SPIRAL observations.
The Readout Speed sets the readout speed for the CCD which determines the readout time,
readout noise and gain. The NORMAL mode is normal, although FAST is acceptable for many
programs. ULTRAFAST is used for setup checks, but should also be acceptable for high signal
targets where read-noise is of little importance.
CCD loader and CCD running pop-up
Two additional GUIs are associated with the CCD system, and are shown in Figure 1.6.
Figure 1.6: The CCD Control loader (left) and CCD running pop-up (right).
The CCD loader shows the status of the CCD control system, and the user will not typically
interact with this window. The CCD running GUI will pop-up on the observing screen when a
CCD exposure is under way. Via this GUI the user can alter the exposure time (note this will
alter the exposure time for any repeat observations as well), Abort the current run, pause the
exposure or set the number of repeat observations.
A Repeat counter is found in the centre of the window, just below the By Count label. This
counter is in the sense that it shows the number of CCD readouts that are yet to complete
(hence it will always be 1 or greater).
11
To add extra observations to the repeat counter: Click on the count button; enter the
required number in the box below counts (this number will be the new number of CCD readouts
required); click the Apply Repeat button.
To set the system back to a single read out: Click the Single button; Click the Apply
Repeat button.
Finlay, there is a radio button on the bottom left of the GUI that allows the status of the
calibration flaps at the end of the exposure to be altered (leave closed or open up), and a text
box to allow the object name for the exposure to be changed.
12
1.4.4
ADC Control
The ADC control window (shown in Figure 1.7) contains a display of the ADC prism angles and
buttons to allow the ADC to be nulled, stopped or set to track a specified telescope position. In
normal operation this window is not needed as the ADC can be controlled from the telescope
control window.
User interaction is typically limited to using the 5 buttons on the bottom left. If the system has
failed for some reason, these allow the user to recover ADC operations by slewing the ADC to
the desire position. The options are:
Stop the ADC — This should be done at the end of the night
Set tracking — To start the ADC tracking with the telescope
Null ADC — Null both elements, remove the ADCs corrective power
Slew to Tel Pos — Rapid slew the ADC to match Telescope position
Update Position — never used
Figure 1.7: The ADC Control Window – This is obtained by clicking on the more button in the ADC section
of the main Control Task window
13
1.4.5
AAOmega Spectrograph Control
The AAOmega spectrograph control window is shown in Figure 1.8. The window provides a
display of the setup of the spectrograph (gratings, focus etc..). Status information (open doors,
dark-slide positions, temperature monitors etc.) can be viewed by selecting the Full Status
button, which will bring up the Status dialogue also shown in Figure 1.8.
Figure 1.8: The Spectrograph Control window (left) and the spectrograph status window (right). Both are
obtained by clicking on respective buttons (more and Full Status) in the Spectrograph section of the main
Control Task window (Figure 1.2).
The spectro control GUI provides the following functions:
• Manual slit exchange — The Observation Slit drop list allows the user to manually
select the slit that should be positioned in the spectrograph beam. Options are MOS slits
0 and 1, SPIRAL, or the long slit calibration unit (once it is implemented).
• Configuration — The Configuration drop list is used to modify AAOmega setup, and
should only be used by an expert user.
• Calibration — The two lower buttons marked Calibrate AAOmega Blue/Red arm are
used to bring up the calibration GUI (see Figure 1.9). This offers control of the Hartmann
shutters, for spectrograph focus, and access to the camera focus GUI(s). Again, this should
only be operated by an expert user.
Grating selection is auto-sensed, and indicated in the dialogue.
14
Figure 1.9: The AAOmega Blue arm calibration GUI. An identical dialogue is available to control the Red arm.
1.5
FPI Control
This area is still under construction
This is used to control the Focal Plane Imaging gantry which carries a small CCD which can
be positioned almost anywhere in 2dFs focal plane to take images. It is used for astrometric
calibration and field acquisition as described in more detail in the Observing guide. The FPI
control window is shown in Figure 1.10. The FPI has the following functions:
Menu Items: File, Commands, Imager, Options
To be done
Camera Control (left-hand side):
• The Image button is used to take a single image of the FPI field, with the exposure time
set in the box near the top. Exposure times typically range from 0.1–1 sec (bright SNAFU
star) to 3–4 sec (fiducial star of 15th mag).
• The Centroid button is used to determine the centroid and FWHM of a star in the FPI
field. This is used most often to measure the seeing.
• The Continuous button allows Images and Centroids to be done continuously, until the
button is clicked again.
• The Control Options button
to be done
Gantry Control (right-hand side):
• The Control Options... button is used to park, unpark, and move the gantry to a given
location in the focal plane.
15
Figure 1.10: The FPI control task window, and 8-but VNC display — used for imaging stars in the focal plane
of 2dF
1.5.1
8-bit VNC display
As well as the FPI control task, Figure 1.10 also shows the 8-bit display which will show the last
image taken with the FPI. This windows is an historical hangover from the evolution of 2dF.
The FPI operations which require keyboard and mouse interactions (i.e. ctrl-click centroids,
shift-drag to define centroid box) interact rather poorly with this window, and so the user
must ensure that they have activated it by clicking on the green bar at its top, before issuing
commands. If ones does not do this then strange, yet recoverable, behaviour of the display will
be observed (the image will jump around and your commands will not be issued).
The window can be minimised by clicking the top right minimise button. It will then be found
in the system tray at the bottom of the console. If the window is inadvertently closed, then it
can be recovered by opening an xterm on the aatlxy console. This runs the aatinst account
start-up script which maximises the VNC display if it is available, or starts a new one if it has
been close.
16
1.6
The Engineering interface
The POS mimic is rarely used, although it offers the facility to print the current configuration
(File->Print) which can be useful while fixing fibreing problems at Prime Focus Access.
The tdfeng task is started from the aatlxy xterm with the imaginative command tdfeng.
Take care to select Access Running and not Start System when bringing tdfeng up.
Figure 1.11: The POS mimic (left) and tdfeng task (right).
17
1.7
Sections to add
1.7.1
pos stats.eps
1.7.2
skycat.eps
18