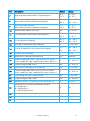
1
User Manual
Farm Pro
Climate Controller for Pigs
Ag/MIS-IGB-2149-11/13 Rev 1.0
P/N: 110190
Farm Pro
Pig
Farm Pro Pigs
User manual
Revision: N1.0 of 18.11.2013
Product Software: Version 8.07
This manual for use and maintenance is an integral part of the apparatus together with the attached
technical documentation.
This document is destined for the user of the apparatus: it may not be reproduced in whole or in part,
committed to computer memory as a file or delivered to third parties without the prior authorization of the
assembler of the system.
Munters reserves the right to effect modifications to the apparatus in accordance with technical and legal
developments.
Index
Chapter
1
INTRODUCTION ------------------------------------------------------------------------------------------------------------------------------------------------------------ 6
1.1
1.2
1.3
2
Features ---------------------------------------------------------------------------------------------------- 8
Principles, Options, and Operation ---------------------------------------------------------------------- 8
3.2.1 60BSummary Ventilation Settings ..................................................................................................... 8
3.2.2 61BExamples: Fan Groups, Curtains, and Levels............................................................................. 9
3.2.3 62BHeaters ...................................................................................................................................... 13
3.2.4 63BAdditional Systems .................................................................................................................... 14
2BOPERATING INSTRUCTIONS --------------------------------------------------------------------------------------------------------------------------------- 16
4.1
4.2
4.3
4.4
4.5
5
Grounding ------------------------------------------------------------------------------------------------- 7
Filtering ---------------------------------------------------------------------------------------------------- 7
Checking the Battery Level ------------------------------------------------------------------------------- 7
INTRODUCTION TO THE FARM PRO --------------------------------------------------------------------------------------------------------------------- 8
3.1
3.2
4
Disclaimer ------------------------------------------------------------------------------------------------- 6
Introduction ------------------------------------------------------------------------------------------------ 6
Notes ------------------------------------------------------------------------------------------------------ 6
PRECAUTIONS ---------------------------------------------------------------------------------------------------------------------------------------------------------------- 7
2.1
2.2
2.3
3
page
15BDisplay --------------------------------------------------------------------------------------------------- 16
16BKeypad -------------------------------------------------------------------------------------------------- 16
17BFactory Reset (Cold Start) ------------------------------------------------------------------------------ 17
18BHot Keys ------------------------------------------------------------------------------------------------- 17
19BMenu Structure ------------------------------------------------------------------------------------------ 18
3BC ONTROL MENU ------------------------------------------------------------------------------------------------------------------------------------------------------- 19
5.1
5.2
5.3
5.4
5.5
5.6
5.7
5.8
5.9
5.10
20BAccessing Menu Items ---------------------------------------------------------------------------------- 19
21BTemperature (Menu 01) -------------------------------------------------------------------------------- 19
2BMin/Max Levels (Menu 02) --------------------------------------------------------------------------- 20
23BHumidity (Menu 03) ------------------------------------------------------------------------------------ 21
24B5Cooling (Menu 04) ------------------------------------------------------------------------------------- 22
26BLighting (Menu 05) ------------------------------------------------------------------------------------- 23
27BFeed (Menu 06) ---------------------------------------------------------------------------------------- 23
28BExtra System (Menu 07) -------------------------------------------------------------------------------- 24
29BStatic Pressure (Menu 08) ------------------------------------------------------------------------------ 24
30B1Foggers (Menu 09) ------------------------------------------------------------------------------------- 27
© Munters AB, 2013
4
6
4BHERD MANAGEMENT MENU ------------------------------------------------------------------------------------------------------------------------------- 28
6.1
6.2
6.3
6.4
6.5
6.6
6.7
6.8
7
5BHISTORY MENU ---------------------------------------------------------------------------------------------------------------------------------------------------------- 31
7.1
7.2
7.3
7.4
7.5
7.6
7.7
8
47BTemperature (Menu 31) -------------------------------------------------------------------------------- 33
48BHumidity (Menu 32) ------------------------------------------------------------------------------------ 33
49BRelays (Menu 33) --------------------------------------------------------------------------------------- 33
50BDigital Inputs (Menu 34) ------------------------------------------------------------------------------- 33
51BAnalog Input (Menu 35) ------------------------------------------------------------------------------- 34
52BAnalog Output (Menu 36) ----------------------------------------------------------------------------- 34
53BPulse (Menu 37) ---------------------------------------------------------------------------------------- 34
7BC ALIBRATION MENU ------------------------------------------------------------------------------------------------------------------------------------------------ 35
9.1
9.2
9.3
9.4
10
40BTemperature (Menu 21) -------------------------------------------------------------------------------- 31
41BHumidity (Menu 22) ------------------------------------------------------------------------------------ 31
42BWater (Menu 24) --------------------------------------------------------------------------------------- 31
43BFeed (Menu 25) ---------------------------------------------------------------------------------------- 31
4BAlarms (Menu 26) -------------------------------------------------------------------------------------- 32
45BMortality (Menu 27) ------------------------------------------------------------------------------------ 32
46BHeaters (Menu 28) ------------------------------------------------------------------------------------- 32
6BTEST MENU ------------------------------------------------------------------------------------------------------------------------------------------------------------------- 33
8.1
8.2
8.3
8.4
8.5
8.6
8.7
9
32BMortality (Menu 11) ------------------------------------------------------------------------------------ 28
3BAnimal Count (Menu 12) ------------------------------------------------------------------------------- 28
34BFeed Inventory (Menu 13) ----------------------------------------------------------------------------- 29
35BTime / Growth Day (Menu 14) ------------------------------------------------------------------------ 29
36BHerd Number (Menu 15) ------------------------------------------------------------------------------ 29
37BNew Herd (Menu 16) ---------------------------------------------------------------------------------- 30
38BAlarm Reset (Menu 17)--------------------------------------------------------------------------------- 30
39BAlarm Test (Menu 18) ---------------------------------------------------------------------------------- 30
54BTemperature (Menu 41) -------------------------------------------------------------------------------- 35
5BHumidity (Menu 42) ------------------------------------------------------------------------------------ 35
56BFeed Pulse Ratio (Menu 45)---------------------------------------------------------------------------- 36
57BWater Pulse Ratio (Menu 46) -------------------------------------------------------------------------- 36
8BC ONFIGURATION------------------------------------------------------------------------------------------------------------------------------------------------------ 37
10.1 8B5System Variables (Menu 96) --------------------------------------------------------------------------- 37
10.2 9B5Password (Menu 97) ----------------------------------------------------------------------------------- 44
11
WARRANTY ------------------------------------------------------------------------------------------------------------------------------------------------------------------- 45
© Munters AB, 2013
5
1 Introduction
1.1 Disclaimer
Munters reserves the right to make alterations to specifications, quantities, dimensions etc. for production
or other reasons, subsequent to publication. The information contained herein has been prepared by
qualified experts within Munters. While we believe the information is accurate and complete, we make no
warranty or representation for any particular purposes. The information is offered in good faith and with
the understanding that any use of the units or accessories in breach of the directions and warnings in this
document is at the sole discretion and risk of the user.
1.2 Introduction
Congratulations on your excellent choice of purchasing an Farm Pro!
In order to realize the full benefit from this product it is important that it is installed, commissioned and
operated correctly. Before installation or using the fan, this manual should be studied carefully. It is also
recommended that it is kept safely for future reference. The manual is intended as a reference for
installation, commissioning and day-to-day operation of the Munters Controllers.
1.3 Notes
Date of release: June 2009
Munters cannot guarantee to inform users about the changes or to distribute new manuals to them.
All rights reserved. No part of this manual may be reproduced in any manner whatsoever without the
expressed written permission of Munters. The contents of this manual are subject to change without notice.
© Munters AB, 2013
6
2 Precautions
2.1 Grounding
CAUTION Always connect temperature and sensor shields to earth ground. Avoid mixing high voltage
wiring with sensor and low voltage wiring.
CAUTION Keep the controller as far as possible from heavy contactor boxes and other sources of
electrical interference.
CAUTION Do not connect communication wire shields, which go from one house to another at both
ends. Connect them at one end only. Connection at both ends can cause ground loop
currents to flow, which reduce reliability.
CAUTION The COM connection for communications is not the shield wire. The COM, RX and TX wires
must connect to each other at all controllers.
2.2 Filtering
15B
CAUTION If this installation includes a power inverter to drive variable speed fans, install an EMI filter
in front of the inverter, according to the specifications provided by the inverter manufacturer.
Refer to the inverter documentation.
2.3 Checking the Battery Level
16B
CAUTION Check the battery once a year. The output must be 2.7 volts (minimum). Authorized
personnel only must replace the battery if the output is below the minimum required level or
every five years.
© Munters AB, 2013
7
3 Introduction to the Farm Pro
This section introduces the Farm Pro Pig unit.
•
•
Features
Principles, Options, and Operation
3.1 Features
•
•
•
•
•
•
•
•
•
•
•
20 output relays (Farm Pro)
Up to eight additional relays
Up to six temperature sensors
Up to two electronic humidity sensors (inside and outside)
Variable speed output (0 to 10 volts)
Light dimmer (0 to 10 volts)
Digital pulse inputs (water, feed, wind direction)
Unique static pressure sensor (optional)
PC communication
Alarm output
Flexibility in add-on capacity:
o Water meter
3.2 Principles, Options, and Operation
The following sections provides example of Farm Pro’s main functions.
•
•
•
•
Summary ventilation settings
Examples: Fan groups, curtains, and levels
Heaters
Additional Systems
3.2.1 Summary ventilation settings
1. Assign ventilation fans to groups. The groups can use multiple output relays, so that several outputs make
up a group. Different groups cannot share the same relay. There is no information to enter into the control
at this point. Simply write the group numbers down with the assigned fans in the installation record, Menu
92 (page 18). The Farm Pro supports up to 12 groups (version 8.07)
2. Fill in the Ventilation Level Table, Menu 92. This is a part of the system installation menu, which does not
appear on the front panel of the control.
WARNING! Be careful to set the maximum ventilation level number correctly in configuration, Menu 91,
item 2. If the higher unused ventilation levels are at zero, the control turns off all fans when it
reaches those levels on a hot day. It is a good practice to duplicate the last line for the rest
of the table.
© Munters AB, 2013
8
3. Fill in the Curtain Level Table, Menu 95 to correspond with the Ventilation Level Table, Menu 92. Note
that the levels in both tables correspond with each other. Fill in the Temperature Table. Choose convenient
growth days, and set appropriate target, heating and cooling temperatures. The Farm Pro can
automatically ramp these temperatures at intermediate growth dates; simply enable ‘auto temp reduction,’
item 6 in installation, Menu 91. The control will regulate the ventilation and heating equipment to maintain
these temperatures.
4. Fill in the Minimum-Maximum Level Table by animal growth dates. This table limits the ventilation levels
the Farm Pro can use. The minimum settings are your winter handle on air quality in the house.
5. Set the Target Humidity and Cooling Tables when using these systems.
6. If using static pressure controlled inlets, enter the static pressure settings.
3.2.2 Examples: Fan groups, curtains, and levels
In this section we consider two different houses. One is curtain sided with cross ventilation and exhaust
fans. The other has only tunnel fans. All of the fans in the first example are in the sidewalls. In the
second, they are all at one end of the house.
The Farm Pro organizes the main ventilation fans in up to 12 groups of various sizes. It turns on
combinations of up to 12 of these groups at a time to provide the correct amount of ventilation.
•
•
•
•
Example A: Typical Fan Grouping (No Tunnel)
Example B: Typical Fan Grouping Side Wall and Tunnel Fans with Static Pressure Control
Example B, Part 2: Typical Ventilation Level Table
Example B, Part 3: Curtain Level Table
3.2.2.1 Example A: Typical fan grouping (no tunnel)
The example here, Typical Fan Grouping, Example A, demonstrates a common organization pattern. The
Farm Pro can also use a variable speed fan, and timers to cycle fans on/off.
Table 1: Typical Fan Grouping, Example A
Group 1
Fan 1 on Timer
Group 2
Fan 2 on Timer
Group 3
Fan 3
Group 4
Fan 4
Group 5
Fans 5 and 6
Group 6
Fans 7 and 8
Group 7
Fans 9 and 10
Example A uses no tunnel ventilation, but has two independent side curtains. The fans are all in the side
walls. An air inlet controlled by static pressure allows minimum fresh air into the building when the exhaust
fans operate. A possible ventilation table is on the next page.
Example A uses exhausts fans for minimum ventilation when the weather is cold, enabling the Air Inlet
open by static pressure. Ventilation level 1 is for one day old chicks, and moves a minimum amount of air
into the house. Level 9 has three exhaust fans going to provide air for animals on very cold days. Levels
10 through 15 are various degrees of natural ventilation, and level 16 and above turn on more
ventilation fans with Air Inlet static pressure for additional cooling during extremely hot conditions.
© Munters AB, 2013
9
Table 2: Typical Ventilation Level Table, Example A
*Natural
Levels
Ventilation Level
Ventilation Groups
On Min
Off
Min
Diff
Var**
1
100000000000
0.5
4.5
0
0
2
100000000000
1.0
4.0
0
0
3
100000000000
2.0
3.0
0
0
4
100000000000
3.0
2.0
0
0
5
100000000000
1.0
0.0
0
0
*6*
120000000000
1.0
4.0
0
0
7
120000000000
2.5
2.5
0
0
8
120000000000
4.0
1.0
0
0
9
123000000000
1.0
0.0
0
0
10…15
000000000000
0.0
0.0
0
0
16
123400000000
1.0
0.0
0
0
17
123450000000
1.0
0.0
0
0
18
123456000000
1.0
0.0
0
0
19
123456700000
1.0
0.0
0
0
20
123456700000
1.0
0.0
0
0
NOTE
10 – 15 is the natural level.
NOTE
Ventilation level 6 has fan groups 1 and 2 active. The cycle timer is set at 1.0 minutes on
and 4.0 minutes off. The cycle timer always applies to the highest numbered group in the
ventilation level, so in this case group 1 is on steady, group 2 cycles 1.0 minute on and 4.0
minute off.
NOTE
The Farm Pro displays either the On/Off minutes at each level, or the variable speed
setting. It does not display both at once, although all data remains correctly in computer
memory. Menu 91 , item 3, controls which data shows on screen.
WARNING! Example A repeats ventilation level 19 to 20 (recommended for safety purposes).
Maximum ventilation level should be set to 19 in Configuration, Menu 91, and item 3 for this example.
However, if the maximum ventilation level was at 20, with levels 20 blank, the Farm Pro turns off all fans
at ventilation levels 20. You may duplicate these levels to prevent this, or program the maximum number
of ventilation levels.
The curtain level table works with the ventilation level table.
Table 3: Curtain Level Table, Example A
Ventilation Level
Curtain 1 % Open
Curtain 2 % Open
1...9
0
0
10
15
10
11
25
20
© Munters AB, 2013
10
Ventilation Level
Curtain 1 % Open
Curtain 2 % Open
12
40
30
13
60
50
14
80
70
15
100
100
16…20
0
0
Example A has two side curtains for ventilation past ventilation level 9. For this example, Curtain 1 is
normally to the lee side of prevailing winds. Example A has it open slightly ahead of Curtain 2. If the
Farm Pro has a wind direction indicator, it automatically switches Curtain 1 and Curtain 2 levels
according to the wind direction.
Referring to the Ventilation Table, from level 16, seven cross ventilation fans blow air across the herd for
more cooling. With System Variable 4 set to 15, “Maximum level when inside temperature is below
cooling,” the Farm Pro does not use level 16 or above unless the temperature is above the cooling
system set point. Alternatively, set the differential to account for the cooling effect and cost of these fans,
as shown.
3.2.2.2 Example B: Typical fan grouping side wall and tunnel fans with static pressure control
65B
Table 4: Typical Fan Grouping, Example B – Part 1
Group 1
Fan 1 on Timer (Side Wall)
Group 2
Fan 2 on Timer (Side Wall)
Group 3
Fan 3 on Timer (Side Wall)
Group 4
Fans 4 and 5
(Tunnel)
Group 5
Fans 6 and 7
(Tunnel)
Group 6
Fans 8 and 9
(Tunnel)
Group 7
Fans 10 and 11 (Tunnel)
In Example B there is a single vent machine and a tunnel curtain machine. All the fans are 48” tunnel
fans. The RPS-1 static pressure sensor controls sidewall/ceiling inlets independently from the ventilation
table.
For ventilation under cold conditions, one, two or three of the tunnel fans provide minimum ventilation.
These blow fresh air through the side inlets, providing uniform fresh air throughout the house. Many
growers would insist on using stir fans out for reasons of safety. Tunnel ventilation with cooling pads
(levels 16…19) provides ventilation for animals during hot weather.
© Munters AB, 2013
11
3.2.2.3 Example B, Part 2
Table 5: Typical Ventilation Level Table
Ventilation Level
Ventilation Groups
On
Minutes
Off Minutes
Diff
Var
1
100000000000
0.5
4.5
0
0
2
100000000000
1.0
4.0
0
0
3
100000000000
2.0
3.0
0
0
4
100000000000
3.0
2.0
0
0
Minimum 5
Ventilation
6
100000000000
4.0
1.0
0
0
100000000000
1.0
0.0
0
0
7
120000000000
1.0
4.0
0
0
8
120000000000
2.5
2.5
0
0
9
120000000000
1.0
0.0
0
0
10
123000000000
1.0
4.0
0
0
11
123000000000
2.5
2.5
0
0
12
123000000000
1.0
0.0
0
0
13
123400000000
1.0
3.0
0
0
14
123400000000
2.0
2.0
0
0
15
400000000000
1.0
0.0
0
0
16
450000000000
1.0
0.0
1.0
0
17
456000000000
1.0
0.0
1.5
0
18
456700000000
1.0
0.0
2.0
0
19
456700000000
1.0
0.0
2.0
0
20
456700000000
1.0
0.0
2.0
0
First Tunnel
Transitional
The first part of Example B’s ventilation table reflects power and transitional ventilation with air coming
through static pressure controlled inlets. At level 16 the Farm Pro switches into tunnel ventilation, with
maximum fan power at level 18. Note the target temperature adjustment (for wind chill) makes by adding
differential temperatures from level 16 and above.
© Munters AB, 2013
12
3.2.2.4 Example B, Part 3
Table 6: Curtain Level Table
Ventilation Level
Tunnel Curtain % Open
1 through 14
0
15
25
16
50
17
75
18
100
19
100
20
100
NOTE
The air inlets are controlled by pressure only. The Tunnel Curtain % sets the minimum
opening if controlled by pressure
The Curtain Level Table, Example B, coordinates with the ventilation table. Note how the tunnel curtain
remains open. The Farm Pro enters tunnel ventilation at the cooling set point, not target temperature.
System Variable 21 enforces a minimum time in tunnel and out of tunnel to prevent oscillating. System
Variable 6 sets the degrees above target temperature to leave tunnel mode.
Tunnel ventilation begins at level 16, which one goes to Menu 91, Configuration > item 5. The side and
tunnel fans operate with the vent machine until level 15. At level 16 the vents close while the tunnel
curtain remains open for tunnel ventilation. Enter the time for tunnel curtain opening and closing in
Menu 91, Configuration > item 10, so the Farm Pro can account for the curtain movement rates.
3.2.3 Heaters
The Farm Pro supports several kinds of heaters. Standard low and high-level heaters and radiant
heaters work in up to six zones.
Standard automatic heaters
Radiant heaters
Variable Heaters
•
•
•
3.2.3.1 Standard automatic heaters
68B
Each of the zones can have low and high-level standard heaters. The low level heaters turn on first, and
if they cannot maintain the set temperature, the high level heaters turn on. For data collection, the Farm
Pro records the run time for the low level heaters only. It does not record the times for the high level or
radiant heaters.
If you use a single zone, the Farm Pro uses the average of the zone temperature sensors to control the
heating. If using multiple zones, the Farm Pro uses the specific zone sensor designated for each zone.
Refer to Menu 91, item 5 and Menu 94.
NOTE
When Farm Pro turns on any of the standard heaters, it immediately returns to minimum
ventilation.
© Munters AB, 2013
13
3.2.3.2 Radiant heaters
Many brooders use radiant heater. The Farm Pro enables the radiant heaters to have individual
temperature sensors to control the brooder heat.
Some radiant heaters require one relay to turn on the ignition and another relay for the high level
burner. System Variable 10 sets the ignition relay on time. System Variable 38 enables setting a higher
set temperature for radiant heaters which is higher than the standard heater setting.
3.2.3.3 Variable Heaters
%
Percentage
of Analog
Out output
100%
Max out 100%
[As defined in
Variables 18
or 22 of
System
Variables
(Menu 97)]
Low Level
Hysteresis
Heat ON
Heat OFF
Min out 0%
[As defined in
Variables 17
or 20 of
System
Variables 0°C
(Menu 97)]
Temp.
High
Level
Heat
Variable 9 of System
Variables (Menu 97)
Low
T.
Level
Heat
Heat
Variable 8 of System
Variables (Menu 97)
3.2.4 Additional systems
The Farm Pro runs lighting, feeding and extra systems. The feeding and lighting systems can coordinate
for dark-out and periodic operation. Extra systems can run according to time, temperature sensor, or
cycle timer.
Water meter and alarm
Feed overtime alarm and shutoff
Wind direction sensor
Remote communication
•
•
•
•
3.2.4.1 Water meter and alarm
71B
A standard pulse output water meter can be attached to Farm Pro. It saves water consumption
information and generates alarms in the event of too little or too much water flow. A decrease in water
© Munters AB, 2013
14
consumption may be the first indicator of a problem with the herd, allowing corrective action before a
serious situation develops.
System Variable 32 sets the overtime alarm limit, variable 33 the shortage limit, and variable 34 the
delay time for reporting water alarms. Use Menu 46 to calibrate the amount of water per pulse of the
water meter. Test Menu 37 reports live counts to test the water meter; while Menu 24 gives water
consumption data.
The shortage alarm applies only during ‘light’ conditions if the light table (Menu 5) turns the lights on and
off. Moreover, this is disabled when water calibration is zero.
3.2.4.2 Feed overtime alarm and shutoff
If System Variable 24 is one, the Farm Pro assigns the digital input 1 to the feed overtime sensor.
System Variable 25 sets a delay between activation of a feed overtime alarm input, and activation of
the alarm relay. Use System Variable 43 to shut down the feed system on an alarm.
3.2.4.3 Wind direction sensor
73B
If System Variable 24 is zero, the wind direction input, digital input 1, can switch the curtain level tables
for curtains 1 and 2 based on wind direction. System Variable 19 sets the time period for the wind
direction check. After each time period, the Farm Pro averages the wind direction to either a '0' or a
'1'. If the average reaches '1' (contact closed), curtains 1 and 2 ventilation table settings are switched
for the next period; otherwise each curtain keeps its own settings.
3.2.4.4 Remote communication
74B
One of the most important capabilities of the Farm Pro is remote communications. A personal computer
can connect locally, or by modem, to an Farm Pro anywhere in the world. Password protection
prevents unauthorized access.
© Munters AB, 2013
15
4 Operating instructions
The following sections describe how to use the Farm Pro unit.
•
•
•
•
•
Display
Keypad
Factory Reset (Cold Start)
Hot Keys
Menu Structure
4.1 Display
Figure 1 illustrates the Farm Pro standard display. If an alarm occurs, the screen alternately shows the
alarm message and this display. If the sensors are disconnected the world “Fail” appear in place of the
temperature.
Figure 1: Standard Display
4.2 Keypad
20B16
•
•
•
•
MENU: Used to display the main menu from the standard screen, and exit menus.
SHIFT: In long tables press Shift and
o 3 to jump up 10 steps
o 9 to jump down 10 steps
o 7 to go to the top of the table
o 1 to go to the bottom of the table
ENTER: Used for:
o Going into a menu
o Setting values such as temperatures, times, etc. This occurs only after you press the
ENTER key
DEL: Used to
o Erase typing mistakes
o Perform ‘Cold Start’ function
© Munters AB, 2013
16
•
ARROW: Navigate through menus, make selections and in some cases used for changing
values.
•
NUMBERS: Enter numbers and make choices in numbered menus.
4.3 Factory reset (Cold Start)
A Cold Restart returns all data tables and settings to factory default settings.
To perform a Cold Restart:
1. Turn controller power off.
2. Press and hold the DEL key and turn controller power on.
3. Keep holding the DEL key until *COLD START* appears on the screen.
4.4 Hot keys
2B18
The Farm Pro has seven hot keys for quick information.
To use the Hot Keys:
1. Go to the Main Menu.
2. Press the required key number.
The screen appears.
NOTE
•
•
•
•
•
NOTE
•
•
•
The hot keys functions are available only from the Main screen.
Hot
Hot
Hot
Hot
Hot
Key
Key
Key
Key
Key
1: Displays the current target, heat and cooling (tunnel) temperature
2: Current relay status
3: Outside temperature and humidity
4: Displays the temperature according to heat zones (A, B, and C)
5: Current pressure and the pressure target
This hot screen is not displayed unless a pressure sensor is defined in Sensor Layout.
Hot Key 6: Displays the current minimum and maximum levels of ventilation
Hot Key 7: Displays the temperature according to heat zones (D, E, and F)
Hot Key 9: Controller’s version
© Munters AB, 2013
17
4.5 Menu structure
NOTE
The above diagram illustrates the actual menu items. The product lexan shows items not
found in the actual software.
© Munters AB, 2013
18
5 Control menu
The following section describes how to use the Control menu.
•
•
•
•
•
•
•
•
•
•
Accessing Menu Items, page 19
Temperature (Menu 01, page 19
Min/Max Levels (Menu 02), page 20
Humidity (Menu 03), page 21
Cooling (Menu 04), page 22
Lighting (Menu 05) 23
Feed (Menu 06), page 23
Extra System (Menu 07), page 24
Static Pressure (Menu 08), page 24
Foggers (Menu 09), page 27
5.1 Accessing Menu Items
* CONTROL MENU *
01 TEMPERATURE
There are two digits, ‘01,’ beside the ‘TEMPERATURE’. This number is from the Quick Menu printed on
the front of the Farm Pro , to the left of the display and keypad.
Enter any menu number and press the ENTER key to reach that section. You can also browse Quick
Menu items with the arrow keys. The blinking line under the ‘1’ is the cursor. It marks the point at which
your typing appears.
5.2 Temperature (Menu 01)
Table 7: Temperature Menu
Day
Target
Heating
Cooling/Tunnel
1
1
32
30
40
2
7
30
28
38
3
14
28
26
32
4
21
26
23
29
5
28
25
21
28
6
35
24
18
26
7
42
24
16
26
© Munters AB, 2013
19
The Temperature Menu is used to set temperatures according to animal age. The Farm Pro enables
defining up to ten growth dates along with.
•
•
•
Target temperature: ideal animal temperature
Heat temperature: controls heater operation
Cooling: determines the point at which the Farm Pro switches into tunnel ventilation or uses
evaporative cooling equipment
To set the Temperature:
1.
2.
3.
4.
In the Control Menu, press 1.
Press Enter.
Type the required days and temperatures.
Press Enter.
Configuration, Menu 91, item 6, “automatic continues daily temperature adjustment,” controls whether
the Farm Pro interpolates between lines of the temperature table, or uses the exact set points from the
table. The interpolation results in temperature ramping with smooth continuous changes, rather than
sudden jumps. This item is good for herds with changing target set points.
5.3 Min/Max Levels (Menu 02)
Table 8: Ventilation and Curtain Levels
Growth Day
Minimum
Maximum
1
1
5
7
2
10
14
4
14
21
5
17
28
6
17
35
6
18
42
7
20
0
0
0
0
0
0
© Munters AB, 2013
20
Growth Day
Minimum
Maximum
0
0
0
The Minimum/Maximum Level Table limits the Farm Pro ventilation and curtain levels by animal age.
The Farm Pro provides space for up to ten growth dates with corresponding minimum and maximum
values. In the example above, the Farm Pro does not exceed Ventilation Level 5 until Growth Day 6.
From Growth Day 7 through Growth Day 13, the Farm Pro uses at least Ventilation Level 2 (even if the
heaters are on), but does exceed level 10.
The ‘Minimum’ column of this table is the usual place to adjust air quality in your pig house. If the house
requires more air, increase the minimum level. If less airflow decreases the minimum ventilation level.
It is possible to draw a curve by using Menu 91, parameter 6 both for the temperature and the
Minimum / Maximum levels.
To set the ventilation levels:
1. In the Control Menu, press 2.
2. Press Enter.
3. Type the required days and temperatures.
4. Press Enter.
The ventilation levels are set.
5.4 Humidity (Menu 03)
Target Humidity: 65%
The Humidity menu sets the permitted relative humidity level. When the humidity goes above the
permitted level, Farm Pro operates the humidity treatment system.
If the Farm Pro has a humidity sensor, it can run the ventilation system to meet target humidity. To
disable humidity treatment, set the target humidity to 100%.
To set the humidity:
1. In the Control Menu, press 3.
2. Press Enter.
3. Type the required humidity.
4. Press Enter.
The humidity is set.
Farm Pro has various optional variables used to configure the humidity parameter.
To set the humidity variables:
1. In the Control menu, press 97.
2. Press Enter.
3. Scroll down to the following variables:
o 13: specifies the delay between increases in ventilation level to reduce humidity or
provide more fresh air
o 27: sets the length of time to remain at the new ventilation level at each increase
© Munters AB, 2013
21
o 36: specifies the minimum temperature for humidity treatment. This is heating
temperature minus this setting.
4. After typing in the required parameters in each variable, press Enter.
5.5 Cooling (Menu 04)
Table 9: Cooling Table
From Time
To Time
Tun. Diff
To %RH
On (Min)
Off (Min)
09:00
21:30
-1.0
85.0
1
10
09:00
21:30
2.0
85.0
1
5
09:00
21:30
3.0
82.5
1
2
12:30
16:00
4.0
75.0
1
0
00:00
00:00
0
00.0
0
0
The Cooling menu defines the conditions when Farm Pro begins to reduce the temperature.
Temperature reduction begins when the temperature exceeds the Cooling/Tunnel (Table 4) plus
the Tun. Diff parameter.
For example, if:
•
•
The Cooling/Tunnel temperature is 29° C
Tun. Diff is -1° C
between 9:00 to 21:30, Farm Pro operates cooling pads for one minute if the temperature is above
28° C and the humidity is less than 85%. After one minute there is a 10 minute break before cooling
can restart.
If the temperature rises to 31° C, then cooling remains on for one minute and then there is a five minute
break.
Additional information:
•
•
•
•
The Farm Pro provides space for up to five growth days.
Tunnel Diff value cannot be less than -18.0° C / -32.4° F or more than 20.0° C / 36.0° F.
The Farm Pro automatically sorts the table in order of ‘From Temperature’ after you enter the
data. The sorting is done according to the following order: temperature (low to high), humidity
and hour.
A line can be active only when all the following conditions are fulfilled: time, temperature and
humidity.
To configure the Cooling parameters:
1. Set the Temperature settings (Temperature (Menu 01), page 19.
2. In the Control Menu, press 4.
3. Press Enter.
4. Type the required parameters.
5. Press Enter.
The Cooling parameters are set.
© Munters AB, 2013
22
After entering the Tun. Dif parameter, press Alt to make the number a negative factor (if
required).
NOTE
5.6 Lighting (Menu 05)
Table 10: Lighting Table
Day
From Time
To Time
Intensity
1
01:00
03:00
100%
1
05:00
07:00
100%
1
05:30
03:00
20%
1
22:00
23:00
100%
7
09:00
14:00
20%
20
00:00
23:59
100%
*
*
*
*
The Lighting menu sets the time when the pig coop is lit. You can enter up to 50 time periods, with
single or multiple periods each day. The Farm Pro sorts the table by ‘day,’ then by ‘from time.’ It
turns lights on and off using relays, or accepts 0 to 10 Volt controlled light dimmers. In this
example, the Day 1 settings apply until Day 7.
To configure the Lighting schedule:
1. In the Control Menu, press 5.
2. Press Enter.
3. Type the required parameters.
4. Press Enter.
The Lighting parameters are set.
5.7 Feed (Menu 06)
Table 11: Feeding Table
From
To
Qt/bird
06:00
14:00
1.000
13:00
07:00
1.000
*
*
*
*
*
*
The Feeding Menu configures the feeding schedule and quantity. It can run up to ten feeding
periods per day. For full feeding, set times to cover the entire day. The Farm Pro stops delivering
feed when it has supplied the amount of feed specified in Qt/animal (in grams). The Farm Pro takes
into account the mortality, initial animal population, and the feed delivery rate.
If desired, the Farm Pro sends an alarm and shut off the feed system for feed overruns.
© Munters AB, 2013
23
To configure the Feeding schedule:
1. In the Control Menu, press 6.
2. Press Enter.
3. Type the required parameters.
o Enter “0” to turn the system off.
4. Press Enter.
The Feeding parameters are set.
To send an alarm and shut of the feed system:
1. In the Control menu, press 97.
2. Press Enter.
3. Scroll down to the following variables:
o 24: enables feed overtime alarm
o 25: enables a feed overtime alarm delay
o 43: enable feed shutoff if feed overtime alarm is activated
4. After typing in the required parameters in each variable, press Enter.
5.8 Extra System (Menu 07)
Table 12: Extra System Table
System
From Time
To Time
From Temp
To Temp
On
Off
Sensor
1
00:00
23:59
0
50.0
5
5
0
2
06:35
07:00
0
50.0
0
0
0
3
04:00
20:00
25.0
50.0
1
4
5
The Farm Pro provides three extra systems to use for various purposes. Each system has a clock time
during which it runs, high and low temperature set points with selectable sensor, and a cycle timer. If
the sensor is ‘0’, the extra systems use the average temperature the ventilation system uses. To ignore
temperature, enter 0 for the low, and a large temperature, such as 50.0° C for the high temperature.
5.9 Static Pressure (Menu 08)
32B9
Table 13: Static Pressure Table
Out Temp (Low): 10.0
Press (Low T): 0.12
Out Temp (High): 25.0
Press (High T): 0.08
Low Alarm: 0.01
High Alarm: 0.6
Open Stage (sec): 0
Close Stage (sec): 0
© Munters AB, 2013
24
Delay (sec): 2
Hysteresis: 0.04
The Static Pressure menu enables manual configuration of the controlled air inlets and Tunnel curtains in
Tunnel mode to ensure proper barn ventilation. When connected to an optional static pressure sensor, the
Farm Pro automatically adjusts the air vents / inlets / tunnel for proper ventilation.
If there is no static pressure sensor, input fixed positions for curtains for the inlets (inlets only work by static
pressure) and minimal tunnel openings in Menu 95. Refer to the Installation manual for information on this
menu).
To configure the Static Pressure parameters:
1. In the Control Menu, press 8.
2. Press Enter.
3. Configure the following parameters:
o Low Outside Temperature: To prevent cold outside air from descending directly on the
herd, Farm Pro mixes cooler air with warm air. This temperature setting specifies the
temperature at which the low temperature pressure set point is in effect. The Farm Pro
will interpolate between the low and high settings. Default: 10° C.
o Low Temperature Pressure Set Point: 0.12 inches of water column. The pressure set
point determines the size of the window opening. The higher the pressure, the greater
the mixing of cold and warm air.
o High Outside Temperature: When the outside temperature is warmer, greater air flow
is required; there is less of a need to mix the inside and outside air. This temperature
setting specifies the temperature at which the high temperature pressure set point is in
effect. Default: 25° C.
o High Temperature Pressure Set Point: Default: 0.08 inches of water column.
o Low Pressure Alarm: Default: 0.01 inches of water column.
o High Pressure Alarm: Default: 0.14 inches of water column.
o Open Stage: This sets the maximum length of open run time to reduce the pressure.
Setting to '0' will run the vent machine all the way to reach the target. Default: 1 second.
o Close Stage: This sets the maximum length of close run time to increase the pressure.
Setting to '0' will run the vent machine all the way to reach the target. Default: 1 second.
o Run Delay: This is the delay after an open or close run to allow the house time to
stabilize after a change in pressure setting. This delay allows for stabilization. System
Variable 31 is a start up delay. It sets the time for validating a pressure change to
prevent reacting to wind gusts. Default: 10 Seconds.
o Hysteresis: This sets the total dead band about the set point, in which it does not adjust
the inlets. Default: 0.02 inches of water column.
4. Press Enter.
The Feeding parameters are set.
Farm Pro has various optional variables used to configure the static pressure.
To set the static pressure variables:
1. In the Control menu, press 97.
2. Press Enter.
© Munters AB, 2013
25
3. Scroll down to the following variables:
o 28: Selects millibars, inches of water column or Pascal as the pressure unit.
o 29: Stops the fans during operation of the curtains. This is useful in the case of a curtain
inlet that cannot move under static pressure.
o 30: Disables the low-pressure alarm for low ventilation levels.
o 31: Forces a minimum delay before responding to changes in static pressure readings.
The Farm Pro bypasses this delay during ventilation level changes and when it turns the
group fans on or off.
o 26: Prevents momentary pressure loss from opening doors, and high pressure pulses
due to wind gusts, from setting off nuisance alarms.
o 44: Opens inlet before fans begin operating.
4. Press Enter.
The Pressure parameters are set.
Figure 14: Static Pressure Graph
Parameters 1 – 4 define the pressure curve according to the temperature. If a curve is not wanted, insert
identical values to parameters 2 and 4.
© Munters AB, 2013
26
5.10 Foggers (Menu 09)
Table 15: Foggers Menu
From Time
To Time
Trg Dif
To %RH
On (Min)
Off (Min)
09:00
21:30
-1.5
85.0
1
10
09:00
21:30
0
85.0
1
5
09:00
21:30
1
82.5
1
2
12:30
16:00
2
75.0
1
0
00:00
00:00
00.0
00.0
0
0
The Foggers menu defines the conditions when Farm Pro begins to operate foggers. Fogging
begins when the temperature exceeds the Target temperature (Table 4) plus the Trg. Diff
parameter.
For example, if:
The Target temperature is 25° C
• Trg. Diff is -1.5° C
between 9:00 to 21:30, Farm Pro operates cooling pads for one minute if the temperature is above
23.5° C and the humidity is less than 85%. After one minute there is a 10 minute break before cooling
can restart.
•
If the temperature rises to 25° C and humidity drops to 82.5%, then cooling remains on for one minute
and then there is a two minute break.
Additional information:
•
•
•
The Farm Pro provides space for up to five growth days.
The Farm Pro automatically sorts the table in order of ‘From Temperature’ after you enter the
data. The sorting is done according to the following order: temperature (low to high), humidity
and hour.
A line is active only when the time, temperature and humidity conditions are met.
To configure the Fogging parameters:
1. Set the Temperature settings (Temperature (Menu 01), page 19.
2. In the Control Menu, press 9.
3. Press Enter.
4. Type the required parameters.
5. Press Enter.
The Fogging parameters are set.
NOTE
After entering the Trg Dif parameter, press Alt to make the number a negative factor (if
required).
© Munters AB, 2013
27
6 Herd Management menu
•
•
•
•
•
•
•
•
Mortality (Menu 11)
Animal Count (Menu 12)
Feed Inventory (Menu 13)
Time / Growth Day (Menu 14)
Herd Number (Menu 15)
New Herd (Menu 16)
Alarm Reset (Menu 17)
Alarm Test (Menu 18)
6.1 Mortality (Menu 11)
Add Mortality
0
Daily Sum
12
Add Culled
0
Daily Culled
2
To keep the herd count current, use the Mortality menus to record the number of dead and culled
animals.
To update the Mortality figures:
1. In the Control Menu, press 11.
2. Press Enter.
3. In the Add Mortality or Add Culled fields, type the required numbers.
4. Press Enter.
The numbers are updated. The next time that you open this menu, the new totals appear.
NOTE: If you only enter the quantity once per day, you can type it directly in the daily line.
6.2 Animal Count (Menu 12)
Initial count
10,000
Updated count
9988
The Animal Count menu shows the initial and current herd count. As you enter daily mortality counts,
the Farm Pro updates the estimated animal population in the Updated count field. The feeding system
(Menu 6) uses these numbers for restricted feeding schedules.
To set the Animal Count number:
1. In the Control Menu, press 12.
© Munters AB, 2013
28
2. Press Enter.
3. Enter the animal population when you receive a new herd.
NOTE: If the animal count becomes zero, the feeding system automatically stops operation.
6.3 Feed Inventory (Menu 13)
Feed supply
1000
Feed inventory
5000
The Farm Pro provides a convenient feed inventory.
To update the Feed Inventory figures:
1. In the Control Menu, press 13.
2. Press Enter.
3. Each time feed arrives; enter the quantity in the Feed supply field.
The Feed inventory field (which shows the remaining supply) is updated automatically.
4. If required, edit the Feed Inventory field.
5. Press Enter.
6.4 Time / Growth Day (Menu 14)
The Time/Growth day menu displays and edits the current time and growth day. Various Farm Pro
functions use these specifications.
The growth day works with the ventilation tables to change the settings as your animals grow.
Normally the new herd function, Menu 16, sets the growth cycle day.
The internal clock uses a precision crystal, and should rarely need adjusting. The time is in 24-hour
format.
To update the Time/Growth specification:
1. In the Control Menu, press 14.
2. Press Enter.
3. Edit the day and time.
4. Press Enter.
The number set here is the first feed cycle day and if changed the cycle begins again from this day
Edit the growth day for the present herd if needed. Day of Cycle is the feed cycle day.
6.5 Herd Number (Menu 15)
Use Menu 15 to enter the herd number. This number saves the management information for each group
separately in your personal computer.
© Munters AB, 2013
29
6.6 New Herd (Menu 16)
The New Herd menu determines if a new herd has entered the system. When a new herd is entered,
Farm Pro begins using the ventilation settings for growth day 1, and collect new management data for
the new herd.
To enter a new herd:
1. In the Control Menu, press 16.
2. Press Enter.
3. Type 1 for to register a new herd.
4. Press Enter.
Farm Pro begins a new growth cycle, erases the old management data, and sets the date in Menu
14 to 1.
6.7 Alarm Reset (Menu 17)
The Alarm Reset menu cancels all Farm Pro alarms. The reset function enables you to clear the alarm
relay (code 40). You can clear the alarm relay to silence the alarm siren or bell, while working on the
problem.
To cancel alarms:
1. In the Control Menu, press 17.
2. Press Enter.
3. Select:
o 0: cancel
o 1: reset alarm siren relay only
o 2: reset all alarms and message. These return after a period of time (see System
Parameter 16, page 38)
4. Press Enter.
6.8 Alarm Test (Menu 18)
The Alarm Test menu enables testing the alarms at a specific time and for a specific of time.
To test alarms:
1.
2.
3.
4.
In the Control Menu, press 18.
Press Enter.
Type the required time and length.
Press Enter.
© Munters AB, 2013
30
7 History menu
The History menus enable viewing herd statistics.
•
•
•
•
•
•
•
Temperature (Menu 21)
Humidity (Menu 22)
Water (Menu 24)
Feed (Menu 25)
Alarms (Menu 26)
Mortality (Menu 27)
Heaters (Menu 28)
7.1 Temperature (Menu 21)
Day
Min.
Avg.
Max.
*
*
*
*
20
25.0
25.5
26.5
21
24.5
25.8
26.5
*
*
*
*
Today
23.0
24.3
26.0
Menu 21 displays the minimum, average and maximum temperature history from Growth Day 1 to the
current growth day. The controller calculates a true continuous average over the entire 24-hour period
for each day. These data points used for the calculations are the average of the zone sensors.
7.2 Humidity (Menu 22)
Menu 22 displays the minimum, average and maximum humidity history from Growth Day 1 to the
current growth day. The controller calculates a true continuous average over the whole 24-hour
period using the average of the zone humidity sensors.
7.3 Water (Menu 24)
Menu 24 shows the daily water consumption, with percent change from the previous day for each
growth day. Use the up/down arrow keys to move forward or backwards to see other growth days.
7.4 Feed (Menu 25)
Menu 25 shows the daily feed consumption, with percent change from the previous day for each
growth day. Use the up/down arrow keys to move forward or backwards to see other growth days.
© Munters AB, 2013
31
7.5 Alarms (Menu 26)
Table 16: Alarms Codes
Code
Alarm
1
Low Temperature
2
High Temperature
3
Temp Failure, Zone A
4
Temp Failure, Zone B
5
Temp Failure, Zone C
6
Feeder Overtime
7
Low Static Pressure
8
High Static Pressure
9
Water Overflow
10
Water Shortage
11
Sensor Failure, Zone D
12
Sensor Failure, Zone E
13
Sensor Failure, Zone F
14
Alarm Test
15
Incompatible card
16
Pressure Failure
Menu 26 displays the alarms history. The Farm Pro stores the last 99 alarm events with growth date, time
and alarm codes. Table 15: Alarms Codes shows the meaning of each alarm code.
To silence the alarm refer to Menu 17, page 30.
7.6 Mortality (Menu 27)
47B5
Menu 27 displays the mortality history. The Farm Pro shows the present growth day data first. To view
other growth days, use the up and down arrow keys.
7.7 Heaters (Menu 28)
48B6
Menu 28 shows the on time for the low level heaters in each zone. The values are in minutes for each
growth day. Note that the Farm Pro maintains heater on times only for heaters with relay codes 9, 11
and 13. If you run your heaters with other relay codes, their time is not recorded.
© Munters AB, 2013
32
8 Test menu
The Test Menu enables testing and configuring various Farm Pro functions.
•
•
•
•
•
•
•
Temperature (Menu 31)
Humidity (Menu 32)
Relays (Menu 33)
Digital Inputs (Menu 34)
Analog Input (Menu 35)
Analog Output (Menu 36)
Pulse (Menu 37)
8.1 Temperature (Menu 31)
Menu 31 shows the individual readings of the temperature sensors. The Farm Pro averages the zone
sensors (see Sensor Layout, Menu 94) to determine the house temperature for ventilation.
•
•
A disconnected sensor shows DIS.
A shorted sensor shows SHR.
8.2 Humidity (Menu 32)
Menu 32 shows the individual humidity readings of each humidity sensor. See Analog Inputs,
Menu 35.
8.3 Relays (Menu 33)
The Relays menu turns individual relays on and off.
To change the Relay status:
1.
2.
3.
4.
NOTE
In the Control Menu, press 33.
Press Enter.
Move the cursor to the relay number.
Press Enter.
See Manual Relay Operation in the installation section for a method of extending manual
relay operation to arbitrarily long times.
8.4 Digital Inputs (Menu 34)
The Digital Inputs menu displays the status of the following digital inputs:
Wind direction/Feed overtime alarm (depending on the card installed)
• Feed pulse system
The displayed value shows the input open or shorted state.
•
© Munters AB, 2013
33
•
•
1: Short
0: Open
8.5 Analog Inputs (Menu 35)
The Analog Input menu displays the humidity/static pressure analog inputs. The values shown
represent the internal digital numbers used by the Farm Pro. The Farm Pro calculates actual values
using calibration factors and other formulas for humidity or static pressure.
NOTE
The (p) column displays the A/D values of the internal pressure sensor and not on the
analog inputs.
8.6 Analog Output (Menu 36)
The Analog Output menu controls a variable speed fan and a light dimmer via the activation voltage.
The menu activates them at the same time.
To change the change the activation voltage:
1. In the Control Menu, press 36.
2. Press Enter.
3. Type the approximate output voltage.
4. Press Enter.
The Farm Pro checks the variable speed fan and the light dimmer at this voltage.
8.7 Pulse (Menu 37)
Menu 37 displays the current pulse count.
© Munters AB, 2013
34
9 Calibration menu
The following menus are used to calibrate Farm Pro sensors.
•
•
•
•
Temperature (Menu 41)
Humidity (Menu 42)
Feed Pulse Ratio (Menu 45)
Water Pulse Ratio (Menu 46)
9.1 Temperature (Menu 41)
Menu 41 checks and calibrates each temperature sensor.
To calibrate a temperature sensor:
1. In the Control Menu, press 41.
2. Press Enter.
3. Stabilize the sensors at a known temperature.
4. Type that temperature.
5. Press Enter.
NOTE
The calibration base value is fixed upon entering Menu 41 . Therefore, do not enter Menu
41 until after the sensors are at a stable temperature.
The Farm Pro calculates the calibration factor. The sensors are factory tested to be accurate to
within 2° F. Note that the calibration is precise only at the calibration temperature. Errors tend to
increase as the temperature deviates from the calibration temperature.
It may be simpler to measure the temperature of a pail of water. Air temperature changes rapidly in small
regions by several degrees as air currents move, making calibration difficult.
•
•
Ensure the water temperature is near ambient air temperature to prevent warm up or cool down
while calibrating.
Stir the water while measuring it to eliminate warmer and cooler regions.
9.2 Humidity (Menu 42)
Menu 42 checks and calibrates each humidity sensor.
To calibrate a humidity sensor:
1. In the Control Menu, press 42.
2. Press Enter.
3. Measure the current humidity using an external independent sensor.
4. Change the humidity level in the controller to match the independent sensor.
5. Press Enter.
o A disconnected sensor shows DIS. and a shorted one shows SHR.
o The factor value is automatic and cannot be changed.
© Munters AB, 2013
35
9.3 Feed Pulse Ratio (Menu 45)
Menu 45 calibrates the feed delivery measurement system.
To calibrate the delivery system:
1. In the Control Menu, press 45.
2. Press Enter.
3. Select a pulse based system (0), or time based system (1).
4. Enter the pounds of feed delivered per pulse or per minute.
5. Press Enter.
9.4 Water Pulse Ratio (Menu 46)
Menu 46 configures the quantity that the water meter measures per pulse. Refer to your water meter
instructions for this value. Entering '0' disables all water alarms, both shortage and overflow.
© Munters AB, 2013
36
10 Configuration
Table 17: Configuration
91
Configuration
92
Ventilation Levels
93
Relay Layout
94
Sensor Layout
95
Setup Curtains
96
System Variables
97
Password
The installation menus are not shown on the front panel of the control. They are not used in the dayto-day operation of the control, but only during initial installation.
To get to these menus from the default display:
1. Press MENU.
2. Enter the menu number from the Installation Menu.
3. Press ENTER.
NOTE
•
•
For information on Menus 91 – 95, refer to the Installation Manual.
System Variables (Menu 96)
Password (Menu 97)
10.1 System variables (Menu 96)
The following sections details Menu 96, which contains the Farm Pro variables used to determine menu
values.
Table 18: Menu 96 Variables
Var.
Description
Default
Range
1
Target Temperature Hysteresis (Degrees)
0.5º C
0.9º F
0.3 – 20º C
0.5 – 36º F
2
Ventilation Level Increase, Time Delay (Minutes)
3
0.2 – 10 Min
3
Ventilation Level Decrease, Time Delay (Minutes)
1.0
0.2 – 10 Min
4
Max Ventilation Level Below Cooling Temp.
20
0 - 20 Levels
5
Tunnel Mode Exit, Amount Above Target (Degrees)
0° C
0° F
0 – 20º C
0 – 36º F
6
Out Temperature As Diff. Above Target Temp.
To Allow Tunnel Mode Exit (Degrees)
0° C
0° F
0 – 20º C
0 – 36º F
© Munters AB, 2013
37
Var.
Description
Default
Range
7
High Temp Alarm, Amount Above Target (Degrees)
4º C
7.2º F
0 – 20º C
0 – 36º F
8
Low Level Heater Hysteresis,
Amount Below Heat Set Temperature (Degrees)
0.5º C
0.9º F
0.3 – 20º C
0.5 – 36º F
9
High Level Heater Hysteresis,
Amount Below Heat Set Temperature (Degrees)
2º C
3.6º F
0 – 20º C
0 – 36º F
10
Radiant Heater Ignition Time (Sec)
60
0 – 99 Sec
11
Low Temp Alarm, Amount Below Heat (Degrees)
3º C
5.4º F
0 – 20º C
0 – 36º F
12
Cooling Hysteresis (Degrees)
0.5º C
0.9º F
0.3 – 20º C
0.5 – 36º F
13
Humidity Treatment Main Delay (Minutes)
5
0 - 99.9 Min
14
Zone A, B Temp Diff for Re-circulation Fan (Degrees)
5º C
9º F
0.3 – 20º C
0.5 – 36º F
15
Curtain Position Calibration
1
0 - 24
16
Delay time for returning from alarm reset
30
0-99 Min
17
Output Voltage At 0 % AN-1. Choose one of four options
(none, veriable fan, light, variable heat) as seen in Menu 91.
3
0 – 10 V out
18
Output Voltage At 100 % AN-1
10
0 – 10 V out
19
Wind Direction Averaging Period (Minutes)
30
0 - 99.9 Min.
20
Output Voltage At 0% AN-2. Choose one of four options
(none, veriable fan, light, variable heat) as seen in Menu 91.
3
0 – 10 V out
21
Tunnel Mode Exit Lockout Time (Minutes)
60
0 - 99.9 Min
22
Output Voltage At 100 % AN-2
10
0 – 10 V out
23
Minimum Curtains 1+2 Opening for Group Fans Run (%)
0
0 - 99.9 %
24
Wind Direction Or Feed Overtime Alarm Selection
For Digital Input 1:
0 = Wind Direction
1 = Feed Overtime Alarm
0
0-1
25
Feed Overtime Alarm Delay (Minutes)
0
0 - 99.9 Min
26
Alarm Relay Output Delay (Minutes)
0.5
0 - 99.9 Min
27
Humidity Treatment Duration (Minutes)
1
0 - 99.9 Min
© Munters AB, 2013
38
Var.
Description
Default
Range
28
Pressure Units for static pressure option:
0 = Millibar
1=Inch Water
2=Pascal
3=Cm. Water
4=Mm. Water
1 Inch
Water
0-4
29
Static Pressure Interlock (Group Fans Off During Pressure
Adjustment):
No = 0
Yes = 1
0
0-1
30
Minimum Level for Low Static Pressure Alarm
1
0 - 20 Levels
31
Static Pressure Wind Gust Delay (Seconds)
10
0 - 99 Sec
32
Water Overflow Alarm Quantity per Minute (Units)
99
0 - 99 Units
33
Water Shortage Alarm Quantity per Hour (Units)
0
0 - 99 Units
34
Water Overflow Alarm Delay (Minutes)
10
0 - 99.9 Min
35
Water overflow during dark (Quantity per Hour)
0
0-99 Units
36
Humidity Treatment, Heater Use Limit (Degrees)
1º C
1.8º F
0 – 20º C
0 – 36º F
37
Humidity Treatment, Heater Use Humidity Start Point
99.9
0 - 99.9 %.
38
Radiation Heater, Set Point Above Heat (Degrees)
0° C
0° F
0 – 20º C
0 – 36º F
39
Tunnel mode transition (Minutes)
3
0 - 99.9 Min
40
Absolute High Temperature Alarm (Degrees)
50º C
122º F
0 – 50º C
32 – 122º F
41
Sunrise/Sunset Duration (Minutes)
1
0 - 99.9 Min
42
Delay time to ignore water overflow at sunrise (Minutes)
10
0-99.9 Min
43
Enable Feed Shutoff if Feed Overtime Alarm:
No = 0
Yes = 1
0
0-1
44
Advanced Air Inlet Open (Seconds)
6
0 - 99 Sec
45
Level Differential High Temp Alarm Option (Degrees)
0° C
0° F
0 – 20º C
0 – 36º F
46
Not in use
30
0 - 99.9 %
47
Not in use
30
0 - 99.9 %
48
Not in use
12
0 - 99 A/D
49
Weighing Sensitivity 0% to 100%
30
0 - 99.9 %
© Munters AB, 2013
39
Var.
Description
Default
Range
50
Not in use
0
0 – 24 (Hours)
51
Not in use
24
0 - 24 (Hours)
52
Munters Use Only
53
Temp change to be considered as quick drop in degrees, to
reduce a level to reach below target temp (Degrees)
0.5º C
0.9º F
0.3 - 20º C
0.5 – 36º F
54
Temp change to be considered as quick drop in degrees, to
reduce a level to reach above target temp (Degrees)
1º C
1.8º F
0.3 - 20º C
0.5 - 36º F
55
Delay for ignition time (Seconds)
10 Sec
0-99 Sec
56
Cool Down Factor (%)
0
0-20%
System Variable Guide
The following details the variables listed in Table 17.
1. Target Temperature Hysteresis (Degrees): Sets the dead band above target temperature.
The ventilation level increases at the target temperature plus the hysteresis, and decreases at
the target temperature. Factory default: 0.5° C / 0.9° F
2. Ventilation Level Increase Time Delay (Minutes): Sets the minimum delay time before a
ventilation level increase, when rising temperatures call for higher ventilation.
Factory default: 3.0 minutes
3. Ventilation Level Decrease Time Delay (Minutes): Sets the minimum delay time before
decreasing a ventilation level, when declining temperatures call for lower ventilation.
Factory default: 1.0 minute.
4. Max Ventilation Level Below Cooling Temp.: Sets the maximum ventilation level the
controller uses at any time the temperature is below the cooling set point. It is a convenient
way of limiting the use of extra ventilation fans to a second set point, namely the cooling
temperature. Factory default: 20
5. Tunnel Mode Exit, Amount Above Target (Degrees): Sets the degrees above target
temperature that the Farm Pro may leave tunnel ventilation, once it has entered tunnel mode.
Factory default: 0.0° C / 0.0° F.
6. Out Temperature as Diff. Above Target Temp. to Allow Tunnel Mode Exit (Degrees):
Define the differential above the target temperature to permit the exiting from Tunnel Mode
when the outside temperature is warmer than the inside temperature.
Factory default: 0.0° C / 0.0° F
7. High Temp Alarm, Amount Above Target (Degrees): Sets the degrees above the target
temperature to generate an alarm. Factory default: 4.0° C / 7.2° F
See also system variables 40 and 45.
8. Low Level Heater Hysteresis, Amount Below Heat Set Temperature (Degrees): Sets the
difference between heaters turned on and heaters turned off. This hysteresis is to the low side of
the set point. Factory default: 0.5° C / 0.9° F
9. High Level Heater Hysteresis: Set the relative temperature difference for high-level heaters, or
amount below the heat set temperature to turn on high-level heaters.
Factory Default: 2.0° C / 3.6° F
© Munters AB, 2013
40
10. Radiant Heater Ignition Time: Sets the length of time the radiant heater ignition is held on.
Factory default: 60 seconds (See also System Variable 55 )
11. Low Temp Alarm, Amount Below Heat (Degrees): Sets the degrees below the Heat
Temperature to generate an alarm. Factory default: 3.0° C / 5.4° F
12. Cooling Hysteresis: Sets the difference between cooling system turned on and cooling system
turned off temperatures. Factory default: 0.5° C / 0.9° F
13. Humidity Treatment Main Delay (Minutes): Sets OFF time for the humidity treatment cycle.
Factory default: 5 minutes
14. Zone A, B Temp Diff. for Re-circulation Fan (Degrees): Sets the temperature difference
between Zone A and Zone B, at which the re-circulation fans turn on.
Factory default: 5.0° C / 9.0° F
15. Curtain Position Calibration. 0-24 Times a Day: Set the number of times in a day you would
like to run a curtain position calibration (If you set this variable to 2, the controller will calibrate
every 12 hours; 3-every 8 hours; etc.) The calibration program runs the curtain to the nearest of
fully open or fully closed positions. The duration of the calibration is the same as the time taken
to go fully open or fully closed, as entered in configuration, Menu 91.
16. Delay Time for Returning from Alarm Reset (Minutes): If the alarm after a reset is not solved
during the delay time set by the user, the alarm continues. If the alarm has been solved, it won't
continue any longer. Factory default: 30 minutes
17. Output Voltage At 0 % AN-1: Set analog output minimum voltage level. The analog output is
defined as one of four options. Factory default: 3.0 Fog
18. Output Voltage At 100 % AN-1: Set analog output maximum voltage level
Factory default: 10.0
19. Wind Direction Averaging Period (Minutes): The Farm Pro can switch curtain tables
between curtains 1 and 2 based on wind direction. This parameter sets the period for checking
average wind direction, before deciding which way the wind is blowing.
Factory default: 30.0 minutes
20. Output Voltage At 0% AN-2: Set analog output minimum voltage level. The analog output is
defined as one of four options. Factory default: 3.0 volts
21. Tunnel Mode Exit Lockout Time (Minutes) Sets the minimum time the Farm Pro remains
locked in Tunnel Mode after entering Tunnel Mode.
Factory default: 60.0 minutes
22. Output Voltage At 100 % AN-2: Set analog output maximum voltage level
Factory default: 10.0 volts
23. Minimum Curtains 1+2 Opening for Group Fans Run (%): Exhaust fans may create static
pressure pulling the curtains against the house when they are almost closed. Set the point to
which you want the fans to stop when the curtains move. The Farm Pro uses the sum of curtain
1 and curtain 2 openings to determine whether to turn the fans off briefly while moving the
curtains. Factory default: 0%
24. Wind Direction/Feed Overtime Alarm Input Selection: Setting this to 1 makes the second
digital input function as feed overtime alarm input. If it is 0, the second digital input causes the
Farm Pro to use it as a prevailing wind direction indication.
25. Feed Overtime Alarm Delay: Set the amount of time in minutes to wait before alarms are
activated (prevents tripping on short alarms). Factory default: 0.0 minutes
*Requires activation of the Feed Overtime Alarm (see System Variable 24 ).
© Munters AB, 2013
41
26. Alarm Relay Output Delay (Minutes): This delay applies to all alarms, except of the Feed
Overtime Alarm (See system variables 24 and 25 ). The alarm relay activates after this delay.
Factory default: 0.5 minutes
27. Humidity Treatment Duration (Minutes): Set the ON time for the Humidity Treatment cycle.
Factory default: 1 minute
28. Pressure Units for Static Pressure Option: Factory default: 1 – "Inches of water column"
Input #
Unit
0
Millibar
1
Inches of water column
2
Pascals
3
Cm. Water
4
Mm. Water
29. Static Pressure Interlock: Factory default is NO interlock or code ‘0’. A code of ‘1’ turns on
the static pressure interlock, which turns off all ventilation groups during static pressure
adjustment.
30. Minimum Level for Low Static Pressure Alarm: Factory default of ‘1’ allows low static
pressure alarms at all ventilation levels.
31. Static Pressure Wind Gust Delay (Seconds): Length of time of delay before making pressure
adjustments to unexpected pressure changes. Factory Default: 10 seconds.
*See Menu 8 for other parameters related to static pressure operation.
NOTE
The Farm Pro bypasses this delay for ventilation level changes and cycle timer fans, since it
knows that the pressure change is not due to a wind gust.
32. Water Overflow Alarm Quantity per Minute (Units): Sets the water quantity per minute from
the water meter that will trigger an overflow alarm. Calibration Menu 46 scales the quantity,
so enter the scaled quantity instead of the number of pulses from the water meter.
Factory default: 99
33. Water Shortage Alarm Quantity per Hour (Units): Sets the minimum water quantity per hour
that the Farm Pro must detect to prevent generating a water shortage alarm. Note that the
lights must be on during the time this alarm can occur. This alarm is disabled when lights are
out. Factory default: 0.
34. Water Overflow Alarm Delay (Minutes): Sets the minimum amount of time that water
overflow must be active before the Farm Pro generates an alarm.
Factory default: 10.0 minutes.
35. Water Overflow During Dark (Quantity per Hour): Sets the water quantity per Hour from the
water meter that will trigger an overflow alarm when it is dark. Factory default: 0
36. Humidity Treatment, Heater Use Limit (Degrees): Sets the number of degrees above the
target temperature at which humidity treatment with the heaters stops.
Factory default: 1.0° C / 1.8° F
37. Humidity Treatment, Heater Use Humidity Start Point: Sets the relative amount above
requested humidity at which heater use to reduce humidity begins.
Factory default: 99.9% (disabled)
38. Radiation Heater, Set Point Above Heat. (Degrees): This is the relative number of degrees
above heater set point, at which the radiant heaters turn on. They stay on for all temperatures
below this. Factory default: 0.0° C / 0.0° F
© Munters AB, 2013
42
39. Tunnel Mode Transition (Minutes): This parameter determines when to transit to Tunnel mode.
During this time, the Tunnel curtain opens and neither pressure control nor pressure alarm occur,
even if the pressure is low. After half of the time set, Inlet closing occurs. At the end of this time,
the controller begins pressure control and returns to dealing with the pressure alarms. For
example, if the time defined is 3.0 minutes, the Tunnel open occurs during all these 3.0 minutes.
After 1.5 minutes Inlet Close occurs.
Factory default: 3.0 minutes
40. Absolute High Temperature Alarm (Degrees): Sets an absolute high temperature alarm
point, which remains at the place you set it. Factory Default: 50º C / 122° F
41. Sunrise/Sunset Effect Duration (Minutes): Sets the length of time to change light levels from
one setting to another. Factory default: 1.0 minute
NOTE
When defining 100% sunrise, the controller reaches 0 – 100% during the time defined. If
less than 100% sunrise is defined, the time will be divided according to its relative
percentage.
42. Delay Time to Ignore Water Overflow at Sunrise (Minutes): This parameter allows an extra
delay during light up. At lights up there will be this delay time to ignore water overflow. Factory
default: 10 minutes
43. Enable Feed Shutoff if Feed Overtime Alarm: Select yes (1) to turn off feed relays for feed
overtime alarm. Factory default: 0 (NO) NO = 0
YES = 1
44. Air Inlet Open Advance (Seconds): This is the number of seconds prior to turning on fans that
the inlets will begin to open when fans cycle according to the ventilation table settings. It is
significant for minimum ventilation settings, where a total run time of 0.5 minutes might not allow
the inlets to get open and set before the fans turn off again. Factory default: 6 seconds
45. Level Differential High Temp Alarm Option (Degrees): This option instructs the
Farm Pro to consider the ventilation level temperature differential in the relative high
temperature alarm setting. The alarm will occur at the target temperature plus the current
ventilation level differential temperature plus System Variable 7. If you leave this at zero (no
level differential option) the high temperature alarm occurs at target temperature plus System
Variable 7. Factory default: 0.0° C / 0.0° F
NOTE: If there is no airflow in the house, the temperature differential from Menu 92 will cause the
alarm temperature to be higher than normal. This can result in animal loss; use this option only
with adequate back up and other means to ensure adequate air flow at all times.
46. Percentage Above Reference Weight (%):Not in use
47. Percentage Below Reference Weight (%):Not in use
48. Tare Sensitivity, 0-A/D to 99-A/D: Not in use
49. Weighing Sensitivity, 0%to 100%: Not in use
50. Birds Weighing Start Time (Daytime): Not in use
51. Birds Weighing End Time (Daytime): Not in use
52. Feed Cycle Length Limitation. (Days): Factory default: 7 days
53. Temp Decrease BELOW Target for Level Decreasing (Degrees):
• IF:
o The average temperature is below the Target Temperature
o AND IF the Outside temperature is below the Heat Temperature (or no temperature
sensor exists)
© Munters AB, 2013
43
o AND IF the average temperature drops more than this setting (Factory default: 0.5°C /
0.9°F) in one minute,
• Then : the Farm Pro decreases one level.
54. Temp Decrease ABOVE Target for Level Decreasing (Degrees):
•
•
IF:
o The average temperature is above the Target Temperature
o AND IF the Outside temperature is below the Heat Temperature (or no temperature
sensor exists)
o AND IF the average temperature drops more than this setting
(Factory default: 1.0°C / 1.8° F) in one minute,
Then: the Farm Pro decreases one level.
55. Delay Ignition Time (Seconds): This is the delay between ignition relay on to heater on.
Default: 10 seconds.
NOTE: See also System Variable 10.
56. Cool Down Factor (%): The minimum percentage correction towards target during each
increase ventilations delay. If the temperature does not improve by this amount, the Farm Pro
increases it in one level after the delay time. Default: 15%.
10.2 Password (Menu 97)
To protect the integrity of the Farm Pro settings, use a password. For the communications programs to
access all the Farm Pro controls on one line, they need to have the same password. You can enter a
high password to provide complete access, and/or a low password that allows reading the information
on the controller but not making changes.
© Munters AB, 2013
44
11 Warranty
Warranty and technical assistance
Munters products are designed and built to provide reliable and satisfactory performance but cannot be
guaranteed free of faults; although they are reliable products they can develop unforeseeable defects
and the user must take this into account and arrange adequate emergency or alarm systems if failure to
operate could cause damage to the articles for which the Munters plant was required: if this is not done,
the user is fully responsible for the damage which they could suffer.
Munters extends this limited warranty to the first purchaser and guarantees its products to be free from
defects originating in manufacture or materials for one year from the date of delivery, provided that
suitable transport, storage, installation and maintenance terms are complied with. The warranty does not
apply if the products have been repaired without express authorisation from Munters, or repaired in such
a way that, in Munters’ judgement, their performance and reliability have been impaired, or incorrectly
installed, or subjected to improper use. The user accepts total responsibility for incorrect use of the
products.
The warranty on products from outside suppliers fitted to Farm Pro, (for example Farm Pro's, sensors,
cables, thermostats, etc.) is limited to the conditions stated by the supplier: all claims must be made in
writing within eight days of the discovery of the defect and within 12 months of the delivery of the
defective product. Munters has thirty days from the date of receipt in which to take action, and has the
right to examine the product at the customer’s premises or at its own plant (carriage cost to be borne by
the customer).
Munters at its sole discretion has the option of replacing or repairing, free of charge, products which it
considers defective, and will arrange for their despatch back to the customer carriage paid. In the case of
faulty parts of small commercial value which are widely available (such as bolts, etc.) for urgent
despatch, where the cost of carriage would exceed the value of the parts, Munters may authorise the
customer exclusively to purchase the replacement parts locally; Munters will reimburse the value of the
product at its cost price.
Munters will not be liable for costs incurred in demounting the defective part, or the time required to travel
to site and the associated travel costs. No agent, employee or dealer is authorised to give any further
guarantees or to accept any other liability on Munters’ behalf in connection with other Munters products,
except in writing with the signature of one of the Company’s Managers.
WARNING! In the interests of improving the quality of its products and services, Munters reserves the
right at any time and without prior notice to alter the specifications in this manual.
The liability of the manufacturer Munters ceases in the event of:
• dismantling the safety devices;
© Munters AB, 2013
45
•
•
•
use of unauthorised materials;
inadequate maintenance;
use of non-original spare parts and accessories.
Barring specific contractual terms, the following are directly at the user’s expense:
•
•
•
•
•
preparing installation sites;
providing an electricity supply (including the protective equipotential bonding (PE) conductor, in
accordance with CEI EN 60204-1, paragraph 8.2), for correctly connecting the equipment to the
mains electricity supply;
providing ancillary services appropriate to the requirements of the plant on the basis of the
information supplied with regard to installation;
tools and consumables required for fitting and installation;
lubricants necessary for commissioning and maintenance.
It is mandatory to purchase and use only original spare parts or those recommended by the
manufacturer.
Dismantling and assembly must be performed by qualified technicians and according to the
manufacturer’s instructions.
The use of non-original spare parts or incorrect assembly exonerates the manufacturer from all liability.
Requests for technical assistance and spare parts can be made directly to the nearest Munters office. A
full list of contact details can be found on the back page of this manual.
© Munters AB, 2013
46
Australia Munters Pty Limited, Phone +61 2 8843 1594, Brazil Munters Brasil Industria e Comercio Ltda, Phone +55 41 3317 5050, Canada Munters Corporation
Mason, Phone +1 517 676 7070, China Munters Air Treatment Equipment (Beijing) Co. Ltd, Phone +86 10 80 418 000, Denmark Munters A/S, Phone
+45 9862 3311, India Munters India, Phone +91 20 3052 2520, Indonesia Munters, Phone +62 818 739 235, Italy Munters Italy S.p.A., Chiusavecchia, Phone
+39 0183 52 11, Japan Munters K.K., Phone +81 3 5970 0021, Korea Munters Korea Co. Ltd., Phone +82 2 761 8701, Mexico Munters Mexico, Phone
+52 818 262 54 00, Russia Munters AB, Phone +7 812 448 5740, Singapore Munters Pte Ltd., Phone +65 744 6828, South Africa and Sub-Sahara Countries
Munters (Pty) Ltd., Phone +27 11 997 2000, Spain Munters Spain S.A., Phone +34 91 640 09 02, Sweden Munters AB, Phone +46 8 626 63 00, Thailand Munters
Co. Ltd., Phone +66 2 642 2670, Turkey Munters Form Endüstri Sistemleri A.Ş, Phone +90 262 751 37 50, USA Munters Corporation Mason, Phone
+1 517 676 7070, Vietnam Munters Vietnam, Phone +84 8 3825 6838, Export & Other countries Munters Italy S.p.A., Chiusavecchia Phone +39 0183 52 11
© Munters AB, 2013
Ag/MIS-IGB-2149-11/13 Rev 1.0
www.munters.com