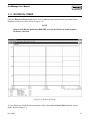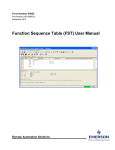
1
Field Automation Systems GRIDMANAGER™ USER INTERFACE SOFTWARE For the GridBoss™ System User Manual Form A6083 October 1999 Part Number D301134X012 GridManager User Manual Revision Tracking Sheet October 1999 This manual may be revised periodically to incorporate new or updated information. The date revision level of each page is indicated at the bottom of the page opposite the page number. A major change in the content of the manual also changes the date of the manual, which appears on the front cover. Listed below is the date revision level of each page. Page Revision All 10/99 Notice: The GridBoss System discussed in this manual was developed with the assistance of the Gas Research Institute. The GridManager software is copyrighted by Fisher Controls International. Fisher Controls International, Inc. 1999. All rights reserved. Printed in the U.S.A. While this information is presented in good faith and believed to be accurate, Fisher Controls does not guarantee satisfactory results from reliance upon such information. Nothing contained herein is to be construed as a warranty or guarantee, express or implied, regarding the performance, merchantability, fitness or any other matter with respect to the products, nor as a recommendation to use any product or process in conflict with any patent. Fisher Controls reserves the right, without notice, to alter or improve the designs or specifications of the products described herein. ii Rev 10/99 GridManager User Manual Table of Contents SECTION 1 — GETTING STARTED...................................................................... 1-1 1.1 User Manual Overview................................................................................................................ 1-1 1.2 Section 1 – Getting Started Contents ........................................................................................ ... 1-3 1.3 Additional Information ...................................................................................................... .......... 1-4 1.4 Product Overview........................................................................................................................ 1-4 1.5 User Interface.............................................................................................................................. 1-8 1.6 Startup..................................................................................................................... ...................1-12 1.7 Connecting GridManager to the GridBoss System......................................................................1-15 SECTION 2 — REGION OVERVIEW..................................................................... 2-1 2.1 Scope .......................................................................................................................................... 2-1 2.2 Description.................................................................................................................................. 2-1 2.3 System Menu............................................................................................................................... 2-5 2.4 Region Menu............................................................................................................................... 2-5 2.5 Other Regions ............................................................................................................................. 2-5 2.6 Poll Region ................................................................................................................................. 2-6 SECTION 3 — DISTRICT REGULATOR .............................................................. 3-1 3.1 Scope .......................................................................................................................................... 3-1 3.2 Description.................................................................................................................................. 3-1 3.3 Associated Low Pressure Point............................................................................................... ..... 3-3 3.4 District Regulator Values ............................................................................................................ 3-3 3.5 Set Control Mode ........................................................................................................................ 3-5 3.6 System Menu............................................................................................................................... 3-6 3.7 Region Menu............................................................................................................................... 3-6 3.8 Region Overview............................................................................................................. ............ 3-6 3.9 Poll Unit...................................................................................................................................... 3-6 3.10 Poll History ................................................................................................................................. 3-6 3.11 Historical Trend ........................................................................................................... ............... 3-7 Rev 10/99 iii GridManager User Manual Table of Contents (Continued) SECTION 4 — LOW PRESSURE POINT ............................................................... 4-1 4.1 Scope .......................................................................................................................................... 4-1 4.2 Description.................................................................................................................................. 4-1 4.3 Associated District Regulators..................................................................................................... 4-3 4.4 Low Pressure Point Monitor Values ............................................................................................ 4-3 4.5 Force an Update .......................................................................................................................... 4-4 4.6 System Menu............................................................................................................................... 4-4 4.7 Region Menu............................................................................................................................... 4-4 4.8 Region Overview............................................................................................................. ............ 4-4 4.9 Poll Unit...................................................................................................................................... 4-5 4.10 Poll History ................................................................................................................................. 4-5 4.11 Historical Trend ........................................................................................................... ............... 4-5 SECTION 5 — REPORTS ......................................................................................... 5-1 5.1 Scope .......................................................................................................................................... 5-1 5.2 District Regulators Daily Report............................................................................................ ...... 5-1 5.3 Low Pressure Points Daily Report ............................................................................................ ... 5-4 GLOSSARY OF TERMS .......................................................................................... G-1 TOPICAL INDEX .......................................................................................................I-1 iv Rev 10/99 GridManager User Manual SECTION 1 — GETTING STARTED 1.1 USER MANUAL OVERVIEW 1.1.1 Scope This manual describes how to use the GridManager™ User Interface Software to configure and monitor the GridBoss™ Gas Pressure Control System, which includes some or all of the following hardware and software: ♦ ♦ ♦ ♦ GB601 District Regulator Controller GB602 Low Pressure Point Controller GRIDLINK™ Configuration Software GridManager Host Software The GridBoss System controls the Setpoint at the District Regulator GB601 through a Kixcel™ such as a Fisher Type 662 Kixcel. An I/P or servo valve may be used in place of the Kixcel. The Setpoint is “predicted” by the historical profile of the District Regulator Outlet Pressure versus the time-of-day and temperature. The Low Pressure Point GB602 monitors the average pressure at a low-pressure point downstream from the District Regulator. The average pressure for the minute and change in Setpoint for the regulator is relayed back to the District Regulator when the average pressure for the minute is out of range. The GridManager software runs on a personal computer using the Windows NT® operating system. This manual covers configuration, alarming, making system adjustments, history, reports, and monitoring of the GridManager software. 1.1.2 Organization This manual is organized into the following major sections: ♦ ♦ ♦ ♦ ♦ ♦ ♦ ♦ Rev 10/99 Table of Contents Section 1 Getting Started Section 2 Region Overview Section 3 District Regulator Section 4 Low Pressure Point Section 5 Reports Glossary of Terms Topical Index 1-1 GridManager User Manual Table of Contents Lists each section and information contained in that section of the document. Section 1 Getting Started describes this manual and mentions related manuals. This section also provides a summary of the GridManager software, installation, hardware overview, basic software functions, user interface, and logging on to the GridManager software. Section 2 Region Overview describes how the Region Overview screen functions and how to maneuver around the GridBoss Gas Pressure Control (GPC) system. Section 3 District Regulator describes how to monitor and adjust the GridManager software for use with the GB601, District Regulator. Section 4 Low Pressure Point describes how to monitor and adjust the GridManager software for use with the GB602, Low Pressure Point. Section 5 Reports provides information detailing how to generate reports concerning the GridBoss Gas Pressure Control system. Glossary of Terms Defines terms used in Fisher Control’s documentation. Topical Index Lists alphabetically the items contained in this manual, including the section and page number. 1-2 Rev 10/99 GridManager User Manual 1.2 SECTION 1 – GETTING STARTED CONTENTS This section contains the following information: Information User Manual Overview Scope Organization Additional Information Product Overview GridManager Host Software GridBoss Gas Pressure Control Units User Interface Interface Overview Menu Bar and Menus Keyboard and Pointing Devices Using the Keyboard Using the Mouse Function Screens Dialog Boxes Startup Launching Windows NT Launching GridManager and Intellution FIX Startup Shut Down Exiting GridManager Exiting Intellution FIX Connecting GridManager to the GridBoss System Communications Overview Rev 10/99 Section 1.1 1.1.1 1.1.2 1.3 1.4 1.4.1 1.4.2 1.5 1.5.1 1.5.2 1.5.3 1.5.3.1 1.5.3.2 1.5.4 1.5.5 1.6 1.6.1 1.6.2 1.6.4 1.6.4.1 1.6.4.2 1.7 1.7.1 Page Number 1-1 1-1 1-1 1-4 1-4 1-4 1-6 1-8 1-8 1-9 1-9 1-10 1-10 1-11 1-11 1-12 1-12 1-12 1-14 1-15 1-15 1-15 1-16 1-3 GridManager User Manual 1.3 ADDITIONAL INFORMATION The physical aspects of the GridBoss 600-Series units and configuring them using GRIDLINK are contained in the manuals listed below. The following manuals include related information not necessarily found in this manual: & GB600-Series Controller of the GridBoss System Instruction Manual (Form A6075) – Part Number D301132X012 & GRIDLINK Configuration Software User Manual (Form A6074) – Part Number D301131X012 & GridManager Host Setup Aid Manual (Form A6089) – not available from Publications Stockroom & Function Sequence Table (FST) User Manual (Form A4625) – Part Number D301058X012 & ROC/FloBoss Accessories Instruction Manual (Form A4637) – Part Number D301061X012 & ROC Protocol User Manual (Form A4199) – Part Number D301053X12 & Type 662 Kixcel Remote Control Pilot Drive Actuator – Part Number D102273X012 & Intellution E-docs – On-line help and user manuals 1.4 PRODUCT OVERVIEW To better understand the information contained in this manual, this section provides a brief overview of the operation of the system. 1.4.1 GridManager Host Software The GridManager Host Software provides the capability to monitor, configure, and adjust the GridBoss Gas Pressure Control system units. The software runs on an IBM-compatible personal computer (PC) using Microsoft® Windows NT®. The software is supplied on a CD-ROM. The following are included with the GridManager Host System: Dell OptiPlex GX1 Keyboard and mouse 128 MB RAM 8 MB Video RAM Windows NT 8 GB Tape Drive Monitor - Dell M770 17" 1-4 Rev 10/99 GridManager User Manual 3COM Courier V.90 56 K Modem Intellution® Package 75 Point MMI Development Kit version 7.0 ESS Support Package Recipe Builder ROC Driver version 6.2 Other Software FIXJet® pcANYWHERE® Microsoft Access® Access Agent® GRIDLINK Configuration Software GridManager Host Software Some of the many functions provided are: ♦ Adjusting I/O points (including Sensor Module inputs) at the District Regulator and Low Pressure Point. ♦ Configuring communications setup between the GB601 District Regulator Controller, the GB602 Low Pressure Point Controller, and the GridManager Host computer. ♦ Retrieving historical and alarm logged data from the remote GridBoss 600-Series units. ♦ Generating reports concerning the GridBoss Gas Pressure Control system. The GridManager Host software is designed for ease of use. Pull-down menus and pushbuttons simplify accessing the functions provided by the software, and dialog boxes help to direct selections and data entry. Actions can be performed with the keyboard or a pointing device such as a mouse. Refer to Section 1.5 for a description of the user interface. Rev 10/99 1-5 GridManager User Manual 1.4.2 GridBoss Gas Pressure Control Units The GridBoss Gas Pressure Control (GPC) System 600-Series units are economical pressure measurement computers that automate the delivery of natural gas at an optimized and adequate pressure for natural gas distribution systems. The GridBoss 600-Series units also perform PID loop control, data archival, and remote communications. The GridBoss System consists of at least two 32-bit microprocessor-based devices. The GB601 is the District Regulator (DR) and the GB602 is the Low Pressure Point (LPP). The DR is automated with a Kixcel such as the Fisher Type 662 Kixcel. An I/P or servo valve may be used in place of the Kixcel. The GB601 provides functions required for measuring the inlet and outlet pressure of the District Regulator, and the GB602 measures the line pressure at the Low Pressure Point. The GRIDLINK Configuration Software is used to configure and tune the DR and LPP units. The GridManager Host Software is used to remotely monitor and configure the DR and LPP units. NOTE An I/P or servo valve may be used in place of the Kixcel. To ensure ease of readability, Kixcel is used throughout this manual to represent all three devices. The GridBoss System computes load profiles based on ambient temperature and time-of-day which are used to determine the “predicted” Setpoint of the District Regulator. The GridBoss System provides on-site functionality and supports remote monitoring, pressure measurement, data archival, communications, and control. The GridBoss System design allows you to configure specific applications including those requiring calculations, logic, and sequencing control using Function Sequence Tables (FSTs). The primary function of the GridBoss System is to adjust the Outlet Pressure of the DR station to maintain a Setpoint at the LPP. This allows the District Regulator to automate the delivering of natural gas at an optimized and adequate pressure. By using history load profiles originating from the Low Pressure Point data and using the load profiles at the District Regulator, the GridBoss System predicts system requirements to improve system integrity and reduce the average system pressure. The LPP GB602 measures the line pressure at the Low Pressure Point downstream from the District Regulator. The line pressure at the Low Pressure Point and the required change in Setpoint for the regulator is relayed back to the District Regulator GB601 when the LPP pressure goes out of range. The line pressure is averaged over a minute. An RBX (Report-by-Exception) alarm can be sent to the Host computer alerting GridManager of the alarm condition. The GridBoss 600-Series units have a weather-tight enclosure with a window for a Liquid Crystal Display (LCD) display, which is further protected by a weather-shield cover. This display consists of a 2-line by 16-character alphanumeric display to monitor information stored by the GridBoss 600-Series units. 1-6 Rev 10/99 GridManager User Manual The GridBoss 600-Series units enclosure contains a processor circuit board with built-in input/output (I/O), including mounting provisions for batteries, a radio, power converter, and an I/O card (standard for DR only). The built-in I/O consists of a direct 4-wire Resistance Temperature Detector (RTD) interface, and a discrete output. Additionally, the District Regulator includes two discrete inputs, two pulse counters, two user configurable pulse or discrete inputs, two discrete outputs, two analog inputs, and one analog output. An optional intrusion switch uses one of the discrete inputs. The GridBoss System can be operated peer-to-peer between the Low Pressure Point and the District Regulator or as part of a communications system, which includes a Host running GridManager. Monitored values are processed and stored for access by personnel in the field using either the LCD display of the GridBoss 600-Series unit or a notebook personal computer (PC) containing the GRIDLINK Configuration Software. Supervisors and managers at central or field offices can remotely monitor the GridBoss 600-Series units through a Host computer running GridManager. As delivered, GridManager automatically polls the GridBoss 600-Series units at 8:00 a.m. and 1:00 a.m. for all 15minute historical values and automatically polls for current data, all data types, and active alarms once per hour using Access Agent. NOTE You to need to check these times in Access Agent. The GridBoss 600-Series units use internal software (called firmware) for gathering input data, converting raw input data into calculated values, storing values, and providing control signals. Two diagnostic inputs monitor input power, battery voltage, and enclosure/battery temperature. Two basic types of memory are used in the GridBoss 600-Series units: Read-Only Memory (ROM) and Random Access Memory (RAM). The ROM is programmable (called flash memory). A portion of the ROM holds the firmware, which is programmed by the factory to contain the operating system and various application programs. Another portion of programmable ROM stores certain configuration and default values. The RAM, which is backed up by its own power source, stores history data and additional configuration data. The GRIDLINK software can access both the programmable ROM and the RAM. Rev 10/99 1-7 GridManager User Manual 1.5 USER INTERFACE You interact with the GridManager Host software using various displays on the computer monitor and the computer keyboard and/or pointing device. The major components of the GridManager user interface are: ♦ Menu bar, menus, and pushbuttons ♦ Function screens ♦ Dialog boxes ♦ Keyboard and pointing devices The previous user interface components are presented in Sections 1.4. Section 1.5.1 is an overview of the user interface. 1.5.1 Interface Overview The GridManager software employs an object-based graphical user interface with a standard Windows menu structure. After launching GridManager, you see the available functions displayed in a menu bar with pull-down/drop-down menus and pushbuttons. Refer to Figure 1-1. Once a function is selected, the screen or dialog box for that function displays. This screen or dialog box provides the requested information and allows you enter the applicable configuration data. A typical screen displays parameters and pushbuttons as displayed in Figure 1-1. Values are contained in data fields next to the parameter name; many of these values can be changed. Pushbuttons display dialog boxes for further configuration details or perform a desired action, such as the Historical Trend pushbutton shown in Figure 1-1. The pushbuttons are activated by clicking with a mouse. Dialog boxes are areas that “pop up” inside the current screen to allow further selections or values to be entered such as the Data Entry dialog box. They can also provide messages or information that is more detailed. 1-8 Rev 10/99 GridManager User Manual 1.5.2 Menu Bar and Menus The Region Overview is the first thing that appears on the screen after successfully logging on. Refer to Figure 1-3. The Menu Bar appears at the top of the screen. Refer to Figure 1-1. Menu Bar Menu Parameter Name Data Field Pushbutton Active Alarms Figure 1-1. Sample GridManager Display From the Menu Bar, you can use either the keyboard or the mouse to activate a menu and then to select a function in that menu. 1.5.3 Keyboard and Pointing Devices There are two methods for “telling” the GridManager software what to do: the keyboard method and the pointing device method. The pointing device can be a mouse, a trackball, or other device. Throughout this manual, the term “mouse” refers to any kind of pointing device. A mouse or trackball is usually easier to use than the keyboard for getting around in the menus and screens. However, the keyboard is still required to enter text and numerical data. Rev 10/99 1-9 GridManager User Manual 1.5.3.1 Using the Keyboard With a menu displayed, you can highlight the desired item by using the Down Arrow and Up Arrow keys. With the desired item highlighted, press the Enter key to activate the function. Instead of using the cursor keys and pressing Enter, you can type the white letter of the menu item (such as “O” for Open). The cursor movement keys are the four arrow keys, which are designated as follows: ♦ Up Arrow (↑) ♦ Down Arrow (↓) ♦ Right Arrow (→) ♦ Left Arrow (←) The text scrolling keys are the Page Up and Page Down keys. To use the keyboard in configuration screens and dialog boxes, press the Tab key to move in a predetermined sequence from one parameter field or pushbutton to the next. The field or pushbutton you select becomes highlighted. Note that fields unavailable for changes are automatically skipped; they are not highlighted. When you Tab to the last field or pushbutton in the screen or dialog box, pressing the Tab key again jumps back to the first field or pushbutton. To go back to a previous field or pushbutton, press the Shift and Tab keys together. In an option field, the currently selected option is highlighted or appears with a rectangle around it. To select one of the other options, use the Up Arrow and Down Arrow keys to highlight the desired option, and then press Enter. In a field that requires a text or numerical entry, type the required characters or numbers from the keyboard. Use the Backspace or Delete keys to erase unwanted characters. In a text field, you can use the Right Arrow and Left Arrow keys to move the cursor one character at a time and the Home and End keys to place the cursor at the beginning and end of the field, respectively. 1.5.3.2 Using the Mouse When using a mouse to access the menus, you can activate any item on the menu bar by clicking (press and release) on the item. Likewise, you can activate any item in a menu by clicking on it. Keep in mind that where the keyboard method highlights an item and then activates it, clicking with the mouse highlights and activates the selected item in one step. You can press the mouse button and drag the mouse cursor through other menu items or off the menus entirely. NOTE Not all menu items are active or are used. Certain functions are not required by GridManager. 1-10 Rev 10/99 GridManager User Manual To use the mouse in the screens and dialog boxes, click on the field you want to change. For option fields, clicking on an option selects it. For text and number entry fields that can be edited, click on the field to select it. Use the keyboard to enter the required characters. Note that you can move most dialog boxes by dragging them with the mouse. To drag a dialog box, place the pointer on the top border of the box, press and hold the left mouse button, then move the mouse. When the box is where you want it, release the button. To use the mouse to activate a pushbutton, just click on the pushbutton. To select a pushbutton without activating it, click the mouse button over the pushbutton (which places a rectangle around the pushbutton), drag the mouse off the pushbutton, and then release the mouse button. To use the mouse in list boxes, click on an item in a list to highlight it. 1.5.4 Function Screens Function screens serve two purposes: to provide information and allow the setting of configuration parameters. Some function screens are strictly for providing information; however, most serve both purposes. Function screens (also called “screens”) appear when a menu function or pushbutton is selected. A screen typically has the following components: ♦ Parameter with a value field ♦ Parameter with an option field ♦ Pushbutton (standard or function key) 1.5.5 Dialog Boxes Dialog boxes are “pop-up” windows that appear during tasks such as configuration. Most appear when a pushbutton is pressed in a function screen. Dialog boxes provide additional information and assist in making selections. A dialog box overlays part of the screen area of the display. The dialog box can be moved with a mouse by dragging its top border. Note that data in the screen behind the dialog box can be changed even with the dialog box displayed. A dialog box can have one or more of the following components: ♦ Parameter with a value field ♦ Parameter with an option field ♦ Pushbutton (standard only) ♦ List box The first three components also appear in function screens and are described in Section 1.5.4. Rev 10/99 1-11 GridManager User Manual The list box is typically used to select a file or a point parameter. If a list box has too many entries to fit inside its borders, a scroll bar is provided on the right-hand border of the box. This scroll bar can be used to move the list one item or one page at a time by clicking the scroll bar with the mouse. 1.6 STARTUP After launching Windows NT, the Intellution FIX Startup application and GridManager should automatically launch. In the event that this does not occur, refer to Section 1.6.1, Launching Windows NT, and Section 1.6.2, Launching GridManager and Intellution FIX Startup. 1.6.1 Launching Windows NT To launch Windows NT: 1. Start the computer. 2. Press Ctrl+Alt+Delete at the prompt. 3. Enter Admin for the default Password. NOTE It is suggested that you change your default Password. Your Windows NT Password can be change through your Control Panel’s Password dialog. 1.6.2 Launching GridManager and Intellution FIX Startup To launch GridManager, Intellution FIX Startup must be running. To launch Intellution FIX Startup: 1. Select Programs from the Windows Start button. 2. Select Intellution FIX. 3. Select Startup. The FIX Startup application should launch and the FIX Startup screen should display and remain active. Refer to Figure 1-2. NOTE You may also launch FIX Startup by double-clicking the Fix Startup shortcut icon located on your Windows Desktop. 1-12 Rev 10/99 GridManager User Manual Figure 1-2. FIX Startup Screen To launch GridManager: 1. Select Programs from the Windows Start button. 2. Select Intellution FIX. 3. Select View. When the GridManager software is loaded, the Region Overview screen displays as shown in Figure 1-3. NOTE After all applications are running, the ROC I/O driver is ready to poll the GridBoss 600-Series units. You can poll the GridBoss 600-Series units on demand. GridManager polls the GridBoss 600-Series units for all 15-minute historical values, for current data and the Alarm Log. Rev 10/99 1-13 GridManager User Manual 1.6.3 Region Overview The Region Overview screen displays an overview of the entire GridBoss Gas Pressure Control (GPC) system. Refer to Figure 1-3. An example Region Overview screen is detailed in Section 3. Figure 1-3. Region Overview 1.6.4 Shut Down Use the following directions to shut down GridManager and the Intellution FIX Startup software. Refer to: ♦ Section 1.6.4.1, Exiting GridManager, on page 1-15. ♦ Section 1.6.4.2, Exiting Intellution FIX Startup, on page 1-15. 1-14 Rev 10/99 GridManager User Manual 1.6.4.1 Exiting GridManager To exit GridManager: 1. Ensure that GridManager is the active program. 2. Select Exit from the GridManager File menu. 1.6.4.2 Exiting Intellution FIX Startup To exit Intellution FIX Startup: 1. Ensure that FIX Startup is the active program. 2. Select Shutdown FIX from the FIX Startup Options menu. Refer to Figure 1-2. CAUTION Do not exit GridManager or the FIX Startup application when the ROC driver is collecting history or LABHIST or you will corrupt your historical data. 1.7 CONNECTING GRIDMANAGER TO THE GRIDBOSS SYSTEM The computer running the GridManager software physically connects to the GridBoss 600-Series units through a modem or serial connection. To connect the computer to a remotely located GridBoss 600Series unit, a serial or dial-up modem communications line must be installed. The remote GridBoss 600-Series units use COM1. The communication ports on the GridManager computer and the GridBoss 600-Series units must be configured similarly. ♦ The GridManager’s communications port is configured using the GridManager’s Channel Setup. ♦ The GridBoss 600-Series units communications port (COM1) is configured using the Comm Ports function in Section 9.5, Comm Ports, of the GRIDLINK User Manual. ♦ The GridManager’s Host communications at the GridBoss 600-Series units is configured using the Comm Ports Modem function in Section 9.5.1, Modem, of the GRIDLINK User Manual. If the communication ports on both the GridManager and the GridBoss 600-Series units are configured properly, then a Poll Unit, Poll History, Poll Region, or Force an Update command causes the GridManager to begin communicating with the GridBoss 600-Series unit. Rev 10/99 1-15 GridManager User Manual 1.7.1 Communications Overview The GridBoss System consists of LPP units, DR units, and a GridManager Host computer system. Both the LPP and DR units communicate with the GridManager Host computer. Communication can be originated by the GridManager Host computer or by the LPP / DR units as a Spontaneous Report-byException (SRBX or RBX) alarm. Refer to Section 9 of the GRIDLINK User Manual, Configuring Report-by-Exception. Communications including the Device Name, Address, and Group at the GridManager are set up in the Configure Channel Setup screen. The LPP can communicate with up to five DR units (GRIDLINK Grid menu>Comm with DRs). Each DR contains information about the LPP that validates the communication (GRIDLINK Grid menu>Comm with LPP). In each LPP, the GRIDLINK System menu>Information screen is used to enter the Station name, Address and Group of the LPP. Refer to Section 9 of the GRIDLINK User Manual, System Information. The GRIDLINK System menu>Comm Ports>Modem screen is used to enter the GridManager Host telephone number (Connect Command). Refer to Section 9 of the GRIDLINK User Manual, Modem. In each LPP, the GRIDLINK Grid menu>Comm with DRs is used to configure the DR Tag name, DR Address, DR Group and telephone number to the DR (Connect Command). Each DR must be individually configured. The Comm with DRs screen is detailed in Section 3, Grid Menu, of the GRIDLINK User Manual. In each DR, the GRIDLINK System menu>Information screen is used to enter the Station name, Address and Group of the DR. Refer to Section 9 of the GRIDLINK User Manual, System Information. The System menu>Comm Ports>Modem screen is used to enter the GridManager Host telephone number (Connect Command). Refer to Section 9 of the GRIDLINK User Manual, Modem. In each DR, the GRIDLINK Grid menu>Comm with LPP screen is used to configure the LPP Tag name, LPP Address and LPP Group of the LPP assigned to control the DR. The Comm with LPP screen is detailed in Section 3, Grid Menu, of the GRIDLINK User Manual. It is recommended that the DR and LPP configuration information along with the communications parameters such as Baud Rate be configured before the units are deployed in the field. Each unit should be marked or labeled. This allows further configuration from a central location. The Sensor Module transducer calibrations should be recorded and if known, should be configured before the units are deployed. It is also useful to synchronize the Date and Time in each unit. Refer to GRIDLINK File menu>New>DR Configuration and GRIDLINK File menu>New>LPP Configuration in Section 2, File Menu, of the GRIDLINK User Manual. 1-16 Rev 10/99 GridManager User Manual SECTION 2 — REGION OVERVIEW 2.1 SCOPE This section describes how the Region Overview screen functions and how to maneuver around the GridBoss™ Gas Pressure Control (GPC) system. 2.1.1 Section Contents This section contains the following information: Information Scope Description Alarm Conditions Region Overview Legend System Menu Region Menu Other Regions Poll Region Section 2.1 2.2 2.2.1 2.2.2 2.3 2.4 2.5 2.6 Page Number 2-1 2-1 2-3 2-4 2-5 2-5 2-5 2-6 2.2 DESCRIPTION The Region Overview screen displays an overview of the entire GridBoss Gas Pressure Control (GPC) system. Refer to Figure 2-1. Rev 10/99 2-1 GridManager User Manual Figure 2-1. Region Overview NOTE You can only run one copy of GridManager at a time. GridManager does not support multiple copies of GridManager running on the same computer at the same time. To view a station, click on the appropriate icon. Refer to Section 2.2.2, Region Overview Legend, on page 2-4. GB601 District Regulator displays the following: ♦ Station name. ♦ Temperature. ♦ Inlet Pressure. ♦ Outlet Pressure. ♦ Control Mode. ♦ Alarm condition. 2-2 Rev 10/99 GridManager User Manual GB602 Low Pressure Point displays the following: ♦ Station name. ♦ Pressure. ♦ Alarm condition. Regulator Stations without any automation display the following: ♦ Station name. The Current System Time displays in the upper right-hand corner of the Region Overview screen. The Region Name displays in the upper left-hand corner of the Region Overview screen. 2.2.1 Alarm Conditions When an alarm occurs at a DR or an LPP, alarm conditions display with a red line around the icons on the Region Overview screen. When an alarm occurs at a DR, the edge of the DR circle icon appears red. The following alarms may occur: ♦ Output monitor failed. ♦ Low battery voltage. ♦ Bad Outlet Pressure transmitter. ♦ Bad temperature sensor (RTD). ♦ Intrusion (if intrusion switch is installed and configured). When an alarm occurs at a LPP, the edge of the LPP square icon appears red. The following alarms may occur: ♦ Intrusion (if intrusion switch is installed and configured). ♦ Low battery voltage. ♦ Bad pressure transmitter. Rev 10/99 2-3 GridManager User Manual 2.2.2 Region Overview Legend To display the Legend associated with the Region Overview, press the Legend pushbutton. The Legend details the icons used within the Region Overview screen. Refer to Figure 2-2. Figure 2-2. Region Overview Legend NOTE An icon with a red slash through it indicates a non-operational station. NOTE You cannot open the Low Pressure Regulator Station. 2-4 Rev 10/99 GridManager User Manual 2.3 SYSTEM MENU You can customize GridManager using Intellution to display several regions to create a System Menu. 2.4 REGION MENU The Region Menu displays all GB601 District Regulators and GB602 Low Pressure Monitoring Points associated with the GPC. Refer to Figure 2-3. Low Pressure Point District Regulator Figure 2-3. Region Menu 2.5 OTHER REGIONS If you have multiple regions in a Gas Pressure Control system, you can use the Other Regions option to switch between regions. Rev 10/99 2-5 GridManager User Manual 2.6 POLL REGION Click the Poll Region pushbutton to manually poll every GridBoss LPP and DR device in the entire GridBoss Gas Pressure Control System. Poll Region polls the current data and the alarms log for all GridBoss LPP and DR devices. GridManager automatically polls every GridBoss LPP and DR device once per hour. The Poll Region function may take an extended period of time depending on the size of your installation. All values update when the Poll Region function is complete. 2-6 Rev 10/99 GridManager User Manual SECTION 3 — DISTRICT REGULATOR 3.1 SCOPE This section describes how to monitor and adjust the GridManager software for use with the GB601, District Regulator. 3.1.1 Section Contents This section contains the following information: Information Scope Description Associated Low Pressure Point District Regulator Values Changing a Data Field Set Control Mode System Menu Region Menu Region Overview Poll Unit Poll History Historical Trend Section 3.1 3.2 3.3 3.4 3.4.1 3.5 3.6 3.7 3.8 3.9 3.10 3.11 Page Number 3-1 3-1 3-3 3-3 3-4 3-5 3-6 3-6 3-6 3-6 3-6 3-7 3.2 DESCRIPTION The primary function of the GridBoss is to control the pressure of natural gas in a distribution grid. The GB601 measures the inlet and outlet pressure at the District Regulator and the GB602 measures the pressure at the Low Pressure Point. At the Low Pressure Point, the Sensor Module converts and reads the static (line) input pressure. The LPP calculates the input pressure average over a minute and compares it to the Setpoint Deadband. If the input average pressure is out of range of the Setpoint Deadband, a message containing the new calculated change in the Setpoint for the Inner Loop and the average pressure over a minute is sent to the DR. Rev 10/99 3-1 GridManager User Manual At the District Regulator, the Sensor Module converts and reads the static (line) inlet pressure, converts and reads static outlet pressure, stores the values temporarily, and communicates the values on demand to the GB602 LPP. The inputs are used to determine the pressure output at the DR. The primary inputs used for pressure monitoring at the DR are static pressure and temperature. The primary input used for pressure monitoring at the LPP is static pressure. The inlet and outlet static pressures come from the Sensor Module. The District Regulator screen is used to monitor and adjust values, collect historical data, and view alarms associated with the DRs the GridManager Host software is connected. Refer to Figure 3-1. Figure 3-1. District Regulator 3-2 Rev 10/99 GridManager User Manual The Current System Time displays in the upper right-hand corner of the DR screen. The Last Successful Poll time and date displays in the upper right-hand corner of the DR screen under the Current System Time. The date and time turn red if the last attempt to communicate failed. The Station Name displays in the upper left-hand corner of the DR screen. The Temperature displays under the RTD sensor in the DR screen. The Control Output displays under the actuator in the DR screen. The Control Mode displays under the Set Control Mode button in the DR screen. 3.3 ASSOCIATED LOW PRESSURE POINT The GB602 Low Pressure Point associated with this DR displays in this field. The LPP can initiate communications with up to five DRs; however, a DR may only be controlled by one LPP. Click on the Associated Low Pressure Point Station Name to view that Associated Low Pressure Point. The Associated Low Pressure Point displays the current inlet pressure in inches of water column (In W.C.) or the Engineering Unit (EU) that you have specified. 3.4 DISTRICT REGULATOR VALUES The actual values of the fields configured at the GB601 District Regulator display. Certain values can actually be altered from this screen. Other values are static; however, they may indicate an alarm condition has occurred. Values displayed in red indicate an alarm condition. Inlet Pressure – The current Inlet Pressure at the DR. The value for the Inlet Pressure turns red if the input associated with this point has a failure. Outlet Pressure – The Outlet Pressure you are controlling at the District Regulator. This is the current value of the process variable, which is determined by the input definition (I/O Definition) defined by GRIDLINK. The value is used for comparison to the Setpoint. Setpoint – The Setpoint around which the Outlet Pressure (process variable) is controlled. When in Manual Mode, you may enter a value to be in line with the Outlet Pressure so there is not a harsh bump at startup. Default Setpoint – This is the default Inner Loop control Setpoint that is used when an alarm condition terminates the Outer Loop or the Adaptive Mode and places the Control loop back to Inner Loop Mode. The Inner Loop then uses the Default Setpoint value. The Default Setpoint is also Rev 10/99 3-3 GridManager User Manual used if the LPP communicates to the DR that the LPP has a problem (such as a low battery error or pressure transmitter failure message) or if the LPP fails to call the DR for a period of 9 hours. If the Default Setpoint is less than zero, then the Setpoint remains at its current value. Maximum Setpoint – The Maximum Setpoint to which the Outer Loop or operator can change the Setpoint. Minimum Setpoint – The Minimum Setpoint to which the Outer Loop or operator can change the Setpoint. Control Output Value – Desired output to the Kixcel, I/P, or servo valve. This can be an Analog Output or a Discrete Output. This should be approximately the same value as the Output Feedback at the GridBoss. Output Monitor Value – Actual output of the Kixcel, I/P, or servo valve. This is the position of the Kixcel, I/P, or servo valve as returned by an Analog Input. This can only be used if the Output Type is an Analog Output. The value turns red if the input associated with this point has a failure. Default Output – The Inner Loop’s default Kixcel position entry. If the DR has a low battery alarm or the Outlet Pressure transducer produces an equipment failure alarm, the control loop shifts to Manual Mode, and the Kixcel moves to the Default Output position. Maximum Output – The maximum Control Output, to which the Inner Loop’s calculated output can not exceed. Minimum Output – The minimum Control Output, to which the Inner Loop’s calculated output can fall. Temperature – The current ambient temperature at the DR. The value turns red if the input associated with this point has a failure. Battery Voltage – The current Battery Voltage at the DR. The value turns red if the Low Battery Voltage Limit is exceeded. 3.4.1 Changing a Data Field To change a data field, double-click on the value. Refer to Figure 3-2. Enter the desired value and click Enter. Click Cancel to exit the dialog without making a value change. 3-4 Rev 10/99 GridManager User Manual Figure 3-2. Data Entry 3.5 SET CONTROL MODE Press the Set Control Mode pushbutton (Figure 3-1) to change the Control Mode at the District Regulator. Refer to Figure 3-3. Figure 3-3. Select Desired Control Mode CAUTION After selecting the new Control Mode, wait for GridManager to contact the District Regulator before exiting this screen or you will cancel the Control Mode change. Exit Mode Set – Exit Control Mode change without changing the Control Mode. NOTE The Control Mode dialog automatically closes when the Control Mode change has been sent to the GridBoss. Rev 10/99 3-5 GridManager User Manual 3.6 SYSTEM MENU You can customize GridManager using Intellution to display several regions to create a System Menu. 3.7 REGION MENU Refer to Section 3, Region Menu. 3.8 REGION OVERVIEW The Region Overview screen display an overview of the entire GridBoss Gas Pressure Control (GPC) system. Refer to Section 3, Region Overview. 3.9 POLL UNIT Click the Poll Unit pushbutton to manually poll the associated District Regulator for its latest values. Poll Unit polls the current data and the Alarm Log from the selected GridBoss. GridManager automatically polls the GridBoss units once per hour. 3.10 POLL HISTORY Click the Poll History pushbutton to poll the associated District Regulator for its history values. 3-6 Rev 10/99 GridManager User Manual 3.11 HISTORICAL TREND Click the Historical Trend pushbutton to view a graphical representation of the associated District Regulator’s historical values. Refer to Figure 3-4. NOTE Click the Poll History pushbutton BEFORE you view the Historical Trend to update the history collection. Figure 3-4. Historical Trends To view Historical Trends for the current time of day, select Set to Current Time from the Actions menu. Refer to Figure 3-5. Rev 10/99 3-7 GridManager User Manual Figure 3-5. Set to Current Time The DR Historical Trend graph displays: ♦ Temperature. ♦ Inlet Pressure. ♦ Outlet Pressure. ♦ Output Value. ♦ Output Monitor Value. Use << to view the previous days history records and use >> to view the next days history records. Use < to view the previous one-half day of history records and use > to view the next one-half day of history records. To exit the Historical Trends screen, select Exit from the File menu, and return to the related device screen. 3-8 Rev 10/99 GridManager User Manual SECTION 4 — LOW PRESSURE POINT 4.1 SCOPE This section describes how to monitor and adjust the GridManager software for use with the GB602 Low Pressure Point. 4.1.1 Section Contents This section contains the following information: Information Scope Description Associated District Regulators Low Pressure Point Monitor Values Changing a Data Field Force an Update System Menu Region Menu Region Overview Poll Unit Poll History Historical Trend Section 4.1 4.2 4.3 4.4 4.4.1 4.5 4.6 4.7 4.8 4.9 4.10 4.11 Page Number 4-1 4-1 4-3 4-3 4-4 4-4 4-4 4-4 4-4 4-5 4-5 4-5 4.2 DESCRIPTION The primary function of the GridBoss is to control the pressure of natural gas in a distribution grid. The GB601 measures the inlet and outlet pressure at the District Regulator and the GB602 measures the pressure at the Low Pressure Point. At the Low Pressure Point, the Sensor Module converts and reads the static (line) input pressure. The LPP calculates the input pressure average over a minute and compares it to the Setpoint Deadband. If the input average pressure is out of range of the Setpoint Deadband, a message containing the new calculated change in the Setpoint for the Inner Loop and the average pressure over a minute is sent to the DR. Rev 10/99 4-1 GridManager User Manual The LPP GB602 measures the average line pressure at the Low Pressure Point downstream from the District Regulator. The average line pressure at the Low Pressure Point and the required change in Setpoint for the regulator is relayed back to the District Regulator GB601 when the LPP pressure goes out of range. An alarm can be sent to the Host computer alerting GridManager of the alarm condition. The Low Pressure Point screen is used to monitor and adjust values, collect historical data, and receive alarms associated with the DRs the GridManager Host software is connected. Refer to Figure 4-1. Figure 4-1. Low Pressure Point The Current System Time displays in the upper right-hand corner of the LPP screen. The Last Successful Poll time and date displays in the upper right-hand corner of the LPP screen under the Current System Time. The date and time turn red if the last attempt to communicate failed. The Station Name displays in the upper left-hand corner of the LPP screen. The Pressure displays near the pressure tap on the Low Pressure Point screen. The Setpoint displays in the LCD (Liquid Crystal Display) on the Low Pressure Point screen. 4-2 Rev 10/99 GridManager User Manual 4.3 ASSOCIATED DISTRICT REGULATORS The GB601 District Regulators associated with this Low Pressure Point displays in this field. The LPP can initiate communications with up to five DRs. In W.C. – Outlet Pressure displayed in inches in water column or the engineering units for your system. Comm Mode – Communications Mode of the DR. Enabled or Disabled. Comm Status – Communications Status of the DR. ♦ OK – Communications Status is OK. ♦ Failed – Communications Status is Failed after the last attempt. 4.4 LOW PRESSURE POINT MONITOR VALUES The actual values of the fields configured at the GB602 Low Pressure Point display. Certain values can actually be altered from this screen. Other values are static; however, they may indicate an alarm condition has occurred. Values display in red to indicate an alarm condition. Current Pressure – The Current Pressure at the LPP. The value turns red if the input associated with this point has a failure. Setpoint – The Setpoint around which the Outlet Pressure (process variable) is controlled. When in Manual Mode, you may enter a value to be in line with the Outlet Pressure so there is not a harsh bump at startup. Setpoint Deadband – A “window” around the Setpoint. When the Avg. Low Press Value is within this window alarming does not occur. For example, if you enter “.5,” there will be a region of .5 units above and .5 units below the Setpoint in which the Avg. Low Press Value can move without causing an alarm. The LPP calculates the input pressure average over a minute and compares it to the Setpoint. Battery Voltage – The current Battery Voltage at the DR. The value turns red if the Low Battery Voltage Limit is exceeded. Rev 10/99 4-3 GridManager User Manual 4.4.1 Changing a Data Field To change a data field, double-click on the value. Refer to Figure 4-2. Enter the desired value and click Enter. Click Cancel to exit the dialog without making a value change. Figure 4-2. Data Entry 4.5 FORCE AN UPDATE Click the Force an Update pushbutton (Figure 4-1) to cause the Low Pressure Point to communicate with all District Regulators. 4.6 SYSTEM MENU You can customize GridManager using Intellution to display several regions to create a System Menu. 4.7 REGION MENU Refer to Section 3, Region Menu. 4.8 REGION OVERVIEW The Region Overview screen display an overview of the entire GridBoss Adaptive Predictive Control (APC) system. Refer to Section 3, Region Overview. 4-4 Rev 10/99 GridManager User Manual 4.9 POLL UNIT Click the Poll Unit pushbutton to manually poll the associated Low Pressure Point for its latest values. Poll Unit polls the current data and Alarm Log for the select GridBoss. GridManager automatically polls the GridBoss units once per hour. 4.10 POLL HISTORY Click the Poll History pushbutton to poll the associated LPP for its history values. 4.11 HISTORICAL TREND Click the Historical Trend pushbutton to view a graphical representation of the associated LPP’s historical values. Refer to Figure 4-3. NOTE Click the Poll History pushbutton BEFORE you view the Historical Trend to update the history collection. Rev 10/99 4-5 GridManager User Manual Figure 4-3. Historical Trends To view Historical Trends for the current time of day, select Set to Current Time from the Actions menu. Refer to Figure 4-4. Figure 4-4. Set to Current Time 4-6 Rev 10/99 GridManager User Manual The LPP Historical Trend graph displays: ♦ Average Pressure. Use << to view the previous days history records and use >> to view the next days history records. Use < to view the previous one-half day of history records and use > to view the next one-half day of history records. To exit the Historical Trends screen, select Exit from the File menu and return to the related device screen. Rev 10/99 4-7 GridManager User Manual [This page is intentionally left blank.] 4-8 Rev 10/99 GridManager User Manual SECTION 5 — REPORTS 5.1 SCOPE This section describes how reports are generated that details the District Regulators and the Low Pressure Points information. Reports are generated using Microsoft Access. 5.1.1 Section Contents This section contains the following information: Information Scope District Regulators Daily Report Low Pressure Points Daily Report Section 5.1 5.2 5.3 Page Number 5-1 5-1 5-4 WARNING Do NOT change how ROC history is configured or referenced. 5.2 DISTRICT REGULATORS DAILY REPORT The District Regulators Daily Report is displayed in Figure 5-1. The report displays the Current Values and Values from Yesterday. The pre-configured reports are generated automatically. Data is transferred from FIX32 to Access tables and then queries have been defined to generate the formatted reports described below. Rev 10/99 5-1 GridManager User Manual Figure 5-1. District Regulators Daily Report Device Name – Name (Tag) of the District Regulator GB601. Inlet – The Inlet Pressure at the District Regulator. Outlet – The Outlet Pressure at the District Regulator. This is the current value of the process variable, which is determined by the input definition (I/O Definition). The value is used for comparison to the Setpoint. Setpoint – The Setpoint around which the Outlet Pressure (process variable) is controlled. Output – Desired output to the Kixcel, I/P, or servo valve. This can be an Analog Output or a Discrete Output. This should be the same value as the Output Feedback at the DR. 5-2 Rev 10/99 GridManager User Manual Temp – Current temperature at the District Regulator. Control Mode – The District Regulator controls the regulator Outlet Pressure by adjusting the output to the Kixcel in one of four modes using the GRIDLINK firmware. The four modes that can be enabled are: ♦ Off – Control processing does not occur if Off is selected. ♦ Manual Mode – Values in Manual Mode are manually manipulated and do not include information from either the District Regulator or the Low Pressure Point. This is the default Mode. ♦ Inner Loop Mode – Inner Loop Mode includes only information from the District Regulator and the Kixcel. Information from the Low Pressure Point is not included. ♦ Outer Loop Mode – Outer Loop Mode includes both information from the District Regulator and the Low Pressure Point. Outer Loop Mode allows the LPP to control the Inner Loop Setpoint. An adaptive temperature coefficient and time-of-day profile are being calculated, but are not used for control loop processing. ♦ Adaptive Mode – Adaptive Mode includes both information from the District Regulator and the Low Pressure Point; in addition, biases based on the time-of-day and temperature load profiles are also calculated and are used for control. This pattern reduces the need for the LPP to continually call the DR. NOTE When in Manual Mode and Inner Loop Mode, the LPP does not communicate with that DR again until the value entered in the Error Time Delay for DRs field has been met. After the Error Time Delay period, the LPP communicates with the DR to determine if it is in Outer Loop Mode or Adaptive Mode. Comm Status – Displays the status of the last communications between the District Regulator and the Low Pressure Point GB602. This is either OK or Failed. Inlet Press – The minimum, maximum, and average value from yesterday of the Inlet Pressure at the DR. Outlet Press – The minimum, maximum, and average value from yesterday of the Outlet Pressure at the DR. Temperature – The minimum, maximum, and average value from yesterday of the Temperature at the DR. Rev 10/99 5-3 GridManager User Manual 5.3 LOW PRESSURE POINTS DAILY REPORT The Low Pressure Points Daily Report is displayed in Figure 5-2. The report displays the Current values, values from Yesterday, and Communication Modes answer Status. Figure 5-2. Low Pressure Points Daily Reports DName – Name (Tag) of the Low Pressure Point GB602. Pressure – The Pressure at the Low Pressure Point. The pressure you are monitoring at the low pressure point in the distribution system. This is the current value of the process variable, which is determined by the input definition (I/O Definition). Setpoint – The Setpoint around which the Pressure (process variable) is controlled. 5-4 Rev 10/99 GridManager User Manual Min – The minimum value from yesterday of the Pressure at the LPP. Max – The maximum value from yesterday of the Pressure at the LPP. Avg – The average value from yesterday of the Pressure at the LPP. Mode 1-5 – The Mode of the LPP. This is either Enabled or Disabled. Enabled indicates that the LPP can call the District Regulators. Calls 1-5 – The total amount of time the LPP was connected to the DR. Rev 10/99 5-5 GridManager User Manual [This page intentionally left blank.] 5-6 Rev 10/99 GridManager User Manual GLOSSARY OF TERMS A AGA – American Gas Association. AI – Analog Input. AO – Analog Output. Analog – Analog data is represented by a continuous variable, such as a electrical current signal. AP – Absolute Pressure. APC – Adaptive Predictive Control. ASCII – American (National) Standard Code for Information Interchange. B Built-in I/O – I/O channels that are fabricated into the GB600-Series devices and do not require a separate I/O card. Also called “on-board” I/O. C COM1 – Port on the GB600-Series devices that may be used for host communications, depending on the installed communications card. Configuration – Typically, the software setup of a device, such as a GB600-Series device that can often be defined and changed by the user. Can also mean the hardware assembly scheme. CSA – Canadian Standards Association. D DB – Database. DCD – Carrier Detect communications signal. DI – Discrete Input. Discrete – Input or output that is non-continuous, typically representing two levels such as on/off. DO – Discrete Output. DP – Differential Pressure. DTR – Data Terminal Ready modem communications signal. Duty Cycle – Proportion of time during a cycle that a device is activated. A short duty cycle conserves power for I/O channels, radios, and such. Rev 10/99 G-1 GridManager User Manual E EEPROM – Electrically Erasable Programmable ROM, a form of permanent memory. EIA-232 – Serial Communications Protocol using three or more signal lines, intended for short distances. EIA-422 – Serial Communications Protocol using four signal lines. EIA-485 – Serial Communications Protocol requiring only two signal lines. Can allow up to 32 devices to be connected together in a daisy-chained fashion. EMF – Electro-motive force. EMI – Electro-magnetic interference. EU – Engineering Units. F Firmware – Internal software that is factory-loaded into a form of ROM. In the GB600-Series devices, the firmware supplies the software used for gathering input data, converting raw input data calculated values, storing values, and providing control signals. Flash ROM – A type of read-only memory that can be electrically re-programmed. It is a form of permanent memory (needs no backup power). FM – Factory Mutual. FSK – Frequency shift keyed. FST – Function Sequence Table, a type of program that can be written by the user in a high-level language designed by Fisher Controls. G, H GFA – Ground fault analysis. GND – Electrical ground, such as used by the power supply in a GB600-Series controller. GP – Gauge Pressure. GPC – Gas Pressure Control. GB601 – District Regulator Remote Operations Controller, Fisher Control’s microprocessor-based unit that provides remote pressure monitoring and control. GB602 – Low Pressure Point Remote Operations Controller, Fisher Control’s microprocessor-based unit that provides remote pressure monitoring and control. GridBoss – The entire GridBoss System including GRIDLINK, GridManager, GB601, GB602, and the GridManager Intellution Setup. Sometimes used to refer to a GB600-Series controller. GRIDLINK – Configuration software used to configure GB600-Series devices to gather data, as well as most other functions. GridManager – Host Configuration software used to configure and monitor GB600-Series devices to gather data. Host – A central computer that polls, monitors, and sometimes configures and controls field devices (such as a GB600-Series Controller), as well as processing and storing data. G-2 Rev 10/99 GridManager User Manual I, J I/O – Input/Output. IEC – Industrial Electrical Code. K Kbytes – Kilobytes. kHz – Kilohertz. Kixcel – The receives the 4-20 mA signal (Analog Output or Timed Duration Output) from the GB601 and converts the signal into an Outlet Pressure adjusting the Setpoint at the DR. L LCD – Liquid Crystal Display. Display-only device used for reading data. LED – Light-emitting diode. LOI – Local Operator Interface. Refers to the serial (RS-232) port on the GB600-Series devices through which local communications are established, typically for configuration software running on a PC. LPM – Lighting Protection Module. Use this module to provide lightning and power surge protection for GB600-Series devices that use an I/O card. M mA – Milliamp(s); one thousandth of an ampere. MCU – Master Controller Unit. MPU – Micro-processor Unit. mW – Milliwatts, or 0.001 watt. mV – Millivolts, or 0.001 volt. N NEC – National Electrical Code. NEMA – National Electrical Manufacturer’s Association. O OH – Off-Hook modem communications signal. Off-line – Accomplished while the target device is not connected (by a communications link). For example, off-line configuration is configuring a GB600-Series device in a electronic file that is later loaded into the units. Ohms – Units of electrical resistance. On-line – Accomplished while connected (by a communications link) to the target device. For example, on-line configuration is configuring a GB600-Series device while connected to it, so that current parameter values are viewed and new values can be loaded immediately. Rev 10/99 G-3 GridManager User Manual OP – Operator Port; see LOI. Opcode – Type of data request in the ROC protocol used by the GB600-Series controllers to communicate with the GRIDLINK or GridManager software, as well as with host computers that use the ROC driver software. P, Q Parameter – A property of a point that typically can be configured or set by the user. For example, the Point Tag ID is a parameter of an Analog Input point. Parameters are normally edited by using configuration software running on a PC. PC – Personal computer. PI – Pulse Input. PID – Proportional, Integral, and Derivative control. Point – Software-oriented term for an I/O channel or some other function, such as a flow calculation. Points are defined by a collection of parameters. Point Number – The location of an I/O point as installed in GB600-Series devices. PSTN – Public switched telephone network. PTT – Push-to-talk signal. Pulse – Transient variation of a signal whose value is normally constant. PV – Process variable. R RAM – Random Access Memory. In GB600-Series devices, it is used to store history, data, most user programs, and additional configuration data. RBX – Report-by-exception. In GB600-Series devices, it always refers to spontaneous RBX or SRBX in which the GB600-Series devices contacts the GridManager Host to report an alarm condition. RFI – Radio frequency interference. RI – Ring Indicator modem communications signal. ROM – Read-only memory. Typically used to store firmware. RTD – Resistance Temperature Detector. RTS – Ready to Send modem communications signal. RXD – Received Data communications signal. S SAC – Scan Alarming Control. SAMA – Scientific Apparatus Maker’s Association. SCADA – Supervisory Control and Data Acquisition. Sensor Module – Provides static pressure inputs to a GB600-Series controller for the pressure calculation. G-4 Rev 10/99 GridManager User Manual Soft Points – A type of GB600-Series device point with generic parameters that can be configured to hold data as desired by the user. SRAM – Static Random Access Memory. Stores data as long as power is applied; typically backed up by a lithium battery or super capacitor. SRBX – Spontaneous Report-by-exception (SRBX or RBX). In a GB600-Series device, it always refers to SRBX in which the GB600-Series device contacts the GridManager Host to report an alarm condition. T-Z TDO – Timed Duration Output. TLP – Type (of point), Logical (or point) number, and Parameter number. TXD – Transmitted Data communications signal. Rev 10/99 G-5 GridManager User Manual [This page intentionally left blank.] G-6 Rev 10/99 GridManager User Manual TOPICAL INDEX Numbers 662 Kixcel Remote Control Pilot Drive Actuator See Kixcel............................................................. 1-4 A Absolute Pressure AP ........................................................................G-1 Adaptive Mode .......................................................... 5-3 Additional Information............................................... 1-4 Alarms....................................................................... 2-3 American Gas Association AGA .....................................................................G-1 Analog.......................................................................G-1 Analog Inputs ............................................................G-1 Analog Outputs..........................................................G-1 APC...........................................................................G-1 ASCII ........................................................................G-1 Associated District Regulators.................................... 4-3 Associated Low Pressure Point................................... 3-3 Automatic Polling .................................................................1-13 Avg ........................................................................... 5-5 B Battery Voltage................................................... 3-4, 4-3 Built-in I/O ................................................................G-1 Current Pressure .........................................................4-3 Current System Time....................................2-3, 3-3, 4-2 D Data Entry ...........................................................3-5, 4-4 Data Field...................................................................1-9 Changing ........................................................3-4, 4-4 DB ............................................................................G-1 DCD..........................................................................G-1 Default Password .............................................................1-12 Default Output............................................................3-4 Default Setpoint..........................................................3-3 Device Name..............................................................5-2 Dialog Boxes............................................................1-11 Discrete.....................................................................G-1 Discrete Inputs...........................................................G-1 Discrete Outputs ........................................................G-1 Displays Overview .....................................................1-9 District Regulator ......................................................G-2 Configuration..................................................2-1, 3-1 DR.........................................................................1-6 District Regulator Controller GB601 ...................................................................1-1 District Regulator Values............................................3-3 DName.......................................................................5-4 DP.............................................................................G-1 DTR ..........................................................................G-1 Duty Cycle ................................................................G-1 C Calls 1-5 .................................................................... 5-5 Changing a Data Field......................................... 3-4, 4-4 COM1 .......................................................................G-1 Comm Mode.............................................................. 4-3 Comm Status ...................................................... 4-3, 5-3 Communications Overview .............................................................1-16 Configuration.............................................................G-1 District Regulator........................................... 2-1, 3-1 Low Pressure Point................................................ 4-1 Connecting Remote Communications......................................1-15 To the GridManager .............................................1-15 Control Loop Modes Selecting the Type................................................. 5-3 Control Mode ..................................................... 3-3, 5-3 Control Output........................................................... 3-3 Control Output Value................................................. 3-4 CSA...........................................................................G-1 Ctrl+Alt+Delete........................................................1-12 Rev 10/99 E EEPROM ..................................................................G-2 EIA-232 ....................................................................G-2 EIA-422 ....................................................................G-2 EIA-485 ....................................................................G-2 EMF..........................................................................G-2 EMI...........................................................................G-2 EU.............................................................................G-2 Exit Mode Set.............................................................3-5 Exiting GridManager........................................................1-15 Intellution FIX Startup .........................................1-15 F Figure 1-1. Figure 1-2. Figure 1-3. Figure 2-1. Figure 2-2. Figure 2-3. Sample GridManager Display ..................1-9 FIX Startup Screen.................................1-13 Region Overview ...................................1-14 Region Overview .....................................2-2 Region Overview Legend.........................2-4 Region Menu ...........................................2-5 I-1 GridManager User Manual Figure 3-1. District Regulator.................................... 3-2 Figure 3-2. Data Entry............................................... 3-5 Figure 3-3. Select Desired Control Mode................... 3-5 Figure 3-4. Historical Trends..................................... 3-7 Figure 3-5. Set to Current Time................................. 3-8 Figure 4-1. Low Pressure Point ................................. 4-2 Figure 4-2. Data Entry............................................... 4-4 Figure 4-3. Historical Trends..................................... 4-6 Figure 4-4. Set to Current Time................................. 4-6 Figure 5-1. District Regulators Daily Report.............. 5-2 Figure 5-2. Low Pressure Points Daily Reports .......... 5-4 Firmware ............................................................1-7, G-2 Fisher Type 662 Kixcel Remote Control Pilot Drive Actuator See Kixcel............................................................. 1-4 FIX Startup...............................................................1-12 Flash ROM ................................................................G-2 FM ............................................................................G-2 Force an Update.................................................1-15, 4-4 FSK ...........................................................................G-2 FST ...........................................................................G-2 Function Screens.......................................................1-11 Function Sequence Table (FST) User Manual............. 1-4 G GB600-Series Controller of the GridBoss System Instruction Manual (Form A6075) ............................ 1-4 GB601 District Regulator Controller ................................. 1-1 GB602 Low Pressure Point Controller ............................... 1-1 GFA ..........................................................................G-2 GND..........................................................................G-2 GP .............................................................................G-2 GPC...........................................................................G-2 GridBoss....................................................................G-2 GRIDLINK................................................................G-2 GRIDLINK Configuration Software User Manual ...... 1-4 GridManager .............................................................G-2 Overview ....................................................... 1-1, 1-4 H Historical Trend.................................................. 3-7, 4-5 I, J I/O Built-in .................................................................G-1 I/P ............................................................................. 1-6 Icons.......................................................................... 2-4 IEC............................................................................G-3 In W.C................................................................ 3-3, 4-3 Information Additional ............................................................. 1-4 Inlet ........................................................................... 5-2 I-2 Inlet Press...................................................................5-3 Inlet Pressure..............................................................3-3 Inner Loop Mode........................................................5-3 Input/Output I/O........................................................................G-3 Intellution FIX Startup..............................................1-12 Interface .....................................................................1-8 K Kbytes.......................................................................G-3 Keyboard...........................................................1-9, 1-10 kHz ...........................................................................G-3 Kixcel ................................................................1-6, G-3 L Last Successful Poll.............................................3-3, 4-2 Launching GridManager........................................................1-12 Intellution FIX Startup .........................................1-12 Windows NT .......................................................1-12 LCD ..........................................................................G-3 LED ..........................................................................G-3 Legend Region Overview ...................................................2-4 List Box ................................................................... 1-11 Logging On .............................................................. 1-12 LOI ...........................................................................G-3 Loop Modes Selecting the Type..................................................5-3 Low Pressure Point ....................................................G-2 Configuration.........................................................4-1 LPP .......................................................................1-6 Low Pressure Point Controller GB602 ...................................................................1-1 Low Pressure Point Monitor Values ............................4-3 LPM..........................................................................G-3 M mA............................................................................G-3 Manual Mode .............................................................5-3 Manual Override.........................................................2-6 Manuals......................................................................1-4 Max............................................................................5-5 Maximum Output .......................................................3-4 Maximum Setpoint .....................................................3-4 MCU .........................................................................G-3 Menu..........................................................................1-9 Menu Bar ...................................................................1-9 Menu Bar and Menus..................................................1-9 Min ............................................................................5-5 Minimum Output........................................................3-4 Minimum Setpoint......................................................3-4 Mode...................................................................3-3, 4-3 Mode 1-5....................................................................5-5 Rev 10/99 GridManager User Manual Modes Selecting the Type................................................. 5-3 Mouse................................................................1-9, 1-10 MPU..........................................................................G-3 mV ............................................................................G-3 mW ...........................................................................G-3 N NEC ..........................................................................G-3 NEMA.......................................................................G-3 O Off Mode................................................................... 5-3 Off-line......................................................................G-3 OH ............................................................................G-3 Ohms.........................................................................G-3 On-line ......................................................................G-3 OP .............................................................................G-4 Opcode ......................................................................G-4 Other Regions............................................................ 2-5 Outer Loop Mode ...................................................... 5-3 Outlet ........................................................................ 5-2 Outlet Press ............................................................... 5-3 Outlet Pressure........................................................... 3-3 Output ....................................................................... 5-2 Output Monitor Value................................................ 3-4 Overview of User Interface ........................................ 1-8 P, Q Parameter ..................................................................G-4 Parameter Name ........................................................ 1-9 Password ..................................................................1-12 PC .............................................................................G-4 PID............................................................................G-4 Point..........................................................................G-4 Point Number ............................................................G-4 Pointing Devices........................................................ 1-9 Poll History ................................................1-15, 3-6, 4-5 Poll Region................................................................ 2-6 Poll Unit .....................................................1-15, 3-6, 4-5 Polling Automatic ............................................................1-13 Pop-up windows .......................................................1-11 Pressure .............................................................. 4-2, 5-4 Process Variable ...........................................3-3, 5-2, 5-4 Product Overview ............................................... 1-4, 1-6 PSTN.........................................................................G-4 PTT ...........................................................................G-4 Pulse..........................................................................G-4 Pulse Inputs ...............................................................G-4 Pushbutton................................................................. 1-9 PV .............................................................................G-4 Rev 10/99 R RAM ..................................................................1-7, G-4 RBX..........................................................................G-4 Region Menu................................................2-5, 3-6, 4-4 Region Name..............................................................2-3 Region Overview........................................................3-6 Region Overview Legend ...........................................2-4 RFI............................................................................G-4 RI..............................................................................G-4 ROC Protocol User Manual ........................................1-4 ROC/FloBoss Accessories Instruction Manual ............1-4 ROM ..................................................................1-7, G-4 RTD ...................................................................3-3, G-4 RTS...........................................................................G-4 RXD..........................................................................G-4 S SAC ................................................................. 1-13, G-4 SAMA.......................................................................G-4 SCADA.....................................................................G-4 Screens.....................................................................1-11 Sensor Module...........................................................G-4 Servo Valve................................................................1-6 Set Control Mode .......................................................3-5 Set to Current Time ....................................................3-7 Setpoint..........................................3-3, 4-2, 4-3, 5-2, 5-4 Setpoint Deadband......................................................4-3 Shift+Tab ................................................................. 1-10 Shut Down ...............................................................1-14 Soft Points................................................................. G-5 Software .....................................................................1-7 SRAM.......................................................................G-5 SRBX........................................................................G-5 Starting GridManager........................................................1-12 Intellution FIX Startup .........................................1-12 Windows NT .......................................................1-12 Static Pressure ............................................................3-2 Station Name.......................................................3-3, 4-2 Status .........................................................................4-3 System Menu................................................2-5, 3-6, 4-4 T Tab........................................................................... 1-10 TDO..........................................................................G-5 Temp..........................................................................5-3 Temperature ..........................................3-2, 3-3, 3-4, 5-3 TLP...........................................................................G-5 Trackball ....................................................................1-9 TXD..........................................................................G-5 Type 662 Kixcel See Kixcel .............................................................1-4 I-3 GridManager User Manual U User Interface ............................................................ 1-8 Dialog Boxes .......................................................1-11 Function Screens ..................................................1-11 Keyboard .............................................................. 1-9 Menu Bar and Menus ............................................ 1-9 Overview ...............................................................1-8 Pointing Devices....................................................1-9 V, W, X, Y, Z Windows NT Launching............................................................ 1-12 If you have comments or questions regarding this manual, please direct them to your Fisher Representative or contact: FAS Technical Documentation c/o Fisher Controls International, Inc. 1612 South 17th Avenue Marshalltown, Iowa 50158 FAX: 515.754.3630 I-4 Rev 10/99