1
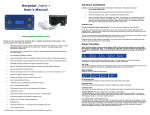
Hardware Installation
WARNING – FIRE OR ELECTRICAL SHOCK MAY RESULT FROM MISUSE. For INDOOR USE ONLY!
1.
Mount the Herpstat Humidity probe in the enclosure. KEEP SENSOR AWAY FROM DIRECT
CONTACT WITH WATER. Should the sensor become saturated let it air dry for a several hours.
Insert the connector on the probe into the jack on the top left side of the Herpstat Humidity.
2.
Attach the Herpstat Humidity power plug to a standard wall outlet.
3.
Attach humidity device to any of the three outlets on the Herpstat Humidity. These devices may
include room humidifiers, foggers, or misting pumps. If using the device in Dehumidfy mode only
attach 120vac fans. Do not attempt to connect a room Dehumidifier. Do not exceed 500 watts.
Herpstat Humidity controller and AC cords should be kept dry and away from water.
Herpstat Humidity User’s Manual
Configure Menu
Adjustments: Display Type, Function, Mode, Active, Start, End, SetClock, Calibrate
When first powered on the Herpstat Humidity will display the probe status. To enter the Configure Menu press
the + Menu button (this menu only is available from the probe status screen. Use the – Display button to
navigate to it if necessary). The display will show two options:
+ Setup
- Config
Press the - button to enter the Configure Menu. While in the Configure Menu the Herpstat Humidity will toggle
to the next option after 5 seconds of inactivity and will return to normal operation once all options have been
displayed. While in the Configure Menu the output is disabled.
Device Type
Options: Misting/Fogger/Humidity/Dehumidify
Selects the type of control the Herpstat Humidity will use.
www.spyderrobotics.com
Thank you for choosing the Herpstat Humidity controller. This product offers the following
features:
•
Adjustable Humidity regulation from 10-90% RH
•
Sensor accuracy: +/- 2% RH (between 10-90% RH)
•
24 hour or settable time period operation
•
Adjustable duration (on time) from 2 seconds to 30 minutes
•
Adjustable interval (time between sessions) from 3 minutes to 8 hours
•
Two optional scheduled times to turn on
•
High / Low humidity and temperature tracking helps monitor moisture system and enclosure
efficiency.
•
Adjustable calibration allowing the user to digitally calibrate the sensor output to match other
equipment.
•
All settings are retained in memory even if power is lost.
•
Power Outage detection / tracking.
•
Easy to read backlit LCD display.
•
Removable sensor for easy replacement if necessary.
•
Resettable fuse never requires replacement.
•
Audible alarm system
•
Internal error detection shuts off output if sensor fails or is disconnected.
•
500 Watt rating.
•
1 year limited warranty
Misting and Fogger have the same functionality. These will use a interval/duration type control which will wait
for the triggered time and then check the humidity level. If the humidity is lower than your set range it will
activate the humidity device until the end of your duration setting. Then it will wait the amount set by the
interval before activating again. Humidity is only checked at the beginning of the triggered cycle to determine if
it will activate the humidity device. Once the humidity device is powered on it will not turn off until the end of
your set duration or if the emergency stop option is used. You will need to watch and experiment with the
Interval / Duration times to match your enclosure and humidifying equipment.
Setting the device type to Humidity will constantly monitor humidity and will activate the humidity device any
time the actual humidity drops below your set range. It will then shut the device off when the actual humidity
breaches your max humidity setting. This is used for room humidifiers or other humidity equipment that have a
slow humidity increase.
Dehumidify is only to be used with fans to air out an enclosure. Do not attach a room dehumidifier to the
Herpstat Humidity.
Active
Options: Always ON / Period
The default setting is for Always ON. When Set to Always ON the Herpstat Humidity will be free to
monitor/adjust the RH all of the time. When set to Period it allows you to setup a time period that you want it
to run. This allows you to only run it during the day and off at night or other combinations.
Start
This is the time you want the Herpstat Humidity to start controlling the humidity. This setting is only available if
Active option is set to Period.
End
This is the time you want the Herpstat Humidity to stop controlling the humidity. This setting is only available if
Active option is set to Period.
Sched 1
Options: Enable/Disable
Enable this option if you would like to force a scheduled on cycle. It will then allow you to set a time for that
event to happen. This can be useful if you would like a little extra humidity during a certain time or misting
session for drinking purposes. During this event the humidity device will be powered on regardless of your
humidity range or time period settings and will last the length of your set Duration.
Sched 2
Options: Enable/Disable
Enable this option if you would like to force a scheduled on cycle. It will then allow you to set a time for that
event to happen. This can be useful if you would like a little extra humidity during a certain time or misting
session for drinking purposes. During this event the humidity device will be powered on regardless of your
humidity range or time period settings and will last the length of your set Duration.
Cycle Status and Internal Clock
Displays if the Herpstat Humidity is currently in a time period that is regulating the humidity level. Active
means it is in a operational session. Inactive means the Herpstat Humidity is currently not monitoring or acting
on humidity changes. Also displays the current time.
Display Type
Options: Celsius/Fahrenheit
The default setting is to display temperature in Fahrenheit.
SetClock
Adjusts the internal clock’s time.
Calibrate
This option allows users to calibrate the Herpstat Humidity Use the + and – buttons to adjust the offset.
Note: The Herpstat Humidity sensor is very accurate in its default setting. Modifications in this menu are not
typically necessary.
Setup Menu
E-Stop / Force ON
During a misting cycle when power is applied to the humidity device you can activate a Emergency Stop by
toggling to this screen and pressing and releasing the PLUS button. To test your setup you can press and hold
the PLUS button which will activate the humidity device for 60 second. Pressing the plus button again during
this will cancel the test.
Next Cycle Time
Displays the next time the humidity level will be checked and acted on.
Next Cycle End Time
Displays the time the next cycle will end. This is the time it starts plus the duration of the cycle.
Adjustments: Max RH, Min RH, Duration, Interval
When first powered on the Herpstat Humidity will display the probe status. To enter the Setup Menu press the
+ button (this menu only is available from the probe status screen. Use the – Display button to navigate to it if
necessary). The display will show two options:
Getting the most out of your Herpstat Humidity
When setting up a new environment allow a minimum of one hour for the enclosure to stabilize.
placement may require experimentation to achieve proper humidity regulation.
+ Setup
- Config
Press the + button again to enter the Setup Menu. While in the Setup Menu the Herpstat Humidity will toggle to
the next setting after 5 seconds of inactivity and will return to normal operation. While in the Setup Menu the
output is disabled.
Probe
The Herpstat Humidity has a built in resettable fuse. In a overload or overheat condition the fuse will trip. To
reset the fuse unplug the Herpstat Humidity for 2 minutes and then reapply power.
When handling misting pumps or other humidity devices always unplug the Herpstat Humidity from
the wall outlet first for safety.
Max RH
This is the maximum acceptable humidity level desired. Default setting is 20%. The humidity will need to
exceed this number before action is taken.
Min RH
This is the minimum acceptable humidity level desired. Default setting is 10%. The humidity will need to drop
below this number before action is taken.
Duration
This is the length of time the output device will be enabled.
set to Misting or Fogger.
This option is only available if the Device Type is
For Example:
If you have a misting system and want the pump to be turned on for 30 seconds when the timing cycle activates
then set the duration to 30s.
Interval
This is the elapsed time between checks.
Fogger.
This option is only available if the Device Type is set to Misting or
For Example:
If you have a misting system and you want the humidity level to be checked every hour and a half set this
option to 1h 30m.
The Display
Options:
Probe Status (Humidty and Temperature) / High Low RH Level/ High Low Temperature
Power Outage Monitor /Cycle Status and Internal Clock /
Emergency Stop and Forced On Option / Next Cycle Time / Next Cycle End Time
Use the – button to toggle between displays. Use the + button to enter a menu or set options.
Temperature Probe Status & Power Output
Shows the current temperature and RH from the probe.
High Low RH
Displays the highest and lowest humidity recorded. Pressing the + button will reset the
High / Low humidity to the current humidity value.
High Low Temperature
Displays the highest and lowest temperature recorded. Pressing the + button will reset the
High / Low temperatures to the current temperature.
Power Outage Monitor
Each time the Herpstat Humidity is powered on it increments this monitor. To reset the monitor to zero press
the + button.
Getting Help
Questions or comments can be e-mailed to:
[email protected]
To purchase accessories please visit us on the web at:
http://www.spyderrobotics.com
1 Year Limited Warranty
Spyder Robotics warrants this product to be free from defects in workmanship and material for a period of one
year from the date of purchase by the original purchaser. The warranty period shall not extend beyond 3 years
from the date Spyder Robotics shipped the product. During this warranty period Spyder Robotics will repair or
replace, at its option, any component parts that in its opinion prove to be defective. Replacement parts may be
new or serviceable used parts at Spyder Robotics option, of equal or better quality to those being replaced. This
warranty does not extend and shall not apply to products that have been subjected to misuse, neglect, accident,
or improper installation.
THIS LIMITED WARRANTY AND REMEDY ARE EXCLUSIVE AND EXPRESSLY IN LIEU OF ALL OTHER WARRANTIES
EXPRESSED OR IMPLIED, INCLUDING BUT NOT LIMITED TO ANY IMPLIED WARRANTIES OF MECHANTABILITY
AND FITNESS FOR A PARTICULAR PURPOSE. IN NO EVENT SHALL SPYDER ROBOTICS BE LIABLE FOR LOST
PROFITS, LOSS OF GOODWILL, OR ANY OTHER INCIDENTAL OR CONSEQUENTIAL DAMAGES.
If you return your product to Spyder Robotics for warranty service, proof of purchase may be required. A
Return Material Authorization (RMA) number must be obtained prior to the return. Spyder Robotics is not
responsible for material returned without the RMA number clearly printed on the outside of the shipping
container. To request an RMA number, contact Spyder Robotics with the description of failure, serial number of
device, and date of purchase via e-mail at [email protected]. Products to be returned to Spyder
Robotics must be returned, shipping and insurance prepaid, by the original purchaser to the address below.
Spyder Robotics
Attn: RMA# _______
634 S. 1st ST.
Rochelle, IL 61068
©2005 Spyder Robotics
http://www.spyderrobotics.com
manual-HS401
6.23.08