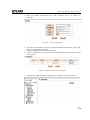
1
SICOM3024 Industrial Ethernet Switch User Manual
SICOM3024 Industrial Ethernet Switch
User’s Manual
KYLAND Telecom Technology Co., Ltd.
SICOM3024 Industrial Ethernet Switch User Manual
SICOM3024 Industrial Ethernet Switch
User’s Manual
Copyright © 2006 KYLAND Telecom Technology CO., LTD.
All rights reserved.
No part of this documentation may be excerpted, reproduced, translated, annotated or
duplicated, in any form or by any means without the prior written permission of KYLAND
Corporation.
Publisher:KYLAND Telecom Technology CO., LTD.
Address:P.O. Box 100096, 085, Beijing, China
Website:http://www.kyland.cn
postcode:100096
Tel:(+8610)82900771
FAX:(+8610)82900780
E-mail:[email protected]
Version:V1, Jan. 2007
No.:s3a01070101
SICOM3024 Industrial Ethernet Switch User Manual
Preface
SICOM3024 is a high-performance network-managed industrial Ethernet switch
specially designed by KYLAND Telecom Technology CO., LTD. for industrial
applications. Its high-performance switch engine, solid and closed case design,
high-efficient single-rib shape case heat dispersion surface without fans, overcurrent,
overvoltage and EMC protection at power input side, and excellent EMC protection of
RJ45 port allows SICOM3024 applicable in harsh and dangerous industrial
environments. The redundant function of optical fiber network, independent entire
network management channel, redundant power input function, and powerful entire
network real-time management system provides multiplex guarantee for reliable
operation of the system.
The user’s Manual for SICOM3024 Industrial Ethernet Switch mainly introduces the
information on technical principles, performance indexes, installation and
commissioning, network management etc. to provide users with references in startup,
expansion and routine maintenance. It is a practical teaching material that can be used
for knowledge and understanding of SICOM3024 industrial Ethernet Switch.
This manual mainly includes the following contents:
Chapter 1 Overview and system features of SICOM3024 industrial Ethernet switch;
Chapter 2 Performance and service functions of SIOCM3024 industrial Ethernet
switch;
Chapter 3 Hardware structure of SICOM3024 industrial Ethernet switch;
Chapter 4 Installation of SICOM3024 industrial Ethernet switch;
Chapter 5 Field test methods for SICOM3024 industrial Ethernet switch;
Chapter 6 Networking modes and system configuration of SICOM3024.
Chapter 7 WEB management of SICOM3024 industrial Ethernet switch;
Chapter 8 CLI of SICOM3024 industrial Ethernet switch;
Appendix A Introduces twisted pair and pin distribution rules of SICOM3024 industrial
Ethernet switch;
Appendix B Introduces cable types and specifications of SICOM3024 industrial
SICOM3024 Industrial Ethernet Switch User Manual
Ethernet switch;
Appendix C Introduces abbreviations used in this manual.
Appendix D FTP application of software upgrade
Statement: as product and technology upgrades and improves constantly, the contents
of this document may not completely accord with the actual product. For product
upgrading information, please visit our company’s website or directly contact with our
business representative.
SICOM3024 Industrial Ethernet Switch User Manual
Notice for Safety Operation
This product offers reliable performances as long as it is used within the designed
scope. Artificial damage or destruction of the equipment should be avoided.
z
Carefully read this manual and well preserve this manual for future reference;
z
Do not place the equipments near water sources or damp places;
z
Do not place anything on power cable which should be placed in unreachable
places;
z
Do not tie or wrap the cable to prevent fire.
z
Power connectors and connectors for other equipments should be firmly
interconnected and frequently checked.
In the following cases, please immediately disconnect the power supply and
contact with our company:
1.
Water gets into the equipments;
2.
Equipment damage or shell breakage;
3.
Abnormal operation conditions of equipment or the demonstrated
performances have changed;
4.
z
The equipment emits odor, smoke or noise.
Please keep optical fiber plugs and sockets clean. During operation of equipments,
do not stare directly into the cross section of optical fiber;
z
Please keep the equipment clean; if necessary, wipe the equipment with soft
cotton cloth;
z
Do not repair the equipment by yourself, unless it is clearly specified in the
manual.
SICOM3024 Industrial Ethernet Switch User Manual
Explanation of Warning Marks:
This manual uses two kinds of noticeable warning signs to arouse special attention
of users during operation. The implications of these signs are as follows:
Warning: pay special attention to the notes behind the mark,
improper operation will result in serious damage of the switch or
injury of operation personnel.
Caution, attention, warning, danger: remind the positions
requiring attention during operation.
SICOM3024 Industrial Ethernet Switch User Manual
Contents
Chapter 1 System Overview ......................................................................................................................... 1
1.1 Product Overview ................................................................................................................................ 1
1.2 System Features................................................................................................................................... 1
1.3 Packing list and unpacking check........................................................................................................ 2
第二章 Performance Specifications ............................................................................................................ 5
2.1 System Specifications.......................................................................................................................... 5
2.2 Service Interface .................................................................................................................................. 5
2.3 Service Function .................................................................................................................................. 7
第三章 Hardware Structure ........................................................................................................................ 9
System Structure...................................................................................................................................... 9
3.1 .............................................................................................................................................................. 9
3.1.1 Case ........................................................................................................................................... 9
3.1.2 Front Panel............................................................................................................................... 10
3.2 Interface Description ......................................................................................................................... 11
3.2.1 Gigabit Optical Fiber interface ................................................................................................ 11
3.2.2 Optical Fiber interface ............................................................................................................. 12
3.2.3 RJ45 interface .......................................................................................................................... 13
第四章 Hardware installation ................................................................................................................... 17
4.1 Installation requirement ..................................................................................................................... 17
4.2 Mainframe installation....................................................................................................................... 17
4.2.1 Stable rack mounting ............................................................................................................... 17
4.3 Cable connecting ............................................................................................................................... 18
4.4 Optical Fiber Connection................................................................................................................... 18
4.5 Cable wiring ...................................................................................................................................... 19
第五章 Test methods .................................................................................................................................. 21
5.1 Self inspection ................................................................................................................................... 21
5.2 TP Port Test........................................................................................................................................ 21
-i-
SICOM3024 Industrial Ethernet Switch User Manual
5.3 Fiber Port Test ....................................................................................................................................21
第六章 Networking ways............................................................................................................................23
6.1 Network ways.....................................................................................................................................23
6.2 System configure................................................................................................................................23
第七章 WEB Management Software ........................................................................................................25
7.1 Login Web service..............................................................................................................................25
7.2 Equipment State Display ....................................................................................................................26
7.2.1 Basic information .....................................................................................................................26
7.2.2 Port State ..................................................................................................................................26
7.2.3 Port Flow ..................................................................................................................................27
7.3 Equipment basic configuration...........................................................................................................27
7.3.1 IP address configure .................................................................................................................28
7.3.2 Equipment name configure ......................................................................................................28
7.3.3 Port configure...........................................................................................................................28
7.3.4 Password change ......................................................................................................................29
7.3.5 Software edition inquiry...........................................................................................................30
7.3.6 Software update........................................................................................................................30
7.4 Advanced Configuration ....................................................................................................................31
7.4.1 Port Traffic Control ..................................................................................................................31
7.4.2 VLAN Configuration ...............................................................................................................31
7.4.3 Port Mirroring Configuration ...................................................................................................32
7.4.4 Port Aggregation Configuration ...............................................................................................33
7.4.5 Redundant Ring Configuration ................................................................................................34
7.4.6 Port Priority Setting..................................................................................................................35
7.4.7 Other Configuration .................................................................................................................36
7.4.8 SNMP Configuration................................................................................................................37
7.4.9 IGMP-SNOOPING ..................................................................................................................37
7.4.10 ACL list control ......................................................................................................................38
7.5 Device Management...........................................................................................................................38
第八章 CLI Command ...............................................................................................................................41
-ii-
8.1Connect to the Switch and Login........................................................................................................ 41
8. 1.1 Command Line ....................................................................................................................... 41
8.1.2 Command syntax ..................................................................................................................... 41
8.1.3 Syntax help .............................................................................................................................. 42
8.1.4 Use syntax help to fill the command ....................................................................................... 42
8.1.5 Symbols in the command......................................................................................................... 44
8.1.6 Types of Command .................................................................................................................. 44
8.1.7 Command abbreviation............................................................................................................ 45
8.1.8 History commands ................................................................................................................... 46
8.1.9 Frequently used commands ..................................................................................................... 46
8.2 Common management methods ........................................................................................................ 53
8.3 Using Console port to manage switch ............................................................................................... 53
8.4 Configure Port ................................................................................................................................... 54
8.4.1 Enabled/Disabled Port ............................................................................................................. 54
8.4.2 Configure Port Rate, Duplex Mode and Flow Control ............................................................ 54
8.4.3 View Port ................................................................................................................................. 55
8.4.4 View/Delete Port Statistics ...................................................................................................... 55
8.5 TRUNK ............................................................................................................................................. 56
8.6 Port Mirroring.................................................................................................................................... 57
8.7 Port Prioritization .............................................................................................................................. 57
8.8 VLAN ................................................................................................................................................ 57
8.8.1 VLAN Overview ..................................................................................................................... 57
8.8.2 Default VLAN ......................................................................................................................... 58
8.8.3 Create VLAN........................................................................................................................... 58
8.8.4 Change VLAN Name .............................................................................................................. 58
8.8.5 Add/Delete VLAN Port ........................................................................................................... 59
8.8.5 Show VLAN ............................................................................................................................ 59
8.9 IGMP Snooping................................................................................................................................. 60
8.9.1 IGMP Snooping overview ....................................................................................................... 60
8.9.2 Configure IGMP Snooping...................................................................................................... 60
8.10 DT-Ring........................................................................................................................................... 61
-iii-
SICOM3024 Industrial Ethernet Switch User Manual
8.10.1DT-Ring Overview ..................................................................................................................61
8.10.2 Create/Delete DT-Ring Domain .............................................................................................62
8.10.3 Add/Delete Ring-port .............................................................................................................62
8.10.4 DT-Ring Domain protocol enable/disable..............................................................................63
8.10.5 Display DT-Ring Domain State..............................................................................................63
Appendix A Twisted-pair and Pin Distribution.........................................................................................65
Appendix B Cable Type and Specifications...............................................................................................67
Appendix C Glossary...................................................................................................................................69
Appendix D FTP Application of Switch Software Update .......................................................................69
-iv-
SICOM3024 Industrial Ethernet Switch User Manual
Chapter 1 System Overview
1.1 Product Overview
SICOM3024 is a high-performance network-managed industrial Ethernet switch
specially designed by KYLAND Telecom Technology CO., LTD. for industrial
applications. Its high-performance switch engine, solid and closed case design,
high-efficient single-rib shape case heat dispersion surface without fans, over-current,
over-voltage and EMC protection at power input side, and excellent EMC protection of
RJ45 port allows SICOM3024 applicable in harsh and dangerous industrial
environments. The redundant function of optical fiber network, independent entire
network management channel, redundant power input function, and powerful entire
network real-time management system provides multiplex guarantee for reliable
operation of the system.
SICOM3024 series gigabit industrial Ethernet switch offers strong web-management
which support CLI, Telnet, WEB, SNMP and OPC-based network management.
SICOM3024 supports 19 inch stable rack mounting for installation. There are two or
four 1000M SFP interface in back panel. It offers twenty-four 10Base-T/100Base-TX ,
or sixteen 10Base-T/100Base-TX and (0-8) pair single(multi) 100Base-FX fiber port.
The fiber-ports can consist 1000Mbit redundant network and recovery time < 300ms.
The 100M fiber ports can consist 100Mbit redundant network and recovery time <
300ms. The six TP 10Base-T/100Base-TX ports 10/100M, full/half duplex,
MDI/MDI-X adaptive.
1.2 System Features
1.
High performance industrial Ethernet switch
Plug and play for 1000M SFP, changeable
-1-
SICOM3024 Industrial Ethernet Switch User Manual
2(4)G+8F fiber port provide various network for customers
Support various management software, easy entrance for user such as: CLI,
TELNET, SNMP, OPC.
10Base-T/100Base-TX self-adoptive Ethernet connector (full/half duplex),
MDI/MDI-X adoptive
100Base-FX full/half duplex SM/MM redundant connector
Recovery time < 50ms increase the system reliability
Setting and query for alarm of power and ports link. Broadcast storm control
IEEE802.3/802.U/802.3X store and forward
VLAN Tag
FTP online update, easy for equipment management and renew
2.
Industrial Power Design
Provide industrial power input: DC24V、DC-48V、AC220V、DC110/220V
Power input over-current, over-voltage protection and EMC
3.
Rugged design
Ribbed heat-removal design (fanless); operation at -35℃ to +75℃
Solid and closed case design, IP40, can be used in harsh environment
1.3 Packing list and unpacking check
1.
Packing list
The packing case includes the following items:
SICOM3024
1 unit
User’s Manual for SICOM3024 Industrial Ethernet Switch
1 copy
Customer Service Guideline
1 copy
Ф4 grounding cold pressed terminal, M3×8 grounding screw
-2-
1 piece each
Chapter One System Overview
2.
Unpacking check
Before opening the case, place it stably, pay attention to the direction of the packing
case, and ensure its right side is facing upward, so as to prevent SICOM3024 from
falling apart after opening the case. If a hard object is used to unclench the case, do
not overly extend the hard object into the case to avoid damage of the equipments
inside the case.
After opening the case, check the amount of SICOM3024 equipments (including
main unit of SICOM3024, parts of equipment, user’s manual, customer service
guideline) according to the packing list, and check the appearance quality of
SICOM3024.
Warning:
For the built-in precise parts of equipments, please handle with care and avoid
strenuous vibration to avoid affecting the performances of equipments.
-3-
SICOM3024 Industrial Ethernet Switch User Manual
第二章 Performance Specifications
2.1 System Specifications
The system performance specifications of SICOM3024 industrial Ethernet switch are
shown in Table 2-1.
Table 2-1 System Specs
Specs
Description
24~16 ×10Base-T/100Base-TX
Quantity of RJ45 port
Quantity
of
Gigabit
redundant port
Quantity of 100M redundant
port
2/4 个 1000Base-T/LX-SM/MM -SFP
0-8 个 100Base-FX-SM/MM
Standard: IEEE802.3、IEEE 802.3x、IEEE 802.3u
Store-and-Forward speed: 1488100 bps
Max. filtering speed: 1488100 bps
System performance
Switching mode: Store-and-Forward
Switching bandwidth of system: 32G
Electromagnetic compatibility interference: EN55022
Electromagnetic compatibility immunity: EN50082-2
Physical port: shielded RJ-45
RJ-45 port: 10Base-T/100Base-TX, supporting automatic
Ethernet port
negotiation function
Port standard: in line with IEEE802.3 standard
Transmission distance: <100m
Optical power: >-13dbm(SM) >-20dbm(MM)
Receiving sensitivity: <-28dbm(SM)
Fiber port
<-35dbm(MM)
Wave length: 1310nm(SM) 1550nm(SM) 1310 nm(MM)
Transmission distance: 20~80Km(SM)
<2Km(MM)
Connector type: LC, SC/FC
Transmission rate: 1.2Gbps, 125Mbps
Physical interface: shielded RJ-45
CONSOLE interface
Interface standard: in line with RS232 standard (3 lines)
Interface rate: 9600bps
Input voltage: AC 220V(AC 200V~240V,50Hz~60Hz)
Power supply
DC24V(DC 18V~36V)
DC-48V (DC -36V~-72V)
DC110V
-5-
SICOM3024 Industrial Ethernet Switch User Manual
DC220V
Input power consumption: 14~22W
Over-current Protection: build-in
Physical dimensions (height×width×depth): 44 ㎜×482.6 ㎜
×245 ㎜
Mounting mode: 19’ Stable rack mounting
Mechanical parameter
Heat removal method: Ribbed aluminum casing heat dissipation
without fan.
Outlet type: back outlet for service,
Shell protection: IP40
Weight: 4 ㎏
Operating temperature: -35℃~75℃
Ambient conditions
Storage temperature: -45℃~85℃
Humidity: 10%~95% (non-condensing)
2.2 Service Interface
1. 16/24-port 10Base-T/100Base-TX RJ45,Each RJ45 port has self adaptation
function, capable of automatically configuring to 10Base-T or 100Base-TX state
and automatically working in full duplex or half duplex operation mode. The
transmission distance is 100m max.
2. Redundant 100Base-FX single mode or multi-mode optical fiber interfaces. The
maximum throughput of each pair of optical fiber interface is 100Mbps, and it is
forced to work in 100M full duplex mode. They support optical fiber line
redundancy technology, with the recovery time less than 50ms.
3. 2/4 pairs of uplink redundant 100Base-FX single mode or multi-mode optical
fiber interfaces. The maximum throughput of each pair of optical fiber interface is
100Mbps, and it is forced to work in 100M full duplex mode. They support optical
fiber line redundancy technology, with the recovery time less than 50ms.
4.
5.
Conform to IEEE802.3/802.3U/802.3X /802.3Z/ab
Meanings of RJ45 port indicator: yellow lamp – rate indicator; on:100M, off:
10M; RJ45 Green lamp – connection state indicator, on: effective connection of
network; blink: network active; off: no connection.
-6-
Chapter Three Hardware Structure
2.3 Service Function
The service function for SICOM3024 mainly include:
LED Indicator
The LEDs (front panel) indicate the port status correctly including transmission rate,
link status and system status.
Layer-2 Switching
Switches work in two ways: Cut-Through and Store-and-Forward. In Cut-Through, a
data packet is immediately relayed further after detecting the target address; in
Store-and-Forward, a data packet is first read-in completely and checked for errors
before the switch relays the same. SICOM3024 employs Store-and-Forward that is a
switching mode widely used.
VLAN
VLAN will divide one network into multiple logical subnets. Data packets cannot be
transmitted between different VLANs so as to control the broadcast domain and
segment flow and improve the reliability, security and manageability. SICOM3024
series supports IEEE802.1q VLAN tag. It can be divided into up to 4094 VLANs based
on ports. The VLAN division can be realized via WEB, CLI, Kyvision3.0 software.
QoS Priority
IEEE 802.1p is the most popular priority solution in the LAN environment. SICOM3024
series supports 802.1p standard, by which you can configure the port-based priority when
the terminal does not support 802.1p and different priority for the ports is wanted.
Port Trunking
In SICOM3024, multiple physical ports can be aggregated into one logic port, which
has the same rate, duplex and VLAN ID. Port Trunking can be configured in one
single switch for max 7 ports. In this way, the pressure of network traffic is reduced.
Port Mirroring
The data of one port can be mapped to another port for user to real-time monitor the
communication.
Configure Port Working Modes
SICOM3024 is able to configure the working mode of all ports through management:
full/half duplex adaptive, enforced full/half duplex, 10M/100M adaptive, enforced 100M
full-duplex for 10M/100M fiber ports, enforced 1000M full-duplex for 1000M fiber/TP
-7-
SICOM3024 Industrial Ethernet Switch User Manual
ports.
Configure Port Traffic Flow
You can configure the TX and RX rate of all ports via the management software of
SICOM3024. For port of 100Mbps, it can be set as 128K、256K、512K、1M、2M、
10M、50M、100M. For Gigabit port, it can be set as 100M、500M、1000M.
IGMP
IGMP is Internet Group Multicast Protocol. SICOM3024 series offers IGMP monitor
and query functions. Data packets can be transmitted to multiple necessary host
computers to prevent overloading. This solves the problems of occupied bandwidth
when broadcasting.
Broadcasting Storm Control
SICOM3024 series offers broadcast storm protection ensuring the smooth communication
platform of the switch network. The switch will filter out the over flow once the bandwidth
of broadcast flow exceed the limit.
DT-Ring
Each Ethernet port or fiber port of SICOM3024 series is able to configure as redundant
mode or not. It makes you form different Gigabit or 100M redundant ring easily and
flexibly. The recovery time is less than 50ms.
-8-
Chapter Three Hardware Structure
第三章 Hardware Structure
3.1 System Structure
3.1.1 Case
SICOM3024 case is 19’ stable rack mounting type structure. The entire unit has a
six-side-enclosed structure, with protection class up to IP40. The case’s left and right
side plates made of ribbed aluminum profile are a part of the heat dispersion system of
the entire unit. The single-rib structure can double heat dissipation area. The heat
generated when the unit is working is effectively dissipated into the environment via
the ribbed heat-dissipation surface in the form of radiation and convection greatly
increasing the high temperature resistance of equipment. Discarding the traditional
form of axial fan heat dispersion reduces power consumption of the entire unit and
increases the stability of the system. The figuration of SICOM3024 case is shown in
Figure 3-1.
Its contour dimension is44 ㎜×482.6 ㎜×245 ㎜(height×width×thickness)
a.SICOM3024-2GX-24T
b.SICOM3024-2GX-8S(M)-16T
-9-
SICOM3024 Industrial Ethernet Switch User Manual
Figure 3-1
outline drawing of SICOM3024
Warning:
The shell of this switch is a part of the heat dissipation system of the unit. It may get
hot during working, so never touch the shell when the equipment is working to avoid
burning.
3.1.2 Front Panel
SICOM3024 Industrial Ethernet switch front panel is show as Figure 3-3:
a.SICOM3024-4GX front panel
b.SICOM3024-2GX front panel
Figure 3-3
Front panel
LED Indicators
The indicators on the front panel of SICOM3024 can show system operation and
port status, helping detect and eliminate faults.
Table 3-1 describes the meanings of all indication lights on the front panel.
Table 3-1
LED
descriptions for LED indicators
Condition
State
System state LED
Blinking
RUN1
1Hz
OFF
-10-
Switch operates normally
Switch not operate
Chapter Three Hardware Structure
Gigabit Optical fiber interface state LED(optical fiber interface G0、G1、G2、G3)
Effective network connection has been established for the
DXP
On
LINK
Blinking
port.
Network activities are available for the port.
Ethernet RJ45 port state LED
Each RJ45 Ethernet port has two indicators, a yellow lamp and a green lamp. The yellow
lamp indicates port speed, and the green lamp indicates port link state.
10M/100M
On
100M working status(i.e. 100Base-TX)
(Yellow)
Off
10M working status (i.e. 10Base-T)
Effective network connection has been established for the
On
LINK/ACT
(Green)
port
Blinking
Off
Network activities are available at the port
No effective network connection has been established for the
port.
3.2 Interface Description
3.2.1 Gigabit Optical Fiber interface
SICOM3024 offers two or four pairs of redundant 1000Base-FX full duplex
single mode or multi-mode optical fiber interface (LC connector), or
1000Base-TX RJ45 (SFP connector) interface. Optical fiber interface should be
used in pairs (TX and RX are a pair), TX interface is the transmitting end
connected to the receiving end RX of the optical fiber interface of another remote
switch; RX is the receiving end connected to the transmitting end TX of the same
optical fiber interface of the same remote switch.
Figure 3-4
SFP Plug and Play unit
-11-
SICOM3024 Industrial Ethernet Switch User Manual
Gigabit SFP FX/TX Plug and play steps:
Insert SFP unit,Figure 3-4:
z
There are two breaks on Fiber-port (LC) and one break on Ethernet port
(RJ45) of SFP unit.
Insert the SFP into case backward to the PCB board. The position is right when
you hear a sound. Ready for use if the SFP handle horizontal with connector.
Pull SFP unit:
z
The fiber part could be separate from SFP case when angle 90 degree
between handle of SFP unit and connector.
Pull out the fiber part from case.
器件豁口
器件笼子
光器件拉手
Figure 3-5
SFP Process for Plug and Play
3.2.2 Optical Fiber interface
SICOM3024 offers eight pairs of redundant 100Base-FX full duplex single mode
or multi-mode optical fiber interface, with port number of 17~24 and SC or FC
connector. Optical fiber interface should be used in pairs (TX and RX are a pair),
TX interface is the transmitting end connected to the receiving end RX of the
optical fiber interface of another remote switch; RX is the receiving end
-12-
Chapter Three Hardware Structure
connected to the transmitting end TX of the same optical fiber interface of the
same remote switch. Two pairs of redundant 100Base-FX optical fiber interface
can be used to form an optical fiber redundant ring network. In the event of the
system fault, the recovery time of the redundant ring network is less than 50ms,
effectively increasing the reliability of network operation.
3.2.3 RJ45 interface
SICOM3024 offers six 10Base-T/100Base-TX RJ45 Ethernet ports numbering
1~16(24. Each RJ45 port has self-adaptation function, support MDI/MDI-X
connection and can be connected to end equipments, servers, hubs or other
switches in straight-through or cross-over way. Each port supports IEEE802.3x
self-adaptation, so the most suitable transmission mode (half duplex or full
duplex) and data rate (10 Mbps or 100Mbps) will be automatically selected (the
connected equipment should also support this characteristic). If the equipment
connected to these port does not support self-adaptation, the ports will be able to
send at proper speed but transmission mode is default as half duplex.
LED indicators
The indicators on the front panel of SICOM3024 can show system operation and
port status, helping detect and eliminate faults.
Table 3-1 describes the meanings of all indication lights on the front panel.
Table 3-1 LED indicators
LED
Conditio
n
State
System state LED
Blinking
RUN1
1Hz
OFF
Switch operates normally
Switch not operate
Gigabit Optical fiber interface state LED(optical fiber interface G0、G1、G2、G3)
DXP
On
LINK
Blinking
Effective network connection has been established for the
port.
Network activities are available for the port.
Ethernet RJ45 port state LED
Each RJ45 Ethernet port has two indicators, a yellow lamp and a green lamp. The yellow
lamp indicates port speed, and the green lamp indicates port link state.
-13-
SICOM3024 Industrial Ethernet Switch User Manual
10M/100M
On
100M working status(i.e. 100Base-TX)
(Yellow)
Off
10M working status (i.e. 10Base-T)
LINK/ACT
(Green)
Effective network connection has been established for the
On
port
Blinking
Network activities are available at the port
No effective network connection has been established for the
Off
port.
Power input terminal
DC24V or DC-48V: Three-wire terminal with interval of 3.81 ㎜ is used for
power connection. The diameter of power cable is less than 1.5 ㎜.
Connection sequence is shown in Figure 3-7. Connection and mounting
procedures are as follows:
1. Strip 5mm-long sheath from power cable and twist the bare copper wires
together into a bundle;
2. Use a 2.5 ㎜ one-slot screwdriver to unscrew the “power cable locking
screw”, insert the power cable into the hole at the terminal tail, and screw
down the
“power cable locking screw”;
Insert the power terminal into the DC power socket of the equipment and use
a 2.5mm one-slot screwdriver to screw down the two “terminal locking screws”
to firmly connect the terminal with the power connector.
端子锁紧螺钉
电源线锁紧螺钉
电源地
+24V
保护地 PG
Figure 3-7
DC Power
AC Power input terminal:
AC Power input terminal:2A fuse is used in SICOM3024 Industrial
Ethernet Switch AC power. Step by step phase as show in following figure.:
-14-
Chapter Three Hardware Structure
Figure 3-6 a
Figure 3-6 b
STEP 1
STEP 2
RS232 Network management interface(CONSOLE)
The network management interface of SICOM3024 is shielded RJ45 connector
and its interface communication standard is 3-wire RS232. Users can use a
network management cable with end bearing RJ45 plug and another end DB9F
plug to connect the network management interface of SICOM3024 with the 9-pin
serial port of the control computer. Operating the local management software to
set up
SICOM3024 by CLI. The wiring sequence for network management
interface of SICOM3024 and the 9-pin serial port of PC computer is shown in
Figure 3-9.
-15-
SICOM3024 Industrial Ethernet Switch User Manual
PC机9针串口
SICOM3024
CONSOLE口
1
8
1
5
Figure 3-9 CONSOLE wiring diagram
-16-
6
9
SICOM3024 Industrial Ethernet Switch User Manual
第四章 Hardware installation
4.1 Installation requirement
As a monomer structure switch. It can be fixed on standard 19’ rack .
Before installation, make sure all condition match the installation requirement.
1:Power supply: (18VDC~36VDC)
。
2:Environment: -35℃~75℃ Relative humidity(non-condensing) 10%~95%(
3:Earth resistance: <5Ω
4:Make sure all fiber are ready for use
5:Avoid sunshine, and strong EMC area
4.2 Mainframe installation
4.2.1 Stable rack mounting
SICOM3024 Industrial Ethernet switch proved rack mounting, before mounting; make
sure the following is ready:
1. Make sure the rack is burliness, and there still have enough space for
SICOM3024.
2. The power supply is available for SICOM3024.
After selecting the mounting location. Fix the SICOM3024 as following figures.
KIEN3016 Industrial Ethernet Switch
10M/100M
LINK/ACT
9
10 11 12 13 14 15 16
Figure 4-1 SICOM3024 mounting drawing
-17-
SICOM3024 Industrial Ethernet Switch User Manual
机架安装立柱
M5法兰安装螺钉
KIEN3016 Industrial Ethernet Switch
DPX
10M/100M
LINK
RUN
Figure 4-2
A
B
C
D
LINK/ACT
1
2
3
4
5
6
7
8
9
10 11 12 13 14 15 16
Mounting the SICOM3024 on the rack
4.3 Cable connecting
After fixed the SICOM3024,the next step is connect the cables.
1:Service interface.
SICOM3024 has 10Base-T/100Base-TX Ethernet RJ45 port, can connect the terminal
equipment with cable directly.
2:Connecting power
The power supply to the SICOM3024 should be DC24V, after connecting all the cable.
The equipment can be used
4.4 Optical Fiber Connection
SICOM3024 provide two or four redundancy duplex 100Base-FX ports (single mode
or multi-mode) SC or FC type are available.
CAUTION :
This switch use fiber as transmitting medium, in order to avoid hurt by the laser, don’t
look the fiber port and terminator directly after electrifying
The connecting procedure as below
-18-
Chapter Tour Hardware installation
1: Remove the rubber cape of the fiber interface. and keep them for 2:protecting the
fiber terminator when unused
3: Inspect the fiber terminator and ensure it is in good condition
4: Connecting the fiber port between the switch and terminal equipment .show as
picture 4-6.
4.5 Cable wiring
Cable wiring should meet the following requirements:
1. Before cable wiring, check whether the specifications, models and quantities of
all cables comply with the construction drawing design and contract
requirements.
2. Before cable wiring, it is necessary to check whether there is damaged cable and
whether the cables are accompanied by ex-factory records and vouchers attesting
their quality such as quality assurance certificate etc.
3. The specifications, quantities, route directions and laying position of the cables
to be laid should meet the design requirements of construction drawings. The
laying length of each cable should be determined according to its actual position.
4. No intermediate break or joint is allowed for the cables to be laid.
5. User’s cables and power cable should be laid separately.
6. Inside walkways, the cables should be properly arranged in good order, with
uniform, smooth and flat turnings.
7. Cables should be straightly laid in cable channels. Extruding of cable from cable
channels to block other outlet or inlet holes is not allowed. The cables at the
outlet part of cable channel or at turnings should be bundled and fixed.
8. If cables, power line and grounding conductor are laid in the same channel,
cables, power line and grounding conductor should be not folded or blended
together. If a cable line is overly long, coil and place it in the middle of the
cabling rack, do not let it cover on other cables.
9. When laying the pigtail, avoid knotting of optical fiber cable, minimize the
amount of turnings and avoid turnings with overly small radius. Bundle pigtails
in proper tightness and avoid too tightly bundling. If laid on a cabling rack, it
-19-
SICOM3024 Industrial Ethernet Switch User Manual
should be placed separately from other cables.
10. There must be the relevant marks at both ends of cable and the information on
the marks should be explicit to facilitate maintenance.
Attention:
When laying pigtails, prevent optical fiber cable from knotting, minimize the amount
of turnings and avoid turnings with too small radius, because turning with too small
radius will result in serious consumption of optical signal of links, affecting
communication quality.
-20-
SICOM3024 Industrial Ethernet Switch User Manual
第五章 Test methods
5.1 Self inspection
When electrify the equipment, all service indicator light will flash, after the first, the
POW indicator light will light and the RUN will flash(not flash be setting)
5.2 TP Port Test
Showing as Picture 5-1.after electrifying, connect the TP port with the computer, send
the “ping” command each other. Each part should receive complete command. The
yellow indicator light will light (100M state)or quench (10M),these state shows the TP
port are in good condition
PC1
PC2
图 5-1
TP port test
5.3 Fiber Port Test
Connect two equipments as picture 5-2, and connect each equipment with computer
through TP port. Send the “ping” commands each other, Both part should receive
complete command, and the LINK/ACT lamp should light. these show the Fiber port
are in good condition.
-21-
SICOM3024 Industrial Ethernet Switch User Manual
图 5-2
Fiber test
PING commands example:
Suppose the IP address for one computer is. 192.168.100.10 and the other one is
192.168.100.11, operate the “begin” menu on the one computer, and select the:
operation” item. input “cmd” or ”command”, sending Ping 192.168.100.11 –l 1000 -t,
operate the “begin” menu on the second computer, and select the: operation” item.
input “cmd” or ”command”, sending ping 192.168.100.10 –l 1000 –t. return “Reply
from 192.168.100.11:bytes=1000 time<10ms TTL=128”,for the second computer,
Return “Reply from 192.168.100.10:bytes=1000 time<10ms TTL=128”,after ten
minutes for operating ,use CTL+C command to Stat. the missing rate. If the missing
rate is “0” shows the equipment are in good condition
-22-
SICOM3024 Industrial Ethernet Switch User Manual
第六章 Networking Method
6.1 Networking
SICOM3024 provides sixteen to twenty-four 10Base-T/100Base-TX Ethernet RJ45
port. each port can connect the terminal directly, and two redundancy 100Base-FX
Fiber ports.(single or multi-mode) with the redundancy Fiber port ,SICOM3024 can
build redundancy ring .the recover time is less than 50ms,it can be widely used in
various Industrial field.
图 6-1 SICOM300 build the redundancy ring
6.2 System configure
SICOM3024 is a integrative industrial Ethernet switch, has 16-24 ix
10Base-T/100Base-TX Ethernet RJ45 port. And two redundancy fiber ports (single or
multi-mode),the power supply for SICOM3024 should be DC24V.detailed configure
showing as table 6-1
Table 6-1 SICOM3024 configure table
-23-
SICOM3024 Industrial Ethernet Switch User Manual
Model
SICOM3024-4GX-24T
Description
4 × 1000Base-LX/T,
24 × 100Base-TX,
Support
WEB-managed 、 Telnet 、 SNMP-based
management 、RMON、DT-ring2.0,RSTP
SICOM3024-2GX-24T
2 × 1000Base-LX/T,
24 × 100Base-TX,
Support
WEB-managed 、 Telnet 、 SNMP-based
management 、RMON、DT-ring2.0, RSTP
SICOM3024-24T
24 × 100Base-TX,
Support
WEB-managed 、 Telnet 、 SNMP-based
management 、RMON、DT-ring2.0, RSTP
SICOM3024-2GX- 16T -nS(M)
2× 1000Base-LX/T,
0- 8 pair Sigle(multi) mode Fiber port,
16×100Base-TX,
Support
WEB-managed 、 Telnet 、 SNMP-based
management 、RMON、DT-ring2.0, RSTP
8SICOM3024-16T-nS(M)
0- 8 pair Sigle(multi) mode Fiber port,
16×100Base-TX,
Support
WEB-managed 、 Telnet 、 SNMP-based
management 、RMON、DT-ring2.0, RSTP
注:n 等于 0-8
-24-
SICOM3024 Industrial Ethernet Switch User Manual
第七章 WEB Management Software
SICOM3024 support WEB page management, Through web page can monitor the
working state of the switch and can configure the switch through web page.
7.1 Login Web service
Connecting the switch with a computer, input the IP address “192.168.1.71” in the IE
browser, a window will appear as Figure 7-1,the default password is 123.click confirm
to enter.
Figure 7-1 Login interface
The main page as Figure 7-2
The left page shows the management tree menu. Include equipment state, basic
configure, advanced configure, equipment management, save all amend. Recover
default and so on. ,each menu may include some child menu.
-25-
SICOM3024 Industrial Ethernet Switch User Manual
Figure 2 Main Page
7.2 Equipment State Display
The Equipment state display. Menu include: basic information. Port state, port flow.
7.2.1 Basic information
Click basic information and enter the interface, showing as Figure 7-3, including
MAC address, IP address, software edition, hardware edition etc
Figure 3 Basic Information
7.2.2 Port State
Click port state and enter the page showing as Figure 7-4, this page can show the link
state, link speed, duplex/semi duplex and flow control state
-26-
SICOM3024 Industrial Ethernet Switch User Manual
Figure 7-4 Port State
7.2.3 Port Flow
Click Port flow and enter the page ,the page display each port flowing Stat
information.
Figure 7-5 Port Flow
7.3 Equipment basic configuration
The Equipment basic configure page include IP address, equipment name, port
configure, password modify, software edition inquiry, software update.
-27-
SICOM3024 Industrial Ethernet Switch User Manual
7.3.1 IP address configuration
Click the IP address menu and enter the page (as Figure 7-6),this page support IP
address modify. Child network mask, gateway modifies. After modifying, click
application .and reset the switch.
Figure 7-6 IP Address Configuration
7.3.2 Equipment name configuration
Click the “equipment name” menu and enter the interface show as Figure 7-7, change
the equipment name as you want and click application.
Figure 7-7 Equipment name Configure
7.3.3 Port configuration
Click Port configures on the lift menu list and enters the interface show as Figure
-28-
SICOM3024 Industrial Ethernet Switch User Manual
7-8,this menu can realize the port state configure ,automatic consulting. Speed
configure, duplex state configure, flow control .after configuring, click application
button to take effect.
Figure 7-8 Port Configure
7.3.4 Password change
Click Password change menu and enter the interface shown as Figure 7-9, input the
old password, new password and reconfirm the new password. After doing so, click
apply button to take effect.
Figure 7-9 Change Password
-29-
SICOM3024 Industrial Ethernet Switch User Manual
7.3.5 Software edition query
Click the Software edition query menu and enter the interface show as figure 7-10,
two editions will appear. One is activities and another is inactive. This function mainly
use for software update.
Figure 7-10 Software edition inquiry
7.3.6 Software update
Click the Software update menu and enter the interface show as Figure 7-11,
detailed update method please refer to appendix D
for
After entering the WEB management homepage,
z
Figure 7-11 Software Update
Configure the server address, username, password and select the software for updating,
till it update succeed.
Click the navigation item and inquiry the software edition, put the updated one as the
default and select reset bottom
-30-
SICOM3024 Industrial Ethernet Switch User Manual
After 30 seconds, start the WEB management system. and make sure it was
completely updated..
7.4 Advanced Configuration
Advanced Configuration includes Port Traffic Control, VLAN Configuration, Port
Mirroring, Port Aggregation, Redundant Ring Configuration, Port Priority Setting and
Other Configuration of switch.
7.4.1 Port Traffic Control
Click the “Port Traffic Control” on left control menu to enter the interface shown as
Figure 7-12, in this control interface, you can set transmit and receive rate of each
ports. The granularity for FE ports is: 128K, 256K, 512K, 1M, 2M, 10M, 50M, 100M;
for GE ports is 100M, 500M, 1000M. Click “apply” when you finished the
configuration.
Figure 7-12 Port Traffic Control
7.4.2 VLAN Configuration
Click the “VLAN Configuration” on left control menu to enter the interface shown as
Figure 7-13 Choose the VLAN mode: Based on 802.1Q and then click “add” to enter
the interface shown as Figure 7-14.
Fill in the VLAN Name, VLAN ID (default ID is 1), and choose VLAN member, Tag /
-31-
SICOM3024 Industrial Ethernet Switch User Manual
Untag. After configuration, click “apply” to save.
Attention:Default VLAN ID is “1”, Available VLAN ID range is
from ”2~4093” .
Figure 7-13 Add VLAN
Figure 7-14 VLAN Configuration
7.4.3 Port Mirroring Configuration
Click the “Port Mirroring” on left control menu to enter the interface shown as Figure
7-15, choose the ports you want to mirror to, the port range is from port1 to port24 and
G0, G1; choose the mirrored port No. There are 3 types of data can be mirrored: TX,
-32-
SICOM3024 Industrial Ethernet Switch User Manual
RX, TX&RX. After configuration, click “apply” to save.
Figure 7-15 Port Mirroring Configuration
7.4.4 Port Aggregation Configuration
Click the “Port Aggregation” on left control menu to enter the interface shown as
Figure 7-16,
SICOM3024 supports two aggregation groups. Click
,
to add and delete
the ports you want to aggregate. After configuration, click “apply” to save.
Attention:G0、G1 can only aggregated with each other, and can not
aggregated with FE ports.
-33-
SICOM3024 Industrial Ethernet Switch User Manual
Figure 7-16 Port Aggregation Configuration
7.4.5 Redundant Ring Configuration
Click the “Redundant Ring Configuration” on left control menu to enter the interface
shown as Figure 7-17, and click “add” to enter the interface as Figure 7-18. Fill the
Domain ID number (ID = 1~32 ) and the Domain Name; set the type of station.
Mater/Slave; choose port number of the ring (suggest G0, G1 for GE ring and FE23,
FE24 for FE ring). After configuration, click “apply” to save.
Attention:The ID number in one redundant ring must be same.
Redundant Ring network support DT-Ring Protocol.
Figure 7-17Redundant Ring Configuration
-34-
SICOM3024 Industrial Ethernet Switch User Manual
Figure 7-18 Detail of Configuration
Figure 7-19 Detail of Inquiry
7.4.6 Port Priority Setting
Click the “Port Priority setting” on left control menu to enter the interface shown as
Figure 7-20. Enable QOS mode, and set the port’s priority level as High/low. After
configuration, click “apply” to save.。
Attention:SICOM3024 support 2 priority level
-35-
SICOM3024 Industrial Ethernet Switch User Manual
Figure 7-20 Port priority Setting
7.4.7 Other Configuration
Click the “Other Configuration” on left control menu to enter the interface shown as
Figure 7-21. This interface includes Broadcast Storm Control and MAC address aging
configurations.
Broadcast Control includes 5 Options: disable, 1/2, 1/4, 1/8, 1/16. when broadcast
package reach 1/2, 1/4, 1/8, 1/16 of total bandwidth, the broadcast packet will be
discarded. Disable option means no limitation of broadcast package.
MAC address aging time includes 4 options: disable, 150s, 300s, 600s
-36-
SICOM3024 Industrial Ethernet Switch User Manual
Figure 7-21 Other Configuration
7.4.8 SNMP Configuration
Click the SNMP configuration on left control menu to enter the interface shown as
Figure 7-22. Enable SNMP mode, and set IP address of TRAP service and port
number of it. After configuration, click “apply” to save.
Figure 7-22 SNMP Configuration
7.4.9 IGMP-SNOOPING
Click the IGMP- SNOOPING configuration on left control menu to enter the interface
shown as Figure 7-23. IGMP-SNOOPING-STATUS as “ENABLE”;AUTO DETECT
STATUS as “ENABLE” . After configuration, click “apply” to save.
-37-
SICOM3024 Industrial Ethernet Switch User Manual
Figure 7-23 IGMP- SNOOPING
7.4.10 ACL list control
Click the ACL configuration on left control menu to enter the interface shown as
Figure 7-24. Enable SNMP mode, and set IP address of TRAP service and port
number of it. After configuration, click “apply” to save.
Enable Port Acl Mode Set, select port state FE1~24、G0~G3 as “none”、“reject”、
“accept”. After configuration, click “apply” to save.
Enable Port Acl MAC Set, fill in MAC address in port FE1~24、G0~G3. After
configuration, click “apply” to save.
Figure 7-24 ACL
7.5 Device Management
Device management includes: Save All Changes and Return to Default
-38-
SICOM3024 Industrial Ethernet Switch User Manual
Click the “Save All Changes” on left control menu to enter the interface and click
“Save” to save all the changes on WEB page configuration.
Click the “Return to Default” on left control menu to enter the interface and click
“Return to default” to reset all configurations.
-39-
SICOM3024 Industrial Ethernet Switch User Manual
第八章 CLI Command
This chapter mainly introduce how to config SICOM3024 via CLI command line, and
the explanation of commands.
8.1Connect to the Switch and Login
8. 1.1 Command Line
You can connect and log in via Serial port or Telnet
To log in via Serial Port, connection between serial port and PC is required. The
detailed connection method and serial line sequence, please refer to Chapter 3.2.3
Switch on the switch, open the serial port and type “Enter”, you can see the prompt
(default is “kyland>”)
Attention:
If users want to remain the change after the switch reboot, please use the “write
flash” command after you configuration to save the changes. See the Common Command
Description。
8.1.2 Command syntax
This part describes the steps to enter CLI command line.
Step one: type “enable” after you enter the command interface to enter the command
line mode. It will show the prompt kyland#
-41-
SICOM3024 Industrial Ethernet Switch User Manual
Step two:Type the command name. If the command doesn’t contain any parameter
options, go to step three. If the command has parameter options, please type the
parameter and the key value.
Command parameters are normally refers to the user input parameter, which could be a
range of Numerical Value, Chat Script or IP address. The key value is the objective
controlled by the command. If the command need more than one parameters, please
type each parameter and key value follow the command help, until the <cr> display in
the command window.
Step three: After input the full command, type “enter”
Example (in the case of no parameters)
kyland# exit
“exit” is a command without parameter, command name is “exit” when input this
command, type “enter” to finish.
Example (in the case parameters required)
8.1.3 Syntax help
The help is integrated in command line interface. If not sure about the syntax, please
type the first part with the wildcard “?” of “space + ?” The command line will
automatically display rest of command and the possible command list. Users can
choose the right command and type rest part until the command line show “<cr>”.
Then type “enter” to finish.
8.1.4 Use syntax help to fill the command
When user type the first part of a command and “Tab”, management soft ware can fill
rest command automatically and move the cursor to the end. If the first part marches
more than one command, the possible command list will be displayed.
For example:
-42-
SICOM3024 Industrial Ethernet Switch User Manual
Step one: type command
KYLAND#show
Step Two: type a “space”, and then type “Tab”. the information as below will be
displayed:
broadcontrol
Broadcontrol
clock
Display the system clock
config
System configuration
fdb
Fdb
history
Display the session command history
igmp
Igmp snooping protocol
interface
Interface status and configuration
manager
Management station status
memory
System memory statistics information
dt-ring
dt-ring protocol
rstp
Rapid spaning tree protocol
running-config
snmp
Current operating configuration
SNMP status
switch
Show switch status
telnet
Telnet configure information
timer
Show timer message
trunk
Show vlan information
uptime
Display the system uptime
version
System hardware and software status
vlan
Show vlan information
Above information are the possible commands users can use after the “show”
command. Users can type the correct command or part of the command with a “Tab”.
-43-
SICOM3024 Industrial Ethernet Switch User Manual
8.1.5 Symbols in the command
In the management software, there only one type of symbol supported, which is “<>”.
It means in this part of the command a parameter is required.
For example: dt-ring new <1-32> domain <1-32> master
2-5
8.1.6 Types of Command
Normally the command in an angle bracket “<>” is command parameters. There are
four types of command parameters in this series switches.
Numerical Value
When the numbers in the angle bracket is connected by a Dash, which means the
parameter is a number between this range.
For example: <1-255> means user can input any integer greater than 1 and less than
255. such as “2”.
IP address
The “A.B.C.D” in angle bracket means it is IP address. User must input a correct IP
address.
For example: 192.168.0.1 is a leag
Chat Script
If the content in the angle bracket is not above two forms, it means the input
parameters are chat script or hex number. Uses can input a “?” at this place to know the
detail parameter description.
For example: <macaddr> means the required input is a hex Mac address, Such as
005023344325 is a legal Mac address. <name> means the input is a chat script as the
subject’s name.
-44-
SICOM3024 Industrial Ethernet Switch User Manual
8.1.7 Command abbreviation
Command abbreviation means users can only input command or the first several letters,
as long as that part don’t have different meaning, switch will recognize that command.
Users can just type “enter” to run that command. The user input parameter, such as
VLAN name (in the blow example, it is “market”) etc. need to be fully input
Example, add port1 to “market” VLAN as untagged form
KYLAND>
KYLAND>enable
KYLAND#config terminal
KYLAND(config)#
KYLAND(config)#vlan 2
KYLAND(config-vlan2)#description market
KYLAND(config-vlan2)#add port 1 untag priority 0
(Above command line can be abbreviated as:)
KYLAND>
KYLAND>ena
KYLAND#con ter
KYLAND(config)#
KYLAND(config)#vlan 2
KYLAND(config-vlan2)#desc market
KYLAND(config-vlan2)#add port 1 un pr 0
(Above to parts have identical function)
-45-
SICOM3024 Industrial Ethernet Switch User Manual
Attention:when use abbreviated commands, users must input
enough letters to ensure there is no different meanings
8.1.8 History commands
The management soft ware can memorize the latest 10 commands.
Users can use “show history” to display the recent command list:
Users can also use up or down in you keyboard to choose the above or next history
command.
Example: after log in to the system, input:
show history
Follow information will be displayed:
enable
8.1.9 Frequently used commands
This part mainly describe several frequently used commands, some specially used
commands will be discussed in the next chapters. Command lines provide two types of
modes: one is Read Only, anther is Configuring Mode. At Read Only mode, users can
only examine part of system configuration information. At Configuring Mode, users
can examine or configure all the system configuration information. At this mode, users
can use some commands to enter certain protocols’ independent configuration mode.
Such as: “KYLAND#” is interface configuration mode.
At Read Only mode, the prompt end with “>” i.e. “KYLAND>”
At Configuring mode, the prompt end with “#” i.e. “KYLAND#”
¾
enable
at Read Only mode, to end Configuring mode use this command:
KYLAND>enable
For Example:
-46-
SICOM3024 Industrial Ethernet Switch User Manual
KYLAND>enable
Press “enter” and system will ask for password
Password:
After input password correctly, enter the Configuring mode.
KYLAND#
Attention:at default status, password is empty.
¾
enable password <1-20>
At Configuring mode, users can set password.
Using the command below:
KYLAND(config)# enable password <1-20>
¾
exit
To return to above level, use command:
exit
¾
show version
To show the software version, use command:
show version
¾
help
At any mode, to get information of how to use “?” or need help, use command
help
For example:
Kyland# help
2-Help may be requested at any point in a command by entering
a question mark '?'. If nothing matches, the help list will
be empty and you must backup until entering a '?' shows the
available options.
-47-
SICOM3024 Industrial Ethernet Switch User Manual
Two styles of help are provided:
1. Full help is available when you are ready to enter a
command argument (e.g. 'show ?') and describes each possible
argument.
Partial help is provided when an abbreviated argument is entered
and you want to know what arguments match the input
(e.g. 'show pr?'.)
¾
Hostname
At Configuring mode, users can use below command to set host name:
hostname <hostname>
Attention:
In same network, please lay out all hosts’ names with same naming strategy.
For example:
Kyland(config)# hostname userA
userA(config)#
¾
clear
At any modes, to clear screen display use command:clear
Attention:
Use this command when there are too much useless information
displayed on the screen.
¾
show running- config
At configuring mode, to display current system configuration, use this command:show
running-config
Attention:This is a very useful command to help system
-48-
SICOM3024 Industrial Ethernet Switch User Manual
administrator examine current system configuration status.
For example:
!config
dt-ring new vlan domain 1 master
rstp hello-time 15
rstp forwarding-delay 0
!interface-eth 1
vlan tag 2
no flow-control
rate ingress 0
rate egress 0
!interface-eth 2
no auto-negotiation
duplex
no flow-control
rate ingress 0
rate egress 0
!interface-eth 3
no flow-control
rate ingress 0
rate egress 0
-49-
SICOM3024 Industrial Ethernet Switch User Manual
!interface-eth 4
no auto-negotiation
duplex
no flow-control
rate ingress 0
rate egress 0
!interface-eth 5
no flow-control
rate ingress 0
rate egress 0
!interface-eth 6
no auto-negotiation
duplex
no flow-control
rate ingress 0
rate egress 0
!interface-eth 7
no flow-control
rate ingress 0
rate egress 0
!interface-eth 8
no auto-negotiation
-50-
SICOM3024 Industrial Ethernet Switch User Manual
duplex
no flow-control
rate ingress 0
rate egress 0
!interface-eth 9
no auto-negotiation
speed 1000m
duplex
no flow-control
rate ingress 0
rate egress 0
!interface-eth 10
no auto-negotiation
speed 1000m
duplex
no flow-control
rate ingress 0
rate egress 0
!interface-down
!interface-backup
-51-
SICOM3024 Industrial Ethernet Switch User Manual
!vlan 2
description market
add port 1 untag priority 0
!dt-ring 1
protocol enable
ringport add 2
ringport add 5
!config terminal
fdb agetime 300
no bcast-control
¾ save
At configuring mode, to save all changed configuration, use this command:
Save
Attention:If users want current configuration available after
system reboot of power switched off, please use this command to save
all changed configuration.
For Example:
Kyland# save
Preparing configuration data to save...Done.
Starting write configuration data to flash...Done.
Configuration save to flash successfully.
¾ load default
-52-
SICOM3024 Industrial Ethernet Switch User Manual
At configuring mode, to delete all saved system start configuration, please use this
command
load default
-1
Attention:If users want to reset switch start configuration, please
use this command to delete all changed configuration.
For example:
KYLAND# load default
Trying erase all configuration from flash, please wait ...... finished.
Successfully erase all configuration info from flash.
8.2 Common management methods
SICOM3024 series switches are mainly managed by the following methods:
using a terminal (or simulation software) to connect to switch’s console port, to visit
switch’s CLI interface
using Telnet to manage switch (not available at the moment)
using SNMP to manage switch (not available at the moment)
8.3 Using Console port to manage switch
Users can connect to switch’s CLI interface via the RJ45 port marked with “console”
on the switch front board.
For SICOM-3000 series, the configuration of Console port is as below:
Baud rate:115200
Bit :8
CRC :No
Stop bit :1
Flow control :No
-53-
SICOM3024 Industrial Ethernet Switch User Manual
When connect switch with Console port, VT100 simulation terminal is recommended.
Configuration steps are: at hyper terminal interface, open “file” menu, select “attribute”
tool bar, and click “configure” at the window appeared, then select VT100 in the list.
8.4 Configure Port
8.4.1 Enabled/Disabled Port
For a switch that is started, all the ports are default enabled. You can also configure
each port state based on requirements. To enable or disable one/more ports, you can
use the following command:
KYLAND(config-if-eth1)#Lock/no lock
EX:
KYLAND>enable
No password set!
KYLAND#config terminal
KYLAND(config)#interface ethernet 1
KYLAND(config-if-eth1)#lock
KYLAND(config-if-eth1)#no lock
8.4.2 Configure Port Rate, Duplex Mode and Flow Control
Fast Ethernet port can be connected in 10Base-T or 100Base-TX networks and works
in half or full duplex mode, which require you to configure it according to application.
All ports are default set as adaptive mode. The software will adjust the port rate and
duplex mode automatically. You can also configure the rate, duplex and flow control
mode manually.
Attend:
To configure the rate, duplex and flow control mode manually, you must close the
adaptive mode firstly.
-54-
SICOM3024 Industrial Ethernet Switch User Manual
¾
Configure adaptive mode
Use the following command to configure adaptive mode:
KYLAND(config-if-eth1)#auto-negotiation/ no auto-negotiation
¾
Configure port rate:
Use the following command to configure port rate:
KYLAND(config-if-eth1)#speed 10m/100m/1000m
¾
Configure duplex:
Use the following command to configure duplex mode:
KYLAND(config-if-eth1)#Duplex/ no duplex
¾
Configure flow control mode
Use the following command to configure flow control mode:
KYLAND(config-if-eth1)#Flow-control/ no flow control
Attend:
The 100Mbit and Gigabit fiber ports are both default set as closed
auto-negotiation and full-duplex. The auto-negotiation, duplex and rate can not be
configured.
8.4.3 View Port
Use the following command to view information on all ports:
KYLAND#show interface ethernet
Use the following command to view information on some port:
KYLAND#show interface ethernet <1-10>
8.4.4 View/Delete Port Statistics
Use the following command to view the port statistics:
KYLAND(config-if-eth1)#show stats
Use the following command to delete the port statistics and make it restart to count:
KYLAND(config-if-eth1)# clear stats
-55-
SICOM3024 Industrial Ethernet Switch User Manual
Attend:
After the port statistics are deleted, the port data are set as zero.
8.5 TRUNK
You can enlarge the bandwidth of switches by creating trunk group. Trunk will bind
several ports to act as one logic port. For example, the trunk group in the VLAN is a
logic port. Trunk also offers assurance for the data packets between clients. When a
port in the trunk group fails, the data packet can be distributed to other port and
transmitted. If the fault port recovers, the data packet will be distributed into all ports in
the trunk group to increasing the bandwidth of switch. SICOM3024 supports totally 3
trunk groups. 7 FE ports can be grouped into 2 trunks (port 1 can not be added into any
trunk group). 2 GE can be grouped into one trunk.
5
Attend:
You must set up trunk both in two connected switches or network loop will
happens and cause the switch to fail.
The ports in the trunk group must be in the same duplex state and rate, and must be in
the sale VLAN.
It is very useful to increase transmission speed to create trunk group when more than 2
ports of one switch need to communicate with other switch.
Configure TRUNK
KYLAND>enable
No password set!
KYLAND#config terminal
KYLAND(config)#trunk <1-3>
KYLAND(config-trunk1)#create
KYLAND(config-trunk1)#add port <1,10>
-56-
SICOM3024 Industrial Ethernet Switch User Manual
8.6 Port Mirroring
SICOM3024 supports port mirroring,which directs all data of given port to the
mirrored port for diagnostics.
Configure mirroring port:
SICOM3024 only supports one mirroring port, to use the following command:
KYLAND(config)#interface ethernet <1-10>
KYLAND(config-if-eth1)#mirror enable
KYLAND(config-if-eth1)#mirror add ingress port <1-10>
mirror enable is to enable mirroring port:
mirror add/delete ingress/egress port <1-10> is for adding or deleting mirrored port.
8.7 Port Prioritization
Switch supports port prioritization by which the important task is protected. You can
configure the priority of the ports(low and high). To validate port prioritization, you
need to enable QOS firstly. When QOS is enabled default, all ports are in low priority.
You need to configure the priority by command.
¾
Qos enabled command:
KYLAND(config)#qos enable
¾
Use the following command to configure priority:
KYLAND(config)#qos add/delete hqport <1-10>
8.8 VLAN
8.8.1 VLAN Overview
VLAN(Virtual Local Area Networks)is a devices group which seems to work in the
same physically local area network. It makes network manager to manage more easily
by create VLAN for switches. Any group of any port(even all ports) can be considered
as a VLAN, which is not limited by hardware physical connection. You can divide
ports, create and define VLAN by command easily.
-57-
SICOM3024 Industrial Ethernet Switch User Manual
SICOM3024 supports total 4093 different VLANs. The name of each VLAN can be
started with any letter and less than 30 characters, which can only be letters, figures or
“_” other marks are not allowed.
VLAN name is only a local mark, which means the name is only meaningful to the
switch where the VLAN is set.
Attend:
For better network management, you should name VLAN universally.
8.8.2 Default VLAN
Each SICOM3024 has a factory default VLAN which is set as below:
VLAN name is default ;
Including all ports;
All ports of default VLAN are untagged except for CPU port(tagged);
default VLAN’s ID is1;
default VLAN can not be changed;
When a port is added into a VLAN in untagged way, it will be deleted in the default
VLAN automatically. When a port is deleted in a VLAN in untagged way, it will be
automatically added into the default VLAN.
8.8.3 Create VLAN
In the configuration mode, to create VLAN won’t be shown. The VLAN will be
deleted when there is no port in it. When a port is added into the VLAN in
tagged/untagged way, VLAN is created automatically.
Use the following command to enter into VLAN configuration mode:
KYLAND(config)#vlan <1-4093>
<1-4093> is the ID range of VLAN。
8.8.4 Change VLAN Name
When you create a VLAN and want to change the name only, you can use the
-58-
SICOM3024 Industrial Ethernet Switch User Manual
following command:
KYLAND(config-vlan2)#description <1-31>
8.8.5 Add/Delete VLAN Port
The ports of SICOM30240 can be added into a VLAN in two ways:
IEEE 802.1Q tagged
IEEE 802.1Q untagged
At default, all ports are added into default VLAN in untagged way.
In untagged way, a port can only be in one VLAN. In tagged way, a port can be in
more than one VLAN simultaneously. Each port in VLAN can have only one default
VID. The port’s default VID is the VID of one of the VLANs where the port belongs to.
The data without 802.1Q Tag value received in the port will be transferred in the
VLAN of default VID.
¾
Use the following command to add untagged port into VLAN:
KYLAND(config-vlan2)#add port <1-10> untag priority <0-7>
<1-10> is for port number;<1-7> is for the port priority。
¾
Use the following command to add tagged port into VLAN:
KYLAND(config-vlan2)#add port <1-10> tag
<1-10> is for port number。
¾
Use the following command to delete VLAN port:
KYLAND(config-vlan2)#delete port <1-10>
<1-10> is for port number。
8.8.5 Show VLAN
You can view the VLAN which has been configured by using the following command:
¾
Show some VLAN settings:
show vlan <2-4093>
<2-4093> is for VLAN ID
¾
Show all VLAN settings:
-59-
SICOM3024 Industrial Ethernet Switch User Manual
Show vlan
8.9 IGMP Snooping
8.9.1 IGMP Snooping overview
IGMP(Internet Group Management Protocol)is a part of IP protocol group to support
and manage the IP multicast between PC and router. Multicast allow to discover
resources and reduce network load the minimum, realizing the most efficient
transmission.
SICOM3024 supports IGMP Snooping, which is used to monitor and process the
IGMP report between PC and router. IGMP Snooping enables the switch to track each
of its physically connected group members. It works between PC and router and
manages group members.
SICOM 3024 supports not only automatic inquiry, but also restraint function. Its apply
network environment without layer-three switch.
8.9.2 Configure IGMP Snooping
8.9.2.1 Automatic inquiry of IGMP Snooping
It must configure IGMP automatic inquiry function if without layer-three switch. To
start IGMP, you need to choose router-port firstly. Router-port is the connecting port of
multicasting server
¾
Enable IGMP
KYLAND(config)#igmp auto-query enable
¾
Disable IGMP
KYLAND(config)#igmp quto-query disable
8.9.2.2 Enable/Disable IGMP Snooping
In the setting mode, use the following command to enable/disable IGMP:
¾
-60-
Enable IGMP Snooping
SICOM3024 Industrial Ethernet Switch User Manual
KYLAND(config)#igmp enable
¾
Disable IGMP Snooping
Attend:
Router-port. You must configure router-port before start IGMP
8.9.2.3 Display IGMP Snooping
In configuration mode to display information about team member:
¾
Display IGMP Snooping
KYLAND#show igmp-snooping
8.10 DT-Ring
8.10.1DT-Ring Overview
DT-Ring is develop and owned by Kyland ltd proprietarily. This protocol test the state
of ring port and pass few protocol messages to decide the state of port on ring and
ensure the redundant ring network work properly, to make the redundant Ethernet fast
and stable, and finally to meet the needs of industrial communication.
Network mode as figure 8-1;
主站
从站
从站
从站
Figure 8-1 DT-Ring Network Mode
-61-
SICOM3024 Industrial Ethernet Switch User Manual
Configuration Instruction:
¾ On the same switch, can configure several domains to set the tangency ring network mode
¾ In the same ring, every switch needs to configure same ID of domain. For the convenience
of maintaining, to set the same name of domain is better.
¾ In one ring, only one master, others are all slave
8.10.2 Create/Delete DT-Ring Domain
¾ Create
DT-Ring
KYLAND(config)#dt-ring new <1-31> domain <1-32> master/slave
The first parameter is domain name, the second one is domain ID
Can set DT-Ring as master, or as slave.
¾ Delete
DT-Ring demain;
KYLAND(config)#mr del domain <1-32>
Attend:
Set DT-Ring,need to create DT-Ring domain first.
8.10.3 Add/Delete Ring-port
In DT-Ring, need to setup ring-port as needs to consist redundant network protection.
¾ Add Ring-port
KYLAND(config)#mrp <1-32>
KYLAND(config-mrp-1)#ringport add <1-10>
<1-32>indicate domain ID;<1-10>indicate Ring-port ID。
¾ Delete Ring-port
KYLAND(config)#mrp <1-32>
KYLAND(config-mrp-1)#ringport delete <1-10>
<1-32>indicate domain ID; <1-10>indicate port ID
Attend:
-62-
SICOM3024 Industrial Ethernet Switch User Manual
There are only two Ring-ports; if setup just one ring-port may not work properly.
8.10.4 DT-Ring Domain protocol enable/disable
Need to set Enable to make DT-Ring work
¾
DT-Ring domain enable
KYLAND(config)#dt-ring <1-32>
KYLAND(config-dt-ring-1)#protocol enable
<1-32>indicate domain ID
¾
DT-Ring domain disable
KYLAND(config)#dt-ring <1-32>
KYLAND(config-dt-ring-1)#protocol disable
<1-32>indicate domain ID
8.10.5 Display DT-Ring Domain State
Display DT-Ring state command, include basic setup and protocol state information.
¾ Display DT-Ring domain state
KYLAND#show mr <1-32>
<1-32>indicate domain ID
-63-
SICOM3024 Industrial Ethernet Switch User Manual
Appendix A Twisted-pair and Pin Distribution
For the connection of 10Base-T/100Base-TX, the twisted-pair must have two pair
cable. Each pair is distinguished with two different colors. For example, one strand is
green, and the other is the alternate of green and white stripes. RJ-45 connector should
be equipped at both ends of the cable.
Warning:
Don’t insert a telephone plug into any RJ-45 port. Only use twisted-pair with RJ45
connectors at both ends conforming to FCC standard.
Fig. A-1 Shows how the connector of RJ-45 is numbered please make sure that the
inserting direction is correct.
1
8
8
1
Figure A-1 Connector of RJ-45
Pin distribution of 10Base-T/100Base-TX
Unshielded twisted- pair (UTP) or shielded twisted-pair (STP) will be used for the
connection of RJ-45: for the connection of 10Mbps, category 3, 4 and 5 of 100 ohm
will be used, and cat.5 of 100 ohm will be used for 100Mbps. Additionally, do make
sure that the connecting length of any twisted-pair shall not exceed 100 meter.
Port of RJ-45 supports automatic MDI/MDI-X operation, PC or server may be connected with
straight-through cable, or connect with other switch or hub. In straight-through cable, pin 1, 2, 3 and 6
at one end of the cable are connected to pin 1, 2, 3 and 6 at the other end of the straight-through cable
-65-
SICOM3024 Industrial Ethernet Switch User Manual
respectively. Cross-over cable must be used for switch or hub with MDI-X port. The pin distribution
of 10Base-T/100Base-TX is listed in the table A-1.
Table A-1 Pin distribution of 10Base-T/100Base-TX
Pin
MDI-X signal name
MDI signal name
1
Receiving data +(RD+)
Output data+(TD+)
2
Receiving data -(RD-)
Output data -(TD-)
3
Output data +(TD+)
Receiving data+(RD+)
6
Output data-(TD-)
Receiving data -(RD-)
4,5,7,8
Unused
Unused
Note: “+”“-”denoting cable polarity.
Definition of straight-through cable from RJ45 (8-pin) to RJ45 (8-pin)
Figure A-2
Cable sequence of straight-through cable
Definition of Cross-over cable from RJ45 (8-pin) to RJ45 (8-pin)
Figure A-3 Cable sequence of cross-over cable
-66-
SICOM3024 Industrial Ethernet Switch User Manual
Appendix B Cable Type and Specifications
The cable type and specifications are shown as table B-1:
Table B-1
Cable
10Base-T
100Base-TX
100Base-FX
100Base-FX
1000Base-T
1000Base-LX
Cable type and specificati
Type
Max. length
Connect
or
Cat 3,4 and 5 100 ohmUTP
100m(328foot)
RJ-45
Cat 5 -100ohmUTP
100m(328foot)
RJ-45
2km(1.24mile)
SC/FC
20km(12.43mile)
SC/FC
100m(328foot)
RJ-45
5km(3.1mile)
LC
550m
LC
50/125 or 62.5/125μm core
multi-mode fiber(MMF)
9/125μm
single-mode
fiber
(SMF)
Cat 5-100 ohm UTP
9μm or 10μm core sigle-mode
fiber(1310nm)
50/125 or 62.5/125μm core
1000Base-LX
multi-mode fiber ( MMF )
(850nm)
-67-
SICOM3024 Industrial Ethernet Switch User Manual
Appendix C Glossary
Terminology
10Base-T
100Base-TX
100Base-FX
Explanation
Twisted-pair standard of Cat3, Cat4 and Cat5 in IEEE
specification for 10Mbps Ethernet
Twisted-pair standard of Cat5 or above in IEEE
specification for 100Mbps Fast Ethernet
Fast Ethernet which uses one pair of multi-mode or single
mode optical fiber to transmit.
A characteristic that is automatically configured to
Adaptive
adaptive mode for the speed, duplex and traffic control
port.
The information capacity that the channel can transmit.
Bandwidth
For instance, the bandwidth of the Fast Ethernet is
100Mbps(bit per second).
It expresses the signaling rate which is defined as the
Baud Rate
change times of the status for the electric or optical
transmission medium within 1 second.
One of network equipments which run on the layer2 in
the OSI layer7 model, and it can be connected to the LAN
Bridge
or network segment which uses the same protocol. It
presents the automatic network address learning and
network configuration function.
-69-
It is a congestion control mechanism. The network
equipment sends the data to the equipment which has
Traffic Control
overloaded and causes the port to congest. The traffic
control can prevent the data packet from loss and avoid
the congestion for the port.
It is the Virtual Local Area Network, which means that it
takes the network management software to establish the
VLAN
point to point logic network which can cross different
network segment and various network on the switching
LAN.
Broadcast
Broadcast storm
IGMP
One data packet is sent to all equipments on the network.
Restless forward broadcast frame or multicast frame on
bridge caused by the bridge ring.
IGMP means Internet Group Multicast Protocol.
Use switches to set up the point to point connection
Full Duplex
among nodes in the LAN and allow them to receive and
send data packet at the same time.
The communication for two nodes can only move toward
Half Duplex
one direction at the same time, but can not move toward
both directions.
It is the Medium Dependent Interface, in which, one
MDI
Ethernet port is taken as the receiving terminal to connect
to the port of other equipment.
MDI-X
-70-
Medium Dependent Interface Cross-over
SICOM3024 Industrial Ethernet Switch User Manual
Appendix D FTP Application for Switch
Software Update
You can use web management to upgrade SICOM-3000 software through switch by
FTP protocol (Switch as Ftp client;PC as Ftp server). Before update, you need to setup
the Ftp server;FTP server is well-known software, and can be downloaded on the
internet. Here is the steps for configuring FTP server.
1. Install WFTPD in PC. Load WFTPD;shown in figure 1:
Figure 1 WFTPD startup
Type in user name, password, main path; click on Security menu, click on Users/rights, click
on the New User in the User/Rights Security Dialog window. As Figure D-2:
FigureD- 2 WFTPD User Name and Password
Type in your user name in New User window; here is “test”, click OK, as FigureD-3:
-69-
SICOM3024 工业以太网交换机用户手册
Figure 3 WFTPD User Name Setup
In Change Password window, type in the password in New Password and Verify area, for
instance ”test”, click OK;
Figure D-4 WFTPD Password Setup
Set home directory; here is C:\
Figure D User information setup dialog box
Click Done to finish FTP server setup
2. Upload the software to home directory on FTP server, here is under C:\。
FTP server setup is finished now. For the successful setup we support two software version:
Host and Backup. The Host version is the one we currently used which is not allowed to
update for the purpose of protecting software. We use WEB management software to
upgrade it, steps:
-70-
附录 D 交换机软件升级的 FTP 的应用
3. Enter into WEB management page, click navigation bar to set Update, as
FigureD-4:
Figure D-4
Software Setup Interface
4. Set FTP server IP address, user name, password, Update software name, click Apply
button, record update software ID;
5. Wait for upgrade software, Update successful;
6. Click on navigation bar to check version; set updated software ID as startup version;
as FigureD-5:
Figure D-4 Display Software Version Dialog Bo
7. Click Restart under equipment management in navigation bar; as Figure D-6:
-71-
SICOM3024 工业以太网交换机用户手册
Figure D-5 Software Restart
8. Wait for 30 seconds,start Web management system; click on navigation bar to
check equipment basic information; software version; sure about the update
successfully. As Figure D-7:
Figure D-6 Equipment Informatio
Update is Finished.
-72-