1
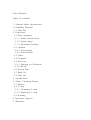
Conglaturation! Youve
' started the journey with Diveroid. In Quick Guide well
'
tell you about how to start diving with Diveorid. From the Second diving, more
steps are added. Please check the Complete User Manual (Visit
artisan- ocean.com and download the User Manual).
1. Getting Started - Housing
- Attaching the wrist strap : To prevent the case or housing from falling
while you are carrying it, make sure the wrist strap is firmly attached to the
body. Connect the wrist strap to the ring located on the bottom right of the
housing. *Caution* Do not pull the strap too hard. This may cause damage to
the housing.
- Initial waterproof testing instructions : a. Inspect Diveroid and check whether
it is contaminant free and appears in good conditions. b. Open the
housing(check section 3 for details) and confirm whether O-ring(s) are in good
condition. Replace the O- ring if it is deformed or exhibit cuts. c. Close the
housing(check section 3 for details) and submerge the housing into water for
15 minutes. d. Test buttons and check whether there are no bubbles coming
out from the housing. e. Remove the housing, dry out and open the case. f.
Do not use if water is found inside.
2. Getting started - Application(free)
- Go into Google Play store and install the Diveroid
'
' application.
- Register and sign in (If you want to share pictures on Facebook using
Diveroid, then you should register with your Facebook account).
- Go to settings and choose among Metric-Imperial, Freshwater-Seawater and
Nitrox level(only if you are certified for Nitrox diving).
3. Getting started - Smartphone Installation
- Opening the housing
The housing is equipped with a double safety lock feature in order to prevent
sudden or unintentional release during usage. To open the housing, push the
lever inside and rotate the lock counter-clockwise.
- Fully charge both your smartphone and the housing(housing can be charged
using standard Android smartphone charging cable).
- Prior to installing your smartphone, change the smartphone settings into
'airplane mode' (to reduce battery usage) and turn on the GPS function (In
order to track location information in Divelog).
- Slightly lift docking station of the housing. Insert your smartphone and make
sure the screen faces you. Connect the smartphones' charging terminals to
Diveroids' docking station(You must separate all accessories on your
smartphone). The edges of the smartphone should rest securely within the
black rubber inside the housing.
- Activate and unlock your smartphone.
- The application should run automatically. Press the OK button on the screen
and give access permission to the application.
- Attaching Sponge (To fix the smartphone on the housing)
a. After taking off the film from one side of the sponge, place it onto both
sides of the upper part of the smartphone(make sure the adhesive side doesnt'
stick onto the smartphone).
b. Close the housing and make the sponge stick to the rear side of the
housing.
c. If the sponge isnt' firmly attached to the housing, quality of photos can be
lower and your smartphone can be separated from the docking station while
underwater. So make sure the sponges are securely placed onto the housing.
- Closing the housing : rotate the lock 90 degrees counter-clockwise. Place the
'A' which sticks out from the back cover to B
' ' part of the lock. Rotate the
lock clockwise untill you here a click.
- Inspect the main body o-ring seal and ensure that you see good contact
between the seal and the housing all around.
- For Galaxy s5 users : Inside Galaxy s5, theres' a waterproof cap beneath the
phone. The cap must be taken apart. The procedure is as follows :
a. Separate the back cover from the smartphone.
b. Using Phillips head screw driver, remove the cross screws fastening the
waterproof cap beneath the smartphone.
c. Put on the back cover and now youre
' ready! (make sure you don’t lose
screws or the waterproof cap)
- At the first dive, you must go into diving without docking the
Smartphone This is to prevent any unexpected situation occurred while
shipping, handling, etc.
4. While Diving
- Navigate through functions with just 2 buttons(small button – to change
modes, big button – to select a mode / shutter button).
- Open Diveroid only when diving is completely finished. We recommend you
do not open the housing on the shore or on the boat (This increases the risk
of O-ring failure).
5. After diving
- Open the housing by pushing the lever in and rotate the lock counterclockwise.
- While placing your palm under the housing, tilt the housing down and grab
the smartphone. Gently pull out the smartphone from the docking station.
- Make sure the docking station is always pushed back so that it aligns with
the front housing. (If it stays lift, it will damage the inner circuit).
- Vividly retrieve memories with Divelog.
6. Important Safety Instructions.
- The dive computer function of this device should only be used by certified
divers.
- Individual physical condition may differ from time to time and Diveroid
cannot take all of these special differences into consideration. Individuals are
recommended to check their diving on their own.
- Diveroid should not be used in the following situations
: Commercial Diving, Technical Diving, Decompression Diving, Diving beyond
the rated depth rating 40m /131ft.
- Use the backup gauge. When diving with Diveroid, you should always carry
depth meter and pressure meter.
- It is not recommended for multiple divers to share one Diveroid.
Decompression information gathered from previous continuous divings become
meaningless for different divers.
- If the diver had dove within 4 days without using Diveroid, it may not
provide accurate information for continuous diving.
- Nitrox diving is only for those who have Nitrox diving certification. Nitrox
diving can lead to oxygen toxicity. When adjusting the rate of oxygen, round
down below decimal point. ex) 27.9% -> 27%
- Color of the housing may attract dangerous underwater animals. In this
situation, hide the housing as soon as possible.
[User Manual]
Table of contents
1 . General safety Instructions
2 . Handling Diveroid
2-1 Fast Key
3 . Functions
3-1 Dive computer
3 -1-1 Safety instructions
3 -1-2 Safety signs
3 -1-3 Adjusting Settings
3-2 Camera
3 -2-1 Accessories
3 -2-2 Semi-shutter
3-3 Video
3-4 Compass
3-5 Dive Log
3 -5-1 Sharing on Facebook
3 -5-2 No-fly
3-6 Diving Plan
3-7 Back Up
3-8 Sign out
4 . Specification
5 . Safety Checking Points
5-1 Battery
5-2 O -ring
5 -2-1 Cleansing O -ring
5 -2-2 Replacing O -ring
5-3 Housing
6 Customer Support
7 . Warranty
1 . Important Safety Instructions
Read this manual carefully before using Diveroid. Improper use of this
device by neglecting this manual may cause serious damage to the
device, injury or even death to the user.
- The dive computer function of this device should only be used by
certified divers .
- There is always the risk of decompression illness (DCI) for any dive
profile even if you follow the dive plan prescribed by dive tables or a
dive computer. An individual’s physical condition may differ from time to
time and Diveroid cannot take all of these special differences into
consideration. Individuals are recommended to check their diving on their
own.
- Diveroid should not be used in the following situations
: Commercial Diving, Technical Diving, Decompression Diving, beyond the
rated depth rating 40m / 131ft .
- Use the backup gauge. When diving with Diveroid, You should always
carry depth meter and pressure meter.
- It is not recommended for multiple divers to share one Diveroid.
Decompression information gathered from previous continuous diving
become meaningless for different divers.
If the diver dove within 4 days without using the Diveroid, it may not
provide accurate information for continuous diving.
- Nitrox diving is only for those who have Nitrox diving certification.
Nitrox diving can lead to oxygen intoxication. When adjusting the rate of
oxygen, round down below decimal point. ex ) 27 .9% -> 27%
- Color of the housing may attract dangerous underwater animals. In this
situation, hide the housing as soon as possible .
2 . Handling Diveroid
Two buttons are all you need to access Diveroid features.
Small button is for changing modes and big button is for selecting
modes and taking pictures/ videos .
2 -1 Fast key
While you are using Dive computer function or Compass function, you
might suddenly come across a mysterious creature passing by. If you
want to quickly capture this moment , simply press the big button.
Pressing the big button in Dive computer mode or Compass mode works
as a fast key to Camera.
3 . Function
3-1 Dive computer
On the first screen, Diveroid will ask about your daily health condition.
The worse your condition, the more conservative the algorithm becomes.
3-1 -1 Safety instructions
As other dive computers, Diveroid cannot be the absolute standard for
preventing Decompression sickness. Individuals are recommended to check
their diving on their own.
- Maximum Depth
This product is designed only for recreational diving with a maximum
depth of 40m /131ft.
- Nitrox
Divers without proper knowledge and skill acquired from public diving
education groups should not use compound air for their diving.
- Oxygen Toxicity
When oxygen partial pressure is over 1.4atm, there is risk of oxygen
toxicity . Oxygen partial pressure is determined by the ratio of the
surrounding pressure and oxygen level, so its' important for you to not
go under maximum depth( 40M/ 131ft).
- Decompression
This device is designed only for recreational diving and its use is not
recommended for diving that needs decompression. Therefore, it is
crucial to strictly follow the No Decompression Limits(NDL). In case of
exceeding NDL, it is pivotal to follow decompression instructions given by
Diveroid.
- Ascent rate
Ascent rate should be maintained under 30ft/min(9m/min). Rapid ascent
increases the risk of DCI due to Nitrogen bubbles forming in the
bloodstream. If proper ascent rate is violated, Diveroid will inform the
user, but the diver should always be aware of his condition.
- Restrictions for air travel
Restrictions for air travel are based on previous dive records. If you
disobey these instructions, sudden decrease in air pressure may result in
DCL. For the same reasons, even during none flying times, you should
not hike in high alpine regions .
3 -1-2 Safety signs
- Violating ascent rate
If you violate ascent rate. Slow
'
' sign will remain until your speed goes
lower than 30ft/ min( 9m / min).
- Violating Maximum depth
'Critical depth' sign appears if you go below 40M / 131ft .
- Oxygen Toxicity
When oxygen partial pressure is over 1.4atm, Oxygen
'
Toxicity' sign will
appear.
- No decompression limit
With less than five minutes left on remaining time, the 'remaining time'
sign starts appearing.
If you happen to stay longer than No Decompression limit(Diveroid
doesnt' support decompression diving), 'DECO' sign starts appearing.
Come out of the water as instructed.
- Back to stop depth
'Back to stop depth' sign appears if you violate safety stop or stage
decompression.
- No -Diving
If you dont' fully follow Diveroids' safety instructions, No
' -diving' sign
will appear for 48 hours .
- No -fly time
If you dove during no decompression time and followed all the safety
signs, No-fly time will be placed for 12 hours.
If you violated No Decompression time and followed all the safety signs
or dove during No decompression time and violated some of the safety
signs, No-fly time will be placed for 24 hours.
If you violated both No decompression time and safety signs, No-fly
time will be placed for 48 hours .
No -fly time sign will appear at the top -left part of Divelog.
3 -1-3 Adjusting Settings
At settings, you can adjust the following conditions .
- Todays' condition
If you want to change the selection of your daily condition after your
first diving, you can re -select from this menu.
- Metric/ Imperial
Metric uses Meter /Celsius and Imperial uses Feet/ Fahrenheit.
- Fresh water/ Sea water
Choose whether you are diving in fresh water or sea water.
- Nitrox
Nitrox diving is only those who have Nitrox diving certification. Nitrox
diving can lead to oxygen intoxication. When adjusting the rate of
oxygen, round down below decimal point. ex ) 27 .9% -> 27%
3 -2 Camera
Camera capability is dependent on each smartphone.
3 -2-1 Accessories
To purchase these accessories, visit artisan-ocean.com
- Red filter
If you go lower than 5m/16ft, red lights are absorbed and this makes
the photos look green. Red filter helps you to take more colorful photos
underwater.
- Lens Holder
This enables you to mount various lenses on top of Diveroid .
- Mount
This helps you use other video lights while using Diveroid.
3 -2-2 Semi-shutter button
Slightly pressing the Big button functions as auto-focusing.
Photos can be taken by firmly pressing the Big button.
3 -3 Video
Video capability depends on each smartphone. By pressing the big
button, recording gets started and by pressing again, recording ends.
3 -4 Compass
Dont' get lost underwater with Diveroid.
3 -5 Dive Log
When you finish diving, DiveLog gets recorded automatically to your
smartphone. Every record is shown in sequence .
On the upper-left part of Dive log, No-fly time will appear until it ends.
3 -5-1 Sharing pictures /videos on Facebook
You can share pictures/videos by simply clicking the Facebook icon if you
had already registered with your Facebook account . If you havent'
registered yet, new registration screen will pop up for you to sign-up.
3 -6 Diving Plan
If you had dove continuously(Diving more than twice within 4 days), this
shows your recommended diving time for the next diving(on left) and
current saturated nigtrogen level(on right).
3 -7 Back Up
[You can find this function at Settings] Whenever your smartphone is
connected to Wi-fi, Dive log is automatically backed up to the server.
However, If you want to manually back up the data while you are
connected to 3G/4G, push the Back up button(Unfortunately, we dont'
support photo back ups yet).
3 -8 Sign out
[You can find this function at Settings] If you sign out from Diveroid,
the application will send you back to default condition. By signing in
again, you can see your Divelogs.
4 . Specification
A p p l i c a
Smartphones
Wate rproo
depth / M a x i m
allowable
depth
b l e
Samsung Galaxy S2, S3, S4,S5 Note2, Note3, Note 4 /
LG G2, GPro, G3 etc
fin g
u m Within 196ft / 131ft
work
Major materials
M ain body: Aluminum
Grip, Lock, Lens: Poly Carbonate
Button: Brass(Ni-Cr plating)
Weight
510g
Standards
Length: 199.5mm
T hickness: Max 52.2mm Min 20mm
Height: 97.5mm
Compon ents
Diveroid, Spare O-ring and Grease, 1 Strap,
1 Quick guide instruction
Supp l em ent ary
battery
Li poly mer battery, 700mah
Dive computer
Air Nitrox modes
Buhlmann ZH-L16, 16 compartment algorithm
Dive profile graph
5 . Important checking points
5 -1 Battery
Before diving, you should fully charge both Diveroid and Smartphone. if
its' fully charged, the Battery Status Light will change from red to green.
If Diveroids' built-in battery is not fully charged, even a fully charged
Smartphone device will not help it operate .
Diveroids' lifetime depends on each smartphones' battery capacity. We
recommend you check how long Diveroid lasts when fully charged.
To save battery, change the smartphone settings into airplane mode and
turn off other operating functions such as Wi-fi or Bluetooh.
5 -2 O-ring
O-ring is critical for the products' waterproof capability. Therefore, after
each usage it is crucial to cleanse the housing and O -ring.
5 -2-1 Cleansing O -ring
a. Open the housing. While firmly graping the housing with the right
hand, using left hands' thumb and middle finger push the O-ring from
left to right with power. This way, one part of O-ring will be pulled out.
Using this part, take out the O -ring.
At this time please be careful not to damage the O -ring or the
housing.
b. Check whether there is any foreign material such as hair or dirt on
the surfaces of the O-ring and on the front and rear side of the housing
c. Apply thin coating of grease to the O-ring using soft material. Avoid
heavy application as it may cause foreign substances to stick to the
O -ring. Also check whether the O -ring is twisted or inverted .
d. Insert the O -ring to the rear cover. Please make sure the O-ring is
not pulled too hard while inserting. Check for any twists or uneven
thickness of the O -ring.
f. Carefully close the rear cover of the housing. Be careful not to let the
O -ring on the rear cover come off.
5 -2-2 O -ring replacement cycle
The O-ring attached to this product is a consumable item. The main
O -ring attached should be replaced every 6 months, and the other
O-rings (such as the ones beneath the buttons ) should be inspected
every year. If O-rings are impaired, you should replace them immediately.
To purchase, check Artisan&Ocean’s homepage. / artisan-ocean.com
5 -3 Housing
- After each usage, housing should be cleansed with freshwater .
- After usage in sea water, make sure to clean out the housing for at
least 30 minutes with fresh water. Also press all the buttons several
times in order to remove salt that may remain inside .
- Dry out the housing with a soft cloth and keep the housing in a
location that is shaded with good ventilation.
6 . Customer support
To reach Artisan&Ocean’ s
artisan-ocean.com
customer
support
center,
visit
7 . Warranty
Limited warranty :
Artisan&Ocean warrants the product against substantial defects in
materials and workmanship under normal use for a one (1) year period
from the date of the original purchase . This limited warranty is
non-transferable and covers only the original end purchaser.
In the event of a defect, please contact Artisan&Ocean’s Customer
support for assistance. Artisan&Oceans' sole obligation under this
warranty will be, at its option, to repair or replace the product.
Companys' limited warranty applies only to the product. The warranty
does not apply to any non-company product, even if packaged or sold
with the product. This warranty applies only to the normal use of the
product. This warranty does not apply to damage caused by accident,
abuse, misuse, force majeure, or modification of the product.
Warranty Disclaimers:
EXCEPT AS EXPRESSLY SET FORTH ABOVE IN THIS LIMITED WARRANTY,
THE PRODUCT IS PROVIDED ON AN "AS IS" BASIS AND THE COMPANY
MAKES NO OTHER EXPRESS OR IMPLIED WARRANTIES TO THE EXTENT
PERMITTED BY LAW AND SPECIFICALLY DISCLAIMS AND EXCLUDES ALL
IMPLIED WARRANTIES, INCLUDING, WITHOUT LIMITATION, THE IMPLIED
WARRANTIES OF MERCHANT ABILITY AND FITNESS FOR A PARTICULAR
PURPOSE. IF SUCH DISCLAIMER OF ANY SUCH IMPLIED WARRANTY IS
NOT PERMITTED BY LAW, THE DURATION OF ANY SUCH IMPLIED
WARRANTIES IS LIMITED TO THE DURATIONS SET FORTH IN THIS LIMITED
WARRANTY. SOME JURISDICTIONS DO NOT ALLOW THE EXCLUSION OF
IMPLIED WARRANTIES OR LIMITATIONS ON HOW LONG AN IMPLIES
WARRANTY MAY LAST, SO SUCH LIMITATIONS OR EXCLUSIONS MAY NOT
APPLY TO YOU. THIS WARRANTY GIVES YOU SPECIFIC LEGAL RIGHTS AND
YOU MAY ALSO HAVE OTHER RIGHTS WHICH VARY FROM JURISDICTION
TO JURISDICTION,
Copyright Notice
The Users' manual is copyrighted, all rights reserved. It may not, in
whole or in part, be copied photocopied, reproduced, translated, or
formed into any electronic format without prior consent in writing.
Diveroid logo is the registered trademark of Artisan&Ocean Ltd., Galaxy,
and Android are trademarks of Samsung and Google Inc., registered in
U.S and other countries. Samsung and Google is not responsible for the
operation of this device or its compliance with safety and regulatory
standards .