1
Entertainment Partners
VISTA Users’ Guide
Version 4.6 for Windows™ operating systems
ENTERTAINMENT PARTNERS MAKES NO REPRESENTATIONS OR WARRANTIES WITH
RESPECT TO THE CONTENTS HEREOF AND SPECIFICALLY DISCLAIMS ANY IMPLIED
WARRANTIES OF MERCHANTABILITY OR FITNESS FOR ANY PARTICULAR PURPOSE.
ENTERTAINMENT PARTNERS IS NOT RESPONSIBLE FOR ANY DAMAGES, INCLUDING BUT
NOT LIMITED TO CONSEQUENTIAL DAMAGES WHICH MAY RESULT FROM THE USE OF
THIS MATERIAL. FURTHER, ENTERTAINMENT PARTNERS RESERVES THE RIGHT TO
REVISE THIS PUBLICATION AND ATTENDANT COMPUTER FILES AND TO MAKE CHANGES
IN THE CONTENT HEREOF WITHOUT OBLIGATION TO NOTIFY ANY PERSON OF SUCH
REVISION OR CHANGES.
The software described in this document is furnished under a license agreement or nondisclosure
agreement. The software may be used or copied only in accordance with the terms of such
agreement.
VISTA/pc is a trademark of Draney Information Service Corp. (DISC) and is used exclusively with
regard to the microcomputer accounting system designed by DISC.
The usability of the VISTA/pc features described herein may differ from one Production Company to
another. Check with your production company for any policies or procedures that may affect the use
of VISTA capabilities.
Microsoft Windows is a trademark of Microsoft Corporation.
No part of this publication may be reproduced, transmitted, transcribed, stored in a retrieval system,
or translated into any language or computer language, in any form or by any means—electronic,
mechanical, magnetic, optical, chemical, manual, or otherwise—without the prior written permission
of Entertainment Partners.
© Copyright 1995, Draney Information Service Corp. All rights reserved.
EP
Entertainment Partners
2835 North Naomi Street
Burbank CA 91504-2024
(818) 955-6000
VISTA Support 24-hour Emergency Pager: (818) 541-6199
January 2001
Contents
CHAPTER 1: INTRODUCTION ................................................................................................................................................. 1-1
W ELCOME TO VISTA…...................................................................................................................................................................1-1
Powerful and Flexible................................................................................................................................................................ 1-1
Accurate and Secure................................................................................................................................................................... 1-1
Easy and Fast.............................................................................................................................................................................. 1-1
Friendly and Intuitive................................................................................................................................................................. 1-2
Always Out In Front................................................................................................................................................................... 1-2
Built for the Future..................................................................................................................................................................... 1-2
READING THE MANUAL ....................................................................................................................................................................1-3
DOCUMENTATION CONVENTIONS...................................................................................................................................................1-3
Showing Modify for Add ............................................................................................................................................................ 1-4
DOCUMENTATION NOTES.................................................................................................................................................................1-4
CHAPTER 2: GETTING S TARTED WITH WINDOWS .................................................................................................... 2-1
INTRODUCTION ..................................................................................................................................................................................2-1
Why Windows? ............................................................................................................................................................................ 2-1
Starting Windows........................................................................................................................................................................ 2-1
Closing Windows........................................................................................................................................................................ 2-2
What is a Window?..................................................................................................................................................................... 2-2
Mouse Hints................................................................................................................................................................................. 2-2
Windows Tutorial........................................................................................................................................................................ 2-3
Do I Have to Use a Mouse?...................................................................................................................................................... 2-3
U SING THE KEYBOARD IN W INDOWS.............................................................................................................................................2-3
Alt Key Combinations................................................................................................................................................................ 2-3
Pulling Down a Menu................................................................................................................................................................ 2-3
Choosing a Menu Item............................................................................................................................................................... 2-4
Moving Around in Dialog Boxes.............................................................................................................................................. 2-4
Finding Open Applications....................................................................................................................................................... 2-5
Conclusion................................................................................................................................................................................... 2-5
DON’T W ORRY, BE HAPPY..............................................................................................................................................................2-6
CHAPTER 3: GETTING S TARTED WITH VISTA.............................................................................................................. 3-1
INTRODUCTION ..................................................................................................................................................................................3-1
CREATING YOUR SYSTEM................................................................................................................................................................3-1
STARTING VISTA..............................................................................................................................................................................3-1
CLOSING VISTA ................................................................................................................................................................................3-2
Deleting or Saving Report Services Files............................................................................................................................... 3-2
GETTING HELP ...................................................................................................................................................................................3-3
Learning and Using On-line Help ........................................................................................................................................... 3-4
M ENUS AND SUBMENUS...................................................................................................................................................................3-4
CURSOR SHAPES ................................................................................................................................................................................3-5
DOING M ORE THAN ONE THING AT A TIME..................................................................................................................................3-5
BLUE VS. BLACK—AND RED A LL OVER.......................................................................................................................................3-7
U SING THE KEYBOARD IN VISTA W INDOWS...............................................................................................................................3-7
CHAPTER 4: VISTA BASICS ...................................................................................................................................................... 4-1
Entertainment Partners
Contents • i
INTRODUCTION ..................................................................................................................................................................................4-1
SCROLL PANELS.................................................................................................................................................................................4-1
Selecting a Vendor...................................................................................................................................................................... 4-2
Narrowing the Search................................................................................................................................................................ 4-2
Using the Keyboard in Scroll Panels...................................................................................................................................... 4-3
Highlighting More than One Choice....................................................................................................................................... 4-3
FUNCTION MENUS.............................................................................................................................................................................4-3
ENTRY CONFIRMATION : PRESS ENTER ..........................................................................................................................................4-4
Entry Editing and Messages..................................................................................................................................................... 4-4
Error Message and Warning Hierarchy................................................................................................................................. 4-5
BATCH PROCESSING ..........................................................................................................................................................................4-5
Typical Routine........................................................................................................................................................................... 4-5
Computer-created batches........................................................................................................................................................ 4-6
Choose Function First............................................................................................................................................................... 4-6
Batch Control Area..................................................................................................................................................................... 4-6
Creating a New Batch................................................................................................................................................................ 4-7
Controlling Batch Year/Period................................................................................................................................................. 4-7
Leaving the Control Area.......................................................................................................................................................... 4-7
Returning to the Control Area.................................................................................................................................................. 4-7
Changing Batch Control Data.................................................................................................................................................. 4-8
Deleting a Batch.......................................................................................................................................................................... 4-8
Editing and Posting a Batch ..................................................................................................................................................... 4-8
Purchase Order Session ID....................................................................................................................................................... 4-9
Per Diem Batches ....................................................................................................................................................................... 4-9
CURRENCY REPORT OPTIONS..........................................................................................................................................................4-9
Currency Conversion ................................................................................................................................................................. 4-9
Exchange Rate............................................................................................................................................................................. 4-9
KEYING DECIMALS..........................................................................................................................................................................4-10
TRANSACTION NUMBERS ...............................................................................................................................................................4-10
A CCOUNT DISTRIBUTION ENTRY..................................................................................................................................................4-10
Input fields..................................................................................................................................................................................4-11
Error Messages .........................................................................................................................................................................4-12
Vendor Name in Description..................................................................................................................................................4-14
VISTA CHART OF A CCOUNTS.......................................................................................................................................................4-14
Production Cost Account Segments.......................................................................................................................................4-15
Break Levels...............................................................................................................................................................................4-15
Account Types............................................................................................................................................................................4-16
More on Accounts.....................................................................................................................................................................4-17
CHAPTER 5: VISTA REPORT SERVICES ............................................................................................................................ 5-1
INTRODUCTION ..................................................................................................................................................................................5-1
GENERATING VISTA REPORTS.......................................................................................................................................................5-1
Printing to the Default Printer................................................................................................................................................. 5-1
Selecting a Different Printer..................................................................................................................................................... 5-2
W INDOWS’ P RINT M ANAGER..........................................................................................................................................................5-3
So Why Won’t it Stop Printing?!.............................................................................................................................................. 5-4
If You Run Out of Paper... ......................................................................................................................................................... 5-4
VIEWING VISTA REPORTS ON THE MONITOR..............................................................................................................................5-6
THE REPORT VIEW WINDOW............................................................................................................................................................5-7
File Menu ..................................................................................................................................................................................... 5-8
View Menu.................................................................................................................................................................................... 5-9
Window Menu.............................................................................................................................................................................. 5-9
Help.............................................................................................................................................................................................5-10
ReportView Toolbar.................................................................................................................................................................5-10
VIEWING YOUR REPORT .................................................................................................................................................................5-10
Scroll Bars..................................................................................................................................................................................5-11
ii • Contents
Entertainment Partners
Paging.........................................................................................................................................................................................5-12
Splitting the Screen...................................................................................................................................................................5-12
CHAPTER 6: VISTA REPORT OPTIONS............................................................................................................................... 6-1
OVERVIEW..........................................................................................................................................................................................6-1
RELATIONSHIPS: DOWN VS. A CROSS..............................................................................................................................................6-1
CHAPTER 7: VISTA MENU MAP ............................................................................................................................................. 7-1
INTRODUCTION ..................................................................................................................................................................................7-1
File................................................................................................................................................................................................. 7-1
Setup.............................................................................................................................................................................................. 7-1
A/P................................................................................................................................................................................................. 7-2
G/L................................................................................................................................................................................................. 7-3
P/C................................................................................................................................................................................................. 7-3
J/E.................................................................................................................................................................................................. 7-3
P/O................................................................................................................................................................................................. 7-4
Cost................................................................................................................................................................................................ 7-4
Bdgt ............................................................................................................................................................................................... 7-4
P/R: VISTA Payroll History Reporting System...................................................................................................................... 7-5
P/R: Payroll Interface................................................................................................................................................................ 7-5
P/D................................................................................................................................................................................................. 7-5
Per Close...................................................................................................................................................................................... 7-6
Util................................................................................................................................................................................................. 7-6
Interfaces...................................................................................................................................................................................... 7-6
CHAPTER 8: VISTA FLOWCHARTS ...................................................................................................................................... 8-1
OVERVIEW..........................................................................................................................................................................................8-1
CHART 1 - VISTA OVERVIEW ........................................................................................................................................................8-2
CHART 2 - VENDORS, PO’S & A CCOUNTS PAYABLE ..................................................................................................................8-3
CHART 3 - CHECKS............................................................................................................................................................................8-4
CHART 4 - JOURNAL ENTRIES & PETTY CASH..............................................................................................................................8-5
CHART 5 - PER DIEM & PAYROLL ..................................................................................................................................................8-6
CHART 6 - M ODIFY POSTED TRANSACTIONS................................................................................................................................8-7
CHART 7 - TRANSACTION REPORTS & A NALYSES.......................................................................................................................8-8
CHART 8 - BUDGETS, ESTIMATES, COSTS, BALANCES ...............................................................................................................8-9
CHAPTER 9: SETUP MENU ........................................................................................................................................................ 9-1
OVERVIEW..........................................................................................................................................................................................9-1
U SER SETUP ........................................................................................................................................................................................9-2
Administrator............................................................................................................................................................................... 9-3
Login ID and Password ............................................................................................................................................................. 9-3
Setting up a User......................................................................................................................................................................... 9-3
Access Options............................................................................................................................................................................ 9-4
U SER DEFAULT SETUP ......................................................................................................................................................................9-5
Default Settings........................................................................................................................................................................... 9-6
COMPANY ...........................................................................................................................................................................................9-6
Company Not Always Company............................................................................................................................................... 9-7
CURRENCY..........................................................................................................................................................................................9-7
Company....................................................................................................................................................................................... 9-8
Base Currency............................................................................................................................................................................. 9-8
Check Amount Language........................................................................................................................................................... 9-9
Exchange Rates........................................................................................................................................................................... 9-9
Number of Places to the Right of the Decimal....................................................................................................................... 9-9
SOURCE CODES..................................................................................................................................................................................9-9
BANK A CCOUNT ..............................................................................................................................................................................9-11
Bank Account Information ......................................................................................................................................................9-12
Entertainment Partners
Contents • iii
Accounts.....................................................................................................................................................................................9-12
Check Print Fields....................................................................................................................................................................9-12
Positive Pay Template..............................................................................................................................................................9-14
PETTY CASH / PURCHASE CARD ...................................................................................................................................................9-14
Petty Cash Custodian...............................................................................................................................................................9-14
Purchase Card Custodian .......................................................................................................................................................9-14
Setting up a PC Custodian ......................................................................................................................................................9-14
COST A CCOUNT TYPES...................................................................................................................................................................9-16
BILLOVER A CCOUNTS.....................................................................................................................................................................9-17
TAX TABLES.....................................................................................................................................................................................9-18
POSITIONAL T.B./LDGR BIBLE/LIST MAINT................................................................................................................................9-18
Copying a Table to Create a New One .................................................................................................................................9-19
Creating or Changing a Table................................................................................................................................................9-19
Deleting a Detail Account Range...........................................................................................................................................9-22
COST TABLE.....................................................................................................................................................................................9-22
Range Line Groups - Report Actions.....................................................................................................................................9-24
Deleting a Range of Account Types.......................................................................................................................................9-25
FLEX COST TABLE...........................................................................................................................................................................9-25
Page One: Flex-Cost Maintenance........................................................................................................................................9-28
Page Two: Cost Heading/Totals............................................................................................................................................9-29
Copying a Cost Table for New Report..................................................................................................................................9-30
PAYROLL INTERFACE TABLE.........................................................................................................................................................9-31
Invoice Prefix.............................................................................................................................................................................9-32
Suffix............................................................................................................................................................................................9-32
Vendor; Payroll Source Code; AP Source Code.................................................................................................................9-32
Vista Payroll History Reporting System...............................................................................................................................9-32
INSURANCE /FREE FIELD.................................................................................................................................................................9-33
Creating or Changing Insurance or Free Fields................................................................................................................9-34
DATA TRANSFER TABLE.................................................................................................................................................................9-35
SYSTEM CUSTOMIZATION ..............................................................................................................................................................9-35
FLEX LEDGER INQUIRY TABLE......................................................................................................................................................9-35
Creating or Changing a Ledger Inquiry Table....................................................................................................................9-36
Identifying the Table.................................................................................................................................................................9-37
Placing Account Segment Breaks...........................................................................................................................................9-37
Selecting and Placing Fields in a Report Line....................................................................................................................9-38
Using the Special Conditions Column ..................................................................................................................................9-38
Handle Special Conditions With Care..................................................................................................................................9-39
PERSONALITY TABLE LISTING.......................................................................................................................................................9-39
COST TABLE LISTING......................................................................................................................................................................9-40
W EEKLY A CCOUNT A NALYSIS TABLE.........................................................................................................................................9-41
CORPORATE SECURITY...................................................................................................................................................................9-42
CHAPTER 10: CHART OF ACCOUNTS - G/L MENU .....................................................................................................10-1
OVERVIEW........................................................................................................................................................................................10-1
Enhance the Chart....................................................................................................................................................................10-1
CHART OF A CCOUNTS ENTRY........................................................................................................................................................10-2
Adding Accounts.......................................................................................................................................................................10-2
Completing the New Account..................................................................................................................................................10-4
Updating the Chart of Accounts.............................................................................................................................................10-5
What’s the G/L Master?...........................................................................................................................................................10-6
Updating the G/L Master.........................................................................................................................................................10-7
Viewing Chart of Accounts Segments....................................................................................................................................10-7
Function Clear Screen.............................................................................................................................................................10-7
CHART OF A CCOUNTS LISTING......................................................................................................................................................10-8
CHAPTER 11: VENDORS - A/P MENU .................................................................................................................................11-1
iv • Contents
Entertainment Partners
OVERVIEW........................................................................................................................................................................................11-1
Vendors by Currency................................................................................................................................................................11-1
Vendor Numbers: History!......................................................................................................................................................11-1
A/P Vendor Menu......................................................................................................................................................................11-2
VENDOR ENTRY...............................................................................................................................................................................11-2
Adding a Vendor.......................................................................................................................................................................11-3
Changing a Vendor...................................................................................................................................................................11-3
Function Inquire.......................................................................................................................................................................11-4
VENDOR RECORD SECTIONS & FIELDS........................................................................................................................................11-4
Vendor Section..........................................................................................................................................................................11-4
Telephone Information Section...............................................................................................................................................11-6
Income Tax Section...................................................................................................................................................................11-6
General Ledger Accounts Section..........................................................................................................................................11-7
Discount Section.......................................................................................................................................................................11-7
Yellow Pages Section...............................................................................................................................................................11-7
Petty Cash Section....................................................................................................................................................................11-8
Miscellaneous Information Section.......................................................................................................................................11-9
Status Section...........................................................................................................................................................................11-10
Don’t Forget: Press Enter! ...................................................................................................................................................11-10
VENDOR LISTING...........................................................................................................................................................................11-10
VENDOR INQUIRY..........................................................................................................................................................................11-11
VENDOR LABEL .............................................................................................................................................................................11-13
VENDOR CHANGE ..........................................................................................................................................................................11-15
YELLOW PAGES LISTING..............................................................................................................................................................11-16
CHAPTER 12: PURCHASE ORDERS - P/O MENU...........................................................................................................12-1
OVERVIEW........................................................................................................................................................................................12-1
Typical Purchase Order Cycle...............................................................................................................................................12-1
Purchase Order Numbers........................................................................................................................................................12-2
Purchase Order varieties ........................................................................................................................................................12-2
P.O. M AINTENANCE........................................................................................................................................................................12-3
Function Menu..........................................................................................................................................................................12-3
Ledger Period Menu.................................................................................................................................................................12-4
P.O. Maintenance – Add..........................................................................................................................................................12-4
PO Error Messages ..................................................................................................................................................................12-6
P.O. Maintenance – Adjustments...........................................................................................................................................12-6
Deleting a Purchase Order.....................................................................................................................................................12-9
P.O. REPORTING..............................................................................................................................................................................12-9
Report Type..............................................................................................................................................................................12-10
Sort By ......................................................................................................................................................................................12-11
Print Selection.........................................................................................................................................................................12-11
PO print options......................................................................................................................................................................12-11
P.O. P RINT ......................................................................................................................................................................................12-11
Overview...................................................................................................................................................................................12-11
Printing Purchase Orders .....................................................................................................................................................12-11
CHAPTER 13: INVOICES - A/P MENU .................................................................................................................................13-1
OVERVIEW........................................................................................................................................................................................13-1
Typical A/P Invoice Cycle.......................................................................................................................................................13-1
INVOICE PROCESSING STAGES.......................................................................................................................................................13-2
INVOICE TYPES AND NUMBERING.................................................................................................................................................13-2
Invoice Number Conventions..................................................................................................................................................13-3
INVOICE ENTRY M ENUS .................................................................................................................................................................13-3
Function Menu..........................................................................................................................................................................13-3
Edit Lines....................................................................................................................................................................................13-4
Ledger Period Menu.................................................................................................................................................................13-4
Entertainment Partners
Contents • v
Batch Menu................................................................................................................................................................................13-4
INVOICE ENTRY WINDOW ..............................................................................................................................................................13-5
Batch Control Section..............................................................................................................................................................13-5
Vendor Information Section....................................................................................................................................................13-6
System Information Section.....................................................................................................................................................13-7
Invoice Information Section....................................................................................................................................................13-7
Check Requirements Section...................................................................................................................................................13-8
Discount Info Section.............................................................................................................................................................13-10
Account Distribution Section................................................................................................................................................13-10
Invoices and Purchase Orders .............................................................................................................................................13-11
Finishing the Transaction.....................................................................................................................................................13-12
Invoice Error Messages.........................................................................................................................................................13-12
INVOICE A UDIT ..............................................................................................................................................................................13-14
INVOICE POST .................................................................................................................................................................................13-15
Posting Report.........................................................................................................................................................................13-15
Narrowing the Selection ........................................................................................................................................................13-15
Confirm Posting......................................................................................................................................................................13-15
Mechanics of Invoice Posting...............................................................................................................................................13-16
A/P Suspense Warning...........................................................................................................................................................13-16
M ODIFY OPEN ITEMS....................................................................................................................................................................13-17
DISTRIBUTION CHANGES..............................................................................................................................................................13-18
The DISTCHGS Batch ...........................................................................................................................................................13-19
Subsequent Distribution Changes........................................................................................................................................13-19
OPEN ITEMS REPORT .....................................................................................................................................................................13-20
Open Items List........................................................................................................................................................................13-21
Open Items Cash Requirements ...........................................................................................................................................13-21
Open Items Aging....................................................................................................................................................................13-22
CHAPTER 14: CHECKS - A/P MENU ....................................................................................................................................14-1
OVERVIEW........................................................................................................................................................................................14-1
Typical Check Cycle.................................................................................................................................................................14-2
INVOICE SELECT ..............................................................................................................................................................................14-2
CHECK PRINT ...................................................................................................................................................................................14-4
Check Restart.............................................................................................................................................................................14-5
CHECK REGISTER.............................................................................................................................................................................14-6
CHECK REGISTER POST ..................................................................................................................................................................14-7
POSITIVE PAY...................................................................................................................................................................................14-8
QUICK CHECK ..................................................................................................................................................................................14-9
Overview.....................................................................................................................................................................................14-9
The Quick Check Procedure.................................................................................................................................................14-10
CHECK CANCEL/REISSUE .............................................................................................................................................................14-13
Overview...................................................................................................................................................................................14-13
The Check Cancel/Reissue Procedure................................................................................................................................14-13
CHECK REPRINT .............................................................................................................................................................................14-15
Overview...................................................................................................................................................................................14-15
The Check Reprint Procedure..............................................................................................................................................14-15
CHECK REGISTER HISTORY..........................................................................................................................................................14-15
Overview...................................................................................................................................................................................14-15
The Check Register History Procedure...............................................................................................................................14-16
BANK RECONCILIATION ...............................................................................................................................................................14-17
Overview...................................................................................................................................................................................14-17
The Bank Reconciliation procedure....................................................................................................................................14-17
BANK RECONCILIATION REPORT ................................................................................................................................................14-19
Overview...................................................................................................................................................................................14-19
The Bank Reconciliation Report Procedure.......................................................................................................................14-20
vi • Contents
Entertainment Partners
CHAPTER 15: VISTA PAYROLL HISTORY REPORTING SYSTEM/PAYROLL INTERFACE - P/R MENU
........................................................................................................................................................................................ 15-1
OVERVIEW ................................................................................................................................................................... 15-1
Mechanics of Payroll Processing ........................................................................................................................... 15-1
PAYROLL INVOICE PROCESSING................................................................................................................................... 15-2
Payroll Processing Cycle ....................................................................................................................................... 15-2
PAYROLL RECEIVE....................................................................................................................................................... 15-2
Downloading a Payroll File ................................................................................................................................... 15-3
Deleting a Downloaded Payroll File...................................................................................................................... 15-3
LABOR CORRECTIONS .................................................................................................................................................. 15-4
FRINGE /JOURNAL TABLE MAINTENANCE.................................................................................................................... 15-6
FRINGE /JOURNAL TABLE PRINT .................................................................................................................................. 15-7
LABOR/FRINGE/AP POST ............................................................................................................................................. 15-8
FLEX REPORTING MAINTENANCE .............................................................................................................................. 15-10
PAYROLL REPORTING ................................................................................................................................................ 15-13
PAYROLL PACKAGE PRINT ......................................................................................................................................... 15-13
Overview............................................................................................................................................................... 15-14
Check Register/Earnings Report .......................................................................................................................... 15-14
Check Fringe Listing ............................................................................................................................................ 15-15
Payroll Audit......................................................................................................................................................... 15-16
LOCATION CHECK PRINT ........................................................................................................................................... 15-17
Overview............................................................................................................................................................... 15-17
Mechanics of Location Check Print...................................................................................................................... 15-17
Printing Location Checks ..................................................................................................................................... 15-18
CHAPTER 16: P/C MENU - PETTY CASH ............................................................................................................. 16-1
OVERVIEW ................................................................................................................................................................... 16-1
PETTY CASH ENTRY .................................................................................................................................................... 16-3
Recording An Amount Advanced ............................................................................................................................ 16-6
Accounting For Petty Cash Disbursed ................................................................................................................... 16-6
PETTY CASH AUDIT ..................................................................................................................................................... 16-8
PETTY CASH POST ..................................................................................................................................................... 16-10
PETTY CASH INQUIRY/HISTORY ................................................................................................................................ 16-11
CHAPTER 17: PER DIEM & MILEAGE - P/D MENU .......................................................................................... 17-1
OVERVIEW ................................................................................................................................................................... 17-1
Regarding Currency ............................................................................................................................................... 17-2
TAXING LOCATIONS .................................................................................................................................................... 17-2
PER DIEM GROUP......................................................................................................................................................... 17-3
MILEAGE GROUP ......................................................................................................................................................... 17-4
PER DIEM EMPLOYEE SETUP ....................................................................................................................................... 17-5
PER DIEM GROUP DEFAULT PAYMENT SET UP ............................................................................................................ 17-6
Daily versus Flat .................................................................................................................................................... 17-7
Default versus Employee ........................................................................................................................................ 17-7
Advance versus Production .................................................................................................................................... 17-7
Daily Per Diem....................................................................................................................................................... 17-9
Flat Per Diem ....................................................................................................................................................... 17-10
MILEAGE GROUP DEFAULT PAYMENT SET UP........................................................................................................... 17-11
Default versus Employee ...................................................................................................................................... 17-12
Advance versus Production .................................................................................................................................. 17-12
PER DIEM & MILEAGE PAYMENT CYCLE .................................................................................................................. 17-14
Payment of Per Diem............................................................................................................................................ 17-15
Payment of Mileage .............................................................................................................................................. 17-17
Per Diem/Mileage Audit ....................................................................................................................................... 17-18
PER DIEM/MILEAGE POST.......................................................................................................................................... 17-19
Entertainment Partners
Contents • vii
Post Options ......................................................................................................................................................... 17-19
PER DIEM RECONCILIATION....................................................................................................................................... 17-20
SIGN-OFF TAX SHEET ................................................................................................................................................ 17-20
CHAPTER 18: TAXES 1099S - A/P MENU .............................................................................................................. 18-1
OVERVIEW ................................................................................................................................................................... 18-1
Typical 1099 Procedure ......................................................................................................................................... 18-1
COMPANY SETUP ......................................................................................................................................................... 18-2
TAX TABLE SETUP ....................................................................................................................................................... 18-2
TAX ID SETUP ............................................................................................................................................................. 18-4
Federal ................................................................................................................................................................... 18-4
State ........................................................................................................................................................................ 18-6
Completing the process........................................................................................................................................... 18-6
TAX ADJUSTMENT ....................................................................................................................................................... 18-6
Dollar Adjustment................................................................................................................................................... 18-7
Code Adjustment..................................................................................................................................................... 18-8
TAX REPORTING .......................................................................................................................................................... 18-8
Report ..................................................................................................................................................................... 18-9
Forms.................................................................................................................................................................... 18-10
Diskette ................................................................................................................................................................. 18-11
FILING FEDERAL 1099 DATA VIA ELECTRONIC MEDIUM ........................................................................................... 18-11
Windows 95 or Later ............................................................................................................................................ 18-11
INDEPENDENT CONTRACTOR REPORTING .................................................................................................................. 18-13
Overview............................................................................................................................................................... 18-13
Tax Cycle ............................................................................................................................................................. 18-14
Tax ID Set Up ....................................................................................................................................................... 18-14
Auditing and Adjustments ..................................................................................................................................... 18-15
Report ............................................................................................................................................................... 18-16
Diskette........................................................................................................................................................... 18-16
Retransfer ....................................................................................................................................................... 18-16
Creating The Diskette..................................................................................................................................... 18-17
Shipping Instructions................................................................................................................................... 18-18
Information Contract................................................................................................................................... 18-18
CHAPTER 19: RECOVERABLE ASSETS - G/L MENU........................................................................................ 19-1
OVERVIEW ................................................................................................................................................................... 19-1
RECOVERABLE ASSETS ENTRY .................................................................................................................................... 19-2
RECOVERABLE ASSETS REPORT .................................................................................................................................. 19-4
Overview................................................................................................................................................................. 19-4
CHAPTER 20: JOURNAL ENTRIES - J/E MENU.................................................................................................. 20-1
OVERVIEW ................................................................................................................................................................... 20-1
JOURNAL ENTRY .......................................................................................................................................................... 20-2
The Batch Control Section...................................................................................................................................... 20-3
The Reference Section............................................................................................................................................. 20-4
The Accounting Entries Section.............................................................................................................................. 20-5
Completing the Journal Entry ................................................................................................................................ 20-5
JOURNAL ENTRY AUDIT REPORTS ............................................................................................................................... 20-5
JOURNAL ENTRY POST ................................................................................................................................................. 20-7
LEDGER ADJUSTMENT ................................................................................................................................................. 20-8
TRANSACTION REVERSAL ............................................................................................................................................ 20-9
PRODUCTION TRANSFER ............................................................................................................................................ 20-11
Production Transfer Entry: .................................................................................................................................. 20-11
Production Transfer Audit:................................................................................................................................... 20-11
Production Transfer Post: .................................................................................................................................... 20-12
viii • Contents
Entertainment Partners
CHAPTER 21: LEDGER INQUIRY - G/L MENU................................................................................................... 21-1
OVERVIEW ................................................................................................................................................................... 21-1
LEDGER INQUIRY ......................................................................................................................................................... 21-1
CHAPTER 22: BUDGET/ESTIMATING - BDGT MENU ...................................................................................... 22-1
OVERVIEW ................................................................................................................................................................... 22-1
BUDGET EFC/ETC UPDATE/ENTRY ............................................................................................................................ 22-2
Interactive Mode..................................................................................................................................................... 22-4
BUDGET EXPLANATION REPORT .................................................................................................................................. 22-6
BUDGET EFC CHANGE TRACKING REPORT ................................................................................................................. 22-7
BUDGET INTERFACE .................................................................................................................................................... 22-8
VISTA Budgeting .................................................................................................................................................... 22-8
Movie Magic ......................................................................................................................................................... 22-10
Speedbid ............................................................................................................................................................... 22-12
CHAPTER 23: COST REPORTING - COST MENU .............................................................................................. 23-1
OVERVIEW ................................................................................................................................................................... 23-1
FLEX PRODUCTION COST ........................................................................................................................................... 23-2
FLEX PRODUCTION COST CONSOLIDATION ................................................................................................................ 23-3
COST TRANSACTIONS .................................................................................................................................................. 23-6
COST TRANSACTIONS CONSOLIDATION ....................................................................................................................... 23-8
SET COST REPORT ....................................................................................................................................................... 23-9
EPISODIC COST .......................................................................................................................................................... 23-11
SET COST CONSOLIDATION ........................................................................................................................................ 23-14
MEMO COST REPORT ................................................................................................................................................. 23-15
CHAPTER 24: CLOSING - PER CLOSE MENU .................................................................................................... 24-1
OVERVIEW ................................................................................................................................................................... 24-1
POSITIONAL T. B. REPORT ........................................................................................................................................... 24-2
LEDGER BALANCE ....................................................................................................................................................... 24-4
LEDGER LIST/BIBLE..................................................................................................................................................... 24-6
FLEX LEDGER REPORT ............................................................................................................................................... 24-7
UPDATE LEDGER PERIOD ............................................................................................................................................. 24-8
BALANCE FORWARD .................................................................................................................................................. 24-11
CHAPTER 25: UTIL MENU ...................................................................................................................................... 25-1
OVERVIEW ................................................................................................................................................................... 25-1
BATCH MODIFICATION ................................................................................................................................................ 25-1
SYSTEM SERVICES ....................................................................................................................................................... 25-2
Ledger Balance Check............................................................................................................................................ 25-3
Data Check ............................................................................................................................................................. 25-3
REPORT SERVICES ....................................................................................................................................................... 25-4
Viewing reports in ReportView............................................................................................................................... 25-4
Printing from ReportView....................................................................................................................................... 25-4
CHAPTER 26: INTERFACES.................................................................................................................................... 26-1
COMMUNICATION ........................................................................................................................................................ 26-1
Overview................................................................................................................................................................. 26-1
Payroll, Get Report/Data........................................................................................................................................ 26-1
MODEM OF EDITS ........................................................................................................................................................ 26-2
Get Report .............................................................................................................................................................. 26-2
Printing Modemed Edits ......................................................................................................................................... 26-3
LOCATION CHECK PRINT ............................................................................................................................................. 26-6
Get Data ................................................................................................................................................................. 26-6
SETUP .......................................................................................................................................................................... 26-8
Entertainment Partners
Contents • ix
DATA TRANSFER ......................................................................................................................................................... 26-9
Guidelines for successful VISTA to VISTA Data Transfer...................................................................................... 26-9
VISTA Location System(s) .................................................................................................................................... 26-11
VISTA Host Procedures........................................................................................................................................ 26-12
PURCHASE CARD INTERFACE ..................................................................................................................................... 26-14
Overview............................................................................................................................................................... 26-14
Receiving the Purchase Card Interface File......................................................................................................... 26-14
Purchase Card Interface Errors ........................................................................................................................... 26-15
Purchase Card Reconciliation.............................................................................................................................. 26-15
Purchase Card Interface: Final Report................................................................................................................ 26-17
Purchase Card Interface into Petty Cash ............................................................................................................. 26-18
CHAPTER 27: PREFERRED EQUIPMENT LIST.................................................................................................. 27-1
OVERVIEW ................................................................................................................................................................... 27-1
VISTA / Microsoft Windows operating systems ...................................................................................................... 27-1
CHAPTER 28: GLOSSARY OF TERMS.................................................................................................................. 28-1
x • Contents
Entertainment Partners
Chapter 1: Introduction
Welcome to VISTA…
The most complete and modern accounting system for the entertainment industry
provided by Entertainment Partners.
VISTA was developed—and is constantly being improved and updated—by
entertainment industry professionals to provide you with the best system available.
No other system provides all the features of VISTA, and no other company provides
the service, backup and dependability of Entertainment Partners.
Powerful and Flexible
VISTA can handle the most demanding show with ease—multiple locations,
currencies, banks, computers—no matter how complex your requirements, VISTA
can do the job. VISTA runs on one computer or as many as you want. Need to do
two or three things at the same time? VISTA can do it. Need for several people to do
two or three things at the same time? VISTA can handle that, too! One person can
run a cost report while others are entering invoices while another is processing a
payroll or preparing per diem—VISTA can do it all.
Need to input data for next period before closing the current period? Just do it with
VISTA. Need to design a special inquiry report and run it throughout the show? You
can do that with VISTA—and not just a single report, but as many as you want,
designed to any level of detail for various levels of production management.
Need to offload production data to a spreadsheet or database for more detailed
analysis? No problem. VISTA lets you choose the data and move it into any other
program you want—DOS or Windows.
Accurate and Secure
VISTA has more internal controls than any other production accounting software.
The system monitors itself constantly for signs of trouble, and input is thoroughly
edited against the most current data. The entire system is protected by an individual
password security system that can be made as stringent as necessary.
Easy and Fast
Need a check right this minute? Use the unique Quick Check feature—get your
check immediately as you enter it into the system, too, so you won’t lose track of it.
Entertainment Partners
Introduction • 1-1
Interrupted in the middle of something? You never have to close down one task in
order to do another. With VISTA, leave what you’re doing where you’re doing it,
perform a second or third job, look up a few things, then come right back to where
you were and continue your work!
Need to correct distribution for an invoice but hate making journal entries? Just make
the correction—VISTA finishes the processing for you, automatically generating a
complete set of transactions, reports, and audit trail.
Need to look up a vendor number? No, not in VISTA. Look up any vendor by name.
The old vendor numbers are still there for absolute control, but you work in VISTA
using the vendor’s name. That’s right—no more printing the vendor list three times a
day to keep it up to date, no more laborious looking up and coding input with
meaningless vendor codes —VISTA makes it easy and saves you time.
VISTA has more features to help you get your work done easier and faster than any
other software you can use. And VISTA takes advantage of the latest in computer
hardware technology to give you the best performance and fastest operation you can
get.
Friendly and Intuitive
VISTA runs in Microsoft Windows, today’s—and tomorrow’s—best and most
popular operating system. If you, like millions of others, are already used to the
friendly Windows interface, you’ll feel right at home with VISTA. If you’re used to
the advantages of other Windows programs like Microsoft Excel or Word for
Windows or Lotus 1-2-3 or WordPerfect for Windows, you’ll already know how to
work with VISTA.
And, because it’s in Windows, you can not only perform different functions at the
same time within VISTA, you can leave VISTA right where it is, move to your
favorite spreadsheet or word processor to do something else, then come right back to
where you were in VISTA.
If you haven’t used Windows yet, you’ll find it’s simple to learn and easy as pie to
use. Afraid of mice? Well, you don’t have to be afraid of the Windows mouse;
because Windows (and VISTA) let you get used to it at your own speed while you
use simple keyboard commands to do just about anything you want.
Always Out In Front
Entertainment Partners is constantly working to improve every aspect of VISTA and
its services to you. Let us know what you think. Your input keeps us going and will
keep VISTA out in front.
Built for the Future
In addition to being at the forefront of today’s technology, VISTA is designed to
carry the User into the twenty-first century. To that end, all VISTA programs and
databases are already Year 2000 compliant.
The VISTA Database operates on a Julian calendar, which requires no
accommodation to the millennial turn.
Those VISTA programs that operate on a standard American MM/DD/YY date
format will apply the 50/50 Rule:
If a two-digit year of 00 through 49 is input, VISTA will recognize that
year as falling within the new millennium;
1-2 • Introduction
Entertainment Partners
If a two-digit year of 50 through 99 is input, VISTA will recognize that
year as falling within the current millennium.
Reading the Manual
What a concept! A manual is for reading and not just to be used as a bookend or to
level a worktable? Well, yes. And here’s why…
Like a lot of other powerful software, VISTA is loaded with features, features
that don’t just pop out at you as you use the program, features that you’re not used to
because they’re not available anywhere els e. In fact, if you didn’t explore the menus
and read the manual, you could use VISTA for a number of productions without ever
knowing some of the possibilities for making your work easier, more efficient, and
even more satisfying.
So read the manual, even if you’ve used VISTA before. In fact, especially if you’ve
used VISTA before. Documentation means a lot more once you’re familiar with
software than it does before you have any experience with it. See if you don’t get a
whole new perspective on VISTA—new ways to solve problems and analyze costs,
new ways to make VISTA work for you.
Use this new knowledge on your current production, then bring new ideas to your
next VISTA setup session and start your next show ahead of the game.
Documentation Conventions
This documentation uses the following conventions throughout.
“Click” or “double -click”
Wherever the words “click” or “double -click” are used,
meaning move the mouse pointer to such-and-such and click
or double -click on so-and-so, it refers to the left mouse
button. Any actions with the right-hand mouse button are
referred to as “right-click.”
Menu Hierarchy
Menu selections are referred to in order of selection in one
series of words beginning with the Main Menu, such as A/P
Check Cycle Invoice Select.
In the example above, first choose A/P from the Main Menu,
then Check Cycle from the A/P Menu, then Invoice Select
from the Check Cycle Submenu.
Purpose, Required,
Defaults, Delete
Wherever it’s applicable, the documentation of a menu choice
will begin with t hese four items.
“Purpose:” explains the function of the menu choice within
VISTA.
“Required:” lists the required fields—those fields that must
contain valid entries before the choice can be completed.
“Defaults:” lists the fields that are filled by the system (and
what they’re filled with) if you don’t enter anything in them.
“Delete:” explains whether the record being created can be
deleted or not.
Entertainment Partners
Introduction • 1-3
Showing Modify for Add
Pictures of Modify screens are shown in some places to illustrate Add functions in
order to show typical completed records or windows.
Documentation Notes
As has been stated elsewhere, VISTA is extremely flexible. That flexibility poses a
problem when trying to document the system.
You have so many choices when it comes to setting up your version of VISTA that
it’s impossible to document your specific version. This is particularly true in relation
to your account number and general ledger structure.
The multiple choices of fields, field sizes, field descriptions and even field uses
create an array of possibilities so large that all of them cannot be covered perfectly.
This documentation has selected a typical account structure using typical
descriptions and offers as much help as possible for those circumstances.
Please be aware that what we describe here is not necessarily exactly what you’ll be
seeing or using. Make allowances for the differences in your system. Extrapolate and
translate what’s here based on any differences, and you’ll still probably find all the
answers you need.
If not, call EP VISTA Customer Support anytime with any questions (see “Getting
Help” on page 3-3).
1-4 • Introduction
Entertainment Partners
Chapter 2: Getting Started with
Windows
Introduction
VISTA runs with the latest and best version of Microsoft Windows™ products. If
you’ve used Windows or an Apple Macintosh ®, learning VISTA will be even easier
for you. If not, here are some basics to get you started and some suggestions to carry
you further.
Why Windows?
Windows is the predominant operating system on personal computers today, and all
indications are it will remain the most popular for years to come. It offers several
distinct advantages:
•
What you see is what you get. The graphical interface lets you see more
of what you’re doing. It’s not only mo re effective; it’s easier and more
fun.
•
All programs in Windows share basic characteristics, making them
easier to learn and use.
•
It’s easy to do more than one thing at a time: you can be working on a
spreadsheet or a word processing document at the same time you are
working in VISTA, switching at will between them without having to
put any of them away.
•
Use of the mouse in some operations makes working easier and faster.
If you’ve never used Windows or a mouse before, don’t be concerned. Go slowly;
don’t get frustrated. Force yourself to take the time to get the basics down. Anything
new takes some getting used to, but millions of others have gone before you and
come out smiling. Windows, the mouse, and VISTA will all be second nature to you
in no time. By the time you finish learning and using VISTA, you’ll be glad you did.
Starting Windows
Usually your computer will be set up to start Windows automatically. For other
occasions, from the DOS C: prompt, type win. Your computer will be set up to start
VISTA automatically whenever Windows starts.
Entertainment Partners
Getting Started with Windows • 2-1
Closing Windows
To close and exit Windows, first close any open applications, including
VISTA and the DISC Database Server, then choose File Exit Windows... from the
File Manager Menu Bar or Shut Down… from the Start button. A confirmation
dialog box will ask you if you really want to end your Windows session. Press Enter
or click OK to exit, and you will be at the DOS C: prompt.
What is a Window?
A window is simply an area of the computer screen—a box—that’s marked by
borders and may be further demarcated by color.
Windows 3.1x
Windows version 3.1x’s control center is a window called Program Manager. It will
always be open; closing Program Manager shuts down Windows and returns you to
DOS.
Other windows serve different purposes. A window may contain a group of
programs represented by icons (small pictures). A window may contain an
application such as a word processor or spreadsheet, and the application will use
additional windows within its window to display “dialog boxes”—information boxes
that present information or allow you to see additional information and select data or
make other decisions.
A window may take up the whole screen, part of the screen, or it may be
“iconized”—“closed” but still active and represented by an icon usually at the
bottom of your screen.
Windows can overlap or overlie each other; they can be enlarged or reduced as
needed. Think of each window as a piece of paper on your desktop, because that’s
the essential analogy behind this type of Graphical User Interface. Just like the items
on your desk, you can arrange windows, shuffle them, work on one for a while then
switch to another, put some away, then bring them back.
Most of these features remain the same in Windows NT 3.5. The basic principle of
working with windows has also been retained in Windows 95--especially the way
active windows are represented on your screen. But there are also quite a few
differences starting with a much friendlier graphical interface. If you are using
Windows 95, take the time to become very familiar with all of its features and
VISTA becomes just one other application running under that environment.
Mouse Hints
The use of the mouse can take some getting used to. Don’t try to move the mouse
without proper hand and arm support. It can be intimidating when you first grab the
mouse and see the cursor flying wildly all over and off the screen. But don’t panic.
Get a grip as follows …
If you’re a southpaw, use the
mouse control software in
Windows to reverse right and
left mouse buttons.
Always use a mouse pad. Rest the heel of your right hand near the edge of the pad
and grasp the mouse lightly in your fingers, with your forefinger over the left mouse
button and your middle finger over the right. Use your thumb and other two fingers
to guide the mouse and cursor—it takes relatively little range of movement to reach
any area of the screen.
2-2 • Getting Started with Windows
Entertainment Partners
Windows Tutorial
The best way to learn the basics of Windows—using the mouse, parts of a window,
icons, etc.—is to go through the Windows Tutorial on the Program Manager or
Start; Help menu.
Do I Have to Use a Mouse?
Yes. And no.
Windows is designed to be almost as easy to use from the keyboard as with the
mouse. (See “Using the Keyboard Windows” on page 2-3.) Most people end up
using the combination of both that’s most comfortable and effective to them.
Don’t be afraid you have to use the mouse for every single thing you do—it doesn’t
work that way. Keyboard alternatives to mouse actions are, for the most part, always
available, easily identified throughout Windows, and easy to learn and get used to.
But there are some things—such as moving windows on the screen—so much easier
to do with the mouse, that you’ll probably find yourself reaching for it intuitively
when the time comes. For example, in VISTA, to move to a particular field way
down the screen, you can click on the field with the mouse instead of tabbing
through many other fields to get there.
Using the Keyboard in Windows
Here are some guidelines for using the keyboard in Windows. These same guidelines
also apply to any Windows application, including VISTA.
The following assumes you have taken the Windows Tutorial and are familiar with
commo n Windows terms such as menu bar, dialog box, etc.
Alt Key Combinations
Many of the keyboard alternatives in Windows require you to press two keys at once,
especially Alt plus another key. The Alt keys are located on either side of the space
bar on most keyboards.
When mentioned in this documentation, these combinations will be referred to, for
example, as Alt-f. This means first press the Alt key, then, while holding it down,
press the second key, in this case f.
This does not mean you hold the keys down for a long time. Like any other
keystroke, simply press Alt; press the second key, and then release both.
Pulling Down a Menu
Every name in a menu bar has one character underlined. (As often as possible, the
underlined character will be the first letter of the menu name.) That is the letter you
press along with Alt to “pull down” (display) that menu. You don’t have to
memorize any key combinations—just remember Alt and look at the screen.
To pull down the File menu, press Alt-f. To see the Window menu, press Alt-w.
To move to another menu, use the Up and Down Arrow keys on your keyboard.
You can use the Left- or Right-Arrow keys to move left and right through the
choices. Each menu will show in turn.
Entertainment Partners
Getting Started with Windows • 2-3
Choosing a Menu Item
You can use the keyboard to choose an item on a menu in a couple of ways.
Arrow Keys
Using the Up- or Down-Arrow keys, move to the item you want and press Enter.
Hot Keys
Notice that each item on the File menu also has an underlined character. To select a
particular item, just press the underlined character.
To close the menu without selecting any items, press the Escape key, Esc (usually in
the upper left corner of the keyboard).
Closing the menu by pressing Esc still leaves the cursor in the menu bar with the
menu name highlighted. Press Esc again to leave the menu bar and re-enter its
window.
Moving Around in Dialog Boxes
In a dialog box such as the one above, you can move from item to item (field to
field) using the Tab key. Press Tab to move forward to the next field, press
Shift-Tab to move backward to the previous field.
But also notice again there are underlines in the key words throughout the dialog
box. You can move directly to a choice by pressing the underlined character in
combination with Alt. For example, Alt-e in the box above would tell Windows to
print the Current Page.
2-4 • Getting Started with Windows
Entertainment Partners
In the sample Print dialog box above, to get to Print What press Alt-p. To choose the
option you want, use the up and down arrow keys to highlight your choice, then
press Tab to move on to the next field.
The buttons at the right of this dialog box (OK, Cancel, etc.) illustrate another aspect
of maneuvering through Windows with the keyboard. One of these buttons is always
highlighted. (The highlight on a button consists of a dark outline and a dotted box
around the word on the button that may not show on this printed version.)
Another way to cancel any
Windows dialog box is to
press the escape key, Esc.
Pressing Enter from anywhere in the dialog box activates the highlighted button. If
OK is highlighted, in this case your document will be printed with the options
you’ve selected. If Cancel is highlighted, the dialog will be canceled and you’ll be
returned to the active application window.
Finding Open Applications
To cycle through all open applications, hold down the Alt key and press Tab. Each
time you press Tab, a different open application icon and name will be displayed in
the center of your screen. To go to a particular application, release the Alt key while
that application name is on your screen.
This is a particularly handy way to move from one VISTA application to another.
For example, you may have Chart of Accounts Entry, Invoice Entry, and Vendor
Entry open all at the same time. If, while working in one, you want to move to
another, hold down Alt and press Tab successively until the application you want is
named on your screen. Then release the keys and that application window will
become the active window.
In Windows 95, the task bar at the bottom of your screen that the Start button is on
always displays the other applications or programs that are running while only the
active one is on your screen. Instead of using the Alt+Tab procedure as above in
Windows 3.x, simply click the item on the task bar and Windows 95 activates it.
Conclusion
Covering all the details of using the keyboard in Windows would take a manual unto
itself. These few examples will get you started and let you see that you don’t have to
give up the keyboard in order to use Windows and VISTA easily and effectively.
Entertainment Partners
Getting Started with Windows • 2-5
More specific examples of keyboard use are given throughout the VISTA portions of
this documentation.
Don’t Worry, Be Happy
As you get used to Windows and VISTA, you may be afraid you’ll do something
wrong, something to destroy data or programs. You may “lose” a window! Don’t
worry—it’s still there somewhere. You may delete an icon or a program group! Does
that mean you’ve wiped away the programs? No. They’re still on the disk, and reestablishing them is a cinch.
Don’t be intimidated by the unknown. Yo u can’t do anything that can’t be undone,
and you will not do anything to permanently damage the software or hardware.
So, have at it. Try anything. Experiment to your heart’s content. Move windows
around, re-size them, and practice the keyboard and the mo use till you find the mix
of both that suits you best.
Once you get used to Windows and VISTA, you won’t want to go back to any other
software.
2-6 • Getting Started with Windows
Entertainment Partners
Chapter 3: Getting Started with
VISTA
Introduction
This section explains some overall aspects of VISTA, some things you will see and
find useful throughout all the programs, and some concepts that apply to all
programs and all windows. It also tells you how to find help easily when you need it.
Creating Your System
VISTA is the most flexible production accounting system available. Before you
begin working with it, the staff at Entertainment Partners will discuss the details of
your project with you.
They will
•
explain the many options in VISTA and what they mean to you
•
discuss field options, sizes, titles, and keying preferences
•
go over your Chart of Accounts and its components and how you plan
to use them
•
ask questions about how you want VISTA to help you
•
explore the idiosyncrasies of your production: multiple locations,
concurrent locations, currencies, bank accounts, etc.
Working together, you will establish the basic version of VISTA that will work most
productively and efficiently for you and the production.
Starting VISTA
VISTA will normally be started automatically when Windows starts.
To start VISTA from within Windows, open the Startup Program Group in Program
Manager.
The Startup Group will contain at least the following two icons: DISC Database
Server and VISTA.
Entertainment Partners
Getting Started with VISTA • 3-1
Dtrieve must be started before VISTA, so double-click on Dtrieve DISC Database
Server first, then double-click on VISTA. In Windows 95, click the Start button, put
the mouse on Programs which opens up the list of applications in that group, put
the mouse on VISTA and when that menu item opens up you will find the Dtrieve
and VISTA command. As in Windows 3.x, start Dtrieve before you start VISTA
itself.
However VISTA is started, the first thing you see is the Login window.
Enter a valid user name (Login ID) and password, and press Enter to open VISTA.
(For more information on Login ID and password, see “User Setup” on page 9-2.)
Closing VISTA
To close VISTA, select Exit from the File menu. Always close VISTA before
closing Windows and shutting down your system.
Deleting or Saving Report Services Files
Temporary report files are created and stored on your disk drive whenever you use
VISTA ReportView to see a report on-screen (see “Viewing VISTA Reports on the
Monitor” on page 5-6).
When you close VISTA, if there are report files on your disk drive, the following
Report Services dialog shows up.
3-2 • Getting Started with VISTA
Entertainment Partners
The dialog is self-explanatory, and the normal response is to press Enter or click on
OK and delete the files before exiting VISTA. But if there are reports (files) you
want to save, clicking on the Select… button brings up the following scroll list
showing the files you have to choose from.
Clicking on the Info… button shows details about the selected file (as long as only
one file is selected).
To save a file, click on it to highlight it, click OK to exit the list, then click OK in
the Report Services list to exit, delete the file(s) you didn’t mark, and save the file(s)
you did.
To save more than one file, see “Highlighting More than One Choice” on page
4-3.
Getting Help
There are three excellent sources of help for VISTA:
Entertainment Partners
1.
Manual
2.
On-line (VISTA systems with the CD ROM installation)
Getting Started with VISTA • 3-3
3.
Entertainment Partners VISTA Customer Support
The Manual covers VISTA from A to Z, with particular emphasis on background
and introductory material—understanding how and why VISTA works and how to
set the system up for your production.
Use the thorough Table of Contents or the detailed Index to home in on the answers
to your questions. Use the profuse cross-references to track even more information
on any subject. Use the Glossary to understand new terms or expressions.
On-line Help is available on your screen from anywhere within VISTA. No need to
turn away from your computer to get all the help you need in day-to-day operations.
On-line Help is up-to-date. If there’s a difference between your Manual and your
On-line Help, the On-line Help will always be more current and accurate. It is far
easier to maintain and distribute the computer help file than it is to re-print a manual
every time a change or correction is made.
EP Customer Support is always just a phone call away—professionals schooled
in every nuance of VISTA, ready to assist with any problem, answer any question.
Dial 818-955-6000 and ask for VISTA Customer Support.
Learning and Using On-line Help
On line Help is not available at this time.
Menus and Submenus
To select an option from a menu, click on the menu name in the menu bar to display
(“pull down”) the menu. Then click on the selection you want in that menu.
An arrow to the right of a menu item means that it has a submenu. Clicking on the
menu item displays its submenu. To choose from the submenu, click on the item you
want.
3-4 • Getting Started with VISTA
Entertainment Partners
Cursor Shapes
The mouse cursor in VISTA assumes three different shapes, depending on where
the cursor is located and what the system is doing.
Arrowhead This is the normal mouse cursor shape, used to select or move
by pointing.
Text Bar (Insertion Bar) The mouse cursor becomes a vertical line when it
is in an input field and the system is waiting for input—characters or
numbers—from the keyboard. Clicking on the field positions the input
cursor (flashing block).
Hourglass When the system is busy, the mouse cursor resembles an
hourglass, meaning wait. But, you may notice the mouse cursor
changes shape if you move it outside the foremost window. This means
that while you’re waiting on an operation in one part of VISTA, you
can be doing something else in another part. (See “Doing More Than
One Thing at a Time” on page 3-5.)
A separate input cursor appears in input fields as a flashing block.
Flashing Block (Input Cursor) The cursor in an input field is a flashing
block one character wide. This is not the mouse cursor. When you see
this cursor, you will also still see the mouse cursor When you move the
mouse cursor to an input field and it becomes a text bar, if you click in
that field, the input cursor appears.
Doing More Than One Thing at a Time
This may sound like a luxury—and it is —but it’s perfectly normal in Windows and
in VISTA. You may hear this called “multi-tasking.” We call it a pleasure.
Any VISTA programs can be open and running at the same time.
Entertainment Partners
Getting Started with VISTA • 3-5
Suppose you’re entering invoices and come across a vendor that hasn’t been set up
yet. You don’t have to close the invoice screen. Select A/P Vendor, Vendor Entry,
set up your new vendor, click on the Invoice Entry window, and continue entering
invoices. You don’t even have to close the Vendor Entry window—just leave it open
in case you need it again. In which case you just click on it to make it the active
window and add another vendor.
If you’re running a report that takes some time to compile, you can enter petty cash
while you wait. If you’re downloading a payroll diskette and see the hourglass, you
can run a G/L inquiry while you wait. You can even start a process in VISTA then
open your word processor or spreadsheet program and work in those until you’re
ready to come back to VISTA.
At any time, to see what applications are open, use the Alt-Tab key combination (see
“Finding Open Applications” on page 2-5).
A Peccadillo
If you move between VISTA windows and other applications regularly, you will
notice that when you return to a VISTA window, there is no active cursor even
though the window is the active window.
When this occurs, simply place the mouse cursor in any field in the window and
click; the cursor will return.
Limits
There are limits to open applications. You are constrained by the memory and
power of your computer. Opening too many applications will bring your computer to
a grinding halt. As a rule of thumb, you can open four or five VISTA application
windows with no problem. If you want to switch to yet another application, close one
or more of the other windows before doing so.
Here is the warning issued by VISTA when too many open programs are draining
too many hardware resources. Read the message carefully and follow the instructions
to avoid problems and potential loss of data.
So Don’t Get Carried Away
Microsoft Windows is an intriguing environment, especially when it’s new to you.
There are all sorts of things to play and fiddle with: desktop organization, creating
windows and moving applications around, showing all those nifty icons on the
screen, colors, wallpapers, desktop patterns, screen savers, mouse settings—and on
and on. But, after the novelty wears off, come back to basics and keep it simple.
3-6 • Getting Started with VISTA
Entertainment Partners
Every one of the flowery features uses resources, leaving fewer resources for the
software that really does your work. If you display every application and game on
your computer on your desktop, you’re just eating up valuable Windows resources.
So, if you can stand it, avoid screen savers (they’re really not necessary for new
monitors, anyway). Don’t use wallpaper or desktop patterns. Organize your key
applications into one Applications Group, and keep all your other Groups iconized at
the bottom of Program Manager. As with your literal desktop, keep your Windows
desktop clean and well-organized, lean and mean.
Blue vs. Black—and Red All Over
VISTA menus display items in black or blue text. If an item is black, it is an
available option. If it is blue, it is not available under the current conditions.
VISTA windows show text or numbers in one of two colors, black or blue. A field
shown in black can be changed by the operator; a field shown in blue cannot be
changed by the operator in this window.
Fields filled with red are required fields that must have valid information entered.
The red fill does not show up until you try to enter a transaction or request without
them. It means you must enter something in the field or what you have entered is not
a valid choice for that field.
Using the Keyboard in VISTA Windows
Here is some general information about using the keyboard in VISTA windows.
All CAPS or Not?
Whether to use all capitals when entering VISTA data or to use caps and lower case
combined is up to you. It makes no difference to VISTA. For consistency and
appearance, we suggest you stick to all of one or the other for any given project.
Keys for Moving Around
Key
Use
Tab
Moves cursor forward from field to field.
Shift-Tab or
Tilde (~)
Moves cursor backward from field to field.
Enter
Moves from a control section into the detail section of a window or
indicates a transaction, change, or request is complete and ready to be
recorded or acted on or performs the action of the highlighted button in
dialog boxes or scroll panels.
Escape (Esc) Cancels dialog boxes or scroll panels
Keys for Entering Data
Entertainment Partners
Key
Use
Insert
Toggles between Overwrite and Insert mode when entering data; default is
Overwrite.
Home
Moves cursor to the first position of a field.
End
Moves cursor to the last position of a field.
Getting Started with VISTA • 3-7
Backspace
Moves cursor one position to left in the field; does not erase character; will
not move back to prior field.
Delete
Deletes the character under the flashing cursor and moves remaining
characters one position to the left.
Left Arrow
Moves cursor one position to left within a field; does not erase data; moves
cursor to first position of prior field from first position of current field.
Right Arrow Moves cursor one position to right; does not erase data; will move cursor
from last position of current field to first position of next field.
Page Up
For input windows with multiple pages of distribution, moves up to
previous page of data.
Page Down
For input windows with multiple pages of distribution, moves down to next
page of data.
Other Special Keys
The special purposes of the Alt key in Windows have already been discussed (see
“Alt” on page 2-3). The Alt key can be used in VISTA menus and dialog boxes just
as it can in any other Windows program.
The F1 key can be pressed at any time anywhere in VISTA to bring up help screens.
Press the F11 key in any account number field where an account number has been
entered and VISTA will display the account’s description, balance, budget amount,
and EFC.
Press the F12 key in any field containing system options (vendor, company, etc.),
and a scroll panel will be displayed showing your choices (unless there is only one
choice, in which case the field will be filled in automatically when you press F12).
This function and the panel that is displayed are described more fully below.
3-8 • Getting Started with VISTA
Entertainment Partners
Chapter 4: VISTA Basics
Introduction
Here are some of VISTA’s basic operating modules, items you will see in any
application or that will effect you in any part of the system.
Scroll Panels
This is the only time you use
the right mouse button in
VISTA.
VISTA makes it easy for you to select the right data by presenting your choices for
you. Throughout VISTA when you get to a field that requires data that is already a
part of the system, you can press F12 when the cursor is in that field, or you can
place the mouse cursor in the field and click the right mouse button.
For example, if you want to modify a Vendor record, choose A/P Vendor, Vendor
Entry. From the Function Menu in Vendor Entry, select Modify. Your window will
look similar to the one shown partially below.
The flashing cursor will be in the Currency field. If yours is a multi-currency show
and the correct currency is not already showing, you can press F12 to see and select
the currency you want. Once the currency is correct, press Tab to move to Vendor
Number. Here again, you may press F12 or move the mouse cursor into the field and
click the right mouse button. This will display a list of Vendors in Vendor Number
Entertainment Partners
VISTA Basics • 4-1
order, from which you can choose the one you want to change. This may have been a
big deal at one time, but Vendor Numbers have diminished in importance now that
you can look up a Vendor by Name.
We could illustrate a scroll panel with either of the above fields, but we’ll use the
next field instead, because it’s the one you’ll use most often when looking up a
Vendor.
Selecting a Vendor
Tab the cursor to the Vendor Name field or right-click the mouse in the Vendor
Name field, and the entire Vendor list will be presented in the scroll panel in Name
order, as below.
If the Vendor you want is in the scroll panel window, double-click on that Vendor
(or click on the Vendor then click on Done) and the scroll panel will be closed and
the Vendor’s information inserted into the fields of the Vendor Entry window.
To move to the next page of Vendors, click on Next. To move backward (upward) in
the list, click on Previous. To cancel the search without selecting anything, click on
Cancel.
Narrowing the Search
To save time and narrow the search in a long list like the Vendor File, type in the
first or first few characters of information in the input field before pressing F12 or
right-clicking the mouse. In this Vendor example, typing C before searching would
produce the following:
4-2 • VISTA Basics
Entertainment Partners
Typing CA in the Vendor Name field before pressing F12 would narrow the search
to two Vendors. Typing CL would narrow the list to one Vendor and eliminate the
need to display the scroll panel.
Using the Keyboard in Scroll Panels
You can highlight the choice you want by using the Up- or Down-Arrow keys.
When the correct choice is highlighted, press Enter.
Alt key combinations do not
work in VISTA scroll panels.
To move to the next or previous page using the keyboard, Tab from button to button
until the Next or Previous button is highlighted, then press Enter.
To cancel the search without selecting anything, press Esc (escape).
Highlighting More than One Choice
In some scrolling lists, you can select more than one choice, for example, batches for
audit lists, payroll invoices for listing or posting, invoices not to be selected for
checks, etc.
To highlight more than one choice, use one of the following techniques.
To highlight a contiguous group of choices, hold down the Shift key while you
click on the first and last choices in the group. The whole group should then be
highlighted. Once the group is highlighted, release the Shift key.
To highlight various choices, hold down the Control key (Ctrl) while you click
on each of the choices you want highlighted. When you’ve finished selecting, release
the Ctrl key.
To de-select one of multiple highlighted choices, hold down the Ctrl key and click
on the highlighted choice. When you’re finished de-highlighting, release the Ctrl
key.
When all the choices you want to make are highlighted, click OK.
To find out if you can select more than one choice in a particular scroll list, just try to
highlight more than one choice. If multiple highlights show up, you can. If not, you
can only choose one option.
Function Menus
Every application window in VISTA has a Function Menu in first position on the
Menu Bar. It is the menu used to Exit every application and close it and its window.
A second item on every Function Menu is Clear Screen, used to clear all fields in
the window for a fresh start at entering data.
If the application can update data (input applications, setup applications, etc.), the
Function Menu is where you choose your operating mode: Add, Modify,
Inquire, or Delete. In some cases where data cannot be deleted, the Delete option
may be, instead, something like Inactivate. The selected operating mode is always
shown either near the top right corner of the application window or at the end of the
Title in the window’s Title Bar. Most applications open in the Add mode.
Entertainment Partners
VISTA Basics • 4-3
The operating modes work as follows:
Choose
To
Add
Add new transactions or entries
Modify
Change, modify, update data in a transaction or other entry
Inquire
Look at a transaction or other entry but make no changes
Delete
Do away with a transaction or other entry where it’s allowed
Where the Function Menu contains the standard options and the options operate
normally, the options will not be covered specifically in describing the application.
Where the Function Menu for a specific application contains a different choice, that
choice will be explained in detail in the application’s documentation.
Entry Confirmation: Press Enter
Whenever you Add, Modify, Delete, or otherwise change a transaction or entry, you
will be asked to confirm your action. This is your chance to say, Yes, this is what I
want to do, or No, don’t do that.
No transactions or entries or changes to them are entered
automatically. You must press Enter when an action is completed to
record that action.
When you press Enter to register any type of change, if all the required fields are
filled with valid data, a dialog box is displayed asking if you want to perform this
change. The response buttons are Yes and No. The dialog below is typical.
Yes is the default choice; pressing Enter will respond Yes and make the additions
or changes. This is the fastest, easiest way to respond.
You can also respond by pressing Y for Yes or N for No. Or you can click on
either button to indicate your choice.
Entry Editing and Messages
Most of VISTA’s entry editing is done when you press Enter to record a
transaction or entry. If a line of account distribution contains an invalid account
number or amount or no description, a message is displayed and the invalid field
highlighted when you press Enter. Warnings are also issued at this time. For
example, if you’ve entered a duplicate invoice number or check number, a warning is
displayed when you press Enter that gives you a chance to either accept the
transaction or decline to enter it.
4-4 • VISTA Basics
Entertainment Partners
Error Message and Warning Hierarchy
Error messages are presented one at a time. If your entry contains multiple errors,
each one will be displayed separately. For example, if you have used invalid
accounts in more than one line of distribution, an error message for the first one will
be displayed, you can correct it, then, when you press Enter again, an error message
for the next will be displayed.
After all errors (if any) are corrected, warning messages are displayed, again,
one at a time. For example, if you’ve entered an invoice number and a check number
in Invoice Entry that have previously been entered, a warning message for each will
be displayed separately, giving you a chance to change or accept the duplicate(s) one
at a time.
Batch Processing
Input data in VISTA is processed in groups of transactions or batches. Accounts
Payable invoices, Petty Cash vouchers, and Journal Entries, are input in
batches, listed for review and auditing, corrected if necessary, then posted to
transaction files and accounts.
Batch processing is the safest, most accurate, and most controlled method of input;
allowing scrutiny and correction before incorrect entries become part of your
permanent records.
Here are the common basics of creating, changing, and deleting transactions and
batches for these three major input categories.
Typical Routine
Here is a basic cycle for data entry.
Input: Create a new batch and key in documents/transactions. Stamp each
document as Entered and record its Transaction Number at the time of
entry.
Audit: Run audit reports by batch in both Transaction and Distribution sequences.
Check audit reports against original documents for accuracy and coding and spelling
errors.
Modify: Make any changes necessary.
Re-audit: If changes were made, run Audit reports again to make sure changes were
made and recorded correctly.
Post: Post each batch individually; file source documents in permanent files or for
further processing (Invoices).
While Audit Reports and Posting Reports can be run for more than one batch at a
time, running them for each batch separately provides a clearer record and better
control, especially if you save and file all your reports.
Saving and filing all your final Audit Reports and Posting Reports provides the best
audit trail for your production.
Entertainment Partners
VISTA Basics • 4-5
Computer-created batches
In addition to the batches input directly, some batches are created for you. These
automatic batches must be posted as any other batch before they effect your
account balances.
An Accounts Payable batch is created when you
•
Cancel/Reissue a check (CRBATCH)
•
Print a Quick Check for an invoice not previously entered
(QCBATCH)
•
Change distribution on a previously posted transaction (DISTCHGS)
•
Post a payroll invoice from diskette (PRBATCH)
•
Adjust tax amounts (TAXADJ)
Audit, Modify and Post these batches from the A/P Invoice menu.
A Journal Entry batch is created when you reverse a posted transaction
(REVERSAL). Audit, Modify and Post these batches from the J/E menu.
These batches, also, can be audited and changed or corrected before posting to
permanent records.
Choose Function First
The Function Menu in each input window is exactly the same, including the
following choices.
Choice
Purpose
Add
Add a new batch of transactions or new transactions to an existing
batch.
Modify
Change or add transactions to an existing batch
Inquire
Look at (but cannot change) an existing batch
Delete
Delete a transaction in an existing batch
Clear Screen
Clears Batch information if in Batch Control Area; clears transaction
information if in transaction area; clears information for fresh start; does
not update any data
Exit
Closes and exits the input window; does not update any information
The choices on the Function Menu apply to the transactions within a batch. To
create a new batch, see “Creating a New Batch” on page 4-7. To delete a batch, see
“Deleting a Batch” on page 4-8. To change batch control codes before the batch is
posted, see “Changing Batch Control Data” on page 4-8.
Batch Control Area
Each of the main input functions—A/P, P/C, and J/E—have a Batch Control Area in
the top left corner of the program’s window. The Control Area establishes which
Company, Currency, and Batch ID you want to work in when you first go into the
batch process. A/P also requires Bank Code (see “Bank Account” on page 9-11 );
Petty Cash also requires P/C Code (see “Petty Cash” on page 9-14).
4-6 • VISTA Basics
Entertainment Partners
Here is the Control Area for A/P (the Batch Control box).
The available choices for the primary control fields can be accessed using F12 or
right clicking in the field to bring up the appropriate scroll panel. You can also press
F12 or right-click in the Batch field to select a batch that already exists.
Creating a New Batch
To start a new batch, just enter the new batch ID in Add mode.
In the Amount field, you may enter a batch total; you may also leave it zero. This
total is for information only. As you enter transactions, the net total will be
displayed. When you’re finished entering, you can compare your total to the net total
for control, but no programmed comparison is made.
Controlling Batch Year/Period
A batch can be designated for the Current Period or Next Period, and the
designation can be changed at any time before the batch is posted.
To choose a designation, use the Ledger Period Menu in the input window menu
bar and select either Current Period or Next Period.
Do not mix entries for different periods within the same batch.
To make sure all transactions are posted to the next-period batch,
select Ledger Period Next Period for each transaction in the batch.
The batch’s Year/Period is shown in the information area for each type of input.
A batch for Next Period can be posted without affecting the balances or the closing
of the Current Period.
Leaving the Control Area
You cannot leave the Control
Area using the mouse.
When the Control Area is as you want it, press Enter. This is the only way to leave
the control area and move the cursor into the transaction area.
Returning to the Control Area
To return to the Control Area from the transaction area, select Unlock Batch on the
input window’s Batch Menu. If there is data in displayed transaction fields, it is
advisable to choose Function Clear Screen before starting anew in the Control Area.
Entertainment Partners
VISTA Basics • 4-7
Changing Batch Control Data
To change the control information of a batch before it’s posted—Company,
Currency, etc.—select Util Batch Modification from VISTA’s Main Menu.
Click on the button for the type of batch—A/P, J/E, or P/C—then enter the control
data of the batch you want to change (or use F12 or right-click to select the batch
from a scroll panel). Enter the new data in the fields in New Batch Heading, and
press Enter when done. You will be asked to confirm the Batch Transfer
(Modification) click Yes to complete the change(s).
Once a batch is posted, this information cannot be changed.
Deleting a Batch
To delete a whole batch, use the Batch Menu in the input window.
Select Batch Delete. If only one batch exists, the batch ID and total will show in
the appropriate control fields. If more than one batch exists, the scroll panel will
display the open batches. Select the batch you want to delete, then click on OK.
You are asked to confirm the delete before it takes effect. If you respond Yes, the
entire batch will be deleted. If you respond No, the batch will not be deleted.
Editing and Posting a Batch
Once a batch is entered, it is usually printed for auditing. After the review, changes
or corrections are made, if necessary. Then the batch is posted. (The specifics of
audit lists and posting are covered in the sections on each type of input.)
When a batch is posted, its transactions become part of the permanent records and
the effects on accounts are posted to those accounts.
Once posted, the batch as an entity ceases to exist, but the transaction always carries
its batch ID and will be displayed on transaction reports for reference.
4-8 • VISTA Basics
Entertainment Partners
Purchase Order Session ID
Purchase Orders are entered in groups identified by Session ID. These Sessions
need not be fully processed before the information effects cost reports. This subject
is covered exhaustively in the “Purchase Orders - P/O Menu” section, beginning on
page 12-1.
Per Diem Batches
Per Diems are entered in batches, also, and they can be edited before being posted.
But there is enough difference in the way they are entered and handled by VISTA
that their batch processing is covered separately in the chapter on Per Diems.
Currency Report Options
Throughout VISTA, in many report specification windows, you’ll see the following
choices:
For any report offering these choices, the choices you make are shown in the report
header on every page.
These choices refer back to Currency Setup, and always offer these options:
Currency Conversion
The Base Currency is the currency that has been designated by the User as the
primary currency in which costs will be entered. Native Currency is the currency
of the location in which the production is shooting. Local costs will likely be
recorded in the local, Native, currency.
Click on Base or enter B to show amounts converted from Native to the Base
Currency. Click on Native or enter N to show amounts in Native Currency as
originally entered.
If you’re listing Pound Sterling transactions and your Base Currency is US
Dollars, choosing Native would show amounts in the original Sterling as entered;
choosing Base would show amounts converted from Sterling to US Dollars.
If you’re listing US Dollar transactions and your Base Currency is US Dollars,
your choices in these fields will not make any difference in the report amounts.
Exchange Rate
Click on Budget or enter B to use the budgeted exchange rate for currency
conversion. Click on Current or enter C to use the Current exchange rate for
currency conversion.
Your choice here makes a difference only if you’re converting amounts from
another currency to Base Currency (and have chosen Base in the Currency
Conversion field) and your Budget and Current Rates are different as recorded in
Currency Setup for the other Currency.
Entertainment Partners
VISTA Basics • 4-9
For more information, see “Currency” on page 9-7.
Keying Decimals
Whenever you enter a currency amount in VISTA, you have the option of keying the
decimal point or not.
If you enter the decimal point, you only need to enter significant digits after the
decimal. That is, to enter $500.00, you would only have to key “500.” and press Tab.
To enter $25.50, you would only have to key “25.5” and press Tab.
If you don’t want to bother with keying decimal points, you can enter the amount in
full, including any digits to the right of the decimal, and VISTA will place the
decimal point automatically. To enter $500.00, key “50000” and press Tab; to enter
$25.50, key “2550” and press Tab.
Note: If you don’t key the decimal point, VISTA will not always place the decimal
so you can see it as soon as you leave the field, but it will always be placed correctly.
Also, if you don’t key the decimal, you must enter the number of digits to the right of
the decimal that has been declared for this Currency in Setup (see “Number of Places
to the Right of the Decimal” on page 9-9). Normally this will be two digits or places.
But if Setup Currency has specified more or fewer digits for input fields, your input
must comply with the spec.
For example, if Number of Places to the Right of the Decimal for Entering Amounts
is set to three (3) for a Currency, then you’d have to key “500000” to enter 500.000
units of that Currency.
Transaction Numbers
Every entry that effects account balances is automatically assigned an eight-digit
Transaction Number by VISTA as soon as it is input. The numbers begin with 1
and are incremented by one as they are assigned. Transactions that remain in the
system retain their Transaction Number.
Examples of transactions: an invoice, a petty cash voucher or envelope, a journal
entry, a purchase order.
In addition to the Transaction Number, a four-digit line item number is
automatically assigned to each line of account distribution. Thus an invoice will have
one Transaction Number and a line item number identifying each line of its
distribution.
While Transaction Numbers are assigned in a continuous sequence, the sequence
will not remain intact throughout the life of your system.
Examples of transactions that may “disappear” (along with their Transaction
Numbers) from the system: transactions in batches that are deleted, transactions that
are deleted before batches are posted, POs that are canceled or fulfilled.
Account Distribution Entry
Data-entry Distribution Lines in VISTA are consistent from program to program,
making it easy to get used to the entry format whether entering PO’s, Invoices, Petty
4-10 • VISTA Basics
Entertainment Partners
Cash, or Journal Entries (there is no Tax Code in Journal Entry Distribution). Here
the basic distribution line is described. Any idiosyncrasies in particular programs are
detailed in that program’s chapter.
The number at the left of each line is the line number. There can be up to 50
distribution lines per input transaction. As you fill in the lines, VISTA will move
automatically to the next set of five lines, through up to ten “pages” of five lines
each. To move yourself through these pages, use the Page Up and Page Down
keys.
Input fields
The left-most field is the Account Number, in the format for your production,
including Set, Insurance, and Free fields.
When you have entered a complete account number, you can verify it
instantaneously by pressing F11. If the account number is valid, a window is
displayed showing the account numb er and title and amounts.
If it is not valid, a small message window tells you that, too.
Enter the amount for the line in the Amount field. For keying options, see “Keying
Decimals” on page 4-10.
The Description field will hold up to 40 characters of description for this line.
Description cannot entered as blank, but, for every line after the first, Description
will repeat automatically from line to line if you leave the field blank as you tab
from one line to the next.
The Tx Cd field is for the 1099 Tax Code, if applicable to this line and this
Vendor. To enter a Tax Code, you can enter it directly, if you know it, or, once the
cursor is in the field, press F12 to see the available codes and select the appropriate
one from a scroll panel.
Entertainment Partners
VISTA Basics • 4-11
Error Messages
When you’ve finished your distribution entries and press Enter to record the
transaction, VISTA checks your transaction for errors. There are particular error
checks associated with different input types, and they are described in those sections
of the documentation (PO’s, A/P, P/C, J/E). For the distribution lines, there are
the following error checks line by line no matter which type of input. (The sample
messages shown are from A/P Invoice Entry, but the messages will be the same for
any input.)
To clear an error message from the screen, press Enter or click on OK. The field
in error will be highlighted in red in the input window and the cursor will be located
in the field in error.
Errors are checked for and reported line by line in the following sequence:
Account validation: The account number is validated through the Set segment,
and must be on the Chart of Accounts. If not, the following message is displayed and
the Account field of the error line is highlighted in red. Fix the Account Number or
add the Segment to the Chart of Accounts.
Remember, you can validate Account Numbers as you enter them by pressing
F11 after completing the Account field while the cursor is anywhere on that
distribution line. Insurance and Free fields are not validated in the F11 process.
Memo Fields validation (Insurance and Free fields): Any entries to
Insurance or Free fields have to have been defined in Setup (see “Insurance/Free
Field” on page 106). Entries in these fields must be exactly like those in the Setup
Tables. For example, if an Insurance field is defined as 04, entering 4 with no
leading zero will cause an error message.
Amount field: The Amount field must contain a number, even if the number is
zero. A blank Amount field will cause the following error message and highlight
the Amount field on the error line in red.
4-12 • VISTA Basics
Entertainment Partners
Note: VISTA will accept Distribution Lines with zero amounts as valid. To delete
a line of Distribution, replace the entire line with blanks.
Description field: The Description field of every Distribution Line must contain
something, i.e., it cannot be blank. A blank Description produces the following error
message.
Remember, after the first line of Distribution, if Description is left blank, the
Description from the previous line will be copied automatically and no error
message will be generated.
Tax Code: Several messages might be displayed regarding the Tax Code on a given
line. (Does not apply to Journal Entries.)
If you enter a Tax Code on any Distribution Line for a Vendor that has not been
designated as Subject to Tax, VISTA will not accept the Tax Code. Your choices
are to delete the Tax Code or update the Vendor record as Subject to Tax (see
“Income Tax Section” on page 11-6 for setting up Vendors).
If you enter an invalid tax code for a Vendor Subject to Tax, the following
message is displayed. Fix or eliminate the Tax Code in the error line. Remember that
pressing F12 in the Tax Code field displays the valid codes in a Scroll Panel for your
selection and avoids this error.
Entertainment Partners
VISTA Basics • 4-13
If you do not enter a Tax Code for a Vendor that is Subject to Tax, the following
warning is displayed. To go back and enter a Tax Code, press Enter or Y or click
Yes. To ignore the warning, press N or click No.
Note: No matter how many lines of Distribution, this warning is issued only once
and only if none of the lines contains a Tax Code.
Vendor Name in Description
In some older systems, it became customary to include an abbreviated Vendor
Name in the Description field, because Vendor Number was all that showed on
some system reports. That is not necessary in VISTA, because Vendor Name is
shown in every system report. You are free to use the limited Description space for
more specific date and other details.
VISTA Chart of Accounts
The Chart of Accounts in VISTA is specifically designed for the entertainment
industry. The numbers and names you assign to various account-number
components are up to you, but the structure of the Chart and the codes that produce
Cost Reports and other financials are strictly defined. Within these definitions,
however, there is abundant flexibility.
It is important to understand three concepts about your VISTA Chart of Accounts:
4-14 • VISTA Basics
•
Segmentation of Production Cost Accounts
•
Break Levels
•
Account Type
Entertainment Partners
Charts of Accounts for productions are all the same and all different. Because they
are “all the same,” chances are your VISTA system will come with your Chart of
Accounts already set up. Because they are “all different,” you will surely want or
have to make changes.
Your understanding of the three concepts discussed here is vital to making
logical, error-free changes to your chart. And it will help you make the most of
VISTA for your production.
Production Cost Account Segments
A typical account configuration is Location, G/L, Production Number, Account
Number (Detail), and Set Number. Expressed as the codes you will see in VISTA,
this configuration will appear as
LO G/L PROD DETL ST
XX XXX XXXX XXXX XX
LO, G/L, and PROD make up the Production Number Segment of the account;
DETL is the Detail Account Segment; and ST is the Set Segment.
Why is this important? Because it saves you time and disk space.
Remember: Segments apply
only to Production Cost
Accounts
The Segments work together so that you don’t, for example, have to enter an account
for every account and set number combination, nor do you have to enter a separate
set of accounts for every production number you create.
Once you establish your Detail accounts, they are valid for every Production Number
you add. Set Numbers added for a specific Location are automatically available for
every Production Number using that Location and every Detail Production Cost
Account.
Break Levels
A Break Level is a number assigned to each account that tells VISTA how to
summarize account balances into meaningful levels of sub-totals and totals. The
higher the number, the lower (more detailed) the total level.
In a report in Chart-of-Account sequence, the totals for each Break Level are
“rolled” (totaled) into the next higher level (lower Break Level number). For
example, the totals of a series of Level 5 accounts are added together and become the
total for the preceding Level 4 account; the totals for a series of Level 4 accounts
become the total for the preceding Level 3 account, etc. (See second table below)
Generally, the higher level (with lower Break Level numbers, such as 1, 2, and 3)
accounts are Header accounts; input is not coded to them, they just help define the
Chart of Accounts. The lower level (with higher Break Level numbers, such as 5, 6)
accounts are the detail (coding) accounts to which transactions are charged.
The following examples may or may not look exactly like your Chart of Accounts,
but they will give you an idea of how to assign Break Levels to your own chart. The
number of levels you have will depend on the complexity of your coding scheme and
chart.
Here are typical Break Levels for the sample account structure shown in “Production
Cost Account Segments” on page 4-16.
•
Entertainment Partners
The highest Break Level (grand total) is 1, usually the total of the entire
chart of accounts (Company).
VISTA Basics • 4-15
•
The next Break Level is 2, usually used for the major categories of
accounts: assets, liabilities, and production costs.
•
Break Level 3 is used for divisions within each major category, such as
Cash, Advances, and Deposits within the major category Assets.
•
Break Level 4 designates accounts within the major categories, such as
individual advances within the Advances category.
•
Break Level 5 is used for sub-accounts within accounts.
•
Break Level 6 is used for Sets.
To relate Break Levels more specifically to the account-number structure, here is a
typical scenario:
Break Level
Account Component
1
Company
2
G/L
3
Production Number
4
Detail
5
Sub-Detail
6
Set Number
Here is another table to help you visualize the assignment of Break Levels —the
partial structure of a typical Chart of Accounts.
Account No.
Description
Break Level
01 000 0000 0000 00
Company
1
01 100 0000 0000 00
G/L
2
01 100 1000 0000 00
Production
3
01 100 1000 1000 00
Detail
4
01 100 1000 1010 00
Sub-Detail
01 100 1000 1010 01
Set
01 100 1000 2000 00
Detail
01 100 1000 2002 00
01 100 1000 2003 00
01 200 0000 0000 00
01 200 1000 0000 00
5
6
4
Sub-Detail
5
Sub-Detail
5
G/L
Production
2
3
Picture your Chart of Accounts as an outline; different Break Levels are assigned to
each different indentation level in the outline, and they must be consistent throughout
the chart.
Account Types
Account Types, like Break Levels, also tell VISTA how to summarize your account
balances into meaningful production totals. The difference between Break Levels
and Account Types is this:
Break Levels apply to individual accounts, and, except for the highest Break
Level 1, are assigned throughout the chart according to the account’s hierarchy.
4-16 • VISTA Basics
Entertainment Partners
Account Types, on the other hand, apply to sections of the Chart of Accounts, and
all accounts of the same Type must be contiguous in the chart and contain the
same Account Type Code.
Here is a table of some Account Type Codes in alphabetical order.
Account Type Code
Account Type
A
Assets
E
Production Costs
EA
Expense Above the Line
EB
Expense Below the Line
EC
Expense Below the Line Post-Production
ED
Below-the-Line Other Charges
EE
Below-the-Line Contingencies
EF
Completion Costs
EG
Cost Recovery/Transfers
EX
Expense
I
Income
L
Liabilities
Note that the structure of the Account Types table mirrors the structure of a Chart of
Accounts, because all related Account Types are grouped together.
There is nothing sacred about the codes used, the number of codes or sections to
your chart, or the placement of the sections within your chart. In fact, you can make
up your own codes in VISTA (see Setup Menu “Cost Account Types” on page 9-16).
What is sacred—what must be—is that all accounts in a given section must be
together (contiguous), and all those accounts must have the same Account
Type.
Slipping an EC type onto an account in the middle of the EB accounts invalidates
your Cost Reports, making them worthless, so be very careful when assigning
Account Type to a new account.
More on Accounts
For more information on the Chart of Accounts, see Setup Menu, “Cost Account
Types” on page 9-16, and the Chapter, “Chart of Accounts” on page 10-1.
Entertainment Partners
VISTA Basics • 4-17
This page left blank intentionally.
4-18 • VISTA Basics
Entertainment Partners
Chapter 5: VISTA Report Services
Introduction
Every report generated by VISTA is processed through the system’s unique Report
Services. The User has the choice of printing VISTA reports to the screen via
ReportView, or to any one of any number of printers to which the User is
connected.
Generating VISTA Reports
When printing a report in VISTA, the Select Printer dialog box will appear.
The scroll list at the left in the Select Printer dialog box displays the list of available
printers plus VISTA’s ReportView. ReportView sends the report to the User’s
monitor for viewing on the screen. The printers on the scroll represent, and are
discussed in the following section. When the Select Printer dialog first appears, the
default printer is always highlighted in the scroll list.
Printing to the Default Printer
To print the report to the default printer with the options as shown, simply press
Enter or click on OK.
Entertainment Partners
VISTA Report Services • 5-1
Selecting a Different Printer
To select a printer other than the default-designated printer: Click on, or use the Upand Down-Arrow keys to highlight the destination printer. Once the destination
printer is highlighted, the following options.
Print Options
Option
Description
Fonts...
Clicking on the Fonts button displays a list of available fonts for your
reports. VISTA reports use TrueType mono-spaced fonts, all of which will
yield similar results, so choosing a different font will not repre sent dramatic
differences in your reports.
Setup...
Clicking on the Setup button displays the Windows setup options for the
printer you’ve selected. You will seldom need to use this option.
Create
Backup
In addition to printing the report, you can create a report file that can be
viewed later in VISTA’s ReportView. To do so, click on Create Backup
so that an X fills the checkbox next to it. To erase the X, click on Create
Backup again.
Disable
Shading
Clicking on Disable Shading toggles between including or excluding
shading in your report. An X in the checkbox next to Disable Shading means
no shading will be printed or shown on the screen. Note that when you
disable shading it remains disabled for subsequent reports until you change
your preference again .
Disable
Borders
Clicking on Disable Borders toggles between including or excluding
borders in your report. An X in the checkbox next to Disable Borders means
no borders will be printed or shown on the screen.
Note that when you disable borders they rema in disabled for subsequent
reports until you change your preference again.
Printing
To print the report, click on the OK button in the Printer Select dialog box. The Print
Report dialog will be displayed, telling you which report is being printed and what
page is being generated.
Canceling a Report
To cancel the report before you start, click on the Cancel button or press the
Escape key in the Printer Select dialog box.
To cancel the report after it’s started and while the Print Report dialog is on screen,
click on the Cancel button in the Print Report dialog box.
To cancel the report from Windows Print Manager, see “Canceling a Report from
Print Manager” on page 5-3.
See “So Why Won’t it Stop Printing” on page 5-4
5-2 • VISTA Report Services
Entertainment Partners
Windows’ Print Manager
The Print Manager stages or queues reports for printing and monitors their progress
as they’re printed. It also monitors the status of your printers.
If you’re using VISTA on a network, the Print Manager should always be active
(running) on the computer to which the printer is attached. It will normally be at the
bottom of the Windows desktop screen as the icon shown above.
Note: See “Never Close Print Manager” on page 5-4.
To examine the contents of Print Manager, double-click on its icon. Below is a
typical view of the Print Manager window.
The window shows all the printers available in your Windows setup, your default
printer, any reports being printed or in the queue for each printer, and the status of
each printer and report.
Notice in the picture above, the HP LaserJet III is underlined to indicate it is the
default printer (there can only be one default printer). Also notice its status is
“Stalled.”
Resuming Printing
When a printer has run out of paper or is off-line for some reason, the Print Manager
will show it as stalled. When this happens, you must get the printer ready, then restart it from Print Manager.
Open the Print Manager window, click on the printer that is stalled, and then select
Resume Printer from the Print Manager Printer Menu.
Likewise, if a report has stalled and the printer is ready, click on the report line to
select it, and then choose Resume Printing Document from the Print Manager
Document Menu.
Canceling a Report from Print Manager
To cancel a report that is printing from Print Manager, open the Print Manager
window by double clicking on its icon. Click on the report you want to cancel, then
Entertainment Partners
VISTA Report Services • 5-3
choose Delete Document from the Print Manager Document Menu or press the
Delete key.
You will get a dialog box asking you to confirm the deletion. Click OK and the
report will stop printing. (See “So Why Won’t it Stop Printing” on page 5-4.
Never Close Print Manager
If you’re in a VISTA network, never close Print Manager. When you’re finished
with the Print Manager window, click once on the Close button in the upper left
corner of the window and select Minimize from the Menu (as illustrated below), or
click on the Minimize button (the down arrow in the upper right corner of the
window). This will return Print Manager to the bottom of the screen as an icon, but it
will still be running.
So Why Won’t it Stop Printing?
You’ve probably noticed that canceling a report—on any system—doesn’t always
stop the printer right away. Sometimes you can even turn the printer off to stop a
report only to find it still running when you turn the printer back on! Likewise, in
VISTA, when you cancel a report, it won’t stop printing immediately. In fact, if it’s
not a long report or you’re near the end, you may get the whole report anyway.
Why? Modern computers, printers, and software do everything they can to process
printing independently. The reason is to let the computer free so you can get on with
your work even while your report is printing. They also do everything they can to
make sure a printer malfunction in the middle of your report won’t cause you to lose
the report. To this end, printers themselves are equipped with memory chips that
retain report information. When you really want to cancel a report, these efforts may
seem more bane than blessing, because, while the report hasn’t started printing yet, a
good number of pages may be already on their way to the printer and may be beyond
recall.
What can you do? Nothing other than doing it as quickly as you can when you have
to cancel. It wouldn’t be very productive to defeat the advantages of speedy printing
for the sake of the few reports you may have to cancel. Just recycle the pages you
didn’t mean to print.
If You Run Out of Paper...
Inevitably your printer will run dry in the middle of a report. If you get more paper
into it before Print Manager notices, you’ll be fine. If you don’t—if your report
comes to a halt—it’s important that you follow this sequence in re-starting it.
5-4 • VISTA Report Services
Entertainment Partners
Open Print Manager. It will show! ERROR status by your printer and the status
message at the bottom of the window as shown below. In this state, Print Manager
has stopped sending data to the printer.
To make sure your report finishes smoothly:
1.
Put paper in the printer’s paper tray, but don’t insert the tray yet.
2.
Go back to Print Manager, choose Printer Resume Printer from the
menus. The! ERROR status message should be replaced with
> Printing.
3.
Quickly insert the printer’s paper tray and continue printing.
It’s vital that you Resume Printer in Print Manager before re-starting your printer. If
you re-start the printer first, the remainder of your report may be garbled, and you
may have to start the whole thing over again.
Getting to the above Print Manager functions in Windows 95 is off the main Start
menu. Select the Printers icon; you can also get to it via the Control Panel. The
functionality under both environments is mostly the same.
Entertainment Partners
VISTA Report Services • 5-5
Viewing VISTA Reports on the Monitor
Whenever you print a report in VISTA you have the choice of showing it on-screen
rather than sending it to a printer. With VISTA, what you see on the screen is always
exactly what you would see from the printer, too.
Choosing ReportView
As mentioned above, when the Select Printer dialog box is displayed, the default
printer is always highlighted first. To select ReportView, use the Up or Down
Arrow keys to highlight ReportView or click on ReportView to highlight it, then
press Enter or click OK.
Options
The Fonts and Setup options are not available in ReportView.
Create Backup is not necessary in ReportView because a file is created and saved
automatically.
Disable Shading and Disable Borders work exactly as they do for a printed
report. For information on these options, see “Print Options” on page 5-2.
Running the Report
When you have selected ReportView in the Printer Select dialog and selected any
options you want, press Enter or click on OK to run the report.
The Print Report dialog box will be displayed just as if you were printing to a printer.
5-6 • VISTA Report Services
Entertainment Partners
Canceling the Report
To cancel the report while it is running, click on the Cancel button in the Print
Report dialog box.
The ReportView Icon
When the entire report has been created for ReportView, the ReportView icon will
be displayed at the bottom of your screen.
Double-click on this icon to display the ReportView window.
The ReportView Window
There are two ways to display the ReportView window.
You cannot see a full page at
once in ReportView.
1.
If you have just run a report to ReportView, the ReportView icon will
be showing at the bottom of your screen. When the report is complete,
double-click on the icon to open the ReportView window.
2.
You can also open ReportView at any time by choosing Report
Services from the Util Menu on VISTA’s Main Menu bar.
If the window is not maximized, it will be helpful to maximize it so you can see as
much of your report as possible. Click the maximize button, the center of the three
buttons in the upper right corner of the window.
This is the window in which all your screen reports will be viewed. The Menus in
ReportView work just as the menus in any other Windows application.
You can have more than one report open at once in the ReportView window, but
only one report will be active at a given time.
The title of the open active report is shown in the ReportView window Title Bar
unless the active report window is maximized; then Page n of n is shown.
Entertainment Partners
VISTA Report Services • 5-7
File Menu
When no report is open in ReportView, the File Menu contains only the options
New and Exit. When a report is open, the File Menu contains all the options listed
below.
Choice
Description
List
Displays a directory of all reports currently residing in ReportView’s buffer.
Update
Adds to the List any reports that have been imported into ReportView via a
source other than VISTA (via modem, e.g.).
Delete
Simultaneously closes and erases the active report.
Close
Closes the active report in ReportView.
Print
Sends the active to the printer.
Send To
(This option is under development and not available at this time.)
Exit
Closes all reports in the ReportView window and closes ReportView itself.
Report Services File List
This dialog box opens when you select File New in the ReportView Window
5-8 • VISTA Report Services
Entertainment Partners
The Report Services File List shows all reports on your disk drive and the details
about what they are, when and by whom (which user) they were created, and how
many pages they contain. To select and see the details of a particular report, click on
it so it’s highlighted.
To open the highlighted report, click on OK.
To delete the highlighted report, click on Delete. The highlighted report will be
permanently deleted from your disk drive.
View Menu
When no report is open, this menu contains only the Toolbar and Status Bar options.
When one o r more reports are being viewed, it contains all the options listed below.
Choice
Description
Toolbar
Toggles display of the Toolbar on and off.
Status Bar
Toggles display of the Status Bar on and off.
Jump...
Allows you to go directly to a particular p age number in the active report.
Shading
Toggles line shading in the active window on and off.
First, Prev,
Next, and
Last Page
Move you to the particular page in the active report.
Window Menu
This menu is on the Menu Bar only when at least one report is open in ReportView
window. It is used when more than one report is open.
Entertainment Partners
Choice
Description
Cascade
Will arrange the open reports in an overlapping array from the top left corner
downward.
Tile
Will arrange all open reports in equally sized windows from top to bottom.
Arrange
Icons
Will arrange the icons for any open minimized reports across the bottom of
the ReportView Window.
List of
Open
Listed beneath the Arrange Icons option on the Window Menu will be all
open reports with a check mark t o the left of the active report.
VISTA Report Services • 5-9
Open
Reports
open reports with a check mark t o the left of the active report.
Help
This menu offers information about the version of ReportView you’re using and
Help for using ReportView.
ReportView Toolbar
The Toolbar is a series of “buttons”—icons—that represent certain menu choices.
You can click on these buttons to save time instead of selecting a menu and a menu
choice.
Button
Purpose (Menu Choice)
File New
File Close
File Exit
File Print
View First Page
View Previous Page
View Next Page
View Last Page
View Jump… (to a particular page number)
Viewing Your Report
To open a report you just printed, select File New from the menu or click the File
New button. Your report will open in its own window within the ReportView
window, like this.
5-10 • VISTA Report Services
Entertainment Partners
Vertical Split Control Button
Vertical Scroll
Button
Vertical Scroll Bar
Horizontal Scroll
Button
Horizontal Scroll
Bar
To open other reports, choose File New or click the File New button and choose the
report you want to see from the Report Services File List.
Maximize the view of your report by clicking on the maximize button in the upper
right corner of its window.
What shows in the ReportView window is part of a page in your report. To view
different parts and pages of your report, VISTA provides some standard Windows
capabilities.
Scroll Bars
To move around a page, use the scroll bars to the right and bottom of the report
window. The scroll bars are shaded areas that border the window and have an
arrowhead at either end. The one to the right is for vertical scrolling (up and down
the page); the one at the bottom is for horizontal scrolling (from side to side).
Between the arrowheads within each scroll bar is a small square scroll button. The
position of this button between the arrowheads indicates the relative position on the
page of the area in view. In other words, if the button in the vertical scroll bar is
about halfway between the up and down arrowheads, then what you see in the
window is about the middle of this report page. If the button is at the top of the
vertical scroll bar, you’re looking at the top of the page. If the button is to the left in
the horizontal scroll bar, you’re looking at the left side of this report page. And so
on.
To move the button—and thus the page—around in the window, you can
•
Entertainment Partners
Click on either of the arrowheads at the ends of either scroll bar.
VISTA Report Services • 5-11
•
Click in the scroll bar on either side of either scroll button.
•
Drag either scroll button to the relative vertical or horizontal position
you want.
Paging
To move from page to page in your report
•
Press the Page Up or Page Down keys.
•
Click on the page arrow or page jump buttons in the Toolbar.
•
Select a particular page from the View Menu.
When you move from page to page, the same relative area is shown for each new
page.
Splitting the Screen
Suppose you want to see more of a page than will show in one window, such as the
left-most column and the right-most column of a report at the same time. You can do
this by splitting the screen into two windows and choosing what will be displayed in
the left portion and what will be displayed in the right.
At the left of the horizontal and the top of the vertical scroll bars (left and above the
arrowheads) are small split control buttons, which you can move with your
mouse to split the screen.
To split the screen vertically, move the mouse cursor to the vertical split button at
the lower left of the window and drag it to the right until the split bar is where you
want it. (You can reposition the split bar by dragging it at any time. To get rid
of the split, drag it to the far left again.) When you release the mouse button, the
screen will be split from top to bottom into two windows with the same view of your
report in each window. Each window now has a separate horizontal scroll bar, so you
can move the report in each window independently.
To see the left side of the page in the left-hand window, scroll to the left in that
window. To see the right columns of the report in the right-hand window, scroll to
the right in that window until you see what you want to see.
From this point, the horizontal positioning will not change unless you change it, but
the two windows will remain synchronized as you move up and down the page
or from page to page.
Below is an illustration of a Chart of Accounts report with a vertical split.
5-12 • VISTA Report Services
Entertainment Partners
To split the screen top and bottom, drag the horizontal split control down from the
top of the vertical scroll bar. It works just as the vertical split. A horizontal split
might be used to keep column totals at the top of the window while scrolling through
a page’s detail lines.
Entertainment Partners
VISTA Report Services • 5-13
This page left blank intentionally.
5-14 • VISTA Report Services
Entertainment Partners
Chapter 6: VISTA Report Options
Overview
The report options in VISTA are so many they can be intimidating to a new user.
They are a second layer, so to speak, of flexibility and customization on top of a first
layer—the completely customizable account, code, and field structures.
They give you the power to select, sequence, sub-total, view, analyze, and even
export your data in the ways most critical to you and to the other managers of your
production.
The reports we’re talking about here are those that involve two or three components
in order to set up and run:
•
Positional Trial Balances
•
Cost Reports
•
FLEX Cost Reports
•
Flex Ledger Inquiry
All of these reports come with basic or default setups already created for your
system, so you don’t have to make changes or create new ones. But understanding
how they work will give you capabilities beyond anything you can get with any other
system.
Relationships: Down vs. Across
It may help to understand these building-block steps by seeing them as follows:
•
The first Setup Tables format a report down the page.
•
The second Setup Tables and Run choices format a report across the
page.
This is a generalization, but a pretty accurate one. It applies to all the reports except
the G/L Inquiry.
For example, in a Setup Positional Trial Balance Table, you’re telling VISTA
what account ranges to include, how to sequence them (as you go down the report
page), what to call them, and where to sub-total and total them (as you go down the
report page).
Entertainment Partners
VISTA Report Options • 6-1
When you get to Per Close Positional Trial Balance Report to actually run the
Positional Trial Balance, you tell VISTA what you want to see in the three columns
across the report page. You can also limit the content going down the report page,
but only within the setup dictated by the report’s Table.
Here is a summary table of multi-step reports showing how they’re put together.
Report
Setup
Second Setup
Run
Positional Trial
Balance
Menu: Setup Positional T.B. Table
N/A
Menu: Per Close Positional T.B.
Report
Define sequence, account ranges,
positional control breaks within
account number, titles, and subtotaling.
Cost Transactions Menu: Setup Cost Table
Choose currency, time period,
balances to be printed, and whether
to export file.
N/A
Uses default cost table REPT603
Choose currency, detail/ summary or
both, actual/POs or both, production
number to be reported, set display,
account range, specific set, time
period, and conversion and
description specs.
Define sequence, account-type
ranges, headings and range
descriptions.
Set Cost
Menu: Setup Cost Table
N/A
Uses default cost table REPT601
Menu: Setup Cost Table
N/A
Uses default cost table REPT604
Menu: Setup Cost Table
N/A
Uses default cost table REPT601
6-2 • VISTA Report Options
Menu: Cost Set Cost Consolidation
Choose currency, detail/summary or
both, consolidation, a production
number or all production numbers,
whether to include POs and sets,
account range, time period, and
conversion, number format, and
account description specs.
Define sequence, account-type
ranges, headings and range
descriptions.
Distribution Cost Menu: Setup Cost Table
Report
Define sequence, account-type
ranges, headings and range
descriptions.
Menu: Cost Episodic Cost
Choose currency, year/period,
detail/summary or both, conversion
and number format specs,
amortization and pattern budget
specs, and details for up to 50
episodes.
Define sequence, account-type
ranges, headings and range
descriptions.
Set Cost
Consolidation
Menu: Cost Set Cost Report
Choose currency, detail/summary or
both, production number and set to
be reported, whether to include POs,
account range, time period, and
conversion and number format specs.
Define sequence, account-type
ranges, headings and range
descriptions.
Episodic Cost
Menu: Cost, Cost Transactions
N/A
Menu: Cost Distribution Cost Report
Entertainment Partners
Report
Setup
Second Setup
Run
Flex Production
Cost
Menu: Setup Cost Table
Menu: Setup Flex Cost Table
Menu: Cost Flex Production Cost
Defaults available.
Four defaults available.
Flex Production
Cost
Consolidation
Ledger Inquiry
Define sequence, account-type
ranges, headings and range
descriptions.
Choose currency, one or all
Define report layout: title, page size production numbers, detail/summary
and orientation, number of columns, or both, set display, account range,
column headings, formulas, contents, time period, and conversion specs.
and number formats. Choose Cost
Table.
Menu: Setup Cost Table
Menu: Setup Flex Cost Table
Defaults available.
Four defaults available.
Menu: Cost Flex Production Cost
Consolidation
Define sequence, account-type
ranges, headings and range
descriptions.
Define report layout: title, page size
and orientation, number of columns,
column headings, formulas, contents,
and number formats. Choose Cost
Table.
Choose currency, one or all
production numbers, detail/summary
or both, account description source,
set display, account range, time
period, and conversion specs.
Menu: Setup Flex Ledger Inquiry N/A
Table
Default available.
Define report layout: title, page
orientation, account segment
breaks, detail lines (fields, field
sequence, size, alignment, spacing,
headings, and conditions).
Entertainment Partners
Menu: G/L Ledger Inquiry
Choose currency, account range,
time period, transaction-number
range, source code, sort sequence,
detail or summary, conversion specs,
and whether to export file.
VISTA Report Options • 6-3
This page left blank intentionally.
6-4 • VISTA Report Options
Entertainment Partners
Chapter 7: VISTA Menu Map
Introduction
Whenever you start VISTA or close all other VISTA programs , what’s at the top of
your screen is the DISC VISTA Main Menu. Here is a Menu Map to give you a
picture of what each menu offers and how to get where you want to go.
File
Exit
Close VISTA system
About...
Show VISTA version information
User Setup
Establish user names/ID’s, passwords, and security access levels
User Default
Setup
Establish defaults for input fields to avoid repetitive keying on
input
Company
Establish company number(s) and info
Currency
Set up and describe currencies, wording on checks, exchange
rates, and decimal placement for input and reporting
Source Codes
Edit source codes, assign to systems, and provide transfer codes
Bank Account
Establish bank accounts and codes, bank info, check-number
info, A/P control accounts, check-printing specs
Petty Cash
Establish petty cash custodian(s), code(s), and account(s)
Cost Account
Types
Add or modify major chart of account classifications (assets,
liabilities, production divisions, etc.)
Billover Accounts
Identify accounts to be used in automatic intercompany
transactions
Tax Tables
Define 1099 or other tax codes and their placement on tax forms
Trial Balance
Table
Define trial balance formats (inactivated--Positional TB now
used instead)
Positional
T.B./Ldgr
Bible/List Maint
Define positional trial balance and ledger bible formats
Cost Table
Define account ranges and totals for production cost reports
Flex Cost Table
Custom-design cost reports
Setup
Entertainment Partners
VISTA Menu Map • 7-1
Payroll Interface
Identify codes, vendor, and accounts for processing payroll
diskettes
Insurance/Free
Field
Set up codes for insurance claims, recoverable assets, inventory,
or other specific purposes
Data Transfer
Table
For corporate systems: establish table for converting account
numbers when transferring data between corporate and lo cation
systems
System
Customization
For corporate systems: establish post-closing year periods (PCL)
availability: quarterly, monthly, both or none
Flex Ledger
Inquiry Table
Custom-design ledger inquiry reports
P.O. Flex Table
Custom-design of P.O. reports (for Customer Support use only)
Personality Table
Listing
View or print most setup items
Cost Table Listing
View or print specific cost tables
Weekly Account
Analysis Table
Set up accounts that will appear in the Control Tables Section of
the Weekly Ledger Balance Report (accounts that require
monitoring)
Corporate Security
Set up account number-based access and security levels (for
Customer Support use only)
A/P
Vendor
Vendor Entry
Edit vendors: add, modify, inactivate, activate
Vendor Listing
List vendors in various formats
Vendor Inquiry
View or print activity for particular vendor
Vendor Label
Print vendor labels for mailings
Vendor Change
View or print a history of changes for particular vendor’s record
Yellow Pages
Listing
View or print yellow pages directory of vendors
Invoice
Invoice Entry
Edit invoices in batches: input, modify, delete
Invoice Audit
View or print audit reports of selected batches
Invoice Post
Post selected batches to accounts
Modify Open Items
Edit check requireme nts fields for posted but unpaid invoices
Distribution
Changes
Alter the distribution of posted invoices and create entries to
record the changes
Open Items
Reports
View or print posted-but-not-paid invoices, cash requirements, or
open item aging
Check Cycle
7-2 • VISTA Menu Map
Invoice Select
Select posted invoices to be paid
Check Print
Print checks; restart when necessary
Check Register
List of checks processed/printed
Check Register
Post
Debit A/P and credit bank account for checks processed
Positive Pay
create check information to transmit to banks and other financial
institutions
Entertainment Partners
Quick Check
Print an urgent manual check; creates QCBATCH
Check
Cancel/Reissue
Cancel an issued check; reissue it if necessary; creates
CRBATCH
Check Reprint
Print a non-negotiable copy of a check
Check Register
History
View or print a check register for a range of checks or dates
Bank
Reconciliation
Enter bank reconciliation data: balances, adjustments, paid
checks
Bank
Reconciliation
Report
View or print a reconciliation report
Tax Cycle
Tax Adjustment
Entry
Edit tax codes or amounts for posted transactions
Tax Report
View or print vendor activity taxed or not taxed
Tax ID Setup
Set up the tax id to be used in 1099 filing and reporting
Chart of Accounts
Entry
Edit the chart of accounts
Chart of Accounts
Listing
View or print the chart of accounts or part of it
Ledger Inquiry
Select and sequence transactions by various criteria for view or
print
Recoverable
Assets Entry
Edit marking of inventory items/recoverable assets
Recoverable
Assets Report
View or print inventory items/recoverable assets
Financial
Departmental
For Entertainment Partners use only
Production
Transfer
Not available at this time. See Production Transfer in J/E menu.
Petty Cash Entry
Enter petty cash transactions by batch
Petty Cash Audit
View or print batch lists for review
Petty Cash Post
Post batches to accounts
Petty Cash
Inquiry/History
View or print PC activity for PC code, vendor, envelope, etc.
Journal Entry
Enter or edit journal entries by batch
Journal Entry
Audit Reports
View or print journal entry batches for review
Journal Entry Post
Post journal entry batches
Ledger Adjustment
By transaction number, edit insurance, free fields, or description
G/L
P/C
J/E
Entertainment Partners
VISTA Menu Map • 7-3
Transaction
Reversal
Create an a utomatic journal entry to reverse a posted transaction;
creates J/E REVERSAL batch
Production Transfer
Production
Transfer Entry
Transfer development costs to production
Production
Transfer Audit
View or print batch lists for review
Production
Transfer Post
Post Production Transfer batches
P.O. Maintenance
Add, modify, delete purchase orders and line items; inquire on
P.O.’s.
P.O. Reporting
Print PO Reports in a format specified by the User.
P.O. Print
Print Vendors’ purchase orders from data input to VISTA.
FLEX Production
Cost
View or print selected production cost report
FLEX Production
Cost Consolidation
View or print selected consolidated production cost report
Cost Transactions
View or print cost transactions (various options)
Cost Transactions
Consolidation
View or print consolidated cost transactions
Set Cost Report
View or print costs per set
Episodic Cost
View or print costs per episode
Set Cost
Consolidation
View or print consolidated production costs
Memo Cost Report
View or print costs by assigned Memo field designation
P/O
Cost
Bdgt
7-4 • VISTA Menu Map
Budget EFC/ETC
Update Entry
Enter/edit budget amounts or other cost estimates, adjustments or
approved overages
Budget Explanation
Report
View or print variances and explanations of changes
Budget EFC
Change Tracking
Prints multiple explanation reports for a given year period by
Session ID.
VISTA Budgeting
Interface
Load VISTA Budgeting budget
Movie Magic
Interface
Load Movie Magic budget
Speedbid Interface
Load Speedbid budget
Toolkit Interface
Load Toolkit budget
Entertainment Partners
P/R: VISTA Payroll History Reporting System
Invoice Processing
Payroll Receive
Download a payroll invoice from diskette or subdirectory.
Labor/Fringe/AP
Post
Post labor and fringe costs to the ledger and payroll invoices to
the accounts payable subsystem.
Labor Corrections
Change labor distribution coding.
Fringe Table
Maintenance
Add or change fringe distribution coding.
Journal Table
Maintenance
Add or change offset account coding.
Flex Report
Maintenance
Store default and custom report formats for yse with
Labor/Fringe/ AP Post option in payroll processing.
Payroll Reporting
Check Register /
Earnings Report
Generates a payroll check register history report for a selected
individual.
Payroll Audit
Allows t he User to view downloaded Location Check Print
payroll invoices that have yet to be posted to the payroll register.
Location Check
Print
Generate the production’s payroll checks on location.
Diskette Download
Copy PR invoice fro m diskette; delete copied invoice
Labor Corrections
Correct labor coding errors and print list of changes
Fringe Table
Corrections
Edit fringe tables for payroll invoices
Labor/Fringe/AP
Post
View, List, or List and Post payroll invoices; create A/P batch of
payroll invoices if desired
Flex Report
Maintenance
For future implementation
Journal Table
Maintenance
For future implementation
Taxing Locations
Establish IRS limits on meals and incidentals and lodging for
each production location
Per Diem Group
Establish group codes and description for per diem
Mileage Group
Establish group codes and federal limits for mileage payments
Per Diem
Employee Setup
Set up employees by group and union and denote whether they
receive per diem or mileage or both
Per Diem Entry
Establish default entries per group or enter per diem per
individual; direct per diems to clearing account or cost accounts
Mileage Entry
Establish default entries per group or enter mileage per
individual; direct mileage to clearing account or cost accounts
Per Diem /Mileage
Audit
View or print per diems or mileage for given week
Per Diem /Mileage
Post
List or Post and List per diems or mileage for given week
P/R: Payroll Interface
P/D
Entertainment Partners
VISTA Menu Map • 7-5
Per Diem
Reconciliation
View or print advances vs recoupment by person
Sign-off Tax Sheet
Print sheet to be signed by recipients as evidence of receiving per
diem cash.
Trial Balance
Report
(Inactivated)
Positional T.B.
Report
View or print selected positional trial balance
Ledger Balance
View or print overview of system activity for period and check
validity of system; report out-of-balance conditions
Ledger List/Bible
View or print selected ledger transactions by account or all
transactions by account (bible)
Flex Ledger
Report
View or print custom-designed ledger inquiries
Update Ledger
Period
Close current period and move on to the next
Balance Forward
Update balance forward amounts from prior year’s balance sheet
accounts; for end of year use
Batch Modification
Change batch ID information of open batch (A /P, P/C, or J/E)
System Services
Run system integrity checks at once or at a particular time
Report Services
Open ReportView to see any report(s) on screen
Per Close
Util
Interfaces
Communication
Payroll
Modem into EP Payroll Server to retrieve Edit and/or Payroll
files.
Mail
For future use
Setup
Establishes parameters for Modem operations.
Data Transfer
Transfer data from one VISTA System to another or between
VISTA and a studio mainframe system (see individual studio
information published under separate cover)
Disney Transfer
Transfer data from VISTA to Disney’s mainframe system
Fox
7-6 • VISTA Menu Map
Download
Transfer data from Fox mainframe system to VISTA
Audit Report
View or print charges downloaded from Fox mainframe system
for the current week
Modify/Convert
Make corrections to charges downloaded from Fox mainframe
system for the current week
Post
Post charges downloaded from Fox mainframe system for the
current week
Purchase Card
Interface
Transfers via Modem data for import to the P/C system.
History Report
View or print a report of all past Fox transfers
Entertainment Partners
Entertainment Partners
Transfer File
Maintenance
Purge posted batches of data posted to VISTA through EPPOST
Universal Transfer
Transfer data from one VISTA System to another or between
VISTA and the Universal Studios mainframe system
VISTA Menu Map • 7-7
This page left blank intentionally.
7-8 • VISTA Menu Map
Entertainment Partners
Chapter 8: VISTA Flowcharts
Overview
The following pages present eight standard flow charts of VISTA’s functions,
pictures of what VISTA does and how it works.
At the top of each chart is a box containing the Setup Menu items that apply to the
functions shown on that chart.
Where applicable, each function box in the flowchart includes the VISTA menu
selection that starts that function. Refer back to the previous chapter, “VISTA Menu
Map” on page 7-1 to see the menu choice in its menu context.
Entertainment Partners
VISTA Flowcharts • 8-1
Chart 1 - VISTA Overview
System Setup: Basic controls, options, security, preferences, and instructions
Vendor
File
P/R
Purchase
Orders
Accounts
Payable
Payroll
BD
Petty Cash
Per Diem
Mileage
Journal
Entries
Budgets
Estimates
Checks
Chart of
accounts
with
balances
Posted
transactions from
all Sources
System
Integrity
Checks
Adjustments,
Reports and
Analyses
· Vendors
· Accounts
· Inquiries
· Taxes
· Insurance
· Free Fields
8-2 • VISTA Flowcharts
Studio
Systems
Upload/
Download
Period
Closing
Trial
Balances
Cost
Reports
Entertainment Partners
Chart 2 - Vendors, PO’s & Accounts Payable
SETUP
Wording for
checks; decimal
placement
Menu: Setup
Currency
Enter or edit vendors
Menu: A/P Vendor Vendor
Entry
Bank account numbers and
codes; check-number info; A/
P accounts; check-printing
specs
Menu: Setup Bank Account
Edit Source
Codes for A/P
and Payroll
Menu: Setup
Source Codes
Edit 1099 or other
tax codes
Menu: Setup Tax
Tables
Menu: P/O Production P.O.
Entry or Corporate P.O.
Entry
Distribution changes for
previously posted
transactions creates A/P
batch DISTCHGS
Vendor File
Menu: A/P Invoice Invoice
Entry
Vendor Changes
Vendor labels
Vendor Lists
Menu: A/P Vendor
Vendor Listing, Vendor
Label, Vendor Change, or
Yellow Pages Listing
Menu: A/P Invoice
Distribution Changes
Cancel/Reissue check
creates A/P batch
CRBATCH
Payroll diskette processing
and posting creates A/P
batch PRBATCH
Menu: A/P Check Cycle
Check Cancel/Reissue
Menu: P/R Labor/Fringe/AP
Post
Quick Checks for new
invoice creates A/P batch
QCBATCH
Adjusting tax amounts
creates A/P batch TAXADJ
Menu: A/P Check Cycle
Quick Check
Menu: A/P Tax Cycle Tax
Adjustment Entry
Audit report sequenced by
transaction or distribution
Modify batch header (batch
transfer)
A/P Batches
Menu: A/P Invoice Invoice
Audit
Post: debit invoices to
costs, credit totals to A/P
Control
Posted transactions
including A/P open
items ready for check
cycle
(Chart 3)
Menu: Util Batch
Modification
A/P Batch Posting report
Menu: A/P Invoice Invoice
Post
Menu: A/P Invoice Invoice
Post
Entertainment Partners
Menu: Setup
Payroll Interface
Enter or edit Purchase
Orders
Enter or edit invoices,
manual checks
Yellow pages listing
Identify A/P
accounts for
processing
Payroll
VISTA Flowcharts • 8-3
Chart 3 - Checks
SETUP
Wording for
checks; decimal
placement
Menu: Setup
Currency
Bank account numbers and
codes; check-number info; A/
P accounts; check-printing
specs
Menu: Setup Bank Account
Modify check requirements
of open items
Menu: A/P Invoice Modify
Open Items
Posted transactions
including A/P open
items ready for check
cycle
(from Chart 2)
Open items, cash
requirements, aging
Menu: A/P Invoice Open
Items Reports
Select invoices to be paid
Menu: A/P Check Cycle
Invoice Select
Pre-check register
Transactions: checks to
be printed
Restart
A/P Check Cycle Check
Register
Print checks or re-start print
checks
Menu: A/P Check Cycle
Check Print
Reprint non-negotiable
check copies
Menu: A/P Check Cycle
Check Reprint
Posted transactions;
updated accounts
Check register
Transactions: checks
printed but not posted
Post check register: debit
AP control, credit bank
account
Menu: A/P Check Cycle
Check Register Post
8-4 • VISTA Flowcharts
Menu: A/P Check Cycle
Check Register
Check register posting
report
Menu: A/P Check Cycle
Check Register Post
Entertainment Partners
Chart 4 - Journal Entries & Petty Cash
JOURNAL
ENTRY SETUP
PETTY CASH SETUP
Edit Source
Codes for journal
entries
Edit Source
Codes for petty
cash entries
Menu: Setup
Source Codes
Menu: Setup
Source Codes
Reverse a posted
transaction; create a JE
batch REVERSAL
Menu: J/E Transaction
Reversal
Establish petty
cash
custodian(s),
code(s), and
account(s)
Menu: Setup
Petty Cash
Enter or edit journal entries
by batch
Create subaccount for
recipient's PC
advance
Menu: G/L Chart
of Accounts Entry
Create vendor
record for PC
recipient; insert
PC account(s)
Menu: A/P
Vendor Vendor
Entry
Enter or edit petty cash by
batch
Menu: P/C Petty Cash
Entry
Menu: J/E Journal Entry
Edit 1099 or other
tax codes
Menu: Setup Tax
Tables
Enter or edit vendors
Menu: A/P Vendor Vendor
Entry
Modify batch header (batch
transfer)
Menu: Util Batch
Modification
Audit report sequenced by
transaction or distribution
Menu: J/E Journal Entry
Audit Reports
Journal Entry batch posting
report
Menu: J/E Journal Entry
Post
Audit report sequenced by
transaction or distribution
Journal Entry Batches
Post journal entries
Menu: J/E Journal Entry
Post
Petty Cash Batches
Menu: P/C Petty Cash
Audit
Post petty cash batches
Petty Cash batch posting
report
Menu: P/C Petty Cash Post
Menu: P/C Petty Cash Post
Posted transactions;
updated accounts
Entertainment Partners
VISTA Flowcharts • 8-5
Chart 5 - Per Diem & Payroll
PER DIEM SETUP
P/R SETUP
Establish
locations and IRS
minimums
Create per diem
and mileage
groups
Create employee
list for per diem
and mileage
Menu: P/D Taxing
Locations
Menu: P/D Per
Diem Group &
Mileage Group
Menu: P/D Per
Diem Employee
Setup
Set up default
amounts and PC/
Cost accounts per
group for per diem
and mileage entry
View or print week's per
diem and mileage for
auditing
Menu: P/D Per Diem/
Mileage Audit
Week's per diem and
mileage posting report
Menu: P/D Per Diem/
Mileage Post
Menu: Setup
Source Codes
Menu: P/D Per
Diem Entry &
Mileage Entry
Manually transfer per
diem and mileage
codes and amounts to
time cards going to EP
payroll
Edit Source
Codes for A/P
and Payroll
P/R
Invoice
Diskette
Identify A/P
accounts for
processing
Payroll
Menu: Setup
Payroll Interface
List labor and fringes for
auditing
Menu: P/R Labor/Fringe/AP
Post (List option)
Enter or edit week's per
diem and mileage
Copy P/R invoices from
diskettes
Correct labor errors; edit/
recode labor
Menu: P/D Per Diem Entry
& Mileage Entry
Menu: P/R Diskette
Download
Menu: P/R Labor
corrections
Weekly per diem and
mileage transactions
Payroll Invoice
transactions
Post per diem and mileage
transactions
Post labor and fringes and
create A/P batch
PRBATCH
P/D Per Diem/Mileage Post
Menu: P/R Labor/Fringe/AP
Post (Post option)
Correct fringe table errors;
edit/recode fringes
Menu: P/R Fringe Table
Corrections
Labor and fringes posting
report
Menu: P/R Labor/Fringe/AP
Post (Post & List option)
Per diem reconciliation
report
Menu: P/D Per Diem
Reconciliation
8-6 • VISTA Flowcharts
Posted transactions;
updated accounts
A/P batch PRBATCH to
A/P batch processing
(Chart 2)
Entertainment Partners
Chart 6 - Modify Posted Transactions
SETUP
Edit insurance or
free fields codes
Menu: Setup
Insurance/Free
Field
Edit 1099 or other
tax codes
Menu: Setup Tax
Tables
Quick Check for an open
invoice updates check
code, date and number
automatically
Reverse transaction; create
J/E batch REVERSAL
Menu: J/E Transaction
Reversal
Menu: A/P Check Cycle
Quick Check
Cancel/reissue check;
create A/P batch
CRBATCH
Modify A/P open item check
requirements
Menu: A/P Invoice Modify
Open Items
Adjust transaction tax
codes
Menu: A/P Tax Cycle Tax
Adustment Entry
J/E batch REVERSAL
to J/E processing
(Chart 4)
Menu: A/P Check Cycle
Check Cancel/Reissue
Posted transactions
from all Sources
including A/P Open
Items
Change distribution for any
posted invoice; create A/P
batch DISTCHGS
Menu: A/P Invoice
Distribution Changes
Edit Recoverable Assets
entries; record disposition
Adjust transaction tax
amounts; create A/P batch
TAXADJ
Menu: G/L Recoverable
Assets Entry
Menu: A/P Tax Cycle Tax
Adjustement Entry
A/P batches
CRBATCH,
DISTCHGS, TAXADJ to
AP batch processing
(Chart 2)
Edit transaction fields:
insurance, free fields, or
description
Menu: J/E Ledger
Adjustment
Entertainment Partners
VISTA Flowcharts • 8-7
Chart 7 - Transaction Reports & Analyses
SETUP
Edit insurance or
free fields codes
Edit 1099 or other
tax codes
Menu: Setup
Insurance/Free
Field
Vendor file
Menu: Setup Tax
Tables
Design custom
cost tables
Menu: Setup Flex
Ledger Inquiry
Table
Menu: Setup
Cost Table
Edit vendor tax
codes
Menu: A/P
Vendor Vendor
Entry
Vendor inquiry/history
Check register history
Menu: A/P Vendor Vendor
Inquiry
Menu: A/P Check Cycle
Check Register History
Transactions by account w/
cost table totaling
Menu: Cost Cost
Transactions
Standard/
Custom Flex
reports and
cost tables
Design custom
inquiries
Petty cash inquiry/history
Posted transactions
from all Sources
including PO's and A/P
Open Items
Transactions selected and
sequenced by various
criteria
Recoverable assets
(inventory) listing
Menu: G/L Recoverable
Assets Report
Menu: G/L Ledger Inquiry
Transactions selected and
sequenced by custom
criteria
Menu: Per Close Flex
Ledger Report
Menu: P/C Petty Cash
Inquiry/History
Checking account
reconciliation
Menu: A/P Check Cycle
Bank Reconciliation
Checking account
reconciliation report
1099 reports, forms,
1099
diskettes
Menu: A/P Tax Cycle Tax
Report
Open P.O. report
P.O. Inquiry report
Menu: A/P Check Cycle
Bank Reconciliation Report
P.O. Audit report
Menu: P/O Purchase Order
Audit, Purchase Order
Inquiry, or Open Purchase
Order Reports
Transactions by account
with opening/closing
balances
Chart of accounts with
balances
8-8 • VISTA Flowcharts
Menu: Per Close Ledger
list/Bible
Entertainment Partners
Chart 8 - Budgets, Estimates, Costs, Balances
SETUP
Design custom
cost reports
Design custom
cost tables
Menu: Setup Flex
Cost Table
Menu: Setup
Cost Table
Enter or edit budgets, EFC,
ETC, approved overages,
BD
and adjustments
Menu: Bdgt Budget EFC/
ETC Update Entry
Edit cost account
types
Menu: Setup
Cost Account
Types
Design custom
trial balance
reports
Menu: Setup Trial
Balance Table
Variance report with
explanations
Menu: Bdgt Budget
Explanation Report
Menu: Setup
Positional T.B.
Table
Edit chart of
accounts
Menu: G/L Chart
of Accounts Entry
Check and report on
system integrity
Posted transactions from
all sources
Chart of accounts listing
Menu: G/L Chart of
Accounts Listing
Design custom
positional trial
balance reports
Chart of accounts with
balances
Menus: Per Close Ledger
Balance;
Util System Services
Update new year balance
sheet accounts with prior
year balances
Menu: Per Close Balance
Forward
Trial balance
Positional trial balance
Menu: Per Close Trial
Balance Report
Menu: Per Close Positional
T.B. Report
Set cost report
Episodic cost report
Menu: Cost Set Cost
Report
Menu: Cost Episodic Cost
Consolidated set cost
report
Distribution cost report
Menu: Cost Distribution
Cost Report
Menu: Cost Set Cost
Consolidation
Pint cost tables
Flex production cost report
Menu: Setup Cost Table
Listing
Menu: Cost FLEX
Production Cost
Flex consolidated
production cost report
Menu: Cost FLEX
Production Cost
Consolidation
Standard/
Custom Flex
reports and
cost tables
Entertainment Partners
VISTA Flowcharts • 8-9
This page left blank intentionally.
8-10 • VISTA Flowcharts
Entertainment Partners
Chapter 9: Setup Menu
Overview
The items available within the Setup Menu benefit the User by allowing the User
to dictate VISTA’s ‘personality.’ By customizing VISTA within this menu, one can
define certain parameters and functions to suit the needs of a particular show or
production. The choices range from establishing security and passwords to
designing tailor-made cost reports. Some items will be more relevant than others,
but that relative importance will change from show to show.
Entertainment Partners
Setup Menu • 9-1
The System Default logon is SYSACCES. The following table illustrates the most
basic entries necessary to get VISTA up and running:
ACTION
REQUIRED
MENU
PROGRAM
REQUIRED FOR ALL
SYSTEMS
Setup
Setup
A/P Vendor
G/L
Per Close
PRODUCTION
OPTIONS
Setup
Setup
Setup
Setup
Setup
Setup
Setup
Setup
Setup
Setup
Setup
Setup
Setup
Setup
Setup
Company
Bank Account
Vendor Entry
Chart of Accounts Entry
Update Ledger Period (Verify in
PERCLOSE)
User Setup
User Default
Petty Cash
Billover Accounts
Insurance / Free Field
Data Transfer Table
System Customization
Currency (US only)
Source Codes
Cost Account Types
Tax Tables
Positional Trial Balance/Ledger Bible
Maint.
Cost Table
Flex Cost Table
Flex Ledger Inquiry Table
Payroll Interface
SYSTEM SETUP
WITH DEFAULTS
TO INTERFACE A
PAYROLL DISKETTE
Setup
Each of these program functions and the methods by which they may be set up will
be discussed in this chapter.
User Setup
Purpose: Establish and update Login IDs, passwords, and access conditions for
each operator of the system.
Required: Login ID.
Defaults: All other fields are left blank—no system access allowed.
Delete: Inactivate.
VISTA gives the User complete control over who will use the system and how.
Security can be as strict as the circumstance demands. A Login ID and Password
can be entered for each operator, and each operator can be selectively allowed to use
or prevented from using each component of the system. There are three levels of
access possible for each system component or menu item: Full, Inquiry, and None.
9-2 • Setup Menu
Entertainment Partners
Administrator
At least one person will be assigned a Login ID and password that allow full access
to all system parts. This person is referred to as the Administrator. Because the
Administrator has full access, he or she can set up other operators, change their
IDs and passwords and prevent them from accessing all or parts of the system.
Login ID and Password
Both Login ID and Password are between one and eight characters long. The
characters can be in any combination desired.
The Password is case
sensitive.
Be aware that the Password is case sensitive . If it has been entered here in lower
case, but the computer boots up with CAPS LOCK on, you will get an error
indicating there is a password mismatch.
Exercise attention and care
when inputting the
Password.
Input the Password carefully, as there is no duplicate confirmation—what is
entered here will be the password. The password cannot be displayed anywhere
ever. The only characters that will ever display in this field are asterisks. .
Entering eight spaces in the password field allows the user access with just an ID.
Setting up a User
Select Setup User Setup from the VISTA Main Menu, and you will see this window.
Entertainment Partners
Setup Menu • 9-3
Add
To add a new user, make sure Add is displayed in the information box at the top
right of the window (or choose Function Add from the Menu), and then enter the
person’s name. Tab to the Login ID field and enter an ID of up to eight digits. Then
tab to the Password field and enter a password of up to eight digits. See Access
Options below. When you’re through, press Enter. You will be asked to confirm
setting up the new user. Press Enter again to confirm, Escape to avoid setting up
the new user.
Modify
To change (and re-activate) a user, choose Function Modify and press F12 or
right-click in the Name field to choose the user you want to change.
Revise the Login ID and password by entering the new data in either or both fields.
See Access Options below. When you’re through, press Enter. You will be asked to
confirm making the changes. Press Enter again to confirm, Escape to avoid
making the changes.
Inactivate
Choose Function Inactivate and press F12 to choose the user you want to
inactivate. Press Enter. You will be asked to confirm the action. Press Enter again
to do so, press Escape to avoid inactivating this user.
Clear Screen
Use Function Clear Screen whenever you want to clear the screen of data and
begin again.
Exit
Function Exit closes User Setup; this function does not update records.
Access Options
Below the User Name, Login ID, and Password is an area of the window for
controlling system access. Use this area to control a user’s access in either Add or
Modify mode.
Full System Access
To allow the user to access and modify data in all system modules, click on the Full
System Access box. When this box contains an X, the user has full system access. To
record this setting for the user, press Enter.
Access by Menu
The buttons below the Full System Access box represent the VISTA Main Menu, a
button for each Main Menu choice. If you don’t want to give a user Full System
Access, use these buttons to define acces s for each of the menu choices.
When you click on one of the Main Menu Buttons, the choices on that Menu appear
at the bottom of the window below the buttons. To the left of each menu choice is a
box. Valid entries for the boxes are Blank for no access, I for Inquiry access, or F
for Full access.
9-4 • Setup Menu
Entertainment Partners
Between the Main Menu Buttons and the Menu Choices is a row of three long
buttons titled All Full Access, All Inquiry, and Deselect All.
To allow this user full access to all the menu choices shown, click on All Full
Access—the boxes beside the choices will all be filled with an F.
To allow this user inquiry-only access to all the menu choices, click on All
Inquiry—the boxes will be filled with an I.
To restrict this user from using any of the menu choices shown, click on Deselect
All—the boxes will all be blanked.
To apply various access levels for this user to the menu choices shown, first
click on the All button that covers the majority of choices, then tab through the boxes
to change the ones that are different.
The default setting for all choices for a new user is blank for no access.
Proceed through each Main Menu Button until the settings are as you want them.
When you’re finished, press Enter to record your entries.
User Default Setup
Purpose: Establish which codes should be entered automatically by the system into
repetitive fields, such as Company, Currency, Bank Code, etc.
Required: Default Type and Login ID.
Defaults: None.
Delete: Yes.
When a production has only one of something—one production number, one bank
account, one currency—or even if it has more than one, but one choice is used most
of the time, it is helpful and efficient to let VISTA enter that information for you
instead of having to type or select it every time you need it.
This is where you tell VISTA which fields you want it to fill in, and the values to be
used. Defaults can always be overridden when you’re actually inputting, but they
will give you a head start most of the time.
Entertainment Partners
Setup Menu • 9-5
There are two types of defaults: Administrator and User. Only the Administrator can
add or change Administrator Defaults. The Administrator defaults are, in effect,
default defaults. Designating a set of defaults Administrator (by clicking on the
Administrator Button or typing A in the Default Type field and using a Login ID
with Full System Access), makes it the standard set for all users.
If a User doesn’t have his or her own set of defaults, the Administrator Defaults will
be used. If a User (based on Login ID) has his or her own defaults, they apply to all
the default fields. If a default field is blank for that User, even if that field is not
blank in the Administrator Defaults, VISTA will not fill it in for that User.
If you wish to limit the Company/Currency/Bank Code for a user, enter Y in the
Lock Co/Curr/Bk field. When that user signs into VISTA, he/she will only be able
to enter or view information for a specific bank account.
Default Settings
Group has not yet been implemented in VISTA. Type 01 in the Group Field.
Fill as many or as few of the other fields as you want.
Use any code you want up to eight digits for Batch. The most common use for this
default is the User’s initials or Login ID, which will set his or her batches apart from
other Users.
For Company, Currency, Bank Code, P/C Code, and Source Code (for
Journal Entries), enter the only or most-used code for this system (Administrator
defaults) or this User (User defaults).
The Cursor Dup To field is a sample of your account-number structure as it will
appear for transaction input. VISTA will duplicate (from left to right) as much of
your account number as you tell it to here as you add lines of distribution for a
transaction.
To tell VISTA how much of your account number to duplicate from one distribution
line to the next, put an asterisk in the right-most position you want duplicated.
For example, if you want the number duplicated through the PROD field, put an
asterisk in the fourth position of the PROD field. To duplicate through the first two
digits of the DETL field, put an asterisk in the second position of the DETL field.
Company
Purpose: Maintain Company information and provide validation for Company
Code entries.
Required: Company Code (Number) and Company Name.
Defaults: None.
Delete: No.
9-6 • Setup Menu
Entertainment Partners
Use the Function Add mode to add a new Company; use Function Modify to change
an existing Company.
Company Number should coincide with the Company field in your Chart of
Accounts, but this file is not used to verify the connection.
The Federal Tax ID, if entered, is used for 1099 Tax Reporting.
You may enter as many Companies as necessary to reflect the structure and makeup
of your production.
Company Not Always Company
This highest level of VISTA structural code is called Company, but, to reflect your
particular production, it may not represent a Company per se. It may represent,
instead, a Location or another facet or breakdown of your show, something that
structures accounts and reports in a more meaningful way for you circumstances. It
is important to keep this distinction in mind as the “Company” Number and its uses
are discussed.
Currency
Purpose: To record the Currencies per Company to be used on the production—
codes, descriptions, check language, exchange rates, and decimal places—designate
Base Currency, and provide validation for Currency entries.
Required: Company Code, Currency Code, Currency Description, and Check
Amount Language fields.
Defaults: Exchange Rates, 1.0; Exchange Dates, current date; Decimal Places for
Entering Amounts, 2; Decimal Places for Printing Cost Reports, 0.
Delete: No.
Entertainment Partners
Setup Menu • 9-7
VISTA can incorporate as many Currencies as you need. Each Currency to be used
on the production has to be set up here in conjunction with Companies.
Use the Function Add mode to create a new Currency, Function Modify to
change an existing Currency. You cannot delete a Currency.
Note: Your VISTA System will be set up with US Currency. You only need to add
additional currencies that will be required for your production.
Company
Currencies are set up in conjunction with Companies. If you have only one Company
record, then one Currency record for each Currency used is sufficient. For each
Company, you must add at least one Currency record.
To Add a Currency, first select the Company, then enter a two-digit Currency
Code—must be an alphabetic code—no numbers or special characters—and the
Currency Description.
Base Currency
If you use only one Currency, it is your Base Currency, and it should be designated
as such.
If you are using more than one Currency, one of the Currencies must be designated
your Base Currency.
To designate a Currency as your Base Currency:
•
9-8 • Setup Menu
If you’re adding it, select Base Currency Modify Base Currency from
the Currency window Menu Bar. Fill in all fields (Exchange Rates will
Entertainment Partners
always be 1.0 for your Base Currency), then press Enter to record the
Add.
•
If it already exists, in Modify mode press F12 and choose the Currency
from the Scroll Panel. Select Base Currency Modify Base Currency
from the Menu Bar, then press Enter to record the change.
When you select Base Currency Modify Base Currency, the word BASE will be
shown in the Mode box in the upper right corner of the window.
There can be only one Base Currency designated per Company.
Check Amount Language
These fields tell VISTA what to print on a check in this Currency when spelling out
the amount of the check.
If you want to print the equivalent of Pay Exactly in another language, enter the
phrase in the Pay Exactly field.
Enter the equivalents of Dollars and Cents for another Currency in the Dollars and
Cents fields, for example, Pounds Sterling and Pence for the English pound.
Leaving any of these fields blank will leave the corresponding area of the check
blank.
Note: While VISTA can spell out the numbers for English dollar amounts
(including US, CN for Canadian currency or UK for British currency), any foreign
currency checks will print out numbers, not words on the check.
Exchange Rates
Enter the Current Rate and the Budget Rate and the effective dates in the
appropriate fields.
The exchange rates used for a particular Currency should be the rate to translate this
Currency to your Base Currency.
The rates for your Base Currency will always be 1.0.
Number of Places to the Right of the Decimal
Specify the decimal places to be shown for Entering Amounts and Printing
Cost Reports. The decimal places for Entering Amounts will be shown on all
reports except Cost Reports.
Once a Currency record has been entered and accepted, the decimal places for
Entering Amounts cannot be changed, so make sure it is accurate when you enter
it.
Source Codes
Purpose: To identify the application and operational origin of transactions.
Required: All.
Defaults: None.
Delete: No.
Entertainment Partners
Setup Menu • 9-9
Source Codes are one- to four-digit codes that identify where a transaction
came from, that is, which application or transaction type. The Code becomes a part
of the transaction and is shown in most system reports. VISTA comes with some
Source Codes defined, but you can change those and add as many as you like.
A given Source Code can apply to only one application.
The Source Codes already defined, in alphabetical order, are:
Code
Description
AP
Accounts Payable
JE
Journal Entry
PC
Petty Cash
PO
Purchase Order
PR
Payroll
WT
Wire Transfer
Note: Additional Source Codes may already be set up in your system if you are
doing a show for a major studio. If you have any questions, contact your VISTA
Customer Support representative.
Once a Code is set up, the Code itself cannot be changed, although its description
and options can be.
While a given code can apply to only one system, multiple codes can be applied to
that system. For example, either of the codes JE and WT can be used with the
Journal Entry system to further identify the operation that triggered the Transaction.
In addition to the code, PC, for Petty Cash, you might create a code, PD, for Per
Diems and use it in Petty Cash, also.
To add a code, enter a new, unique Source Code, a Description, then enter N in each
of the System Fields except the one that applies to this Code; enter Y in that System
field. Press Enter to record the Add.
9-10 • Setup Menu
Entertainment Partners
To change a code, in Modify mode enter the code or select it from the Scroll Panel.
Make the changes and press Enter to record them.
Source Codes cannot be deleted.
The Transfer Code and Transfer(Y/N)? fields are used only when you are uploading
information from your VISTA system to a major studio’s main computer system.
Please contact VISTA Customer Support before adding new Source Codes if this is
the case.
Bank Account
Purpose: Maintain Accounts Payable Bank Account data for each
Company/Currency combination, including Control Accounts and check
specifications.
Required: Company, Currency, A/P Bank Code, Bank Name, Source Code,
Accounts (A/P Control, Cash, and Suspense).
Defaults: Check Number Length, 3; Check Range from, 0; Check Range to,
99999999; Checks, C (Collated); Print $0 amount checks, N (No); Printer Type, L
(Laser); Check Stock Type, V (VISTA); Copies per check, 1.
Delete: No.
Each Company-Currency combination must have a Bank Account
associated with it in order to post A/P Transactions.
Entertainment Partners
Setup Menu • 9-11
To add a new Bank Account, use Add mode, select a Company and Currency,
make up and enter a two-digit, alpha-numeric A/P Bank Code, and fill in the fields
(field descriptions below). Press Enter when finished to set up the new Bank
Account.
To change a Bank Account, use Modify mode, select the account you want to
change, make the changes, then press Enter to record the changes.
A bank account can not be deleted; nor can a User change the Company, Currency,
or A/P Bank Code after the account is established.
Bank Account Information
The Account Number field in this section is for the actual account number from
the production’s bank.
Source Code—the Source Code of the system for which this Bank Account will
be valid is usually AP.
Check Prefix can be left blank, or be used for any constant characters that should
precede this account’s check numbers.
Enter the number of digits in this account’s check numbers in Check Number
Length.
In Check Range from and to, enter the range of check numbers for this account.
Check numbers input to this account will be validated against this range. To allow
any number, use all zeros and all nines in the from and to fields. Being as specific as
possible in this range may help prevent a check for one account being entered to
another account.
Accounts
These are the accounts VISTA uses to automatically post activity for this Bank
Account: A/P Control (Clearing) for open-item A/P balances; A/P Cash for bank
balances; and A/P Suspense for undistributed Quick Checks. (The accounts must
already exist in the Chart of Accounts before entering them here.)
The Control account is automatically credited when A/P invoices are posted,
automatically debited when checks are posted. The Cash account is automatically
credited when checks are posted. (Deposits to the Bank Account are recorded as
debits to the Cash account, usually via Journal Entry.)
The Suspense account is automatically debited when a Quick Check is written
with no distribution entries; it is automatically credited when the Quick Check’s
distribution entries are made.
Set up a different set of accounts for each Bank Account so analysis and
reconciliation will be straightforward.
Check Print Fields
These fields give VISTA important information about the checks you’re using for
this Bank Account.
Collated vs. Uncollated
This option applies only to the printing of Laser checks. With a laser printer,
originals and copies may be sorted and collated in different sequences. If the
9-12 • Setup Menu
Entertainment Partners
production accounting office will not be printing A/P cheeks on a laser printer,
choose the Collated option.
Click on Collated or enter C to print the original check and its copies directly
behind it (original, copy, copy, original, copy, copy, original, etc.).
Click on Uncollated or enter U to print the original checks first, then the copies
(original, original, original, copy, copy, copy, copy, etc.)
Print Zero Checks
Click Yes or enter Y to print zero-amount checks. Click No or enter N if zerochecks are not desired.
Zero-amount checks may be useful for the production’s or the vendors’ records in
cases where the check nets to zero.
This is only a printing option. Invoices that net to zero will still be processed
normally through the check-printing and posting process.
Printer Type
Click Laser or enter L if the production is using a laser printer to print A/P
checks. Click Dot Matrix or enter D if A/P checks are to be printed on a dotmatrix printer.
Check Stock Type
VISTA allows the User to choose one of eight check stock formats for the printing of
A/P checks from each Bank Account.
A production shooting within the United States will most likely be printing checks
on the standard VISTA format.
Productions shooting and doing business within the United Kingdom will likely be
printing A/P checks on one of the three UK check stock formats.
Productions shooting in France may choose the FRench check stock selection.
Users printing A/P checks for business in Australia will elect to print their checks on
AUStralian check stock.
MAL and NZL formats are programmed to print in formats required by the
Malaysian and New Zealand banks, respectively.
Copies Per Check
Enter the number of copies of checks to be printed—not including the original—
usually 1 or 2.
This applies only to Users printing A/P checks on laser printers, because dot-matrix
checks are continuous form and have their copies behind the original.
Print Production Title
Select this check box to print the production’s title on the face of the check and the
check stub. Deselecting this box will omit the title of the production from the check
and stub.
Entertainment Partners
Setup Menu • 9-13
Positive Pay Template
Information input into this field tells VISTA which format to use when creating an
output file of check information for all checks that have been processed through
VISTA for this specific bank (see “Positive Pay” on page 14-8).
Petty Cash / Purchase Card
Purpose: Maintain data and control account for each Petty Cash or Purchase
Card Custodian.
Required: Company, Currency, Custodian Name, P/C Source Code, Custodian’s
Account Number, Purchase Card Custodian’s Suspense Account.
Defaults: None
Delete: Yes.
These records establish who is in charge of Petty Cash and Purchase Cards, and
what account will be automatically credited when Petty Cash or Purchase Card
batches are posted.
Petty Cash Custodian
Petty Cash is a cash bank maintained by the production accountant for the purpose
of advancing money to designated members of the production staff. The account
numbers in this record will be credited for all Petty Cash advances.
Purchase Card Custodian
Purchase Card capability allows VISTA Users to establish purchase card accounts
for their petty cash recipients. Purchase cards may be used instead of cash at preapproved locations. The account number in this record will be credited for all
approves Purchase Card limits.
Setting up a PC Custodian
Set up as many Petty Cash/Purchase Card Custodians as are desired and
necessary.
9-14 • Setup Menu
Entertainment Partners
Use Function Add to add a new Custodian, and Function Modify to change an
existing Custodian. The Company/Currency/PC Code combination established
for a PC Custodian cannot be modified. A Custodian record can be eliminated,
however, via Function Delete.
Company & Currency
Select a Company/Currency combination.
Because the records input via this window are tracked by Company/Currency
combinations, there should be at least as many Custodian/Vendors and Custodian
Account #s as are Company/Currency combinations. If there is more than one
Custodian or Vendor for the same Company/Currency combination, different
Codes and Accounts must be created for each one.
PC Code & PC Source Code
Assign a PC Code - two-digits, any two characters - for the Custodian/Vendor.
PC Codes must be unique within the same Company/Currency, but the same code
may be used within different Company/Currency combinations.
The custodian’s initials may be used for the PC Code.
The PC Code created here will be used in the Batch Control section of the Petty
Cash Batch Input window to tell VISTA which P/C Account to credit when the
batch is posted. The PC Code will become an identifying part of each transaction in
the batch.
The PC Source Code must
already exist within VISTA.
Entertainment Partners
The PC Source Code, created in Setup, Source Codes (see “Source Codes” on
page 9-9) will also be added to each transaction in the batch to identify its source
application.
Setup Menu • 9-15
Custodian Name & Account #
The Custodian Account #
must already exist within
VISTA’s Chart of Accounts.
Input the Custodian Name and the Custodian Account #. The account
designated here will be automatically credited when a PC batch is posted for this
Custodian/Vendor.
Custodian Type
Click on the appropriate button to indicate the Custodian Type: either Petty
CASH for a conventional petty cash Custodian, or Purchase CARD to establish
this custodian’s status as a purchase card Vendor.
Purchase Card Custodian: Suspense Account #
The Custodian Suspense
Account # must already exist
within the Chart of Accounts.
The Suspense Account # input here will be used for Purchase Card
transactions that have been received with invalid account numbers that were not
corrected before posting.
Press enter to accept.
Cost Account Types
Purpose: Maintain Cost Account Types (divisions of the Chart of Accounts)
Required: Account Type; Description.
Defaults: None.
Delete: No.
Account Types segment the Chart of Accounts, identifying like accounts and
providing more meaningful totals and sub-totals in reports.
For a discussion of what Account Types mean to VISTA (and to you), see VISTA
Chart of Accounts, “Account Types” on page 4-16.
The following Account Types come with VISTA and will be included in your Chart
of Accounts.
Account
Type
Code
Account Type
A
Assets
L
Liabilities
EX
Production Costs
EA
Expense Above the Line
EB
Expense Below the Line
EC
Expense Below the Line Post-Production
ED
Below-the-Line Other Charges
EE
Below-the-Line Contingencies
EF
Completion Costs
EG
Cost Recovery/Transfers
Use Function Add to add a new Type, Function Modify to change an existing Type.
9-16 • Setup Menu
Entertainment Partners
To Add, enter a new one- or two-digit Account Type, then a Description of the
Type. When Modifying, all you can change is the Description. Press Enter to
record the new Type or changes.
Remember, if you Add and use a new Account Type, it must apply to a contiguous
group of accounts in your Chart, or it will invalidate your Cost Reports.
Billover Accounts
Purpose: Maintain accounts used for automatic inter-company offset entries.
Required: Currency, From Account, To Account.
Defaults: None.
Delete: No.
With Billover Accounts, you tell VISTA where you want the offset entries to be
posted for each Company in an Inter-company transaction. When you enter such a
transaction, VISTA creates the balancing entries for you.
You cannot mix Currencies in a Billover Account set.
Use Function Add to create a new set, Function Modify to change an existing set of
Billover Accounts.
Select or enter a Currency, then enter or change the From and To accounts (the
accounts must already exist). Press Enter to record the new set or changes.
Entertainment Partners
Setup Menu • 9-17
Tax Tables
Purpose: Maintain Tax-Code options for coding taxable, reportable Transactions.
Required: Currency, Tax Code, Tax Form, and Box Number.
Defaults: None
Delete: Yes.
From VISTA’s main toolbar, select Setup; Tax Tables.
Change the function to Modify, if necessary.
NOTE: The limit for the aggregate total of boxes 1,3,6,7 is contained in Tax ID Set
Up from the Tax Cycle of Accounts Payable.
Positional T.B./Ldgr Bible/List Maint
Purpose: Maintain multiple, custom Positional Trial Balance account-range
specifications and Ledger Bible specifications.
Required: All fields per account range.
Defaults: None.
9-18 • Setup Menu
Entertainment Partners
Delete: Yes.
The Positional Trial Balance and Ledger List/Bible reports in VISTA can be
defined in the minutest detail or the highest summary level, and most any variation in
between. One or more Positional Trial Balances and Ledger List/Bibles may
come already set up within VISTA, but a User may define as many others as are
desired.
There are two steps to creating and printing these reports in VISTA, an extremely
flexible process that allows a User to examine any facet of account data. For an
overview of this type of report, see “VISTA Report Services” on page 5-1.
First, set up the Table (this option) or use one of the pre-set Tables, specifying
which accounts to include in what sequence, where to break for sub-totals, what to
call them, and how much (what Level) to show on the report.
Second, in the Main Menu choice Per Close Positional T. B. Report, specify
Currency, Period Ending Date, the Table to be used, the Year, Month, Week, and
Quarter, and the activity or balances to be shown in the three columns available.
(See “Positional T. B. Report” on page 24-2.) Or, in the Main Menu choice
Ledger/List Bible, specify the Table to be used, Currency and the report type
(See “Ledger List/Bible” on page 24-6).
Copying a Table to Create a New One
To create a new Table, it is often easier to copy one that already exists and then
modify the new copy, rather than build a new table from scratch. That way, most of
the work will already be done before beginning.
To copy an existing Table to a new one, choose Function, Copy and select the
Table to be copied. Hitting F-12 or right clicking in the Report ID field will
summon a list of existing Tables. When the Table to be copied is displayed in the
window, input the desired description in the Description field. In the Report
Name field, choose either Positional Trial Balance or Ledger List. Hit enter
to initiate the copying procedure.
Creating or Changing a Table
To create a Table, specify ranges of accounts to be shown in the report. For each
range, the User must:
1.
Choose its sequence in the report in relation to the other ranges.
2.
Choose the level of detail to be shown.
3.
Describe it.
4.
Tell VISTA whether to print sub-totals.
When completed, the User will have created a personalized Positional Trial
Balance or Ledger/List Bible structure.
Here is the Setup Positional Trial Balance Table window, with a sample Table
loaded.
Entertainment Partners
Setup Menu • 9-19
To input default columns
(normally A,B,C,) change
function to Modify, select
Positional Trial Balance and
Report ID. Click on the button at
the bottom of the screen.
First, select which report will be created: 1. Positional Trial Balance or 2. Ledger
Listing/Bible. Then, input a unique Report ID of up to 14 alphanumeric digits and
an alphanumeric Description of the report. The Description is also the report’s
title, and will print as the heading of each report page.
Next, input the details for each account range.
Screen Information
Up to thirty “pages” of account ranges may be input for each report. With four
ranges per “page,” up to 120 account ranges may be built into a Positional Trial
Balance or Ledger List/Bible. To move from page to page, use the Page Up and
Page Down keys.
The number to the left of Sequence Number is the Range Number. It is fixed,
and increments by one for each of the 120 potential ranges.
Report Sequence
The Report Sequence is an arbitrary designation that determines the flow of the
report. Account ranges will appear on the report in the ascending order of the
numbers input in this field. For example, the three ranges in the sample contain the
9-20 • Setup Menu
Entertainment Partners
Report Sequences 100, 200, and 300; however, sequence numbers 5, 10, and 15,
would produce the same report.
The Sequence Number enables the User to arrive at the desired report without
shuffling account ranges about this Setup window. For example, to display
Liabilities (Range Number 0300 in the illustration) first on this Positional Trial
Balance, simply change its Report Sequence to 50 (or anything else less than 100,
the report’s first sequence number).
Concentrate on inputting the account ranges without worrying about their sequence.
Then designate Report Sequences that order the report as desired.
Account Range
In the From and To fields, input the low and high account numbers for this range.
Notice that the account numbers do not have to be actual accounts—they can be
outside limits. If actual account numbers are input, those accounts will be included in
the range.
Note: Blanks are as valid as zeros in establishing lower limits.
Breaks
Specify where In the Positional Trial Balance or Ledger List/Bible to break for
sub-totals by placing asterisks at the positions within the account number where
breaks are to occur.
In this example, notice the different break levels specified by the asterisks for each
account range. For ranges 001 and 002, Assets and Liabilities, each detail (DETL)
account will be shown on the report and there will be no intermediate sub-totals.
For range 003, Production Costs, the Break asterisks are placed differently. A line
will print whenever the first two digits of Detail account number change (because of
the asterisk in the second position of DETL), and a sub-total will print whenever the
Production Number changes (because of the asterisk in the fourth position of
PROD).
Note: You can enter different Breaks for different Account Ranges.
Entertainment Partners
Setup Menu • 9-21
Heading/Total Description
The Description entered here will be printed at the beginning and the end of this
range.
Sub-total This Range [Y/N]
Enter Y for Yes if you want to see sub-totals for this range; enter N for No if not.
Deleting a Detail Account Range
To eliminate a range of accounts in a Positional Trial Balance or Ledger List/Bible,
blank out all the entries for that range by entering spaces or deleting what’s there.
Press Enter to save the changes.
Cost Table
Purpose: Maintain pre-defined and custom sets of Cost Report Account-Type
specifications for use in Cost Reports and FLEX Cost Reports.
Required: All fields per Account-Type range.
Defaults: None.
Delete: Yes.
A Cost Table provides a framework of Account Type ranges, sequences, and
descriptions for a Cost Report or FLEX Cost report. Several Cost Tables are
delivered with VISTA and apply to the following reports:
Table ID
Report on Cost Menu
REPT603
Cost Transactions Report
REPT601
Set Cost Report; Set Cost Consolidation
REPT604
Episodic Cost
PRODCOST
Flex Production Cost
CONSOLIDATE
Flex Production Cost Consolidation
COST_ANALYSIS Flex Production Cost
FOX_COST
Flex Production Cost for Twentieth Century Fox
DISNEY_COST
Flex Production Cost for Disney
(For a review of Account Types, see “Account Types” on page 4-16 and “Cost
Account Types” on page 9-16.)
You can alter any of these Tables or create your own Tables to tailor these reports to
your needs. To create new Tables, you can copy an existing one and change the
copy, or you can start from scratch.
Copying a Cost Table to Create a New Table
To create a new Cost Table based on an existing Table, choose Function Inquire
and select the Table you want to copy. When the Table is displayed in the window,
choose Function Add. In Add Mode, enter your new Report ID, make any changes
to accounts or codes, and press Enter to save your new Table.
9-22 • Setup Menu
Entertainment Partners
Creating or Changing a Cost Table
To create a new Table, use Function Add and enter a unique Report ID of up to
14 digits, alpha or numeric.
To change a Table, use Function Modify and load the Table to be changed.
Now enter the details for each account-type range.
Screen Information
You can enter up to ten “pages” of account-type ranges for one report, but note
that each complete range takes up to three input lines. To move from page to page,
use the Page Up and Page Down keys.
The number to the left of Report Sequence Number is the Line Number. It is fixed
and increments by one for each of the 100 potential lines.
Report Sequence
Report Seq is an arbitrary sequence number that applies to this report only.
Account-type ranges (and their component lines) will be arranged in order of the
numbers you enter here in ascending sequence. For example, the ranges in the
sample contain Report Sequence Numbers beginning with 5 and progressing by 5 for
each successive line; they could just as easily have started with 10 and been
incremented by 10 and produced the same report.
Entertainment Partners
Setup Menu • 9-23
The Seq Number is included so you don’t have to move ranges around to arrive at
the sequence you want. For example, if you wanted Above the Line (lines 1-3 in the
sample) at the end of your report, you’d simply have to change the Report Seq
Numbers of the three lines to numbers higher than any other Report Seq numbers
already in the report. That’s all.
You can concentrate on getting your ranges exactly as you want them without
worrying about sequence. When you’re satisfied with the ranges you’ve entered, then
construct Report Seq Numbers that order the report as you want it.
Why are the example Report Seq Numbers 5, 10, 15 instead of 1, 2, 3? To allow for
the addition of new lines later which can be sequenced anywhere in the report. For
example, to add a second Header line for Above the Line in the sample, just go to the
end of the Cost Table, add the Header line with a Report Seq number of 7 (any
number between 5 and 10), and your new Header would be in place.
Range Line Groups - Report Actions
A range group in a cost table consists of up to three lines or Report Actions:
Header, Range, and Total. Because the Report Sequence Number will arrange the
report as you specify it, it is not absolutely necessary to arrange the lines in any
particular order, but to maintain a visually logical organization, it is best to arrange a
group in the Header-Range-Total sequence. However the lines are arranged visually
in the Cost Table, the Report Sequence Numbers must put them in the correct
Header-Range-Total order.
Each line of your Cost Table will be one of the three Report Actions. Be careful to
spell the Report Action correctly each time you use it.
“Header” Lines
This line provides a title to precede this range in the report. The Report Range
From and To fields can remain blank (the heading here is positioned based on
Report Seq number), but all the default reports include the Account Type Codes for
the range being titled, and it does explain the line more fully. What you want printed
on the report goes in the Heading/Total Description field.
You can use multiple Header lines to describe a section of the report, using the
Report Seq number to place them where you want.
“Range” Lines
A Range line tells VISTA which Account Types to include at this point in the report.
For an overview of Account Types, see “Account Types” on page 4-16. To include a
single Type, put the same Code in the Report Range From and To fields. To
include more than one Type, put the first Type to be included in the Report Range
9-24 • Setup Menu
Entertainment Partners
From field and the last Type to be included in the Report Range To field. The
Heading/Total Description field on a Range Line is not used in the report, but
you could use it to note which Types are included.
“Total” Lines
A Total line inserts a total in the report. The total will include all accounts of the
Type(s) in Report Range From and To fields and will be described by the entry in
the line’s Heading/Total Description field.
You can use multiple Total lines to specify range totals and more encompassing
group and grand totals. The example below shows multiple Total lines in the
Rept601 Cost Table.
Deleting a Range of Account Types
To eliminate a line or range of Account Types in a Cost Table, blank out all the
fields for that line or range by entering spaces or deleting what’s there. Make sure
you blank out all the lines that apply to a deleted range. Press Enter to save the
changes.
Flex Cost Table
Purpose: Store default and custom cost report formats for use with Cost Tables and
Flex Cost Reports.
Required: Report Number, Report Title, Report Layout, and Column Contents
Code
Defaults: None.
Delete: Yes.
Warning: Do not minimize any Flex Cost Table windows.
A Flex Cost Table is a layout for a Cost Report. You control every aspect of the
report: what it is called, paper size and orientation, how many columns, what goes in
the columns, what the columns are called, and how the numbers are formatted. And
you decide which Cost Table to use with the layout.
Four default layouts come with your VISTA system:
PRODCOST for traditional FLEX Production Cost Reports
CONSOLIDATE for FLEX Consolidated Cost Reports
COST_ANALYSIS, the Disney Cost Analysis format
FOX_COST, the Fox Production Cost Format
You can alter any of these formats, build your own format from scratch, or use one
of these defaults as a basis for a new one. We strongly recommend that you
Entertainment Partners
Setup Menu • 9-25
leave the default formats as they are and make any changes to a
renamed copy.
Function Menu
There are two choices on the Flex Cost Table Function Menu that are not on most
Function Menus: Print and Copy.
Print allows you to print the format of any of the Flex Cost Tables.
Copy allows you to copy an existing format to a new report number in order to alter
the new number rather than starting from scratch.
Relationships
There is a one-to-one relationship between Cost Tables and Flex Cost Tables. That
is, for every Flex Cost Table (report layout) there will be a Cost Table (content
specs) with the same name.
If you create a new Flex Cost Table (layout), the last step in that creation, as you will
see, will be to copy an existing Cost Table to be used with the new layout, and the
copied Cost Table will be given the same name as the Flex Cost Table.
Copying Cost Tables to Create a New Table
The easiest way to create your own Cost Table and Flex Cost Table is to copy the
existing one closest to what you want, rename it, and modify it.
To copy an existing set, choose Function Copy and select the Cost Table you want to
copy.
Enter a new Report Number (14 digits, alpha or numeric) in the Copy TO Report
Number field, and press Enter. Your new Cost Table and Flex Cost Table (layout)
will be created.
To modify the Cost Table for “My Cost Report,” go to Setup Cost Table Modify,
select the report and make the changes. To modify the Flex Cost Table (layout),
choose Setup Flex Cost Table Modify, select the report and make the changes.
FLEX Cost Report Layout Windows
Whether adding or modifying a layout, there are two windows to deal with. The
first window or page contains the report number, title, page size and orientation,
and codes for the content of each column.
9-26 • Setup Menu
Entertainment Partners
The second window or page Contains column headings and formulas and number
formats.
To move from the first page to the second, press Page Down (do not press Page
Down when in the second window). To move from the second page to the first, press
Page Up or Enter.
Here are examples of the two windows using the default report, CONSOLIDATE.
Page 2 is a pretty full window. If you can’t see all of it on your screen, there will be a
scroll bar at the right which you can use to scroll up and down. You can also
maximize the window so that it fills your screen until you’re through with it.
Entertainment Partners
Setup Menu • 9-27
Page One: Flex-Cost Maintenance
Report Number is a unique 14-digit code of numbers and/or letters that identify
this layout and Cost Table.
Report Title is a 30-digit description that prints at the top of each page of the
report, so make it as descriptive as you can.
Report Layout describes the paper size and orientation of your report. The choice
here effects the number of columns your report can show. There are three choices:
•
Portrait (PT): 8½ x 11 paper straight up; allows up to eight columns.
•
Landscape (LN): 8½ x 11 paper sideways; allows up to 13 columns.
•
Legal (LG): 8½ x 13 paper sideways (landscape mode); allows up to
15 columns.
Column numbers 1-15 provide spaces for the single-digit codes that determine what
will be shown in each column. The Amount Type codes are shown at the bottom of
the page.
9-28 • Setup Menu
Entertainment Partners
To print one of the amounts listed (A through O) in a column, enter the letter code
for that amount in the column field. For example, to print PO’s added this period in
column 03, put a D in the box under Column 03.
To print a total of other columns in any column, put an asterisk (*)in that
column. The formula for your total will be entered on Page 2—for now just enter the
asterisk.
The pound sign (#) for consolidated average is for episodic productions. To
print consolidated average (for multiple Production Numbers) in a particular column,
put the # in that column. The formula for the average will be entered on Page 2. (On
a report covering only one Production Number, a consolidated average column will
function exactly as a total column.)
Page Two: Cost Heading/Totals
At the top of Page 2 is a repeat of the Column Numbers and Column Amount Codes
that you filled in on Page 1. Beneath the Column Amount Codes for each column are
fields for Amount Format codes. (You cannot change Column Amount Codes on
page 2.)
The five choices for Amount Format are shown at the bottom of Page 2. The default
format for new columns is Format 1. The only difference between formats is the way
in which credit amounts are shown: a minus sign or various brackets.
Enter the number of your choice of format in the box for each active column on your
report in the Amt Format line at the top of Page 2. A code must be entered for each
active column.
In the center of Page 2 are three banks of Upper Heading, Lower Heading, and
Total Formula fields for Columns 1-15. Here is a sample section for the first five
columns.
You can change the wording of any headings as you wish. If you’ve added a new
total column, the default heading will be “Total Column.” Change that heading to
describe the total you create for that column.
Entertainment Partners
Setup Menu • 9-29
In the Total Formula fields for any columns marked with an asterisk, you must
enter a formula using plus or minus signs and the Column Amount Codes from other
columns in your report. In the sample above, the formula for Column 04 is B+E,
that is, Actual To Date plus PO’s To Date, and the Column Headings have been
changed to Total Cost Plus Commits.
A Total Formula must begin in the first position of the field and there should be
no spaces between signs and elements. The formula can consist of as many
Column Amount Codes as you want, whether they’re shown on the report or not,
with a plus or minus sign between each code.
At the bottom of Page 2, the Column Amount Codes and Descriptions are repeated
for reference.
To leave Page 2 without recording any changes, use Function Exit.
To record changes, close Page 2 and return to Page 1, press Page Up or Enter.
Copying a Cost Table for New Report
If you have entered a brand new report (as opposed to copying an existing report and
changing the copy), to add your new report to the list of available Flex Cost Reports,
press Enter from Page 1.
Answer Yes to “Do you want to update this report?” and the following message will
be displayed:
Press Enter to clear this message and get to the Cost Report Copy window.
9-30 • Setup Menu
Entertainment Partners
As the message explains, you must now pick a Cost Table to copy for your new
report. The Report Number for the copy will be the same as your new Flex Cost
Table.
Press F12 to select a Cost Table from the existing list, choose the one you want, and
press Enter to begin the copy process. The copying takes only a few seconds. When
it is finished, your new Flex Cost Report is ready to run!
Payroll Interface Table
Purpose: Maintain control codes and accounts for posting payroll diskettes and
paying payroll invoices.
Required: Invoice Prefix and Suffix, Company, Currency, and Bank Code.
Delete: Yes.
Payroll Interface information gives VISTA the codes and accounts necessary to
process payroll information as it is received from Entertainment Partners prior to
entering that information into Accounts Payable.
Depending upon the payroll program a particular production is using – either the
VISTA Payroll History Reporting System or the Payroll Interface programs – the
mechanics and functions of the Payroll Interface Table will differ slightly. Review
“VISTA Payroll History Reporting System” beginning on page 15-1 for a thorough
discussion of the distinctions between the programs.
Entertainment Partners
Setup Menu • 9-31
Use Function: Add to add a new Payroll Interface Table; use Function Modify
to make changes to an existing one.
Invoice Prefix
VISTA Payroll History Reporting System requires only one Payroll Interface
Table. VPHRS invoices will have one of three Invoice Prefixes: C (from the
California office); N (from the New York office); or F (from the Florida office). As
invoices with differing prefixes are downloaded, VISTA Payroll History Reporting
System will offer the User the opportunity of duplicating the existing Payroll
Interface Table with the new Prefix.
Suffix
The Invoice Suffix field can not be empty. Input any alpha/numeric character.
Input the Invoice Prefix and Suffix for the table, then tab to enter the Company,
Currency and Bank Code from which the payroll invoices will be paid.
Vendor; Payroll Source Code; AP Source Code
The Vendor and Source
Codes selected must already
be established.
Select the Payroll Vendor, i.e. Entertainment Partners. Specify the Payroll
Source Code to be inserted into Payroll transactions. Specify the A/P Source
Code to be inserted in A/P transactions.
Vista Payroll History Reporting System
The following three questions need to be answered by Users of VISTA Payroll
History Reporting program:
9-32 • Setup Menu
Entertainment Partners
Do you want to update Fringe/Journal tables with EP’s?
Users with the Payroll
Interface program will not be
presented with this option.
A Yes in this field will enable VISTA to override the Fringe and Journal Tables
stored locally with the Tables stored by Entertainment Partners Payroll department.
If a User has made changes to a production’s Tables without notifying EP Marketing
department, those changes will be reversed by VISTA unless the User chooses No.
Note: Any changes to a production’s Fringe or Journal Tables should be reported to
Entertainment Partners Marketing department so that those changes may be applied
to that production’s payroll invoices.
Do you want to fringe to Set?
A Yes in this field will enable VISTA to use the full account configuration,
including the Set field in the coding of the received payroll. Status of this field
should generally be verified through a production’s studio or corporate accounting
office.
Do you want to fringe to Memo?
A yes in this field will enable VISTA to include the memo fields ( Insurance, free
fields) in the calculation of fringes.
NOTE: These are independent options. A Yes response on one will have no affect
on the other.
Insurance/Free Field
Purpose: Maintain custom, user-defined codes and definitions for insurance and
free fields.
Required: All fields for each subject field defined.
Defaults: None.
Delete: No.
VISTA’s Insurance and Free Fields are strictly for you, the user. They enable you to
set up codes that can be entered into transactions to identify those transactions over
and above anything the account code can do. They can reach across Company,
Currency, Vendor and Account lines to bring together costs that are of a particular
interest to the production, for whatever reason.
Codes can be alpha or numeric or both. Once the codes are set up and the
transactions are coded, you can create reports through G/L Inquiry based on these
codes.
VISTA does not use these fields, so you could finish an entire production without
creating or using an insurance code or free field code. Even the Recoverable
Assets program, which makes use of at least one of these fields, need not be used.
On the other hand, you can make extensive use of these codes to identify certain
costs, but the tradeoff is this: By using too many codes, it can make input too
complicated. Remember, the codes and their uses are up to you, but the results are
only as accurate as your consistent use of the codes at input time.
Entertainment Partners
Setup Menu • 9-33
One of the choices you have when setting up VISTA is whether to have one or two
Free Fields and how many digits they will be (see “Creating Your System” on page
3-1). For this section—but not throughout the documentation—we will assume
you’ve chosen two.
The Insurance Field is so named because it can be used to identify and track costs
for a particular insurance claim (in the rare circumstance that you have one). But
even though Insurance is its title, you can consider it as just another free field and
use it however you want.
Creating or Changing Insurance or Free Fields
Use Function Add to create a new field; use Function Modify to change a field.
Once a code has been added, the code cannot be changed, but the Memo Description
and Valid For fields can.
Here is a sample Insurance Free Field Table window showing two Free Fields, open
to Modify the first Free Field (Reference 3).
You can add or change one type of field at a time. The fields available in your
system are displayed in buttons at the top of the window with Reference
Numbers above the buttons (in this case, IN for Insurance, F for Free field, and F2
for Free Field 2). Choose the Reference Number you want to add or change first
by either filling in the field with the code for IN, F, or F2 (2, 3, or 4, respectively), or
by clicking on the appropriate button.
When you have chosen the field to be added or changed, press Enter.
If you are adding codes, the cursor will skip the Memo Selection Range box.
If you are changing codes, the cursor will move to the Memo Selection Range
box. To see one code, enter the code in the From field and press Enter. To see
multiple codes, enter a low code in the From field, a high code in the To field, and
press Enter. Leaving the fields blank will display all codes that have been entered.
9-34 • Setup Menu
Entertainment Partners
Notice the Page nn of 10 notice above the codes display. You can have as many as
ten pages of each of the Insurance or Free Field Codes, or up to 100 of each Code.
To move from page to page, use the Page Down and Page Up keys.
Enter or change the Memo Description (30 characters), which is used only on the
Recoverable Assets Report.
The Valid For fields are P for Production Cost and B for Balance Sheet. To
prohibit use of this code in either of these categories of accounts, put N for No in
the field. To allow use of this code, put Y for Yes in the appropriate field(s).
Press Enter to record your additions or changes.
Data Transfer Table
Purpose: Maintain account conversion table for transferring data to and from a
corporate VISTA System.
Required: License Number, Account Configuration, and Direction
Defaults: Group = 01
Delete: Yes.
If you are required to do data transfers to and from a corporate VISTA System, this
table will be set up for you. Please contact EP Customer Support if you have any
questions.
System Customization
Purpose: Determine which post-close ledger periods will be available for inputting.
Required: PCL Status Flag
Defaults: PCL Status Flag = N (no PCL’s available)
Delete: N/A
The post-close ledger period function is available for corporate systems, and is not
used in a production environment. Please contact EP Customer Support if you have
any questions.
Flex Ledger Inquiry Table
Purpose: Maintain custom Ledger Inquiry Report specifications.
Required: Report ID, Report Description, Report Layout, at least one field selected
(Sequence Number).
Defaults: Segment breaks for first and second account ranges.
Delete: Yes.
The Flex Ledger Inquiry is one of the most potent tools at your disposal for
analyzing costs. Every VISTA system comes with a Default Ledger Inquiry layout,
and that may be enough for you. But, if it’s not, the Flex Ledger Inquiry Table
allows you to design and keep your own layouts.
You can copy a Table, rename it, and tweak the new one to your satisfaction. You
can break your account number any way you want to see Detail costs across
Entertainment Partners
Setup Menu • 9-35
Company or Production lines. You can specify the fields you want to see and t he
line layout of those fields. You can set criteria for data selection in as many fields
as you want, to pull out exactly and only the transactions you want to see. And, if
that’s not enough, when it comes time to run your report (see “Ledger Inquiry” on
page 21-1), you can export the selected transactions so you can analyze or use them
further in your own spreadsheet, database, or word processor.
Creating or Changing a Ledger Inquiry Table
There are two ways to create a new Table: Copy an existing one and rename it
(then change the new one) or start from scratch. Either way, start with Function
Add.
To copy a Table to a new one, in Add Mode select the Table you want to copy.
Change the Report ID (and any other fields you want to change) and press Enter to
record the new Table.
To create a new Table from scratch, in Add Mode enter fields as described in the
following sections, then press Enter to record the new Table.
To change a Table, use Function Modify, select the Table to be changed, update
the fields as described in the following sections, then press Enter to record the
changes.
9-36 • Setup Menu
Entertainment Partners
Identifying the Table
Described here are the fields in the top section of the Ledger Inquiry Table
Maintenance window.
Report ID must be a unique mix of up to 14 alpha and/or numeric characters. This
identifies this layout and appears on the report.
Report Description describes the report and can be up to 30 characters long.
Description also appears on your report as a heading line.
Use the Default Report button select and display the system Default report
layout.
A Ledger Inquiry Report is printed on 8½” x 11” paper by default, but you can
choose a Report Layout orientation of either Portrait (straight up) or
Landscape (sideways).
To choose Portrait, enter PT in the Report Layout field or click the Portrait
button. To choose Landscape, enter LN or click the Landscape button.
Portrait orientation allows up to 112 characters or spaces across a report line;
Landscape allows up to 153 characters.
Landscape reports will use more paper because the pages are shorter.
Placing Account Segment Breaks
In this section of the Ledger Inquiry Table Maintenance window, you specify how to
break up your account number to provide the selection you want. By breaking your
account number into pieces, in the Ledger Inquiry Report window you can then
specify one range for one part of your structure and an independent range for
another.
For example, the structure shown above will produce the following field choices in
G/L Ledger Inquiry:
This allows you to see in one inquiry report all the entries for one detail account
across a range of Location-G/L-Production codes (in a single currency).
Entertainment Partners
Setup Menu • 9-37
Selecting and Placing Fields in a Report Line
The large section at the bottom of the Ledger Inquiry Table Maintenance window
lists every available General Ledger field in your system. It allows you to choose
which fields will be included in your Inquiry, where they will be placed on the report
line, and how much of the field will be shown.
It also allows you to specify conditions for each field that will limit the
transactions included in the report. (The specifications in the window shown on the
next page are those for the Default Ledger Inquiry layout.)
The left column of this section lists the fields you can choose from. For each field
you want on your report line, specify the following in the successive columns.
Sequence: The position from left to right of each field on a line. For example,
assigning Sequence Number 1 to a field will place that field in the left-most position
on the line. Successive Sequence Numbers will place fields in that relative sequence
from left to right across the page.
Length of Field: Specify the number of positions in the field to be shown on the
report.
LCR Justify: Enter L(eft), C(enter), or R(ight) to specify how the field should be
aligned in its allotted space.
Spaces Before: Specify the number of spaces to be left blank in front of the field
(between the field and the field to its left). Two is the default; leaving only one space
may allow more information on a line, but creates a dense report that may be
difficult to read or interpret. You can specify any number you choose.
Headings Line 1\Line2: Here you fill in the column headings for the fields you’ve
chosen to show. There are two lines available for headings, and you can use both by
separating with a backslash (\) what goes on the first line from what goes on the
second. To place your entire description on the second line, begin the description
with the backslash as in \Vendor Name, the default heading for the Vendor Name
field.
Using the Special Conditions Column
Special Conditions EQ NE GT GE LT LE AND OR: In this column, you can
specify conditions (up to 80 characters) that will limit the transactions selected
for your report. You may leave this column blank.
9-38 • Setup Menu
Entertainment Partners
The initials after the words Special Conditions stand for:
EQ
Equal to
NE
Not equal to
GT
Greater than
GE
Greater than or equal to
LT
Less than
LE
Less than or equal to
AND
Compounds conditions that must be met (all conditions must be
met for a transaction to be selected)
OR
Adds conditions for which a transaction will be selected
For example, if you want to print transactions of $1,000 or more, enter GE 1000 in
the Special Conditions Column for Detail Amounts. GE 1000 and LE 5000 would
give you all amounts between $1,000 and $5,000 inclusive.
For descriptions, entering EQ ADVANCE on the DETAIL DESCRIPTION line will
give you all transactions that have ADVANCE as the first word in the description
field. EQ*ADVANCE* will search the entire description, and print any transaction
where the word ADVANCE appears anywhere in the description field. To select a
description of multiple words, place quotation marks around the entry, i.e., EQ
“CHECK REGISTER POST.”
Handle Special Conditions With Care
The ability to select certain transactions can be a powerful analysis tool, but it can be
misleading as well. Remember, the computer is frustratingly literal—it does exactly
what you tell it to do, whether it’s what you really want or not. When you specify a
certain condition, you will see the transactions that meet that condition, but you
won’t see those that “come close” to meeting the condition and might be in your
listing if your spec had been a little different or more accurate. Never rely only on
a report using Special Conditions. What’s not selected could be just as
important as what’s selected. Always support it and check it against a report with no
Special Conditions.
Personality Table Listing
Purpose: List current settings for most Setup options.
Required: N/A
Defaults: See default choices below; all set to No.
Delete: N/A
Entertainment Partners
Setup Menu • 9-39
The Personality Table Listing prints any or all of the Setup information shown
above. To print all of the tables, click on Yes or enter Y for the first choice and press
Enter. To print only selected tables, click Yes or enter Y beside the tables you want
to print, then press Enter.
Cost Table Listing
Purpose: List a Cost Table for selected Cost Report
Required: Report ID
Defaults: None
Delete: N/A
9-40 • Setup Menu
Entertainment Partners
To list the Cost Table for a particular Cost Report, Open Cost Table Listing on the
Setup menu and press F12 or right-click in the Report ID field to select the ID. Once
the ID you want is in the Report ID field, press or click on Enter to print the report.
Weekly Account Analysis Table
Purpose: Define accounts to be included in the Control Tables section of the
Weekly Ledger Balance report.
Required: Currency
Defaults: None
Delete: N/A
Choose Setup, Weekly Account Analysis Table from VISTA’s Main Menu to
see the following screen:
Entertainment Partners
Setup Menu • 9-41
Enter the Currency (or F12 or right-click to see a scroll panel of valid choices).
Enter up to ten account numbers that require special attention on a weekly basis to be
included on the report.
Corporate Security
Purpose: Set up field-governed security for a Corporate VISTA System
Defaults: None
If you require field-level security, please contact Customer Support for assistance.
9-42 • Setup Menu
Entertainment Partners
Chapter 10: Chart of Accounts G/L Menu
Overview
The VISTA Chart of Accounts is designed specifically for production accountants.
For an overview of the structure of any VISTA chart, see “VISTA Chart of Accounts”
on page 4-14. Additionally, before adding any segment, read the section on adding
that segment and follow the instructions carefully.
Enhance the Chart
The Chart of Accounts is one of the foundations of VISTA. Time spent
customizing it and making it conform to the production accountants’ needs will be
time well spent throughout the run of the production. Here are a couple of
suggestions to dress it up and make it more useful.
Indenting
By making sure that the Break Levels are properly aligned, VISTA will indent the
accounts on reports automatically. For a detailed discussion of Break Levels, see
“Break Levels” on page 4-15.
Entertainment Partners
Chart of Accounts - G/L Menu • 10-1
Spell It Out
In every Chart there are catch-all accounts for every department such as “Box
Rental” or “Other Costs.” Using these simple descriptions are clear enough when
the accounts appear in context with their department headers, but they can be
confusing or unclear when they appear alone, as in an input distribution listing. Clear
up the Chart by making all the descriptions stand alone. Instead of just “Other
Costs,” include the department name: “Producers Other Costs,” “Construction Other
Costs,” etc.
Chart of Accounts Entry
Purpose: Input and update Production Numbers, G/L and Cost Accounts, and Sets
to the Chart of Accounts.
Required: Complete account numbers, types, break levels, and posting status
Delete: Accounts can be either deleted; or deactivated.
Choose G/L, Chart of Accounts Entry from VISTA’s Main Menu.
Adding Accounts
Choose Add from the Function Menu, then from the Segment Menu select the
Segment to be added.
The Segment choices available when adding an account are:
Cost Accounts - Add a cost account only.
Balance Sheet Accounts - Add accounts other than Production, Cost or Set
accounts; for example, assets, liabilities, etc.
Productions - Add a new Production Number only.
Sets - Add a new Set only.
10-2 • Chart of Accounts - G/L Menu
Entertainment Partners
To add an account, input all—but only—the fields pertinent to the Break Level to be
added. If adding a new Level 1 (LO), enter the LO field, then tab over to the
Description field, leaving the remaining account number fields blank.
Enter the new account’s name in the Description field. To add other Levels, enter
the fields that apply, beginning from the left, tab over any fields to be left blank, then
enter the description.
Caution: Be very careful when entering a new account for an existing production
combination. An “invalid” production combination will not be recognized by
VISTA as invalid—it will be considered a new production, and will create a new
production with the description given to the account.
For information about adding the rest of the G/L account fields, peruse the “Adding a
Cost Account” section of this document.
Adding a Cost Account
Choose Function Add, Segments Cost.
Input the proper Cost account number in the marked field. Input the name of the
account to be added in the description field. The remaining fields, Valid for
Posting?, Account Type, and Break Level, may be completed as described in
the “Completing the New Account” section on page 10-4 of this document.
Adding Balance Sheet Accounts
Choose Function Add, Segments Bal Sheet Account.
Input the proper Balance Sheet Account numbers in the designated field. Input
the name of the account to be added in the description field. The remaining fields,
Valid for Posting? and Account Type may be completed as described in the the
“Completing the New Account” section on page 10-4 of this document.
Adding a Production Number
To add a new Production Number (which will automatically accept any of the
Cost accounts), choose Add from the Function menu, then Production from the
Segments menu.
Input the new numbers. Input the production name in the Description field. Add as
many as 150 new productions at a time (up to ten pages of fifteen each). If adding
more than fifteen, use the Page Down and Page Up keys to move from page to
page. The Valid for Posting? field must be completed as described in the “Valid
For Posting” section on page 10-4 of this document.
Adding a Set Code
A blank Set code must be established for each Location or Company in order to
run Cost Reports for that Location or Company.
Choose Function Add and Segments Set.
Depending on the production’s setup, Company (LO) and Set will be displayed.
Enter a valid Company Code, then enter the new Set code.
Enter the name of the set in Account Description. Add as many as 150 new sets at a
time (up to ten pages of fifteen each). If adding more than fifteen, use the Page
Down and Page Up keys to move from page to page. The remaining Valid for
Entertainment Partners
Chart of Accounts - G/L Menu • 10-3
Posting? field must be completed as described in the “Valid For Posting” section
on page 10-4 of this document.
Adding a Production Cost Account
Choose the Add function and select a segment. Enter the new account number, then
tab to Account Description and enter the new account’s name.
For information about the rest of the fields in adding a Production Cost account, see
the next section: “Completing the New Account”.
Completing the New Account
To complete a new Production Cost account entry, input the following fields, then
don’t forget to press enter.
Brk Lvl
Use the bi-directional arrows at the far-left edge of the window to toggle the account
line into the proper break level position. Notice that the account’s Brk Lvl as noted
by VISTA in the column at the far right of the window automatically adjusts
accordingly. For a detailed discussion of Break Levels, see “Break Levels” on page
4-15.
Acct Type
Enter the one- or two-digit Account Type code for the new account, placing it in
the range of other accounts of the same type. For a detailed discussion of Account
Types, see “Account Types” on page 4-16.
Valid For Posting
A User may wish to deactivate an account for posting without deleting the account
altogether. Setting this designation indicates to VISTA whether or not a User may
allocate costs to this account. A Y or N must be entered.
Setting the Valid For Posting flag to N prevents posting to that account while
retaining the account within the Chart of Accounts.
Setting the Valid for Posting setting to I Inactivates the account. An Inactive
account will not appear on reports.
An Account may be inactivated for posting regardless of past activity within the
Account. An inactivated account will not appear on a Chart of Accounts Listing,
but the Account will appear on various other VISTA reports showing account
activity if the Account has had such activity prior to being inactivated.
Completing the Accounts Entry
Enter as many as 150 new accounts at a time (up to ten pages of fifteen each). If
adding more than fifteen, use the Page Down and Page Up keys to move from
page to page.
When finished entering, press enter to record the new account(s).
10-4 • Chart of Accounts - G/L Menu
Entertainment Partners
Updating the Chart of Accounts
To update any of the account Segments, choose Modify from the Function menu,
then select the desired Segments: Cost Accounts, Balance Sheet Accounts,
Productions, Sets or Reporting Descriptions.
Unless working a Corporate VISTA System, the Department selection of the
Segments menu will be blue, and unavailable for modification.
When selecting the Segments to be modified, From and To range boxes will be
shown at the top of the Chart of Accounts Entry window.
Displaying All Entries in a Segment
The default Function is Inquire. To see all the entries in the selected Segment,
simply press enter. The entire range of entries (beginning with the first fifteen
entries) will be displayed in the pages at the bottom of the window. If there are more
than fifteen entries, use the Page Down and Page Up keys to move from one page
to another.
VISTA will only display up to 150 entries at a time (ten pages of fifteen entries
each). When Paged Down to the tenth page, a caption at the left bottom of the
window will say Last Page. This means the last page of this set of 150 entries, not
necessarily the end of all entries. To move on to the next set of entries (if a range of
more than 150 has been selected), press Enter. Answer Yes to the update
verification question even if no changes have been made. The next set of up to 150
entries will be displayed.
Use upper and lower limits in ranges (all zeroes and all nines, for example). The
accounts specified in ranges do not need to be valid accounts.
Displaying all entries is not only the easiest selection to make, it’s also helpful
because it shows the record(s) in context with the records proceeding and following,
allowing the User to double-check Break Levels, Account Types, and other codes
simultaneously.
Selecting a Segment Range
To display a specific record, input that record’s code(s) in the From field(s) and
press Enter. For example, to see a particular Set, input the Company (LO) code
(if necessary) and Set code in the From fields and press Enter. To see a particular
Cost account, tab to the DETL field, input the account DETL number, then press
Enter.
To display a select range of records, use the From and To fields to specify the
exact range to be viewed.
Modifying Accounts
Choose the Segments to be modified: press Enter to view all Segments, or input
a range or set of codes. Press Enter. Identify the item to be modified, and tab to the
field to be modified. Input the new data. Modify as many records in the selected
range as desired.
When all modifications are complete, press Enter to update the Chart.
For more information about the various fields on an account display line, review the
information in the “Completing the New Account” section on page 10-4 of this
document.
Entertainment Partners
Chart of Accounts - G/L Menu • 10-5
Deleting Accounts
Accounts may be deleted from the Chart of Accounts by the User only if the
account to be deleted is not a Heading Account, and only if there is no activity
posted to the account.
With the mouse, change the Function to Delete. A VISTA dialog box will prompt
the User for an account, or range of accounts, to be deleted. Upon inputting the
accounts to be deleted, press Enter.
VISTA will generate a report that will document the deletion of the accounts, or that
will explain the reasons for which the accounts could not be deleted.
A User may prefer to deactivate an account rather than delete it. Refer to “Valid For
Posting” on page 10-4 for explanation and instruction of this feature.
What’s the G/L Master?
The G/L Master is a file that VISTA creates based on the accounts you’ve posted to.
There are no records on the G/L Master when your system is first set up. As you use
accounts, they are added to the G/L Master file by Currency.
Once an account has been added to the G/L Master, the only way to change a
description on the G/L Master is to do it directly. Changing the account’s description
in your Chart of Accounts will not change it on the G/L Master if you’ve already
used the account number with a particular Currency.
Why does this matter?: because some VISTA reports use account descriptions from
the G/L Master. You may have changed the description for an account in the
Account Segment of your Chart, only to see the old, incorrect description still
showing up on some of your VISTA reports. When this happens, it’s because the
account was used (posted to) prior to your change, and it was added to the G/L
Master with the outdated description.
The solution is to update the G/L Master description as well as the Account Segment
description.
10-6 • Chart of Accounts - G/L Menu
Entertainment Partners
Updating the G/L Master
Choose Function Modify and Segments Reporting Descriptions. Enter or
select the Currency (it cannot be blank, and you cannot display records for more
than one Currency at a time). Press Enter to see all the accounts for that Currency,
or use the From and To fields to display a range of accounts. Enter the specific
codes in the From field to display a specific record.
Account Description is the only field you can change in the G/L Master.
If your range includes more than fifteen accounts, use the Page Down and Page
Up keys to move from page to page. If your range includes more than 150 records,
when you get to the tenth (last) page, press Enter to save any changes you’ve
made (even if you’ve made no changes) to move on to the next set of records in the
range.
When you’re through making changes, press Enter to update the G/L Master.
Viewing Chart of Accounts Segments
To view Segments of the Chart of Accounts, choose Function Inquire, choose the
Segment you want to view from the Segments menu, then use the same
techniques for selecting accounts or ranges as described in “Updating the Chart of
Accounts” on page 10-5. You will not be able to make any changes in Inquire mode.
Function Clear Screen
Use Function Clear Screen to reset the Chart of Accounts Entry window and
begin again. This can be done at any point in any of the other functions. Any
changes made prior to clearing the screen will be discarded. Remember, to record
changes, press Enter.
Entertainment Partners
Chart of Accounts - G/L Menu • 10-7
Chart of Accounts Listing
Purpose: Produce printouts of all or selected portions of the Chart of Accounts
Required: Segment selection and range
Defaults: None
Choose G/L; Chart of Accounts Listing from VISTA’s Main Menu.
This menu choice, G/L; Chart of Accounts Listing, produces reports showing the
structure of the show’s Chart, including the descriptions and codes for each account.
It does not print any activity or balance information.
To print all of a given Segment, click on the Segment, then press Enter.
To narrow the scope within a Segment, use the From and To fields to define the
range of accounts you want to print. For more about ranges, see “Selecting a
Segment Range” on page 10-5.
To include inactive accounts; that is to say, accounts that have not been designated as
Valid for Posting, click the check box at the bottom left of the window.
Create Export file?
VISTA allows the user to ‘export’ information generated by VISTA into other
programs, such as Microsoft Word or Excel, by translating VISTA data into an
electronic .vis file that can be accessed by those other programs. Check the box to
create such a file.
10-8 • Chart of Accounts - G/L Menu
Entertainment Partners
Chapter 11: Vendors - A/P Menu
Overview
The VISTA Vendor file is one of the most important files in the system. Here is
stored far more than a Vendor’s name and address. The file contains tax information
and ID, phone numbers, default account numbers, contact names, discount data,
petty cash control accounts, and more.
Take the time when setting up Vendors to enter as much information as possible, it
comes in very handy and can save a lot of time as the production progresses. The
more information the Vendor file contains, the more useful the file will be down the
road.
A User need not close an A/P
window containing an active
Vendor to affect a change to
that Vendor in another A/P
window.
Vendor information is dynamic and can be changed any time. The changes take
place immediately. If, for example, a Vendor has been marked for No taxes, but a
User realizes in the middle of entering an invoice that the Vendor should be 1099’d,
the User can select A/P Vendor Vendor Entry, Function Modify, specify the
Vendor, change the tax information, press Enter to record the changes, close the
Vendor Entry window, and go back to entering the invoice.
Vendors by Currency
VISTA maintains Vendor files by Currency. If a production uses more than one
Currency, that production will need more than one Vendor file. To pay a Vendor in
more than one Currency, add that Vendor separately for each Currency that
applies. When looking up a Vendor for data entry, the Vendors available will be
only those entered for the active Currency.
Vendor Numbers: History!
Although Vendor Numbers are still present and presented in VISTA - on-screen and
in reports - there is no reason to keep track of them. At every point at which a
Vendor is called for in VISTA, part or all of the Vendor’s Name can be used to look
it up. VISTA assigns 12-digit Vendor Numbers in sequence beginning with 1.
Vendor Numbers can also be specifically assigned by a User when adding a Vendor.
This has two important advantages for operators. It eliminates the need to list
Vendors several times a day and code input with arbitrary numbers, saving
significant time and reams of paper. It also cuts down on the number of duplicate
Vendors, because if the Vendor has already been added by another User, it’s on file
Entertainment Partners
Vendors - A/P Menu • 11-1
the instant that User hits Enter. (See “Naming Conventions” on page 11-5 for
further suggestions on avoiding duplicate Vendors.)
The Vendor Number field is still included on all VISTA screens, but because it has
been relegated to a control number and is no longer key to input, this document will
refer back to these paragraphs when appropriate and otherwise not mention the
Vendor Number field except to direct to tab past it.
A/P Vendor Menu
To access the Vendor file, choose A/P Vendor from VISTA’s Main Menu. Vendor
choices are displayed on a sub-menu to the right of the full A/P menu.
Vendor Entry is for entering new Vendors and updating existing records.
Vendor Listing produces various printouts of Vendors on file.
Vendor Inquiry produces Vendor payment history reports by Invoice or Check.
Vendor Label prints name and address labels.
Vendor Change prints a history report of changes made to a selected single
Vendor or all Vendors.
Yellow Pages Listing prints a Vendor File according to the entries made in the
Yellow Pages fields of Vendor records.
Note: To produce reports quickly and see them without wasting paper, select
VISTA’s ReportView as the printer. It’s also a fast way to get familiar with new
reports. Using ReportView displays the information, verifies the use of a report’s
selection criteria, and previews a report’s format. To print a report from
ReportView, select Print from the ReportView File menu.
Vendor Entry
Purpose: Enter and update Vendor records by Currency
Required: Vendor name and address
Defaults: Subject to Tax? No; Status, Active; W9? No
Delete: Vendors cannot be deleted, but they can be Inactivated
Choose A/P Vendor Vendor Entry from VISTA’s Main Menu.
11-2 • Vendors - A/P Menu
Entertainment Partners
Adding a Vendor
In the Vendor Entry window, choose Function Add. Enter or select (press F12) a
Currency, tab past the Vendor Number field, and begin entering information for
the Vendor in the Name field. For more information about the different sections of
the Vendor record, see “Vendor Record Sections & Fields” on page 11-4.
Changing a Vendor
In the Vendor Entry window, choose Function Modify. Enter or select (press F12)
the desired Currency, tab past the Vendor Number field, and enter the first or the
first few positions of the Vendor’s Name. Press F12 or right-click on the Vendor
Name field to bring up the Vendor Scroll Panel (if the keyed characters produce a
match for more than one Vendor) or the Vendor record itself (if the keyed characters
match only one Vendor). For more information about the different sections of the
Vendor record, see “Vendor Record Sections & Fields” on page 11-4.
A Vendor’s Name can not be modified if the Vendor has open or unpaid invoices.
If the combination of characters in Vendor Name produces no match, a No
Records Found message will be displayed. To try again, enter fewer characters in
the Name field and press F12 again, which may or may not produce a match.
Pressing F12 or right-clicking on an empty Vendor Name field will produce an
alphabetical scroll box of all the Vendors on file. If the Vendor isn’t already on file,
choose Function Add and proceed to add the new record.
When modifying a record, Currency and Vendor Number will be displayed in blue
and cannot be changed. Any other fields in the record can be modified, and a record
Entertainment Partners
Vendors - A/P Menu • 11-3
is kept of each change. This audit trail can be printed out using menu selection
Vendor Change (see “Vendor Change” on page 11-15).
Function Inquire
To display a Vendor but not change any fields, use this Function and look up the
Vendor as described in “Changing a Vendor” on page 11-3. To clear the screen for
another Vendor, press Enter or choose Function Clear Screen or another
Function. Do not confuse this Inquire Function, which just displays a Vendor, with
the Vendor Inquiry choice on the Vendor menu, which prints or displays Vendor
activity history. For more on the latter choice, see “Vendor Inquiry” on page 11-11.
Vendor Record Sections & Fields
Here are descriptions of each section and field in the Vendor record, whether adding
or modifying.
Vendor Section
Required Fields
The fields in this section are
used on VISTA checks, so be
particularly careful when
entering, and double check
them before posting.
There are only a few fields that are required (must be entered) for a Vendor record,
and they all fall within this section: Name, Address line 1, City, State, and Postal
Code (ZIP). If this information is unavailable, enter any character such as a period in
the address, city, and postal code fields. If the State is unknown, or if the Vendor is
not located within the US State coding system, enter or select FO in the State field.
(VISTA understands FO to stand for FOreign.)
(Petty Cash Accounts are required before a Vendor can be used as a Petty Cash
Vendor, but they are not required just to set up the Vendor’s record.)
Name
A Vendor’s Name will always
be in caps, no matter how the
keyboard is set.
Enter the Vendor’s name as completely and accurately as possible. For a person’s
name, enter last name, forward slash (/), then first name. This will list the
person in alphabetical order by last name, but will re-arrange the name into first
name, last name for checks.
The forward slash can also be used for Vendors whose names begin with The
or A. By putting the A or The behind a forward slash (/) at the end of the name
instead of at the beginning, the Vendor appears on lists in a meaningful alphabetic
11-4 • Vendors - A/P Menu
Entertainment Partners
position, but the name will be printed correctly on checks. For example, Vendor
Name HAND PROP ROOM/THE will list this Vendor in the H’s but make checks to
THE HAND PROP ROOM.
Naming Conventions
A problem that can lead to duplicate Vendor entry and duplicate Vendor file folders
is not deciding in advance how to handle the alphabetization of names. There are
conventions used by phone books and by dictionaries. There may be other sources of
conventions that are better or simpler or more endearing. It is important to pick a set
and make sure all VISTA Users understand and use them. Consistent application of
those rules is important to the whole production as far as avoiding confusion and
mistakes.
Rules need to cover conditions such as thes e:
•
If the Vendor name contains (or more importantly, begins with) a
number, will the Users enter the digits or spell them out? Will it be 3M
or Three M (or Minnesota Mining and Manufacturing)?
•
Should periods be used or not? Should spaces be left between acronyms
or not? Will it be LA Gear, L A Gear, L.A. Gear, or L. A. Gear?
Why does this make a difference? Because each different entry above will place that
Vendor in a very different spot on a populated Vendor list. Even more importantly,
looking up a Vendor by name in VISTA using one method will not find the Vendor
if it was entered using a different method. For example, if the latter Vendor is
entered as LA Gear, and a User enter L A in Vendor Name, the Vendor won’t be
found, and that User will be on the way to adding a duplicate.
Handling Duplicate Vendors
VISTA tries to prevent duplicate Vendors by comparing the first 20 positions of a
new Vendor’s Name to Names already on the file. If there’s a match, the following
message is displayed.
If it is a genuine duplicate, answer No and avoid it. But this method isn’t foolproof.
Because the computer is completely literal, this test would not catch the duplicates
L.A. Gear and L A Gear. Because it tests only the first 20 positions of the name, it
will raise a false alarm for legitimate Vendors such as BLS Limousine Service of NY
and BLS Limousine Service of LA.
No matter what precautions are taken, duplicate Vendors happen. If one of the
Vendor entries has not been used for posting activity, use that record and modify
it into the next Vendor record to be added. This is safe and allowable because all
Vendor changes are tracked by the system and there is no activity to the original
Vendor (see “Vendor Change” on page 11-15).
If activity has been posted using both Vendor records, the only choice is to Inactivate
one of the records to prevent it being available or used again (see “Status Section” on
page 11-10.
Entertainment Partners
Vendors - A/P Menu • 11-5
Address
Add or change up to two lines of street Address, City, State, and Postal Code (ZIP).
Pressing F12 in the State field displays a scroll box of valid two-digit State codes.
Note that this list includes all Canadian Provinces and several island
territories such as Puerto Rico.
The Attention field is for a contact name, and will appear on checks under the
Name as part of the address.
Telephone Information Section
Enter up to three phone numbers, complete with area codes and international dialing
codes. Use the Description field to record who or where or what kind of phone this
number calls, e.g., Home, Cellular, Car, Marvin.
Income Tax Section
This section controls US 1099 information, used to code reportable, taxable input
and to prepare 1099’s for the production. Generally, individuals and companies that
are not incorporated may be subject to 1099 reporting. It has also become common
practice to get Federal ID numbers even for Corporations and record them here. As
with other tax laws, the rules and forms for 1099’s change frequently. Secure access
to the latest regulations.
Even if the Vendor is not subject to tax, it may still be desirable to fill in the Tax ID
and the Work State fields for information. If no valid tax code is entered, no entry
for this Vendor will be 1099-able.
If the Vendor may be 1099’d, enter a valid code in the Tax Code field. This will
now be the default code that will be inserted automatically by VISTA when entering
invoices or other input for this Vendor. Entering a valid Tax Code will allow
VISTA to code entries for that Vendor with a 1099 code, although not every entry
for that Vendor will automatically be marked for tax reporting.
If a Tax Code is entered, a US Federal Tax ID number for organizations or
businesses or a US Social Security number for an individual or business that
doesn’t have a Federal Tax ID must be entered also. If the number is not available,
enter a temporary explanation, such as Applied for or Calling in.
Place the standard two-digit State codes in the Work State fields to enter up to
three states in which this Vendor has worked and may be 1099’d.
11-6 • Vendors - A/P Menu
Entertainment Partners
If a W-9 form is on file for this Vendor, enter a Y in the W-9 field. An Expire Date
may also be entered for informational purposes.
TIN Vendor Name stands for ‘Tax Identification Number Vendor Name.’ This is
the field in which to enter the name of the person to whom the tax id number (i.e.
social security number) has been issued if it is different from the name under which
the Vendor is entered
General Ledger Accounts Section
If this Vendor is normally coded to specific accounts, save input time by filling in
those accounts here. Enter from one up to three valid account numbers. In Purchase
Order, Invoice, or Petty Cash Entry windows the accounts entered here will
automatically be placed in the entry’s distribution lines when this Vendor is selected.
In those windows, these accounts can be overridden at input time.
Discount Section
If this Vendor normally grants a discount, enter the discount terms here. VISTA will
automatically enter and apply them when an invoice is entered. These fields can be
overridden at input time.
The Due Days field is the number of days after the Invoice Date that the discount
applies.
Yellow Pages Section
VISTA can help organize Vendors and find contacts or supplies when needed by
listing Vendors by Yellow Pages category. The three Yellow Pages fields are
hierarchical, i.e., the first field is for a broad category of Vendor, such as Caterers;
the second narrows the definition, such as Caterers, Buffalo NY; and the third
narrows it even further, such as Caterers, Buffalo NY, Southern Cooking.
Entertainment Partners
Vendors - A/P Menu • 11-7
To use Yellow Pages entries, see “ Yellow Pages Listing" on page 11-16.
Petty Cash Section
If the active Vendor is to be used for Petty Cash or Purchase Card entries, these
fields must contain valid account numbers. That is, if this Vendor is going to have a
petty cash advance or float, or if the vendor is to be designated as valid for purchase
card transactions, then the account numbers assigned to the advance, float or
purchase card must be entered here.
The first field, Advance, is for the Vendor’s Advance account number. The second
field, Accounted For, is for the Vendor’s Offset account. If these accounts are the
same, input the account number in the first, Advance field and leave the
Accounted For field blank. VISTA will duplicate the Advance account in the
Accounted For field.
EDI Setup
EDI stands for Electronic Data Interface. EDI Setup is necessary if the vendor
being added or modified is to be designated as approved for Purchase Card
transactions.
Click on the EDI Setup button at the bottom of the Petty Cash section of the
Vendor Entry screen to add or modify electronic data (i.e. purchase card)
information for the vendor selected.
11-8 • Vendors - A/P Menu
Entertainment Partners
If this is a new vendor:
Select Interface Type by clicking on the appropriate button.
Card Number – The number of the card assigned to this vendor.
Valid date From: Enter the range (month/year) for which the card will be valid for
purchases.
Cardholder name 1 & 2 – Vendor names. If the vendor is known by more than
one name, you may use name 2
Advanced account – The account number on the chart of accounts assigned to
this vendor to receive purchase card advances (credit limit).
Acctd for Account - The account number on the Chart of Accounts assigned to
this vendor for accounted for amounts (purchase expenses).
Account Mask – to be appended to the account number in the transfer file. Call
VISTA Customer Support if additional information regarding this field is required.
Account numbers must exist in the chart of accounts.
Press Enter to accept the information in the window. You will return to the
previous vendor screen. Press Enter again to accept.
If this is an existing vendor:
Add or change the necessary information, then press Enter.
For information regarding the setup of petty cash custodians and purchase card
vendors, see the “Petty Cash” section on page 9-14 in the Setup chapter of this
document.
Miscellaneous Information Section
The Comments field is for any information to be recorded for this Vendor.
Comments print on the Vendor List if the All Information option is selected. For
more about printing Vendor Lists, see “Vendor Listing” on page 11-10.
Studio Vendor No. applies
only to productions at certain
studios.
Entertainment Partners
The Studio Vendor No. field is for recording the number assigned by a studio to
this Vendor. If the studio provides a production with a Vendor number, or if there is
a studio- or production-specific numbering scheme, this is the place for it. This
number will be used in uploads to the studio’s records.
Vendors - A/P Menu • 11-9
Status Section
A VISTA Vendor cannot be deleted, but can be made Inactive. To make a Vendor
Inactive, enter I in the Status Active/Inactive field. Press Enter to record the
change. The Vendor will still show up on Vendor scroll boxes and lists, but VISTA
will not allow the selection of the Vendor and will display a Vendor Inactive
message.
To Activate an Inactive Vendor, enter A in the Status Active/Inactive field and
press Enter to record the change.
Don’t Forget: Press Enter!
To record a new Vendor or changes to a Vendor, press Enter and answer Yes to
the update query.
Vendor Listing
Purpose: Produce on screen or printer various lists of the Vendor file
Required: Currency, Vendor range, sequence and type of list wanted
Defaults: Default Currency, Name sequence and Name and Number list for all
Vendors
Choose A/P Vendor Vendor Listing from VISTA’s Main Menu.
11-10 • Vendors - A/P Menu
Entertainment Partners
Enter the Currency of the Vendor File to be viewed. Then choose a sequence by
clicking on NAme or NUmber.
Then specify the type of report desired by clicking on one of the buttons at Vendor
Information by.
Name and Number produces a two-column list of just Vendor Names and
Numbers.
Name and Address produces a listing that shows Vendor Number, Name,
Address, Telephone Numbers and Descriptions, and Studio Vendor Number.
All Information shows everything about every Vendor.
History of Changes shows an itemized listing of Vendor changes, listing the
current information first
Vendor selection may also be limited to only Taxable Vendors (Y), NonTaxable Vendors (N), or all Vendors (B for both). For W-9 tracking purposes,
select only Vendors who have W-9 forms on file (Y), those for whom there are no
W-9's (N), or all Vendors (B for both).
At the bottom of the window, limit the Vendors printed on a report by entering
From and To Vendors in the Vendor Selection Range fields. To select Vendor
Number sequence, enter upper and lower Numbers in these fields. To select Vendor
Name sequence, enter Vendor Names in these fields.
When the request is ready, click on the Enter button or press Enter.
Vendor Inquiry
Purpose: Print or display payment history for a Vendor
Required: Company, Currency, Sort by, Vendor Name or Number is optional
Defaults: Report by Invoice, Inquire by All Items, Distribution by Detail
Entertainment Partners
Vendors - A/P Menu • 11-11
Choose A/P Vendor Vendor Inquiry from VISTA’s Main Menu.
Vendor Inquiry gives an easy-to-read report of a Vendor’s activity in a given
Company and Currency.
Enter the Company and Currency. In the Vendor field, enter a specific Vendor
Number or enter the first few characters of the Vendor’s Name, press F12, and
select the Vendor from the scroll window.
Note: When selecting the Vendor by Name, what will display in the Vendor
window once the Vendor is selected will be the Vendor’s Number, not Name.
In the Report by field, enter I or C or click on Invoice or Check to list payments
in sequence by invoice or check number.
In the Inquiry by field, enter P or O or click on Paid Items or Open Items to
restrict the list to one or the other. To see all items - paid and open - enter A
(default) for All in the Inquire by field.
To show detailed distribution per invoice or check, enter D or click on the Detail
button at the Distribution by field. For a summary report (showing no
distribution), enter S or click on the Summary button.
Limiting the Selection
Further limit what’s shown on this report by entering a range of Invoice Numbers,
VISTA Year Periods, or Production Numbers.
11-12 • Vendors - A/P Menu
Entertainment Partners
Utilize any one or any combination of these three choices. The effect of using more
than one is cumulative, i.e., restricts the selection further. It is not either/or.
Caution: Be careful when using an invoice number range. Incorrectly entered
invoice numbers may be inadvertently excluded. See “Invoice Number Conventions”
on page 13-3.
Page Break at new Vendor?
Check this box to enable VISTA to start a new page when beginning the list for a
new another Vendor.
Getting the Report
When the entries are chosen and input, press Enter or click on the Enter button to
start the report.
Vendor Label
Purpose: Print laser name and address mailing labels for Vendors.
Required: Currency
Defaults: Taxable Vendors Only? defaults to Both; W9 Vendors Only? defaults
to Both; label content selections default to a standard 5-line street address.
Choose A/P Vendor, Vendor Label from VISTA’s Main Menu. This function
prints Vendor Names and Addresses in a three-across, ten-down format for the
purpose of creating mailing labels. This three-across-ten-down configuration
corresponds to Avery 5960 laser printer labels, although other manufacturers can
supply a product suitable for the task.
Entertainment Partners
Vendors - A/P Menu • 11-13
Currency
Input the Currency of the Vendors to print. VISTA does not allow the
simultaneous printing of labels for vendors of different currencies.
Vendor Selection Range
Select a range of Vendor numbers, or leave the range blank to select all Vendors.
Print New?
Print only new Vendors (Vendors added to the file since the last time labels were
printed) by clicking on the Print New? Button. By answering Yes to this prompt,
the User can print labels only for Vendors for whom labels have never before been
printed.
In order to invoke this feature, the response to Save last Vendor printed? must
have been Yes the last time Vendor Labels were printed.
Taxable vendors only?
To print labels for only taxable (1099) Vendors, enter Yes in the Taxable
Vendors only? field. To print labels for only non-taxable Vendors, enter No. To
print labels for all Vendors, regardless of tax status, enter Both.
W9 Vendor only?
To print labels for only W9 Vendors, enter Yes in the W9 Vendors only? field. To
print labels for only Vendors from whom a W9 form has not been received, enter
No. To print labels for all Vendors, regardless of W9 status, enter Both.
Create Export File?
To Create an Export File, click the check box. VISTA will create a file with an
extension of .VIS (in addition to the printed labels) that can be imported into a
spreadsheet program such as EXCEL.
Quantity per Vendor
Input the number of labels for each Vendor to be printed. If more than 1 label per
Vendor is selected, then the total quantity of labels for each Ve ndor will be printed in
turn.
Select the items you wish to print.
VISTA allows the User to select the information that appears on the Vendor Label.
(The information that comprises the Vendor Label information originates from
VISTA’s Vendor Entry module.)
Using the mouse, click the items that are to appear on the labels in the order in which
they are to appear. The number in the field to the left of each checked item indicates
that item’s assigned position upon the label.
Each checked item will occupy an entire single line on the label, except for the
Address, which will occupy two lines.
If more than five lines’ worth of information is selected, then a .VIS -extension
export file is automatically created. This file may be imported into a spreadsheet
11-14 • Vendors - A/P Menu
Entertainment Partners
program (such as EXCEL) for further processing and printing. VISTA can not
print more than five lines of data on a single Vendor Label.
Press Enter to initiate the printing of the Vendor Labels.
Vendor Change
Purpose: List history of changes to Vendor records for all or a selected Vendor
Required: Currency, Vendor selection
Defaults: All Vendors for selected Currency
Delete: N/A
Choose A/P Vendor Vendor Change from VISTA’s Main Menu.
VISTA keeps a record of any changes made to any Vendor records. This is an audit
trail for security purposes and can be printed any time.
Enter the Currency of the Vendor file to print.
To print a list of before and after information for all Vendors for this Currency,
leave the Vendor field blank.
To choose a specific Vendor, enter a Vendor Number or the first few characters of a
Vendor’s Name and press F12. The Name option will either select a Vendor or
display the scroll window so that one may be selected. (When a Vendor is chosen,
the Vendor’s Number, not Name, is displayed in the Vendor field.)
The veracity of this function
depends upon the accuracy of
the system date.
This report may be limited to a time span by entering a date in the Print all
changes since field. VISTA will print changes to the selected Vendor that have
been affected between the specified date and the current date.
Press Enter or click the Enter button to begin printing the report.
Entertainment Partners
Vendors - A/P Menu • 11-15
Yellow Pages Listing
Purpose: List Vendors in a Yellow Pages category or sub-category
Required: Currency, Yellow Pages Reference of References
Choose A/P Vendor Yellow Pages Listing from VISTA’s Main Menu.
To list the Vendors in a Yellow Pages category (see “Yellow Pages Section” on page
11-7), enter the Currency of the Vendor file. Enter the exact Yellow Pages category
desired (and sub-categories, if desired) in the Yellow Pages Reference fields.
Press Enter to begin the report.
11-16 • Vendors - A/P Menu
Entertainment Partners
Chapter 12: Purchase Orders P/O Menu
Overview
VISTA’s Purchase Order system allows the User complete and flexible purchase
order information.
Purchase orders may be linked directly to Accounts Payable invoices. Data input
within the Purchase Order module may be accessed via Accounts Payable from
A/P Invoice Entry, and even modified there as necessary. Refer to “Invoices and
Purchase Orders” on page 13-11 of this document.
Typical Purchase Order Cycle
There are three steps to the typical Purchase Order cycle:
1.
Input;
2.
Modification; and
3.
Reporting
Unlike most other VISTA modules, neither auditing nor posting of Purchase
Orders is necessary.
Input
Key in new Purchase Orders. Stamp each PO as it is entered and record its
Transaction Number at the time of entry.
Entertainment Partners
Purchase Orders - P/O Menu • 12-1
Modify
Purchases are normally relieved from Accounts Payable Invoice Entry, but they
may also be adjusted in the Purchase Order Maintenance module. VISTA
maintains separate amount accumulators so that the User may isolate that which has
been relieved through A/P and that which has been adjusted via Purchase Order
Maintenance. These amounts are visible on the screen as well as included on the
Purchase Order Reports.
Report
All purchase orders that have been entered are immediately available for reporting.
No auditing or posting is necessary. There are three different report types and six
sort options. There are three levels of detail available: Summary, Detail, and
Transaction Detail (which shows all adjustments, invoices, etc.).
Purchase Order Numbers
Unlike most of VISTA’s other “number” fields, which are strictly numeric, the sixdigit Purchase Order Number is alphanumeric, and may contain both numbers
and letters.
Another distinction is that the PO Number is left-justified.
Each Purchase Order Number entered for each Vendor must be unique. This is to
say that the same Vendor may not have duplicate Purchase Order Numbers. This
is so even though the same Purchase Order Number may be entered for different
Vendors (except in the case of a Blanket P.O. vendor).
The PO Number may be modified only if an A/P Invoice has not relieved the PO.
Purchase Order varieties
VISTA is programmed to recognize and accept several ‘types’ of purchase orders.
The distinctions within the PO system will aid the User to input and maintain
accurate and complete records.
Blanket Purchase Orders
Established within VISTA is a vendor: BLANKET_P.O. This vendor may only be
used in the Purchase Order Maintenance module. It was designed and included
specifically to hold purchase orders for which the commitment amount is known but
the vendors are not. Such a purchase order is added in the same manner as any other,
but the selected Vendor is BLANKET_P.O.
Blanket purchase orders are accessible to all Vendors via Accounts Payable, and
will be included in all PO scroll panels. When a blanket PO is relieved, the Vendor
and Invoice information for that relief is attached to the PO, and will be recorded as
such on the Purchase Order Reports.
Credit vs. Over-Relieved Purchase Orders
The distinctions between a “credit” purchase order and an “over-relieved” purchase
order are as follows:
Credit POs are entered as a credit amount. The purpose of a Credit PO is
to record anticipated future savings.
12-2 • Purchase Orders - P/O Menu
Entertainment Partners
Over-relieved POs are POs in which the invoices that have relieved the
PO exceed the amount of the PO.
Entering a line with a credit amount on a Purchase Order the total of which is not a
credit will cause that line to be treated as over-relieved. If this is not the desired
result, either: enter the credit amount on a separate Purchase Order, to be created as
a credit P.O.; or input the net amount of the Purchase Order.
Either credit or over-relieved purchase orders can be exclusively included or
excluded from the Cost Reports and/or the Purchase Order Reports. The
default is to have Credit POs included and Over-relieved or zero-balance POs
excluded. EP Customer Support can assist the User to change these defaults.
P.O. Maintenance
Purpose: Add, Modify, View, or Delete Purchase Orders
Required: Currency, Vendor, PO Number, Distribution Account, Amount, and
Description
Defaults: PO Date defaults to current system date
Delete: Yes; if the PO has not been relieved.
Select P/O; P.O. Maintenance from VISTA’s Main Menu.
Function Menu
Choose Add to add a new PO, Modify to change a PO already entered, Inquire to
view but not change a PO already entered, Delete to delete a PO already entered.
Clear Screen clears any data from the window’s fields and repositions the cursor
in the Vendor field. No modifications made within that window will be recorded.
Exit closes the entry window and terminates the entry program. Any data in the
fields of the entry window is not recorded.
Entertainment Partners
Purchase Orders - P/O Menu • 12-3
Ledger Period Menu
Current Period registers the PO about to be entered as having been entered in the
current ledger period.
Selecting Next Period registers the PO about to be entered as having been entered
in the next ledger period, i.e., it will not show up on current period Purchase Order
or Cost Reports.
To register a PO for Next Period, select Next Period from the Ledger Period
menu before pressing enter to record the new PO. The default entry period is
always current period.
P.O. Maintenance – Add
The following sections describe each area of the PO Maintenance window and
how to complete transactions.
The upper portion of the Purchase Order Maintenance window is divided into
four ‘panes.’ Each section is described in turn below.
Currency
Input the Currency, or press F12 to select a Currency from a scroll panel. Pressing
F12 when only one currency is available will automatically input that currency.
If User Defaults have been established via the Setup menu for the active User ID,
that default will automatically appear in the Currency field whenever the PO
Maintenance window is opened. Refer to “User Default Setup” on page 9-5 for
more information.
PO Number
Input the PO Number (an alphanumeric combination of up to six characters, leftjustified). See “Purchase Order Numbers” on page 12-2 for further explanation.
In Modify, Inquire, or Delete mode, press F12 in the PO Number field to
display a scroll panel of POs already input for the selected Vendor.
Vendor
Input a Vendor Number, or the first few characters of the Vendor Name, and
press F12. Select the correct Vendor from the scroll panel. When the Vendor is
12-4 • Purchase Orders - P/O Menu
Entertainment Partners
selected, the Vendor Number will be displayed in the Vendor field, and the
Vendor Name and address will be displayed below the Vendor Number.
If the Vendor is not yet on file, a message to that effect will be displayed. Without
closing the PO Maintenance window, go to the Main Menu A/P Vendor; Vendor
Entry and add the Vendor. After closing the Vendor Entry window, the newly
added Vendor will appear on the scroll panel in PO Maintenance. For more
information on selecting a Vendor see “Selecting a Vendor” on page 4-2.
Session ID
To create a new Session ID, input any eight-digit alphanumeric characters. The
default is the current system date (YYMMDDID).
Year Period
This field displays the year period chosen for the active Purchase Order. If Next
Period has been selected for the PO, that period will show. Otherwise, the Current
Period will show.
Transaction
This field displays the Transaction Number that VISTA assigns automatically to
each system transaction. This number will change depending on the Function.
In Add mode, this field will initially be blank. When adding a PO, a Transaction
Number will appear here - it is the number assigned to the PO just entered. The
number is not assigned until after the User has pressed enter and answered Yes to
add the PO. Until that point, the number displayed here is the number of the
previously added PO, not the one for which data is being input.
In any other mode, this field will contain the Transaction Number of the PO
being changed, viewed, or deleted.
Function Clear Screen will reset the Transaction field to blank.
It is recommended procedure when entering transactions to write the VISTA
Transaction Number on the source document; i.e. the PO. To record the correct
Transaction Number, always follow this sequence:
1.
input the PO data,
2.
press enter,
3.
resolve any error or warning messages,
4.
answer Yes to add the new PO,
5.
then write down the number displayed in Transaction.
Should the Transaction Number be overlooked before closing the window, it may
be found on any of the Purchase Order Reports (refer to “P.O. Reporting” on
page 12-9).
P.O. Date
The P.O. Date will default to the current system date. To use a different date, input
the P.O. Date in the American format (MM/DD/YY).
Entertainment Partners
Purchase Orders - P/O Menu • 12-5
P.O. Description
Input a general Description of the purchase order. The Description will be carried
forward as the invoice description when entering the Invoice for the PO. This is not
a required field.
Reference
The User may input to this field any desired reference data. This is not a required
field.
Distribution Section
For a description of inputting data to this section, see “Account Distribution Entry”
on page 4-10.
Completing the PO Maintenance Addition
To add the Purchase Order or input modifications or a deletion, press enter. If
there are any input errors or warnings to be issued, they will be displayed at this
point. Refer to “Error Messages” on page 4-12 for common error messages, and to
“PO Error Messages” for error messages specific to POs.
After all errors and warnings have been handled, the User will be asked to confirm
the entry, changes or deletion. Press enter or Y or click on Yes to confirm. Press
N or click on No to avoid updating the PO file.
PO Error Messages
To clear an error message from the screen, press enter or click OK. The error field
will be highlighted in red and the cursor will be in that field.
Duplicate PO Number
Each Purchase Order Number entered for each Vendor must be unique. This is to
say that the same Vendor may not have duplicate Purchase Order Numbers.
Refer to the “Purchase Order Numbers” section for a complete description of this
subject.
PO Amount vs. Distribution difference
A small window will appear displaying the Purchase Order total. If the data in the
window is correct, click Yes. If the data is incorrect, click No to return to the PO
Maintenance window for further input.
P.O. Maintenance – Adjustments
A VISTA Purchase Order is never ‘closed;’ it is always available for modification.
Adjustments to Purchase Orders are made via the Purchase Order
12-6 • Purchase Orders - P/O Menu
Entertainment Partners
Maintenance module, by changing the function from Add to Modify. The User
is able to Modify PO Amount, PO Date, PO Description and Distribution
information.
Select P/O; P.O. Maintenance from VISTA’s Main Menu.
Change the Function from Add to Modify and select an existing purchase order to
be modified. This may be done by right-clicking in the PO Number field and
selecting the appropriate P.O. from the scroll panel.
In order to relieve either a zero-amount or over-relieved P.O., the User must
manually input the Purchase Order Number. These two types of Purchase
Orders will not be included on the scroll panel.
Currency
Input the Currency, or press F12 to select a Currency from a scroll panel.
Pressing F12 when only one currency is available will automatically input that
currency. To proceed, press enter
Vendor Number
Input a Vendor Number or the first few characters of the Vendor Name and
press F12. Select the Vendor from the Scroll Panel. When the Vendor is
selected, the Vendor Number will be displayed in the Vendor field and the Vendor
Entertainment Partners
Purchase Orders - P/O Menu • 12-7
Name will be displayed below the Vendor Number. If the Vendor is not yet on file,
a message to that effect will be displayed.
The Vendor on a Purchase Order can be changed using the Modify mode if there
have been no invoices relieving the Purchase Order.
PO Number
Go directly to the P.O.
Number field, bypassing the
Vendor Number field, to pull
up a scroll panel of all
purchase orders.
Input a P.O. Number or press F12 (or right click) in the field to get a scroll
panel. The current outstanding information for that PO will be displayed. If any
lines of the purchase order have been relieved via Invoice Entry, those lines will
appear in blue. The entire history of the selected purchase order may be generated
by running a Transaction Detail Report (see page 12-10 for further information).
Amount
The Amount field displays the dollar total of distribution recorded for each line.
Line Item Breakdown
Right-click with the cursor in the Amount field to bring up a box describing the
activity for that particular distribution line.
The Original amount is the total that was initially input for the line of distribution.
The Relieved amount notes the amount that the line has been reduced via Invoice
Entry.
The Adjusted line notes any modification to the line’s distribution made via P.O.
Maintenance.
The Total line displays the current total of the line of distribution, including all
current deviations – both Relieved and Adjusted – from the Original entry.
Adjust Purchase Order to Zero
Clicking on the Adjust Purchase Order to Zero bar at the bottom of the PO
Maintenance window automatically adjusts all lines of distribution to read zero.
This would be done, for example, when the User knows that the purchase order will
have no further activity , and that there will be no further Invoices entered against the
purchase order, but there remains a balance on the p.o.
Completing the P.O. Modification
A User can Modify the distribution of a Purchase Order as many times as necessary
without recording those changes as an adjustment. However, once the line of
12-8 • Purchase Orders - P/O Menu
Entertainment Partners
distribution has been relieved via Accounts Payable, the account number can no
longer be changed, and any subsequent modifications to that line will be treated as an
adjustment. The addition of a line to an existing Purchase Order will be treated as
an adjustment.
The User may modify the P.O. Amount, P.O. Date, P.O. Description or
Reference fields on the top half of the window. On the lower portion of the
window, the User may modify the Account Number, Amount, Description or
Tx Cd.
Press enter to record the changes. The program will re-calculate the amounts based
on the modifications, and will offer the User the opportunity to verify the difference.
Click Yes to complete the adjustment.
Deleting a Purchase Order
A Purchase Order may be deleted only if there have been no invoices relieving
that Purchase Order. Select the Purchase Order to be Deleted. Change the
Function to Delete. Press enter.
If the Purchase Order has been relieved, simply click on the button on the lower
portion of the screen that says Adjust Purchase Order to Zero.
P.O. Reporting
Purpose: Print Purchase Order Reports in the specified format.
Required: Currency
Defaults: Report Type: Detail; Sort By: PO Number; Native Currency
Conversion; if conversion is requested; will default to Budget Rate.
Select P/O; P.O. Reporting from VISTA’s Main Menu.
Entertainment Partners
Purchase Orders - P/O Menu • 12-9
Currency
Input the appropriate currency, or right-click for a scroll panel from which to
choose the currency.
Report Type
This selection determines what level of detail will be included on the Purchase Order
report.
Summary
Summarized at the Sort By level; i.e. if the Sort By requested is PO Number, the
Summary Report will show one line per PO.
Detail
Will show detail lines of the PO; i.e. if the Sort By requested is PO Number, the
report will be in PO Number order, displaying all the line items for each PO.
Transaction Detail
Similar to the Ledger Bible, but for Purchase Orders. This report type will list the
original PO line items as well as all invoices and adjustments affecting this PO.
12-10 • Purchase Orders - P/O Menu
Entertainment Partners
Sort By
Select the criteria by which the report will be ordered.
Sorting by Session Edit will produce a report in transaction order.
Print Selection
Use the options labeled on the six buttons to select the content of the selected
Purchase Order Report.
PO print options
The selected items reflect the options designated in VISTA Setup. To change them,
simply click to include or exclude each option on the report requested. The default
options also indicate what POs will be included on the Cost Reports. Please call
EP Customer Support if the defaults need to be changed.
P.O. Print
Purpose: Generate purchase orders from within VISTA.
Required: Company, Currency
Overview
If, for whatever reason, the original purchase order is not available, a User may
generate a purchase order with VISTA. All that is required is that the purchase order
has been input to VISTA via the Purchase Order Maintenance module.
VISTA-generated purchase orders contain the production company name and
address; Vendor name and address; and complete distribution information. There are
also places for approval signatures.
No special forms are required. VISTA prints purchase orders on plain paper.
Printing Purchase Orders
Select P/O; P.O. Print from VISTA’s main toolbar.
Entertainment Partners
Purchase Orders - P/O Menu • 12-11
Company/Currency
Input the Company and Currency, or either right-click or f-12 in the Company
or Currency field.
Vendor
Input or select the Vendors in the Vendor From and To fields. The Vendors input
in these fields compose the range of vendors for which purchase orders will be
generated.
If purchase orders for only one Vendor are needed, input that single vendor in the
From field, leaving the To field empty.
Completing the process
The remaining fields need not be input to produce the purchase order. Hit or click
enter to complete the process and generate the purchase order
12-12 • Purchase Orders - P/O Menu
Entertainment Partners
Chapter 13: Invoices - A/P Menu
Overview
The majority of a production's input to VISTA is in the form of Invoices. Processing
Invoices quickly and accurately is critical to staying on top of production costs.
Invoices, like other major input sources, are processed by Batch (see “Batch
Processing” on page 4-5). In addition to the batches you prepare and enter manually,
there are A/P Invoice batches automatically generated by VISTA as a result of
other system actions. When you process a Payroll diskette and post it to A/P, VISTA
creates a batch of Payroll invoices. When you Cancel a Check, VISTA creates an
A/P batch. There are others (see “Computer-created batches” on page 4-6). Each of
these automatic batches is discussed further in its own documentation section. What
you must keep in mind is that once those batches are created, before the results effect
your costs, they must be audited and posted from this A/P Menu just like batches
you create here directly.
Typical A/P Invoice Cycle
A/P Invoices are processed as a middle cycle between Purchase Orders and
Checks. For a complete perspective on Invoice processing also read the sections on
PO's (“Typical Purchase Order Cycle” on page 12-1) and Checks (“Typical Check
Cycle” on page 14-2). There may not always be Purchase Orders for an Invoice, but
most Invoice processing must always be followed by a Check cycle.
The typical processing cycle for A/P Invoice batches is as follows:
Prepare: Match open Purchase Orders to Invoices where appropriate.
Entertainment Partners
Invoices - A/P Menu • 13-1
Input: Create a batch by entering it directly or performing some other function that
creates an A/P batch (see "Computer-created Batches" on page 27). If you input the
batch directly, stamp each invoice as "Entered" and write its VISTA Transaction
Number on it as soon as you enter it.
Audit: Run audit reports in both Transaction and Distribution sequences. Check for
Amount accuracy and coding or spelling errors.
Modify: Make any changes necessary.
Re-Audit: Run audit lists again to verify changes; file them to provide a permanent
audit trail of input.
Post: Post the batch to permanent records to update costs and G/L accounts; file the
posting report to provide a permanent audit trail.
Until you Post a batch, you can add to it or modify it to your heart's content - it's still
a separate entity and hasn't had any effect yet on your permanent records. Once you
Post it, it is no longer accessible as a batch. The records it contains are now part of
your permanent accounting transactions and the transaction amounts are included in
your account balances. Batch ID will continue to show in each transaction record,
but it is for reference only.
Invoice Processing Stages
An Invoice goes through three stages in VISTA. In its original Batch, it can be
edited, deleted, turned inside out without affecting any other part of the system.
When the Batch containing the Invoice has been posted, the Invoice is now an
integral, permanent part of the system, but it is in a temporary status. It is now an
A/P Open Item (even if it was paid by a Manual check), i.e., entered but not paid. It
has been posted to costs and to the A/P Control account. Any changes you make to it
now (see “Modify Open Items” on page 13-17 and “Distribution Changes” on page
13-18) will be recorded as part of the audit trail for the system.
Finally, when it passes through the Check Cycle (and it must pass through the Check
cycle), it loses the Open Item status and becomes a Paid Invoice. The only changes
that can be made at this point must be double-entry, in-and-out changes reflected in
the system’s audit trail.
Invoice Types and Numbering
Invoices, more than any other type of input, come in all shapes and sizes, such as:
•
Normal invoices with PO references, invoice numbers and dates
•
Check requests
•
Invoices with no PO, no invoice number
•
Invoices paid by manual check
•
Scraps of paper
VISTA handles all these diverse types, but you have some decisions to make to get
the most out of the system.
The VISTA Invoice Number field is 20 alpha-numeric positions, and it's left
justified. That means whatever you type in is what becomes the Invoice Number. If
you enter leading zeroes, they stay. If you enter hyphens, they stay. VISTA will
13-2 • Invoices - A/P Menu
Entertainment Partners
watch for duplicate invoices for the same Vendor, but to maximize the effectiveness
of this safeguard, you must make sure everyone is entering invoice numbers the
same way.
Invoice Number Conventions
As with Vendor Names (see Vendor “Naming Conventions” on page 11-5 for a
parallel discussion), rules should be established for inputting invoice numbers. And,
as with Vendor Names, the specifics of the rules are not as important as having and
using the rules. For example, some people might choose to enter leading zeroes if a
Vendor's invoice number has them, others may prefer to drop them. Either way will
work fine; what's important is to decide ahead of time, make a rule, and be consistent
about it.
Some of the circumstances you have to make rules for are these:
•
What to use as Invoice Number for a check request
•
What to use as Invoice Number for an invoice that has none
•
What to do with Vendor invoice numbers that have leading zeroes
•
What to use as Invoice Number for invoices like phone bills which
have no invoice number, but have customer-account numbers and dates
•
What to u se as Invoice Numbers for Vendors that use the same number
to identify every invoice
The more exact and encompassing your rules are and the more each operator follows
them, the more effective VISTA and VISTA's reports will be - the more effective
your work will be.
Invoice Entry Menus
Purpose: Enter, change, view, or delete invoices
Required: Company, Currency, Bank, Batch ID, Vendor, Invoice Number and
Date, Invoice total, Payment Date, Check Code, Distribution Account, Amount, and
Description
Defaults: Current Period, Payment Date defaults to today's date, Check Code
defaults to zero.
Delete: Distribution line, yes; Invoice, yes; Batch, yes
Choose A/P Invoice Invoice Entry from VISTA’s Main Menu.
Function Menu
Choose Add to create a new batch and add new invoices to a batch. Choose Modify
to change an invoice already entered, Inquire to view without changing an invoice
already entered, Delete to delete an invoice already entered.
Clear Screen clears any data from the window's fields and repositions the cursor in
the Vendor field.
Entertainment Partners
Invoices - A/P Menu • 13-3
Exit closes the entry window and terminates the entry program. Any data in the
fields of the entry window is not recorded.
Edit Lines
This function allows the User to Insert or Delete the lines of distribution at the
bottom of the Invoice Entry window. Place the cursor the account field of the line
to be affected. With the mouse pull down the Edit Lines function to effect the
distribution. Insert will shift the lines of distribution below the line selected down
one slot and duplicate the distribution of the line selected on the new line. The User
may then fill in the remaining fields to reflect the changes. Selecting Edit Lines,
Delete will erase the selected line and shift the lines below that line up one slot.
Delete is not a reversible function.
Ledger Period Menu
Current Period registers the Invoice to be entered or being changed as having been
entered in the current ledger period. Current Period is the default when you create a
new batch or enter a new Invoice.
Selecting Next Period registers the Batch or Invoice about to be entered or being
modified as having been entered in the next ledger period, i.e., it will not show up in
current period reports. To make sure a Batch and all its Invoices are tagged for Next
Period, select Batch Next Period when you set up the Batch and for every Invoice
entered in the Batch (the Year/Period is displayed in the upper right hand corner).
Period selection cannot vary in a given batch. Current Period is the default.
Batch Menu
Unlock Batch will clear the window and place the cursor at the Company field in
the Batch Control section.
Delete Batch will delete the entire Batch as selected in the Batch Control section.
To delete a Batch, select Batch Delete Batch from anywhere in the Invoice Entry
Window. If there are multiple active A/P Batches, a scroll panel is displayed for you
to select the one to be deleted; if there is only one active A/P Batch, it is selected
automatically. The selected Batch's control information (Company, Currency, Bank,
and Batch ID) is displayed in the window's Batch Control section, and the following
message appears.
Double check the Batch selected to make sure it’s the one you want to delete, then
press Enter or Y or click on Yes to delete it; press N or click on No to avoid the
deletion. When you delete a Batch, it and all its transactions are gone for good.
13-4 • Invoices - A/P Menu
Entertainment Partners
Invoice Entry Window
The following sections describe each area of the Invoice Entry window and how to
complete transactions.
Batch Control Section
ALWAYS SELECT BATCH CONTROL FIELDS CAREFULLY! Once Invoices
are posted for one set of Batch Control fields, those Control fields cannot be
changed in that Batch. If you Post Invoices to the wrong Bank, for example, the
only way to change them is to enter a complete reversing Batch and re-enter them in
a new Batch. BE CAREFUL!
Before you Post, you can change Batch Control fields. See “Changing Batch
Control Data” on page 4-8 and the Util Menu “Batch Modification” on page 25-1.
If you set up User Defaults in the Setup Menu for your User ID, those defaults will
automatically be in the Company, Currency, and Bank Code fields whenever
Entertainment Partners
Invoices - A/P Menu • 13-5
you open Invoice Entry. See “User Default Setup” on page 9-5 for more
information.
Enter a Company, Currency, Bank Code combination or press F12 in any of the
three fields to display a scroll panel of valid combinations to select from. If there is
only one valid combination, pressing F12 will automatically fill in all three fields.
To create a new Batch, enter a Batch ID. To recall an existing Batch, enter the
Batch's ID or press F12 to select from existing Batches.
Caution: If you press F12 or right-click in the Batch field and there is only one
Batch active, that Batch and its Control fields will be automatically selected. Check
the control fields carefully before you add to this Batch, because Control fields you
may have entered will have been overwritten.
Example: You have one Company (01), one Currency (US), but two Bank Codes
(LA and BA). You enter 01 US LA, then press F12 to select a Batch. If there is one
active Batch, it will be selected and its Control fields will overwrite what you
entered. If they are the same as what you entered, there's no problem. But if the
Batch is for Bank BA, the LA code you entered will be overwritten and, unless you
are careful and notice it, you may start entering Invoices to the wrong Bank account.
The Amount field in this section is for a Batch Total, if you calculate and use one.
It can be left at its default of zero. If you enter a batch total here, VISTA does no
automatic comparison to the running total of the batch. You can, however, make
your own comparison, because the last field in the section, Cur, will show a running
total for the Batch as you enter Invoices. Cur is system-calculated and displayed in
blue; you cannot enter anything directly into this field.
To exit the Batch Control section when it is as you want it, press Enter. There is
no other way to move from Batch Control into the rest of the window.
Vendor Information Section
Above the Vendor Information box is the system box which shows you the Mode
you're in. In the example above, Modify mode has been selected.
Vendor: Enter a Vendor Number or the first few characters of the Vendor
Name and press F12. If you've identified multiple Vendors, choose the one you
want from the Scroll Panel. When the Vendor is selected, the Vendor Number will
be displayed in the Vendor field and the Vendor Name and three lines of Address
will be displayed below the State Worked field. If the Vendor is not yet on file, a
message to that effect will be displayed. Without closing the Invoice Entry window,
go to the Main Menu A/P Vendor Vendor Entry and add the Vendor, close the
Vendor Entry window, then come back to Invoice Entry, right-click on the Vendor
field or click on the Vendor field to activate the cursor, and press F12 again. This
time, the Vendor will be found. For more information on selecting a Vendor see
“Selecting a Vendor” on page 4-2.
13-6 • Invoices - A/P Menu
Entertainment Partners
State Worked: When you choose a Vendor, this field will be automatically filled in
with data from the Vendor record (see "Income Tax Section" on page 130) and the
field will be skipped. It is for 1099 reporting. If this Vendor is a 1099 Vendor and
this Invoice is to be 1099'd and this field is blank or incorrect, Shift-tab back to fill in
the two-digit State code where the Vendor worked for this Invoice.
System Information Section
This section displays information updated by VISTA. The operator does not enter
anything directly into these fields.
Year/Period displays the Year/Period chosen for this Batch and Invoice. It will be
either the Current or Next Year/Period.
Transaction is the VISTA Transaction Number which is assigned automatically to
every new system transaction. This number will change depending on the Function
or Mode.
In Add mode, this field will initially be blank. When you add an Invoice, a
Transaction Number will appear here - it is the number assigned to the Invoice
you just entered. Note that the number is not assigned until after you have
pressed Enter and answered Yes to add the Invoice. Until that point, if a
number is showing here, it is the number of the previous Invoice added, not the one
for which you may be entering data.
In any other mode, this field will contain the Transaction Number of the Invoice
you are changing, viewing, or deleting. When you Clear Screen or the window is
cleared to perform another operation, the field will be blank again.
Note: It is normal procedure when entering transactions to write the VISTA
Transaction Number on the source document, in this case, the Invoice. To record the
correct Transaction Number, always do it in this sequence: enter the Invoice data,
press Enter, resolve any error or warning messages, answer Yes to add the new
Invoice, then write down the number displayed in Transaction. In case you miss the
number before closing the window, you may pick it up from the Audit reports or
almost any other VISTA system report.
The Totals fields, Gross, Discount, and Net, display running totals of these three
figures for the current Batch.
Invoice Information Section
Invoice: Enter the Invoice Number (up to 20 characters long and left-justified). See
“Invoice Types and Numbering” on page 13-2 for more information.
Note: In Modify, Inquire, or Delete mode, press F12 in the Invoice field to
display a scroll panel of Invoices in the Batch for the Vendor you've selected.
Entertainment Partners
Invoices - A/P Menu • 13-7
Date: Enter the Invoice Date.
Amount: Enter the Invoice Total.
REFERENCE: Enter any reference data you choose. This data will remain a part of
this Transaction and show on VISTA reports, but it is not a control field, just
information.
Check Requirements Section
Check Code
To select a Code other than the default zero, you display and choose from a predefined list of valid Codes. This type of field is called a Combo List Box in
Windows parlance.
If you know the Code you want to use, or you want to go with the default Code, zero,
just Tab past the field.
To view and select with the keyboard: With the cursor in the Code field, press
Alt-Down Arrow to open the list of Codes. There are more Codes than can be
shown in the short display. To see all of the Codes, use the Down and Up Arrow
keys to scroll through the list. To select a Code, press Tab when the Code you
want is highlighted. The list will close, the cursor will move to the next field, and the
Code you chose will fill the Code field.
To view and select with the mouse: Click on the arrow to the right of the field
to open the list. Click on the up and down arrows at the top and bottom of the list's
scroll bar to see the whole list. Click on the Code you want in the list. The list will
13-8 • Invoices - A/P Menu
Entertainment Partners
close and the Code you chose will be in the field. Tab to the next field to continue
inputting.
What the Codes mean: Codes zero through nine and asterisk (*) are used to
group or segregate Invoices for a Vendor onto different computer checks.
The alpha Codes stand for the following types of entries:
C
Cancel - usually entered by automated check cancel/re-issue
M Manual - usually entered by operator in Invoice Entry
S
Stop Payment - usually entered by operator in Invoice Entry
Q
Quick Check - entered by automated Quick Check print
V
Void - usually entered by operator in Invoice Entry or automatically in
check re-start procedure
Checks to be Printed by Computer
Check/Due Date: Enter the date the Invoice is to be paid by. This is the date
VISTA looks at when you select Invoices for check printing. (See “Invoice Select”
on page 14-2.) The default date when entering an Invoice is your computer's current
date.
Description: A 30-position description of the Invoice which will appear on the
Invoice line on the Check Stub. It will appear on Batch Audit Transaction reports,
but will not appear on any other VISTA reports. Use this description more for
helping the Vendor identify the payment than for your identifying the cost; use
Distribution Description for the latter.
Code: For the mechanics of choosing a code, see “Check Code” on page 13-8. For
computer checks, Code is used to control the combination of Invoices on checks for
a given Vendor. The codes to be used for computer checks are zero through nine and
asterisk (*). The alpha codes identify other types of check transactions and should
not be used for computer checks.
Using different Codes, you can tell VISTA to group some Invoices on one check and
another group on another check. The default Code is zero. Using the numeric Codes
zero through nine, group Invoices into checks any way you want to. Invoices with
Code zero will go on one check, Invoices with Code one will go on another check,
etc. (all for the same Vendor, of course). To force a separate check for an invoice,
use the asterisk (*) Code. Every Invoice with an asterisk (*) Code will be put on a
check by itself.
Number: Always leave Number blank for computer checks.
Manual Checks
To input checks that have been typed or hand-written.
Check/Due Date: Enter the Check Date.
Description: Since this field appears on the check stub only (and the check has
already been typed), there is no reason to put anything in this field for manual
checks.
Code: For the mechanics of choosing a Code, see “Check Code” on page 13-8. For
a manual checks, always use Code M.
Number: Enter the check number. It is not necessary to enter leading zeroes; the
number you enter will be right-justified by VISTA automatically.
Entertainment Partners
Invoices - A/P Menu • 13-9
Void Checks
To input checks that have been rendered unusable. Most productions establish a
"VOID" Vendor to use when recording these checks through Invoice Entry.
VISTA distinguishes between Void and Canceled checks this way: A Void is a
check that has never been issued and is unusable. A Canceled check is one that has
been issued and entered into the system, then Canceled through VISTA's Check
Cancel/Re-issue menu. To record an issued check as a Stop Payment, use
VISTA's Check Cancel/Re-issue menu, then change the Check Code to S in Invoice
Entry before posting the transaction.
Check/Due Date: Accept the default date.
Description: Not necessary
Code: For the mechanics of choosing a Code, see “Check Code” on page 13-8. For
void checks, always use Code V.
Number: Enter the check number. It is not necessary to enter leading zeroes; the
number you enter will be right-justified by VISTA automatically.
Discount Info Section
If you use the Discount fields,
VISTA expects the
Distribution to total to the
Net Amount of the Invoice,
not the Invoice total.
To take a direct discount on an Invoice without creating a second line of
Distribution, use these fields. If you set up the Vendor with this information (see
“Discount Section” on page 11-7), it will be automatically inserted here when you
select the Vendor.
Percent: Percentage of the total Invoice to be deducted. If you key this field here,
include the decimal point. Example: Ten percent is entered as 10.0. To clear a
percentage, enter zeroes.
Amount: Will be calculated by VISTA based on Percent, or enter the discount
amount (leaving Percent blank). To clear an Amount, enter zeroes. If there is a
percentage in Percent, replace that with zeroes, too.
Due Days: Days after the Invoice date that the Discount is available.
Amt Subj Tax: This field displays a running total of Distribution Amounts tagged
for 1099 reporting on this Invoice. It is displayed in blue and is not directly editable.
Account Distribution Section
13-10 • Invoices - A/P Menu
Entertainment Partners
For a description of entering data in this section, see “Account Distribution Entry” on
page 4-10. For Void checks, enter any valid Account and zeroes in Amount.
When there is a PO connected with the invoice being entered, these following
additional procedures are relevant.
A quick note: The Description field in PO's is only 25 positions, in Invoices, 40. You
may want to expand or overwrite your PO Descriptions to include more detail.
Invoices and Purchase Orders
When you select a PO in Invoice Entry, the data you entered into the PO record is
automatically transferable to the Invoice record. The following table shows the
relationship between the PO fields and the corresponding Invoice fields.
PO Entry Field
Invoice Entry Field
Notes
PO Number
PO Number
Reference
Reference
Can be overwritten
PO Description
Check Description
Can be overwritten
Distribution Account
Distribution Account
Can be changed (see
below)
Distribution Amount
Distribution Amount
Can be overwritten
Distribution Description
(25 characters)
Distribution Description
(40 characters)
Can be overwritten or
added to
Distribution Tax Code
Distribution Tax Code
Can be overwritten
In order for a User to have the ability to ‘Adjust Purchase Orders to Zero’ from
Accounts Payable, that User must have Full access towards that end, as established
in Setup, User Setup. See the section titled Access Options on page 9-4 for
details.
Neither zero-amount nor over-relieved Purchase Orders will appear within the
selection of any scroll panel. In order to access such a P.O., the User must input the
P.O. Number. (For further information regarding Purchase Order varieties,
peruse the so-titled section on page 12-2.)
When you’ve selected the P.O. you want to process with this particular invoice, with
the cursor still in the P.O. field, F12 or a right-click will bring up a scroll panel
showing all the lines of distribution for this P.O.
With the scroll panel listing the lines of distribution, select the one(s) you want by
clicking (and dragging) and then clicking Done.
After you’ve selected certain lines, you can right-click the P.O. No. field containing
an already selected P.O. number again to bring back the scroll panel and select
Entertainment Partners
Invoices - A/P Menu • 13-11
another line of distribution. When you do that, you will replace the line in that row
with the new selection.
If your wish was to add another line, right-click within a P.O. No. field that is
blank. In doing so, you are taken to the scroll panel listing the P.O. Numbers once
more where you may select the same PO again. From that selection you can then
proceed to the scroll panel listing the lines of distribution for that PO and select
further lines of distribution for that invoice.
If that line has had an invoice applied to it, the dollar amount will be reduced by the
invoice amount.
Line Item: Line item refers to the line number in the original PO set up in PO
Maintenance. The line number is transferred onto your transaction in invoice entry
for reference. It is not accessible for modification....
Changing PO Distribution Account
To change the account number to which a line item has been charged as it came
across from the PO, simply type over the existing account number.
In doing so, you will effectively have made an adjustment to that PO, and the PO
Reports will reflect that transaction with the new account number—The balance left
on the PO will retain the original account number. If the original account number is
no longer correct, then it must be changed in PO Maintenance.
Changing PO Distribution Amount
Similarly, the amount of that line item as it came across from the PO can be changed
simply by typing over it and once again the PO Reports will reflect the revised
amount when the invoice has been posted.
Purchase Order Reports and Cost Reports will not be affected until the invoices
have been posted.
Finishing the Transaction
To add the Invoice or register your changes or deletion, press Enter. If there are any
errors in your entry or warnings to be issued, they will be displayed at this point.
When errors and warnings have been handled (see “Error Messages” on page 4-12
for common error messages; see following section for error messages specific to
Invoices), you will be asked to confirm the entry or changes or deletion. Press
Enter or Y or click on Yes to confirm. Press N or click on No to avoid updating.
Invoice Error Messages
To clear an error message from the screen, press Enter or click OK. The error field
will be highlighted in red and the cursor will be in that field.
Duplicate Invoice Number Warning: VISTA will warn you if you're entering an
Invoice number that has been entered before for this Vendor. Note that this is only a
warning. VISTA will not prevent this entry. Once you click OK, you are free to go
ahead and add the duplicate Invoice Number.
13-12 • Invoices - A/P Menu
Entertainment Partners
Invoice Amount vs. Distribution difference: If the total of your Distribution
Amounts differs from the Invoice Amount, the following message is displayed,
showing the difference. Press Enter to erase the message, then adjust either the
Invoice Amount, the Discount Percentage and Amount, or the Distribution Amounts
and press Enter again.
Remember: If you use the Discount fields, VISTA expects the Distribution to
total to the Net Amount of the Invoice, not the Invoice total.
Invoice Number is Blank: This field cannot be blank. Enter an Invoice Number
and press Enter again.
Invoice Date is Blank or Invalid: Invoice date must be a valid date in US format
(MM/DD/YY). Enter a date and press Enter again.
Invoice Amount is Invalid: The only Invoice Amount that is invalid is blanks.
Enter an Amount, even if it is zeroes, then press Enter again.
Entertainment Partners
Invoices - A/P Menu • 13-13
Invoice Audit
Purpose: List Batches by Transaction and Distribution for review
Required: Company, Currency, Bank, Batch ID, Report By selection, Currency
Conversion and Exchange Rate selections
Defaults: Report by Transaction, All Transactions, Native Currency, Budget
Exchange Rate
Choose A/P Invoice Invoice Audit from VISTA’s Main Menu.
Right-click in the Batch field to select from a scroll panel of un-posted Batches.
Select one or as many of the Batches as you want to print.
Note: Multiple Batches are listed in one continuous report in Transaction sequence,
multiple reports by batch in Distribution sequence. If you keep a complete set of
reports for each Batch, you may not want to list more than one Batch at a time.
Choose Report By (report sequence) by entering T or clicking on Transaction or
entering D or clicking on Distribution. If you wish to print both types of reports in
one pass, enter B or click on Both.
To restrict the report to a range of Transaction Numbers, enter from (low) and to
(equal or higher) Transaction Numbers. Leading zeroes do not have to be entered.
See “Currency Report Options” on page 4-9 for information on setting the Currency
options.
Press Enter or click on Enter to begin your report.
13-14 • Invoices - A/P Menu
Entertainment Partners
Invoice Post
Purpose: Add Batch Transactions to System Transactions, post distribution charges
to system accounts, post Batch Total to A/P Bank control account, delete Batch and
Batch Transactions after all processing is complete; can post more than one Batch at
a time
Required: Company, Currency, Bank Code, Batch ID, Print Yes or No
Defaults: Print, Yes; User defaults, if any, for Company, Currency, Bank Code
Choose A/P Invoice Invoice Post from VISTA’s Main Menu.
The quickest way to select from open Batches is to right-click in the Batch field. If
there is only one Batch available, it will be automatically selected. More than one
Batch will be displayed in a scroll panel, and you can choose one or as many Batches
as you want to post (see “Highlighting More than One Choice” on page 4-3).
If you choose more than one Batch, the fields in the Invoice Posting window will be
filled with asterisks.
Posting Report
To get a printed record of Invoice Posting, leave the Print (Y/N) field at its default
of Yes. To bypass a report, enter N in this field. Printing a report and filing it is
recommended for a thorough audit trail.
The report prints one line for each Invoice in the Batch. If you select multiple
Batches, a separate report is printed for each Batch.
Narrowing the Selection
To post selected Transactions in a Batch, enter a low and high Transaction Number
in the Transaction No. from and to fields. This option should be used only when
posting a single Batch.
This option should be used carefully, if at all. To post all Transactions in the
Batch(es) being posted, leave these fields blank (default).
Confirm Posting
To begin posting the selected Batch(es), press Enter. You will be asked to confirm
posting as follows.
Entertainment Partners
Invoices - A/P Menu • 13-15
To proceed, press Enter or Y or click on Yes. To return to the Invoice Posting
window without posting, press N or click on No.
Mechanics of Invoice Posting
In the Invoice posting process, VISTA
•
adds the amount of each Transaction to the Account balance in the
Transaction’s Account field
•
credits each Invoice Amount to the A/P Control Account for the
Company Currency Bank being posted (see Setup A/P “Accounts” on
page 9-12)
•
adds each Transaction to the permanent Transaction file
•
creates an offset Transaction using the Invoice’s Transaction Number
and Amount to reflect the posting to the Control Account and adds it to
the permanent Transaction file
•
deletes the Batch Transactions and Batch information
Note: As VISTA posts, you may notice a message in the Invoice Posting window
that reads “Deleting transaction....” Don’t be alarmed. This is VISTA deleting the
original Batch Transactions after they have been posted to accounts and added to the
system’s posted Transactions.
This process takes place for all Transactions in any Batch posted, even for Manual
Checks. The A/P Control Accounts are debited when a Check run is posted (see
“Check Register Post” on page 14-7).
A/P Suspense Warning
At the end of the posting routine, if there is a balance in the A/P Suspense Account
for the Company Currency Bank just posted to, the warning above will be displayed.
This warning will continue to be displayed after any Batch is posted to this Company
Currency Bank combination until the balance is cleared to zero.
13-16 • Invoices - A/P Menu
Entertainment Partners
One source of entries to an A/P Suspense Account is a Quick Check Invoice that is
not Modified before posting. See “Quick Check ” on page 14-9.
Modify Open Items
Purpose: Change State Worked or Check Requirements for A/P Open Items
Required: Company, Currency, Bank Code, Vendor, Invoice Number
Choose A/P Invoice Modify Open Items from VISTA’s Main Menu.
An A/P Open Item is an Invoice that has been posted but not “paid,” that is, not run
through the Check Printing process (see “Invoice Processing Stages” on page 13-2).
Although you can change the State Worked field with this function, the primary use
for Modify Open Items is to update the Check Requirements fields of Open Items
before they’re selected for Check Printing. For example, you may want to change the
Check Code of an Invoice to force a separate check for it. For another example, if
you’ve entered an Invoice and then have to issue a Manual check for the Invoice
before you print a computer check, use this function to insert the check date and
number and change the check code to M.
To display an Open Item, enter the Company Currency and Bank Code of the item
you’re looking for and press Enter to leave the Control Section. Select the Vendor
using F12 (see “Selecting a Vendor” on page 4-2). Tab past the State Worked field to
Entertainment Partners
Invoices - A/P Menu • 13-17
the Invoice field. Press F12 to see the Open Items for this Company Currency Bank
Vendor. Select the one you want; when the Invoice Number is in the Invoice field,
press Enter to retrieve and display the Invoice data. The whole Invoice entry will
be displayed, but all fields except the ones you can change will be displayed in blue.
Make any changes you want to the State Worked or any Check Requirements fields.
Press Enter to record your changes.
To reverse an open item, change function to Reversal, select open item to be
reversed and press enter. A Batch called OIREVERS will be created in invoice entry.
Distribution Changes
Purpose: Change Invoice distribution without formal Journal Entry; create A/P
Invoice Batch of changes with Batch ID of DISTCHGS
Required: Company, Currency, Bank Code, Vendor, Invoice Number
Defaults: Function, Add; Ledger Period, Current Period
Delete: No
Choose A/P Invoices Distribution Changes from VISTA’s Main Menu.
13-18 • Invoices - A/P Menu
Entertainment Partners
This menu choice gives you the opportunity to change the Distribution for any
Invoice in the system at any time. It does not allow changes to any other aspect of
the Invoice.
Enter the Company Currency and Bank of the Invoice to be changed. The Batch ID
is automatically DISTCHGS. Press Enter to exit the Control section. Select the
Vendor you want (see “Selecting a Vendor” on page 4-2). Tab past the State Worked
field and press F12 to see the Invoices for this Vendor. Select the Invoice you want
to change. When the Invoice Number appears in the Invoice field, press Enter
again to display the entire entry.
Every field in the Invoice will be displayed in blue except the Distribution fields.
Make any changes you want to any of the Distribution fields, then press Enter to
record the changes. The confirmation window below will appear. Press Enter again
to accept the changes.
The DISTCHGS Batch
When you change Distribution for an Invoice, a Batch is created with the Batch ID
DISTCHGS. For every Invoice you’re changing, it contains a credit to the old
Distribution coding and a debit to the changed or new Distribution, even if you only
change the Memo fields or Description. To change Memo fields or Descriptions
without creating debit and credit entries, see “Ledger Adjustment” on page 20-8.
This Batch is not accessible in A/P Invoice Invoice Entry. It cannot be edited or
deleted. It must be posted as is. It can be listed with A/P Invoice Invoice Audit,
however.
Subsequent Distribution Changes
Once you’ve accepted a change to an Invoice, you cannot change that Invoice again
until the current changes are posted. If you try to access a changed Invoice a second
time before the first changes have been posted, the following message is displayed.
The original (changed) Invoice is tagged by VISTA and cannot be changed again.
The new entry, however, can be changed. To change the latest incarnation of the
Invoice, press Enter or answer Yes to the query, and the latest version of the Invoice
will be presented. To cancel the selection, answer No.
Entertainment Partners
Invoices - A/P Menu • 13-19
Lines that have been changed previously with a distribution change will be in blue,
and are not accessible.
Open Items Report
Purpose: Report A/P Open Items, Open Items Cash Requirements, or Open Items
Aging to screen or printer for review.
Required: Company, Currency, Bank Code, Report Type, Pay Through Date
Defaults: Report Type, Open Items
Choose A/P Invoice Open Items Report from the VISTA Main Menu.
This menu choice offers three ways to look at A/P Open Items. To begin any of the
three, enter the Company, Currency, and Bank Code for the items you wish to
examine. Enter a Report Type and a Pay Through Date.
13-20 • Invoices - A/P Menu
Entertainment Partners
To print the report for a range of Vendors, enter Vendor Numbers in the From and
To fields in Vendor Selection. Since these fields revert to Vendor Numbers instead
of Names, this selection is not recommended.
Depending on the report you choose, when you press Enter after filling in the above
fields, the empty section of the Open Items Reports window will be filled with
additional input fields. See the descriptions below.
Open Items List
Choose this list by entering O in Report Type or clicking on the Open Items
button. Enter a Pay Through Date and press Enter. The Detail or Summary and
Prior Month fields are displayed for entry.
The default for Detail or Summary is Detail. To change it to Summary, enter S. To
print the report for a prior month, enter the full four-digit Year and a two-digit
Month.
Press Enter or click on the Enter button to begin the report. The Open Items list
Summary prints one line per Vendor, showing the Vendor’s Number and Name and
Address, the Gross, Discount, and Net Amounts through the Pay Through Date,
Future Amounts, and a Vendor Total. The Detail report is also by Vendor, but
shows, within Vendor, each Invoice Type, Number, and Date, Payment Date, and the
Amounts shown on the Summary version.
Open Items Cash Requirements
This report shows you how much money you will need to pay the current Open Items
based on one or two Pay Through Dates and beyond.
When you choose Report Type C or click the Cash Requirements button and
press Enter for the first set of control fields, a Second Pay Through Date field is
displayed in the lower window section. Fill in this second date (must be higher than
the first date) to see three divisions of requirements: up to the first date, between the
first and second date, and anything beyond the second date (future). If you leave the
second date blank, you will see two divisions: requirements up to the first date and
requirements beyond the first date (future).
To begin the report, press Enter or click on the Enter button. The report shows
each Open Invoice by Vendor, the Invoice Number and Pay Due Date, Gross,
Discount, and Net Amounts, the totals required for the first Pay Through Date, the
second (if any), and beyond.
Entertainment Partners
Invoices - A/P Menu • 13-21
Open Items Aging
To see an aging of Open Items, enter A in Report Type or click on the Aging button.
Enter a Pay Through Date and press Enter. Three new fields appear in the lower
section of the window: Days in 1st period, Days in 2nd period, and Days in 3rd
period. These are the aging periods used by the report. The defaults are 30, 60, and
90 days. If you want to change these, enter any three-digit number of days, each
greater than the last, in each of the three fields.
To begin the report, press Enter or click on the Enter button. The report shows
Invoices by Vendor, the Pay Due Date, the Net Amount, then sub-totals them
according to the number of days beyond the Due Date based on the three period
ranges you selected. By default, the report shows payments past due from 1-30, 3160, 61-90 and over 90 days. 111
13-22 • Invoices - A/P Menu
Entertainment Partners
Chapter 14: Checks - A/P Menu
Overview
VISTA’s check processing cycle is the completion phase of what began
as P/O or A/P input. The Check Cycle must be run to complete the
records whether or not checks were actually printed. All checks—
computer, manual, quick, voids, cancels, re-issues, stop payments—
must go through this cycle in order to become part of VISTA’s
permanent accounting and banking transactions.
Note: For Bank Reconciliation choices, see “ Bank Reconciliation” on page 14-17.
VISTA can print various types of checks on laser or dot-matrix
printers, US or international formats. Check specifications are entered
as part of the Bank Code record (see Setup Bank “Check Print Fields”
on page 9-12). Laser checks are the prevalent form for VISTA.
Entertainment Partners
Checks - A/P Menu • 14-1
Ordering Laser Checks
If you do not have a regular supplier for laser checks, call our Customer
Support department at (818) 955 6000 for recommendations. Over the
years, EP has established a list of vendors with proven reliability and
service.
Sequencing Laser Checks
The sequential numbering of your laser check is not of any particular
significance except to the extent that you must not duplicate any of the
numbers within the same bank account (as designated by the combined
Company-Currency-Bank Code id). Some like to start their check
numbers at 1, and others at 101, 1001, etc..
Typical Check Cycle
Following is a typical processing cycle for printing and posting checks
in VISTA for a given Company Currency Bank combination.
Invoice Select: Pick the Invoices to be “paid.” As many as 500
Invoices (to a common vendor) may be paid with a single check.
Check Register: Print a preliminary Check Register, if necessary, to
see what will be paid.
Re-run Invoice Select: Alter the Invoices to be paid, if necessary.
Print Checks: Print computer checks and process other checks and
transactions.
Check Register: Print a register of checks processed.
Check Register Post: Post check printing transactions to accounts;
debit A/P Control account and credit Bank account.
Invoice Select
Purpose: Select Invoices/Checks to be printed/processed.
Required: Company, Currency, Bank Code, Pay Through Date
Defaults: Pay Through Date is Current Date
Delete: N/A
Choosing A/P, Check Cycle, Invoice Select from VISTA’s Main
Menu brings up the following screen:.
14-2 • Checks - A/P Menu
Entertainment Partners
Vendor invoices in VISTA are referenced to a specific bank and are
identified by way of the combined Company-Currency-Bank ID.
Selecting invoices to be paid is also done by reference to the same
criteria. VISTA requests the bank of which checks are to be used to pay
the invoices that are selected. Only the invoices entered under a certain
bank code can be paid under that bank code.
The Pay Through Date defaults to the current system date. When the
system brings up the list from which a User can select invoices for
payment, it will include only those whose due date is equal to or less
than this date.
To view all invoices awaiting payment, enter a Pay Through Date
which is a few years in the future (e.g. 12/31/99).
To select only invoices belonging to one particular vendor, enter the
vendor’s number in the Vendor field.
To limit the choice of checks to a particular type (voids, cancels, a
specific separate check code), select the type from the check type
dialog box that pulls down to a list of valid codes. (Selecting a check
type with the vendor field blank processes that check type for all
vendors.)
Press Enter when these selection are complete.
A scroll panel lists all unpaid invoices satisfying the selection criteria.
These are invoices to be paid. You do so by highlighting the invoices
that you do NOT wish to pay . On using scroll panels for invoices,
please see “Scroll Panels” on page 4-1.
Note: Manual, void, canceled and quick checks are not listed. They are
automatically processed unless excluded explicitly with appropriate selection
criteria.
After highlighting any invoice(s) that are not to be paid, press Done.
VISTA brings up a summary listing of check type, the number of
checks to be printed, the total amount. At the bottom it also reports the
number of checks you need to mount in the printer.
Entertainment Partners
Checks - A/P Menu • 14-3
Check Print
Purpose: To print checks for the A/P Invoices selected for payment,
and to process Manual, Quick, Voids, Cancels and Reissues
through the check print cycle.
Required: Company, Currency, Bank
Defaults: Check Date defaults to the current system date.
Choose A/P, Check Cycle, Check Print from the main VISTA
Menu.
Company-Currency-Bank
Input the Company, Currency and Bank from which the A/P check run shall be
drawn. Right-clicking, or hitting F-12, in any of these fields will summon choices
from which to select.
Check Date Format
VISTA allows the User to select the format in which the check date will be printed
on the A/P Check. Click the arrow at the right of this field to pull-down the menu
from which to choose the Check Date Format.
Starting Check Number
VISTA requires the Starting Check Number for the current check
run, which shall correspond to the number of the next physical check
available for use. Properly mounted in the paper tray, it will be the first
check to be pulled by the printer.
14-4 • Checks - A/P Menu
Entertainment Partners
Check Date
The check date defaults to the current system date, but this
information may be modified by the User in this field.
Restart?
Unless Restarting a check run, leave the Restart field with its default
setting of N to tell the system this is a normal, first-time check run.
Completing the Check Print
Press Enter when ready to begin printing checks. A message pops up
to remind the User to load the printer tray with check stock. Only when
this has been done, press OK to begin check printing.
Check printing in VISTA is controlled by two main parameters:
1.
the specifications given when setting up the bank account
in Setup, Bank Account that establish the check image
to be used (laser, dot matrix, VISTA, etc.) and the number
of copies; and
2.
the type of printer you have dictates how the checks are to
be loaded (check / copy or copy / check; face up or face
down; top or bottom, or form feed.
When the printing is complete, another message pops up to remind the
User to remove the check stock from the printer tray. When this is
done, press OK. The check-printing screen is closed automatically by
the system.
Check Restart
The Restart option allows the User to recover during the current
procedure when things have gone wrong with check printing--such as
when some checks came out on plain paper, the check number
sequence given does not correspond with the numbers of the physical
checks, a power failure causes some of the checks not to be printed,
etc..
This recovery is possible only during the current procedure. If a failure had not been
noticed and the User proceeded with the complete check cycle through Check
Register Posting, the only recourse is through the Check Cancel/Reissue
function described further on.
Another companion function called Check Reprint is not to be
confused with Check Restart. Check Reprint allows the reprint of
check copies, not originals.
A Restart is initiated by specifying the Company-Currency-Bank
code, completing the Print Checks panel with starting check number,
check date and clicking the Yes button or entering a Y in the Restart
check box (the default of which is No).
With regard to the starting check number, everything depends on
whether or not any of the original checks were damaged in the abortive
run. If none were (if the check run printed on plain paper, for
example), the same Starting number may be used for the Restart.
The Range of checks to be Voided fields would, in this instance,
Entertainment Partners
Checks - A/P Menu • 14-5
be left empty. If all or some checks were damaged, enter the from
number and the to number of damaged check stock that is to be voided
by the system.
Press Enter. VISTA walks through the step-by-step loading, printing
and removal of your check originals.
A Restart results from a mishap, an error or mistake. It is therefore recommended
that the procedure be approached with great care and attention. When it is
discovered that something went wrong with the printing, print the check register to
compare the check data in the system with the actual physical printing that has been
done. Identify every discrepancy between the system’s records and the physical
documents. Determine each recovery task as illustrated by the following example:
A check run of 20 checks, from check number 1001 to 1020, resulted
in:
•
1001 to 1005 (5 checks) being printed correctly;
•
1006 to 1016 (11 checks) being unusable (e.g. grossly out
of line, too faint to read, etc.), and;
•
1017 to 1020 (4 checks) never printed.
The User faces three separate tasks to recover from the malfunctioned
check printing process:
•
check numbers 1001 through 1005 are fine; this group
need not be adjusted further;
•
the second group of 11 checks (1006 through 1016) needs
to be printed again. Because damaged check stock cannot
be reused, these check numbers also have to be voided.
•
The third group of four checks (1017 through 1020) never
printed; thus the check stock may still be used.
To print new checks for those 11 damaged checks and for the four checks that never
printed, complete the Check Print screen as follows:
(a) give the new Starting Check Number (1017, since this is the first
good physical check number);
(b) enter 1006 in the Range of Checks to be voided from field;
(c) enter 1016 in the Range of Checks to be voided to check number
field, and;
(d) press Enter to start the check printing process.
VISTA will walk through the step-by-step loading, printing and removal of your new
check originals.
Always run a new check register after performing a check Restart to
verify that the system data contained in the check register corresponds
with the physical checks printed. If discrepancies exist, isolate the
corrective measures that have to be taken and start afresh. Call EP for
assistance if unsure about the procedures.
Check Register
Purpose: Print a Check Register to verify the check data that has
been recorded in VISTA after your check print runs.
14-6 • Checks - A/P Menu
Entertainment Partners
Required: Company-Currency-Bank code.
Defaults: Summary Register--i.e. no details; Report Date is current
system date.
Check Registers cannot be
printed for previously posted
check runs
A Check Register can be run as many times as desired for the most recent check
print run for a selected Company-Currency-Bank code. Check registers for
posted check runs can, however, be reprinted through Check Register History.
Choose A/P, Check Cycle, Check Register from VISTA’s Main
Menu:
Select a Check Register for a specified bank by giving the combined
Company-Currency-Bank code.
A User may print check register information for a single check by
entering a Check Number in this field. Leaving it blank selects all
checks that were included in the most recent or latest check print run.
The Register may be run in either a detailed or a summarized format.
The latter is the default. Defaulting to a summarized report and
pressing Enter immediately initiates the report printing.
Choosing Yes for a Detailed Register pops up two dialog boxes
asking if the register is to include:
1.
invoice details, and;
2.
account distribution information.
After you making these choices, the printing of the register begins
automatically.
Review the register thoroughly. Make any corrections that are
necessary. Distribution changes can still be made at this stage (through
A/P, Invoice, Distribution Changes). Reprint the Check Register
after any corrections. Repeat the process until the information is
correct.
Check Register Post
Purpose: To post the checks written in the check runs to the ledgers
Required: The Company-Currency-Bank code of the bank.
Entertainment Partners
Checks - A/P Menu • 14-7
Defaults: Yes to printing a report of the posting.
The Check Register Post function records the issue or printing of
checks in the system ledgers.
In the general ledger, the A/P Control and the Cash Control accounts
are debited and credited respectively. In the accounts payable (or
open items) ledger, the vendor accounts are updated and open items
closed as appropriate.
Choose A/P, Check Cycle, Check Register Post.
Enter the Company-Currency-Bank code to select the bank whose
checks are being posted to the ledgers.
A right-click or F12 in the Company field brings up the bank(s) for
which there are checks issued and waiting to be posted. If there is
nothing to be posted, the system advises accordingly.
Leave the default Yes to Print a report of the posting transaction
(recommended); change it to a No if one is not desired.
This process must be
complete before beginning
another check cycle for the
same currency-bank code
A check register post must be run before you can run invoice select again for
the same currency-bank code
Positive Pay
Purpose: To create a file of check information that can be transmitted
to a financial institution before the check is cashed.
Required: Template, Company-Currency-Bank code of the
bank.
The Positive Pay function creates an output file and printed report of
check information for all checks that have been processed in VISTA,
through either the regular Check Print function or through the Quick
Check function..
Choose A/P, Check Cycle, Positive Pay.
14-8 • Checks - A/P Menu
Entertainment Partners
A right-click or F12 in the Template field brings up the scroll panel
of templates available for creating the output file.
NOTE: Templates are set up by Entertainment Partners Customer Support, and are
created to the detailed specifications, provided by the studio and the bank, of each
production.
The printed report will show the Transfer code for this file. If the
transfer file is lost, the User may recreate the transfer by entering the
code in the retransfer field.
Enter the Company-Currency-Bank code to select the bank of
which checks are to be included in the output file. Press Enter to
begin processing.
An output file will be created and stored in the DISC\UPLOAD
directory. The studio will provide instructions regarding how and
where to send the output file.
Quick Check
Purpose: Allows printing of checks without performing any of the
otherwise prerequisite processes.
Required: Company-Currency-Bank identification code; Vendor,
Check Number; Invoice Date; Invoice Number; Gross (amount).
Defaults: Check Date defaults to the current system date and cannot
be changed.
Overview
The Quick Check (QC) function allows the printing of a check for a
vendor immediately without performing the VISTA processes of
invoice entry, audit, posting and select.
Entertainment Partners
Checks - A/P Menu • 14-9
QC transactions are held together in a special batch called QCBATCH.
QCBATCHes are identified by the Company-Currency-Bank code
and Batch ID.
Invoices related to a quick check may be entered at the same time the
Quick Check screen for the check is completed.
If there unpaid invoices have been entered as items for the vendor to
whom a Quick Check is to be issued, a right-click (F12) brings up
those invoices. Double-clicking same brings them into the Quick
Check screen to be paid with a quick check. A previously entered,
unpaid invoice may be paid along with an invoice not previously
entered in the system on the same quick check. The QCBATCH will
contain only the invoice(s) not previously entered in the system
through Invoice Entry even though the quick check amount itself will
include the invoices previously entered as well as the invoices entered
in the Quick Check screen.
The invoices previously entered in Invoice Entry will be found under
their original batch and must be processed through the rest of the A/P
functions (Invoice Select, Check Register, Check Register Post, etc.)
under that batch.
If all the invoices being paid with a quick check had already been
entered previously through Invoice Entry, the system will not create a
QCBATCH for that check although the check will be clearly marked
‘QC’ to indicate that it was printed through the Quick Check
function.
VISTA Quick Check proofreads for duplicate invoices and selfcorrects. If there is an unpaid invoice in the system for a vendor and a
User attempts to draw a quick check by entering that invoice number,
VISTA will recognize the invoice and process that invoice versus
treating the number that the User entered as a separate or new invoice.
VISTA will note this procedure by inserting an asterisk to the left of
that invoice number on the screen.
Furthermore, if a User enters such an invoice number but with an
amount that is different from the original, VISTA will automatically
correct the amount to the original amount of the unpaid invoice already
in the system.
The Quick Check function also checks for duplicate check numbers,
and offers the opportunity to correct for duplicates.
The Quick Check Procedure
Choose A/P, Check Cycle, Quick Check.
14-10 • Checks - A/P Menu
Entertainment Partners
The bottom half of the window is an image of the Quick Check to be
printed.
Company-Currency-Bank Code
The bank on which the Quick Check is to be drawn is selected by the
Company-Currency-Bank Code ID. A right-click lists the banks
set up in the system identified by the same combined ID and bank
name.
Vendor
After selecting the bank, tab to the Vendor Number field. Tabbing to
this field before selecting a bank or after selecting an invalid combined
bank code is not allowed; the blank or invalid fields will be highlighted
in red to warn of the omission or the invalid code. Once the vendor is
selected, the check image at the bottom fills in automatically.
Check Date
The Check Date defaults to the current system date, but can be
modified by the User via input to this field.
Entertainment Partners
Checks - A/P Menu • 14-11
Printed Check Date Format
VISTA allows the User to select the format in which the check date will be printed
on the Quick Check. Click the arrow at the right of this field to pull-down the menu
from which to choose the Check Date Format.
Check Number
Provide VISTA with the appropriate Check Number. This number
must correspond with the preprinted number on the physical check.
Invoice Date-Invoice Number-Amount
Invoice Date, Invoice Number and Amount must also be entered.
If there are any unpaid invoices (open items) for the selected vendor, a
right-click in the Invoice Number field summons a list of the invoice
numbers of open invoices, along with the corresponding system
transaction numbers for reference. If there is only one unpaid invoice
for the selected vendor, then that invoice defaults into the Quick
Check window. If that is not the invoice to be paid via the Quick
Check, that line may be written over.
VISTA will automatically add the invoice input amounts, deduct any
discount and print a Quick Check for the correct total.
Completing the Quick Check
When all the invoice information is input, press Enter. VISTA will
begin the printing process by reminding the User to load a check on the
printer. When this is done, click Yes.
After confirming the printer name and type to which the Quick Check
is to be routed by highlighting the choice and clicking OK, the system
prints the check. When the QC has finished printing, VISTA will ask if
copies are needed. Verify that appropriate check stock is loaded before
responding.
To expedite the processing of the Quick Check, VISTA automatically
assigns the distribution to the A/P Suspense Account for the selected
bank. Therefore, once the Quick Check has printed, modify the
distribution via Invoice Entry, Modify mode, in the QCBATCH.
Print an Invoice Audit Transaction Register and post the
QCBATCH. The rest of the check processing steps required for Quick
Checks (Invoice Select, Check Register, Check Register Post)
will automatically include the Quick Checks when the normal
Computer-Issued Checks are processed. If no other normal
computer checks have been printed, the system requires these processes
to be run just for the Quick Checks before the books can be closed.
Trans No.
The Transaction Number at the top right corner of the screen
indicates the last quick check that was printed. It comes into view
immediately after printing the original quick check and before printing
a copy of that check.
Some VISTA inquiries are made by reference to the Transaction
Number; note it for future reference on the invoice for which the
quick check has been drawn.
14-12 • Checks - A/P Menu
Entertainment Partners
Check Cancel/Reissue
Purpose: Cancel a check, or Cancel a check to reissue it with or without changes.
Required: Company-Currency-Bank Code, Vendor Number and Check Number
Defaults: Check Date, today’s date
Overview
The following distinction may help clarify the exact functionality of
certain VISTA capabilities:
•
Check Restart allows a User to reprint the same check
numbers (from the system’s point of view) when the
check stock itself was never used--e.g., when the printing
was done on plain paper by mistake. This is only possible
before Check Register Post has been run.
•
If posting has been done, use Cancel/Reissue. Cancel
the original unusable check number and reissue a new
check to the vendor. Anything about the payment may be
changed in reissue.
•
Check Reprint is actually a reprinting of copies, clearly
marked as such, which cannot be used as negotiable
instruments
The Cancel/Reissue function allows a User to cancel a check. The
function then goes the extra step of allowing the User to reissue another
check; possibly, but not necessarily, for the same invoices. This saves
the effort of having to re-input the same invoice data.
A CRBATCH cannot be
created via Invoice Entry
Cancel transactions and reissue transactions are held in a batch called CRBATCH
which is automatically created by VISTA..
In the CRBATCH, Cancel transactions are credits or negative
amounts (just like credit notes). Reissue transactions are debits or
positive amounts (just like invoices). Although a CRBATCH adds up
to zero, checks will be printed for the debit amounts.
To enable VISTA to print
zero-amount checks, refer to
Setup, Bank Account.
By contrast, if there is a normal batch created through Invoice Entry
with invoices and credit notes that add up to zero, no checks will print.
The check register still needs to be printed in this instance in order to
process the latter transactions through the complete check processing
cycle before printing checks for that bank.
CRBATCH data must also be processed through the A/P cycle
(invoice post, invoice select, check printing, posting, etc.) to record the
transactions in the books. The next time the check processing cycle for
normal checks is run, the CRBATCH transactions will automatically
process as well.
The Check Cancel/Reissue Procedure
Choose A/P, Check Cycle, Check Cancel/Reissue.
Entertainment Partners
Checks - A/P Menu • 14-13
The Check Cancel/Reissue screen is identical to the Quick Check
screen, including the check image in the lower half of the screen.
Identify the bank account on which the check that is to be canceled was
drawn by entering the combined Company-Currency-Bank Code.
VISTA proofreads the input. When valid data is detected, the system
tabs over to the Vendor number field.
If a valid vendor with a check number of a check that is payable to
another vendor are entered, VISTA displays a message that the check
cannot be found.
Check dates initially default
to the current system date.
If a valid vendor with a number of a check payable to that vendor are entered, but the
check date is wrong, the system changes the check date entered to the check’s
correct date.
When all the correct check information is input, VISTA brings up all
invoice details associated with the check as well as the details of the
check image. Review this information and proceed with the
cancellation. VISTA confirms the cancellation with a dialog box.
Pressing No returns VISTA to the Cancel/Reissue screen with the
check details intact to allow further review. Pressing Enter again
returns to the confirmation dialog box. Press Yes, the system proceeds
with the cancellation by displaying another dialog box confirming its
action and asking if a Reissue check for the same invoices is desired
A No ends this stage of the procedure and returns to an empty
Cancel/Reissue screen. A Yes displays another dialog box asking if
changes to the vendor number, bank code or check date are to be made.
A No ends the procedure. A Yes instructs the User to make the
changes and press Enter to continue. Click OK to leave the dialog box
for the Cancel/Reissue screen to make the desired changes.
After the changes, pressing Enter ends the procedure with the message
further changes can be made before the check is reissued by accessing
this transaction in the CRBATCH through Invoice Entry.
The next time a complete check cycle is run the cancellation will post
along with any other checks.
14-14 • Checks - A/P Menu
Entertainment Partners
Check Reprint
Purpose: Print copies of checks
Required: Company-Currency-Bank Code, Check number(s) to print
Overview
The Check Reprint function prints copies of checks for the selected
bank. The copies cannot be used as negotiable instruments and are
marked as ‘CHECK REPRINT’.
Check Reprint is useful in cases in which the copies printed
previously have been lost, or in which file copies were not printed at
the time the original checks were printed.
The Check Reprint Procedure
Choose A/P, Check Cycle, Check Reprint.
Load the printer tray with the
desired paper stock before
pressing Enter.
Enter the combined Company-Currency-Bank Code to identify the bank whose
check copies are to be printed. Enter the check number or number range you wish to
print. Press Enter.
Check Register History
Purpose: Print a register of checks from past check runs
Required: Company-Currency-Bank Code
Defaults: Report Date to today’s date; Check Number to all; Year
Period to all; No to details on register
Overview
A Check Register can only be printed for checks in a current check
cycle before that check register is posted (through the Check
Register Post function).
A check register history can
be printed for several check
runs on the same register.
Entertainment Partners
Once a current check register has been posted, the only way to get another register is
through Check Register History. Checks that are sitting in batches going
through a current check cycle that has not completed the Check Register Post
process are not included in a Check Register History
Checks - A/P Menu • 14-15
The Check Register History Procedure
Choose A/P, Check Cycle, Check Register History.
Input the combined Company-Currency-Bank Code to identify the
bank whose checks you want to appear in the check register. The
Report Date is purely for time reference and defaults to the current
system date.
A register for a check or a check range may be requested. If the
Check Number(s) entered do not exist, VISTA advises that it has
found no information based on the given criteria. Pressing Enter with
these fields blank defaults to all checks in the system for that bank.
A User may further narrow the report to specific VISTA Year
Period(s). Pressing Enter without specifying any Year Period
enables VISTA to pull the checks for all year periods.
The last option regards check information. Answering No to Detailed
Register initiates printing. A Yes prompts the User for specific
Invoice details and then Distribution details. The amount of
information on the register corresponds to the choices made.
A User may select the types of checks to be included with the request.
The standard default is to include all check types. To exclude check
types, simply click on the checkbox to deselect a type.
Further data manipulation can be affected by exporting the report to
Excel. Click the Create Export File? checkbox.
14-16 • Checks - A/P Menu
Entertainment Partners
Bank Reconciliation
Purpose: Match bank account deposits and check disbursements
against bank statements
Required: Company-Currency-Bank Code
Overview
The Bank Reconciliation function is the first of a two-part VISTA
procedure that reconciles the bank balance, per the general ledger, with
the balance as reported on the bank statements as of a specified date.
This first part allows a User to match the deposit and disbursement
entries as shown in the general ledger against the entries on the bank
statements.
The second part, Bank Reconciliation Report, covered in the next
VISTA menu command, provides a worksheet to facilitate agreeing the
two balances by accounting for deposits, checks and other reconciling
items that are in one set of records and not in the other and for errors,
omissions, etc..
The Bank Reconciliation worksheet works as follows:
1.
It lists in the lower part of the screen, ten at a time, every
transaction processed through VISTA, for this bank
account (the account number declared for A/P Cash
under the Setup, Bank Account menu command) for
all year periods up to the current year period, that has not
yet been run through this Bank Reconciliation process.
2.
By manually matching the latter transactions so listed on
the screen against the entries in the bank statement and
marking them with a ‘c’ whenever you have a match,
VISTA credits and debits the above opening balance with
disbursements and deposits respectively.
The field titled Current Bank Statement Balance
allows a User to enter the closing balance as shown in the
current bank statement top which the book balance is
being reconciled.
Entertainment Partners
Checks - A/P Menu • 14-17
The Bank Reconciliation procedure
Choose A/P, Check Cycle, Bank Reconciliation.
Note: To get a snapshot of
the Reconciliation Report
click on the “View
Reconciliation
Status”botton.
Enter the Company-Currency-Bank Code needed to identify the
bank account being reconciled and press Enter. VISTA allows the
reconciliation of two accounts. For example: a funding account for
deposits; and a disbursement account for checks, etc.
Refer to the production’s current bank statement and enter the closing
balance in the Current Bank Statement Balance field.
14-18 • Checks - A/P Menu
Entertainment Partners
These entries are listed ten at
a time. Use the PageUP and
PageDown keys to view the
items on the next page or go
back and forth between
pages.
The next step in the reconciliation process is not VISTA function or
activity. The User must carefully examine the entries on the bank
statements and match as many of them as possible with the list of
transactions that VISTA has posted to the bank account in its books.
Enter a ‘c’ in the check box opposite each item as it is accounted for on
the bank statement.
A word of caution: After the last item at the bottom of a page, the
cursor jumps back up to the top of that screen; the Current Bank
Statement Balance field. Be mindful of the cursor position because
the system will let you enter ‘c’ in that field.
Be sure that every item on the bank statement has been either matched
or noted in order to account for it as a reconciling item or adjust the
book balance with (adjustment, correction, interest earned, bank
charges, etc.) in the next step of the reconciliation process (the Bank
Reconciliation Report function).
When this examination of the two sets of records is complete and as
many entries as possible have cleared, press Enter to end the
procedure.
At that point, VISTA offers two options: to (1) Save Partial
Reconciliation or (2) Post Completed Reconciliation.
If all possible entry matching has been done and all the reconciling
items have been noted for use in the reconciliation, Post the
reconciliation to complete the reconciliation process with Bank
Reconciliation Report.
If the matching task has not been complete, or needs further research
into unmatched items, discrepancies, etc., Save the reconciliation work
so that work can resume on at a later time.
Whether Posted or Saved, the Bank Reconciliation Report may be
run for information--see the next step below.
Bank Reconciliation Report
Purpose: Print bank account transactions and reconciliation statement
Required: Company-Currency-Bank Code
Defaults: Report Date is current date, includes all checks and all year
periods
Overview
When running the Bank Reconciliation Report without Posting
the matching work done in the Bank Reconciliation, the report lists
all the transactions that were matched and remain to be matched for the
current period’s reconciliation.
The matched items show a check status of ‘u’ for cleared but
unposted. The unmatched items have a blank check status.
If a transaction listing of these items with the check status is desired,
do not Post the reconciliation the first time around.
Entertainment Partners
Checks - A/P Menu • 14-19
The Bank Reconciliation Report Procedure
Choose A/P, Check Cycle, Bank Reconciliation Report.
Identify the bank being reconciled by entering the CompanyCurrency-Bank Code.
The Report Date defaults to the current date.
The Report Summery Only field defaults to YES. If a full report is
desired, select NO for this option.
As explained in the above Overview, if the Bank Reconciliation has
been Posted and a listing of all transactions, cleared and uncleared is
desired, click No to the Outstanding Only option.
14-20 • Checks - A/P Menu
Entertainment Partners
In the Reconciling Items section, enter those items that must be
taken into account (adjustments, corrections, interest earned or charged,
bank charges, etc.) that are yet to be booked in the ledger or corrected
by the bank in order to get the ledger balance and the bank balance to
agree.
If everything has been accounted for, the two balances will agree. If
they don't agree, further research is required to account for the
difference.
Book these reconciling items in the ledger separately by Journal
Entries. For the next reconciliation, Mark these items as cleared as
they’ve effectively been cleared against these current bank statements
although they will be listed by the system as current activity in the
next reconciliation.
The corrections that the bank has to make in their books need not
journaled, but do keep track of them and check that they appear in
future bank statements so as to account for them accordingly in future
reconciliations.
Press Enter and the system will print out the reconciliation report.
It will list the outstanding items only or all items depending on your
choice. The last page of the report summarizes the reconciliation
statement by giving a count and a total of the outstanding checks
broken down by type (computer, manual, quick, etc.) as well as a total
counts and amount.
Entertainment Partners
Checks - A/P Menu • 14-21
This page left blank intentionally.
14-22 • Checks - A/P Menu
Entertainment Partners
Chapter 15: VISTA Payroll History
Reporting System
Overview
The Vista Payroll History Reporting System (VPHRS) has been designed to provide
our users with some of the same payroll information that is available at
Entertainment Partners. Union reports, check registers, fringe reports, and more are
now available in the payroll module of your Vista Production Accounting System. In
addition to providing our users with these valuable reports, edits and /or invoices are
now available electronically via modem in addition to the traditional method of
receiving a diskette.
Mechanics of Payroll Processing
This is the basic procedure VISTA follows in applying payroll transactions to the
General Ledger. As soon as a User posts a payroll invoice, the associated costs are
recorded in the ledger. Labor and fringe are charged to the payroll cost accounts and
the offset totals are charged to the payroll clearing accounts. When a User posts the
Payroll invoice to A/P, payroll-clearing accounts are debited and the A/P clearing
account is credited. When the payment is processed the A/P clearing account is
debited and the specified cash account is credited.
Entertainment Partners
VISTA Payroll History Reporting System • 15-1
Payroll Invoice Processing
The most basic functions of VISTA Payroll are found within the P/R; Invoice
Processing module. These functions also serve as an effective introduction to the
Payroll Processing Cycle.
Payroll Processing Cycle
The following is a typical production payroll cycle taking full advantage of EP’s
payroll processing “automation” sequence.
Payroll Receive: Download the payroll file into VISTA. At this point a User will
be able to audit and adjust the invoice prior to posting.
NOTE: Users with Location Check Print capabilities will be able to generate
their production’s payroll checks after the invoice has been received but before the
invoice is posted.
List and Review Labor and Fringes: List the labor and fringe charges in detail
using the List option of Labor/Fringe/AP Post. Review for accuracy and make
corrections using P/R Labor Corrections or P/R Fringe Table Corrections.
Re-List Labor and Fringes: List the detail again to make sure corrections were
made accurately.
List / Post Labor and Fringes; Post Invoice to A/P: List and post labor and
fringe costs to the ledger. To create an A/P Batch (PRBATCH) which will automate
the invoice entry process for the A/P item, be sure to answer ‘Y’ to the “Post to A/P”
option on the screen.
Process PRBATCH through A/P: Complete the payroll cycle by following the
standard A/P process for the payroll invoice.
Payroll Receive
Purpose: Download a payroll invoice from diskette or folder
Required: Payroll file (either on diskette or loaded onto the production’s hard
drive electronically)
15-2 • VISTA Payroll History Reporting System
Entertainment Partners
Downloading a Payroll File
To download a payroll file into VISTA from diskette or folder, choose P/R, Invoice
Processing, Payroll Receive from the VISTA Main Menu.
Users with payroll invoices
delivered on diskette:
Insert the payroll invoice diskette in the diskette drive and designate the appropriate
drive path. Typically A:\
Users with Location Check
Print:
Users with Location Check Print will be receiving payroll files not from a diskette
but from the location on their c:drive at which EP's payroll computers wrote their
payroll file. c:\disc\download is the location of such an invoice file. Refer to the
“Location Check Print” section of this chapter on page 15-17.
As the information is transferred, labor totals will accumulate on the screen.
When the download is finished a message will appear asking if there are more
diskettes to download. If there are: first remove the current diskette from the disk
drive, insert the next one, then press Enter or Y. Repeat this procedure until all
diskettes are downloaded. When downloading is complete, press N or click on No
in response to VISTA’s prompt.
Note: VISTA will not allow a payroll diskette to be downloaded more than once. If
an attempt is made to download a diskette a second time, a notification to that effect
will be displayed.
Deleting a Downloaded Payroll File
To delete a downloaded invoice from the hard drive, choose the Delete Invoice
function.
Entertainment Partners
VISTA Payroll History Reporting System • 15-3
Do not confuse this process
with reversing a posted
invoice from the ledger. Go to
Labor/Fringe/AP Post to
reverse invoice, see page15-9
In the invoice field, press F12 to choose from the available invoices. After choosing
the invoice to be deleted, press Enter to begin the deletion process. Although the
deletion process is irreversible, a deleted invoice may be downloaded again.
Labor Corrections
Purpose: Change labor distribution coding
Required: Client Number, Invoice Number, and Tax ID Number
VISTA Payroll History Reporting System: To change the labor distribution that has
been coded by EP, choose P/R, Labor Corrections from the VISTA Main Menu.
15-4 • VISTA Payroll History Reporting System
Entertainment Partners
Client
The Client Number is assigned to each production by Entertainment Partners
Marketing Department during initial show set-up. F12 or right-click in this field to
select the appropriate Client Number.
Invoice Number
An F12 or a right-click in this field brings up a scroll panel listing all current
payroll invoices. Select the invoice to be corrected.
Tax ID Number
An F12 or a right-click in this field brings up a scroll panel listing all available
individuals for the selected invoice in alphabetical order. The Tax ID Number
generally corresponds to the employee’s social security number; however, some
employees may have a Tax ID Number issued by the Federal government. Choose
the individual whose labor distribution information is to be modified.
The daily charges for this employee will fill the lower portion of the screen. Make
changes by typing over what is displayed in the account distribution, hours and/or
amount fields.
Split
Clicking the Split button at the end of a row of distribution will insert another row
directly beneath that one, copying that row’s distribution code, pay code and
class code. The distribution code may be modified. The amount field of the
new row will be empty. The User may enter an amount into the new row, but
existing amount fields must be altered to reflect the new amount distribution.
Totals:
VISTA automatically checks the math and verifies that the figures input as amounts
match the Totals amounts at the bottom of the window. VISTA will list the Total
Labor Hours and the Total Labor Amount at the bottom of the window
The User can not alter the
Total Labor figures.
Review these totals carefully before closing the Labor Corrections window. If
there is a discrepancy, VISTA will notify the User of the difference. The User must
amend the amount fields to match the Total Check amount before proceeding.
Associated fringe distribution may be changed automatically based on the current
Fringe Table.
Entertainment Partners
VISTA Payroll History Reporting System • 15-5
Fringe/Journal Table Maintenance
Fringe Table Maintenance
Purpose: Add or change fringe distribution coding
Required: Production Number(s)
During initial setup of each system, the production company provides Entertainment
Partners with a fringe table. This table specifies where production fringe costs are to
be charged. VISTA allows a User to adjust these charges based on a specific labor
account, or a range of labor accounts. Fringe costs may be posted to separate
accounts based on fringe types. If a fringe type has not been specified, the charges
will be posted to the default fringe type--which acts as a ‘catch-all’ for all
unspecified fringe types.
Choose P/R, Invoice Processing, Fringe/Journal Table Maintenance from
VISTA’s Main Menu. Change function to Modify.
The default function in this application is INQUIRE. A User may add a new
production number and/or detail range with associated fringe costs. To change an
existing range, select the function MODIFY before selecting the Production range.
Production (From / To): F12 or right click the production field for a scroll
panel of available production numbers, or enter the information if known, and press
Enter.
15-6 • VISTA Payroll History Reporting System
Entertainment Partners
Account (From / To): Access a list of the labor accounts for which fringe tables
have been set up with the F12 or right click function. Select the appropriate range
and then press enter.
Note: Fringe following labor is the result of the labor account number not being
included in the account range of the fringe table. To correct you can modify an
existing range or add a new one.
Journal Table Maintenance
Purpose: Add or change offset account coding
Required: Group Number, Company Number
During initial setup of each VISTA system, the Production Company provides
Entertainment Partners with a journal table. This table specifies where labor and
fringe offsets are to be charged. VISTA allows the User to modify those offsets, or to
add new ones.
To update the Journal Table click on Table from the menu and select Journal.
Change Function to Modify.
To add or modify offset accounts, choose the appropriate function, set up or correct
the offset account number for each offset type.
Payroll History Reporting
users may select the option of
disabling VISTA’s fringe
overwrite option. Refer to the
set up chapter’s section on
the “Payroll Interface Table”
on page9-31
Journal/Fringe Table corrections as described here affect the tables stored by VISTA
on the User’s hard drive; any invoices downloaded into VISTA thereafter may be
‘filtered’ through these tables. Changes to the Journal/Fringe Tables used by
Entertainment Partners Payroll department must be made directly to the in-house
system at EP. Contact the EP Marketing department if changes are required.
Fringe/Journal Table Print
VISTA will list the current fringe and Journal tables. It shows the default fringe
account and any other fringe accounts that have been set up by the Entertainment
Partners Marketing department. F12 or right click to select the client number you
wish to report on.
Fringe Table corrections as described here affect the fringe table stored by VISTA
on the User’s hard drive; any invoices downloaded into VISTA thereafter will be
‘filtered’ through this table. Changes to the Fringe Table used by Entertainment
Partners Payroll department must be made directly to the in-house system at EP.
Contact the EP Marketing department if these changes are required. Refer to
“Payroll Interface Table” on page 9-31 for further detailed information.
Entertainment Partners
VISTA Payroll History Reporting System • 15-7
Labor/Fringe/AP Post
Purpose: Post labor and fringe costs to the ledger and payroll invoices to the
accounts payable sub system
Required: Report Number, Invoice Number
The Labor/Fringe/AP Post program allows the User to process the payroll
invoices received from Entertainment Partners directly into VISTA. This application
posts labor costs and associated fringe costs to the general ledger, and provides the
option of creating an A/P invoice automatically.
Choose P/R, Invoice Processing, Labor/Fringe/AP Post from VISTA’s main menu.
15-8 • VISTA Payroll History Reporting System
Entertainment Partners
Report Number
The payroll flex reporting option provides the opportunity to set up various report
formats. The Labor/Fringe/APPost application allows a User to print reports in any
of the existing formats. “DISC850” is VISTA’s default report format. For more
information on report set up, please see the Flex Reporting information at the end of
this section.
Invoice Number
VISTA holds payroll invoice data for both current invoices (Current) and posted
invoices (History). F12 or right-click in the invoice field to bring up a scroll
panel of all available un-posted payroll invoices. Select the appropriate invoice.
List vs. List/Post
Always run this program in List mode when processing an invoice for the first time.
Choosing the List option will default the other screen options, and will produce a list
of payroll download information for the User’s review.
Proofread the payroll information carefully. If labor or fringe corrections need to be
made, use the Labor Corrections and/or Fringe Table Corrections functions.
Selecting List/Post will post the payroll data directly to the ledger, and will
produce a posting report.
Warnings Only
see note on page 15-6
This will list only those items on the selected invoice that have warnings:
Fringe following labor
Post By Detail
VISTA will post every line of distribution as it appears on the List.
Post to A/P
Answering Yes to this prompt creates an A/P invoice payable to Entertainment
Partners in an A/P batch called PRBATCH.
VISTA Payroll History
Reporting System users
will find that the
PRBATCH will post
labor and fringes to the
assigned billover
accounts, if applicable
The VISTA Payroll history Reporting System will find that the labor and
clearing accounts are credited as assigned by the production’s EP Paymaster.
Deductions will be pulled as a credit by the A/P posting. If, at the instruction of
the production’s accounting office, the EP Paymaster does not direct per diem
totals to specific accounts, the totals will accumulate in the “Miscellaneous”
account specified in the production’s Journal Table.
The PRBATCH should be modified and processed like any other A/P batch.
If No is the User’s response to the question Post to A/P, a payroll invoice must be
entered manually into the A/P cycle.
Entertainment Partners
VISTA Payroll History Reporting System • 15-9
Reversing an Invoice
To reverse a posted invoice key in invoice number, click on the HIST INV ONLY
button. Then click on List/Post and hit enter.
Flex Reporting Maintenance
Purpose: Store default and custom report formats for use with
Labor/Fringe/APPost option in payroll processing
Required: Report Number, Report Title, Report Layout, and Column Contents
Code
Defaults: DISC850
This feature allows the User to design the format of payroll reports. The User
controls all aspects of the report format: report title, paper size and orientation, how
many columns, what items appear on the report, column headings and amount
formats. A default DISC850 report will fill the window the first time this
application is opened. Press Enter to add the report to the system.
Note: Report print order: E-Employee Within Union; A – Account Order
15-10 • VISTA Payroll History Reporting System
Entertainment Partners
The standard VISTA function menu options are available along with the following
additional items:
The Print option will provide a format layout for a specified report.
Copy allows the User to copy an existing format to a new report number in order to
alter the new report rather than starting from scratch (as discussed below).
Setup Default will remain available only until the default report has been added to
the system.
A User can add or reformat as many layouts as are desired. Entertainment
Partners strongly recommends leaving the default format as it is, and making
any changes to a renamed copy. Select Function, Copy. The following window
will appear:
In the Copy FROM field insert the name of the report to be duplicated (i.e.
DISC850). In the Copy TO field enter the name of the new report (i.e. Jane’s
Report, Friday AM, etc.). Hit Enter. Jane’s Report will now appear alongside
DISC850 on the menu of Report Number options. Jane’s Report will be identical
to DISC850.
To customize a report, pull down Function Modify and select the report from the
Report Number menu. The particulars of that report will fill the window.
Report Title is what will appear at the top of the page of the report.
Report Layout designates the orientation and size of paper on which the report will
be printed. The Layout will determine the maximum number of columns allowable
on the report. (Legal refers to 8.5” by 14” paper in landscape format.)
Entertainment Partners
VISTA Payroll History Reporting System • 15-11
Column indicates what information, in what order, will be on the report. Select
from the list of options (A through U) exactly what information is required.
Additionally, an asterisk (*) may be entered in any column to indicate that VISTA
needs to combine, or total, two or more items from the list of options. Enter the
appropriate letter (or asterisk) in the column position (1 through 7, 11, or 13
depending upon the selected Layout).
To Change Headings/Setup Totals for the columns, click the bar at the bottom
of the window, or press the Page Down key on the keyboard.
The row labeled Column at the top of this window reminds the User of which
letters and in what positions are selected for the report. The list of options and their
corresponding letters at the bottom of the window reminds the User of which
information is represented by which letters. In the center of this window are three
fields for each column, one each of Upper Heading, Lower Heading, and Total
Formula.
Upper Heading may be designated by the User by clicking and typing within the
field.
Lower Heading corresponds to the information selected by the User for that
column. This field may not be altered without changing the report information
option in the previous window.
Total Formula for a column is computed by the use of letters designated by the
User in this field in conjunction with the asterisk (*) discussed earlier. Enter the
letters of the options to be combined within the column.
Hit Enter to affect the changes and return to the Flex-Disc window. The User may
print the report by pulling down Function Print and selecting the Report
Number from the menu of available reports.
15-12 • VISTA Payroll History Reporting System
Entertainment Partners
Payroll Reporting
The following reports are accessed through the P/R; Payroll Reporting menu.
Payroll Package Print, Check Register/Earnings Report, Check/Fringe Listing
Report, Payroll Audit, Location Check Print, and Commercial Reports.
Users have the option of Printing the production’s payroll checks on Location.
Payroll Package Print
Entertainment Partners
VISTA Payroll History Reporting System • 15-13
Overview
Payroll Package Print allows the User to print the reports that are received from
Entertainment Partners as part of payroll processing. You can print these reports
from posted or unposted payroll invoices. If you are requesting reports for invoices
that have already been posted click on the Hist Inv Only button. To request reports
for both unposted and posted Payroll Invoices click on the Hist and Current button.
The reports are available individually by clicking on the appropriate button or in total
by selecting Print Payroll Package.
Check Register / Earnings Report
Overview
The Check Register / Earning Report allows the user to run a cumulative history
report of payroll for members of the production.
15-14 • VISTA Payroll History Reporting System
Entertainment Partners
Check Register
The check register report is requested by client number and invoice number. The
report displays, in check number order, the earnings reported on the time cards for
that particular invoice. It shows employee as well as employer deductions in
addition to the number of hours.
Earnings Report
If payroll information that spans invoices is required, then this is the report that
needs to be requested. The Earnings Report may be requested by:
•
individual,
•
union,
•
week ending date range,
or a combination thereof. The report will include earnings from all invoices that
have been posted in VISTA’s Payroll History Reporting System.
Check / Fringe Listing Report
Entertainment Partners
VISTA Payroll History Reporting System • 15-15
Overview
The reports available are:
Detail / summary employee check listing; Lists checks in numeric order
within employee in accordance with report option criteria. Includes check
number, gross amount, all deductions, net amount, check date, and period
ending date.
Detail / summary employee fringe listing; List employer fringes by
employee in accordance with report option criteria. Includes gross amount,
all employer fringes, vacation/holiday accruals, check date, check number,
and period ending date.
Payroll Audit
Overview
Payroll Audit allows the User to view production staff’s payroll files that have
been downloaded into VISTA.
The Payroll Audit may be run in either Name or Invoice Number order.
Note: This report is similar to Repot Creation by EP-Paymaster
Input either a Client or a Tax ID Number by which to define the parameters of the
Audit. At least one Week Ending Date must be input in the Range fields. Note
that the field for the Year is four characters long.
Press enter to initiate the Payroll Audit.
15-16 • VISTA Payroll History Reporting System
Entertainment Partners
Location Check Print
Overview
An option available to a VISTA User is the ability to print the production's payroll
checks at the production accounting office. Printing checks on location benefits the
production accountant by reducing the turnaround time between the submission of
timecards to EP and the delivery of the checks to the personnel on location. By
eliminating the shipping of payroll checks, Location Check Printing can provide
savings in both time and costs to the productions.
Location Check Printing capabilities can be initiated through Entertainment
Partners Marketing Department. Among issues that Marketing will resolve are:
Location Check Print
requires VISTA Pay HRS
The initiation of VISTA's Payroll History Reporting System, which
is necessary for the Location Check Print function
The establishment of Passcodes to be assigned to production staff
authorized by the production to print checks
Furthermore, productions using Location Check Print must also be running a 32-bit
Windows operating system, such as 95 or NT, and be equipped with both a modem
and telephone line.
Location Check Print
requires special check stock.
In addition to these basic requirements, Location Check Print requires
specific check stock for the printing of checks. Although the documents
produced by VISTA from electronic payroll files will contain signature and
logo images, these documents in-and-of themselves on plain white paper are
not valid checks. Entertainment Partners will supply productions using
Location Check Print with valid check stock.
Location Check Print
requires the use of MICR
toner.
Additionally, checks must be printed with Magnetic Ink Character
Recognition (MICR) toner. MICR toner is necessary if the images on the
check are to be read by the scanning machines used by financial institutions.
EP has tested and supports Hewlett/Packard series 4 and 5 laser jet printers
with MICR toner.
Mechanics of Location Check Print
The production's payroll clerk will submit timecards to the Entertainment Partners
paymaster as usual. Rather than printed checks, however, the EP paymaster will
create an electronic payroll invoice file, which will be stored on an EP payroll
computer. The production accountant will dial via modem into the EP computer and
collect the payroll file, which will be written directly to that production's hard drive.
After receiving the payroll files into VISTA and auditing the invoices via VISTA's
Labor/Fringe List function, the production accountant will print payroll checks for
the production personnel. Posting of the electronic invoices to the General Ledger
and A/P subsystem is achieved via VISTA's Labor/Fringe Post function.
Entertainment Partners
VISTA Payroll History Reporting System • 15-17
Printing Location Checks
Once the files have been successfully received into VISTA, the User may begin the
process of printing payroll checks (refer to supplemental “Location Check Print “
documentation). The program that initiates this procedure is accessed via the P/R
tab, Payroll Reporting, Location Check Print.
Printing Checks
The first time a User accesses Location Check Print, the User will need to enter his
or her Personal Identification Number (PIN) twice; once in each of the fields so
labeled in the window. Subsequent entries into Location Check Print will require
only a single PIN entry.
The PIN is a five-digit numeric sequence. No alphabetical characters are allowed in
this field. The PIN is neither assigned nor known by anyone at Entertainment
Partners; it is a security code known only by the User designated to print payroll
checks.
Upon entering a valid PIN, VISTA will escort the User into the Location Check
Print window.
15-18 • VISTA Payroll History Reporting System
Entertainment Partners
A right-click (or F-12) in the Invoice No field will summon any payroll invoice
that has been received but not posted by VISTA. If there is more than one invoice in
Payroll Receive, a scroll panel will appear, inviting the User to select the invoice(s)
to be printed.
Note: VISTA will not allow User to post invoice before checks have been printed.
Select a single invoice by double-clicking on it, or select several invoices by clicking
and dragging across the range.
Entertainment Partners
VISTA Payroll History Reporting System • 15-19
The Passcode field should
be left blank under normal
circumstances.
The entry of a Passcode is required only if :
•
the User is attempting to re-reprint checks beyond the second
printing;
•
the User is proofreading the check image on the check stock
in the printer. Refer to the section “Test Check” for details
and instructions.
The Passcode is assigned to a User by the EP Customer Support
Department under the first two of these unusual circumstances.
Leave the Passcode field blank if printing the checks for the first time.
Check stock must be loaded
into the printer before
printing checks.
Clicking on the Enter box with the desired invoices selected will conjure
a pop-up window reminding the User that the active printer must be
equipped with MICR toner and be loaded with check stock.
Clicking OK will immediately initiate the printing of the checks. Because of this it
is imperative that sufficient check stock be properly loaded into the destination
printer before OK (or Enter) is clicked.
An information window will appear informing the User that the invoice batch is
being printed as checks on the printer.
Note: Please verify that the checks have printed with the following information on
the check face. The EP logo in the top left, the signatures on the right side and the
bank information across the bottom.
Remove unused check stock from the printer as soon as the checks have finished
printing.
15-20 • VISTA Payroll History Reporting System
Entertainment Partners
Test Check
Proofing the check stock with the printer is advised, particularly when printing
checks for the very first time, or even the first time in a session. In the Location
Check Print window, select an invoice number as described in the above section.
In the Passcode section, input ALIGN. Hit enter.
VISTA will print a single test check from the check stock in the printer tray.
Proofread the test check carefully. Verify that the signature, logo, and MICR
marks are all present on the check.
Problems discovered by printing the test check may be caused by problems with the
installation of fonts or printer drivers. Call EP Customer Support if such problems
are apparent.
Check Re-Print
In the event of a problem with the check run (i.e. printing to blank paper, a printer
jam, etc.), it will be necessary to restart the printing procedure.
It is not possible to print selectively from an electronic invoice. Re-Print is an allor-nothing proposition. Summon the Location Check Print window from the
desktop folder as described in the proceeding section.
Verify that the active printer
is loaded with sufficient check
stock before hitting Enter.
Right-click or F-12 in the Invoice No field. Unless the invoice has been posted
to the A/P accounts (refer to the following sections), it will remain in the Payroll
Receive scroll. Select the invoice, load the check stock and initiate printing by
clicking Enter.
In the event that the invoice has been posted through the Labor/Fringe/APPost
process, it will no longer be available through the Location Check Print window.
Please contact EP's Customer Support Department for specific instructions regarding
re-printing electronic invoice files.
Entertainment Partners
VISTA Payroll History Reporting System • 15-21
This page left blank intentionally.
15-22 • VISTA Payroll History Reporting System
Entertainment Partners
Chapter 16: P/C Menu - Petty
Cash
Overview
The term “petty cash” refers to a bank of cash money maintained by the production’s
accounting office for distribution to certain production staff designated as “petty cash
custodians.” VISTA’s Petty Cash module is set up to process not only petty cash
transactions but Purchase Card transactions as well.
VISTA’s Purchase Card capabilities are in βeta testing as of the writing of this
document. Further information will be made available to VISTA Users as testing
continues.
For a thorough discussion of the distinctions between Petty Cash and Purchase
Card Custodians, refer to the “Petty Cash / Purchase Card” section on page 9-14.
Additionally, a thorough discussion of the processes by which Purchase Card
transactions are interfaced with VISTA’s Petty Cash module can be found on page
26-14 under the heading “Purchase Card Interface.” Once a Purchase Card
transaction interfaces with VISTA’s Petty Cash module, it is processed through
Petty Cash exactly as though it were a standard Petty Cash transaction.
The processing of petty cash through VISTA is done in three separate modules of the
VISTA system.
1.
Entertainment Partners
In the first module, there s a need to set up a petty cash custodian-that’s the person who has primary custody of the petty cash funds--use
the Setup, Petty Cash menu command.
P/C Menu - Petty Cash • 16-1
The instructions for this function are covered under the Setup menu but a
reminder about the general ledger account number entered in the
Custodian’s Account field would be useful.
The Custodian’s Account number is the account that is credited when
advances to petty cash vendors are recorded in the P/C, Petty Cash
Entry function.
2.
In the second module, the custodian must then be set up as a vendor
(using the A/P, Vendor, Vendor Entry menu command) for 2
purposes:
(a) so petty cash funding checks can be drawn in her favor in her capacity as
the custodian;
(b) so there is a vendor record to use if, this time in her capacity as a petty
cash vendor, she is also to be advanced petty cash funds and is to
account for them.
In this vendor record for the custodian, a word about the account numbers
is in order:
(1) in the General Ledger Accounts box, nothing needs to be entered.
But if you wish, the account that is to be debited every time you
replenish the custodian’s funds could be entered here to save you
having to remember it when you process the ‘invoice’ to draw the
check;
(2) if you make this account number the same as the account number for the
Custodian’s Account number in the custodian’s record created with
the Setup, Petty Cash command, then all of the funds that custodian
was given and all of the advances she in turn paid out to the petty cash
vendors will appear in the same general ledger account--making an
analysis of her petty cash received and paid out a little easier. Many
shows do it this way. If you don’t make them the same, it just means
you have to go to 2 accounts to get the same information.
(3) In the Petty Cash Accounts box, as for any other vendor who is to
be a petty cash vendor, you must enter an account to be debited for
advances received by this vendor and an account to be credited for the
amounts that are accounted for (when the actual expense accounts are
debited). These 2 account numbers are required by the Petty Cash
system in order to effect these accounting entries automatically.
(4) You can make the account to be debited and the account to be credited
the same number so that the petty cash vendor’s cash received and
disbursed are in the same account, which may facilitate subsequent
analysis of her transactions. This is what we see the most out in the
field and once again, if you don’t make them the same, it just means
you have to go to 2 accounts to get the same information.
(5) If you make the custodian’s Account number, the GL Account
number in her vendor record and the Petty Cash Account number(s)
also in her vendor record all the same, the accounting entries would still
be technically correct but this approach makes analysis difficult based
on what we’ve seen in the field. But the choice is yours.
All of the account numbers referred to above must have been set up in your
chart of accounts (using G/L, Chart of Accounts Entry).
Likewise, every petty cash vendor, other than the custodian, who is
advanced petty cash and is required to account for it as production
16-2 • P/C Menu - Petty Cash
Entertainment Partners
expenses must also be set up as a vendor. The rules and tips regarding
Petty Cash Account numbers are the same as for the custodian’s
petty cash vendor record.
3.
In the third module, the subsequent recording of cash advances made
to petty cash vendors, accounting for what is spent, auditing transaction
journals, posting, inquiry and reporting on petty cash are performed or
maintained through the P/C (petty cash) menu commands.
The operational features in the first two VISTA areas are covered under the Setup
and A/P menu commands.
The P/C (petty cash) menu commands are those that are covered in detail in this
section and consist of the following:
1.
Petty Cash Entry
2.
Petty Cash Audit
3.
Petty Cash Post
4.
Petty Cash Inquiry/History
Petty Cash Entry
Purpose: To record advances made to petty cash vendors (production staff, crew
members, etc.) who need to pay in cash and to record the expenses incurred under
this disbursement method by properly accounting for the advances.
Required: The petty cash custodian must be set up (Setup), both custodian (s) and
the persons receiving advances must be set up as vendors (A/P). The Company,
Currency, the P/C Code and Batch ID are required.
Defaults: Year Period defaults to current year period. Envelop date defaults to
today’s date.
Delete: Batches can be deleted before they are posted.
Choosing the P/C, Petty Cash Entry menu command brings up this screen:
Entertainment Partners
P/C Menu - Petty Cash • 16-3
The system defaults to the ADD mode. That can be either adding a new batch or
adding new transactions to a new or existing batch.
The full identification of a batch of petty cash transactions is held in the top left
panel in the Petty Cash Entry screen and is made up of 4 fields:
1.
Company;
2.
Currency;
3.
P/C Code, and;
4.
Batch number or name.
The Company and Currency codes are the same ones used throughout VISTA for
almost every other processing function.
Company consists of the company code(s) established under Setup, Company
command and used throughout your system to identify your companies.
Currency is any one of the currencies that you have to work in at all times when
using VISTA.
As for the P/C Code, the code that you assigned to a particular person to uniquely
identify him when you set him up as a custodian under Setup, Petty Cash is the
code you use here--precisely for that intended purpose--to uniquely refer to that
custodian.
P/C Code, which is really custodian code, can be any 2 characters and/or numbers.
Using a custodian’s initials is a good choice.
Batch number or name consists of any 8 characters and/or numbers that let you tell
one batch from the others.
16-4 • P/C Menu - Petty Cash
Entertainment Partners
Right-clicking in the Company field brings up all the custodians set up in the
system under their combined Company-Currency-P/C Code identification.
Select the one you want; alternatively enter that information if you know it.
Right-clicking in the Batch field brings up existing batches belonging to the
custodian you’ve entered or selected. Please note: only the batches belonging to the
selected custodian show up. To look at batches pertaining to another custodian, you
must select that custodian first.
The Amount field does not have to be completed and if you leave it blank, the
system allows you to proceed all the way to posting your transactions.
You cannot input anything in the Current field. It is used by the system to give a
running total of the advance(s) being input for the batch.
If you do enter an amount in the Amount field, it is treated by the system as the
batch control total and is used to balance back to the total of the advance(s) that
you’re inputting for the batch.
If the advances you’ve entered do not add up to the batch control total, the system
will not let you post the batch.
When you exit the batch, the system will not stop you or warn you that the batch is
out of balance because the batch can still be reopened, added to, modified, deleted,
etc. However, the system will stop you when you try to actually post the batch under
the P/C, Petty Cash Post function.
Please note that the Amount and the Current fields are only concerned with
tallying advances. Transactions entered to account for petty cash are not
accumulated in these fields.
After completing the batch identification section, you need to press Return to
indicate that you wish to proceed with that batch. If the batch already exists, VISTA
allows you to continue with your processing; if it does not exist, the system asks you
to confirm that you want create a new batch.
The second box (top right corner) shows the Year Period and the transaction
number--Trans No.
Year Period defaults to the current year period. You can enter petty cash for the
Current period and the Next period.
You cannot enter anything in the transaction number (Trans No) field. VISTA uses
it to tell you the system transaction number that was assigned to the last transaction
you’ve just processed.
The transaction number appears on your audit reports. It’s a good idea to write the
transaction number on the source documents for future inquiry or reference purposes.
The next section of the screen, the middle panel, starts the processing of actual petty
cash data. This panel is used for both recording an Amount Advanced and
Accounting For petty cash disbursed.
Recording an advance and accounting for disbursements are normally performed
together but can also be done in separate steps.
Except when an initial float is being advanced to a person, almost every petty cash
transaction involves both an advance and accounting for an amount equivalent to the
amount being ‘advanced’ in the same session--more precisely being ‘reimbursed’ in
the same session.
The method of always reimbursing a person for expenses to bring her float back to
the original amount advanced to her is called the Impress or Constant Float method
of petty cash accounting.
Entertainment Partners
P/C Menu - Petty Cash • 16-5
Recording An Amount Advanced
The fields used to record an advance are:
1.
Vendor;
2.
Envelope N(o)umber;
3.
Voucher;
4.
Envelope Date;
5.
State (worked)
6.
Amount Advanced.
Anyone who is made a petty cash advance and is then reimbursed for expenses or
anyone who is being reimbursed for expenses only through petty cash must be set up
as a vendor in VISTA.
It is therefore necessary to identify a vendor in any transaction. Right-clicking in the
Vendor field brings up a scroll panel listing all vendors in the system in alpha order.
Entering one or more letters in the vendor field and then right-clicking will limit the
results of the inquiry.
Vendors set up with account numbers in the Petty Cash Accounts fields (i.e.
petty cash vendors) show up with ‘p/c’ after their vendor number in the scroll panel.
Only vendors set up in the system under the same Currency as that used in the
Company-Currency-P/C Code to identify the custodian whose petty cash
records you’re processing will be displayed in the scroll panel.
Select a vendor or enter a vendor number. The vendor’s name appears under the
vendor number field when you tab to the next field.
The next field is the Env No. In the industry, an envelope number is used to identify
the group of receipts that are being reimbursed. Envelope identifications usually
include the payee’s initials coupled with a date or week ending date, a dept ID with a
date, etc.. This is a required field.
The Voucher field provides additional reference information for the reimbursement
such as actual invoice number. Voucher information is optional.
The Envelope Date is required and defaults to today’s date if an actual date is not
given.
The State field is used for 1099 purposes, if applicable.
Amount Advanced is the petty cash being disbursed for the current transaction (see
Total Account For below).
Several advances can be recorded in the same batch and within the same session.
Accounting For Petty Cash Disbursed
Accounting for a petty cash disbursement can be processed as a separate transaction.
But it can also be the second half of a transaction that first had an ‘advance’ and
then, the accounting for that ‘advance’ by way of cost distribution.
In the Total Acct For field, enter the amount being accounted for and for which
distribution is required in the third section of the Petty Cash Entry screen.
16-6 • P/C Menu - Petty Cash
Entertainment Partners
As mentioned above, this amount is often, but does not have to be, the same as the
advance being recorded in Amount Advanced above as part of the same
transaction and session as prescribed under the Impress or Constant Float method.
Tabbing out of the ‘accounted for’ field, VISTA puts the cursor on the first line of
distribution numbered ‘01’, bypassing the first two lines at the top. These first two
lines are discussed later below.
Enter the general ledger account number (including the memo fields of INsurance,
Free, etc., if needed) in the first field to distribute the cost.
In Amount, put in the amount to be distributed to this account.
Ledger Description is a required field; use something that will help you
understand or identify this line item later in your reports. From the second
distribution row down, leaving this field blank causes VISTA to copy the ledger
description from the previous row.
VISTA uses the Tax Code for 1099 processing and reporting later in other modules.
It can be left blank if the item is not subject to 1099 assessment.
Leave the Tax Vendor field blank if the recipient of this petty cash reimbursement
is the person against whom the 1099 assessment is to be made.
When the recipient is being reimbursed for a payment made to a third party against
whom the 1099 assessment is to be made, enter the Vendor Number of the third
party in the Tax Vendor field (or hit F-12 to select from the scroll panel).
The first 2 rows in the account distribution section that were bypassed by the system
when you tabbed out of the Total Accounted For field are not accessible to you for
input and are used by VISTA as follow:
•
The first row is used to display the petty cash vendor’s account number
to be debited with the advance amount made to that vendor for the
specified envelope number. This is the top Petty Cash Account
number in the vendor’s A/P record. The account to be credited (but not
shown anywhere on this screen) would be the custodian’s
Custodian’s Account number in her record created under the
Setup, Petty Cash menu.
•
The second row is used to display the petty cash vendor’s account
number to be credited (this is the bottom Petty Cash Account
number in the vendor’s A/P record) with the total of the distribution
amounts debited to production cost accounts in accounting for the
advance for the specified envelope number.
These two fields are not accessible to you for input; However, you will see them
displayed when you press Enter at the end of data entry, and prior to confirming
adding the transaction. Also, when you’re inquiring into or are modifying a
transaction covered by the specified envelope number and in the Petty Cash
Inquiry/History reports (see below).
Other menu functions besides ADD that are available in the Petty Cash Entry
screen are:
Function, Modify: lets you modify data in existing batches.
A right-click in the Company field brings up all batches that have been created but
not yet posted, each identified by their Company-Currency-P/C Code. Select
from the scroll panel or enter the pertinent detail. You can change any batch data that
is not ghosted.
Entertainment Partners
P/C Menu - Petty Cash • 16-7
Next, if you want to change envelope data (in the next panel), you need to identify
for the system the vendor whose batches you want.
Right-click in the Vendor field for a list of vendors, enter the beginning of the
vendor’s name and then right-click for a more focused list of those vendors whose
names match the characters you input or enter a vendor number.
When the system has the vendor, right-click in the Env No (envelope number) field
for a list of the unposted envelopes and select the one you want to modify.
Function, Inquire: the procedures are identical to those in the Modify function
except that you cannot make any changes in this mode.
Function, Delete: allows you to delete a transaction once you’ve brought it up on
the screen. Finding the batch, vendor, and envelope you want is done the same way
as for the Modify function.
Ledger Period, Current period: the petty cash transactions are processed in the
current year period. This is the default mode;
Ledger Period, Next Period: lets you process petty cash transactions in the next
year period so that those petty cash transactions are not reported in the current
accounting period.
Batch, Unlock Batch: After pressing Return to lock a batch in, you can unlock
the batch identification panel with this menu command in order to switch to another
batch or make changes to the Amount field as you wish. The Current field remains
inaccessible for input.
Batch, Delete Batch: allows you to delete a batch once you’ve identified and
selected it in the batch identification panel. You are asked to confirm your request
and then the system deletes the batch even though the batch may contain some
transactions.
Petty Cash Audit
Purpose: To report the petty cash transactions input into the system for auditing
prior to releasing for posting to the ledgers.
Required: identification of the batch(es) by their Company-Currency-P/C
Code-Batch name or number
Defaults: in Transaction number order; for all transactions; in Native currency ;
convert using Budget exchange rate.
16-8 • P/C Menu - Petty Cash
Entertainment Partners
Choose the P/C, Petty Cash Audit menu command.
A right-click in the Company field brings up a scroll panel listing all batches in the
system that are to be posted. The batches are identified by their combined
Company-Currency-P/C Code-Batch name/number.
Select one or more, or all the batches.
The other choices you have to tailor your reports are:
•
printing in Transaction number order or in Distribution, i.e., account
number, order;
•
report transactions as opposed to only the transaction number(s)
specified in the range fields;
•
to have the amounts in their Native currency versus converted to the
system’s Base currency;
•
and if a conversion is to Base currency requested, to use either the
Budget rate or the Current rate as set up by you in your currency
record.
When you’ve made all your choices, press Enter. The system will ask if you wish to
print to ReportView (on the screen) or to the printer.
If you need to make corrections or changes to your transactions after reviewing the
audit reports, go back to the Petty Cash Entry function (P/C, Petty Cash Entry)
and use the Modify or Delete functions.
Audit reports may be run as many times as you wish as long as the batches have not
been posted.
Entertainment Partners
P/C Menu - Petty Cash • 16-9
Petty Cash Post
Purpose: To post the petty cash transactions to your Accounts Payable and General
Ledger records.
Required: identification of the batch(es) by their Company-Currency-P/C
Code-Batch name or number
Defaults: to print a report of the transactions being posted; all transactions in the
batch(es).
Choose the P/C, Petty Cash Post menu command.
A right-click in the Company field brings up a scroll panel listing all batches in the
system that are to be posted. The batches are identified by their combined
Company-Currency-P/C Code-Batch name/number.
Select one or more, or all of the batches.
The other choices you have are:
•
suppressing the printing of a report of the transactions being posted.
This is not advisable as a record of what has been posted is an
invaluable document for reference and audit purposes;
•
to post only a specified transaction or range of transactions. This choice
leaves the batch and the unposted transactions open so either can be
modified, deleted or added to.
When you’ve made all your choices, press Enter. The system will ask if you wish to
print to ReportView (on the screen) or to the printer if you haven’t suppressed the
printing.
With reference to unposted batches and/or transactions remaining accessible for
addition, modification and deletion, conversely, those that have been posted are now
no longer available.
Any changes to posted transactions have to be effected through a new petty cash
batch or journal entries (see the J/E menu).
16-10 • P/C Menu - Petty Cash
Entertainment Partners
Petty Cash Inquiry/History
Purpose: to report petty cash batch and transaction information by vendor(s).
Required: identification of the custodian by the Company-Currency-P/C Code
Defaults: inquiry is on Current (unposted) transactions and reporting full Details,
all petty cash envelopes and all year periods.
Choose the P/C, Petty Cash Inquiry/History menu command.
Right-clicking the Company field brings up a scroll panel with a list of the petty
cash custodians set up in the system. A separate inquiry needs to be run for each
custodian.
After selecting a custodian, you can limit your inquiry to a single vendor. Leaving
the Vendor field blank tells the system you want all the vendors with petty cash
transactions for that custodian.
Right-clicking the Vendor field produces a scroll panel listing all petty cash vendors
set up in the system. You can select one vendor if you wish. The choice is either one
vendor or all vendors, which you select by leaving the Vendor field blank.
Choosing to inquire on Current transactions produces the batches / transactions that
are open (unposted). Choosing History tells the system to report the posted
transactions only.
Selecting Detail in distribution by will print one line per account number. Selecting
Summary will print one line per envelope.
You can narrow down your inquiry further by specifying the envelope number in the
Envelope Number field.
If you had narrowed down your inquiry to a single vendor, right-clicking the
Envelope Number field brings up the petty cash envelopes belonging to that
vendor--open or posted, depending on whether you chose Current or History.
Right-clicking doesn’t work if you haven’t selected a vendor.
Year Period Range
The Year Period Range fields allow you to narrow your selection to specific
periods. Leaving them blank will default to all periods.
Entertainment Partners
P/C Menu - Petty Cash • 16-11
Press Enter when you’ve completed your selections and you will have the option of
sending your report to ReportView (to the screen) or to the printer.
The inquiry / history report gives the following information:
•
Vendor number, vendor name;
•
Envelope number, envelope date;
•
Voucher number, transaction number and Batch number or name;
•
General ledger account number
•
Petty cash advanced; petty cash accounted for; and the vendor balance.
Print Ledger Description
Selecting the Print Ledger Description will include the ledger description for each
distribution item. If such a description is not required, then click on the checkbox to
deselect it.
16-12 • P/C Menu - Petty Cash
Entertainment Partners
Chapter 17: Per Diem & Mileage P/D Menu
Overview
VISTA facilitates the payment, recording and reporting of Per Diems both for
accounting and tax purposes. Per Diems include payments to cast and crew on
location for meals, lodging, mileage and other (such as laundry).
The system functions include:
Entertainment Partners
1.
telling VISTA the geographic locations in which you will be paying per
diems. These locations are pertinent because the non-taxable amounts
are set by the IRS for each type of location as listed in the CONUS
table (VISTA menu command P/D, Taxing Locations);
2.
classifying recipients into groups to expedite per diem calculation and
disbursement (P/D, Per Diem Group and P/D, Mileage Group);
3.
setting up personal details for each recipient (P/D, Per Diem
Employee Setup);
4.
specifying the default per diem (meals, incidentals & lodging) and
mileage amounts applicable to each group (P/D, Per Diem Entry,
P/D, Mileage Entry);
Per Diem & Mileage - P/D Menu • 17-1
5.
generating per diem and mileage payments to be made to each group
(the same P/D, Per Diem Entry, P/D, Mileage Entry menu
commands);
6.
printing a report of what is going to be paid for auditing purposes (P/D,
Per Diem/Mileage Audit);
7.
posting an approved payment schedule to record the per diem payments
in VISTA (P/D, Per Diem/Mileage Post);
8.
balancing the cash drawn for per diem, the payment schedule and any
unpaid per diem cash in hand (P/D, Per Diem Reconciliation);
9.
printing a sign-off sheet for the signature of recipients as evidence of
their receiving their allowances (P/D, Sign-off Tax Sheet).
Regarding Currency
VISTA’s Per Diem functions are designed for use with US currency only. US is the
only currency to which Per Diem will post, regardless of the currency that has been
designated as the base currency.
Taxing Locations
Purpose: To set up every location in which you will be paying Per Diems.
Required: Only for the locations in which Per Diems will be paid.
Defaults: No system defaults.
Choose P/D, Taxing Locations from VISTA’s Main Menu.
17-2 • Per Diem & Mileage - P/D Menu
Entertainment Partners
The system will default to the function ADD you are required to enter:
Location: a two-character code each for state, county and city is needed.
Description - give the full name of the taxing location to facilitate identification.
Total M&I and Lodging - these 2 columns are for the amounts that are taxallowable under IRS rules for Meals & Incidentals and Lodging respectively. The
CONUS tables give the limits. Call EP Marketing if you don’t have this information.
VISTA requires that an amount be entered in both the Total M&I and the Lodging
columns and the system considers the sum of these 2 amounts as the daily allowable
per diem for that location; it will not work properly with one column left blank.
Example: per the CONUS tables, the taxing location in which you’re paying has a
tax-allowable M&I allowance of $50.00 and a Lodging allowance of $100.00 but
you’re only paying M&I on this show. You therefore want to establish in VISTA that
the total tax-allowable ‘total payment’ for this location is only $50 and not $150.
Because VISTA requires amounts in both Total M&I and Lodging, you cannot enter
$50 under Total M&I and $0 (zero) under Lodging or leave the latter blank. You
must enter an amount in each column that comes to $50 in total--$25 in each column
will do; so will $49 under M&I and $1 under Lodging and anything in between.
Per Diem Group
Purpose: to set up homogenous groups for more efficient processing of per diem
by groups rather than by individuals.
Required: every recipient must belong to a group, so your groups must be entered
in the system before any per diem can be paid.
Delete: not allowed; simply do not use a group that was set up but is not needed.
Before you set up groups, review the organization of your cast and crew members
and establish the groups you want to create in the system. Reference to allowance
levels, functions, departments, sites, etc. to facilitate physical distribution,
confidentiality and any other factors that promote efficiency in recording, paying
and generally processing per diem.
Choose the P/D, Per Diem Group menu command.
Entertainment Partners
Per Diem & Mileage - P/D Menu • 17-3
The screen defaults to the ADD mode.
Up to 2 characters (letter or number) can be used to define a group. Use a twocharacter code that is meaningful; WR for writers, CC for construction crew and AT
for animal trainers are good examples.
Use the TAB to get to the next field or line. Press enter to book the groups.
After the per diem groups, if you are also paying mileage you need to set up your
mileage groups.
Mileage Group
Purpose: to set up homogenous groups for more efficient processing of mileage
allowances by groups rather than by individuals.
Required: every recipient must belong to a group so the latter must exist in the
system before mileage reimbursements can be made.
Defaults: None
Delete: not allowed; simply do not use a group that was set up but is not needed.
17-4 • Per Diem & Mileage - P/D Menu
Entertainment Partners
The P/D, Mileage Group menu command brings up this screen:
The screen defaults to the ADD function.
As for per diem groups, up to 2 characters (letter or number) can be used to define a
group (WR for writers, CC for construction crew and AT for animal trainers).
Additionally, a person who’s receiving both per diem and mileage must belong to
the same group under per diem and under mileage. You will see in the next function
(Per Diem Employee Setup) that there is only room to specify one group for both per
diem and mileage payments to an individual.
The groups set up for mileage therefore tend to be identical to those set up for per
diem. Only when mileage is paid for a group that is not receiving per diem will you
have a mileage group with no corresponding per diem group and vice versa.
In addition to giving group code and description, the IRS tax-allowable
reimbursement per mile must also be entered. The format is .325 for 32.5 cents.
After you’ve set up the per diem groups and the mileage groups, you set up each
employee who is to receive per diem and mileage in the system.
Per Diem Employee Setup
Purpose: to let the system know who gets per diem and mileage
Required: a person must be set up before she can receive per diem and mileage.
Defaults: None
Delete: cannot delete a person who’s been set up but her entitlements can be
changed from Y to N to stop further payments.
Choose the P/D, Per Diem Employee Setup
Entertainment Partners
Per Diem & Mileage - P/D Menu • 17-5
The screen defaults to the ADD function.
Every person to receive per diem and/or mileage must be set up in the system. The
recipient’s SSN must be the same as the one used for payroll. For a person who’s
being paid through a loan-out corporation, it’s the person’s SSN that’s needed, not
the corporation’s Federal ID. Enter each person’s SSN and name in the respective
fields.
Enter the group code to which the individual belongs. The Union field is not used at
this time.
Under the Valid for fields enter a ‘Y’ under P and M if the person is to receive per
diem and mileage or an ‘N’ if he is not to receive either of these allowances. VISTA
uses these indicators to allow or prevent payment of the allowance.
Right-clicking in the group field brings up a scroll panel that lists the group codes set
up in the system.
Do not enter a person on separate lines (i.e. twice) for per diem and then for mileage.
Per Diem Group Default Payment Set Up
NOTE: The same menu command and screens are used for both per diem Group
Default Setup and per diem Payment Processing.
The P/D, Per Diem Entry menu command is used in this section to set up the
defaults and these instructions are for that specific function only. The use of this
same menu command for paying per diem is covered elsewhere in this section.
Purpose: to set up the default per diem amount, whether daily or flat (i.e. weekly),
for a specific per diem group.
Required: per diem default amounts for a group must be set up before anyone in
that group can be paid.
Defaults: none
Delete: a default for a group cannot be deleted but can be modified
17-6 • Per Diem & Mileage - P/D Menu
Entertainment Partners
Every week, the individuals of a particular group are paid the default amount
applicable to that group unless the amount is changed by you at the time of payment.
Daily versus Flat
Two methods of per diem default payments can be set up: daily and flat. When it
comes time to pay, you can alternate between these two methods; the choice is made
at the time of processing a payment.
Daily - under this method of per diem payment, you are allowed to specify the
amount for each day of the week as well as charge each day to a different account.
Flat - under this method, a lump sum payment is specified for the week. By
indicating the number of days for which the lump sum is being paid, the system
determines the daily allowance.
Default versus Employee
As noted at the beginning of these instructions, the same screen is used for setting up
a group default as well as for processing payment. As we’re discussing group default
here and not how to pay employee, it’s the Default button you’re interested in.
Advance versus Production
Advance and Production define the method to be used to account for the payment
of per diem and the booking of the charges to the cost or expense accounts.
Under Advance, the Per Diem system will charge the payments to a Per Diem
Clearing Account (crediting petty cash or bank). On the recipients’ timecards, these
per diem payments are coded to the production cost or expense accounts, causing the
EP payroll system to debit the cost or expense accounts with the charges and credit
the Per Diem Clearing with the offset in the accounting entries that it sends back to
VISTA via the payroll diskette.
Under the Production method, the Per Diem system itself directly debits the per
diem payments to the production cost or expense accounts. On the recipients’
timecards, all per diems are coded to the Per Diem Clearing Account thereby causing
the EP payroll system to debit the Per Diem Clearing Account with the charges while
still crediting the same Per Diem Clearing Account with the offset as before in the
accounting entries that it sends back to VISTA via the payroll diskette.
Choose the P/D, Per Diem Entry menu command.
Entertainment Partners
Per Diem & Mileage - P/D Menu • 17-7
In the Group field, enter the group code of the group for which you’re setting up a
per diem default.
In the ADD mode, a right-click brings up a list of the groups for which you can set
up defaults. In the INQUIRE and MODIFY modes a right-click brings up the
groups for which defaults have been set up.
Although a week-ending date is only relevant when paying per diem, it is required in
group default setup because we are using the same screen as for payment, therefore
enter the week-ending date of the first week that you will be making per diem
payments. This date must be a Saturday.
Click the Daily button if you want to set up an amount for each day of the week or
the Flat button if all you want is to give one amount for the entire week. These
options take you to different screens for the next step as shown below.
Next, click the Default (and not the Employee) button as we’re setting up a group
default here and not paying the employees yet.
As explained above, choose the Advance button if you want to charge the
production cost accounts via the timecards (i.e. via the EP payroll system) or choose
the Production button if you want to charge the production cost accounts through
the Per Diem system directly.
If you choose Advance, i.e. you want to charge the per diem payments to the cost
accounts via EP’s payroll system and not via the Per Diem system, and therefore in
the latter Per Diem system you only want to put the payments temporarily in a
clearing account, VISTA asks you for the account number of that clearing account-what it calls the Petty Cash Advance account.
Give the account number of the Petty Cash Advance account as appropriate.
If you choose Production, VISTA does not require the Petty Cash Advance
account number and bypasses it.
The Petty Cash Custodian account number is the account number that gets
credited with all per diem payments, so this account number is always required.
Once this screen is completed, the rest of the data needed for VISTA to set up a
default for a group is provided on the next screen. Click the Next Screen button to
bring it up.
17-8 • Per Diem & Mileage - P/D Menu
Entertainment Partners
Daily Per Diem
Under the daily method of paying per diems, this is the screen you need to fill:
The 4 fields named Group, Description, Week-ending and Name are carried over
from the previous screen. Note that the Name field holds the word ‘Default’ in it
versus that of a crew member since we’re setting up the default amounts for a group
in this instance versus paying an individual. For the same reason, the fifth field,
‘SSN’ can be left blank.
The remainder of this screen allows you to tell the system what the default amounts
for the group are for meals (Breakfast, Lunch and Dinner), Incidentals--the
system will calculate the Total--and then enter the default amount for Lodging.
You can enter this information for each day of the week for which you want to have
a default.
In the Location field, enter the taxing location in which the per diem is being paid.
Taxing Locations have to have been set up previously and are validated in this
screen. A right-click brings up the locations that you’ve set up.
In the GL field, you have to enter a 1, 2 or a 3 to indicate which one of the three
available GL Distribution sets applies to each line or day. In the GL Distribution
sets themselves, you can charge Meals, Incidentals and Lodging each to a different
account.
If you enter an account number for Meals only, the system will assume the same
account for Incidentals and Lodging, and fill in that account number as you tab out
of those fields.
For each GL Distribution set that you’ve referenced in a GL field above (1, 2 or 3)
you have to supply the account number(s) when setting up defaults.
In completing the GL Distribution sets, you are telling VISTA that you want the
Per Diem system to debit the production cost accounts directly (versus debiting them
via EP’s Payroll System). It stands to reason therefore that you had specified
Production on the Per Diem Entry first screen as opposed to Advance.
Entertainment Partners
Per Diem & Mileage - P/D Menu • 17-9
Note: The GL field and the corresponding group of accounts in the lower portion of
the screen must be completed even if you have decided to charge the per diem
clearing (i.e. advance) account instead of the actual production cost or expense
accounts. However, even with providing the production cost account numbers under
this (Advance account) option, the transactions will still be posted to the advance
account and not those production cost or expense accounts.
The Total for meals and incidentals is added to the mileage default (whose setup is
covered in the next menu choice) and the result compared with the federal limit for
M&I for each taxing location set up earlier. The daily lodging amount is also
compared with the federal limit for Lodging for that taxing location. The Per Diem
system uses this procedure to automatically split the allowable and taxable amounts
on the report produced by the system.
When you have completed the screen, press the Post button to record these default
per diem allowances for the group. These default allowances must be set up for each
group being paid under the daily method.
Flat Per Diem
If you’re paying a flat weekly amount for per diem, that option brings up this
screen:
The 4 fields named Group, Description, Week-ending and Name are carried over
from the previous screen. The Name field holds the word ‘Default’ versus that of a
crew member (as we’re setting up the default amounts for a group and not paying
someone). For the same reason, the fifth field, ‘SSN’ can be left blank.
The remainder of this screen allows you to tell the system what (1) the default Flat
Weekly amounts for the group are for Meals (no breakdown by Breakfast, Lunch
and Dinner as under the Daily Method) and Incidentals, and (2) the default Flat
Weekly amount for Lodging.
Instead of entering the default amounts for each day of the week, you tell the system
how many days the weekly default amount covers.
17-10 • Per Diem & Mileage - P/D Menu
Entertainment Partners
The remaining fields are entered using the daily method discussed earlier.
In the Location field, enter the taxing location in which the per diem is being paid.
Taxing Locations have to have been set up previously and are validated in this
screen. A right-click brings up the locations that you’ve set up.
In the GL field, you have to enter a 1, 2 or a 3 to indicate which one of the three
available GL Distribution sets applies to each line or day. In the GL Distribution
sets themselves, you can charge Meals, Incidentals and Lodging each to a different
account.
If you enter an account number for Meals only, the system will assume the same
account for Incidentals and Lodging.
For each GL Distribution set that you’ve referenced in a GL field above (1, 2 or 3)
in setting up defaults you have to supply the account number(s) for it.
In completing the GL Distribution sets, you are telling VISTA that you want the
Per Diem system to debit the production cost accounts directly (versus debiting them
via EP’s Payroll System). It stands to reason therefore that you had specified
Production on the Per Diem Entry first screen as opposed to Advance.
Note: The GL field and the corresponding group of accounts in the lower portion of
the screen must be completed even if you have decided to charge the per diem
clearing (i.e. advance) account instead of the actual production cost or expense
accounts. However, even with providing the production cost account numbers under
this (Advance account) option, the transactions will still be posted to the advance
account and not those production cost or expense accounts.
The Total for meals and incidentals is added to the mileage default (whose setup is
covered in the next menu choice) and the result compared with the federal limit for
M&I for each taxing location set up earlier. The daily lodging amount is also
compared with the federal limit for Lodging for that taxing location. The Per Diem
system uses this procedure to automatically split the allowable and taxable amounts
on the reports produced by the system.
When you have completed the screen, press the Post button to record these default
per diem allowances for the group. These default allowances must be set up for each
group being paid under the flat (weekly) method.
Note: The GL field and the corresponding group of accounts in the lower portion of
the screen must be completed even if you have decided to charge the per diem
clearing (i.e. advance) account instead of the actual production cost or expense
accounts. However, even with providing the production cost account numbers under
this (Advance account) option, the transactions will still be posted to the advance
account and not those production cost or expense accounts.
See “Taxing Locations” on page 17-2.
Mileage Group Default Payment Set Up
NOTE: As is the case of Per diem, the same menu command and screens are used
for both Mileage Group Default Setup and Mileage Payment Processing. You are
therefore going into the same screens for these two separate and distinct processes
which are accounting functions that more often than not occur at different
frequencies and times.
Entertainment Partners
Per Diem & Mileage - P/D Menu • 17-11
The P/D, Mileage Entry menu command is therefore used here to set up the
defaults and these instructions are for that specific function only. The use of this
same menu command for paying Mileage diem is covered further below.
Purpose: to set up the default mileage diem amounts for a specific mileage group.
Required: mileage default amounts for a group must be set up before anyone in that
group can be paid mileage.
Defaults: none
Delete: a default for a group cannot be deleted but can be modified
Every week, the individuals of a particular group are paid the default amount
applicable to that group unless the amount is changed by you at the time of payment.
Default versus Employee
As noted at the beginning of these instructions, the same screen is used for setting up
a group default as well as for processing payments. As we’re discussing group
default here and not how to pay employee, it’s the Default button you’re interested
in.
Advance versus Production
Advance and Production define the method to be used to account for the payment
of mileage and the booking of the charges to the cost or expense accounts.
Under Advance, the Per Diem system will charge the mileage payments to a
Clearing Account (crediting petty cash or bank). On the recipients’ timecards, these
mileage payments are coded to the production cost or expense accounts, causing the
EP payroll system to debit the cost or expense accounts with the charges and credit
the Per Diem Clearing with the offset in the accounting entries that it sends back to
VISTA via the payroll diskette.
Under the Production method, the Per Diem system itself directly debits the mileage
payments to the production cost or expense accounts. On the recipients’ timecards,
all mileage payments are coded to the Clearing Account thereby causing the EP
payroll system to debit the Clearing Account with the charges while still crediting
the same Clearing Account with the offset as before in the accounting entries that it
sends back to VISTA via the payroll diskette.
Choosing the P/D, Mileage Entry menu command brings up this screen:
17-12 • Per Diem & Mileage - P/D Menu
Entertainment Partners
In the Group field, enter the group code of the group for which you’re setting up a
mileage default.
In the ADD mode, a right-click brings up a list of the groups set up in the system that
you can set up defaults for. In the INQUIRE and MODIFY modes a right-click
brings up the groups that you already have defaults set up for.
Although a week-ending date is only relevant when paying mileage, it is required in
group default setup because we are using the same screen as for payment, therefore
enter the week-ending date of the first week that you will be making per diem
payments. This date must be a Saturday.
Next, click the Default (and not the Employee) button as we’re setting up a group
default here and not paying the employees yet.
As explained above, choose the Advance button if you want to charge the
production cost accounts via the timecards (i.e. via the EP payroll system) or choose
the Production button if you want to charge the production cost accounts through
the Per Diem system directly.
If you choose Advance, i.e. you want to charge the mileage payments to the cost
accounts via EP’s payroll system and not via the Per Diem system, and therefore in
the latter Per Diem system you only want to put the payments temporarily in a
clearing account, VISTA asks you for the account number of that clearing account-what it calls the Petty Cash Advance account.
Give the account number of the Petty Cash Advance account as appropriate.
If you choose Production, VISTA does not require the Petty Cash Advance
account number and bypasses it altogether.
The Petty Cash Custodian account number is the account number that gets
credited with all mileage payments, so this account number is always required.
Once this screen is completed, the rest of the data needed for VISTA to set up a
default for a group is provided on the next screen. Click the Next Screen button to
bring the next screen you need to complete:
Entertainment Partners
Per Diem & Mileage - P/D Menu • 17-13
The 4 fields named Group, Description, Week-ending and Name are carried over
from the previous screen. Note that the Name field holds the word ‘Default’ in it
versus that of a crew member since we’re setting up the default amounts for a group
in this instance versus paying someone. For the same reason, the fifth field, ‘SSN’
can be left blank.
The remainder of this screen allows you to tell the system what the default distance
in miles and the rate per mile are for the group--the system will calculate the Total.
You can enter this information for each day of the week for which you wish to have
a default
In the GL field, you have to enter a 1, 2 or a 3 to indicate which one of the three
available GL Distribution fields applies to each day.
For each GL Distribution field that you’ve referenced in a GL field above (1, 2 or
3) in setting up defaults you have to supply the account number.
In completing the GL Distribution field, you are telling VISTA that you want the
Per Diem system to debit the production cost accounts directly (versus debiting them
via EP’s Payroll System). It stands to reason therefore that you had specified
Production on the first Mileage Entry screen as opposed to Advance.
Note: The GL field and the corresponding group of accounts in the lower portion of
the screen must be completed even if you have decided to charge the per diem
clearing (i.e. advance) account instead of the actual production cost or expense
accounts. However, even with providing the production cost account numbers under
this (Advance account) option, the transactions will still be posted to the advance
account and not those production cost or expense accounts.
The Total for mileage is added to the meals and incidentals default (whose setup is
covered in the previous menu choice) and the result compared with the federal limit
for M&I for each taxing location set up earlier. The Per Diem system uses this
procedure to automatically split the allowable and taxable amounts on the reports
produced by the system.
When you have completed the screen, press the Post button to record these default
mileage allowances for the group. These default allowances must be set up for each
group being paid mileage.
Per Diem & Mileage Payment Cycle
The Per Diem/Mileage payment cycle has four steps:
17-14 • Per Diem & Mileage - P/D Menu
1.
generating per diem payments to be made to each group (P/D, Per
Diem Entry);
2.
generating mileage payments to be made to each group (P/D, Mileage
Entry);
3.
printing an report of what is going to be paid for auditing purposes
(P/D, Per Diem/Mileage Audit);
4.
posting an approved payment schedule to record the per diem payments
in VISTA (P/D, Per Diem/Mileage Post). You must post the
batches before the per diem and mileage information will be included
in cost reports or appear on the ledger.
Entertainment Partners
Payment of Per Diem
Purpose: generate per diem payments for a group for the week
Required: the default per diem (meals, incidentals, lodging) amounts must be
already set up for the group you want to pay
Defaults: group default amounts automatically apply for every person in the group
Delete: delete or modify any of the payment line (items generated based on the
group’s defaults) by requesting ‘Verify’.
Choosing the P/D, Per Diem Entry menu command to make payments brings up
the same screen that was used for setting up group defaults :
The screen comes up with the default ADD mode which is the mode needed to
initiate payments.
In the Group field, enter the code of the group you’re paying or select the group you
want from the scroll panel invoked with a right-click.
In the ADD mode, a right-click in the group field brings up the Groups that have
been set up in the system. In the Modify and Inquire modes, a right-click brings up
the Group Defaults and any Open Payment Batches that have not been posted to
the general ledger yet.
Modify lets you make changes or corrections to either Defaults or Payment
Batches.
The system automatically brings in the Description for you.
You need to enter a Week Ending date that is a Saturday.
For the next field, which is the one-character option box, you have to remember
whether the default already set up for this group was Daily or Flat. Selecting one
that has not been set up will bring up an error message advising you of this fact.
As you are making payments (and not setting up defaults), click Employee and not
Default..
The other fields--option box for Advance or Production, Petty Cash Advance,
Petty Cash Custodian account numbers are pulled from the Group Default
record and brought in for you by the system.
Entertainment Partners
Per Diem & Mileage - P/D Menu • 17-15
Once this screen is completed, the system is ready to list the names of the employees
that comprise this group. To proceed click the Next Screen button and the system
brings up this screen:
The screen has 3 boxes. All employees in the group start off in the Do Not Pay box
as a precaution and the system forces you to consciously select each person for
payment.
To pay someone, you can ADD her to either the Verify or the Nonverify box.
Adding someone to the Verify box causes VISTA, in the next step after you click
OK, to bring up that person on a payment detail screen (the same one used for setting
up default payment details) showing the amounts (which are the group’s default
amounts) that will be paid to the person. In that screen, you can delete a line of
payment or make any change you wish.
Adding someone to the Nonverify box processes the employee’s payment(s)
through and does not afford you the opportunity of review or to make any changes.
To add a person, highlight her name and click the ADD button of either the Verify
or the Nonverify box.
If you don’t want to pay someone for that week, leave him in the Do Not Pay box
or if you’ve already ADDed him, use Remove to bring him back to the Do Not
Pay box by highlighting his name in the Verify or Nonverify box and clicking the
Remove button.
Click OK when all selections have been made.
The Per Diem Entry second screen with payment details will appear for all
employees ADDed to the Verify box. After review and all required changes click the
Post button to put the payment in review in a batch that can now be posted (see
P/D, Per Diem/Mileage Post menu command described below).
In this Verify mode, the Skip button lets you bypass the payment for an individual
shown on the screen for processing later.
Both the Post and the Skip options call up the next payment that was added to the
Verify box for review or change.
Cancel takes you back to the first screen in the payment process.
Quit will end the Per Diem Entry function without placing any of the payment
transactions in a batch for posting. Upon resuming the process from the first Per
Diem Entry screen, you will be brought to the screen that allows you to review and
change the contents of the Do Not Pay, Verify and Non-verify boxes.
17-16 • Per Diem & Mileage - P/D Menu
Entertainment Partners
Payment of Mileage
Purpose: generate mileage payments for a group for the week
Required: default mileage amounts must be already set up for the group you want
to pay
Defaults: group default amounts automatically apply for every person in the group
Delete: delete or modify any of the payment lines by requesting ‘Verify’.
Choosing the P/D, Mileage Entry menu command brings up the same screen that
was used for setting up group defaults.
The screen comes up in ADD mode which is the mode needed to initiate payments.
In the Group field, enter the code of the group you’re paying or select the group you
want from the scroll panel invoked with a right-click.
In the ADD mode, a right-click in the group field brings up the Groups that have
been set up in the system. In the Modify and Inquire modes, a right-click brings up
the Group Defaults and any Open Payment Batches that have not been posted to
the general ledger yet.
Modify lets you make any changes or corrections that you may want to Defaults
and Payment Batches.
The system automatically displays the Description for you.
You need to enter a Week Ending date that is a Saturday.
As you are paying mileage on this run (and not setting up defaults), click Employee
and not Default..
The other fields--option box for Advance or Production, Petty Cash Advance,
Petty Cash Custodian account numbers are pulled from the Group Default
record and displayed for you by the system.
Once this screen is completed, the system is ready to list the names of the employees
that comprise this group. To proceed click the Next Screen button and the system
brings up a screen that allows you to process individuals in the group for payment.
The screen has 3 boxes. All employees in the group start off in the Do Not Pay box
as a precaution and the system forces you to consciously select each person for
payment.
To pay someone, you can ADD her to either the Verify or the Nonverify box.
Adding someone to the Verify box causes VISTA, in the next step after you click
OK, to bring up that person on a payment detail screen (the same one used for setting
up default payment details) showing the amounts (which are the group’s default
amounts) that will be paid to the person. In that screen, you can delete a line of
payment or make any change you wish.
Adding someone to the Nonverify box processes the employee’s payment(s)
through and does not afford you the opportunity of review or to make any changes.
To add a person, highlight her name and click the ADD button of either the Verify
or the Nonverify box.
If you don’t want to pay someone for that week, leave him in the Do Not Pay box
or if you’ve already ADDed him, use Remove to bring him back to the Do Not
Pay box by highlighting his name in the Verify or Nonverify box and clicking the
Remove button.
Click OK when all selections have been made.
Entertainment Partners
Per Diem & Mileage - P/D Menu • 17-17
The Mileage Entry second screen with payment details will appear for all
employees ADDed to the Verify box. After review and all required changes click the
Post button to put the payment in review in a batch that can now be posted (see
P/D, Per Diem/Mileage Post menu command described below).
In this Verify mode, the Skip button lets you bypass the payment for an individual
shown on the screen for processing later.
Both the Post and the Skip options call up the next payment that was added to the
Verify box for review or change.
Cancel takes you back to the first screen in the payment process.
Quit closes the Per Diem Entry function altogether without placing any of the
payment transactions in a batch for posting. Upon resuming the process, from the
first Per Diem Entry screen you will be brought to the screen that allows you to
review and change the contents of the Do Not Pay, Verify and Non-verify boxes.
Per Diem/Mileage Audit
Purpose: Print a report of payments to be made for audit and filing
Required: For a specific Week Ending Date and Group
Defaults: Set for all payments batched for posting, unless an SSN is provided, and
for “Per Diem”, in “Detail” and to sort by “Name”.
Delete: Not applicable
Choose the P/D, Per Diem/Mileage Audit menu command.
Enter a Week Ending date for which there are payments batched and waiting to be
posted. If you have more than one week or more than one group to be posted, you
need to run a separate report for each.
Enter a Group for whom there are payments batched and ready for posting.
All the payments for the given week ending date and for the group selected will be
printed unless you provide a SSN in which case only that individual will be printed.
Specify whether you want the Per Diem payments or the Mileage payments to be
printed by clicking the appropriate button. If there are both types of payment for a
group, you need to print out separate reports for each.
Indicate whether you want full breakdown of the payments with Detail or just one
line per person with Summary. You can also request both reports by clicking Both.
The report(s) can be printed either in Name order or in SSN order.
17-18 • Per Diem & Mileage - P/D Menu
Entertainment Partners
Upon reviewing your audit report, use the Modify function in the P/D, Per Diem
Entry or the P/D, Mileage Entry menu commands to make any changes or
corrections that you wish.
Per Diem/Mileage Post
Purpose: To record Per Diem and Mileage payments in the production cost
records (i.e. booking the entries into the general ledger).
Required: Payments must have been generated and posted to open batches
Defaults: “Per Diem” versus Mileage; List Only versus Post and List.
Choose the P/D, Per Diem/Mileage Post menu command.
Group-Week Ending
Right-clicking in the Group field brings up a scroll panel listing the open batches
of payments that have been generated but have yet to be posted to the general
ledger. The attributes listed by batch are (1) Group code and (2) Week Ending
date.
Selecting one or more batches for posting by highlighting and clicking Done
brings the Group(s) and Week Ending date(s) into the Per Diem/Mileage Post
window.
If posting only one batch, and both the Group code and Week Ending date are
known, then a User can simply input that information.
Post Options
VISTA allows the User to control the parameters of the posting of the Per Diem and
Mileage batches via selections input into the Per Diem/Mileage Post window.
Per Diem/Mileage
Batches are by Group, individual Week Ending date and payment type (i.e. per
diem or mileage). Therefore each group, week ending date and per diem batch;
and each group, week ending date and mileage batch are posted separately. The
Per Diem and Mileage button selects whether to post per diem or mileage.
Entertainment Partners
Per Diem & Mileage - P/D Menu • 17-19
Post and List/List Only
The posting option List Only allows the User to check the data once more before
actually posting. Select Post and List in order to post the transactions and
generate a printed list of the transaction.
Detail
VISTA posts Per Diem/Mileage to the ledger in full Detail. This means that an
entry for each employee will be generated.
Completing the Per Diem/Mileage Post
Press Enter when the Group, Week Ending and Post Options have been input.
Once a batch has been posted to the general ledger through this function, it can no
longer be changed or corrected via the Modify function in the P/D, Per Diem
Entry or the P/D, Mileage Entry menu commands.
Per Diem Reconciliation
Purpose: To view or print a report that compares per diem payments made through
VISTA with per diem information processed through Entertainment Partners payroll
system.
Required: Week Ending
Defaults: None
Choose P/D Per Diem Reconciliation from VISTA’s Main Menu.
The Per Diem Reconciliation Report allows you to inquire upon the status of per
diem and mileage payments that have been entered for a particular week. You have
the option of printing the report for a single recipient or for all recipients (by leaving
the SSN field blank). This report will compare your per diem and mileage entries to
the per diem processed through Entertainment Partners to determine if the individual
has any advances outstanding.
Sign-off Tax Sheet
Purpose: To print a report that can be used for obtaining receiving signatures
when handing out cash per diem payments
Required: Week Ending, Group
Defaults: Sort By, “N” (Name)
17-20 • Per Diem & Mileage - P/D Menu
Entertainment Partners
Choose P/D Sign-off Tax Sheet from VISTA’s Main Menu.
Enter the Week Ending date and Group (or press F12 or right-click to see a scroll
panel of selections). You have the option to sort the Sign-off Sheet by name or by
SSN. Click on the selected button, and press Enter to get the report.
Entertainment Partners
Per Diem & Mileage - P/D Menu • 17-21
This page left blank intentionally.
17-22 • Per Diem & Mileage - P/D Menu
Entertainment Partners
Chapter 18: Taxes 1099s - A/P
Menu
Overview
Typical 1099 Procedure
There are seven steps to the typical 1099 procedure:
1.
Company Setup
2.
Tax Table Setup
3.
Tax ID Setup
4.
Tax Adjustment
5.
Tax Reporting
6.
Print Vendor 1099s;
7.
Generate the 1099 diskette to submit to the Federal IRS.
Completion of each step is recommended prior to the commencement of the next.
Each step is described in turn.
Entertainment Partners
Taxes 1099s - A/P Menu • 18-1
Company Setup
From VISTA’s Main toolbar, select Setup; Company.
Right-click or F-12 with the cursor in the Company field to display the
production’s established Company information.
If the production has more than one Company, each Company must be reviewed
and if necessary, modified separately.
The production’s Company information must be completed and accurate in order for
the IRS to accept the 1099 data, and for the production to avoid costly penalties.
This includes both the production company’s Address and Federal Tax ID
number. The production’s corporate tax accounting department should be able to
supply the Federal Tax ID number.
Change the Function to Modify. Make any changes or additions to the data fields.
When the window is complete, press enter to record the modifications.
Tax Table Setup
If the production has been capturing taxable earnings or withholdings for tax codes
4, 11, or 13, then the User must modify the records for those codes so that the codes
will print appropriately on the 1099 forms. The only tax code for which the IRS has
set a limit is code 2. The limit for 1999 code 2 Royalties is $10.00.
The Federal Tax Limit amount of $600. is applied in the Tax ID Setup (described
on page 18-4 of this document), and represents the aggregate of 1099 boxes 1, 3, 6
& 7.
18-2 • Taxes 1099s - A/P Menu
Entertainment Partners
From VISTA’s main toolbar, select Setup; Tax Tables.
Change the function to Modify.
Right-click or F-12 with the cursor in the Tax Code field to activate a menu of the
available tax codes.
Of the IRS Tax Codes, only code 2, Royalties, requires a tax limit. Select 2,
Royalties from the scroll panel. Move the cursor into the IRS Tax Limit field that
appears. Input 10. Make sure to enter a decimal point following 10.
Press enter when the data for the tax code is complete and accurate.
If any of the tax codes listed above do not appear on the User’s menu, the User can
Add the desired codes within the Tax Tables window by changing the Function to
Entertainment Partners
Taxes 1099s - A/P Menu • 18-3
Add, and inputting the appropriate information within the open fields. Press enter
to record the new Tax Code.
Tax ID Setup
VISTA requires the User to establish Tax Identification for each of the state
jurisdictions through which the production paid taxable Vendors during the previous
tax year.
From VISTA’s main toolbar, select A/P; Tax Cycle; Tax ID Setup.
Select the Company and Currency for which the production will be reporting
1099s. If the production has established several Company numbers, then the
process described here must be repeated for each Company through which 1099s
will be generated.
Federal
Data input into these fields is required for reporting to the IRS. This information
accompanies and references the total taxable earnings from all states for each
Vendor.
Tax ID
Input the company’s assigned Federal Tax ID number. This number is assigned to
the production company by the Federal Government for the purpose of tax reporting.
The production’s corporate tax accounting department should be able to provide this
data.
18-4 • Taxes 1099s - A/P Menu
Entertainment Partners
Do not include any spaces, dashes or hyphens when entering the Federal Tax ID
number.
Transaction Control Code
The Transaction Control Code identifies to the IRS the source of the programs
that allow the reporting company with the software to file electronically.
Unless the production’s parent corporation has obtained its own Transaction
Control Code, the User should input the number 39332 into this field. This data
identifies Entertainment Partners as the supplier of the programs allowing for
electronic 1099 filing to the IRS.
Tax Limit Amount (…boxes 1, 3, 6, & 7)
The Federally ordained Tax Limit Amount for filing 1099s to vendors is $600.
This limit refers to the aggregate amounts appearing in boxes 1, 3, 6, and 7 of the
standard 1099.
When inputting to this field, input both the dollar amount and the decimal point.
(Omit any dollar signs and cents amount. The decimal point may be included.) In
other words, to input the Federal Tax Limit of $600.00, input ‘600.’.
Caveat: Although the Federal Tax Limit Amount is set by the IRS., a production’s
corporate accounting department may have different requirements. The User should
confer with his or her corporate accounting office for the proper input to this field.
Contact Name, Phone No.
Input into these fields the Name and Phone Number of the person at the
production or studio (not Entertainment Partners) to whom the production’s Vendors
should direct questions regarding their 1099s.
If the production’s accounting office is only a temporary entity, then a contact at the
production’s corporate level is appropriate.
State of Incorporation
Input the two-digit abbreviation of the state in which the production company is
incorporated. This information can be verified with the production’s corporate
accounting office.
State Tax ID
Input the Tax Identification Number assigned to the production company by the
company’s state of incorporation. This information should be verified with the
production’s corporate accounting office.
Do not include any spaces, dashes or hyphens when entering the State Tax ID
number.
Entertainment Partners
Taxes 1099s - A/P Menu • 18-5
State
The data input into the fields within the State section of the Tax ID Setup window
is required for the states through which taxable Vendors were processed.
State
Input the state abbreviation. A scroll panel from which to select the abbreviations
can be summoned by right clicking within the field. A record must be added for
each state to which the production is reporting.
Bank/PC Code
Input into this field is required only if the User is planning on preparing 1099s by
Bank or PC account. Unless this is the case, this field should be left blank.
If planning to prepare 1099s by bank or petty cash account, contact VISTA
Customer Support for advice and information: (818) 955-6071.
Completing the process
Press enter to complete the Tax ID Setup procedure.
Tax Adjustment
The Tax Adjustment Entry function allows the User to:
•
Add a tax code to a posted invoice/envelope;
•
Remove a tax code from a posted invoice/envelope;
•
Change a tax code or a work state of a posted invoice/envelope;
•
Tax a vendor on a total dollar amount.
From the Main VISTA toolbar, select A/P; Tax Cycle; Tax Adjustment Entry.
18-6 • Taxes 1099s - A/P Menu
Entertainment Partners
Dollar Adjustment
The dollar amount option is for adjusting by an amount the total 1099 income for a
vendor without affecting Vendors, their costs or the General Ledger histories within
VISTA. This function is used mainly for adjusting prior year figures once the User
is ready to process in the current year; non-monetary and in-kind compensation, etc.
that is subject to a 1099.
Input the Company, Currency and Bank/PC code fields.
Select the Vendor to which the taxable dollar amount is to be applied.
Select the Tax Adjustment Type: Dollar button.
Press enter to proceed. The cursor will fall into the Dollar Adjustment section of
the window. Input data into each of the five fields within the Dollar Adjustment
section.
Adj Amt
Input either a credit number to decrease the total taxable amount for the Vendor, or a
debit amount to increase.
Description
Input a brief explanation for the Dollar Adjustment.
Entertainment Partners
Taxes 1099s - A/P Menu • 18-7
Completing the Dollar Adjustment
Press enter to record the Dollar Adjustment. Doing so will create an A/P or P/C
batch named TAXADJ that must be audited and posted. The Dollar Adjustment
will not be recorded into the Tax Cycle system until the A/P or P/C batch has been
posted.
Code Adjustment
If a particular line of distribution can not be found, please use the Dollar
Adjustment procedure.
Input the Company, Currency and Bank/PC code fields.
Select the Vendor to be modified.
Select the Tax Adjustment Type: Code button.
Press enter to continue. The cursor will fall into the Code Adjustment section of
the window.
Invoice/Envelope Number
If the Invoice or Envelope Number is known, it should be input into this field. If
the Number is not know, a scroll panel of available numbers can be viewed by rightclicking or hitting F-12 with the cursor in this field.
When the proper Invoice/Envelope Number is selected and input, hit enter.
Doing so will display data for the desired Invoice or Envelope.
Completing the Tax Code Adjustment
When the desired Invoice or Envelope is displayed in the window, the User can
modify either the State Worked or the Tax Codes for each of the lines of
distribution.
No TAXADJ batch is created for Tax Code Adjustments.
Press enter to close the window and save the modifications.
Tax Reporting
VISTA’s Tax Report program allows the User to:
•
Create a Report to verify taxable and non-taxable vendors and amounts;
•
Print 1099 Forms for distribution to the production’s Vendors;
•
File 1099 data to the IRS electronically via Diskette.
Select A/P; Tax Cycle; Tax Report.
18-8 • Taxes 1099s - A/P Menu
Entertainment Partners
Report
The Report function produces a hard-copy list of Vendors and their taxable income
totals.
All taxable earnings for each vendor must be reported to the individual work states
and the total reported to the resident state of the Vendor and the IRS.
The User must be aware of this new reporting requirement in reconciling each
Vendor’s 1099 income. The totals on the report produced under the Diskette
function are the correct totals to be used in completing the IRS form 4804.
Select the Report button.
Input the Company, Currency and Tax Year: 1999.
Bank Code
Generally, the Bank Code field should be left blank.
However, if the production has several Company numbers, each with its own Tax
ID number, then the User must input the Bank/PC Code that corresponds with the
Company containing the Tax ID entity for which the Report is desired.
Optional: Vendor, Tax ID
The Vendor and the Tax ID fields may be left blank.
However, if the Report is to be limited to either a single Vendor or by a single Tax
ID, then the desired parameters must be input here.
Entertainment Partners
Taxes 1099s - A/P Menu • 18-9
Completing the Report
Press enter to initiate the printing of the report.
Forms
The Forms function generates the 1099 sheets to be sent to each Vendor. The
1099s must be printed on standard, three-part, three-on-a-sheet pre-printed IRS laser
forms that are available through most office supply stores. (Appropriate forms can
also be ordered through Form Consultants, a vendor with whom most VISTA Users
will be familiar.)
Printing with either Collated or Uncollated forms:
Purchasing blank 1099 forms by order from a Vendor, such as Form Consultants,
gives the User the opportunity to order the forms pre-collated. This is preferable,
because purchasing uncollated forms, such as are typically available from office
supply stores, requires the User to print the forms three times: once each for
Federal, State and Recipient batches of appropriate forms. The User must then
collate the resultant three batches of printed 1099s by hand.
Select the Forms button.
Input the Company, Currency and Tax Year data.
•
If printing pre-collated three-page forms, leave the No. of Collated Copies
field to its default, 3.
•
If printing 1099 forms which are not collated, then change the No. of
Collated Copies field to 1.
Press enter to initiate the printing of the 1099 forms.
It is urged that the 1099 forms be printed through ReportView rather than directly
to the printer. By printing through ReportView, the User can print one, several or
all 1099s at a time, and may begin and stop printing the 1099s at any consecutive
points in the run. This will be particularly useful in case of a printer jam, or other
unforeseen interruption.
18-10 • Taxes 1099s - A/P Menu
Entertainment Partners
Additional Tips for printing Vendors’ 1099 forms:
•
If the tax total for a Vendor is a credit amount, then the VISTA records may be
incorrect. Review the transactions and adjustments.
•
When preparing 1099s on a state-by-state basis, pay particular attention to the
State Code for each invoice. If there is no tax state in the invoice, VISTA
will default to the Vendor’s resident state.
•
VISTA can print a 1099 for each Vendor to whom any amount has been paid.
To do so, set the Tax Limit Amount to zero. (Refer back to page 18-5 for a
review of that process.)
Diskette
The Diskette function produces an electronic data file that must be copied onto a
magnetic media diskette that will be submitted to the Federal government and each
state.
Input the Company, Currency and Tax Year. Press enter.
The User must then select the printer to which VISTA will print the breakdown
report that will detail what has been reported to the IRS and states.
VISTA will typically take several minutes to compile the data to produce the
electronic file and the summary report
The Diskette function does not create a diskette. Nor does it write to whatever
diskette may happen to be in the a: drive. Diskette creates an electronic file on the
User’s hard drive. That file must then be moved to the diskette drive.
When the Diskette function has completed, there will be a new directory called
FID00000 written to the User’s c:drive. Within that directory will be a file for the
IRS, and each state.
Filing Federal 1099 data via Electronic Medium
VISTA allows the User to file the 1099 data required by the IRS via electronic
diskette. The first steps, as described above, culminate in the creation of an
electronic data file, written to the User’s c:drive.
The next step is to transfer that electronic file from the c: drive to a diskette.
The diskette must be submitted to the government agencies with the appropriate
Federal and State Forms.
Windows 95 or Later
Right click on your START button and select EXPLORE
Entertainment Partners
Taxes 1099s - A/P Menu • 18-11
On the left side you will see the FID00000 directory. double-click to open this
directory. You will then have subdirectories attached, one labeled FEDERAL; the
others, labeled with the initials of the STATES that have been taxed in your system.
Insert a blank diskette and put it in the active floppy drive (typically the a:drive).
Double-click on the FEDERAL directory on the right. Within that folder will be an
IRSTAX document. Right-click upon IRSTAX to get a menu. Select SEND TO;
then select 3 1/2 FLOPPY (A:)
The IRS tax information will then be copied to the diskette in the assigned floppy
drive.
Remove that diskette and affix to it a label that describes that this is the federal
electronic filing diskette. The label should include:
•
the name of the company,
•
the name of the show;
•
the company’s Tax ID Number;
•
the date on which the file was created; and
•
the total number of people listed in the file as having received 1099’s.
Also within the directory will be files for each state for which electronic filing
records have been created. Follow the preceding process to create diskettes for each
of the states for which filing is required.
Be sure to fill out the 4804 form and appropriate state forms and send them with the
diskettes.
If you have multiple companies to report to (BANK/PC is selected,) then you can
stay in the TAX REPORT window and continue to select your next company’s
information. By staying in the window, you will create a FID00001 directory to
separate your reporting and Vista will continue to increase the directory number for
each time you run your diskette option. IF you exit out of the window and open it up
again, the counter will return to FID00000 and will overwrite whatever data you
previously saved.
Verify that all necessary diskettes have been created before generating subsequent
FID files for other shows or companies. The Diskette procedure erases any existing
FID00000 files before writing the new one.
18-12 • Taxes 1099s - A/P Menu
Entertainment Partners
Make sure to use one diskette for the Federal and one for each state to which filing is
required.
Independent Contractor Reporting
Overview
Independent Contractor Reporting Law (ICR)
In 1999, Senate Bill 542 was passed by the California Legislature to expand the reporting requirements of ‘New
Employee Registry’ program, to include independent contractors. Effective January 1, 2001, any business
deriving trade or business income from sources within this state or subject to the laws of this state that is
required to file a Federal form 1099-MISC for services performed by an independent contractor must report
specific information to EDD. This legislation will further assist state agencies in establishing, modifying, or
enforcing child support obligations.
This means that any Vendor that you will be issuing a 1099 to will need to be reported to the EDD within 20
days after paying $600 or more, or entering into a contract of $600 or more, per calendar year. All California
business, governmental entities and out-of-state business are required to make these filings. There are NO
exemptions.
California’s new forms for reporting this information are:
Paper Documents
DE 542 “Report of Independent Contractor(s)”
Registration
DE 164 “Magnetic Media Filing Registration”
Magnetic Media
DE 542T “Transmittal for Independent Contractor Reporting”
You will be required to provide the following information that applies to you and your Vendor:
! Your: Federal employer Identification Number
CA Employer Account Number (if it applies)
Social security account Number (if it applies)
Business Name, Address and Telephone Number
! The Independent Contractor’s:
First name, middle initial and last name or business name
Social Security Number and/or Federal ID number
Home address
Start Date of Contract
Amount of contract (including cents)
Contract Expiration Date
Indicate ‘Ongoing Contract’ (if applicable or
unable to determine contractual parameters)
Being that the filing requirement is “within 20 days”, we recommend that you anticipate doing a filing every two weeks.
Also, the first time you file Form DE 542T you are required to file Form DE 164, “Magnetic Media Filing Registration”.
(See attached DE 164 sample.)
For more information, questions or forms you can call 916-657-0529 or visit the web site at www.edd.ca.gov
Vista has supplemented the existing Tax Cycle with a new Independent Contractor Reporting (ICR) program to
provide the required California EDD filings. The new program will review Vendor payments for transactions that have
been flagged with tax codes 1, 2, 3, 6, 7 & 13. The ICR program has been designed to include a Vendor the first time
payments have reached or exceeded $600. The vendor will be reported once per annum, per State requirements.
In addition to the setup requirements for 1099’s, it is also now necessary to indicate the State of Incorporation in the
Tax ID Setup. The tax limits fields in Tax Table and Tax ID Setup will not effect the ICR reporting limit of $600.
The following is a summary of the setup requirements for the reports to be accurate:
Entertainment Partners
Taxes 1099s - A/P Menu • 18-13
!
Production Company information must be complete in Setup, Company
!
All applicable tax codes are setup in Tax Table Setup
!
State of Incorporation must be entered the Tax ID Setup
!
Taxable vendors must has a Y for Taxable Status in their vendor record – Vendor Entry
!
Enter the Vendor’s name in the TIN Vendor Name field – Vendor Entry
!
Vendors have CA as one of there Work States – Vendor Entry
ALERT
To avoid possible penalties, enter the Vendors name into the TIN Name field using the following format:
Last Name space First Name space Middle Initial
Example: Smith/Mary T.
Enter: Smith Mary T
For detailed instruction in completing these fields please review the 1099-MISC Ops Notes or the Vista Manual:
Chapter 9: Setup Menu
Company
page 9-6
Tax Tables
page 9-18
Chapter 18: Taxes 1099s A/P
Tax ID Setup
page 18-7
Chapter 11: Invoices
Vendor Entry
page 11-2
Vista’s ICR program will not accommodate paper document filings
Tax Cycle
Vista has made the ICR reporting requirement part of the Tax Cycle. The information that you flagged for
1099’s will also be used in identifying which Vendors that will need to be reported to the State. We have added
a new menu option to the ‘Tax Cycle’.
Tax ID Setup
In order for Vista to accurately report Vendors to California EDD; the State of Incorporation, as well as all the
other information requested in this screen, must be completed in the Tax ID Setup.
18-14 • Taxes 1099s - A/P Menu
Entertainment Partners
From VISTA’s main toolbar, select A/P, Tax Cycle, Tax ID Setup.
Change the Function to Modify
Right-click or F12 with the cursor in the Company field to view the current information.
Right click or F12 in the State of Incorporation field and choose from the scroll panel. Enter the State Tax ID
number that the State has assigned to the Production Company.
The Tax Limit Amount in this screen will NOT affect the ICR reporting. The ICR program is designed to
report all Vendors when they have received $600, or more.
Press Enter when the production company’s information is correct.
For complete instruction on entering data into this record, see Vista Manual, Chapter 18: Taxes 1099s – A/P
Menu
Auditing and Adjustments
Follow the procedures outlined in Tax Adjustment Entry and Tax Report for auditing Vendors information.
Entertainment Partners
Taxes 1099s - A/P Menu • 18-15
Independent Contractor Report
Report
The Report function produces a hard copy of the Vendors who have received $600 or more since the
last ICR reporting. You can request this report in Detail or Summary.
Select A/P, Tax Cycle, Independent Contractor Reporting
The Date field can be used to search for payments up to and including the date entered.
Diskette
The Diskette function will produce a Summary Report of the Vendors being reported and generate an
electronic data file that will need to be copied onto a magnetic media diskette for submission to the
State. When you select the Diskette button your Production name, address and Fed ID number will
come up in the bottom portion of the window. Please use this opportunity to verify this information.
The first time the Diskette function is used a new directory called Edd00000 will be written to the
User’s c: drive. Within that directory will be a file using the report date in the format of
YYYYMMDD.
Example:
C:\Edd00000\20010101
Per State requirements the file name is “Indcontr”.
Retransfer
If you should need to resubmit a report to the EDD, the Retransfer function will recreate the ICR
Summary report and write over the “Indcontr” file in C:\Edd00000.
18-16 • Taxes 1099s - A/P Menu
Entertainment Partners
Choose Diskette,
Right-click or F12 and select the appropriate Company and Currency
Enter the Date of the report you need to recreate
Verify the company name, address and Fed ID that comes up at the bottom of the screen.
You will get a box asking you to verify the date of the report you wish to recreate.
Yes will print the ICR Summary Report and write over the “Indcontr” in the directory path for that
report. No will place the cursor back on the Date box.
Creating the Diskette
The Diskette function has created the electronic data file and has placed it in the
C:\Edd00000\YYYYMMDD directory with a file name of “Indcontr”. Now you will need to copy
this file to a diskette, affix an identifying label and complete the appropriate State Form(s).
Windows 95 or Later
Right click on your START button and select PROGRAMS, WINDOWS EXPLORER
On the left side you will see the C:\Edd00000 directory. Double-click to open this directory. You
will then see the attached subdirectories, one labeled for every report you have created (or will be
creating) 20010101.
Insert a blank 3 1/2 inch diskette into the appropriate drive; typically a: drive (5 1/4 diskettes are also
acceptable)
Double-click on the YYYYMMDD directory on the left. Within that folder will be an Indcontr
document. Right-click upon the Indcontr folder to get a menu. Select SEND TO; then select 3 1/2
FLOPPY (A:)
Entertainment Partners
Taxes 1099s - A/P Menu • 18-17
The ICR information will then be copied to the diskette in the assigned floppy drive.
Remove that diskette and affix a transmitter identification label that describes this as the State’s ICR
electronic filing diskette. The label should include:
•
State of California Independent Contractor Reporting
•
Transmitter: the name of the Company,
•
FEIN: the company’s Federal Tax ID Number; (FID)
•
State Acct No: the company’s State Employer Acct No (EDD #)
•
Total Records Reported: the number of contractors listed in the file.
(displayed on the last page of the report)
•
the Date on which the file was created.
ICR’s Transmittal Form(s)
Magnetic Media Filing Registration, DE 164 To file the ICR reports in the magnetic format you
must submit a ‘Registration’ Form (DE 164) with the first filing to the State. E.P. has included a
sample of form.
Transmittal for Independent Contractor Reporting, DE 542T
A DE 542T must be submitted with each magnetic filing.
Do not submit your ICR filings without the proper Form(s) or a diskette label
Shipping Instructions
With a completed DE 542T, (a DE 164, first time only) and an identification label affixed to the
diskette; place in a box or mailer with proper padding and mail to:
Employment Development Department
P.O. Box 997350, MIC 99
Sacramento, CA 95899-7350
Information Contact
To request forms, labels, or information relative to magnetic media reporting of independent contractor
data; you can call the State at (916) 651-6945, visit the web site at www.edd.ca.gov; or write to:
Magnetic Media Coordinators, MIC 15
Employment Development Department
P.O. Box 826880
Sacramento, Ca 94280-0001
18-18 • Taxes 1099s - A/P Menu
Entertainment Partners
Chapter 19: Recoverable Assets G/L Menu
Overview
The means of managing Recoverable Assets in VISTA are spread over many of
its modules:
•
Under Setup, Insurance/Free Field, you define the Codes that are
valid for coding in such segment, the description for each code and
indicate if those codes are valid for production accounts or balance
sheet accounts.
•
Having established these Codes, you actually append them at the end
of your standard account number on each line of distribution against
items of expenditure that are deemed assets, or worth tracking for
some purpose or other, in A/P, Invoice, Invoice Entry and in P/C,
Petty Cash Entry.
•
Having set up in this manner and then diligently recorded each item as
appropriate when processing invoices and accounting for petty cash,
you then are given 2 additional and separate functions under the G/L
menu to further process and report on these recoverable assets:
(1) Recoverable Assets Entry;
(2) Recoverable Assets Report.
See also “Ledger Adjustment” on page 20-8.
Entertainment Partners
Recoverable Assets - G/L Menu • 19-1
The Recoverable Asset program is designed to allow you to record disposition
information without having to maintain independent logs and worksheets. You may
designate as many values for the recoverable asset free field and/or insurance field as
necessary.
Recoverable Assets Entry
Purpose: Record disposition, amount recovered and reporting status of items of
recoverable assets
Required: Currency, Insurance/Free Field Code
Defaults: All accounts
Recoverable Assets Entry lets you bring up the items that have been coded as assets
with the Insurance/Free Field codes and add to each record:
•
the disposition method;
•
amount recovered for the asset;
•
whether or not you want the item to appear on the Recoverable Assets
Report.
It is very important to note the way this function distinguishes between items that
have a disposition method already and those that don’t.
In the Add mode, only the items that don’t have a disposition method entered for
them are displayed for processing in that mode.
In the Modify mode, only the items that do have a disposition method entered for
them are displayed for you to modify. This applies to the Inquire mode also with the
exception that you cannot change anything in that mode.
Choose G/L, Recoverable Assets Entry from VISTA’s Main Menu.
Decide whether you wish to Add disposition method and information to certain
items or to Modify the disposition methods and information of items that have them
already.
19-2 • Recoverable Assets - G/L Menu
Entertainment Partners
Currency: enter the currency (of the bank accounts) under which these items were
recorded or paid for.
Memo: this field refers to the Insurance / Free Field Code that is carried by the
items that you wish to process.
Account Range: If you know for sure the account range within which certain
assets would have been recorded, you can expedite the system’s search for all these
items by giving the account range here. Leave the fields blank and the system will
include all account numbers in its search for assets that carry the Code you’ve
specified in Memo.
Press Enter to start the system searching for the assets. What it brings back depends
on whether you’re in the Add mode or the Modify / Inquire mode (see above).
In all cases, the fields that are filled in by the system and cannot be changed are:
•
Vendor Name
•
Ledger Description
•
Purchase Amount
The fields that can be added to or modified by you in this function are:
•
Disposition Method
•
Recovered Amount
•
Yes or No to Report
Typical Disposition Methods include sold, scrapped, transferred to Stores.
The Recovered Amount is what you’ve received for the asset upon its disposal.
Entertainment Partners
Recoverable Assets - G/L Menu • 19-3
A Yes will make the item show up when you print a Recoverable Assets
Report. A No stops it from appearing on the report although the record is still very
much in your system and can be modified further.
This feature is useful for displaying items of varying status and disposition.
Recoverable Assets Report
Purpose: Produces a report version of recoverable asset information that’s
displayed on the entry screen above plus a little more.
Required: Currency code, Insurance/Free code used to identify assets
Defaults: All account numbers, No to the question ‘only assets with disposition
method’ (i.e. all assets coded to chosen asset code).
Overview
This report gives you the information that’s shown on the screen in Recoverable
Assets Entry screen plus the system transaction number and the source code.
Note that this report can only be printed one ‘Asset’ code at a time and that only the
items marked with a Y on the Entry screen to indicate that you want this item to
appear on this report end up appearing on the report.
Choose G/L, Recoverable Assets Report from VISTA’s Main Menu.
Currency: by requesting that you give only the Currency, VISTA is indicating
that recoverable assets are viewed across all bank accounts.
Production No.: this field refers to the Company and/or GL production Code that
is carried by the items that you wish to show up on the report.
Detail: If you know for sure the account range within which certain assets would
have been recorded, you can expedite the system’s search for all these items by
giving the account range here. Leave the fields blank and the system will include all
account numbers in its search for assets that carry the Code you’ve specified in
Production No.
You can of course still restrict the reporting to a certain account range if you’re only
interested in what assets have been recorded within those accounts.
Only assets with disposition method: This limits the information to only the
assets that have a disposition method recorded if you change the default No to a Yes.
19-4 • Recoverable Assets - G/L Menu
Entertainment Partners
Chapter 20: Journal Entries - J/E
Menu
Overview
The Journal Entry module in VISTA allows you to generate accounting entries
directly to the General Ledger outside of the flow of accounting entries generated by
the feeder systems that support the Accounts Payable, Petty Cash, Payroll and Per
Diem processing functions.
For batch control purposes, VISTA provides you with two options:
•
to have all journal entries created under one given batch with a
predefined batch ID, or;
•
give free rein to users of your system to create as many journal entry
batches with names or batch ID of their own designation.
There is no preferred method; rather the only advice we would venture is that
standardized methods and procedures, batch naming conventions, built-in indicators
to identify the authors constitute good practice that will help you control the use of
this flexible accounting tool in affecting the financial and cost records of your
production.
The option to control your journals under a single batch cannot be chosen through a
menu command and has to be set up by your Customer Representative. Please call us
for assistance.
The Journal Entry module consists of the following menu commands:
Entertainment Partners
Journal Entries - J/E Menu • 20-1
•
Journal Entry
•
Journal Entry Audit Report
•
Journal Entry Post
•
Ledger Adjustment
•
Transaction Reversal
•
Production Transfer
- Production Transfer Entry
- Production Transfer Audit
- Production Transfer Post
Journal Entry
Purpose: Generate journal entries to be posted to the general ledger
Required: Company, Currency, Batch ID, Source Code, Account Number, Amount
(balanced entry), Ledger Description
Defaults: Source Date and Year Period
Delete: Delete an entire batch or delete a transaction within a batch
Choose J/E, Journal Entry from VISTA’s Main Menu.
The (default) Add mode in this menu command means either adding a new batch to
the system or adding transactions to batches that were created earlier but have not yet
been posted.
20-2 • Journal Entries - J/E Menu
Entertainment Partners
If a Batch ID is input (rather that selected from the scroll panel), and if that Batch
ID already exists, then VISTA searches for and selects it. If the Batch ID does not
already exist, then VISTA prompts the User to confirm that he or she is entering a
new journal entry batch.
Please refer to Year Period instructions below for notes on the Ledger Period
menu function.
The Batch, Unlock Batch command allows the User to clear the Batch Control
section and restart the function with another batch without exiting the function.
Batch, Delete Batch allows the User to delete a batch that was created previously
and is open. The deletion is allowed even when the batch contains live journal entry
transactions. VISTA will prompt the User to confirm the deletion of the batch.
Please note the distinction between Function, Delete and Batch, Delete Batch.
The former deletes a transaction in a batch, the latter deletes the entire batch.
The Batch Control Section
Company-Currency-Batch ID:
As in all VISTA functions it is necessary to indicate the Company and the
Currency to be affected. For the purposes of this window, the combined
Company-Currency-Batch ID code is what identifies the unique name of the
batch to be created, added to, inquired about; or whose transaction is to be modified
or deleted.
An F12 in the Company field lists all the company-currency combinations set up
in VISTA.
With Company filled in, an F12 in Currency lists only the currencies set up with
the specified company from which to choose.
With Company and Currency input, an F12 in the Batch field lists the batches
already created, but not yet posted, under the specified combined companycurrency code.
VISTA will notify the User if there are no open batches to process. In the case of a
new batch, input the name chosen for the batch.
Debit Amount
Batch control debit total: This field is used to tell the system what batch control
total to be affected. It is checked by the system automatically when posting the
batch. VISTA interrupts the posting process if the debit total (and the credit total for
that matter, since a journal entry must balance to zero) does not agree with this input
batch control total. Leave this field blank to decline to use batch control total
balancing
Current Debit
Opening batch control debit total: VISTA uses this field to display the total debits
of the last working session on the current batch. In other words, the total is not
dynamically updated on an ongoing basis. Instead, it is updated when the batch is
closed, so that when opened once again for whatever reason, this field will hold an
updated total up to the last concluded session.
This field can not be accessed for input.
Press the Enter key when the Batch Control Section has been completed.
Entertainment Partners
Journal Entries - J/E Menu • 20-3
Source Code
Source codes (by which transactions are identified) are established under Setup,
Source Codes. Part of the process of establishing source codes is the definition of
the modules(s) in which each source code can be used.
Input any of the source codes defined as valid for the Journal Entry module.
Although ‘JE’ tends to be used for generic journal entry functions, some Users
prefer to identify their journal entries more specifically--such as ‘WT’ for wire
transfers, ‘ST’ for studio advances and so on. VISTA validates the source code
before proceeding.
Source Date
This field defaults to the current system date, but may be modified by the User.
Total Debit
Transaction debit control total: This is a current transaction control total. Use this
control total to check the complete-ness of each transaction entered in the current
session. It requires establishing the transaction control totals ahead of time. Every
time this total is entered, VISTA checks for complete-ness by comparison with the
total entered in the lines of distribution.
Year/Period
The Year/Period defaults to the current year period. The Year/Period cannot be
changed except through the function Ledger Period which allows the User to make
Journal Entries for Next year period, Month-to-date PCL and Quarter-to-date
PCL within the same batch and within a single session.
It is generally poor practice to mix year periods’ journal entries. It is a better
practice to create separate batches for each different ledger period.
Session Debit
Control total for the current session: This is the running debit total of journal
entries between opening a batch for processing and closing it. This field resets to
zero whenever it is reopened for further processing.
The Session Debit total at the time the current session is closed will be added to
the Current Debit total at the time that the current session was opened. This total
will become the Current Debit total at the opening of the next session.
Transaction No
The system transaction number in this field is the number that was assigned to the
last journal entry made. Write this number on supporting documentation, as it is a
search criterion helpful when using system inquiry functions in the future.
The Reference Section
Comments
The information input into this field serves as explanation for the journal entry
transaction in subsequent reports.
20-4 • Journal Entries - J/E Menu
Entertainment Partners
Ref. Trans. No.
This numeric field is provided for referencing a voucher or invoice number that may
be related to this journal entry.
The Accounting Entries Section
Account Number
Up to 150 lines of distribution
can be entered for each
journal entry.
Enter the account to be debited or credited. Every account number must be
provided, because journal entries are not created with automatic clearing or control
accounts. VISTA validates the input against the chart of accounts.
Amount
Debit amounts are entered as positive; credit amounts are entered as negative. In
total, debits must equal credits. VISTA does not allow completion of a transaction
that is out of balance.
Ledger Description
Make the ledger description as descriptive as possible. Information input here can
help explain the reason for the journal entry transaction via reference to the general
ledger.
REFERENCE
In this field the User can enter a brief description of the distribution line.
If the same Reference is desired for several consecutive lines, the User can simply
tab through the Reference field, thereby duplicating the description from the
previous field.
Completing the Journal Entry
Up to 150 lines of distribution can be entered for each journal entry transaction.
Pressing Enter books the current journal entry transaction and updates the
Transaction No., the Session Debit total.
To call up another journal entry, or to create a new batch at the end of the current
session, activate another batch without leaving the Journal Entry window with the
Batch, Unlock Batch function.
To close the batch, use the Function, Exit command.
Journal Entry Audit Reports
Purpose: Prints journal entries by batch for auditing.
Required: Company-Currency-Batch ID
Defaults: Report by transaction, all transaction in the batch, in native currency, and
if conversion to base currency selected, uses budget conversion rate.
Choose J/E, Journal Entry Audit Reports from VISTA’s Main Menu.
Entertainment Partners
Journal Entries - J/E Menu • 20-5
Company-Currency-Batch ID: Identify the batch to print with a unique
combined Company-Currency-Batch ID code.
As the audit report function is narrowly focused, an F12 or right-click in the
Company, Currency or Batch ID field lists all the batches that are open in your
system for selection. Unlike the Entry function, you can select and print several
batches at the same time.
Report by: the default order in which journal entry Transactions are printed is
transaction number order. Change it to Distribution if you want it in account number
order.
Transaction No. Range: if you wish to limit your report to certain transactions
only, give the transaction number or range in these fields. Even when your reporting
selection is by distribution, selection by transaction number is still valid. In this way,
especially when you have large batches, you retain full flexibility in printing out
your journal entry transactions for review.
The default is to print all transactions in the selected batch(es). When you press
Return at the end, the system therefore automatically fills in these fields with zeroes
to nines.
The last print option you have is the currency in which you want the report.
Currency Conversion: the report prints in Native currency by default (i.e. the
currency in which the transactions were originally entered in the system). Change the
selection check box to Base if you want the transaction amounts converted to the
base currency.
Exchange Rate: If your selection is for conversion to base, you further have the
option to direct the conversion to be done using the Budget or the Current exchange
rate.
For information about your currencies and exchange rates, use the Setup,
Currency menu command.
Press Enter to start the report process.
20-6 • Journal Entries - J/E Menu
Entertainment Partners
If, after reviewing your audit reports, you need to make corrections, use the J/E,
Journal Entry menu command.
Journal Entry Post
Purpose: Posts journal entries to the general ledger.
Required: Company, Currency, Batch ID
Defaults: Print a report of postings, all transactions in the batch
Choose J/E, Journal Entry Post from VISTA’s Main Menu.
Company-Currency-Batch ID: Identify the batch to post with a unique combined
Company-Currency-Batch ID code.
The posting function is narrowly focused, so an F12 or right-click in the
Company, Currency or Batch ID field lists all the batches that are open in your
system for selection. Unlike the Entry function, you can select and post several
batches in one run.
If a batch has a pre-defined Debit Amount (i.e. a batch control total) and the total
of the journal entry transactions does not agree with that control total, the system
stops the posting with a warning.
Transaction No.: You can restrict the transactions to be posted within a batch to a
specific transaction or range of transactions. Enter the transaction numbers of your
selection in the ‘from” and ‘to’ fields.
If the transaction number (s) you have given in your posting are not in the batch(es)
you have selected the system will display a warning.
When a partial posting has been selected for a batch, the batch remains open. You
can make changes to unposted transactions and/or add new transactions.
Do you wish to Print a posting report (Y/N): defaults to printing a report of the
transactions being posted. Change to a No if you have a good reason for not wanting
a report; we advise our users to always print this report and file it away to maintain
an audit trail.
When you’ve selected all your options, press Enter to start the posting.
Once you’ve posted a batch, it is no longer open and accessible for any further or
additional processing. If you need to change a posted journal entry, use the Journal
Entry function to create a new journal entry to make your corrections or
adjustments. Other menu commands available for this purpose, covered later in this
Entertainment Partners
Journal Entries - J/E Menu • 20-7
manual, are Ledger Adjustment (partial adjustments only) and Transaction
Reversal that reverses the entire journal entry transaction.
Ledger Adjustment
Purpose: Calls up transactions posted to the General Ledger for you to add to or
change their Insurance/Free Field and Ledger Description.
Required: Transaction Number
Ledger Adjustment is a function that allows you to make very limited changes to
your general ledger records. The changes have no financial impact on the accounting
records.
Specifically, they are limited to changing the following:
•
the code, set up to track insurance claim, recoverable asset or for other
identification purposes, that is entered in the Insurance / Free Field
when coding transactions,
•
the ledger description entered in accounts payable, petty cash and
journal entry processing that accompanies each transaction when it is
posted to the general ledger,
•
and the JE NBR Voucher reference number.
Choose J/E, Ledger Adjustment from VISTA’s Main Menu.
The Ledger Adjustment command has no Add or Inquire mode and is
constantly in Modify mode.
Transaction number is the only reference by which it works.
Note: There is no F12 or right-click function to bring up a scroll panel of
Transaction numbers available in the system.
You will recall that throughout our instructions in this manual we have often advised
noting the Transaction Number at the end of an Entry process on your supporting
20-8 • Journal Entries - J/E Menu
Entertainment Partners
documents, invoices or vouchers. This is an instance where you would need this
information to use a VISTA function.
Enter a Transaction number and press Enter.
VISTA brings up the following details about the transaction:
•
Vendor number, vendor name
•
Invoice number
•
PO number
•
JE-NBR Voucher number
•
GL account number
•
Insurance/Free field
•
Detail Amount
•
Description
Only the italicized fields for each line of distribution can be modified.
Make your changes and press Enter. The system posts your changes after requesting
and obtaining confirmation from you through a pop-up dialog box--Yes to proceed,
No to go back to the input screen.
As soon as you call up a transaction in this function, the desire to change it is implied
by the system. If you do not make any changes, pressing Enter causes the system to
notify you that you haven’t made a change and it goes on to leave the retrieved
transaction on the screen.
To back out of a transaction altogether without making a change, click Function,
Clear Screen to start over or Function, Exit to quit.
Changes through Ledger Adjustment are made to the existing general ledger
records in the system. The fields that can be changed are reference information only.
Transaction Reversal
Purpose: Backs out a Journal Entry previously posted to the General Ledger.
Required: Specify whether reversal of Transfer Code or of Transaction
Choose J/E, Transaction Reversal from VISTA’s Main Menu.
Entertainment Partners
Journal Entries - J/E Menu • 20-9
This function was designed primarily for the reversal of transactions posted to the
ledger through the VISTA Journal Entry function.
Transaction Reversal can not be run on an Accounts Payable or a Petty Cash
item. Transaction Reversal is available only for Journal Entry items.
The reversal transaction that is generated creates a debit entry for every credit entry,
and a credit entry for every debit entry, that was in the transaction selected for
reversal.
Reversal transactions are put in a batch called REVERSAL which can be audited
through J/E, Journal Entry Audit Reports. The batch then has to be posted
(J/E, Journal Entry Post) before the reversal takes effect in the general ledger.
The audit report of the REVERSAL batch should be reviewed carefully before
posting in case a transaction number has been inadvertently reversed more than once.
Note: There is no F12 or right-click function to bring up a scroll panel of
Transaction numbers available in the system.
In this function you need to give the full transaction number--including the leading
zeros. Enter a Transaction number and press Return.
The system asks you to confirm that you wish to reverse the transaction. It does not
display the transaction that is being reversed; you therefore must be very certain that
you have the right transaction number and confirm the correctness of your selection
by subsequently reviewing the REVERSAL batch audit report very carefully.
20-10 • Journal Entries - J/E Menu
Entertainment Partners
If you have posted downloaded transactions from another VISTA system or a studio
mainframe system, you will have the option to reverse by Transfer Code. Be
certain that you have the correct Transfer Code and that you review the
REVERSAL batch audit report before posting.
Production Transfer
The three Production Transfer functions, Entry, Audit and Post are used
mainly at the corporate accounting level. Refer any questions regarding these
functions to either VISTA Support or the Corporate Accounting office that supports
your production.
Production Transfer Entry:
Production Transfer Audit:
Entertainment Partners
Journal Entries - J/E Menu • 20-11
Production Transfer Post:
20-12 • Journal Entries - J/E Menu
Entertainment Partners
Chapter 21: Ledger Inquiry - G/L
Menu
Overview
The Ledger Inquiry function will search throughout the general ledger records for
financial information and display it in a format as specified in the Setup, Flex
Ledger Inquiry Table menu command. The inquiry is a search based on four
parameters or criteria or a combination thereof:
1.
GL Account Number or range;
2.
Year Period or range;
3.
Transaction Number or range, and;
4.
Source Code.
A User can gather information on one report that is generally spread throughout the
general ledger.
Ledger Inquiry
Purpose: Reports financial information based on set parameters
Required: Report ID, Currency
Entertainment Partners
Ledger Inquiry - G/L Menu • 21-1
Defaults: Sorts by the search criteria, report in detail, no currency conversion, but if
conversion requested, uses budget exchange rate.
Choose G/L, Ledger Inquiry from VISTA’s Main Menu.
Report ID
Select by name the report desired for this inquiry. Use the VISTA default report or a
report designed under the Setup, Flex Ledger Inquiry Table menu command.
Report Heading
The information input into this field will serve as the Report Heading on the
printed report. The User can customize the report with his or her own title: Ldgr
Inq re: Catering; Tuesday Meeting; Jane’s Report; etc. This field is optional.
21-2 • Ledger Inquiry - G/L Menu
Entertainment Partners
Currency
VISTA general ledger records are separated by individual currencies. Ledger
Inquiry only works by a single specified currency. Enter the currency code of the
GL information through which to search.
Ledger Inquiry Search Parameters
The next four input fields are used to obtain search criteria to be used in the inquiry.
The more criteria specified, the more selective (narrow) the inquiry:
At least one of the search
fields must have search
criteria to initiate a valid
inquiry
Any search parameters given in the GL Account Number, Year Period,
Transaction Number and Source Code will make the system narrow down the
search to the specific given criteria. If any criteria fields are left empty, VISTA will
include all available criteria in the report.
Sort By
VISTA offers the User four options by which the Ledger Inquiry report will be
arranged. The report will be sorted by either Account number, Transaction
number, Year Period, or by Source Code. Clicking one of the four buttons
selects how the Ledger Inquiry data will be formatted.
When VISTA detects that the selected Sort By parameters entail a complex sorting
process, the system will display an Increased Run Time message.
Report Type
The report prints full Detail by line of distribution by default. Choose Summary for
only one line per transaction found to meet the search criteria.
Currency Conversion
VISTA assumes that no currency conversion is needed, and reports all amounts in
Native currency. Choose Base if all amounts are to be converted to the base
currency.
Exchange Rate
If conversion to base currency is requested, the system defaults to using the
Budgeted exchange rate. Change the choice to Current rate if that’s what is desired.
Create Export File?
Checking the Create Export File check box produces a file with a .VIS extension
that can be read into a spreadsheet (such as EXCEL) or a word processor (such as
WORD).
Press Enter when all choices are made.
Entertainment Partners
Ledger Inquiry - G/L Menu • 21-3
This page left blank intentionally.
21-4 • Ledger Inquiry - G/L Menu
Entertainment Partners
Chapter 22: Budget/Estimating Bdgt Menu
Overview
There are two ways to enter an original budget for a show in VISTA:
“VISTA Budgeting” is a
separate budgeting program
sold by Entertainment
Partners. Please contact EP
Marketing department for
further information regarding
VISTA Budgeting.
•
load the budget data prepared with show budgeting software such
VISTA Budgeting, Movie Magic, etc. into VISTA electronically;
•
enter the budget, into VISTA through Budget EFC/ETC Entry.
Once the original budget entry has been achieved, changes to the existing
budget, EFC, ETC and approved overages, and other adjustments can be
effected through the Budget EFC/ETC Entry and VISTA Budgeting.
Although updates to the budget figures are relatively rare under normal
circumstances once the show is in production, updating the EFC or ETC
may occur frequently, or may be done whenever cost reports are being
produced. Unlike budgeting for overhead or operational expenses where
budgeted amounts can be reasonably predetermined for each accounting /
reporting period (weekly, monthly, etc.), show budgeting is relatively less
dependent, or even independent, of time.
Therefore, comparing actual costs with budgeted costs for or up to a specified
accounting period is not meaningful in production cost control. Rather, the
meaningful comparison is between Estimated Final Costs and budgeted costs. EFC
is derived from taking actual costs to date and adding to that the PO commitments to
date and Estimated costs To Complete the production.
Entertainment Partners
Budget/Estimating - Bdgt Menu • 22-1
The original budget and the final budget should be the same in that frequent or casual
updates to an approved budget are not the norm. However, circumstances may
require adjustments to the original budget. These are commonly referred to as
Approved Overages. Original budget plus approved overages equals the final
budget.
VISTA’s Budget EFC/ETC Entry function is designed to accommodate the entry,
update and adjustments to the budget, EFC and ETC figures, for each account used
in collecting production costs.
Budget EFC/ETC Update/Entry
Purpose: Enter, adjust Budget, ETC, EFC amounts by account
Required: Currency code and Production number
Defaults: Include PO’s in Total Cost, No running totals, Add To (versus Replace)
Delete: A Replace mode effectively deletes the old amount and replaces it with the
new amount
Choosing Bdgt, Budget EFC/ETC Update/Entry from VISTA’s Main Menu
calls up the following screen:
22-2 • Budget/Estimating - Bdgt Menu
Entertainment Partners
This menu command has three data entry modes: Add To, Replace, and Inquire.
Add To (the default mode) will add the amount a User enters to the existing amount
in the account. Replace will substitute the amount entered for what currently exists
in that account. This allows a User to change the budget, ETC, EFC and Total Cost
(which is actual cost plus PO commitments) through seven transaction types:
1.
Estimate To Complete
2.
Estimated Final Cost
3.
BUdget
4.
BOth Budget and EFC
5.
Approved Overage
6.
Adjustment
7.
Interactive
VISTA allows for working with the estimates in either Add To mode or Replace
mode for the first six transaction types. The Interactive transaction type is
discussed on page 22-4. Whenever the input change affects the item displayed on
the screen, the amount on the screen is changed immediately, enabling a constant
review of the results of changes.
Estimate To Complete (ET): Estimate To Complete is added to Actual Costs plus
PO Commitments (the latter two together often referred to as Total Cost) to give
Estimated Final Cost.
In the Add To mode the amount entered is added to or subtracted from the existing
ETC amount for the account. In the Replace mode, the input takes the place of
what currently exists in the account. The change is reflected in both the EFC and cost
variance since the latter is derived from comparing EFC with Budget.
Estimated Final Cost (EF) is a direct way of affecting the eventual costs for the
account. In either mode, the input change is reflected in the ETC for that account
and the cost variance.
Budget (BU): A budget transaction affects the original Budget amount for the
account directly. The cost variance reported is affected, but no change takes place in
the ETC or the EFC.
Both Budget/EFC (BO) changes both the Budget amount and the EFC for the
account. The change is also reflected in the ETC but because both Budget and EFC
are affected, cost variance does not change.
The Approved Overage
feature is used by certain
studios that have tailored
their own reports..
Approved Overages (AO): An approved overage does not change the original
Budget amount for an account. Instead it is tracked as a separate amount under that
heading and is added to the original Budget to give a computed Total Budget against
which EFC is now compared in calculating a cost variance. An approved overage
also changes the EFC for that account, so no change occurs in the cost variance for
that account.
Adjustments (AD): An adjustment is tracked under that heading and is added to
Actual Cost to date and PO Commitments to change what is reported as Total Cost
Amount. ETC is adjusted correspondingly, thereby not affecting EFC and cost
variance.
Currency: Select the valid currency under which the cost records have been
recorded.
Entertainment Partners
Budget/Estimating - Bdgt Menu • 22-3
Production: Enter the production number (e.g. LO GLPROD or CO GLPROD) by
which the show is identified.
Detail Range: Users can restrict the detail accounts with which to work. Leaving
these fields blank brings up every production account number (excluding balance
sheet accounts). Enter an appropriate range of accounts if specific accounts are
desired.
Set: Productions that code to the Set level will be able to change ETC, EFC,
Budget, etc. by Set. Enter a Set number here to restrict the update to a single set.
Leaving this field blank brings up all sets that have budget allocations or have
incurred costs to date.
Include PO’s? defaults to Yes, meaning Purchase Order commitments are added
to Actual Costs to give the amount shown under Total Cost Amount.
Whether PO’s are included or
excluded here does not affect
the bottom line. It is just a
preference on the part of the
production accountant.
Note: In estimating ETC, production accountants that prefer to include PO’s
calculate their figures without taking into account anything for which they have PO
commitments made. Those who like to exclude PO’s when working with the
opening figures ignore PO commitments in this screen and estimate their ETC by
taking into account only what they have paid up to date.
Session ID: The number or code entered here by the User can be used to run a
report based on the changes made to the budget.
If a User presses Enter while
in the middle of a group of
100, VISTA moves on to next
group of 100 accounts.
There are 10 pages of 10 lines each available for Budget EFC/ETC changes at a
time. The PageUp and PageDown keys on the keyboard move the window between
pages. If the account range requested exceeds 100, only 100 lines at a time will be
available. Make changes to the first group of 100 accounts, then press Enter to
record those changes. The second group of 100 will then be brought up for changes.
When finished with the second group of 100, press Enter to book the changes and
the third group of 100 will come up, and so on until all the accounts requested have
been processed.
Use the column labeled Explanation to make a brief note to document specific
reasons for changes made.
When Enter is pressed to book changes, VISTA asks for confirmation and then
updates all the records immediately.
Refer to “Interactive Mode”
for information regarding
making changes of different
types of transactions.
Budget EFC/ETC changes for only one transaction type at a time (e.g. EFC, ETC,
etc.) can be made through this window. If more than one type of change is desired,
the changes for each type must be complete before the process can be initiated for
the next transaction type.
Interactive Mode
Pushing the button at the top left of the Budget EFC/ETC Update Entry window
marked INteractive allows a User to make changes in any combination of mode or
transaction type.
22-4 • Budget/Estimating - Bdgt Menu
Entertainment Partners
Guide lines within the window direct the User through the hierarchy of this function.
The row atop the input field is made up of buttons labeled with the six transaction
types previously discussed. This row corresponds to the first column of the input
field below. The second row consists of a pair of buttons labeled with the two
functions previously discussed and corresponds to the second column.
CU stands for Currency. The rest of the columns are labeled with the production’s
account code, the amount by which the individual accounts are to be affected, and a
short line to be used by way of Explanation of the change.
Inputting a slash / in the Explanation field will duplicate the input from the
previous Explanation field.
A valid account code must be
input to the code field.
The User may enter the transaction, function and currency codes in the first three
columns, input the account code to be affected, the amount by which it is to be
affected and a brief explanation for the change.
Tabbing from the explanation field at the end of a line advances the cursor to the
currency field of the next line, duplicating the previous line’s transaction type and
function codes. Those fields may be changed by placing the cursor inside the boxes
and either pushing the buttons within the top rows or simply typing the two letter
codes that represent each mode or function.
The keyboard’s PageUp and PageDown keys move the window through ten pages
of ten lines of account codes each. To record changes to the codes press Enter.
VISTA will verify that the changes are to be made before closing the window and
returning to the VISTA toolbar.
Entertainment Partners
Budget/Estimating - Bdgt Menu • 22-5
Budget Explanation Report
Purpose: Reports cost variances based on Budgets and EFCs.
Required: Currency code, Production number
Defaults: Prints explanations, no zero variances, all accounts and to current period
end, negatives for adverse variances.
The Budget Explanation Report produces three reports that show the cost
variances based on EFC, final and historical budgets and prior period’s EFC.
Choose Bdgt, Budget Explanation Report.
Currency: Select the valid currency under which the cost records have been
recorded.
Production: Enter the production number (e.g. LO GLPROD or CO GLPROD)
that identifies the show.
There are three reports from which to choose:
Final Budget To EFC
The Final Budget to EFC report shows the current budget amount and the current
EFC for each account, and the variance calculated by subtracting the EFC from the
budgeted amount. Unfavorable variances are shown as negatives (with minus sign or
in brackets).
22-6 • Budget/Estimating - Bdgt Menu
Entertainment Partners
Prior Budget To EFC
The Prior EFC to Current EFC report shows the prior period’s EFC amount and the
current period’s EFC for each account, and the variance calculated by subtracting the
current EFC from the prior EFC. An increase in current EFC is shown as a negative
number (with minus sign or in brackets).
History Of EFC Changes
The History of EFC Changes (also referred to as History of Budget to EFC)
report shows the history of EFC changes by year period for each account. The report
shows the current budget amount against the EFC.
Budget Explanation Report Parameters
The User will need to make several other choices in addition to the type of report
desired before initiating report printing:
Print Explanation: A Yes in this will include information entered to the
Explanation field.
Print Zero Variances: A Yes in this field enables the report to print variances
with zero amounts.
Print Summary Option: Selecting Yes for this option directs VISTA to generate a
summarized version of the EFC/ETC Variance Report. Selecting No will generate
a report down to the Set level.
Account Range: Enter the Account Range to be reported. Leaving these fields
empty will report all accounts.
Period End: Period End defaults to the current system date, and can be changed
by the User.
Currency Conversion & Exchange Rate: Parameters designated here by the
User will define the conversion of the Currency: either to Base or to Native; and
the Exchange Rate; either Budget or to Current.
Variance Amount Format: The Variance Amount Format allows the User to
choose the look of negative amounts on the report. While positive amounts are
standard, negative amounts will either be followed by a negative sign (-) or be
enclosed by the User’s choice of four different brackets. Click the arrow at the right
of this field make a selection.
Press enter at the lower right corner of the window to start report printing.
Budget EFC Change Tracking Report
Purpose: Prints multiple explanation reports for a given year period by Session ID
Required: Company, Production number, Session ID
Defaults: Current year period.
The Budget Explanation Report produces three reports that show the cost
variances based on EFC, final and historical budgets, and prior period’s EFC.
Choose Bdgt, Budget EFC Change Tracking Report.
Entertainment Partners
Budget/Estimating - Bdgt Menu • 22-7
Enter the Currency and Production Number of the explanations to be printed.
If the Account Range for the desired explanations is known, enter it in the From To boxes. Leaving these fields blank will print explanations for all account ranges
within the given Currency and Production Number.
Print Explanation: A Yes in this field includes on the report any information that
was entered in the Explanation field.
Session ID: This report is run by reference to the Session ID assigned by the User
at the time Budget EFC/ETC Entries were made. (Refer to section marked “Budget
EFC/ETC Update/Entry” on page 22-2.) Enter the Session ID number in the
indicated field.
When all pertinent information has been input, hit enter to initiate the report.
Budget Interface
Although a User is able to enter a budget into VISTA directly, Entertainment
Partners recognizes that a VISTA User may want to import his or her production’s
budget into VISTA from a separate budgeting program. For that reason, VISTA is
capable of interfacing with several budgeting software programs. These budget
programs are:
VISTA Budgeting;
Movie Magic;
Speedbid; and
Toolkit.
VISTA Budgeting
“VISTA Budgeting” is a
budgeting program sold by
Entertainment Partners.
A budget created in VISTA Budgeting can be imported into VISTA
Accounting. Follow the VISTA Budgeting directions for creating the
budget file and a file called "xxxxxxxx.vbe" will be created, where
“xxxxxxxx” is the name of the budget.
22-8 • Budget/Estimating - Bdgt Menu
Entertainment Partners
Choose Bdgt, VISTA Budgeting Interface.
Select the “Exit” button at the
bottom of the window to not
load the budget.
Input the name of the VISTA Budgeting interface file; or F12 (or rightclick) in the filename field. Click on the “Next Step” button at the
bottom of the window to continue the process.
The window will be replaced with information pertaining to the requested budget
file.
Production: The production number associates the budget to be loaded with the
show being processed by VISTA. This production number is also validated and
must be set up in VISTA Accounting before the budget can be loaded.
Select: There are several options from which to choose when posting:
1. Budget Only
2. EFC Only
Entertainment Partners
Budget/Estimating - Bdgt Menu • 22-9
3. Both Budget/EFC
4. ETC Only
5. Approved Overage
Mode: Post the information by Adding to or Replacing the existing information
in VISTA.
Option: List the budget, Post/Print the budget or Post/no print (post the budget
without printing a report).
Once all options have been selected, click Enter to continue the process (or choose
the Exit button to stop the process, or the Previous Step button to enter a different
file name on the prior screen). If there are any errors, an error report will be
produced. In some cases, where accounts are not set up in the VISTA Chart of
Accounts, for example, the interface will offer to set up these missing account
numbers. If there are no errors and a Post option has been selected, the program will
post the budget information based on selected options.
Movie Magic
Movie Magic™ creates a budget interface file that can be imported into VISTA.
Two versions of Movie Magic™ are available: a Windows™ version and a DOS
version. VISTA will interface with either version. The procedures for interfacing
both Movie Magic versions are identical.
There are two methods of creating an interface file in Movie Magic: Method A and
Method B. The general rule in determining which method to use is as follows:
•
for a 4-digit detail account number, use Method A;
•
if the detail account number has more than 4 digits, use Method B.
The Movie Magic Reference Manual has detailed instructions on the use of this
interface.
Once the interface file has been created, load the budget information into VISTA.
Choose Bdgt, Movie Magic Interface from VISTA’s Main Menu.
It is critical that a backup be done prior to starting the interface process in case there
are errors in the Movie Magic file which may cause the program to add erroneous
accounts to VISTA Chart of Accounts.
22-10 • Budget/Estimating - Bdgt Menu
Entertainment Partners
Company: The company code must be indicated because the budget interface data
does not contain a reference to the company.
Currency: Transfer of budget data is effected one currency at a time. When
dealing with a budget with more than one currency, load the budget data for each
currency separately. In VISTA, records are kept by currency so loading several
budget amounts of different currencies for the same account achieves the desired
objective of populating VISTA records with the budget in each currency.
Filename: Enter the path and name of the file that holds the budget data. The
default directory is C:\MM\. Copy the Movie Magic data from the diskette into that
directory or direct VISTA to any other drive/directory by changing the default in this
field (e.g. A:\BUDGET.DSC to read the data directly from the floppy drive and the
name of the budget data file is BUDGET).
Verify that the file to be interfaced is the file created through the interface process in
Movie Magic, not the Movie Magic budget file itself. The interface file will always
have a .DSC extension, whereas the budget file has a .BUD extension and cannot be
read by VISTA.
Select: There are three options from which to choose when loading the budget EFc, BUdget or BOth EFc/BUdget. The system defaults to the BOth option.
Production Number: the production number associates the loading budget with
the show being processed on VISTA. This production number is also validated and
must be set up before the budget can be loaded.
Press Enter to start the transfer.
The following screen will appear after VISTA has read the file:
The program will create a report of all valid account numbers (as validated on the
VISTA Chart of Accounts) and their respective budget amounts.
To insure an accurate transfer, it is important to review the report before answering
Yes to the above dialogue box. If the account numbers on the report do not properly
Entertainment Partners
Budget/Estimating - Bdgt Menu • 22-11
follow the Chart of Accounts configuration, answer No to the above screen and
contact Customer Support for assistance.
If the report looks good, respond Yes. The following screen will signal the next step
in the process if VISTA has encountered any account numbers which are NOT on
the Chart of Accounts:
Again, it is important to review the report before responding to the question. If the
accounts listed on the second report can be added to the Chart, answer Yes to the
screen question. Answering No will completely stop the process and no budget
figures will be loaded into VISTA.
Speedbid
A budget created on Speedbid (TM) can be imported into VISTA. Follow the
Speedbid directions for creating the budget file and a file called "estimate.prn" is
created.
Choose Bdgt, Speedbid Interface from VISTA’s Main Menu.
Company: The VISTA company code must be indicated because the budget
interface data does not contain any reference to the company.
Currency: Transfer of budget data is effected one currency at a time. When dealing
with a budget with more than one currency, load the budget data for each currency
separately. In VISTA, records are kept by currency so loading several budget
amounts of different currencies for the same account achieves the desired objective
of populating VISTA records with the budget in each currency.
Filename: VISTA looks for the standard Speedbid file called estimate.prn in the
DISC\BIN directory either in the C: drive or on the network. For VISTA to read the
file from another drive and directory, provide those directions (such as
C:\SPDBID\ESTIMATE.PRN).
22-12 • Budget/Estimating - Bdgt Menu
Entertainment Partners
Starting Account: the way in which the Speedbid data is loaded into VISTA is
determined by the design of the interface between these two systems. Indicate the
VISTA account number into which to load the first budget record of the Speedbid
budget data file. The transfer program then loads the remaining budget records
consecutively into the next numerically sequenced accounts until it’s exhausted all of
the Speedbid data.
Press enter to start the transfer.
Entertainment Partners
Budget/Estimating - Bdgt Menu • 22-13
This page left blank intentionally.
22-14 • Budget/Estimating - Bdgt Menu
Entertainment Partners
Chapter 23: Cost Reporting - Cost
Menu
Overview
The FLEXible Production Cost reporting in VISTA provides custom report
formats. The Setup, Cost Table menu gives access to customize information that
is arranged vertically on the reports (the costs reported) and the Setup, Flex Cost
Table menu gives access to customize information that is arranged horizontally on
the reports (the headings that classify the cost information).
VISTA comes with five report formats already available:
1.
a standard Production Cost format (PRODCOST);
2.
the Cost Analysis format (COST_ANALYSIS);
3.
the Fox Production Cost format (FOX_COST);
4.
the Consolidated Cost format (CONSOLIDATE), and;
5.
the Cash Flow format (CASH FLOW).
Other FLEX Production Cost Report formats may be created under the two menu
commands mentioned above. Please see “Flex Cost Table” on page 9-25 for detailed
instructions.
The cost report options available in VISTA are as follows:
•
Entertainment Partners
FLEX Production Cost
Cost Reporting - Cost Menu • 23-1
•
FLEX Production Cost Consolidation
•
Cost Transactions
•
Set Cost Report
•
Episodic Cost
•
Set Cost Consolidation
FLEX Production Cost
Purpose: Print production cost report in specified format
Required: Report Number (name), Currency code, Production account number
Defaults: Report Details, use Customized account names, Will not show sets, use
Customized set names, Include all accounts, Current year period, No currency
conversion and if conversion requested, use Budget rate.
Choose Cost, FLEX Production Cost from VISTA’s Main Menu.
In addition to the report design parameters given in the Setup menu, VISTA
requires additional information:
Report Number: Enter the identification name or number of the report to be run.
This is the name given to the report when it was created under the Setup, Flex
Cost Table menu (refer to page 9-25).
23-2 • Cost Reporting - Cost Menu
Entertainment Partners
Currency: enter the currency or currencies in which the transactions were recorded.
When you select more than one currency, the transactions are printed out separately
by currency. F12 or a right-click brings up a list of all currencies set up in your
system for you to choose from.
If you want each account’s balance to be a combined total across all currencies, with
due conversion, you need to run the Consolidation version of the Flex Production
Cost report.
Production: give the production number(s) you want to include in the report. The
account balances for each production are reported separately. Entering an A in this
field selects all productions in your system. F12 or a right-click brings up a list of
your production numbers for you to choose from.
To see each account balance combined across several selected productions, you need
to run the consolidation version of the Flex Production Cost report.
Report Type: Detail is by individual accounts, Summary prints out by major
account category only. You can print out both formats by selecting Both.
Detail Description From Master Chart of Accts: Yes tells the system to use
the standard / generic account names in the Account Control Table (ACT) versus the
customized account names in the GL Masters.
Show Sets in Report: Yes has the system print out account balances to the level
of individual sets. No limits it to (Detail) account level only; N is the system default.
Detail Account Range: the from - to fields allow you to specify the range of
accounts. The system will select all accounts if the field is blank.
Year period: defaults to current year period. You can go back to the first year
period of the previous month (i.e. a maximum of 6 weekly year periods) in your
reporting. Subject to this limitation, enter the year period you want over the default
year period.
Period Ending: this defaults to the system’s current date and appears on the report
as the period ending date. Enter a different date if you wish.
Currency Conversion: and Exchange Rate: these 2 options are only relevant
when you are running the Consolidation version of this report.
If you wish to Create an Export File, click its check box. A file with an extension
of .VIS is created (in addition to your printed report) that can be imported into a
spreadsheet program such as EXCEL.
To Print zero balance accounts on the Cost Report check the box labeled as
such.
Pressing Enter after all your selections initiates the report.
FLEX Production Cost Consolidation
Purpose: Print production cost report in specified format, consolidating across
productions by account and/or major account category.
Required: Report Number (name), Currency code, Production account number
Defaults: Report Details, use Customized account names, Show sets, use
Customized set names, Include all accounts, Current year period, No currency
conversion and if conversion requested, use Budget rate.
The FLEX Production Cost Consolidation report prints cost information in the
same formats as available for FLEX Production Cost but can also consolidate
Entertainment Partners
Cost Reporting - Cost Menu • 23-3
account balances and major category totals across multiple productions and/or
multiple currencies.
Choose Cost, FLEX Production Cost Consolidation from VISTA’s Main
Menu to bring up the following screen:
Report Number: Enter the identification, name or number of the report to be run.
This is the name given to the report when it was created under the Setup, Flex
Cost Table menu. All the report formats created in Setup can be used for both
Flex Production Cost and Flex Production Cost Consolidation.
Currency: Enter the currency or currencies to be reported. When more than one
currency is selected, account balances are combined across currencies. F12 or a
right-click brings up a list of all available currencies set up in the system.
For each account’s balance to be listed separately by currency, run the Flex
Production Cost report and NOT this Consolidation version..
Production: Enter the production number(s) to be included in the report. The
account balances for all productions are combined by account. Entering an A in this
field selects all productions in VISTA. F12 or a right-click brings up a list of
available production numbers from which to choose.
To see each account balance listed separately by production, run the Flex
Production Cost report and NOT this Consolidation version.
23-4 • Cost Reporting - Cost Menu
Entertainment Partners
Report Type: Detail is by individual accounts, Summary prints out by major
account category only. Print out both formats by selecting Both.
Detail Description From Master Chart of Accts: Yes tells the system to use
the standard / generic account names in the Account Control Table (ACT) versus the
customized account names in the GL Masters.
Show Sets in Report? No limits it to (Detail) account level only. Yes has the
system print out account balances to the level of individual set numbers and conjures
the following screen options:
Set description from Master Chart of accounts? Yes utilizes the Set
description established in the Chart of Accounts; No utilizes the Set description as
established in the G/L Master.
Show Set Subtotals? Yes includes the Set Subtotals on the report; No excludes
the Set Subtotals.
Detail Account Range: the from - to fields allow you to specify the range of
accounts on which to report. Leaving these fields blank makes the system select all
accounts.
Year period: defaults to current year period. You can go back to the first year
period of the previous month (i.e. a maximum of 6 weekly year periods) in your
reporting. Subject to this limitation, enter the year period you want over the default
year period.
Period Ending: this defaults to the system’s current date and appears on the report
as the period ending date. Enter a different date if desired.
Currency Conversion: Currency conversion is assumed when you’ve opted to
consolidate account balances across productions and across currencies and the
conversion is done to the Base currency. The box defaults to B for convert to base
currency.
However, if you have a situation where you have several productions in a foreign
(i.e. local or native) currency that you specifically want to consolidate but still report
them in the native currency, select N and the system will NOT perform a conversion
and those native currency production combined account balances will be reported in
the native currency.
Exchange Rate: when a conversion to Base currency is appropriate and is
requested, a User has the further option of choosing to convert using the budget rate
or the current rate.
To Create an Export File, click its check box. A file with an extension of .VIS is
created (in addition to your printed report) that can be imported into a spreadsheet
program such as EXCEL.
Pressing enter after all selections initiates the report.
Entertainment Partners
Cost Reporting - Cost Menu • 23-5
Cost Transactions
Purpose: Print every transaction by production cost account in various formats
Required: Currency code, Production number
Defaults: Prints individual transactions, includes both cost and PO amounts,
excludes sets and set subtotals, for current year period, system date for report date,
no conversion to base currency, if conversion requested, use budget exchange rate
and use customized accounts names (versus generic ACT account names).
The Cost Transactions report provides the means of printing out every
transaction that has ever been charged to each detail account, with a variety of
options described below.
The report headings and columns are fixed and cannot be modified. The main feature
of the report is to list or group accounts by Account Type (EA, EB, EC, etc.) - see
“Cost Account Types” on page 9-16.
The following components of each transaction are printed for an account:
1.
account number and description;
2.
transaction description;
3.
transaction reference;
4.
vendor name;
5.
invoice number;
6.
P.O. number;
7.
source code;
8.
source date;
9.
transaction number;
10. transaction amount;
11. subtotal by account and other break totals.
Choose Cost, Cost Transactions from VISTA’s Main Menu.
23-6 • Cost Reporting - Cost Menu
Entertainment Partners
Currency: Enter the currency under which the accounting transactions were
reported. F12 or right-click in this field to conjure a panel listing all valid
currencies.
To report on multiple currencies, highlight the desired currencies from the scroll
panel.
Production: Enter the production(s) for which you want cost transactions listing.
F12 / right-click brings up a list of production numbers. An ‘A’ for All includes
every production number in the system. When more than one production is
requested, the system lists them separately; this report does not consolidate account
balances across productions.
Report Type: you can request a Detail report or a Summary report or Both. A
detail report prints every transaction that makes up an account balance; a summary
only shows the account balance.
Amount Type: Cost shows actual costs only; PO’s shows only your open PO’s
(i.e. PO commitments). Both includes both these amounts in the report. Running
the PO’s (only) report can be very useful when trying to reconcile your PO
commitments back to what is shown on your Production Cost Report.
Entertainment Partners
Cost Reporting - Cost Menu • 23-7
Set Reporting: Allows the User to include either a Detailed set report on the Cost
Transaction Report, a Summary of the Sets that includes only the balance, or None
at all.
Selecting Set Reporting Detail produces the option to Show Set Subtotals
(Yes or No).
Detail From / To: Enter a range of accounts to limit the report to that range. The
default blanks tell the system to include all production cost accounts balance sheet,
income and expense accounts are always excluded from this report).
Set: A set number (must be the combined location/set number) will limit the
reporting to the specified set only. The default blank includes all sets.
Period Ending: This defaults to the system’s current date and appears on the
report as the period ending date. Enter a different date if desired.
Cost Period: Current includes costs accrued within the current year period only.
All includes all costs accrued by the production since inception to date. Range
conjures a pair of From/To boxes in which to enter the year periods from which
costs are to be included.
PO Period: Current includes POs accrued within the current year period only. All
includes all POs generated by the production since inception to date. Or, enter a
range in the From – To fields to report specific year periods.
Currency Conversion: Selecting Base prints all account balances in Base
currency. If more than one currency has been selected for this report, this option
must be selected. The Native currency option can be chosen only when only one
currency has been selected. VISTA prints account balances in the currency in which
the transactions were originally entered.
Exchange Rate: If a currency conversion has been requested, indicate whether to
use the Budget or Current exchange rate.
Account Description From Master Chart of Accts: Yes tells the system to
use the standard / generic account names in the Account Control Table (ACT) versus
the customized account names in the G/L Masters.
To Create an Export File, click its check box. A file with an extension of .VIS is
created (in addition to your printed report) that can be imported into a spreadsheet
program such as EXCEL.
Press or click enter to print the report when all selections have been made
Cost Transactions Consolidation
The Cost Transactions Consolidation Report has all the features of the “Cost
Transactions” Reports. Additionally, this function will consolidate the reported
information across currencies and location/productions.
If more than one production or currency is requested, VISTA will produce one report
that consolidates costs and converts currencies as directed by the User.
This function will also print every transaction by production cost account, showing
the detail that supports the figures on the cost reports. In other words, if the User
produces a consolidated cost report, he or she can also produce a consolidated detail
report.
23-8 • Cost Reporting - Cost Menu
Entertainment Partners
Input the parameters of the report as described in the “Cost Transactions” section on
page 23-6 of this document.
Currency Conversion
If generating a report for more than one Currency, then the Currency must be
converted to Base.
If reporting in only one currency, then the report may be generated in either Base or
Native Currency.
Press enter to initiate the report.
Set Cost Report
Purpose: Print account or major account category balances by set with various
options.
Required: Currency code, Production number, Set number
Defaults: Includes PO commitments, all accounts, for current year period and uses
current system date for period ending date.
Entertainment Partners
Cost Reporting - Cost Menu • 23-9
The Set Cost Report prints out cost account balances by set. When selecting
several currencies, productions and sets, each will produce a separate report.
The report headings and columns are fixed and cannot be modified. The main feature
of the report is to list or group accounts by Account Type (EA, EB, EC, etc. - see
“Cost Account Types” on page 9-16).
The following components of each account are printed for an account:
1.
account number and description;
2.
current period actual cost;
3.
total actual cost to date;
4.
if requested, PO commitments;
5.
total costs (actual cost plus commitments);
6.
estimated costs complete production;
7.
estimated final cost (total costs plus estimate to complete);
8.
total budget;
9.
cost variance (budget minus estimated final cost). Unfavorable
variances are shown as negatives;
Choose Cost, Set Cost Report from VISTA’s Main Menu.
23-10 • Cost Reporting - Cost Menu
Entertainment Partners
Currency: Enter the currency under which the accounting transactions to be
reported were recorded in VISTA. F12 or right-click to display a panel listing of
valid currencies.
To report the records under more than one currency, F12 or Right click to display
the scroll panel and highlight the currencies to be reported.
Report Type: Request a Detail report or a Summary report or Both. A detail
report prints every account balance, a summary only shows the balances by major
account categories.
Production: Enter the production(s) for which Set information is desired. F12 or
right-click displays a list of production numbers set up in the system. An ‘A’ for
All includes every production number in the system.
When more than one production is requested, the system lists them separately; this
report does not consolidate account balances across productions.
Set: Enter the Set number(s)--must be the combined location/set number—to be
reported. F12 or right-click displays a list of Set numbers in the system. An ‘A’
for All includes every set number in the system.
Include PO Commitments: The default Yes shows PO commitments and adds
them to Total Cost.
Detail From / To: enter a range of accounts if you want to limit the report to that
range. The default blanks tell the system to include all production cost accounts
(balance sheet, income and expense accounts are always excluded from this report).
Year period: defaults to current year period. You can only go back to the first year
period of the previous month (i.e. a maximum of 8 weekly year periods) in your
reporting. Subject to this limit, enter the year period you want over the default year
period.
Period Ending: this defaults to the system’s current date and appears on the report
as the period ending date. Enter a different date if you wish.
Currency Conversion: Selecting Base prints all account balances in the Base
currency. If you’ve selected more than one currency for this report, you must select
this option. The Native currency option can be chosen only when one currency has
been selected. The system prints account balances in the currency in which the
transactions were originally entered.
Exchange Rate - if you’ve requested currency conversion, indicate whether you
wish to use the Budget or Current exchange rate.
Variance Amount Format: lets you choose if unfavorable variances are to be
shown as negatives or with various types of brackets.
Press / click Enter when you’ve made all your selections to print the report.
Episodic Cost
Purpose: Prints cost report customized for requirements of episodic TV
Required: Currency code, Episode Number
Defaults: Select current year period activity; every account balance; no currency
conversion; if conversion requested, use budget exchange rate; negative variances
with minus sign.
Entertainment Partners
Cost Reporting - Cost Menu • 23-11
The Episodic Cost report shows production costs for episodic TV series that
includes information pertinent to this show format, such the average cost of an
episode, the pattern budget established for an average episode, etc..
More specifically, the report gives the following information for selected episodes by
account or by major account category:
•
account number and description;
•
budgeted amortized costs to be allocated;
•
estimated final cost for amortized costs (EFAC);
•
actual costs to date;
•
total budgeted costs;
•
total estimated final costs (including EFC);
•
the total cost for all episodes selected for the report;
•
the average cost per episode based on the episodes selected;
•
the pattern budget
•
the variance between the actual average cost for an episode and the
pattern budget.
The report headings and columns are fixed and cannot be modified. The main feature
of the report is to list or group accounts by Account Type (EA, EB, EC, etc. see
“Cost Account Types” on page 9-16).
Choose Cost, Episodic Cost from VISTA’s Main Menu.
23-12 • Cost Reporting - Cost Menu
Entertainment Partners
Currency: enter the currency in which your costs are recorded. The report allows
you to select only one currency at a time.
Year period: defaults to current year period. You can only go back to the first year
period of the previous month (i.e. a maximum of 8 weekly year periods) in your
reporting. Subject to this limit, enter the year period you want over the default year
period.
Report Type: Detail prints every account balance; Summary sums up everything
by major account category (for each episode selected). Clicking the Both button
gives you both reports.
Currency Conversion: Selecting Base prints all account balances in the Base
currency from the Native (foreign) currency under which the costs have been
recorded. If you want the report to come out in the original currency, choose Native.
Exchange Rate - if you’ve requested conversion to Base, indicate whether you
wish to use the Budget or Current exchange rate for the conversion.
Variance Amount Format: lets you choose if unfavorable variances are to be
shown as negatives or with various types of brackets.
Amortization Account: enter the dummy production number that you’ve used to
collect and temporarily hold the episodic costs that couldn’t be charged directly to
the individual episodes on an on-going basis. Requesting your total amortized costs
gives you the budgeted amortizable costs and the EFC for those costs. Leave this
field blank if you don’t want to see this information.
Pattern Budget: enter the dummy production number used to hold the preestablished pattern budget for an episode for this show to see this information on
your report. Leave it blank if you don’t wish to see this information.
Summary Amortization Accounts - OPTIONAL - if you wish to see additional
amortized accounts at a summary level at the end of the report, enter the production
numbers.
Episode Number: enter the production number of each episode that you wish to
include on the report.
Pressing F12 or a right-click in any of the last four production number fields
displays a listing of all production numbers in your system. VISTA does not know if
the production number is used for amortizable costs, a pattern budget, or for a real
episode production number.
Episode Title: the production title in the chart of accounts is used unless you
override it with another in this field.
Director: enter the Director's name if you wish this additional information to appear
on the report.
# of Days: this is also additional information you can display on the report. The
number of filming days may be useful in comparing the cost of one episode with
another.
Atd, Bdgt, Efc: this report gives you the ability to compare the different levels of
cost of episodes against one another, against the average episode as well as against
the pattern budget. The cost levels at which this comparison can be made are:
Atd--actual costs to date;
Bdgt--budgeted costs, and;
EFC - estimated final costs.
The system default is Atd if the field is left blank.
Entertainment Partners
Cost Reporting - Cost Menu • 23-13
Lic Fee Reimb: enter the license fee from the network for each episode if you want
this information on the report. It will appear at the bottom of the report, followed by
the difference between the total episode cost and the license fee to allow you to
determine if each episode is over or under the license fee and reimbursement
amount.
Episode Weight: in calculating the average cost for an episode it is important to
consider factors that would distort the result. For example, if the first episode was a
one-hour pilot for a half-hour series, it should be given a weight of 2 versus the halfhour episodes’ weight of 1.This will produce the correct weighted average.
Press Enter when you’ve made all your selections to start the report.
Set Cost Consolidation
The Set Cost Consolidation Report offers the User all of the features described
in the “Set Cost Report” section on page 23-9 of this document. Additionally, the
Consolidated Set Cost function allows the User to consolidate costs by Set field
across multiple production numbers.
Input the desired parameters of the Set consolidation, and press enter to generate
the report.
23-14 • Cost Reporting - Cost Menu
Entertainment Partners
Memo Cost Report
The purpose of the Memo Cost Report is to allow the User to generate a report of
costs falling in specific ‘memo fields.’ The Memo Field is part of VISTA’s Chart
of Accounts, and is typically designated as F, F1, F2 or IN. The Memo field is
used to track various types of costs: labor costs; tax rebates; insurance claims;
Canadian taxes via Province; etc. The Memo Cost Report is valuable because it
offers the User the ability to report these various types of costs on a single report.
Review the “Insurance Free Field “ section on page 9-33 of this document for
detailed instructions on adding a Memo field.
Input the Currency, Production numbers and Report Type to be reported.
A specific Detail range may be designated.
Designate from one to four Memo fields to be included on the report. Up to 40 free
field codes can be included on a single report. When the first four Memo fields have
been input, press the Page Down key on the keyboard to advance to the next of ten
pages.
When all parameters have been input, press enter to generate the report.
Entertainment Partners
Cost Reporting - Cost Menu • 23-15
This page left blank intentionally.
23-16 • Cost Reporting - Cost Menu
Entertainment Partners
Chapter 24: Closing - Per Close
Menu
Overview
Closing your books--referred to in VISTA as Period Close--is a matter of stopping
to record transactions in one accounting period or year period and starting to record
them in the next one.
The most commonly used accounting method when it comes to year period in
production cost is weekly. Hence, typically, the month of, say, January 2001 would
consist of 4 or 5 normal accounting periods of 20010101, 20010102, 20010103,
20010104 and 20010105.
VISTA allows up to six week periods per month.
The Period Close feature in VISTA is therefore used for closing one year period
and opening the next one--e.g. closing 20010101 to open 20010102, closing
20010105 and opening 20010201.
The year period accounting convention is actually entirely up to you. You could for
example use a monthly cycle--in which case your year periods would be 20010101,
20010201, 20010301, 20010401 and so on. Of course then you would be closing,
say, 20010201 and opening 20010301 and not 20010202.
You will see that the VISTA function (Update Ledger Period) for closing a year
period and opening a new one defaults to the weekly method commonly used in
production accounting.
Entertainment Partners
Closing - Per Close Menu • 24-1
AND VISTA goes through all six weekly year periods for each month. It is therefore
entirely up to you to control the year periods that you will be using for your
accounting records.
And then there is the annual closing. This is the Balance Forward function that
closes a YEAR and starts a new one--so that your year periods will go from
2001xxxx to 2002xxxx. (See the Balance Forward section later in this chapter).
The VISTA Period Close menu command consists of two types of functions:
•
Reports that allow you to check that all is in order with your books--i.e.
they are in balance--before you close out one period, and;
•
The actual closing procedures performed by the system to update all
your records that result in a year period that has been closed and a new
one opened.
The Report functions are:
•
Positional Trial Balance;
•
Ledger Balance;
•
Ledger List/Bible, and;
•
Flex Ledger.
The Closing functions are:
•
Update Ledger Period, and;
•
Balance Forward.
One recommended closing procedure includes the following:
1.
running the above reports as well as the standard COST REPORTS
used in your normal weekly reporting;
2.
backing up your data, and then;
3.
closing the current year period and opening the new year period.
You will establish your own procedure or one that is in use by the studio. At a
minimum, the above standard VISTA functions will give you a satisfactory
procedure that will ensure you maintain adequate records of your production costs
with the required audit trail.
Positional T. B. Report
Purpose: Prints account balances set up by the user.
Required: Currency code, Report ID, selections for standard 3 information columns
Defaults: Reports summary information; for current year period; uses current
system date for period ending date; no page break for each account range, no zero
balance accounts and no export file.
The Trial Balance is a report that lists all of the general ledger account balances in
detail or in summary formats.
The Positional T.B. Report allows you as a user to define its structure so that it is
not merely a listing of all of your general ledger account balances. Setup,
Positional TB Table is the menu command used to define the report structure.
24-2 • Closing - Per Close Menu
Entertainment Partners
The production trial balance totals to zero, if all transactions and processing occurred
without errors.
You can print as many positional trial balance reports, in as many different formats
as you like. They can be run at any time not just during the period close. It is
recommended that you run the report(s) before you close your books for the year
period and review them for any mistakes in recording the period’s transactions.
Choose Per Close, Positional T. B. Report from VISTA’s Main Menu.
Currency: enter the currency under which the general ledger transactions were
recorded.
If you have more than one currency, you may select multiple currencies to produce a
consolidated report. Please note that a Consolidated Trial Balance will always be in
the Base currency.
Report ID: enter the trial balance report you want to use in this run by the name
given it under Setup, Positional TB Table.
Report Type: Detail prints out every account balance; Summary will sum up
account balances and print by major account category only.
Year / Month / Week: These 3 fields default to the current year period.
You can only request a report for weeks within the current month. In order to have a
trial balance for every closing, please make sure you print a final trial balance before
you close the current year/period.
Period End Date: this is the Period Ending Date that prints out on the report for
reference purposes. It defaults to the current week ending date. You need to change it
appropriately depending on whether you’re running a report for the latest year period
or going back to a previous year period (week).
Entertainment Partners
Closing - Per Close Menu • 24-3
Column 1 / Column 2 / Column 3: you can choose the accounting information
on your trial balance. It is limited to 3 columns and the choices that you have are
listed in the panel titled Column Choices. Make your choice by entering the letter
that corresponds with the balance listed in the panel.
The most commonly selected are A (Beginning Balance), B (Current Activity) and C
(Account (closing) Balance) but as you can see, there are quite a few other choices,
including two computed columns--one that gives the sum of column 1 and 2, and the
other, the difference between these 2 columns.
Page Break: requesting a page break with a Y will create a new page every time
the range of accounts changes. Range in this case means the separate account ranges
defined in creating your positional trial balance under Setup, Positional TB
Table. The default is for no page break.
Zero Balance: a Yes will print the accounts that have had activity but happen to
have a net balance of zero as of the date of the report. The default is to not print out
such accounts.
Create Export File: creating an export file allows you to process this information
in a spreadsheet. You need to click the check box to request the file.
Ledger Balance
Purpose: Checks that detail transactions records agree with summary records and
general ledger account balances.
Defaults: For current year period and perform all tests
The Ledger Balance function in VISTA performs a health check on your data.
Additionally, it prints a summary that allows you to review the year period’s
financial activities at a glance.
The three checks that it performs are:
1.
It checks that every transaction (A/P invoice entry, journal entry, petty
cash advance or accounted for) balances to zero;
2.
It checks that the total of all of the invoices not yet paid agrees with the
control total accumulated in the system’s A/P clearing account;
3.
It checks that the general ledger account balances for the year period
correctly reflect the accumulation of the accounting entries generated
by all entry transactions (through A/P, petty cash, journal entry, etc.)
Additionally, it gives you a snapshot of the current year period’s financial activity
with weekly transactions analysis of your entry system activities, PO’s added, bank
account transactions, control accounts activity, etc. Because of these checks on your
data’s integrity and completeness, it is imperative that Ledger Balance be run as a
standard procedure in closing your books.
Choose Per Close, Ledger Balance from VISTA’s Main Menu.
24-4 • Closing - Per Close Menu
Entertainment Partners
Note: A page will print if no exceptions are found so you will know the process has
been completed.
This function should be run every week. If you haven’t been doing this and require
that the default settings be changed, please contact a VISTA Customer Support
Representative to discuss the options available.
After the screen comes up, simply press Enter.
Ledger Balance prints out a report for any of the verification processes in which it
uncovers data exceptions and transactions that are out of balance.
It gives full details (account number, transaction number, etc.) and the sources of the
discrepancies as well as a total column that shows the amount of the difference.
If any of your reports shows that there is a difference, please contact your VISTA
Customer Support Representative. There are no menu choices that allow you to fix
your data. When there is a difference, the investigation and fix require the assistance
of Entertainment Partners.
Never ignore these differences and proceed with the close of a period and the
opening of a new period. Please call a customer support representative if you need
assistance.
If you’ve been running the Ledger Balance on a regular basis and this is the first
time the process has had with exceptions, chances are that it is something minor and
the repair process will be quick and simple.
The Ledger Balance can also be run through the System Services program. By using
System Services, you can automatically run the Ledger Balance as frequently as you
like without having to be present to start the process. For detailed instructions,
please see the section entitled HOW TO RUN SYSTEM SERVICES.
Entertainment Partners
Closing - Per Close Menu • 24-5
Ledger List/Bible
Purpose: Prints general ledger transaction details
Required: None for standard report
Defaults: For current period, all accounts, report date is system current date
Ledger List/Bible prints out an opening balance, every transaction posted to the
account for the specified period and a closing balance.
It prints out this accounting information for a specified range of accounts or for all
accounts (if the selection is Bible).
Where there are more than one currency, each one is printed on separate reports.
Choose Per Close, Ledger List/Bible from VISTA’s Main Menu.
Report ID: enter the name / identification of the report as created in Setup. F12 or
a right-click lists all the reports set up in the system.
Currency: enter the currency under which the ledger transactions were recorded.
Only one currency can be selected at a time.
Report Heading: Allows the User to name or title the report. The title input into
this field will appear at the head of the printed report.
Report Type: defaults to C for current period.
The Current Period option shows the balance of the account at the beginning of
the current year period, the transactions posted during that period and the account
balance at the end of that current period.
You can specify all accounts or an account range.
The YR/ PD Range option is not an unlimited selection of various year periods
from inception to date but rather of different (weekly) year periods within the same
month and the same year.
You can go as far back as the first year period of the previous month. You can
include all accounts or an account range.
24-6 • Closing - Per Close Menu
Entertainment Partners
The Bible option prints all year periods since inception.
The Current Year Period displayed on the screen is for your information only and
cannot be changed.
YR/ PD from / to: Enter the year period for reporting if you’ve selected Year
Period Range.
Period End Date: is the week ending date that appears on the report. You need to
change it depending on the options you’ve selected above.
Press Enter when you’ve made all your selections to start the report.
Restart Options - Currency / Page No.: if you encounter a problem while
printing a report (i.e. the printer jams), the system allows you to restart the report
without having to start from the beginning. Complete the screen exactly as you did
the first time you ran the report, then enter the currency and page number at which
you want the reprinting to start. For example, if your Ledger List is 200 pages long,
and the printer jammed after completing page 154, you would ask the system to
restart the report beginning at page 155.
FLEX Ledger Report
Purpose: Prints general ledger information in a flexible format and with various
data selection criteria.
Required: Currency code, Report ID
Defaults: For current year period, current system date for report date
This function allows you to run a Flex Ledger report as previously defined under
the Setup, Positional T.B./Ldgr Bible/List Maint menu command. Please refer
to this section of the documentation (page 9-19) for Set Up information.
Choose Per Close,Flex Ledger Report from VISTA’s Main Menu.
Currency: enter the currency under which the ledger transactions were recorded.
Only one currency can be selected at a time.
Report ID: enter the name / identification of the report as created in Setup. F12 or
a right-click lists all the reports set up in the system.
Entertainment Partners
Closing - Per Close Menu • 24-7
Year Period From / To: this option is not an unlimited selection of various year
periods from inception to date but rather of different (weekly) year periods within the
same month and the same year.
You can go as far back as the first year period of the previous month. Subject to
these restrictions, enter the year periods that specify the period range you want to
include in your report.
Period End Date: is the week ending date that appears on the report. You need to
change it depending on the options you’ve selected above.
The Current Year Period displayed on the screen is purely for your information
only and cannot be changed
Page break at new production: If you wish each production to begin on a new
page, enter an X in this box.
Press Enter when you’ve made all your selections to start the report.
Restart Options - Currency / Page No.: if you encounter a problem while
printing a report (i.e. the printer jams), the system allows you to restart the report
without having to start from the beginning again. Complete the screen exactly as you
did the first time you ran the report, then enter the currency and page number at
which you want the reprinting to start. For example, if your Ledger List is 200 pages
long, and the printer jammed after completing page 154, you would ask the system to
restart the report beginning at page 155.
Update Ledger Period
Purpose: Closes the (accounting) year period you’re currently working in and
opens the next year period.
Required: None--unless you’re not using the standard VISTA year period
sequencing.
Defaults: VISTA standard year period sequencing for the next 2 year periods
The Year Period conventions in VISTA are as follows:
1.
The weekly cycles consist of 6 weekly year periods per month, for 13
months per year;
Five weekly year periods are required per month to cover the months with
more than 28 days (4 weeks times 7 days) and a sixth year period for
the month provides for an extra year period if ever there is need to
isolate accounting entries outside of the normal entries.
The 13th month is to provide for those instances where the accounting
periods are based on thirteen months of four weeks each.
The normal year period numbering sequence when using weekly cycles are
using 2001 as an example:
Y/P 20010101 to 20010106
Y/P 20010201 to 20010206
Y/P 20010301 . . . . .
Y/P 20011201 to 20011206
Y/P 20011301 to 20011306
The monthly cycles consist of 13 months per year.
24-8 • Closing - Per Close Menu
Entertainment Partners
2.
The normal year period numbering sequence when using the monthly
cycles are, again using 2001 as an example:
Y/P 20010101
Y/P 20010201
Y/P 20010301
.....
Y/P 20011201
Y/P 20011301
3.
Although the month designation, as in 0101, 0203, 0706 is usually
used to denote January, February and July respectively in this particular
case, it does not have to used in this manner.
Y/P 20010101 can very well be used to denote April 2001 when March
2001, the end of the last fiscal year was 20001201. May 2001 would
then be 20010201, and so on.
Post-close accounting adjustments may be required on a monthly basis as
well as on a quarterly basis.
The year period numbering convention used in VISTA for post-close
accounting is as follows, using 2001 as an example and assuming that
the fiscal year coincides with the calendar year:
For monthly post-close:
20010190 is the January 2001 post-close year period;
20010290 is for February 2001;
20010390 for March 2001 and so on.
For quarterly post-close:
20010391 is for the first quarter;
20010692 the second quarter;
20010993 the third quarter;
20011294 the fourth quarter.
4.
The fiscal year for many organizations does not always coincide with
the calendar year. In those cases, the above year periods simply shift
with the chosen fiscal year period conventions.
The final step in the weekly or monthly closing process is to ‘update’ the ledger
period--closing the current year period and opening the new year period.
Choose the Per Close, Update Ledger Period command from VISTA’s Main
Menu to initiate the process.
If, upon starting the process, the system detects any unposted transactions in any of
VISTA subsystems, it warns you of the fact with the following panel:
Entertainment Partners
Closing - Per Close Menu • 24-9
The subsystems that have unposted transactions are listed in the panel.
At this point you can click OK to get the Update Ledger Period screen and then
either exit that screen to investigate the unposted transactions or continue with the
year period update regardless of the unposted entries.
If you choose the latter step, the system will ignore the unposted batches in closing
the current year period and opening the new year period. These transactions can then
be processed in the new year period.
The warning panel does not pop up if there are no unposted transactions.
The Update Ledger Period screen that comes up looks like this:
The Update Ledger Period screen displays the defined Year Periods. The Current
column displays the period that is active and the period that will follow. Only The
Current and Next Year Periods can be changed in the New column; the other Year
Periods displayed can not be changed. Press enter to have the system accept changes.
Remember that the system automatically defaults to the established year period
numbering convention. The year periods that are required for reporting when your
production begins. For example, it will automatically go into week 05 and 06, so
watch out for those in case you do not want to use them.
To change the year periods to the ones you want, simply type over what’s in the
fields.
24-10 • Closing - Per Close Menu
Entertainment Partners
Once you’ve run Update Ledger Period, what were current year period transactions
before are now prior year period transactions and can no longer be modified, updated
or changed. Therefore, review all the reports produced in the Per Close function
before you run this final step.
Press Enter to update the ledger period in your system and you will then be in a new
year period.
Balance Forward
Purpose: Closes out one year and opens up a new year
The Balance Forward process is designed to close out one fiscal/calendar year and
start a new fiscal year for accounting purposes.
You are reminded by the Update Ledger period process to run this program
whenever the year segment of your current year period is in one year (e.g. 2000) and
the year segment of the next year period is in the next year (e.g 2001).
The balances that VISTA carries forward into a new year are those of production
cost accounts (with Account Types of EA, EB, EC, etc.) and the balance sheet
accounts (with Account Types of A, L and C).
NOTE: Account types may be included or excluded from the Balance Forward
process by going to Set Up, Cost account types.
The balances that are closed out and not carried forward are those of income
statement accounts (those with Account Types of I and EX).
Choose Per Close, Balance Forward from VISTA’s Main Menu.
There are no options from which to choose; the system will display the year from
which the balance is carried forward and the year into which the balances are being
brought forward.
Press Enter to start the process.
A panel in the top right corner of the screen displays a running total number of
accounts that are being created by the system for the new year.
Entertainment Partners
Closing - Per Close Menu • 24-11
This page left blank intentionally.
24-12 • Closing - Per Close Menu
Entertainment Partners
Chapter 25: Util Menu
Overview
The items found in VISTA's UTIL Menu are not typical ‘accounting’ functions.
These items are included to assist production accountants in completing common
tasks.
These items are: Batch Modification, System Services, and Report
Services.
Batch Modification
Purpose: Modify the batch header information prior to posting a batch
Required: System Selection, Original Batch Heading, New Batch Heading
Defaults: None
Choose Util, Batch Modification from VISTA’s Main Menu.
Entertainment Partners
Util Menu • 25-1
System Selection
Choose the system into which the affected batch was entered: Ap for invoice
batches, Je for journal entry batches or P/c for petty cash batches.
Original Batch Heading
Input the Company, Currency, Bank and Batch in which the object batch was
entered; or F12 or right-click in the Batch field to display a list of unposted batches.
New Batch Heading
Input the desired Company, Currency, Bank and Batch name for the object
batch.
A User may not rename a QCBATCH or a DISTCHG batch.
Press enter to complete the process.
System Services
Purpose: Run system integrity checks immediately, at a specific time in the future,
or at a regular designated interval.
Required: Frequency
Defaults: Frequency - Never
By using the System Services function, a User can perform Ledger Balance and
Data checks, either upon demand or at pre-designated regular intervals.
Select Util, System Services from VISTA’s Main Menu.
25-2 • Util Menu
Entertainment Partners
Ledger Balance Check
The Ledger Balance function performs a ‘health check’ on the input data by
verifying that the detail transaction records agree with summary records and general
ledger account balances. Additionally, the Ledger Balance produces a summary
that allows review of the year period's financial activities. More information
regarding “Ledger Balance” functions may be found on page 24-4 of this document.
Frequency: Select one of the following choices from the drop-down menu:
Daily, Never, Now, One Time or Weekly.
Day: If either One Time or Weekly is selected as the Frequency, choose a day of
the week from the Day drop-down menu.
Time: Enter a valid time (between 1 and 12) and indicate if am or pm is desired.
Data Check
Commonly referred to as a BCheck, the Data Check performs en error check
routine. Running a Data Check at regular intervals can prevent larger, more
complex problems with your data from occurring at a later date. EP Customer
Support recommends a daily data check.
Frequency: Select one of the following choices from the drop-down menu:
Daily, Never, Now, One Time or Weekly.
Day: If either One Time or Weekly is selected as the Frequency, choose a day of
the week from the Day drop-down menu.
Time: Enter a valid time (between 1 and 12) and select AM or PM. Path: Enter the
path to the data to be checked. Typically, the data will reside at c:\disc\db\. To
check all data files, specify data in the directory by entering the four digit VISTA
license number followed by *.* .
Click on the OK button to begin the process or accept the input.
Entertainment Partners
Util Menu • 25-3
Report Services
Purpose: Opens ReportView to read or print reports created or imported therein.
Required: None
Defaults: None
Report View displays a screen of reports created in your current session.
ReportView is also used in conjunction with Interfaces functions to import and
print payroll edit reports transmitted from the Entertainment Partners payroll
computer.
Choose Util, Report Services from VISTA’s Main Menu.
Viewing reports in ReportView
Information may be sent to ReportView in different ways. A User can send a
VISTA report to ReportView by selecting ReportView as the destination printer in
the print dialogue box. A User may import data files into VISTA from an outside
source, as is the case with Modem of Edit procedure. To update the list select file,
Update.
25-4 • Util Menu
Entertainment Partners
Printing from ReportView
Once a report has been accessed through ReportView, it can be printed by clicking
the printer icon or selecting File, Print.
•
The entire active report can be printed by clicking the All button.
•
Clicking the Selection button prints active or highlighted pages.
•
Clicking Pages and designating a range in the From - To fields will
print the specified range of pages.
Clicking the Setup button escorts the User to a Print Setup window in which the User
can designate Printer, Orientation and Paper Size and Source.
Click OK to send the report information to the designated printer.
Entertainment Partners
Util Menu • 25-5
This page left blank intentionally.
25-6 • Util Menu
Entertainment Partners
Chapter 26: Interfaces
Communication
Overview
The Interfaces section of the VISTA main menu contains programs that allow data
to be transferred between VISTA systems and between VISTA and various other
systems.
Payroll, Get Report/Data
The VISTA software will dial via modem into Entertainment Partners payroll
computer to pick up electronic edits or payroll files. Access the Modem Of Edits and
Location Check Print through Interfaces, Communication, Payroll, Get P/R Edit/
Invoice.
Entertainment Partners
Interfaces • 26-1
Modem of Edits
Required: Modem, VISTA Payroll History Reporting System programs, EP
computer access established via EP Marketing department.
VISTA’s Modem of Edits function benefits the User by providing the User with
access to payroll edits; information generated by Entertainment Partners Payroll
department, that would otherwise require physical transportation from EP offices to
the User’s location.
Get Report
Selecting Interfaces, Communication, Get Report/Data will display a Login
window into which the User must input his or her User Name and Password,
both of which are established by the EP Marketing Department.
Input the User Name and the Password, and click OK to initialize modem
connection.
NOTE: Passwords are typed in uppercase
If no files are found, VISTA will notify the User that no files are available.
26-2 • Interfaces
Entertainment Partners
A likely reason a User would receive this message is that the show’s EP Paymaster
has yet to post payroll for that show to EP’s Remote Access Server (RAS). The
show’s Paymaster can advise Users when data for their show has been posted to the
RAS.
When edit files are found, VISTA will display a message informing the User that a
file transfer is in progress. VISTA will download all available files to the
Disc\Download directory.
A message will notify the User that the data transfer has been successfully completed
and display the number of downloaded files.
When the transfer is complete, the edit report data will have been written to the
User’s hard drive, in the Disc\Download directory.
The next step in the process is to access the reports via the Report Services
ReportView function.
Printing Modemed Edits
Once the edit files have been successfully transferred from EP’s Payroll computer to
the User’s VISTA system, the User must translate the electronic edits into a format
suitable for reporting purposes. This is accomplished through the Util, Report
Services function.
Select Util, Report Services from the VISTA toolbar.
Entertainment Partners
Interfaces • 26-3
If there are no current report files other than payroll edits, the message ‘No report
files are found’ may appear. This is acceptable, press OK. The VISTA
ReportView screen will appear. From the VISTA ReportView toolbar, select File,
Update.
A pair of dialog boxes will appear. Select OK on both dialog boxes.
These boxes notify the User that the import may take more than just a few minutes.
VISTA ReportView will decompress all available files in the disc\download
directory. An information box will advice the User when the Update is complete.
26-4 • Interfaces
Entertainment Partners
To view and print the report, return to the ReportView toolbar and select File, List.
The payroll edit report will appear in the ReportView window.
Only one payroll edit may be viewed or printed at a time. If multiple edits have been
downloaded simultaneously, selecting File, List from the ReportView toolbar a
second time will display a scroll panel where the user can select the next report for
viewing or printing. Continue until you have printed all the edits.
If there are no files found in the import directory, a warning message will appear.
This message indicates that the files may have been written to a different directory.
If this message is received, verify that a disc\download\ directory exists. The files
being transported and unzipped are in a *.rzf format. Once the files are unzipped the
*.rzf files are deleted and changed to *.vdd and *.vde in the Windows\temp
directory. Contact Entertainment Partners Customer Support for assistance.
Importing edits into ReportView creates files in the system's Temp directory. Upon
exiting VISTA, a message will appear giving the user a choice to either save or
delete.
It is recommended that the User click Ok to delete the Temp files.
In the instance that the User has imported the edit files into ReportView, but has not
printed the edit reports, the User must save the report files in the Temp directory for
review at a later time. Click Select… and highlight the edit reports to be saved. The
saved files can be accessed through ReportView.
Entertainment Partners
Interfaces • 26-5
Location Check Print
Purpose: Allow Users to print the production’s payroll checks at the production’s
accounting office.
Required: VISTA Payroll History Reporting System, MICR toner, Check Stock
VISTA's Location Check Print enables a production accountant to print a
production's payroll checks at the accounting office. Information from
Entertainment Partners is transferred to the User's hard drive from which checks are
generated. (More information regarding “VISTA Payroll History Reporting System”
may be found in the P/R chapter of this document, on page 15-1)
Get Data
The first step of the procedure is to pick up the electronic payroll invoice file from
the EP RAS computer. From the main VISTA toolbar, select Interfaces,
Communication, Payroll, Get Report/Data.
A message from VISTA will notify the User that VISTA is connecting with the EP
computer.
Upon achieving the connection with EP, the EP computer will request a Logon
identification code from the User.
26-6 • Interfaces
Entertainment Partners
In the fields marked User name and Password, input the log-on name and secret
code as established by EP Marketing Department at the time that the production's
Location Check Print capabilities were established. NOTE: The passwords must
be typed in uppercase letters.
EP will then connect VISTA to the proper payroll directory and initiate a search of
the computer for payroll files.
When files are found, VISTA will display a message informing the User that it is
Receiving Data Files. VISTA will download all available files to the
Disc/Download directory. Another message will notify the User that the file
transfer has been successfully completed.
When the transfer is complete, VISTA will automatically disconnect from the EP
computer.
Entertainment Partners
Interfaces • 26-7
The next step in the Location Check Print procedure is performed through the P/R,
Invoice Processing, P/R Receive function. Refer to the “Payroll Receive”
section on page 15-2 for detailed information.
Setup
Choose Interfaces, Communication, Setup from VISTA's toolbar.
The information input into this window enables VISTA modem access to
Entertainment Partners' RAS. In most cases, a User's VISTA software will be
delivered to the production with all data input into this window. However, if a
production changes locations or moves offices, it may be necessary to modify some
of this data.
Area Code: Input into this field the area code from which VISTA will be dialing
into EP.
Prefix: If the phone lines of the production accounting office require a prefix
number to dial an outside line (commonly a 9), input that prefix here. A comma
26-8 • Interfaces
Entertainment Partners
following the prefix will cause a slight pause to establish an outside dial tone
between the prefix and the modem number
Long Distance Code: Input a 1 to proceed the area code and modem number. (If
the production were dialing EP from a foreign country, the United States’s country
code would also be input into this field.)
Import Directory: c:\disc\download\ Do not change.
Export Directory: c:\disc\upload\ Do not change.
Net Driv.: Q: Do not change. Click OK to modify the data in this window.
Data Transfer
Purpose: Consolidate data from one VISTA Location system to a VISTA Host
system, or between a Host and a VISTA corporate system.
Required: Template
This option is used to transfer data between VISTA systems or to send/receive data
from Studio/Corp systems.
Guidelines for successful VISTA to VISTA Data Transfer
Entertainment Partners
1.
Perform a system save prior to performing a transfer.
2.
Both VISTA systems must be in the same year period.
3.
Choose a time in the accounting cycle that is consistent in both
systems; i.e. before closing a year period.
4.
Keep Host system updated with any changes to the Location system’s
Setup menu; e.g. additions to the Chart of Accounts.
Interfaces • 26-9
5.
A send may be transferred multiple times, but a receive may be posted
only once.
6.
The Host system must share with the Location system the following
Setup items:
•
Company Numbers,
•
Currencies,
•
Bank Codes,
•
Petty Cash Codes
•
Identical Chart Of Account
(Refer to these items under the “Setup Menu” section of this document,
page 9-1, for detailed instructions.)
Host System
The Host system; the VISTA system receiving data must be equipped with a unique
vendor template (a two-digit alpha code) and License number assigned by
Entertainment Partners.
Location System
The Location System(s); the VISTA system sending data must be equipped with a
unique vendor template and License number assigned by Entertainment Partners
Data Transfer Options
Choose Interfaces, Data Transfer from the VISTA main menu. The following
screen will appear:
To see a scroll panel of available choices, press F12 or right-click in the Template
field. The following window will appear:
26-10 • Interfaces
Entertainment Partners
SENDing Data: EPUPLD.DLL: Creates a file(XXXXEP.OUT) to be sent to the
VISTA Host system.
RECEIVEing Data: EPDNLD.DLL: Receives a file XXXXEP.OUT file from
Location VISTA system. This process must be done before the file can be posted
using the POST option.
POSTing Data: EPPOST.DLL: Post information from VISTA Location to
VISTA Host system’s General Ledger.
Select the desired option, and press enter to return to the Data Transfer window.
VISTA Location System(s)
Send: EPUPLD
Select Send: EPUPLD.DLL from the template module. VISTA will begin
searching the data files for records that have not been previously sent in order to
create the new transfer file. At the end of processing, a Transfer Report will be
created and the following screen will appear:
Entertainment Partners
Interfaces • 26-11
A file will be created in the C:\DISC\UPLOAD directory with the name
XXXXEP.OUT, in which the XXXX is the VISTA System license number. This file
can then be transmitted via modem, e-mail, or diskette to another VISTA System.
VISTA Host Procedures
RECEIVE: EPDNLD
After pressing enter, the system will look for XXXXEP.OUT in the
C:\DISC\DOWNLOAD directory. The system will display a screen that indicates
how many records have been downloaded:
Post: EPPOST
After pressing enter, the Upload Options screen is displayed.
Subsystems: By choosing AP/PC, all of the Vendor history files will be updated.
Choosing Ledger will post transactions to the General Ledger file. Selecting
26-12 • Interfaces
Entertainment Partners
Budgets/EFC will update the budget information. One or more of these options
must be selected. The system will default to all three options selected.
Year period: VISTA defaults to the current year period. Depending upon a
Studio’s preference, a User may post to one of the PCL (post close ledger)
periods.
Currency Conversion: The system will default to Native currency.
Options: A User may select to post sets and memo fields or, if these options are
not selected, post only to the detail level.
When all choices have been made, click on Done or press enter to begin
processing. If there are no errors, you will get the following message:
Choosing No will produce a detail report without posting the data. Selecting Yes
will complete the post as well as produce the detail report. The following screen will
appear:
VISTA will not post a data
transfer in which errors are
detected.
Entertainment Partners
If the system detects any errors, the option to print a report of all transactions or only
those with errors is available. The posting process will not complete until all errors
have been corrected. A legend in the top left corner of the report will explain the
error codes assigned to each line item on the report. Review the error reports, make
the necessary corrections and begin the post again.
Interfaces • 26-13
Purchase Card Interface
Overview
Purchase Card Interface allows VISTA Users to establish purchase card accounts
for their petty cash vendors. Purchase cards may be used instead of cash at preapproved locations.
Electronic reports of purchases can be retrieved via modem connection with the
institution that issued the card. The reports detail purchases made with the cards,
and may be viewed and edited by the production accountant before being imported
into VISTA. Once the reports are imported, the information may be edited again
before being merged into VISTA’s Petty Cash module. Once merged into Petty
Cash, the information may again be edited. At this point the transactions will be
treated as VISTA treats any other petty cash transaction.
VISTA’s Purchase Card Interface will save the User time by allowing purchases
to be recorded electronically, instead of waiting for the petty cash vendor to return
his or her envelope and receipts. Additionally, Replacing cash advances with
purchase cards will significantly reduce the risks inherent in holding large amounts
of cash on location.
Familiarity with VISTA’s
Petty Cash and Vendor
Entry functions is essential in
using Petty Cash Interface.
Detailed explanations for establishing A/P vendors and the setup of Purchase Card
Vendors can be found in the sections “Vendor Entry” on page 11-2.
Receiving the Purchase Card Interface File
Select Interfaces, Purchase Card Interface to receive the transfer file into
VISTA
26-14 • Interfaces
Entertainment Partners
Select the Purchase Card Custodian by using F12 or the right button of the mouse
in the Company field.
The Batch number is a sequence of eight alpha/numeric characters that will be used
to identify the file to be transferred.
The Transfer File will have been received via modem from the institution issuing
the cards and must reside on the local drive, usually in C:\disc\download.
The Custodian Account is
established in Setup, Petty
Cash.
The Custodian Account number is brought forward from the Petty Cash
Custodian setup, and cannot be changed here. If it becomes necessary to change
this account number select Petty Cash from the Setup menu and modify the
appropriate custodian
When this screen has been completed press enter:
Purchase Card Interface Errors
There are two types of errors: Fatal and Reconcilable.
Fatal Errors
If fatal errors exist, a report will be printed with a legend for the numeric error codes.
Fatal errors must be corrected by the institution creating the file. Once the file has
been corrected it must be processed again by the Vista user.
Reconcilable Errors
Reconcilable errors are to be corrected by the VISTA User. VISTA will produce a
report that will include a legend for the numeric error codes
A dialog box will appear advising the User if either type of error exists in the file
being transferred. The User will be given the choice of printing a report of the
errors, including a legend of error codes.
Entertainment Partners
Interfaces • 26-15
Click Yes to print the error report. Click No to proceed directly to the reconciliation
screen where reconcilable errors may be corrected before updating the VISTA Petty
Cash module.
The fields that may be corrected are:
•
Account Number;
•
Voucher;
•
Description.
The fields containing errors will be highlighted in red.
All other fields are displayed in blue and may not be modified.
To correct an invalid account number, key in the entire account number and tab
through to the end of that line.
26-16 • Interfaces
Entertainment Partners
To use the suspense account number, click on the box to the left of the line
being corrected. Tab through the line, modifying the fields where applicable. If the
red highlight remains after tabbing through to the end of the line, the account number
input is not valid. Verify the account number, and correct as necessary.
Use the Page Down key to correct more than one page of transactions.
After all errors have been corrected press enter. A dialog box will ask the User if
the corrections are to be made to the PCX file.
Click Yes to update the Petty Cash module of Vista with these purchase
transactions, or click on No to return to the reconciliation screen to make further
corrections.
Purchase Card Interface: Final Report
When the User has updated the Petty Cash module, VISTA will offer the User the
opportunity to print a final report of the Purchase Card Interface.
Click Yes to produce a final error-free report. Click on No to proceed without
printing the report. Either response will initiate the process by which the Purchase
Card data is interfaced into VISTA’s Petty Cash system.
Entertainment Partners
Interfaces • 26-17
Purchase Card Interface into Petty Cash
An information box will notify the User that the transfer into the Petty Cash module
of Vista has been completed:
The transactions have now been transferred into VISTA, and can be handled in the
same manner as any other petty cash transaction. In order for the costs to be updated
with these purchase transactions, they must be audited and posted.
These Purchase Card transactions are now available in the Petty Cash module of
VISTA under the assigned Batch Name. The Batch Name is displayed in the
upper left-hand corner of the reports.
Further editing of the transactions’ account numbers and descriptions may be made,
if necessary, in VISTA’s Petty Cash module. Select Petty Cash, Petty Cash
Entry, select Function: Modify, and change as needed. Detailed instruction
regarding these features can be found in the “P/C Menu - Petty Cash” chapter on
page 16-1.
26-18 • Interfaces
Entertainment Partners
Chapter 27: Preferred Equipment
List
Overview
This chapter outlines the hardware and software that are required or recommended
for an efficient and stable environment on which to run VISTA. These specifications
will change as hardware and software upgrades occur. Please call EP Customer
Support whenever planning to add hardware. The following pages outline the
VISTA requirements as of the time of publication.
VISTA / Microsoft Windows operating systems
Before VISTA install can be initiated, the following equipment and software must be
installed.
Please review this Preferred Equipment List before installing VISTA
Accounting. It is important to have all of the applicable equipment, software and
documentation at hand prior to installing Vista.
General
Entertainment Partners
Win 95
Windows 98
Win NT
Windows ME
Windows 2000
H A R D W A R E
Pentium II class 300mz or
above with a minimum of 64mb
of RAM (for Win NT - a
minimum of 64mb of RAM) and
800mb free on the hard drive.
Ensure the motherboard has no
less than 256k of on-board
cache. (This description does
not take into account the
various applications other than
Vista that might be installed on
the computer.)
Any machine approved by
Microsoft for the operation of
Win 95 or Windows 98.
Example: Compaq, IBM,
AST, Hewlett Packard or
other name brands.
Preferred Equipment List • 27-1
Standalone
Server
(to be used with
connected Work
stations)
Workstation
Hard Drives
Monitors
Modems
Printers
Win 95
Windows 98
Win NT
Windows ME
Windows 2000
Win 95
Windows 98
Win NT
Windows ME
Windows 2000
Novell
Win 95
Windows 98
Win NT
Windows ME
Windows 2000
Novell
Win 95
Windows 98
Win NT
Windows ME
Windows 2000
Win 95
Windows 98
Win NT
Windows ME
Windows 2000
Novell
Win 95
Windows 98
Win NT
Windows ME
Windows 2000
Win 95
Windows 98
Win NT
Windows ME
Windows 2000
27-2 • Preferred Equipment List
Pentium II class 300mz or
above with no less than 64mb
of RAM and a minimum of
400mb of free hard drive
space.
Pentium II class 450mz or
above with no less than 64mb
of RAM and a minimum of
800mb of free hard drive space
(larger shows require more disk
space)
Pentium II class 300mz or
above with no less than 64mb
of RAM and a minimum of
100mb of free hard drive
space. (For speed, install
Windows on each workstation’s
hard drive.)
Stand Alone, Server or
workstation - a minimum of 4.3
GB
See General section above.
See General section above.
See General section above.
See General section above.
A monitor that supports
800x600 non-interlaced
resolution. (interlaced monitors
flicker, and may give the User
headaches over time)
See General section above.
28.8 BPS modem is minimum.
A 56k or above external
modem is preferred. (Needed
for remote control support
and/or electronic transfer of
Payroll/Edits)
US Robotics Sportster
Practical Peripherals
Motorola
Hayes
A PCL5, PCL6, or Postscript
printer that supports Postscript
level 2 with 8mb of RAM.
For location payroll check
printing, MICR toner is
required.
(Note: EP strongly suggests
PCL5 and that the print engine
speed be at least 8 pages per
minute)
HP 4 series or above
HP 4000 series
Lexmark 4039 10-16L plus
or equivalent
Entertainment Partners
Backup Units
Network Interface
Cards
Win 95
Windows 98
Win NT
Windows ME
Windows 2000
Novell
Win 95
Windows 98
Win NT
Windows ME
Windows 2000
Novell
Network Cabling
Win 95
Windows 98
Win NT
Windows ME
Windows 2000
Novell
UPS
(uninterrupted
Power Support)
Battery Backup
Win 95
Windows 98
Win NT
Windows ME
Windows 2000
Novell
Entertainment Partners
A backup system capable of
saving the entire capacity of the
standalone or server’s hard
drive.
Any line of internal or
external storage device:
tape drive, portable Zip/Jazz
Cartridge Drives
10baseT or 10base2, 16 or 32
bit network interface cards.
Note: If using 10baseT (RJ45
connectors) supply a hub to
configure the network.
Intel EtherExpress 16 or
16tp
Intel EtherExpress Pro 10+
Combo cards, with coaxial or
RJ45 connectors.
3Com Combo Cards, with
coaxial or RJ45 connectors
~ PCMCIA ~
3Com or MegaHertz
RJ45 10baseT or Coax
RG58 thin net with 50ohm
terminating resister and T
connectors.
An Ethernet topology is
preferred. Ethernet cabling
would consist of data grade
level 5 unshielded, twisted pair
or 10baseT with a Hub; or
RG58 thin Ethernet coax cable.
If using RG58 cabling, T
connectors and 50ohm
terminators are needed.
A battery backup/power surge
protector is suggested when the
computer(s) is in a remote
location where the integrity of
the electrical power supply is
questionable and the production
environment mandates that
there be no down time.
APC - American power
conversion
Tripp-Lite
NSSI - (successor to Elgar
Systems)
Preferred Equipment List • 27-3
Operating System Win 95
Windows 98
Win NT
Windows ME
Windows 2000
Remote Access
Win 95
Software
Windows 98
Win NT
Windows ME
Windows 2000
Uninterrupted
Win 95
Power Source
Windows 98
Win NT
Windows ME
Windows 2000
Data
Win 95
Compression
Windows 98
Win NT
Windows ME
Windows 2000
27-4 • Preferred Equipment List
S O F T W A R E
Vista runs only under Microsoft
Windows. Depending on the
environmental demands, make
sure to use the appropriate
version of Windows.
Remote Control Software
Windows peer-to-peer &
Netware networking
capability
Norton PC Anywhere32 for
Win 95, Windows 98 or NT.
Carbon Copy version 3.0
UPS Monitoring Software
Power Chute, Power Safe
Data compression
software/utility
DISCZIP data compression
utility is included in your
VISTA software package.
(Note: do not use disk
compression software to
compress the hard drive’s
space! - i.e. Stacker, Drive
Space, Double Space,
Speed Store, etc.)
Entertainment Partners
Chapter 28: Glossary of Terms
Account Type
The definition of a section of the Chart of Accounts, such as Assets, Below-the-Line
Production Costs, etc.; accounts with a given type must be grouped together
(contiguous) within the Chart of Accounts.
Account Type Code
The unique code (one or two digits, numeric or alpha) that identifies an Account
Type.
Batch
A group of similar transactions (invoices, journal entries, etc.) for one control-field
combination (Company, Bank, Currency, etc.) entered and posted under one batch
ID at one time.
Batch ID
The identifier for a batch; becomes a permanent part of each transaction in the batch.
Blue
Menu choices in blue are not available; fields displayed in blue are not editable.
Checkbox
One form of option in dialog boxes or windows; is a square box followed by a
description; an X in the box means the option is selected, a blank in the box means it
is not selected.
Click
Press the left mouse button once and release it, usually after moving the mouse
cursor to a particular spot.
Dialog Box
A window that displays information such as error messages, printer selection, etc.
Entertainment Partners
Glossary of Terms • 28-1
Double-click
Move the mouse cursor to a particular spot and click the left mouse button twice
Drag
Position the mouse cursor on an object (such as a scroll button, or window), hold
down the left mouse button and move the object to a new location or to display
information you need, and release the left mouse button.
Enter Key
Indicates a transaction, change, or request is complete and ready to be recorded or
acted on or performs the action of the highlighted button in dialog boxes or scroll
panels.
F11
Press F11 in a filled-in account field to display the account’s description and
balances.
F12
Press F12 in any applicable field to display a scroll panel of valid choices. Rightclicking the mouse in the same field produces the same results.
Header Account
A summary account in the Chart of Accounts to which distribution is never coded.
Header Accounts exist to give structure and definition to the Chart. Examples:
Assets, Cast, Camera.
Memo fields
Insurance and Free fields. These are user-defined fields.
Menu Bar
The horizontal strip at the top of a window just below the Title Bar; contains menu
options for that window or application. Clicking on an option in the Menu Bar “pulls
down” or reveals that menu’s choices.
Red
Invalid or incorrect fields are highlighted with a red background after an error
message has been displayed explaining the problem. You can enter or correct data in
a red field.
Right-click
Click once with the right mouse button. The only right-click operation in VISTA
displays a scroll panel of valid choices for the field you right-click on. The keyboard
equivalent of right-click is F12.
28-2 • Glossary of Terms
Entertainment Partners
Tab
Pressing the Tab key moves the cursor forward from field to field or from object to
object; Shift-Tab moves backward.
Title Bar
The horizontal strip at the top of a window which describes the contents or purpose
of the window; contains the Control-menu button at its left end and the Minimize
and Maximize/restore buttons at its right end (if they are present).
Entertainment Partners
Glossary of Terms • 28-3
This page left blank intentionally.
28-4 • Glossary of Terms
Entertainment Partners


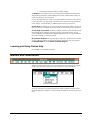
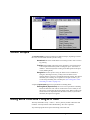
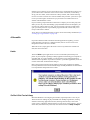
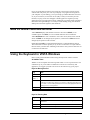


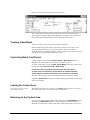


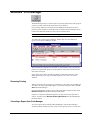
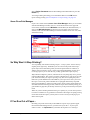
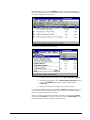
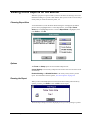

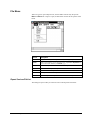
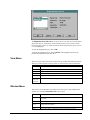


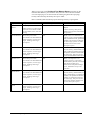
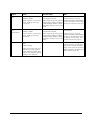


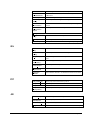


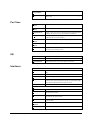


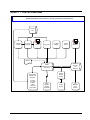


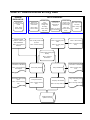


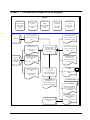
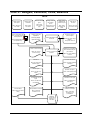


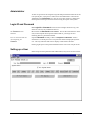


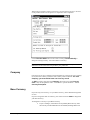

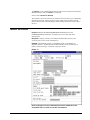


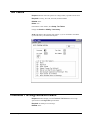
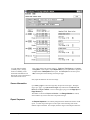


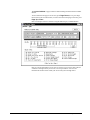

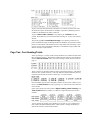
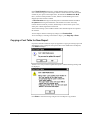
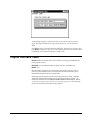


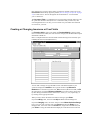

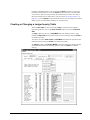
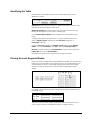
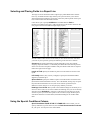
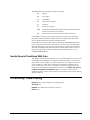
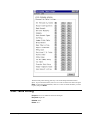


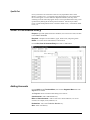


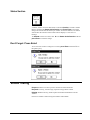
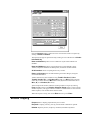


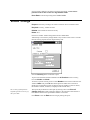


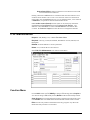


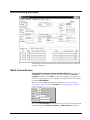
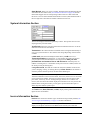


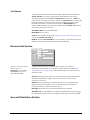
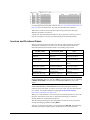

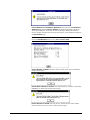


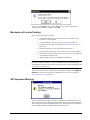

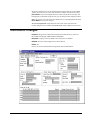


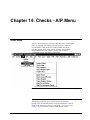

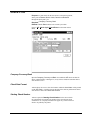


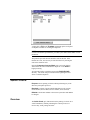


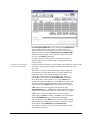

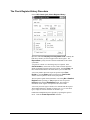


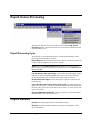
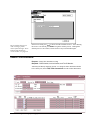


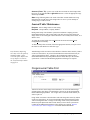


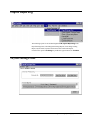
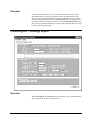

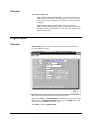


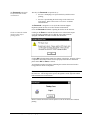


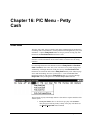


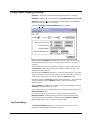

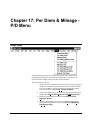
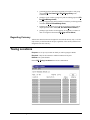


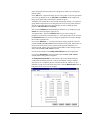


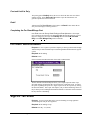
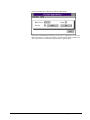


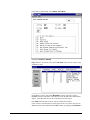


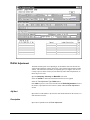

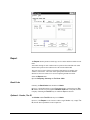

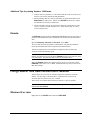

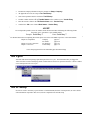
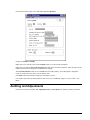
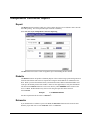


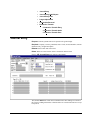

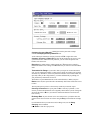


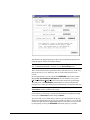
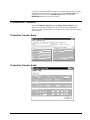


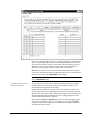
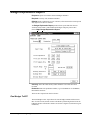

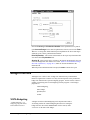
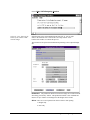
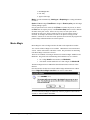
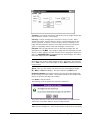


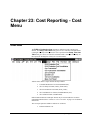


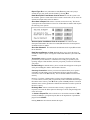


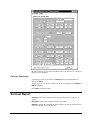


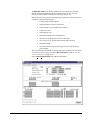
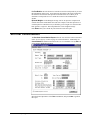


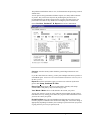

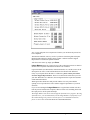
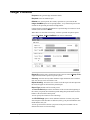
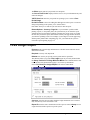


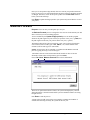


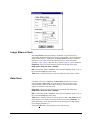
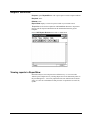
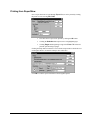


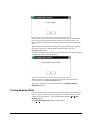
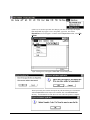


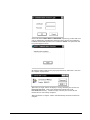
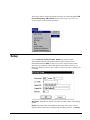
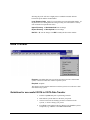
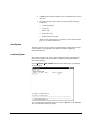
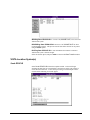
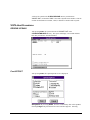
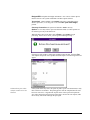

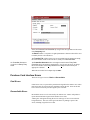
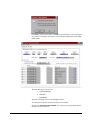
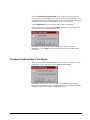
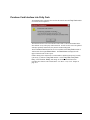


![[WAP035] [Evaluating Twittervane] Project Final Report](http://vs1.manualzilla.com/store/data/005882807_1-a2020170b6b6795bf72e9c3d683c54a5-150x150.png)