1
GDA Developer Guide
Release 8.24
Diamond Light Source
November 12, 2012
CONTENTS
1
Introduction to the GDA
1.1 Aims of the framework . . . . . . . . . . . . . . . . . . . . . . . . . . . . . . . . . . . . . . . . . .
1.2 Design overview . . . . . . . . . . . . . . . . . . . . . . . . . . . . . . . . . . . . . . . . . . . . .
1.3 Major design concepts . . . . . . . . . . . . . . . . . . . . . . . . . . . . . . . . . . . . . . . . . .
2
GDA installation
2.1 Introduction . . . . . . . . .
2.2 Installation Folder Structure .
2.3 Configuration Folder Structure
2.4 Starting to develop the GDA .
3
3
3
3
.
.
.
.
5
5
5
6
10
3
Jython Script types
3.1 Configuration . . . . . . . . . . . . . . . . . . . . . . . . . . . . . . . . . . . . . . . . . . . . . . .
3.2 Adding a Script Queue to the Configuration . . . . . . . . . . . . . . . . . . . . . . . . . . . . . . .
3.3 Linking Scripts and the GUI . . . . . . . . . . . . . . . . . . . . . . . . . . . . . . . . . . . . . . .
11
12
12
13
4
Writing new Device classes in Jython and Java
4.1 Introduction . . . . . . . . . . . . . . . . . . . . . . . . . . . . .
4.2 The Scannable interface and ScannableBase classes . . . . . . . .
4.3 Description of the Scannable properties and relations between them
4.4 Add a new device to the server . . . . . . . . . . . . . . . . . . . .
4.5 Examples of other Scannable classes and tests in GDA . . . . . . .
4.6 Demonstrate use of Scannable in terminal . . . . . . . . . . . . . .
.
.
.
.
.
.
.
.
.
.
.
.
.
.
.
.
.
.
.
.
.
.
.
.
.
.
.
.
.
.
.
.
.
.
.
.
.
.
.
.
.
.
.
.
.
.
.
.
.
.
.
.
.
.
.
.
.
.
.
.
.
.
.
.
.
.
.
.
.
.
.
.
.
.
.
.
.
.
.
.
.
.
.
.
.
.
.
.
.
.
.
.
.
.
.
.
.
.
.
.
.
.
.
.
.
.
.
.
15
15
15
16
17
19
19
Swing Client GUI development
5.1 Introduction . . . . . . . . . . . . . . . . . .
5.2 Writing the Swing GUI component . . . . . .
5.3 Adding the new component to the GDA client
5.4 CORBAising the object . . . . . . . . . . . .
.
.
.
.
.
.
.
.
.
.
.
.
.
.
.
.
.
.
.
.
.
.
.
.
.
.
.
.
.
.
.
.
.
.
.
.
.
.
.
.
.
.
.
.
.
.
.
.
.
.
.
.
.
.
.
.
.
.
.
.
.
.
.
.
.
.
.
.
.
.
.
.
21
21
21
22
22
6
RCP Client GUI development
6.1 Introduction . . . . . . . . . . . . . . . . . . . . . . . . . . . . . . . . . . . . . . . . . . . . . . .
6.2 The Experiment Perspective . . . . . . . . . . . . . . . . . . . . . . . . . . . . . . . . . . . . . . .
25
25
25
7
Remoting
7.1 CORBA in the GDA . . . . . . . . . . . . . . . . . . . . . . . . . . . . . . . . . . . . . . . . . . .
7.2 Alternatives to CORBA . . . . . . . . . . . . . . . . . . . . . . . . . . . . . . . . . . . . . . . . .
29
29
33
8
GDA configuration
8.1 Spring configuration . . . . . . . . . . . . . . . . . . . . . . . . . . . . . . . . . . . . . . . . . . .
37
37
5
.
.
.
.
.
.
.
.
.
.
.
.
.
.
.
.
.
.
.
.
.
.
.
.
.
.
.
.
.
.
.
.
.
.
.
.
.
.
.
.
.
.
.
.
.
.
.
.
.
.
.
.
.
.
.
.
.
.
.
.
.
.
.
.
.
.
.
.
.
.
.
.
.
.
.
.
.
.
.
.
.
.
.
.
.
.
.
.
.
.
.
.
.
.
.
.
.
.
.
.
.
.
.
.
.
.
.
.
.
.
.
.
.
.
.
.
.
.
.
.
.
.
.
.
.
.
.
.
.
.
.
.
.
.
.
.
.
.
.
.
.
.
.
.
.
.
.
.
.
.
.
.
.
.
.
.
.
.
.
.
.
.
.
.
.
.
.
.
.
.
.
.
.
.
.
.
.
.
.
.
.
.
.
.
.
.
.
.
.
.
.
.
i
8.2
8.3
8.4
8.5
8.6
8.7
8.8
9
Logging . . . . . . . . . . . . . . . . . . .
Recording Jython terminal output . . . . .
Java Properties and Customising the GDA .
Metadata . . . . . . . . . . . . . . . . . .
Role-Based Access Control . . . . . . . .
New configuration layout . . . . . . . . .
Memory configuration . . . . . . . . . . .
.
.
.
.
.
.
.
.
.
.
.
.
.
.
.
.
.
.
.
.
.
.
.
.
.
.
.
.
.
.
.
.
.
.
.
.
.
.
.
.
.
.
.
.
.
.
.
.
.
.
.
.
.
.
.
.
.
.
.
.
.
.
.
.
.
.
.
.
.
.
.
.
.
.
.
.
.
.
.
.
.
.
.
.
.
.
.
.
.
.
.
.
.
.
.
.
.
.
.
.
.
.
.
.
.
.
.
.
.
.
.
.
.
.
.
.
.
.
.
.
.
.
.
.
.
.
.
.
.
.
.
.
.
.
.
.
.
.
.
.
.
.
.
.
.
.
.
.
.
.
.
.
.
.
.
.
.
.
.
.
.
.
.
.
.
.
.
.
.
.
.
.
.
.
.
.
.
.
.
.
.
.
.
.
.
.
.
.
.
.
.
.
.
.
.
.
.
.
.
.
.
.
.
.
.
.
.
.
.
.
.
.
.
.
.
.
.
41
44
45
46
46
49
50
Introduction to integrating EPICS in GDA
9.1 Configure JCA . . . . . . . . . . . . . . . . . . . . . . . .
9.2 GDA-EPICS interface . . . . . . . . . . . . . . . . . . . .
9.3 Access PV strings in BLxxI-gda-interface.xml file
9.4 Fastest method to get/put in a script . . . . . . . . . . . . .
9.5 More performant method to get/put in a script . . . . . . . .
9.6 Using CAClient to make a Scannable . . . . . . . . . . . .
9.7 Access EPICS in Java . . . . . . . . . . . . . . . . . . . .
9.8 A General Purpose Class EpicsScannable . . . . . . . . . .
9.9 Particular device classes in GDA . . . . . . . . . . . . . . .
.
.
.
.
.
.
.
.
.
.
.
.
.
.
.
.
.
.
.
.
.
.
.
.
.
.
.
.
.
.
.
.
.
.
.
.
.
.
.
.
.
.
.
.
.
.
.
.
.
.
.
.
.
.
.
.
.
.
.
.
.
.
.
.
.
.
.
.
.
.
.
.
.
.
.
.
.
.
.
.
.
.
.
.
.
.
.
.
.
.
.
.
.
.
.
.
.
.
.
.
.
.
.
.
.
.
.
.
.
.
.
.
.
.
.
.
.
.
.
.
.
.
.
.
.
.
.
.
.
.
.
.
.
.
.
.
.
.
.
.
.
.
.
.
.
.
.
.
.
.
.
.
.
.
.
.
.
.
.
.
.
.
.
.
.
.
.
.
.
.
.
.
.
.
.
.
.
.
.
.
.
.
.
.
.
.
.
.
.
.
.
.
.
.
.
.
.
.
55
55
56
57
57
57
57
58
59
59
10 Integrating TANGO in GDA
11 GDA Demo
11.1 Basic commands
11.2 Other scannables
11.3 Default detectors
11.4 Beam focusing .
61
.
.
.
.
63
63
63
64
64
12 Developing for the GDA
12.1 Commit messages . . . . . . . . . . . . . . . . . . . . . . . . . . . . . . . . . . . . . . . . . . . .
65
65
13 Contributors to the GDA project
67
14 Indices and tables
69
ii
.
.
.
.
.
.
.
.
.
.
.
.
.
.
.
.
.
.
.
.
.
.
.
.
.
.
.
.
.
.
.
.
.
.
.
.
.
.
.
.
.
.
.
.
.
.
.
.
.
.
.
.
.
.
.
.
.
.
.
.
.
.
.
.
.
.
.
.
.
.
.
.
.
.
.
.
.
.
.
.
.
.
.
.
.
.
.
.
.
.
.
.
.
.
.
.
.
.
.
.
.
.
.
.
.
.
.
.
.
.
.
.
.
.
.
.
.
.
.
.
.
.
.
.
.
.
.
.
.
.
.
.
.
.
.
.
.
.
.
.
.
.
.
.
.
.
.
.
.
.
.
.
.
.
.
.
.
.
.
.
.
.
.
.
.
.
.
.
.
.
.
.
.
.
.
.
GDA Developer Guide, Release 8.24
Contents:
CONTENTS
1
GDA Developer Guide, Release 8.24
2
CONTENTS
CHAPTER
ONE
INTRODUCTION TO THE GDA
1.1 Aims of the framework
The Generic Data Acquisition framework (GDA) is an open source project which provides a configurable platform for
running experiments on synchrotron and neutron beamlines. It is intended that the software provides visiting scientists
with a science focused, rather than hardware-centric environment to perform experiments.
There is a graphical interface (GUI) with an embedded command-line interface (CLI). The GUI contains tools for data
visualisation and analysis.
Hardware may be operated directly from the GDA, or via control systems such as EPICS or TANGO.
The software is designed to be configurable and extensible. This makes the software flexible to the requirements of
different beamlines and facilities, and maximises code sharing.
1.2 Design overview
Java is the principal language used in the GDA code. Jython is the scripting interpreter embedded in the GDA server.
The GDA has a client-server design. The server provides connectivity to the beamline control systems and hardware.
The server distributes objects representing the hardware via a CORBA server. These objects are configured using
Spring XML files.
The server also holds the Jython interpreter within which the data collection scans and scripts are run. This is known
as the Command Server. The Command Server also provides central services for the GDA on that beamline such as
role-based access control.
The client is an Eclipse RCP product which communicates with the server via the CORBA (for both remote procedure
calls and events). It performs data visualisation of live data, and browse old data files.
The code base is split into Eclipse plugins. GUI code, facility-specific and technique-specific code are separated from
a generic ‘core’ set of plugins. The same code is used on both server and client. However the server runs as a regular
(non-OSGi) Java process whereas the client is an Eclipse RCP (OSGi) product.
Data is principally written to Nexus format files, but a GDA installation may be configured to write to any format.
1.3 Major design concepts
Scannables Interface for objects which wish to participate in step scans. Most objects available to beamline users are
Scannables. A Scannable is a high-level object representing a number or an array of numbers. These numbers
could be as simple as motor positions, a value held in a file or could be the results of a calculation.
3
GDA Developer Guide, Release 8.24
Detectors Sub-interface of Scannable. Detectors are distinguished from Scannables as during a step scan, each node
(point) in the scan has two phases: a movement phase in which non-Detector Scannables are operated and then
a data collection phase in which Detectors are operated.
Scans The principal context in which data is collected. The generic step scan is run from a single command in the
Jython environment. The Scan operates a series of Scannables and broadcasts its data after each point to clients
for display and to file writers. There are several variants of the main step scan. It is possible to write other
types of scan classes which fulfil the Scan interface. Alternatively scripts could be written which simply operate
Scannables and Detectors and create ScanDataPoints within the scripts.
ScanDataPoint A Serializable object which holds the data from a single point in a scan, as well as metadata such as
the number fo that point in the scan. These objects are passed to Clients for display in graphs and to data writers
to be recorded in files.
Devices Interface for an object representing a piece of hardware. Device is a super interface to Scannable. Device
has a large number of sub interfaces for different types of hardware. By operating types of devices via Device
interfaces rather than having standalone objects, the underlying control systems used by GDA are abstracted.
This makes the higher levels are the GDA agnostic to control system or brands of hardware types.
Finder Singleton class providing a service to locate objects (both local or distributed via CORBA) by name.
InterfaceProvider Singleton class providing resources to services provided by the Command Server.
CommandServer The GDA’s Jython environment and related services. These services include role-based access
control, script and scan status, broadcast of scan data points.
4
Chapter 1. Introduction to the GDA
CHAPTER
TWO
GDA INSTALLATION
2.1 Introduction
This section will outline the GDA installation and the various ways in which the GDA is configured.
2.2 Installation Folder Structure
Following the Quick Start guide and using the example downloadable from the opengda website, the directory structure
will have the folders:
builder Contains scripts to compile the source and to build the client and the CORBA java code from the IDL source.
documentation Contains the documentation source. Compile this by running make all. The compiled documentation in various forms will be placed in a sub-folder called build.
example-config Contains the example configuration. Configuartion folder have a standard structure which will be
explained below.
features Standard Eclipse Java IDE workspace directory. Contains the features projects.
licenses Licensing information of the third-party software used in the GDA.
plugins Standard Eclipse Java IDE workspace directory. Contains the plugins projects.
thirdparty Contains some third-party software required to compile the GDA. This software is referenced by the
GDA build target which should be set when compiling the source code from an Eclipse IDE. This is referenced
automatically by the build scripts.
For new developers, the folder of most interest will probably be the example-config where the beamline-specific
configuration will need be defined.
2.2.1 Adding new or existing plugins
When creating a new plugin, the plugin project must be located in the plugins directory or the build and startup scripts
will not work properly.
Existing plugins can be imported into the workspace from the Eclipse IDE by running the import wizard: File>Import...->General->Existing Projects. Ensure that the Copy Into Workspace checkbox is selected. Once the project
has been imported, if it has not been placed into the plugins folder, perform a Refactor->Move... to relocate the new
plugin project.
5
GDA Developer Guide, Release 8.24
2.3 Configuration Folder Structure
You are recoommended to use the New style configuration directory structure described below.
The example-config follows the standard folder structure. This structure needs to be adhered to as the locations of the
sub-folders in the directory are assumed from the java property gda.config.
The contents of the configuration directory is:
css Configuration files for the CSS synoptic perspective. (RCP client only)
lookupTables Location of lookup tables for the Scannable objects which use them.
properties Java, Jacorb and JCA (EPICS API) properties files. The Jacorb file has to be placed in a sub-folder named
‘etc’.
scripts Location of beamline-specific Jython scripts
users For the example-config, contains log files, user scripts and is where data will be written to. It is likely that these
files will want to be placed in other locations. Use Java properties to define the directories where these types of
files are to be located. See the later section for more information about these Java properties.
var For files which are changed whilst the GDA is running.
xml The XML files which define the contents of the ObjectServer processes.
It is likely that for new developers, when starting out with the GDA, the items of most interest will be the java.properties
file to customise folder locations etc. and the ObjectServer xml files to customise the objects representing hardware.
2.3.1 File permissions
The var and users directory are likely to require broader permissions from the rest of the GDA installation to allow
processes run by any user to edit the files in those directories.
It is recommended in a production environment to use a var directory outside of the GDA installation as some of the
files kept there may need to be used consistent across different versions of the GDA. This make upgrading to new
GDA versions easier.
2.3.2 New style configuration directory structure
Starting with version 8.10, GDA is moving to a new, more explicit configuration directory structure to support easy
switching between different running modes, server and client profiles. A brief descriptions of this new configuration
layout can be found here.
Below is an example of this new configuration layout extended to include configuration for logging, epics, authorisation, etc:
config
|-- clients
|
|-- main
|
|
|-- dummy
|
|
|
|-- client.xml
|
|
|-- live
|
|
|
|-- client.xml
|
|
|-- main-common.xml
|
|-- rcp
|
|
|-- dummy
|
|
|
|-- client.xml
|
|
|-- live
6
Chapter 2. GDA installation
GDA Developer Guide, Release 8.24
|
|
|
|
|-|
|
|
|
|
|
|-|
|
|
|
|
|
|-|
|
|
|
|-|
|
|
|
|
|
|
|
|-|-|
|
|-|
|
|
|
|
|
|
|-|
|-|
|
|
|
|
|
|
|
|
|
|
|
|
|-- client.xml
|
|-- rcp-common.xml
|-- clients-common.xml
|-- commandQueueProcessor.xml
epics
|-- dummy
|
|-- BL11I-gda-interface.xml
|
|-- epics.properties
|-- live
|
|-- BL11I-gda-interface.xml
|
|-- epics.properties
jacorb
|-- dummy
|
|-- etc
|
|
|-- jacorb.properties
|-- live
|
|-- etc
|
|
|-- jacorb.properties
jca
|-- dummy
|
|-- JCALibrary.properties
|-- live
|
|-- JCALibrary.properties
logging
|-- dummy
|
|-- LogServer.xml
|
|-- log.properties
|-- live
|
|-- LogServer.xml
|
|-- log.properties
|-- LoggingConfiguration.xml
|-- logPanel.xml
lookupTables
permissions
|-- beamlinestaff.xml
|-- user_permissions.xml
properties
|-- dummy
|
|-- java.properties
|-- live
|
|-- java.properties
|-- beamline.properties
|-- gda.properties
|-- jaas.cclrc.conf
scripts
|-- localStation.py
servers
|-- main
|
|-- dummy
|
|
|-- .....
|
|
|-- server.xml
|
|-- live
|
|
|-- .....
|
|
|-- server.xml
|
|-- simulation
|
|
|-- server.xml
|
|-- .....
|
|-- main_common.xml
2.3. Configuration Folder Structure
7
GDA Developer Guide, Release 8.24
|
|-- CommandServer.xml
|
|-- commandQueueProcessor.xml
|
|-- scriptControllers.xml
|
|-- servers_common.xml
|-- var
|
|-- limitsAndOffset
|
|-- motorPositions
|
|-- 30.tmp
|-- buckminster.cspec
clients Location for Spring configurations of client objects, which should have two profiles: main and rcp. Each
profile should in turn contain two modes: dummy and live. Each mode must contain client.xml file
epics Location for GDA-EPICS integration configuration if required (optional), which should contain two modes:
dummy and live. Each of these should contain EPICS integration specification and epics.properties.
jacorb Loaction for CORBA configuration. It must contain two modes: dummy and live, which must has etc
directory containing jacorb.properties.
jca Location for EPICS Channel Access configuration (only required to communicate to EPICS IOC). It must contain
two modes: dummy and live, which in turn contains the JCALibrary.properties file.
logging Location for GDA logging configuration files. It should contain two modes: dummy and live. Each of these
modes has a log.properties and LogServer.xml configuration for the Log Server. Object logging and
log viewer configurations can be made mode-agnostic.
lookupTables Location of lookup tables for the Scannable objects which use them.
permission Location for default user authorisation settings for GDA object access control if enabled.
properties beamline.properties - defines beamline specific properties ; gda.properties - defines GDA
generic properties, some of which reference to properties defined in other properties files; java.properties
- defines properties for mode-dependent customisation. The java.properties file must include other properties as demonstrated by the following example:
include=../beamline.properties
include=${gda.config}/logging/dummy/log.properties
include=${gda.config}/epics/dummy/epics.properties
# customisable properties below
gda.var=/${user.home}/${gda.beamline.name}/var
gda.data = /${user.home}/${gda.beamline.name}/data
gda.data.scan.datawriter.datadir = ${gda.data}
gda.device.temperature.datadir
= ${gda.data}/temperature
gda.users.scripts.dir=/${user.home}/${gda.beamline.name}/scripts
gda.dummy.mode=True
gda.gui.AcquisitionGUI.authorisationMethod = gda.jython.authoriser.FileAuthoriser
gda.server.name=localhost
# custmisable properties above
include=../gda.properties
The beamline.properties must be included at the first line, the gda.properties must be included at
the last line of java.properties file.
scripts Location of beamline-specific Jython scripts.
localStation.py.
It should at least contain the GDA startup script file
servers Location for Spring configurations of server objects, which should contain at least one main profile. Each
profile should in turn contain two modes: dummy and live. Each mode must contain server.xml file. The
server.xml imports main-common.xml in parent folder which defines common objects configurations
8
Chapter 2. GDA installation
GDA Developer Guide, Release 8.24
available for all modes; The main-common.xml in turn imports servers-common.xml which defines
common objects configurations for all profiles.
var GDA cache data directory, for files which are changed whilst the GDA is running.
Other directories and files that are often used on Diamond beamlines are show below:
config
|-|
|
|
|
|
|
|
|
|
|
|
|
|
|
|
|
|-|
|
|
|
|
|
|
|
|
|
|-|
|
|
|
|
|
|-|
|
|
|-|
|
|
|
|
|-|
|
|
|
|
bin
|-- GDA_RemoteStart_Lin
|-- GDA_ShowLogFile
|-- GDA_StartClient
|-- GDA_StartLogPanel
|-- GDA_StartLogServers
|-- GDA_StartRCP
|-- GDA_StartServers
|-- GDA_Start_GTK
|-- GDA_StopServers
|-- gda_command
|-- gdaclient
|-- gdalog
|-- gdaservers
|-- lookForFile.sh
|-- remotestartupscript.sh
|-- set_facl.sh
Desktop
|-- DataDispenser.desktop
|-- gda-beamline-manual.desktop
|-- gda-client.desktop
|-- gda-logfile.desktop
|-- gda-logpanel.desktop
|-- gda-servers.desktop
|-- gda-startup-guide.desktop
|-- gda-user-guide.desktop
|-- gda.directory
|-- gda.menu
doc
|-- images
|
|-- gdadesktoplaunchers.png
|
|-- gdamenulaunchers.png
|-- BLS-I11-MAN-001-v0.5.html
|-- Starting_GDA_Help.html
|-- mythen.doc
etc
|-- README
|-- gda_environment.sh
|-- i11_profile.sh
launcherInstaller
|-- beamline.sh
|-- gda_launchers.sh
|-- install-gda-launchers.sh
|-- install-launchers.sh
|-- logout.sh
launchers
|-- EventServer.launch
|-- Gui.launch
|-- LogPanel.launch
|-- LogServer.launch
|-- NameServer.launch
2.3. Configuration Folder Structure
9
GDA Developer Guide, Release 8.24
|
|-- ObjectServer.launch
|
|-- RcpPorduct.launch
|-- pytools
|
|-- src
|
|-- fileappender.py
|
|-- mergecolumns.py
|
|-- mythenbin.py
|
|-- mythensum.py
|
|-- rebin.py
|
|-- rebin_idl.py
bin Shell scripts to launch GDA components
Desktop Linux desktop files for launching GDA components
doc Beamline specific documents
etc Beamline specific environment for GDA
launcherInstaller Shell scripts to install GDA launchers in Applications menu on Linux.
launchers eclipse launchers for GDA components
pytools Beamline specific python scripts for online and off-line data processing.
2.4 Starting to develop the GDA
A few notes for new developers:
1. Once you have a version of the GDA source, and a beamline or example configuration downloaded/checked out
you may compile by either opening the source in an Eclipse IDE or run the compile script. The compile script
will place the compiled classes in the same location as the Eclipse IDE.
2. The GDA server runs as a regular Java process, so uses the compiled classes located in the projects in the plugins
and features directories.
3. However the client is an RCP ‘product’ and once compiled runs using its own compiled classes inside the client
directory (created when the client is compiled using the gda-build script).
4. You may run the client from the Eclipse IDE, and this will not use any source code or other files from inside the
client directory. This would run entirely from compiled code in the plugins and features directory.
2.4.1 Vanilla GDA
For an ‘empty’ GDA installation to add your own objects, make the following changes to the example-config:
1. remove all scripts in the scripts directory, except localStation.py
2. remove all scripts in the users/scripts directory
3. in xml/client/client.xml, remove all the objects below the comment
4. in xml/server, remove all files and sub-folders except server.xml
5. in xml/server/server.xml, remove the imports near the bottom of the file
10
Chapter 2. GDA installation
CHAPTER
THREE
JYTHON SCRIPT TYPES
There are three different ‘types’ - CORE, CONFIG, and USER - of Jython scripts which may be written. As their
purposes are different it is helpful to place them in different directories, and to even have different permissions on
those directories. It is possible to have any number of directories for each ‘type’ of scripts, so a beamline could use
configuration scripts from a shared library in addition to its own configuration folder. Setting up these paths is defined
in the Configuration section below. The locations given below are simply examples provided for guidance.
Core Scripts
• Location: ${gda.root}/uk.ac.gda.core/scripts
• Type: CORE
These are general purpose scripts to be shared by all beamlines. They are not intended to be edited by users or
beamline staff. Scripts should be placed within the gdascripts folder to clearly show that the modules are
not Java classes which have a gda top-level directory.
EPICS scripts
• Location: ${gda.root}/uk.ac.gda.epics/scripts
• Type: CORE
These scripts have the same type as the Core Scripts described above. They are EPICS related scripts and require
EPICS IOC to run successfully.
Beamline configuration scripts
• Location: ${gda.config}/scripts
• Type: CONFIG
These are beamline specific scripts. These will be data collection or analysis utilities which are not expected to
be edited by users. They may be written by beamline staff.
localStation.py is often located in this directory; it is run by the JythonServer object when the server
is started to customise the Jython environment for that beamline.
User scripts
• Location: any folder defined by the Spring IoC XML configuration for the GDA command_server.
• Type: USER
These are scripts written or can be edited by users for their experiment. This is a separate folder from the other
types of scripts as this directory may want to be emptied at the end of an experiment.
An example of this USER type folder is example-config/users/scripts in the example-config
project.
11
GDA Developer Guide, Release 8.24
3.1 Configuration
The paths to script project folders are defined via beans which are given as parameters of the Jython Server object in
the server’s Spring IoC configuration. Each project is defined as a gda.jython.ScriptProject object, which
includes the path to the folder containing the scripts, the name of the project and its type (USER, CONFIG or CORE).
The project name appears in the RCP user interface in the Project Explorer view.
The project objects should be referenced by, or inner beans of, a gda.jython.ScriptPaths bean. The projects
are defined as an ordered list: when a Jython run command is given, the command server searches for the script
file in the folders in the order they are listed in the Spring configuration. The ScriptPaths object should also be
configured with the full path to the startup script (often named localStation.py) which is run when the command
server starts up.
Finally, the ScriptPaths bean should itself be referred by the gda.jython.JythonServer instance, which
must be named command_server. This is the controller object for the Jython environment in the GDA. Putting
all of this together, the resultant Spring configuration will look like this excerpt from the example configuration’s
server.xml file:
<bean id="command_server" class="gda.jython.JythonServer">
<property name="jythonScriptPaths">
<bean class="gda.jython.ScriptPaths">
<property name="projects">
<list>
<bean class="gda.jython.ScriptProject">
<property name="path" value="${gda.config}/users/scripts" />
<property name="name" value="Scripts: User" />
<property name="type" value="USER" />
</bean>
<bean class="gda.jython.ScriptProject">
<property name="path" value="${gda.config}/scripts" />
<property name="name" value="Scripts: Config" />
<property name="type" value="CONFIG" />
</bean>
<bean class="gda.jython.ScriptProject">
<property name="path" value="${gda.root}/uk.ac.gda.core/scripts" />
<property name="name" value="Scripts: Core" />
<property name="type" value="CORE" />
</bean>
</list>
</property>
<property name="startupScript" value="${gda.config}/scripts/localStation.py" />
</bean>
</property>
<property name="gdaVarDirectory" value="${gda.config}/var" />
<property name="cacheDirectory" value="${gda.config}/var/jythonCache" />
<property name="remotePort" value="9999" />
</bean>
3.2 Adding a Script Queue to the Configuration
On the Server add the following beans:
<bean id="commandQueue" class = "gda.commandqueue.CommandQueue">
</bean>
<bean id="commandQueueProcessor"
12
Chapter 3. Jython Script types
GDA Developer Guide, Release 8.24
class = "gda.commandqueue.FindableProcessorQueue">
<property name="queue" ref="commandQueue"/>
<property name="startImmediately" value="true"/>
<property name="logFilePath" value="${gda.var}/commandQueueProcessor.log"/>
</bean>
<bean class="uk.ac.gda.remoting.server.GdaRmiServiceExporter">
<property name="serviceName" value="gda/commandQueueProcessor" />
<property name="service" ref="commandQueueProcessor" />
<property name="serviceInterface"
value="gda.commandqueue.IFindableQueueProcessor" />
</bean>
On the client add the following beans:
<bean id="commandQueueProcessor"
class="uk.ac.gda.remoting.client.GdaRmiProxyFactoryBean">
<property name="serviceUrl"
value="rmi://<server-host-name>/gda/commandQueueProcessor" />
<property name="serviceInterface"
value="gda.commandqueue.IFindableQueueProcessor" />
<property name="refreshStubOnConnectFailure" value="true" />
</bean>
<bean class="gda.rcp.util.OSGIServiceRegister">
<property name="class" value="gda.commandqueue.Processor" />
<property name="service" ref="commandQueueProcessor" />
</bean>
<bean class="gda.rcp.util.OSGIServiceRegister">
<property name="class" value="gda.commandqueue.Queue" />
<property name="service" ref="commandQueueProcessor" />
</bean>
Scripts that take a long time should inform the user of progress and regularly allow the script to be paused. These two
actions can be done by code of the form:
from gda.commandqueue import JythonScriptProgressProvider
JythonScriptProgressProvider.sendProgress( percent, msg)
where percent is percent complete ( integer) and msg is a string to be displayed.
How to submit a script to the queue from the RCP GUI is documented
uk.ac.gda.client.actions.QueueScriptSelectionActionDelegate
in
the
class
To submit a script to the queue from the Jython terminal enter the command:
finder.find("commandQueue").addToTail(
JythonScriptFileCommandProvider(<path to script>))
3.3 Linking Scripts and the GUI
It is beneficial to hold beamline-specific experimental logic in Jython scripts instead of Java code as the Jython can
be edited at run-time by both GDA developers and other beamline staff. These Jython scripts would probably use the
main scanning mechanism to collect data, but there may be work outside of the scans to perform, such as preparing
sample environments or running some beamline-alignment logic.
To store this logic as Jython scripts makes development and maintenance simpler of the what is often the most complex
and, over time, changing part of a GDA installation. However it is often useful to report progress of these scripts to
the user.
3.3. Linking Scripts and the GUI
13
GDA Developer Guide, Release 8.24
To enable communication from scripts, a distributed object is used which acts as a middle-man between a specific
script and parts of the GUI interested in this script’s work. The gda.jython.scriptcontroller.ScriptController class is a
server-side object which fans out messages from a script to IObserver classes on the client-side. The GUI can then
report progress back to the users.
Example configuration:
<bean id="MyScriptObserver" class="gda.jython.scriptcontroller.ScriptControllerBase"/>
Client-side Java classes would then implement the IObservable interface, register themselves as Observers of this object and receive events through the update(Object,Object) method. The script would send these messages by retrieving
this object from the finder and sending messages via the ScriptController’s update() method:
controller = Finder.getInstance().find("MyScriptObserver")
controller.update(None,ScriptProgressEvent("I have got to this point in the script"))
Although the IObserver/IObservable interfaces allow any serializable object to be passed to the GUI, communication
is clearer when specific event objects are used. There are some in the gda.jython.scriptcontroller.event package. New
event types, if generic enough, should be added there to give some form of standardisation to the system.
For example, scans initiated by the script can have their unique IDs broadcast to the script’s observers using the
ScanCreationEvent class:
myscan = ConcurrentScan(args)
scan_id = myscan.getName()
controller.update(None,ScriptProgressEvent("Starting scan..."))
controller.update(None,ScanCreationEvent(scan_id)
myscan.runScan()
controller.update(None,ScanFinishEvent(scan_id,ScanFinishEvent.FinishType.OK))
A simple way to start a script from the client is to use the gda.jython.scriptcontroller.ScriptExecutor class. See the
Javadoc for more details:
ScriptExecutor.Run("MyScriptObserver", this, null, "myscript()",null);
This would run the script, which would send progress messages back to the Java class via its update() method, and
block until the script has finished.
14
Chapter 3. Jython Script types
CHAPTER
FOUR
WRITING NEW DEVICE CLASSES IN
JYTHON AND JAVA
4.1 Introduction
New devices can be written using core classes in GDA. These can be written in either Jython or Java.
For both Jython and Java:
1. Define new devices in code
2. Load onto server (object server)
For Jython:
1. Define classes in Jython scripts that extend ScannableMotionBase
2. Load them into the object server by importing the Jython module, and make instances of the Jython-defined
devices
For Java:
1. Write new devices in Java implementing different device interfaces. Here we illustrate by writing new Scannable
devices
2. Import instances of the classes defined in Spring beans configuration files
To illustrate the process of developing new devices in Java, and incorporating them into GDA, we describe the process
of developing several new devices that implement the Scannable interface. These devices are then included in the
system by editing configuration files which are read by the server at startup. The devices can then be scanned and
manipulated in GDA from the Jython terminal.
Developing software for new devices for GDA is a likely requirement at each site using GDA, to accommodate specific
beamline components into the GDA software framework.
Users should first read “Chapter 5: Scanning” in the GDA Users manual for an introduction to the basic data acquisition
techniques used in GDA. Below, we describe developing new classes which implement the Scannable interface. This
will likely be required development at each site using GDA in order to accommodate specific beamline components
into the GDA software framework.
4.2 The Scannable interface and ScannableBase classes
All Scannable classes implement the Scannable interface. A core base class implementing the Scannable interface
is available in GDA as the class gda.devive.scannable.ScannableBase. New user-defined Scannable implementations
15
GDA Developer Guide, Release 8.24
should extend ScannableBase. Instances of these will then be visible in the GDA terminal after issuing the command
‘ls Scannable’.
The most important methods for a Scannable to implement are:
• getPosition()
• asynchronousMoveTo()
• isBusy()
Other fields in the Scannable that must be defined are:
• name
• initial position
• inputNames
• extraNames
• outputFormats
• units
A full description of the parameters available in a Scannable implementation is available in ‘Chapter 5: Scanning’ of
the GDA Users Manual.
A test class that has static methods for constructing instances of several different types of ‘dummy’
or testable software Scannables is available in the documentation configuration src directory:
org.myls.gda.device.scannable.ScannableClassGenerator. It has methods:
• genarateScannableGaussian()
• generateScannableGaussian(Gaussian)
• generateScannableSine()
• generateScannableSine(SineWave)
This generator constructs instances of the two Scannable classes ScannableGaussian, and ScannableSine. These
scannables classes differ in the value returned by getPosition(). For ScannableGaussian, the method returns the value
of a Gaussian of the specified position, width and height 1, with additional noise if defined, at the specified x value:
@Override
public Object getPosition() throws DeviceException {
// we assume the position is a double - it is only for testing
double x = (Double) super.getPosition();
double x2 = x - centre;
double sigma = 0.425 * width // FWHM -> sd
double noiseVal = height * (Math.random() * noise;
double y = Math.exp(-(x2 * x2) / (sigma * sigma)) + noiseVal;
return new Double[] { x, y };
}
4.3 Description of the Scannable properties and relations between
them
(This material is derived from ‘Chapter 5: Scanning’ in the GDA Users’ manual; it is repeated here for convenience)
It is obligatory to set the values of several fields in the constructor of all Scannables. These obligatory fields are:
16
Chapter 4. Writing new Device classes in Jython and Java
GDA Developer Guide, Release 8.24
• name
• inputNames
• extraNames
• outputFormat
• currentPosition
The fields ‘inputNames’, ‘outputNames’, and ‘outputFormat’ together define what numbers this Scannable represents,
what they are called, and the format for printing their values out to file or console.
The ‘’‘inputNames’‘’ array defines the size of the array that this Scannable’s rawAsynchronousMoveTo expects. Each
element of the inputNames array is a label for that element which is used in file headers etc. Note that this array can
be empty (size 0) if required.
The ‘’‘extraNames’‘’ array is used in a similar manner to the inputNames array, but lists additional elements in the
array returned by the Scannable’s rawGetPosition() method, i.e. the array returned by getRawPosition() may be
larger than the array required by rawAsynchronousMoveTo(). This allows for the possibility that a Scannable may
hold and return more information than it needs in order to move pr perform whatever operation it does inside its
rawAsynchronousMoveTo() method. This array is normally empty (size 0).
The ‘’‘outputFormat’‘’ array lists the formatting strings for the elements of both the inputNames and extraNames
arrays. It is used when printing the output from the rawGetPosition() method to the console and logfiles.
Note: It is an absolute requirement that the length of the outputFormat array is the sum of the lengths of the inputNames and outputNames arrays for the Scannable to work properly.’‘’
4.4 Add a new device to the server
The new device is added to the server by defining it as a bean in a Spring beans configuration file. In the distribution,
this file is ‘server_beans.xml’ in the ‘xml’ directory. This file can be consulted for the syntax used to define new object
instances as beans in the Spring beans configuration file. The beans defined in this file are loaded into the object server
at server startup, and can be accessed and manipulated by the GDA client.
Both getter and constructor dependency injection can be used. Each object on the server must have a ‘name’ property,
which is its unique identifier in the server object namespace. As an example, we define several instances of the
ScannableGaussian class using different bean definitions:
• scannableGaussian0 — all properties set in the bean definition
• scannableGaussian1 — only the properties of the Gaussian are set in the bean. Other properties such as input
and extra names, and output formats are set to defaults in the Java constructor
• scannableGaussian2 — the scannable is defined using a constructor argument which is a test Gaussian bean
defijned in the Spring configuration file. This demonstrates constructor dependency injection by Spring
• scannableGaussian3 — no properties or constructor arguments are defined in the bean. The scannable is constructed using the default no argument constructor. All necessary properties are set to defaults in the Java class.
Similar examples are provided by several instances of the scannableSine class in the Spring configuration file:
• scannableSine0 — the name and properties of the sine are set in the bean definition. Default values for other
properties, such as input and extra names, and output formats, are defined in the Java class.
• scannableSine1 — the properties of the sine are assigned to the object by a test sine bean defined in the bean
configuration file (‘testSineWave’ bean)
4.4. Add a new device to the server
17
GDA Developer Guide, Release 8.24
• scannableSine2 — no properties other than the name are defined in the bean definition. All other properties are
set in the zero-argument constructor in the Java class.
4.4.1 Example: ScannableGaussian with setter injection
Fields of the ScannableGaussian are set as properties in the Spring beans configuration file, and default values defined.
Atomic fields are defined with ‘name’ and ‘value’ attributes fields; array fields are defined using the ‘list’ tag:
<bean id=’scannableGaussian1’ class=’org.myls.gda.device.scannable.ScannableGaussian’>
<property name=’name’ valuew=’simpleScannable1’/>
<property name=’position’ value=’0.0’/>
<property name=’inputNames’>
<list>
<value>x</value>
</list>
</property>
<property name=’extraNames’>
<list>
<value>y</value>
</list>
</property>
<property name=’level’ value=’3’/>
<property name=’outputFormat’>
<list>
<value>%5.5G</value>
<value>%5.5G</value>
</list>
</property>
<property name=’units’>
<list>
<value>mm</value>
<value>counts</value>
</list>
</property>
</bean>
Now instantiate a ScannableGaussian using a predefined Gaussian Spring bean. Spring beans definition of a test
Gaussian object:
<bean id=’testGaussian’ class=’org.myls.gda.device.scannable.Gaussian’>
<property name=’testGaussian’ value=’testGaussian’/>
<property name=’centre’ value=’0.0’/>
<property name=’width’ value=’1.0’/>
<property name=’height’ value=’1.0’/>
<property name=’noise’ value=’0.1’/>
</bean>
This test Gaussian bean can be used to create an instance of a ScannableGaussian using constructor injection with the
test Gaussian as a constructor argument:
<bean id=’scannableGaussian2>
<property name=’name’ value=’scannableGassian2’/>
<constructor-arg ref=’testGaussian’/>
</bean>
18
Chapter 4. Writing new Device classes in Jython and Java
GDA Developer Guide, Release 8.24
4.4.2 Exercise
Start with an empty server_beans.xml file, add Scannable components one by one, and test them in the GDA Jython
console (requires server restart to incorporate the new components).
4.5 Examples of other Scannable classes and tests in GDA
• DummyMotor: from core: gda.device.motor.DummyMotor
• ScannableMotorTest: from core/test: gda.device.scannable.ScannableMotorTest
• TotalDummyMotor from core (used by test): gda.device.motor.TotalDummyMotor
4.6 Demonstrate use of Scannable in terminal
The new components are now available to be controlled from the GDA client.
4.6.1 Scan 1D
The example scanabbles can be scanned and manipulated from the Jython terminal in the GDA GUI.
Scan the example scannable scannableGaussian0 from -2 to 2 in steps of 0.01:
>>> scan scannableGaussian0 -2.0 2.0 0.1
Change the width of scannableGaussian0 from 1 to 2, and rescan:
>>> scannableGaussian0.setWidth(2)
>>> scan scannableGaussian0 -2.0 2.0 0.1
Change the centre of scannableGaussian0 to -1.0 and rescan:
>>> scannableGaussian0.setCentre(-1)
>>> scan scannableGaussian0 -2.0 2.0 0.1
4.6.2 Nested scan
Import the demo scannable classes defined in the user‘q demonstration module scannableClasses.py (located in ‘documentation/users/scripts’, and viewable from from the JythonEditor view):
>>>
>>>
>>>
>>>
import scannableClasses
from scannableClasses import *
sgw = ScannableGaussianWidth(’sgw’, scannableGaussian0)
scan sgw 0.2 2.0 0.2 scannableGaussian0 -1.0 1.0 0.02
This nested scan has an outer scan which sets the width of the contained scannable Gaussian to different values from
0.2 to 2.0 in steps of 0.2. The inner scannable is then plotted for each width from -1.0 to 1.0 in steps of 0.02
4.5. Examples of other Scannable classes and tests in GDA
19
GDA Developer Guide, Release 8.24
20
Chapter 4. Writing new Device classes in Jython and Java
CHAPTER
FIVE
SWING CLIENT GUI DEVELOPMENT
5.1 Introduction
Having written new devices in Java and created instances of them on the server, they can now be examined and
controlled from the interactive Jython interpreter. However, the GDA also allows developers to build custom graphical
components for direct interaction with the server-side devices. These custom GUI components can be added to the
core GDA client. This mechanism allows for a much more flexible means of examining and controlling new devices.
The process of extending the GDA client in this way requires two development steps:
• Writing the GUI component (currently in Swing)
• Setting up the communication between the client-side GUI component and the server-side device
These processes will be illustrated using an example of a simple power supply device, which has two states: ‘On’ and
‘Off’.
5.2 Writing the Swing GUI component
All custom GDA GUI components must extend the GDA class AcqusitionPanel (in the uk.ac.gda.core plugin, package
gda.gui). This enables correct behaviour of the new component in the GDA client, and enables some of the components
of client-server communication.
The example power supply GUI component extending AcquisitionPanel is in the documentation src tree,
org.myls.gda.gui.PowerSupplyPanel. It comprises two JButtons, ‘On’ and ‘Off’. Its behaviour is to toggle the state of
the server-side power supply between the two states using the buttons. When the state of the underlying power supply
is ‘Off’, the ‘Off’ button is disabled, and the ‘On’ button enabled. Clicking on the ‘On’ button changes the state of the
server-side power supply to ‘On’ through CORBA-implemented client-server communication. The GUI component is
registered as an observer of the power supply, and responds to any changes in state of the server-side device. In this
example, the state of the server-side power supply has been changed by the user. The GUI component responds to the
changed state by disabling the ‘On’ JButton, and enabling the ‘Off’ button.
This behaviour is implemented in GDA using the Observer and Observable interfaces. The PowerSupplyPanel registers
itself as on Observer of the server-side power supply, which sends changes in state back to the PowerSupplyPanel.
A standalone application which wraps the PowerSupplyPanel component is org.myls.gda.gui.PowerSupplyTestFrame,
and can be run from the command line or from within Eclipse.
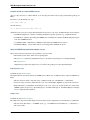
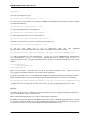
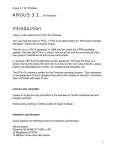
Appearance of the PowerSupplyPanel when the power supply is in state ‘Off’:
21
GDA Developer Guide, Release 8.24
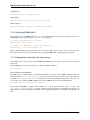
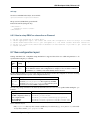
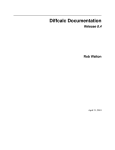
Clicking the ‘On’ button changes the state of the remote power supply to ‘On’. This change is detected by the clientside panel, which updates to the stet below:
5.3 Adding the new component to the GDA client
The new GUI component is added to the GDA client by defining an instance of it the Spring beans configuration
file ‘client_beans.xml’ in the documentation/xml directory. This configuration file is for including custom (non-core
GDA) components to the GDA client. (Another client configuration file, ‘client.xml’, is used to define which of the
predefined GDA graphical components to include in the client.)
The ‘client_beans.xml’ configuration file is a Spring beans container, and follows the Spring beans XML schema. The
bean definition for the PowerSupplyPanel is:
<bean id=’powerSupplyPanel’ class=’org.myls.gda.gui.PowerSupplyPanel’>
<property name=’name’ value=’gdaPowerSupplyPanel1’/>
<property name=’psuName’ value=’gdaPowerSupply1’/>
</bean>
The new view appears in the GDA client as the panel ‘gdaPowerSupplyPanel1’.
5.4 CORBAising the object
See the corba manual next to this file for more specifics.
5.4.1 Writing the CORBA classes for GUI–server communication
Several generic CORBA classes are provided which external developers can extend. These include CORBA adaptors,
Impl classes, and base classes.
5.4.2 Creating CORBA proxies for client-server communication
The new device is now available on the server and can be controlled from the Jython interpreter in the Scripting
Terminal view. For example, scannable objects can be scanned, and the result of the scan displayed automatically in
plot window.
However, it may the case that specialised GUI panel needs to be developed to control and simply the new device.
In that case, communication must be set up between the client (GUI) and the object on the server. In GDA, this
communication is CORBA-based.
22
Chapter 5. Swing Client GUI development
GDA Developer Guide, Release 8.24
CORBA proxies for custom devices are built using the Ant target ‘make-corba-jar’. This target calls ‘compilecorba-classes’, which in turn calls ‘compile-idl-definitions’. This invokes a CORBA idl2java compiler, in this case
org.jacorb.idl.parser’.
Therefore, for each custom device that has been written, it is also necessary to define an IDL for that class.
An example of an IDL for a simple power supply device is:
Module
Module
Module
Module
Module
Module
org {
myls {
gda {
device {
powersupply {
corba {
interface CorbaPowerSupply
{
void setOn(in Boolean on);
boolean getOn();
};};};};};};};
The name of the resulting CORBA proxy implementation is based on the name of the device class. The convention is
new name = old name, lowercased apart from first letter + ‘Impl’. For example a device class called ‘PowerSupply’
has a CORBA proxy generated with name ‘PowersupplyImpl’.
5.4. CORBAising the object
23
GDA Developer Guide, Release 8.24
24
Chapter 5. Swing Client GUI development
CHAPTER
SIX
RCP CLIENT GUI DEVELOPMENT
6.1 Introduction
An example RCP client product may be found in the uk.ac.gda.example.feature plugin. This contains two perspectives:
• Scripts
• Experiment
Scripts provides tools to view, edit and run Jython scripts. It has the Jython Console view which displays the GDA’s
Jython environment. The Jython engine runs server-side but the terminal console provided in this view runs on the
client.
Experiment is a demo of a generic perspective in which users can define and run experiments. Experiments are
grouped together in multi-scans and folders. A multi-scan is a series of experiments which are run in order by a single
command from the GUI. Folders hold multi-scans and represent the sub-folders in whcih the data files are written to.
6.2 The Experiment Perspective
This perspective is a generic perspective aimed at beamlines which repeatedly run scans defined using a large number
of parameters. The parameters for each scan are stored in one or more xml files. The xml files are stored with the data
and are edited by users in the UI using graphical editors.
Scan maybe grouped in multiscans, and the xml files may be stored in more than one directory. The UI helps users to
organise their scans.
The scans are run using the Command Queue mechanism, and progress is displayed in the Script Log view.
This functionality is provided by the uk.ac.gda.client.experimentdefinition plugin.
Each type of xml file has its own graphical editor and behind each editor is a Java bean. The beans are used to transport
the parameters to Jython scripts which hold the experimental logic.
The xml files provide persistence of the experimental options and are stored in folders so users may build up a library
of xml files during their visit to the beamline. These xml files could then be retrieved in subsequent visits to repeat
experiments.
The relationship between the Java beans, xml files and editors is held in the GDAs RichBean framework. The perspective which uses these objects is mostly generic, but for each implementation of this perspective some coding is
required. There is are extension points which should be contributed to. This lists the implementation specific classes
and options required to operate the Experiment perspective.
25
GDA Developer Guide, Release 8.24
6.2.1 Development required
To configure your own implementation of the Experiment Perspective:
1. Required dependencies
(a) Your plugin will need to depend on the following plugins:
-
uk.ac.gda.common
uk.ac.gda.common.rcp
uk.ac.gda.client.experimentdefinition
org.eclipse.core.resources
(b) It will also need to be a registered buddy of experimentdefinition by including the following line
in the MANIFEST.MF file:
Eclipse-RegisterBuddy: uk.ac.gda.client.experimentdefinition
2. create the Java beans and related editors
This will define your experiments.
For more information,
see the
uk.ac.gda.common.rcp/src/uk/ac/gda/richbeans/package-info.java.
must implement IRichBean.
Javadoc in
The Beans
(a) write the Java beans which will define your experiments and export that package.
(b) Add the RichBean Framework wizard to your Eclipse IDE. This is a jar which should be placed in the
plugins folder of your Eclipse IDE installation. Then restart the IDE with the –clean option.
(c) Use the RichBean Framework wizard to build UI classes based on the beans you have defined. To do this,
in the IDE, use the menu option:
New -> Other... -> DLS Wizards -> New Rich Bean Editor from Wizard
(d) Write the mapping file and XSD file which is used to map the Java beans to xml. The tag for the experiment
object should match the class name. These should be referenced in each Java class by two public static
URLs and two methods:
static public final URL mappingURL = MyBean.class.getResource("MyBeanMapping.xml");
static public final URL schemaURL = MyBean.class.getResource("MyBeanMapping.xsd");
public static MyBean createFromXML(String filename) throws Exception {
return (MyBean) XMLHelpers.createFromXML(mappingURL, MyBean.class, schemaURL, fil
}
public static void writeToXML(MyBean scanParameters, String filename) throws Exception {
XMLHelpers.writeToXML(mappingURL, scanParameters, filename);
}
3. Use extension points to configure your Experiment perspective.
(a) for each bean class contribute one entry to the following extension points:
i. uk.ac.common.beans.factory
ii. uk.ac.gda.richbeans.beantypes
iii. org.eclipse.ui.editors (editor id must match to the Java class)
iv. org.eclipse.core.contenttype.contentTypes
26
Chapter 6. RCP Client GUI development
GDA Developer Guide, Release 8.24
(b) make a contribution to the uk.ac.gda.client.experimentdefinition extension point. This
references the implementation-specific classes which are used by the Experiment perspective to perform
certain roles. Classes which extend the following abstract base classes are required:
(a) ExperimentObjectManager – creates and manages the experiments in a multi-scan
(b) ExperimentObject – the scan object - holds references to the xml files
(c) AbstractValidator – logic for validating the values in the beans in each scan
(a) A command and handler to copy a template file for each bean type to the working
directory need to be defined in your plugin.
The underlying handler class is always
uk.ac.gda.client.experimentdefinition.ui.handlers.XMLCommandHandler but separate contributions to the
org.eclipse.ui.handlers and org.eclipse.ui.commands extension points need to be made for each bean type.
3. Configure the Command Queue, which is used by the Experiment perspective to run the scans. In the server
add:
<bean id="commandQueue" class="gda.commandqueue.CommandQueue">
</bean>
<bean id="commandQueueProcessor" class="gda.commandqueue.FindableProcessorQueue">
<property name="queue" ref="commandQueue" />
<property name="startImmediately" value="false" />
<property name="pauseWhenQueueEmpty" value="true" />
<property name="logFilePath" value="${gda.logs.dir}/commandQueueProcessor.log" />
</bean>
<bean class="uk.ac.gda.remoting.server.GdaRmiServiceExporter">
<property name="serviceName" value="gda/commandQueueProcessor" />
<property name="service" ref="commandQueueProcessor" />
<property name="serviceInterface" value="gda.commandqueue.IFindableQueueProcessor" /
</bean>
<bean id="MyLoggingScriptController"
class="gda.jython.scriptcontroller.logging.LoggingScriptController">
<property name="messageClassToLog"
value="<an implementation specific bean implementing gda.jython.scriptcontro
<property name="directory" value="${gda.var}/" />
<property name="local" value="true"/>
</bean>
<bean class="uk.ac.gda.remoting.server.GdaRmiServiceExporter">
<property name="serviceName" value="gda/MyLoggingScriptController" />
<property name="service" ref="MyLoggingScriptController" />
<property name="serviceInterface"
value="gda.jython.scriptcontroller.logging.ILoggingScriptController" />
</bean>
And in the client xml configuration:
<bean id="MyLoggingScriptController" class="uk.ac.gda.remoting.client.GdaRmiProxyFactoryBean
<property name="serviceUrl" value="${gda.rmi.prefix}MyLoggingScriptController" />
<property name="serviceInterface" value="gda.jython.scriptcontroller.logging.ILoggin
<property name="refreshStubOnConnectFailure" value="true" />
</bean>
<bean id="commandQueueProcessor" class="uk.ac.gda.remoting.client.GdaRmiProxyFactoryBean">
<property name="serviceUrl" value="${gda.rmi.prefix}commandQueueProcessor" />
<property name="serviceInterface" value="gda.commandqueue.IFindableQueueProcessor" /
<property name="refreshStubOnConnectFailure" value="true" />
</bean>
<bean class="gda.rcp.util.OSGIServiceRegister">
6.2. The Experiment Perspective
27
GDA Developer Guide, Release 8.24
<property name="class" value="gda.commandqueue.Processor" />
<property name="service" ref="commandQueueProcessor" />
</bean>
<bean class="gda.rcp.util.OSGIServiceRegister">
<property name="class" value="gda.commandqueue.Queue" />
<property name="service" ref="commandQueueProcessor" />
</bean>
Once configured, the Experiment Perspective can then be included in your own product and have the same functionality
for managing xml files and running scans as in the example product.
Example classes are in the gda.example.richbean package of the uk.ac.gda.example plugin.
Important: must implement toString(), hashCode() and equals()
28
Chapter 6. RCP Client GUI development
CHAPTER
SEVEN
REMOTING
7.1 CORBA in the GDA
7.1.1 Introduction
This section describes how to create a new object and CORBA-enable it - that is, create the additional files, interfaces
and classes needed for the clients to interact with the object remotely.
7.1.2 Writing the Java code
Create the Java interface for the object
External hyperlinks, like gda.device.detector.Phantom.
Write an implementation of your interface
For example gda.device.detector.phantom.PhantomV73.
Note that if the interface is some.package.Xxx, the implementation should be in some.package.xxx.SomeClass.
In the case of the Phantom, the PhantomV73 class fits into the Device/Scannable/Detector hierarchy, but an object
implementing the IPhantomV73Controller interface is used to actually interact with the hardware (or a simulation of
it).
7.1.3 Creating CORBA-specific files
Create an IDL that matches the Java interface
For example, phantom.idl
A few points:
• Note that whereas the Java interface is called Phantom, the CORBA interface is called CorbaPhantom.
• Java and CORBA types are different; for example, a Java int corresponds to a CORBA long.
• Input parameters must be prefixed with in; for example: double getDemandVoltage(in long electrodeNumber)
raises (device::corba::CorbaDeviceException);
29
GDA Developer Guide, Release 8.24
Compile the IDL to create CORBA classes
(It is no longer necessary to add the IDL file to an Ant script; the make-corba-jar target automatically picks up all
IDLs.)
From the root of the GDA project, type:
$ ant make-corba-jar
Or if this fails, try:
ant -f build-classic.xml make-corba-jar
which will create a new gda-corba.jar that will include new classes for your object. For Phantom these classes include:
• CorbaPhantomOperations - interface containing the Phantom-specific operations (e.g. setupForCollection)
• CorbaPhantom - interface representing the CORBA version of Phantom; extends CorbaPhantomOperations plus
some other CORBA interfaces
• _CorbaPhantomStub - implements CorbaPhantom and makes the CORBA remote requests
• CorbaPhantomHelper - various utility methods for working with CorbaPhantom objects
Write the CORBA implementation/adapter classes
These classes must be located in the correct package so they are found.
• The interface for the device will be in some.package.Xxx.
• The ImplFactory requires the implementation class to be named some.package.xxx.corba.impl.XxxImpl.
• The AdapterFactory
AdapterFactory] requires the adapter class to be named some.package.xxx.corba.impl.XxxAdapter.
Implementation class
For Phantom, this is PhantomImpl.
The implementation class must extend your CORBA object’s POA class (for Phantom, this is called CorbaPhantomPOA).
• The class needs two fields: * The real object - a Phantom in the case of the Phantom. * A POA field.
• You need a 2-arg constructor which takes the “real” object and the POA. ImplFactory will use this constructor.
• Each method that you implement should delegate to the “real” object; any exceptions must be converted into
CORBA-specific exceptions (e.g. DeviceException to CorbaDeviceException). See PhantomImpl for examples
of how to implement these methods.
Adapter class
For Phantom, this is PhantomAdapter.
The adapter class may extend other adapter classes but always needs to implement your Java interface (e.g. Phantom).
• The class needs three fields: * A CORBA object (e.g. a CorbaPhantom for the Phantom). * A NetService. *
The object’s name.
30
Chapter 7. Remoting
GDA Developer Guide, Release 8.24
• You need a 3-arg constructor which takes a CORBA object, the object’s name, and a NetService. AdapterFactory
will use this constructor.
• Each method that you implement should delegate to the CORBA object; any CORBA exceptions must be converted into corresponding non-CORBA exceptions (e.g. CorbaDeviceException to DeviceException). See PhantomAdapter for examples of how to implement these methods.
7.1.4 How the remote call works
Once the CORBA work has been done, the object can be used like this:
MyObject myObject = Finder.getInstance().find("My_Object_Name");
myObject.myMethod("foobar");
The way this is handled is as follows:
• myObject.myMethod(“foobar”) calls the corresponding method in the adapter.
• The adapter calls the CORBA stub.
• The CORBA stub makes the remote call across the network.
• On the server, the corresponding method in the implementation class is called by CORBA.
• The implementation class calls the “real” object.
7.1.5 Reference
Phantom.idl:
#ifndef _PHANTOM_IDL_
#define _PHANTOM_IDL_
#include <detector.idl>
module
module
module
module
module
gda {
device {
detector {
phantom {
corba {
/**
* An interface for a distributed motor class
*/
interface CorbaPhantom : device::detector::corba::CorbaDetector
{
void setUpForCollection(in long numberOfFrames, in long framesPerSecond, in long width, in long he
raises (device::corba::CorbaDeviceException);
any retrieveData(in long cineNumber, in long start, in long count) raises (device::corba::CorbaDev
string command(in string commandString) raises (device::corba::CorbaDeviceException);
};
};};};};};
#endif
ImplFactory:
gda.factory.corba.util.ImplFactory
7.1. CORBA in the GDA
31
GDA Developer Guide, Release 8.24
AdaptorFactory:
gda.factory.corba.util.AdaptorFactory
PhantomImpl:
gda.device.detector.phantom.corba.impl.PhantomImpl
PhantomAdaptor:
gda.device.detector.phantom.corba.impl.PhantomAdaptor
7.1.6 Validating CORBA JARs
The compiled code in a CORBA JAR can get out of sync with the IDL file that was used to generate the code. A
CORBA JAR can be validated using gda-build.py. For example:
# validate the CORBA JAR in all plugins
gda-build.py corba-validate-jar
# validate the CORBA JAR in the specified plugins only
gda-build.py -i core corba-validate-jar
This recompiles the IDL file to produce Java source code, then compiles the Java source code to produce class files.
The newly-compiled class files are compared to those inside the CORBA JAR. Any mismatches are reported.
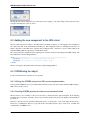
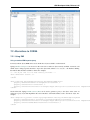
7.1.7 Viewing objects bound in the name server
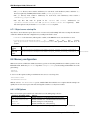
After a GDA object server has been started, JacORB’s NameManager can be used to view the objects bound in the
name server.
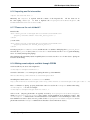
The NameManager can be started using the gda launcher using the command:
gda namemanager
This will launch the NameManager:
By default the gda launcher will try to automatically determine the location of the JacORB configuration directory,
which contains the etc/jacorb.properties file that specifies the location of the name server. (This directory
is typically $GDA_CONFIG/properties.) If the directory cannot be determined automatically for any reason, or
if you want to use a specific JacORB configuration file, the JacORB directory can be specified manually:
gda namemanager --jacorb=/path/to/jacorb/dir
The standard NameManager supplied with JacORB does not show all bound objects due to a bug. The
org.jacorb.naming.namemanager plugin contains a patch for this bug. If this plugin is present in your
GDA installation, it will automatically be included on the classpath. The plugin must be compiled for the patch to take
effect.
32
Chapter 7. Remoting
GDA Developer Guide, Release 8.24
7.2 Alternatives to CORBA
7.2.1 Using RMI
Using a standard RMI exporter/proxy
For newly-written objects, RMI can be used to make those objects available over the network.
Spring’s RmiServiceExporter can be used on the server side to make an object remotely available. It must be told
which object is being exported, the name to export the object with, and the service interface - the interface defining
the methods that should be available to clients. For example:
<!-- the object that is to be made remotely available -->
<bean id="server" class="...">
...
</bean>
<bean class="org.springframework.remoting.rmi.RmiServiceExporter">
<property name="serviceName" value="gda/ProsilicaServer" />
<property name="service" ref="server" />
<property name="serviceInterface" value="gda.images.camera.prosilica.server.ProsilicaImageServer"
</bean>
On the client side, Spring’s RmiProxyFactoryBean can be used to generate a proxy to the object on the server. It
will create a proxy object that implements the service interface; each method makes a call to the remote object. For
example:
<bean id="prosilica_server" class="org.springframework.remoting.rmi.RmiProxyFactoryBean">
<property name="serviceUrl" value="rmi://otherserver/gda/ProsilicaServer" />
<property name="serviceInterface" value="gda.images.camera.prosilica.server.ProsilicaImageServer"
<property name="refreshStubOnConnectFailure" value="true" />
</bean>
7.2. Alternatives to CORBA
33
GDA Developer Guide, Release 8.24
The refreshStubOnConnectFailure property causes the client to reconnect to the server if, for example, the
server is restarted. This allows a hot restart of the server without the need for the client to be restarted.
Note that using RmiProxyFactoryBean means that every call to a method in the service interface will result in
a remote method invocation. This is not appropriate, for example, for objects that implement IObservable for
eventing. See the next section for a solution to this.
There are currently a number of issues that prevent this mechanism from being used instead of CORBA for objects
such as scannables:
• The ‘remote interface’ defined by the CORBA IDL files, and the adapter and implementation classes, often
differ from the methods implemented by the ‘real’ object. An object exported using RmiServiceExporter,
and a proxy automatically generated by RmiProxyFactoryBean, would not account for these differences.
• CORBA adapter and implementation classes often include additional logic not present in the ‘real’ object. They
also sometimes carry out type conversion. Again, using the standard RMI exporter/proxy beans would not take
these differences into account.
• CORBA adapter and implementation classes often carry out conversions between ‘real’ exception types (such
as DeviceException) and CORBA-specific exception types (such as CorbaDeviceException). This
means that the exceptions that a client needs to be prepared to handle are often quite limited. Using an
automatically-generated RMI proxy would mean that the client may need to be modified to deal with other
exception types.
However, if you are developing new objects and wish to invoke methods remotely, using this mechanism may be
sufficient.
Using GdaRmiServiceExporter and GdaRmiProxyFactoryBean
Spring’s RmiServiceExporter and RmiProxyFactoryBean classes are not appropriate when the server-side
object implements IObservable, for two reasons:
• Although the object will be made available using RMI, so that clients can invoke methods on it, any events that
the object generates will not be propagated to the client.
• On the client, a remote method invocation will be performed for every method in an object’s service interface including the IObservable methods, which will not work.
To export an object that generates events, the GdaRmiServiceExporter and GdaRmiProxyFactoryBean
classes should be used instead of RmiServiceExporter and RmiProxyFactoryBean respectively.
GdaRmiServiceExporter exports an object using RMI in much the same way as RmiServiceExporter,
except that any events generated by the object will be propagated through CORBA to clients.
GdaRmiProxyFactoryBean creates a proxy that handles IObservable method calls locally. The proxy is
automatically connected to the CORBA event dispatch system, and registers to receive events related to the server-side
object. It also maintains a client-side list of observers. When events are received by the client-side proxy, they will be
dispatched to observers.
Care must be taken to ensure that the names of the server-side and client-side objects match, or events will not be
received. On the server, the GdaRmiServiceExporter will arrange for events to be sent using the name of the
underlying object. So for this:
<bean id="A" class="...">
...
</bean>
<bean class="uk.ac.gda.remoting.server.GdaRmiServiceExporter">
<property name="serviceName" value="..." />
<property name="service" ref="A" />
34
Chapter 7. Remoting
GDA Developer Guide, Release 8.24
<property name="serviceInterface" value="..." />
</bean>
events will be sent with the object name A. On the client, the GdaRmiProxyFactoryBean must also be called A,
as otherwise it will not receive events from the server-side object called A.
<bean id="A" class="uk.ac.gda.remoting.client.GdaRmiProxyFactoryBean">
...
</bean>
7.2. Alternatives to CORBA
35
GDA Developer Guide, Release 8.24
36
Chapter 7. Remoting
CHAPTER
EIGHT
GDA CONFIGURATION
8.1 Spring configuration
8.1.1 The gda namespace
Using the namespace in your XML files
To use elements from the gda namespace, you will need to declare the namespace by adding the following attribute
to the <beans> element in your Spring configuration:
xmlns:gda="http://www.diamond.ac.uk/schema/gda/gda"
You will also need to add these entries to the xsi:schemaLocation attribute:
http://www.diamond.ac.uk/schema/gda/gda http://www.diamond.ac.uk/schema/gda/gda/gda-gda-1.0.xsd
Adding the namespace to your XML Catalog in Eclipse
If you use elements from the gda namespace in your XML files, you should add the schema for the gda namespace
to the Eclipse XML Catalog, so that Eclipse can validate XML files containing these custom elements. To do this:
• Open the Eclipse preferences (Window → Preferences)
• Go to XML → XML Catalog
• Click “Add...”
• Enter the following details:
– Location: click “Workspace...” and select uk.ac.gda.core/src/gda/spring/namespaces/gda/gda-gda-1.
– Key Type: choose “Namespace Name”
– Key: enter http://www.diamond.ac.uk/schema/gda/gda/gda-gda-1.0.xsd
8.1.2 FindableNameSetterPostProcessor
Putting this:
<bean class="gda.spring.FindableNameSetterPostProcessor" />
in your Spring XML file causes all Findable objects to have their name property set to be the same as the Spring
id. Therefore you don’t (except in a couple of special cases) need:
37
GDA Developer Guide, Release 8.24
<property name="name" value="..." />
8.1.3 Making properties from java.properties available
Use this:
<context:property-placeholder location="file:${gda.config}/properties/java.properties" />
It allows you to use properties in your Spring XML files. For example:
<property name="hostname" value="${gda.images.camerahost}" />
To make the tags in the context namespace are available to you, you will need to add the following attribute to the
<beans> element in your Spring configuration:
xmlns:context="http://www.springframework.org/schema/context"
You will also need to add these entries to the xsi:schemaLocation attribute:
http://www.springframework.org/schema/context http://www.springframework.org/schema/context/spring-co
8.1.4 Instantiating EPICS devices directly
For example:
<bean id="S1_top_motor" class="gda.device.motor.EpicsMotor">
<property name="pvName" value="BL04J-AL-SLITS-01:Y:PLUS" />
</bean>
8.1.5 Instantiating using the EPICS interface “behind the scenes”
This is for those who don’t like having PVs in their XML files ;-)
To use Diamond’s GDA-EPICS interface file, generated during EPICS IOC build,
Put this somewhere in the Spring XML file (it doesn’t need an ID):
<bean class="gda.configuration.epics.EpicsConfiguration">
<constructor-arg value="${gda.config}/xml/epics-interface.xml" />
</bean>
Then do this:
<bean id="S1_top_motor" class="gda.spring.EpicsMotorFactoryBean">
<property name="deviceName" value="S1.YP" />
</bean>
EpicsMotorFactoryBean is a Spring factory bean - the S1_top_motor object will actually be an
EpicsMotor.
In addition to EpicsMotorFactoryBean, there is also
EpicsPositionerFactoryBean (they all need a deviceName).
38
EpicsMonitorFactoryBean
and
Chapter 8. GDA configuration
GDA Developer Guide, Release 8.24
8.1.6 Importing one file into another
<import resource="S1.xml" />
Effectively, the <import> is replaced with the contents of the imported file.
All the beans are in
the same Spring context (i.e.
no need to duplicate the PropertyPlaceholderConfigurer, the
FindableNameSetterPostProcessor, etc.).
8.1.7 Please use the ref attribute!!!
Instead of this:
<bean id="s1_bottom" class="gda.device.scannable.ScannableMotor">
<property name="motorName" value="S1_bottom_motor" />
</bean>
you can do this:
<bean id="s1_bottom" class="gda.device.scannable.ScannableMotor">
<property name="motor" ref="S1_bottom_motor" />
</bean>
Note the property is motor, not motorName, and this uses the ref attribute - which plugs the S1_bottom_motor
motor into the s1_bottom object (so the ScannableMotor doesn’t need to use the Finder to get the underlying
motor - it’s already wired up using Spring).
Since Spring has this dependency injection capability, there’s no need to use the Finder in new classes - Spring can
be used to do the wiring.
8.1.8 Making remote objects available through CORBA
You’ll need this in your server-side configuration:
<corba:export namespace="stnBase" />
You need to declare the corba namespace by putting this at the top of the XML file:
xmlns:corba="http://www.diamond.ac.uk/schema/gda/corba"
and adding these entries to the xsi:schemaLocation attribute:
http://www.diamond.ac.uk/schema/gda/corba http://www.diamond.ac.uk/schema/gda/corba/gda-corba-1.0.xsd
Due to a limitation of Spring, property placeholders cannot be used in the namespace attribute when using
<corba:export />. So this, for example:
<corba:export namespace="${gda.beamline.name}" />
will not work. (Property placeholders are typically resolved by a PropertyPlaceholderConfigurer,
which is a BeanFactoryPostProcessor that operates on bean definitions in an application context. The
<corba:export /> element itself is not transformed into a bean definition: it uses the namespace value to add
bean definitions for remote objects. It is not possible for the PropertyPlaceholderConfigurer to resolve
placeholders used in the namespace attribute before that value is used to find remote objects.)
8.1. Spring configuration
39
GDA Developer Guide, Release 8.24
8.1.9 Importing remote objects from another object server
You’ll need this in your client-side configuration:
<corba:import namespace="stnBase" />
As with <corba:export />, to use the corba namespace you need to declare it at the top of the XML file.
The good thing about using corba:import is that ‘hidden’ beans are added to the Spring context for all of the
remote objects, so you can use them in any ref="..." attributes elsewhere in the file.
8.1.10 Enabling role-based access control using <gda:rbac />
To enable role-based access control (RBAC), add the following element to your Spring configuration:
<gda:rbac />
You must also set the gda.accesscontrol.useAccessControl property to true.
8.1.11 The corba namespace
As with the gda namespace, if you use the <corba:export> or <corba:import> elements described above,
you should add the schema for the corba namespace to the Eclipse XML Catalog. To do this, follow the instructions
for the gda namespace above, but use the following values:
• Location: uk.ac.gda.core/src/gda/spring/namespaces/corba/gda-corba-1.0.xsd
• Key: http://www.diamond.ac.uk/schema/gda/corba/gda-corba-1.0.xsd
Due to an issue with SpringSource Tool Suite, you may still get the following warning, which can be ignored:
Unable to locate Spring NamespaceHandler for element ‘corba:export’ of schema namespace
‘http://www.diamond.ac.uk/schema/gda/corba’
8.1.12 SingletonRegistrationPostProcessor
<bean class="gda.spring.SingletonRegistrationPostProcessor" />
This registers certain objects you create in the Spring context as the application-wide singleton instances (e.g. the
metadata).
(Objects in Spring XML files are, by default, singletons. In a perfect world, the metadata and other singletons could
be injected into other objects, rather than the other objects calling Whatever.getInstance(). In practice it’s
difficult to do this because (1) there are too many objects that need the singletons; and (2) not all of those objects will
be defined in the Spring XML file. It’s good to define the objects in the Spring XML file, as this gives us complete
control over their configuration, and means we can swap the real objects for mock objects. But this means we need to
register those objects with some kind of registry.)
8.1.13 Property editors
PropertyEditor (Javadoc) is a standard Java interface concerned with converting text representations of property
values into their ‘real’ types (among other things).
In Spring they are used to convert the text values used in Spring configuration files into the type required by the bean
being instantiated. Spring has built-in support for many types already, but by putting this in your Spring configuration:
40
Chapter 8. GDA configuration
GDA Developer Guide, Release 8.24
<import resource="classpath:gda/spring/propertyeditors/registration.xml" />
you will also be able to set properties of these types:
• double[][] - 2D double array
• org.apache.commons.math.linear.RealMatrix - Commons Math matrix
and any other types supported by the PropertyEditors listed in the GdaPropertyEditorRegistrar class.
8.1.14 Example Spring configuration
The Diamond I04.1 beamline uses Spring exclusively for its configuation. If you have access to the GDA Subversion
repository, you can view the I04.1 configuration. The Spring contexts for the two object servers are split into multiple
XML files, which are all in the servers/main/live directory.
8.2 Logging
Logging messages can be generated not only by GDA classes, but also by third-party libraries such as Apache Commons Configuration. GDA classes typically use the SLF4J API for logging. Log entries from code that uses Commons
Logging or Log4j are redirected into SLF4J using two SLF4J bindings: Commons Logging over SLF4J and Log4j
over SLF4J.
GDA uses Logback as the SLF4J implementation, so logging entries are passed from SLF4J to Logback.
The following diagram shows one of the logging configuration options - the centralised logging service - used on some
of DLS beamlines
8.2.1 Log Server configuration
GDA provides an utility - gda.util.LogServer - for centrally logging messages from its objects running on both
servers and clients as shown in the diagram above. You need to configure the log server using four properties:
Property
Description
gda.logserver.port
the port that the Log Server listening to
gda.logserver.xml
the logging configuration file, for example, LogServer,xml, of the log Server
gda.logs.dir
the directory in which GDA log file, for example gda.log, is to be stored
gda.logPanel.logging.port
the port that the log viewer listening to, i.e. the port the Log Server forwarding
message to
While the first two properties is required by the LogServer class and are essential, the last two are optional and only
used in the LogServer.xml file to specify the log destinations.
LogServer.xml defines logging destinations (appenders), logger level filters, and file logging rules for the cental logging service at the Log Server.
8.2.2 GDA objects logging configuration
GDA objects are the sources of the logging messages in the system. Although it is possible to configure client objects
logging differently from that of server objects, here we describe the situation that both client and server send their
logging messages to the central Log Server as shown in the diagram above.
In this case, both clients and servers share the same logging configuration defined in, for example, LoggingConfiguration.xml or logBack.xml. Four properties (one is already defined above) need to be set:
8.2. Logging
41
GDA Developer Guide, Release 8.24
42
Chapter 8. GDA configuration
GDA Developer Guide, Release 8.24
Property
gda.logserver.port
gda.logserver.host
gda.client.logging.xml
gda.server.logging.xml
Description
the remote port to which all messages are sent, i.e.the Log Server’s listening port
the remote host in which the Log Server is running.
the logging configuration file for GDA client objects
the logging configuration file for GDA server objects
LoggingConfiguration.xml defines the Log Server as log destination and sets the desired logger level filters for
all/specific loggers used in GDA objects at the message sources.
The reason that there are two logging configuration file properties in the system is historical as we used to configure clients differently from servers. In the case we discussed here, the last two properties are pointed to the same
LoggingConfiguration.xml file.
8.2.3 Log Viewer Configuration
GDA also provides a simple log viewer utility - gda.util.LogPanel for viewing the logging messages received from the central Log server. It connects to the Log server via a socket at port specified by property
gda.logPanel.logging.port. This property are required to start the logPanel viewer.
Property
Description
gda.logPanel.logging.port
the port that the log viewer listening to, i.e. the port the Log Server forwarding
message to
gda.logPanel.logging.xmlthe logging configuration file, for example, LogPanel.xml, for this log viewer.
LogPanel.xml provides you with opportunities to further configure your message display levels for all/specific loggers
used in GDA objects at the display end.
8.2.4 Default server-side logging configuration
The server-side logging configuration is used for object servers, and for the event server.
GDA has a default server-side logging configuration file, located in the uk.ac.gda.core plugin in the file
src/gda/util/logging/configurations/server-default.xml. It is currently used only to specify
the log filters for some of the 3rd part libraries used in GDA.
A server-side logging configuration file for a particular GDA configuration can be specified using the
gda.server.logging.xml property. The default server-side configuration will be applied first, followed by
the custom configuration.
8.2.5 Default client-side logging configuration
GDA has a default client-side logging configuration file, located in the uk.ac.gda.core plugin in the file
src/gda/util/logging/configurations/client-default.xml.It is currently used only to specify
the log filters for some of the 3rd part libraries used in GDA.
A client-side logging configuration file for a particular GDA configuration can be specified using the
gda.client.logging.xml property. The default client-side configuration will be applied first, followed by
the custom configuration.
8.2.6 Using property placeholders in Logback configuration files
You can make properties defined in java.properties available for use in a Logback configuration file by adding
the following element to the top of the file (inside the <configuration> element):
8.2. Logging
43
GDA Developer Guide, Release 8.24
<property file="${gda.config}/properties/java.properties" />
(Use of ${gda.config} works here because gda.config is a system property.)
You can then use property placeholders elsewhere in the file. For example:
<appender name="SOCKET" class="ch.qos.logback.classic.net.SocketAppender">
<RemoteHost>${gda.logserver.host}</RemoteHost>
<Port>${gda.logserver.port}</Port>
...
</appender>
Note that the include statement available in properties file is not read by the logging system. To handle multiple
properties files add multiple <property .../> elements.
8.3 Recording Jython terminal output
The server can be configured to record all text sent to clients’ Jython terminals to a file in the current data/visit
directory. To do this a RedirectablefileLogger should be created in Spring and provided an ObservablePathProvider
which tracks the data/visit directory. When the file location changes, a note will left in the last file directing a reader
to the new file, and a note will be made in the new file indicating where the log was transferred from. Adapters can
then be used to the same observables that a the JythonTerminal observes.
For example, given that a JythonServer has been made (always named ‘command_server’), try this to get a JythonServerFacade reference:
<bean id="jython_server_facade" class="gda.jython.JythonServerFacade">
<constructor-arg ref="command_server" />
</bean>
and then the following to build up a typical logger:
<bean id="terminal_logger" class="gda.jython.logger.RedirectableFileLogger">
<constructor-arg ref="terminallog_path_provider" />
</bean>
<bean class="gda.jython.logger.OutputTerminalAdapter">
<constructor-arg ref="jython_server_facade" />
<constructor-arg ref="terminal_logger"/>
</bean>
<bean class="gda.jython.logger.InputTerminalAdapter">
<constructor-arg ref="command_server" />
<constructor-arg ref="terminal_logger"/>
</bean>
<bean class="gda.jython.logger.ScanDataPointAdapter">
<constructor-arg ref="jython_server_facade" />
<constructor-arg ref="terminal_logger"/>
</bean>
<bean class="gda.jython.logger.BatonChangedAdapter">
<constructor-arg ref="jython_server_facade" />
<constructor-arg ref="terminal_logger"/>
</bean>
where the terminallog_path_provider bean might be a dummy:
<bean id="terminallog_path_provider" class="gda.data.SimpleObservablePathProvider">
<property name="path" value="${gda.data.scan.datawriter.datadir}/gdaterminal.log" />
<property name="local" value="true" />
</bean>
44
Chapter 8. GDA configuration
GDA Developer Guide, Release 8.24
or a one that tracks the server’s visit metadata:
<bean id="terminallog_path_provider" class="gda.data.ObservablePathConstructor">
<property name="template" value="${gda.data.scan.datawriter.datadir}/gdaterminal.log" />
<property name="gdaMetadata" ref="GDAMetadata" />
<property name="local" value="true" />
</bean>
Note that the InputTerminalAdapter receives the commands typed into all clients’ teminals (via the command server).
8.4 Java Properties and Customising the GDA
Properties to be shared throughout the code base are stored as name-value pairs in the java.properties file
located in the config/properties folder. This is a common way to customise GDA behaviour.
Variable interpolation may be used when defining the java properties in the same manner as Spring or Logback xml
files.
The following are the principal java properties which may need customising. However there are many more.
Java properties assumed to be set by -D flags when running the server processes:
PropDescription
erty
gda.rootthe plugins directory of the GDA installation. The features and third-party directories are assumed to
be at the same level
gda.config
location of the configuration directory. A standard sub-structure to this directory is assumed.
gda.datathe top-level data directory. The sub-directories where data files are actually written is derived by the
gda.data.scan.datawriter.datadir property which should use variable interpolation
Note that the RCP client will also rely on the gda.config and gda.data variables being set in its .ini file.
Properties which must be set by a -D flag when running the GDA Java processes (third-party software requirement).
These flags are added automatically by the Python start script:
Property
jacorb.config.dir
Description
${gda.config}/properties or ${gda.config}/jacorb/<mode> (new
style configuration) - this is the directory containing the etc directory for JacORB
gov.aps.jca.JCALibrary.properties
The JCA library properties file for connecting to EPICS PVs.
Properties most likely to be customised:
Property
gda.logs.dir
Description
global read-write directory for any logging processes. Note that the main logging
system has its own configuration file as described above.
gda.data.scan.datawriter.datadir
the directory where data files are to be written. This can be made to be dynamic
using the $visit$ variable and configuring the ICAT system.
gda.data.scan.datawriter.dataFormat
the data format which scans write
gda.rcp.workspace
where workspaces are created for the RCP client. This will need to use variable
interpolation if multiple RCP clients are to be allowed.
GDA property files are read using Commons Configuration. More information about the property file format can be
found in the Properties files section of the Commons Configuration User’s Guide.
A property file can include another property file by using the include directive. For more information, see the
Includes section in the User’s Guide.
8.4. Java Properties and Customising the GDA
45
GDA Developer Guide, Release 8.24
8.5 Metadata
8.5.1 ICAT
The ICAT subsystem talks to a database (an RDBMS or an xml file) which maps user id’s to beamlines and experiments. It is used to find which experiments the user who started each client belongs to and so where any data should
be written to by scans collected under the command of that client.
If no ICAT is used then data is always written to the same folder as defined by the gda.data.scan.datawriter.datadir java
property.
Some examples of different ICAT systems:
To always write to the same data dir:
gda.data
= /scratch/data
gda.data.scan.datawriter.datadir = ${gda.data}
For no ICAT, but to change the data directory in every different experiment:
gda.data
= /scratch/data
gda.data.metadata.icat.type
= gda.data.metadata.icat.NullIcat
gda.data.scan.datawriter.datadir = ${gda.data}/$visit$
# change this for every experiment:
gda.defVisit
= myVisit
To use an ICAT to dynamically change the output directory depending on who is running the GDA client which has
the baton (control of the beamline):
gda.data
gda.data.scan.datawriter.datadir
gda.data.metadata.icat.type
gda.data.metadata.icat.url
gda.data.metadata.icat.shift_tolerance
gda.data.metadata.dlsicat.user
gda.data.metadata.dlsicat.password
=
=
=
=
=
=
=
/scratch/data
${gda.data}/$year$/$visit$
gda.data.metadata.icat.DLSIcat
jdbc:oracle:thin:@(DESCRIPTION=(ADDRESS=(HOST=${oracle.host}
1440
icatusername
icatpassword
The DLSIcat class provides connectivity to the ICAT database. There is an alternate class in the uk.ac.gda.core
plugin called XMLIcat which uses an XML file as a database. This is primarily for use in unit testing or offsite
demonstrations, but could also be used by other facilities if they do a database dump into that format.
At Diamond, the scripts in /dls_sw/dasc/bin/iKittenScripts can be used to diagnose problems with
ICAT. For example:
• getCurrentVisit will show the ID of the current visit, if there is one.
• getFedIdsForCurrentVisit will show details of users on the current visit.
• getDetailsOfVisit will show information about a particular visit.
8.6 Role-Based Access Control
8.6.1 Concepts
The idea behind the RBAC system is not to provide cast-iron security to the system, but it to prevent users from
accidentally operating hardware at the wrong time which could damage their experiment. E.g. preventing users from
moving optical equipment which have been tuned or hardware shared between different branches
46
Chapter 8. GDA configuration
GDA Developer Guide, Release 8.24
Device protection
Every piece of equipment (class extending Device) can be assigned a protection level (default is 1), and every
user assigned an authorisation level (default is 1, but this can be configured to a different value). When certain methods of an object representing a device are called then the user’s authorisation is compared to the protection level; if the authorisation is equal or greater than the protection level then the method is called, otherwise an
gda.jython.accesscontrol.AccessDeniedException is thrown.
GDA developers do not have to write any special code in their device classes to implement this access logic. However
if there is a method in a class or interface that needs protection (e.g. Motor.moveTo()) then in the Java source code
you should annotate that method using the tag:
@!MethodAccessProtected(isProtected=true)
The RBAC system will search through the source code using reflection to find such annotations.
The idea is that certain methods will always check for protection whereas some will always be called no matter what
the authorisation of the user (e.g. all users can ask the position of any motor, but may only be able to control certain
motors).
Client authorisation
When a GDA client is started the user id is either taken from the OS or a different user id and password maybe
entered. If different details are entered they are authenticated against the whatever Authoriser has been configured (the
single-sign-on LDAP system at Diamond).
The login in information is passed to the Command Server (Jython Server) from the client via the InterfaceProvider
class. The client makes a unique registration with the Command Server so the source of each command may be
identified. The Command Server then determines the authorisation level of that client by comparing the FedID that
the Client uses against an xml database on that beamline. If the FedID is listed in the xml then the stored authorisation
level is used, otherwise the client is given the default.
There is a tool (gda.jython.authoriser.EditPermissions) which developers or beamline scientists can use to set and
change authorisation levels. It is recommended to only list users with elevated authorisation or beamline staff in the
xml.
The Baton
One beamlines implementing the RBAC system there is the option to use a baton to determine which client has
control of the beamline if the beamline may have multiple clients running. Clients holding the baton have control of
the beamline subject to their authorisation level, whereas other clients cannot operate the protected methods of any
hardware no matter what their authorisation level.
A baton holder may release the baton, so any client can pick it up or it can give the baton to a specific client.
A client may also take the baton from the baton holder if the holder has a lower authorisation level.
There is a GUI panel which lists all the clients on the beamline and has controls for releasing/taking/passing the baton.
8.6.2 Configuration options
java properties
To switch on rbac add the following element to your Spring configuration:
8.6. Role-Based Access Control
47
GDA Developer Guide, Release 8.24
<gda:rbac />
and set the following java property:
gda.accesscontrol.useAccessControl = true
To switch on baton control (if this is set to true then you MUST use the BatonPanel in the Swing UI, it will be available
by default in the SWT UI):
gda.accesscontrol.useBatonControl = true
To set the default authorisation level (default is 1):
gda.accesscontrol.defaultAuthorisationLevel = 1
To set the default authorisation level for staff (default is 2):
gda.accesscontrol.defaultStaffAuthorisationLevel = 2
For the first client after the server starts to automatically pick up the baton:
gda.accesscontrol.firstClientTakesBaton = true
To tell the server which class to use for authorisation (This class must
gda.jython.authoriser.gda.jython.authoriser, this is mainly to distinguish between users and staff):
implement
gda.gui.AcquisitionGUI.authorisationMethod = gda.jython.authoriser.LdapAuthoriser
A common implementation is the FileAuthoriser - in fact, the provided LDAPAuthoriser implementation
uses a FileAuthoriser to provide a local override. FileAuthoriser uses an xml file, which it looks for in
${gda.user.permissions.dir} (or ${gda.config}/xml/ if the first property isn’t defined). Both have the same format,
which is:
<user_permissions>
<user_id>N</user_id>
</user_permissions>
Where user_id identifies a particular user, and N is the numeric permission level.
user_permissions.xml indicate what users exist and their device permissions.
Entries in the file
To tell the server which class to use for authentication (implements gda.jython.authenticator.Authenticator interface.
If this is not defined then no login screen will appear and OS authentication will be used - this is recommended):
gda.gui.AcquisitionGUI.authenticationMethod = gda.jython.authenticator.LdapAuthenticator
(for Diamond we now use ldap as the cclrc ldap server can also be used to distinguish staff and user accounts)
xml files
To identify specific accounts as staff there should be an xml file placed in the configuration which lists all staff (nonuser) accounts which are outside of the ldap server.
This is xml/beamlinestaff.xml and a copy of this is in the example configuration.
The difference between staff and users in the RBAC system is that staff get a different default permission level and if
no visit can be found in the ICAT system for that user ID then the default visit is used (defined by a java.property). If
a non-staff account has no associated visit in the ICAT system then the UI will not start.
48
Chapter 8. GDA configuration
GDA Developer Guide, Release 8.24
xml tags
On devices and DOFs in the Object server xml file:
<protectionLevel>1</protectionLevel>
The protection level MUST be greater than 0!
In the client xml file (Swing UI only):
<!BatonPanel>
<name>Baton Control</name>
</BatonPanel>
8.6.3 How to setup RBAC on a beamline on Diamond
1.
2.
3.
4.
5.
set the
add the
add the
run the
restart
java properties as listed above.
appropriate tags to the server and client xml configuration files for each piece of hardwa
beamlinestaff.xml file to your configuration to list which accounts should be treated as s
tool to build the authorisation database for that beamline if you wish to give certain use
the GDA !
8.7 New configuration layout
Starting with GDA 8.10, a simplified startup mechanism is supported that allows two additional parameters to be
specified when using the gda launcher.
PaDefault
ramesetting
ter
--profile
main
--mode live
Purpose
Used to distinguish between different types of GDA object server or client
Allows different variants of the configuration; for example, a ‘live’ mode that connects to
real hardware, or a ‘dummy’ mode where dummy devices are used
To allow these parameters to be used, a new directory layout must be used for the configuration. All of the following
directories must exist in the top level of the configuration directory:
Directory
clients
jacorb
jca
servers
Purpose
Contains client-related XML configuration files
Contains jacorb.properties files required by JacORB
Contains JCALibrary.properties files required by JCA
Contains server-related XML configuration files
The following settings will then be automatically determined, and do not need to be specified when running the gda
launcher:
Setting
Properties file
JacORB configuration directory
JCA configuration file
Server XML file
Client XML file
Value
$CONFIG/properties/<mode>/java.properties
$CONFIG/jacorb/<mode>
$CONFIG/jca/<mode>/JCALibrary.properties
$CONFIG/servers/<profile>/<mode>/server.xml
$CONFIG/clients/<profile>/<mode>/client.xml
Notes on the new layout:
• The properties directory must contain a subdirectory for each mode (e.g. dummy and live); each subdirectory must contain a java.properties file.
8.7. New configuration layout
49
GDA Developer Guide, Release 8.24
• The jacorb directory must contain a subdirectory for each mode; each subdirectory must contain the etc
directory required by JacORB (which in turn contains jacorb.properties).
• The jca directory must contain a subdirectory for each mode; each subdirectory must contain a
JCALibrary.properties file.
• The only files that must be present in the servers and clients subdirectories are
<profile>/<mode>/server.xml and <profile>/<mode>/client.xml respectively. Other
files can be placed at any level under servers and clients as required.
8.7.1 Object server startup file
Any client or server that starts up an object server or creates an objectServerImpl will create a startup file. The name
of this file is different if the new configuration layout with profile name is used.
• <xmlfile> is the base name (without paths or suffix) of the XML file used to start the client or server
• <initialisationCompleteFolder>
is
defined
in
the
Java
property
gda.objectserver.initialisationCompleteFolder that specifies where this file is to be
created
Layout
format
Old
New with
profile
Startup file name
<initialisationCompleteFolder>/object_server_startup_<xmlfile>
<initialisationCompleteFolder>/object_server_startup_<xmlfile>_<profilename>
8.8 Memory configuration
With recent versions of GDA, the default java memory options are becoming insufficient for reliable operation of the
RCP GDA client. While the gdaclient script in the example-config sets the starting and maximum size of the
general heap:
-Xms256m
-Xmx1024m
it does not set the seperate starting or maximum Permanent Generation heap sizes:
-XX:PermSize=128m
-XX:MaxPermSize=256m
Without at least a -XX:MaxPermSize option, an RCP GDA client which is more complex than the example can
quickly run out of PermGen space and crash, leaving little evidence as to why it has crashed.
8.8.1 JVM Options
There are four main options which control the behaviour of the JVM garbage collector:
Parameter & Default setting
-XX:PermSize=16m
-XX:MaxPermSize=64m
-Xms64m
-Xmx1024m
Purpose
Default starting size of the Permanent Generation heap.
Default maximum size of the Permanent Generation heap.
Default starting size of the jvm heap.
Default maximum size of the jvm heap.
In addition, there are a few options which help to monitor the jvm garbage collector and change it’s behaviour.
50
Chapter 8. GDA configuration
GDA Developer Guide, Release 8.24
Parameter
-verbose:gc
-XX:+PrintGCDetails
-XX:+PrintGCTimeStamps
-XX:+PrintHeapAtGC
-XX:+DisableExplicitGC
-XX:+ExplicitGCInvokesConcurrent
Purpose
Request that the jvm print details of each garbage collection.
Causes additional information to be printed.
Will add a time stamp at the start of each collection
Prints even more information about each garbage collection.
Request that the jvm ignore System.gc() calls.
Use a different GC mechanism for System.gc() calls.
8.8.2 JVM defaults
The current system defaults can be seen using the following command:
$ java -server -XX:+PrintFlagsFinal -version 2>&1 | grep -i -E ’heapsize|permsize’
uintx AdaptivePermSizeWeight
= 20
{product}
uintx ErgoHeapSizeLimit
= 0
{product}
uintx InitialHeapSize
:= 66328512
{product}
uintx LargePageHeapSizeThreshold
= 134217728
{product}
uintx MaxHeapSize
:= 1063256064
{product}
uintx MaxPermSize
= 67108864
{pd product}
uintx PermSize
= 16777216
{pd product}
If we add in the suggested memory configuration options, we can see the effect that these options have:
$ java -server -Xms256m -Xmx1024m -XX:PermSize=128m -XX:MaxPermSize=256m \
>
-XX:+PrintFlagsFinal -version 2>&1 | grep -i -E ’heapsize|permsize’
uintx AdaptivePermSizeWeight
= 20
{product}
uintx ErgoHeapSizeLimit
= 0
{product}
uintx InitialHeapSize
:= 268435456
{product}
uintx LargePageHeapSizeThreshold
= 134217728
{product}
uintx MaxHeapSize
:= 1073741824
{product}
uintx MaxPermSize
:= 268435456
{pd product}
uintx PermSize
:= 134217728
{pd product}
Note: If the above commands show no output, or reduced output, try adding the parameter:
-XX:+UnlockDiagnosticVMOptions
8.8.3 Optimising starting and maximum values
The JVM allows you to specify different starting and maximum values so that you can optimise memory use in your
application.
The options -Xms256m -Xmx1024m say:
• Start by allocating 256MB of memory to the heap for this application, but allow the heap to grow up to 1GB if
the application requires it.
If the memory required by the application increases above 256MB, then the JVM will request more memory from the
operating system and resize the application heap. If the memory required by the application increases above 1GB,
then then eventually the application will crash with a java.lang.OutOfMemoryError exception.
Unfortunately every time the JVM increases the size of the heap, time is required to manage the expansion. If a GDA
client allocates 400MB of memory during the process of starting up, it will start with 256MB, increase it by a small
block when it goes above that, increase it a little more when it goes over that new limit and and keep increasing the
size until it no longer need to increase the heap any more. Each of these heap expansions will add time to the start up
of the GDA client.
8.8. Memory configuration
51
GDA Developer Guide, Release 8.24
For optimal results, it is a good idea to use jvisualvm to profile how much memory the GDA client typically needs,
then add a little more for future expansion.
For instance, if a client allocates 400MB just for startup, rises to 480MB after a few basic scans, but rises to 1.6GB
during intense use, then -Xms512m -Xmx2g might be a good starting point.
The same applies to Permanent Generation space.
For instance, if jvisualvm shows you that a client allocates uses 60MB when starting up with the scan perspective, rises to 90MB after opening the PyDev scripts perspective and peaks at 150MB during a long session, then the
--XX:PermSize=96m -XX:MaxPermSize=192m might be sufficient.
8.8.4 Out of memory exceptions
Most out of memory exceptions are a simple matter of the jvm running out of general heap space, which can often be
corrected by increasing the -Xmx value.
When you run out of heap space, the error will be of the form:
java.lang.OutOfMemoryError: Java heap space
Other out of memory exceptions are more obscure though.
In java 6, the garbage collector will generate an out of memory exception if more than 98% of the total time is spent
in garbage collection and less than 2% of the heap is recovered. This may indicate that you are creating an excessive
number of temporary objects in an already memory constrained jvm. It might be fixed by just giving the jvm more
heap space, but it may also be indicative of other problems.
When garbage collection was taking over your application, the error will be of the form:
java.lang.OutOfMemoryError: GC overhead limit exceeded
When you run out of PermGen space, the error may occur in a random thread, so any error of the form:
java.lang.OutOfMemoryError: PermGen space
is an indication that -XX:MaxPermSize= may need to be increased.
An example of an error due to MaxPermSize being too low, logged in a gda_output log file was:
Logging exception:
java.lang.OutOfMemoryError: PermGen space
Exception in thread "jReality ToolSystem EventQueue" java.lang.OutOfMemoryError: PermGen space
Exception in thread "AWT-EventQueue-0" java.lang.OutOfMemoryError: PermGen space
Finally, on 32-bit RHEL machines, there also appears to be an issue when you increase the total of permgen space and
heap to around 2.6GB.
In one test, using -Xmx2048m -XX:MaxPermSize=768m, the jvm refuses to load the client. This can be shown
with:
$ java -Xmx2048m -XX:MaxPermSize=768m -version
Error occurred during initialization of VM
Could not reserve enough space for object heap
Could not create the Java virtual machine.
With -Xmx2048m -XX:MaxPermSize=640m, the jvm allows the RCP GDA client to load, but then within 300
to 1000 seconds, the client would crash with a fatal error in the java runtime:
52
Chapter 8. GDA configuration
GDA Developer Guide, Release 8.24
#
#
#
#
#
#
#
#
#
#
#
A fatal error has been detected by the Java Runtime Environment:
java.lang.OutOfMemoryError: requested 32756 bytes for ChunkPool::allocate. Out of swap space?
Internal Error (allocation.cpp:166), pid=6265, tid=69073808
Error: ChunkPool::allocate
JRE version: 6.0_24-b07
Java VM: Java HotSpot(TM) Client VM (19.1-b02 mixed mode linux-x86 )
An error report file with more information is saved as:
/home/gfn74536/hs_err_pid6265.log
This is an internal error, not an exception, so it cannot be caught or handled, and appears to be the jit compiler itself
running out of memory, even though there is plenty of both heap and PermGen space available.
The limits of the Windows 32bit jvm and the Windows or Linux 64bit jvm’s have not been explored.
8.8.5 Pauses due to garbage collection
If your GDA client suffers from frequent noticable pauses, you may want to try adding the option:
-verbose:gc
This will log details of the heap before and after each garbage collection, along with the time that the collection took.
Since the JVM performs both minor and full collections, some will take very little time to complete while others may
take seconds to complete.
Further options can be used to provide more information at each garbage collection.
-XX:+PrintGCDetails
-XX:+PrintGCTimeStamps
-XX:+PrintHeapAtGC
Although use of the System.gc() call is discouraged, some parts of the GDA software still use it. As
System.gc() forces an immediate explicit full garbage collection, each call could cause the RCP GDA client
to pause for more than a second.
If explicit garbage collection is causing problems, you can instruct the jvm to ignore calls to System.gc() by the
use of the option:
-XX:DisableExplicitGC
Another option 1 , which was introduced in Java 6, appears to offer halfway house between full explicit garbage
collection and none:
-XX:+ExplicitGCInvokesConcurrent
This option uses the Concurrent Mark Sweep Collector which aims to keep garbage collection-induced pauses short.
This has not be tested, but might be worth investigating if both disabling explicit garbage collections and leaving it
enabled cause problems.
1
http://java.sun.com/performance/reference/whitepapers/6_performance.html#2.2.2
8.8. Memory configuration
53
GDA Developer Guide, Release 8.24
8.8.6 Further information
For Java 6 the official tuning guide can be found in the document Java SE 6 HotSpot[tm] Virtual Machine Garbage
Collection Tuning 2 and there is additional information in the Java SE 6 Performance White Paper. 3
2
3
54
http://www.oracle.com/technetwork/java/javase/gc-tuning-6-140523.html
http://java.sun.com/performance/reference/whitepapers/6_performance.html
Chapter 8. GDA configuration
CHAPTER
NINE
INTRODUCTION TO INTEGRATING
EPICS IN GDA
EPICS
Integration of EPICS within GDA covers:
• configuration of Java Channel Access (JCA);
• Diamond GDA-EPICS interface specification - the schema and XML files
• the creation of Scannables and Detectors that talk to EPICS as a Channel Access client allowing devices to be
incorporated into a full Data Acquisition system;
9.1 Configure JCA
GDA uses Channel Access for Java (CAJ) - 100% pure Java implementation of the EPICS Channel Access JCA library
- to communicate with EPICS IOCs.
To enable GDA access to EPICS Processing Variables (PVs), GDA servers (or clients, if clients need to talk to PVs
directly) must be started with a property gov.aps.jca.JCALibrary.properties setting, for example:
-Dgov.aps.jca.JCALibrary.properties=${gda.config}/jca/live/JCALibrary.properties
The property file JCALibrary.properties should contain the following properties (corresponding to EPICS
Channel Access enviroment variables):
com.cosylab.epics.caj.CAJContext.addr_list
com.cosylab.epics.caj.CAJContext.auto_addr_list
com.cosylab.epics.caj.CAJContext.connection_timeout
com.cosylab.epics.caj.CAJContext.beacon_period
com.cosylab.epics.caj.CAJContext.repeater_port
com.cosylab.epics.caj.CAJContext.server_port
com.cosylab.epics.caj.CAJContext.max_array_bytes
=
=
=
=
=
=
=
172.23.111.255
true
30.0
15.0
5065
5064
4000000
55
GDA Developer Guide, Release 8.24
#com.cosylab.epics.caj.CAJContext.event_dispatcher= gov.aps.jca.event.QueuedEventDispatcher
#com.cosylab.epics.caj.CAJContext.event_dispatcher= gov.aps.jca.event.LatestMonitorOnlyQueuedEventDis
com.cosylab.epics.caj.CAJContext.event_dispatcher= gov.aps.jca.event.SplitQueuedEventDispatcher
com.cosylab.epics.caj.CAJContext.logger
= com.cosylab.epics.caj.CAJContext
com.cosylab.epics.caj.impl.CachedByteBufferAllocator.buffer_size=32000
com.cosylab.epics.caj.impl.reactor.lf.LeaderFollowersThreadPool.thread_pool_size = 5
Among these, the properties that are most often changed are:
com.cosylab.epics.caj.CAJContext.addr_list
com.cosylab.epics.caj.CAJContext.auto_addr_list
com.cosylab.epics.caj.CAJContext.repeater_port
com.cosylab.epics.caj.CAJContext.server_port
=
=
=
=
172.0.0.1
false
6065
6064
for communicating with EPICS IOC running on your localhost and using CA server port of 6064.
GDA will also set com.cosylab.epics.caj.CAJContext.event_dispatcher to gov.aps.jca.event.SplitQueuedEventDispat
The last two properties are CAJ specific. In most case, you are not required to set them as the defaults are sufficient.
However, if required, you can use these properties can be set to customise CAJ internal byte buffer size and thread
pool size.
At Diamond, we run an EPICS simulation server on dasc-epics.diamond.ac.uk for off beamline development
of GDA software. Its IP address is 172.23.7.113, server port is 6064, repeater port is 6065.
9.2 GDA-EPICS interface
While it is possible to caget from and caput to a PV within GDA, just like on a console, at Diamond, a GDAEPICS interface specification had been developed for the integration of EPICS control system with Diamond Data
Acquisition system. This specification is described in a XML Schema, which currently defines more than 60 types of
devices available in this interface. The benefits of using a schema definition for this interface are:
• It ensures stability and compatibility on the interface between GDA and EPICS, in that the EPICS build system
generates XML files for the interface that always valid with respect to this schema, thus ensure PVs served by
EPOCS IOCs always matches with what GDA expected;
• It delivers simplicity and device security by enabling us to only exposing a subset of PVs for each of the devices
that are required by experiment control and data acquisition processes;
• It is intuitive and transparent by grouping set of PVs into logical units as devices which can be easily access
using domain-specific language, such as MotorTye, provided by Java-XML data binding;
• It is extensible to allow new device types being added later as development requires;
The Java-XML data binding is generated from this schema using CASTOR source code generator. Currently this is a
manual process only required when the schema is updated. To build a new epics-xxx.jar, you need to run Ant
build on build.xml in uk.ac.gda.epics/epics.jar.generator/Epics_Interface (Phase II)/.
Please remember to change the version number in build.xml according the instruction at the top so not to over-write
existing epics jar to allow the possibility of rollback. After the new epics-xxx.jar generated, it must be added to
the EPICS plugin’s classpath to take effect.
You can view the list of device types supported here
56
Chapter 9. Introduction to integrating EPICS in GDA
GDA Developer Guide, Release 8.24
9.3 Access PV strings in BLxxI-gda-interface.xml file
PV names of a device defined in the interface XML file can be accessed through the interface type classes in
epics-xxx.jar generated above. For example, in an Epics Access class ADBaseImpl.java, you can get individual PV name string, say PV for temperature, by retrieving interface type configuration first then retrieve PV of the
Temperature element as:
ADBaseType config = Configurator.getConfiguration(getDeviceName(), ADBaseType.class);
String pvString = config.getTemperature().getPv()
You may already notice that we have followed a naming pattern here:
<ADBase> element in
BLxxI-gda-interface.xml is accessible using ADBaseType in epics-xxx.jar, which is used in ADBaseImpl
class. They all share the same base name ADBase. This way we can easily find the interface type to use in Java classes
from the XML interface file.
9.4 Fastest method to get/put in a script
• To get the value of pv test:sensor1:
from gda.epics import CAClient
ca = CAClient()
val = ca.caget("test:sensor1")
returns String values,
• To put to pv test:sensor1 a value of 1:
from gda.epics import CAClient
ca = CAClient()
ca.caput("test:sensor", 1.0)
ca.caput("test:sensor", "1.0")
accepts native types & String
9.5 More performant method to get/put in a script
• Create an object once and reuse:
from gda.epics import CAClient
ca = CAClient("test:sensor1")
val = ca.caget()
... some time later
ca.caput(1.0)
... when done close the channel
ca.clearup()
• variations of caget/caput exist for different types
• caput can accept a listener or timeout
9.6 Using CAClient to make a Scannable
• Defined class in epics_scannables.py:
9.3. Access PV strings in BLxxI-gda-interface.xml file
57
GDA Developer Guide, Release 8.24
from gda.device.scannable import PseudoDevice
from gda.epics import CAClient
class SimpleEPICSMonitor(PseudoDevice):
def __init__(self, name, pvstring, unitstring, formatstring):
self.setName(name);
self.setInputNames([])
self.setExtraNames([name])
self.Units=[unitstring]
self.setOutputFormat([formatstring])
self.ca=CAClient(pvstring)
self.ca.configure()
def rawGetPosition(self):
return self.ca.caget()
def rawAsynchronousMoveTo(self,position):
pass
def rawIsBusy(self):
return False
• Import the class definition and create the scannable:
import epics_scannables
sensor1 = epics_scannables.SimpleEPICSMonitor(’sensor1’,
’test:sensor1’, ’mm’, ’%.4f’)
....
pos sensor1
scan motor1 1. 10. 1. sensor1
9.7 Access EPICS in Java
• A cut down Java Scannable class to get/put a double field:
public class SimpleDoubleScannable extends ScannableBase{
...
configure(){
controller = EpicsController.getInstance();
channel = controller.createChannel(pvName);
...
asynchronousMoveTo(Object value){
busy = true;
controller.caput(getChannel(), (Double) value, putListener);
...
(In putListener putCompleted method set busy to false)
...
boolean isBusy(){
return busy
...
Object rawGetPosition(){
return controller.cagetDouble(channel);
...
}
58
Chapter 9. Introduction to integrating EPICS in GDA
GDA Developer Guide, Release 8.24
9.8 A General Purpose Class EpicsScannable
• Use in script to get/set test:sensor2:
from gda.device.scannable import EpicsScannable
sensor2=EpicsScannable()
sensor2.setName("sensor2")
sensor2.setPvName("test:sensor2")
sensor2.setUseNameAsInputName(True)
sensor2.setUserUnits("mm")
sensor2.configure()
...
pos sensor2
pos sensor2 "1.2 mm"
pos sensor2 "1.2 m"
• Add to system using Spring:
<bean id="sensor3" class="gda.device.scannable.EpicsScannable">
<property name="PvName" value="test:sensor3"/>
<property name="useNameAsInputName" value="true"/>
<property name="userUnits" value="mm"/>
</bean>
9.9 Particular device classes in GDA
• Add to system using Spring:
<bean id="m1_motor" class="gda.device.motor.EpicsMotor">
<property name="pvName" value="test:m1"/>
<property name="local" value="true"/>
</bean>
...
<bean id="m1" class="gda.device.scannable.ScannableMotor">
<property name="motor" ref="m1_motor" />
</bean>
9.8. A General Purpose Class EpicsScannable
59
GDA Developer Guide, Release 8.24
60
Chapter 9. Introduction to integrating EPICS in GDA
CHAPTER
TEN
INTEGRATING TANGO IN GDA
TANGO TANGO
Integration of TANGO within GDA covers the creation of Devices and Scannables that talk to TANGO devices
Connecting GDA to TANGO is done by use of class gda.device.TangoDeviceProxy in the plugin org.gda.tango. This
plugin contains the TANGO jar TangORG-7.0.3.jar
To create a bean to connect to the tg_test device supplied with the main Tango release registered in the Tango database
at localhost:10000 add the following to the Spring config:
<bean id="tg_test_dev_proxy" class="gda.device.TangoDeviceProxy">
<constructor-arg value="tango://localhost:10000/sys/tg_test/1" />
</bean>
This device proxy is then used as a property of device specific classes.
An example of this is
gda.device.scannable.TangoScannable. This scannable’s position is associated with an attribute of the device via the
attributeName property. In the example below the position of the scannable tg_test is associated with the double_scalar
attribute of the device defined above:
<bean id="tg_test" class="gda.device.scannable.TangoScannable">
<property name="tangoDeviceProxy" ref="tg_test_dev_proxy"/>
<property name="attributeName" value="double_scalar"/>
</bean>
61
GDA Developer Guide, Release 8.24
62
Chapter 10. Integrating TANGO in GDA
CHAPTER
ELEVEN
GDA DEMO
11.1 Basic commands
To get help:
help
scannable = software abstraction of angles, slits, energy, temperature probe, detector...
pos – show current positions of all scannables
e.g. pos x, pos y, pos z
shows extended syntax – no brackets
Move: pos x 10
ls – look at objects of certain types
e.g. ls Motor
Easy to write dummy scannables, e.g. x/y/z, for testing
11.2 Other scannables
t shows time since initialisation
dt shows time since last data point captured
w waits for specified time. e.g. to wait 2 seconds:
>>>pos w 2
all single-value position so far
multi-input – can move to multi-value position – e.g. pos mi [2, 3]
multi-extra – read-only output values – e.g. pos me
can combine – mie – one input, two (read-only) outputs – pos mie 4
63
GDA Developer Guide, Release 8.24
11.3 Default detectors
list_defaults
add_default pil
remove_default pil
11.4 Beam focusing
fwhm = full width half maximum
minimise fwhmarea = area of spot on detector in pixels
Scan to show the images being plotted:
>>> scan f 430 600 20 pil 20
To display the images: images plotted on “Data Vector” panel
to focus on region of interest:
peak2d.setRoi(50, 50, 150, 150)
11.4.1 wide scan
>>> scan f 430 600 20 pil 20 peak2d
(finds 490 as the minimum)
data plotted as it’s collected
11.4.2 finer scan
::
>>> go minval
>>> rscan f -20 20 2.5 pil 20 peak2d
(finds 482.5 as the minimum)
11.4.3 get feature details
::
>>> minval
64
Chapter 11. GDA Demo
CHAPTER
TWELVE
DEVELOPING FOR THE GDA
12.1 Commit messages
Start with one short line, preferably less than 50 characters, summarising the changes. Follow this with one empty
line, then a more detailed description.
Here is an example:
SUBSYSTEM: Short (50 chars or less) summary of changes
More detailed explanatory text, if necessary. Wrap it to about 72
characters or so. In some contexts, the first line is treated as the
subject of an email and the rest of the text as the body. The blank
line separating the summary from the body is critical (unless you omit
the body entirely); tools like rebase can get confused if you run the
two together.
Write your commit message in the present tense: "Fix bug" and not "Fixed
bug." This convention matches up with commit messages generated by
commands like git merge and git revert.
Further paragraphs come after blank lines.
- Bullet points are okay, too
- Typically a hyphen or asterisk is used for the bullet, preceded by a
single space, with blank lines in between, but conventions vary here
- Use a hanging indent
Examples of SUBSYSTEM:
• CORE - the code that is released on the website
• DLS - Diamond-specific code
• CONFIG - configuration
The following links provide advice on writing good commit messages:
• “A Note About Git Commit Messages” by Tim Pope
• “Creating good commit messages” in the Git User’s Manual
• FreeBSD’s Committer’s Guide has some useful advice. Search for “Good commit messages”
• ScummVM Commit Guidelines
65
GDA Developer Guide, Release 8.24
66
Chapter 12. Developing for the GDA
CHAPTER
THIRTEEN
CONTRIBUTORS TO THE GDA
PROJECT
The Generic Data Acquisition (GDA) software was initially developed at SRS Daresbury. In 2003 it was adopted by
Diamond Light Source, who took over as the principal developer.
This section lists people who have contributed in some way (code, design, documentation) to the GDA project. Names
are ordered alphabetically by surname.
Contributors to the most recent release
Jun Aishima
Alun Ashton
Mark Basham
Mark Booth
Oliver Buckley
Peter Chang
Chris Coles
Richard Fearn
Matthew Gerring
Paul Gibbons
Jonah Graham
Paul Hathaway
Karl Levik
Geoff Mant
Tracy Miranda
Vasanthi Nagalingam
Xiaoxu Ren (Eric)
Tobias Richter
Irakli Sikharulidze
Duncan Sneddon
Ravi Somayaji
67
GDA Developer Guide, Release 8.24
Robert Walton
Matthew Webber
Richard Woolliscroft
Fajin Yuan, Past contributors
Stuart Campbell
Josephine Chan
Joachim Diepstraten
Graham Lee
William Newell
Bill Pulford
Richard Tyler.
68
Chapter 13. Contributors to the GDA project
CHAPTER
FOURTEEN
INDICES AND TABLES
• genindex
• modindex
• search
69