1
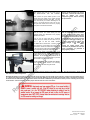
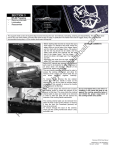
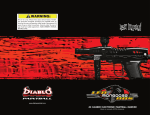
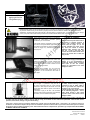
SECTION 4
-
WS-66 Usage
Air Source Safety
Applying Air Source
Firing Marker (dry)
NOTES OR COMMENTS
ba
l
Before attaching any power source to the WS-66,
review the power-source connection options
available to you on the WS-66
l.c
om
The power system used on the Warsensor WS-66 Tactical Marker contains compressed gas or air. NEVER work on,
disassemble the marker with the compressed air source connected. The marker has a volumizer chamber which will retain
air pressure. Please ensure your air source is properly turned off, and the marker is cleared of all compression before
disassembly. If working with CO2 avoid CO2 gas or escaping liquid to contact the skin – it can cause freezer burn. Always
ensure your power source bottle is firmly screwed in to avoid accidental release which could cause bodily harm.
14
1p
ai
nt
The marker is factory configured to use a remote
line direct to the quick-release nipple which exits
the marker at the back end of the magazine, just
under the trigger. Any standard remote should
snap right on.
Please ensure the quick release lock on
the remote is properly secured. It
should snap forward locking the
remote onto the nipple. If it is not
secured, activating the power source
may cause the remote to become
detached under pressure and WILL
blow the o-rings in the head. The
pressure of such a release could cause
injury if the remote was to strike the
body, or face.
se
d
by
The second option for players who prefer to play
without a remote is to attach the bottom line
adapter onto the marker- It comes complete with
the necessary adapter to snap on to the quick
release nipple, and the screws to fasten it to the
bottom of the trigger frame.
The WS-66 is capable of operating at
input pressures ranging from 450psi to
1200psi. It is not recommended to
operate the marker below or beyond
these limits as this will severely
hamper the performance and could
damage the marker
R
ec
om
pr
es
With this option installed, you can screw the
compressed gas/air power source directly on to
the marker…or use a remote line with screw in
ASA nipple
Never leave a pressurized marker or air source in
direct sunlight – in particular if using CO2 as an
air source. Excessive heat can cause internal
pressures to build beyond safe levels and could
cause safety burst disks to rupture if the bottle is
sitting erect.
If the bottle is lying on its side – the excessive
pressure could cause a burst which could damage
the marker, or the air bottles valve system.
Cylinder valve (the copper neck on the
air bottle) should be firmly, and fully
connected to the air bottle. Make a
mark on your bottle and inspect this
regularly to see if it has moved.
A loose cylinder valve under pressure
can be extremely dangerous – the air
bottle would become a high speed
projectile which could cause serious
damage or death.
During filling, if any leaks are detected, immediately stop the filling process and examine the power source for the location of the leak. If it
is leaking from the fill adapter’s ASA it could be that the o-ring on the bottle is worn and needs replacement –bleed off ALL excess
pressure, remove bottle, change o-ring and resume filling.
If the leak is coming from the connection between the Cylinder valve and the bottle body – cease filling, use a hard tool such as a
screwdriver or other item to depress the pin valve and release ALL pressure from the bottle . If you have an on/off valve open it to release
the pressure. Have the bottle inspected by a US – DOT certified air-smith or compressed air specialist to get it repaired. DO NOT ATTEMPT
TO REPAIR THE BOTTLE YOURSELF!
Warsensor WS-66 User Manual
GAS UP & FIRE THE WS-66
Revision 1 printed
5/30/2004
Using the bottom line setup is just as simple –
Your air source can screw directly into the
optional bottom line attachment once properly
affixed to the marker.
NOTE – if your air source does not
have an on/off valve, please remember
to hold marker upside down, while
slowly unscrewing the bottle, and firing
the marker at the same time to release
pressure buildup. At a certain point the
pin-valve will disengage allowing you
to totally de-pressure the marker and
making removal of the bottle both
easier
–
and
SAFE!
Holding the marker upside down,
ensures that no paintballs can enter the
breach accidentally (in particular if
using a gravity hopper)
ba
l
Line up your air source and with a clockwise
motion, screw the bottle onto the ASA until you
get a tight fit and the bottle STOPS.
om
First connect the quick release portion of the
remote line to the nipple on the marker. Ensure
that it snap-locks into place. Only after you have
done this should you consider activating the air
source – we will get to that in just a bit, for now,
lets just make certain the air source is properly
setup and connected to the WS-66.
If you are depressuring the marker –
first turn off the remote line air source
at the bottle – then fire the marker a few
times
to
deplete
any
excess
compressed gas/air before removing
the quick release.
l.c
After you have connected the remote line to the
ASA Cylinder valve head of your power source.
DO NOTACTIVATE THE AIR SOURCE.
1p
ai
nt
For bottles with an on/off valve – ensure it is OFF
when doing this. If the bottle is pin-valve driven,
remember to COCK the marker first. Screwing on
a pin-valve driven bottle will immediately engage
the compressed gas/air and ready the marker.
by
14
Once your air source is properly installed, if you
haven’t already done so, COCK THE MARKER by
pulling back on the top rear cocking handle as
illustrated. At this point you may activate the air
source (unless it is a directly screwed on pin-valve
driven bottle on the bottomline ASA).
se
d
YOUR MARKER IS NOW COCKED AND READY
FOR FIRING. Please observe all necessary
safety precautions when firing the marker.
ec
om
pr
es
To fire the marker – depress the trigger safety to the LEFT (red ring showing). The safety is now OFF. This puts the trigger in active mode
and makes the marker ready-to-fire.
R
DRY FIRE the marker a few times to get used to the feel of the trigger, and the marker under pressure. Practice firing the marker with air
on –observe the reaction of the marker. Turn your air source OFF (either by the on/off valve of the remote, bottle, or by slightly unscrewing
the bottle from the ASA bottomline, and fire the marker a few times to familiarize yourself with the entire process of running out of power
on the marker – see how it reacts. Practice proper removal of the air source a few times.
Warsensor WS-66 User Manual
GAS UP & FIRE THE WS-66
Revision 1 printed
5/30/2004
R
ec
om
pr
es
se
d
by
14
1p
ai
nt
ba
l
l.c
om
CO2/HPA/N2 INFO
Warsensor WS-66 User Manual
GAS UP & FIRE THE WS-66
Revision 1 printed
5/30/2004
om
l.c
ba
l
ai
nt
1p
14
by
se
d
ec
om
pr
es
R
Warsensor WS-66 User Manual
GAS UP & FIRE THE WS-66
Revision 1 printed
5/30/2004
om
l.c
ba
l
ai
nt
1p
14
by
se
d
ec
om
pr
es
R
Warsensor WS-66 User Manual
GAS UP & FIRE THE WS-66
Revision 1 printed
5/30/2004