1
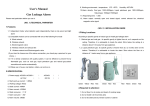
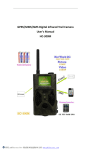
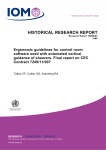
2.9. Working environment:temperature:-5ºC~60ºC; Humidity: ≤97%RH
User’s Manual
2.10.Alarm density: Coal gas: 1000~5000ppm, Liquid petroleum gas: 1000~5000ppm,
Natural gas: 1000ppm~5000ppm
Gas Leakage Alarm
2.11. Responding time: ≤30S
Please read particulars before you use it.
2.12. Alarm output: normally open and closed signal, control exhaust fan, electrical
magnetic valve signal.
(NO. 1) TECHNICAL PARAMTER
1.Features:
(NO. 2)INSTALLATION GUIDE
1,1 Independent mode: when detector used independently, there is only sound and light
alarm
1.2 Compatible mode:it can be connected with one of the following five mode
A. Wired network
1.Fitting Locations:
According to specific gravity of natural gas to install gas leakage alarm
1.1.Natural gas and coal gas : its specific gravity is lighter than air, so it suspends on the
B. Wireless network
ceiling. Therefore, it is adviseable to locate the alarm 30cm below the ceiling at a
C. Electromagnetic valve
distance about 1.5m away from gas appliance.
D. Wireless network and exhaust fan
1.2.Liquid petroleum gas: its specific gravity is heavier than air, so it sinks down on the
E . Wireless network and Electromagnetic valve
bottom. Therefore,it is adviseable to locate the alarm 30cm above the floor at a
(If you intent to choose one of the above connection, you shoud pay a premium for your
distance of 1 meter away from a gas appliance.
choice. )
1.3 If It is strictly compliance with quality system, It can be effective to prevent fire by
flammable gas, such as coal gas, liquid petroleum gas and natural gas,carbon
monoxide and monitor automatically.
1.4 Widely use in house, coal station, colliery ,car and so on
2.SPECIFICATION:
2.1. Power supply: AC220V /AC230V(
AC110V
(
)
)
(
AC240V
DC12V
(
)
)
2.2. Start warm-up current: ≤60MA
2.3. Working voltage: 6VDC
Green Yellow
Red Test
Green
Red Test
Red
Yellow Green
2.Required to attention:
2.4. Static current: ≤40MA
1. Do not face it to oil smoke and steam of cooking range
2.5. Alarm current: ≤150MA
2. Do not install it at the airness area
2.6. Static consume: <1 W
3. Do not be obstructed by window curtain or cabinet
2.7. Alarm consume <3W
4. Do not install it at the area with heavy vapor, such as washing room
2.8. Alarm volume: ≥90dB
利用 pdfFactory Pro 测试版本创建的PDF文档 www.pdffactory.com
Test
3.About output wire:
3.Do not touch any electrical switch, plug, telephone or door ring
3.1. Red wire =Positive power input
This wire must be connected to a permanent 12v DC positive source.
Black wire = Negative power input.
This wire must be connected to a permanent 12v DC negative source.
3.2. Yellow wire = Relay (Common) COM contact.
4.Do not use match or lighter. Turn off all fire immediately
5.Do not test the gas leakage with fire
6.Do not shut off the alarm power because the alarm is automatically stop to alarm once
gas leakage disappeared
7.Check off the gas leakage reason and immediately notify gas supply to send
professional technician to repair it.
Blue wire = Relay (Normally open) NO contact.
(NO. 5) OTEHRS
White wire = Relay Normally closed) NC contact.
The above three wires only need to be connected if you intend to trigger an external
device such as a siren or monitoring system
3.3. Connect with exhaust fan
Connect both blue and yellow wire with exhaust switch.
(NO. 3) OPERATION GUIDE
1.Test
Spay some inflammable gas into the detecting hole of alarm. If it gives off clear pulse alarm
signal , that means the alarm detector is all right. (Suggestion: do the test weekly to proof of
reliability of detector)
1.1. Press Test button shortly, the detector will do self-test of audio-light.
1.2. Press Test button for a long time, it will test the output of
1. Warm-up situation:
the wired or wireless signal.
2. Maintenance:
Upon connecting power to the gas alarm the Green LED will start to flash.
Ensure the alarm grills are always free of dust and cobwebs.
This indicates the warm up period. It will stop flashing after approximately 3~5 minutes.
Disconnect power and lightly dust the grills with a soft brush.
With the Green LED constantly illuminated, the gas alarm is ready to detect.
Never use chemical sprays to clean the alarm enclosure.
Never allow water to enter the alarm enclosure.
2.Alarm situation
Do not throw out the alarm or disassemble the alarm.
Upon detecting gas, the Red LED will start to flash and the siren will activate.
3. Warranty:
Lingbao Electronics Co.,Ltd warrant to the purchaser that the product described herein is
3.Fault display
free from defects in the material or workmanship under normal use for three year from the
When the yellow LED light flashed with the sound of buzzer, it displayed the sensor have
date of purchase. During the warranty period, UPON PROOF OF PURCHASE , we will
ever fault, please send it to repair. If there is not yellow LED light, when the sensor has fault,
either repair, or replace the product without charge for either parts or labour. The purchaser
the red and green lights flash alternately.
shall bear all posting and insurance costs to our company.
If the above condition occurs, you should disconnect power to gas alarm for 1 minute and
then re-apply.
(NO. 4) ALARM SOLUTION
When the alarm is warning, solutions are needed immediately:
1.Shut off wipe valve of gas.
2.Open all window to let gas out of room
利用 pdfFactory Pro 测试版本创建的PDF文档 www.pdffactory.com
This warranty does not cover damage resulting from :
•
Negligence of the precautions in the installation / operation manual.
•
Alterations performed by unauthorised persons.
•
Abuse.