1
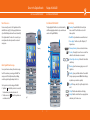
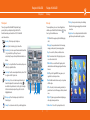
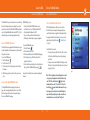
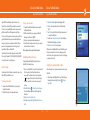
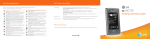
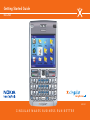
Getting Started Guide
Nokia E62
9253131
CINGULAR MAKES BUSINESS RUN BETTER
Important Information
Frequency Quadband EGSM 850, 900, 1800, and 1900
Size Length: 4.59 in
Width: 2.75 in
Thickness: 0.55 – 0.64 in
Weight 5.08 oz with battery
Battery 1500 mAh Li-Polymer battery (BP-5L)
Time Talk: up to 5.5 hours
Standby: up to 14 days
is used for body-worn operation, it should not contain
metal and should position the device at least 7/8 inch
(2.2 cm) away from your body.
This device supports WAP 2.0 protocols (HTTP and
SSL) that run on TCP/IP protocols. Some features of this
device, such as Services, require network support for
these technologies.
Parts of the device are magnetic. Metallic materials
may be attracted to the device, and persons with a
hearing aid should not hold the device to the ear with
the hearing aid. Always secure the device in its holder,
because metallic materials may be attracted by the
earpiece. Do not place credit cards or other magnetic
storage media near the device, because information
stored on them may be erased.
Operating environment
Remember to follow any special regulations in force
in any area and always switch off your device when its
use is prohibited or when it may cause interference
or danger. Use the device only in its normal operating
positions. This device meets RF exposure guidelines
when used either in the normal use position against the
ear or when positioned at least 7/8 inch (2.2cm) away
from the body. When a carry case, belt clip, or holder
Important Information
radio waves recommended by international guidelines.
These guidelines were developed by the independent
scientific organization ICNIRP and include safety
margins designed to assure the protection of all
persons, regardless of age and health.
In order to transmit data files or messages, this device
requires a quality connection to the network. In some
cases, transmission of data files or messages may be
delayed until such a connection is available. Ensure the
above separation distance instructions are followed
until the transmission is completed.
The exposure guidelines for mobile devices employ a
unit of measurement known as the Specific Absorption
Rate or SAR. The SAR limit stated in the ICNIRP
guidelines is 2.0 watts/kilogram (W/kg) averaged
over 10 grams of tissue. Tests for SAR are conducted
using standard operating positions with the device
transmitting at its highest certified power level in all
tested frequency bands. The actual SAR level of an
operating device can be below the maximum value
because the device is designed to use only the power
required to reach the network. That amount changes
depending on a number of factors such as how close
you are to a network base station. The highest SAR
value under the ICNIRP guidelines for use of the device
at the ear is 0.51 W/kg.
Use of device accessories and enhancements may result
in different SAR values. SAR values may vary depending
on national reporting and testing requirements and
Certification information (SAR)
THIS MOBILE DEVICE MEETS GUIDELINES FOR
EXPOSURE TO RADIO WAVES.
Your mobile device is a radio transmitter and receiver.
It is designed not to exceed the limits for exposure to
2
3
the network band. Additional SAR information may be
provided under product information at www.nokia.com.
Your mobile device is also designed to meet the
requirements for exposure to radio waves established
by the Federal Communications Commission (USA) and
Industry Canada. These requirements set a SAR limit of
1.6 W/kg averaged over 1 gram of tissue. The highest
SAR value reported under this standard during product
certification for use at the ear is 0.95 W/kg and when
properly worn on the body is 0.81 W/kg. Information
about this device model can be found at http://www.fcc.
gov/oet/fccidby searching the equipment authorization
system using FCC ID: GMLRM-88A.
© 2006 Nokia. All rights reserved. Nokia and Nokia Connecting People
and Mail for Exchange are registered trademarks of Nokia Corporation.
BlackBerry is a trademark of Research In Motion Limited. Other product
and company names mentioned herein may be trademarks or trade names
of their respective owners. Specifications are subject to change without
notice. Many features and mobile services are network dependent and
require network support. Some networks have limitations that affect how
you can use phone features. Contact Cingular about feature support and
availability. Screen images simulated.
Cingular and the graphic icon are registered trademarks of Cingular
Wireless LLC. Cingular Raising The Bar is a trademark of Cingular Wireless
LLC. © 2006 Cingular Wireless LLC. All rights reserved.
Table of Contents
Welcome to Cingular
Welcome
Set Up Your Nokia E62
Insert the SmartChip and Battery
Connect to the Cingular Network
Get Connected with the Nokia E62
Navigate the Nokia E62
Get Familiar with the Nokia E62
6
6
7
7
8
8
9
9
Full Keyboard
10
Menu Key
11
Use your Nokia E62
12
Make a Call
12
Use Your Cingular Voicemail
13
Access the Web
Choose from Two Web Browsers
Choose Your Email Solution
5
14
15
Xpress Mail Personal Edition
18
Good Mobile Messaging
22
BlackBerry Connect
25
Mail for Exchange
29
Email Support Options
32
Sync Your Nokia E62
Nokia PC Suite
Troubleshooting
Frequently Asked Questions
Use Your Nokia E62
Tips and Tricks
4
14
33
33
34
34
36
36
Welcome to Cingular
Welcome
Battery
You can find more information about your device in the Nokia E62
User Guide found on the Getting Started CD-ROM included in
your sales package. Further detailed information is given in the
separate user guide. Do not use this Getting Started Guide in
place of the complete User Guide which provides important safety
and maintenance information.
fig. 1
a.
b.
fig. 2
b.
Insert the SmartChip
Nokia E62 device
1. Always switch the device off and disconnect the charger
before removing the battery. With the back of the Nokia E62
facing you, hold down the cover release button (fig. 1a), and
slide the battery cover in the direction shown (fig. 1b).
2. If the battery is installed, use the finger grip to lift the
battery from the battery compartment to remove it.
3. Slide the SmartChip into position with the metal contacts
facing down and the beveled edge pointing toward the
bottom of the device (fig. 2).
AC battery charger
What’s in the box?
Take a moment to look at your Nokia E62 sales package. Make
sure the following components have been included:
Headset
Getting Started CD-ROM
Insert the SmartChip and Battery
Your Nokia E62 uses a convenient SmartChip that holds
information about your Cingular service and stores your contact
information. A SmartChip allows you to switch between phones,
and keep your phone number and phone book with you. That
means you can transfer your Cingular service and store your
contacts to any phone simply by inserting your SmartChip!
Thank you for purchasing the Nokia E62 and welcome to the
Cingular network! Your purchase of the Nokia E62 provides
you with the winning combination of a superior mobile email
experience and Cingular’s uncompromised network quality.
Where can I find more information?
Set Up Your Nokia E62
Getting Started Guide
SmartChip
(with metal contacts)
fig. 3
fig. 4
a.
Headset jack
USB
Insert and charge the battery
DKE-2 USB data cable
1. Insert the battery by aligning the contacts of the battery
with the corresponding connectors on the battery
compartment and gently click the battery into place (fig. 3).
2. Replace the battery cover. Ensure the cover is secure and
locked into place.
Safety & warranty info
6
7
Charger
connector
3. Plug the Nokia AC battery charger into a standard AC wall
outlet.
4. Connect the charger cable to the bottom of the Nokia E62
(fig. 4).
Connect to the Cingular Network
Get Connected with the Nokia E62
Navigate the Nokia E62
Get Familiar with the Nokia E62
Power the device on
Get familiar with the Nokia E62
You are now ready to connect to the Cingular network. Press
and hold the Power key (fig. 5) in the upper right hand corner
of your Nokia E62 and your device will connect automatically
to the Cingular network. To make a call or access data, your
service plan must be active and you must be in a network
coverage area.
The large display with 16 million colors, dedicated email key
and full messaging keyboard make it easy to send and receive
emails or surf Cingular’s MEdia Net.
Learn the keys
2. Email LED: Lets you know when a new email has arrived.
1
3. Device display: 16 million colors, 240 x 320 pixels, 2.8”
diagonal screen.
2
Power key
4. Volume up/down keys: Increase or decrease the volume.
3
About Cingular Network coverage
5. Voice key: Press quickly to access the voice recorder. Press
and hold to activate enhanced voice commands.
4
6. Left and right selection keys: Performs the function listed
above the key.
5
7. Menu key: Opens the main menu, giving you access to all
applications.
Icons on your Home screen show you the wireless coverage
level for the area where you are using you Nokia E62. Your
coverage can be affected by terrain, weather, buildings,
construction, signal strength, and many other factors.
Check your service icons before using your Nokia E62:
• Signal bars (
) indicate that your device is connected to
the network and you can make and receive calls.
• The data service icon (
) indicates that your device can
send and receive data.
1. Power key: Press and hold this button to switch your
device on and off. Press this button once to switch
between profiles.
8. Email key: Opens your default email inbox. Press and hold
to begin composing a new email. (Note: Functionality may
vary based on your email service provider.)
6
7
10
8
9
11
9. Joystick: Move up, down, left, or right to navigate. Press to
select.
10. Call key: Dials the number indicated on the display.
11. End key: Ends the current call and closes open application
and returns you to the Home screen.
fig. 5
8
9
Navigate the Nokia E62
Full Keyboard
Navigate the Nokia E62
Menu Key
Full keyboard
Menu key
Text entry is easy with the Nokia E62’s full keyboard. Simply
press any letter key on the keyboard to type that letter. The
familiar format makes your transition from a PC to the Nokia E62
easier than ever before.
The menu key allows you to access the useful applications
available on your Nokia E62. Press the Menu key (
) at any
time to go to the main Menu screen.
1. IM: Chat with other people using the Instant Messaging
client.
1. Space key: Press the space key to add spaces.
12. Applications: Access the preloaded and other installed
applications you have downloaded to your phone.
2. Messaging: Compose and send email or text messages,
manage your inbox, and set your messaging options.
2. Enter key: Press the enter key to go to the next line.
3. Function key: Use to enter special characters and functions like &,
!, or %, printed at the top of the keys. Press and
release this key, then press the key with the desired character or
function.
3. Log: See recent calls, call timers, and data counters.
4. Help: View and search a list of help topics, plus you can
access the on device tutorial.
4. Shift key: Use to capitalize letters. Press and release, then press a
letter key to capitalize that letter.
7
5. Control key: Use with common keyboard shortcuts, such as Ctrl+C
to copy text and Ctrl+V to paste text.
2
6. Character key: Use to select and enter special characters not
3
) to
found on the keyboard. Press and release the Chr key (
view the table of special characters. Use the joystick to navigate
to the desired character, and press the joystick to select the
highlighted character.
11. Settings: Access your entire device options including
Bluetooth technology, managing profiles, and network
connections.
6
4
1
8
5
5. MEdia Net: Access content from the Cingular portal or
download items and visit web pages designed for wireless
browsers.
4
7. Email: Available email solutions are easy to set up and use
with this option.
9. My Stuff: Organize your personal items including images,
video clips, and even presentations.
8. Own key: Use to customize a shortcut to your favorite application.
10. Address Book: Store a list of your important contacts.
10
2
3
4
5
6
7
8
9
10
11
12
6. Mall: Shop at the Cingular Mall for tunes, games, and
applications to customize your device.
8. Office: View, edit, or create documents, spreadsheets, or
presentations. Access the file manager, calculator, and much
more.
7. Backspace key: Press the backspace key to delete the last
character typed.
1
11
Use your Nokia E62
Make a Call
Use Your Nokia E62
Use Your Cingular Voicemail
Make a call
Set up your voicemail box
Navigate the voicemail menu options
The design of the Nokia E62 makes it easy to dial, navigate and
multitask. Its advanced voice features provide you with everything
you need to stay in touch.
Don’t miss another call with Cingular voicemail. Once
your phone has been activated, you will be able to receive
voicemail. Any unanswered calls are automatically transferred
to your Cingular voicemail box where you can retrieve the
messages later. Even if you leave your Nokia E62 at home, you
can check your voicemail from another phone.
Use these keys to choose your voicemail options:
1. From the Home screen (fig. 6), enter the phone number using
the number pad on the keyboard (fig. 7). You do not have to
press the function key (
) to access the numbers when
dialing.
2. Press the call key (
) to make the call.
To set up your voicemail, press and hold the 1 key to connect
to your voicemail box. Then follow the voice prompts to set up
your voicemail box.
Speak handsfree
To activate the speakerphone, press the right selection key
) during a call.
(
Consult your User Guide to learn about more advanced voice
features available on the Nokia E62.
Check your voicemail
1. Press and hold the 1 key to connect to your voicemail box.
2. Enter your password.
3. Follow the voice prompts to listen to your messages.
fig. 6
Check your voicemail from other phones
1.
2.
3.
4.
fig. 7
12
13
Dial your 10-digit wireless phone number.
Press the * key when you hear your personal greeting.
Enter your password.
Follow the voice prompts to listen to your messages.
(1)
(2)
(3)
(4)
(5)
(6)
(7)
(9)
(*)
(0)
(#)
Listen to message.
Pause message.
Fast forward message.
Slow message playback.
Get date and time.
Speed up playback.
Delete message.
Save message.
Exit voicemail.
Get help and instructions.
Skip to the next message.
Access the Web
Choose from Two Web Browsers
The Nokia E62 offers you a choice between two convenient web
browsers for surfing on the large color display. You can access
your favorite content via the Nokia E62’s full HTML web browser
or use the Cingular MEdia Net web browser (WAP 2.0). To start
surfing the web, you must have an appropriate data plan.
Connect to full HTML web browser
Your Nokia E62 comes equipped with a full web browser to give
you the rich graphics and complete experience of the web right
in the palm of your hand.
To access the HTML browser:
1. Select the Menu key. (
)
2. Scroll to and select Office.
3. Scroll to and select Web, then press the joystick to launch
the browser.
4. While browsing, use the joystick to control your on-screen
cursor.
Choose Your Email Solution
Choose Your Email Solution
Choose the Best Email Solution for You
With MEdia Net, you can:
• Check your Yahoo! Mail or MSN Hotmail accounts
• Get the latest scores from CBS SportsLine and ESPN
• Stay informed with headlines from CNN
• See your local forecast from the Weather Channel
• Download your favorite ringtones, games, and graphics
To access the MEdia Net browser:
1. Select the Menu key. (
)
2. Scroll to and select MEdia Net.
3. Your browser will be directed to the MEdia Net homepage.
4. Scroll to and select any of the links from the list. For
example, select Weather.
5. Your local weather report displays. Press the right selection
)
key to go back to the MEdia Net homepage. (
With a full keyboard and one-button access to email, the
Nokia E62 is a perfect companion for keeping up with your
email. The device features an application that makes installing
the supported email clients fast and easy. You can access this
application by selecting the Menu key (
) > Email > E-mail
inst. (fig. 8).
Your Nokia E62 can connect to:
• Personal email accounts like Yahoo!, AOL, at&t or Comcast.
See the Personal Email Setup section on the next page to
get started.
• Corporate email accounts (like Microsoft Exchange or Lotus
Domino). See the Corporate Email Setup section on the next
page to get started.
fig. 8
Consult your User Guide to learn more about navigating the
browsers.
Note: If IT security policy is enforced during device or email
set up, you may be prompted to enter the default security
code: 12345. Press the function key (
) twice to lock
number mode, then enter 12345 and select OK. Press the
function key (
) again to unlock number mode. Once you
have changed your security code, the default setting is no
longer valid. If you changed your security code and do not
remember the new code, contact your IT help desk.
Connect to the Cingular MEdia Net browser
The Cingular MEdia Net browser brings your favorite web
pages, email, messaging, downloads, and more to your Nokia
E62. You can personalize your favorite categories and place
them on your MEdia Net homepage.
14
15
Choose Your Email Solution
Choose Your Email Solution
Personal Email Setup
Corporate Email Setup
Personal email accounts include those accounts you have with
Internet Service Providers (ISP’s) such as Yahoo!, AOL, at&t,
Comcast and others.
A corporate email account is usually managed by a company’s
IT organization and operates on a corporate server such as
Microsoft Exchange or Lotus Domino.
There are two ways to get your personal email on the
Nokia E62:
There are two setup options for accessing your corporate email
on the Nokia E62. Each provides different email solutions that
work with that particular setup option:
1. Xpress Mail. Refer to pages 18-21 of this guide for complete
instructions on setting up your personal email account using
Xpress Mail.
2. BlackBerry Internet Service via BlackBerry Connect. Refer
to pages 25-28 of this guide for complete instructions on
setting up your personal email account using BlackBerry
Internet Service.
1. Self Service – Xpress Mail is a self service option for
accessing your corporate email from your Nokia E62 without
IT support. Note: Your IT administrator may prohibit self
service options. Please consult your IT administrator before
beginning setup.
Self Service Solution:
Xpress Mail provides wireless access to your corporate email
and calendar. All you need is your work email address, the
type of email server your company runs (Microsoft Exchange,
Lotus Domino or IMAP) and the computer you use to access
your corporate email (must be connected to the Internet). Use
of Xpress Mail requires you to have an eligible data rate plan
activated on your Cingular Wireless account. Refer to pages
18-21 of this guide for complete instructions on setting up your
corporate email account using Xpress Mail.
16
Choose Your Email Solution
Choose Your Email Solution
2. IT Managed – Good Mobile Messaging, BlackBerry
Enterprise Server (via BlackBerry Connect) and Mail for
Exchange require that your IT administrator centrally
manage and authorize your access to these solutions.
Before you begin setup, the IT administrator must establish
your account on the corporate server. Contact your IT
administrator to see if your company has deployed one or
more of these solutions.
IT Managed Solutions:
Good Mobile Messaging provides real-time wireless push
synchronization of email, calendar, contacts, tasks list and
notes for Microsoft Outlook and Lotus Notes. You must have
an account on your company’s Good Mobile Messaging server.
Contact your IT administrator for more information. You must
also have a qualifying Good data rate plan from Cingular to use
Good Mobile Messaging. Refer to pages 22-24 of this guide for
complete instructions on setting up your corporate email using
Good Mobile Messaging.
BlackBerry Connect links devices with the trusted BlackBerry
push email solution for corporate email, wireless calendar
synchronization, Global Address Lookup (GAL) and attachment
viewing. IT departments can leverage existing BlackBerry
Enterprise Server infrastructure for centralized device
management, triple DES encryption security and the most
17
widely used IT policies—kill handheld, set password and
remote lock. You must have an account on your company’s
BlackBerry Enterprise Server. You will also need a BlackBerry
Connect data plan activated on your Cingular account. Refer to
pages 25-28 of this guide for complete instructions on setting
up your corporate email using BlackBerry Connect.
Mail for Exchange provides wireless access to your corporate
Microsoft Outlook email, contacts, calendar and tasks list. Your
company must have a Microsoft Exchange 2003 server with
Service Pack 2 (SP2). Use of Mail for Exchange requires a PDA
Connect for Microsoft Direct Push data plan to be activated on
your Cingular account. Refer to pages 29-31 of this guide for
complete instructions on setting up your corporate email using
Mail for Exchange.
Choose Your Email Solution
Xpress Mail Personal Edition
Xpress Mail Personal Edition provides wireless access to
Internet Service Provider (ISP) personal email accounts such
as Yahoo, Comcast, and Earthlink, as well as corporate email
platforms such as Microsoft Exchange and Lotus Domino.
You can access both your personal and corporate accounts from
your Nokia E62. Email messages are automatically delivered
and you can send, receive, and reply to emails directly from
your device. This guide explains how to install, open and
register Xpress Mail on your Nokia E62.
You will need to have an eligible data plan to use Xpress Mail.
Please contact Cingular at 1-866-CINGULAR (1-866-246-4852)
to activate if you have not already done so.
Before You Begin
You will need to do the following to complete the set up of your
Xpress Mail Personal Edition account.
To set up personal email:
1. Complete the initial Nokia E62 device set up using the
Getting Started Guide.
2. Find your ISP email account name and password.
To set up corporate email:
1. Complete the initial Nokia E62 device set up using the
Getting Started Guide.
2. Find the email platform your company uses (Microsoft
Exchange, Lotus Domino or IMAP4).
3. Find your corporate email address and password.
4. You will need the computer used to access your corporate
email and an Internet connection.
Please complete all set up steps listed in this guide.
Installing Xpress Mail on the Device
To begin the Xpress Mail installation directly from your
Nokia E62, follow the steps below.
Choose Your Email Solution
Xpress Mail Personal Edition
5. Select Install Now to begin downloading Xpress Mail.
6. Select Yes when asked if you want to install Xpress Mail
(fig. 10).
7. Select OK to accept the End User Software Agreement and
to complete the installation.
8. You will see an “Installation Complete” notice when Xpress
Mail has finished installing on your device.
9. Select Options > Exit to close the browser.
After you have installed Xpress Mail on your Nokia E62, proceed
to the personal email section if you are setting up a personal
email account or the corporate email section if you are setting up
a corporate email account.
fig. 9
Setting Up Personal Email with Xpress Mail
1. Power on your Nokia E62 to connect to the mobile network
(if not already on). You will know that your device is
connected to the network when you see the signal bars
(
) in the upper left-hand corner of the device display.
Your device needs to be in a network coverage area to
continue.
2. Select the Menu key (
) > Email > E-mail inst. to open
the email installation application. Read the application
information.
3. Select Options > Installable clients.
4. Scroll down to Xpress Mail (fig. 9), then select Options >
Install.
18
Follow these steps to set up your personal email account on your
Nokia E62.
1. After you have installed Xpress Mail on your Nokia E62, open
the application by selecting the Menu key (
) > Apps. >
Xpress Mail.
fig. 10
19
Choose Your Email Solution
Xpress Mail Personal Edition
2. Enter your 10 digit mobile number (numbers only) and select
Options > Next (fig. 11).
3. Choose your email service provider from the list displayed
and select OK (fig. 12). If your email provider is not listed
select More to view additional providers.
4. Enter your ISP username and password, then select
Options > Done.
5. Xpress Mail will begin to synchronize your email with your
Nokia E62. When complete, you will be redirected to your
Xpress Mail inbox.
6. (Optional). Xpress Mail for personal email synchronizes email
items ONLY. To synchronize your calendar and contacts,
proceed with the Getting Started CD-ROM and select the
option Install Nokia PC Suite Only. After installing Nokia
PC Suite, select the Synchronize option and in the Settings
menu uncheck the box for email so that your emails will not be
duplicated on your device.
Xpress Mail Personal Edition
3.
4.
5.
6.
fig. 11
7.
You will be prompted to create an Xpress Mail username and
password. Make note of the username and password as they
will be needed later.
At the download page, select Download to select the
desktop software.
Select Open or Run to begin the installation of the desktop
software to your PC.
Select Yes when asked if you want to install the desktop
software.
Select Next to begin set up and follow the on-screen
instuctions. When prompted, enter the username and
password created in step 2 above.
When Xpress Mail has successfully connected to your
corporate email account, the installed desktop software will
minimize and you will be redirected to a web page with the
message “Congratulations. You are connected” and will be
prompted to complete the set up on your Nokia E62.
After you have installed Xpress Mail on your device, created an
Xpress Mail account and downloaded the desktop software to
your PC, follow these steps to continue with Xpress Mail set up.
Setting Up Corporate Email with Xpress Mail
To begin the Xpress Mail set up for corporate email, you must
first create an Xpress Mail account and download the desktop
software.
From your Nokia E62:
)>
1. Open Xpress Mail by selecting the Menu key (
Apps. > Xpress Mail.
2. Enter your 10 digit mobile number (numbers only) and select
Options > Next.
3. Select Work, then seleck OK.
Using the browser on your PC:
1. Go to http://xpressmailpe.cingular.com and select Register
Now.
2. Fill in the required fields on the Acount Activation screen.
Choose Your Email Solution
fig. 12
20
21
4. Select Personal then select OK.
5. Enter your Xpress Mail username and password created
earlier online, then select Options > Done.
6. Xpress Mail will begin to generate the encryption keys
and to synchronize your email with your Nokia E62. When
complete, you will receive a message that the process has
been successful and be redirected to your Xpress Mail
inbox.
7. (Optional). Xpress Mail for corporate email can also
synchronize your calendar and contact items. Consult your
Xpress Mail User Guide for instructions to enable calendar
and contact synchronization. You can find this guide at
www.cingular.com/xpressmail.
Choose Your Email Solution
Good Mobile Messaging
With Good Mobile Messaging, you can wirelessly access your
corporate email, calendar, contacts, notes and task lists from
your Nokia E62. This information is automatically delivered
to your device, allowing access to important messages and
more. This guide explains how to set up and use Good Mobile
Messaging.
If enabled by your administrator, you can use your Nokia E62’s
wireless connection to set up the Good Mobile Messaging
application. The use of Good Mobile Messaging requires
that your company has a Good Messaging Server installed
and connected to your email system. Check with your IT
department to ensure compatibility with your company’s email
server.
The use of Good Mobile Messaging requires wireless service
provider support and an appropriate data rate plan. Contact
Cingular at 1-866-CINGULAR (1-866-246-4852) for more
information.
Before You Begin
You will need to do the following to complete the set up of
your Good Mobile Messaging account:
3. Obtain a Personal Identification Number (PIN).*
* Contact your company’s IT help desk.
Please complete all set up steps listed in this guide.
Installing Over-the-Air (OTA) for Good Mobile
Messaging
To begin the Good Mobile Messaging installation directly from
your Nokia E62, follow the steps below:
1. Power on your Nokia E62 to connect to the mobile network
(if not already on). You will know that your device is
connected to the network when you see the signal bars
(
) in the upper left-hand corner of the device display.
Your device needs to be in a network coverage area to
continue.
2. Select the Menu key (
) > Email > E-mail inst. to open
the email installation application. Read the application
information.
3. Select Options > Installable clients.
4. Scroll to Good Messaging, then select Options > Install.
1. Complete the initial Nokia E62 device set up using set up
instructions in the Getting Started Guide.
2. Verify that you have authorized access to your corporate
Good Messaging Server.*
Choose Your Email Solution
Good Mobile Messaging
5. Follow the on-screen instructions. The file will begin to
download automatically and download details will display on
your device (fig. 13).
6. Select Yes when asked if you want to install OTA Setup
(fig. 14).
7. Select Continue after you read the application information.
8. You will see an “Installation Complete” notice when OTA
Setup has finished installing on your device.
9. Select Options > Exit to close the browser.
Installing Good Mobile Messaging and
Synchronization
After you have installed OTA Setup on your Nokia E62, open
the application by selecting the Menu key (
) > Apps. > OTA
Setup (fig. 15).
fig. 13
22
1. Follow the on-screen instructions (fig. 16). Enter your email
address and PIN (fig. 17).
2. Select Next to begin the OTA set up of the Good Mobile
Messaging application. If your PIN has expired or if you
change devices, contact your IT administrator.
23
fig. 14
fig. 15
fig. 16
fig. 17
Choose Your Email Solution
Good Mobile Messaging
3. When prompted to choose an access point, select E-mail
Settings (fig. 18).
4. Select OK to start Good Mobile Messaging synchronization.
5. Your Nokia E62 automatically synchronizes with the
information in your Microsoft Outlook or Lotus Notes
account. When synchronization is complete, the inbox on
your Nokia E62 will contain:
• Email folders and the most recent 100 email inbox and
sent items messages
• All personal and shared contacts
• Calendar appointments from one week ago and all future
appointments
• All uncompleted tasks or to-do items (only the first
instance of a recurring task will appear)
• All notes or journal items, including up to 4 kb of text per
item
Choose Your Email Solution
BlackBerry Connect
With BlackBerry Connect, you can wirelessly access your
corporate and personal email on your Nokia E62. Email
messages are automatically delivered and you can send,
receive, and reply to emails directly from your device. This
guide explains the two ways to use BlackBerry Connect on
your Nokia E62.
•
•
fig. 18
BlackBerry Enterprise Server — Provides corporate
users with wireless access to Microsoft Exchange or Lotus
Domino email, calendar, and corporate directory. Check
with your company’s IT department to verify that you have
authorized access to your corporate BlackBerry Enterprise
Server.
BlackBerry Internet Service — Provides wireless access to
Internet (ISP) email accounts such as POP3 or IMAP4.
You can set up and use BlackBerry Enterprise Server or
BlackBerry Internet Service or you can set up and use both for
access to your corporate and personal mail.
If Microsoft Outlook or Lotus Notes automatically filters new
email into your inbox subfolders, you may want these subfolders
also synchronized on your Nokia E62. To change your
synchronization preferences, open the Good Mobile Messaging
application and scroll to Preferences > Email Delivery >
Menu > Add Folder and choose a folder from the list (fig. 19).
You will need to have BlackBerry Connect service to enable
BlackBerry email. Contact Cingular at 1-866-CINGULAR
(1-866-246-4852) to activate a BlackBerry Connect rate plan if
you have not already done so.
Before you begin
You will need to do the following to complete the set up of
your BlackBerry Connect account:
1. Complete the initial Nokia E62 device set up using the
Getting Started Guide.
2. For a BlackBerry Enterprise Server account:
a. Obtain authorized access to your corporate BlackBerry
Enterprise Server.*
b. Locate the Getting Started CD-ROM and a PC with a
CD-ROM drive.
3. For a BlackBerry Internet Service account:
a. Find your personal Internet Service Provider (ISP) email
account name and password.
b. Find your BlackBerry Internet Service email and
password.
c. Find the PIN and IMEI of your device. When BlackBerry
is installed on your device:
• Select the Menu key (
) > Messaging > Options >
Settings > Email > BlackBerry then
• Navigate the joystick to the right to the Device info
tab (
) to find the PIN and IMEI.
* Contact your company’s IT help desk.
Please complete all set up steps listed in this guide.
fig. 19
24
25
Choose Your Email Solution
BlackBerry Connect
Installing the BlackBerry client on the device
To begin the BlackBerry Connect installation directly from your
Nokia E62, follow the steps below.
1. Power on your device to connect to the mobile network (if
not already on). You will know that your device is connected
to the network when you see the signal bars (
) in the
left-hand corner of the device display. Your device needs to
be in a network coverage area to continue.
2. Press the Menu key (
) and select > Email > E-mail
inst. to open the email installation application. Read the
application information.
3. Select Options > Installable clients.
4. Scroll down to BlackBerry, then select Options > Install.
5. Fill in the required information (location, name, mobile
number, email address), accept the End User Software
Agreement and select Send.
6. The file will begin to download automatically and download
details will display on your device (fig. 20 and 21).
After you have installed the BlackBerry file, BlackBerry Connect
will launch automatically. You are ready to continue when
) icons are
) and BlackBerry (
both the Data Services (
visible on the device display. If the icons do not appear after a
few minutes, you can manually enable BlackBerry Connect by
following these steps:
1. Press the Menu key (
) and select Messaging >
Options > Settings.
2. Select Email > BlackBerry.
3. In the General tab (
), set BlackBerry service to On.
4. Press Back or select Options > Exit to exit settings.
BlackBerry Connect
Connecting with a BlackBerry Enterprise Server
For corporate email access, this option requires your company
to have a BlackBerry Enterprise Server installed. Check with
your IT department for assistance. If your company does not
support BlackBerry Enterprise Server, you can configure a
personal BlackBerry Connect account using BlackBerry Internet
Service.
To get started with a BlackBerry Enterprise Server account:
1. Download and install the BlackBerry file using the
instructions on the previous pages.
2. Insert the Getting Started CD from your sales package into
your CD drive. Click the Install Software tab and select
Install Nokia PC Suite AND BlackBerry Connect Desktop
for Nokia. Follow the instructions in the installation
wizard to:
• Install Nokia PC Suite and BlackBerry Connect Desktop for
Nokia.
• When prompted, connect your device to your computer
using the data cable. A list of connection modes will
appear on the device screen; select PC Suite.
• From your computer, launch the BlackBerry Connect
Desktop for Nokia application.
• Press Connect in the BlackBerry Connect Desktop for
Nokia and follow the on-screen instructions to generate
security keys and to enable your device with BlackBerry
email and calendar synchronization.
Note: If BlackBerry Connect is turned off and the
BlackBerry icon is not visible, you will not be able to
send emails. You may save them to the drafts folder until
BlackBerry Connect is turned back on.
After the file has been downloaded to your device, continue
with the BlackBerry Connect installation:
1. Select Yes when asked if you want to install BlackBerry.
2. Select Continue after you read the application information.
3. You will see an “Installation Complete” notice when
BlackBerry has finished installing on your device.
4. Select Options > Exit to close the browser.
fig. 20
Choose Your Email Solution
fig. 21
26
27
Access to your BlackBerry Enterprise Server email should now
be set up.
3. (Optional). BlackBerry Enterprise Server wirelessly
synchronizes email and calendar items ONLY. To synchronize
your contacts, open Nokia PC Suite and select Synchronize.
In the Settings menu, uncheck the boxes for email and
calendar so that these items will not be duplicated on your
device.
Note: BlackBerry Connect does not synchronize your tasks list.
Connecting with BlackBerry Internet Service
BlackBerry Internet Service will provide you with wireless push
email from your Internet email accounts. This option requires
that you have an ISP, POP3 or IMAP4 personal email account.
To get started with BlackBerry Internet Service account:
1. Download and install the BlackBerry file using the
instructions on the previous pages.
2. Locate the PIN and IMEI of your device. You can find the
PIN and IMEI when BlackBerry Connect is installed on your
device by selecting the Menu key (
) > Messaging >
Options > Settings > Email > BlackBerry, then scroll right
to the Device info tab (
).
Note: You will need your ISP email account name and
password to integrate your personal email accounts with
BlackBerry Internet Service.
Choose Your Email Solution
BlackBerry Connect
3. Register your device and integrate your ISP email accounts
using one of the two methods below:
From your device:
• Select the Menu key (
) > MEdia Net then scroll down
the Bookmarks list and select BlackBerry account setup
(fig. 22).
• If you are a new user, select Create New Account from
the Web page that displays. Then follow the on-screen
instructions to create your username, password and
to integrate your personal email accounts. If you are a
returning user, enter your user ID and password and select
Login.
Your BlackBerry Internet Service should now be set up.
4. (Optional). BlackBerry Internet Service synchronizes email
items ONLY. To synchronize your calendar and contacts,
proceed with the Getting Started CD-ROM and select the
option Install Nokia PC Suite Only. After installing Nokia
PC Suite, select the Synchronize option and in the Settings
menu, uncheck the box for email so that your emails will not
be duplicated on your device.
Mail for Exchange
With Mail for Exchange, you can wirelessly access your email,
calendar, and contacts from your Microsoft Exchange account
on your Nokia E62. You can synchronize your data manually
or schedule the synchronization automatically so your data is
always up-to-date on your device and on your computer.
This guide explains how to:
• Install and open Mail for Exchange on your Nokia E62.
• Create a synchronization profile that controls what and
when you synchronize.
• Synchronize your device to get your email, calendar, and
contact entries from your Microsoft Exchange 2003 server.
Note: Mail for Exchange works with Microsoft Exchange
2003 servers with Service Pack 2 (SP2) only. The use of Mail
for Exchange requires a PDA Connect for Microsoft Direct
Push data plan or another eligible PDA Connect plan. Contact
Cingular at 1-866-CINGULAR (1-866-246-4852) for more
information.
From your compatible computer:
• From your PC browser, visit
www.cingular.com/blackberrystart.
• If you are a new user, select Create New Account and
enter the PIN and IMEI of your device when prompted.
You can find the PIN and IMEI using the instructions
provided in step 2 on the previous page. Follow the onscreen instructions to create your username, password
and to integrate your personal email accounts. If you are a
returning user, enter your user ID and password and select
Login.
Choose Your Email Solution
Before you begin
You will need to do the following to complete the set up of
your Mail for Exchange account:
1. Complete the initial Nokia E62 device set up using the
Getting Started Guide.
2. Find the name of your Microsoft Exchange 2003 server.*
3. Obtain the Domain from where you download your email.*
4. Find your network user name and password.
fig. 22
* Contact your company’s IT help desk.
28
29
Please complete all set up steps listed in this guide.
Installing Mail for Exchange on the device
To begin the Mail for Exchange installation directly from your
Nokia E62, follow the steps below.
1. Power on your device to connect to the mobile network (if
not already on). You will know that your device is connected
to the network when you see the signal bars (
) in the
upper left-hand corner of the device display. Your device
needs to be in a network coverage area to continue.
2. Select the Menu key (
) > Email > E-mail inst. to open
the email installation application. Read the application
information.
3. Select Options > Installable clients.
4. Scroll down to Mail for Exchange, then select Options >
Install.
5. Fill in the required information (location, name, mobile
number, email address), accept the End User Software
Agreement and select Send.
6. The file will begin to download automatically and download
details will display on your device (fig. 23 on the next page).
Choose Your Email Solution
Mail for Exchange
After the file has been downloaded to your device, continue
with the Mail for Exchange installation:
Mail for Exchange can use most of the default profile
settings although within each category, you must enter all
settings marked by an asterisk (*).
1. Select Yes when asked if you want to install Mail for
Exchange (fig. 24).
2. Select Continue after you read the application
information.
3. You will see an “Installation Complete” notice when
Mail for Exchange has finished installing on your device.
4. Select Options > Exit to close the browser.
Choose Your Email Solution
Mail for Exchange
3. Open the Connection tab and enter your Microsoft
Exchange server. Then scroll to and select Access Point,
and from the list of access points select E-mail Settings.
4. Select the type of information you want to synchronize in
the Sync content tab (fig. 27) and how often to synchronize
in the Sync schedule tab.
5. In the Calendar, Contacts and Email tabs, fill in the
required settings for synchronizing this data.
Note: When choosing the Initial sync settings in the
Calendar and Contacts tabs, be sure to choose the option
“delete items on phone” (fig. 28). Not choosing this
option will cause any calendar or contact items that may
already exist on your device, to be duplicated.
After you have installed Mail for Exchange on your device,
open the application by selecting the Menu key (
)>
Apps. > Mail for Exchange.
6. Press the Back key twice to save your profile (fig. 29 and
30).
7. After creating a profile, synchronize your device with your
Microsoft Exchange account to get your email, calendar,
and contact entries on your device for the first time. If
you selected anything other than Manual sync in the Sync
schedule tab, synchronization will begin automatically.
To synchronize manually, press the Menu key (
) then
select Apps. Open Mail for Exchange (
), then select
Options > Synchronize.
Working with a synchronization profile
With a profile, you can customize certain Mail for Exchange
synchronization settings. For example, you can control
when you want synchronization to happen (peak, off peak,
weekdays) and what you want to synchronize (email,
contacts, calendar). To create your synchronization profile:
1. Obtain from your IT department the name of the
Microsoft Exchange 2003 server you are using, your
username, password, and domain.
2. On the device, select Yes when prompted “You have no
Mail for Exchange Profile. Create Profile?” (fig. 25). A list
of categories for profile settings appears (fig. 26).
After you enable email synchronization, a Mail for Exchange
folder appears within the main Messaging folder of your device.
To read your email messages, select the Menu key (
)>
Messaging, then scroll to the Mail for Exchange folder.
fig. 23
fig. 24
fig. 25
fig. 26
30
31
fig. 27
fig. 28
fig. 29
fig. 30
Choose Your Email Solution
Email Support Options
Sync Your Nokia E62
Nokia PC Suite
Email Support Options
Nokia PC Suite
Consult the following resources for more information about the
Nokia E62 email solutions:
Nokia PC Suite is a free software program that allows you to
exchange data between your device and a compatible computer.
Nokia PC Suite can be installed directly from your Nokia E62
Getting Started CD-ROM.
User Guides
Consult the Additional Resources section of the Getting Started
CD-ROM to find User Guides for Xpress Mail, Good Mobile
Messaging, BlackBerry Connect and Mail for Exchange. The User
Guides contain comprehensive information for using each email
solution.
1. Insert the CD-ROM into the CD-ROM drive on your computer.
If the CD does not automatically launch, select Start > Run >
D:/start.exe (where D: is your CD-ROM drive).
2. Click the Install Software link on the left side of the screen.
3. Click the Install Nokia PC Suite ONLY option.
Getting Started CD-ROM
Contains Nokia PC Suite and BlackBerry Connect Desktop for
Nokia software. Check out the Additional Resources section of the
CD for other helpful information.
After installing Nokia PC Suite, the Connection Wizard will assist
you in connecting your Nokia E62 to your computer using your
choice of USB cable, Bluetooth wireless connectivity or infrared
wireless connection.
1-866-CINGULAR (1-866-246-4852)
Contact Cingular for service or billing related questions.
Consult your User Guide to learn more about these connectivity
options.
Web Support for Xpress Mail
Visit www.cingular.com/xpressmail for web support.
Note: Do not use the Synchronize function of Nokia PC Suite
if you are using a wireless email solution, unless instructed
to do so in the email solution setup instructions. Using Nokia
PC Suite in addition to a wireless email solution can result in
duplicated entries. All other Nokia PC Suite features can be
used in combination with a wireless email solution.
32
33
Troubleshooting
Frequently Asked Questions
Why does my Nokia E62 not turn on?
The battery might not be charged. See ‘Insert the SmartChip
and battery’ on page 7 for more information.
Why does my Nokia E62 not charge?
A connection might not be complete. Check that all cables and
plugs are fully inserted into ports and power outlets. See ‘Insert
the SmartChip and battery’ on page 7 for more information.
The battery might not be inserted properly. Turn off your Nokia
E62 and then remove and reinsert the battery. Verify that the
connectors on the battery align with the connectors on your
Nokia E62. See ‘Insert the SmartChip and battery’ on page 7 for
more information.
Why does my battery drain quickly?
The battery life depends upon what features of the phone you
are using. For optimal battery life, allow the battery to run
almost all the way down before recharging. Please consult your
device user manual for best results.
How do I compose and send an email?
address of the recipient. Press the scroll key down two times
and enter the subject. Press the scroll key down one more time
to type your message. Make sure the cursor is in the To: field,
and enter the address of the recipient. Press the scroll key down
two times and enter the subject. Press the scroll key down one
more time to type your message. When you are finished, select
Options > Send.
Why can I not send or receive email messages?
Your Nokia E62 may not be connected to the wireless network
or you may be outside a Cingular coverage area. See ‘Connect
to the Cingular network’ on page 8 for more information.
If you still cannot send and receive email messages, reset your
Nokia E62 by removing and reinserting the battery.
How do I insert a compatible memory card into my
Nokia E62?
Remove the battery cover and insert the memory card fully into
the memory card slot. Ensure that the contact area is facing
down. Then replace the battery cover. Consult your Nokia E62
User Guide for details on inserting a memory card.
Troubleshooting
Frequently Asked Questions
What should I do when my device prompts me to
enter a security code?
If IT security policy is enforced during device or email setup,
you may be prompted to enter the default security code: 12345.
Press the function key (
) twice to lock number mode, then
enter 12345 and select OK. Press the function key (
) again
to unlock number mode. Once you have changed your security
code, the default setting is no longer valid. If you changed your
security code and do not remember the new code, contact your
IT help desk.
Can I use my Nokia E62 without a SmartChip?
Yes, you can. The Offline profile is automatically activated when
the device is switched on without a SmartChip. This allows you
to use your SmartChip in another phone.
You can make an emergency call (to most emergency numbers,
e.g., 911) without having a SmartChip in your Nokia E62
and/or keying in the PIN code. Also, emergency calls to most
emergency numbers are possible even with the keyboard of
your phone locked.
Press and hold the email key (
) to begin composing a new
email. Make sure the cursor is in the To: field, and enter the
34
35
Use Your Nokia E62
Tips and Tricks
Tip! Purchase a separate memory card to fully utilize the
available memory of your Nokia E62.
Tip! Press and hold the call key (
numbers dialed.
Tip! Press and hold the Menu key (
applications.
Tip! To dial a number that contains letters (such as 1-866CINGULAR), hold down the Chr key (
) while pressing
) to make a call.
the letter keys. Press the call key (
) to display a list of last
Tip! To reset your voicemail password, dial *611 from your
Cingular phone and follow the instructions.
) to display a list of open
Tip! Press the blue function key (
) twice to lock the key
and enter only characters printed at the top of the keys.
Press again to release it.
Tip! To enter accent marks on letters, press and hold the Chr
key (
), and then press the letter key repeatedly until
the special character appears.
Tip! To customize your MEdia Net Homepage, open MEdia Net
and click the EDIT link in the top right corner of the page.
Here you can select the categories you would like to have
on your personal MEdia Net Homepage.
Tip! To activate Bluetooth, press the blue function key (
and the Ctrl key (
) simultaneously. To deactivate,
press the blue function key and the Ctrl key again.
)
) twice to turn on caps lock and
Tip! Press the shift key (
enter only capital letters. Press again to release it.
Tip! To lock your keyboard, press and release the left selection
key (
) then press the function key (
). To
)
unlock, press and release the left selection key (
and then press the function key (
) again.
36
Nokia E62 Getting Started Guide
Where can you find more information?
Use the following resources to learn more about your new
Nokia E62.
Nokia E62 User Guide
On-Device Tutorial
Refer to the Nokia E62 User Guide included on the Getting
Started CD-ROM for the most comprehensive details on how to
use your new Nokia E62.
Use the on-device Help and Tutorial for instant support with
your Nokia E62.
Cingular Support
1. Press the Menu key (
).
2. Scroll to and select Help.
3. Scroll to and select Tutorial.
Check out www.cingular.com/support/contact_us for Web
support or call 1-866-CINGULAR (1-866-246-4852) for service
or billing-related questions.
To launch help topics within an application, press the left
) labeled Options and select Help.
selection key (
Nokia Support
Web Tutorial
To learn more about your Nokia E62, visit the web-based
tutorial at www.cingular.com/tutorials/nokiae62.
Getting Started CD-ROM
To review the CD-ROM, insert the CD into the CD-ROM drive
of your compatible PC. If the CD does not automatically launch,
select: Start > Run > D:\start.exe, where D: is your CD-ROM
drive.
Check out www.nokiausa.com/support for the latest
information or call 1-888-NOKIA2U (1-888-665-4228) for toll
free technical support.