1
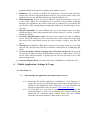
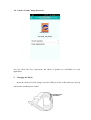
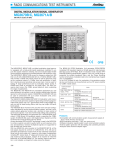
SANTWATCH USER MANUAL
Congratulations on your purchase of SantWatch - ST01 and gifting your child the perfect
gift of freedom and safety.
SantWatch is a testimony to our dedication to enhance the safety and security of children
around the Globe. Let us help you understand the awesome features of this amazing device
and that how intuitive its operation is.
The solution is composed of 4 main components:
1. Watch : SantWatch ST-01, which is packed in this box.
2. SantWatcher: Mobile phone App. Currently we have Android application package
(APK) and Apple IOS versions. We apologise the inconvenience to the Windows phone
users and promise to come up with a windows app very soon. The person in charge of
the kids (typically mother or father) who from now on will be referred as the “guardian
angel”, or simply as the guardian, needs to install the App on his/her phone.
3. Servers: This component is not visible, but is an important part of the overall security
solution. The Watch and APK communicates with Server in a very secured manner and
algorithms running on our servers process that data to ensure the safety of your
children.
4. Satellite/Mobile Towers: This component provides information about the current
location, which is needed by the watch to compute its position and communicate it to
the server.
Please download the SantWatcher mobile application from your Android Playstore or
Apple Store to get started. Alternately, you can download the respective application from
our website: www.santwissen.com Our company reserves the right to revise the content of this manual without notice in
advance. To get the latest version, you can refer to the afore-mentioned website as well.
!1
SANTWISSEN COMPANY PROFILE
Santwissen (pronounced, Sa-int-vi-ss-en) is a combination of Hindi and German words:
SANT/संत meaning Saint and Wissen meaning Knowledge in German. Santwissen literally
translates to “Knowledge from the Saints”.The torch symbol was taken from the Greek
mythology and represents the fire, which was stolen from the gods by Prometheus and
given to the mankind, as an allusion that technology shall be useful to the society.
Just like the name, Santwissen as an organisation is built on the strong shoulders of
technology and business leaders from India, Germany and Mexico with more than 150
years of Engineering and Business experience. Santwissen is an IOT (Internet Of Things)
Solutions Provider with its prime focus on personal safety and security of people around
the globe.
We envision a world where individuals and businesses powered by our state of the art
technology solutions have less worries and more time for meaningful activities. For us the
main value of technology relies in its potential to improve the quality of life for people
around the globe. Our mission is to take care of your most import assets: your time, your
family & loved ones & of course you!
SantWatch is a testimony to our dedication and sincerity towards our mission. With their
Guardian, literally and metaphorically, on the watch, we want to assure the parents
around the Globe that their children are in safe hands.
Thanks for your trust in our product and we hope that you enjoy the product as much as
we enjoyed designing it!! Live Free. Feel Safe. Everywhere! Always!!
!2
TABLE OF CONTENTS
1. Unpacking the BOX 4
2. A closer look at the aesthetic & functional design of the SantWatch 5
3. What makes your SantWatch so Awesome?
7
4. Mobile Application: Settings & Usage
8
4.1. First Time Use 8
4.1.1. Downloading the application and registration on server
8
4.1.2. How to Integrate the SantWatch with the Guardian’s phone?
4.2. Functional Feature Settings and information on the map screen 12
4.3. Updating the settings of a particular Watch14
4.3.1. Set Family numbers
14
4.3.2. Historical Location15
4.3.3. Locations of All 15
4.3.4. Power Savings Mode 16
4.3.4.1. Updating the location update interval 16
4.3.4.2. Updating the locating mode 17
4.3.4.2.1.Accurate Mode 17
4.3.4.2.2. General Mode 17
4.3.4.2.3.Power Saving Mode 17
4.3.5. Collision Level Settings 17
4.3.6. Safety Area Settings
17
4.3.7 Quiet Time Settings 18
4.4. Walkie-Talkie Function (Voice Intercom) 19
4.5. Updating Watch List or editing an existing Watch Data
21
5. Charging the Watch 23
6. Troubleshooting your SantWatch
24
6.1. No Display 24
6.2. Watch is offline message on the smartphone application 24
6.3. Bluetooth screen doesn’t show your watch 24
6.4. Location update not happening as per programmed interval 25
6.5. Accuracy of the location is not as expected 25
6.6. Sensors not responding 25
!3
9
1. Unpacking the BOX
As you set on to the joyful journey of exploring your proud ST01 Watch, this is what
you will discover in the box:
1. The trendy SantWatch designed with un-compromising dedication for
your little Angel
2. A USB charger
3. A USB cable
4. A SIM card ejection pin
5. This User Manual
6. SIM Card*
*This might not be applicable for your Region/Geography. Please contact your retailer for
further details.
!4
2. A closer look at the aesthetic & functional design of the SantWatch
!5
SantWatch
2.1. On-Off Key: Power on/ off by pressing this key for 4 seconds, Hang up by a short
press for an incoming or ongoing call, Force Reset by pressing this key for 8
seconds.
2.2. Key 1: Answer an incoming call by pressing this key, Dial Family number 1 by
long pressing this key. On an ongoing call, increase the volume by pressing this
key. Press this button twice to turn on the Mosquito Repellant function, doubleclick the button again to turn the repellent function off.
2.3. Key 2: Answer an incoming call by pressing this key, Dial Family number 2 by
long pressing this key. On an ongoing call, decrease the volume by pressing this
key. This Key is also used during the Walkie-Talkie operational mode of the Watch.
You will have to first select an avatar by pressing Key 3 before recording. The
Recording is turned on by long pressing this key and sent over to the Guardian’s
phone when the button is released.The same button is also used to listen to the
voice message when there is one.
2.4. Key 3:Answer an incoming call by pressing this key, Dial Family number 3 by
long pressing this key. On Standby, you can enter the voice object list for the
walkie talkie functionality by short pressing this key, if there are many objects,
press this button to switch.
2.5. SOS Key: Answer an incoming call by pressing this key. Press this button for 3
second to send SOS to all family numbers, and call family numbers (1, 2, and 3) in
that order. On standby, open volume control interface by short pressing this key.
Press Keys 1/ 2 will increase/ reduce volume respectively, including key tones,
!6
ring tones, switch ring tones.
2.6. Microphone: Don’t cover the holes while talking
2.7. USB Interface: For Charging.
2.8. Speaker: Don’t cover the holes while talking
2.9. SIM card slot
2.9.1. Horizontally insert the SIM card chip (metal side down).
2.9.2. SIM card is properly identified if it is showing “Welcome” during the boot,
the time is updated and there’s signal.
3.
What makes your SantWatch so Awesome?
Here is a high level list of features that certify SantWatch’s claim to be the true guardian
on the Watch:
1. 2-Way Voice Communication: The Watch comes integrated with a Quad-band
GSM which makes it a mobile phone in all respect as far as Guardian and kids are
concerned. 3 keys (Ref. Sec 2.1) allow kids to call their parents on a push button.
2. SOS Alerts at push button: At the slightest sense of danger, the children can push
this button (Ref. Sec 2.5). Parents will receive an alert with the last location of the
child and a phone connection will be attempted to pre-registered numbers.
3. Positioning and Tracking: With GPS (outdoors) and LBS (Location Based
Services through Mobile towers) used to position the child, guardians can always
keep an eye on their children from anywhere, anytime.
4. Safety Areas Setting: Parents can set the safety areas for their children. Every time
a child steps out of the safety area, an alert will be sent to the Guardian’s phone.
Parents need to enable this feature through mobile app.
5. BT child accompany feature: Now you don't have to worry if your child is around
whether you are in the park or a mall. Enable this feature through mobile app and
you will be alerted whenever the child leaves the 10m -15 m radius.
6. Fall-Off from wrist alert: If enabled through mobile app, you will receive an alert
whenever the watch is removed intentionally or un-intentionally from Child’s wrist.
7. Abnormal Collision Detection: If enabled through mobile app, you will receive an
alert whenever your child collides or falls down abnormally. You have the choice to
!7
8.
9.
10.
11.
12.
13.
14.
4.
program 4 different impact levels ranging from slight to serious.
Pedometer: Let us teach our children the importance of exercise right from their
tender years. We have integrated motion sensors to give you the count of steps your
child covered in a day. Health and Safety go hand in hand. Isn’t it?
Silent Monitoring: In case you sense a danger to your kid and want to be sure if it
is not a false alarm, we recommend you to send the silent monitor command
through your application, the child’s watch will be connected to your phone and
you can hear what is happening in background without the child having to accept
your call.
Mosquito Repellant: Let your children step out in the mother nature and enjoy
without having to worry about mosquito bites. Refer section 2.2 on how to enable/
disable this feature.
Non-Toxic Hypoallergenic straps: We know how sensitive the skin of children
can be. That’s the reason we have chosen the best of best materials so that long
time wear of the watch doesn’t cause any sort of allergy or rash to your kids. We
care!!
Waterproof: SantWatch is IP65 grade waterproof. In simple terms, let your child
step out and experience the first rain in summer without the fear of damaging the
watch.
At least 1 full day without charging with all features turned on: We promise
one full day of battery run time with all features turned on. What’s more? You will
receive alerts when the battery is getting too low and you can choose one of the
power savings mode.
Attractive Digital Watch: Last but not the least, SantWatch is a watch after all ;)
Mobile Application: Settings & Usage
4.1. First Time Use
4.1.1. Downloading the application and registration on server
4.1.1.1. Download the mobile application “SantWatcher” from Playstore or
Apple store (as per your Operating System) and open the application as
guided by the application steps. Alternately, you can download the
respective application from our website: www.santwissen.com
4.1.1.2. As a first time user, you need to register and create a username and
password (Figure 1). If you are a registered user and just enabling the
application on a different phone, simply login with your existing
username and password and we shall do the rest for you.
!8
Figure 1. Register User
4.1.2. How to Integrate the SantWatch with the Guardian’s phone?
4.1.2.1. Before starting, please charge the battery as explained in section 5.
4.1.2.2. Insert the Micro SIM card into the slot properly (Ref. Sec 2.9). Then
turn on SantWatch (Ref Sec 2.1). If you attempt to call SantWatch
Phone number at this time, you should expect a busy tone. If the call
fails with a message that the phone number is switched off, please reinsert SIM as per instructions in section 2.9 or try with another SIM
card.
4.1.2.3. When you login to the application for the first time, you’ll see an
empty Watch list. Therefore you will have to create Watch data
!9
corresponding to your child who is wearing it.
4.1.2.4. To create Watch data, you will have to enter the following details
(Figure 2 and 3): Name of the child
Icon to represent your child Gender, Birthday, Height, Weight
SantWatch’s SIM Card Number
SantWatch’s IMEI Number. You will find this number on the watch
box.
Captcha. Please refer Sec 4.1.2.4 for details.
Location Icon. Pick up one of the many colors your fancy to represent
your child’s location
Once the SantWatch is shown on the list, you can adjust the time by
clicking the avatar picture and choosing the option calibrate time. By
clicking on “Get system time” you can obtain the time from your cell
phone and transmit it to the watch
Figure 2: Add Watch
!10
Figure 3: Add Watch
Figure 4: Set Family Numbers
Figure 5: Map Screen
4.1.2.5. To enter the Captcha, you need to first click on “Get Captcha”, then the
application will send an SMS to the watch you are trying to pair. After
receiving the SMS, the Captcha will be shown on the screen of watch.
You need to enter the same code in the phone app to ensure that you
are indeed the guardian and have your kid’s watch around.
**when SantWatch is displaying Captcha, you can cancel the display
by pressing any key.
4.1.2.6. After properly entering all the details, please click “Save” button. The
newly created Watch data will be securely saved on to Santwissen
servers.
!11
4.1.2.7. You can add additional Watch data through the map screen. On the
main screen pull the menu in the left side and click “Add” icon at the
bottom. This will open the screen for adding additional watches. You
can add a maximum of 8 watches at the moment. If you need to add a
newer watch, you will have to delete the older data once the limit of 8
watches is reached.
4.1.2.8. After successfully creating the watch data, before you can use the
features of the SantWatch, you need to add family numbers for that
particular watch you just added (Figure 4). You can save upto 8
numbers: 3 primary and 5 secondary. The difference between Primary
and secondary numbers is that child can call to any of the 3 primary
numbers by pressing a corresponding key on the watch (Ref. sec. 2).
The secondary numbers are numbers which are allowed to call the
child but child can not call them. Please don’t forget to click the save
button once you have added the family numbers for them to take effect.
4.1.2.9. After you have successfully updated the Watch data and set the family
numbers, you will be guided to the map screen (Figure 5) which is
going to be the primary screen from now onwards every time you login
successfully with your user name and password.
4.2. Functional Feature Settings and information on the map screen
On the main map screen (Figure 5), you can check “Location”, “Dial back and
Monitor”, “Enable continuos Tracking”, “Set Safety Areas”, “Control Fall Off
Detection”, “Enable Bluetooth child accompany”, “Enable collision detection
alerts”, “Check power level of kid’s watch”, “Check Pedometer” and other
functions. If the icon is blue it indicates that the function is enabled and if it is gray
it indicates that the function is turned off. You can click a corresponding icon to
turn it from gray to blue or vice-versa.
4.2.1.Location: Click the icon as shown to get the current location on the
map. If the circle around the location marker is orange, it means there is a
GPS link between the watch and the satellite. Otherwise a green circle
denotes LBS location, which is less accurate.
4.2.2.Continuous Tracking: Click the icon as shown to turn on the
continuous tracking function. That means, every pre-defined period of time
(which is configurable and is explained in more detail in Section 4.3.4) the
current position will be stored. There are 3 different tracking modes which
can be enabled through Watch Settings which will decide how accurate the
displayed tracking location is.
4.2.3.Safety Area: Click to enable or disable the “Safety Area” feature. If
this is enabled and safety area is set for the child, your smart phone will get
!12
the alarm if the kid wearing the corresponding watch gets out of the defined
safety area.
4.2.4.Strap Detection: Click the icon shown to enable or disable the strap
off detection feature. There is an ambient light sensor at the back of the
watch which detects if the watch is on the child’s wrist or taken off. If this
feature is on and child’s watch is taken off the wrist, an alert is sent on
Guardian’s phone.
4.2.5.Parent-Kid Accompany: Click the icon shown to turn on the
Bluetooth Child Accompany feature. After successfully connecting to the
watch via blue tooth, watch screen will pop up the message, “BT OK”. The
smart phone will get an alarm if child wearing the watch exceeds the
bluetooth range. As soon as the child comes back in the range, BT icon
displays that the child is in range again. (Note: You need to have Android
version 4.3 or higher for this feature to work)
4.2.7.Collision Warning: Click the icon shown to enable or disable the
collision warning alerts on your smart phone. If this is enabled, an alert will
be sent to Guardian’s smart phone if the child falls down or collides with
someone based on the collision level settings as explained later.
4.2.8.Dial back and Monitor: Click the icon shown to request for call back
and silent monitoring enable.
4.2.9.Click to call: Click this icon to place a call to your kid.
4.2.10.Walkie-Talkie Mode switch: Click this icon to take you to WalkieTalkie mode screen. You can send and receive messages to and from the
watch from this screen.
4.2.11.Power: You can see the battery level at the bottom of the “Watch” picture.
4.2.12.Pedometer: it will count how many steps your child wearing the
corresponding watch has walked.
!13
4.3. Updating the settings of a particular Watch
The existing settings or default settings for a given watch can be programmed by
clicking the Settings icon the top right of the map screen. It will open a side bar on
Contact Us & Change Password
Figure 6: Watch Settings Update
the right hand side as shown in Figure 6.
4.3.1. Set Family numbers
This will open the screen as shown in Figure 4. Refer Section 4.1.2.7 on
further details on family numbers.
!14
Figure 7: Historical Location
Figure 8: Locations of All
4.3.2. Historical Location
This will open the screen as shown in Figure 7. You can use the respective
arrows to browse the historical locations for the child who had worn the
corresponding watch.
4.3.3. Locations of All
This will open the screen as shown in Figure 8. You can see the locations of
all active online watches that have been added from the given user account.
!15
Figure 9: Power Savings Mode
Figure 10: Collision level settings
4.3.4. Power Savings Mode
This will open the screen as shown in Figure 9. You can choose the location
update interval as well as the location or watch positioning mode through
this screen.
4.3.4.1. Updating the location update interval
You can select one of the five location update interval settings ranging
from 3 minutes (Most Frequent Updates and hence more power
consumption) to 30 minutes( Less frequent and hence longer battery
life for watch).
!16
4.3.4.2. Updating the locating mode
There are 3 modes available to be chosen from.
4.3.4.2.1.Accurate Mode
Uses GPS satellite positioning. If GPS signal is weak (like in Indoors),
LBS (Location Based Services or mobile towers) location is used. This
is the most precise and also the most power consuming locating mode.
4.3.4.2.2. General Mode
In this mode bilateral location is calculated using both GPS and LBS
locations.
4.3.4.2.3.Power Saving Mode
Only LBS based location is displayed. This is most inaccurate and also
the least power consuming mode.
4.3.5. Collision Level Settings
This will open the screen as shown in Figure 10. You can choose the shock
or collision level at which you want to receive a notification on your smart
phone. There are 4 different collision level settings ranging from Slight hit
to Serious impact.
4.3.6. Safety Area Settings
This will open the screen as shown in Figure 11 and 12. On the “Safety
area” screen, click the setting button on the upper right, the map will get in
to “setting status”. You could then directly delimit an area on the map by
using your touch point pen or finger.After delimiting the area, click “OK”,
which means you have successfully set the activity area. After this setting, if
the safety area function is enabled from map screen as explained in section
4.2, the smart phone will get the alarm if the child wearing the watch gets
out of the delimited area.
!17
Figure 12: Safety Areas Setting
Figure 11: Safety Areas Setting
4.3.7 Quiet Time Settings
This will open the screen as shown in Figure 13. You can set four quiet time
periods. You can set the time periods as: 13:19 – 14:00, the second time must be
bigger than the first one. During this period, Watch will turn off. Tip: You can
set the period during which your child is having class so that your child doesn’t
get interrupted during the class.
!18
Figure 13: Quiet Time Setting
4.4. Walkie-Talkie Function (Voice Intercom)
4.4.1. Clicking on the Intercom Icon on the bottom left of the main screen (Figure
14) will take you to the Walkie-Talkie screen (Figure 15).
4.4.2. Keep pressing the “Press and speak” button and record your message, the
message will be sent to the watch automatically as soon as you lift your
finger. When the watch receives the message, you can hear it by pressing the
dial key 2 on the watch.
4.4.3. The watch: Press the dial key 3 to come to the interface of avatar list, choose
the object you want and then long press the dial key 2 to begin recording,
which can be of 15 seconds at most, the message will be sent out
immediately once you lift your finger.
4.4.4. The messages from both the phone and the watch will be stored in the list,
!19
you can click anyone to replay the message.
Figure 14: Intercom screen enable
Figure 15: Intercom screen
!20
4.5. Updating Watch List or editing an existing Watch Data
Open Watch Management screen by going to settings, you can check the data of
the user, edit the data, delete the watch list and check the guardian record and other
operations (Figure 16,17, 18, 19)
Figure 16: Watch Management
Figure 17: Watch Management
!21
Figure 18: Watch Management
Figure 19: Watch Management
!22
4.6 Contact Us and Change Password
Contact Us and Change Password
SantWatcher
Ver:ST01_1.0_0307a
You can check the User Agreement and check if updates are availablele for your
application. 5.
Charging the Watch
Insert the small end of the charger into the USB port of the cradle and insert the big
end into the standard power cradle.
!23
Use only the USB power adapter battery and USB cable provided. Any other USB power
adapter and USB cable may cause the explosion of the battery or destroy of the device.
6.
Troubleshooting your SantWatch
6.1. No Display
6.1.1.Please ensure that the watch has some charge. You can connect the
USB cable and the Charging screen should appear on the Watch.
6.1.2.Please press the power on/off key for around 4 seconds while the
charging cord is inside the USB slot. The welcome dialogue should
appear on the screen.
6.2. Watch is offline message on the smartphone application
6.2.1.If you are inserting the SIM for the first time or you recently inserted
it, please ensure that you have inserted the SIM card properly in the
slot as guided in the chapter 2.
6.2.2.Please ensure that you have a valid 2G SIM and have sufficient
balance on the SIM card.
6.2.3.Please ensure that you are in the area with reasonable mobile
connectivity
6.2.4.IF you have ensured all of above, you should see the GSM signal
strength represented by a capital alphabet “P - Excellent’ to “N- No
connectivity” and two up/down arrows side by side to represent that
2G connection is valid and working.
6.3. Bluetooth screen doesn’t show your watch
6.3.1.Please ensure that the BT on your phone is turned on.
6.3.2.Please ensure that the watch is in the BT range: 10 meters to 15
meters.
6.3.3.If still you can’t detect the watch on the BT screen, please keep the
BT screen ON on the smart phone but turn your watch off and turn it
back on once. You should now see “BT OK” message on the watch
and the Avatar for the watch on the BT screen.
!24
6.4. Location update not happening as per programmed interval
6.4.1.Please don't panic. In order to ensure longer battery life of the watch,
we will not update the location on the application as long as the
position of the watch doesn’t change.
6.4.2.Sometime the watch is inside the buildings where GPS connectivity
is not that good and LBS location will be the same. So even though
you moved around a few meters but the location displayed will be still
the same and the older timestamp.
6.4.3.In some case, you did move around but due to temporary nonavailability of the 2G connection on the watch or the data connection
on your smart phone, the location update is not reflected. In that cases,
as soon as you get into an area with reasonable connectivity , the
location updates should start to work as expected.
6.5. Accuracy of the location is not as expected
6.5.1. If you are in open air with good signal connectivity, please double
check the power saving mode settings as explained in chapter 4.3.4.
Please enable Accurate Mode to get the precise location.
6.5.2.In open air on clear sky, the accuracy should be < 10 meters, on some
cloudy days or lot of buildings around this can change to <30meters
6.5.3.If you are indoors or inside a life, in the basement of a building, it is
quite possible that you will not receive the GPS location but the
location from the nearest tower we have tied up with. That accuracy
can go all the way to 800 meters.
6.6. Sensors not responding
6.6.1.Please ensure that the corresponding sensor like wrist-off or collision
sensor that you want to observe is displayed in Blue Color on the
application screen. If it is Gray in color, it means the functionality of
that sensor is turned off.
6.6.2.Please click on the sensor icon once if it is gray and wait for “Set
Ok” message on the Watch and corresponding sensor icon turning blue
on the smart phone apk.
6.6.3.If you don’t see “Set Ok” message, please ensure that you are
connected to the internet as explained in section 6.2
!25
6.6.4.For collision detection, there are 4 different levels. So, we will
recommend you to change the settings for collision level as advised in
section 4.3.5 to “Slight” and then try the collision by hitting the watch.
!26