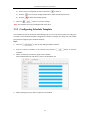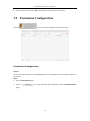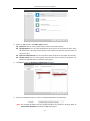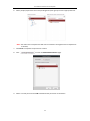
1
Access Control System User Manual UD.6L0207D1029A01 User Manual of Access Control System Hikvision® Access Control System User Manual This manual, as well as the software described in it, is furnished under license and may be used or copied only in accordance with the terms of such license. The content of this manual is furnished for informational use only, is subject to change without notice, and should not be construed as a commitment by Hangzhou Hikvision Digital Technology Co., Ltd. (Hikvision). Hikvision assumes no responsibility or liability for any errors or inaccuracies that may appear in the book. Except as permitted by such license, no part of this publication may be reproduced, stored in a retrieval system, or transmitted, in any form or by any means, electronic, mechanical, recording, or otherwise, without the prior written permission of Hikvision. HIKVISION MAKES NO WARRANTIES, EXPRESS OR IMPLIED, INCLUDING WITHOUT LIMITATION THE IMPLIED WARRANTIES OF MERCHANTABILITY AND FITNESS FOR A PARTICULAR PURPOSE, REGARDING THE HIKVISION SOFTWARE. HIKVISION DOES NOT WARRANT, GUARANTEE, OR MAKE ANY REPRESENTATIONS REGARDING THE USE OR THE RESULTS OF THE USE OF THE HIKVISION SOFTWARE IN TERMS OF ITS CORRECTNESS, ACCURACY, RELIABILITY, CURRENTNESS, OR OTHERWISE. THE ENTIRE RISK AS TO THE RESULTS AND PERFORMANCE OF THE HIKVISION SOFTWARE IS ASSUMED BY YOU. THE EXCLUSION OF IMPLIED WARRANTIES IS NOT PERMITTED BY SOME STATES. THE ABOVE EXCLUSION MAY NOT APPLY TO YOU. IN NO EVENT WILL HIKVISION, ITS DIRECTORS, OFFICERS, EMPLOYEES, OR AGENTS BE LIABLE TO YOU FOR ANY CONSEQUENTIAL, INCIDENTAL, OR INDIRECT DAMAGES (INCLUDING DAMAGES FOR LOSS OF BUSINESS PROFITS, BUSINESS INTERRUPTION, LOSS OF BUSINESS INFORMATION, AND THE LIKE) ARISING OUT OF THE USE OR INABILITY TO USE THE HIKVISION SOFTWARE EVEN IF HIKVISION HAS BEEN ADVISED OF THE POSSIBILITY OF SUCH DAMAGES. BECAUSE SOME STATES DO NOT ALLOW THE EXCLUSION OR LIMITATION OF LIABILITY FOR CONSEQUENTIAL OR INCIDENTAL DAMAGES, THE ABOVE LIMITATIONS MAY NOT APPLY TO YOU. 2 User Manual of Access Control System Contents Chapter 1 Overview ....................................................................................................................... 4 1.1 Description .................................................................................................................... 4 1.2 C/S Client Access ........................................................................................................... 4 Configuration Flow .................................................................................................................... 4 Chapter 2 Device Management ..................................................................................................... 5 2.1 Controller Management ................................................................................................ 5 2.1.1 Interface Introduction ....................................................................................... 5 2.1.2 Device Management ......................................................................................... 6 2.2 Access Control Point Management ............................................................................... 8 2.2.1 Interface Introduction ....................................................................................... 8 2.2.2 Group Management .......................................................................................... 8 2.2.3 Door Management ............................................................................................ 9 Chapter 3 Permission Management ............................................................................................ 11 3.1 Person Management ................................................................................................... 11 3.1.1 Interface Introduction ..................................................................................... 11 3.1.2 Department Management .............................................................................. 11 3.1.3 Person Management ....................................................................................... 11 3.2 Card Management....................................................................................................... 12 3.2.4 Interface Introduction ..................................................................................... 12 3.2.5 Blank Card ....................................................................................................... 12 3.2.6 Normal Card .................................................................................................... 13 3.2.7 Lost Card.......................................................................................................... 14 3.3 Schedule Template ...................................................................................................... 14 3.3.1 Configuring Week Plan .................................................................................... 14 3.3.2 Configuring Holiday Group .............................................................................. 15 3.3.3 Configuring Schedule Template ....................................................................... 16 3.4 Door Status Management ........................................................................................... 17 3.5 Permission Configuration ............................................................................................ 20 Chapter 4 Access Control ............................................................................................................. 25 4.1 Status Monitor ............................................................................................................ 25 4.1.1 Access Anti-control .......................................................................................... 25 4.1.2 Access Status ................................................................................................... 27 4.1.3 Real-time Event ............................................................................................... 27 4.2 Access Event ................................................................................................................ 27 4.3 Event Search ................................................................................................................ 28 Chapter 5 System Maintenance ................................................................................................... 30 5.1 Log Management ........................................................................................................ 30 5.1.1 Interface Introduction ..................................................................................... 30 5.1.2 Search Configuration Log ................................................................................ 31 5.1.3 Search Control Log .......................................................................................... 32 5.2 System Configuration .................................................................................................. 33 5.2.1 Interface Introduction ..................................................................................... 33 5.2.2 Card Dispenser Configuration ......................................................................... 35 3 User Manual of Access Control System Chapter 1 Overview 1.1 Description An access control system is a system of checking permission of door access. It provides multiple functionalities, including device management, people/card management, permission configuration, door status management, event search, etc. This user manual describes the function, configuration and operation steps of Access Control System. To ensure the properness of usage and stability of the system, please refer to the contents below and read the manual carefully before installation and operation. 1.2 C/S Client Access As a sub-system of iVMS-5200P Web Manager, the C/S client of access control system is designed to be visited via iVMS-5200P Web Manager. Access the iVMS-5200P via Web Manager, and click Access Control Configuration Logical View page (under Resource Management) to access the client. Configuration Flow Refer to the following flow chart for the configuration order. Configure the Card Dispenser Configure the Access Controller Configure the Door Configure the Department, Person and Card Configure the Schedule Template (Week Plan, Holiday Group and Schedule) Configure and Download the Permission View Status 4 User Manual of Access Control System Chapter 2 Device Management 2.1 Controller Management 2.1.1 Interface Introduction Click the icon to enter the controller management interface. The interface is divided into 2 parts: device management and online device detection. Device Management: Manage the access control devices, including adding, editing, deleting, and batch time synchronizing functions. Online Device Detection: Automatically detect online devices in the same subnet with the access control server, and the detected devices can be added to the server in an easy way. 5 User Manual of Access Control System 2.1.2 Device Management Adding Device Steps: 1. Click the to enter the Add Access Control Device interface. 2. Input the device name in the text filed to be displayed in the software. 3. Select the device type in the dropdown list. 4. Select the connection mode in the dropdown list: TCP/IP or COM port. COM1-5: Connect the device via the COM port. TCP/IP: Connect the device via the network. 5. Set the parameters of connecting the device. If you choose to connect the device via network, you should input the IP address and port No. of the device, and set the Dial-up value to 1. If you choose to connect the device via COM port, you should set the Baud Rate and Dial-up value. 6. Click the button to finish adding. Editing Device Purpose: After adding the device, some advanced parameters can be configured in the editing device interface, e.g. downloading hardware parameters, reading hardware parameters, time synchronizing, configuring access point, etc. Steps: 1. In the device list, click button to edit the information of the selected added device. 6 User Manual of Access Control System 2. Configure the basic parameters of the device on your demand, which are the same as the ones when adding the device. 3. (Optional) Check the checkbox of Enable Holiday to enable the holiday parameters when downloading permissions. 4. Click the 5. Click the the device. button to finish editing. button to download the updated parameters to the local memory of Deleting Device Steps: 1. In the device list, select a device by clicking it, or select multiple devices by pressing Ctrl button on your keyboard and clicking them one by one. 2. Click the button to delete the selected device(s). 3. Click OK button in the popup confirmation dialog to finish deleting. Batch Time Synchronization Steps: 1. In the device list, select a device by clicking it, or select multiple devices by pressing Ctrl button on your keyboard and clicking them one by one. 2. Click the button to start time synchronization. A message box will pop up on the lower-right corner of the screen when the time synchronization is compeleted. 7 User Manual of Access Control System 2.2 Access Control Point Management 2.2.1 Interface Introduction Click the icon on the control panel to enter the door management interface. Group Management The doors can be added to different groups to realize the centralized management. Door Management Manage the specific door under the door group, including importing, editing and deleting door. 2.2.2 Group Management Adding Group Steps: 1. Click the button to pop up the Add Group dialog. 8 User Manual of Access Control System 2. Input the group name in the text field and click the button to finish adding. Note: Multi-level groups are not supported yet. Editing Group Steps: Double-click the group or right-click the group and select Edit in the right-click menu. Deleting Group To delete a group, three ways are supported. Click to select a group and click the Right-click a group and select Delete in the popup menu. button. Move the mouse onto the group and click icon of it. And then click the OK button in the popup window. 2.2.3 Door Management Doors under the group can also be edited, refer to the following instructions. Importing Door Steps: 1. Click the button to pop up the import door interface. 2. Select a door to import by clicking it. 3. Click to select a group in the right side bar to import to. 4. Click button to import the selected doors or click to import all the available doors. Note: You can click button on the upper-right corner of the window to create a new group. Editing Door Steps: 1. Click to select a door in the list and click the button to edit the door. 9 User Manual of Access Control System 2. Edit the Door Name and Position. 3. Click button to finish editing. Note: you can also enter the Edit interface by double clicking the door from the list. Deleting Door Several ways are supported to delete the door, as shown below. Click to select a group in the group list, select door(s) under it, and click button. Click to select a group in the group list, and click button to delete all doors under the group. Move the mouse onto a group in the group list, and click button to delete all doors under the group. Note: you can also edit/delete a door on the Import Access Control Point panel. Steps: 1. Select a control point on the Group panel. 2. Click the / icon to enter the Edit Access Control Point panel or to delete the control point. 10 Chapter 3 Permission Management 3.1 Person Management 3.1.1 Interface Introduction Click the icon on the control panel of the software. Adding, editing, deleting and filtering of the department and person are supported in this interface. 3.1.2 Department Management Steps: 1. In the department list, click button to pop up the adding department interface. Notes: Multi-level department system can be created. Click a department as the upper-level deparment and click button, and then the added department will be the sub-department of it. Up to 10 levels can be created. 2. You can double-click an added department to edit its name. 3. You can click to select a department, and click the button to delete it. Notes: The lower-level departments will be deleted as well if you delete a department. Make sure there is no person added under the department, or the department cannot be deleted. 3.1.3 Person Management Steps: 1. Select a department in the list and click the in the person infoarmation list to User Manual of Access Control System pop up the adding person interface. 2. Input the Person Name (required), Gender, ID Card, etc., upload the photo of the person and click to finish adding. Note: The format of the photo should be .jpg. 3. You can double-click an added person to edit its information. 4. You can click to select a person, and click the button to delete it. If a card is associated with the current person, the association will be invalid after the person is deleted. 3.2 Card Management 3.2.4 Interface Introduction Click on the control panel of the software to enter the card management interface. The cards are divided into 3 types: Blank Card, Normal Card, and Lost Card. Blank Card: A card has not been issued with a person. Normal Card: A card is issued with a person and is under normal using. Lost Card: A card is issued with a person and is reported as lost. 3.2.5 Blank Card Adding Card Before you start: Make sure a card dispenser is connected to the PC and is configured already. Refer to 5.2.2 Card Dispenser Configuration for details. Steps: 1. Click the button to add cards. 2. Two modes of adding cards are supported. Adding Single Card Choose the Single Add as the adding mode by clicking the Date, Expiring Date and Card No. in the text field. 12 to and input the Start User Manual of Access Control System Batch Adding Cards Choose the Batch Add as the adding mode by clicking the to and input the Start Date, Expiring Date, tart No. and End No. in the corresponding text fields. 3. Click the button to finish adding. 4. Click an added blank card in the list and click button to issue the card with a person. Note: you can double click the blank card in the card list to enter the Issue Card Page. 5. Click to choose a person on your demand in the popup dialog box and click to finish. The issued card will disappear from the Blank Card list, you can check the card information in the Normal Card list. Deleting Card You can click an added blank card in the list and click button to delete the selected card. 3.2.6 Normal Card Click the tab in the card managemet interface to show the Normal Card list. You can view all the issued card information, including card No., card holder, and the department of the card holder. Click to select a card and click the to change the associated card for card holder. Select another card in the popup window to replace the current card. Click to select an issued card and click the to cancel the assotiation of the card, then the card will disappear from the Normal Card list, which you can find it in the Blank Card list. 13 User Manual of Access Control System Click to select an issued card and click the to set the card as the Lost Card, that is, an invalid card. Click to select an issued card and click the to set the password for the card, set the password in the text filed and click the OK button to finish setting. The password will be required when the card holder swiping the card to get enter to or exit from the door if you enable the card&password authentication on the advanced configuration page. 3.2.7 Lost Card Click the tab in the card managemet interface to show the Lost Card list. You can view all the lost card information, including card No., card holder, and the department of the card holder. Click the button to resume the card to the normal card. Click the button to issue a new card to the card holder replacing for the lost card. Select another card in the popup window as the new card and the predefined permissions of the lost card will be copied to the new one automatically. 3.3 Schedule Template 3.3.1 Configuring Week Plan Adding Week Plan System defines 2 kinds of week plan by default, Enable Week Plan by Default and Disable Week Plan by Default. You can define custom plans on your demand. Steps: 1. Click the to pop up the adding plan interface. 2. Input the name of week plan in the text filed and click the button to add the week plan. 3. Select a week plan in the plan list on the left-side of the window to edit. 4. Click and drag your mouse on a day to draw a blue bar on the schedule, which means in that period of time, the cofigured permission is activated. 5. Repeat the above step to configure other time periods. 14 User Manual of Access Control System Or you can select a configured day and click the to copy the same settings to the whole week. Deleting Week Plan Click to select a configured duration and click the Click the to delete it. to clear all the configured durations, while the week plan still exists. Click the to delete the week plan directly. 3.3.2 Configuring Holiday Group Adding Holiday Group Steps: 1. Click the to pop up the adding holiday group interface. 2. Input the name of holiday group in the text filed and click the button to add the holiday group. Note:At most 4 holiday groups can be added. 3. Select a week plan in the plan list on the left-side of the window to edit. 4. Click the button to add a holiday in the holiday list and configure the duration of the holiday. 1) Click and drag your mouse on a day to draw a blue bar on the schedule, which means in that duration, the cofigured permission is activated. 15 User Manual of Access Control System 2) Click to select a configured duration and click the to delete it. 3) Click the to clear all the configured durations, while the holiday still exists. 4) Click the to delete the holiday directly. 5. Click the button to save the settings. Note: The holidays cannot be overlapped with each other. 3.3.3 Configuring Schedule Template The schedule consists of week plan and holiday group; you can only choose which plan and group to enable in the schedule template configuration interface. Configure the week plan and holiday group before configuring the schedule template. Steps: 1. Click the to pop up the adding schedule interface. 2. Input the name of schedule in the text filed and click the schedule. 3. Select a week plan you want to apply to the schedule. Click the Week Plan tab and select a plan in the dropdown list. 4. Select holiday groups you want to apply to the schedule. 16 button to add the User Manual of Access Control System Click to select a holiday group in the left-side list and click the Click to select an added holiday group in the right-side list and click the to add it. to delete the it. Click the 5. Click the to delete all the added holiday groups. button to save the settings. 3.4 Door Status Management Purpose: The function of Door Status Management allows you to schedule weekly time periods for a door to remain open or closed. Click the icon on the control panel to enter the interface. 17 User Manual of Access Control System Steps: 1. Enter the Door Status Management page. 2. Click and select a door from the door list on the left side of the page. 3. Draw a schedule map. 1) Select a door status brush / on the upper-left side of the Door Status Settings panel. Remain open: the door will keep open during the configured time period. The brush is marked as yellow. Remain Closed: the door will keep closed during the configured duration. The brush is marked as blue. 2) Click and drag the mouse to draw a color bar on the schedule map to set the duration. Notes The min. segment of the schedule is 30min. You can copy the configured time periods of a day to the whole week. Steps: 18 User Manual of Access Control System 1. 4. Select a day which has already been configured. 2. Click on Edit the schedule map. to copy the time periods to the whole week. Edit Duration: Click and drag the color bar on the schedule map and you can move the bar on the time track. Click and drag the mouse on the ends of the color bar and you can adjust the length of the bar. Delete a Duration: Click and select a color bar and click to delete the time period. Clear All Durations: Click to clear all configured durations on the schedule map. 5. Click on to save the settings. 6. You can copy the schedule to other doors by clicking on doors. 7. Click on to enter the Download Door State page. 19 and select the required User Manual of Access Control System 8. Select a control point and click OK to download the configuration to the system. 3.5 Permission Configuration Click the icon on the control panel to enter the interface. Permission Configuration Purpose: You can allocate permission for people/department to enter/exist the control points (doors) in this section. Steps: 1. Enter the Permission page. 2. Click on icon on the upper-left side of the page to enter the Add Permission page. 20 User Manual of Access Control System 3. Select an adding type in the Select Type interface. By Person: you can select people from the list to enter/exit the door. By Department: You can select departments from the list to enter/exit the door. Once the permission is allocated, all the people in this department will have the permission to access the door. By Access Control Point: You can select doors from the door list for people to enter/exit. By Door Group: You can select groups from the door list for people to enter/exit. The permission will take effect on the door in this group. 4. Click Next to enter the Permission Configuration interface. 5. Click on the dropdown menu to select a schedule template for the permission. Note: The schedule template must be configured before any permission settings. Refer to 3.3 Schedule Template for detailed configuration guide. 21 User Manual of Access Control System 6. Select people/ department and corresponding doors/door groups from the appropriate lists. Note: The lower-level of department will also be selected if the highest-level of department is selected, 7. Click Done to complete the permission creation. 8. Click to enter the Download Permission page. 9. Select a control point and click OK to download the permission to the device. 22 Permission Searching Purpose: After the permission configuration being completed, you can search and view permission assigning condition on the searching interface. Steps: 1. Enter the Permission page. 2. Enter the search criteria (main type/sub type/permission content). 3. 4. Click Search to get the search results. Note: You can click Reset on the search criteria panel to clear all the displayed search results. Permission Deleting Steps: 1. Follow steps 1-3 in the Permission Searching section to search for the permission needs to be deleted. 2. Click to select the permission from the results list. Note: you can press the CTRL or Shift key on the keyboard, User Manual of Access Control System 3. Click 4. Click to delete the permission. to enter the Download Permission page. 5. Select a control point and click OK to download the deletion operation to the device. 24 User Manual of Access Control System Chapter 4 Access Control Purpose: In this section, you are able to anti-control the status of the door and to check the event report of the control point. To access the following functions, please login the iVMS-5200P Control Client, and click Tool->Access Control Configuration 4.1 Status Monitor Purpose: You can anti-control the door status and check the real-time access event information for the control point. Click the icon on the control panel to enter the interface. 4.1.1 Access Anti-control Door Anti-control Purpose: You can control the status for a single control point (a door) in this section. Steps: 1. Enter the status monitor page. 25 User Manual of Access Control System 2. Click on the icon on the Status Information panel to select a door. 3. Click on the button listed on the upper-left side of the Status Information panel to select a door status for the door. : Click on the button to open the door once. : Click on the button to close the door once. : Click on the button to keep the door open. : Click on the button to keep the door closed. 4. You can also right click the icon and to select a status for the door. Note: If the status is selected as Remain Open/Remain Closed, the door will keep open/ closed until a new anti-control command being made. Group Anti-control Purpose: You can control the status for a group of control points (doors) in this section. Steps: 1. Enter the status monitor page. 2. Right click on a group in the Group list and to select a door status for the group. Note: If the status is selected as Remain Open/Remain Closed, all the doors in the group will keep open/ closed until a new anti-control command being made. 26 User Manual of Access Control System 4.1.2 Access Status The door status will be represented instantly by the change of icon on the Access Information panel if the access event is triggered or an anti-control command is made. 4.1.3 Real-time Event You can check the Real-time information of the access event on this panel. Click More to enter the Access Event page to view more event information. 4.2 Access Event Purpose: You can view real-time access event (such as swiping to open the door, unrecognized card number, duration group error, etc.) information in this section. Click the icon on the control panel to enter the interface. 27 User Manual of Access Control System Steps: 1. Enter the access event page. 2. View the event information in the event list. 3. Click on an event to view the information of the card holder on the Person Information panel on the left side of the page. 4.3 Event Search Purpose: You can search historical access event according to the search criteria (such as event type, name of the person, card No. or start/end time) in this section. Click the icon on the control panel to enter the interface. 28 User Manual of Access Control System Steps: 1. Enter the event search page. 2. Enter the search criteria (event type/ person name/ card No/ start &end time). 3. Click Search to get the search results. 4. View the event information in the event list. 5. Click on an event to view the information of the card holder on the Person Information panel on the left side of the page. 29 User Manual of Access Control System Chapter 5 System Maintenance 5.1 Log Management 5.1.1 Interface Introduction Purpose: The log files of the Access Control System and the devices that connected to the Access Control System can be searched for checking. Click the icon on the control panel to open the Log Search page. Search Configuration Logs Purpose: The Configuration Log files of the Access Control System can be searched by time ,including One-card Configuration, Access Control Configuration, Downloading Permission and System Configuration. Steps: 1. Open the Log Search page. 2. Select the radio button of Configuration Logs. 3. Select the Operation Type of log files. 4. Click the icon to specify the start time and end time. 5. Click Search. The matched log files will display on the list. 30 User Manual of Access Control System You can check the operation time, log type and other information of the logs. Note: Please narrow the search condition if there are too many log files. Search Control Logs Purpose: The Control Log files of the Access Control System can be searched by time ,including Access Control and Log Search. Steps: 1. Open the Log Search page. 2. Select the radio button of Control Logs. 3. Select the Operation Type of log files. 4. Click the icon to specify the start time and end time. 5. Click Search. The matched log files will display on the list. You can check the operation time, log type and other information of the logs. Note: Please narrow the search condition if there are too many log files. 5.1.2 Search Configuration Log Search One-card Configuration Logs Purpose: The One-card Configuration Log files include departments, persons and cards log files. One-card Configuration of the Access Control System can be operated as adding ,modifying and deleting logs. Steps: 1. Open the Log Search page. 2. Select the radio button of Configuration Logs. 3. Select the operation type as One-card Configuration. 4. Click the icon to specify the start time and end time. 5. Click Search. The matched log files will display on the list. You can check the operation time, log type and other information of the logs. Note: Please narrow the search condition if there are too many log files. Search Access Control Configuration Logs Purpose: The Access Control Configuration Log files include Access Control devices log files. Access Control Configuration of the Access Control System can be operated as adding, modifying and deleting door groups or doors and access control device permission operations. Steps: 1. Open the Log Search page. 31 User Manual of Access Control System 2. Select the radio button of Configuration Logs. 3. Select the operation type as Access Control Configuration. 4. Click the icon to specify the start time and end time. 5. Click Search. The matched log files will display on the list. You can check the operation time, log type and other information of the logs. Note: Please narrow the search condition if there are too many log files. Search Downloading Permission Logs Purpose: The Downloading Permission Log files include downloading permission log files, and no record for downloading permission failure log files. Steps: 1. Open the Log Search page. 2. Select the radio button of Configuration Logs. 3. Select the operation type as Downloading Permission. 4. Click the icon to specify the start time and end time. 5. Click Search. The matched log files will display on the list. You can check the operation time, log type and other information of the logs. Note: Please narrow the search condition if there are too many log files. Search System Configuration Logs Purpose: The System Configuration Log files of the Access Control System can be searched as system configuration interface log files. Steps: 1. Open the Log Search page. 2. Select the radio button of Configuration Logs. 3. Select the operation type as System Configuration Logs. 4. Click the icon to specify the start time and end time. 5. Click Search. The matched log files will display on the list. You can check the operation time, log type and other information of the logs. Note: Please narrow the search condition if there are too many log files. 5.1.3 Search Control Log Search Access Control Logs Purpose: The Access Control Log files of the Access Control System include door groups and doors access control logs and door on/off control log files. 32 User Manual of Access Control System Steps: 1. Open the Log Search page. 2. Select the radio button of Control Logs. 3. Select the operation type as Access Control Logs. 4. Click the icon to specify the start time and end time. 5. Click Search. The matched log files will display on the list. You can check the operation time, log type and other information of the logs. Note: Please narrow the search condition if there are too many log files. Log Search Purpose: The Log Search of the Access Control System include informations for configuration log files and control log files. Steps: 1. Open the Log Search page. 2. Select the radio button of Control Logs. 3. Select the operation type as Log Search. 4. Click the icon to specify the start time and end time. 5. Click Search. The matched log files will display on the list. You can check the operation time, log type and other information of the logs. Note: Please narrow the search condition if there are too many log files. 5.2 System Configuration 5.2.1 Interface Introduction Purpose: The general parameters, Auto Time Adjustment and Card Reader of the Access Control System can be configured. Click the page. icon on the control panel to open the System Configuration 33 User Manual of Access Control System Auto Time Adjustment Purpose: The Auto Time Adjustment of the Access Control System can operate auto time adjustment to all access control devices of the Access Control System according to specified period and time. Steps: 1. Open the System Configuration page. 2. Click the General tab to enter the General Settings interface. 3. Tick the checkbox to enable Auto Time Adjustment. 4. Select the matched day and input the time to operate the time adjustment. 5. Click Save to save the settings. Note: You can click Default Value to restore the defaults of all the local configurations. Card Reader Configuration Purpose: The Card Reader Configuration is for Access Control System to read the card by setting Card Reader parameters. For now D8E-U-A-III and DS-K1F100-M card reader types are supported. Steps: 1. Open the System Configuration page. 2. Click the Card Reader tab to enter the Card Reader Settings interface. 3. Select the device type, connection mode, serial port, baud rate and other parameters of the Card Reader Configuration. 4. Click Save to save the settings. Note: You can click Default Value to restore the defaults of all the local configurations. 34 User Manual of Access Control System 5.2.2 Card Dispenser Configuration Purpose: The Card Dispenser of the Access Control System can be configured. Click the icon on the control panel to open the Card Reader Configuration page. Configuration Instruction Purpose: The Card Reader Configuration of the Access Control System can configure device type, connection mode, serial port, baud rate and other parameters of the Card Reader Configuration. DS-K1F100-M: select Serial Port Mode as accessing mode (currently only support serial port mode), the serial port NO. is the COM port NO. of the computer. Set other parameters as default. D8E-U-A-III: select USB Mode as accessing mode (currently only support USB mode). Set other parameters as default. It is supported using card type as regular and Wiegand. When the BEEP is selected as “YES”, the audio will be off when you click the “SAVE” if the Card Reader Configuration is set wrong; the audio will be on when you click the “Save” and when you insert the card reader if the configuration is set correct. Note: You can click Default Value to restore the defaults of all the local configurations. 35 User Manual of Access Control System 36