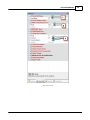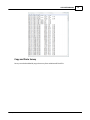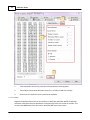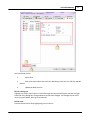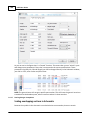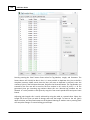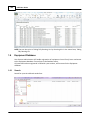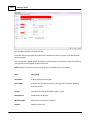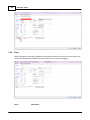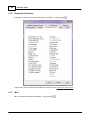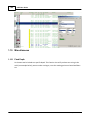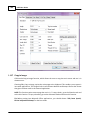
1
User Manual
CSD - Completion String Design
www.csd.as
Completion Services as, Fabrikkveien 9, 4033 Stavanger, NORWAY
Phone +47 913 01 006
CSD™ Copyright © Completion Services as
2
CSD User Guide
Table of Contents
0
Part I CSD USER MANUAL
5
1 Introduction
................................................................................................................................... 5
General Inform..........................................................................................................................................................
ation
6
The CSD Concept
.......................................................................................................................................................... 6
Log On
.......................................................................................................................................................... 8
2 Open a...................................................................................................................................
Completion
9
Set Read Only.......................................................................................................................................................... 12
Show Expired..........................................................................................................................................................
Wells
14
Open as Read..........................................................................................................................................................
Only
16
3 CSD Main
...................................................................................................................................
Screen
16
Context Menues
.......................................................................................................................................................... 18
Schem atic .......................................................................................................................................................... 20
Part Explorer
......................................................................................................................................................... 22
Toolbox in .........................................................................................................................................................
Schematic mode
22
Check List......................................................................................................................................................... 24
Explorer ......................................................................................................................................................... 30
Toolbar ......................................................................................................................................................... 34
Menu bar ......................................................................................................................................................... 36
Properties .........................................................................................................................................................
dialog
37
Status bar ......................................................................................................................................................... 39
Sketch
.......................................................................................................................................................... 39
Control Points
......................................................................................................................................................... 40
Default Setup ......................................................................................................................................... 40
Move Control Points
......................................................................................................................................... 40
Add or delete Control
.........................................................................................................................................
Points
41
Text
......................................................................................................................................................... 41
Changing the texts
......................................................................................................................................... 42
Toolbox in .........................................................................................................................................................
Sketch mode
44
Options ......................................................................................................................................................... 45
Copy to Image
......................................................................................................................................................... 46
Well Path
.......................................................................................................................................................... 47
4 Build...................................................................................................................................
Your Completion
49
First Step: Enter
..........................................................................................................................................................
Data
49
Well & Completion
.........................................................................................................................................................
Data
49
General Data ......................................................................................................................................... 50
Depths
......................................................................................................................................... 52
Datum
......................................................................................................................................... 54
History
......................................................................................................................................... 57
Well & Completion
.........................................................................................................................................................
Attributes
59
Casing
......................................................................................................................................... 59
Casing Attribute ......................................................................................................................................... 62
Cement Plug
......................................................................................................................................... 64
Fish
......................................................................................................................................... 66
Formation
......................................................................................................................................... 68
Gravel Pack
......................................................................................................................................... 70
Perforation
......................................................................................................................................... 72
© Completion Services
Contents
3
Survey data
......................................................................................................................................... 74
Well Hole
......................................................................................................................................... 76
X-mas tree
......................................................................................................................................... 78
Second Step: ..........................................................................................................................................................
Build the string
80
Single String
......................................................................................................................................................... 80
Item Properties ......................................................................................................................................... 84
Item Data
................................................................................................................................... 84
Control Line
................................................................................................................................... 87
Inserted Equipment
................................................................................................................................... 88
R.A Tag
................................................................................................................................... 91
Clamp
................................................................................................................................... 93
Bandit
................................................................................................................................... 94
Secondary.........................................................................................................................................................
String Mode
95
Dual Strings
......................................................................................................................................................... 97
Multilateral.........................................................................................................................................................
Wells
99
The Main Bore of
.........................................................................................................................................
a Multilateral Well
100
The Lateral Bore
.........................................................................................................................................
of a Multilateral Well
101
Assemblies
......................................................................................................................................................... 105
Generic Symbols
......................................................................................................................................................... 107
Scaling Stinger
.........................................................................................................................................................
Completion
108
ESP functionality
......................................................................................................................................................... 110
Third Step: Save
.......................................................................................................................................................... 112
5 Inventory,
...................................................................................................................................
Transition between modes
114
Sim ple Tally ..........................................................................................................................................................
(w ithout pipe inventory)
114
Tally w ith Pipe
..........................................................................................................................................................
Inventory
114
Construction
.........................................................................................................................................................
of Pipe Inventory
114
Pipe Inventory ......................................................................................................................................... 114
Pipe Inventory Items
......................................................................................................................................... 115
Transition.........................................................................................................................................................
from Plan to Tally
117
Operation.........................................................................................................................................................
in Tally against Pipe Inventory
117
6 Equipment
...................................................................................................................................
Database
120
Search
Data
Docum ents
Usage
Report
History
.......................................................................................................................................................... 120
.......................................................................................................................................................... 128
.......................................................................................................................................................... 129
.......................................................................................................................................................... 130
.......................................................................................................................................................... 132
.......................................................................................................................................................... 134
7 Print................................................................................................................................... 135
Heading
.......................................................................................................................................................... 135
Schem atic Setup
.......................................................................................................................................................... 136
Data boxes .......................................................................................................................................................... 137
8 Reports
................................................................................................................................... 137
Tubing Tally ..........................................................................................................................................................
Running List
138
Threads Report
.......................................................................................................................................................... 138
Excel and Special
..........................................................................................................................................................
Reports
139
9 Setup
................................................................................................................................... 140
Wellbore Schem
..........................................................................................................................................................
atic Colum ns
140
Units/Decim als
.......................................................................................................................................................... 141
Expansion .......................................................................................................................................................... 142
Part Explorer..........................................................................................................................................................
Colum ns
143
Sketch
.......................................................................................................................................................... 144
Running List..........................................................................................................................................................
Colum ns
146
© Completion Services
3
4
CSD User Guide
Misc
Fonts
.......................................................................................................................................................... 146
.......................................................................................................................................................... 148
10 Miscellaneous
................................................................................................................................... 150
Fixed Depth .......................................................................................................................................................... 150
Well Docum ent
.......................................................................................................................................................... 152
Casing Cem ent
.......................................................................................................................................................... 154
Volum e
.......................................................................................................................................................... 157
Minim um Drift
..........................................................................................................................................................
ID
159
Com m ent .......................................................................................................................................................... 160
Copy to Im age
.......................................................................................................................................................... 162
Save As PDF.......................................................................................................................................................... 163
Delete Com pletion
.......................................................................................................................................................... 164
11 Administration
................................................................................................................................... 165
User Messages
.......................................................................................................................................................... 165
Users
.......................................................................................................................................................... 167
Person ......................................................................................................................................................... 168
Field/Person
......................................................................................................................................................... 171
Well/Person
......................................................................................................................................................... 172
Person Rights
......................................................................................................................................................... 173
Sym bols
.......................................................................................................................................................... 173
Symbol ......................................................................................................................................................... 174
Symbol - .........................................................................................................................................................
Fish
176
Symbol - .........................................................................................................................................................
Texture
176
Code Tables.......................................................................................................................................................... 176
Update Code
.........................................................................................................................................................
Table
178
Merge Code
.........................................................................................................................................................
Table items
178
Field - Code
.........................................................................................................................................................
Tables
181
Well - Code
.........................................................................................................................................................
Tables
183
Wellbore .........................................................................................................................................................
- Code Tables
185
Dynamic Attributes
......................................................................................................................................................... 187
Log Database
.......................................................................................................................................................... 193
File Recovery
..........................................................................................................................................................
- XML im port
194
Delete & Read
..........................................................................................................................................................
Only
197
Index
0
© Completion Services
CS D US ER MANUAL
1
CSD USER MANUAL
1.1
Introduction
5
CSD - Completion String Design, is an advanced Norwegian made software solution for the design
and presentation of completion strings and well history tracking. CSD allows you to quickly and
accurately create a well schematic, and provides the engineers and staff with a comprehensive set
of tools for planning and implementing completions and well interventions!
The software is used to document the planning, operation and as built phases during well
completion, intervention and well maintenance activities.
BENEFITS:
Build Single, Dual and Multilateral completions
Well Schematic diagrams – onshore / offshore wells
Drag & drop completion elements for string construction
Built in equipment symbol package
Default equipment database (usually extended and customized during the use of CSD)
String inside string functionality
ESP solutions
3D well trajectory visualization and TVD calculations from survey data
Completion data export / import / integration
Revision control / well history / approve, finalize and lock completion drawing
Customizable Excel reports
Real time well schematics QA verification / Check List
Completions Services acknowledge the importance of gathering all your well documentation in
one place for easy access, easy retrieval and easy update. CSD offers intuitive visualization and
reporting, as well as real time quality assurance and information sharing and protection tools!
The purpose of this user guide is to help users of CSD to get started using the application.
This manual give insights on how the application works and how to use it.
All data; both equipment data and completion sketches, used as examples in this manual are
fictitious.
Some of the abbreviations used in this user guide:
MD - Measured Depth
TVD - True Vertical Depth
MSL - Mean Sea Level
GL - Ground Level
PBTD - Plug Back Total Depth
© Compl eti on Ser vi c es
6
CSD User Guide
TD - Total Depth
RKB - Rotary Kelly Bushing
1.1.1
General Information
CSD is an application that can run under Microsoft® Windows XP, Microsoft® Windows Vista,
Microsoft® Windows 7, Microsoft® Windows 8, Microsoft® Windows 10 and Apple® Mac OS X.
More information about standard Windows functionality can be found in the Microsoft Windows
user manual.
1.1.2
The CSD Concept
CSD is an application where you can make use of an equipment database and free text symbols to
build up the schematics for the completion string, and keep track of the history of each well.
Each component has a number, which is a key in the database. This is called Part Number (also
referred to as Commodity number). One component with one Part Number can be installed in
several completions. Part Number must not be confused with Serial Number (Serial Number is a
unique number that identifies one specific component in one specific well completion).
CSD initially comes with a default equipment database (must be maintained and extended), as
well as an set of free text symbols. This allows you to immediately start building the string. If you
need parts added to the equipment database, this is taken care of by your System Administrator.
The user can work in different modes:
Plan - Planning phase
Tally - Completion phase (Optional)
© Completion Services
CSD USER MANUAL
7
Existing /Actual - As installed
P&A - Plug and Abandon
The user builds the string in Plan mode. The tubing sections will be displayed as one symbol with
one total length.
The user can go from Plan to Tally mode (Optional). Then the tubing joints will be shown
individually. Each joint length and tag joint number can be registered. Number of joints in each
tubing section is calculated using the total length of the section and the average length of each
joint. In this mode it is also possible to register equipment Serial Number.
NOTE: One can choose to go directly from Plan mode to Existing / Actual mode without creating a
Tally mode.
Then the user goes to Existing / Actual mode, which is the final and official version of the
completion (as installed mode).
All three modes are stored in the database and can be opened when the user desires to do so.
When workovers/interventions are carried out, always use the last revision of the Existing /
Actual version as a base for the new Plan drawing. Then update the drawing and take it to
Existing / Actual mode.
Revisions are necessary to keep track of the history of each well. The initial completion has
revision number 1.00. The revision numbering is split into two categories:
© Completion Services
8
CSD User Guide
1. Minor workovers: Setting of plugs, insert valves, re-perforation etc. The revision number will
increase with 0.01. So the first minor workover overhaul should get the revision number 1.01.
2. Major workovers: Replacement of the complete tubing. Revision number will increase by a
whole number. So the first major overhaul should get version number 2.0.
NOTE: This is suggested revision numbering. Each company defines for itself what is considered a
minor or a major workover.
1.1.3
Log On
Double clicking on the CSD icon starts CSD. Where this icon is located varies. If you cannot find the
icon, you must get in touch with your IT department.
CSD starts, and the equipment database, symbols and Part/Fields information will be loaded into
the machine memory. There is a progress bar for this in the bottom left corner (in the status bar).
Afterward; a message window can be displayed. Here you will get messages about CSD updates
and other practical information like CSD course dates, new versions, system maintenance etc. This
message window will appear like in the figure below. If you “Mark As Read” the message will
disappear.
© Completion Services
CSD USER MANUAL
1.2
9
Open a Completion
As a user, you have the possibility to open and look at existing completions. One of the most basic
functions in CSD, is to open an already existing completion. Choose File, Open or push this button
. This brings you into the CSD Open dialog.
CSD remembers last completion used, and will automatically select this one.
Choose Field, Well, Revision Number and Mode. Remember that the official version is located in
the last revision number in Existing / Actual mode.
If you are going to open an official version of a completion, this can be easily done by pressing the
OK button after you have highlighted a well name. Then the program will open the latest revision
of the latest completion in Existing / Actual mode, if it exists.
It is also possible to open wells from the Explorer tab in the CSD main screen. This is done by
double click on a schematic revision, or right click and choose Open.
© Completion Services
10
CSD User Guide
Tip! If this is not visible in your screen, please go to the CSD top menu: View, Toolbars and
Docking Windows and choose Explorer.
Show Expired Wells
If you select Show Expired Wells at the lower left in the Open dialog, or pressing the Expired
button in Explorer, you will see the wells that have been marked expired. Those are highlighted
in red, as in the figures below.
© Completion Services
CSD USER MANUAL
It is also possible to open and view expired wells from the Explorer tab.
© Completion Services
11
12
1.2.1
CSD User Guide
Set Read Only
NOTE: If a schematic revision is set to ‘Read Only’, it can only be unlocked by the person locking it
in the first place, or by the System Administrator.
If the completion schematic is set to Read Only, the revision icon will include a padlock symbol:
Whenever you open a Read-Only well, the information bar will show at the top:
How to set a revision to Read Only:
In the Explorer dialog; highlight a well revision number; i.e. "2.01". Then click on the padlock icon
at the top, to set it to Read Only. Alternatively you can set the Read Only flag in the Properties
dialog, again by first marking the revision number.
NOTE: When you lock a completion revision; you lock all the underlying modes (I.e. Plan, Tally,
Existing / Actual & P&A).
© Completion Services
CSD USER MANUAL
13
FAQ: Who can set and remove revisions as read only?
SCENARIO:
© Completion Services
ABLE TO SET/REMOVE AS READ
ONLY?
14
CSD User Guide
Users with read access only
no
User (with write/admin access) creates revision, but other user
set it to read only:
-
User who created the revision
no
-
User who set it to read only
yes
Admin sets revision to read only:
-
Other user with write access to same
field
no
-
User loses admin rights, but has write yes
access to field
-
User loses admin rights, and write
access to field
no
User with write access to field, sets revision to read only:
-
Other user with write access to same
field
no
-
User loses write access to field
no
Summary:
Only admin and the user who set the revision to read only, can
remove the read only flag, given that they still have write
access to the specific field. Whether or not the user created the
revision does not matter.
1.2.2
Show Expired Wells
If you select Show Expired Wells at the lower left in the Open dialog, or press the Expired button
in Explorer, you will also see expired wells. This is usually wells that have been plugged and
abandoned. The expired wells are the ones with red well names, as you can see in the figures
below:
© Completion Services
CSD USER MANUAL
It is also possible to open expired wells from the Explorer tab found to the right in the main
screen:
© Completion Services
15
16
CSD User Guide
Tip! If this is not visible in your screen, please go to the CSD top menu: Options, Reset Window
Layout.
1.2.3
Open as Read Only
If you have write access, but want to open a file in read only mode, right click on the wellbore,
(either in the Open dialog and the Explorer window), and choose Open Read-Only. This can also
be done by clicking on the arrow beside the OK button and choosing Open Read Only.
Another user are now able to work on the completion drawing without you locking it.
Although the completion is set to ‘Read Only’, it is possible to save the completion as a new
revision or a new completion.
Tip! You can use the MRU (Most Recently Used) list in the file menu to open completions. This list
contains the completions that where opened recently.
FAQ/Troubleshooting
Q
A
1.3
I want to open a completion but I get a message saying Completion is locked by “name”.
What does it mean?
This indicates that the completion is already opened by another user, and you won’t be
able to save any changes you do. Get in touch with the person who is specified in the
message, or ask your CSD administrator.
CSD Main Screen
The figure below shows how the CSD workspace can look like.
© Completion Services
CSD USER MANUAL
17
CSD shows completion schematic in tabs. The Schematic window itself contains 3 standard tabs
found at the bottom of the schematic window:
1. Schematic
2. Sketch
3. Well Path (Usually disabled on Terminal Server)
NOTE: The well trajectory is visible after survey data has been imported.
Tip! If you want the window settings back to the original state go to Options, Reset Window
Layout.
© Completion Services
18
1.3.1
CSD User Guide
Context Menues
Introduction
The context menus appear when the right mouse button is clicked. The menus change depending
on where your mouse cursor is located. When hoovering the cursor over a toolbar or the status
bar, the menu could look like this:
Schematic
The following menu is shown when you right click a selected element in the Schematic window:
© Completion Services
CSD USER MANUAL
New...
19
Add a new part in the well schematic. First choose a symbol in the Toolbox.
Then press New... The mouse pointer gets a plus sign next to it. Click to insert
the part at the desired location in the schematic grid. This is applicable for both
Database Equipment and Generic Items
Tip! If you enter an item at the wrong location; use left mouse-button drag and
drop, to to move and place the item below the appearing dotted line.
Change...
Change / replace an item in the grid. If it is a database part; the Part, Search
dialog opens. Choose another part and press OK to change. If the selected Item
is a Generic Item, the Item Properties dialog will show, allowing you to change
the details of the freetext item (non database part)
Fixed Depth...
Lock an element to a specific depth
Assembly...
Mark one or several elements in the Schematic grid to form an assembly
© Completion Services
20
CSD User Guide
View Part...
View part information for the selected database part
Reject Joint
Removing inventory joint from Tally
Insert Similar
Joint From
Inventory...
Insert inventory joint to Tally
Cut (Shift+Del)
Cut and remove the item from the grid
Copy (Ctrl+C)
Copy an item
Paste (Ctrl+V)
Paste an item
Select All (Ctrl+A)Select all items in the grid
Item Properties...Opens the Item Properties dialog for the selected part
NOTE: If more than one element is selected, some of the menu items might be deactivated.
1.3.2
Schematic
When building your well, you will mostly work in the Schematic window.
An example of how a schematic screen looks like (default setting):
© Completion Services
CSD USER MANUAL
21
To enable and disable docking windows; go to View, Toolbars and Docking Windows:
Reset to default windows and positioning; choose Options, Reset Windows Layout:
Columns
It’s important to be able to format the Schematic to get a nice print out. Here is a summary of
what you can do with the columns:
• Change the order of the columns:
Place the mouse pointer on the column header cell. Hold down the left mouse button while
moving the cursor to the border of the area (the cursor will have a square next to it). Drag the
columns to the desired position. A dotted line will show you where the columns will be
inserted. Then release the mouse button.
• Scale columns:
Place the cursor on the border of the column. Hold down the left mouse button and re-size
the width of the column by dragging. A column can be automatically adjusted by double
clicking on the column left vertical border.
Tip! Scale all columns automatically by choosing Data, Adjust Column Widths. The Symbol- and
Assembly column will not be affected.
NOTE: The column width is automatically adjusted when you open a completion.
© Completion Services
22
CSD User Guide
For info on edit Schematic columns display, go to Setup, Wellbore Schematic Columns.
1.3.2.1
Part Explorer
The Part Explorer gives you an easy access to search for the part you are looking for. Simply type in
some of the part information in the search field, such as part number, symbol name, part
description etc. The search list narrows the selection as you type. When the correct part is found;
you can drag it into a well schematic holding down your left mouse-button (insert below the
appearing dotted line).
In this window it is possible to change the sort order. To do this, click the column you want to sort
by. The first time the column is clicked the list is sorted in ascending order, the next time the list
is sorted in descending order.
NOTE: If you auto hide the Part Explorer, it may prevent you to drag an element to the bottom of
the string. In this case you should dock it again, clicking the small pin at the upper right.
Tip! If the Part Explorer is missing in the Schematic window; go to View, Toolbars and Docking
Window and select Part Explorer.
1.3.2.2
Toolbox in Schematic mode
The toolbox shows available symbols to be used in CSD. Please note that the symbols usually are
arranged in several levels. For instance can the group symbol "TUBULARS" contain "Pup Joint",
"Tubing" and so forth.
The toolbox is by default docked to the main window's right side. It can also be floating and
placed anywhere on the work space. This is also the case for tabs like Explorer, Checklist and Well
Data.
© Completion Services
CSD USER MANUAL
23
The symbols under the blue arrows are symbols belonging to parts registered in the equipment
database, but there are also a category of Generic Items (freetext symbols).
© Completion Services
24
CSD User Guide
Tip! If the Toolbox is missing, go to View, Toolbars and Docking Window and select Toolbox for
this to appear in the main screen.
1.3.2.3
Check List
The Check List function is a tool helping the user to check that the well schematic is done
correctly. It consists of both manual and automated check list items that must be completed
before taking a well schematic to the Existing / Actual mode. The check list is also useful to
identify errors that could have existed in the original drawings/papers.
NOTE: When saving a Plan or Tally mode to Existing / Actual, the user must first complete the
Check List.
© Completion Services
CSD USER MANUAL
FIG 1: Check List Tab
© Completion Services
25
26
CSD User Guide
FIG 2: Automated Check List
© Completion Services
CSD USER MANUAL
FIG 3: Threads Check is overridden
FIG 4: To show the Error column in wellbore schematic: Go to Options, Setup..., Wellbore Schematic Columns
© Completion Services
27
28
CSD User Guide
© Completion Services
CSD USER MANUAL
29
FIG 5: Clearing the Check List
In the check list, there are 3 alternatives:
1. Confirm that the topic is completed by checking the box. The topic text will then change from
red to black.
2. The topic itself will appear in red if data is missing or faulty, and change to black when the data
is entered or corrected.
3. The topic is not correct, but you have the option to correct the data, or override by entering a
comment and press Enter. The topic will then change from red to purple.
Tip! To clear the Check List and start over; go to Data, Clear Checks.
NOTE: Some standard Check List topics are described below, but it is possible to change and
personalize this list according to the customer needs.
Topic
Description
Check Well Name
Make sure that the well name is correct.
Check Wellbore Name
Make sure that the wellbore name is corrected. Wellbore name is
located in Well & Completion Data, General Data.
RKB-Tubing Hanger
Checks that the RKB-TH value is entered for the current wellbore. This
is entered in Well & Completion Data, Depths.
RKB-MSL
Checks that the RKB-MSL value is entered for the wellbore.This must
be entered in Depth under Well & Completion Data.
Total depth
Total depth must be entered in TD (MD) in Depth under Well &
Completion Data. It is also possible to import this from survey data
Casing Data
Casing data will show how many casing is entered in Casing under Well
& Completion Attributes. This will appear as error if no casing is typed
in.
Check Perforation
Make sure the perforation intervals is correct in Perforation under
Well & Completion Attributes.
Check Well Hole
Make sure the Well Hole intervals is correct in Well Hole under Well &
Completion Attributes.
Check Casing Cement
Make sure the Casing Cement is correct in Casing Cement under Well &
© Completion Services
30
CSD User Guide
Completion Attributes.
Confirm Correct Survey
Data
Make sure the survey data is correct in Survey Data under Well &
Completion Attributes.
Threads Check (auto)
CSD checks for thread connection errors in the completion string (FIG
2). Thread errors will show in the Error column in the wellbore
schematic. Enable the Error column in Options, Setup..., Wellbore
Schematic Columns. This check can be overridden by inserting an
override reason and press Enter.
Minimum Drift ID
Minimum Drift ID is a topic which detects the minimum Drift ID on
your string. The user don't necessary have to do anything to on this
post.
Tubing Install Date
Make sure the Tubing Install Date is correct in Data under Well &
Completion Attributes. This post is possible to ignore error by pick
overwrite and insert text in override reason, then press Enter.
Approved by
When user have checked all the topics, check for approve the list.
Tip! If the Check List is missing, go to View, Toolbars and Docking Window and select Check List for
this to appear in the main screen.
1.3.2.4
Explorer
You can open a revision directly from Explorer tab.
© Completion Services
CSD USER MANUAL
31
Tip! If Explorer is missing, go to View, Toolbars and Docking Window and select Check List for this
to appear in the main screen.
Show/Hide Expired Wells
By clicking the expired button, you can also view/hide all the expire wells in the list.
© Completion Services
32
CSD User Guide
Set Read Only
When the completion is open you are free to make changes both to the data belonging to this
completion and to the schematic, if you have write access to the field/well. If the well is set to
‘Read Only’, you cannot make changes to the completion drawing. When a revision is set to readonly it will have a padlock symbol like in the figure below:
© Completion Services
CSD USER MANUAL
33
Whenever you open a Read-Only well, this information bar will show at the top:
After working with a revision, you might want to set this as Read Only, so no other users is able to
make any changes to the final and existing revision.
1. Choose the current revision you wish to set in Read-Only mode and highlight this.
2. Select the lock symbol
NOTE: Only the user who has set a revision to Read-Only, or the System Administrator can unlock
it again.
© Completion Services
34
CSD User Guide
Document folder
In the Explorer tab, the user also have the possibility to open document folder for highlighted
well.
1. Activate/highlight the wanted well.
2. Select the Folder symbol.
1.3.2.5
Toolbar
The toolbar will work as a shortcut to the some of the most used functions in CSD. It is possible to
move and place this anywhere in the desktop.
© Completion Services
CSD USER MANUAL
Function Description
Create a new document
Open an existing mode
Save the active document
Save the active document as a PDF file
Print the active document
Change the page layout
Print preview. Display full pages
Cut the selected row and put it on the clipboard
Copy the selected row and put it on the clipboard
Function to copy the active document as image
Insert content clipboard content
Undo the last action
Redo the previously undone action
Display program information, version number and copyright
View part information on selected item
Edit attributes of selected item
Edit comment on highlighted item
Item data
Register completion data
Register completion attributes
Enter secondary string mode
Choose report template
Choose columns to display, units and decimals, and symbol scaling
© Completion Services
35
36
CSD User Guide
Set schematic font
Inventory
Minimum ID
Change depth reference to specific depth
Calculates volumes in annulus and string
Change mode of active string from plan to tally
Change mode of active string from plan to existing
Change mode of active string from tally to existing
Change mode of active string from current mode to plan
Display my messages
Delete fields, wells, completions and modes (only able for admin)
Maintenance of symbols groups and symbols
Search for parts in the equipment database
Administer users. Give access to fields and wells
Message administration
Global system settings dialog
1.3.2.6
Menu bar
File
The File menu contains the basic file options like new, open, save and print. You
will also find 4 most recent opened wells here
Edit
The Edit menu contains basic editing commands like Cut, Copy, Paste and Undo
View
The View menu shows customizing options for CSD main screen such as
Toolbars, Docking Windows and Zoom of the current window tab
Item
The Item menu contains options for highlighted part in the schematic, such as
© Completion Services
CSD USER MANUAL
37
Change, Comment, Length etc.
1.3.2.7
Data
The Data menu is the main menu for data enty. It also contains Secondary, Dual
String, Insert Additional Wellbore, Threads Report, calculation option and
changing modes of revision
Database
The Database contains mainly options for users with administration access such
as Code Tables, Administrations, Symbol and Parts
Options
The Option menu contains several Setup options, Change Passport function and
users messages
Window
The Window menu shows open windows and window display options.
Help
The Help menu provides access to the help file
Properties dialog
The Properties dialog shows a lot of information about the highlighted equipment in the
Schematic window. The properties in black font are editable directly in the Properties dialog.
Make a change to a property and click Enter.
© Completion Services
38
CSD User Guide
In the properties dialog, user can also change color for current row . This will also effect how the
text will appear in Sketch. For the glass plug, it is also possible to change the status of the part
from Open to Closed or reversed in the properties dialog.
NOTE: If a part has addition information such as control line or inserted equipment, will this
appear on the button of the properties dialog. For the Control Line, you can change several
© Completion Services
CSD USER MANUAL
39
information such as Style, Position, Thickness, Color and Comments directly.
1.3.2.8
Status bar
When a operation is executed or a selection is made in either the tool bar or the menu bar, a short
description will be displayed on the status bar.
1.3.3
Sketch
The simplified sketch shows the string along a two-dimensional curve. The curve can be freely
defined by the user. By default the scale of the equipment and attributes along this curve is equal
to the schematics scale.
True Scaling of Sketch mode
If you click on F12 while in Well Path, you will see that the Sketch will change and take the same
form as in Well Path. The completion equipment will also be scaled accordingly (true scale mode).
If you then click F12 again in Sketch mode, the schematic will keep the Well Path shape, but the
completion equipment returns from true scaling.
The following data can be shown in the sketch:
Elements (With or without symbols)
Casings
Perforations
Fish
Cement Plug
Gravel Pack
Under Reamed
Casing Attributes
Casing Cement
Control Lines
Well Hole / Drilled Sections
Formation zones
Bottom of Well Info
Inserted Equipment
Comments
Custom notes
An example of how a typical sketch might look like:
© Completion Services
40
1.3.3.1
CSD User Guide
Control Points
The user is free to change the shape of the sketch wellbore. By moving the mouse pointer over a
control point, the red control point will be highlighted to show that it can be moved. Press the left
mouse button and move the cross to the position you want. Then release the mouse button. In
this operation, the casings will be shown so that you can have an impression on how the result
will look like.
NOTE: The Control Points are only there to define the curve, and will not show on the printouts.
1.3.3.1.1 Default Setup
There will be a default setup for the shape of the sketch but once you change it and press save,
the new layout will be saved along with the revision. You can move back to the default layout by
choosing right mouse button, "Reset all control points". If you click F12 in Well Path you will see
that the sketch will get the same curve as the wellpath. By pressing F12 in the sketch view, the
sketch will be scaled more realistically. This means that a lot of the important parts like valves,
packers and so on will not be displayed very well, due to the fact that they are very short
compared to the long sections of tubulars.
1.3.3.1.2 Move Control Points
By moving the mouse pointer over a control point, the red control point will be highlighted to
show that it can be moved. Press the left mouse button and move the cross to the position you
© Completion Services
CSD USER MANUAL
41
want. Then release the mouse button. In this operation, the casings will be shown so that you can
have an impression on how the result will look like.
If you want to move several control points at the same time this can be done by holding the Ctrl
button down and select each point by moving the mouse pointer over and click the left mouse
button (while the Ctrl button is pressed).
The control points will now have a blue colour. Then use the mouse pointer to drag the points to
the position you want.
It is also possible to select several control points by using the selection tool. Press the left mouse
button and drag the mouse in any direction. A rectangular box will be displayed. When you
release the mouse button, the control points which are displayed inside the rectangle will be
selected.
1.3.3.1.3 Add or delete Control Points
Control points can be added or removed. To add a control point, click the right mouse button and
the following menu will be displayed:
Select Add control point. The new control point will be added in the sketch at the location where
the mouse pointer was when you pressed the right button. If you press the right mouse button
between two existing control points, the new control point will be located between the existing.
You can press Undo to remove the newly inserted control point.
1.3.3.2
Text
To get the best sketch layout, you have to adjust the position of the texts. This is done using the
mouse and is very similar to moving control points as described above. Press and hold the left
mouse button while the pointer is above the text. Pull the text to the position you want it to be,
and release the mouse button.
To move several text objects at the same time, hold down the Ctrl-key and select the different
text objects with the mouse while keeping the Ctrl-key pressed.
You can also use the mouse to select several text objects by holding the left mouse-button down
while dragging the mouse. A rectangle will be shown and all text objects inside the rectangle will
be highlighted. Use the mouse to move the selection.
For select all text objects, press the right mouse button. A menu box will appear. Select the
© Completion Services
42
CSD User Guide
“Select All” menu item. You can also use the keyboard by pressing the standard windows
combination for Select All (Ctrl + A)
If you select text objects and click the right mouse button you can choose to align and sort them
left or right. You can also move them together if you for example have identical parts to save
space and get a better structure in the Sketch.
You can always reset text position by right clicking the canvas and choose "Reset All Text
Positions".
1.3.3.2.1 Changing the texts
It is possible to change all the texts in the sketch. Only one text can be changed at the time.
Choose a text by clicking on it with the left mouse bottom. If you click once more, you enter edit
mode for this text. You can also press F2 instead of the second mouse click. In the textbox you can
either write free text or in code format. By writing in code, the information will automatically
appear, and maintain updated if you change some of the information in CSD. It is important to
remember that when you write in freetext you loose the connection to the data in the object. For
© Completion Services
CSD USER MANUAL
43
instance if you have a casing text, and then change the depth of the casing, the freetext in the
sketch will not show these changes.
If you change the text, either with freetext or code, CSD will automatically add a star sign to the
text as shown in figure below.
List of code that can be used in Sketch
WellCompletion:
<PB_MD>
<PB_TVD>
<FILL_MD>
<FILL_TVD>
<TD_MD>
<TD_TVD>
Elements:
<DESCRIPTION> (part)
<LENGTH>
<MD_TOP>
<MD_BOTTOM>
<TVD_TOP>
InsertedEquipment:
<TYPE> (symbol)
<DESCRIPTION> (part)
<MD_TOP>
<MD_BOTTOM>
Casing:
<SIZE>
<MD_TOP>
<MD_BOTTOM>
<TVD_TOP>
<TVD_BOTTOM>
WellHole:
<SIZE>
<MD_TOP>
<MD_BOTTOM>
<TVD_TOP>
<TVD_BOTTOM>
Perforation:
<STAGE_NO>
<CLUSTER_COUNT>
<MD_TOP>
<MD_BOTTOM>
<TVD_TOP>
<TVD_BOTTOM>
© Completion Services
44
CSD User Guide
CasingAttribute:
<TYPE>
<MD_TOP>
<MD_BOTTOM>
<TVD_TOP>
<TVD_BOTTOM>
Cement:
<TYPE>
<MD_TOP>
<MD_BOTTOM>
<TVD_TOP>
<TVD_BOTTOM>
DynamicAttribute:
<TYPE>
<MD_TOP>
Fish:
<TYPE>
<MD_TOP>
<MD_BOTTOM>
MineralZone (Formation):
<TYPE>
<MD_TOP>
<MD_BOTTOM>
To get back to the original standard text, you have to enter edit mode and then delete the text
and press Enter. The original text is taken from the Part Database, and the changes you make in
Sketch mode won’t have any effect in that database.
A selection of text objects can be hidden from the sketch view by pressing the Delete key. To
show these texts again, choose “Reset all texts” from the short menu described above. By hiding a
text and showing it again, the default text description is given to the text object.
It is also possible to add annotation text in the Sketch by right click and choose Add Annotation.
Click at the text box for writing free text and adjust in properties dialog MD Top, MD bottom and
color for the text.
Tip! You can break the text to a new line by pressing Ctrl + Enter.
1.3.3.3
Toolbox in Sketch mode
The Toolbox is used here to pick a symbol type that you want more information on. If you want
more information on Pup joints, you put a mark in the box next to Pup joint. Now all Pup joints in
the string will show depth and description in addition to the symbol showing in the simplified
schematic.
Some of the symbols that are defined as important will be shown in Sketch as default. This can be
adjusted by the CSD administrator.
The toolbox also contains choices for which completion attributes that should be displayed in the
sketch. Note that on / off only changes the text part and not the graphical presentation. This
means that if you indicate that you don’t want to see perforation data only the text will be
removed from the Sketch and not the perforation symbols.
© Completion Services
CSD USER MANUAL
45
Example of toolbox in the Sketch mode:
1.3.3.4
Options
Choose Options, Setup from the menu and open the tab called Sketch. Here you can set what to
show in the sketch.
© Completion Services
46
CSD User Guide
Show: lets you decide what texts are to be shown for the different completion attributes. You can
also choose if you want to show all the casings or only the inner one.
Smoothing Mode: gives you two options: high speed or high quality. High quality is the default
choice and often the most sensible one.
Element fill: lets you control if the symbols are to be filled or not. You can customize the fill.
Scale: controls how the width of the sketch.
1.3.3.5
Copy to Image
Choosing Edit, Copy to Image, copies the sketch to the clipboard, including a well report header.
This enables you to paste it into other applications. The sketch is built in two formats: Metafile
and bitmap. Choose the format that gives the best result in the external application.
© Completion Services
CSD USER MANUAL
47
Tip! When pasting into Microsoft Office applications you should use “Edit, Paste Special, Device
independent bitmap” for the best result.
1.3.4
Well Path
The Well Path shows a 3D-representation of the well path. This only works if you have imported
survey data.
True Scaling of Sketch mode
If you click on F12 while in Well Path, you will see that the Sketch will change and take the same
form as in Well Path. The completion equipment will also be scaled accordingly (true scale mode).
If you then click F12 again in Sketch mode, the schematic will keep the Well Path shape, but the
completion equipment returns from true scaling.
You can zoom, move and twist the drawing using special mouse operations. If you press and hold
the left mouse button while moving the mouse, you move the drawing. If you press and hold the
right mouse button while moving the mouse, you zoom. To twist the drawing, see it from
different angles, you press and hold both mouse buttons while moving the mouse.
© Completion Services
48
CSD User Guide
You can always choose Edit, Copy to Image to copy the image to the clipboard. Well Path is then
made available as a picture that other applications can paste.
© Completion Services
CSD USER MANUAL
1.4
49
Build Your Completion
In the following examples we assume that your System Administrator has entered all the
equipment that you are going to use in your string, and that he/she has defined a well name in
the system.
To start building a new completion, select File, New or the toolbar button.
.
Building a new completion involves two major steps:
1.4.1
First Step: Enter Data
First step is to enter data.
A wide variety of data can be entered when building a new completion. We recommend that you
start with the Well & Completion Data dialog, and then continue with the Well & Completion
Attributes dialog.
For further information please review the following topics:
1.4.1.1
Well & Completion Data
A wide variety of data can be entered when building a new completion. We recommend that you
start with Data, Well & Completion Data.
Well & Completion Data is opened by choosing Data, Well & Completion Data or by pressing the
corresponding icon. This is a dialog box consisting of three tabs.
© Completion Services
50
CSD User Guide
1.4.1.1.1 General Data
General Data is located under Well & Completion Data. The General Data is the main entry dialog
for editing and entering Wellbore information such as Wellbore Name, Installation, Status, Well
Type, Operation Finish Date etc.
Input field description for General data.
Input field
Description
Wellbore Name
The name of the current Wellbore.
Latitude/Longitude
Read only: Shows the registered position from Database, Code Tables,
© Completion Services
CSD USER MANUAL
51
Well. Format: DDD° MM' SS.S" (Degrees, Minutes and Seconds) + compass
direction. This will not show graphically in CSD.
Operation Finish Date Date when the last operation finished. Existing / Actual mode only).
Tubing Installed Date
Date when tubing was installed / completion finalized (Normally when
Tubing Hanger is landed).
Modified Date
Read only: Shows last saved date.
Installation
Shows the current reference Rig / Installation and the corresponding
Airgap. The installation can be changed from a dropdown if multiple
installations. The installations are entered in the Datum tab.
Status
Drop down list where you choose if the well is an oil producer, gas
injector etc. If you miss a well status; contact the CSD System
Administrator.
Well Type
Choose type of well.
Up/Down Weight
Weight of the string.
Packer Fluid
Description of fluid in the annulus. (Free text area).
Heading (current
wellbore)
Report header for the printed well schematic. Preview by clicking the
Print Preview icon.
Prepared Date
Date the well schematic is prepared. (Auto-fills, but can be edited).
Prepared By
Name of the CSD user preparing the well schematic. (Auto-fills, but can
be edited).
Remarks (current
wellbore)
Remarks for the current wellbore. This will be visible in the printed
report heading.
NOTE: Use Ctrl+Enter for starting a new line.
Revision Remarks
(common for all
wellbores)
Revision Remarks are shown in the Open and Explorer dialog as a part of
the title, and is a useful tool to indicate in few words changes that are
made to the various revisions.
I.e: Writing Recompletion in this input field will show as "2.00 Recompletion".
© Completion Services
52
CSD User Guide
1.4.1.1.2 Depths
The Depth tab is located under Well & Completion Data. Here you have an overview of the depths
in the well such as MD, TVD etc. By choosing "Get From Survey" some of the column will be auto
filled based on transferred survey in Well & Completion Attributes, Survey Data. You can also
manually enter this data.
Input field
Description
RKB-MSL (Airgap)
Read only: Distance from RKB to
mean sea level (MSL). Taken from
the Installation dropdown in the
© Completion Services
CSD USER MANUAL
53
General Data tab.
MSL-Tubing Hanger Distance from mean sea level to
tubing hanger. (Usually found as
top depth for TH in tally).
RKB-Tubing Hanger Read only: Sum of RKB-MSL and
MSL-TH
RKB-Skid Deck
Distance from Skid Deck.
PBTD - MD
Measured Depth to plug back. This
is used to display PB on
Schematic/Sketch.
PBTD - TVD
Read only: Derived from the
imported survey data.
TD - MD
Measured Depth to Total Depth.
This is a mandatory field as is used
by CSD to scale the drawings.
TD - TVD
Read only: Derived from the
imported survey data.
Fill (Top) - MD
Measured depth to Top of fill. This
is indicated in both Schematic and
Sketch mode.
Fill (Top) -TVD
Read only: Derived from the
imported survey data.
Fill Date
Date when fill data was entered.
Max Dogleg Degree
Maximum Dogleg in Wellbore.
This can be auto-filled from survey
data, or entered manually.
© Completion Services
NOTE:
We
define
the
PlugBackTotalDepth as the depth
down to where the cement is set
up inside the last liner. This is
normally the Landing Collar in the
shoetrack, or it could be to the
depth of drilling out excess cement
inside the last liner.
54
CSD User Guide
Max Dogleg MD
MD where maximum dogleg
occurred. This can be auto-filled
from survey data, or entered
manually.
Max Deviation
Degree
Maximum deviation. This can be
auto-filled from survey data, or
entered manually.
Max Deviation - MD MD where maximum deviation
occurred. This can be auto-filled
from survey data, or entered
manually.
Average Angle
through Pay
Average Angle through Pay. This
can be auto-filled from survey
data, or entered manually.
NOTE: The TVD values are automatically calculated from the imported survey data.
1.4.1.1.3 Datum
When you create a new file in CSD (File, Open), you are met with the following message: "No
installation registered for this completion. MSL is therefore current datum. Press the button to
add installation."
To set the correct datum press the Set…-button or Open Well & Completion Data and go to the tab
called Datum.
© Completion Services
CSD USER MANUAL
55
Press the New button and choose a rig from the Installation dropdown. Enter the correct RKB-MSL
(Airgap) and press Update. The set Rig and airgap will now be the new datum.
If more than one rig has been involved in operations of the well, you can add additional rigs with
belonging airgaps in the same manner. You will then be able to switch back and forth between
these and MSL to view the welldata from the preferred reference point. The easiest way is to pick
from the dropdown in the top toolbar:
© Completion Services
56
CSD User Guide
You can also choose between different rigs from Well & Completion Data in the General Data tab:
When you have set datum and are ready to start building the string, you have to enter the MSLTubing Hanger depth in the Depths tab in the Well & Completion Data dialog. This value is set for
© Completion Services
CSD USER MANUAL
57
CSD to calculate the correct RKB-Tubing Hanger depth, which will be the top depth for the first
element in the completion schematic. If you don’t have the MSL-Tubing Hanger depth, you can
use the following equation to find it:
RKB-Tubing Hanger – RKB-MSL (airgap) = MSL Tubing Hanger
You will need to know the RKB-MSL (airgap) and subtract it from the RKB-Tubing Hanger depth
( Usually found as top depth for TH in tally).
NOTE: When you attempt to save files created in previous CSD versions, you are met with the
following message: "Completion is marked as read only due to automatic datum change. Please
save changes as a new revision by using Save As."
1.4.1.1.4 History
Under the History tab, users can enter information and date for occurrence in the wellbore. The
window looks like this with example data:
© Completion Services
58
CSD User Guide
New row
1. Select New
2. Enter date and information about occurrence. (Note that you can use Ctrl+Enter to insert a
line break).
3. Update the list.
Edit an existing row
Highlight one of the rows in the list. This will bring all the data concerning the row into the righthand side of the dialog box. Change whatever needs to be changed an push Update, OK or go to
another tab. Remember to save the Well Schematic before you close it by choosing File, Save or
© Completion Services
CSD USER MANUAL
59
Ctrl+S.
Delete a row
Push the Delete button after highlighting a row in the list.
1.4.1.2
Well & Completion Attributes
In addition to Well & Completion Data, you should also register data in Well & Completion
Attributes as this will affect the layout of the Schematic and ketch. In order to get a proper
presentation, you should e.g. enter casings, perforations, formation etc.
Choose Data, Well & Completion Attributes or push the button:
Attributes that can be entered:
o Casing
o Casing attributes
o Cement Plug
o Fish
o Formation
o Gravel Pack
o Perforation
o Survey data
o Well Hole
o X-mas tree
1.4.1.2.1 Casing
Casing is located under Data and Well & Completion Attributes. The casing tab contains
information about casing size, casing depth and general information such as Max OD, ID, treads
etc.
The inner casings are drawn on the schematic (the casing shoe is represented by a triangle), while
all casing are shown in the Sketch mode. The width and placement on the schematic depends on
the data that has been entered. If the casing is a liner, then remember to check off the “Liner”
box, and add depth of the Liner Hanger PBR. In addition; you can enter attributes such as
radioactive tags and casing patches, by choosing the Casing Attribute tab.
© Completion Services
60
CSD User Guide
© Completion Services
CSD USER MANUAL
61
1. Select New.
2. A new row will be inserted into the list and you can start to enter all the data on the righthand side. The mandatory fields in this window are: Size and MD bottom.
3. Push Update.
Edit an existing row
Highlight one of the rows in the list. This will bring all the data concerning the row into the righthand side of the dialog box. Change whatever needs to be changed. The changes will be saved
when you push Update, OK or go to another tab.
Delete a row
Push the Delete button after highlighting a row in the list.
NOTE: If the casing is a liner, then remember to check off the “Liner”check-box, and optionally
add depth of the Liner Hanger PBR.
Input field description for casing string (list and details):
Input field
© Completion Services
Description
62
CSD User Guide
Size
Nominal diameter of casing/liner
MD Top
Measured depth (MD) for the top of the casing/liner
MD Bottom
Measured depth (MD) for the bottom of the casing/liner
Nom.Weight
The nominal weight per foot of the casing/liner pipe
Max OD
The maximum outer diameter (OD) of casing/liner
ID
Inner diameter of casing/liner
Drift ID
The inside diameter of casing/liner that pipe manufacturer guarantees per
specifications
Matl Spec
Material specifications
Threads
Also known as Coupling. The coupling between two joint of casing, also
known as casing collar
Comments
Add additional comments regarding current casing in comment field
Top of PBR
(Top of Liner-TOL). Depth to top of liner PBR. This can only be registered if
"Liner" has been checked off.
1.4.1.2.2 Casing Attribute
A casing attribute such as R.A. Tag, Casing Cement, Collapsed Casing, Tieback Packer etc. can be
inserted in the Casing Attribute tab in Well & Completion Attributes. The mandatory field in this
tab depends on the casing attribute type.
© Completion Services
CSD USER MANUAL
63
Insert casing attributes:
1. Select New.
2. Choose type in the Casing/ Liner Element dropdown list, and add information to the casing
attribute .
3. Press Update to enter the new casing attribute.
Edit an existing row
Highlight one of the rows in the list. This will bring all the data concerning the row into the righthand side of the dialog box. Change whatever needs to be changed. The changes will be saved
when you push Update, OK or go to another tab.
Delete a row
Push the Delete button after highlighting a row in the list.
© Completion Services
64
CSD User Guide
Input field description for Casing Attribute (list and details):
Input field
Description
MD Top
Measured top depth of casing element
MD Bottom
Measured bottom depth of casing element
Max OD
The maximum outer diameter of casing element
ID
Inner diameter of casing element
Drift ID
The inside diameter of casing element manufacturer guarantees per
specifications
Date Installed
Date when the casing element was installed
Part number
Part number to current casing element
Attach to casing / liner
Select the corresponding casing / liner
Description
Add additional description or comment to current casing element
1.4.1.2.3 Cement Plug
Add cement plug in tab Cement Plug under Well & Completion Attributes.
© Completion Services
CSD USER MANUAL
65
1. Choose new
2. Scroll and chose current Cement Plug Type. Insert information. Mandatory fields are MD
top and MD Bottom
3. Update Cement plug list
Edit an existing row
Highlight one of the rows in the list. This will bring all the data concerning the row into the righthand side of the dialog box. Change whatever needs to be changed. The changes will be saved
when you push Update, OK or go to another tab.
Delete a row
Push the Delete button after highlighting a row in the list.
Input field description for Cement Plug (list and details):
© Completion Services
66
CSD User Guide
Input
Description
Cement Plug Type
Scroll and choose between Sand Fill or Cement Plug
MD Top
Measured top depth of cement plug
MD Bottom
Measured bottom depth of cement plug
Date Cemented
Date when plug was installed
Comments
Add additional comments to current cement interval
1.4.1.2.4 Fish
Add lost items in well in Fish under Well & Completion Attributes.
© Completion Services
CSD USER MANUAL
67
1. Select New
2. Scroll and choose which symbol to use as an indication for the fish/junk. Mandatory fields
are MD top and MD Bottom
3. Update Fish list
Edit an existing row
Highlight one of the rows in the list. This will bring all the data concerning the row into the righthand side of the dialog box. Change whatever needs to be changed. The changes will be saved
when you push Update, OK or go to another tab.
Delete a row
Push the Delete button after highlighting a row in the list
Input field description for Fish (list and details):
© Completion Services
68
CSD User Guide
Input field
Description
Fish Symbol
Scroll and choose current symbol for lost item
Drop Date
Date when fish was lost/dropped
MD Top
Measured top depth of fish
MD Bottom
Measured bottom depth of fish
Comment
Add additional comments to current cement interval
1.4.1.2.5 Formation
Insert formation information in Formation tab located under Well & Completion Attributes.
© Completion Services
CSD USER MANUAL
69
1. Select New
2. Scroll and choose formation and fill mandatory field MD Top and MD Bottom
3. Update the formation list
Edit an existing row
Highlight one of the rows in the list. This will bring all the data concerning the row into the righthand side of the dialog box. Change whatever needs to be changed. The changes will be saved
when you push Update, OK or go to another tab.
Delete a row
Push the Delete button after highlighting a row in the list
Input field description for well hole (list and details):
© Completion Services
70
CSD User Guide
Input field
Description
Formation
Scroll and choose current formation
MD Top
Measured top depth of formation
MD Bottom
Measured bottom depth of formation
Comments
Add additional comments to current formation top
NOTE: Should a formation missing from the drop-down list, please contact the CSD System
Administrator to add it to the system.
1.4.1.2.6 Gravel Pack
Gravel Pack is locate under Well & Completion Attributes. Register Gravel Pack interval under this
tab. This will be indicated with a yellow colored on the schematic:
© Completion Services
CSD USER MANUAL
1.
To enter a new row, push the New button below the list.
2.
Enter information such as MD Top, MD Bottom and Comments
3.
Update the Gravel Pack interval
71
Edit an existing row
Highlight one of the rows in the list. This will bring all the data concerning the row into the righthand side of the dialog box. Change whatever needs to be changed. The changes will be saved
when you push Update, OK or go to another tab.
Delete a row
Push the Delete button after highlighting a row in the list
Input field description for gravel pack (list and details):
© Completion Services
72
CSD User Guide
Input
Description
MD Top
Measured top depth of gravel pack
MD Bottom
Measured bottom depth of gravel pack
Comments
Add additional comments to current cement interval
1.4.1.2.7 Perforation
Perforation interval can be inserted under tag Perforation in Well & Completion Attributes. Under
Perforation tab you will see all perforation intervals, also the closed ones.
Insert perforation interval:
1. Select New.
2. Enter information about the perforation interval. Mandatory fields are MD top, MD
© Completion Services
CSD USER MANUAL
73
bottom and status of the well.
3. Update the perforation list.
Edit an existing row
Highlight one of the rows in the list. This will bring all the data concerning the row into the righthand side of the dialog box. Change whatever needs to be changed. The changes will be saved
when you push Update, OK or go to another tab.
Delete a row
Push the Delete button after highlighting a row in the list.
Input field description for perforation (list and details):
Input field
Description
MD top
Measured top depth of perforation interval
MD bottom
Measured bottom depth of perforation interval
Shoots per
Number of shoots per length unit
Length
Phasing
Angle from one gun hole to another in the gun
Gun type
Used gun type in current perforation interval. Select from drop down list. This list
is updated by the manager
Date Shoot
Date when perforation was shot.
Date Closed
Date when the perforation interval was sealed
Status
Status of the perforation interval as open or closed
Comments
Add additional comments for current perforation interval in comment field
© Completion Services
74
CSD User Guide
1.4.1.2.8 Survey data
Survey data is special in Completion Attribute context because it doesn’t influence the schematic
in any way. It deviates from the standard layout of all the other dialog boxes in this group. Here
you can import survey data. The inclination and TVD will be calculated for each element. You can
also use the survey data to calculate all TVD depths.Survey data can be imported from a text file.
TVD and the angle (inclination) to each element are calculated using these data. The MD,
inclination and azimuth columns must be part of the survey file.
Transferring survey as a Text File
1. Choose Select Text File… Find current Survey data. Note that this must an ASCII (text) file with
the columns delimited with tab, space or another character.
2. Press Scan to import survey data for this wellbore.
Example of the text file format:
© Completion Services
CSD USER MANUAL
Copy and Paste Survey
Survey can also be added by copy the survey from an Microsoft Excel file.
© Completion Services
75
76
CSD User Guide
1.
After copied the survey file, paste this to Survey data by choosing Paste.
2.
Enter/adjust information about the survey file, so CSD will read this correctly.
3.
Select Scan to transfer the survey data for the wellbore.
1.4.1.2.9 Well Hole
Register the drilled sections for current wellbore in Well Hole tab under Well & Completion
Attributes. Well Hole sections should have a continual flow from one section to another. This
involves that MD Bottom from one section should be MD Top to next section.
© Completion Services
CSD USER MANUAL
77
Insert well hole section:
1.
2.
Select New.
Enter information about the well hole. Mandatory fields are: Size, MD Top and MD
Bottom.
3.
Update the Well Hole list.
Edit an existing row
Highlight one of the rows in the list. This will bring all the data concerning the row into the righthand side of the dialog box. Change whatever needs to be changed. The changes will be saved
when you push Update, OK or go to another tab.
Delete a row
Push the Delete button after highlighting a row in the list.
© Completion Services
78
CSD User Guide
Input field description for well hole (list and details):
Input field
Description
Size
The largest diameter of the drilled section
MD Top
The measured top depth (MD) for each of the well hole sizes
MD Bottom
The measured bottom depth (MD) for each of the well hole
size
Comments
Add additional comments for current well hole section in
comment field
1.4.1.2.10 X-mas tree
Register Well heads and specification in X-mas tree tab under Well & Completion Attributes.
© Completion Services
CSD USER MANUAL
79
1.
Select New.
2.
Select Well Head type and scroll and choose current well head. Add date installed.
3.
Update X-mas tree.
Edit an existing row
Highlight one of the rows in the list. This will bring all the data concerning the row into the righthand side of the dialog box. Change whatever needs to be changed. The changes will be saved
when you push Update, OK or go to another tab.
Delete a row
Push the Delete button after highlighting a row in the list.
Input field description for X-mas tree (list and details):
© Completion Services
80
1.4.2
CSD User Guide
Input
Description
Well Head type
Choose which type to register (X-mas tree, surface well head, subsea
well head
Well Head
Drop down list. Choose from a predefined list
Date Installed
Date when tree was installed
Comments
Add additional comment to current X-mas tree
Second Step: Build the string
As all data has been entered, you can start building the string.
1.4.2.1
Single String
All data has now been entered and you are ready to build the string. What functionality you will
use, depends on your plan for the wellbore.
Tip! It is easier to build the string from the top and down, than the other way around.
There are 4 different ways to insert a new element:
© Completion Services
CSD USER MANUAL
81
1. Part Explorer: An easy way to add components to the well. Search for a part by filling in
different information (part number, symbol name, description, etc.), and the search will narrow
as you type.
2. Drag & Drop-method: The symbols in the toolbox are organized in several levels. If you for
instance want to use a valve, you have to press the arrow in from of Valve in the toolbox. A new
level will be displayed.
© Completion Services
82
CSD User Guide
Please note that this is just an example. Organizing of symbols can be different in your company.
Place the cursor in the toolbox on top of the highlighted symbol. Hold down the left-hand mouse
button while you drag the symbol into the schematic. When you let go of the mouse button, the
Part dialog will appear. You can then use the Part search criteria to find the element you want to
insert. When you have found the element, highlight it and push "OK", or double click on the
marked line. Note that you can search for elements by using the search fields on the left hand
side in the Part dialog box.
© Completion Services
CSD USER MANUAL
83
Repeat the operation to build the entire string. It is also possible to use Copy & Paste. Copy/Paste
functions are located in the Edit menu.
3. Move the cursor to the schematic window. Press the right mouse button and choose New from
the menu that appears. The cursor will change (there will be a + sign next to it) and you can now
choose where you want to insert the new element. Pressing the left mouse button does this. Part
dialog appears and the procedure will be the same as described above. Note that default symbol
to be used will be the symbol highlighted in the toolbox.
4. Choose ‘New’ from the Item menu. The cursor change form and you have to select where the
new element shall be placed. This is done by placing the cursor where you want the element to
be placed and then press the left mouse button. Note that the default symbol to be used will be
the symbol highlighted in the toolbox. Now the dialog box, ‘Part’ is displayed. To complete,
follow the same procedure as for item 1 and 2.
Repeat operations 1, 2, 3 and/or 4 to build the entire string.
Copy & Paste function
Sometimes the same Part Number is used several times. In these situation it is easier to use the
copy/paste functions. You can do this in several ways.
© Completion Services
84
CSD User Guide
1. Highlight one or several rows that you want to copy. Choose Edit, Copy and then Edit, Paste.
The cursor will change ( there will be a + sign next to the arrow). Use the cursor to choose
where you want to insert the element(s). If you want to move the highlighted are, use Edit, Cut
and Edit, Paste.
2. Highlight one or several rows that you want to copy. Press the Copy button
and then the
Paste button
. The cursor will change (there will be a + sign next to the arrow). Use the
cursor to choose where you want to insert the element(s). If you want to move the highlighted
are, use the Cut button
and then the Paste button
.
3. Highlight one or several rows that you want to copy. Press Ctrl C (to copy) and then Ctrl V (to
paste). The cursor will change (there will be a + sign next to the arrow). Use the cursor to
choose where you want to insert the element(s). If you want to move the highlighted area,
press Ctrl X (to cut) and Ctrl V (to paste).
4. Highlight one or several rows that you want to copy. Move the cursor inside the marked border
and left click. The cursor will change (there will be a square next to it).Press down the left
mouse button to drag it to a new position. A dotted line will show you where the elements will
be inserted.
1.4.2.1.1 Item Properties
In the following chapter we will take a closer look at Item Properties.
There are several ways to open Item Properties.
1. Right click on a part and choose Item Properties.
2. Highlight a part in the schematic and click on symbol
in the toolbar.
3. Highlight a part in the schematic and choose Item, Attributes... in the CSD top menu.
1.4.2.1.1.1 Item Data
To get a simple overview of the data for an element, choose, Item Properties from the element
short menu. This dialog box let the user change length, drift ID, serial number and comments for
the selected element, as well as setting fixed depth for the item. If the part is a generic item, all
dialog boxes are open for editing (as figure below).
© Completion Services
CSD USER MANUAL
85
In the Item Data tab, you find three buttons with different functionality. These are called: Detach,
Attach To Part and Create New Part From This Data. The way you use these are as follows:
Detach:
You use the Detach button when you want to make a new generic part with the same
specifications as an existing registered part. You highlight the part, choose Item Properties and
press the Detach button. It then copies all the information from the part except for the symbol,
which you have to specify from a list of generic Item symbols. Making it a generic item then
means that the specifications now are editable.
NOTE: This will only affect the specific highlighted element in this completion, and not the part
registered in the database.
This is useful if you for instance have a well where there have been used registered parts with
part numbers only, and you need to make changes to a number of pup joints. You can then detach
the pup joints that you need, to edit and make changes on them as any other generic items.
© Completion Services
86
CSD User Guide
The detach button is only active when you are working on a part registered in the part database.
Attach To Part:
Attach to part is used if you want to change a generic part with a part from the part database. The
part will then be changed to the selected part from the equipment database with its belonging,
specifications and part number. But the length, serial number, comments and so on will remain as
it was on the generic item.
The Attach To Part button is only active when you are working on a generic part.
Create New Part From This Data:
This functionality is used when you want to change a generic part into a new part with a new part
number in the equipment database. You click the button and will then be taken to the Part dialog.
Go to the Data tab and you will see that CSD has copied all the specifications from the generic
part. You may edit any specifications and you will have to give it a unique Part number and choose
symbol.
The Create New Part From This Data button is only active when you are working on a generic part.
Input field
Description
Description
A short description of the part
Symbol
Drop down list with all available symbols in CSD.
Manufacturer
Manufacturer of the part
ID/SAP Number
Internal number
Supplier
Supplier of the part
Matl. spec.
Material Specification
Serial Number
CSD Scale OD
Serial Number is a unique number that identifies one specific component
in one specific well completion
Choose a scaling OD for part. Usually the same as Threads OD Top (inch)
Nom. weight
Nominal weight to the part
Length (joint)
Length of part per joint
Makeup loss
Loss of length due to coupling
Max OD
The maximum outer diameter (OD)
Min ID
Inner diameter
© Completion Services
CSD USER MANUAL
Drift ID
The inside diameter that manufacturer guarantees per specification
Threads
Also known as coupling.
Threads OD Top
Outer diameter at top
Threads OD Bottom
Outer diameter at bottom
Fixed Depth
Lock an element to a specific depth
87
NOTE: If you change or add information in the Item Data dialog, it affects this well only. It will not
affect any other completions also using this part.
1.4.2.1.1.2 Control Line
Registration of Control Lines.
1. Select New.
© Completion Services
88
CSD User Guide
2. Choose the Control Liner tab and enter type and comments. Adjust your control line in several
style by choosing position, style, thickness and color.
3. Update the list.
Topic
Description
Control line type Drop down list. Select which control line type to use.
Comment
Add additional comments to current cement interval
Edit an existing row
Highlight one of the rows in the list. This will bring all the data concerning the row into the righthand side of the dialog box. Change whatever needs to be changed. The changes will be saved
when you push Update, OK or go to another tab.
Delete a row
Push the Delete button after highlighting a row in the list.
NOTE: Talk to your System Manager if you want the list of types updated.
1.4.2.1.1.3 Inserted Equipment
This function gives you possibility to insert an element into another element .
© Completion Services
CSD USER MANUAL
89
1. Select New.
2. Select Symbol. After selecting symbol you will be redirected to the Part Explorer. Find the
current part.
3. Fill in rest of the info about inserted equipment.
4. Update the list.
Edit an existing insert equipment
Highlight one of the rows in the list. This will bring all the data concerning the row into the righthand side of the dialog box. Change whatever needs to be changed. The changes will be saved
when you push Update, OK or go to another tab.
Delete insert equipment
Push the Delete button after highlighting a row in the list.
© Completion Services
90
CSD User Guide
Input field
Description
Depth from Top of Length from top of the part which you wish to inserted an element into.
Item
Equipment LengthLength of the inserted equipment
Serial Number
Serial Number is a unique number that identifies one specific component in
one specific well completion
Date Installed
Date when the inserted equipment was installed.
Drift ID
The inside diameter of inserted equipment manufacturer guarantees per
specifications
Comments
Add additional comments to current inserted equipment
The inserted equipment is scaled relative to the length of the element that it’s inserted into. Data
belonging to the inserted equipment will be presented on a separate row beneath the outer
element. Insert equipment must have partnumber, thought this must be registered in the
equipment database.
The inserted equipment is scaled according to it's nominal OD. The schematics will therefore look
strange if you insert a 7” element into a 4 1/2” element.
Insert Equipment with Ctrl-Function
It is also possible to add inserted element from the part explorer. Do as follows:
1. First find the element you want to insert in the Part Explorer.
2. While holding down the Ctrl button on your keyboard, drag and drop it above the item you
want to insert it into.
© Completion Services
CSD USER MANUAL
91
3. Insert the relative information in the Properties dialog found at the lower right of the CSD main
screen. (Scroll down to the Inserted Equipment section and write directly into the grid.)
NOTE: If you are missing the Properties dialog from your CSD main screen, you can enable it by
choosing View, Toolbars and Docking Window and check Properties from the CSD top menu.
1.4.2.1.1.4 R.A Tag
To register radioactive tags on an element, do the following. Highlight an element and push the
, or you can right click and choose Item Properties. Choose the R.A. Tag tab.
© Completion Services
92
CSD User Guide
1. Select New.
2. Register depth relative to the top of element.
3. Update the list.
Edit an existing insert equipment
Highlight one of the rows in the list. This will bring all the data concerning the row into the righthand side of the dialog box. Change whatever needs to be changed. The changes will be saved
when you push Update, OK or go to another tab.
Delete insert equipment
Push the Delete button after highlighting a row in the list.
© Completion Services
CSD USER MANUAL
93
Note the MD Top of the R.A Tag is showing in the left column and can also be modified in the
Properties dialog along with a comment. When a R.A. Tag is registered it is indicated in the
schematic with a symbol as seen in the figure below:
1.4.2.1.1.5 Clamp
Choose a row in the schematic window, choose Item, Attribute or
. Choose the Clamp tab.
1. Select New.
2. Register the type of clamp, number of clamp and add a comment. If the type field doesn’t
contain the clamp-type you need, contact your manager to update the list.
3. Update the list.
© Completion Services
94
CSD User Guide
Edit an existing row
Highlight one of the rows in the list. This will bring all the data concerning the row into the righthand side of the dialog box. Change whatever needs to be changed. The changes will be saved
when you push Update, OK or go to another tab.
Delete a row
Push the Delete button after highlighting a row in the list.
NOTE: There is no graphical presentation of clamps.
1.4.2.1.1.6 Bandit
Choose a row in the schematic window, choose Item, Attribute or
. Choose the Clamp tab.
1. Select New.
2. Register the type of Bandit, number of bandit and add a comment.
© Completion Services
CSD USER MANUAL
95
3. Update the list.
Edit an existing row
Highlight one of the rows in the list. This will bring all the data concerning the row into the righthand side of the dialog box. Change whatever needs to be changed. The changes will be saved
when you push Update, OK or go to another tab.
Delete a row
Push the Delete button after highlighting a row in the list.
NOTE: If the type field doesn't contain the Bandit type you need, you must contact your system
manager to update the list.
1.4.2.2
Secondary String Mode
You can use a secondary element layer to place a string inside a string in CSD. You should use the
Secondary String Mode to register inner strings / DIACS (Down hole instrumentation and control
system), straddles etc.
To enter the Secondary String Mode, choose Data, Secondary String Components, or push the
button.
Build your secondary string as usual by dragging the elements from the Toolbox. You will be asked
to enter fixed depth when you insert the first element.
Choose Data, Secondary String Mode or push the button
to return to the Schematic mode,
where the secondary string is now visible. The secondary string can be placed on top of, or beside
the main string. This is controlled by turning on or off the Symbol 2 column in Options, Setup, and
Wellbore Schematic Columns.
© Completion Services
96
CSD User Guide
You can choose to view the Secondary String schematics in 3 different modes:
1. The two strings shows on top of each other. (Option, Setup: Symbol 2 column disabled).
NOTE: You can close the Symbol 2 column, by dragging one edge over the other. The two columns will then
show on top of each other.
© Completion Services
CSD USER MANUAL
97
2. The two strings shows beside each other. (Option, Setup: Symbol 2 column enabled).
Tip! When you enable the Symbol 2 column in Option, Setup; the column appears as the last
column to the right in the grid. You can drag and drop the Symbol 2 column to the left by grabbing
the column heading.
3. Show only the secondary string. (Go to the Secondary String Mode).
NOTE: If you make a secondary string deeper than the first string, the bottom elements of the
secondary string will not be visible. You should then switch the strings around regarding the
bottom assemblies. Also note that Print Layout will show and print out the current Schematic
mode.
Tip! If you want to place only one element inside another, you should use the Inserted Equipment
functionality.
1.4.2.3
Dual Strings
Building a dual string is done in the same way as building a single string.
When creating a dual string, you can start with single string and choose Data, Toggle Single/Dual
(or F9). You can also change the string from dual to single using the same command.
© Completion Services
98
CSD User Guide
When a dual string is selected, the symbol columns will always be located in the middle of the
schematic window. When you insert a new symbol you must remember to choose on which side it
is going to be inserted. Data which belongs to the left string is displayed at the left side and data
which belongs to the right string is displayed at the right side.
Example of a Dual String Well:
NOTE: Some of the symbols are designed to be used in wells where there are two strings. E.g. Yblock (two strings goes into one string), splitter (split the string into two strings), right from
centre, centre from right, left from centre and centre from left. These symbols should be grouped
in a DUAL STRING section in Toolbox.
© Completion Services
CSD USER MANUAL
1.4.2.4
99
Multilateral Wells
The main bore and lateral bore(s) are registered as different wellbores within the same well. You
register each wellbore in a separate tab in the Schematic view.
© Completion Services
100
CSD User Guide
A lateral bore should start with the first element attached to the cross-section of the parent
wellbore, or from the hanger section inside the parent wellbore.
NOTE: You don’t insert an element in a lateral bore which is already inserted in the main bore.
1.4.2.4.1 The Main Bore of a Multilateral Well
You start by building the main wellbore in the same manner as in non-multilateral wells. Follow
the instructions for Single string.
© Completion Services
CSD USER MANUAL
101
1.4.2.4.2 The Lateral Bore of a Multilateral Well
To create an additional wellbore; choose Data, Insert Additional Wellbore.
NOTE: To delete a lateral bore; contact the CSD System Administrator.
You can write the correct wellbore name in Data, Well & Completion Data, or double-click on a
wellbore banner and change the name; then hit Enter. One input field will update the other.
Remember to use the correct name-tags for the different wellbores!
© Completion Services
102
CSD User Guide
NOTE: You should not double register any elements across the different wellbores, such as
common casing strings.
You connect the lateral wellbore to a parent wellbore in the Data, Completion Data, Depths
dialog, by entering TAML MD and Parent Wellbore.
TAML MD: A CSD specific value, which indicates where the lateral wellbore connects to the parent
for the wellbore. Top depth for the first element in the lateral wellbore.
To connect the wellbores, use the control points to place the lateral bore(s) to the main bore at
the correct connection point, then press Save.
© Completion Services
CSD USER MANUAL
Import Survey data for each wellbore separately.
© Completion Services
103
104
CSD User Guide
The well trajectories will then show in the Well Path mode:
© Completion Services
CSD USER MANUAL
1.4.2.5
105
Assemblies
You can mark one or many elements in the Schematic grid to form an assembly.
How to mark one or many elements
Hold down the left mouse button (without releasing it) at the first element in the selection, and
roll the mouse downwards or upwards to make the selection.
Then right click on the selection and choose Assembly.
NOTE: If you select one item and then release the mouse button, you will move the selected item
instead of making a selection!
© Completion Services
106
CSD User Guide
The selection will show as an assembly in the Assembly column, typically placed as the first
column in the Schematic grid.
Select the assembly and right click to Renumber Assembly or Unassembly.
© Completion Services
CSD USER MANUAL
1.4.2.6
107
Generic Symbols
Using Generic Items (freetext symbols)
Generic Items are used typically when there is lesser information available about parts. Often that
is parts where there’s no information about Part Number. This includes parts such as Blank Pipes,
Pup Joints, Tubing, X-overs etc. With Generic Symbols you have the freedom to choose all the
specifics for the part (see figure below). For more important elements such as packers, valves,
nipples etc. you should have a part number and register this in the CSD equipment database.
© Completion Services
108
CSD User Guide
As you can see in the figure there’s a “Detach” function. This means that you can “unlock” a part
and change some parameters if they don’t correspond to the correct specifications. These
parameters (typically IDs, OD and length) can also be changed directly in the Schematic window;
just click in a cell, write a value and press Enter.
NOTE: The generic items will not get a specific part number. This will leave the generic items less
traceable than the database parts, when it comes to where it's been used etc.
1.4.2.7
Scaling Stinger Completion
Scaling overlapping sections in Schematic
Because the symbols in the schematic are scaled relative to one another, there are certain
© Completion Services
CSD USER MANUAL
109
scenarios where some symbols might look a little squeezed. This is for instance the case when
you have two sections with overlapping intervals where an assembly or a number of items in the
lower section overlaps with a tubing section in the upper section. This will force CSD to draw all
the symbols overlapping the tubing depth, within the same space as the tubing symbol. Below is
an example where the lower section starts in the middle of a tubing section:
As you can see the PBR assembly is barely visible. But there are a few workarounds. For instance
you can split up the tubing section so that you have a single joint in the same depth as the
assembly. That will look something like this:
Alternatively you can expand the whole row by adding a number of lines in the comments field
for the tubing. Highlight the row and click:
© Completion Services
110
CSD User Guide
Here you enter new lines by pressing the Ctrl-button and Enter at the same time. Add as many as
you need for the items to show up in the schematic:
1.4.2.8
ESP functionality
The best way of registering ESP equipment with bypass tubing in CSD, is to build the bypass tubing
and the ESP section separately. The bypass tubing is then built in the Main String Mode and the
ESP section in the Secondary String Mode:
Bypass tubing in Main String Mode:
© Completion Services
CSD USER MANUAL
111
ESP equipment in Secondary String Mode:
Combined:
By default, the two strings are presented on top of each other, but this can be adjusted. Highlight
© Completion Services
112
CSD User Guide
the parts you want to adjust, hold the Shift-key and press either the left or right arrow-key on
your keypad. This will move the selected parts to the left or to the right.
So for this example it makes sense to move the bypass tubing to the left, and then enter
Secondary String Mode and move the ESP equipment to the right.
Default presentation:
1.4.3
Shift +
on the selected bypass tubing in Main String Mode:
Shift +
on the selected ESP Equipment in Secondary String Mode:
Third Step: Save
To keep track of the history of each well, it is important to save changes to a new revision number.
The well history will be kept in the CSD database.
Use Save As (in database)... when you save the completion for the first time. Choose New
Completion, and choose the well you want to save it to. The initial completion has revision
number 1.00. Note that the well must be predefined. From now on you can use the Save option in
the File Menu or the button
when you want to save your changes.
© Completion Services
CSD USER MANUAL
113
The revision numbering is split into two categories:
1. Major workovers: Replacement of the complete tubing. Revision number will increase by a
whole number. The first major overhaul will receive version 2.0.
2. Minor workovers: Setting of plugs, re-perforation etc. The revision number will increase with
0.01. The first minor workover overhaul will get the revision number 1.01.
Each company defines for itself what is considered a minor or a major workover.
You should always make remark about which update you have done in the new version. This will
be helpful when other people need to open the schematic.
Save as new revision:
Open the last revision number of the well that you want to change. This is done by choosing File,
Open or by pressing
. Choose Save As in the File menu. The Save As dialog box appears.
Choose if you want to save the completion as:
o Revision (the revision number will automatically be increased by 0.01).
o Recompletion (the revision number is rounded up to the closest integer according to the
open completion).
o New Completion. This is used when saving initially. Choose which well to save to from the
window on the left.
© Completion Services
114
CSD User Guide
Push OK. The completion is saved with a new revision number. Alter your data and use the Save
button from now on.
NOTE: There is no auto save functionality in CSD, due to the fact that the user should be able to
play around with an existing well Schematic or Sketch, making preliminary / simplified
presentations etc., without wanting to save it as an official completion drawing.
Tip! We recommend that you save periodically to prevent loss of data due to unexpected errors
with your PC, database network etc.
1.5
Inventory, Transition between modes
An important part of CSD is the transition between modes. With modes we mean Plan, Tally and
Existing. When a string is built initially, this is done in Plan mode. When you go to Tally mode, the
length of each joint can be registered.
1.5.1
Simple Tally (without pipe inventory)
When going from Plan to Tally, all tubing joints will be given a Tag joint number. CSD calculates
how many joints that are needed. You will be asked if you want the tag joint number to start from
1 or from another number. The Tag joint number represents how many joints that is available for
putting into the well.
The Tag joint numbers are generated using the following rules:
• The tubing joints are numerated from top to bottom
• Tubing sections get different tag joint number series if they have different part number
• If the tubing sections are configured in the following way: A, B, A, then A will have one tag
joint number series.
When going from Tally to Existing, all consecutive tubing joints will be “collapsed” into one
symbol (as in Plan).
1.5.2
Tally with Pipe Inventory
Pipe Inventory allows the user to set lengths on all joints in the offshore inventory. There is a
connection between the elements in the CSD schematic and the joints in the inventory. The work
flow is created so that it matches the way the tally operation is executed offshore.
1.5.2.1
Construction of Pipe Inventory
To build a pipe inventory, choose Data, Inventory. If you haven’t already created an inventory,
CSD will ask during the plan to tally transition if you want to use the pipe inventory functionality.
If you select ‘No’, CSD will use the simple tally. If you select ‘Yes’, you will be presented with the
Pipe Inventory dialog box.
1.5.2.1.1 Pipe Inventory
This is the main dialog box for registering pipe inventories:
© Completion Services
CSD USER MANUAL
115
Even though this dialog box only contains a table, it still follows the CSD standard for entering
data. The difference is that the cells in the table work as input fields/drop down fields. As all
details about a row are visible, the table gives a better overview of the data.
When pressing the ‘New’ button, a row is added to the table. Enter Name/Type for the pipes in
the inventory, and move to the next cell. Enter Size. Repeat this for Nom Weight, Matl. Spec. and
Comments. To move between the input fields in the table, use the Tab key, and use the mouse to
move to the drop down fields. When done registering data about the inventory, click the Update
button. The Open Inventory button will now be enabled, and clicking it will open the dialog box
for registration of the pipes in the inventory (Pipe Inventory Item).
To delete an inventory, choose the row with the inventory to delete, and click the Delete button.
All pipes (Pipe Inventory Items) for this inventory are also deleted.
The last column in the table shows the available amount of pipes in that inventory.
The last column in the table shows the available amount of pipes in that inventory.
1.5.2.1.2 Pipe Inventory Items
This dialog box is where all joints for the inventory are registered. The table shows the currently
selected inventory:
© Completion Services
116
CSD User Guide
Start by pressing the “New” button. Enter values for Tag Number, Length, and Comment. The
Status column will initially be Not in Use. It is now possible to duplicate this joint to build a
complete inventory. Make certain that the joint you want to duplicate is selected, enter the
number of joints in the field Auto Generate, and press the Generate button. The Tag Number you
entered for the first row will be used as the first number in this series of joints, i.e. all the
generated joints get increasing tag numbers above this one. Identical tag numbers are not
allowed. It is also possible to add joints by copy this from excel spread sheet and press Paste
button.
Adjusting joint lengths: this is easily achieved by using the table as a spread sheet. Select the
Length cell for the joint you wish to change, and enter the length. To move to the cell (joint)
above or below, use the arrow buttons on the keyboard. Moving to another row or pressing Enter
will accept the changes. To cancel editing, press Escape.
© Completion Services
CSD USER MANUAL
1.5.2.2
117
Transition from Plan to Tally
If a pipe inventory exists, the following dialog box will appear when going from plan to tally. You
will need to choose which inventory to use pipes from in the different tubing sections. If the
number of joints is insufficient, you will be notified.
1.5.2.3
Operation in Tally against Pipe Inventory
In tally mode, each individual joint will have a link to the pipe inventory. This link allows several
operations to be performed, which are described in this chapter. Most of these operations are
available through the right mouse button (short menu) or the Item menu.
Reject joint: In some cases it is necessary to remove joints from the tally, due to thread cutting,
make up problems, etc. To remove a joint from the tally, choose the joint in the schematic, click
the right mouse button, and select Reject Joint. You will then be asked if you wish to replace this
joint with another one from the pipe inventory. If a joint is rejected, this will be indicated with
red in the pipe inventory, and it cannot be used elsewhere.
Insert similar joint from inventory: To insert a joint from the inventory, choose a joint which is
already in the schematic, click the right mouse button, and select Insert Similar Joint from
Inventory. Then select a joint in the inventory. You cannot use a joint twice, or use a joint which is
marked as rejected. The new joint is added to the Schematic.
© Completion Services
118
CSD User Guide
Copy/Paste - Attach to inventory item: To add a new joint it is also possible to use copy/paste.
First select the joint to copy, and paste it into the schematic. This manual copy operation will
remove the link to the inventory. The link can be re-established by choosing Attach to Inventory
Item from the Item menu. You cannot use a joint twice, or use a joint which is marked as rejected.
Note that in this case you may choose from all joints in all inventories. Make sure that you choose
a joint from the correct inventory.
© Completion Services
CSD USER MANUAL
119
Lengths: It is possible to adjust the lengths of each joint if needed. This can be done either in the
schematic or in the pipe inventory, and changes are updated in both places
automatically.
Printing: If you need a hard copy of the pipe inventory, enter the Pipe Inventory dialog, and press
the button Send to Browser. The list of joints in the inventory will then be presented in your web
browser. From the browser you can choose print, or copy the data to Excel or other software.
© Completion Services
120
CSD User Guide
NOTE: You can also print a Tubing Tally Running List by choosing this in the menu Data, Tubing
Tally Running List.
1.6
Equipment Database
Your System Administrator will handle registration of equipment. You will only have read access
to the equipment database. Choose Parts in the Database menu.
All parts that has been registered in CSD with a part number, will be stored in the Equipment
database.
1.6.1
Search
Search for a part in tab Search under Part:
© Completion Services
CSD USER MANUAL
121
1. Enter information in the description columns
2. Select Search. Based on the information entered, CSD finds parts matching with this.
Input
Description
Symbol
Scroll down and choose between the symbols
Part No
A unique part number for the part. Usually given in assy dwg from the supplier
Descr.
A short description of the part
Threads
Also known as coupling
Manufacturer
Manufacturer of the part
Matl. Spec.
Material Specification
CSD Scale OD
Scaling OD for part. Usually the same as Threads OD Top (inch)
Nom. weight
Nominal weight to the part
Threads OD Top
Outer diameter at top
Threads OD BottomOuter diameter at bottom
The search field CSD Scale OD and Nom. Weight are special. The values entered are starting point
for intervals. The size of the interval is adjusted in Setup. Choosing the tab Misc, you find the
fields under Part Search Precision. As a example: If CSD Scale OD search precision is 0.1 and you
enter 5 in your search, all CSD Scale between 4.9 and 5.1 are included in the search.
If the part you are looking for missing in equipment database, please fill out an standard excel
sheet for part registration in CSD and contact CSD Help and Support to create this for you. The CSD
Part registration form can be found in the open dialog box:
© Completion Services
122
CSD User Guide
In windows where data is displayed in lists/tables, it is possible to change the sort order. To do
this, click the column you want to sort by. The first time the column is clicked the list is sorted in
ascending order, the next time the list is sorted in descending order.
Setup...
The "Setup..." button in the Search tab will redirect you to the setup. In the Setup, under tab Part
List Columns you can choose what column to show in the Part List.
© Completion Services
CSD USER MANUAL
123
New
The New button will only be available for the System Administrator in CSD. Here you can create
new parts and add this to the equipment database. By clicking this, you will be redirected to Data
tab to create new part:
© Completion Services
124
CSD User Guide
The mandatory fields are marked with red.
CSD Scale OD is used to scale the symbol and is important to secure a correct visual presentation
in the schematic
There will be some logical checks on diameter and pressure data. ID cannot be larger than OD and
test pressure must be greater than work pressure.
NOTE: Each Part number have to be unique and is not editable after you push Save.
Input
Description
Description
A short description of the part
Part number
A unique part number for the part. Usually given in assembly drawings
from the supplier
Symbol
Drop down list with all available symbols in CSD
Manufacturer
Manufacturer of the part
ID/SAP Number
SAP number or company ID number
Supplier
Supplier of the part
© Completion Services
CSD USER MANUAL
125
Matl. spec.
Material Specification
CSD Scale OD
Choose a scaling OD for part. Usually the same as Threads OD Top (inch)
Nom. weight
Nominal weight to the part
Total length
Total length of part
Makeup loss
Loss of length due to coupling
Max OD
The maximum outer diameter (OD)
Min ID
Inner diameter
Drift ID
The inside diameter that manufacturer guarantees per specification
Cost (1000)
Cost of part
Expired Date
Some parts has expiration date
Threads
Also known as coupling
Threads OD Top
Outer diameter at top
Threads OD Bottom
Outer diameter at bottom
Int. yield press. (test)
Initial yield tested
Int. yeld press (work)
Initial yield at use
Collapse res. (test)
Collapse resistance tested
Collapse res. (work)
Collapse resistance at use
Edit...
This button is disable for regular users. Superusers and admin have access to edit an existing part.
NOTE: A change to a part that are in use, will influence all completions where this part has been
used.
© Completion Services
126
CSD User Guide
1. Find current part which you wish to edit.
2. Mark this and choose edit.
3. If the part has been used in existing revision, a pop-up window will inform you in how many
existing revision this part has been used. By choosing Yes, you will be able to continue to edit the
part.
4. After editing the part, choose update to save the changes.
Delete
A part that has been used in a completion cannot be deleted until it has been removed from the
completion. To find out where a Part Number has been used, go to tab Usage.
Note that only a superuser and admin have access to delete an existing part.
© Completion Services
CSD USER MANUAL
127
1. Find and mark the wanted part.
2. Choose Delete to delete current part.
Copy...
This function is used to create a new part by copying data of an existing part. Note that also this
function is only available for superusers and admin.
1. Find the existing part you wish to copy data from.
2. Mark this and choose Copy...
3. Edit the wanted data and enter partnumber for new part.
4. Choose Update to save new part.
© Completion Services
128
1.6.2
CSD User Guide
Data
When finding the current part, highlight this and go under tab Data. Here you can see data for the
current part. Superusers and admin also will have access to edit an existing part.
Input
Description
© Completion Services
CSD USER MANUAL
1.6.3
129
Description
A short description of the part
Part number
A unique part number for the part. Usually given in assembly drawings
from the supplier
Symbol
Drop down list with all available symbols in CSD
Manufacturer
Manufacturer of the part
ID/SAP Number
Internal number
Supplier
Supplier of the part
Matl. spec.
Material Specification
CSD Scale OD
Choose a scaling OD for part. Usually the same as Threads OD Top (inch)
Nom. weight
Nominal weight to the part
Total length
Total length of part
Makeup loss
Loss of length due to coupling
Max OD
The maximum outer diameter (OD)
Min ID
Inner diameter
Drift ID
The inside diameter that manufacturer guarantees per specification
Cost (1000)
Cost of part
Expired Date
Some parts has expiration date.
Threads
Also known as coupling.
Threads OD Top
Outer diameter at top
Threads OD Bottom
Outer diameter at bottom
Int. yield press. (test)
Initial yield tested.
Int. yeld press (work)
Initial yield at use
Collapse res. (test)
Collapse resistance tested
Collapse res. (work)
Collapse resistance at use
Documents
All documents attached to a part is located under tab Documents. Such documents can be part
© Completion Services
130
CSD User Guide
description etc. Remember to choose first a part under tab Part. Under this tab admin and
superusers will have access to remove/add new documents/link , while regular users will have
access to read/open and save them.
1. Click on the small arrow to choose between Folder, Document from File or Link.
2. Enter name and description for document.
3. Update the list.
Tip! Organize your documents in folders for a better overview.
1.6.4
Usage
In the column Field you find the Fields where the part number is used. If you need more
information, you can choose one of the fields in the Field-window. Choose the well name to see
in what completion the part is used. Choose completion to see in what mode the part is used. In
the column Mode, you can double-click a mode to open the completion drawing.
© Completion Services
CSD USER MANUAL
131
NOTE: Remember to highlight and choose part first in Search tab.
Replace...
Admin also have access to replace a certain part/component in several wells simultaneously.
1. Choose Replace..
2. Choose with which part you wish to replace the current part.
© Completion Services
132
CSD User Guide
3. Choose OK and it will show how many revisions this action will effect.
1.6.5
Report
Use the Equipment Database Report to generate a report of the equipment in the database. You
can choose whether you want a report for the entire database, for a specific symbol, Part No,
description, threads, manufacturer, material specification CSD Scale OD, Nominal weight, Threads
OD Top or Threads OD Bottom.
© Completion Services
CSD USER MANUAL
133
1. Choose Database,Parts . The search database for part will open. Parts. If needed add a filter for
your search, and choose the Report tab ( see figure above).
2. Choose which columns you want to display, and if needed set filters for your search.
3. Choose optional Output to and press Create.
If you choose to send the report to a window inside the CSD-application, the data is presented as
a spread sheet. When the report is generated, you get a new menu item: Report. Choose Report,
Adjust Column Widths to adjust the width of the columns.
© Completion Services
134
1.6.6
CSD User Guide
History
The History tab shows who has created and edited the part, and the modification date
Tip! Remember to first highlight and choose part in the Search tab.
© Completion Services
CSD USER MANUAL
1.7
135
Print
It is possible to print out the different completions. To print out the schematic you must first open
the completion.
The print out have three main elements:
1. Heading.
2. Schematic.
3. Data boxes.
1.7.1
Heading
The heading contains information such as well number, revision number, field, status (oil
producer, gas injector and so on). Most of these data are entered in Data, Well & Completion Data.
The content of information in the heading can be personalized for each company. For custom
report headers, please contact the CSD system responsible.
Example on heading setup for reports:
© Completion Services
136
1.7.2
CSD User Guide
Schematic Setup
The completion schematic consists of symbols and belonging data. The look of this schematic can
be manipulated in a number of ways. Here are a few examples:
Fonts and font sizes can be changed in Option, Setup, and Fonts. If you want to change
the fonts used in Schematic, you should make changes to the entry Completion
Components. Note that there are separate settings for fonts regarding inserted
equipment, Symbol Extra column etc.
The length of the last part of the well (area between the last element and TD) can be
changed. This is done in Option, Setup in the tab Expansion. Number of lines to expand
bottom of well can vary from 1 to 100 rows. (5 rows are default).
The length of the tubing elements can be changed by changing the expansion factor,
© Completion Services
CSD USER MANUAL
137
also in Option, Setup, Expansion.
The Symbol column in the Schematic view is scalable. Move the cursor to the column
border, push down the left-hand mouse button and drag to broaden or narrow.
1.7.3
Data boxes
Print Layout is used to select which data boxes to be included in the report. The data boxes
contain data related to perforations, fish/junk, casings, cement etc.
Go to Print Preview (File, Print Preview). The Print Layout dialog at the lower right, allows you to
choose which data boxes to display at the last page in the report. If you for instance want
information about fish/junk in your report; select Fish in the Print Layout hierarchy. This box will
automatically be shown in the Report Layout screen. The red arrow indicate to view the next page
of the print.
The font size in the data boxes can be changed in Option, Setup, Fonts and Report Box.
The headers and the watermark is customizable. If needed; please contact the System
Administrator to adjust this for your company.
1.8
Reports
CSD comes with several standard report such as:
Equipment Database Report.
Tubing Tally Running List.
© Completion Services
138
CSD User Guide
Threads report.
Excel and other special reports.
1.8.1
Tubing Tally Running List
Tubing Tally Running List is as the name indicates a running list. The elements are in the opposite
order compared to the schematic (last element is first in the running list).
1. Choose Option, Setup and tab Running List Columns to select which columns you want
displayed in the report. Press OK.
2. Choose Data, Tubing Tally Running List.
3. The report will be generated in Microsoft Excel.
Example Tubing Tally Running List:
1.8.2
Threads Report
The threads reports checks thread type combination, Threads OD and Box/Pin configuration.
1. Choose Data and Threads Report.
2. The report will then be generated. The report will tell you where the error has occurred and
what’s wrong.
© Completion Services
CSD USER MANUAL
139
Note: One of the elements in the Checklist, should be to go through the thread report.
1.8.3
Excel and Special Reports
CSD comes with some standard Excel reports and can be set up with custom report for each
company. The reports are organized in folders in the System Document are in Explorer (top left in
the CSD main screen). Please contact the CSD system administration for custom reports.
© Completion Services
140
1.9
CSD User Guide
Setup
Your setup is saved when you close the application. This setup includes all parameters that are
chosen in Option, Setup.
1.9.1
Wellbore Schematic Columns
You can choose which columns to display in the schematic window in Option, Setup and Wellbore
Schematic Columns tab or by pressing
in the toolbar.
© Completion Services
CSD USER MANUAL
NOTE: This setup also represents the columns showing in the printout.
1.9.2
Units/Decimals
Units/Decimals is located under Option, Setup... or by pressing
© Completion Services
.
141
142
CSD User Guide
NOTE: This setup will change units and decimal for all functions in CSD, including the printout.
1.9.3
Expansion
Expansion is located under Option and Setup... or by pressing
.
© Completion Services
CSD USER MANUAL
143
Symbol Expansion: The length of the tubing elements can be changed by changing the expansion
factor.
Bottom of well expansion: The length of the last part of the well (area between the last element
and TD) can be changed. Number of lines to expand bottom of well can vary from 1 to 100 rows. (5
rows are default).
1.9.4
Part Explorer Columns
Part Explorer Columns is located under Option and Setup... or by pressing
© Completion Services
.
144
CSD User Guide
Select which columns to appear in the search criteria for the Part Explorer.
1.9.5
Sketch
Sketch is located under Option, Setup... or by pressing
.
© Completion Services
CSD USER MANUAL
145
Show: Check off which information you wish to appear in the sketch window.
Smoothing Mode: This will effect the appearance of the sketch.
Symbol Transparency: Move the arrow to the left to make the symbols in sketch more transparent,
and opposite in the other direction.
Element fill: It is also possible to personalize fills for the symbols in the sketch. You can edit the
color, position or choose not to have fill at all.
Scale: Adjust the scale of the schematic. To enlarge the sketch move the arrow to the right, and
opposite in the other direction.
© Completion Services
146
1.9.6
CSD User Guide
Running List Columns
Running List Columns is located under Option and Setup... or by pressing
.
In this setup, user can choose which columns to appear in the Tubing Tally Running List.
1.9.7
Misc
Misc is located under Option and Setup... or by pressing
.
© Completion Services
CSD USER MANUAL
147
Symbol Extra Info: In this section you can choose which text info to appear in the Symbol Extra
Info column found in the Schematic window.
Casing Sort Order: Choose to sort casing according to size or depth. This will effect the casing list
in Well & Completion Attributes under casing tab.
Recently Used File List: In the File menu bar, you can view the last visited wells (MRU list). In this
setup, you can choose a number from 1 to 9 on how many wells to appear in the list.
Auto Fit To Page: The Schematic columns are scaled to fit the printed page margins. Default is
"On".
© Completion Services
148
CSD User Guide
Auto Calculate TVD values: By checking off this section, all true vertical depths columns in CSD will
be auto calculated when survey data is transferred. Default is "On".
Part Search Precision: The search field CSD Scale OD and Nom. Weight are special. The values
entered are starting point for intervals. As an example: If CSD Scale OD search precision is 0.1 and
you enter 5 in your search, all CSD Scale between 4.9 and 5.1 are included in the search.
Restore all caution messages: Enable all system warning messages.
1.9.8
Fonts
You can regulate the font for assembly, completion components etc. in Option, Setup and Fonts
tab or by pressing
in the toolbar.
© Completion Services
CSD USER MANUAL
149
1. Mark which font you wish to edit.
2. Choose font, font style and size.
3. You can also add effects such as strikeout, underline and choose color for your font.
4. Press OK.
NOTE: This setup also represents the font appearance on the printout.
Terminal Server Font
Tip! When running CSD on Terminal Server / Citrix you may need to adjust the Schematic font
color to make the text visible when marking an element in the grid.
© Completion Services
150
1.10
CSD User Guide
Miscellaneous
1.10.1 Fixed Depth
An element can be locked to a specific depth. This function is used if you have two string in the
well (see example below), want to make a stringer, to set the starting point on a lateral wellbore
etc.
© Completion Services
CSD USER MANUAL
Fig. 1: The second pup joint has been set to Fixed Depth = 1600 m
Stem is stung into a PBR by setting the PBR to a fixed depht
151
Fig 2: A Seal
1. Highlight the row containing the element you want to set to a specific depth.
2. Right click and choose "Fixed Depth..." and enter the depth. Remove it by delete the number. It
is also possible to enter or delete fixed depth in the Properties dialog found at the lower left in
the CSD main screen, by entering a number and press Enter or Delete.
© Completion Services
152
CSD User Guide
1.10.2 Well Document
You can attach any document to a well by choosing Data, Well Document or open Well Document
folder from the Open dialog.
© Completion Services
CSD USER MANUAL
153
Select "New" and browse to the document, or drag and drop the document into the document
area. Its possible to create new folders and organize the documents. The well document area
should be used to store STATIC documents, such as assembly drawing, final well reports, tallies
etc. You can also add internet links into the document area, for dynamic documents.
The well documents will be available to all users.
© Completion Services
154
CSD User Guide
NOTE: You should attach all assembly drawing for the current well, as well as the handover
documentation.
1.10.3 Casing Cement
The casing cement interval should be registered if present. The cement shows both in Schematic
and Sketch.
© Completion Services
CSD USER MANUAL
155
NOTE: In Schematic mode, you can view the cement for the inner casings only. Go to the Sketch
mode to view the cement for all casings.
© Completion Services
156
CSD User Guide
Register casing cement
1. Select New.
2. Choose the cement type from the Casing/Liner Element Type drop down list.
3. Enter information about casing cement: MD Top / Bottom, Attached to casing / liner and
optionally Description.
4. Update the list.
© Completion Services
CSD USER MANUAL
157
Edit an existing row
Highlight one of the rows in the list. This will bring all the data concerning the row into the righthand side of the dialog box. Change whatever needs to be changed. The changes will be saved
when you push Update, OK or go to another tab.
Delete a row
Push the Delete button after highlighting a row in the list.
Input
Description
MD Top
Measured depth (MD) top of the casing cement
MD Bottom
Measured depth (MD) bottom of the casing cement
Max OD
N/A
ID
N/A
Drift ID
N/A
Date Installed
N/A
Part Number
N/A
Attach to casing/liner
Attach the casing cement to a casing/liner. Choose from the drop down
list. The drop down list will depend on info typed in Casing tab
Description
A short description about the casing cement (Optional)
1.10.4 Volume
It is also possible to do some volume estimations in CSD. The following volume calculations are
estimated:
© Completion Services
158
CSD User Guide
Topic
Description
Closed end
displacement
volume
The volume inside the string + the volume of the steel. To calculate this
volume, CSD use Nom OD of each string element
Volume Annulus Volume in annulus from hanger to the first packer. Volume is calculated using
casing ID and Nom OD of each string element
Net steel
displacement
volume
Net steel volume. Volume is calculated using Nom OD and Min ID on each
element. The volume is Total string displaced volume - Internal string volume
Volume to first
perforation
Works only for "simple" completions
Internal string
volume
Volume is calculated using Min ID for each element.
Volume to
specified depth
Works only for "simple" completions. This functionality is build to calculate
down to depth below the last element in a simple completion
Volume calculation will work for:
“Simple” completions as described below.
More complex completions where the perforations comes in space before other equipment.
The sketch shows a simple completion.
© Completion Services
CSD USER MANUAL
159
The volume down to the perforations is given by V 1 + V 2 - V 3
where V 1 is the Internal string volume, V 2 is the volume around the tailpipe and the volume in
the casing down to the perforations, and V 3 is the Net steel displaced volume from packer down
to the entry guide.
The same equation works for volumes to a specific depth. The only difference is that V 2 is
changed.
Volume calculations will only be accurate for simple completions.
Some cases might give errors in the calculation:
Lack of information (ID, OD).
Complex completions (inserted equipment, use of fixed depth, use of reamed section etc.).
Cases with no packer in the well.
Cases where the tubing hanger is positioned higher than the casing top.
1.10.5 Minimum Drift ID
Minimum Drift ID will find the minimum drift ID or ID to a specified depth. If a specific element in
the completion is selected, the Minimum Drift ID or ID down to the selected element is found. If
no element is chosen, the Minimum Drift ID for the complete completion is shown.
© Completion Services
160
CSD User Guide
Choose Data, Minimum Drift ID. Adjust Depth if needed. Press the ">>" button to calculate the
Minimum Drift ID.
1.10.6 Comment
In CSD there are several ways to enter a comment to an element / part in the completion string.
1. You can double-click on the Comment column in the Schematic window and write a comment.
This will look like this in the schematic window (see figure below):
NOTE: Remember that you have to choose to display the Comment column to see the comments
that has been entered. This is done in Option, Setup.
2. Highlight an element and in Properties dialog you can add a comment for the chosen part:
© Completion Services
CSD USER MANUAL
3. Righ click on the current part, choose Item Properties..., and add comment in the column
Comment:
© Completion Services
161
162
CSD User Guide
1.10.7 Copy to Image
CSD has also Copy to Image function, which allows the user to copy the main screen and use it in
document etc.
Choosing Edit, Copy to Image, copies the active page to the clipboard. This enables you to paste it
into other applications. The image is built in two formats: Metafile and bitmap. Choose the format
that gives the best result in the external application.
NOTE: This function copies current page the user is in. To copy sketch, go to the Sketch mode and
select this function. To copy schematic, go too the Schematic mode and select this function.
Tip! When pasting into Microsoft Office applications, you should choose “Edit, Paste Special,
Device independent bitmap” for the best result.
© Completion Services
CSD USER MANUAL
163
1.10.8 Save As PDF
CSD comes with a built in PDF printer, allowing you to create save the CSD well schematics as PDF
files.
Open a well Schematic in Schematic, Sketch or Well Path mode. Press the Save As PDF button in
the toolbar.
This will save the current window user is in as a pdf file. The sketch mode will be saved as the
sketch would appear in the print out of the well.
In the schematic window, this function will save the Schematic of the well including the report
boxes that has been checked off in the Print Layout toolbox.
© Completion Services
164
CSD User Guide
Tip! If the Print Layout toolbox is not visible in your CSD screen, go to View, Toolbars and Docking
Windows and select Print Layout.
1.10.9 Delete Completion
If you need to delete a schematic revision go to Database, Administration, Delete & Read Only...
Mark a well completion revision and press Delete. You can only delete completion modes, not the
whole node (I.e. 1.00). This has to be done by the System Administrator.
NOTE: You can only delete well completions from fields that you have write access to.
© Completion Services
CSD USER MANUAL
1.11
165
Administration
The System Administrator plays a key part in CSD, and has the responsibility to:
Define users and their access.
Keep the part database updated.
Keep the code tables updated.
Define new fields and wells.
Edit existing well names.
Define standard setup.
Assist users.
1.11.1 User Messages
The System Administrator can create user messages which will show when the application starts.
© Completion Services
166
CSD User Guide
The user can choose "Mark As Read" to hide it from application startup.
Tip! All messages are found in the CSD top menu; Options, Messages...
Create a new user message
To create a new user message, go to Database, Administration, Messages...
© Completion Services
CSD USER MANUAL
167
1. Select New.
2. Select Draft (for myself only).
3. Enter message title and message text. Note that the message text could also contain HTML and
pictures.
4. Enter the message expiry date (if any), or leave blank.
5. To publish; uncheck Draft (for myself only) and press Edit to select recipients.
Update an existing message
Highlight one of the rows in the list. Edit the message and press Update.
Delete a message
Push the Delete button after highlighting a row in the list.
1.11.2 Users
The System Administrator maintains the list of users and their access level.
Choose Database, Administration, Users. The User dialog box can have four tabs:
© Completion Services
168
CSD User Guide
Person
Field/Person
Well/Person
Person Rights
1.11.2.1 Person
Users and user roles
NOTE: You can use the Person tab to create new users, and to create user roles which could be
assigned to the users.
You have to be a System Administrator to be able to create, edit and delete users and user roles.
In Database, Administration, Users; Choose the Person tab.
© Completion Services
CSD USER MANUAL
169
1. Select New.
2. Enter info about the new user or user role.
3. Update the list.
Input
Description
User ID
Users ID.
Name
Users full name, or description of the user role.
Email
Users email (optional).
Comments
Additional comments regarding the user or user role (optional).
Password
(Set password for the user) NOTE: This should be left blank in most
cases, as CSD is commonly installed with auto log in functionality.
Expired date
Expiration date for user (optional). When exceeded, the user will no
longer have access to the system.
Role
Defining user roles could be handy in larger companies, to ease the
work when giving access to the different users. Persons can be arranged
into categories by assigning them to a role (one role only!). When a
user has been given a role, the user will have the same access level and
field access as defined in the role. I.e. user role:
WRITE_ACCES_NORWAY.
Show Roles Only
Shows only roles that already has been used in the dropdown. Uncheck
to view all Person / Roles.
Access Level
There are three types of access level:
1. Engineer:
Role for the common engineer. It contains read access to all fields by
default, and write access to one ore more fields could be entered in the
Field/Person tab.
2. Manager:
3. Systems Manager:
Full access to the system, including Code Tables, Parts and Symbols.
Show Expired Persons /
Roles
© Completion Services
The list will include the Persons / Roles which has expired. (Shows in
red font)
170
CSD User Guide
Summary
When giving users access to the system, the System Administrator has the following options:
1) Leave the "Role" dropdown blank and set the access lever to 1, 2, or 3 (Fig1). Then go to the
Field/Person tab and enter that users write access fields (Fig2).
NOTE: You don't have to enter read access to a field. This is enabled by default.
2) Assign the user to a predefined role, found in the "Role" drop down (Fig3). The user will then
inherit the same access as defined in the user role.
Fig1
Fig2
© Completion Services
CSD USER MANUAL
Fig3
1.11.2.2 Field/Person
Choose the Field/Person tab.
© Completion Services
171
172
CSD User Guide
1. Choose person or role that you are going to give access to (Choose in the drop down menu
Person/Role).
2. Register new access by pressing New.
3. Find the field and choose what rights to the fields you want to give.
4. Update the list.
The list to the left shows which fields the person/role has access to, and what rights that has been
given (Read/Write).
1.11.2.3 Well/Person
As a System Administrator you can restrict access to wells. This means that you can give a user
access to enter information for one or more wells in a given field.
1. Highlight a person in the Person dialog.
© Completion Services
CSD USER MANUAL
173
2. Make sure that the "Role" drop down is blank.
3. Got to the Well/Person tab and select New.
4. Choose the Field, Well and Rights for that well.
5. Update the list.
NOTE: This functionality might be disabled in your company.
1.11.2.4 Person Rights
Gives a summary of the wells and the rights of a person/role.
1.11.3 Symbols
NOTE: CSD comes with a default symbol library found in Toolbox, covering most of the completion
equipment types needed to create new parts. You would very rarely have to enter new symbols,
but if so it's recommended that you contact the CSD team at http://www.csd.as/contact-us
© Completion Services
174
CSD User Guide
Go to Database and choose Symbols...
The symbol dialog box is divided in two main parts:
1. Symbol: Symbols that are to be used in the schematics.
2. Fish: Symbols used with Completion Attributes, Fish.
1.11.3.1 Symbol
In CSD you can have several levels on the symbols.
1. If you want to add a new symbol on the main level, you choose Symbol before pressing New. If
you want to add a new symbol under an existing one, you choose that one before pressing
© Completion Services
CSD USER MANUAL
175
New.
2. Press New
3. As you see above there are several pieces of information that must be entered for a symbol:
Topic
Description
Symbol Name
Give the symbol a name.
Expansion factor
The expansion factor in the Y-direction for the symbol. This is used to
emphasize important symbols like packers, nipples and TRSCSSV. Only
integers can be used. The number 1 is equivalent to one row in the
schematic.
Description
Short description of the symbol.
Show in Sketch
Tells if this symbol is defined as an “important symbol” that is to be shown
in Sketch mode (the simplified schematics). Users can override this setting
in Sketch mode, choosing it in the Toolbox.
Detached (from part) Tells if this symbol can stand on its own feet – so that the elements using
this symbol is not connected to the equipment database.
Symbol type
Choose symbol type. The different symbol types can have different
properties.
4. Press Update
5. Add the symbol image by pressing Load...
6. Press Update
Delete Symbol
To delete a symbol; mark a symbol and press Delete. NOTE: You are not allowed to delete a
symbol that is used by a database part.
A standard symbol is designed according to the following template using a 10% transparent frame
at both sides:
© Completion Services
176
CSD User Guide
With a standard symbol we understand Pup Joint. All symbols must contain a transparent frame.
Arranging symbols in groups
You can arrange the symbols in logical groups using Drag and Drop. If you want Bull plug to be a
sub-level to Anchor, you select the Bull plug, press and hold the right mouse button, drag the
symbol and drop it on Anchor.
1.11.3.2 Symbol - Fish
You activate the Fish tab when you click Fish in the upper left corner in the Symbol dialog box.
Registering Fish is done in the same way as symbols except that you cannot enter Symbol type
and Exp. Factor (Y) for a Fish.
It is possible to categorize the Fishes, even though it is not recommendable.
1.11.3.3 Symbol - Texture
Textures are used to display mineral zones, sea and seabed in the well path. You work with
textures on the Texture tab located in the upper left corner of the Symbol dialog box. Registering
textures is done in the same way as symbols except that you cannot enter Symbol type and Exp.
Factor (Y) for textures.
1.11.4 Code Tables
Go to Database, Code Tables.
CSD has a set of code tables that the System Administrator must maintain. This values will show in
the different drop down menues in CSD.
Topic
Description
Country
All the countries, country flags and corresponding country codes comes with the
system as default
Operator
Register operators and the corresponding operator logo
Field
Registering fields
Well
Registering well names. Ordinary users cannot define well names themselves, so
this becomes one of the most important code table to maintain. When a new well
is defined, CSD automatically defines a well bore named Wellbore1
Rig
Registering rigs/platforms and used in General Data
Rig Datum
Assign one or more datum references to a rig
© Completion Services
CSD USER MANUAL
177
Topic
Description
Status
Registering different types of status, like Oil Producer, Water Injector and Gas
Producer. Used in General Data
Manufacturer Registering manufactures used in Part
Supplier
Registering suppliers used in Part
Threads
Registering threads used in Part, Casing and for thread-checks
Matl. Spec.
Registering material specifications (grade)
Threads OD
Top
Registering nominal size of Threads Top. Used in Part and for scaling of XO symbol
Threads OD
Bottom
Registering nominal size of Threads Bottom. Used in Part and for scaling of XO
symbol
Well Head
Registering X-mas tree, surface well head and subsea well head. Used in X-mas tree
Formation
Registering geological formations and used in Formation and in Perforation
Perforation
Gun
Registering different types of perforation guns and used in Perforation
Control Line
Type
Registering different types of control lines and used in Control Line
Clamp type
Registering different types of clamps. Used in Item Properties..., Clamps/Bandits
Bandits type Registering different types of bandits. Used to define Bandit in Item Properties... ,
Clamp/Bandit
Cement Plug Register different types of cement plugs. Used in Cement Plug
type
Casing
Register different types of casing attributes, such as casing cement. Used in Casing
Attribute Type Attribute
Check List
Register different check list items. NOTE: Should not be edited! CS personnel only
Report
Template
Edit or change default report templates. NOTE: Should not be edited! CS personnel
only
Dynamic
Attribute
Manage dynamic attributes.
© Completion Services
178
CSD User Guide
1.11.4.1 Update Code Table
All of the code tables follows a standard setup and how to update this.
Here; Material Specification is used as an example:
NOTE: By not pressing New, you risk to overwrite an existing Matl. Spec from the list.
1. Select New.
2. Write the Matl. Spec. name/code with its description.
3. Press Update.
Tip! If you press New by a mistake, just press Close and the blank line will not be saved.
1.11.4.2 Merge Code Table items
If you want to clean up duplicate or similar values in a Code Table column, you should use the
Merge functionality.
© Completion Services
CSD USER MANUAL
179
NOTE: In most cases CSD will not allow you to delete any entries in the Code tables. You should
use the merge functionality instead, to clean up the list.
1. Highlight the item you want to merge into another item.
2. Press Merge From.
© Completion Services
180
CSD User Guide
3. Chose the item you want to merge into.
4. Press Merge To.
5. Press Yes to proceed with the merge, or No to cancel.
6. Wait a few seconds for the merge to succeed, then press Close.
The two instances have now been merged in to one.
© Completion Services
CSD USER MANUAL
181
1.11.4.3 Field - Code Tables
All the fields in CSD have to be predefined by a System Administrator, before you can create an
underlying well.
Create a new field
In the CSD top menu; choose Database, Code Tables, Field.
© Completion Services
182
CSD User Guide
1. Choose the operator from the Operator dropdown.
2. Press New.
3. Type in the field name in the Field input field.
4. Choose country from the Country dropdown.
5. Choose if the field should be visible or not in CSD and Cdim (CSD Web). This is done in the
Visible pane. Note that this list can vary in your company.
6. Press Update.
NOTE: The Well button takes you to the Code Tables, Well dialog.
© Completion Services
CSD USER MANUAL
183
Edit an existing field
Highlight one field in the list. Edit the information and press Update.
Delete a field
Push the Delete button after highlighting a field in the list.
1.11.4.4 Well - Code Tables
All the wells in CSD have to be predefined by a System Administrator, before you can save a
new completion drawing on it.
If you cannot find the correct field in the dropdown list, or if it is a new field, this must be
created first.
Create a new well
In the CSD top menu; choose Database, Code Tables, Well.
© Completion Services
184
CSD User Guide
1. Choose the correct field from the Field dropdown.
2. Press New.
3. Type in the well name in the Well input field.
4. Press Update.
The Wellbore button opens the Code Tables, Wellbore dialog.
The Documents button opens the Well Document folder.
© Completion Services
CSD USER MANUAL
185
Input
Description
Latitude /
Enter position coordinates. Format: DDD° MM' SS.S" (Degrees, Minutes and
Seconds) + compass direction.
I.e: 32° 18' 23.1" N 122° 36' 52.5" W. This will not show graphically in CSD.
Longitude
(Optional)
Expired Date
You may enter an expired date, to prevent the field to show in CSD.
(Optional)
Edit an existing well
Highlight one well in the list. Edit the information and press Update.
Delete a well
Push the Delete button after highlighting a row in the list.
NOTE: A wellbore is created when you save a new completion schematic on this well.
1.11.4.5 Wellbore - Code Tables
This dialog shows all the wellbores connected to one well, and all the revisions of the well
completion, as well as Modified By, and Modified Date.
© Completion Services
186
CSD User Guide
You can edit the wellbore name, by changing the name in the Wellbore input field, then press
Update.
The Delete button enables you to delete a wellbore. You should be careful deleting a wellbore,
and be absolutely sure before doing so.
NOTE: You are not able to create a wellbore using this dialog, as wellbores are created when you
first save a well schematic to a new well.
© Completion Services
CSD USER MANUAL
187
1.11.4.6 Dynamic Attributes
How to add dynamic attributes
A. For mandatory values
1. Open CSD, (you do not need to open any well), and go to Database, Code Tables. Then proceed
to Dynamic Attribute…
2. Let us take an example. We want to add Nominal OD as a dynamic attribute to the Latch symbol,
meaning that all Latch equipment can then register Nominal OD as a part property.
Press New, and name the dynamic attribute "Nominal OD", as shown in Figure 1. Select
Inserted Equipment, then Latch, under Symbols, as shown in Figure 2.
3. Furthermore, we have predefined and given options for the nominal OD; 1”, 1 ½” and 1 ¾”. Thus
these are mandatory. Select Enabled and Mandatory. Thus, these 3 options can ONLY be
modified and selected when creating a part in CSD. In other words, existing parts cannot be
modified. Add the 3 options under Valid Values by clicking on the folder icon. Furthermore,
select String in Data Type, for drop down choices. Leave Unit Measure Quantity blank. All is
shown in Figure 3.
4. Finally, remember to click Update before proceeding to Close.
© Completion Services
188
CSD User Guide
Figure 1. Here we have added the dynamic attribute.
© Completion Services
CSD USER MANUAL
Figure 2. Here we select the corresponding symbol.
Figure 3. The final step.
© Completion Services
189
190
CSD User Guide
After performing the steps from section A, this is how the Properties toolbox should look like when using an existing part, in this
case a Latch.
B. For non-mandatory values
In this section we will use Gas Lift Valve as an example. We want to add orifice type as a dynamic
attribute to all Gas Lift Valves.
1. Repeat 1) and 2) (keeping in mind that we are regarding Gas Lift Valves)
2. We want to add Orifice Type as a dynamic attribute. This has default values as followed
Orifice and Venturi. Select Enabled and Is Default Value Only. Thus, these 3 options can be
modified and selected when creating and using an existing part. Add the 2 options under
Valid Values, by clicking the folder icon. Furthermore; select String under Data type, for
drop down choices. Leave Unit Measure Quantity blank. All is shown in Figure 4.
3. Since these are default values and not mandatory, it is possible to add a third option as
© Completion Services
CSD USER MANUAL
191
seen in figure 4. It is not always the case that orifice types would be available for all gas
lift valves. Choose this option too for a similar matter.
4. Finally, remember to click Update before proceeding to Close.
Figure 4. For default values.
© Completion Services
192
CSD User Guide
C. For numeric values
1. Repeat 1) and 2) as above. This is still regarding Gas Lift Valves.
2. We want to add Orifice size this time. This is a number with diameter as unit. Select
Enabled and Is Default Value Only. Thus, the numeric values can be modified and selected
when creating and using an existing part. Add the values under Valid Values by clicking on
the folder icon. Furthermore; select Double under Data type, for drop down choices.
Proceed to select Diameter under Under measure Quantity. All Is shown under figure 5.
3. Finally, remember to click Update before proceeding to Close.
Figure 5. For numeric values.
© Completion Services
CSD USER MANUAL
193
Here we see a mixture of default values with a drop down menu, mandatory and numeric values. An existing Gas lift Valve is used as
an example.
1.11.5 Log Database
The Log database is used to get an overview over which people who have been modified and
worked on the different well schematics. You can find information about which fields and which
wells specific engineers have been involved in. This is an easy way for managers to have control
over the work done by engineers on the different well schematics.
© Completion Services
194
CSD User Guide
You’ll find the Log in CSD under Options, Log. If you want to search after work done by a specific
engineer you go further to ‘Advanced...’ as you can see in the figure above. As you can see there
are a lot of search parameters you can use to find the right information.
1.11.6 File Recovery - XML import
If you for some reason want to recover a previous version of a completion drawing, this is also
done in the Log dialog.
In the Advanced mode; select person and choose Log Type= Completion Save Select the time-span
and press Search Log. Locate the well completion / mode that you want to recover. Then double
click on the row and save the XML file on your PC. Open a blank well completion, or one you want
to overwrite. Go to Data, Import (XML)… Browse to the XML file and press OK.
Restore a deleted wellbore - step by step
NOTE: You must have the System Administrator role in CSD to be able to do this, also the wellbore
must have been saved at one time to be restored from the database.
Before you start, make sure that you have the import XML file menu item enabled. Press the
System Settings button showed below, and set the HasFileXMLMenues option to Yes. Then restart
CSD.
© Completion Services
CSD USER MANUAL
TIP: If you don’t see the Admin toolbar in at the top of CSD, you should enable it from View,
Toolbars and Docking Windows, Admin.
© Completion Services
195
196
CSD User Guide
Choose Options, Log… from the CSD top menu, to open the Completion Log dialog. Press the
Advanced button at the lower right to open the extended log dialog.
Choose Log type: "Completion – Save" or "Completion - Save As". Set the search criteria From & To
date and press Search log.
© Completion Services
CSD USER MANUAL
197
Double click on the latest saved revision found in the list (the one you want to restore), and save
it on your PC (XML file). Then close the Log dialogs. In the CSD main screen; choose File, New for a
blank page. In the top menu, choose Data, Import (XML)… and browse to the XML file you
previously saved. Press Open, than OK on the nest dialog. Then save the restored completion to
the correct well in CSD.
NOTE: In case of importing multilateral wells, choose the desired wellbore in the Wellbore(s)
drop down, before pressing OK.
1.11.7 Delete & Read Only
If you need to delete a schematic revision go to Database, Administration, Delete & Read Only...
Mark the item you want to delete; one revision (I.e. Actual) or the whole node (I.e. 1.00), and
press Delete.
NOTE: If you delete a node such as 1.00 or 1.01, all underlying completion schematics will also be
deleted.
© Completion Services
198
CSD User Guide
© Completion Services