1
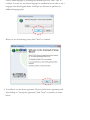
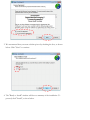
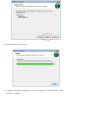
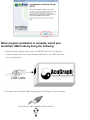
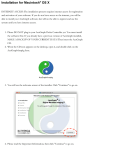
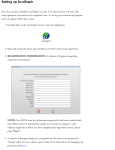
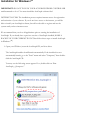
Installation for Windows 7®
IMPORTANT: DO NOT PLUG IN YOUR ACUGRAPH PROBE CONTROLLER
until instructed to do so! You must install the AcuGraph software first!
INTERNET ACCESS: The installation process requires internet access for registration
and activation of your software. If you do not have access to the internet, you will be
able to install your AcuGraph software, but will not be able to register and use the
system until you have internet access.
We recommend that you close all applications prior to starting the installation of
AcuGraph. If you already have a previous version of AcuGraph installed, MAKE A
BACKUP OF YOUR CURRENT DATA! Then follow these steps to install AcuGraph
in Windows 7®:
1. Open your CD drive, insert the AcuGraph CD, and close drive.
The AcuGraph installer should launch automatically. If the installer does not
automatically launch, go to the "Start" menu and select "Computer," then doubleclick the AcuGraph CD.
You may see the following screen appear. If so, double click on “Run
AcuGraph_4_Setup.exe.”
Choose which language to use during the installation process. Click "OK" to
continue. You may use any chosen language for installation, but in order to use a
language other than English within AcuGraph you will need to purchase an
additional language pack.
When you see the following screen, click "Next" to continue"
2. You will now see the license agreement. Please read the license agreement, and
after clicking on "I accept the agreement," click "Next" to continue, as shown
below:
3. We recommend that you create a desktop icon by checking the box, as shown
below. Click "Next" to continue.
4. The "Ready to Install" window will show a summary of the installation. To
proceed, click "Install", as show below:
5. The installation will proceed.
6. A window will appear notifying you of the completion of the installation. Click
"Finish" to continue.
When program installation is complete, install your
AcuGraph USB Probe by doing the following:
1. Attach the black and gray probe leads to the RIGHT side of your AcuGraph
Probe Controller case. Next, attach the black USB cable to the LEFT side of the
case, as shown below:
2. The other end of the black USB cable plugs into the USB port on your computer:
Your USB port will be labeled with this symbol:
NOTE: The USB cable ends are indexed to only insert one way. Do not force the
connection. If you are experiencing difficulty inserting the USB plug, please make
sure it is in the proper orientation. Normally, the molded USB symbol is facing
up.
3. When you have plugged in your AcuGraph Probe Controller, a small window will
appear informing you that the system has found new hardware and is installing
drivers. When driver installation is complete, you are ready to use your AcuGraph.
CONGRATULATIONS!
You are now ready to set up your AcuGraph software. Please proceed to
"Setting Up AcuGraph."