1
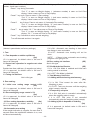
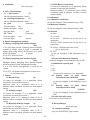
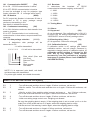
TABLE OF CONTENTS PREPERATION FOR OPERATION ......................................................................... - 1 - ASSEMBLY WARNINGS ......................................................................................... - 1 - GENERAL WARNINGS............................................................................................ - 4 - COMMENTS ON VERIFICATION ............................................................................ - 4 - DISPLAY AND KEYBOARD .................................................................................... - 8 - FIRST OPERATION ................................................................................................. - 9 - WEIGHING THE PRODUCT .................................................................................... - 9 - WEIGHING BY PRICING ......................................................................................... - 9 - REGISTERING THE UNIT PRICE LOOKUP KEYS ...................................................................................................................... - 10 - USAGE OF EXTRA PRICE LOOKUPS (PLU) ....................................................... - 10 - WEIGHING WITH TARE......................................................................................... - 10 - TOTAL MEMORY TRANSACTIONS ..................................................................... - 11 - DISPLAY BACKLIGHT .......................................................................................... - 13 - RS232 INTERFACE................................................................................................ - 13 - SETTINGS .............................................................................................................. - 13 - 1. TARE ................................................................................................ - 14 - 2. ZERO SETTING: ................................................................................. - 14 - 3. TOTAL MEMORY, UNIT PRICE: ........................................................... - 14 - 4. LIMITATION: ...................................................................................... - 15 - 5. LCD / TIME SETTINGS: ...................................................................... - 15 - 6. POWER MANAGEMENT SETTINGS: ...................................................... - 15 - 7. FILTERS: .......................................................................................... - 15 - 8. CALIBRATION: ................................................................................... - 15 - 9. RELAY SETTINGS: ............................................................................. - 15 - 10. INTERFACE SETTINGS:..................................................................... - 15 - 11. TESTING MENU: .............................................................................. - 16 - 12. OTHERS: ........................................................................................ - 16 - THINGS TO DO BEFORE CALLING THE SERVICE ................................................................................................................ - 16 - TECHNICAL SPECIFICATIONS ............................................................................ - 18 - LIST OF AUTHORIZED SERVICES ...................................................................... - 18 - MKULMEB_EN-Rev.No:15 Rev.Date:25.01.2013 PREPERATION FOR OPERATION After removing scale from its package, installation could be accomplished by following instructions given in “ASSEMBLY WARNINGS” part. In models using post part, after setting the post to desired angle, screw the connecting screw to stabilize it. Place the scale on a horizontal stable base. Avoid disturbing environmental conditions such as shocks, vibrations and air currents. For setting the scale parallel to the base just turn the adjustable feet in order to stable the spirit level. (The bubble of the spirit level must be within the indicating circle) Attach the adaptor to an electric outlet that has ground (220V), and connect it to adaptor input. There is an on/off key near the adaptor input. You can operate scale from this key. NOTE: If scale has a rechargeable battery (sealed lead type), it should be charged at least 8 hour before first operation. NOTE: There are protecting bands on the back display and post display. Taking out these bands make clear seeing the display. There may be white or blue band to protect stainless steel part of the scale. It should be taken off before using the scale. ASSEMBLY WARNINGS EGE-M AND EGE-LED HOLDING WIRE: - + -+ + EGE-M (ALKALINE BATTERY ATTACHMENT): WARNING: WHILE D SIZE BATTERY IS ATTACHED, DO NOT CONNECT ADAPTOR! If D size alkaline battery will be attached, unplug battery connector and remove rechargeable sealed lead type battery. Attach D size battery in right electrical poles. (See figure). Place (be careful to the direction) cover parallel to the base (See figure) NOTE: D size battery cannot use on dual battery production -1- ASSEMBLY OF EGEB, MEB AND TEB SCALES: Connect post to the bottom chassis with metric 10x25 imbus bolts. Attach the shield with 10x25 hexagon bolts. Attach indicator to the post like above. Do not remove after looked up. To remove indicator from post, remove two screws near the post connector. -2- -3- GENERAL WARNINGS In a failure case, behave according to the part “THINGS TO DO BEFORE CALLING TO SERVICE”. Before cleaning, connection between scale and network must be cut off. Remove the plug to break of the electricity circuit before starting cleaning the scale. Then clean the scale with a dry or lightly detergent dampened cloth. Do not use solvents such as gasoline, benzene, thinner, alcohol and hard cleaning substances. Plug for electricity connection after being sure that the scale is completely dried. When it is necessary to transport, carry the scale (for removable plate scales) without its weighing plate to protect it from strokes. It will reduce the risk of being damaged to carry the scale with its original package and Styrofoam. Obey the transporting rules on package, during transportation. Do not place more product than scale’s maximum capacity (maximum value written on data plate). Measurement component could be damaged. Attach the adaptor to an electric outlet that has ground. If you are not sure that outlet has ground, ask it to an electrician. Even if there is rechargeable sealed lead type battery in scale, use the scale with its adaptor as possible as you can. Place adaptor cable like it won’t be damaged (somewhere no one would step on it, or nothing could crush to it) and place it like it won’t move as it is possible. Do not pull the adaptor from its cable when you remove it from outlet or scale. Remove it from outlet with holding adaptor itself, and remove it from scale with holding the outlet on scale. Do not cover scale with nylon or any cloth like it. It must not touch anywhere except its legs. Weight, unit price and price displays should place as customer could see them easily in direct sales to public. If there is one display it should be placed as both customer and user could see it easily. x NOTE: Weighing instruments which got marking “Not to be used for direct sale to the public” should not use for direct sale to the public. In models with rechargeable battery, period of sealed lead type battery life can be change in large ranges according to usage of conditions. Periods explained in brochures are the longest periods of battery life For instance, if a scale with LCD display Works for 8-10 hours in a day without using its display backlight. It can be used, without charging, for weeks. On the other hand if it can be used with display backlight it should be charged in every 2-3, even every day. If you cancel a flashing point in a scale with LED display (in a scale with LCD display “------” is shown) and just use the weight display, battery life becomes shorter about 3-4 times. Battery should be replaced in every 2 years for models with sealed lead type rechargeable battery. Warranty does not applied to instrument that any of its security stickers or data plates were removed or damaged. COMMENTS ON VERIFICATION Do not take this section into consideration, if the weighing instrument does not bear “green M” sticker. Measuring instruments are reverified according to the legal requirements applicable in the individual Member States. See data plate for the year (near the CE marking) the measuring instrument is installed and put into service. This date authoritative in two years but Period of circulation can be changed in your country. End of period of circulation you must go to relevant ministry with your machine. If the instrument connected to additional equipment, the “red M” sticker will be affixed to the additional equipment, thus permitting it to be put into service and trade with the exception of direct sales to the public. After the periodic or repairs, for inspection and sealing process authorized should take empty counter "Service Tag" from your services. Then, with this label should go to inspection and should be determined. Details about the inspection process can be found on the website from www.temterazi.com Important stickers that permitting the instrument to be put into service and used in trade are; x Data plate with “green M” sticker x Security sticker(s) -4- If modifications of any kind are made to stickers that given above after the weighing instrument being put into service, the competent Weights and Measures Authorities must be notified. Detail Security of Seals: The count of event counter is displayed during start-up for two seconds and is identified as C XXXX where XXXX is the count. This count must be the same with inscribed count of event counter on a label is placed near the data plate. If this two numbers are not same,it means that the seal breaks down. Weighing Scale; Count of event counter that displayed during start-up Event Counter Count of event counter that displayed during start-up Event Counter Indicators; o The event counter is incremented each time the calibration or any metrological configuration parameters are changed. The security of weighing instrument will be broken. In this case or any damage on event counter sticker or data plate, weighing instrument has verification done again. The responsibility of using weighing instrument with out verification belongs to user. o NOTE: Calibration and Metrological configurations are secured with a special password. Therefore these settings can not changed mistakenly. The increasing of event counter is an argument of consciously arrangement The responsibility of using weighing instrument in this situation belongs to user. Places of Verification Stickers: o There must be a security sticker with TEM logo(Hologram) on data plate(Figure 3) Data plate of weighing instrument -5- Data Plate of weighing instrument with two load cell receptor Figure 3 o There must be a security sticker with TEM logo(Hologram) on Event Counter Sticker. On indicators the load cell serial number does not exists on Event Counter Sticker. Weigh Instrument Indicator Event Service Event Event Counter Sticker Counter Sticker Counter o In the weighing instrument, there must be an security sticker with TEM Logo(Hologram) to protect measurement components. If there is platform connection to indicator; Figure 5 o Load cell connector bears the serial number(B) of weighing instrument on its identification label(A). These serial numbers must be same. Figure 6 o Load receptor bears the serial number of the weighing instrument on its identification label. -6- . o If junction box is used for load cell connections, there must be security sticker to prevent from any arrangement on it. This security sticker do not removed or damaged. Data Plate: CE mark, the sign attached to the EC type approval certificate number and the last of two digits of the year. Green M has verification’s stciker Max Largest capacity Min Smallest capacity e= Verification measure interval İndikator Model Plate: Platform İdentifier Sticker: Seri No: Model: M 1 T 2 -B -Y T C -R A P EMNøYET ùERøDø Security Sticker: TEM Logos Security Hologram 11 12 10 1 9 200- 2 8 3 7 4 6 5 11 12 10 1 9 AY 2 8 3 7 4 6 5 Söküldüğü taktirde cihaz kanuni olarak kullanÕlamaz ve garanti kapsamÕ dÕşÕnda kalÕr. Calibration Event Sticker : -7- first Service Event Counter DISPLAY AND KEYBOARD Zero Indicator O : Shows that the weighing plate is empty. Before weighing a product, be sure that the weighing plate is empty and press “O” key for zero setting if the O indicator is off. Otherwise error may occur. Equilibrium Indicator D : Shows that the load on the weighing plate is well stabled. It is off while placing or removing the product. If D indicator goes off, the weight shown on the display may be wrong. Therefore, in order to read the weight, wait until D symbol appears after placing the product on the weighing plate. NET Indicator NET: It is ON, when there is a tare. Actual weight value is NET weight value. Tare Indicator T : Shows that the tare effects the weighing. It flashes when the tare is not fixed. It is continuously on when the tare is fixed. (Only for scales with LCD display.) Total Memory Indicator M: It flashes when the total memory is containing a value. It remains continuously on while the content of the total memory is being displayed. Battery Indicator: R : Shows that the battery is used. If Battery indicator is ON, scale is powered by the battery. If it flashes, it is necessary to charge or change the battery in the shortest time. Weighting instrument that designed with using LCD type display modules has four additional battery indicators for indicating the fullness of the battery and also they have a sliding battery charging animation mode, which is only activated when the adapter connection is established. While the adapter connection is not established, the battery frame around the battery indicators appears for indicating the battery is being used. Just before the battery becomes empty, the battery frame flashes. W1 and W2 Indicator: Shows actual weighing range (only for multiple range scales). See max, min, e values of each range on data plates. Number Keys : Used to enter unit price or other variables. C Key : Used for zero setting of unit price or other variables. T Key : Used for accepting the load as tare. O Key : Used for zero setting the scale when the weighing plate is empty. F Key : Used for reaching setting menu and some functions similar to settings. E Key : Used for adding to memory without weighing. A Key : Fixes the unit price. Q Key : Used for taking printout. (Only for PC or printer options) W Key : Used for adding total memory. -8- M/X Key : Used for displaying and deleting total memory. Ɓ Key : Toggles backlight between ON, OFF, ON-OFF (only for LCD displays) P Key : Used for reaching to price lookup table by a single key. P1, P2... Keys : Used for reaching price lookup table by a single key. U Key : Used for reaching to programs that are written bottom of the price lookup keys. FIRST OPERATION When scale is turn on all segments and symbols are seen. Numbers counting backwards are seen on display about 10 seconds. After that, maximum capacity and division is seen for a while and scale gets ready to weigh. Value of zero is seen on display. O and D indicators are ON. Nothing should be placed on weighing plate until it gets ready for weighing operation. If there is any weight on weighing plate or there is no weighing plate on scale, ER 5 error message might be seen on display. Be sure that there is no weight on the weighing plate before calling service. WEIGHING THE PRODUCT Place the product on the weighing plate. Wait until the display. D indicator is on. Weight of the product is seen on The value “0.000” should appear on the display and also the D and O indicator should be on when the weighing plate is empty. If the value on the display is not zero(or D indicator is not on), press O for zero setting. After establishing zero and balance, proceed to the weighing process. WARNING: Absolutely not place any load more than maximum capacity of scale. (“Max” value on data plate) Product should be placed on weighing plate by hand. Leaving the product from high or throwing it on to the weighing plate (even the weight is low) scale may be damaged. WEIGHING BY PRICING If unit price is entered while weighing, price to pay is computed automatically. It is possible to enter unit price in 2 different ways.: o “0”, “1” … “9” keys (number keys) o P1,…, P30” price lookup keys. Entered price should be seen on unit price display, price to pay should be seen on price to pay display. Pres U (shift) key to reach the programs placed at the bottom (programs between P16-P30). NOTE: Unit price can be entered as integer or fractional number. Example: If 75.9 is wanted to see as unit price. 1) Press “7” key. 2) Press “5” key. 3) Press “.” key. 4) Press ”9” key. -9- NOTE: Unit price is cleared after product has been weighed. (When the weighing plate is empty). To prevent this, press “SABİT” key after entering unit price. To cancel automatic clearing of unit price continuously, turn OFF “Temporary Unit Price” (Set 3-2) specification from SEETINGS. REGISTERING THE UNIT PRICE LOOKUP KEYS Press one of P1,…, P30 keys that you want to save the unit price, at least 3 seconds. A long “Beep” signal is heard. Number of price lookup key you enter is seen on unit price display for a while. Firstly press Ukey to reach the programs placed to the bottom (programs between P16-P30). USAGE OF EXTRA PRICE LOOKUPS (PLU) There are 250 price lookups. It is possible to reach first 30 programs directly by other price lookup tables: o P1,…,P30 keys. To reach Press P key. ” PLU “is seen on price display. o Enter program number. (For instance; press “7”, “1” keys for registering the program number) Unit price is saved in program 71 is seen on the unit price display. First, “PLU display. 71 ” should be seen then price to pay should be seen on price Registering the unit price on program keys: o Enter price by using number keys. This price is seen on unit price display. o Press P key at least 3 seconds. Flashing “PLU” is seen on price to pay display. o Enter program number (for instance, press “7”, “1” keys one by one for program numbered 71) After 3 seconds long “Beep” signal is going to be heard. Saved program’s number is seen on price to pay display for a while. WEIGHING WITH TARE o Place the tare weight on the weighing plate. Wait until the D indicator is on. Weight of tare can be read from weight display. o Press T key. “dara” is seen on display for a second then value of “0.000”is seen on display.. NET indicator is ON. T symbol is flashing (only for LCD display). Tare has been weighted. o Place the product on weighing plate. Wait until D indicator is on. Product’s net weight is seen on display screen. o Make empty the weighing plate. Wait until the automatically. D indicator is on. NET and T indicators are off. Tare is cancelled Preset Tare: o Tare value can be entered by using numerical keypad. o Press E key. “EL” message is seen on unit price display. Weight display is empty. o Press T key. - 10 - “EL” message is seen on unit price display. Zero value is seen on Weight display. (for 30 kg 2x3000 zero value is “0.000”) o Weight value can be entered by using numerical keys “0”,”1”,…”9”. If 1 kg Tare value will be set for 30 kg 2x3000 weighing instrument, “1.000” must be entered. o Press F key to fix the tare value. In this case tare will not be cancelled when weighing plate is empty. NOTE: Press T key 2 times for blocking the cancellation of tare. In this case, word “sabit” is seen on weight display for a while and tare symbol (only for scale with LCD display) begins to be continuously ON. To cancel tare, press T key when the weighing plate is empty. Models with T symbol (for LCD display); x Never ON : There is no tare x FLASHING :When weighing plate is empty, tare will be cancelled automatically. x Always ON :Tare is fixed. Press T key to cancel it when weighing plate is empty. TOTAL MEMORY TRANSACTIONS ATTENTION: If weighing instrument is EGE-M or EGE-LED and there is no printer, not to be used for Total Memory Transactions. Total memory is used for adding weight and price of products to previous calculated weight and price. For this transaction there are two keys W, M X on keyboard. Adding to Total Memory: o Place the product; to add to memory, on the weighing plate. Wait until D indicator turns ON. o Enter the unit price of product. o Press W key. Weight and price to pay are added to memory. Related M indicator flashes. NOTE: During the zero, negatif and Full weight indications and also when the total memory will not be operated. D indicator is off; adding to NOTE: After an adding to total memory transaction, new adding transactions will not be allowed until weighing plate is empty and “0.000” value is seen on weight display or new unit price value is entered. ATTENTION: If weighing instrument is EGE-M or EGE-LED and there is no printer, not to be used for Total Memory Transactions. NOTE: It is possible to see the total as soon as pressing W key. For this transaction turns off “Adding without Showing Total” (Set3-1) specification from SETTINGS. In this case, total would be seen until the product is taken from weighing plate. NOTE: Turn off “Temporary Unit Price” (Set3-2) specification from SETTINGS part to cancel zero setting of unit price continuously. NOTE: Maximum 80 record is allowed for total memory transaction. - 11 - Adding Price to Memory without Weight: If a product that has no relation between its unit price and weight (ex: bread) is required to be added to the total memory: o Press E key. “EL” message is seen on unit price display. Weight display is empty. o Enter the price you want to add by using number keys. Price you entered is seen on price to pay display. o Press W key. Number seen on price to pay display is added to total memory. Total weight does not change. Seeing and Erasing Total: o Press M X key. Total weight is seen on weight display, price is seen on price to pay display, “TPA” and the number of products added to memory is seen on unit price display. o Press M X key to delete the total memory or press F to return to normal weighing mode. Total indicator is seen as “M”. If total indicator is; off memory is empty. flashing memory has value. on memory value is seen. NOTE: It is possible to see the details of weighted products that are saved to total memory by pressing W key. Detailed explanation can be found in “Seeing the Memory in Details” part. ATTENTION: If weighing instrument is EGE-M or EGE-LED and there is no printer, not to be used for Total Memory Transactions. Seeing the Memory in Details: o Press M X key. Total weight is seen on weight display, price is seen on price to pay display, “TPA” and the number of products added to total memory is seen on unit price display. o Press W key. Weight and price that are saved first are seen on weight and price to pay display, “TPA” message is seen on unit price display. o When W key is pressed transactions are seen on display, respectively. o Press M X key. Total weight is seen on weight display, price is seen on price to pay display, “TPA” and the number of products added to total memory is seen on unit price display. o Press M X key to erase memory or press F to return without erasing. - 12 - DISPLAY BACKLIGHT Press ☼ key to toggle between backlight ON, OFF and ON_OFF modes. To change backlight mode : o Press ☼ key. For a second, backlight’s mode is seen on display. bL On : Backlight ON Backlight is continuously ON. bL OFF : Backlight OFF. Backlight is continuously OFF. bLOnFF : Backlight ON_OFF . Backlight is ON while weighing or pressing a key. Backlight is OFF when there is no weight on the weighing plate. When scale is turned on, backlight mode is OFF. If there will be a flashing point on display instead of weight value, backlight will be turned off automatically. RS232 INTERFACE RS232 connection and related settings for wieghing instrument with RS232 output are exists in PCdemohelp_tr.pdf in PCDemo folder in CD which is given with weighing insturment. NOTE: F key is use to send data to computer which is EGE series SETTINGS o Pres F key during 3 seconds to enter settings menu. “Set” and “Basis Menu Number” is seen on Weight display, and “Sub Menu Number” is seen on Unit Price display. Value is seen on Price to Pay display. o Press F key to pass to following menu. o Press O key to pass to following sub menu. To change the type of On/Off values: x Press T key. To change the type of number values: o x Number keys should be used to change x Press F key to save the number. Press F key for 3 seconds to return normal weighing. NOTE: After exiting from Setting menu, scale should be turned off and turned on for a reliable weighing. - 13 - EXAMPLE: Turn off “Set 2-4” to block Automatic Zero Setting specification continuously. (2:basis menu number, 4:sub menu number): Press F key during 3 seconds. “Set1” is seen on Weight display, 1 (submenu number) is seen on Unit Price display. Value is seen on Price to Pay display. Press F key once. Pass to menu 2. (Zero setting) “Set2” is seen on Weight display, 1 (sub menu number) is seen on Unit Price display. Value is seen on Price to Pay display. Press O key 3 times. Pass to sub menu 4. (Automatic Zero setting) “Set2” is seen on Weight display, “4” (sub menu number) is seen on Unit Price display. Value is seen on Price to Pay display. Press T key to make “Off” the value seen on Price to Pay display. “Set2” is seen on Weight display, “4” (sub menu number) is seen on Unit Price display. “Off” is seen on Price to Pay display. Press F key 3 seconds to return normal weighing. Turn off the scale and turn it on again. SETTINGS MENU: 2.5 Automatic zero tracking (Values in parenthesis are factory settings.) If it is ON : Automatic zero tracking is done when the display is zero and stable. 1. Tare If it is OF : Automatic zero tracking will not be done. 1.1 Tare depends on stable equilibrium (On) NOTE : If there is tare, automatic zero tracking program is not going to run. (If it is approved, its default value is ON and it cannot be changed) 2.6 Zero setting via interface 1.2 Cancel tare operation in negative net value (On) (Off) Not in this type. 2.7 Silo Mode Acitve/Passive Smaller tare than valid tare. (In negative net value) (Off) If it is ON :Silo Mode is enabled and initial zero setting control is not done. (If it is approved, its default value is ON and it cannot be changed) 1.3 Taring via Interface (On) If it is OFF :Silo Mode is disabled. (Off) 3. Total Memory, Unit Price: Not in this type. 3.1 Adding without showing total memory (On) 2. Zero setting: If it is ON: Total cannot be seen after M+. Weighing is seen. 2.1 Initial zero setting range control ±10% (On) If it is OFF: Total can be seen until the weighing plate is empty, after M+ (If it is approved, its default value is ON and it cannot be changed) 3.2 Temporary unit price 2.2 Zero setting key range control < 2% (On) If it is ON: Unit price is cancelled automatically when the weighing plate is empty. (If it is approved, its default value is ON and it cannot be changed) If it is OFF: Unit price is not cancelled automatically when the weighing plate is empty. 2.3 Zero setting depends on stability (On) 3.3 Adding by M+ is depends on stability (If it is approved, its default value is ON and it cannot be changed) 2.4 Automatic zero setting (On) (On) (If it is approved, its default value is ON and it cannot be changed.) (On) If the weight indication is negative for more than 5 seconds when the equilibrium indicator is on, zero will be set automatically. - 14 - 7.4 Filter Break Count Value 4. Limitation: (It cannot be changed, if it is approved. Some models do not have the function.) Not in this type. Minimum value is 70, maximum value is 2800. If different value is entered, all filters run with default values. 5. LCD / Time Settings: 5.1 LCD contrast (7) Can be adjusted between 1 and 9. 8. Calibration: 5.2 Backlight brightness 8.1 Calibration coefficient (7) Can be adjusted between 1 and 9 (It can be changed, if the calibration key is ON) 5.3 Date 8.2 Maximum capacity First two digits: (Optional) day Middle two digits: month (It can be changed, if the calibration key is ON) Last two digits: year 5.4 Time (Optional) First two digits: 8.3 Division 0: 3000 hour Last two digits: (1) 1: 2 x 3000 minute 6. Power management settings: 2: 3 x 3000 approved) 6.1 Empty weighing plate special display (On) 3: 6000 / 7500 (division can not be set if it is approved) If it is ON: there will be a flashing point on display instead of weight value if scale is powered by battery and empty during 30 seconds. (in a scale with LCD display “------” is shown) 4: 12000 / 15000(division can not be set it is approved) 6: 1500 (It can be changed, if the calibration key is ON.) If it is OFF: does not work. 6.2 Empty weighing plate special display (On) 8.4 Load Cell Maximum Capacity (It can be changed, if the calibration key is ON.) Manages Empty Weighing Plate Special Display mode and other power management modes. 8.5 Maximum capacity unit 1: kg 2: ton If it is OFF: No power management is done and “-----” is not shown also. (It can not be changed, if it is approved) 8.6 7. Filters: (5) (It cannot be changed, if it is approved. Some models do not have the function.) 8.7 (50) Gravity value of place where instrument will be used (9.8006) (It can be changed, if the calibration key is ON) (It cannot be changed, if it is approved. Some models do not have the function.) 8.8 Load Cell mV/V value Minimum value is 10, maximum value is 50. If different value is entered, all filters run with default values. 7.3 Minimum Average Length Gravity value of place where instruments was calibrated (9.8022) (It can be changed, if the calibration key is ON) Minimum value is 1, maximum value is 9. If different value is entered, all filters run with default values. 7.2 Average Length (1) 0: g If it is ON: Power management is done for all modes. 7.1 Median Filter (division can not be set if it is mv/V value of used Load Cell 9. Relay settings: (1) Not in this type. (It cannot be changed, if it is approved. Some models do not have the function.) 10. Interface settings: Minimum value is 1, maximum value is 25. If different value is entered, all filters run with default values. (Only for PRINTER/PC type scales.) - 15 - 10.1 Communication ON/OFF 10.5 Baudrate (On) It determines the baudrate of RS232 communication between weighing scale and PC. If it is ON : RS232 communication is active. If it is OFF: RS232 communication is inactive. (It must be activated in only for printer/pc type scales; otherwise ER 8 message will be seen.) 0 : 9600 10.2 ID Number 2: 38400 1: 19200 (8888) For PC output this Number is Instrument ID that is transmitted to PC in every package except continuous transmitting is ON. 3: 57600 4: 115200 11. Testing Menu: See details in related documents. 10.3 Continuous transmitting (0) Not in this type. (Off) 12. Others: If it is ON: Activates continuous data transfer from scale to computer. 12.1 Approved (On) If it is OFF: Communication is not continuously, communication is done when a request sends from computer. (It can be changed, if the calibration key is ON.) If it is turned ON, all settings depended on condition “APPROVED” returns to factory settings values. 10.4 PC data package selection 12.2 Starting delay (10sn) It determines transmitted to PC. data (11111) package will (If it is approved, it cannot be changed) be 12.3 Calibration Switch (Off) If calibration switch is off, settings with related calibration swichs can not change. Password is required to change position of calibration switch. If calibration switch position is changed to ON from OFF by this operation, event counter increased by one.The verification of weighing insturment is broken.(Please look COMMENTS ON VERIFICATøON.) 1: It will be transmitted. X X X X X (On) 0: It will not be transmitted. Price detail (Sum and Unit Price) Date and Time Tare Mirror enable Unit detail . NOTE: If it is approved, price detail, unit detail and tare always are transmitted. For printer type models see related documents. THINGS TO DO BEFORE CALLING THE SERVICE FAILURE SIGNALS ER 1 : Turn off the scale and then turn on it again. If failure continues, call service. ER 2 : Wait for a while. Turn off the scale and then turn on it again. If failure still continues, call service. ER 3 : Wait for a while. Sure weighing plate is empty and press O key. If failure continues, turn off the scale and then turn on it again. If failure still continues, call service. ER 4 : Turn off the scale and then turn on it again. If failure continues, call service. ER 5 : Initial zero setting range control error. Weighing not allowed. Be sure the weighing plate is empty. (If the weighing plate is not on scale, put it on to the scale)Turn off the scale and turn it on again, when the weighing plate is empty. Call the service if this warning is active again, when the weighing plate is empty. ER 6 : Turn off the scale and turn on it again. If failure continues, call service. ER 7 : Turn off the scale and then turn on it again. If failure continues, call service. - 16 - ER 8 : Interface communication error. Turn off the scale and then turn on it again. If scale is not pc/printer type and error still continues, call the service. If scale is pc/printer type, change SET 10.1 to “On” and turn off the scale and turn on it again. If still continues call the service. ER 9 : Turn off the scale and then turn on it again. If failure continues, call service. ER 11 : Turn off the scale and then turn on it again. If failure continues, call service. ER 12 : Turn off the scale and then turn on it again. If failure continues, call service. ER 13 : For pc/printer type models, If alibi memory is full, this message will be shown. There will be no data transmission to the PC/Printer and new transaction will be blocked until alibi memory erased. Erase alibi memory, turn off the scale and then turn on it again. For Printer type models see related documents. ER 14 : Loadcell cable detection error. Check loadcell connector and cable. If the connector is unplugged, plug it again. If failure continues, turn off the scale and then turn on it again. If failure still continues, call service. ER 15 : Wait for a while. If failure continues, turn off the scale and then turn on it again. If failure still continues, call service. ER 16 : See “PrinterUserManualAnnex.doc”. If failure continues, call service. Lo bAtt: The battery is empty. Scale does not work. It should be charged or changed as soon as possible. Full (on weight display): Weight is more than maximum capacity. Full (Price display): Price to pay is too long to shown on display. nnnnnn : Platform (load carrier) is not fitted, or when there is weight on the platform weighing instrument may be tried to open up. On the empty platform. (The platform is not installed, replace) If necessary, there was no load on the instrument a more open platform. If load carrier has two platform, you make sure to empty on load carrier. The platform was empty, If failure still continues, call service. ACOUSTIC SIGNALS Short beep : Any key pressed. Double short beep : Indicates the pressed key has no use for the related function. Long beep done. : Same frequency with short beep. Indicates second function of the pressed key was Short beep and long beep different frequency: It indicates desired operation could not be operated. For example, pressing T key when D indicator is off. Regular short beep 10 seconds period : When battery is low, scale signals in every ten seconds. However, battery indicator flashes. It means that the battery is going to be empty and weighing cannot be done after a while. Adaptor should be connected as soon as possible. If you continue weighing without adaptor it continues signaling. Press F key to cancel signaling. Look at the red light on adapter to control if it works or not. - 17 - TECHNICAL SPECIFICATIONS Adapter : 220-240 VAC, 50 Hz input, Weighing Instrument Electrical Specifications Metrological Specifications : Look at data plate on scale. Operating temperature range : -10 °C ~ +40 °C MODEL CLASS MAXIMUM CAPACITY (kg) MINIMUM CAPACITY (kg) FEATURE MEB, EGE-B EGEM,EGELED III, IIII 1 -999999 Price Computing III 0,15 – 30 20 e (III) 10 e (IIII) 50 e (II) 20 e (III) 7,5 V DC output, 10 W : 7.5 V DC, 6 W Price Computing LIST OF AUTHORIZED SERVICES FACTORY AND HEADQUARTERS: Istanbul Deri Organize Sanayi Bolgesi Kazlicesme cad. No:48 Orhanli 34956 TUZLA/ ISTANBUL TEL: (216) 394 25 25 FAX: (216) 394 83 82 www.temscale.com Note: For latest information about authorized services, call factory service. - 18 -