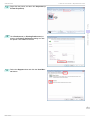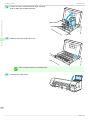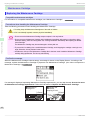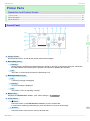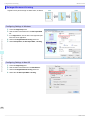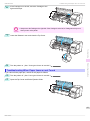
1
Large Format Printer
Series
Basic Guide
Preface
Safety Precautions...................................................... 2
Manuals for this printer................................................... 6
Handling Paper
Handling rolls................................................................ 12
Handling sheets............................................................ 21
Consumables and Maintenance
Ink Tanks....................................................................... 25
Printheads..................................................................... 36
Maintenance Cartridge..................................................42
Cleaning the Printer...................................................... 47
Printer Parts
Operations and Display Screen.................................... 51
Printer parts.................................................................. 63
Printer Relocation
Preparing to Transfer the Printer...................................69
Software Installation
Installing the Printer Driver (Windows)..........................79
Installing the Printer Driver (Mac OS)........................... 81
Convenient Printer Driver Features.............................. 83
Adjustments for Better Print Quality
Adjusting the Printhead................................................. 89
Adjusting the feed amount............................................ 91
Troubleshooting
Problems Regarding Paper...........................................94
Printing does not start................................................. 104
The printer stops during a print job............................. 106
Problems with the printing quality............................... 107
Cannot print over a network........................................ 114
Installation problems................................................... 115
HP-GL/2 problems...................................................... 116
Other problems........................................................... 118
Error Message
Manuals for this printer
Setup Guide
Quick Guide
Basic Guide Electronic manual
User's Guide Electronic manual
Paper Reference Guide Electronic manual
Read this manual before attempting to operate the printer.
Keep this manual in a handy location for future referencing.
Messages regarding paper......................................... 122
Messages regarding ink.............................................. 131
Messages regarding printing or adjustment................ 133
Messages regarding printheads.................................. 135
Messages regarding the maintenance cartridge......... 137
Messages regarding the hard disk.............................. 138
Messages regarding HP-GL/2.....................................140
Other Messages.......................................................... 141
Error Messages........................................................... 143
ver1.00 2014-11-21
ENG
Safety Precautions
iPF830 Series
Preface
Safety Precautions
Safety Precautions ............................................................................................................................................ 2
Legal Notices .................................................................................................................................................... 4
Safety Precautions
Preface
Follow the warnings and precautions below to use the printer safely. Do not perform any operations or procedures
other than as described in this manual. Doing so may result in unexpected accidents and can cause a fire or electrical shocks.
Safety Precautions
Printer location
• Do not set up the printer in any location exposed to alcohol, thinner, or other volatile liquids. If these substances
Warning
come into contact with electrical components inside the printer, there is a risk of fire or electrical shock.
• Never install the printer on an unstable or vibrating surface. If it falls over, this could cause personal injury.
Caution
• Never set up the printer in a location that is exposed to high humidity or large amounts of dust, or exposed to
direct sunlight, high temperature, or open flame. This could cause a fire or electrical shock. Use the printer location in an environment where temperature and humidity are within the ranges of 15 °C to 30 °C (59 °F to 86 °F)
and 10 to 80% RH (with no condensation).
• Never place the printer on a heavy wool or shag carpet. The fibers may enter the printer and cause a fire.
• Keep the area around the power outlet clear of items so that you can disconnect the power cable immediately if
the printer starts operating abnormally. In the event of a printer malfunction, remove the power cable from the
outlet as soon as possible to prevent fire and electrical shocks.
• Do not install the printer near sources of strong electromagnetic fields, whether equipment that generates such
fields or places where such fields occur. This could damage the printer or cause malfunction.
Power Supply
• Never handle the power cable with wet hands. Doing so may cause electrical shock.
Warning • Insert the power cable securely and completely into the power source. If the power cable is not inserted com-
pletely, this could cause a fire or electrical shock.
• Do not use any power cable other than the one provided. This could cause a fire or electrical shock. Never use
the power cable with any other electrical device.
• Never cut the power cable or attempt to modify it, and never stretch it or bend it forcefully. Never place a heavy
object on the power cable. Damaged sections of the power cable could cause a short circuit and may cause a fire
or electrical shock.
• Never connect the power cable to a power strip or any power source shared by other electrical devices. This
could cause a fire or electrical shock.
• Never knot the power cable or wrap it around itself. This could cause a fire or electrical shock.
• Periodically disconnect the power cable and use a dry cloth to wipe away dust that has collected on the plug and
the area around the power outlet. Leaving the power cable plugged in and not cleaned for a long period, especially in an area subject to dust, oil, and humidity, could cause the insulation material to deteriorate and lead to a fire.
2
Basic Guide
iPF830 Series
Safety Precautions
• Always grip the plug to remove the power cable from the power outlet. Pulling on the power cable could damage
Caution
the cable and lead to a fire or electrical shock.
• Never use an extension cord. This could cause a fire or electrical shock.
• Never use any power source other than 100–120 / 220–240 V AC. This could cause a fire or electrical shock. The
printer operating conditions are described below. Use the printer under the following conditions.
Power supply voltage: 100–120 / 220–240 V AC
Power supply frequency: 50/60 Hz
• If the printer emits smoke or strange odors, continuing to use the printer may cause a fire or electrical shock.
Warning
Switch the printer off immediately and remove the power plug from the power outlet. Contact your Canon dealer
or support center.
• For cleaning, use a cloth dampened in water. Never use flammable solvents such as alcohol, benzene, or thinner.
If these substances come into contact with electrical components inside the printer, there is a risk of fire or electrical shock.
Safety Precautions
Cleaning the Printer
Warning
Preface
In an Emergency
• Always disconnect the power cable from the outlet before cleaning the printer. If the printer is switched on acciCaution
dentally, moving parts inside the printer may cause personal injuries.
Pacemakers
• This printer generates a low-level magnetic field. Anyone wearing a pacemaker who experiences discomfort while
Warning
working around the printer should leave the area. Consult a physician before continuing to work around the printer.
Moving the Printer
• Moving the printer requires at least six people, holding it on both sides. Be careful to avoid back strain and other
Caution
injuries.
• When moving the printer, firmly grasp the Carrying Handles under each side. The printer may be unsteady if you
hold it at other positions, which poses a risk of injury from dropping the printer.
Printhead, Ink Tanks, and Maintenance Cartridge
• Always store consumables in a safe location out of the reach of small children. If a child licks or ingests ink acciCaution
dentally, seek medical assistance immediately.
• If ink accidentally gets in your eyes, immediately rinse with water.
If ink gets on your skin, immediately clean it off with soap and water.
If irritation persists in your eyes or on your skin, contact a physician immediately.
• Avoid dropping or shaking printheads, ink tanks, and maintenance cartridges. Spilled ink can stain clothing and
the work area.
• Never touch the electrical contacts of the Printhead after printing. The contacts become extremely hot and can
cause minor burns.
3
Basic Guide
Legal Notices
iPF830 Series
Other
• Never disassemble the printer or attempt repairs. There are high voltage parts inside the printer that can cause a
Warning
fire or electrical shock.
• Never use flammable sprays around the printer. The gas of flammable sprays can cause a fire or electrical shock,
if it contacts high voltage points inside the printer.
• Never touch the cutting edge of Cutter Unit (a). This could cause personal injury.
Preface
Safety Precautions
a
• Never insert your hand into the printer while it is printing. Moving parts inside the printer can cause injuries.
Caution
• Never place anything on the printer such as small metal objects (paper clips, staples), liquids, any type of liquid
container that contains flammable liquids (alcohol, benzene, etc.). If such objects fall into the printer, this could
cause a fire or electrical shock.
• To prevent a fire hazard or dangerous electric shock, if a foreign object falls into or a liquid spills into the printer,
press the Power button immediately to switch the printer off, unplug the printer power cable from the outlet, and
then contact your Canon dealer or support center. If you continue to use the printer, this could cause a fire or
electrical shock.
• Connect the interface cable correctly. To avoid damage, before connection make sure that the shape of the cable
Important
connector matches the connection point on the printer.
• During printing, turn on the ventilation system in the room.
• We recommend ensuring ample space for installation.
Legal Notices
FCC Regulations (U.S.A)
Canon Large Format Printer
iPF830
This device complies with Part 15 of the FCC Rules. Operation is subject to the following two conditions: (1) This
device may not cause harmful interference, and (2) this device must accept any interference received, including
interference that may cause undesired operation.
Note: This equipment has been tested and found to comply with the limits for class B digital device, pursuant to
Part 15 of the FCC Rules. These limits are designed to provide reasonable protection against harmful interference
in a residential installation.
This equipment generates, uses and can radiate radio frequency energy and, if not installed and used in accordance with the instructions, may cause harmful interference to radio communications.However, there is no guarantee that interference will not occur in a particular installation. If this equipment does cause harmful interference to
radio or television reception, which can be determined by turning the equipment off and on, the user is encouraged
to try to correct the interference by one or more of the following measures:
4
• Reorient or relocate the receiving antenna.
• Increase the separation between the equipment and receiver.
Basic Guide
iPF830 Series
Legal Notices
• Connect the equipment into an outlet on a circuit different from that to which the receiver is connected.
• Consult the dealer or an experienced radio/TV technician for help.
Use of shielded cable is required to comply with Class B limits in Subpart B of Part 15 of FCC Rules.
Do not make any changes or modifications to the equipment unless otherwise specified in the manual.
If such changes or modifications should be made, you could be required to stop operation of the equipment.
Canon U.S.A. Inc.
One Canon Park Melville, NY 11747 , U.S.A.
Tel No. 1-800-652-2666
Included battery contains Perchlorate Material - special handling may apply.
See http://www.dtsc.ca.gov/hazardouswaste/perchlorate/ for detail.
• Canon, the Canon logo, and imagePROGRAF are trademarks or registered trademarks of CANON INC.
• Microsoft is a registered trademark of Microsoft Corporation.
• Windows is a trademark or registered trademark of Microsoft Corporation in the U.S. and/or other countries.
Safety Precautions
Trademarks
Preface
For CA, USA Only
• Mac, Mac OS, Bonjour and OS X are trademarks of Apple Inc., registered in the U.S. and other countries.
• Adobe RGB, a trademark of Adobe Systems Incorporated, is color space proposed by Adobe Systems Incorporated.
Copyright
• Unauthorized reproduction of this user manual in whole or part is prohibited.
Legal Notice
• It is illegal to reproduce currency, bills, negotiable securities and other documents prohibited by law. Reproduction of such items may be subject to criminal prosecution.
• It is illegal to reproduce legal certificates, licenses, travel tickets, and certain public and private documents prohibited from reproduction by law. Reproduction of such items may be subject to criminal prosecution.
• Please note that intellectual property protected by copyright may not be reproduced without the express permission of the copyright holder except for personal or household use under limited circumstances.
5
Basic Guide
Manuals for this printer
iPF830 Series
Manuals for this printer
Manuals for this printer ..................................................................................................................................... 6
To view the User's Guide or Paper Reference Guide ......................................................................................... 6
About This User Manual .................................................................................................................................. 10
Manuals for this printer
This printer has the following manuals.
Preface
Name
Contents
Medium
Manuals for this printer
Setup Guide
Instructions for unpacking and setting up the printer, and for
installing the software and electronic manuals.
Quick Guide
Contains information such as a guide to exchanging paper,
Ink Tank, and Printhead, and cautions for using the product
safely.
Basic Guide
Descriptions of basic printer operations.
User's Guide
Detailed instructions for using the printer.
Paper Reference Guide
This guide describes about the types and specifications of the
available media on the printer.
Setup Guide
Quick Guide
Basic Guide
Printed Manuals
Electronic manuals
User's Guide
Paper Reference Guide
To view the User's Guide or Paper Reference Guide
To view the User's Guide or Paper Reference Guide, display the various manuals on the website from the links in
the software installed on your computer.
• Windows
The basic instructions for displaying the User's Guide or Paper Reference Guide from the printer driver are as
follows.
1
2
Install the software.
Note that the driver installation procedure varies depending on the type of connection.
(See "Installing the Software (Windows).") ➔ P.79
Click start > Printers and Faxes (or Printer, Devices and Printers).
6
Basic Guide
iPF830 Series
Right-click the printer, and then click Properties (or
Printer Properties).
4
Click Preferences (or Printing Preferences) to
display the Printing Preferences dialog box with
the printer name added to the title.
5
Select the Support sheet and click the User Manual button.
Preface
3
To view the User's Guide or Paper Reference Guide
Manuals for this printer
7
Basic Guide
To view the User's Guide or Paper Reference Guide
6
iPF830 Series
To display User's Guide, click User's Guide.
Alternately, to display Paper Reference Guide, click
Paper Reference Guide.
Preface
Manuals for this printer
• Mac OS
The basic instructions for displaying the User's Guide or Paper Reference Guide from imagePROGRAF Printmonitor are as follows.
1
Install the software.
(See "Installing the Software (Mac OS).") ➔ P.81
2
Click System Preferences icon in the Dock.
3
Click Printers & Scanners (Print & Scan or Print &
Fax).
4
Select the printer in the Printer list and click Options
& Supplies.
8
Basic Guide
iPF830 Series
Click Utility.
6
Click Open Printer Utility.
7
Click Support.
Preface
5
To view the User's Guide or Paper Reference Guide
Manuals for this printer
9
Basic Guide
About This User Manual
iPF830 Series
Click the User Manual button.
9
To display User's Guide, click User's Guide.
Alternately, to display Paper Reference Guide, click
Paper Reference Guide.
Preface
8
Manuals for this printer
About This User Manual
• Symbols
The following symbols are used in this user manual to indicate safety information and explanations on restrictions or precautions in use.
Warning
Indicates warning items for which operating error poses a risk of death or serious injury. To ensure safe
use, always follow these warnings.
Caution
Indicates caution items for which operating error poses a risk of injury. To ensure safe use, always follow
these cautions.
Important
Indicates important information and restrictions that definitely are to be followed during operation. Be sure
to read this information to prevent troubles, malfunctions, or damage to equipment or property by operating errors.
Note
Indicates helpful reference information and supplemental information on particular topics.
• Button names and user interface elements
Key and button names on the control panel and user interface elements in software (such as menus and buttons) are indicated as follows in this user manual.
10
Control panel buttons
Example: Press the OK button.
Control panel messages
Example: Head Cleaning is displayed.
Software interface items
(menus and buttons)
Example: Click OK.
Basic Guide
iPF830 Series
Keyboard keys
About This User Manual
Example: Press the Tab key.
• Cross-reference
Other pages or manuals that provide related information are indicated as follows in this user manual.
Cross-reference in the same user manual
Example: see "Menu Structure." ➔ P.56
Cross-reference in related manuals
Example: Refer to the Paper Reference Guide.
Other cross-reference
Example: See the printer driver help.
• Figures and software screens
• Screens depicted in this user manual for the printer driver or other software may be different from the actual screens because of subsequent updates.
• The information in this user manual is subject to change without notice.
• We strive to ensure accuracy of information in this user manual, but if you notice errors or omissions, contact support center.
Manuals for this printer
• May we request
Preface
• Figures in this user manual may be different from the actual appearance of the printer in some cases.
11
Basic Guide
Attaching the Roll Holder to Rolls
iPF830 Series
Handling Paper
Handling rolls
Attaching the Roll Holder to Rolls .................................................................................................................... 12
Loading Rolls in the Printer ............................................................................................................................. 15
Removing the Roll from the Printer .................................................................................................................. 18
Handling Paper
Attaching the Roll Holder to Rolls
When printing on rolls, attach the Roll Holder to the roll.
Rolls have a two- or three-inch paper core. Use the correct attachment for the paper core. The printer comes
equipped with the 2-Inch Paper Core Attachment installed.
Using the 2-Inch Paper Core Attachment
Using the 3-Inch Paper Core Attachment
Handling rolls
Roll Holder Side
Holder Stopper Side
Roll Holder Side
Holder Stopper Side
No Attachment Needed
2-Inch Paper Core Attachment
3-Inch Paper Core Attachment #1
3-Inch Paper Core Attachment #2
• Set the roll on a table or other flat surface so that it does not roll or fall. Rolls are heavy, and dropping a roll may
Caution
cause injury.
12
Basic Guide
iPF830 Series
Attaching the Roll Holder to Rolls
• When handling the roll, be careful not to soil the printing surface. This may affect the printing quality. We recomImportant
mend wearing clean cloth gloves when handling rolls to protect the printing surface.
• Cut the edge of the roll paper if it is uneven, dirty, or has tape residue. Otherwise, it may cause feeding problems
and affect the printing quality. Be careful not to cut through any barcodes printed on the roll.
㧪OO
Handling Paper
• Align the edges of the paper on both ends of the roll. This may cause feeding problems.
Handling rolls
• For details on supported sizes and types of roll paper, see Paper Sizes or the Paper Reference Guide. (See
Note
"Paper Sizes.") ➔ User's Guide
(See "Displaying the Paper Reference Guide.") ➔ User's Guide
• To view instructions as you attach the Roll Holder, press the Navigate button. (See "How to View Instructions With
Navigate.") ➔ User's Guide
1
Lift the Holder Stopper lever (a) from the shaft side to
unlock it. Holding the Holder Stopper at the position
indicated (b), remove it from the Roll Holder.
a
b
13
Basic Guide
Attaching the Roll Holder to Rolls
2
iPF830 Series
When using a 3-inch paper core, align the tips (a) of 3Inch Paper Core Attachment #1 with the holes (b) of
the Roll Holder and insert it firmly.
b
a
Handling Paper
3
Handling rolls
With the edge of the roll paper facing forward as
shown, insert the Roll Holder from the right of the roll.
Insert it firmly until the roll touches the flange (a) of
the Roll Holder.
a
• When loading a roll, be careful to avoid hitting the printer hard with the roll. This may damage the Roll
Important
4
Holder.
Insert the attachments for the roll paper core on the Holder Stopper.
Align the tips (a) of the attachment with the holes (b) of the Holder Stopper and insert it firmly.
• 3-Inch Paper Core Attachment #2
b
a
14
Basic Guide
Loading Rolls in the Printer
iPF830 Series
• 2-Inch Paper Core Attachment
b
5
b
c
Handling rolls
Insert the Holder Stopper from the left in the Roll
Holder as shown. Holding it at the position shown (b),
push it firmly in until the flange (a) of the Holder Stopper touches the roll. Lock the Holder Stopper lever (c)
by pushing it down toward the shaft side.
Handling Paper
a
a
Loading Rolls in the Printer
Follow these steps to load rolls in the printer.
• Always load rolls when the printer is on. If the printer is off when you load a roll, the paper may not be advanced
Important
correctly when you turn the printer on.
• Before loading a roll, confirm whether the inside of the Top Cover or the Ejection Guide is soiled. If soiled, we
recommend cleaning in advance. (See "Cleaning Inside the Top Cover.") ➔ P.47
15
Basic Guide
Loading Rolls in the Printer
iPF830 Series
Handling Paper
1
Press the Load button.
2
Press ▲ or ▼ to select "Load Roll Paper", and then press the OK button.
• If any roll paper that will not be used or cut sheet has been fed, a message is shown requesting you to
remove it.
Press ▲ or ▼ to select Yes, and then press the OK button. Remove the paper and go to the next step.
Note
• If roll paper is loaded but cut sheet is selected as the paper source, a message asking you whether or not
Handling rolls
to change paper is displayed.
Press ▲ or ▼ to select Load, and then press the OK button. Remove the paper and proceed to the next
step.
3
Open the Top Cover and lift the Ejection Guide.
4
Holding the Roll Holder so that the side with the white
gear faces the side of the Roll Holder Slot with a
white gear, load the Roll Holder shaft (a) into the
grooves (b) on both ends of the Roll Holder Slot.
b
a
a
b
• Be careful not to drop the roll and hurt yourself when loading it.
16
Caution
• Be careful not to pinch your fingers between the Roll Holder shaft (a) and the guide grooves (b) when
loading rolls.
Basic Guide
iPF830 Series
Loading Rolls in the Printer
• For instructions on attaching the Roll Holder to rolls, see "Attaching the Roll Holder to Rolls."
➔ P.12
Note
5
Using both hands, pull out the roll evenly on both
ends and insert it in the Paper Feed Slot (a). Advance
the roll until the buzzer sounds.
Handling rolls
a
Handling Paper
a
• Be careful not to soil the printing surface of roll paper as you insert it in the slot. This may affect the
Important
printing quality. We recommend wearing clean cloth gloves when handling rolls to protect the printing
surface.
• If the paper is wrinkled or warped, straighten it out before loading it.
• Load the roll so that there is no gap between
the right edge of the paper and the Roll Holder.
6
Lower the Ejection Guide.
17
Basic Guide
Removing the Roll from the Printer
iPF830 Series
• When lowering the Ejection Guide, lower it
Important
slowly. If the Ejection guide is lowed forcefully,
the Ejection Supports (a) may hit the roll and
scratch the printing surface.
a
Handling Paper
7
Close the Top Cover.
Handling rolls
8
9
Press the OK button.
The paper is now advanced.
Once paper feeding starts, you will need to do the following, based on the ManageRemainRoll setting and
the barcode printed on rolls. (See "Keeping Track of the Amount of Roll Paper Left.") ➔ User's Guide
ManageRemainRoll
Off
Barcodes
Printed
Not printed
On
Printer Operation After the Paper is Fed
A menu for selection of the type of paper is shown on the Display Screen.
Press ▲ or ▼ to select the type of paper, and then press the OK button.
Printed
The type and amount of paper left is automatically detected based on the barcode printed on the
roll.
There is no need to specify the type and length of the paper.
Not printed
A menu for selection of the type and length of paper is shown on the Display Screen.
Press ▲ or ▼ to select the type and length of paper loaded, and then press the OK button.
• Cut the edge of the roll using the Paper Cutting function if the edge is creased or soiled. (See "SpeciImportant
fying the Cutting Method for Rolls.") ➔ User's Guide
• For details on types of paper to select, see the Paper Reference Guide. (See "Displaying the Paper RefNote
erence Guide.") ➔ User's Guide
• Adjusting the printhead alignment with the type of paper to be used in printing may enhance printing quality. (See "Automatic Adjustment to Straighten Lines and Colors.") ➔ P.89
Removing the Roll from the Printer
Remove rolls from the printer as follows.
• If you need to cut a printed roll, select Paper Cutting in the printer menu and cut the roll at the desired position.
18
Note
(See "Specifying the Cutting Method for Rolls.") ➔ User's Guide
Basic Guide
iPF830 Series
1
Removing the Roll from the Printer
On the Tab Selection screen of the Control Panel, press ◀ or
▶ to select the Paper tab (
).
• If the Tab Selection screen is not displayed, press the Menu button.
2
3
Press ▲ or ▼ to select Remove Roll, and then press the OK button.
Press ▲ or ▼ to select Yes, and then press the OK button.
The roll is rewound.
• If you have selected ManageRemainRoll >
Important
Handling rolls
4
Press the OK button.
The Paper Menu is displayed.
Handling Paper
Note
On in the Control Panel menu, a barcode is
printed on the leading edge of the roll.
Do not remove the roll before the barcode is
printed. You will be unable to keep track of
the amount of roll paper left. (See "Keeping Track of the Amount of Roll Paper Left.") ➔ User's Guide
5
Open the Top Cover and lift the Ejection Guide.
6
Using both hands, rotate the Roll Holder in the direction of the arrow to rewind the roll.
19
Basic Guide
Removing the Roll from the Printer
7
iPF830 Series
Holding the Roll Holder flange (a), remove the holder
from the Roll Holder Slot.
Handling Paper
• For instructions on removing the Roll Holder from rolls, see "Removing the Roll Holder from
Note
Handling rolls
8
Rolls." ➔ User's Guide
Lower the Ejection Guide and close the Top Cover.
• To load new paper in the printer at this point, see "Loading Rolls in the Printer."
Note
➔ P.15
• Clean inside the top cover before loading paper.
(See "Cleaning Inside the Top Cover.") ➔ P.47
20
Basic Guide
iPF830 Series
Loading Sheets in the Printer
Handling sheets
Loading Sheets in the Printer .......................................................................................................................... 21
Removing Sheets ............................................................................................................................................ 23
Loading Sheets in the Printer
Follow these steps to load sheets in the printer.
Important
• Load the paper straight. Loading paper askew will cause an error. (See "Paper loaded askew..")
➔ P.127
• Before loading sheets, make sure the printer is clean inside the Top Cover and around the Ejection Guide. If these
Note
• Store unused paper in the original package, away from high temperature, humidity, and direct sunlight.
Select sheets as the paper source.
• If a print job was received
Sheets are automatically selected, and the media type and size specified by the print job are shown on
the Display Screen.
Press ▲ or ▼ to select Load Paper, and then press the OK button.
Handling sheets
1
areas are dirty, we recommend cleaning them in advance. (See "Cleaning Inside the Top Cover.") ➔ P.47
Handling Paper
• Paper that is wrinkled or warped may jam. If necessary, straighten the paper and reload it.
• If no print job was received
1.
Press the Load button.
2.
Press ▲ or ▼ to select Cut Sheet, and then press the OK button.
• If any paper has been advanced that will not be used, a message is shown requesting you to remove it.
Note
2
Press ▲ or ▼ to select Yes, and then press the OK button. Remove the paper and go to the next step.
Lift the Release Lever and open the Top Cover.
21
Basic Guide
Loading Sheets in the Printer
iPF830 Series
• Do not touch the Linear Scale (a), Carriage
Important
a
Shaft (b), or Ink Tube Stabilizer (c). Touching
these parts may damage them.
c
b
Handling Paper
Handling sheets
3
With a sheet lengthwise and printing-side up, insert it between the Platen (a) and the Paper Retainer (b).
Align the edges of the sheet as follows.
1.
2.
Align the sheet with the Paper Alignment Line (c) at right.
Align the inserted edge of the sheet with the leading edge of the Paper Alignment Line (d), as shown.
c
d
c
b
a
When inserted, sheets are automatically held by suction against the Platen.
• Load a sheet so that it is parallel to the Paper Alignment Line at right (c). Loading paper askew will
Important
cause an error.
• Warped paper may rub against the Printhead. Straighten paper if it is warped before loading it.
• You can adjust the strength of suction holding paper against the Platen when the Release Lever is up. If it
Note
is difficult to load paper, press the ▲ or ▼ button on the Control Panel to adjust the strength. Set suction
stronger by pressing the ▲ button or weaker with the ▼ button. Three settings are available.
However, even if you increase the suction, it may not be sufficient to hold some types of paper against
the Platen well. In this case, use your hand to load the paper.
• Sheets are held in place by suction through holes on the Platen. Although the suction may produce a
noise when paper is loaded in some positions, it does not indicate a problem. If the noise is distracting,
try moving the paper over slightly to the left or right (up to 1 mm [0.039 in]) while keeping it parallel to the
Paper Alignment Line.
22
• The suction remains on for about 30 seconds during loading. If you cannot finish loading a sheet during
this time, pull the sheet away and reinsert it to start the suction again.
Basic Guide
iPF830 Series
4
Removing Sheets
Lower the Release Lever and close the Top Cover.
Handling Paper
• If no print job was received
A menu for selection of the type of paper is shown on the Display Screen.
Press ▲ or ▼ to select the type of paper, and then press the OK button.
The printer now starts feeding the paper.
Handling sheets
• If a print job was received
Pressing the OK button will advance the paper, and then printing will begin.
• Refer to Paper Reference Guide for details on type of paper to select. (See "Displaying the Paper ReferNote
ence Guide.") ➔ User's Guide
Removing Sheets
Remove sheets from the printer as follows.
1
On the Tab Selection screen of the Control Panel, press ◀ or
▶ to select the Paper tab (
).
• If the Tab Selection screen is not displayed, press the Menu button.
Note
2
Press the OK button.
The Paper Menu is displayed.
3
Press ▲ or ▼ to select Eject Paper, and then press the OK button.
4
Press ▲ or ▼ to select Cut Sheet, and then press the OK button.
5
Press ▲ or ▼ to select Yes, and then press the OK button.
The paper is ejected from the front of the printer.
23
Basic Guide
Removing Sheets
As you hold the sheet, lift the Release Lever and remove the sheet.
7
Lower the Release Lever.
Handling Paper
6
iPF830 Series
Handling sheets
24
Basic Guide
Replacing Ink Tanks
iPF830 Series
Consumables and Maintenance
Ink Tanks
Replacing Ink Tanks
For information on the compatible ink tanks for this printer, see "Ink Tanks." ➔ User's Guide
Replacement ink tanks in 330 ml (11.2 fl oz) and 700 ml (23.7 fl oz) capacities are supported.
• Depending on the color, you can also use an ink tank with a different capacity.
Note
Precautions when handling ink tanks
Consumables and Maintenance
Compatible ink tanks
Take the following precautions when handling ink tanks.
Ink Tanks
• For safety, keep ink tanks out of the reach of children.
•
If ink is accidentally ingested, contact a physician immediately.
Caution
• There may be ink around the ink supply section of ink tanks you removed. Handle ink tanks carefully during
Important
replacement. The ink may stain clothing.
• Do not install used ink tanks in another model of printer.
This will prevent correct ink level detection, which may damage the printer or cause other problems.
• We recommend using up an Ink Tank in the course of printing within six months after breaking the seal. Printing
quality may be affected if you use older ink tanks.
• Do not leave the printer without ink tanks installed for extended periods (a month or more). Residual ink may
become clogged inside the printer and affect printing quality.
How to replace an Ink Tank
1.
2.
3.
Confirm the message ➔ P.25
Access the menu for Access the menu for Ink Tank replacement ➔ P.26 (Otherwise, open the Ink Tank Cover.)
Remove the Ink Tank.
• Remove the Ink Tank (330 ml) ➔ P.27
• Remove the Ink Tank (700 ml) ➔ P.28
4.
Load the new Ink Tank.
• Load the Ink Tank (330 ml) ➔ P.29
• Load the Ink Tank (700 ml) ➔ P.32
Confirm the message
When the ink level becomes low, a message is displayed on the Display Screen.
25
Basic Guide
Replacing Ink Tanks
iPF830 Series
According to the message, replace the ink tank or prepare a new ink tank. (See "When to Replace Ink
Tanks.") ➔ User's Guide
Printing
OK: Ink Menu
Consumables and Maintenance
C
M
Y
M
B
K
Printing
OK: Ink Menu
Not much ink is
left. Prepare to
replace the ink.
B
K
If a message requests you to replace an Ink Tank, press the OK button. In this case, you can skip the step Access
the menu for ink tank replacement. Follow the instructions in Remove the ink tanks.
No ink left.
Replace ink tank.
OK
Ink Tanks
C
M
Y
M
B
K
B
K
• Do not remove an Ink Tank during initialization immediately after turning on the printer, or during printhead cleanImportant
ing. Ink may leak out.
• Ink Tank replacement is possible even during printing, when print jobs are being canceled, or when paper is being
Note
advanced.
Access the menu for Ink Tank replacement
1
On the Tab Selection screen of the Control Panel, press ◀ or
).
▶ to select the Ink tab (
Ready
OK: Ink Menu
C
M
Y
M
B
K
B
K
• If the Tab Selection screen is not displayed, press the Menu button.
Note
2
3
Press the OK button.
The Ink Menu is displayed.
Press ▲ or ▼ to select Rep. Ink Tank, and then press the OK button.
Instructions are displayed on the Display Screen.
26
Basic Guide
iPF830 Series
Replacing Ink Tanks
Remove the Ink Tank (330 ml)
1
Open the Ink Tank Cover of the tank for replacement
and check the Ink Lamp.
The Ink Lamp flashes quickly if there is no ink left.
Important
Lift the stopper (a) of the Ink Tank Lock Lever for the
color to replace. Lift the Ink Tank Lock Lever until it
stops, and then push it down to the front.
Ink Tanks
2
Jolting the printer during printing may deteriorate print quality.
Consumables and Maintenance
• Avoid hitting the printer when replacing an Ink Tank. Handle the printer gently when replacing tanks.
GG
a
Note
3
• Push the Ink Tank Lock Lever down until it locks.
• Make sure the Ink Tank Lock Lever does not return to the original position.
Hold the Ink Tank by the grips (a) and remove it.
Press the OK button.
a
27
Basic Guide
Replacing Ink Tanks
iPF830 Series
• If there is still ink in the Ink Tank you removed, store it with the
Important
a
ink holes (a) facing up. Otherwise, ink may leak and cause
stains. Put the removed Ink Tank in a plastic bag and seal it.
Consumables and Maintenance
• Dispose of used ink tanks according to local regulations.
Note
Remove the Ink Tank (700 ml)
1
Open the Ink Tank Cover of the tank for replacement
and check the Ink Lamp.
The Ink Lamp flashes quickly if there is no ink left.
Ink Tanks
• Avoid hitting the printer when replacing an Ink Tank. Handle the printer gently when replacing tanks.
Important
2
Jolting the printer during printing may deteriorate print quality.
Lift the stopper (a) of the Ink Tank Lock Lever for the
color to replace. Lift the Ink Tank Lock Lever until it
stops, and then push it down to the front.
a
Note
• Push the Ink Tank Lock Lever down until it locks.
• Make sure the Ink Tank Lock Lever does not return to the original position.
28
Basic Guide
iPF830 Series
3
Replacing Ink Tanks
Hold the Ink Tank by the handle (a) and remove it.
Press the OK button.
a
Consumables and Maintenance
BK
• If there is still ink in the Ink Tank you removed, store it in the
Important
a
Ink Tanks
box with the ink holes (a) facing up. Otherwise, ink may leak
and cause stains.
• Dispose of used ink tanks according to local regulations.
Note
Load the Ink Tank (330 ml)
1
Before opening the pouch, tilt the Ink Tank to the left
and right gently seven or eight times.
• Do not remove and agitate ink tanks that have already been installed in the printer. Ink may leak out.
Important
Basic Guide
• If you do not agitate the Ink Tank, the ink may settle, which may affect printing quality.
29
Replacing Ink Tanks
iPF830 Series
• If the Ink Tank is cold, allow it to adjust to room temperature before attaching it to the printer.
Note
2
Open the pouch and remove the Ink Tank.
Consumables and Maintenance
Ink Tanks
• Never touch the ink holes or electrical contacts. This may cause stains, damage the Ink Tank, and afImportant
3
fect printing quality.
Press the OK button and insert the Ink Tank into the
holder facing as shown, with the ink holes down.
• Ink tanks cannot be loaded in the holder if the color or orientation is incorrect.
Important
If the Ink Tank does not fit in the holder, do not force it into the holder. Make sure the color of the Ink
Tank Lock Lever matches the color of the Ink Tank, and check the orientation of the Ink Tank before
reloading it.
30
Basic Guide
iPF830 Series
Replacing Ink Tanks
Lift the Ink Tank Lock Lever until it stops, and then
push it down until it clicks into place.
5
Make sure the Ink Lamp is lit in red.
Consumables and Maintenance
4
Ink Tanks
• If the Ink Lamp is not lit in red, reload the tank.
Note
6
Close the Ink Tank Cover.
31
Basic Guide
Replacing Ink Tanks
iPF830 Series
• After Ink Tank replacement, always close the Ink Tank Cover. If the Ink Tank Cover cannot close, some
Important
Ink Tank Lock Lever may not be closed completely. Make sure all ink tank lock levers are fully closed.
•
To close the Ink Tank Cover when no Ink Tank is
installed (as when moving the printer), push the
release lever (a) as shown while returning the
Ink Tank Lock Lever to the original position.
Consumables and Maintenance
a
Y
Y
G
MB
K
BK
M
Load the Ink Tank (700 ml)
Ink Tanks
1
Before opening the pouch, hold the new Ink Tank with
both hands and tilt it to the left and right as shown,
shaking gently it seven or eight times.
• 700 ml ink tanks are heavy, so use your whole arm to agitate it instead of just your wrist. If you agitate it
Caution
using just your wrist, you may injure your wrist.
• Do not remove and agitate ink tanks that have already been installed in the printer. Ink may leak out.
Important
• If you do not agitate the Ink Tank, the ink may settle, which may affect printing quality.
• If the Ink Tank is cold, allow it to adjust to room temperature before attaching it to the printer.
Note
32
Basic Guide
iPF830 Series
2
Replacing Ink Tanks
Open the pouch and remove the Ink Tank.
Consumables and Maintenance
Important
3
fect printing quality.
Ink Tanks
• Never touch the ink holes or electrical contacts. This may cause stains, damage the Ink Tank, and af-
Press the OK button and insert the Ink Tank into the
holder facing as shown, with the ink holes down.
• Ink tanks cannot be loaded in the holder if the color or orientation is incorrect.
Important
If the Ink Tank does not fit in the holder, do not force it into the holder. Make sure the color of the Ink
Tank Lock Lever matches the color of the Ink Tank, and check the orientation of the Ink Tank before
reloading it.
33
Basic Guide
Replacing Ink Tanks
4
iPF830 Series
Lift the Ink Tank Lock Lever until it stops, and then
push it down until it clicks into place.
Consumables and Maintenance
M
5
Make sure the Ink Lamp is lit in red.
Ink Tanks
• If the Ink Lamp is not lit in red, reload the tank.
Note
6
Close the Ink Tank Cover.
34
Basic Guide
Replacing Ink Tanks
iPF830 Series
• After Ink Tank replacement, always close the Ink Tank Cover. If the Ink Tank Cover cannot close, some
Important
Ink Tank Lock Lever may not be closed completely. Make sure all ink tank lock levers are fully closed.
•
To close the Ink Tank Cover when no Ink Tank is
installed (as when moving the printer), push the
release lever (a) as shown while returning the
Ink Tank Lock Lever to the original position.
Y
Y
G
MB
K
BK
M
Consumables and Maintenance
a
Ink Tanks
35
Basic Guide
Replacing the Printhead
iPF830 Series
Printheads
Replacing the Printhead
When to replace the Printhead
Consumables and Maintenance
Replace the Printhead in the following situations.
• If the printing quality does not improve even after one or two cycles of Head Cleaning B from the printer
menu
• If the Display Screen indicates "Open top cover and replace the printhead."
• If your Canon dealer has advised you to replace the Printhead
Compatible printheads
For information on compatible printheads, see "Printhead." ➔ User's Guide
Printheads
Precautions when handling the Printhead
Take the following precautions when handling the Printhead.
• For safety, keep the Printhead out of the reach of children.
• If ink is accidentally ingested, contact a physician immediately.
Caution
• Do not touch the Printhead immediately after printing. The Printhead becomes extremely hot, and there is a risk
of burns.
• There may be ink around the nozzles of the Printhead you remove. Handle the Printhead carefully during reImportant
placement. The ink may stain clothing.
• Do not open the Printhead pouch until immediately before installation. After removing the Printhead from the
pouch, install it right away. If the Printhead is left after the pouch is opened, the nozzles may dry out, which may
affect printing quality.
Access the menu for Printhead replacement
• When replacing the Printhead immediately after printing, wait a few minutes before replacing it. The metal parts of
Caution
the Printhead become hot during printing, and there is a risk of burns from touching these parts.
• Your hands may become dirty during Printhead replacement. Use the gloves provided with the new Printhead for
Important
replacement.
• Prepare a new Ink Tank when ink levels are low.
Note
1
• When the remaining capacity of Maintenance cartridge is low, prepare a new Maintenance cartridge.
On the Tab Selection screen of the Control Panel, press ◀ or
▶ to select the Settings/Adj. tab (
).
36
Basic Guide
iPF830 Series
Replacing the Printhead
• If the Tab Selection screen is not displayed, press the Menu button.
Note
2
4
Press ▲ or ▼ to select Maintenance, and then press the OK button.
Press ▲ or ▼ to select Replace P.head, and then press the OK button.
Ink begins being drawn in. When it finishes, instructions are displayed on the Display Screen.
Replace the Printhead
Open the Top Cover.
Instructions are now shown on the Display Screen regarding Printhead replacement.
2
If the Printhead Fixer Cover or Printhead Fixer Lever
is dirty, use a damp cloth that you have wrung out
completely to wipe it clean.
Printheads
1
Consumables and Maintenance
3
Press the OK button.
The Set./Adj. Menu is displayed.
37
Basic Guide
Replacing the Printhead
iPF830 Series
• Do not touch the Linear Scale (a), Carriage
Important
a
Shaft (b), or Ink Tube Stabilizer (c). Touching
these parts may damage them.
c
b
Consumables and Maintenance
Printheads
3
If the ventilation duct (a) is dirty, use a damp cloth that
you have wrung out completely to wipe it clean. Move
the Carriage out of the way manually if the Carriage is
concealing the ventilation duct, and then clean the
duct.
4
Pull the Printhead Fixer Lever forward all the way to open
it completely.
5
Pull up the Printhead Fixer Cover to open it completely.
a
38
Basic Guide
iPF830 Series
6
Replacing the Printhead
Remove the Printhead and press the OK button.
Important
adhered to the metal contacts of the Carriage. These may damage the printer.
• Dispose of the used Printhead in accordance with local regulations.
Consumables and Maintenance
• Never touch the metal contacts of the Carriage. Furthermore, do not allow any dirt or debris to become
Note
Printheads
7
Holding the new Printhead by the grips (a), remove it from
the pouch.
a
a
• When handling the Printhead, always hold it by the grips (a). Never touch the nozzles (b) or metal conImportant
tacts (c). This may damage the Printhead and affect printing quality.
• Never touch the ink supply section (d). This may
a
cause printing problems.
d
c
b
8
While firmly holding the Printhead you have removed, use
your other hand to remove the orange Protective Part (a).
Squeeze the grips (c) of Protective Part (b) and pull it down to
remove it.
c
d
a
b
39
Basic Guide
Replacing the Printhead
iPF830 Series
• The inside surface of the Protective Part (a) and Protective Part (b) is coated with ink to protect the
Important
nozzles. Be careful not to touch these surfaces when removing the caps.
• The Printhead contains ink to protect the nozzles. We recommend removing Protective Part (b) as you
hold it over the Printhead package or safely out of the way to avoid spilling ink and staining your clothes
or the surrounding area. If ink accidentally spills, wipe off the ink with a dry cloth.
• If you need to put a Printhead somewhere temporarily before installation, do not keep the nozzles and
Consumables and Maintenance
metal contacts facing down. If the nozzles or metal contacts are damaged, it may affect the printing
quality.
• Do not reattach the removed Protective Part. Dispose of these materials in accordance with local regulations.
With the nozzles facing down and the metal contacts toward the back, insert the Printhead into the Carriage.
Carefully push the printhead firmly into the Carriage, ensuring that the nozzles and metal contacts do not touch
the carriage.
10
Pull the Printhead Fixer Cover down toward the front to
lock the Printhead in place.
11
Push the Printhead Fixer Lever toward the back of the
printer until it clicks.
Printheads
9
40
Basic Guide
iPF830 Series
12
Replacing the Printhead
Close the Top Cover.
Ink now fills the system.
Important
out.
• After Printhead has been replaced and filled with ink, Head Posi. Adj. ( Auto(Advanced) ) is performed
Note
Printheads
if you have selected Rep.P.head Print > On in the Control Panel menu. (See "Menu Settings.") ➔ User's Guide
In this case, follow the instructions on the Display Screen for Printhead adjustment.
If Rep.P.head Print is Off, perform Head Posi. Adj. ( Auto(Advanced) ) yourself. (See "Automatic Adjustment to Straighten Lines and Colors.") ➔ P.89
Consumables and Maintenance
• While ink is being filled, definitely do not remove the Ink Tank or Maintenance Cartridge. Ink may leak
41
Basic Guide
Replacing the Maintenance Cartridge
iPF830 Series
Maintenance Cartridge
Replacing the Maintenance Cartridge
Compatible maintenance cartridges
Consumables and Maintenance
For information on compatible maintenance cartridges, see "Maintenance Cartridge." ➔ User's Guide
Precautions when handling the Maintenance Cartridge
Take the following precautions when handling the Maintenance Cartridge.
• For safety, keep the Maintenance Cartridge out of the reach of children.
• If ink is accidentally ingested, contact a physician immediately.
Caution
• Do not remove the Maintenance Cartridge except to replace it. Ink may leak out.
Important
• Do not remove an Maintenance Cartridge during initialization immediately after turning on the printer, during
Maintenance Cartridge
Printhead cleaning, while ink is being drawn out, or during initialization immediately after replacing the Maintenance Cartridge.
The Maintenance Cartridge may become damaged or ink may leak out.
• To prevent ink from leaking from a used Maintenance Cartridge, avoid dropping the cartridge or storing it at an
angle. Otherwise, ink may leak and cause stains.
• Ink adheres to the top of the Maintenance Cartridge after it has been used. Handle the Maintenance Cartridge
carefully during replacement. The ink may stain clothing.
Confirm the message
When the Maintenance Cartridge is almost empty, a message is shown on the Display Screen. According to the
message, replace the Maintenance Cartridge or prepare a new Maintenance Cartridge. (See "When to Replace the
Maintenance Cartridge.") ➔ User's Guide
If a message is displayed requesting Maintenance Cartridge replacement, you can skip the step Access the menu
for Maintenance Cartridge replacement. Follow the instructions in Replace the Maintenance Cartridge.
Maintenance
cartridge full.
>Ⴑ3DXVH@
㻝㻛㻞
Replace the
MaintCart,
keeping it level.
>Ⴑ3DXVH@
㻞㻛㻞
42
Basic Guide
iPF830 Series
Replacing the Maintenance Cartridge
Access the menu for Maintenance Cartridge replacement
1
On the Tab Selection screen of the Control Panel, press ◀ or
▶ to select the Settings/Adj. tab (
).
Consumables and Maintenance
• If the Tab Selection screen is not displayed, press the Menu button.
Note
2
3
Press ▲ or ▼ to select Maintenance, and then press the OK button.
Maintenance Cartridge
4
Press the OK button.
The Set./Adj. Menu is displayed.
Press ▲ or ▼ to select Repl. maint cart, and then press the OK button.
Instructions are displayed on the Display Screen.
Replace the Maintenance Cartridge
1
Open the box, remove the plastic bag and packaging
material, and take out the Maintenance Cartridge.
• Never touch the metal contacts (a). This may damImportant
age the Maintenance Cartridge.
a
43
Basic Guide
Replacing the Maintenance Cartridge
Consumables and Maintenance
2
At this point, open the Maintenance Cartridge Cover.
3
Hold the used Maintenance Cartridge by the grip (a)
with one hand and put your other hand under the
Maintenance Cartridge to hold it firmly on the bottom,
keeping it level as you pull it out.
iPF830 Series
a
Maintenance Cartridge
• Used maintenance cartridges are heavy. Always grasp the cartridge firmly and keep the cartridge level
Important
during removal and storage. If you drop a used Maintenance Cartridge or store it at an angle, ink may
leak and cause stains.
• The remaining Maintenance Cartridge capacity is recorded on each printer. Do not install a used Maintenance Cartridge in another printer.
4
Keep the used Maintenance Cartridge level as you
put it in the plastic bag. Expel excess air from the
plastic bag and seal the zipper.
5
Confirm the Maintenance Cartridge is right-side up,
put it in the box with the packaging material attached,
and store it so that it stays level.
44
Basic Guide
iPF830 Series
Replacing the Maintenance Cartridge
• Always put the used Maintenance Cartridge back in the box and store the box on a flat surface. Also,
Important
seal the zipper thoroughly. Otherwise, ink may leak and cause stains.
• Put the used Maintenance Cartridge in the plastic bag of the new cartridge, and dispose of it in accordance with local regulations.
Note
Wipe away any soiling on the Maintenance Cartridge
Cover.
Consumables and Maintenance
6
Important
7
Maintenance Cartridge
• Support the Maintenance Cartridge Cover from underneath as you wipe it.
Keeping the new Maintenance Cartridge level, insert it
all the way in.
The printer now initializes the Maintenance Cartridge.
a
• Do not remove the Maintenance Cartridge during initialization immediately after replacing the MainteImportant
8
nance Cartridge. The Maintenance Cartridge may become damaged.
Close the Maintenance Cartridge Cover.
• If you did not perform the operation in Access the menu for Maintenance Cartridge replacement, this
Note
Basic Guide
is the end of the procedure and you do not need to press the OK key in the next step.
45
Replacing the Maintenance Cartridge
9
iPF830 Series
Press the OK button.
Consumables and Maintenance
Maintenance Cartridge
46
Basic Guide
iPF830 Series
Cleaning Inside the Top Cover
Cleaning the Printer
Cleaning Inside the Top Cover ......................................................................................................................... 47
Cleaning the Printhead .................................................................................................................................... 49
Cleaning Inside the Top Cover
•
•
•
•
•
•
•
•
If the printed surface or the underside of paper is dirty after printing
After you have used up a roll
After borderless printing
After printing on small paper
After printing on paper that generates a lot of cutting debris
If you have replaced the roll
After printing on paper that generates a lot of paper dust
If the message "Blue platen switch is dirty." is displayed
Important
Platen after borderless printing or printing on small paper.
• If the Ejection Guide is dirty, it may soil the edge of the paper when the paper is cut. We recommend cleaning
the Ejection Guide even if it does not appear dirty, because it may actually be covered with paper dust.
1
Open the Top Cover.
Cleaning the Printer
• If the Platen inside the Top Cover becomes dirty, it may soil the underside of paper. We recommend cleaning the
Consumables and Maintenance
Clean inside the Top Cover about once a month to maintain better printing quality and help prevent problems.
Also clean inside the Top Cover in the following situations to ensure optimal operation.
47
Basic Guide
Cleaning Inside the Top Cover
2
iPF830 Series
If paper dust has accumulated in the Vacuum holes
(a) on the Platen or in the Borderless Printing Ink
Grooves (b), use the Cleaning Brush (c) provided with
the printer to wipe it away.
Consumables and Maintenance
c
Cleaning the Printer
a
b
• Do not touch the Linear Scale (a), Carriage
Important
a
Shaft (b), or Ink Tube Stabilizer (c). Touching
these parts may damage them.
Avoid cleaning where the Carriage is retracted, in position (d) or (e).
c
b
d
e
• If the Cleaning Brush is dirty, rinse it in water.
Note
48
Basic Guide
iPF830 Series
3
Cleaning the Printhead
Using a damp cloth that you have wrung out completely, wipe away dirt or paper dust (debris from
cutting) inside the Top Cover.
Wipe away any ink residue and paper dust (debris
from cutting) on the Top Cover Roller (a), all over
the Platen (b), the Paper Retainer (c), the Borderless Printing Ink Grooves (d), the Ejection Guide
(e), the blue Switch (f), the section around the rightside Borderless Printing Ink Grooves (g), and so
on.
g
a
Consumables and Maintenance
e
Cleaning the Printer
b
d
f
c
• Never use flammable solvents such as alcohol, benzene, or thinner. If these substances come into conWarning
tact with electrical components inside the printer, there is a risk of fire or electrical shock.
• Do not use a dry cloth to wipe inside the Top Cover. This may create a static charge, which may attract
Important
4
dust and affect the printing quality.
• Do not touch the clear sheet on the side of the Top Cover Roller. This may damage the roller.
Close the Top Cover.
Cleaning the Printhead
If printing is faint, cleaning the Printhead may improve results.
Choose one of two Printhead cleaning modes ( Head Cleaning A or Head Cleaning B ), depending on the problem to resolve.
• Head Cleaning A
Basic Guide
49
Cleaning the Printhead
iPF830 Series
Use this mode if printing is faint or contains foreign substances. This method of cleaning consumes the least
amount of ink.
• Head Cleaning B
Use this mode if no ink is ejected at all, or if Head Cleaning A does not solve the problem.
• Do not remove the Maintenance Cartridge or ink tanks during either Head Cleaning A or Head Cleaning B.
Important
Ink may leak or an error may occur.
Consumables and Maintenance
• If printing does not improve even if you execute Head Cleaning B, try repeating Head Cleaning B once or
twice. If this still does not improve printing, the Printhead may have reached the end of its useful life. Contact
your Canon dealer for assistance.
• By default, nozzles are checked at fixed intervals.
Note
Configure the settings on the Control Panel menu in Nozzle Check.
(See "Menu Settings.") ➔ User's Guide
Perform cleaning as follows.
1
On the Tab Selection screen of the Control Panel, press ◀ or
▶ to select the Settings/Adj. tab (
).
Cleaning the Printer
• If the Tab Selection screen is not displayed, press the Menu button.
Note
2
Press the OK button.
The Set./Adj. Menu is displayed.
3
Press ▲ or ▼ to select Maintenance, and then press the OK button.
4
Press ▲ or ▼ to select Head Cleaning, and then press the OK button.
5
6
Press ▲ or ▼ to select Head Cleaning A or Head Cleaning B, and then press the OK button.
Head cleaning is now executed.
Print a test pattern to check the nozzles, and determine whether cleaning has cleared the nozzles. (See
"Checking for Nozzle Clogging.") ➔ User's Guide
50
Basic Guide
iPF830 Series
Control Panel
Printer Parts
Operations and Display Screen
Control Panel .................................................................................................................................................. 51
Menu Operations ............................................................................................................................................ 52
Menu Structure ............................................................................................................................................... 56
Control Panel
Printer Parts
b Data Lamp (green)
Operations and Display Screen
a Display Screen
Shows printer menus, as well as the printer status and messages.
• Flashing
During printing, the Data lamp flashes when the printer is receiving or processing print jobs. Otherwise,
this lamp flashes when the print job is paused or the printer is updating the firmware.
• Off
There are no active print jobs when the Data lamp is off.
c Message Lamp (orange)
• On
A warning message is displayed.
• Flashing
An error message is displayed.
• Off
The printer is off or is operating normally.
d Menu button
Displays the Tab Selection screen. (See "Menu Settings.") ➔ User's Guide
e Arrow buttons
• ◀ button
Press this button on the Tab Selection screen to move to another tab.
In menu items requiring numerical input, press this button to move to another digit.
• ▲ button
Press this button in the menu to move to another item.
Basic Guide
51
Menu Operations
iPF830 Series
In menu items requiring numerical input, press this button to increment the number.
• ▶ button
Press this button on the Tab Selection screen to move to another tab.
In menu items requiring numerical input, press this button to move to another digit.
• ▼ button
Press this button in the menu to move to another item.
In menu items requiring numerical input, press this button to decrement the number.
f OK button
Press this button on the Tab Selection screen to display the menu of the tab shown.
is displayed at left will move to the lower level of
Pressing this button in menu items of each tab for which
the menu item, enabling you to execute menu commands or set menu values.
Also press this button if the Display Screen indicates to press the OK button.
Printer Parts
g Stop button
Cancels print jobs in progress and ends the ink drying period.
h Power button (green)
Turns the printer on and off. (See "Turning the Printer On and Off.") ➔ User's Guide
The Power button is lit when the printer is on or in Sleep mode.
Operations and Display Screen
i Navigate button
Enables you to check instructions for loading and removing paper or replacing ink tanks or printheads, as well
as other operations. (See "How to View Instructions With Navigate.") ➔ User's Guide
j Back button
Displays the screen before the current screen.
k Cut button
Pressing this button when rolls are loaded cuts the paper, if you have specified Automatic or Eject in Cutting
Mode in the Control Panel menu. (See "Specifying the Cutting Method for Rolls.") ➔ User's Guide
l Feed button
Pressing this button when rolls are loaded enables you to reposition the paper. (See "Feeding Roll Paper Manually.") ➔ User's Guide
m Load button
Press this button when loading or replacing paper.
(See "Loading Rolls in the Printer.") ➔ P.15
(See "Loading Sheets in the Printer.") ➔ P.21
n Roll Media lamp (green)
Lit when rolls are selected as the paper source.
o Cut Sheet lamp (green)
Lit when sheets are selected as the paper source.
• In Sleep mode, any button can be pressed except the Power button to recover from Sleep mode.
Note
Menu Operations
To view available menus organized on tabs, select a tab on the Tab Selection screen and press the OK button.
For details, see "Menu Settings." ➔ User's Guide
52
Basic Guide
iPF830 Series
Menu Operations
• Menus (when the Ink tab is selected and the OK button is pressed)
• If the Tab Selection screen is not displayed, press the Menu button.
Note
•
•
•
•
Accessing menus ➔ P.53
Specifying menu items ➔ P.54
Specifying numerical values ➔ P.54
Executing menu commands ➔ P.55
Printer menus are grouped by function.
Menus are displayed with the upper line selected. You can use the buttons on the Control Panel to access each
menu.
Operations and Display Screen
Accessing menus
Printer Parts
Simply press buttons on the Control Panel to access menus on various tabs from the Tab Selection screen and
set or execute Menu items.
The following section describes menu operations.
• Press Back to access a higher menu in the menu list, and press OK to access a lower one. If not all menu
items are displayed, hold down ▲ or ▼ to scroll through higher and lower menu items. Items you select are
highlighted.
53
The scroll bar at right indicates the current position in the overall menu.
Basic Guide
Menu Operations
iPF830 Series
• Lower menus are available if
is displayed at left next to the second and subsequent rows. To access the
lower menus, select the menu and press the OK button.
Specifying menu items
Menu items can be set as follows.
Printer Parts
1
Press ▲ or ▼ to select the desired setting, and then press the
OK button.
After two seconds, the display reverts to the upper level menu.
Operations and Display Screen
• If a confirmation message is displayed regarding the setting you entered, follow the on-screen instrucNote
tions.
• If you have changed the Interface Setup menu settings, a message confirming whether to register the
settings is displayed if you press Back button or Menu button. Follow the instructions shown on the
screen.
Specifying numerical values
Follow these steps to enter numbers. In this example, network settings items are entered.
1
Press the ◀ or ▶ button to move to the next field for input.
54
Basic Guide
iPF830 Series
2
Menu Operations
Press the ▲ or ▼ button to enter the value.
• Hold down ▲ or ▼ to increase or decrease the value continuously.
Note
3
Repeat steps 1 and 2 to complete the settings, and then press the OK button.
• If a confirmation message is displayed regarding the setting you entered, follow the on-screen instrucNote
tions.
• If you have changed the Interface Setup menu settings, a message confirming whether to register the
settings is displayed if you press Back button or Menu button. Follow the instructions shown on the
screen.
Menu commands can be executed as follows.
1
Press ▲ or ▼ to select the action to execute, and then press the OK button.
The menu command is now executed.
Printer Parts
Executing menu commands
Operations and Display Screen
55
Basic Guide
Menu Structure
iPF830 Series
Menu Structure
The menu structure is shown categorized by tab. The * on the right side of an item indicates the default value.
The printer menu is classified into regular menu items available when no print job is in progress and menu during
printing items only available while printing is in progress. see "Printer Menu Operations." ➔ User's Guide
Regular menu
Menu during printing
Paper Menu
Not displayed
Ink Menu
The same
Ink Menu as normal is displayed.
Job Menu
The same
Job Menu as normal is displayed.
Set./Adj. Menu
A limited
played.
Printer Parts
•
•
Set./Adj. Menu containing the following items is dis-
Adj. Fine Feed(*1)
Printer Info
*1:Only displayed in the menu during printing. Not displayed in the regular menu.
For instructions on menu operations, see "Menu Operations." ➔ P.52
For details on menu items, see "Menu Settings." ➔ User's Guide
Menus may change according to the optional products in use.
Operations and Display Screen
Paper Menu
The Paper Menu is not displayed during printing.
First Level
Second Level
Third Level
Load Paper
Eject Paper
Roll Paper | Cut Sheet
Roll Paper | Cut Sheet
Chg. Paper Type(*1)
Roll Paper
(The paper type is displayed here.) (*1)
Cut Sheet
(The paper type is displayed here.) (*1)
Sheet Size(*4)
(The size of paper is displayed here.) (*2)
Chg. Paper Size
CustomPaperSize
Roll Length(*3)
(Set the length)
Roll Width(*4)
(Set the width)
ManageRemainRoll
Off* | On
Paper Details
(The paper type is
displayed here.) (*1)
Head Height
Fifth Level
(Set the length and width)
Skew Check Lv.
Automatic* | Highest | High | Standard | Low |
Lowest
Standard* | Loose | Off
Cutting Mode(*6)
Automatic | Eject | Manual
Cut Speed
Fast | Standard | Slow
Trim Edge First
Automatic | Off | On (Preset Len) | On(Input
Length) | Manual
Off | On
CutDustReduct.
VacuumStrngth
NearEnd RollMrgn
Automatic* | Strongest | Strong | Standard |
Weak | Weakest
Dry time
Off* | 1 sec. | 3 sec. |
5 sec. | 7 sec. | 9
sec.
Area(*5)
Entire area* | Leading edge
Off | 30 sec. | 1 min. | 3 min. | 5 min. | 10 min. |
30 min. | 60 min.
3mm | 20mm
NearEnd Sht Mrgn
3mm | 20mm
Scan Wait Time
Roll DryingTime
56
Fourth Level
Basic Guide
iPF830 Series
Menu Structure
First Level
Second Level
Third Level
BordlessOversize
Width Detection
Fourth Level
Fifth Level
Standard* | Little
Off | On*
Return Defaults
Paper Details
Keep Paper Type
Off* | On
Ink Menu
Printer Parts
*1:For information on the types of paper the printer supports, refer to the Paper Reference Guide. (See "Displaying the Paper
Reference Guide.") ➔ User's Guide Types of paper in the printer driver and related software (as well as on the Control Panel ) are updated when you install the printer driver from the User Software CD-ROM or if you update paper information with
the Media Configuration Tool. (See "Updating paper information.") ➔ User's Guide
*2:For information on the sizes of paper the printer supports, see "Paper Sizes." ➔ User's Guide
*3:Available only if ManageRemainRoll is On.
*4:Available only if Width Detection is Off.
*5:Leading edge is not available as a setting option in the Paper Detailed Settings dialog box of the printer driver.
*6:see "Specifying the Cutting Method for Rolls." ➔ User's Guide
First Level
Job Menu
First Level
Second Level
Third Level
Print Job
Stored Job
Job List
Mailbox List
(Choose a print job.)
(Enter a password if
one has been set.)
Job Log(*2)(*3)
(Choose from information about the latest
three print jobs.)
Document Name
Fourth Level
Fifth Level
Delete | Preempt Jobs(*1)
Job List
Print | Delete
Print Job List
Operations and Display Screen
Rep. Ink Tank
Head Cleaning A
User Name
Page Count
Job Status
OK | CANCELED
Print Start Time
Print Time
yyyy/mm/dd
hh:mm:ss
yyyy/mm/dd
hh:mm:ss
xxxsec.
Output Img. Size
(The image size is displayed)
Print End Time
Media Type
Paper Consumed
Paper Length
Paper Width
Interface
USB | Network | HDD
Ink Consumed
Tot.Ink Consumed
xxx.xxx ml
xxx.xxx ml
Print settings
(The ink color is displayed here.)
Head Height
Temp./Humidity
Adjustment req.
Print Job Log
Pause Print
Basic Guide
Off* | On
57
Menu Structure
iPF830 Series
First Level
HDD Information
Second Level
Third Level
Fourth Level
Fifth Level
Total capacity | Box free space
*1:If a pending job is selected, Print Anyway is displayed.
*2:This is displayed when Show Job Log is On in System Setup.
*3:Even if Show Job Log is Off in System Setup, it is displayed if a password is configured in Change Password in the
Admin. Menu and the password has been authenticated.
Set./Adj. Menu
Limited items are displayed during printing. The displayed items are indicated by annotations.
First Level
Test Print
Printer Parts
Adjust
Printer
Second Level
Third Level
Fourth Level
Fifth Level
Sixth Level
Seventh Level
Eighth Level
Nozzle Check | Status Print | Interface Print | GL2 Set Print | Paper Details | Print Job Log | Menu Map | Color
Palette
Head Posi.
Standard
Adj.
Simple
Feed Priority
Operations and Display Screen
Other
Initial adjustmt | Manual(*1)
Adj. Priority
Adj. Quality(*2)
Adjust
Length(*3)
Automatic* | Print Quality | Print Length
Head Inc. Adj.
Maintenance
Head
Cleaning
Nozzle Check
Auto(GenuinePpr) | Auto(OtherPaper) | Manual
AdjustA:High | B:Standard/Draft
mentPrint
Change
A:High | B:Standard/Draft
Settings
Head Cleaning A | Head Cleaning B
Replace P.head
Repl. maint cart
Head Info
GL2 Settings
Quality
Manager
Paper
Manager
58
Color
Mode
Print Quality
Input Resolution
Print
(Economy)
Paper
Source
Margin
Monochrome | Color (CAD) 1* | Color (CAD) 2 | Color (CAD) 3 | Color (CAD) 4
| Color (CAD) 5 | Color (CAD) 6
Fast | Standard* | High
Oversize
Off | On*
Conserve
Paper
Auto Rotate
Enlarge/
Reduce
Print centered
Standard
cut
Off* | On
600dpi* | 300dpi
Off* | On
Automatic* | Roll Paper | Cut Sheet
3mm(Standard)* | 5mm
Off* | On
Off* | Specify scaling | Fit to paper
Off* | On
Off* | On
Basic Guide
iPF830 Series
First Level
Menu Structure
Second Level
Line & Pen
Manager
Third Level
Fourth Level
Nesting
Use Nesting
Nesting
WaitTime(*4)
Cut
Lines(*4)
Off* | On
Off* | On
Select Palette
Define Palette
Software* | Palette A | Palette B | Factory
Enable
merge
Pen Setup
Fifth Level
Sixth Level
Seventh Level
xx min.
Off* | On
Palette A
(Select the
pen number)
Width
Line Attributes
Palette B
Factory
(Select the
pen number)
All Palette | Palette A | Palette B
ProcessingOption
No Setting |
Circle Setting
(Indicates
(Specify the
Width, Colvalues of
or, and Line
Width, ColAttributes )
or, and Line
Attributes )
(Indicates Width, Color, and
Line Attributes )
Reset Palette
Software* | Smooth
ThickenFineLines
AdjustFaintLines
Ln wdth
correct
Warning
Off* | On
On-the-Fly
Off* | On
Detect img
size
Off* | Command priority | Detected size
Operations and Display Screen
(Select the
pen number)
(Indicates
the value of
Width )
0~255
Printer Parts
Color
Smoothing
Eighth Level
Off | On*
Black/gray | Color
Off* | On
GL2 Set Print
Interface
Setup(*8)
EOP Timer(*8)
TCP/IP(*8)
10 sec. | 30 sec. | 1 min. | 2 min. | 5 min. | 10 min.* | 30 min. | 60 min.
IPv4(*8)
IPv4
Mode(*8)
Protocol(*5)(*8)
IPv4 Settings(*9)
Basic Guide
Automatic | Manual*
DHCP(*8)
On | Off*
BOOTP(*8)
On | Off*
RARP(*8)
On | Off*
IP Address(*9)
Subnet
Mask(*9)
Default
G/W(*9)
xxx.xxx.xxx.xxx
xxx.xxx.xxx.xxx
xxx.xxx.xxx.xxx
59
Menu Structure
First Level
iPF830 Series
Second Level
Third Level
Fourth Level
DNS Settings(*9)
Fifth Level
Sixth Level
Seventh Level
Eighth Level
DNS Dync
On | Off*
update(*9)
Pri. DNS SrvAddr(*9)
Sec. DNS SrvAddr(*9)
DNS Host Name(*9)
DNS Domain Name(*9)
IPv6(*8)
Printer Parts
IPv6 Support(*8)
IPv6 StlessAddrs(*8)
(*10)
DHCPv6(*
8)(*10)
DNS Settings(*9)
(*10)
On | Off*
On* | Off
On | Off*
DNS Dync
update(*9)
Statefull
Addr(*9)
Stateless
Addr(*9)
Pri. DNS SrvAddr(*9)
On | Off*
On | Off*
Sec. DNS SrvAddr(*9)
Operations and Display Screen
DNS Host Name(*9)
DNS Domain Name(*9)
Ethernet
Driver(*8)
Auto Detect(*8)
Comm.Mo
de(*6)(*8)
Ethernet
Type(*6)
(*8)
Spanning
Tree(*8)
MAC Address(*8)
Interface Print(*8)
On* | Off
Half Duplex* | Full Duplex
10 Base-T* | 100 Base-TX | 1000 Base-T
Not Use* | Use
xxxxxxxxxx
xx
Return Defaults(*8)
System
Setup
Sleep Timer(*11)
Shut Down
Timer
Buzzer
5 min.* | 10 min. | 15 min. | 20 min. | 30 min. | 40 min. | 50 min. | 60 min. | 210 min.
Contrast
Adj.
Date &
Time(*8)
-4,-3,-2,-1,0*,+1,+2,+3,+4
Date Format(*8)
Language
Time
Zone(*8)
60
Off | 5 min. | 10 min. | 30 min. | 1 hour | 4 hours | 8 hours* | 12 hours
Off | On*
Date
Time
yyyy/mm/d
hh:mm
d(*7)
yyyy/mm/dd* | dd/mm/yyyy | mm/dd/yyyy
English | 日本語 | Français | Italiano | Deutsch | Español | Português | Русский | 中文(简体字)
| 한국어
0:London (GMT) | +1:Paris,Rome | +2:Athens,Cairo | +3:Moscow | +4:Eerevan,Baku | +5:Islamabad | +6:Dacca | +7:Bangkok | +8:Hong Kong | +9:Tokyo,Seoul | +10:Canberra |
+11:NewCaledonia | +12:Wellington | -12:Eniwetok | -11:Midway is. | -10:Hawaii(AHST) |
-9:Alaska(AKST) | -8:Oregon (PST) | -7:Arizona(MST) | -6:Texas (CST) | -5:NewYork(EST) |
-4:Santiago | -3:Buenos Aires | -2: | -1:Cape Verde
Basic Guide
iPF830 Series
First Level
Menu Structure
Second Level
Length
Unit
Detect Mismatch
Paper Size
Basis
Fourth Level
Fifth Level
Sixth Level
Sht Selection 1
Sht Selection 2
Off* | On
ISO A3+* | 13"x19"(Super B)
ISO B1* | 28"x40" (ANSI F)
Automatic | Off* | On
Off | On*
Frequency
Standard* | 1 page | 10 pages | Off
Warning
Off* | On
Erase HDD
High Speed(*8) | Secure High Spd.(*8) | Secure(*8)
Data
Output
Print* | Print (Auto Del) | Save: Box XX
Method
Print After
Off* | On
Recv
Common
Print* | Print (Auto Del)
Box Set.
(*5)(*8)
Show Job
Off | On*
Log(*8)
Use TakeDisable* | Enable
up Reel
Auto Feed(*13)
Operations and Display Screen
Prep.Move
Printer
Admin.
Menu(*8)
Eighth Level
Pause | Warning | None* | Hold Job
CarriageSAutomatic* | Fixed
canWdth
Use
On* | Off
USB(*8)
Use EtherOn* | Off
net(*8)
Use RemoOn* | Off
teUI(*8)
Reset PaprSetngs(*8)
Take-up
Reel(*12)
Seventh Level
Printer Parts
Keep Paper Size
TrimEdge
Reload
Rep.P.hea
d Print
Nozzle
Check
Third Level
meter* | feet/inch
Skip TakeOff* | On
Up Err(*14)
Level 1 | Level 2 | Level 3
Change
(The screen for setting the password is displayed)
Password(*9)
Init.Admin.Pswd(*9)
Adj. Fine Feed(*15)(*16)
Printer Info(*15)
Paper Info
Ink Info
Head Info
System Info
Error Log
Basic Guide
61
Menu Structure
First Level
iPF830 Series
Second Level
Use Situation
Third Level
Fourth Level
Fifth Level
Sixth Level
Seventh Level
Eighth Level
Tot.Print Area | Duty Counter
Printer Parts
Operations and Display Screen
*1:Available after you have used Standard or Initial adjustmt in Head Posi. Adj. once.
*2:Available if Adj. Priority is Automatic or Print Quality.
*3:Available if Adj. Priority is Automatic or Print Length.
*4:Available only if Use Nesting is On.
*5:Not displayed if IPv4 Mode is Manual.
*6:Not displayed if Auto Detect is On.
*7:Follows the setting in Date Format.
*8:Restrictions apply if a password is configured using Change Password in the Admin. Menu.
Viewing and configuration is possible for administrators, and only viewing for other users.
*9:Restrictions apply if a password is configured using Change Password in the Admin. Menu.
Viewing and configuration is possible for administrators only.
*10:Not displayed if IPv6 Support is Off.
*11:Default setting for the time to enter the power save mode/Sleep mode is recommended.
*12:Displayed only when the Media Take-up Unit is attached.
*13:Available if: (a) Use Take-up Reel is Enable, (b) roll paper is loaded, and (c) you have not executed Auto Feed for the
loaded roll.
*14:Available when Use Take-up Reel is Enable.
*15:Displayed as the menu during printing while printing is in progress.
*16:Not displayed in the regular menu.
62
Basic Guide
Front
iPF830 Series
Printer parts
Front ............................................................................................................................................................... 63
Back ............................................................................................................................................................... 65
Top Cover (Inside) ........................................................................................................................................... 66
Carriage .......................................................................................................................................................... 67
Ink Tank Cover (Inside) .................................................................................................................................... 68
Front
a
i
b
m
l
Printer Parts
j
p
c
h
m
s e
r
n
q
k
o
g
s
d
Printer parts
f
t
a Top Cover
Open this cover to install the Printhead, load paper, and remove any jammed paper from inside the printer as
needed. (See "Top Cover (Inside).") ➔ P.66
b Ejection Guide
Guides printed documents as they are ejected. Open this guide when loading a roll.
c Roll Holder Slot
Slide the Roll Holder into this slot.
d Roll Holder
Load the roll on this holder.
e Ejection Support
Prevents printed documents from winding around the Roll Holder or being drawn into the Paper Feed Slot.
f Stationary Output Stacker
A cloth tray that catches ejected documents. (See "Stationary Output Stacker.") ➔ User's Guide
g Paper Feed Slot
When loading a roll, insert the edge of the roll paper here.
Basic Guide
63
Front
iPF830 Series
h Holder Stopper
Secure rolls on the Roll Holder with this part.
i Ink Tank Cover
Open this cover to replace an Ink Tank. (See "Ink Tank Cover (Inside).") ➔ P.68
j Control Panel
Use this panel to operate the printer and check the printer status. (See "Control Panel.") ➔ P.51
k Release Lever
Releases the Paper Retainer. Lift this lever toward the front of the printer when loading paper.
l Maintenance Cartridge
Ink used for maintenance purposes such as head cleaning is absorbed. (Replace the cartridge when it is full.)
m Carrying Handles
When carrying the printer, have six people hold it by these handles under both sides.
Printer Parts
n Maintenance Cartridge Cover
Open this cover to replace the Maintenance Cartridge.
o Stand
A stand that holds the printer. Equipped with casters to facilitate moving it.
Printer parts
p Stand L
The left leg of the Stand.
q Stand R
The right leg of the Stand.
r Top Stand Stay
Supports Stand L and Stand R. Attach the optional Media Take-up Unit to this part.
s Leg Covers
Covers for Stand L and Stand R.
t Stopper
Locks the Stand casters.
Always release the Stopper before moving the printer. Moving the printer while the Stopper is locked may
scratch the casters or the floor.
64
Basic Guide
Back
iPF830 Series
Back
b c
f
d
e
Printer Parts
g
a
Printer parts
a
a Carrying Handles
When carrying the printer, have six people hold it by these handles under both sides.
b USB Port
Connect a USB cable to this port. The printer is compatible with Hi-Speed USB connections.
c Ethernet Port
Connect an Ethernet cable to this port. The lamp is lit if the Ethernet cable is connected correctly and communication is possible between the computer and printer.
d Manual Pocket
Store printer manuals in this pocket.
e Accessory Pocket
Store assembly tools, Roll Holder attachments, and other items in this pocket.
f Power Supply Connector
Connect the power cord to this connector.
g Media Take-up Unit Power Inlet
Connect the connection cable for the Media Take-up Unit (optional).
65
Basic Guide
Top Cover (Inside)
iPF830 Series
Top Cover (Inside)
h
a
i j
Printer Parts
c
Printer parts
k
d
e
f
g
b
l
a Top Cover Roller
Prevents paper from rising when ejected.
b Paper Alignment Line
Align paper with this line when loading it.
c Carriage
Moves the Printhead. The carriage serves a key role in printing. (See "Carriage.") ➔ P.67
d Carriage Shaft
The Carriage slides along this shaft.
e Paper Retainer
Important in supplying the paper. This retainer holds paper as it is fed.
f Platen
The Printhead moves across the platen to print. Vacuum holes on the platen hold paper in place.
66
g Borderless Printing Ink Grooves
For catching ink outside the edges of paper during borderless printing.
Basic Guide
Carriage
iPF830 Series
h Cleaning Brush
When cleaning inside the printer under the Top Cover, use this brush to sweep away paper dust on the Platen.
Also use the brush to move the blue Switch on the Platen.
i Cutter Rail
The Cutter Unit passes over this rail to cut paper.
j Cutter Unit
A round-bladed cutter for automatic paper cutting.
k Linear Scale
The linear scale serves a key role in detecting the Carriage position. Be careful not to touch this part when
cleaning inside the Top Cover or clearing paper jams.
l Switch
Set the switch to the side opposite ● if the edges of printed images are blurred. Set the switch to the ● side
before borderless printing. (See "Setting the Blue Switch on the Platen.") ➔ User's Guide
b
a
Printer Parts
Carriage
Printer parts
c
d
a Printhead Fixer Cover
Holds the Printhead in place.
b Printhead
The printhead is equipped with ink nozzles. The carriage serves a key role in printing.
c Printhead Fixer Lever
Locks the Printhead Fixer Cover.
d Angle Adjustment Lever
Use this lever to fine-tune the printer to correct misalignment of printed lines.
67
Basic Guide
Ink Tank Cover (Inside)
iPF830 Series
Ink Tank Cover (Inside)
d
a
b
c
Y
GY
MB
K
BK
B
Printer Parts
Note: The figure shows the printer as loaded with 700 ml (23.7 fl oz) Ink Tank.
a Ink Tanks
Cartridges of ink in various colors.
Printer parts
b Ink Tank Lock Lever
A lever that locks the Ink Tank in place and protects it. Lift and lower the lever when replacing an Ink Tank. To
open it, lift the stopper of the lever until it stops, and then push it down toward the front. To close it, push it
down until it clicks into place.
c Ink Lamp (Red)
Indicates the state of the Ink Tank as follows when the Ink Tank Cover is opened.
• On
The Ink Tank is installed correctly.
• Off
No Ink Tank is installed, or the ink level detection function is disabled.
• Flashing Slowly
Not much ink is left.
• Flashing Rapidly
Ink tank is empty.
d Ink Color Label
Load an Ink Tank that matches the color and name on this label.
68
Basic Guide
Preparing to Transfer the Printer
iPF830 Series
Printer Relocation
Preparing to Transfer the Printer
Preparing to Transfer the Printer ...................................................................................................................... 69
Reinstalling the Printer ..................................................................................................................................... 75
Preparing to Transfer the Printer
To protect the internal parts in transit, always follow these steps before transferring the printer to a new location.
Refer to the Setup Guide for details on packing the printer and installing it after transfer.
• Be sure to contact your Canon dealer before transferring the printer to a new location. Ink may leak and damage
Important
the printer if you do not prepare the printer correctly and it is tipped or stood on end in transit.
Note
(that is, when you execute the printer menu item to prepare for transfer).
• Ink must be drawn into the Maintenance Cartridge before Level 2 or Level 3 printer transfer, as described in the
following table. Prepare the Maintenance Cartridge in advance.
Printer Relocation
• Depending on the state of the printer, part replacement may be necessary when preparing to transfer the printer
• Always follow the instructions of the service representative when transferring the printer under Level 3 conditions.
1
No
Permitted Angle of Inclination
Required
Amount of Ink to Maintenance
Dispose of
Cartridges(*1)
Lengthwise: 0–30º
Usage Examples
0(*2)
Moving Within a Room
and Storage In Room
Temperature Environments
Preparing to Transfer the Printer
Transport and
Storage In
Level Low Temperature Environments
Rotation: 0–10º
2
Yes
All directions: 0–30º
Approx. 700
ml (20.3 fl oz)
1 or 2
Transport By Vehicle
3
Yes
Lengthwise: 0–90º
Rotation: 0–30º
Approx. 700
ml (20.3 fl oz)
1 or 2
Move by temporarily
standing vertically
*1:This is the number of new Maintenance Cartridges required when you execute the Prep.MovePrinter
menu. The number varies depending on the amount remaining in the Maintenance Cartridge being used.
*2:If a message instructing you to replace the Maintenance Cartridge is displayed on the Display Screen, the
Maintenance Cartridge needs to be replaced.
Remove paper
1
Remove the paper.
• Rolls (See "Removing the Roll from the Printer.") ➔ P.18
• Sheets (See "Removing Sheets.") ➔ P.23
Basic Guide
69
Preparing to Transfer the Printer
iPF830 Series
Access the Prep.MovePrinter menu
1
2
If a message instructing you to replace the Maintenance Cartridge is displayed on the Display Screen, replace the Maintenance Cartridge.
(See "Replacing the Maintenance Cartridge.") ➔ P.42
On the Tab Selection screen of the Control Panel, press ◀ or
).
▶ to select the Settings/Adj. tab (
• If the Tab Selection screen is not displayed, press the Menu button.
Printer Relocation
Note
3
4
Preparing to Transfer the Printer
5
6
Press the OK button.
The Set./Adj. Menu is displayed.
Press ▲ or ▼ to select Prep.MovePrinter, and then press the OK button.
Press ▲ or ▼ to select the level of transfer, and then press the OK button.
Displays the confirmation screen.
Press ▲ or ▼ to select Execute, and then press the OK button.
The printer is now prepared for transfer.
• Level 1
Once preparations are finished, a message on the Display Screen requests you to turn off the printer.
Turn off and pack the printer. There is no need to remove the ink tanks.
(See "Pack the printer.") ➔ P.72
• Level 2 and Level 3
When the preparation is finished, instructions are displayed on the Display Screen.
Remove the ink tanks before packing the printer.
(See "Removing Ink Tanks.") ➔ P.70
• If consumables must be replaced, the message "Consumables must be replaced. Call for service."
Important
is shown on the Display Screen and preparation is not possible. If this message is displayed, press the
OK button and contact your Canon dealer for assistance.
Removing Ink Tanks
1
Open the Ink Tank Cover.
70
Basic Guide
iPF830 Series
2
Preparing to Transfer the Printer
Lift the stopper (a) of the Ink Tank Lock Lever (a). Lift
the Ink Tank Lock Lever until it stops, and then push it
down to the front.
a
Hold the Ink Tank by the handle (a) and remove it.
Printer Relocation
3
a
Preparing to Transfer the Printer
BK
• Store the Ink Tank you removed in the box with the ink holes
Important
4
(a) facing up. Otherwise, ink may leak and cause stains.
a
Repeat steps 2 and 3 to remove all ink tanks.
71
Basic Guide
Preparing to Transfer the Printer
5
iPF830 Series
Push down the release lever (a) as shown as you
gently return all ink tank lock levers to the original position.
a
Printer Relocation
6
Close the Ink Tank Cover.
At this point, ink is drawn out from inside the tubes.
Preparing to Transfer the Printer
• Do not remove the Maintenance Cartridge except when the message for replacing it is displayed.
Important
7
8
If you remove the Maintenance Cartridge while ink is being drawn out, the ink may leak out.
When the process is finished, "Preparations for moving the printer finished. Turn the power off" is displayed.
When this happens, replace the Maintenance Cartridge currently being used with a new Maintenance Cartridge.
Press the Power button and turn off the printer.
Pack the printer
1
Disconnect the power cord and interface cable, as well as the Media Take-up Unit cable.
• Turn off the printer before you unplug it. It may damage the printer if you unplug it before it is off and
Important
transfer it in that state. If you accidentally unplug the printer, plug it in again, reinstall the ink tanks, and
follow this procedure again.
72
Basic Guide
iPF830 Series
Open the Top Cover and lift the Ejection Guide.
3
Remove the four ejection supports and lower the
Ejection Guide.
4
Grasp the Belt, insert it between the Belt Stopper, and
affix the Belt Stopper with a hex screw at the position
indicated.
Printer Relocation
2
Preparing to Transfer the Printer
Preparing to Transfer the Printer
73
Basic Guide
Preparing to Transfer the Printer
iPF830 Series
• Here, the Belt Stopper is the one that was removed and stored after initial installation. Neglecting to
Important
attach the Belt Stopper may damage the printer.
• Do not touch the Linear Scale (a), Carriage
a
Shaft (b), or Ink Tube Stabilizer (c). Touching
these parts may damage them.
c
b
Printer Relocation
Close the Top Cover.
6
Tape down printer covers to secure them, in the reverse order of tape removal during installation.
Preparing to Transfer the Printer
5
74
7
Remove and package the Output Stacker by reversing the installation procedure.
8
Remove and package the Stand by reversing the installation procedure, when it was attached to the printer.
9
Disassemble and repackage the Stand by following the installation procedure in reverse.
10
Repack the Roll Holder, Holder Stopper, and printer in shipping materials, and then package them in a
shipping box.
Basic Guide
iPF830 Series
Reinstalling the Printer
Reinstalling the Printer
The basic workflow for reinstalling the printer is as follows.
For detailed instructions, see the Setup Guide.
Assemble the stand
1
Referring to the Printer Stand Setup Guide, assemble the Stand.
• The Stand must be assembled by at least two people on a flat surface. Attempting assembly by yourself
Caution
poses a risk of injury or bending the Stand.
• When assembling the Stand, lock the casters. In addition, always unlock the casters before moving the
assembled Stand. Attempting to move the stand when the casters are locked poses a risk of injury or
damage to the location site.
1
Printer Relocation
Install the printer
Mount the printer on the assembled Stand and tighten
the screws firmly.
Caution
Preparing to Transfer the Printer
• Moving the printer requires at least six people, holding it on both sides. Be careful to avoid back strain
and other injuries.
• When moving the printer, firmly grasp the Carry-
ing Handles (a) under each side. The printer may
be unsteady if you hold it at other positions,
which poses a risk of injury from dropping the
printer.
a
75
Basic Guide
Reinstalling the Printer
Attach the Stationary Output Stacker to the Stand by
referring to Printer Stand Setup Guide.
3
If you are using the optional Media Take-up Unit, attach the Media Take-up Unit to the Stand by referring
to the Setup Guide included with the Media Take-up
Unit.
4
Remove tape and packaging material attached to the
printer. Also open the Top Cover and remove stoppers
and spacers inside the printer.
Printer Relocation
2
iPF830 Series
Preparing to Transfer the Printer
76
Basic Guide
iPF830 Series
5
Reinstalling the Printer
Lift the Ejection Guide and attach the four Ejection
Supports to the back of the Ejection Guide.
6
Plug the power cord into the outlet.
8
Press the power button to turn the printer on.
When the message "Has printer been reinstalled?
(Do not load ink tanks yet.)" is displayed, select Yes
and press the OK button.
9
Open the Ink Tank Cover and install the ink tanks.
Preparing to Transfer the Printer
7
Connect the power cord to the Power Supply Connector
on the back of the printer.
Printer Relocation
a
77
Basic Guide
Reinstalling the Printer
10
Attach the Roll Holder to the Roll Media.
(See "Attaching the Roll Holder to Rolls.") ➔ P.12
11
Load the Roll Media in the printer.
(See "Loading Rolls in the Printer.") ➔ P.15
iPF830 Series
Printer Relocation
Preparing to Transfer the Printer
12
Install the software.
Note that the driver installation procedure varies depending on the type of connection.
(See "Installing the Software (Windows).") ➔ P.79
(See "Installing the Software (Mac OS).") ➔ P.81
78
Basic Guide
iPF830 Series
Installing the Software
Software Installation
Installing the Printer Driver (Windows)
Installing the Software
The basic instructions for installing the software are as follows.
For detailed instructions, see the Setup Guide.
Supported connection methods
The printer driver works over USB or network (TCP/IP) connections.
The driver installation procedure varies depending on the type of connection.
Follow these steps to install the software.
Installing the Software (Windows)
Important
tions displayed.
If you accidentally connect the USB cable first, the printer driver may not be installed correctly.
• When the printer is connected to a network (via TCP/IP), the printer's IP address may be changed if you reinstall
the printer. In this case, be sure to reconfigure the printer's IP address.
1
2
Insert the provided User Software CD-ROM for the
appropriate operating system in the CD-ROM drive.
3
Follow the instructions displayed to complete installation.
Installing the Printer Driver (Windows)
Turn the computer on.
When setting up a TCP/IP (network) connection, after making sure the printer is on, connect the LAN cable
to the Ethernet port on the left side of the printer and to your network hub port.
Software Installation
• When setting up a USB connection, connect the USB cable during printer driver installation following the instruc-
79
Basic Guide
Installing the Software
iPF830 Series
• For USB connections, when the dialog box at
Important
4
right is displayed, make sure the printer is on
and connect the printer and computer with
the USB cable.
On the Finish window, select Restart my computer now and click Restart.
Software settings take effect after the computer restarts.
Software Installation
Installing the Printer Driver (Windows)
80
Basic Guide
iPF830 Series
Installing the Software
Installing the Printer Driver (Mac OS)
Installing the Software
The basic instructions for installing the software are as follows.
For detailed instructions, see the Setup Guide.
Supported connection methods
The printer driver works over USB or network (Bonjour or IP) connections.
Follow these steps to install the software.
Installing the software
• When the printer is used over a network, the printer's IP address may be changed if you reinstall the printer. In
Important
After making sure the computer and printer are not connected by a cable, turn the computer on.
Insert the provided User Software CD-ROM for the
appropriate operating system in the CD-ROM drive.
3
Follow the instructions displayed to complete installation.
Installing the Printer Driver (Mac OS)
2
Software Installation
1
this case, be sure to reconfigure the printer's IP address.
• When the dialog box at right is displayed,
Important
make sure the printer is on and connect the
printer and computer with the cable.
81
Basic Guide
Installing the Software
4
iPF830 Series
After installation, click Exit.
Software Installation
Installing the Printer Driver (Mac OS)
82
Basic Guide
iPF830 Series
Print Preview
Convenient Printer Driver Features
Print Preview ................................................................................................................................................... 83
Rotate Page 90 degrees (Converse Paper) ...................................................................................................... 85
Borderless Printing .......................................................................................................................................... 86
Large-Format Printing ..................................................................................................................................... 87
Enlarged/Reduced Printing ............................................................................................................................. 88
Print Preview
Using the print preview function enables the following.
Check an image of the document as arranged on the paper, in the position it will be printed.
You can reduce printing costs by checking how documents
will be printed beforehand, without the need to print them.
•
Change the layout orientation relative to the paper.
You can save paper by correcting the direction in which
the document is arranged on the paper, if necessary.
1.
2.
Access the Main sheet.
3.
Check details in the Information dialog box displayed next
and click OK to close the Information dialog box.
4.
After you click OK, when you print a job, the imagePROGRAF Preview window will be displayed.
Select the Open Preview When Print Job Starts check
box.
Convenient Printer Driver Features
Configuring Settings in Windows
Software Installation
•
• Under some settings and in some environments, PageComposer may be started.
Note
83
Basic Guide
Print Preview
iPF830 Series
Configuring Settings in Mac OS
1.
2.
Access the Main pane.
3.
After you click Print, the Canon imagePROGRAF Preview window will be displayed.
Select the Print Preview check box.
Software Installation
Convenient Printer Driver Features
84
Basic Guide
Rotate Page 90 degrees (Converse Paper)
iPF830 Series
Rotate Page 90 degrees (Converse Paper)
You can conserve roll paper by specifying particular settings
as suitable for your original.
When you print an original that is in portrait orientation, the
original is rotated 90 degrees before printing if it fits within the
roll width. This enables you to conserve paper.
• If the page would exceed the roll paper width after rotation, you can use this function with Scale to fit Roll Paper
Note
Width to print rotated pages.
Configuring Settings in Windows
Access the Page Setup sheet.
Select the Rotate Page 90 degrees (Conserve Paper)
check box.
1.
2.
Convenient Printer Driver Features
Configuring Settings in Mac OS
Software Installation
1.
2.
Access the Page Setup pane.
Select the Rotate Page 90 degrees check box.
85
Basic Guide
Borderless Printing
iPF830 Series
Borderless Printing
In regular printing, a margin required by the printer is added
around the original. With borderless printing, you can print
documents without the margin, so that the printed image covers the entire surface of the paper.
Borderless printing is only available with rolls.
Configuring Settings in Windows
1.
2.
Software Installation
3.
4.
5.
Access the Page Setup sheet.
Select the Borderless Printing check box to display the
Information dialog box.
Click the width of the loaded roll in the Roll Paper Width
list.
Click OK to close the Information dialog box.
Select Fit Paper Size, Scale to fit Roll Paper Width, or
Print Image with Actual Size.
Convenient Printer Driver Features
Configuring Settings in Mac OS
1.
2.
3.
4.
Access the Page Setup pane.
Click the width of the loaded roll in the Roll Width list.
Select the Enlarged/Reduced Printing check box.
Select the Borderless Printing check box.
86
Basic Guide
iPF830 Series
Large-Format Printing
Large-Format Printing
You can create vertical or horizontal banners by printing originals in banner formats on rolls.
Originals created in Microsoft Word or other applications in
your preferred size can be enlarged to fill the width of roll paper by completing simple printer driver settings.
The printer supports roll printing up to a maximum length of
18.0 m (19.7 yd).
Configuring Settings in Windows
Access the Page Setup sheet.
5.
Click the width of the loaded roll in the Roll Paper Width
list, and then click OK.
Click Size Options and register the original size.
Select the Enlarged/Reduced Printing check box.
After you click Fit Roll Paper Width, the Information dialog box is displayed.
1.
2.
3.
4.
Access the Page Setup pane.
Convenient Printer Driver Features
Configuring Settings in Mac OS
Software Installation
1.
2.
3.
4.
Click the width of the loaded roll in the Roll Width list.
Select the Enlarged/Reduced Printing check box.
Click Fit Roll Paper Width.
87
Basic Guide
Enlarged/Reduced Printing
iPF830 Series
Enlarged/Reduced Printing
Originals can be printed at larger or smaller sizes, as desired.
Configuring Settings in Windows
Software Installation
1.
2.
Access the Page Setup sheet.
3.
In the Page Size list, click the size of the original as specified in the source application.
Select the Enlarged/Reduced Printing check box.
4.
5.
Click the width of the loaded roll in the Roll Paper Width
list.
Select Fit Paper Size, Fit Roll Paper Width, or Scaling.
Convenient Printer Driver Features
Configuring Settings in Mac OS
1.
2.
3.
4.
Access the Page Setup pane.
Click the width of the loaded roll in the Roll Width list.
Select the Enlarged/Reduced Printing check box.
Select either Fit Roll Paper Width or Scaling.
88
Basic Guide
iPF830 Series
Automatic Adjustment to Straighten Lines and Colors
Adjustments for Better Print Quality
Adjusting the Printhead
Automatic Adjustment to Straighten Lines and Colors
If vertical lines in printed documents are warped or colors are out of alignment, execute Head Posi. Adj.. The printer will print and read a test pattern, and the Printhead position will be adjusted automatically.
There are two modes for automatic Printhead adjustment: Standard and Simple.
• Standard
Execute if vertical lines in printed material are warped or colors are out of alignment.
Furthermore, if Simple does not improve printing, try Standard.
• This function is not available with Tracing Paper, Translucent Matte Film, or Clear Film.
Important
• If adjustment is not possible as expected using special media, try another type of paper, or try Manual adjust-
• Because the results of adjustment vary depending on the type of paper used for adjustment, use the same type of
paper as you will use for printing.
• If Standard does not improve printing, try adjusting the printhead manually.
(See "Manual Adjustment to Straighten Lines and Colors.") ➔ User's Guide
Adjusting the Printhead
ment.
(See "Manual Adjustment to Straighten Lines and Colors.") ➔ User's Guide
Note
Adjustments for Better Print Quality
• Simple
Executes simple adjustment in a short time.
Execute this when frequently adjusting the printhead, such as during daily inspection.
• If the printhead position was not adjusted during initial setup or when the printhead was replaced, execute Initial
adjustmt.
(See "Adjustment When Installing the Printhead.") ➔ User's Guide
Items to Prepare
When Using Rolls
An unused roll at least 254.0 mm (10.00 in) wide
When Using Sheets
Standard : Two sheets of unused paper, A4/Letter size (or one sheet when using A3 or larger)
Simple: One sheet of unused paper, A4/Letter size
Perform adjustment as follows.
1
Load paper.
• Attaching the Roll Holder to Rolls ➔ P.12
• Loading Rolls in the Printer ➔ P.15
• Loading Sheets in the Printer ➔ P.21
• Always make sure the loaded paper matches the type of paper specified on the printer. Adjustment canImportant
Basic Guide
not be completed correctly unless the loaded paper matches the settings.
89
Automatic Adjustment to Straighten Lines and Colors
2
iPF830 Series
On the Tab Selection screen of the Control Panel, press ◀ or
▶ to select the Settings/Adj. tab (
).
• If the Tab Selection screen is not displayed, press the Menu button.
Note
3
Press the OK button.
The Set./Adj. Menu is displayed.
Adjustments for Better Print Quality
4
Press ▲ or ▼ to select Adjust Printer, and then press the OK button.
5
Press ▲ or ▼ to select Head Posi. Adj., and then press the OK button.
6
7
Press ▲ or ▼ to select Standard or Simple, and then press the OK button.
A test pattern is printed for adjustment.
Adjustment is now finished if you have printed on a roll.
If you are printing on cut sheets, a confirmation message is displayed on the Display Screen asking you
whether to continue printing.
Press the OK button and follow the instructions on the Display Screen.
Adjusting the Printhead
90
Basic Guide
iPF830 Series
Selecting a Feed Amount Adjustment Method
Adjusting the feed amount
Selecting a Feed Amount Adjustment Method ................................................................................................ 91
Adjusting Line Length ..................................................................................................................................... 92
Selecting a Feed Amount Adjustment Method
Methods of adjusting the amount paper is fed are set in Adj. Priority.
Adjust Adj. Priority to suit your particular printing application.
• Print Quality: Adjusts the feed amount to reduce banding across the sheet in printed documents.
Adj. Quality settings are applied. When Adj. Fine Feed is executed, the Adj. Fine Feed settings are applied
in addition to the Adj. Quality settings.
• Print Length: Adjusts the feed amount for better accuracy of lines in printed documents.
The settings of A:High or B:Standard/Draft in Adjust Length are applied.
• Either A:High or B:Standard/Draft in the Adjust Length menu is applied, depending on printer driver settings at
Note
the time of printing.
• If you have selected Easy Settings in the printer driver, follow these steps to confirm the Print Priority setting.
• Windows: Click View Settings on the Main tab to display the View Settings dialog box.
Adjustments for Better Print Quality
• Automatic: Print Quality or Print Length is selected, depending on Print Priority as selected in the printer
driver at the time of printing.
Image or Office Document: Print Quality is selected.
Line Drawing/Text: Print Length is selected.
• Mac OS: Click View set. on the Main pane to display the View set. dialog box.
1
Load the paper.
• Attaching the Roll Holder to Rolls ➔ P.12
• Loading Rolls in the Printer ➔ P.15
• Loading Sheets in the Printer ➔ P.21
2
On the Tab Selection screen of the Control Panel, press ◀ or
▶ to select the Settings/Adj. tab (
).
Adjusting the feed amount
Follow these steps to configure the settings.
• If the Tab Selection screen is not displayed, press the Menu button.
Note
3
Press the OK button.
The Set./Adj. Menu is displayed.
4
Press ▲ or ▼ to select Adjust Printer, and then press the OK button.
5
Press ▲ or ▼ to select Feed Priority, and then press the OK button.
6
Press ▲ or ▼ to select Adj. Priority, and then press the OK button.
Basic Guide
91
Adjusting Line Length
7
iPF830 Series
Press ▲ or ▼ to select Automatic, Print Quality, or Print Length, and then press the OK button.
Adjusting Line Length
To ensure that lines in CAD drawings are printed at exactly the right length, use Adjust Length to adjust the
amount that paper is advanced.
There are two options in Adjust Length : AdjustmentPrint and Change Settings.
• AdjustmentPrint
After a test pattern is printed, you will measure the discrepancy based on the results of printing.
• Change Settings
No test pattern is printed. Instead, you will measure a document already printed to determine the discrepancy.
Additionally, two modes are available in both AdjustmentPrint and Change Settings : A:High or B:Standard/
Draft. Choose the mode that suits your particular printing application.
Adjustments for Better Print Quality
• A:High
This setting is applied when Highest or High is selected in Print Quality in the printer driver.
• B:Standard/Draft
This setting is applied when Standard or Fast is selected in Print Quality in the printer driver.
• Always check the Adj. Priority values before using Adjust Length. (See "Selecting a Feed Amount Adjustment
Note
Method.") ➔ P.91
• Use paper of the same type and size for adjustment as you will use for printing.
Paper to Prepare
When Using Rolls
Adjusting the feed amount
When Using Sheets
•
•
An unused roll at least 10 inches wide
•
•
One sheet of unused paper of at least A4/Letter size
High-precision ruler
High-precision ruler
Perform adjustment as follows.
1
Load the paper.
• Attaching the Roll Holder to Rolls ➔ P.12
• Loading Rolls in the Printer ➔ P.15
• Loading Sheets in the Printer ➔ P.21
• Always make sure the loaded paper matches the type of paper specified. Adjustment cannot be comImportant
2
pleted correctly unless the loaded paper matches the settings.
On the Tab Selection screen of the Control Panel, press ◀ or
▶ to select the Settings/Adj. tab (
).
• If the Tab Selection screen is not displayed, press the Menu button.
Note
92
3
Press the OK button.
The Set./Adj. Menu is displayed.
Basic Guide
iPF830 Series
Adjusting Line Length
4
Press ▲ or ▼ to select Adjust Printer, and then press the OK button.
5
Press ▲ or ▼ to select Feed Priority, and then press the OK button.
6
Press ▲ or ▼ to select Adjust Length, and then press the OK button.
7
Press ▲ or ▼ to select AdjustmentPrint or Change Settings,
and then press the OK button.
When you select AdjustmentPrint, a test pattern is printed for
you to measure the scale and calculate the discrepancy. The
scale bar prints Millimeter in 50 mm increments and Inch in 1inch increments.
Millimeter
Inch
Note
Draft.
• To cancel printing the test pattern for adjustment, hold down the Stop button. When "Stop printing?" is
displayed, press ▲ or ▼ to select Yes, and then press the OK button.
8
Press ▲ or ▼ to enter the amount of discrepancy, and then press the OK button.
If the scale is shorter than the actual size, use a positive setting value. If it is longer, use a negative value.
The feed amount can be adjusted in 0.02% increments.
Adjustments for Better Print Quality
• A test pattern is printed in black when you choose A:High or in magenta if you choose B:Standard/
Adjusting the feed amount
93
Basic Guide
Clearing Jammed Roll Paper
iPF830 Series
Troubleshooting
Problems Regarding Paper
Clearing Jammed Roll Paper ........................................................................................................................... 94
Clearing a Jammed Sheet ............................................................................................................................... 97
Troubleshooting When Paper Jams are not Found .......................................................................................... 99
Roll paper cannot be inserted into the Paper Feed Slot ................................................................................. 101
Cannot load sheets ....................................................................................................................................... 102
Paper is not cut neatly ................................................................................................................................... 102
Paper is not cut ............................................................................................................................................. 102
The Media Take-up Unit Continues Rotating .................................................................................................. 102
The size of clear film cannot be detected ...................................................................................................... 103
Clearing Jammed Roll Paper
If roll paper jams, follow the steps below to remove jams.
• If you do not find any scraps or jams, see "Troubleshooting When Paper Jams are not Found."
➔ P.99
Note
Troubleshooting
1
Turn the printer off. (See "Turning the Printer On and Off.") ➔ User's Guide
2
Open the Top Cover.
Problems Regarding Paper
• If the leading edge of the roll jams in the carriage such as when the paper curls strongly, you may be able
Note
3
to avoid paper jamming by setting the roll cutting method to Manual and setting the detection of paper
leading edge to Do not perform.
(See "Specifying the Cutting Method for Rolls.") ➔ User's Guide
If the Carriage is out, move the Carriage out of the
way, away from the paper.
94
Basic Guide
iPF830 Series
Clearing Jammed Roll Paper
• Do not touch the Linear Scale (a), Carriage
Important
a
Shaft (b), or Ink Tube Stabilizer (c). Touching
these parts may damage them.
c
b
4
If the Cutter is out, move the Cutter to the right side,
away from the paper.
Troubleshooting
Important
5
turn the printer on, the printer may rip the paper.
Lift the Release Lever.
Problems Regarding Paper
• If the Cutter is on the left side, be sure to move it to the right. If the Cutter is on the left side when you
95
Basic Guide
Clearing Jammed Roll Paper
6
iPF830 Series
Holding the paper on both sides, pull the jammed portion out toward the front. Use a scissors or cutting tool
to cut away the printed or wrinkled portion.
• When cutting paper, be careful to avoid injury and damaging the printer.
Troubleshooting
Caution
7
If the Carriage is on the left, move the Carriage to the
right until it stops.
Problems Regarding Paper
• Always move the Carriage to the right side. If the Carriage is on the left, a Carriage error may occur
Important
8
when you turn on the printer.
Hold the edge of the roll paper in the middle as you
gently pull it evenly to the position of the Ejection
Guide (a). Align the right side of the roll paper with the
Paper Alignment Line (b), keeping this side parallel to
the line, and then lower the Release Lever.
a
b
96
Basic Guide
iPF830 Series
Clearing a Jammed Sheet
• Do not force the roll paper into alignment with the Paper Alignment Line (b). This may prevent the paper
Important
9
10
from being advanced straight.
• If you pull out too much of the roll, an excessive amount will be cut away.
Close the Top Cover.
Turn the printer on. (See "Turning the Printer On and Off.") ➔ User's Guide
The roll is now advanced. After it is finished being advanced, you can resume printing.
• You can ensure that the edge is cut neatly by selecting Paper Cutting in the printer menu.
Note
(See "Specifying the Cutting Method for Rolls.") ➔ User's Guide
Clearing a Jammed Sheet
Turn the printer off. (See "Turning the Printer On and Off.") ➔ User's Guide
2
Open the Top Cover.
3
If the Carriage is out, move the Carriage out of the
way, away from the paper.
Problems Regarding Paper
1
Troubleshooting
If a sheet jams, follow the steps below to remove it.
97
Basic Guide
Clearing a Jammed Sheet
iPF830 Series
• Do not touch the Linear Scale (a), Carriage
Important
a
Shaft (b), or Ink Tube Stabilizer (c). Touching
these parts may damage them.
c
b
Lift the Release Lever.
5
Hold the paper and pull it out, toward the front.
Troubleshooting
4
Problems Regarding Paper
• If you do not find any scraps or jams, see "Troubleshooting When Paper Jams are not Found."
➔ P.99
Note
98
Basic Guide
iPF830 Series
6
Troubleshooting When Paper Jams are not Found
If the Carriage is on the left, move the Carriage to the
right until it stops.
• Always move the Carriage to the right side. If the Carriage is on the left, a Carriage error may occur
Important
when you turn on the printer.
Lower the Release Lever and close the Top Cover.
8
Turn the printer on. (See "Turning the Printer On and Off.") ➔ User's Guide
Troubleshooting
7
1
Turn the printer off. (See "Turning the Printer On and Off.") ➔ User's Guide
2
Open the Top Cover and lift the Ejection Guide.
Problems Regarding Paper
Troubleshooting When Paper Jams are not Found
If you cannot find a paper jam, search for the paper as follows.
99
Basic Guide
Troubleshooting When Paper Jams are not Found
Check for paper in the lower part of the printer. Remove any jammed paper here by pushing it to the
floor with your fingers.
4
Lift the Release Lever.
5
Open the Top Cover, and if there is a paper jam at the
position shown, push it inside with your fingers.
Troubleshooting
3
iPF830 Series
Problems Regarding Paper
100
Basic Guide
iPF830 Series
Roll paper cannot be inserted into the Paper Feed Slot
The paper will drop to the floor or to the lower part of the printer.
• If there is paper left in the lower part of the printer, push it to the floor with your fingers.
Note
• If the paper does not drop to the floor or to the lower part of the printer, fold an A4 sheet three times,
insert it through the gap of the Platen (a) and the Paper Retainer (b), and push the jammed paper out.
a
7
Turn the printer on. (See "Turning the Printer On and Off.") ➔ User's Guide
Problems Regarding Paper
Lower the Release Lever and close the Top Cover.
Troubleshooting
6
b
Roll paper cannot be inserted into the Paper Feed Slot
Cause
Corrective Action
The roll paper is warped.
Straighten out curls and reload the roll.
Paper is jammed by the paper feed slot.
Remove the jammed paper.
(See "Clearing Jammed Roll Paper.") ➔ P.94
(See "Clearing a Jammed Sheet.") ➔ P.97
The paper source selection is incorrect.
Press the Load button and select the paper source.
101
Basic Guide
Cannot load sheets
iPF830 Series
Cannot load sheets
Cause
Corrective Action
The paper source selection is incorrect.
Press the Load button and select the paper source.
Paper is not cut neatly
Cause
Corrective Action
The paper is bent or curled at the cut position.
Straighten out any curling by the edges of the paper.
Paper rises by the ends of the cut position
before it is cut.
Reload the paper correctly.
You are using paper that cannot be cut with
the Cutter Unit.
Specify Manual in Cutting Mode in the Control Panel menu and use scissors or a
cutting tool to cut the roll after printing.
(See "Specifying the Cutting Method for Rolls.") ➔ User's Guide
Cut Speed is not configured correctly in the
Control Panel menu.
Change the Cut Speed setting in the Control Panel menu.
(See "Menu Structure.") ➔ P.56
During cutting, printed documents fall out at
an angle.
In the Control Panel menu, set Cutting Mode to Eject. Hold documents after printing, as they are cut.
(See "Specifying the Cutting Method for Rolls.") ➔ User's Guide
Paper is not cut
Troubleshooting
Cause
Corrective Action
Problems Regarding Paper
In the printer driver, No or Print Cut
Guideline is specified in Automatic
Cutting.
Specify Yes in Automatic Cutting in the printer driver.
(See "Page Setup Sheet (Windows).") ➔ User's Guide
(See "Paper Detailed Settings Dialog Box (Mac OS).") ➔ User's Guide
In the Control Panel menu, Cutting
Mode is set to Eject or Manual.
If the Cutting Mode is Eject, press the Cut button to cut the paper.
If the Cutting Mode is Manual, cut rolls with scissors or the like.
(See "Specifying the Cutting Method for Rolls.") ➔ User's Guide
Rolls are not cut when you are using
the Media Take-up Unit.
Either cut the roll paper by pressing the Cut button or lift the Release Lever and cut the roll
with scissors.
(See "Removing Printed Documents from the Media Take-up Unit.") ➔ User's Guide
The Media Take-up Unit Continues Rotating
Cause
There is a foreign object in the path of the Media Take-up Sensor (indicated
by a dotted line).
Corrective Action
Remove the foreign object from the Media Take-up
Sensor path. Arrange the Basket Cloth and Basket
Rod so they do not interfere with the Media Takeup Sensor.
102
Basic Guide
The size of clear film cannot be detected
iPF830 Series
Cause
Corrective Action
Remove the foreign object from the Media Take-up
Sensor path. Arrange the Basket Cloth and Basket
Rod so they do not interfere with the Media Takeup Sensor.
Reconnect the Media Take-up Sensor cord as follows.
Turn the printer off.
2.
Disconnect the Media Take-up Sensor cord
from the Right Media Take-up Unit and reconnect it firmly, all the way in.
Turn the printer on.
3.
(See "Using the Media Take-up
Unit.") ➔ User's Guide
If the Media Take-up Unit continues rotating, contact your Canon dealer for assistance.
Problems Regarding Paper
1.
Troubleshooting
The Media Take-up Sensor cord is not connected to the Right Media Take-up
Unit correctly.
The size of clear film cannot be detected
Cause
Corrective Action
The Platen is soiled with ink or other substances.
Open the Top Cover and clean the entire Platen.
(See "Cleaning Inside the Top Cover.") ➔ P.47
103
Basic Guide
The Data lamp on the Control Panel does not light up
iPF830 Series
Printing does not start
The Data lamp on the Control Panel does not light up ................................................................................... 104
The printer does not respond even if print jobs are sent ................................................................................ 104
Ink Filling.. is displayed .................................................................................................................................. 104
The display screen indicates Agitating ........................................................................................................... 105
The Data lamp on the Control Panel does not light up
Cause
The printer is not
on.
Corrective Action
Make sure the power cord is securely plugged in, all the way. Press the Power button to turn on the printer.
The target printer
was not selected
when printing.
•
In Windows, select the printer by clicking Select Printer or Printer in the printing dialog box and try printing
again.
•
In Mac OS, open the dialog box of the printer driver, select the printer from the list of Printer, and try printing again.
The print job is
paused.
•
In Windows, restart the print job as follows.
Troubleshooting
1.
2.
3.
Click the printer icon in the Devices and Printers window.
Click See what's printing to open a window.
Click Pause Printing in the Printer menu to clear the check box.
Note, depending on the version, restart the print job as follows.
1.
2.
Printing does not start
•
Right-click the printer icon in the Printers and Faxes (or Printers) window.
Click Resume Printing in the menu.
In Mac OS, restart the print job as follows.
1.
Click Print & Scan. (This is identified as Printers & Scanners or Print & Fax in other versions of Mac
OS.)
2.
Choose the printer.
3.
Click Open Print Queue to open a window.
4.
Click Resume Printer (or Resume).
The printer does not respond even if print jobs are sent
Cause
Corrective Action
In the Control Panel menu, Pause Print is On.
Set Pause Print to Off.
(See "Pausing Printing.") ➔ User's Guide
In the Control Panel menu, Use USB or Use
Ethernet is set to Off.
Set Use USB or Use Ethernet to On.
(See "Menu Settings.") ➔ User's Guide
You have selected Save in mail box in Output
Method on the printer.
Print the job saved on the printer's hard disk.
(See "Printing Saved Jobs.") ➔ User's Guide
Print jobs are pending.
Manage the jobs on hold and print as needed.
(See "Managing Pending Jobs (Printing or Deleting Jobs on
Hold).") ➔ User's Guide
Ink Filling.. is displayed
104
Cause
Corrective Action
The printer was forced off during operation.
Wait until the system has been filled with ink.
Basic Guide
The display screen indicates Agitating
iPF830 Series
The display screen indicates Agitating
Cause
Corrective Action
Ink agitation is in progress.
Please wait until ink agitation is finished.
The time for agitation varies depending on how long the printer has been off.
Troubleshooting
Printing does not start
105
Basic Guide
An error message is shown on the Display Screen
iPF830 Series
The printer stops during a print job
An error message is shown on the Display Screen ........................................................................................ 106
The printer ejects blank, unprinted paper ...................................................................................................... 106
An error message is shown on the Display Screen
Cause
Corrective Action
The last portion of roll paper was used during a print job, and paper
could not be advanced because the trailing edge is taped to the
roll.
Remove the used roll and insert a new roll.
(See "Removing the Roll from the Printer.") ➔ P.18
(See "Removing the Roll Holder from Rolls.") ➔ User's Guide
(See "Loading and Printing on Rolls.") ➔ User's Guide
The printer ejects blank, unprinted paper
Troubleshooting
Cause
Corrective Action
The leading edge of the roll paper was cut
to straighten it.
The leading edge of rolls may be cut to straighten it if Trim Edge First is set to a value
other than Off in the Control Panel menu.
(See "Cutting the Leading Edge of Roll Paper Automatically.") ➔ User's Guide
The Printhead nozzles are clogged.
Print a test pattern to check the nozzles and make sure the Printhead is in good condition for printing.
(See "Checking for Nozzle Clogging.") ➔ User's Guide
A print job was received from an incompatible printer driver.
Use the correct imagePROGRAF printer driver for the printer and try printing again.
The printer has received print data that includes HP RTL commands when Auto
Rotate is On in the Control Panel menu.
In the Control Panel, set Auto Rotate to Off and print again.
(See "Menu Settings.") ➔ User's Guide
The printer is damaged.
Contact your Canon dealer for assistance.
The printer stops during a print job
106
Basic Guide
iPF830 Series
Printing is faint
Problems with the printing quality
Printing is faint ............................................................................................................................................... 107
Paper rubs against the Printhead .................................................................................................................. 108
The edges of the paper are dirty .................................................................................................................... 108
The surface of the paper is dirty .................................................................................................................... 109
The back side of the paper is dirty ................................................................................................................. 109
Printed colors are inaccurate ......................................................................................................................... 109
Banding in different colors occurs ................................................................................................................. 110
Colors in printed images are uneven .............................................................................................................. 110
Image edges are blurred or white banding occurs ......................................................................................... 111
The contrast becomes uneven during printing ............................................................................................... 111
The length of printed images is inaccurate in the feeding direction ................................................................. 112
Images are printed crooked ........................................................................................................................... 112
Documents are printed in monochrome ........................................................................................................ 112
Line thickness is not uniform ......................................................................................................................... 112
Lines are misaligned ...................................................................................................................................... 113
Printing is faint
Cause
Corrective Action
Print on the printing surface.
The Printhead nozzles are
clogged.
Print a test pattern to check the nozzles and see if they are clogged.
(See "Checking for Nozzle Clogging.") ➔ User's Guide
Because the printer was left
without ink tanks installed for
some time, ink has become
clogged in the ink supply system.
After the ink tanks have been installed for 24 hours, run Head Cleaning B from the Control Panel.
(See "Cleaning the Printhead.") ➔ P.49
Paper is jammed inside the Top
Cover.
Follow the steps below to remove the jammed piece of paper inside the Top Cover.
1.
Open the Top Cover and make sure the Carriage is not over the Platen.
2.
Remove any scraps of paper inside the Top Cover.
(See "Clearing Jammed Roll Paper.") ➔ P.94
(See "Clearing a Jammed Sheet.") ➔ P.97
3.
Close the Top Cover.
The ink was not dry when paper was cut.
Specify a longer drying period in the Control Panel menu, in Paper Details > Roll DryingTime.
(See "Menu Settings.") ➔ User's Guide
Printing may be faint if Print
Quality in Advanced Settings
in the printer driver is set to
Standard or Fast.
In Advanced Settings of the printer driver, choose Highest or High in Print Quality.
Printing in Fast or Standard mode is faster and consumes less ink than in Highest or High
modes, but the printing quality is lower.
(See "Giving Priority to Particular Graphic Elements and Colors for Printing.") ➔ User's Guide
You are printing on paper that
tends to generate dust when
cut.
In the Control Panel menu, set CutDustReduct. in Paper Details to On.
(See "Reducing Dust from Cutting Rolls.") ➔ User's Guide
Problems with the printing quality
To check for nozzles after printing, set Frequency in Nozzle Check in the Control Panel menu to
a setting other than Off.
Furthermore, to have a warning displayed depending on the result of the nozzle check, set Warning in Nozzle Check in the Control Panel menu to On.
Note that when Warning is set to On, printing may stop depending on the content of the warning.
(See "Menu Settings.") ➔ User's Guide
Troubleshooting
You may be printing on the
wrong side of the paper.
107
Basic Guide
Paper rubs against the Printhead
iPF830 Series
Paper rubs against the Printhead
Cause
The type of paper specified in the
printer driver does not match the
type loaded in the printer.
Corrective Action
Load paper of the same type as you have specified in the printer driver.
(See "Loading Rolls in the Printer.") ➔ P.15
(See "Loading Sheets in the Printer.") ➔ P.21
Make sure the same type of paper is specified in the printer driver as you have loaded in the
printer.
1.
2.
Press the Stop button and stop printing.
Change the type of paper in the printer driver and try printing again.
Paper has been loaded incorrectly,
causing it to wrinkle.
Reload the paper.
(See "Loading Rolls in the Printer.") ➔ P.15
(See "Loading Sheets in the Printer.") ➔ P.21
The Printhead is set too low in the
Control Panel menu.
In the Control Panel menu, set Head Height to Automatic.
(See "Troubleshooting Paper Abrasion and Blurry Images.") ➔ User's Guide
You are printing on heavyweight
paper or paper that curls or wrinkles easily after absorbing ink.
For paper-based media such as Heavyweight Coated Paper, set the VacuumStrngth to
Strong or Strongest in the Control Panel menu. If the paper still rubs against the printhead,
set the Head Height in the Control Panel menu to a higher value than the current setting.
(See "Adjusting the Vacuum Strength.") ➔ User's Guide
(See "Troubleshooting Paper Abrasion and Blurry Images.") ➔ User's Guide
Troubleshooting
For film-based media such as Tracing Paper, set the VacuumStrngth to Standard, Strong or
Strongest in the Control Panel menu. If the paper still rubs against the printhead, set the
Head Height in the Control Panel menu to a higher value than the current setting.
(See "Adjusting the Vacuum Strength.") ➔ User's Guide
(See "Troubleshooting Paper Abrasion and Blurry Images.") ➔ User's Guide
Problems with the printing quality
When printing on paper 0.1 mm (0.004 in) thick or less, choose a VacuumStrngth setting of
Weakest in the Control Panel menu. If rubbing still occurs, in the Control Panel menu, use a
higher Head Height setting.
(See "Adjusting the Vacuum Strength.") ➔ User's Guide
(See "Troubleshooting Paper Abrasion and Blurry Images.") ➔ User's Guide
When you have loaded paper, the
paper you have loaded does not
match the type selected on the
Control Panel.
Be sure to select the correct type of paper in the Control Panel menu when loading paper.
(See "Loading Rolls in the Printer.") ➔ P.15
(See "Loading Sheets in the Printer.") ➔ P.21
The edges of the paper are dirty
Cause
Corrective Action
The Platen has become dirty after
borderless printing or printing on
small paper.
Open the Top Cover and clean the Platen.
(See "Cleaning Inside the Top Cover.") ➔ P.47
The type of paper as specified on
the printer does not match the type
specified in the printer driver.
Make sure the same type of paper is specified on the printer as in the printer driver.
(See "Changing the Type of Paper.") ➔ User's Guide
Make sure the same paper type is specified in the printer driver as on the printer.
1.
2.
108
Press the Stop button and stop printing.
Change the type of paper in the printer driver and try printing again.
The paper is wrinkled or warped.
Straighten out the wrinkles or curls and reload the paper. Do not use paper that has been
printed on previously.
(See "Loading Rolls in the Printer.") ➔ P.15
(See "Loading Sheets in the Printer.") ➔ P.21
A cut line is printed because CutDustReduct. is On in the Control
Panel menu to reduce cutting dust.
If this function is not needed, set CutDustReduct. to Off in the Control Panel menu.
(See "Menu Settings.") ➔ User's Guide
Basic Guide
The surface of the paper is dirty
iPF830 Series
Cause
Corrective Action
The Printhead is set too low in the
Control Panel menu.
In the Control Panel menu, set Head Height to Automatic.
(See "Troubleshooting Paper Abrasion and Blurry Images.") ➔ User's Guide
You are printing on heavyweight paper or paper that curls or wrinkles
easily after absorbing ink.
For paper-based media such as Heavyweight Coated Paper, set the VacuumStrngth to
Strong or Strongest in the Control Panel menu. If the paper still rubs against the printhead,
set the Head Height in the Control Panel menu to a higher value than the current setting.
(See "Adjusting the Vacuum Strength.") ➔ User's Guide
(See "Troubleshooting Paper Abrasion and Blurry Images.") ➔ User's Guide
For film-based media such as Tracing Paper, set the VacuumStrngth to Standard, Strong
or Strongest in the Control Panel menu. If the paper still rubs against the printhead, set the
Head Height in the Control Panel menu to a higher value than the current setting.
(See "Adjusting the Vacuum Strength.") ➔ User's Guide
(See "Troubleshooting Paper Abrasion and Blurry Images.") ➔ User's Guide
The Ejection Guide is soiled.
Clean the Ejection Guide.
(See "Cleaning the Printer Exterior.") ➔ User's Guide
The surface of the paper is dirty
Cause
Corrective Action
Clean the Paper Retainer.
(See "Cleaning Inside the Top Cover.") ➔ P.47
You are using a paper that
does not dry easily.
In the Control Panel menu, set Roll DryingTime to at least 1 min.
(See "Menu Settings.") ➔ User's Guide
When paper that does not dry easily is used for printing, it may curl during printing and touch the
Output Tray.
In this case, in the Control Panel menu, complete the settings for Dry time and Area in Scan Wait
Time.
However, note that printing will now take longer.
(See "Menu Settings.") ➔ User's Guide
Cause
The Platen has become dirty after borderless
printing or printing on small paper.
Corrective Action
Open the Top Cover and clean the Platen.
(See "Cleaning Inside the Top Cover.") ➔ P.47
In the Control Panel menu, set CarriageScanWdth to Fixed.
(See "Menu Settings.") ➔ User's Guide
The Platen has become soiled because you
have set Width Detection to Off in the Control Panel menu.
Set Width Detection to On in the Control Panel menu, and then open the Top Cover and clean the Platen.
(See "Cleaning Inside the Top Cover.") ➔ P.47
Problems with the printing quality
The back side of the paper is dirty
Troubleshooting
The Paper Retainer is soiled.
Open the Top Cover and clean the Platen. After this, manually advance the roll onto
the Platen before printing.
(See "Cleaning Inside the Top Cover.") ➔ P.47
(See "Feeding Roll Paper Manually.") ➔ User's Guide
The Platen suction is too strong.
In the Control Panel menu, reduce the level of VacuumStrngth.
(See "Adjusting the Vacuum Strength.") ➔ User's Guide
Printed colors are inaccurate
Cause
Corrective Action
Color adjustment has not been activated in the
Advanced Settings of the printer driver.
In the Advanced Settings of the printer driver, access Color Settings in Color
Mode to adjust colors.
(See "Main Sheet (Windows).") ➔ User's Guide
(See "Main Pane (Mac OS).") ➔ User's Guide
Colors have not been adjusted on the computer
or monitor.
Refer to the computer and monitor documentation to adjust the colors.
Basic Guide
109
Banding in different colors occurs
iPF830 Series
Cause
Corrective Action
Colors have not been adjusted on the computer
or monitor.
Adjust the settings of the color management software, referring to the software
documentation as needed.
The Printhead nozzles are clogged.
Print a test pattern to check the nozzles and see if they are clogged.
(See "Checking for Nozzle Clogging.") ➔ User's Guide
Application Color Matching Priority is set to
Off in the Windows printer driver.
Click Special Settings in the Layout sheet of the printer driver, and set Application Color Matching Priority to On in the dialog box that is displayed.
(See "Layout Sheet (Windows).") ➔ User's Guide
Color may change slightly even on the same
model of printer if you use a different version of
the firmware or printer driver, or when you print
under different settings or in a different printing
environment.
Follow these steps to prepare the printing environment.
1.
2.
Use the same version of firmware or printer driver.
Specify the same value for all settings items.
Banding in different colors occurs
Cause
Corrective Action
Troubleshooting
Problems with the printing quality
The paper feed amount is out of adjustment.
Adjust the feed amount.
(See "Adjusting the Feed Amount.") ➔ User's Guide
Printing does not proceed smoothly
because print jobs are interrupted
during transmission.
Exit other applications and cancel other print jobs.
In the Control Panel menu, Adj. Priority is set to Print Length.
Setting Adj. Priority to Print Quality in the Control Panel menu and adjusting the feed
amount may improve results.
(See "Adjusting the Feed Amount.") ➔ User's Guide
The Printhead is out of alignment.
Adjust the Printhead alignment.
(See "Automatic Adjustment to Straighten Lines and Colors.") ➔ P.89
The Printhead nozzles are clogged.
Print a test pattern to check the nozzles and see if they are clogged.
(See "Checking for Nozzle Clogging.") ➔ User's Guide
Streaks may occur if you set the
Print Quality too low.
Choose a higher level of Print Quality in the Advanced Settings of the printer driver and
try printing again.
Printing in Fast or Standard mode is faster and consumes less ink than in Highest or High
modes, but the printing quality is lower.
(See "Giving Priority to Particular Graphic Elements and Colors for Printing.") ➔ User's Guide
The type of paper specified in the
printer driver does not match the type
loaded in the printer.
Load paper of the same type as you have specified in the printer driver.
(See "Loading Rolls in the Printer.") ➔ P.15
(See "Loading Sheets in the Printer.") ➔ P.21
Make sure the same type of paper is specified in the printer driver as you have loaded in the
printer.
1.
2.
Press the Stop button and stop printing.
Change the type of paper in the printer driver and try printing again.
Colors in printed images are uneven
Cause
110
Corrective Action
Line Drawing/Text is selected when
printing images in many solid colors.
In Print Priority in the Advanced Settings of the printer driver, choose Image.
You are printing on paper that curls
easily.
Printed colors may appear uneven on the leading edge of paper that is susceptible to curling.
Select a stronger level in VacuumStrngth in the Control Panel menu to increase suction
against the paper, or specify a leading margin of 20 mm (0.79 in) or more.
(See "Adjusting the Vacuum Strength.") ➔ User's Guide
Printed colors may be uneven if you
set the Print Quality too low.
Choose a higher level of Print Quality in the Advanced Settings of the printer driver.
Printing in Fast or Standard mode is faster and consumes less ink than in Highest or High
modes, but the printing quality is lower.
Basic Guide
Image edges are blurred or white banding occurs
iPF830 Series
Cause
Corrective Action
(See "Giving Priority to Particular Graphic Elements and Colors for Printing.") ➔ User's Guide
Printed colors may be uneven if you
set the Print Quality too low.
Color may be uneven between dark
and light image areas.
Select Unidirectional Printing in the Advanced Settings of the printer driver.
When borderless printing is used,
the edge of the paper is cut during
printing. Thus, ink density may be
slightly uneven at the leading edges.
Specify No in Auto Cut in the printer driver before printing. In this case, the paper can be
printed without borders on the left and right sides only. Cut the printed document ejected
from the printer, and then use scissors or a cutting tool to cut away the edges on the top and
bottom.
Choose a higher level of Print Quality in the Advanced Settings of the printer driver.
(See "Giving Priority to Particular Graphic Elements and Colors for Printing.") ➔ User's Guide
The Printhead is out of alignment.
Adjust the Printhead alignment.
(See "Automatic Adjustment to Straighten Lines and Colors.") ➔ P.89
Allowing printed documents to dry
on top of each other may cause uneven colors.
To avoid uneven colors, we recommend drying each sheet separately.
Density may be uneven if you use
Glossy Paper or Coated Paper.
In Advanced Settings of the printer driver, choose Highest or High in Print Quality.
The type of paper specified in the
printer driver does not match the
type loaded in the printer.
Load paper of the same type as you have specified in the printer driver.
(See "Loading Rolls in the Printer.") ➔ P.15
(See "Loading Sheets in the Printer.") ➔ P.21
1.
2.
Scan Wait Time > Area in the Control Panel menu is set to Leading
edge.
Press the Stop button and stop printing.
Change the type of paper in the printer driver and try printing again.
Image edges are blurred or white banding occurs
Cause
The Platen suction is too strong.
Corrective Action
In the Control Panel menu, reduce the level of VacuumStrngth.
(See "Adjusting the Vacuum Strength.") ➔ User's Guide
Close the blue Switch on the platen so that it matches the paper size.
(See "Setting the Blue Switch on the Platen.") ➔ User's Guide
Incorrect Printhead alignment value.
In the Control Panel menu, set Head Height to a lower height.
(See "Troubleshooting Paper Abrasion and Blurry Images.") ➔ User's Guide
The type of paper specified in the
printer driver does not match the
type loaded in the printer.
Load paper of the same type as you have specified in the printer driver.
(See "Loading Rolls in the Printer.") ➔ P.15
(See "Loading Sheets in the Printer.") ➔ P.21
Problems with the printing quality
When Scan Wait Time > Area is set to Leading edge, colors may be uneven 110–160 mm
from the leading edge. (The position varies depending on the Print Quality setting.)
In this case, select Scan Wait Time > Area > Entire area.
However, note that printing will now take longer.
(See "Menu Settings.") ➔ User's Guide
Troubleshooting
Make sure the same type of paper is specified in the printer driver as you have loaded in the
printer.
Make sure the same type of paper is specified in the printer driver as you have loaded in the
printer.
1.
2.
Press the Stop button and stop printing.
Change the type of paper in the printer driver and try printing again.
The contrast becomes uneven during printing
Cause
The paper feed amount is out of adjustment.
Basic Guide
Corrective Action
Adjust the feed amount.
(See "Adjusting the Feed Amount.") ➔ User's Guide
111
The length of printed images is inaccurate in the feeding direction
Cause
iPF830 Series
Corrective Action
The type of paper specified in the printer
driver does not match the type loaded in
the printer.
Load paper of the same type as you have specified in the printer driver.
(See "Loading Rolls in the Printer.") ➔ P.15
(See "Loading Sheets in the Printer.") ➔ P.21
Make sure the same type of paper is specified in the printer driver as you have loaded
in the printer.
1.
2.
Press the Stop button and stop printing.
Change the type of paper in the printer driver and try printing again.
The length of printed images is inaccurate in the feeding direction
Cause
Corrective Action
In the Control Panel menu, Adj. Priority
is set to Print Quality.
Set Adj. Priority to Print Length in the Control Panel menu, and then execute Adjust
Length.
(See "Adjusting the Feed Amount.") ➔ User's Guide
The type of paper specified in the printer driver does not match the type loaded in the printer.
Load paper of the same type as you have specified in the printer driver.
(See "Loading Rolls in the Printer.") ➔ P.15
(See "Loading Sheets in the Printer.") ➔ P.21
Make sure the same type of paper is specified in the printer driver as you have loaded in
the printer.
Troubleshooting
1.
2.
Press the Stop button and stop printing.
Change the type of paper in the printer driver and try printing again.
Images are printed crooked
Problems with the printing quality
Cause
Corrective Action
In the Control Panel menu, Skew Check Lv. is set to Loose or Off.
In the Control Panel menu, set Skew Check Lv. to Standard.
In the Control Panel menu, Width Detection is set to Off.
Set Width Detection to On in the Control Panel menu.
Documents are printed in monochrome
Cause
Corrective Action
In the Advanced Settings of the printer driver,
Monochrome, Monochrome (BK ink), or Monochrome Bitmap is specified in Color Mode.
In the Advanced Settings of the printer driver, specify Color in Color Mode
and try printing again.
The Printhead nozzles are clogged.
Print a test pattern to check the color ink nozzles and see if they are clogged.
(See "Checking for Nozzle Clogging.") ➔ User's Guide
Line thickness is not uniform
112
Cause
Corrective Action
In the Special Settings dialog box
of the Windows printer driver, Fast
Graphic Process is set to On.
Access the printer driver Properties dialog box from Print in the File menu of the source application, and follow these steps to print.
The type of paper specified in the
printer driver does not match the
type loaded in the printer.
1.
2.
Clear the option Open Preview When Print Job Starts on the Main sheet.
3.
Click the Special Settings button in the Layout sheet, open the Special Settings dialog
box, and set Fast Graphic Process to Off.
Clear the option Page Layout on the Layout sheet.
Load paper of the same type as you have specified in the printer driver.
(See "Loading Rolls in the Printer.") ➔ P.15
(See "Loading Sheets in the Printer.") ➔ P.21
Make sure the same type of paper is specified in the printer driver as you have loaded in the
printer.
Basic Guide
iPF830 Series
Lines are misaligned
Cause
Corrective Action
The type of paper specified in the
printer driver does not match the
type loaded in the printer.
1.
2.
The blue Switch on the platen is
set incorrectly.
Move the Switch numbered corresponding to the size of paper for printing opposite to the ●
position.
(See "Setting the Blue Switch on the Platen.") ➔ User's Guide
Press the Stop button and stop printing.
Change the type of paper in the printer driver and try printing again.
Lines are misaligned
Cause
Corrective Action
The Printhead alignment is not adjusted.
Adjust the Printhead alignment.
(See "Automatic Adjustment to Straighten Lines and Colors.") ➔ P.89
(See "Manual Adjustment to Straighten Lines and Colors.") ➔ User's Guide
(See "Adjusting Line Misalignment.") ➔ User's Guide
The type of paper specified in the
printer driver does not match the
type loaded in the printer.
Load paper of the same type as you have specified in the printer driver.
(See "Loading Rolls in the Printer.") ➔ P.15
(See "Loading Sheets in the Printer.") ➔ P.21
Make sure the same type of paper is specified in the printer driver as you have loaded in the
printer.
1.
2.
Press the Stop button and stop printing.
Change the type of paper in the printer driver and try printing again.
Troubleshooting
Problems with the printing quality
113
Basic Guide
Cannot connect the printer to the network
iPF830 Series
Cannot print over a network
Cannot connect the printer to the network .................................................................................................... 114
Cannot print over a TCP/IP network .............................................................................................................. 114
Cannot print over a Bonjour network ............................................................................................................. 114
Cannot connect the printer to the network
Cause
Corrective Action
The Ethernet cable
is not connected
correctly to the
printer's Ethernet
port.
1.
Make sure the printer is connected to the network with the correct Ethernet cable, and then turn the printer on. For instructions on connecting the cable, refer to the Setup Guide.
2.
Make sure the Link indicator is lit.
The top indicator is lit in green and the bottom indicator is lit in orange when the printer is connected via
1000Base-T.
The top indicator is lit in green when the printer is connected via 100Base-TX.
The bottom indicator is lit in orange when the printer is connected via 10Base-T.
If the Link indicator is not lit, check the following points.
Troubleshooting
Cannot print over a network
•
Make sure the connection point is on.
•
Make sure the end of the Ethernet cable is connected correctly.
Insert the Ethernet cable until it clicks and locks in place.
•
Make sure there is no problem with the Ethernet cable.
If there is any problem, replace the Ethernet cable.
•
Check the communication mode with the connection point.
Although the printer normally detects the communication mode and transmission rate of the communication point automatically (in auto negotiation mode), sometimes the communication point settings
cannot be detected. In this case, configure the connection method manually, specifying the communication mode in use.
(See "Configuring the Communication Mode Manually.") ➔ User's Guide
Cannot print over a TCP/IP network
Cause
Corrective Action
The printer's IP address is not
configured correctly.
Make sure the printer's IP address is configured correctly.
(See "Configuring the IP Address Using imagePROGRAF Device Setup Utility.") ➔ User's Guide
(See "Configuring the IP Address Using the Printer Control Panel.") ➔ User's Guide
The printer's TCP/IP network settings are not configured correctly.
Make sure the printer's TCP/IP network settings are configured correctly.
(See "Configuring the Printer's TCP/IP Network Settings With RemoteUI.") ➔ User's Guide
The computer you are trying to
print from is not configured correctly.
Make sure the computer's TCP/IP network settings are configured correctly.
(See "Configuring the Printer Driver Destination (Windows).") ➔ User's Guide
(See "Configuring the Destination in TCP/IP Networks (Mac OS).") ➔ User's Guide
Cannot print over a Bonjour network
Cause
Corrective Action
The computer you are trying to
print from is not configured correctly.
Make sure the computer is configured correctly.
(See "Configuring the Destination for Bonjour Network (Mac OS).") ➔ User's Guide
The computer and printer are
not on the same network.
Due to the nature of Bonjour, you cannot print if the printer is on another network behind a router.
Make sure the computer and printer are on the same network. For information about network settings, ask your network administrator.
114
Basic Guide
Removing Installed Printer Drivers
iPF830 Series
Installation problems
Removing Installed Printer Drivers
Follow these steps to remove installed printer drivers and utilities.
Removing printer drivers (Windows)
Remove the printer driver as follows.
• The following procedure is for Windows 7. The method of removing printer drivers varies depending on the version
Note
1
of Windows.
From the Windows start menu, select All Programs > Canon Printer Uninstaller > imagePROGRAF
Printer Driver Uninstaller to display the Delete Printer window.
2
Select the printer in the list and click Delete.
3
Click Yes after the Warning message is displayed.
4
Make sure that the printer has been removed from the list, and then click Exit.
Remove imagePROGRAF Status Monitor as follows.
• The following procedure is for Windows 7. The method of removing printer drivers varies depending on the version
Note
of Windows.
Select Control Panel from the start menu.
2
Select Uninstall a program.
• If the User Account Control dialog box is displayed, click Yes.
Note
3
Installation problems
1
Troubleshooting
Removing imagePROGRAF Status Monitor (Windows)
Select imagePROGRAF Status Monitor, and then click the Uninstall button.
Removing imagePROGRAF Device Setup Utility (Windows)
Remove imagePROGRAF Device Setup Utility as follows.
• The following procedure is for Windows 7. The method of removing printer drivers varies depending on the version
Note
1
of Windows.
From the Windows start menu, select All Programs > imagePROGRAF Device Setup Utility > Uninstaller (imagePROGRAF Device Setup Utility) to start the wizard.
2
In the wizard window, click Delete, and then click Next.
3
Follow the instructions on the screen to remove imagePROGRAF Device Setup Utility.
115
Basic Guide
With HP-GL/2, printing is misaligned
iPF830 Series
HP-GL/2 problems
With HP-GL/2, printing is misaligned ............................................................................................................. 116
Lines or images are missing in printed HP-GL/2 jobs. ................................................................................... 116
Lines are printed too thick or thin in HP-GL/2 print jobs ................................................................................ 116
HP-GL/2 jobs are printed in monochrome (or color) ...................................................................................... 117
Printed colors of lines are inaccurate during HP-GL/2 printing ....................................................................... 117
HP-GL/2 jobs are printed 6 mm larger than specified .................................................................................... 117
HP-GL/2 jobs are printed at maximum size, even if a standard size is specified ............................................. 117
HP-GL/2 printing takes a long time ............................................................................................................... 117
The printer stops when printing a HP-GL/2 job (the carriage stops moving) ................................................... 117
With HP-GL/2, printing is misaligned
Cause
The plotter origin is incorrect.
Corrective Action
Check the printing commands.
Set Detect img size to Command priority or Detected size in the Control Panel
menu.
(See "Menu Settings.") ➔ User's Guide
The Margin setting in the Control Panel
menu is incorrect.
Adjust the Margin setting values in the Control Panel menu.
(See "Menu Settings.") ➔ User's Guide
Troubleshooting
Lines or images are missing in printed HP-GL/2 jobs.
Cause
Corrective Action
HP-GL/2 problems
The memory is full.
Check the size of the data in the print job.
An HP-GL/2 command not supported by this printer
was received.
Check the print job and settings.
The printer has received print data that includes HP
RTL commands when Auto Rotate is On in the
Control Panel menu.
In the Control Panel, set Auto Rotate to Off and print again.
(See "Menu Settings.") ➔ User's Guide
The plotter origin is incorrect.
Set Detect img size to Command priority or Detected size in the Control
Panel menu.
(See "Menu Settings.") ➔ User's Guide
Oversize in the Control Panel menu is set to Off.
Set Oversize to On in the Control Panel menu.
(See "Menu Settings.") ➔ User's Guide
Lines are printed too thick or thin in HP-GL/2 print jobs
Cause
Corrective Action
The Width setting in the Control Panel
menu is incorrect.
Change the Width setting configured in Pen no. of the Palette A or Palette B selected
in the Control Panel menu.
(See "Menu Settings.") ➔ User's Guide
ThickenFineLines in the Control Panel
menu is set to Off.
If fine lines are printed faintly, setting ThickenFineLines to On will print the lines more
distinctly.
(See "Menu Settings.") ➔ User's Guide
The Ln wdth correct setting in the Control Panel menu is incorrect.
Change the Ln wdth correct setting in the Control Panel menu.
(See "Menu Settings.") ➔ User's Guide
116
Basic Guide
HP-GL/2 jobs are printed in monochrome (or color)
iPF830 Series
HP-GL/2 jobs are printed in monochrome (or color)
Cause
Corrective Action
The Color Mode setting in
the Control Panel menu is
incorrect.
Check the Color Mode setting in the Control Panel menu.
(See "Menu Settings.") ➔ User's Guide
However, for optimal Printhead performance, the printer consumes trace amounts of color ink even
when Monochrome is selected as Color Mode.
Printed colors of lines are inaccurate during HP-GL/2 printing
Cause
Corrective Action
AdjustFaintLines is On in the Control Panel menu.
Setting AdjustFaintLines to Off in the Control Panel menu may help produce the expected
results. However, lines in some colors may appear broken.
HP-GL/2 jobs are printed 6 mm larger than specified
Cause
Corrective Action
The page size of the HP-GL/2 print job, as created in the source application, is
incorrect.
In the Control Panel menu, set Oversize to Off.
(See "Menu Settings.") ➔ User's Guide
HP-GL/2 jobs are printed at maximum size, even if a standard size is specified
Corrective Action
Set Detect img size to Command priority or Detected size in the Control
Panel menu.
(See "Menu Settings.") ➔ User's Guide
Set Conserve Paper to On in the Control Panel menu.
(See "Menu Settings.") ➔ User's Guide
Cause
Corrective Action
Large print jobs with a lot of data take longer to print.
Please wait a while until printing is finished.
A job was printed when Input Resolution in the Control Panel menu was set to 600dpi.
In the Control Panel menu, set Input Resolution to 300dpi and print
again.
(See "Menu Settings.") ➔ User's Guide
HP-GL/2 problems
HP-GL/2 printing takes a long time
Troubleshooting
Cause
The page size of the HP-GL/2 print job, as created in
the source application, is incorrect.
The printer stops when printing a HP-GL/2 job (the carriage stops moving)
Cause
Corrective Action
The printer is analyzing the print job.
Please wait a while until printing is finished.
A job was printed when Input Resolution in the Control Panel menu was set to 600dpi.
In the Control Panel menu, set Input Resolution to 300dpi and print again.
(See "Menu Settings.") ➔ User's Guide
117
Basic Guide
The printer does not go on
iPF830 Series
Other problems
The printer does not go on ............................................................................................................................ 118
The printer takes time to start up ................................................................................................................... 118
If the Printer Makes a Strange Sound ............................................................................................................ 118
Messages advising to check the maintenance cartridge are not cleared ........................................................ 119
The printer consumes a lot of ink .................................................................................................................. 119
Ink Level Detection ........................................................................................................................................ 119
The printer does not go on
Cause
Corrective Action
The printer is unplugged.
Plug the power cord into the outlet, and then turn on the printer.
The specified voltage is not supplied.
Check the voltage of the outlet and breaker.
(See "Specifications.") ➔ User's Guide
The printer takes time to start up
Troubleshooting
Cause
Corrective Action
The printer may have shut down incorrectly last time. This may happen after power outages or if the printer is unplugged before it is
turned off.
In this case, the next time power is restored, the printer's hard disk is
checked, and startup may take some time.
Please wait a while, because it may take several minutes to
finish checking the hard disk.
If an error message is displayed after the hard disk check,
follow the instructions indicated to resolve the problem.
If the Printer Makes a Strange Sound
Other problems
Cause
The printer
makes a sound
during operation.
Corrective Action
The following sounds do not indicate a problem with the printer.
•
There is a sound of suction from the Platen
To prevent paper from rising, paper is held against the Platen by suction from Vacuum holes under it.
•
There is a sound when a different size of paper is used and when the Carriage goes from side to side
When paper of a different size is used, a valve is automatically activated to switch the area for paper suction,
which may make a sound. This mechanism prevents suction from Vacuum holes where there is no paper.
In addition, ink is ejected in sync with the movement of the Carriage back and forth to ensure optimal ink flow.
At this time, the valve automatically switches the area for paper suction, which may make a sound.
•
Roll paper makes a fluttering sound during printing
There may be a fluttering sound when large paper is advanced.
•
If you suddenly hear the tone for cleaning operations
At regular intervals, for printer maintenance, cleaning operations will begin automatically, even if the printer is
in Sleep mode.
•
If you suddenly hear the tone for ink agitation
At regular intervals, to ensure optimal printing quality, the ink is agitated automatically, even if the printer is in
Sleep mode.
The ink is also agitated automatically under the following conditions. Note that other operations are not possible while "Agitating" is displayed on the control panel.
•
After the printer is turned on
In other cases, contact your Canon dealer.
118
Basic Guide
iPF830 Series
Messages advising to check the maintenance cartridge are not cleared
Messages advising to check the maintenance cartridge are not cleared
Cause
Corrective Action
The printer has not detected the new Maintenance Cartridge that was used to replace the old
one.
Remove the new Maintenance Cartridge you have just installed and insert it
again firmly.
(See "Replacing the Maintenance Cartridge.") ➔ P.42
The printer consumes a lot of ink
Cause
Corrective Action
Many full-page color images
are printed.
In print jobs such as photos, images are filled with color. This consumes a lot of ink. This does not
indicate a problem with the printer.
Head Cleaning B in the Control Panel menu is executed
frequently.
Head Cleaning B in the Control Panel menu consumes a lot of ink. This does not indicate a problem with the printer. Unless the printer has been moved or stored for a long period or you are
troubleshooting Printhead problems, we recommend not performing Head Cleaning B, to the extent possible.
You have just finished initial installation, when more ink is
consumed to fill the system.
After initial installation or at the first-time use after transfer, ink flows into the system between the
Ink Tank and Printhead.
Although the amount of remaining ink may drop as a result, it does not indicate a problem.
The Printhead nozzles are
clogged.
Check for nozzle clogging.
(See "Checking for Nozzle Clogging.") ➔ User's Guide
Ink level detection
• After ink level detection has been released, this function cannot be reactivated for currently loaded Ink Tank. To
Important
Other problems
Ink tanks specified for this printer feature an ink level detection function to prevent the ink from running out during
printing, which prevents printer damage. (See "Ink Tanks.") ➔ User's Guide
This function will not work correctly if you use refill ink tanks. As a result, printing stops. Thus, before using refill ink
tanks, you must cancel the ink level detection.
Printing with the ink level detection canceled may lead to printer damage and printing problems. Canon Inc. is not
liable for any damage that may occur as a result of refilling ink.
Troubleshooting
Ink Level Detection
Ink level detection will be deactivated if you load ink tanks once emptied.
use ink level detection again, replace the Ink Tank with new ones specified for use with the printer.
• Repeatedly removing and inserting an Ink Tank may damage the connection between the Ink Tank and the printer, which may cause ink leakage from the Ink Tank and damage the printer.
Releasing ink level detection
1
On the Display Screen, a message indicates that the ink level
cannot be detected. After checking the message, press the ▶
button.
119
Basic Guide
Ink Level Detection
Troubleshooting
Press ▲ or ▼ to select Information, and then press the OK button.
3
A confirmation message is shown on the Display Screen about
releasing ink level detection. After checking the message, press
the ▶ button.
4
After checking the message, press the ▶ button.
5
Press ▲ or ▼ to select Yes, and then press the OK button.
6
Check the message and press the ▶ button.
7
Check the message and press the ▶ button.
Other problems
2
iPF830 Series
120
Basic Guide
iPF830 Series
8
Press ▲ or ▼ to select Yes, and then press the OK button.
9
A confirmation message about updating ink information is shown
on the Display Screen. After checking the message, press the ▶
button.
10
Ink Level Detection
Press ▲ or ▼ to select Yes, and then press the OK button.
Ink level detection is now released.
Troubleshooting
Other problems
121
Basic Guide
MediaType Mismatch
iPF830 Series
Error Message
Messages regarding paper
MediaType Mismatch .................................................................................................................................... 122
PaprTypeMismatch ........................................................................................................................................ 122
The paper is too small. .................................................................................................................................. 123
The paper is too small. .................................................................................................................................. 123
PaprWidth Mismatch ..................................................................................................................................... 124
Paper size not detected. ............................................................................................................................... 124
Insufficient paper for job ................................................................................................................................ 124
This paper cannot be used as size is not supported. ..................................................................................... 125
Roll printing is selected. ................................................................................................................................. 125
Roll printing is selected, but sheets are loaded. ............................................................................................. 125
The roll is empty. ........................................................................................................................................... 126
Sheet removed. ............................................................................................................................................. 126
Sheet printing is selected. ............................................................................................................................. 127
Regular printing is selected, but a roll is loaded. ............................................................................................ 127
Paper jam. .................................................................................................................................................... 127
Paper loaded askew. ..................................................................................................................................... 127
Paper cutting failed. ...................................................................................................................................... 128
End of paper feed. ........................................................................................................................................ 128
Rel lever is in wrong position. ........................................................................................................................ 129
Error Message
Rewinding error. ............................................................................................................................................ 129
Media take-up unit ready. .............................................................................................................................. 129
Turn on the media take-up unit. ..................................................................................................................... 129
Borderless printng not possible. .................................................................................................................... 129
Paper position not suitable for borderless printing. ........................................................................................ 130
Messages regarding paper
MediaType Mismatch
Cause
You tried to print a test pattern for printer
adjustment on several sheets, but sheets
of different types of paper were used.
Corrective Action
When printing a test pattern for adjustment, use sheets of the same type of paper, in
the required quantity. Replace the paper as follows and perform adjustment again.
1.
Lift the Release Lever and stop printing.
2.
Replace the paper.
(See "Loading and Printing on Sheets.") ➔ User's Guide
3.
Execute adjustment again from the control panel menu.
When Detect Mismatch in the Control
Panel menu is set to Warning, the type of
paper loaded does not match the type
specified in the printer driver.
You can continue to print, but note that this error may cause paper jams or problems in
the printing results.
PaprTypeMismatch
Cause
122
When Detect Mismatch in the Control
Panel menu is set to Pause, the type of
paper loaded does not match the type
specified in the printer driver.
Corrective Action
Follow these steps to ensure the paper type matches on the printer and in the printer
driver.
1.
Press ▲ or ▼ to select Stop Printing, and then press the OK button.
2.
Change the paper type setting in the printer driver to the type loaded in the printer
and try printing again.
Basic Guide
iPF830 Series
The paper is too small.
Cause
When Detect Mismatch in the Control
Panel menu is set to Pause, the type of
paper loaded does not match the type
specified in the printer driver.
Corrective Action
Follow these steps to ensure the paper type matches on the printer and in the printer
driver.
1.
Press ▲ or ▼ to select Change Paper, and then press the OK button.
2.
Replace the loaded paper with paper of the type and size you have specified in the
printer driver.
(See "Loading and Printing on Rolls.") ➔ User's Guide
(See "Loading and Printing on Sheets.") ➔ User's Guide
Press ▲ or ▼ to select Print, and then press the OK button to resume printing.
However, note that this error may cause paper jams and affect the printing quality.
The paper is too small.
Cause
When Detect Mismatch in the Control
Panel menu is set to Pause or Hold Job,
paper smaller than the size specified in the
printer driver is loaded.
Corrective Action
Press ▲ or ▼ to select Print, and then press the OK button to resume printing.
However, note that this error may cause paper jams and affect the printing quality.
Adjust the paper size setting in the printer driver to match the size loaded in the printer as follows.
1.
Press ▲ or ▼ to select Stop Printing, and then press the OK button.
2.
Change the paper size setting in the printer driver to the size loaded in the printer
and try printing again.
Replace the loaded paper with paper of a size that matches the size setting in the
printer driver as follows.
Press ▲ or ▼ to select Change Paper, and then press the OK button to stop
printing.
2.
Replace the loaded paper to match the settings in the printer driver and try printing
again.
(See "Loading and Printing on Rolls.") ➔ User's Guide
(See "Loading and Printing on Sheets.") ➔ User's Guide
The paper is too small.
"Replace paper with A4/LTR (vertical) or larger"
Cause
The loaded paper is too small.
(When you have attempted to print a test
print sheet or other printer status information.)
Messages regarding paper
You can continue to print, but note that this error may cause problems in the printing
results.
Error Message
When Detect Mismatch in the Control
Panel menu is set to Warning, paper smaller than the size specified in the printer driver is loaded.
1.
Corrective Action
Replace the paper with paper of A4/Letter (vertical) size or larger as follows.
1.
Press ▲ or ▼ to select Change Paper, press the OK button, and remove the paper.
(See "Removing Sheets.") ➔ P.23
2.
Switch to paper A4/Letter (vertical) or larger.
(See "Loading and Printing on Sheets.") ➔ User's Guide
The printer will resume printing.
Press ▲ or ▼ to select Stop Printing, and then press the OK button.
123
Basic Guide
PaprWidth Mismatch
iPF830 Series
PaprWidth Mismatch
Cause
Corrective Action
When Detect Mismatch in the Control Panel
menu is set to Pause or Hold Job, the width of the
loaded roll does not match the width specified in
Fit Roll Paper Width in the printer driver.
Press ▲ or ▼ to select Print, and then press the OK button to resume printing.
However, note that this error may cause paper jams and affect the printing
quality.
Press ▲ or ▼ to select Stop Printing, and then press the OK button.
Follow these steps to replace the roll to match the width specified in the printer
driver.
1.
Press ▲ or ▼ to select Change Paper, and then press the OK button.
(See "Removing the Roll from the Printer.") ➔ P.18
(See "Removing the Roll Holder from Rolls.") ➔ User's Guide
2.
Replace with paper of the width configured in the printer driver.
(See "Attaching the Roll Holder to Rolls.") ➔ P.12
(See "Loading Rolls in the Printer.") ➔ P.15
The printer now starts printing the print job.
Make sure the roll width selected in the dialog box displayed when you select
Fit Roll Paper Width in the printer driver matches the width of the roll loaded
in the printer, and then try printing again.
Paper size not detected.
Cause
Paper has been loaded askew, or warped paper has been loaded.
Corrective Action
Error Message
Lift up the Release Lever and reload the
paper.
(See "Loading Rolls in the Printer.") ➔ P.15
(See "Loading Sheets in the Printer.") ➔ P.21
Messages regarding paper
If "Not finished printing. Finish printing
remaining jobs?" is displayed on the Display Screen, press the OK button.
Printing will resume, starting from the
page on which the error occurred.
If this error recurs after you reload the roll,
remove the Roll Holder from the printer,
push the roll firmly in until it touches the
Roll Holder flange, and reload the Roll
Holder in the printer.
(See "Attaching the Roll Holder to
Rolls.") ➔ P.12
Because the Platen is soiled with ink or other substances, the size of the clear
film cannot be detected.
Open the Top Cover and clean the entire
Platen.
(See "Cleaning Inside the Top Cover.") ➔ P.47
Insufficient paper for job
Cause
The printer has received a print job longer than the amount of roll paper left when ManageRemainRoll in the Control Panel menu is On.
124
Corrective Action
Press ▲ or ▼ to select Print, and
then press the OK button to resume
printing.
However, the roll paper may run out
during the print job and you may not
be able to print all of the document.
Basic Guide
iPF830 Series
This paper cannot be used as size is not supported.
Cause
Corrective Action
Press ▲ or ▼ to select Change Paper, and then press the OK button to
stop printing.
(See "Removing the Roll from the
Printer.") ➔ P.18
(See "Loading Rolls in the Printer.") ➔ P.15
Press ▲ or ▼ and select Stop Printing or press the Stop button to stop
printing.
This paper cannot be used as size is not supported.
Cause
Corrective Action
Lift the Release Lever and load paper of the correct size.
(See "Paper Sizes.") ➔ User's Guide
Paper that is too small for the printer has been
loaded.
Lift the Release Lever and load paper of the correct size.
(See "Paper Sizes.") ➔ User's Guide
Paper has been loaded that is too small to
print the test pattern for printhead adjustment
or nozzle checking.
Lift the Release Lever and load unused paper A4/Letter (vertical) or larger. More
than one sheet may be required depending on the adjustment.
Roll printing is selected.
Cause
You have attempted to print on a roll,
but no roll is loaded.
Corrective Action
Press ▲ or ▼ and select Stop Printing or press the Stop button to stop printing.
Roll printing is selected, but sheets are loaded.
Cause
A print job for rolls was received when a
sheet is loaded.
Corrective Action
Follow these steps to load and print on a roll.
1.
Press ▲ or ▼ to select Eject Cut Sheet, press the OK button, and remove the sheet.
(See "Removing Sheets.") ➔ P.23
2.
Load a new roll.
(See "Loading Rolls in the Printer.") ➔ P.15
The printer now starts printing the print job.
Messages regarding paper
Press ▲ or ▼ to select "Load Roll Paper", and then press the OK button. Load the roll,
and then print.
(See "Attaching the Roll Holder to Rolls.") ➔ P.12
(See "Loading Rolls in the Printer.") ➔ P.15
Error Message
Paper that is too large for the printer has been
loaded.
Press ▲ or ▼ to select Stop Printing, and then press the OK button.
125
Basic Guide
The roll is empty.
iPF830 Series
The roll is empty.
Cause
The tailing edge of
the paper was detected because cut
sheets were loaded in
the roll paper Paper
Feed Slot.
Corrective Action
Follow these steps to install the roll paper.
1.
Press the OK button and remove the paper.
2.
Load the new roll.
(See "Attaching the Roll Holder to Rolls.") ➔ P.12
(See "Loading Rolls in the Printer.") ➔ P.15
3.
If no barcode was printed on the roll, specify the type of paper.
(See "Changing the Type of Paper.") ➔ User's Guide
4.
If no barcode was printed on the roll, specify the paper length.
(See "Specifying the Paper Length.") ➔ User's Guide
5.
If "Not finished printing. Finish printing remaining jobs?" is shown on the Display Screen, press the
OK button.
Printing will resume, starting from the page on which the error occurred.
"Lift the release lever and replace the roll."
Cause
The roll is empty.
Corrective Action
Follow these steps to replace the used roll with a new roll of the
same type and size.
Error Message
Messages regarding paper
There is remaining roll paper, but because it could not be advanced, it could not be detected.
1.
Lift the Release Lever and remove the roll.
(See "Removing the Roll from the Printer.") ➔ P.18
(See "Removing the Roll Holder from Rolls.") ➔ User's Guide
2.
Load the new roll.
(See "Attaching the Roll Holder to Rolls.") ➔ P.12
(See "Loading Rolls in the Printer.") ➔ P.15
3.
If no barcode was printed on the roll, specify the type of paper.
(See "Changing the Type of Paper.") ➔ User's Guide
4.
If no barcode was printed on the roll, specify the paper length.
(See "Specifying the Paper Length.") ➔ User's Guide
5.
If "Not finished printing. Finish printing remaining jobs?" is
shown on the Display Screen, press the OK button.
Printing will resume, starting from the page on which the error
occurred.
The unused portion of the roll is heavy, and this is placing a burden on the printer. It may be helpful to change the printing mode,
which will change the paper feed timing.
Choose a higher level of Print Quality in the Advanced Settings
of the printer driver.
(See "Giving Priority to Particular Graphic Elements and Colors for
Printing.") ➔ User's Guide
Sheet removed.
Cause
A sheet has come out of
the printer during printing.
Corrective Action
1.
Lift the Release Lever and remove the paper.
2.
If "Not finished printing. Finish printing remaining jobs?" is shown on the Display Screen, press
the OK button.
Printing will resume, starting from the page on which the error occurred.
126
Basic Guide
Sheet printing is selected.
iPF830 Series
Sheet printing is selected.
Cause
Corrective Action
You have attempted to print on a sheet,
but no sheet is loaded.
Press ▲ or ▼ to select Load Paper, and then press the OK button. Load a sheet, and
then print.
(See "Loading and Printing on Sheets.") ➔ User's Guide
Press ▲ or ▼ and select Stop Printing or press the Stop button to stop printing.
Regular printing is selected, but a roll is loaded.
Cause
Corrective Action
A print job for printing on
sheets was sent when a roll
is loaded.
1.
Press ▲ or ▼ to select Remove Roll Paper, and then press the OK button to stop printing.
2.
After removing the roll, load and print on a sheet of the type and size of paper you have specified in the printer driver.
(See "Removing the Roll from the Printer.") ➔ P.18
(See "Loading and Printing on Sheets.") ➔ User's Guide
Press ▲ or ▼ to select Stop Printing, and then press the OK button to stop printing.
You are using a roll with the
Media Take-up Unit, but a
print job requiring sheets was
sent.
1.
Press the OK button to stop printing.
2.
After removing the roll, load and print on a sheet of the type and size of paper you have specified in the printer driver.
(See "Removing Printed Documents from the Media Take-up Unit.") ➔ User's Guide
(See "Loading and Printing on Sheets.") ➔ User's Guide
Paper jam.
Error Message
"Lift the release lever."
Cause
Corrective Action
A paper jam occurred
in the printer during
printing.
Lift the Release Lever and remove the jammed paper.
(See "Clearing Jammed Roll Paper.") ➔ P.94
(See "Clearing a Jammed Sheet.") ➔ P.97
2.
If "Not finished printing. Finish printing remaining jobs?" is shown on the Display Screen, press the
OK button.
Printing will resume, starting from the page on which the error occurred.
"Manually rewind the roll all the way and press OK."
Cause
Corrective Action
A paper jam occurred
when advancing the paper.
1.
Rewind paper on the Roll Holder manually, all the way, and then press the OK button.
2.
If "Not finished printing. Finish printing remaining jobs?" is shown on the Display Screen, press
the OK button.
Printing will resume, starting from the page on which the error occurred.
Messages regarding paper
1.
"Lift the release lever and remove the paper."
Cause
Corrective Action
A paper jam occurred in the printer during printing.
Lift the Release Lever and remove the jammed paper.
(See "Clearing Jammed Roll Paper.") ➔ P.94
(See "Clearing a Jammed Sheet.") ➔ P.97
Paper loaded askew.
Cause
Paper loaded crooked was detected when the paper was advanced.
Basic Guide
Corrective Action
Lift up the Release Lever and reload the
paper.
127
Paper cutting failed.
iPF830 Series
Cause
Corrective Action
(See "Loading Rolls in the Printer.") ➔ P.15
(See "Loading Sheets in the Printer.") ➔ P.21
If this error recurs after you reload the roll,
remove the Roll Holder from the printer,
push the roll firmly in until it touches the
Roll Holder flange, and reload the Roll
Holder in the printer.
(See "Attaching the Roll Holder to
Rolls.") ➔ P.12
• To disable this message (if it is displayed repeatedly despite reloading paper, for example), choose Off or Loose
Important
in the Skew Check Lv. setting of the printer menu. However, this may cause jams and printing problems because paper may be askew when printed. Also, the Platen may become soiled, which may soil the back of the
next document when it is printed.
Paper cutting failed.
Cause
Corrective Action
Error Message
Messages regarding paper
There are sheets left on
the Ejection Guide.
1.
Lift the Release Lever and remove the paper.
2.
If "Not finished printing. Finish printing remaining jobs?" is shown on the Display Screen, press
the OK button.
Printing will resume, starting from the page on which the error occurred.
There is a foreign object
by the Output Tray, obstructing the Cutter Unit.
1.
Lift the Top Cover and remove the foreign object.
2.
If "Not finished printing. Finish printing remaining jobs?" is shown on the Display Screen, press
the OK button.
Printing will resume, starting from the page on which the error occurred.
You are not using the
printer under the recommended environmental
conditions for the paper.
Use the printer only where the recommended environmental conditions for the paper are met. Note
that various environmental conditions are recommended for various types of paper. For details on the
recommended environmental conditions for paper, see the Paper Reference Guide.
(See "Displaying the Paper Reference Guide.") ➔ User's Guide
You are using paper that
is not compatible with automatic cutting.
Specify Manual as the cutting method and cut the roll manually.
(See "Specifying the Cutting Method for Rolls.") ➔ User's Guide
For information about paper that is compatible with automatic cutting, see the Paper Reference
Guide.
(See "Displaying the Paper Reference Guide.") ➔ User's Guide
The Cutter Unit stops in
the middle of cutting.
If the Carriage is out, move the Carriage out of the way, away from the paper.
If the Cutter is out, move the Cutter to the right side (away from the paper) and remove the jammed
paper.
(See "Clearing Jammed Roll Paper.") ➔ P.94
If the paper cannot be cut using the Cutter Unit, specify Manual as the roll cutting method and cut the
roll manually.
(See "Specifying the Cutting Method for Rolls.") ➔ User's Guide
In other cases, the Cutter
Unit may be damaged.
Contact your Canon dealer for assistance.
End of paper feed.
128
Cause
Corrective Action
Although an attempt was made to advance the paper manually, it reached
the limit position that can be advanced.
Canceling manual advancing.
(See "Feeding Roll Paper Manually.") ➔ User's Guide
Basic Guide
iPF830 Series
Rel lever is in wrong position.
Cause
Corrective Action
Paper can be retracted only up to 17 mm (0.7 in) when using the Media
Take-up Unit.
Canceling manual advancing.
Rel lever is in wrong position.
Cause
Corrective Action
The Release Lever is up.
Lower the Release Lever.
If the error occurs again, turn off the printer and wait a while before restoring power.
Rewinding error.
Cause
Corrective Action
There is some foreign object near the Media Take-up Unit sensor and the
roll cannot be detected.
Remove the foreign object near the sensor.
The roll is out of range of detection by the Media Take-up Unit sensor.
Reload the roll.
Press the OK button to clear the error.
(See "Loading Rolls in the Printer.") ➔ P.15
(See "Using the Media Take-up Unit.") ➔ User's Guide
A paper jam has occurred and the roll cannot be rewound.
Remove the paper from the Media Take-up Unit.
Press the OK button to clear the error.
The Media Take-up Unit sensor is damaged.
Contact your Canon dealer for assistance.
*1:Printing will stop momentarily if an error involving the Media Take-up Unit occurs. If you prefer printing not to stop, set Skip
Take-Up Err to On. However, note that this error may cause paper jams and affect the printing quality.
Corrective Action
The Take-up Reel setting in the printer Set./Adj. Menu
was changed from Enable to Disable, but a print job
was received before the roll was removed.
Press ▲ or ▼ to select Stop Printing, and then press the OK button to
stop printing.
The mode switches from take-up mode to regular mode after you change
the Take-up Reel setting in the Set./Adj. Menu from Enable to Disable
and lift the Release Lever to remove a roll, or after you execute Paper
Cutting.
Press ▲ or ▼ to select Print, and then press the OK button to resume
printing.
Turn on the media take-up unit.
Cause
Corrective Action
The Take-up Reel setting in the control panel menu was changed to Enable while the power
to the Take-up Reel was off and the Roll Media lamp on the control panel was lit.
Messages regarding paper
Cause
Error Message
Media take-up unit ready.
Turn the Media Take-up Unit on.
The Take-up Reel setting in the
control panel menu changes to
Disable.
Borderless printng not possible.
Cause
The print job received specifies
a type or width of paper that is
not compatible with borderless
printing.
Basic Guide
Corrective Action
Follow these steps to change the settings of the print job to enable borderless printing.
1.
Press ▲ or ▼ to select Stop Printing, and then press the OK button.
2.
Make sure the correct printer driver for the printer is selected and try printing again.
For information on types of paper compatible with borderless printing, refer to the Paper Reference Guide.
(See "Displaying the Paper Reference Guide.") ➔ User's Guide
129
Paper position not suitable for borderless printing.
Cause
iPF830 Series
Corrective Action
The print job received specifies
a type or width of paper that is
not compatible with borderless
printing.
Press ▲ or ▼ to select Print With Border, and then press the OK button to continue printing.
The document will be printed with a border.
The loaded paper is a size not
compatible with borderless printing.
Press ▲ or ▼ to select Stop Printing, and then press the OK button.
Replace the paper with paper compatible for borderless printing as follows.
1.
Press ▲ or ▼ to select Change Paper, and then press the OK button.
(See "Removing the Roll from the Printer.") ➔ P.18
(See "Removing the Roll Holder from Rolls.") ➔ User's Guide
2.
Replace the paper with paper compatible for borderless printing.
(See "Attaching the Roll Holder to Rolls.") ➔ P.12
(See "Loading Rolls in the Printer.") ➔ P.15
The printer now starts printing the print job.
For information on types of paper compatible with borderless printing, refer to the Paper Reference Guide.
(See "Displaying the Paper Reference Guide.") ➔ User's Guide
Press ▲ or ▼ to select Print With Border, and then press the OK button to continue printing.
The document will be printed with a border.
Because paper expands or contracts depending on the environment of use, it may become narrower or wider than the supported width for borderless printing.
Use each type of paper only where the recommended environmental conditions are met. For details on environmental conditions for various paper, see the Paper Reference Guide.
(See "Displaying the Paper Reference Guide.") ➔ User's Guide
Error Message
Paper position not suitable for borderless printing.
Cause
Corrective Action
Messages regarding paper
Because paper expands or
contracts depending on the
environment of use, it may become narrower or wider than
the supported width for borderless printing.
Press ▲ or ▼ to select Stop Printing, and then press the OK button.
Use each type of paper only where the recommended environmental conditions are met. For details on environmental conditions for various paper, see the Paper Reference Guide.
(See "Displaying the Paper Reference Guide.") ➔ User's Guide
The paper is loaded askew.
Press ▲ or ▼ to select Change Paper and straighten the paper so that the edges are between
the ink grooves for borderless printing.
Insert the roll firmly until it touches the flange of the Roll Holder.
(See "Attaching the Roll Holder to Rolls.") ➔ P.12
Press ▲ or ▼ to select Print With Border, and then press the OK button to continue printing. The
document will be printed with a border.
Press ▲ or ▼ to select Stop Printing, and then press the OK button.
130
Basic Guide
Ink insufficient.
iPF830 Series
Messages regarding ink
Ink insufficient. .............................................................................................................................................. 131
No ink left. ..................................................................................................................................................... 131
Remaining level of the ink cannot be correctly detected. Check ink tank. ...................................................... 131
Close Ink Tank Cover .................................................................................................................................... 131
Ink tank is empty. .......................................................................................................................................... 131
Not much ink is left. ...................................................................................................................................... 132
No ink tank loaded. ....................................................................................................................................... 132
The following ink tanks cannot be recognized. .............................................................................................. 132
Wrong ink tank. ............................................................................................................................................. 132
Ink insufficient.
Cause
Corrective Action
The ink level is low, so you cannot print, clean the Printhead, or do
other operations that require ink.
There is not enough ink of the color with × displayed above the remaining ink indicator.
Press the OK button, open the Ink Tank Cover, and replace
the Ink Tank for the color that does not have enough ink.
(See "Replacing Ink Tanks.") ➔ P.25
No ink left.
Cause
Corrective Action
Press the OK button, open the Ink Tank Cover, and replace the Ink Tank for
the color that is out of ink.
(See "Replacing Ink Tanks.") ➔ P.25
Remaining level of the ink cannot be correctly detected. Check ink tank.
Cause
Corrective Action
Ink level detection cannot work correctly
if you use refill ink tanks.
The refill ink tank can no longer be used. See the section Ink level detection and take
the appropriate action. (See "Ink Level Detection.") ➔ P.119
Messages regarding ink
Close Ink Tank Cover
Cause
Corrective Action
The Ink Tank Cover is open.
Error Message
There is no ink left.
There are no ink colors with × displayed above the
remaining ink indicator.
Close the Ink Tank Cover.
Ink tank is empty.
Cause
Corrective Action
There is no ink left in an ink tank.
There are no ink colors with × displayed above the remaining ink indicator
in the Ink tab top screen.
(See "Checking Ink Tank Levels.") ➔ User's Guide
Open the Ink Tank Cover, and replace the Ink Tank for
the color that is out of ink.
(See "Replacing Ink Tanks.") ➔ P.25
Basic Guide
131
Not much ink is left.
iPF830 Series
Not much ink is left.
Cause
Corrective Action
Not much ink is left.
Prepare a new Ink Tank.
We recommend replacing the Ink Tank with a new Ink Tank at this point if you plan to print large-format or
high-quantity jobs.
No ink tank loaded.
Cause
Corrective Action
There is no Ink Tank of the indicated color in the printer.
Load or reload the Ink Tank.
(See "Replacing Ink Tanks.") ➔ P.25
There is a problem with the Ink Tank.
Replace it with a new Ink Tank.
(See "Replacing Ink Tanks.") ➔ P.25
The following ink tanks cannot be recognized.
Cause
Corrective Action
An Ink Tank that is incompatible with the printer is loaded.
Load an Ink Tank that is compatible with the printer.
(See "Replacing Ink Tanks.") ➔ P.25
Wrong ink tank.
Cause
Corrective Action
The Ink Tank in the printer is incompatible.
Load an Ink Tank specified for use with the printer.
(See "Replacing Ink Tanks.") ➔ P.25
Error Message
Messages regarding ink
132
Basic Guide
Cannot print as specified.
iPF830 Series
Messages regarding printing or adjustment
Cannot print as specified. .............................................................................................................................. 133
Cannot adjust printhead. ............................................................................................................................... 135
Borderless printng not possible. Paper stretched or shrank. .......................................................................... 133
Before borderless printing, move the blue platen switch. ............................................................................... 133
Borderless printng not possible. .................................................................................................................... 129
Blue platen switch is dirty. ............................................................................................................................. 133
Move the blue platen switch No.xx to the right. (xx represents a number) ...................................................... 133
Check printed document. .............................................................................................................................. 134
Cannot print as specified.
"Lift the release lever and replace paper with A4/LTR (vertical) or larger."
Cause
Corrective Action
The loaded paper is too small.
Switch to paper A4/Letter (vertical) or larger.
"Lift the release lever and replace roll with 10 in. wide or larger roll."
Cause
Corrective Action
The loaded paper is too small.
Load a roll 10 inches wide or larger.
Cause
Corrective Action
The loaded roll has expanded or contracted due to environmental conditions, making it wider or narrower than the
supported width for borderless printing.
Press the OK button to stop printing.
Before borderless printing, move the blue platen switch.
Cause
Corrective Action
The blue Switch on the platen was set to the side opposite ● when a borderless print job was received.
Before borderless printing, set the blue Switch on the platen to the ● side.
(See "Setting the Blue Switch on the Platen.") ➔ User's Guide
Blue platen switch is dirty.
Cause
Corrective Action
The blue Switch on the platen is dirty.
Open the Top Cover and clean the blue Switch on the platen.
(See "Cleaning Inside the Top Cover.") ➔ P.47
Messages regarding printing or adjustment
Use each type of paper only where the recommended environmental
conditions are met. For details on environmental conditions for various paper, see the Paper Reference Guide.
(See "Displaying the Paper Reference Guide.") ➔ User's Guide
Error Message
Borderless printng not possible. Paper stretched or shrank.
Move the blue platen switch No.xx to the right. (xx represents a number)
Cause
Corrective Action
The printer has detected that the blue Switch on the platen needed in maintenance during printing is set away from the ● mark.
Set blue platen Switch of the indicated number toward the ● side.
(See "Setting the Blue Switch on the Platen.") ➔ User's Guide
133
Basic Guide
Check printed document.
iPF830 Series
Check printed document.
Cause
Corrective Action
The Printhead nozzles are becoming clogged.
If printing is faint, clean the Printhead.
(See "Cleaning the Printhead.") ➔ P.49
Error Message
Messages regarding printing or adjustment
134
Basic Guide
Cannot adjust printhead.
iPF830 Series
Messages regarding printheads
Cannot adjust printhead. ............................................................................................................................... 135
Wrong printhead. .......................................................................................................................................... 135
Printhead error .............................................................................................................................................. 135
Cannot recognize print head. ........................................................................................................................ 135
Execute printhead cleaning. .......................................................................................................................... 136
Cannot adjust printhead.
Cause
Corrective Action
The Printhead nozzles are
clogged.
Execute Head Posi. Adj. again, as follows.
1.
Press the OK button to clear the error.
2.
Print a test pattern to check the nozzles.
(See "Checking for Nozzle Clogging.") ➔ User's Guide
3.
Clean the Printhead if the nozzles are clogged.
(See "Cleaning the Printhead.") ➔ P.49
4.
Execute Head Posi. Adj. again.
(See "Automatic Adjustment to Straighten Lines and Colors.") ➔ P.89
Press the OK button to clear the error.
We recommend using a type of paper that you often use, other than film, for Printhead adjustment.
(See "Automatic Adjustment to Straighten Lines and Colors.") ➔ P.89
The Printhead is installed
crooked.
Straighten the Printhead as follows, and then execute Head Posi. Adj. again.
Press the OK button to clear the error.
2.
Use Head Inc. Adj. to adjust the angle of inclination of the Printhead.
(See "Adjusting Line Misalignment.") ➔ User's Guide
3.
Execute Head Posi. Adj. again.
(See "Automatic Adjustment to Straighten Lines and Colors.") ➔ P.89
Wrong printhead.
Cause
Corrective Action
An incompatible Printhead has been installed.
Open the Top Cover and replace the Printhead with a new one.
(See "Replacing the Printhead.") ➔ P.36
Printhead error
Cause
Corrective Action
There is a problem with the Printhead.
Open the Top Cover and replace the Printhead with a new one.
(See "Replacing the Printhead.") ➔ P.36
Messages regarding printheads
1.
Error Message
The Printhead cannot be
aligned; highly transparent film
is loaded.
Cannot recognize print head.
Cause
No Printhead is installed.
The Printhead cannot be recognized because it is not installed correctly.
Corrective Action
Follow these steps to install the Printhead.
1.
Open the Top Cover.
2.
Install the Printhead.
(See "Replacing the Printhead.") ➔ P.36
Follow these steps to reinstall the Printhead.
1.
Basic Guide
Open the Top Cover.
135
Execute printhead cleaning.
iPF830 Series
Cause
Corrective Action
The Printhead cannot be recognized because it is not installed correctly.
2.
Reinstall the Printhead.
(See "Replacing the Printhead.") ➔ P.36
Execute printhead cleaning.
Cause
The Printhead nozzles are clogged.
Corrective Action
Follow these steps to clean the Printhead.
1.
Stop printing by pressing ▲ or ▼ to select Stop Printing.
2.
Clean the Printhead.
(See "Cleaning the Printhead.") ➔ P.49
If the message is still displayed when printing, replace the Printhead.
(See "Replacing the Printhead.") ➔ P.36
Press ▲ or ▼ to select Print, and then press the OK button to resume printing. However, note that this error
may affect the printing quality.
Error Message
Messages regarding printheads
136
Basic Guide
Insert the maintenance cartridge.
iPF830 Series
Messages regarding the maintenance cartridge
Insert the maintenance cartridge. .................................................................................................................. 137
Wrong maintenance cartridge. ...................................................................................................................... 137
Maint. cart. The level is low ........................................................................................................................... 137
No Maintenance Cartridge capacity. .............................................................................................................. 137
Maintenance cartridge full. ............................................................................................................................ 137
Maintenance cartridge problem. .................................................................................................................... 137
Insert the maintenance cartridge.
Cause
Corrective Action
The Maintenance Cartridge is not installed.
Install the Maintenance Cartridge.
(See "Replacing the Maintenance Cartridge.") ➔ P.42
Wrong maintenance cartridge.
Cause
Corrective Action
A Maintenance Cartridge for a different model of printer is installed.
Replace it with the Maintenance Cartridge for your particular model.
(See "Maintenance Cartridge.") ➔ User's Guide
Maint. cart. The level is low
Cause
Corrective Action
You can continue to print, but prepare a new Maintenance Cartridge to use when the message
for replacement is displayed.
No Maintenance Cartridge capacity.
Corrective Action
After confirming that the printer has stopped operating, replace the Maintenance
Cartridge.
(See "Replacing the Maintenance Cartridge.") ➔ P.42
Maintenance cartridge full.
Cause
Corrective Action
The Maintenance Cartridge is full.
After confirming that the printer has stopped operating, replace the Maintenance Cartridge.
(See "Replacing the Maintenance Cartridge.") ➔ P.42
Maintenance cartridge problem.
Cause
An incompatible or used Maintenance Cartridge has
been installed.
Corrective Action
Install an unused Maintenance Cartridge specified for use with the printer.
(See "Replacing the Maintenance Cartridge.") ➔ P.42
Messages regarding the maintenance cartridge
Cause
The Maintenance Cartridge cannot absorb
enough ink for Printhead cleaning or other operation.
Error Message
The Maintenance Cartridge is almost full.
137
Basic Guide
Hard disk error.
iPF830 Series
Messages regarding the hard disk
Hard disk error. ............................................................................................................................................. 138
File read error. ............................................................................................................................................... 138
The mail box is full. ........................................................................................................................................ 138
Mail box full. Now printing without saving data. ............................................................................................. 138
Mail box nearly full. ........................................................................................................................................ 138
Maximum jobs stored. ................................................................................................................................... 138
Mail box full. Delete unwanted data ............................................................................................................... 138
Hard disk error.
Cause
Corrective Action
The format of the printer's hard
disk is invalid.
Press the OK button to start reformatting the hard disk. When formatting is finished, data on the
printer hard disk is erased and the printer automatically restarts.
File read error.
Cause
Corrective Action
Files on the printer's hard disk have become
corrupted.
Restart the printer. Only the corrupted files will be deleted, and the printer will restart.
The mail box is full.
Error Message
Cause
Corrective Action
There is no more space on the printer's
hard disk.
Press the Stop button and stop printing.
Delete print jobs from the queue.
(See "Managing the Job Queue (Deleting or Preempting Other Jobs).") ➔ User's Guide
Delete unneeded jobs stored in personal boxes.
(See "Deleting Saved Jobs.") ➔ User's Guide
Messages regarding the hard disk
Mail box full. Now printing without saving data.
Cause
Corrective Action
No more space is available on the printer's hard disk, so jobs are now printed without saving them. (Print jobs can no longer be saved on the hard disk.)
After printing, this message is cleared.
Mail box nearly full.
Cause
Corrective Action
The free hard disk space left for Personal Boxes in the printer's hard disk does
not have more than 1 GB, combined.
Delete unneeded jobs stored in Personal Boxes.
(See "Deleting Saved Jobs.") ➔ User's Guide
Maximum jobs stored.
Cause
Corrective Action
100 jobs are stored in the personal box.
Delete unneeded jobs stored in personal boxes.
(See "Deleting Saved Jobs.") ➔ User's Guide
Mail box full. Delete unwanted data
Cause
138
100 jobs are stored in the Personal Box.
Corrective Action
Press the Stop button and stop printing.
Delete print jobs from the queue.
(See "Managing the Job Queue (Deleting or Preempting Other Jobs).") ➔ User's Guide
Basic Guide
iPF830 Series
Mail box full. Delete unwanted data
Cause
100 jobs are stored in the Personal Box.
Corrective Action
Delete unneeded jobs stored in personal boxes.
(See "Deleting Saved Jobs.") ➔ User's Guide
Error Message
Messages regarding the hard disk
139
Basic Guide
This type of paper is not compatible with HP-GL/2.
iPF830 Series
Messages regarding HP-GL/2
This type of paper is not compatible with HP-GL/2. ...................................................................................... 140
GL2: Wxxxx The memory is full. (xxxx is 0501, 0903, or 0904) ...................................................................... 140
GL2: W0502 The parameter is out of range. ................................................................................................. 140
GL2: W0504 This command is not supported. .............................................................................................. 140
This type of paper is not compatible with HP-GL/2.
Cause
Corrective Action
The printer has received a HP-GL/2 print
job that cannot be printed on the paper
that has been advanced.
Follow these steps to replace the type of paper in the printer.
1.
Press ▲ or ▼ to select Change Paper, and then press the OK button.
2.
Replace the paper with a type compatible with HP-GL/2. For details on paper compatible with HP-GL/2, refer to the Paper Reference Guide.
(See "Displaying the Paper Reference Guide.") ➔ User's Guide
Press ▲ or ▼ to select Stop Printing, and then press the OK button.
Press ▲ or ▼ to select Print, and then press the OK button to resume printing. However, note that this error may cause paper jams and affect the printing quality.
GL2: Wxxxx The memory is full. (xxxx is 0501, 0903, or 0904)
Cause
Error Message
The printer memory is
full.
Corrective Action
Because the entire print job could not be received, the printer may not be able to print the entire original.
Check the printing results.
In the Control Panel menu, setting On-the-Fly to On may enable printing. However, check the printing
results because the image may be incomplete in some cases.
GL2: W0502 The parameter is out of range.
Messages regarding HP-GL/2
Cause
Corrective Action
A parameter specified in a HP-GL/2 command is out of the supported range.
Check the print job.
If you have specified ProcessingOption > Warning > On in
the Control Panel menu, set it to Off instead.
GL2: W0504 This command is not supported.
Cause
The printer has received an unsupported HP-GL/2 command.
Corrective Action
Check the print job.
If you have specified ProcessingOption > Warning > On in the
Control Panel menu, set it to Off instead.
140
Basic Guide
GARO Wxxxx (x represents a number)
iPF830 Series
Other Messages
GARO Wxxxx (x represents a number) .......................................................................................................... 141
ERROR Exxx-xxxx (x represents a letter or number) ...................................................................................... 141
Hardware error. xxxxxxxx-xxxx (x represents a letter or number) .................................................................... 141
Top cover is open. ......................................................................................................................................... 141
Prepare for parts replacement. ...................................................................................................................... 142
Parts replacement time has passed. ............................................................................................................. 142
Unknown file. ................................................................................................................................................ 142
Multi-sensor error .......................................................................................................................................... 142
GARO Wxxxx (x represents a number)
Cause
Corrective Action
There is a problem with the print job.
Try printing again, using the correct printer driver.
It is also possible to continue printing in this state.
However, you may not be able to obtain the desired printing results.
ERROR Exxx-xxxx (x represents a letter or number)
Cause
Corrective Action
An error requiring service may have occurred.
Write down the error code and message, turn off the printer, and contact your Canon dealer for assistance.
Error Message
Cause
Corrective Action
The last portion of roll paper was used during a print job. The paper
was not advanced because the trailing edge is taped to the roll.
Turn off the printer and remove the roll from the printer before restoring power.
Fastening tape or the Belt Stopper has not been removed inside the
Top Cover.
Turn off the printer, open the Top Cover and remove the
tape or the Belt Stopper before restoring power.
An error requiring service may have occurred.
Turn off the printer and wait at least three seconds before
restoring the power.
If the message is displayed again, write down the error code
and message, turn off the printer, and contact your Canon
dealer for assistance.
Other Messages
Hardware error. xxxxxxxx-xxxx (x represents a letter or number)
Top cover is open.
Cause
The printer has detected that the Top Cover is
open.
Basic Guide
Corrective Action
Open the Top Cover fully, remove any foreign objects, and close the Top Cover
again.
141
Prepare for parts replacement.
iPF830 Series
Cause
Corrective Action
The printer has detected that the Top Cover is
open.
If the error occurs again, close the Top Cover, turn off the printer, and wait a while
before restoring power.
Prepare for parts replacement.
Cause
Corrective Action
It is almost time to replace consumables
for which service is required.
You can continue to use the printer for some time until "Parts replacement time has
passed." will be displayed.
Contact your Canon dealer for assistance.
Parts replacement time has passed.
Cause
Corrective Action
It is past the recommended time to replace consumables for which service is required.
Contact your Canon dealer for assistance.
Unknown file.
Cause
Corrective Action
Data sent to keep the printer up to date (such as paper information) is in the wrong format.
Check the data. Turn off the printer and wait a while before restoring power,
and then resend the data.
You have uploaded firmware for a different model.
Check the firmware version. Turn off the printer and wait a while before restoring power, and then resend the firmware.
If the message is displayed again, contact your Canon dealer for assistance.
Error Message
Multi-sensor error
Cause
Corrective Action
Other Messages
Direct sunlight or strong lighting may be shining on
the printer and causing the sensor to malfunction.
Take steps to ensure the printer is not used when exposed to direct sunlight
or strong lighting.
The performance of a sensor inside the printer may
be impaired.
Turn off the printer and wait at least three seconds before restoring the power.
If the message is displayed again, contact your Canon dealer for assistance.
142
Basic Guide
iPF830 Series
Error Messages
Before borderless printing, move the blue platen switch. ............................................................................... 133
Blue platen switch is dirty. ............................................................................................................................. 133
Borderless printng not possible. .................................................................................................................... 129
Borderless printng not possible. Paper stretched or shrank. .......................................................................... 133
Cannot adjust printhead. ............................................................................................................................... 135
Cannot print as specified. .............................................................................................................................. 133
Cannot recognize print head. ........................................................................................................................ 135
Check printed document. .............................................................................................................................. 134
Close Ink Tank Cover .................................................................................................................................... 131
End of paper feed. ........................................................................................................................................ 128
ERROR Exxx-xxxx (x represents a letter or number) ...................................................................................... 141
Execute printhead cleaning. .......................................................................................................................... 136
File read error. ............................................................................................................................................... 138
GARO Wxxxx (x represents a number) .......................................................................................................... 141
GL2: W0502 The parameter is out of range. ................................................................................................. 140
GL2: W0504 This command is not supported. .............................................................................................. 140
GL2: Wxxxx The memory is full. (xxxx is 0501, 0903, or 0904) ...................................................................... 140
Hard disk error. ............................................................................................................................................. 138
Hardware error. xxxxxxxx-xxxx (x represents a letter or number) .................................................................... 141
Error Messages
Mail box full. Delete unwanted data ............................................................................................................... 138
Mail box full. Now printing without saving data. ............................................................................................. 138
Mail box nearly full. ........................................................................................................................................ 138
Maint. cart. The level is low ........................................................................................................................... 137
Maintenance cartridge full. ............................................................................................................................ 137
Maintenance cartridge problem. .................................................................................................................... 137
Maximum jobs stored. ................................................................................................................................... 138
Media take-up unit ready. .............................................................................................................................. 129
MediaType Mismatch .................................................................................................................................... 122
Move the blue platen switch No.xx to the right. (xx represents a number) ...................................................... 133
Multi-sensor error .......................................................................................................................................... 142
Error Message
Ink insufficient. .............................................................................................................................................. 131
Ink tank is empty. .......................................................................................................................................... 131
Insert the maintenance cartridge. .................................................................................................................. 137
Insufficient paper for job ................................................................................................................................ 124
No ink left. ..................................................................................................................................................... 131
No ink tank loaded. ....................................................................................................................................... 132
No Maintenance Cartridge capacity. .............................................................................................................. 137
Not much ink is left. ...................................................................................................................................... 132
Paper cutting failed. ...................................................................................................................................... 128
Paper jam. .................................................................................................................................................... 127
Paper loaded askew. ..................................................................................................................................... 127
Paper position not suitable for borderless printing. ........................................................................................ 130
Paper size not detected. ............................................................................................................................... 124
PaprTypeMismatch ........................................................................................................................................ 122
PaprWidth Mismatch ..................................................................................................................................... 124
Parts replacement time has passed. ............................................................................................................. 142
Prepare for parts replacement. ...................................................................................................................... 142
Printhead error .............................................................................................................................................. 135
Regular printing is selected, but a roll is loaded. ............................................................................................ 127
Rel lever is in wrong position. ........................................................................................................................ 129
Basic Guide
143
iPF830 Series
Remaining level of the ink cannot be correctly detected. Check ink tank. ...................................................... 131
Rewinding error. ............................................................................................................................................ 129
Roll printing is selected, but sheets are loaded. ............................................................................................. 125
Roll printing is selected. ................................................................................................................................. 125
Sheet printing is selected. ............................................................................................................................. 127
Sheet removed. ............................................................................................................................................. 126
The following ink tanks cannot be recognized. .............................................................................................. 132
The mail box is full. ........................................................................................................................................ 138
The paper is too small. .................................................................................................................................. 123
The paper is too small. .................................................................................................................................. 123
The roll is empty. ........................................................................................................................................... 126
This paper cannot be used as size is not supported. ..................................................................................... 125
This type of paper is not compatible with HP-GL/2. ...................................................................................... 140
Top cover is open. ......................................................................................................................................... 141
Turn on the media take-up unit. ..................................................................................................................... 129
Unknown file. ................................................................................................................................................ 142
Wrong ink tank. ............................................................................................................................................. 132
Wrong maintenance cartridge. ...................................................................................................................... 137
Wrong printhead. .......................................................................................................................................... 135
Error Message
Error Messages
144
Basic Guide
Index
A
Adjust Length ........................................................ 91, 92
Adjust Printer .............................................................. 91
Adobe RGB .................................................................. 5
C
CAD .......................................................................... 92
Cleaning ................................................. 3, 36, 47, 49, 67
Clearing a Jammed Sheet ............................................. 97
Cutting Mode .............................................................. 52
D
Device Setup Utility .................................................... 115
Printhead ....................... 3, 36, 49, 63, 66, 67, 89, 108, 135
R
Removing printer drivers ............................................. 115
Removing the Roll ....................................................... 18
Replace P.head ........................................................... 37
Replacing Ink Tanks ..................................................... 25
Rewinding error ......................................................... 129
Roll Holder ....................................... 12, 16, 19, 63, 65, 78
Rotate Page 90 degrees ............................................... 85
W
When to replace .......................................................... 36
E
Ejection Guide ............................ 16, 19, 49, 63, 77, 96, 99
F
Feed Priority ............................................................... 91
G
GARO Wxxxx (x represents a number) ......................... 141
H
Hardware error .......................................................... 141
Head Cleaning ............................................................ 49
Head Cleaning A ......................................................... 49
Head Cleaning B ......................................................... 49
Holder Stopper ............................................................ 64
I
If a message is displayed .............................................. 42
Ink level .................................................................... 119
Ink level detection ...................................................... 119
L
Large-Format Printing .................................................. 87
M
Maintenance Cartridge ................................. 3, 42, 64, 137
Media Take-up Unit .................................... 64, 65, 76, 102
Menu Operations ......................................................... 52
Menu Structure ........................................................... 56
N
Navigate .................................................................... 52
P
Paper Feed Slot .............................................. 17, 63, 101
Power .......................................................... 2, 52, 65, 77
Preparing to Transfer the Printer .................................... 69
Print Priority ................................................................ 91
Printer menu ............................................................... 53
145
iPF830 Series Basic Guide
ENG
© CANON INC. 2014