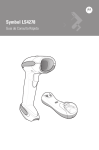
1
Nordic ID Morphic User Manual Nordic ID International Headquarters Myllyojankatu 2A FI-24100 SALO FINLAND Phone: Fax: Email: +358 2 727 7700 +358 2 727 7720 [email protected] www.nordicid.com Table of Contents 3.3 Stylus and Touch Screen............................ 20 3.3.1 Input Panel: Soft Keyboard ................ 21 (i) A few words of caution..................................... 4 (ii) Trademarks......................................................... 4 3.4 Rebooting your Nordic ID Morphic ............ 21 3.4.1 Soft-resetting your device................... 21 3.4.2 Hard-resetting your device ................. 22 (iii) Safety precautions .......................................... 5 3.5 Registry ......................................................... 22 Laser beam ........................................................... 5 3.6 Non-volatile Storage.................................... 23 Note of caution about the laser beam in European languages............................................ 6 3.7 Control Panel................................................ 23 3.7.1 Accessing Control Panel..................... 24 3.7.2 Opening Applet .................................... 24 3.7.3 Closing Applet ...................................... 24 3.7.4 Closing Control Panel ......................... 24 Battery.................................................................... 7 Wall charger .......................................................... 8 Medical devices .................................................... 8 (iv) CE Compliance Statement............................. 9 (v) FCC Compliance Statement ........................... 9 (vi) FCC Compliance Notice ................................. 9 1. Introduction ....................................................... 10 1.1 Nordic ID Morphic........................................ 10 2. Getting Started .................................................. 11 2.1 Wall Charger ................................................ 11 2.2 Installing Battery .......................................... 11 2.3 About the lithium-polymer battery ............. 12 2.4 Charging Battery on Nordic ID Morphic ... 13 2.5 Charging Battery on Docking Cradle ........ 13 3. Basics of Nordic ID Morphic.......................... 15 3.1 Desktop Window.......................................... 15 3.1.1 Taskbar ................................................. 15 3.2 Keypad .......................................................... 17 3.2.1 ’Activator’ Key ...................................... 17 3.2.2 ‘Cancel/Esc’ Key.................................. 17 3.2.3 ‘Navigation Ring’.................................. 18 3.2.4 ‘tab/alt’ Key ........................................... 18 3.2.5 ‘F/mode’ - Keypad Function/mode Selector Key ................................................... 18 3.2.6 Alphanumeric Keypad......................... 18 3.2.7 Backspace Key .................................... 19 3.2.8 Function Keys ...................................... 19 3.2.9 Scan Key............................................... 20 3.2.10 Power button ...................................... 20 Nordic ID International Headquarters Myllyojankatu 2A FI-24100 SALO FINLAND 3.8 Control Panel Applets ................................. 25 3.8.1 Bluetooth Device Properties............... 25 3.8.2 Certificates ............................................ 25 3.8.3 Clear Type ............................................ 25 3.8.4 Date/Time ............................................. 25 3.8.5 Dialing.................................................... 26 3.8.6 Display................................................... 26 3.8.7 Error Reporting..................................... 26 3.8.8 Input Panel............................................ 26 3.8.9 Internet Options.................................... 26 3.8.10 Keyboard............................................. 26 3.8.11 Network and Dial-up Connections .. 26 3.8.12 NID AutoStart Settings...................... 27 3.8.13 NID Backlight...................................... 27 3.8.14 NID Indicators .................................... 27 3.8.15 NID Keypad ........................................ 27 3.8.16 NID Link Watchdog ........................... 28 3.8.17 NID Power Button.............................. 28 3.8.18 NID Scanner....................................... 29 3.8.19 NID SNTP Service............................. 29 3.8.20 NID Touch Screen............................. 30 3.8.21 Owner.................................................. 30 3.8.22 Password ............................................ 30 3.8.23 PC Connection................................... 30 3.8.24 Power .................................................. 31 3.8.25 Regional Settings .............................. 31 3.8.26 Storage Manager............................... 31 3.8.27 Stylus................................................... 31 3.8.28 System ................................................ 32 3.8.29 USB Profile ......................................... 32 3.8.30 Volume & Sounds.............................. 33 3.9 Power Management .................................... 33 3.9.1 Power States ........................................ 34 3.9.2 Backup battery ..................................... 35 Phone: Fax: Email: +358 2 727 7700 +358 2 727 7720 [email protected] www.nordicid.com 4. Data Capture...................................................... 37 4.1 Bar Code Reader......................................... 37 4.1.1 Checking on Bar Code Reading........ 37 4.1.2 Enabling / Disabling Bar Code Type. 38 4.1.3 Configuring Bar Code Specifics ........ 39 4.1.4 Changing Aim/Triggering of Bar Code Reading........................................................... 39 4.1.5 Changing Scanning Timeout ............. 39 5. Connectivity....................................................... 40 6.5 Adjusting Screen Brightness ...................... 55 6.6 Setting Timeout for Reduction in Screen Brightness............................................................ 55 6.7 Setting Timeout for Automatic Screen Turning-off ........................................................... 56 6.8 Setting Timeout for Automatic Suspension .............................................................................. 56 5.1 Wireless LAN in a nutshell ......................... 40 5.2 Wireless LAN Connectivity......................... 41 5.2.1 Introduction to Configuring Wireless LAN Interface ................................................. 41 5.2.2 Setting up WLAN Interface – Add New …...................................................................... 44 5.2.3 Setting up WLAN Interface – SSID Available ......................................................... 45 5.2.4 Setting up IP-networking .................... 46 6. Configuring and Administering System Properties ............................................................... 47 6.1 Managing Registry Database .................... 47 6.1.1 Accessing Registry Backup ............... 47 6.1.2 Closing Registry Backup .................... 47 6.1.3 Making Your Configuration Settings Permanent ...................................................... 47 6.1.3 Restoring Your Nordic ID Morphic to Factory Defaults............................................. 48 6.2 Repartitioning Non-volatile Storage .......... 48 6.3 Configuring Keypad..................................... 49 6.3.1 Adjusting Keys’ Auto-repeat Delay ... 49 6.3.2 Adjusting Keys’ Auto-repeat Rate ..... 50 6.3.3 Enabling/Disabling Keys’ Auto-repeat Property .......................................................... 50 6.3.4 Mapping Key’s Functionality onto Another............................................................ 51 6.3.5 Specifying Default Mode of Alphanumeric Keypad................................... 52 6.3.6 Enabling/Disabling Scan Key............. 52 6.3.7 Adjusting Brightness of Keypad’s Backlight ......................................................... 52 6.4 Managing Touch Screen ............................ 53 6.4.1 Adjusting Double-tapping Sensitivity of Touch Screen................................................. 53 6.4.2 Recalibrating Touch screen ............... 53 6.4.3 Disabling/Enabling Touch Screen..... 54 Nordic ID International Headquarters Myllyojankatu 2A FI-24100 SALO FINLAND Phone: Fax: Email: +358 2 727 7700 +358 2 727 7720 [email protected] www.nordicid.com Nordic ID Morphic User Manual V0.3s draft, December 2008 © Copyright 2008 by Nordic ID Oy. All rights reserved. (i) A few words of caution (i) Nordic ID provides this publication “AS IS” without any warranty, either express or implied, including, but not limited to, the implied warranties of merchantability, fitness for a particular purpose, and non-infringement. (ii) This publication can include technical inaccuracies or typographical errors. (iii) The information presented in this publication is subject to change without notice. (iv) Nordic ID might change the utilities, applets, or programs described in this publication. You can have the latest version of the manual by visiting Nordic ID’s web pages. (ii) Trademarks All designations mentioned in this User Manual that are either trademarks or service marks, are the property of their respective owners. Where those designations appear in this manual and Nordic ID was aware of a trademark claim, the designations have been written in initial capital or in capitals. Microsoft, Windows, Windows Embedded CE, Windows CE, Visual Basic, WordPad, and ActiveSync are registered trademarks or trademarks of Microsoft Corporation, in the United States, in other countries, or both. 802.11 and all 802.11-based trademarks and logos are trademarks or registered trademarks of IEEE Inc., in the United States, in other countries, or both. Java and all Java-based trademarks and logos are trademarks or registered trademarks of Sun Microsystems, Inc., in the United States, in other countries, or both. Bluetooth is a trademark of Bluetooth SIG, in the United States, in other countries, or both. Nordic ID and the NORDICID -logo are registered trademarks of Nordic ID Oy. Nordic ID International Headquarters Myllyojankatu 2A FI-24100 SALO FINLAND Phone: Fax: Email: +358 2 727 7700 +358 2 727 7720 [email protected] www.nordicid.com (iii) Safety precautions Laser beam The NORDIC ID Morphic is provided with a laser barcode scanner making the device a Class 2 Laser product. The laser scanner uses a low power, visible light diode. As with any very bright light source, such as the sun, the user should avoid staring directly into the light beam. Momentary exposure to a Class 2 laser is not known to be harmful. The NORDIC ID Morphic fulfils the regulatory requirements as follows: Complies with 21CFR1040.10 and 1040.11 except for deviations pursuant to Laser Notice No. 50, dated July 26, 2001. EN60825-1:1994+ A1:2002 +A2:2001 IEC60825-1:1993+A1:1997+A2:2001 Caution: Use of controls, adjustments or performance of procedures other than those specified herein may result in hazardous laser light exposure. Although the brief exposure to the visible Class 2 laser beam is not known to be harmful to the eye, the risk always exists that the light beam causes injury to the eye, when the laser beam is aimed even indirectly via a reflecting surface (e.g. mirror) at the eyes. So, always take care when you are reading bar codes or when you troubleshoot bar code scanning problems. Never look in the direction of the bar code scanner from which the scan engine emits the laser beam when you activate the scanning process, nor aim the scanner at the human eye or the eye of any animal. Scan key Caution: EVERY TIME THE SCAN KEY IS PRESSED THE SCANNER STARTS EMITTING LASER BEAM. By default the functioning of the scan key is not conditional on any application being intended to read bar codes and nor is it conditional on the field or the active area on the display in which barcodes can be read or is intended to be read. Caution: Any key on the Nordic ID Morphic’s keypad with the exception of a power button can control the laser scanner. Besides the scan key or as a substitute for the scan key the scan functionality can be mapped on any other key on the keypad. Nordic ID International Headquarters Myllyojankatu 2A FI-24100 SALO FINLAND Phone: Fax: Email: +358 2 727 7700 +358 2 727 7720 [email protected] www.nordicid.com Note of caution about the laser beam in European languages DANSK DEUTSCH ENGLISH ESPAÑOL FRANCAIS ITALIANO NEDERLANDS NORSK PORTUGUÊS SUOMI SVENSKA LASERLYF! SE IKKE IND I STRÅLEN! KLASSE 2 LASER! LASERSTRAHLEN! NICHT DIRECT IN DEN LASERSTRAHL SCHAUEN! LASERPRODUKT DER KLASSE 2! LASER LIGHT! DO NOT STARE INTO BEAM! CLASS 2 LASER! LUZ LASER! NO MIRE FIJAMENTE EL HAZ! PRODUCTO LASER DE LA CLASE 2 LUMIERE LASER! NE PAS REGARDER LE RAYON FIXEMENT! PRODUIT LASER DE CLASSE 2! LUCE LASER! NON FISSARE IL RAGGIO PRODOTTO! LASERLICHT! NIET IN STRAAL STAREN! KLASSE-2 LASER! LASERLYS! IKKE STIRRINN I LYSSTRÅLEN! LASER, KLASSE 2! LUZ DE LASER! NÃO FIXAR O RAIO LUMINOSO! PRODUTO LASER DA CLASSE 2! VARO LASERSÄDETTÄ! ÄLÄ SUUNTAA SÄDETTÄ SILMIIN! LASER, LUOKKA 2! VARNING LASERSTÅLNING! STIRRA EJ IN I STRÅLEN! KLASS 2 LASER Nordic ID International Headquarters Myllyojankatu 2A FI-24100 SALO FINLAND Phone: Fax: Email: +358 2 727 7700 +358 2 727 7720 [email protected] www.nordicid.com Battery Use only original, Nordic ID approved rechargeable batteries being intended for the Nordic ID Morphic to avoid serious health hazards to you or to your fellow-men, or damage to the surrounding property and to your device. Battery Caution: Under no circumstances must you disassemble the battery casing or damage it. If the battery casing is damaged, for example, the joint of the casing is opened when the battery has fallen onto the floor, dispose of the battery. If there is any difference from what is usual or expected on the battery such as a change in normal shape, smell of electrolyte, and an electrolyte leakage, do not use the battery any longer, and dispose of it. Do not put the battery into any liquid. Care shall be taken to handle, or to store the rechargeable battery so that the battery’s electrical conductors do not short-circuit. The short circuit causes damage to the battery. Do not expose the rechargeable battery to direct sunlight or to other heat sources. The battery temperature cannot go up over 60°C (140°F) without possible consequences for the battery’s useful life. The higher temperature may cause damage to the battery, which makes the battery unusable. 100°C (212°F) or higher temperature can cause a battery explosion. Keep the battery out of the reach of children Nordic ID International Headquarters Myllyojankatu 2A FI-24100 SALO FINLAND Phone: Fax: Email: +358 2 727 7700 +358 2 727 7720 [email protected] www.nordicid.com Wall charger Before charging the rechargeable battery, check that the mains voltage into which you are plugging the wall charger (AC/DC wall adaptor) does not exceed the AC voltage specified on the charger unit. The input voltage exceeding the specified voltage on the AC wall adaptor may destroy the wall charger, and the charger electronics on your morphic. Caution: Use only the Nordic ID approved wall charger being intended for the Nordic ID Morphic device Do not use the wall charger for any other purposes than for charging the rechargeable batteries on the Nordic ID Morphic or on its docking cradle. The wall charger and your Nordic ID Morphic are designed to charge the Nordic ID approved rechargeable batteries INDOORS ONLY at normal room temperature, or at temperature near that. Medical devices Caution: Nordic ID Morphic can interfere with medical devices such as hearing aids or pacemakers. Keep your Nordic ID Morphic at least 20 cm (8 inches) from a pacemaker; otherwise it can prevent the pacemaker from working correctly because of radio signals of wireless communication generated when you use your Morphic. Nordic ID International Headquarters Myllyojankatu 2A FI-24100 SALO FINLAND Phone: Fax: Email: +358 2 727 7700 +358 2 727 7720 [email protected] www.nordicid.com (iv) CE Compliance Statement Hereby, Nordic ID Oy, declares that the NORDIC ID Morphic models are in compliance with the essential requirements and other relevant provisions of Directive 1999/5/EC (v) FCC Compliance Statement This hand-held device complies with part 15 of the FCC Rules. Operation is subject to the following two conditions: (1) This device may not cause harmful interference, and (2) this device must accept any interference received, including interference that may cause undesired operation. Changes or modifications not expressly approved by the party responsible for compliance could void the user’s authority to operate the hand-held equipment The FCC ID information is printed on the back side of your hand-held. (vi) FCC Compliance Notice NOTE: This equipment has been tested and found to comply with the limits for a Class B digital device, pursuant to part 15 of the FCC Rules. These limits are designed to provide reasonable protection against harmful interference in a residential installation. This equipment generates, uses, and can radiate radio frequency energy and, if not installed and used in accordance with the instructions, may cause harmful interference to radio communications. However, there is no guarantee that interference will not occur in a particular installation. If this equipment does cause harmful interference to radio or television reception, which can be determined by turning the equipment off and on, the user is encouraged to try to correct the interference by one or more of the following measures: Reorient or relocate the receiving antenna. Increase the separation between the equipment and receiver. Connect the equipment into an outlet on a circuit different from that to which the receiver is connected. Consult the dealer or an experienced radio/TV technician for help. Nordic ID International Headquarters Myllyojankatu 2A FI-24100 SALO FINLAND Phone: Fax: Email: +358 2 727 7700 +358 2 727 7720 [email protected] www.nordicid.com 1. Introduction 1.1 Nordic ID Morphic Nordic ID Morphic is a data collecting platform to develop a lightweight handheld linkage between information encoded onto bar codes and the business applications running in the edge or data center systems. For automatic identification needs it provides 1 dimension barcode reader; 802.11b/g wireless communication with strong encryption and authentication; and user interface with alphanumeric keypad, touch screen, and 2.2”, 320-by-240-pixel resolution backlit color screen. It supports wide range of technologies to build up client-server applications, and it provides a device API of its own for different programming technologies like C/C++, JAVA, C#, and Visual Basic. PICTURES Nordic ID International Headquarters Myllyojankatu 2A FI-24100 SALO FINLAND Phone: Fax: Email: +358 2 727 7700 +358 2 727 7720 [email protected] www.nordicid.com 2. Getting Started After opening the box, in addition to Nordic ID Morphic you have the booklet containing information on how to get started with the handheld. If you have a docking cradle for your Nordic ID Morphic, the box of the docking cradle also includes the booklet giving you instructions for what you should do to bring the cradle into service. Use those booklets as a main source of information on getting started with the handheld unit and its docking cradle. The purpose of this ‘Getting Started’ section is not to repeat all the details of the booklets but dealing with some topics in general, such as wall charger, battery, battery installing, and battery charging options. 2.1 Wall Charger Nordic ID Morphic is provided with a wall charger in its package. The wall charger is made up of a power switching unit and an exchangeable AC plug part having three different versions included in the product box for the simple reason that the power supply is targeted at the markets of UK, continental Europe, and North America. (The Nordic ID Morphic product is targeted at the European market – both at the Continental and the UK – and at United States market) So before you can use the wall charger you have to assemble the wall charger by fixing the AC plug part applying to your location to the power switching unit according to the following picture: Be aware that you can plug the lead from the power supply into the power socket being either on the Nordic ID Morphic or on its docking cradle, meaning that you can use the same wall charger with the handheld unit and with the docking unit. 2.2 Installing Battery Nordic ID Morphic has two battery options. There is a standard version with an ampere-hour capacity of 1320mAh. Another battery version is offered as an add-on to the Nordic ID Morphic, and its ampere-hour capacity is greater than that of the standard version. Due to fact that the ampere-hour capacity is directly proportional to the weight of the battery, the add-on battery is also thicker than the standard one and it requires the battery cover of it its own. So be aware that when you purchase the greater capacity battery you cannot use the standard battery cover with it on the Nordic ID Morphic. Nordic ID International Headquarters Myllyojankatu 2A FI-24100 SALO FINLAND Phone: Fax: Email: +358 2 727 7700 +358 2 727 7720 [email protected] www.nordicid.com Whatever the thickness of the battery is, installing the battery remains the same. The following series of pictures depicts battery installation in its compartment on the device. STEP 1: Open battery cover STEP 2: Put battery into its compartment STEP 3: Close battery cover 2.3 About the lithium-polymer battery Note that the lithium-polymer rechargeable battery included in the box is not fully charged. Before first-time use of the device the battery must be fully charged. Note that it is strongly recommended to charge the lithium-polymer battery indoors at 20°C temperature, or at temperature near that (± 2°C), because continual charging at high or low temperature may cause degradation of battery performance even within specified temperature range, which is 0 to 45 degrees Celsius. Note that every charge/discharge cycle has an effect on the rechargeable battery’s ampere-hour capacity, so that the fully charged battery, which is charged many times before, runs down more rapidly in use than the battery just brought into use. After 500 charge/discharge cycles, if the battery has been run with care enough, the battery’s ampere-hour capacity is still more than twothirds of its original one. However, the charge/discharge cycle is a conception being not unambiguous. Accordingly, between short operating periods it is not reasonable to recharge the battery. Note that ambient temperature has an effect on how long the fully charged lithium-polymer battery is able to power your device. A rule of thump is that the colder is using conditions the shorter is operating time of the device powered by the fully charged battery. Note that if the battery runs down, do not leave the device with the flat battery or the battery which has run down lying idle without recharging the battery, because the battery may be overdischarged due to self discharge. After overdischarging the battery does not preserve its performance properties. In the worst-case scenario, the battery is damaged and cannot store energy any longer. Note that if you do not use your Nordic ID Morphic for a long time, remove the battery from its battery chamber. Never store the battery in the device. Note that the battery may not be flat nor be fully charged for long-time storage. The ideal charge is about 60% of the battery’s full capacity. Nordic ID International Headquarters Myllyojankatu 2A FI-24100 SALO FINLAND Phone: Fax: Email: +358 2 727 7700 +358 2 727 7720 [email protected] www.nordicid.com 2.4 Charging Battery on Nordic ID Morphic A standard option to get the rechargeable battery charged is to charge it in the battery chamber of the device. However, there are two ways how to connect up the Nordic ID morphic to the mains to get the battery charged in its chamber. When there is no docking cradle available, the lead from the wall charger is connected to the power socket on the bottom of the Nordic ID Morphic device. After that the wall charger is plugged into the mains. The other means is to put the Nordic ID Morphic into its docking cradle, assuming that the docking cradle is plugged into the mains. THE PICTURE OF DOCKING CRADLE OPTION IS REQUIRED RED Battery is being charged ORANGE Battery is still being charged by everlowering current GREEN Battery is fully charged Once the operating system of the device is up and running, the LED in the bottom right-hand corner of the device‘s keypad area indicates charging status, that is, when the battery is being charged, and when it is fully charged. Red light indicates that charging is in progress. When light changes from red to orange the battery is charged approximately 80% of its total capacity. After that, the Nordic ID Morphic keeps on charging the battery with everlowering current until it has fully charged the battery. Green light indicates that the battery is fully charged. 2.5 Charging Battery on Docking Cradle There are two slots on the docking cradle of Nordic ID Morphic. The one slot is for the device, the other one is to charge the battery on the docking cradle. This battery charging slot is intended to charge a so-called spare battery. Nordic ID International Headquarters Myllyojankatu 2A FI-24100 SALO FINLAND Phone: Fax: Email: +358 2 727 7700 +358 2 727 7720 [email protected] www.nordicid.com If your use of the device is so intensive during the workdays that the battery cannot power the unit for the whole workday without recharging it, then the spare battery is well worth considering. You can also see that keeping your Nordic ID Morphic fully operational all the time is essential to get your job done on time. In that case, your unit should be at full powered and being connected to back-end system the whole time, which may require replacing the flat battery with the fully charged one during the workday. Before you put the battery into its charging slot, connect the docking cradle into the mains (see the booklet included in the cradle box). To charge the battery on the docking cradle: 1. Place the contacts end of the battery in the slot so that there is approximately 3mm space between the battery and slot contacts 2. Press the battery and slot contacts against each other by putting the battery at the back end into its slot 3. Check that the indicator in the front rim of the device slot displays the red battery status, meaning that the battery is being charged 4. The battery is charged when the charging indicator changes from red to green Related information: Section ‘Power Management’ Nordic ID International Headquarters Myllyojankatu 2A FI-24100 SALO FINLAND Phone: Fax: Email: +358 2 727 7700 +358 2 727 7720 [email protected] www.nordicid.com 3. Basics of Nordic ID Morphic The every day use of Nordic ID Morphic becomes more effortless if you accustom yourself to some essential features, and to the basic logic embedded in the Nordic ID Morphic. On the other hand, when Nordic ID Morphic is being integrated with business application, it is good to know of the different features belonging to Nordic ID Morphic system. The aspects which are dealt with in this section are the interactions between user and the device, and the basic facilities in the system. 3.1 Desktop Window A file browser, once opened, it shows directories off the root of the device file system A hidden directory to which the shell moves files and directories when you delete them A short cut to Microsoft Web browser Taskbar Double-tapping the icon on the desktop you can launch the application or the other facility which the icon represents. 3.1.1 Taskbar Start menu icon The start menu icon is also known as ‘Start‘ button. Tapping on the button with a stylus the Start Menu opens on the desktop. You can also open the menu by means of a keypad as follows: 1. Set ‘Input focus’ to the Start button with a ‘tab/alt’ key 2. Press an ‘Activator’ key; the Start menu opens Nordic ID International Headquarters Myllyojankatu 2A FI-24100 SALO FINLAND Phone: Fax: Email: +358 2 727 7700 +358 2 727 7720 [email protected] www.nordicid.com Related information: Section ‘‘tab/alt’ Key’ Section ‘’Activator’ Key’ Soft keyboard Tapping on the Soft keyboard icon on the task bar the menu of the soft keyboard opens. With the menu you can open the soft keyboard on the display as well as close the soft keyboard window. The soft keyboard is also referred to as ‘Input Panel’ in the Windows CE documentary material. Related information: Section ‘Input Panel: Soft Keyboard’ Desktop Tapping the Desktop icon and after that selecting ‘Desktop’ menu item you can minimize all the windows you have open on the screen. ‘Annunciator’ area In this area on the task bar the various subsystems running behind the scenes notify you of their status by showing the icon being appropriate at a particular moment. Tapping the announciator icon you can get further information about the status and even more. However, not all of the background services provide dialog for user. Time On the taskbar there is field showing the time. If you double tab on that field the dialog window of a Date/Time control panel applet opens. Related information: Section ‘Date/Time’ (‘Date/Time’ control panel applet) Nordic ID International Headquarters Myllyojankatu 2A FI-24100 SALO FINLAND Phone: Fax: Email: +358 2 727 7700 +358 2 727 7720 [email protected] www.nordicid.com 3.2 Keypad 1. Activator 2. Navigation ring 3. tab/alt 4. Backspace 1 5 5. Cancel/Esc 2 6 6. Scan 3 7 8 7. F/mode 4 9 8. Alphanumeric keypad / Function keys 9. Power button / Hardware reset, by holding down for 5 sec. Note! On the keypad all the keys with the exception of the power button are programmable, including the properties they have. In a sense, the power button is also programmable if you write your own shutdown utility. The result of a key press depends on the application, so the key can produce the result differing from its default one explained here. In addition to being programmable, the keys can be ‘customized’ meaning that a key can be mapped to another one by configuring the keyboard driver in response to the keystroke of the key to send another key code than the key’s default one to an application. Related information: Section ‘Mapping Key’s Functionality onto Another’ Section ‘Specifying Default Mode of Alphanumeric Keypad’ Section ‘Enabling / Disabling Scan Key’ 3.2.1 ’Activator’ Key With the ‘activator’ key an operation is accepted or activated. In conventional sense it provides the same functionality as an ‘ENTER’ key. For example, the key advances the cursor to the next line in writing. 3.2.2 ‘Cancel/Esc’ Key In general, the ‘Esc/Cancel’ key cancels the selection or the operation being under way just as an ‘Esc’ key on a conventional PC-keyboard. Nordic ID International Headquarters Myllyojankatu 2A FI-24100 SALO FINLAND Phone: Fax: Email: +358 2 727 7700 +358 2 727 7720 [email protected] www.nordicid.com 3.2.3 ‘Navigation Ring’ The ‘navigation ring’ captures control of cursor movements in the editing context, and control of selection among the items grouped together by window elements such as menus, lists, or the desktop icons representing applications and utilities. The functionality of the ring is similar to that of the arrow keys on a PC-keyboard. 3.2.4 ‘tab/alt’ Key This key is a two-mode in nature; it is both a TAB key and an ALT key. TAB is the key’s default function. ALT function requires pressing once the ‘F/mode’ key before pressing this key. Conventionally TAB advances cursor predefined number of spaces or to the next tab stop in the text editing context. As a TAB the key also gives navigation property by controlling of the input focus movements among window elements. The input focus means that the window element having input focus is activated to receive messages from user’s key presses. As an ALT this key is often pressed together with some other key (ALT + key combination), and action taken is usually application dependent. The key pressed as a mere ALT accesses various window menus. 3.2.5 ‘F/mode’ - Keypad Function/mode Selector Key The key is a multi-mode selector. By means of the ‘F/mode’ key it is possible to change alphanumeric keys either functioning as numeric or as alphabetic and numeric keys. The key also switches between lower case and upper case letters. In addition, by this key, the numeric keys operate as function keys, and ‘tab/alt’ key as an ALT key. As an ‘F’ the key is pressed once. To get ‘mode’ changed the key needs to be pressed successively twice. Note that the ‘F’ feature of the key is not coupled with the ‘mode’ feature. To put it another way, e.g. after one key press the number keys act as function keys no matter in which mode the alphanumeric keypad is. The functioning of the key is explained in more detail in the context of the particular key or keys over which the ‘F/mode’ has control. 3.2.6 Alphanumeric Keypad Modes of alphanumeric keypad An alphanumeric keypad can operate in three different modes as follows: In numeric mode In lower-case text-writing mode In upper-case text-writing mode The mode of the alphanumeric keypad can be changed by two consecutive ‘F/mode’ key presses. The mode of the alphanumeric keypad changes in the following sequence: 1. From the numeric mode to the lower-case text-writing mode 2. From the lower-case text-writing mode to the upper-case text-writing mode 3. From the upper-case text-writing mode again to the numeric mode Nordic ID International Headquarters Myllyojankatu 2A FI-24100 SALO FINLAND Phone: Fax: Email: +358 2 727 7700 +358 2 727 7720 [email protected] www.nordicid.com Alphanumeric keys in the numeric mode By default alphanumeric keypad is in numerical mode, that is, the key with the figure enters only number in every key press. In this mode, holding down the key repeats the number until the key is released (auto-repeat property). Related information: Section ‘Specifying Default Mode of Alphanumeric Keypad’ Section ‘Adjusting Keys’ Auto-repeat Delay’ Section ‘Adjusting Keys’ Auto-repeat Rate’ Section ‘Enabling/Disabling Keys’ Auto-repeat Property’ Writing text To insert letters, numbers, punctuation marks, symbols, and white spaces the alphanumeric keypad is switched to text mode by two successive ‘F/mode’ key presses (note the sequence of modes; see section ‘Modes of alphanumeric keypad’ above). In the text-writing mode, repetitive key press enters next character, if letter in the alphabetical order, in the place of cursor until the number printed on the key appears. After that the character sequence starts again from the beginning. If small break is taken between repetitions or repetition is stopped the cursor advances to the next position and the character which appeared on the display before stopping repetition stays in the entry area. Note that the key printed zero on it enters either space or zero only. Note that when the key is pressed and held down in the text-writing mode, the character sequencing property is skipped, and the key enters the number only. At the same time cursor advances to the next position. Switching between upper case and lower case In the lower case mode, two consecutive ‘F/mode’ key presses changes alphanumeric keypad into upper-case mode. Changing from upper case to lower case requires four ‘F/mode’ keystrokes. 3.2.7 Backspace Key Pressing the backspace key deletes the previous symbol being nearest to the cursor. The backspace key has an auto-repeat property, when the key is being held down. Note that the key retains its backspace function no matter in which mode the alphanumeric keypad is. Related information: Section ‘Adjusting Keys’ Auto-repeat Delay’ Section ‘Adjusting Keys’ Auto-repeat Rate’ Section ‘Enabling/Disabling Keys’ Auto-repeat Property’ 3.2.8 Function Keys The Nordic ID Morphic provides function keys F1 to F10 on its keypad. After the ‘F/mode’ key is pressed once (the ‘F’ feature of the key) the every numeric key acts as a function key which its numerical value represents. For example, the ‘F/mode’ and the ‘4’ key press in sequence means the ‘F4’ key press on a PC-keyboard. Note that ‘F10’ is the sequence of the ‘F/mode’ and the ‘0’ key presses. The function keys can be accessed no matter in which mode the alphanumeric keypad is. Nordic ID International Headquarters Myllyojankatu 2A FI-24100 SALO FINLAND Phone: Fax: Email: +358 2 727 7700 +358 2 727 7720 [email protected] www.nordicid.com 3.2.9 Scan Key The scan key press activates the bar code scanner. By default a barcode tag can be read in any field or area in which text can be inserted. For example, tag can be read in Microsoft WordPad so that the decoded bar code appears as a text string on page. Scanning bar codes PICTURE IS REQUIRED Note that the scanner may need to be configured before it is able to decode the bar code type which you are reading with your Nordic ID Morphic. Related information: Section ‘Enabling / Disabling Scan Key’ Section ‘Enabling / Disabling Bar Code Type’ Section ‘Configuring Bar Code Specifics’ 3.2.10 Power button Switching ON your device To switch ON your device, press the power button to energize your device when it is not up and running; the system is ready for use without rebooting. However, for instance, the first-time use is an exception to the above-mentioned awakening, then the Nordic ID Morphic boots up its system after power button press. Switching OFF your device Assuming that your Nordic ID Morphic is running on battery and its operating system is up and running. To switch off your device: 1. Press the ‘power button’ without holding down it; the device shows a ‘Shutdown’ dialog window on its screen. 2. Press the ‘Activator’ key; the system gets to sleep The shutdown window gives more options than just ‘shutting down’ your device but the default option is to put the Nordic ID Morphic in the power state in which its power consumption is the lowest possible (that is, the sleep state). So, the ‘Power button’ and the ‘Activator’ key press sequence is enough to ‘switch off’ (to suspend, actually) your device. Related information: Section ‘Rebooting your Nordic ID Morphic’ Section ‘Power Management, 3.3 Stylus and Touch Screen The simplest way to navigate through the Windows CE desktop and utility windows is to use a touch screen. For the touch-screen navigation the Nordic ID Morphic is equipped with a stylus, a pen without ink capability. Nordic ID International Headquarters Myllyojankatu 2A FI-24100 SALO FINLAND Phone: Fax: Email: +358 2 727 7700 +358 2 727 7720 [email protected] www.nordicid.com The stylus and the touch screen are the means being in some way analogues to a mouse. A press of the stylus on the screen produces the same result as a left mouse button click on a Windows PC. A right mouse button click is not so obvious, but in the Windows CE desktop window a right click is to tap and hold with the stylus. However, this method does not produce the same effect on the taskbar. To ‘right click’ the taskbar needs to hold down the ‘alt’ key while tapping on the taskbar. So, it is up to Windows CE application to choose a sequence as a right mouse click. PICTURE IS REQUIRED 3.3.1 Input Panel: Soft Keyboard Windows CE provides a control that simulates the keyboard on the touch screen. The ‘F/mode’ and the ‘Activator’ key press sequence displays (it also hides) this so called soft keyboard. Characters are entered by tapping on soft keys and they appear in the entry field in the same way as if they were inserted by means of the alphanumeric keypad. PICTURE IS REQUIRED Note that on the task bar there is the icon of the soft keyboard showing its availability. Tapping on the icon toggles the soft keyboard as well. Related information: Section ‘Input Panel’ (‘Input Panel’ control panel applet) 3.4 Rebooting your Nordic ID Morphic The Nordic ID Morphic gives variety of reboot options. All the options are accessible by means of the power button. 3.4.1 Soft-resetting your device To soft-reboot your device 1. Press the power button, after releasing the button a ‘Shutdown’ dialog window pops up on the screen. The following soft-resets are available: Warm boot Cold boot Reload Windows CE If you want to cancel the operation, press the ‘Esc/Cancel’ key, or repress the power button; the shutdown window closes, and the device stays running. 2. Select among the options by means of the ‘Navigation ring’. 3. Press the ‘Activator‘ key to launch the selected option, Be aware that by means of the shutdown dialog you may also place the device in the sleep (suspended) state. Although the sleep/awakening (suspend/resume) cycle is not an actual reboot option, some drivers unload and reload on resume. Nordic ID International Headquarters Myllyojankatu 2A FI-24100 SALO FINLAND Phone: Fax: Email: +358 2 727 7700 +358 2 727 7720 [email protected] www.nordicid.com 3.4.2 Hard-resetting your device To hard-reset your device Hold down the power button about for five seconds to reset the hardware of your Nordic ID Morphic and to boot the system up. Note that re-slotting the battery into its chamber does not reset the device but generates just sleep/awakening cycle. 3.5 Registry The Windows CE running on the Nordic ID Morphic has a database used to store configuration information for the system itself and for applications. The database also contains state information that the operating system continually references during operation, so in general it is a channel to communicate between different parts of the system in different operational states. The database is called registry as in all versions of Windows. However, the layout of the Windows CE registry does not match up with the Windows versions running on the desktop machines. On the Nordic ID Morphic the implementation of the registry is RAM-based, meaning that the Windows CE maintains the registry in its object store being a RAM-based file system. This matter has consequences for the persistence of the registry keys and values, if changed, deleted, or created. Although the RAM device on the Nordic ID Moprhic is battery backed meaning that the RAM is being refreshed when the device is turned off, the registry data does not persists on cold boots, without mentioning the hardware resets. It’s also possible that the device remains lying idle for long enough so that all the batteries on the device run down and the registry settings vanish. However, so called factory settings in the registry does not cease to exist because the system image of the CE windows includes a file containing the registry settings generated during the build process of the Windows CE image. The Windows CE gives options to implement a save-and-restore method in order to keep volatile registry changes persisting when the registry in the RAM is erased (e.g. on the cold boot), or when the RAM device is not being powered. On the Nordic ID Morphic, one of the save-and-restore methods is implemented so that the contents of the RAM-based registry can be stored in a nonvolatile memory, if need be. The Windows CE system checks for the up-to-date registry information in the memory during booting up, and if the updated registry file is available the system initializes the registry database in the object store accordingly. To store the changed registry information in the non-volatile memory there are two options available on the Nordic ID Morphic. One possibility is that an application calls a ‘RegFlushKey’ function to force a flush of the registry to the persistent storage. The other one is a ‘Registry Backup’ maintenance utility. Be aware that if your business application calls ‘RegFlushKey’ on a regular basis it slows down performance of the system because the persistent storage technology is slow relative to the other parts of the system. Note that there is an extra method to bring additional persistent information to the registry database through *.PAK files in the ‘Flash’ folder. Related information: Section ‘Managing Registry Database’ Nordic ID International Headquarters Myllyojankatu 2A FI-24100 SALO FINLAND Phone: Fax: Email: +358 2 727 7700 +358 2 727 7720 [email protected] www.nordicid.com 3.6 Non-volatile Storage Nordic ID Morphic comes equipped with a persistent storage device opening the way for business applications to store data in files on the device, for example, when data colleting is being done in the area being out of the reach of wireless communication. Especially, in the cases when the persistence of the data is a preferred quality. By default, the whole storage is allocated for one file system partition using ‘Flash’ as a logical drive name, meaning in practice that the partition is represented as a ‘Flash’ directory off the root of the file system. You cannot replace the ‘Flash’ name with another although you repartition the volume. ‘Flash’ remains the directory (folder) name for the first partition. If there is more than one partition on the storage device, the folder name of the second partition is ‘Flash2’; the third would be ‘Flash3’, and so on. If your application needs the persistent storage, then repartitioning the volume is recommended because a Nordic ID Customizer system uses the first partition to bring update, upgrade, bug fix, and customizing patches to the system through *.pak files stored in the ‘Flash’ folder. In case of repartitioning the volume, it is reasonable to reallocate two times the size of the Windows CE system image for the first partition, that is, about 30 - 40 megabytes (,or at least 20Mbytes), so that your application could use the persistent storage freely within its own partition(s). In the Control Panel there is an applet called ‘Storage Manager’ with which you can repartition the persistent storage. Note that you can create only FAT file system partitions on the storage. The storage in a nutshell Storage technology Storage capacity NAND Flash 128 Megabytes File systems available Sector size Logical name of the device Logical drive(s) as folder(s) off the root in the file systems hierarchy FAT 512 Bytes ‘DSK1:’ ‘Flash’, ‘Flash2’, ‘Flash3’, and so on Note that the ‘Storage Manager’ (don’t confuse this with the Control Panel applet being the same by name) allocates half a megabyte for managing the device. In addition, each partition takes about half a megabyte from the allocated capacity to maintaining of the partition table(s). Related information: Section ‘Storage Manager’ (‘Storage Manager’ control panel applet) Section ‘USB Profile’ (‘USB Profile’ control panel applet) Section ‘Repartitioning the Non-volatile Storage’ 3.7 Control Panel Control panel is a collection of applets to access the settings of different system properties; to configure those properties; to change their performance characteristics; to enable and disable them, among others. The control panel is one channel to manage the properties of the Nordic ID Morphic. It may not be the most convenient means to do that, and it is worth considering whether Nordic ID International Headquarters Myllyojankatu 2A FI-24100 SALO FINLAND Phone: Fax: Email: +358 2 727 7700 +358 2 727 7720 [email protected] www.nordicid.com the end user of the device could have access to the device’s system resources through the control panel, or whether some of those adjustable and informative features should be made available to the end user in an actual business application. The control panel is also a good starting point for understanding the features the system allows to enable / disable, to adjust, etc. 3.7.1 Accessing Control Panel There are two means of accessing the Control Panel either by means of the keypad, or by means of the touch-screen and the stylus. The following instructions are based on the use of the keypad. Before you begin, close all application windows on the screen. To open the control panel: 1. Press the ’tab/alt’ key so that the input focus is set to the Start menu icon on the far left of the taskbar, in the bottom left-hand corner of the screen. 2. Press the ‘Activator’ key to bring up the Start menu 3. Select the ‘Settings’ menu item by the ‘up-arrow’ of the ‘Navigation ring’ 4. Press the ‘right-arrow’ to bring up the Settings submenu, the ‘Control Panel’ submenu item is selected 5. Press the ‘Activator’ key to open the Control Panel 3.7.2 Opening Applet To open an applet: 1. Select the applet of your choice by means of the ‘Navigation ring’ 2. Press the ‘Activator’ key; the applet opens 3.7.3 Closing Applet To close the applet and its window you have two choices: ♦ If you want to discard the changes you made to the configuration, press the ‘Esc/Cancel’ key ♦ If you want to put into effect the changes you made, press the ‘Activator’ key Note! There are also exceptions to the above-mentioned practice such as a Network and Dial-up Connections applet. 3.7.4 Closing Control Panel To close the Control Panel: 1. Press first the ‘F/mode’ key and then the ‘tab/alt’ key, the ‘File’ menu opens in the Control Panel 2. Select the ‘Close’ menu item by the ‘down-array’ of the ‘Navigation ring’ 3. Press the ‘Activator’ key; the Control Panel closes Nordic ID International Headquarters Myllyojankatu 2A FI-24100 SALO FINLAND Phone: Fax: Email: +358 2 727 7700 +358 2 727 7720 [email protected] www.nordicid.com 3.8 Control Panel Applets 3.8.1 Bluetooth Device Properties The Bluetooth Device applet gives the configuring options and other Bluetooth-related features as follows: ♦ Turning on / off the Bluetooth radio ♦ Information on the device’s Bluetooth MAC address, among other hardware details ♦ Making available RFCOMM service on the logical ports: COM1, COM7, COM8, and COM9 ♦ ActiveSync link capability ♦ Discovering the existence of other Bluetooth devices being within range ♦ Assigning the Bluetooth device name to the Nordic ID Morphic ♦ Whether or not to be available to other device’s try at discovering Bluetooth devices Related information: Section ‘System’ (‘System’ control panel applet) 3.8.2 Certificates Windows Embedded CE provides a certificate store (in fact, three logical stores) to keep and maintain certificates. With the aid of the store and its application programming interface, embedded CE applications can verify, enumerate, retrieve, store, and delete certificates. For example, a Wireless Zero Configuration subsystem when acting as a supplicant uses the store if EAP-TLS is selected as the authentication method for the wireless access. So, the Certificates applet is the instrument for: ♦ Viewing certificates in the store as well as their contents ♦ Deleting certificates from the store ♦ Adding certificates to the store. 3.8.3 Clear Type Windows Embedded CE provides support for three different types of text display technologies. One of them is a ClearType. A ClearType applet refers to the text display technologies as ‘font antialiasing’, and in fact, one of the font anti-aliasing methods is a ‘No Anti-Aliasing’. By means of the ClearType applet you can choose from those three text display technologies to find the best possible look of a font on the display. In addition, the applet gives you possibility even to fine-tune the rendering method to get the rendering of your chosen font yet improved. Be aware that the font rendering technology of your choice is enabled for all fonts in the system, in view of the fact that the look of one font may improve but the look of the other one doesn’t on the display when text is rendered using different fonts with the same text display technology. 3.8.4 Date/Time In addition to date and time settings, with the ‘Date/Time’ applet you can change your device’s time zone, and enable/disable automatic daylight saving time change. Related information: ♦ Section ‘NID SNTP Service’ Nordic ID International Headquarters Myllyojankatu 2A FI-24100 SALO FINLAND Phone: Fax: Email: +358 2 727 7700 +358 2 727 7720 [email protected] www.nordicid.com 3.8.5 Dialing With the current communication options of the Nordic ID Morphic the ‘Dialing’ applet is an oddity. In the future models the applet may be useful, but currently it is not possible to set dialing properties for any means of communication on the device. 3.8.6 Display With the ‘Display’ applet you can change the appearance of the window elements on the screen and the background image of the desktop. 3.8.7 Error Reporting In Windows Embedded CE there is a set of technologies to get information about the state of the machine at the time of a program crash. With the ‘Error Reporting’ applet you can disable or enable this system property. Furthermore, you can select how much memory the error reporting system allocates for its report file. 3.8.8 Input Panel With this applet you can change the appearance of the soft keyboard. 3.8.9 Internet Options This is a utility to configure Internet Explorer. The Internet Options is also available on the view menu in the Internet Explorer. 3.8.10 Keyboard The applet makes it possible to enable/disable the auto-repeat property of the keys on the keypad, and to adjust the following auto-repeat parameters: repeat delay and repeat rate Related information: Section ‘Adjusting Keys’ Auto-repeat Delay’ Section ‘Adjusting Keys’ Auto-repeat Rate’ Section ‘Enabling/Disabling Keys’ Auto-repeat Property’ 3.8.11 Network and Dial-up Connections The applet reveals all means of communications on your device either being ready to connect or having already connected. By default the applet shows ‘USB’ and ‘NXPWLAN1’ icons representing the USB interface and 802.11b/g radio on the Nordic ID Morphic, respectively. When you dock the device into the cradle you can see an ‘AX887721’ icon in the applet window. It represents the Ethernet interface on the cradle. In addition to the above-mentioned icons, you can also see a ‘COM6:’ icon if the USB cable from the cradle is connected to PC, assuming that the PC is up and running. Nordic ID International Headquarters Myllyojankatu 2A FI-24100 SALO FINLAND Phone: Fax: Email: +358 2 727 7700 +358 2 727 7720 [email protected] www.nordicid.com Note that it is not possible to get the ‘AX887721’ and ‘COM6:’ interface icons shown in the applet window before the cradle is plugged into the mains. The configuration options which the different media icons give by douple-tapping on them apply to IP-networking information with the exception of the ‘USB’ icon. It either starts establishing connection or makes it possible to disconnect the link, if connected. However, if you select the USB icon and then open the ‘Properties’ item on the ‘Connection’ menu in the applet window, you gain access to its properties. In practice, where you need the ‘Network and Dial-up Connections’ applet is to assign static IPaddress information to the ‘NXPWLAN1’ and ‘AX887721’ interfaces, DHCP is set default to the interfaces. The applet also gives a ‘New…’ option to make a new connection such as virtual private network or point-to-point connection. Note that you can access this applet on the ‘Settings’ submenu of the ‘Start’ menu as well. 3.8.12 NID AutoStart Settings Using this applet you can enable/disable the service having control over the system when the device is about to be up and running after it has been powered up. The purpose of the service is to launch your business application after the network connection has been established, and to keep user-friendliness both by hiding unnecessary displayed information on the screen and by hindering the user from interfering with the connection establishment phase by pressing the keys or by tapping the screen. The applet has the help of its own to instruct you in its use 3.8.13 NID Backlight With the help of a NID Backlight applet, you can adjust the screen brightness, and the brightness of a keypad backlight in different power states. Related information: Section ‘Adjusting Brightness of Keypad’s Backlight’ Section ‘Adjusting Screen Brightness’ 3.8.14 NID Indicators A NID Indicators gives two measuring bars on the screen. One bar shows charge remaining in the battery. The other one displays signal strength which the Nordic ID Morphic sees from the wireless LAN access point to which it has attached. Moreover, the applet gives four possibilities to place the bar (or bars) on the display. 3.8.15 NID Keypad A NID keypad is an applet to control all the following properties the keypad has: Changing a key to another one Enabling/disabling the scan key Default mode of the alphanumeric keypad, being numeric, lower-case text-writing, or uppercase text-writing Enabling/disabling key lock Nordic ID International Headquarters Myllyojankatu 2A FI-24100 SALO FINLAND Phone: Fax: Email: +358 2 727 7700 +358 2 727 7720 [email protected] www.nordicid.com Related information: Section ‘Mapping Key’s Functionality onto Another’ Section ‘Specifying Default Mode of Alphanumeric Keypad’ Section ‘Enabling / Disabling Scan Key’ 3.8.16 NID Link Watchdog With this applet you can bring a connectivity monitoring service into use, either wireless LAN (WLAN) or USB. The service informs user of the loss of connection by sounding a warning signal and showing the message you can see appropriate for the situation on the screen. When there is functional communication channel available again, the message window disappears from the screen with a connected-sound. The purpose of this service is to increase usability of the device especially in the WLAN environment in which the loss of connectivity may happen on a daily basis because the device goes out of range of the WLAN coverage, or bad quality of signal transmission path persists for long enough. So the user can receive information about the loss of WLAN connectivity, which may be otherwise difficult to notice among other hitches such as slow response time, and accordingly it is possible take right action when the loss of WLAN connectivity arises. The link watchdog service calls for the computer being reachable through the wired backbone network of the WLAN infrastructure. Monitoring does not require any special software on that computer, just its IP-address and a TCP port number to send ‘polls’ are set in the applet. However, the polling requires that the TCP port is open in the computer. Additionally the machine must respond to TCP connection initiations from the Nordic ID Morphic. One alternative to the endpoint to monitor connectivity is the computer running a web server. Note! If there is a firewall, a NAT, or both of them in operation between the Nordic ID Morphic and the computer to which the polls are sent, it might be that the NID link watchdog service is not workable in that case without configuration changes to the NAT and firewall. 3.8.17 NID Power Button Through the NID Power button you can customize the functioning of the power button. Just to give you an example of the power of this applet, try the following changes to suspend the device by pressing the power button twice: 1. Set the ‘Virtual Key’ value to ‘RETURN’ on the ‘Misc’ property sheet 2. Press the ‘Activator’ key, the change of the ‘Virtual Key’ setting comes into effect. Now, to suspend the device: 1. Press the ‘power button’ without holding down it; the ‘Shutdown’ dialog window pops up 2. Repress the ‘power button’ without holding down it; the system gets to sleep To power up the device: 1. Press the ‘power button; the system wakes up and the ‘Shutdown’ dialog window pops up 2. Press the ‘Esc/Cancel’ key; the shutdown window closes and the system is ready to use Nordic ID International Headquarters Myllyojankatu 2A FI-24100 SALO FINLAND Phone: Fax: Email: +358 2 727 7700 +358 2 727 7720 [email protected] www.nordicid.com One method to reset the ‘Virtual Key’ value to its default after trying out the above-mentioned feature: Hold down the power button until the screen goes blank; after the system reboot the default ‘Virtual Key’ value has come into effect. Be aware that it is also possible to customize the ‘Shutdown’ utility by writing the shutdown executable of your own, and by setting the ‘Exec’ value to your own executable on the ‘Misc’ property sheet. 3.8.18 NID Scanner A NID Scanner applet gives you control of the scan engine and scan operation on the Nordic ID Morphic as follows: Enabling/disabling barcode decoding on a barcode-to-barcode basis Setting the barcode’s optional parameters Setting the triggering mode of the scan key Setting the timeout for the barcode reading Adding affixes and placeholders to the read code string Replacing the mark in the read code string with another Setting how success and failure of the barcode reading is indicated to the user Testing the barcode reading to see if the reader reads a particular barcode Be aware that the ‘NID Scanner’ applet is not so much a control panel applet as a sample utility to demonstrate the configuration options being available on the scan engine equipped with your Nordic ID Morphic. Related information: Section ‘Bar Code Reader’ 3.8.19 NID SNTP Service If your business application requires keeping the Nordic ID Morphic(s) in synch with your servers’ time, a NID SNTP Service applet makes a Simple Network Time Protocol (SNTP) client available on your Nordic ID Morphic. The SNTP client can retrieve time value from one source. In addition to the address of a time server, you can specify a destination port on which the service is available, if need be. Furthermore, the implementation of the SNTP client demands polling parameters. With a ‘Settings’ tab of the applet you can also adjust the following parameters: ‘Update interval’ - how frequently the client checks time (either in minutes or in hours) ‘Timeout’ - how long to wait for the response from the server before resending the time check request ‘Retries’ - how may times to retry before giving up per the update interval. This applet also provides a facility for adjusting the system time of the device. You can link a time query user dialog utility, called ‘AskTime’, to the SNTP queries. There are two tabs to customize (to localize) the text fields of the user interface of the AskTime in the applet. In addition to using the AskTime, the ‘Settings’ tab also instructs you to start the SNTP client. Nordic ID International Headquarters Myllyojankatu 2A FI-24100 SALO FINLAND Phone: Fax: Email: +358 2 727 7700 +358 2 727 7720 [email protected] www.nordicid.com Note! Nordic ID Morphic has the Real Time Clock chip which is powered by its own rechargeable battery to maintain system time over the resets. Related information: Section ‘Date/Time’ (‘Date/Time’ control panel applet) 3.8.20 NID Touch Screen Using this applet you can disable (also enable) the touch screen. Related information: Section ‘Disabling/Enabling Touch Screen’ 3.8.21 Owner This applet applies mainly to user identification information. There are the following tabs available to insert user information. ‘ Identification’ – you can specify general information on the owner of the device such as name, company, and address details ‘Network ID’ – this user information is needed to gain access to network resources 3.8.22 Password If you need to protect against unauthorized party from gaining access to your background system by using the Nordic ID Moprhic then with the Password applet you may provide the device with a password protection. The password protection is applied when the system powers on, or when the blank display is turned on again. Actually, both of the situations refer to the transition from lower system power state to the highest possible power state, the ‘On’ state. So if you ‘enable password protection for screen saver’ in the Password applet, it means in practice that when the screen has gone blank, in the case of user or system activity, the screen (or the whole device) is turned on, and the device requires that user enters his/her password to get into the system again. When you specify password, use the soft keyboard to make certain of which characters your password actually is composed. If you mix, for instance, numerals, lower case letters, and upper case letters, the entering password by using the keypad is an awkward operation. Note that the soft keyboard is also available to enter the password when you log on. Related information: Section ‘Input Panel: Soft Keyboard’ Section ‘Power States’ Section ‘Power’ (‘Power’ control panel applet) 3.8.23 PC Connection With the help of this applet you can disable or enable PC connectivity which is based on Microsoft ActiveSync technology. Especially, the ActiveSync connectivity across the USB link; on the Nordic ID Morphic, the USB is as a default medium for ActiveSync connectivity. Nordic ID International Headquarters Myllyojankatu 2A FI-24100 SALO FINLAND Phone: Fax: Email: +358 2 727 7700 +358 2 727 7720 [email protected] www.nordicid.com Be aware that ActiveSync connectivity requires that you have installed the Microsoft ActiveSync on your Windows-based computer in addition to the USB driver provided by Nordic ID for the ActiveSync connectivity. After that the establishing PC connection over the USB link should be a plug-and-play operation. However, you cannot plug USB cable directly into your device but you need the docking cradle for the Nordic ID Morphic into which the USB cable can be connected (see the docking cradle guide, for more information on the docking cradle and USB connectivity). 3.8.24 Power This applet provides the control of system power state transitions from the highest power consumption state to the lowest. (The power states are described in the ‘Power Management’ section.) The actual control is based on the adjustment of three timeout periods. For each of the periods the system has to remain idle until the change in lower power state can happen, and finally after three idle periods in succession gets the system suspending itself. In addition to controlling the power management of the device, the ‘Power’ applet provides information on battery status, and on the power status of the sub-systems such as wireless LAN adapter, audio system, and barcode scanner. Related information: Section ‘Power Management’ Section ‘Setting Timeout for Reduction in Screen Brightness’ Section ‘Setting Timeout for Automatic Screen Turning-off ’ Section ‘Setting Timeout for Automatic Suspension’ 3.8.25 Regional Settings The ‘Regional Settings’ applet covers the settings of national language support (NLS) in Windows Embedded CE, and in particular the extent of the NLS implementation on the Nordic ID Morphic. The NLS is about date, time, calendar, number, and currency formats. Furthermore, the applet opens up options to select user interface and input language but for those features the support may be very limited on your Nordic ID Morphic. 3.8.26 Storage Manager This applet is a tool to manage the non-volatile storage (“DSK1:”) on your device. With the help of the applet you can repartition the storage. You can also format the whole volume after dismounting it and deleting all the partitions on it. Or you can just delete one partition on the persistent storage. Related information: Section ‘Non-volatile Storage’ Section ‘Repartitioning Non-volatile Storage’ 3.8.27 Stylus As the name of ‘Stylus’ implies, the applet makes available the interfaces to adjust your interaction with the touch screen. You can calibrate the touch screen to be unerring for the points of your stylus tapping in addition to your double-tapping interaction with it. Nordic ID International Headquarters Myllyojankatu 2A FI-24100 SALO FINLAND Phone: Fax: Email: +358 2 727 7700 +358 2 727 7720 [email protected] www.nordicid.com Related information: Section ‘Recalibrating Touch screen’ Section ‘Adjusting Double-tapping Sensitivity of Touch Screen’ 3.8.28 System The ‘System’ applet has two informative tabs, ‘General’ and ‘Copyrights’. Over and above those informative tabs the applet has two more tabs, ‘Memory’ and ‘Device Name’. On the ‘Memory’ tab there is a trackbar slider which regulates the usage of the RAM memory between program execution and storage capacity of the RAM-based file system on your device. The default position of the slider should be fine in normal use, but the occasions can arise e.g. when some maintenance operation can fail unexpectedly. In that case, the adjustment to the usage of the RAM between the file system memory space and the execution memory space may help. Windows Embedded CE supports dynamic name registration with a WINS (Windows Internet Naming Service) server. For the registration the device has to have a unique name on the network. On the ‘Device Name’ tab you can specify your device name. Be aware that the Bluetooth communication uses the same device name, and that the device name is also possible to specify on the ‘General’ tab in the ‘Bluetooth Device Properties’ applet. Related information: Section ‘Bluetooth Device Properties’ 3.8.29 USB Profile The ‘USB Profile’ applet can be seen as a selector by which you choose an operational mode of your device across the USB link. You can put Nordic ID Morphic into operation across the USB as follows: ActiveSync Mass Storage RNDIS ActiveSync mode By default Nordic ID Morphic operates across the USB in the ActiveSync mode. This operational mode is for synchronizing data between a local Windows-based desktop computer and Windows CE-based device across the USB link. The mode is also dependent on the enable-disable parameter which you can specify in the ‘PC Connection’ control panel applet. Be aware that on Windows Vista-based computers this data synchronizing operation is not referred to as ‘ActiveSync’, but the data synchronizing technology is embedded in the part of a ‘Windows Mobile Device Center’ (WMDC) software package in the Windows Vista systems. Related information: Section ‘PC Connection’ Mass Storage mode If you select the ‘Mass Storage’ option, your Nordic ID Morphic is seen as USB mass storage device by Windows-based computer when it is connected to the computer’s USB socket. What the Windows on your computer sees is the ‘Flash’ folder off the root of the Windows CE file system on Nordic ID International Headquarters Myllyojankatu 2A FI-24100 SALO FINLAND Phone: Fax: Email: +358 2 727 7700 +358 2 727 7720 [email protected] www.nordicid.com your Nordic ID Morphic. So, in this mode you can use your device – your device’s Flash folder, to be precise – as a USB memory dongle. Related information: Section ‘Non-volatile Storage’ RNDIS mode RNDIS (Remote Network Driver Interface Specification) is the protocol which the ActiveSync communication has been based on since the release of the version 4.0. The RNDIS mode on your device in combination with the ActiveSync on your local Windows machine provides IP connectivity across the USB serial bus. In case you need wired IP connectivity to synchronize data between your application host system and your Nordic ID Morphic, it is recommended that you use the Ethernet interface on the docking cradle of the Nordic ID Morphic instead of it is USB interface, and your own synchronization software instead of the RNDIS option on the Nordic ID Moprhic. This is because the ActiveSync technology is complex and its remote synchronization feature may expose to possible security risks. 3.8.30 Volume & Sounds Windows Embedded CE uses sound effects to indicate diverse occurrences in the device to user. The occurrences are classified into five categories: application sounds, system events and warnings, alarms and remainders, keystrokes, and touch-screen taps. The ‘Volume & Sounds’ applet refers to the system events and warnings as ‘events’, and to the alarms and remainders as ‘notifications’. To the keystrokes it refers as ‘key clicks’. With the help of the applet, you can allow or prevent the sound effects on a source-by-source basis. However, the sound effects of keystrokes and touch-screen taps have three level volume control of their own, and when you disable their sound effects, you actually mute their sound. The ‘Volume & Sounds’ also provides a volume control of a speaker affecting all the sounds the system produces. In addition, there is a ‘Sound’ tab by which you can have greater choice in enabling and disabling the event sources, and the sound effects which you assign to them. The tab also helps you in selecting the sound effect for a particular event by giving you possibility to preview the sounds available. After having made your choice for the enabled event sources and their particular sounds, you can save your choice as a scheme file. 3.9 Power Management In the Nordic ID Morphic system, a so called power manager (PM) controls on power-related things. One of the tasks of the PM is to save battery energy by reducing power consumption. The rationale behind reducing the power usage is based on the inactivity of a user or the system. For example, by default the PM decreases the screen brightness, if the devise remains idle without any user input either key press or stylus tapping on the screen for the specified period of time. On the contrary, if user or user application action occurs it is the PM’s task to activate the system. For instance, if the screen is turned off, the PM directs the system to turning on the screen with the adjusted, maximum brightness when the user presses some key or taps the screen. Nordic ID International Headquarters Myllyojankatu 2A FI-24100 SALO FINLAND Phone: Fax: Email: +358 2 727 7700 +358 2 727 7720 [email protected] www.nordicid.com 3.9.1 Power States The Nordic ID Morphic has two main power states, either it is switched on or switched off. In addition, it can be on AC power, or it can be running on battery. However, from the user’s point of view there are four distinctive system power states on the device: On, UserIdle, SystemIdle, and Suspended. Note! In this manual both ‘Suspended’ and ‘Sleep’ is used to refer to the ‘OFF’ state of the device, that is, to refer to the situation when the Nordic ID Morphic is switched off. By default, if the Nordic ID Morphic remains idle for a while it reaches the ‘Suspended’ via the ‘UserIdle’ and ‘SystemIdle’ states. For this transition from the ‘On’ state to the ‘Suspend’ state the PM uses three inactivity timers. If all the three timers expire the PM suspends the Nordic ID Morphic. So through the shutdown window by means of the power button is not the only way to suspend the device. By default the PM has always tendency to place the device in the suspended state to save energy when it is running on battery. In addition, if the battery cover is removed the Nordic ID Morphic suspends itself. On the other hand, you can power down your Nordic ID Morphic through the shutdown dialog window in whatever active power state your device is, whether it is either in the ‘On’ or in the transitional states. Suspended When Nordic ID Morphic is switched off, it is said that it is suspended. For the simple reason that the device cannot be turned off completely but the critical parts of the system’s electronics remain powered after powering down the device. So, setting the device to ‘Sleep’ through the shutdown dialog window suspends the device. The PM suspends the device if the ‘SystemIdle’ state is reached, provided that a Suspend timer expires. However, the Suspend timer has a settings value of ‘Never’, if set, the PM does not suspend the Nordic ID Morphic. You can recognize the suspended state by the blank screen and that the device does not react, with the exception of the power button, to any key press by turning on the screen. So, only pressing the power button gets the device leaving this state. Be aware that when the device is on AC power it cannot be placed in the suspended state. Related information: Subsection ‘NID Power Button’ of the section ‘Control Panel Applets’ Section ’ Setting Timeout for Automatic Suspension’ On When you are actively using your Nordic ID Morphic it is in the ‘On’ state. If the device is in some other power state than the ‘On’, the PM changes the system to the ‘On’ state when you start operating it, for example, by powering it up, if suspended. You can recognize the ‘On’ state by the turned-on screen with the adjusted, maximum brightness. The device leaves this state if you power down it, or if a ‘User Idle’ inactivity timer expires. If the timer expires, the system changes to the ‘UserIdle’ power state. However, there is a settings value Nordic ID International Headquarters Myllyojankatu 2A FI-24100 SALO FINLAND Phone: Fax: Email: +358 2 727 7700 +358 2 727 7720 [email protected] www.nordicid.com of ‘Never’, and putting that setting into effect the timer does not expire but the device remains in the ‘On’ state until user powers down it. Related information: Section ‘Setting Timeout for Reduction in Screen Brightness’ UserIdle The ‘UserIdle’ is a transitional state. The point to enter this state is nothing but power saving, and at the same time giving impression that the device is still powered. Typically, the change to the ‘UserIdle’ state can be noticed when the screen brightness decreases. By tapping the screen or pressing a key you can get the device entering the ‘On’ state again. Otherwise after the specified timeout the device enters the ‘SystemIdle’ state in which the device consumes less power by turning off the screen. However, if there is a running application on the device, which demands that the system remains in the current power state, then the PM does not set the power state to ‘SystemIdle’. Related information: Section ‘Setting Timeout for Reduction in Screen Brightness’ Section ‘Setting Timeout for Automatic Screen Turning-off ’ SystemIdle The ‘SystemIdle’ is a transitional state. Changing to this state requires that a System Idle timer expires. The System Idle timer has also a settings value of ‘Never’. If set, the device does not shift to ‘SystemIdle’ state but remains in the ‘UserIdle’ state until user operates the device. It might happen that it is not easy to make difference between the ‘SystemIdle’ state and the ‘Suspend’ state because those power states resemble each other on the outside of the device. When your device looks as if it were turned off the best way to set it to ‘On’ state is to press the power button. If the shutdown dialog window appears on the screen, repress the power button to close the window. Appearing the shutdown dialog indicates that the power state was the ‘SystemIdle’. The device remains in the ‘SystemIdle’ power state for the timeout of the Suspend timer unless some other activity occurs before that, either system or user one. If the Suspend timer expires the PM suspends the device. Related information: Section ‘Setting Timeout for Automatic Screen Turning-off ’ Section ’ Setting Timeout for Automatic Suspension’ 3.9.2 Backup battery Nordic ID Morphic makes it easy for the user to handle the situations when the main battery on the system is running down, and there is a charged spare battery available. On the Nordic ID Morphic there is the backup battery, which powers the critical parts of the system such as RAM memory during the battery replacement. The backup battery is a rechargeable one, and being fully charged Nordic ID International Headquarters Myllyojankatu 2A FI-24100 SALO FINLAND Phone: Fax: Email: +358 2 727 7700 +358 2 727 7720 [email protected] www.nordicid.com it is able to power the system in the suspended state for the time to replace the flat battery with the fully charged one. The backup battery is charged by means of the main battery. For example, during the charging of the main battery in its chamber the backup battery is being charged as well. Note that when the main battery is not being charged, nevertheless it charges the backup battery, if need be. Nordic ID International Headquarters Myllyojankatu 2A FI-24100 SALO FINLAND Phone: Fax: Email: +358 2 727 7700 +358 2 727 7720 [email protected] www.nordicid.com 4. Data Capture 4.1 Bar Code Reader For bar code reading the Nordic ID Morphic has the laser scan engine which supports the following bar code types: EAN-8 EAN-13 UPC-A UPC-E UPC-E1 Bookland EAN Code 128 UCC/EAN-128 ISBT 128 Codabar Code 1 Code 39 Trioptic Code 39 Code 93 Interleaved 2 of 5 Discrete 2 of 5 MSI RSS-14 RSS-Limited RSS-Expanded By default all the bar code types are enabled. Although the scan engine makes it possible to be configured by means of specific bar codes it is strongly recommended that the changes to the configuration are made with the help of a ‘NID Scanner’ control panel applet. However, the ultimate goal should be that the configuration of the scan engine is in command of the business application software by virtue of Nordic ID MHL API. 4.1.1 Checking on Bar Code Reading There is a ‘NID Scanner’ applet in the control panel which provides a ‘Scan’ tab for checking on bar code reading. On the ‘Scan’ tab, it is possible to read a bar code by directing the laser beam emitted by the scan engine at the bar code after pressing the ‘Scan’ key. Nordic ID International Headquarters Myllyojankatu 2A FI-24100 SALO FINLAND Phone: Fax: Email: +358 2 727 7700 +358 2 727 7720 [email protected] www.nordicid.com The tab shows scanning result in its output fields as follows: Field Result String Result Info AIMSI (AIM Symbology Identifier) AIM Code Identifier (AIMCI) Mod char Bar code type Description When the scan succeeds the field shows the decoded result, that is, the machine-readable symbology in the human-readable form The field tells whether the scan operation ended in success or in failure When the scan operation succeeds the combination of three characters is shown in this field. The first character is a flag. (It informs that AIM code follows next in the character string received from the scan engine.) The character after the flag tells the symbology type, and third one is a modifier character. The modifier character out of the three character AIM symbology identifier tells how the reader interpreted the symbology. (The modifier character, that is, the interpretation is pertinent to the symbology type.) When the scan succeeds this tells the type of the decoded symbology in an understandable form 4.1.2 Enabling / Disabling Bar Code Type On the ‘Codes’ tab, the ‘NID Scanner’ control panel applet lists all the bar codes the device supports. Each list item has a check box telling whether or not the reader decodes the bar code type when the particular type of bar code is being scanned. Before you begin, open the ‘NID Scanner’ control panel applet (see section ‘Control Panel’). To enable decoding of a particular bar code type: 1. Select the ‘Codes’ tab in the NID Scanner applet 2. Check the check box of the bar code list item by tapping the check box with the stylus 3. Press the ‘Activator’ key; the decoding of the bar code is enabled. To disable decoding of a particular bar code type: 1. Select the ‘Codes’ tab in the NID Scanner applet 2. Uncheck the check box of the bar code list item by tapping the check box with the stylus 3. Press the ‘Activator’ key; the decoding of the bar code is disabled. Related information: Section ‘Enabling/Disabling Scan Key’ Section ‘Making Your Configuration Settings Permanent’ Section ‘Checking on bar code reading’ Nordic ID International Headquarters Myllyojankatu 2A FI-24100 SALO FINLAND Phone: Fax: Email: +358 2 727 7700 +358 2 727 7720 [email protected] www.nordicid.com 4.1.3 Configuring Bar Code Specifics Before you begin, open the ‘NID Scanner’ control panel applet (see section ‘Control Panel’). To set optional features of the bar code type: 1. Select the ‘Codes’ tab in the NID Scanner applet 2. Double-tap the bar code list item; the options window of the bar code type opens. 3. Set the options of your choice 4. Tap the ‘OK’ button to approve your settings 5. Press the ‘Activator’ key; the selected options are stored in the registry. Related information: Section ‘Making Your Configuration Settings Permanent’ Section ‘Checking on bar code reading’ 4.1.4 Changing Aim/Triggering of Bar Code Reading Before you begin, open the ‘NID Scanner’ control panel applet (see section ‘Control Panel’). To set Aim/Trigger mode: 1. Select the ‘Misc’ tab in the NID Scanner applet 2. Select the ‘Trigger Mode’ of your choice. 3. If you want to check on how the selected triggering works, select the ‘Scan’ tab and read some sample bar code by pressing the ‘Scan’ key and directing the laser beam emitted by the scan engine at the bar code. 4. Press the ‘Activator’ key; the selected trigger mode is stored in the registry. Related information: Section ‘Making Your Configuration Settings Permanent’ Section ‘Checking on bar code reading’ 4.1.5 Changing Scanning Timeout Before you begin, open the ‘NID Scanner’ control panel applet (see section ‘Control Panel’). To set the scan timeout: 1. Select the ‘Misc’ tab in the NID Scanner applet 2. Enter timeout value (in seconds) of your choice in the ‘Scan Timeout’ text field. 3. If you want to check if the selected value is appropriate time to wait for the scan engine until it gives up trying, select the ‘Scan’ tab and press the ‘Scan’ key and direct the laser beam emitted by the scan engine at the surface without bar codes. 4. Press the ‘Activator’ key; the selected timeout value is stored in the registry. Related information: Section ‘Making Your Configuration Settings Permanent’ Section ‘Checking on bar code reading’ Nordic ID International Headquarters Myllyojankatu 2A FI-24100 SALO FINLAND Phone: Fax: Email: +358 2 727 7700 +358 2 727 7720 [email protected] www.nordicid.com 5. Connectivity Wireless LAN (WLAN) is designed as primary channel to convey data from a business application to the Nordic ID Morphic and vice versa. In the enterprise environment WPA or WPA2 security protocols should form the basis for WLAN communication. In the WPA and WPA2, authentication is the deciding factor how wireless LAN service is made available. Both of them permit two options to set up authentication being either certificate-based or pre-shared key (PSK) -based. Those two authentication options set very different requirements for an effort to set up wireless infrastructure so that in contrast to the certificate-based authentication the PSK-authentication can be seen as an effortless approach to establish authentication component for the wireless LAN access. Although the WPA and WPA2 security protocols are strongly recommended securing WLAN communication, the Nordic ID Morphic can also be put into operation by using a WEP security. Even so, note that the WEP is no longer expected to be reliable security method. In addition to the infrastructure networking, an ad-hoc networking is an option to establish direct communication without WLAN access point(s) between your Nordic ID Morphic and some other device supporting WLAN. For peripheral wireless communication your device has a Bluetooth radio. Other communication technologies, which the Nordic ID Morphic can make use of, are USB and Ethernet when it is put into its docking cradle. Related information: Subsection ‘Network and Dial-up Connections’ of the section ‘Control Panel Applets’. 5.1 Wireless LAN in a nutshell WLAN Radio Characteristics Radio Data rates Antenna Tx Power Control Rx sensitivity WLAN Security Options Authentication Link-layer encryption 802.11b/g b: 1, 2, 5.5, and 11Mbps g: 6, 9, 12, 18, 24, 36, 48, and 54Mbps Internal, Rx diversity From 0 to +19dBm 1) -70 to -93dBm 2) WEP with shared key (either manual or dynamic) Pre-shared key (PSK) (according to either WPA or WPA2) EAP-TLS, or PEAP 3) (according to either WPA or WPA2) WEP, TKIP, or CCMP 4) 1) Note that the maximum output power depends on data rate and modulation being in use at a particular moment Nordic ID International Headquarters Myllyojankatu 2A FI-24100 SALO FINLAND Phone: Fax: Email: +358 2 727 7700 +358 2 727 7720 [email protected] www.nordicid.com 2) Note that maximum receiver sensitivity depends on data rate being in use at a particular moment 3) Note that the PEAP uses MS-CHAP-V2 as an inner authentication method (IETF RFC2759) 4) Note that the CCMP is an AES-based block cipher protocol specified by the IEEE 802.11i, and in the context of Windows Embedded CE, AES is used as a synonym for CCMP. 5.2 Wireless LAN Connectivity On the Nordic ID Morphic, a ‘Wireless Zero Configuration’ (WZC) – a built-in automatic configuration subsystem – is in charge of communication over WLAN. It provides different user interface aspects of WLAN configuration and of networking information, a supplicant to support 802.1X protocols, and methods for wireless networking management. When the Nordic ID Morphic is powered up, the WZC attempts to find out any networks within range, and it may automatically connect to network(s) for which it has configuration. (In the WZC, the configurations for 802.11 networks are called preferred networks.) In case that you have not configured preferred network(s), it pops up its dialog box called ‘Network Status Monitor’. The same may happen if there is not the configured network in range, but it may take for a while after the system came on. The WZC subsystem has two appearances being accessible on the desktop window. In addition to its pop-up ‘Network Status Monitor’ dialog box with its icon on the taskbar, there is the wireless interface icon in the window of the ‘Network and Dial-up Connections’ control panel applet. 5.2.1 Introduction to Configuring Wireless LAN Interface The ‘Network Status Monitor’ taskbar icon has two forms. The point of the two icons is to communicate the wireless LAN networking status on the taskbar. Both the icons do inform that the WZC is up and running but the difference is whether or not the TCP/IP stack is ready to communicate as follows: TCP/IP stack has no IP-address for networking TCP/IP stack has an IP-address for networking. However, this does not necessarily mean that the assigned IP-address is valid in the networking context, because in case that the DHCP address assigning fails the WZC may assign an IPv4 address with the 169.254/16 prefix being valid for link-local communication only (for further information see IETF RFC3927). The link-local IP-address is used for the communication across ad-hoc links. By double-tapping on either icon on the taskbar you can get the ‘Network Status Monitor’ dialog box open. The dialog box gives an adapter view of the wireless LAN communication. Accordingly, the title text of the dialog box is rather cryptic and it refers to the name used internally by Windows Embedded CE for the instance of the wireless LAN adapter driver. The ‘Network Status Monitor’ presents four tabs: IP Information, IPv6 Information, Wireless Information, and Hardware. IP Information tabs The IP and the IPv6 Information tabs give current status of the IP address information assigned to the wireless LAN interface. The tabs have the same function as the Network Status Monitor taskbar icons, but the information is available in dotted-decimal notation format. If you assign a static IP address to the interface the IP address will be shown on the tab as your Nordic ID Morphic Nordic ID International Headquarters Myllyojankatu 2A FI-24100 SALO FINLAND Phone: Fax: Email: +358 2 727 7700 +358 2 727 7720 [email protected] www.nordicid.com has gained full access to the network. On the other hand, if you select the DHCP option, the tabs show the IP address information once the device has received that information from the network after the completion of WLAN authentication and association. In a sense, the IP and IPv6 Information tabs are mutually exclusive because the IP networking is typically based on either the IPv4 or IPv6. So the IPv6 tab is not very informative in the case that the IP networking uses IPv4 addressing scheme. Related information: Section ‘Network and Dial-up Connections’ Section ‘Setting up IP-networking’ Hardware tab Setting physical WLAN parameters such as 802.11g-radio, 802.11b-radio or both of them in use, open the Hardware tab. It is recommended that you at least check if your device is in accordance with your country’s regulation of the allowable set of channels and of the allowable maximum transmit (TX) power within the 2.4 GHz unlicensed ISM band. Note that there is no regulatory domain (country or geographical region) in which all the 14 channels specified by the IEEE 802.11b/g standards may operate. ETSI regulation is mainly followed in European countries; the exceptions are Spain and France. If the default value (ETSI) is not appropriate, specify the regulatory domain followed by your country with the ‘Hardware’ tab. If you change the values on the ‘Hardware’ tab, you need to reset (to warm-boot) your device to put into effect the changes you made. By means of the ‘Hardware’ tab the changes to the physical settings are made in the registry only, so the warm-boot gets the WLAN interface re-initializing itself according to the settings in the registry Related information: Section ‘Making Your Configuration Settings Permanent’ Wireless Information tab The most informative part of the ‘Network Status Monitor’ dialog box becomes visible on the Wireless Information tab. It also accepts you to configure security parameters of wireless LAN communication, that is, to set a preferred network configuration, and to configure the behavior of WZC itself. The Wireless Information tab shows the wireless LAN devices being within range in its list window – a network view. The WZC updates the list in the network view on a regular basis, which is based on the beacon frames the WLAN adapter has received within the refreshing period of the network view. Nordic ID International Headquarters Myllyojankatu 2A FI-24100 SALO FINLAND Phone: Fax: Email: +358 2 727 7700 +358 2 727 7720 [email protected] www.nordicid.com In addition, the network view gives two different approaches to the wireless LAN configuration as follows: By tapping on the ‘Add New …’ list item in the network view By tapping on the network name shown in the list Note that as you specify wireless networking parameters such as authentication and encryption to join your Nordic ID Morphic to the desired service set (SSID) you make a ‘preferred network’ of that SSID. Other display items and controls on the Wireless Information tab Status field tells connection state of the wireless LAN adapter. Signal field expresses the signal strength/quality the WLAN adapter sees from the other end of the established wireless link. The checked ‘check box’ enables (unchecked disables) the dialog box to appear on the screen, for example, after the warm-boot, provided that you have not specified the preferred network. However, the above-mentioned does not happen when the device awake from a sleep state. In that case, the stress is placed on the word ‘new’, that is, only if a new SSID is found out by sweeping from channel to channel the WZC shows up the dialog box as long as there is not the preferred network(s) assigned to the WLAN interface. Note that the WZC retains the found SSID information over the sleep/awakening cycle. On the other hand, if the device has a working wireless link, the appearance of the new SSID does not get the Wireless Information tab to pop up on the screen. Despite the fact that assigning preferred network(s) to the WLAN interface has an influence on the pop-up feature of the Network Status Monitor dialog box, the assigned, preferred network does not hinder the Wireless Information tab from popping up on the screen. If the check box is checked, and for some reason the WZC is unable to connect to the preferred SSID(s), the dialog box with the Wireless Information tab appears on the display after the WZC has made an unsuccessful attempt to associate with the preferred network(s). Pressing ‘Connect’ button forces the attachment to the selected SSID in the network list. Nordic ID International Headquarters Myllyojankatu 2A FI-24100 SALO FINLAND Phone: Fax: Email: +358 2 727 7700 +358 2 727 7720 [email protected] www.nordicid.com Pressing ‘Advanced …’ button opens the configuration window of the WZC showing e.g. a preferred list of the networks for deleting network configurations from the WZC, and for rearranging the preferences for the configured networks. Pressing ‘Log …’ button reveals the WLAN events the WZC has recorded since the last rebooting of the device. 5.2.2 Setting up WLAN Interface – Add New … If you are not attaching your Nordic ID Moprhic to any available networks or if the available network access point(s) is ‘silent’, in that case, using the ‘Add New …’ option you are able to add a network to the preferred network list of the WZC (Wireless Zero Configuration). You must set the configuration from scratch meaning that you have to know beforehand a network name (SSID), the type of network authentication used by the network, and the encryption used on the link. Note that by default the ‘Add New …’ suggests you the highest level of security possible in the wireless LAN standards. If it should happen that you have to specify EAP-TLS 802.1X authentication type, you may first require using a ‘Certificates’ applet being available in the Control Panel for manual certificate enrolment. Before you begin, open the Wireless Information tab on the screen (see section ‘Introduction to managing Wireless LAN interface’). To add new preferred network: 1. Double-tap on the ‘Add New …’ list item in the network view window; a ‘Wireless Properties’ dialog box opens 2. Enter the network name in the Network Name (SSID) -text field 3. Select the ‘Authentication’ used by the network, this selection is a requisite for the rest of the settings. The authentication selection controls the options and fields being available for further configuration. 4. Select the ‘Encryption’ used on the wireless link 5. Chose the appropriate options from the rest of the enabled setting fields. For example, enter the network key if the ‘Network key’ field is enabled. Note that in the case of the configuration for the network SSID, the ‘This is an ad-hoc network’ check box is leaved unchecked. Note that if the network uses PEAP 802.1X authentication, you do not need to set its properties, but using EAP-TLS 802.1X authentication you have to select appropriate certificates 6. Tap on the ‘OK’ button, the WZC attempts to connect to the network which you just made a preferred network. If the connecting attempt results in the message: ‘Failed to connect’, it is very likely that there is no network access point available. If that is not the case, check the settings you made e.g. the ‘Network key’, if applicable; see also the ‘Log’, it may hold some clue to the cause of the failed connecting attempt. Nordic ID International Headquarters Myllyojankatu 2A FI-24100 SALO FINLAND Phone: Fax: Email: +358 2 727 7700 +358 2 727 7720 [email protected] www.nordicid.com Related information: Section ‘Setting up IP-networking’ Section ‘Making Your Configuration Settings Permanent’ Subsection ‘Network and Dial-up Connections’ of the section ‘Control Panel Applets’. 5.2.3 Setting up WLAN Interface – SSID Available If you want to attach your Nordic ID Moprhic to the network whose name is shown in the network view on the ‘’Wireless Information” tab, then you need only to double-tap on the network name in the list. Before you begin, open the ‘Wireless Information’ tab on the screen (see section ‘Introduction to managing Wireless LAN interface’). To attach to the access point, the network SSID of which is listed in the network view: 1. Wait for a little while so that the WZC has captured the beacon frame sent by the desired wireless access point, and shows its network name (SSID) in the network view 2. Double-tap on the network name in the list of the network view; a ‘Wireless Properties’ dialog box opens Note that the WZC has already filled the ‘Network name (SSID)’ field, and has selected the ‘Encryption’ and the ‘Authentication’ being in use on the wireless access point 3. Choose the appropriate options from the rest of the enabled setting fields. For example, enter the network key if the ‘Network key’ field is enabled. Note that in the case of configuration for the network SSID, the ‘’This is an ad-hoc network’ check box is leaved unchecked. Note that if the network uses PEAP 802.1X authentication, you do not need to set its properties, but using EAP-TLS 802.1X authentication you have to select appropriate certificates. In case you cannot find the required certificates, you have to import (enroll) the certificates into the Windows Embedded CE, for example, manually with the help of the ‘Certificates’ control panel applet before you are able to get your Nordic ID Morphic connected to the desired wireless access point. 4. Once you have chosen the other wireless networking options, tap on the ‘OK’ button. The WZC attempts to connect to the network which you just made a preferred network. The connecting attempt should succeed, and you should see in the ‘Status’ field the following information: ‘Connected to <SSID>’. Otherwise, check the settings you made e.g. the ‘Network key’, if applicable; see also the ‘Log’, it may hold some clue to the cause of the failed connecting attempt. Note! If you test whether or not the established wireless link works, for example, by using an Internet Explorer or a ping utility in the command prompt window, the connectivity test may fail because your Nordic ID Morphic has not the IP address being valid for networking. To check which IP address and network mask are assigned to the WLAN interface, open the IP Information tabs, either IP Information or IPv6 Information tab, depending on the addressing scheme in use. (For further information, see section ‘Introduction to managing Wireless LAN interface’) Nordic ID International Headquarters Myllyojankatu 2A FI-24100 SALO FINLAND Phone: Fax: Email: +358 2 727 7700 +358 2 727 7720 [email protected] www.nordicid.com Related information: Section ‘Setting up IP-networking’ Section ‘Making Your Configuration Settings Permanent’ 5.2.4 Setting up IP-networking An established connection between your Nordic ID Morphic and the WLAN access point does not necessarily open the communication channel over the access point. What you may need to do is to assign static IP address information to the WLAN interface. By default the device expects to obtain IP-address information from the local area network to which the access point is attached, and if the network provides DCHP service there is not necessary need for WLAN connectivity to configure networking part of the WLAN communication. However, if the static address assignment is preferable to your networking, then the ‘Network and Dial-up Connections’ is used to assign the IP-address to the WLAN interface. To assign a static IP-address to the WLAN Interface is a straightforward operation: 1. Open the ‘Network and Dial-up Connections’ control panel applet ( see section ‘Control Panel’) 2. Double-tab the WLAN interface icon in the applet window, the IP address property sheets of the WLAN interface are available on the display 3. On the ‘IP Address’ tab, select the ‘Specify an IP address’ 4. Enter your IP network information in their particular fields on the ‘IP Address’ tab. If need be, fill the fields on the ‘Name Servers’ tab. 5. Tap on the ‘OK’ button; the IP address is assigned to the WLAN communication Related information: Subsection ‘Network and Dial-up Connections’ of the section ‘Control Panel Applets’. Section ‘Making Your Configuration Settings Permanent’ Nordic ID International Headquarters Myllyojankatu 2A FI-24100 SALO FINLAND Phone: Fax: Email: +358 2 727 7700 +358 2 727 7720 [email protected] www.nordicid.com 6. Configuring and Administering System Properties 6.1 Managing Registry Database The Nordic ID Morphic has a simple facility for making the changes in the registry permanent, and on the other hand, for removing the permanent changes from the registry. For example, you make changes in the registry when you change some attribute of the device property by means of a control panel applet and after that you close the applet by pressing the ‘Activator’ key. The facility for managing the registry is called ‘Registry Backup’. Be aware that clearing the persistent changes from the registry resets the device to its factory defaults in fact. 6.1.1 Accessing Registry Backup There are two means of accessing the Registry Backup either using the keypad, or using the touch-screen and the stylus. The following instructions are based on the use of the keypad. Before you begin, close all application windows on the screen. To open the Registry Backup: 1. Press the ’tab/alt’ key so that the input focus is set to the Start menu icon on the far left of the taskbar, in the bottom left-hand corner of the screen. 3. Press the ‘Activator’ key to bring up the Start menu 4. Select ‘Programs’ menu item by the ‘up-arrow’ of the ‘Navigation ring’ 5. Press the ‘right-arrow’ to bring up the Programs submenu, ‘NordicID’ submenu is selected 6. Press the ‘right-arrow’ to bring up the NordicID submenu 7. Select ‘Registry Backup’ menu item by the ‘down-arrow’ of the ‘Navigation ring’ 8. Press the ‘Activator’ key to open the Registry Backup 6.1.2 Closing Registry Backup If you want to exit from the Registry Backup utility: 1. Select ‘Close’ by the ‘Navigation ring’ 2. Press the ‘Activator’ key; the Registry Backup ends Or just press the ‘Esc/cancel’ key. 6.1.3 Making Your Configuration Settings Permanent If you want to make persistent the configuration you have performed, for example, with the help of the Control Panel, use the Registry Backup to store them permanently. Before you begin, open the Registry Backup -utility, see ‘Accessing Registry Backup’. To make the changes in the registry permanent: 1. Select ‘Backup Registry’ by the ‘Navigation ring’ 2. Press the ‘Activator’ key 3. Wait until the Registry Backup utility informs you that it is finished with the operation. Now your configuration settings are stored in the non-volatile memory Nordic ID International Headquarters Myllyojankatu 2A FI-24100 SALO FINLAND Phone: Fax: Email: +358 2 727 7700 +358 2 727 7720 [email protected] www.nordicid.com 6.1.3 Restoring Your Nordic ID Morphic to Factory Defaults If your Nordic ID Morphic does not operate as you may expect, or if you just want to start from scratch, in that case, the Registry Backup gives an option to clear all the changes you or your application have made permanent in the registry database. (Note despite the fact that you have not saved your configuration changes in the persistent registry, your changes can be in there because some part of the system called the ‘RegFlushKey’ function.) Before you begin, open the Registry Backup -utility, see ‘Accessing Registry Backup’. To restore the Nordic ID Morphic to its factory defaults: 1. Select ‘Factory Default’ by the ‘Navigation ring’ 2. Read the information the Registry Backup shows in the window 3. Press the ‘Activator’ key; the Registry Backup gives you the last chance to go back on the operation by pressing the ‘Esc/Cancel’ key 4. Press the ‘Activator’ key; the Registry Backup removes the persistent add-ons from the registry and cold-boots your device Note that the system asks you to calibrate the touch screen when the cold boot phase is ending. To calibrate the touch screen: 1. Tap on the centre of the reference points showed on the screen with the stylus, until the calibration utility stops showing new reference points. 2. Press the ‘Activator’ key; the calibration is completed. Note! After your Nordic ID Morphic is up and running, all the changes to the default contents of the registry are gone except the registry settings in *.pak (or *.PAK) file(s) in the Flash folder on your device. So, even though you restored the contents of the registry to the factory defaults, the registry settings specified in the *.pak file(s) remain in the registry after the cold boot. 6.2 Repartitioning Non-volatile Storage This section gives an example of how to divide the ‘DSK1:’ volume into two partitions. (The section ‘Non-Volatile Storage’ provides more discussion of the storage device.) To illustrate how to repartition the persistent storage device, the default state of the volume is assumed, that is, the whole storage is allocated for one file system partition using the name ‘Part00’. In addition, the target is to allocate 30 megabytes for the first partition and the rest of the storage capacity for the second partition. Note that the following operations will destroy all the files in the ‘Flash’ folder. Back up the files in the folder before continuing with the instructions below, for example, by copying them onto the hard disk on your Windows workstation over ActiveSync connection. Before you begin, open the ‘Storage Manager’ control panel applet (see section ‘Control Panel’). To repartition the non-volatile storage: (i) Delete the current partition(s) 1. Tap the ‘Dismount’ button to detach the storage device from the file system hierarchy 2. Select ‘Part00’ list item by tapping it 3. Tap the ‘Delete’ button, the ‘Delete the selected partition …’ window pops up 4. Tap the ‘Yes’ button in the pop-up window, the ‘Part00’ is deleted on the storage volume Nordic ID International Headquarters Myllyojankatu 2A FI-24100 SALO FINLAND Phone: Fax: Email: +358 2 727 7700 +358 2 727 7720 [email protected] www.nordicid.com (ii) Erase the whole storage volume 1. Tap the ‘Format’ button in the ‘Storage Manager’ tab, the ‘Format the selected store?” window pops up 2. Tap the ‘Yes’ button, the storage erasing starts, and is completed when the ‘Format store succeeded’ window pops up 3. Tab the ‘OK’ button in the pop-up window (iii) Create the first partition being 30 megabytes 1. Tap the ‘New’ button in the ‘Storage Manager’ tab, the ‘Create New Partition’ window pops up 2. Enter the partition name of your choice (like ‘pFlash0’ or ‘Part00’) in the ‘Name’ text field 3. Uncheck the ‘Use All Available Disk Space’ check box by tapping on the check box 4. Enter the number of sectors (512 bytes per sector) to be allocated for the partition, for 30 megabytes it is needed 61440 sectors. Note! The number of sectors has to be even numbers. 5. Tap the ‘OK’ button on the ‘Create New Partition’ title bar; the 30 megabytes partition is created. (iv) Create the second partition taking the rest of the storage capacity 1. Tap the ‘New’ button in the ‘Storage Manager’ tab, the ‘Create New Partition’ window pops up 2. Enter the partition name of your choice (like ‘pFlash1’ or ‘Part01’) in the ‘Name’ text field 3. Tap the ‘OK’ button on the ‘Create New Partition’ title bar; the second partition is created Note that the ‘Use All Available Disk Space’ check box is leaved checked (v) Close the Storage Manager by tapping the ‘OK’ button on the ‘Storage Properties’ title bar; two partitions are created. Now there should be ‘Flash’ and ‘Flash2’ folders off the root of the file system in the file system hierarchy. Related information: Section ‘Non-Volatile Storage’ 6.3 Configuring Keypad 6.3.1 Adjusting Keys’ Auto-repeat Delay The auto-repeat delay has an influence on how quickly the repeat property takes place after the first symbol the keystroke generated is shown on the screen. Before you begin, open the ‘Keyboard’ control panel applet (see section ‘Control Panel’), and check that the alphanumeric keypad is in the numerical mode (see section ‘Alphanumeric keypad’) To shorten the auto-repeat delay: 1. Move the ‘Repeat delay:’ -trackbar slider in the direction of the right side, or tap the rightarrow button at the right side of the trackbar 2. Tap the test entry field at the bottom of the applet window to have a quick check how shortening the delay has an effect on the auto-repeat property 3. Press some numeric key and hold down it for a little while to see the length of the delay 4. If the result of the quick check was satisfactory, tap the ‘OK’ button on the title bar. Otherwise, repeat the operation. Nordic ID International Headquarters Myllyojankatu 2A FI-24100 SALO FINLAND Phone: Fax: Email: +358 2 727 7700 +358 2 727 7720 [email protected] www.nordicid.com To lengthening the auto-repeat delay: 1. Move the ‘Repeat delay:’ -trackbar slider in the direction of the left side, or tap the left arrow button at the left side of the trackbar 2. Tap the test entry field at the bottom of the applet window to have a quick check how the lengthening the delay has an effect on the auto-repeat property 3. Press some numeric key and hold down it for a little while to see the length of the delay 4. If the result of the quick check was satisfactory, tap the ‘OK’ button on the title bar. Otherwise, repeat the operation. Related information: Section ‘Making Your Configuration Settings Permanent’ 6.3.2 Adjusting Keys’ Auto-repeat Rate The auto-repeat rate has an influence on how quickly the symbol the keystroke generates is repeated on the screen. Before you begin, open the ‘Keyboard’ control panel applet (see section ‘Control Panel’), and check that the alphanumeric keypad is in the numerical mode (see section ‘Alphanumeric keypad’) To increase the auto-repeat rate: 1. Move the ‘Repeat rate:’ -trackbar slider in the direction of the right side, or tap the rightarrow button at the right side of the trackbar 2. Tap the test entry field at the bottom of the applet window to have a quick check how adjusting the rate has an effect on symbol repeating on the screen 3. Press some numeric key and hold down it for a little while to see the repeat rate 4. If the result of the quick check was satisfactory, tap the ‘OK’ button on the title bar. Otherwise, repeat the operation. To decrease the auto-repeat rate: 1. Move the ‘ Repeat rate:’ -trackbar slider in the direction of the left side, or tap the left -arrow button at the left side of the trackbar 2. Tap the test entry field at the bottom of the applet window to have a quick check how the adjusting the rate has an effect on symbol repeating on the screen 3. Press some numeric key and hold down it for a little while to see the repeat rate 4. If the result of the quick check was satisfactory, tap the ‘OK’ button on the title bar. Otherwise, repeat the operation. Related information: Section ‘Making Your Configuration Settings Permanent’ 6.3.3 Enabling/Disabling Keys’ Auto-repeat Property Before you begin, open the ‘Keyboard’ control panel applet (see section ‘Control Panel’) To enable the auto-repeat property 1. Check the ‘Enable character repeat’ check box on the ‘Repeat’ tab by tapping the box 2. Tap the ‘OK’ button on the title bar; the auto-repeat property is enabled Nordic ID International Headquarters Myllyojankatu 2A FI-24100 SALO FINLAND Phone: Fax: Email: +358 2 727 7700 +358 2 727 7720 [email protected] www.nordicid.com To disable the auto-repeat property 3. Uncheck the ‘Enable character repeat’ check box on the ‘Repeat’ tab by tapping the box 4. Tap the ‘OK’ button on the title bar; the auto-repeat property is disabled Related information: Section ‘Making Your Configuration Settings Permanent’ 6.3.4 Mapping Key’s Functionality onto Another Before you begin, open the ‘NID Keypad’ control panel applet (see section ‘Control Panel’). To illustrate a simple mapping case first the key ‘0’ is configured to act as the ‘tab’ key. To map a key’s functionality onto another one: 1. Select the ‘Mappings’ tab in the NID Keypad applet 2. Select ‘Key’ you want to map onto another one, in the ‘Mappings’ area. In this example, the key ‘0’ is selected. 3. Select ‘VK’ (Virtual Key) code you want the selected key to generate. In this example, the ‘TAB’ virtual key code is selected. 4. Tap the ‘Apply’ button at the bottom of the tab 5. Tap the ‘OK’ button on the title bar; the key ‘0’ acts now as a ‘tab’ key Note that the ‘Mappings’ tab gives some more options to mapping keys. For example, if the ‘TAB’ functionality is assigned to the ‘F10’ key, then the operation is as follows: 1. Select the ‘Mappings’ tab in the NID Keypad applet 2. Select ‘Key’ you want to map onto another one, in the ‘Mappings’ area. In this example, the key ‘0’ is selected. 3. Select ‘Modifier’, in the ‘Mappings’ area. In this example, ‘Function’ is selected 4. Select ‘VK’ (Virtual Key) code you want the selected key to generate. In this example, the ‘TAB’ virtual key code is selected. 5. Tap the ‘Apply’ button at the bottom of the tab 6. Tap the ‘OK’ button on the title bar; the key ‘0’ as an F10 key acts now as a ‘tab’ key. In addition, the ‘Mappings’ tab makes it possible to assign some action to a key, meaning that the keystroke starts the executable – an action –, which you have assigned to the key. The following steps illustrate the mapping case in which the ‘F10’ keystroke starts an AskTime utility in the Windows folder. Actually, now the ‘F10’ key will be assigned to the action identification number, which is assigned to the AskTime utility as follows: 1. Select the ‘Mappings’ tab in the NID Keypad applet 2. Select ‘action id’ in the ‘Actions’ area. In this example, the number 5 is selected. 3. Tap the ‘…’ button to browse the executable the desired key will launch. In this example the AskTime in the Windows folder is selected. Now the action id is linked with the executable. 4. Select ‘Key’ you want to map onto the action id, in the ‘Mappings’ area. In this example, the key ‘0’ is selected. 5. Select ‘Modifier’, in the ‘Mappings’ area. In this example, ‘Function’ is selected 6. Select ‘VK’ (Virtual Key code) you want the selected key to generate. In this example, the default ‘F10’ virtual key code is selected. 7. Select ‘Action’ in the ‘Mappings’ area, that is, the action identification number you linked with the executable above. In this example, the number 5 is selected. 8. Tap the ‘Apply’ button at the bottom of the tab Nordic ID International Headquarters Myllyojankatu 2A FI-24100 SALO FINLAND Phone: Fax: Email: +358 2 727 7700 +358 2 727 7720 [email protected] www.nordicid.com 9. Tap the ‘OK’ button on the title bar; the task is finished. In this illustrative example, the key ‘0’ as an F10 key now starts the executable AskTime when pressed. Related information: Section ‘Making Your Configuration Settings Permanent’ Section ’Function keys’ 6.3.5 Specifying Default Mode of Alphanumeric Keypad The factory default mode of the alphanumeric keypad is numeric, that is, every keystroke of the alphanumeric keys enters only numbers on the display by default. The default in this context means that after rebooting the device (warm, cold, hardware, or reloading the system) the alphanumeric keypad is in its default mode. This default mode can be changed with the help of the ‘NID Keypad’ control panel applet. Before you begin, open the ‘NID Keypad’ control panel applet (see section ‘Control Panel’). To change the default mode of the alphanumeric keys: 1. Select the ‘Misc’ tab in the NID Keypad applet 2. Select ‘Input mode’ of your choice. 3. Tap the ‘OK’ button on the title bar; the task is finished. Related information: Section ‘Making Your Configuration Settings Permanent’ 6.3.6 Enabling/Disabling Scan Key Before you begin, open the ‘NID Keypad’ control panel applet (see section ‘Control Panel’). To disable the Scan key: 1. Select the ‘Misc’ tab in the NID Keypad applet 2. Select ‘None’ item within the Scan mode list. 3. Tap the ‘OK’ button on the title bar; the task is finished. Now, pressing the scan key does not start the barcode scanning. To enable the Scan key: 1. Select the ‘Misc’ tab in the NID Keypad applet 2. Select ‘Scanner’ item within the Scan mode list. 3. Tap the ‘OK’ button on the title bar; the task is finished. Now, pressing the scan key starts the barcode scanning. Related information: Section ‘Making Your Configuration Settings Permanent’ 6.3.7 Adjusting Brightness of Keypad’s Backlight Nordic ID Morphic is equipped with a backlit keypad. There is a ‘NID Backlight’ control panel applet which has two trackbar sliders to adjust the brightness of the keypad’s backlight. With one trackbar slider the adjustment applies to backlight brightness when the device is in the ‘On’ power state. Nordic ID International Headquarters Myllyojankatu 2A FI-24100 SALO FINLAND Phone: Fax: Email: +358 2 727 7700 +358 2 727 7720 [email protected] www.nordicid.com With the other slider adjustment applies to the backlight brightness when the Nordic ID Morphic is in the ‘UserIdle’ power state (for more information on the system power states, see section’ Power States’). In addition, both the sliders work as a switch. When you move the slider at the left side of the trackbar, the keypad’s backlight property is disabled in the power state to which the slider applies. Once you have the ‘NID Backlight’ applet open there are those two sliders available on the ‘Misc’ tab. Note that adjusting the backlight brightness the keypad backlight gives you immediate feedback on the brightness level. This applies to both power states. ‘On’ Power State Brightness To adjust the brightness of the keypad backlight in the ‘On’ power state, move the ‘Full Power Brightness’ –slider ‘UserIdle’ Power State Brightness To adjust the brightness of the keypad backlight in the ‘UserIdle’ power state, move the ‘Power Save Brightness’ –slider Related information: Section ‘Making Your Configuration Settings Permanent’ Section ’Power States’ Section ‘Setting Timeout for Reduction in Screen Brightness’ Section ‘Setting Timeout for Automatic Screen Turning-off ‘ 6.4 Managing Touch Screen 6.4.1 Adjusting Double-tapping Sensitivity of Touch Screen Before you begin, open the ‘Stylus’ control panel applet (see section ‘Control Panel’). Be aware that double-tapping sensitivity is measured against the maximum time between two screen-taps in succession. That is, quicker successive tapping than the longest period allowed between consecutive taps functions as a double-tapping but the longer does not. In addition, the time between successive tapping to be a double-tapping is limited to certain maximum value by the system. To adjust double-tapping sensitivity: 1. Select ‘Double-Tap‘ tab in the Stylus applet 2. Follow the instructions on the tab to adjust and to check the double-tapping sensitivity 3. Once you are satisfied with your adjustment, tap the ‘OK’ button on the title bar Related information: Section ‘Making Your Configuration Settings Permanent’ 6.4.2 Recalibrating Touch screen It should be rare to recalibrate the touch screen. However, in some cases it could be reasonable to recalibrate it, for example, if the touch screen has no good response to tapping it. Note that it is normal that the response time to tapping some display object on the screen varies because it correlates directly with the load of the processor unit. Nordic ID International Headquarters Myllyojankatu 2A FI-24100 SALO FINLAND Phone: Fax: Email: +358 2 727 7700 +358 2 727 7720 [email protected] www.nordicid.com Before you begin, open the ‘Stylus’ control panel applet (see section ‘Control Panel’). To calibrate the touch screen: 1. Select ‘Calibration‘ tab 2. Tap the ‘Recalibrate’ button 3. Tap with the stylus on the centre of the reference points showed on the screen, until the calibration utility stops showing new reference points. 4. Press the ‘Activator’ key; the calibration is completed. 5. Tap the ‘OK’ button on the title bar; the task is finished. Note that you do not need to make the calibration settings permanent because the Stylus applet flushes the changes to the calibration values in the Registry to persistent storage. Note that if the touch screen needs to be calibrated on a regular basis due to fact that tapping objects on the screen does not seem to result in success in the desired function until the recalibration, it is strongly recommended that you send your device to our repair centre to be checked for the hardware of the touch screen. Related information: Section ‘Making Your Configuration Settings Permanent’ Section ‘Adjusting Double-tapping Sensitivity of Touch Screen’ 6.4.3 Disabling/Enabling Touch Screen Be aware that after disabling the touch screen you cannot enable it any longer by tapping a check box with the stylus. If you want to enable the touch screen again you have the following choices: Using the keypad to uncheck the ‘Touch screen lock enable’ check box Cold-booting your device, assuming that you have not made the change permanent Resetting your Nordic ID Morphic to the factory defaults Before you begin, open the ‘NID Touch Screen’ control panel applet (see section ‘Control Panel’). To enable the touch screen by means of the keypad: 1. If the ‘Misc ‘ tab is not shown on the display, set first the input focus to the label of the currently visible tab by pressing the ‘tab/alt’ key, and then select the ‘Misc’ tab by using the ‘Navigation ring’ 2. On the ‘Misc’ tab, set the input focus to the ‘Touch screen lock enable’ check box by pressing the ‘tab/alt’ key 3. If the alphanumeric keypad is not in the text inserting mode, switch it to text mode by two successive ‘F/mode’ key presses 4. Uncheck the ‘Touch screen lock enable’ check box by pressing the ‘0’ key once or twice. 5. Press the ‘Activator’ key, the touch screen is enabled To disable the touch screen: 1. Select ‘Misc ‘ tab 2. Check the ‘Touch screen lock enable’ check box by tapping it with the stylus 3. Press the ‘Activator’ key; the touch screen is disabled. Nordic ID International Headquarters Myllyojankatu 2A FI-24100 SALO FINLAND Phone: Fax: Email: +358 2 727 7700 +358 2 727 7720 [email protected] www.nordicid.com Related information: Section ‘Making Your Configuration Settings Permanent’ Section ‘Rebooting your Nordic ID Morphic’ Section ‘Resetting your Nordic ID Morphic to the factory defaults’ 6.5 Adjusting Screen Brightness There is a trackbar slider called ‘Backlight’ available on the ‘Misc’ tab in the ‘NID Backlight’ control panel applet. Moving the slider affects directly the screen brightness in the full power state of the device (i.e. the ‘On’ power state). When adjusting the backlit screen gives you immediate feedback on the brightness in that power state. However, the adjustment also alters indirectly the screen brightness level in the ‘UserIdle’ power state, which you can check for by waiting until the device changes to the ‘UserIdle’ power state. Before you begin, open the ‘NID Backlight’ control panel applet (see section ‘Control Panel’). To adjust the brightness of the screen: 1. Select ‘Misc‘ tab 2. Move the ‘Backlight’ slider to find appropriate brightness level 3. If you want to check how your adjustment affects the screen brightness in the ‘UserIdle’ power state, wait for a little while until the ‘UserIdle’ inactivity timer expires (, assuming that the timer expires within a minute or less). 4. Press the ‘Activator’ key; the brightness adjustment is finished. Related information: Section ‘Making Your Configuration Settings Permanent’ Section ’Power States’ Section ‘Setting Timeout for Reduction in Screen Brightness’ 6.6 Setting Timeout for Reduction in Screen Brightness The backlight of the color backlit screen is a drain on the power. For that reason, the system has tendency to start to reduce power consumption by reducing the screen brightness. If the devise remains idle without any user input, a key press or stylus tapping on the screen, then after the specified ‘User Idle Timeout’ period the device changes to the less power consumption state by reducing the brightness of the screen’s backlight (for more information on UserIdle state, see section ‘Power States’). Before you begin, open the ‘Power’ control panel applet (see section ‘Control Panel’). To set the timeout value for the reduction in the screen brightness: 1. Select ‘Schemes‘ tab 2. Select ’Power Scheme’ to which your timeout change applies, either ‘Battery Power’ or ‘AC Power’. That is, a source of electricity on which the device is running determines when the setting is in use 3. Select the ’User Idle Timeout’ value being appropriate for your needs (for more information on ‘Never’ settings value, see section ‘Power States’ / ‘On’) 4. Press the ‘Activator’ key; new timeout value is set. Nordic ID International Headquarters Myllyojankatu 2A FI-24100 SALO FINLAND Phone: Fax: Email: +358 2 727 7700 +358 2 727 7720 [email protected] www.nordicid.com Be aware that three timeout values for transition from one power state to another, which can be specified on the ‘Schemes’ tab, are associated with each other (for more information, see section ‘Power States’). In addition to the fact that the ‘Never’ settings value disables the feature of saving battery energy by decreasing the screen brightness, it also disables all the transitions to lower power consumption states. Note that this setting also affects the keypad’s backlight in the ‘On’ power state. Related information: Section ‘Making Your Configuration Settings Permanent’ Section ’Power States’ Section ‘Adjusting Screen Brightness’ 6.7 Setting Timeout for Automatic Screen Turning-off The device turns off the screen after the specified periods of the ‘User Idle Timeout’ and the ‘System Idle Timeout’, if there is neither user nor user application activity during those timeout periods. The ‘System Idle Timeout’ alone specifies the period between the reduction in the screen brightness and the screen turning-off. Although your device may look as if it is suspended after turning off the screen, the rest of the unit stays on. Before you begin, open the ‘Power’ control panel applet (see section ‘Control Panel’). To set the timeout value for the automatic screen turning off: 1. Select ‘Schemes‘ tab 2. Select ’Power Scheme’ to which your timeout change applies, either ‘Battery Power’ or ‘AC Power’. That is, a source of electricity on which the device is running determines when the setting is in use. 3. Select the ’System Idle Timeout’ value being appropriate for your needs 4. Press the ‘Activator’ key; new timeout value is set. Be aware that three timeout values for transition from one power state to another, which can be specified on the ‘Schemes’ tab, are associated with each other. The ‘Never’ settings value disables the automatic screen turning-off. In addition, it disables further transitions to lower power consumption states. (For more information, see section ‘Power States’) Note that this setting also affects the keypad’s backlight in the ‘UserIdle’ power state. Related information: Section ‘Making Your Configuration Settings Permanent’ Section ’Power States’ Section ‘Setting Timeout for Reduction in Screen Brightness’ 6.8 Setting Timeout for Automatic Suspension The Power Manager suspends Nordic ID Morphic after the third inactivity period has expired. In fact, after the three inactivity timers have expired in succession. The third inactivity period is called ‘Suspend Timeout’. The other twos are ‘User Idle Timeout’ and ‘System Idle Timeout’. The ‘Suspend Timeout’ settings value determines how long the device can remain idle before the Nordic ID International Headquarters Myllyojankatu 2A FI-24100 SALO FINLAND Phone: Fax: Email: +358 2 727 7700 +358 2 727 7720 [email protected] www.nordicid.com system will automatically power down itself. The idleness in this context means that neither the user operates the device nor the business application prevents the device from powering down. For example, application traffic over the wireless link does not stop automatic suspension from occurring. Be aware that you can disable automatic suspension by setting the ‘Suspend Timeout’ to ‘Never’. Before you begin, open the ‘Power’ control panel applet (see section ‘Control Panel’). To set the timeout value for the automatic suspension: 1. Select ‘Schemes‘ tab 2. Select ’Battery Power’ from the ‘Power Scheme’ list. 3. Select the ’System Idle Timeout’ value being appropriate for your needs 4. Press the ‘Activator’ key; new timeout value is set. Related information: Section ‘Making Your Configuration Settings Permanent’ Section ’Power States’ Section ‘Setting Timeout for Reduction in Screen Brightness’ Section ‘Setting Timeout for Automatic Screen Turning-off ’ Nordic ID International Headquarters Myllyojankatu 2A FI-24100 SALO FINLAND Phone: Fax: Email: +358 2 727 7700 +358 2 727 7720 [email protected] www.nordicid.com Disposal within European Union The rechargeable battery and the Nordic ID Morphic may not be thrown away with everyday rubbish. Please, dispose of the battery and this product in an ecologically sound manner according to the regulation governing your location. EU directive 2002/96/EC on Waste Electrical and Electronic Equipment (WEEE) Nordic ID International Headquarters Myllyojankatu 2A FI-24100 SALO FINLAND Phone: Fax: Email: +358 2 727 7700 +358 2 727 7720 [email protected] www.nordicid.com